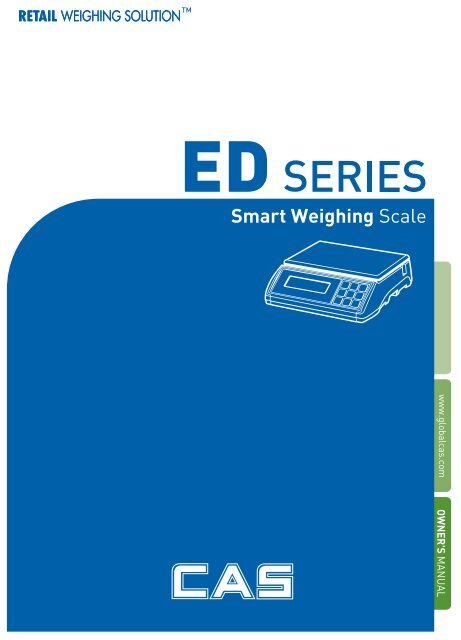
User Manual (PDF) - Scales
User Manual (PDF) - Scales
User Manual (PDF) - Scales
Create successful ePaper yourself
Turn your PDF publications into a flip-book with our unique Google optimized e-Paper software.
2<br />
ED
3<br />
CONTENTS<br />
PRECAUTIONS................................ 4<br />
PREFACE............................................ 6<br />
DISPLAY AND KEYBOARD......... 6<br />
OPERATIONS ................................... 7<br />
SETUP MODE ................................. 18<br />
ERROR MESSAGES ..................... 23<br />
SERIAL INTERFACE.................... 23<br />
SPECIFICATIONS ......................... 24
PRECAUTIONS<br />
4
PREFACE<br />
Thank you for the purchasing of ED series.<br />
This series have been designed with CAS reliability, under rigid quality control and with outstanding<br />
performance. Your specialty departments can enjoy with CAS products.<br />
We hope that CAS product meets your needs. The user manual is designed to guide you to understand<br />
product operation and proper care of product.<br />
DISPLAY AND KEYBOARD<br />
■ DISPLAY<br />
■ KEYBOARD<br />
6
■ KEY FUNCTIONS<br />
KEYS DES CRIPTIONS<br />
Used to set the zero point to 0.00.<br />
Used as an ESC key in Setup Mode.<br />
Used to enter a tare weight and used to cancel a tare weight.<br />
Used to convert the mode as below.<br />
[WEIGHING] [pcs] [%] [WEIGHT LIMIT ON/OFF] <br />
[COUNT LIMIT ON/OFF] [UNIT CONVERSION] [WEIGHING]<br />
Used as an ENTER key.<br />
Used to calculate a unit weight of a sample.<br />
[▶] Used to enter next digit.<br />
[▲] Used to have number up.<br />
PRINT key.<br />
[▼] Used to have number down.<br />
Used to turn ON or OFF the power.<br />
Not use.<br />
OPERATIONS<br />
1. General Weighing<br />
■ The display indicates if the scale is at zero or if there is a tare entered into the scale by way of a<br />
ZERO and NET.<br />
① Turn on the power. The<br />
display shows 0.00. Make sure<br />
that STABLE and ZERO lamps<br />
are on.<br />
② When the display is not zero<br />
though there is nothing on the<br />
platter, press the ZERO key.<br />
7<br />
③ Place an item on the platter.<br />
When the STABLE lamp is on,<br />
read the weight.
2. Weighing with Tare<br />
■ Tare is the weight of container being used for a commodity. The TARE key subtracts the weight of<br />
the container.<br />
① Place the container on the<br />
platter.<br />
3. Counting Mode<br />
② Press the TARE key, NET<br />
lamp is on..<br />
8<br />
③ Place an item in the<br />
container.<br />
④ To release the TARE function, remove an item and<br />
container from the platter and press the TARE key.<br />
■ If you want to count parts, first you have to set sample size.<br />
OR<br />
① Press the MODE key until the display shows “PCSSET”. Make<br />
sure that PCS lamp is on. If you have set sample size before,<br />
the display shows “0”.<br />
② Press the SAMPLE key, then<br />
the display shows “10”.<br />
③If you want to increase sample size, press the SAMPLE key.<br />
The display shows 10, 20, 30, 40, 50, 100, 150 and 200 every<br />
time pressing the SAMPLE key.
④ If you set sample size to 10, place 10 samples on the platter.<br />
⑤ Press the SET key. The display shows unit weight and then shows the number of samples. If the<br />
display shows “LACK(◀ )”, the counting result may not correct. (LCD version : Lack of Unit lamp is On) If<br />
the display shows “ Err9”, it is impossible to count samples because the unit weight is too small. (Refer to Table 1)<br />
Model ED 3kg ED 6kg ED 15kg ED 30kg<br />
Range of Lack 1 g≥Lack 2 g≥Lack 5 g≥Lack 10 g≥Lack<br />
Range of Low 0.5g≥ Err9 1g≥ Err9 2 g≥ Err9 5g≥ Err9<br />
4. Percent Weighing Mode<br />
OR<br />
< Table 1 ><br />
① Press the MODE key until the display shows “PErSEt”. If you<br />
have set reference sample before, the display shows “0.0”.<br />
⑥ Place parts on the platter, then the display shows the number<br />
of parts. You can also use tare function in counting mode<br />
9<br />
② If you want to use container,<br />
place it and press the TARE key.
5. Hold Function<br />
■ Key hold<br />
① Place an item on the platter and then press the HOLD key.<br />
② “HOLD” is shown on the<br />
display.<br />
④ Place an item on the platter, then the weight is displayed as a<br />
percentage of the reference..<br />
③ Average weight is shown on<br />
the display.<br />
■ After average weight display 3 times, HOLD function will be release automatically.<br />
■ Auto Hold function<br />
① After weighing item<br />
remove all of the container<br />
from the platter, press Hold key.<br />
③ Press “Hold” key to save<br />
and exit to normal mode.<br />
③ Place reference sample on the platter and press the SAMPLE<br />
key. The display shows “100.0”. Make sure that reference sample<br />
bigger than 3% of maximum capacity. If it is lower than 3% of<br />
maximum capacity, the display shows “low”. In this case, increase<br />
the weight of reference sample and press the SAMPLE key.<br />
② Use “TARE” key to select<br />
one of Auto Hold function.<br />
④ Place an item on the platter.<br />
Then weight display will show “Hold”.<br />
The “Hold” blinks for two times, and then<br />
the average weight blinks continuously.<br />
⑤ After remove the item of the platter, place another item on the platter.Then display will show<br />
average weight again. If you don’t want use auto-hold function, remove the item and press hold<br />
key. Display shows AH_on. Press tare key. İt will be changed AH_off.<br />
Then press Hold key. Auto-hold function will not operate.<br />
10
6. Cumulative Weight Sum<br />
The function of cumulative weight sum is to be showing the aggregate times and<br />
weight as adding the value of weighing a several times. Even though power is<br />
off, the scale stores data. This function is only available in weighing mode.<br />
① Place an item on the platter. ② To add this weight, press the SAMPLE key. Make sure that<br />
SUM lamp is on.<br />
③ The display shows cumulative weight sum and aggregate times every time pressing the SET key.<br />
④ To cancel last added weight, press the SET key to display cumulative weight sum or aggregate times and then<br />
press the SAMPLE key. The display shows “S SUB”.<br />
11
⑤ You can delete cumulative weight sum or aggregate times. Press the SET key to display cumulative weight<br />
sum or aggregate times and then press the ZERO(ESC key).<br />
⑥ To print out cumulative weight sum, press the SET key to display cumulative weight sum or aggregate times<br />
and then press the PRINT key. (DEP only)<br />
7. Weight Comparison Function(HI/OK/LOW)<br />
7-1. How to compare weight<br />
① Press the MODE key until<br />
the display shows “WL OFF”.<br />
It means that weight limit<br />
function is deactivated.<br />
④ Press the HOLD(▲) or<br />
PRINT(▼) key to have number up<br />
or down. To enter next digit, press<br />
the SAMPLE key.<br />
② Press the HOLD key to<br />
activate this function, the<br />
display shows “WL ON”.<br />
⑤ Press the SET key to set up<br />
high value, the display shows<br />
“H000.00”.<br />
12<br />
③ Press the SET key to set up<br />
low value, the display shows<br />
“L000.00”.<br />
⑥ Press the HOLD(▲) or<br />
PRINT(▼) key to have number<br />
up or down. To enter next digit,<br />
press the SAMPLE(▶) key.
⑦Press the SET key, the display shows “WL ON”.<br />
⑧ If you set up LOW/HIGH limit wrong, “WL ERR” will be shown on the display. Then you have to set it up<br />
again. For example) LOW=10kg HIGH=9kg High limit is lower than Low limit.<br />
⑨ Press the MODE key three times to go to weighing mode.<br />
⑩ Suppose that the High limit of 7kg and the Low limit of 3kg are set up. In this condition, OK lamp is lighted on if<br />
the weight is 4kg, HI lamp is lighted on if the weight is 8kg and if the weight is 2kg, LO lamp is lighted on. It beeps as<br />
fixed on <strong>User</strong> Setup Mode. (Refer to Setup Mode Table on page 18)<br />
7-2. Counting comparison function<br />
①Press the MODE key until the<br />
display shows “CL OFF” It<br />
means the counting comparison<br />
function is deactivated.<br />
②Press the HOLD(▲) key to<br />
activate this function, the display<br />
shows “CL ON”.<br />
13<br />
③Press the SET key, the display<br />
shows “L00000”.
④Press the HOLD(▲) or<br />
PRINT(▼) key to have number up<br />
or down. To enter next digit, press<br />
the SAMPLE(▶) key.<br />
⑤Press the SET key, the display<br />
shows “H00000”.<br />
⑦ Press the SET key, the display shows “CL ON”..<br />
14<br />
⑥Press the HOLD(▲) or<br />
PRINT(▼) key to have<br />
number up or down. To enter<br />
next digit, press the<br />
SAMPLE(▶) key.<br />
⑧ If you set up LOW/HIGH limit wrong, “CL Err” will be shown on the display. Then you have to set it up again .<br />
For example) LOW=00100, HIGH=00090 or LOW=00100, HIGH=00100<br />
⑨ Press the MODE key to go to weighing mode.<br />
⑩ Suppose that the High limit of 200 and the Low limit of 80 are set up. In this condition, OK lamp is lighted on if the<br />
weight is 120, HI lamp is lighted on if the weight is 220 and if the weight is 60, LO lamp is lighted on. It beeps as fixed<br />
on <strong>User</strong> Setup Mode. (Refer to Setup Mode Table on page 17)
8. Print Out<br />
8-1. <strong>Manual</strong> Print<br />
■ You can print out data every time pressing the PRINT key. You can setup print function depends<br />
on your need. Refer to Setup Mode Table on page 19.<br />
Sample format(DEP-50)<br />
-Weighing Function-<br />
======== WEIGHT ========<br />
WELCOME TO CAS<br />
DATE . 2008/10/21<br />
TIME. 17:35:58<br />
Weight : 0.000 kg<br />
- WEIGHT LIMIT SET VALUE -<br />
Limit(H): 40.000 kg<br />
Limit(L): 30.000 kg<br />
15<br />
-Counting Function-<br />
======== COUNT ========<br />
WELCOME TO CAS<br />
DATE. 2008/10/21<br />
TIME. 17:35:58<br />
Weight : 40.200 kg<br />
Quantity : 50 pcs<br />
- COUNT LIMIT SET VALUE -<br />
Limit(H): 2000 pcs<br />
Limit(L): 1000 pcs<br />
When ‘the weight comparison function’ is set. When ‘the counting comparison function’ is set.<br />
-Cumulative Weight Sum Function-<br />
(DEPonly)<br />
======== WEIGHT ========<br />
WELCOME TO CAS<br />
DATE . 2008/10/21<br />
TIME. 17:35:58<br />
Weight : 4.180 kg<br />
Weight : 4.200 kg<br />
Weight : 4.200 kg<br />
Weight : 4.200 kg<br />
Weight : 4.200 kg<br />
Weight : 4.200 kg<br />
Weight : 4.200 kg<br />
Weight : 4.200 kg<br />
Weight : - 4.200 kg<br />
Weight : 4.200 kg<br />
Weight : 4.200 kg<br />
Weight : 4.200 kg<br />
- - - - - - - - - - - - - - - - - - - - - - - - - -<br />
Total : 41.980 kg<br />
Count : 10 times<br />
Label Caption<br />
Date<br />
Time<br />
- means that you cancel the weight right before<br />
this weight.<br />
Cumulative weight sum<br />
Aggregate times<br />
※ To operate the total print functions, get into set mode and use print key to set up
Sample format(DLP-50)<br />
1. Weight + tare<br />
※ In order to use the above label format, Barcode set as OFF and weight comparison function as<br />
OFF in SET OP MODE<br />
2. Weight + Tare + Barcode<br />
※ In order to use the above label format, Barcode set as ON and weight comparison function as<br />
OFF in SET OP MODE<br />
3. counting function<br />
※ Quantity Comparison Functions should set as ON<br />
4. Weight comparison function<br />
※ Weight comparison functions should set as ON<br />
※ When using DLP printer, it could not print in the percentage mode<br />
16
8-2. Auto Print<br />
① To use auto print function, you have to set printer menu to “Pr AUt” in setup mode.<br />
Refer to Setup Mode Table on page 19.<br />
② If the weight is stable, it is printed out automatically.<br />
And You can print out data every time pressing the PRINT key.<br />
8-3. Stream Print<br />
① To use auto print function, you have to set printer menu to “Pr Str” in setup mode.<br />
Refer to Setup Mode Table on page 19.<br />
② If the weight is stable, it is printed out continually<br />
9. Battery Charge<br />
■ Warning massage is shown when the battery voltage is very low. ( )<br />
■ At this time, charge the battery. (a charging battery only)<br />
■ The display will show a red lamp and the battery will begin a fast charge automatically.<br />
- Use only the ac adapter which comes with the scale. Other AC adapter may cause damage.<br />
10. Unit conversion (Kg, lb, oz)<br />
① Press press 5 on MODE key at<br />
weighing mode. The display shows<br />
“U kg” (or your last unit)<br />
※ If the tare is set, scale cannot change the unit.<br />
② Use “HOLD key” or “PRINT<br />
key” you can set which unit you<br />
want to use. Kg, lb, oz.<br />
17<br />
③ Press “SET key” and<br />
“CHAnGE” will display.<br />
④ Press the “MODE” key to go<br />
to the weighing mode.
SETUP MODE<br />
1. How to Go to Setup Mode<br />
Make sure that power is OFF. While pressing the PRINT key, press the POWER key. The display<br />
shows “U SEt”. You can select each menu by pressing the MODE key and change the setting by<br />
pressing the HOLD or PRINT key. If you press SET key, you will save current setting and finish this<br />
mode. To finish this mode without saving, press the ZERO key.<br />
2. Set up Mode Table<br />
MENU DISPLAY DESCRIPTIONS<br />
Buzzer<br />
Printer<br />
Print method<br />
Linefeed<br />
(DEPonly)<br />
Barcode<br />
(DLP only)<br />
Baud Rate<br />
Backlight<br />
“ b on ” You can hear buzzer.<br />
“ b oFF ” You cannot hear buzzer.<br />
“Pr oFF” Do not use printer.<br />
“Pr DLP” DLP50 printer interface. (Label)<br />
“Pr DEP” DEP50 printer interface. (Ticket)<br />
“Pr key” <strong>Manual</strong> print. (DLP, DEP)<br />
“Pr AUt” Auto print when the scale is stable. (DLP, DEP)<br />
“Pr Str” Ptint continually when the scale is stable. (DEP)<br />
LF1~LF9 Linefeed<br />
“BC on/off” Print out barcode on/off.<br />
“ br 96 ” 9,600 bps<br />
“ br 192 ” 19,200 bps<br />
“ br 384 ” 38,400 bps<br />
“ bL on ” Use back-light.<br />
“ bL 10 ” Back-light is on 10 seconds.<br />
“ bL 30 ” Back-light is on 30 seconds.<br />
“ bL oFF ” Do not use back-light.<br />
Brightness “ 1 ~7 ” You can set backlight brightness. (Default : 3)<br />
Auto Power Off<br />
“ AP oFF ” Do not use Auto Power Off function.<br />
“ AP 10 ”<br />
“ AP 30 ”<br />
“ AP 60 ”<br />
Power turns to be off automatically when the scale is<br />
not in operation over for 10 minutes.<br />
Power turns to be off automatically when the scale is<br />
not in operation over for 30 minutes.<br />
Power turns to be off automatically when the scale is<br />
not in operation over for 60 minutes.<br />
18
Weight Limit<br />
Count Limit<br />
Date<br />
Date Display<br />
(‘dy on’ only)<br />
Time<br />
Label<br />
Default<br />
“ WL M0 ” HIGH Limit ≥ Weight ≥ LOW Limit - You will hear buzzer.<br />
“ WL M1 ”<br />
HIGH Limit ≤ Weight, Weight ≤ LOW Limit<br />
- You will hear buzzer.<br />
“ WL M2 ” Weight ≤ LOW Limit - You will hear buzzer.<br />
“ WL M3 ” HIGH Limit ≤ Weight - You will hear buzzer.<br />
“ CL M0 ”<br />
“ CL M1 ”<br />
HIGH Limit ≥ Counting result ≥ LOW Limit<br />
- You will hear buzzer.<br />
HIGH Limit ≤ Counting result,<br />
Counting result ≤ LOW Limit - You will hear buzzer.<br />
“ CL M2 ” Counting result ≤ LOW Limit - You will hear buzzer.<br />
“ CL M3 ” HIGH Limit ≤ Counting result - You will hear buzzer.<br />
“ dy on ” Print out date/day.<br />
“ dy oFF ” Do not print out date/day.<br />
“ yymmdd ” Declared date is ‘Year, Month, Day’<br />
“ ddmmyy ” Declared date is ‘Day, Month, Year,’<br />
“ mmddyy “ Declared date is ‘Month, Day, Year’<br />
“ ti on ” Print out time.<br />
“ ti oFF ” Do not print out time.<br />
“ LA off ” Do not print out label caption.<br />
“ LA on ” Print out label caption.<br />
“ dF oFF” Default setting is released.<br />
“ dF on ” Everything is setup in default.<br />
19<br />
※ Italic Bold : Default Setting<br />
※Select the DEP printer in the Set up mode, LINE Feed Features are enable to use and if DLP printer is<br />
selected then Barcode features are enable to use. However, both Line Feed and Barcode features<br />
could not use at the same time.
3. How to Enter Date<br />
① Press the MODE key until the<br />
display shows “dy ON”. It means<br />
that date is printed out..<br />
③ Press the SAMPLE(▶) key,<br />
the display shows “00,00,00”.<br />
⑥ You can change the day by<br />
pressing the HOLD(▲) or<br />
PRINT(▼) key. If you set up a<br />
day of the week wrong, “Wk err” is<br />
shown on the display.<br />
② If you do not want to print out date, press the HOLD(▲) key.<br />
④ Press the HOLD(▲) or<br />
PRINT(▼) key to have number up<br />
or down. To enter next digit, press<br />
the SAMPLE(▶) key.<br />
⑦Press the SET key to save.<br />
“Wksave” is shown on the<br />
display.<br />
20<br />
⑤ Press the SET key to save.<br />
“dysave” is shown on the display<br />
and then the display shows a day of<br />
the week.
⑧ Press the Hold key or Print<br />
key, you can change the<br />
message on display.<br />
4. How to Enter Time<br />
① Press the MODE key until the<br />
display shows “ti ON”. It means<br />
that time is printed out.<br />
③ Press the SAMPLE(▶) key<br />
to set up time, “00,00,00” is<br />
shown on the display.<br />
⑨ You can see that Date<br />
pattern is changed.<br />
21<br />
⑩ Press the SET key to save.<br />
“dysave” is shown on the<br />
display shows a day of the<br />
week. If you set up a day of the<br />
week wrong, “dy err” is shown<br />
on the display.<br />
② If you do not want to print out time, press the HOLD(▲) key.<br />
④ Press the HOLD(▲) or<br />
PRINT(▼) key to have number<br />
up or down. To enter next digit,<br />
press the SAMPLE(▶) key.<br />
⑤ Press the SET key to save.<br />
“tisave” is shown on the display.
5. How to Enter Label Caption<br />
① Press the MODE key until<br />
the display shows “LA off”. It<br />
means that label caption is not<br />
printed out.<br />
③ Press the SAMPLE(▶) key,<br />
“WELCOM” is shown on the<br />
display in default.<br />
⑤ Press the SET key to save. “LA save” is shown on the display.<br />
⑥ If you do not want to save, press the ZERO key.<br />
② To print out label caption, press the HOLD (▲) key. The display<br />
shows “LA on”.<br />
④ You can program label caption by pressing HOLD(▲) or<br />
PRINT(▼) key. To enter next digit or previous digit, press the MODE<br />
or SAMPLE(▶) key.<br />
22
ERROR MESSAGES<br />
Error<br />
Message<br />
on Display<br />
Description Solution<br />
“Err 0” The "Err 0" occurs when scale is not stable. Remove unstable facts.<br />
“Err 1”<br />
The "Err 1" occurs when a current zero point has<br />
shifted from the last span calibration.<br />
23<br />
Please call your CAS dealer.<br />
“Err 3” The "Err 3" is an overload error. Please remove the weight.<br />
“Err 9”<br />
“Err 14”<br />
The "Err 9" is no weight error.<br />
When scale is in counting mode, you must load<br />
the weight.<br />
If you have no weight on your scale,<br />
you can see this error message.<br />
The "Err 14" means calibration range is not<br />
correct.<br />
SERIAL INTERFACE<br />
To sample set hour to raise in the petal<br />
which falls a weight.<br />
Please call your CAS dealer.
SPECIFICATIONS<br />
MODEL ED 3 ED 6 ED15 ED 30<br />
CAPACITY<br />
TARE SUBTRACTION<br />
INTERNAL<br />
TESOLUTION<br />
EXTERNAL<br />
ESOLUTION<br />
1.5kg/0.5g<br />
3kg/0.001kg<br />
3lb/0.001lb<br />
6lb/0.002lb<br />
50oz/0.02oz<br />
100oz/0.05oz<br />
▶ Notice: Specifications are subject to change for improvement without notice.<br />
24<br />
3kg/0.001kg<br />
6kg/0.002kg<br />
6lb/0.002lb<br />
15lb/0.005lb<br />
100oz/0.05oz<br />
200oz/0.1oz<br />
6kg/0.002kg<br />
15kg/0.005kg<br />
15lb/0.005lb<br />
30lb/0.01lb<br />
250oz/0.1oz<br />
500oz/0.2oz<br />
15kg/0.005kg<br />
30kg/0.01kg<br />
30lb/0.01lb<br />
60lb/0.02lb<br />
500oz/0.2oz<br />
1000oz/0.5oz<br />
-1.4995kg -2.999kg -5.998kg -14.995kg<br />
-2.999lb -5.998lb -14.995lb -29.99lb<br />
-49.98 oz -99.95 oz -249.9 oz -499.8 oz<br />
1/60,000 1/60,000 1/60,000 1/60,000<br />
DUAL 1/3,000<br />
DISPLAY LCD 6 digits<br />
DISPLAY LAMP<br />
STABLE, ZERO, HOLD, NET, HI/OK/LO, lb, oz<br />
%, PCS, SUM, kg, Low Battery<br />
INERFACE RS-232C, DEP50, DLP50<br />
POWER SOURCE<br />
TEMPERATURE<br />
RANGE<br />
PLATTER<br />
SIZE(WD)mm<br />
PRODUCT SIZE<br />
(WDH)mm<br />
DC 12V 1.25A Adaptor<br />
6V 3.6AH Pb Battery<br />
-10°C ~ +40°C<br />
306(W) × 222(D)<br />
330 (W) X 346 (D) X 107 (H)<br />
PRODUCT WEIGHT 4.7kg<br />
BATTERY LIFE<br />
MINMUM VOLTAGE<br />
LEVEL OF THE<br />
BATTERY<br />
When Battery is charged for 24 hours<br />
Approximately 170 hours(Back light off)<br />
About 5.6V
MEMO<br />
25
MEMO<br />
26
뒷표지<br />
28


