Testing Your Clay - Ceramic Arts Daily
Testing Your Clay - Ceramic Arts Daily
Testing Your Clay - Ceramic Arts Daily

Create successful ePaper yourself
Turn your PDF publications into a flip-book with our unique Google optimized e-Paper software.
• For best results, start firings at the lowest cone<br />
temperature and then progressively refire the<br />
bars at higher cones until the highest desired<br />
cone is reached.<br />
• A sample for progressive test firings for a cone<br />
10 clay body would be cone 06, cone 01, cone<br />
6 then finally cone 10.<br />
<strong>Clay</strong> Bar Tests<br />
The following traditional tests give a good range<br />
of basic information that helps you to better<br />
understand your clay body. Keep good records in<br />
your notebook so you’ll have the results for future<br />
reference. If there are other specific qualities, such<br />
as glaze fit or color effect, test for these also.<br />
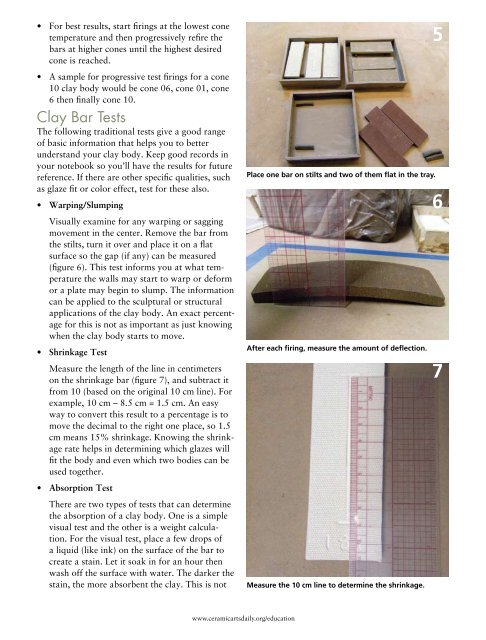
• Warping/Slumping<br />
Visually examine for any warping or sagging<br />
movement in the center. Remove the bar from<br />
the stilts, turn it over and place it on a flat<br />
surface so the gap (if any) can be measured<br />
(figure 6). This test informs you at what temperature<br />
the walls may start to warp or deform<br />
or a plate may begin to slump. The information<br />
can be applied to the sculptural or structural<br />
applications of the clay body. An exact percentage<br />
for this is not as important as just knowing<br />
when the clay body starts to move.<br />
• Shrinkage Test<br />
Measure the length of the line in centimeters<br />
on the shrinkage bar (figure 7), and subtract it<br />
from 10 (based on the original 10 cm line). For<br />
example, 10 cm – 8.5 cm = 1.5 cm. An easy<br />
way to convert this result to a percentage is to<br />
move the decimal to the right one place, so 1.5<br />
cm means 15% shrinkage. Knowing the shrinkage<br />
rate helps in determining which glazes will<br />
fit the body and even which two bodies can be<br />
used together.<br />
• Absorption Test<br />
www.ceramicartsdaily.org/education<br />
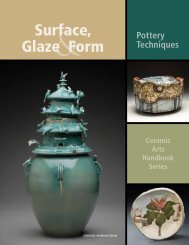
Place one bar on stilts and two of them flat in the tray.<br />
After each firing, measure the amount of deflection.<br />
There are two types of tests that can determine<br />
the absorption of a clay body. One is a simple<br />
visual test and the other is a weight calculation.<br />
For the visual test, place a few drops of<br />
a liquid (like ink) on the surface of the bar to<br />
create a stain. Let it soak in for an hour then<br />
wash off the surface with water. The darker the<br />
stain, the more absorbent the clay. This is not Measure the 10 cm line to determine the shrinkage.<br />
5<br />
6<br />
7