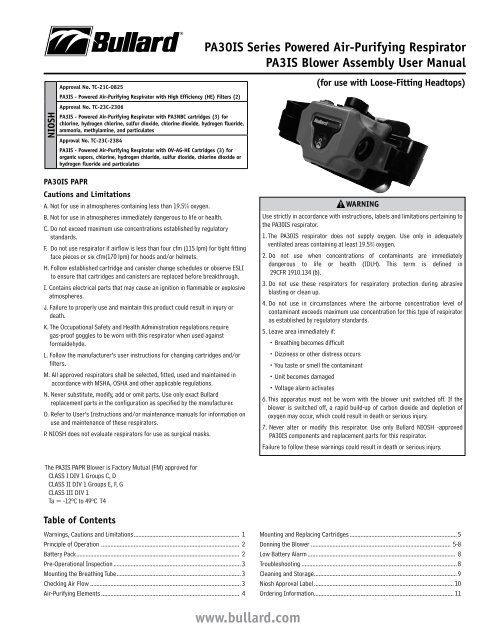
PA30IS Series Powered Air-Purifying Respirator PA3IS ... - Bullard
PA30IS Series Powered Air-Purifying Respirator PA3IS ... - Bullard
PA30IS Series Powered Air-Purifying Respirator PA3IS ... - Bullard

You also want an ePaper? Increase the reach of your titles
YUMPU automatically turns print PDFs into web optimized ePapers that Google loves.
NIOSH<br />
Approval No. TC-21C-0825<br />
<strong>PA3IS</strong> - <strong>Powered</strong> <strong>Air</strong>-<strong>Purifying</strong> <strong>Respirator</strong> with High Efficiency (HE) Filters (2)<br />
Approval No. TC-23C-2306<br />
<strong>PA3IS</strong> - <strong>Powered</strong> <strong>Air</strong>-<strong>Purifying</strong> <strong>Respirator</strong> with PA3NBC cartridges (3) for<br />
chlorine, hydrogen chlorine, sulfur dioxide, chlorine dioxide, hydrogen fluoride,<br />
ammonia, methylamine, and particulates<br />
Approval No. TC-23C-2384<br />
<strong>PA3IS</strong> - <strong>Powered</strong> <strong>Air</strong>-<strong>Purifying</strong> <strong>Respirator</strong> with OV-AG-HE Cartridges (3) for<br />
organic vapors, chlorine, hydrogen chloride, sulfur dioxide, chlorine dioxide or<br />
hydrogen fluoride and particulates<br />
<strong>PA30IS</strong> PAPR<br />
Cautions and Limitations<br />
A. Not for use in atmospheres containing less than 19.5% oxygen.<br />
B. Not for use in atmospheres immediately dangerous to life or health.<br />
C. Do not exceed maximum use concentrations established by regulatory<br />
standards.<br />
F. Do not use respirator if airflow is less than four cfm (115 lpm) for tight fitting<br />
face pieces or six cfm(170 lpm) for hoods and/or helmets.<br />
H. Follow established cartridge and canister change schedules or observe ESLI<br />
to ensure that cartridges and canisters are replaced before breakthrough.<br />
I. Contains electrical parts that may cause an ignition in flammable or explosive<br />
atmospheres.<br />
J. Failure to properly use and maintain this product could result in injury or<br />
death.<br />
K. The Occupational Safety and Health Administration regulations require<br />
gas-proof goggles to be worn with this respirator when used against<br />
formaldehyde.<br />
L. Follow the manufacturer’s user instructions for changing cartridges and/or<br />
filters.<br />
M. All approved respirators shall be selected, fitted, used and maintained in<br />
accordance with MSHA, OSHA and other applicable regulations.<br />
N. Never substitute, modify, add or omit parts. Use only exact <strong>Bullard</strong><br />
replacement parts in the configuration as specified by the manufacturer.<br />
O. Refer to User’s Instructions and/or maintenance manuals for information on<br />
use and maintenance of these respirators.<br />
P. NIOSH does not evaluate respirators for use as surgical masks.<br />
The <strong>PA3IS</strong> PAPR Blower is Factory Mutual (FM) approved for<br />
CLASS I DIV 1 Groups C, D<br />
CLASS II DIV 1 Groups E, F, G<br />
CLASS III DIV 1<br />
Ta = -12ºC to 49ºC T4䍃<br />
Table of Contents<br />
Warnings, Cautions and Limitations .................................................................... 1<br />
Principle of Operation ......................................................................................... 2<br />
Battery Pack ......................................................................................................... 2<br />
Pre-Operational Inspection .................................................................................. 3<br />
Mounting the Breathing Tube ................................................................................ 3<br />
Checking <strong>Air</strong> Flow ................................................................................................. 3<br />
<strong>Air</strong>-<strong>Purifying</strong> Elements ......................................................................................... 4<br />
<strong>PA30IS</strong> <strong>Series</strong> <strong>Powered</strong> <strong>Air</strong>-<strong>Purifying</strong> <strong>Respirator</strong><br />
<strong>PA3IS</strong> Blower Assembly User Manual<br />
www.bullard.com<br />
(for use with Loose-Fitting Headtops)<br />
WARNING<br />
Use strictly in accordance with instructions, labels and limitations pertaining to<br />
the <strong>PA30IS</strong> respirator.<br />
1. The <strong>PA30IS</strong> respirator does not supply oxygen. Use only in adequately<br />
ventilated areas containing at least 19.5% oxygen.<br />
2. Do not use when concentrations of contaminants are immediately<br />
dangerous to life or health (IDLH). This term is defined in<br />
29CFR 1910.134 (b).<br />
3. Do not use these respirators for respiratory protection during abrasive<br />
blasting or clean up.<br />
4. Do not use in circumstances where the airborne concentration level of<br />
contaminant exceeds maximum use concentration for this type of respirator<br />
as established by regulatory standards.<br />
5. Leave area immediately if:<br />
• Breathing becomes difficult<br />
• Dizziness or other distress occurs<br />
• You taste or smell the contaminant<br />
• Unit becomes damaged<br />
• Voltage alarm activates<br />
6. This apparatus must not be worn with the blower unit switched off. If the<br />
blower is switched off, a rapid build-up of carbon dioxide and depletion of<br />
oxygen may occur, which could result in death or serious injury.<br />
7. Never alter or modify this respirator. Use only <strong>Bullard</strong> NIOSH -approved<br />
<strong>PA30IS</strong> components and replacement parts for this respirator.<br />
Failure to follow these warnings could result in death or serious injury.䍃<br />
Mounting and Replacing Cartridges ..................................................................... 5<br />
Donning the Blower .......................................................................................... 5-8<br />
Low Battery Alarm ............................................................................................... 8<br />
Troubleshooting .................................................................................................... 8<br />
Cleaning and Storage ............................................................................................ 9<br />
Niosh Approval Label .......................................................................................... 10<br />
Ordering Information .......................................................................................... 11
Principle of Operation / Battery Pack<br />
2<br />
<strong>PA3IS</strong> - Principle of Operation<br />
The <strong>PA30IS</strong> <strong>Powered</strong> <strong>Air</strong>-<strong>Purifying</strong> <strong>Respirator</strong> (PAPR) System is supplied in six parts:<br />
1. The blower assembly (Part No. <strong>PA3IS</strong>) which includes:<br />
<strong>PA3IS</strong>BU Blower Unit<br />
PA1SB Belt or PA1DB Decon Belt<br />
PA1AFI <strong>Air</strong> Flow Indicator<br />
2. The battery pack, Part No. <strong>PA3IS</strong>BP, will last approximately seven hours.<br />
3. The breathing tube, which is available in two different types:<br />
PAHBT <strong>Powered</strong> <strong>Air</strong> Hood Breathing Tube Assembly (standard length)<br />
PAHBTXS <strong>Powered</strong> <strong>Air</strong> Hood Breathing Tube Assembly (short length)<br />
PAHBTXL <strong>Powered</strong> <strong>Air</strong> Hood Breathing Tube Assembly (long length)<br />
PA1BT Hood breathing tube assembly with clamp (standard length)<br />
PA1BTXS Hood breathing tube assembly with clamp (short length)<br />
PA1BTXL Hood breathing tube assembly with clamp (long length)<br />
PA20LFBT Loose fitting facepiece breathing tube assembly (standard length)<br />
PA20LFBTXS Loose fitting facepiece breathing tube assembly (short length)<br />
PA20LFBTXL Loose fitting facepiece breathing tube assembly (long length)<br />
4. The cartridges are available in different types for most toxic contaminants. (See pages<br />
4 and 7 for a listing of the cartridges.) The types include High Efficiency particulate only,<br />
chemical cartridges for gases and vapors, and combination cartridges for gases, vapors<br />
and particulates.<br />
5. The hood with headband suspension and/or hard hat, or loose fitting facepiece. The<br />
following hood models may be used with the <strong>PA3IS</strong>BU blower unit:<br />
RT1/RT1T Hood with long inner and outer bib (NIOSH approved for use without a<br />
headband suspension)<br />
RT2/RT2T Hood with long inner and outer bib (NIOSH approved for use without a<br />
headband suspension)<br />
RT3/RT3T Hood with long inner and outer bib (NIOSH approved for use without a<br />
headband suspension)<br />
RT4/RT4T Hood with long inner and outer bib (NIOSH approved for use without a<br />
headband suspension)<br />
20TJ/20TJT Hood<br />
20TIC/20TICT Hood with inner bib<br />
20TICH/20TICHT Hood for use with <strong>Bullard</strong> hard hat<br />
20TICS/20TICST Hood with taped and sealed seams<br />
20SIC/20SICT Hood with taped and sealed seams<br />
20SICV/20SICVT Hood with taped and sealed seams and PVC lens<br />
20SICH/20SICHT Hood with taped and sealed seams for use with <strong>Bullard</strong> hard hat<br />
20SICVH/20SICVHT Hood with taped and sealed seams and PVC lens for use with<br />
<strong>Bullard</strong> hard hat<br />
20TPC/20TPCT Hood with solvent resistant lens and inner bib<br />
20TP/20TPT Hood with solvent resistant lens<br />
20LFM Loose fitting facepiece, medium size<br />
20LFL Loose fitting facepiece, large size<br />
20LF2M Loose fitting facepiece (narrow profile), medium size<br />
20LF2L Loose fitting facepiece (narrow profile), large size<br />
20LF2S Loose fitting facepiece (narrow profile), small size<br />
6. The Battery Charger:<br />
<strong>PA3IS</strong>C Intrinsically Safe Quick Charger (single port)<br />
<strong>PA3IS</strong>GC Intrinsically Safe Gang Charger (six port)<br />
The blower unit draws in ambient air through the cartridges. The purified air is blown into<br />
the wearer’s hood through the breathing tube. A flow indicator is provided to check that<br />
there is an adequate volume of air available to the wearer prior to use.<br />
The units are designed for use at temperatures from 10ºF to 120ºF (-12ºC to 49ºC).The<br />
system is designed to operate at a minimum air flow of approximately seven cubic feet of<br />
air per minute (210 liters per minute) in the hood under normal use.<br />
The battery pack(s) mount in compartment(s) on the back of the blower. One fully charged<br />
battery pack will power the blower for approximately seven hours.<br />
The <strong>PA3IS</strong>BU is fitted with an alarm which will sound when voltage is low.<br />
CC20 and RT <strong>Series</strong> <strong>Air</strong>line <strong>Respirator</strong><br />
NIOSH Approval No. TC-19C-154, Type C and TC-19C-412, Type C<br />
Most of the same headpieces approved for use with the CC20 and RT <strong>Series</strong> of supplied air<br />
respirators (SARS) are also approved for use with the PA30 <strong>Series</strong> of powered air-purifying<br />
respirators. CC20 and RT <strong>Series</strong> respirators provide a high level of respiratory protection<br />
and user comfort over long work periods, in a wide variety of hazardous environments.<br />
The CC20 and RT SAR air flow control devices and other components are described in the<br />
CC20 and RT <strong>Series</strong> User Instructions.<br />
Battery Pack<br />
A fully charged battery pack will power a blower unit to provide adequate air volume for the<br />
respirator for approximately seven hours for the <strong>PA3IS</strong>BU.<br />
To charge the battery pack, do the following:<br />
• Open the battery latch and remove the battery from the back of the blower.<br />
WARNING<br />
Make sure that the Blower Unit has been shut off completely before removing the<br />
battery. DO NOT remove the battery while the unit is running. DO NOT install a<br />
battery into a blower that has been left in the “on” position. Failure to follow these<br />
instructions may cause damage to the battery and may put the wearer at risk.<br />
• Place each battery in the charging ports of the battery charger. Ensure that the battery<br />
contacts line up with the contacts in the charger port (see Figure 1).<br />
• Connect the battery charger to a 115-volt AC electrical outlet.<br />
Charge the battery pack for approximately eight hours.<br />
While the <strong>PA3IS</strong>BP battery is charging, the light on the cord will<br />
remain red. When the unit is charged, it will turn green.<br />
Table-top gang chargers (Part No. <strong>PA3IS</strong>GC, with 6 ports)<br />
and analyzers/conditioners are also available.<br />
To maximize battery life, these guidelines should be<br />
followed:<br />
• Charge the battery pack before it is completely discharged.The low<br />
voltage alarm indicates that the battery needs to be charged.; operating Figure 1<br />
the PAPR for more than 20 minutes after the alarm has been activated may damage the<br />
battery. Deeply discharged batteries may cause the charger to falsely indicate a complete<br />
charge.<br />
• Always charge the batteries at room temperature or less. At higher temperatures, the<br />
battery pack may not accept a full charge. If the battery pack feels hot, let it cool for 30<br />
minutes before charging.<br />
• Do not charge battery packs in an enclosed cabinet without ventilation.<br />
• Battery capacity may be checked with battery analyzer/conditioner.<br />
Table-top gang chargers (Part No. <strong>PA3IS</strong>GC, with 6 ports) are also available.<br />
www.bullard.com<br />
WARNING<br />
PA3BP battery packs MUST be used with PA3 blower units and <strong>PA3IS</strong>BP intrinsically<br />
safe battery packs MUST be used with <strong>PA3IS</strong> blower units. Interchanging<br />
these batteries with blowers may cause damage to the blower and battery AND<br />
the blowers will not operate as intended and may put the wearer at risk. Failure to<br />
follow these instructions may result in death or serious injury.
Initial Charging Procedure with Quick Charger<br />
To ensure a full charge on a new battery pack, follow these important guidelines.<br />
These guidelines also apply to battery packs that have been in storage for<br />
extended periods of time.<br />
For new battery packs or packs that have been in storage for extended periods of<br />
time, follow the directions above under “Battery Pack”, and when the light turns<br />
green (<strong>PA3IS</strong>BP), do the following:<br />
• Remove the battery pack. Wait 15 seconds. Replace the battery pack in the<br />
nest. The charger light will now turn red (<strong>PA3IS</strong>BP).<br />
• When the light turns green (<strong>PA3IS</strong>BP), remove the battery pack. Wait 15<br />
seconds. Replace the battery pack in the nest again. The charger light will now<br />
remain on or turn red.<br />
The charger light will turn green (<strong>PA3IS</strong>BP), indicating that the battery is fully<br />
charged.<br />
This procedure should also be followed after periods of prolonged storage.<br />
Without periodic charging, the nickel metal hydride batteries will lose up to<br />
1%–2% of their charge per day. Allowing a battery to self-discharge during<br />
periods of prolonged storage will not damage the battery.<br />
WARNING<br />
DO NOT charge batteries in hazardous area.<br />
Pre-Operational Inspection<br />
Prior to each work shift, perform the following Pre-Operational Inspection to<br />
ensure proper operation and to insure that the unit is complete.<br />
1. Belt Mounted Blower Unit, Part No. <strong>PA3IS</strong>BU<br />
• Check that the unit is clean and undamaged.<br />
• Inspect for deterioration, physical damage, and improper assembly.<br />
• Ensure that the correct filters/cartridges for the appropriate contaminant<br />
are properly mounted on the blower unit. Screw the cartridges into the<br />
ports until hand-tight.<br />
Consult the NIOSH approval label and your own in-plant safety professional if<br />
you have any questions as to the suitability and efficiency of the <strong>Air</strong>-<strong>Purifying</strong><br />
Element.<br />
2. Battery Pack<br />
• Check that the battery is not damaged.<br />
• Place the battery pack in the battery compartment on the blower by first<br />
engaging the tab on the pack under the lip on the edge of the compartment.<br />
Then close the latch.<br />
3. Hood with Suspension or Hard Hat, or Loose Fitting Facepiece<br />
• The hood is constructed of either DuPont Tychem ® QC or Tychem SL.<br />
Depending on the model selected, it may be used with either a headband<br />
suspension or a hard hat. The loose fitting facepiece is constructed of<br />
Tychem QC and features an internal suspension.<br />
• All hoods and loose fitting facepieces are approved for use with the<br />
<strong>PA3IS</strong>BU Blower Units.<br />
• Inspect the hood or loose fitting facepiece for any physical damage.<br />
<strong>PA30IS</strong> <strong>Series</strong> <strong>Powered</strong> <strong>Air</strong>-<strong>Purifying</strong> <strong>Respirator</strong><br />
<strong>PA3IS</strong> Blower Assembly User Manual<br />
www.bullard.com<br />
Mounting the Breathing Tube on the <strong>PA3IS</strong>BU Blower<br />
Ensure that a rubber gasket is in place in the breathing tube coupler on the<br />
blower unit.<br />
Screw one end of the<br />
breathing tube into the<br />
blower unit (hand tight is<br />
sufficient) (see Figure 2).<br />
Ensure that neither the<br />
breathing tube nor the filter<br />
is blocked.<br />
Ensure that the ON/OFF<br />
Gasket<br />
Switch is in the OFF position.<br />
Switch on the blower. If the Low Voltage Alarm sounds<br />
Figure 2<br />
at this time, the battery needs to be recharged. See<br />
instructions on page 2 regarding properly charging the battery.<br />
Checking <strong>Air</strong>flow with the <strong>Air</strong>flow Indicator (PA1AFI)<br />
With the blower switched ON and the filters/cartridges mounted, take the free<br />
end of the breathing tube in one hand, hold it<br />
upright and place the <strong>Air</strong>flow Indicator into<br />
the end of the tube (see Figure 3).<br />
Apply a light downward pressure to the<br />
<strong>Air</strong>flow Indicator to get a reasonable seal<br />
at the breathing tube end. Ensure that the<br />
air outlet holes in the <strong>Air</strong>flow Indicator tube<br />
are not blocked. Two hands may be used if<br />
preferred, one to hold the breathing tube and<br />
one to hold the <strong>Air</strong>flow Indicator.<br />
The position of the ball in the <strong>Air</strong>flow<br />
Indicator should be observed. If any part of<br />
the ball is below the PASS LINE on the <strong>Air</strong>flow<br />
Figure 3<br />
Indicator, check for:<br />
• Blower malfunction.<br />
• Clogged or damaged <strong>Air</strong>-<strong>Purifying</strong> filter elements on the HE filters or the<br />
combination cartridges with HE filters. See “Mounting and Replacing<br />
Cartridges on the Blower Unit” on page 5.<br />
• Low voltage or battery malfunction.<br />
If the ball is completely above the PASS LINE on the <strong>Air</strong>flow Indicator, then the<br />
system is ready for use.<br />
When the blower passes the flow test, it is ready to use. 䍃<br />
WARNING<br />
If the blower malfunctions during use in a hazardous area:<br />
DO NOT remove the respirator hood, blower or waist-belt while in the<br />
hazardous area.<br />
DO remain calm and LEAVE the hazardous area immediately.<br />
After reaching a hazard-free area, immediately remove the respirator.<br />
DO NOT use a blower that fails the flow test.<br />
Use ONLY <strong>Bullard</strong> cartridges which comply with and have the NIOSH<br />
approval label and which are appropriate for the contaminant.<br />
Failure to observe these warnings could result in death or serious injury.<br />
Initial Charging / Pre-Operational Inspection<br />
3
<strong>Air</strong>-<strong>Purifying</strong> Elements<br />
4<br />
<strong>PA3IS</strong>BU <strong>Air</strong>-<strong>Purifying</strong> Elements<br />
Principle of Operation<br />
The following filter/cartridge protection classification applies when used with any of the hoods or loose fitting facepieces. In the following table “Quantity” refers to<br />
the number of filters/cartridges which must be attached to the blower unit to provide the required protection.<br />
Protection Filter/Cartridge Type Quantity NIOSH / ANSI Color Code<br />
for Cartridge Label<br />
HE PAPRFC1 2 Purple<br />
OV/CL/HC/SD/CD/HF/HE PAPRFC2 3 Yellow and Purple<br />
CL/HC/SD/CD/HF/FM/AM/MA/HE PA3NBC* 3 Olive Green and Purple<br />
* The PA3NBC cartridge provides protection for acid gases, formaldehyde, and ammonia and therefore is effective against a wide range of Toxic Industrial Chemicals.<br />
The High Efficiency (HE) Particulate Filter provides protection against airborne bacteria, viruses, and other particulates. Although not NIOSH-approved for use<br />
against the following contaminants, independent laboratories have tested and verified that the PA3NBC cartridge is effective against many chemical warfare agents<br />
and/or their recognized surrogates. These agents/surrogates are listed below.<br />
PA3NBC CARTRIDGE<br />
CHEMICAL WARFARE GAS PERFORMANCE TESTING<br />
Gas Challenge Test Flow Breakthrough Time to<br />
Concentration Rate Concentration Breakthrough<br />
DMMP 3000 mg/m3 50 lpm .04 mg/m3 >120 minutes*<br />
Sarin (GB) 4000 mg/m3 32 lpm .04 mg/m3 >120 minutes*<br />
Cyanogen Chloride (CK) 4000 mg/m3 32 lpm 8.0 mg/m3 30 minutes*<br />
Chloropicrin (PS) 15000 mg/m3 30 lpm 0.7 mg/m3 60 minutes<br />
Hydrogen Cyanide (AC) 5500 mg/m3 30 lpm 5.0 mg/m3 >30 minutes<br />
Tear Gas (CS) 23 mg/m3 64 lpm 0.4 mg/m3 >480 minutes<br />
Tear Gas (CN) 101 mg/m3 64 lpm 0.3 mg/m3 >480 minutes<br />
*These tests are part of the performance specifications for the C2A1 military canister. The PA3NBC Cartridge meets or exceeds the performance requirements of<br />
the C2A1 canister for these gases.<br />
HE particulate filters are 99.97% effective against all particulate aerosols.<br />
Filters and cartridges are supplied in quantities of six per box.<br />
The following abbreviations are approved by NIOSH to indicate the particulates,<br />
gases or vapors which are removed by the gas/vapor cartridges:<br />
CL Chlorine<br />
CD Chlorine Dioxide<br />
HC Hydrogen Chloride<br />
SD Sulfur Dioxide<br />
FM Formaldehyde<br />
AM Ammonia<br />
MA Methylamine<br />
OV Organic Vapors<br />
HF Hydrogen Fluoride<br />
HE High Efficiency Particulate <strong>Air</strong> Filter for <strong>Powered</strong><br />
<strong>Air</strong>-<strong>Purifying</strong> <strong>Respirator</strong>s<br />
www.bullard.com<br />
WARNING<br />
Use only the cartridge described in the above table. Used/particulate-laden<br />
cartridges must be changed as a set and not individually. All cartridges must be<br />
of the same type. Do not change cartridges while in a hazardous atmosphere.<br />
Incorrect cartridge selection will invalidate all performance statements and<br />
approvals for this equipment.<br />
Three (3) of the same type of cartridge must be used on the <strong>PA3IS</strong>BU blower<br />
unit, with the exception of the PAPRFC1 filter which are used two (2) at a time,<br />
in conjunction with the PA3PG plug. DO NOT use the PA3PG plug to close off a<br />
port with any other cartridge type.<br />
For Hospital Preparedness applications, the PA3NBC cartridges and PA3BU<br />
blower should only be used with the 20SICVH and 20SICV hoods. These hoods<br />
are made of Tychem SL, which has been tested by DuPont and shown to be<br />
effective against chemical warfare agents. These hoods also feature a press<br />
polished vinyl lens adequate for hospital preparedness applications.<br />
These respirators are not NIOSH-approved for use against chemical warfare<br />
agents.<br />
The respirator and cartridges should not be used beyond eight (8) hours<br />
after initial exposure to chemical warfare agents to avoid possibility of agent<br />
permeation. If liquid exposure is encountered, the respirator should not be<br />
used for more than two (2) hours.<br />
Follow established cartridge change schedules to ensure that cartridges are<br />
replaced before breakthrough occurs. Failure to follow these warnings could<br />
result in death or serious injury.
Mounting and Replacing Cartridges on the Blower Unit<br />
The useful life of a chemical cartridge for vapors and gases will vary with the<br />
concentration and nature of the contaminant, the breathing rate of the respirator<br />
wearer, and ambient temperature and humidity.<br />
The Occupational Safety and Health Administration (OSHA) regulations 29 CFR<br />
1910.134 require that the employer must implement a change schedule when<br />
using <strong>Air</strong>-<strong>Purifying</strong> respirators for protection against gases and vapors, if there<br />
is no end-of-service-life indicator on the cartridges. The change schedule must<br />
be based on objective data that will ensure that the cartridges are replaced<br />
before the end of their service life. Factors to consider include workplace conditions<br />
such as contaminant concentration, relative humidity, temperature, work<br />
activities, respirator use pattern (e.g., continuous or intermittent use), presence<br />
of other contaminants, potential for contaminant migration/desorption, health<br />
effects of the gas or vapor, and the presence of any warning properties. Contact<br />
<strong>Bullard</strong> for further information on change-out schedules.<br />
High efficiency particulate filters must be replaced when retained particles clog<br />
the filters and reduce air flow below acceptable levels, as indicated by testing<br />
with the <strong>Air</strong> Flow Indicator.<br />
To Replace Cartridges<br />
Remove the air-purifying element from its packaging, and inspect for damage. If<br />
in doubt do not use.<br />
Check that the air-purifying element has not exceeded its “use-by” date and that<br />
the connecting thread is in good condition.<br />
Check that the air-purifying element is appropriate to the hazard. If in doubt<br />
consult your respirator program administrator or supervisor.<br />
Check that the threads in the blower unit port are in good condition and clear of<br />
contaminant.<br />
Check that the <strong>PA3IS</strong>BU blower ports<br />
have the rubber gasket seals present.<br />
Remove the air-purifying element<br />
seals (see Figure 4).<br />
Screw the air-purifying elements into<br />
the receptacles (see Figure 5)<br />
Figure 4<br />
until the cartridge is hand tight. DO<br />
NOT OVER-TIGHTEN.<br />
When using the two PAPRFC1 filter<br />
cartridges, install the filter plug into<br />
one of the ports. DO NOT OVER-<br />
TIGHTEN (Figure 6).<br />
Figure 6<br />
<strong>PA30IS</strong> <strong>Series</strong> <strong>Powered</strong> <strong>Air</strong>-<strong>Purifying</strong> <strong>Respirator</strong><br />
<strong>PA3IS</strong> Blower Assembly User Manual<br />
Figure 5<br />
www.bullard.com<br />
Donning the Blower and <strong>Respirator</strong><br />
Prepare to don the blower, battery and hood in a safe, hazard-free area and do<br />
the following:<br />
Check that the cartridges are properly mounted on the blower unit.<br />
Prior to assembling the system, place the battery in the battery compartment<br />
on the back of the blower. Make sure that the correct battery is used in the appropriate<br />
blower unit. (See instructions and warning on page 2). Fit the blower<br />
and belt around the user’s waist. With the blower at the rear of the user, adjust<br />
the belt for a comfortable fit.<br />
Remove the belt and blower.<br />
Ensure that the cartridges used are suitable for the contaminant in question and<br />
are compatible with the <strong>PA3IS</strong>BU Blower Unit.<br />
WARNING<br />
The use of any cartridge not approved with the <strong>PA3IS</strong>BU blower units may put<br />
the user at risk and could result in death or serious injury.<br />
Donning the <strong>PA3IS</strong>BU with the CC20<br />
<strong>Series</strong> Hood<br />
Adjusting and Installing Headband Suspension<br />
in Hood<br />
NOTE<br />
20LF and 20LF2 series loose-fitting facepiece hoods have a sewn-in<br />
headband.<br />
NOTE<br />
RT <strong>Series</strong> hoods do not use a suspension.<br />
To change the headband size, unlock the four pins from the sizing holes. Place<br />
the headband on your head. Pull down, allowing headband to expand until it feels<br />
comfortable. The headband will automatically adjust to your size. Lock into place<br />
by pushing the four pins into the sizing holes (Figure 7).<br />
Figure 7<br />
NOTE<br />
If using the optional 20RT ratchet headband suspension, refer to the<br />
instruction sheet provided with the 20RT.<br />
Adjust Crown Straps for Vertical Fit<br />
To improve suspension comfort, adjust crown<br />
straps vertically by repositioning the crown<br />
strap posts in the crown straps. Vertical<br />
adjustment makes the headband ride higher or<br />
lower on the wearer’s head. To adjust, push<br />
crown strap post from slot, move to new slot,<br />
and snap in to secure. Move key to desired<br />
vertical position. Repeat for other crown strap<br />
post (Figure 8).<br />
NOTE<br />
Brow pad<br />
Figure 8<br />
If the hood rises off your head during<br />
use, first verify proper air pressure, then select a different hood for your<br />
application, or use the optional chin strap.<br />
8<br />
64<br />
7 63<br />
7 62<br />
7 61<br />
SIZE<br />
7 60<br />
7 59<br />
7 58<br />
7/8 3/4 5/8 1/2 3/8 1/8<br />
Crown strap<br />
7<br />
57<br />
6 56<br />
7/8<br />
6 55<br />
Crown<br />
strap<br />
post<br />
6 54<br />
6 53<br />
3/4 5/8 1/2<br />
Mounting the Cartridges / Donning the Blower<br />
5
CC20 Hood Use<br />
6<br />
Adjusting and Installing Hard Hat in <strong>Respirator</strong><br />
Hood (20SICH & 20TICH)<br />
1. Assemble and adjust the standard <strong>Bullard</strong> hard hat suspensions RS4PC or<br />
RS6PC or the optional ratchet suspensions RS4RC or RS6RC by following the<br />
directions on instruction sheet attached to headband on hard hat. Read all hard<br />
hat warning labels and instructions. The following <strong>Bullard</strong> hard hat models are<br />
NIOSH approved for use with CC20 <strong>Series</strong> respirator hoods: C30, C30R, S51<br />
and S51R.<br />
2. If desired, install and adjust optional ES42 hard hat<br />
chinstrap.<br />
3. Before inserting hard hat into hood, remove the two<br />
adhesive-backed Velcro ® strips attached to the Velcro<br />
piece that is sewn into the hood (see Figures 10 & 11).<br />
4. Peel the backing off the longer Velcro tab and apply it<br />
to the inside center rear of the hard hat, about 1/4”<br />
up from the edge. Apply shorter Velcro tab to the<br />
underside of the brim of the hard hat (see Figure 10).<br />
5. Insert hard hat into respirator hood with cap visor<br />
Figure 9<br />
facing front of hood (see Figure 11).<br />
6. Tuck cap brim on top of front elastic Velcro band sewn into hood (see Figure<br />
19).<br />
7. Loop the Velcro strip sewn inside the hood around the back of the cap and affix<br />
it to the corresponding Velcro tab previously installed inside the hard hat in<br />
step 4 (see Figure 11).<br />
8. Remove protective plastic from plastic lens of respirator hood. If desired, apply<br />
optional 20LC or 20LCL adhesive-backed lens covers designed to protect the<br />
respirator’s plastic lens. Apply 2-3 lenses at a time. When lens becomes soiled,<br />
remove by pulling tab at edge of lens cover to clear your vision.<br />
Velcro strip<br />
Velcro tabs<br />
Window<br />
Front<br />
elastic<br />
band<br />
Figure 10<br />
Figure 11<br />
Velcro<br />
Strip<br />
Installing Breathing Tube Assembly in CC20 Hoods<br />
For hoods without a threaded port at the rear, Breathing Tubes PA1BT,<br />
PA1BTXS and PA1BTXL will attach to the hood with a clamp as follows:<br />
1. Remove nylon clamp from plastic anchor plate on hood (see Figure 12).<br />
2. Insert the open end of the breathing tube approximately five inches into<br />
hood’s air entry sleeve (see Figure 13). Do not insert breathing tube into<br />
hood air entry sleeve more than 6 inches as it may cause a flow restriction.<br />
3. Install nylon clamp over air<br />
To remove<br />
entry sleeve and breathing<br />
tube, inserting clamp locks<br />
To tighten<br />
through two holes in plastic<br />
anchor plate that is sewn into To tighten<br />
hood. Locks should face away<br />
from user’s neck (see Figure<br />
14). The air entry sleeve<br />
seams should be on the top<br />
and bottom of the breathing<br />
Figure 12<br />
tube when properly installed<br />
and worn.<br />
4. Engage clamp locks and squeeze together until tight. <strong>Air</strong> entry sleeve should<br />
not be twisted or restricted (see Figure 15). If so, then remove the clamp<br />
and repeat steps 2-4.<br />
For hoods with a threaded port at the rear (designated with a “T” suffix),<br />
Breathing Tubes PAHBT, PAHBTXS, PAHBTXL will attach to the hood by the<br />
threading into the port at the rear (See Figure 13A).<br />
Figure 14<br />
Figure 13<br />
Correct<br />
Figure 15<br />
Figure 13A<br />
Twisted – incorrect<br />
WARNING<br />
Do not put on or remove these respirators in a hazardous atmosphere except for<br />
emergency escape purposes. Failure to heed these warnings could result in death<br />
or serious injury.<br />
Donning the CC20 and <strong>PA30IS</strong>BU<br />
1. With PAPR Blower Unit Running, put on CC20 <strong>Series</strong> respirator hood.<br />
2. Position headband suspension or hard hat for a comfortable fit.<br />
3. If using an optional chin strap, pull elastic strap under<br />
your chin. Adjust for a secure and comfortable fit.<br />
4. Tuck inner bib of hood into shirt or protective clothing<br />
if using hood with inner bib (see Figure 16).<br />
5. Pull respirator outer bib over collar of shirt or<br />
protective clothing.<br />
Figure 17<br />
6. Ensure that the neck cuff is down below the<br />
chin and that the air outlets<br />
of the cuff (see Figure17)<br />
are not restricted. If<br />
the neck cuff is not<br />
below the chin, then<br />
pull down before<br />
continuing (See<br />
Figure<br />
18).<br />
Figure 16 Figure 18
RT <strong>Series</strong> Hood Use<br />
Installing Breathing Tube Assembly in RT <strong>Series</strong><br />
<strong>Respirator</strong> Hoods<br />
For hoods without a threaded port at the<br />
rear, Breathing Tubes PA1BT, PA1BTXS<br />
and PA1BTXL will attach to the hood with a<br />
clamp as follows:<br />
1. Remove nylon clamp from the breathing<br />
tube (see Figure 12).<br />
2. Insert the open end of the breathing<br />
Figure 19<br />
tube approximately five inches into<br />
hood’s air entry sleeve (see Figure 19).<br />
Do not insert breathing tube into hood air<br />
entry sleeve more than 6 inches as it may<br />
cause a flow restriction.<br />
3. Install nylon clamp over air entry sleeve and<br />
breathing tube. If desired, 2 or more clamps<br />
may be used(see Figure 20). The air entry<br />
sleeve seams should be on the sides of the<br />
breathing tube when properly installed and Figure 20<br />
worn.<br />
4. Engage clamp locks and<br />
squeeze together until tight.<br />
Twisted – incorrect<br />
<strong>Air</strong> entry sleeve should not<br />
be twisted or restricted<br />
(see Figure 21). If so, then<br />
remove the clamp and<br />
repeat steps 2-4.<br />
5. With PAPR blower unit<br />
running, put on RT <strong>Series</strong><br />
Correct<br />
respirator hood. Pull the<br />
hood over your head until<br />
the neck cuff is securely<br />
around your neck.<br />
Figure 21<br />
6. Ensure that the neck cuff<br />
is down below the chin and<br />
that the air outlets of the cuff are not restricted. If the neck cuff (see Figure<br />
17) is not below the chin, then pull down before continuing (See Figure 18).<br />
For hoods with a threaded port at the rear (designated with a “T” suffix),<br />
Breathing Tubes PAHBT, PAHBTXS, PAHBTXL will attach to the hood by the<br />
threading into the port at the rear (See Figure 13A).<br />
NOTE<br />
The RT3 and RT4 hoods have an adjustable velcro strap near the top of<br />
the lens that allows the user to customize the curvature of the lens to<br />
his/her personal preference. This strap may be removed if desired.<br />
7. Make sure that the breathing tube is not twisted after donning.<br />
8. T uck inner bib of hood into shirt or protective clothing (see Figure 16).<br />
9. Pull respirator outer bib over collar of shirt or protective clothing. Pull the long<br />
outer bib down on the outside of clothing and secure with tie down straps or<br />
tape (if employer operating procedures will allow.)<br />
<strong>PA30IS</strong> <strong>Series</strong> <strong>Powered</strong> <strong>Air</strong>-<strong>Purifying</strong> <strong>Respirator</strong><br />
<strong>PA3IS</strong> Blower Assembly User Manual<br />
www.bullard.com<br />
WARNING<br />
The user should ensure that the neck cuff is unrestricted all around the neck<br />
to allow proper inflation and reduce restrictions.<br />
Battery run time will be reduced by a restricted or improperly donned hood.<br />
Loose-Fitting<br />
Facepiece Use<br />
Installing Breathing<br />
Tube Assembly<br />
in Loose-Fitting<br />
Facepieces<br />
Figure 22<br />
1. The 20LFM, 20LFL, 20LF2S, 20LF2M<br />
and 20LF2L loose-fitting facepieces<br />
have a sewn-in breathing tube connector on the back. The PA20LFBT breathing<br />
tube has a special connector on the hood end with bayonet type pins.<br />
2. Insert the bayonet connector of the PA20LFBT breathing tube in the hood<br />
connector and turn clockwise until it locks in place (see Figure 22).<br />
Available in large 20LF2L or 20LFL, medium 20LF2M or 20LFM, and small 20LF2S.<br />
Select the size that fits most comfortably and matches your head size. Remove<br />
the protective cover from the visor. Pull the hood over your head and adjust the<br />
headband around your head and the elasticized edge of the faceseal under your<br />
chin. Make sure that the breathing tube is not twisted after donning.<br />
Final Donning:<br />
• Attach the other end of breathing tube to blower unit (if not already<br />
attached) by screwing adapters together.<br />
• Remove any protective film covering the lens of the headpiece.<br />
• Put on the belt and blower assembly and make any final adjustments to the<br />
belt as necessary, keeping the breathing tube and hood behind the head.<br />
• Turn the blower on by depressing and holding the on/off switch for<br />
approximately 1 second.<br />
• Buckle the belt onto the waist (blower unit should be in the lower back of the<br />
wearer).<br />
• Don the headpiece.<br />
• Place the hood on the head making any final adjustments to the fit as<br />
required at this time to ensure a comfortable and stable fit.<br />
•Tuck inner bib into coveralls or shirt if using a hood with inner bib.<br />
WARNING<br />
Do not enter a hazardous area until you are sure that the blower and hood are<br />
fully operational and the blower is running. The user should periodically leave the<br />
hazardous area to check the airflow through the system. If the low battery or low flow<br />
alarm should sound, or if the user experiences any difficulty in breathing, or senses<br />
any taste or any odors from the hazard, the user should leave the hazardous area<br />
immediately. Failure to observe these warnings could result in death or serious injury.<br />
RT Hood Use/Loose-Fitting Facepiece Use<br />
7
Final Donning/Low Voltage Alarm/Troubleshooting<br />
8<br />
CC20 Single Bib<br />
CC20 Double Bib<br />
RT <strong>Series</strong><br />
20LFL<br />
20LF2L<br />
Final Donning<br />
Front Back<br />
<strong>PA3IS</strong>BU Low Voltage Alarm<br />
www.bullard.com<br />
The <strong>PA3IS</strong>BU Blower units are equipped with a Low Voltage Alarm. This device will<br />
activate if the battery voltage is below acceptable levels. The <strong>PA3IS</strong>BU Low Voltage<br />
Alarm is a mechanical pulsing of the blower. The alarm is internal to the blower and<br />
the sound will be carried up the breathing tube into the hood. Sounding of the alarm<br />
indicates that insufficient airflow may be imminent. The user should immediately do<br />
the following:<br />
Leave the hazard area, remove the headpiece, disconnect the breathing tube from<br />
the hood and check the airflow with the airflow indicator (see page 5).<br />
If the airflow indicator indicates insufficient airflow, the battery should be fully<br />
charged (see “Battery Pack” on page 2), and/or the filter/cartridge should be<br />
replaced.<br />
The <strong>PA3IS</strong>BU Low Voltage Alarm must not be solely relied upon as an indication of a<br />
low air flow condition. Only the <strong>Air</strong> Flow Indicator should be utilized for checking for<br />
adequate air flow, as required by NIOSH.<br />
NOTE<br />
When the Low Voltage Alarm sounds and the filter cartridges are not clogged,<br />
the battery should be recharged to protect the battery and thereby prolong<br />
the working life of the unit. If the ball in the <strong>Air</strong>flow Indicator is BELOW or<br />
PARTLY BELOW the PASS LINE with a fully charged battery, the filter<br />
cartridges may need to be changed.䍃<br />
Troubleshooting<br />
The following guide will enable you to locate and correct malfunctions.<br />
Malfunction Possible Cause Solution<br />
Low Voltage Alarm is sounding, but <strong>Air</strong>flow Low Voltage Re-charge battery<br />
Indicator shows adequate air flow or<br />
breathing tube inserted incorrectly<br />
<strong>Air</strong> inlet to hood is twisted or constricted Remove, inspect, and reinsert PA1BT Breathing Tube<br />
approximately 5” into hood inlet<br />
No/low airflow into covering<br />
(Alarm sounding for low voltage)<br />
Clogged/damaged air-purifying filter element Replace filter cartridge<br />
Battery low Re-charge battery<br />
Blower malfunction Replace blower<br />
Breathing tube or hood damaged Replace breathing tube and/or hood<br />
Smell or taste contaminant Equipment damaged or filter needs to be replaced Leave hazardous area immediately and check<br />
equipment<br />
Replace filter<br />
If the problem persists and no damage is found,<br />
return equipment for repair<br />
Low airflow See above.<br />
Blower unit does not run for full service life<br />
<strong>PA3IS</strong> (Approximately 7 hours with 1<br />
battery pack)<br />
Improper initial charge Review “Initial Charging Procedure” page 3<br />
Prolonged storage of unit not on charger Review guidelines for maximizing battery life, page 2<br />
Deeply discharged battery<br />
(under Battery Pack).
WARNING<br />
Avoid contaminant entry into the breathing tube, as this will compromise<br />
respiratory protection and could result in death or serious injury. Consult<br />
your local safety professional if you suspect that contaminant has entered<br />
the breathing tube. When cleaning the equipment, do the following:<br />
Ensure water does not enter cartridges. Replace wet cartridges.<br />
DO NOT use gasoline, organic-based solvents, or chlorinated degreasing<br />
fluids (such as trichloroethylene) as they will cause damage.<br />
DO NOT immerse the equipment in water or other cleaning fluid as this may<br />
cause contamination in the breathing tube and blower interior that will be<br />
difficult to remove.<br />
Failure to observe the instructions and warnings in this manual invalidates all<br />
performance statements and approvals for this equipment and could result<br />
in death or serious injury.<br />
<strong>PA30IS</strong> <strong>Series</strong> <strong>Powered</strong> <strong>Air</strong>-<strong>Purifying</strong> <strong>Respirator</strong><br />
<strong>PA3IS</strong> Blower Assembly User Manual<br />
www.bullard.com<br />
Cleaning<br />
Once cartridges have reached the end of their useful life, discard in accordance<br />
with federal, state, and local guidelines, and in conformance with plant safety<br />
regulations.<br />
Use a lint-free cloth moistened in a mild solution of soap and warm water to<br />
clean the outer surface of the equipment.<br />
Consult the CC20/RT <strong>Series</strong> Tychem Hood User Manual for cleaning instructions<br />
for the hood components.<br />
Storage<br />
When the apparatus is completely dry, store in a clean, dry area, away from<br />
direct sunlight and sources of direct heat.<br />
The storage temperature should be between 32º F to 90º F (0º C to 32º C) with<br />
humidity less than 90% RH.<br />
Consult the CC20 <strong>Series</strong> Hood User Manual or RT <strong>Series</strong> Hood User Manual for<br />
storage instructions on hood components.<br />
Cleaning and Storage<br />
9
NIOSH Label<br />
<strong>PA30IS</strong> Approval Label<br />
10<br />
<strong>Bullard</strong><br />
Cynthiana, KY 41031 USA<br />
1-800-827-0423<br />
<strong>PA30IS</strong> <strong>Powered</strong> <strong>Air</strong>-<strong>Purifying</strong> <strong>Respirator</strong><br />
This respirator is approved only in the following configurations:<br />
RESPIRATOR COMPONENTS<br />
CAUTIONS<br />
AND<br />
LIMITATIONS2 ACCESSORIES<br />
ALTERNATE BELTS<br />
AIR FLOW INDICATOR<br />
BATTERY<br />
ALTERNATE CARTRIDGES<br />
BLOWER UNIT<br />
PORT PLUG<br />
FILTER<br />
ALTERNATE BREATHING<br />
TUBES<br />
ALTERNATE<br />
SUSPENSION<br />
/ HARD HAT<br />
ASSEMBLIES<br />
TC# PROTECTION 1 ALTERNATE HOOD ASSEMBLIES<br />
20LFL<br />
20LFM<br />
20LF2L<br />
20LF2M<br />
20LF2S<br />
20TJN<br />
20TJNT<br />
20TPN<br />
20TPNT<br />
20TICN<br />
20TICNT<br />
20SICVN<br />
20SICVNT<br />
20TPCN<br />
20TPCNT<br />
20SICN<br />
20SICNT<br />
20TICSN<br />
20TICSNT<br />
20TICH<br />
20TICHT<br />
20SICH<br />
20SICHT<br />
20SICVH<br />
20SICHVT<br />
RT1<br />
RT1T<br />
RT2<br />
RT2T<br />
RT3<br />
RT3T<br />
RT4<br />
RT4T<br />
20TG<br />
20RT<br />
30XXR<br />
30XXP<br />
51XXR<br />
51XXP<br />
PA1BT<br />
PA1BTXS<br />
PA1BTXL<br />
PAHBT<br />
PAHBTXS<br />
PAHBTXL<br />
PA20LFBT<br />
PA20LFBTXS<br />
PA20LFBTXL<br />
<strong>PA3IS</strong>BU<br />
PA3PG<br />
PAPRFC1<br />
PA3NBC<br />
PAPRFC2<br />
PA1AFI<br />
<strong>PA3IS</strong>BP<br />
PA1SB<br />
PA1DB<br />
<strong>PA3IS</strong>C<br />
PA1EB<br />
PA1DEB<br />
20NC<br />
ES42<br />
20LCL<br />
RTLC<br />
20SLBTC<br />
PAPRPFCOVER1<br />
PAPRPF1<br />
PAPRSC1<br />
<strong>PA3IS</strong>GC<br />
20QCBTC<br />
POLYBTC<br />
20LFLEF<br />
20LF2LEF<br />
20LF2MEF<br />
20LF2SEF<br />
21C-0825 HE X X X X X X X X X X X X X X X X X X X X X X X X X X X X X X X X X X X X X X X X X X X X X X X X X X X X X X X X X X X X X X X X X X X X X X X X X ABCFIJLMNOP<br />
23C-2384 OV/CL/HC/HF/SD/CD/HE X X X X X X X X X X X X X X X X X X X X X X X X X X X X X X X X X X X X X X X X X X X X X X X X X X X X X X X X X X X X X X X X X X X X X X X X ABCFHIJLMNOP<br />
23C-2236 AM/CL/HC/MA/FM/HF/SD/CD/HE X X X X X X X X X X X X X X X X X X X X X X X X X X X X X X X X X X X X X X X X X X X X X X X X X X X X X X X X X X X X X X X X X X X X X X X X ABCFHIJLMNOP<br />
1 PROTECTION<br />
www.bullard.com<br />
HE - High Efficiency Particulate <strong>Air</strong> Filter for <strong>Powered</strong> <strong>Air</strong> <strong>Purifying</strong> <strong>Respirator</strong>s<br />
AM - Ammonia<br />
CD - Chlorine dioxide<br />
CL - Chlorine<br />
FM - Formaldehyde<br />
HC - Hydrogen chloride<br />
HF - Hydrogen fluoride<br />
MA - Methylamine<br />
OV - Organic Vapors<br />
SD - Sulfur Dioxide<br />
2 CAUTIONS AND LIMITATIONS<br />
L. Follow the manufacturer’s instructions for changing cartridges and / or filters.<br />
M. All approved respirators shall be selected, fitted, used and maintained in accordance with MSHA,<br />
OSHA and other applicable regulations.<br />
N. Never substitute, modify, add or omit parts. Use only exact replacement parts in the configuration<br />
specified by the manufacturer.<br />
O. Refer to User’s Instructions, and/or maintenance manuals for information on use and maintenance<br />
of these respirators.<br />
P. NIOSH does not evaluate respirators for use as surgical masks.<br />
A. Not for use in atmospheres containing less than 19.5% oxygen.<br />
B. Not for use in atmospheres immediately dangerous to life or health.<br />
C. Do not exceed maximum use concentrations established by regulatory standards.<br />
F. Do not use powered air-purifying respirators if airflow is less than four cfm (115 lpm) for tightfitting<br />
facepieces or six cfm (170 lpm) for hoods and / or helmets.<br />
H. Follow established cartridge and canister change schedules or observe ESLI to ensure that<br />
cartridges and canisters are replaced before breakthrough occurs.<br />
I. Contains electrical parts that may cause an ignition in flammable or explosive atmospheres.<br />
J. Failure to properly use and maintain this product could result in injury or death.
Ordering Information<br />
CATALOG<br />
NUMBER DESCRIPTION<br />
<strong>Respirator</strong> Assemblies<br />
<strong>PA30IS</strong>LFLSB 20LFL Loose-Fitting Facepiece System with Standard Comfort Belt<br />
<strong>PA30IS</strong>TJB 20TJ Single Bib Hood System with Standard Comfort Belt<br />
<strong>PA30IS</strong>TICSB 20TIC Double Bib Hood System with Standard Comfort Belt<br />
<strong>PA30IS</strong>TICHSB 20TICH Double Bib Hood for Hard Hat System with Standard Comfort Belt<br />
<strong>PA30IS</strong>SICSB 20SIC Double Bib Saranex Coated Hood System with Standard Comfort Belt<br />
<strong>PA30IS</strong>SICHSB 20SICH Double Bib Saranex Coated Hood For Hard Hat System with Standard<br />
Comfort Belt<br />
<strong>PA30IS</strong>TPSB 20TP Single Bib Hood for Painting System with Standard Comfort Belt<br />
<strong>PA30IS</strong>TPCSB 20TPC Double Bib Hood for Painting System with Standard Comfort Belt<br />
<strong>PA30IS</strong>TICSSB 20TICS Extra Long Double Bib Hood System with Standard Comfort Belt<br />
<strong>PA30IS</strong>RTISB RT1 Headband Free Extra Large Lens Double Bib Hood System with Standard<br />
Comfort Belt<br />
<strong>PA30IS</strong>RT2SB RT2 Headband Free Extra Large Lens Double Bib Saranex Coated Hood<br />
System with Standard Comfort Belt<br />
<strong>PA30IS</strong>RT3SB RT3 Headband Free Extra Large Lens Double Bib Hood System with Standard<br />
Comfort Belt<br />
<strong>PA30IS</strong>RT4SB RT4 Headband Free Extra Large Lens Double Bib Hood System with Standard<br />
Comfort Belt<br />
NOTE<br />
For Decon Belt change SB suffix to DB<br />
Blower Assemblies<br />
<strong>PA3IS</strong> Tri-filter blower unit (blue color), intrinsically safe with low voltage alarm,<br />
battery, and belt. Breathing tube, replacement battery and charger sold<br />
separately.<br />
Battery Chargers<br />
<strong>PA3IS</strong>C Quick charger for <strong>PA3IS</strong>BP (1 port)<br />
<strong>PA3IS</strong>GC Table top gang charger (6 ports)<br />
Replacement Cartridges<br />
PAPRFC2 OV/CL/HC/SD/CD/HF/HE (6 per box)<br />
PAPRFC1 HE (6 per box)<br />
PA3NBC CL/HC/SD/CD/HF/FM/AM/MA/HE (6 per box)<br />
<strong>Respirator</strong> Hoods<br />
Basic style hood, for use with headband suspension<br />
20TJ/20TJT Tychem QC with 20TG headband suspension<br />
20TJN/20TJNT Tychem QC, no headband suspension<br />
20TP/20TPT Tychem QC, with solvent-resistant polyester lens, 20TG headband suspension<br />
(CC20 only)<br />
20TPN/20TPNT Tychem QC with solvent-resistant polyester lens, no suspension<br />
(CC20 only)<br />
Hood with inner bib, for use with headband suspension<br />
20TIC/20TICT Tychem QC, with 20TG headband suspension<br />
20TICN/20TICNT Tychem QC, no headband suspension<br />
20TPC/20TPCT Tychem QC, with solvent-resistant polyester lens, 20TG headband suspension<br />
(CC20 only)<br />
20TPCN/20TPCNT Tychem QC with solvent-resistant polyester lens, no suspension<br />
(CC20 only)<br />
Hood with inner bib, for use with <strong>Bullard</strong> hard hat<br />
20TICH/20TICHT Tychem QC, hard hat not included<br />
20SICH/20SICHT Tychem SL, with taped and sealed seams,hard hat not included<br />
20SICVH/20SICVHT Tychem SL, with taped and sealed seams and CBRN-resistant PVC lens, hard<br />
hat not included<br />
<strong>PA30IS</strong> <strong>Series</strong> <strong>Powered</strong> <strong>Air</strong>-<strong>Purifying</strong> <strong>Respirator</strong><br />
<strong>PA3IS</strong> Blower Assembly User Manual<br />
www.bullard.com<br />
CATALOG<br />
NUMBER DESCRIPTION<br />
Hood with inner bib and long outer bib, for use with headband suspension<br />
20TICS/20TICST Tychem QC with taped and sealed seams, and 20TG headband suspension<br />
20TICSN/20TICSNT Tychem QC with taped and sealed seams, no headband suspension<br />
20SIC/20SICT Tychem SL, with taped and sealed seams, and 20TG headband suspension<br />
20SICN/20SICNT Tychem SL, with taped and sealed seams, no headband suspension<br />
20SICVN /20SICVNT Tychem SL, with taped and sealed seams and CBRN-resistant PVC lens, no<br />
headband suspension<br />
Hoods with Inner Bib and Long Outer Bib, for use without a Suspension<br />
RT1/RT1T Tychem QC Hood with long inner and outer bib (inflatable neck cuff)<br />
RT2/RT2T TychemSL Hood with long inner and outer bib (inflatable neck cuff)<br />
RT3/RT3T Tychem QC Hood with long inner and outer bib (sport neck cuff)<br />
RT4/RT4T Tychem SL Hood with long inner and outer bib (sport neck cuff)<br />
Loose Fitting Facepieces with Sewn-In Suspension<br />
20LFM Tychem QC, facial seal, medium<br />
20LFL Tychem QC, facial seal, large<br />
20LF2S Tychem QC, facial seal, narrow profile, small<br />
20LF2M Tychem QC, facial seal, narrow profile, medium<br />
20LF2L Tychem QC, facial seal, narrow profile, large<br />
Accessory Items for All Hoods<br />
20LCL Mylar lens covers (25/pkg)<br />
Headband Suspensions and Hard Hats<br />
20TG Standard headband suspension<br />
20RT Sure-Lock® ratchet headband suspension<br />
30XXP Hard hat with standard suspension<br />
30XXR Hard hat with ratchet suspension<br />
51XXP Hard hat with standard suspension<br />
51XXR Hard hat with ratchet suspension<br />
Accessories for Headbands Suspension and Hard Hats<br />
ESULTRA Standard replacement suspension for C30 hard hat<br />
ESRTSL Replacement ratchet suspension for C30R hard hat<br />
RS4PC Standard replacement suspension for S51 hard hat<br />
RS4RC Replacement ratchet suspension for S51R hard hat<br />
20NC Chin strap for 20TG and 20RT headband suspension<br />
ES42 Chin strap for 3000 and 5100 hard hats<br />
Replacement Parts and Accessories<br />
PA1SB Standard belt<br />
PA1DB Decon belt<br />
PA1EB Extension standard belt kit<br />
PA1DEB Extension decon belt kit<br />
PA1AFI <strong>Air</strong> flow indicator<br />
<strong>PA3IS</strong>BU Blower housing unit (I.S. version), motor and impeller<br />
PA1BT Hood breathing tube assembly; includes tube and clamp; standard length<br />
PA1BTXS Hood breathing tube assembly; includes tube and clamp; short length<br />
PA1BTXL Hood breathing tube assembly; includes tube and clamp; long length<br />
PAHBT <strong>Powered</strong> air hood breathing tube assembly; standard length<br />
PAHBTXS <strong>Powered</strong> air hood breathing tube assembly; short length<br />
PAHBTXL <strong>Powered</strong> air hood breathing tube assembly; long length<br />
PA20LFBTXL Loose fitting facepiece breathing tube assembly; extra long length<br />
PA20LFBT Loose fitting facepiece breathing tube assembly; standard length<br />
PA20LFBTXS Loose fitting facepiece breathing tube assembly; short length<br />
PA1BTS Breathing tube/cartridge seal<br />
<strong>PA3IS</strong>BP 7 hour battery pack (Intrinsically Safe)<br />
S18051 Breathing tube clamp<br />
PA3PG Plug for blower port<br />
Ordering Information<br />
11
Americas:<br />
<strong>Bullard</strong><br />
1898 Safety Way<br />
Cynthiana, KY 41031-9303<br />
Toll free: 877-BULLARD (285-5273)<br />
Tel: 859-234-6616<br />
Fax: 859-234-8987<br />
Europe:<br />
<strong>Bullard</strong> GmbH<br />
Lilienthalstrasse 12<br />
53424 Remagen • Germany<br />
Tel: +49-2642 999980<br />
Fax : +49-2642 9999829<br />
Asia-Pacific:<br />
<strong>Bullard</strong> Asia Pacific Pte. Ltd.<br />
LHK Building<br />
701, Sims Drive, #04-03<br />
Singapore 387383<br />
Tel: +65-6745-0556<br />
Fax: +65-6745-5176<br />
www.bullard.com<br />
ISO 9001<br />
certified<br />
©2012 <strong>Bullard</strong>. All rights reserved.<br />
Tychem is a registered trademark of E.I. DuPont de Nemours &<br />
Company.<br />
6081508621D (0312)