FOR LOGO!
FOR LOGO!
FOR LOGO!
Create successful ePaper yourself
Turn your PDF publications into a flip-book with our unique Google optimized e-Paper software.
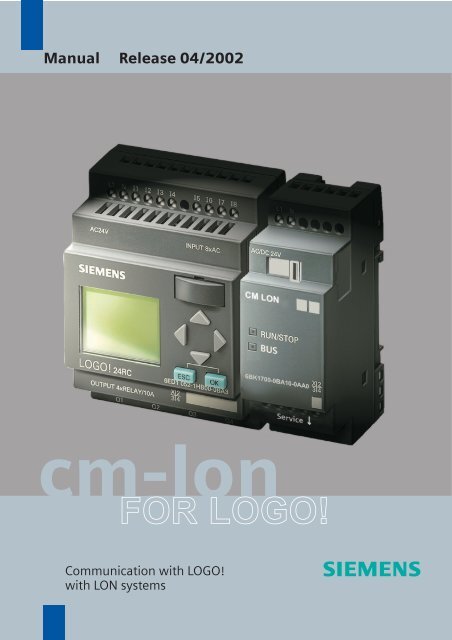
Manual Release 04/2002<br />
cm-lon<br />
<strong>FOR</strong> <strong>LOGO</strong>!<br />
Communication with <strong>LOGO</strong>!<br />
with LON systems
s<br />
CM LON<br />
<strong>LOGO</strong>! Expansion Module<br />
Manual<br />
Chapters<br />
Safety Notices<br />
1 Getting to know CM LON<br />
2 Mounting and wiring the CM LON<br />
3 Putting the CM LON into operation<br />
4 Supported functions<br />
5 CM LON specifications<br />
INDEX
CM LON <strong>LOGO</strong>! Expansion Module<br />
Copyright - Siemens AG 1996 - 2002 All rights reserved<br />
You may not transfer or duplicate this document or utilize or reveal its contents,<br />
unless expressly authorized in writing. In the case of a violation, you will be obliged<br />
to pay damages. All rights reserved, in particular in the event that a patent is<br />
granted or that a utility model is registered.<br />
Disclaimer of liability:<br />
We have checked that the contents of this document correctly describe the<br />
associated hardware and software. Nonetheless, it is impossible to exclude the<br />
possibility of deviations and therefore we cannot guarantee that there are no errors<br />
in this document. The information in this document is checked regularly and any<br />
necessary corrections are then made in the next release issued. We are of course<br />
thankful for any suggestions for improvements.<br />
CM LON<br />
2 J31069-D1263-U002-A2-7618
CM LON <strong>LOGO</strong>! Expansion Module<br />
Table of Contents<br />
Safety Notices<br />
1. Getting to know CM LON ....................................... 5<br />
1.1 What is CM LON?..................................................... 5<br />
1.2 The construction of the CM LON .............................. 6<br />
2. Mounting and wiring the CM LON......................... 7<br />
2.1 General guidelines .................................................... 7<br />
2.2 Wiring the CM LON................................................... 9<br />
2.2.1 Connecting the power supply..................................10<br />
2.2.2 Connecting the LON ...............................................11<br />
3. Putting the CM LON into operation..................... 12<br />
3.1 Step-by-step............................................................ 12<br />
3.2 The CM LON - operational status ........................... 13<br />
3.3 Behavior in case of a fault....................................... 15<br />
4. Supported functions............................................. 16<br />
4.1 Virtual inputs / outputs ............................................ 16<br />
4.2 Available network variables .................................... 18<br />
4.3 LON configuration parameters................................ 19<br />
4.4 Inputs / Outputs – special considerations ............... 20<br />
4.5 Alias table entries.................................................... 20<br />
5. CM LON - Specifications...................................... 21<br />
CM LON<br />
J31069-D1263-U002-A2-7618 3
CM LON <strong>LOGO</strong>! Expansion Module<br />
Safety Notices<br />
DANGER<br />
WARNING<br />
CAUTION<br />
CAUTION<br />
WARNING<br />
Indicates that death, severe bodily<br />
injury or substantial material damage<br />
will occur, if the corresponding safety<br />
measures are not taken.<br />
Indicates that death or severe<br />
bodily injury may occur, ifthe<br />
corresponding safety measures<br />
are not taken.<br />
With the warning triangle, this<br />
indicates that minor bodily<br />
injury may occur, if the<br />
corresponding safety measures<br />
are not taken.<br />
Without the warning triangle,<br />
this indicates that material<br />
damage may occur, if the<br />
corresponding safety measures<br />
are not taken.<br />
This indicates that an undesirable<br />
result or condition may occur, if the<br />
corresponding instructions are not<br />
observed.<br />
CM LON<br />
4 J31069-D1263-U002-A2-7618
CM LON <strong>LOGO</strong>! Expansion Module<br />
1. Getting to know CM LON<br />
1.1 What is CM LON?<br />
The Local Operating Network (CM LON) communications<br />
module is an interface for connecting <strong>LOGO</strong>! onto a LON<br />
Works network.<br />
The <strong>LOGO</strong>! communications module has been implemented<br />
as a Slave module for the <strong>LOGO</strong> control module (12/24 or<br />
110/240 Volt).<br />
The module supports communication between the <strong>LOGO</strong>!<br />
Master and external LON devices via a LON.<br />
The CM is a bus station on the LON and allows the <strong>LOGO</strong>! to<br />
communicate with other LON devices.<br />
What are the capabilities of the CM LON?<br />
The CM presents the current states of the LON stations to<br />
the <strong>LOGO</strong>!, which is thus able to use its logical functions und<br />
timers to join them together. In the process, the LON signals<br />
can also be combined with the signals of the local <strong>LOGO</strong>!<br />
inputs and outputs. The CM then transmits every change of<br />
the output signal via the LON.<br />
The combination of <strong>LOGO</strong>! and LON-CM gives the user a<br />
decentralized controller functionality for the LON with the<br />
capability of setting or changing parameters or operations<br />
quickly, simply and without a programming device.<br />
CM LON<br />
J31069-D1263-U002-A2-7618 5
CM LON <strong>LOGO</strong>! Expansion Module<br />
1.2 The construction of the CM LON<br />
1. Power supply<br />
2. Bus lock slider, interface to the <strong>LOGO</strong>!<br />
3. The RUN/STOP LED for <strong>LOGO</strong>! communication<br />
4. The BUS LED - LON communications<br />
5. Input - LON connection<br />
6. Expansion interface to the <strong>LOGO</strong>!<br />
7. Mechanical coding - pin<br />
8. Service button<br />
CM LON<br />
6 J31069-D1263-U002-A2-7618
CM LON <strong>LOGO</strong>! Expansion Module<br />
2. Mounting and wiring the CM LON<br />
2.1 General guidelines<br />
The following guidelines should be observed when mounting<br />
wiring your CM LON:<br />
- When wiring the CM LON, make certain that you follow all<br />
of the applicable and legally binding standards. Observe<br />
all of the relevant national and regional regulations when<br />
installing and operating the device. Check with the local<br />
authorities regarding the standards and regulations that<br />
must be observed in your special case.<br />
- Make certain that the device is de-energized.<br />
- Use only approved bus cables.<br />
- Make certain that the specified cable lengths are used and<br />
that the correct terminating resistors are installed properly.<br />
- The CM LON must always be installed as the last module<br />
on the right of the <strong>LOGO</strong>!, since you may not install other<br />
expansion modules onto the CM LON.<br />
CM LON<br />
J31069-D1263-U002-A2-7618 7
CM LON <strong>LOGO</strong>! Expansion Module<br />
Please notice:<br />
- The CM LON must have its own power supply (12/24 V<br />
AC/DC).<br />
NOTE<br />
This module may only be mounted and wired by qualified<br />
personnel, who know and observe the generally applicable<br />
guidelines and applicable regulations and standards.<br />
Observe the assembly and disassembly instructions in the<br />
<strong>LOGO</strong>! manual.<br />
WARNING<br />
The expansion module may only inserted or removed when<br />
the power is off.<br />
CM LON<br />
8 J31069-D1263-U002-A2-7618
CM LON <strong>LOGO</strong>! Expansion Module<br />
2.2 Wiring the CM LON<br />
TowiretheCMLON,useascrewdriverwith3mmwide<br />
blade.<br />
- You do not need to use wire end ferrules when clamping<br />
the wires.<br />
NOTE<br />
After the installation, the terminals must be covered. To<br />
protect personnel against unintentional contact with the<br />
portions of the CM LON that are conducting electricity, the<br />
appropriate national and local standards must be observed.<br />
The CM LON is a double-insulated switching device.<br />
A protective grounding conductor is not necessary.<br />
CM LON<br />
J31069-D1263-U002-A2-7618 9
CM LON <strong>LOGO</strong>! Expansion Module<br />
2.2.1 Connecting the power supply<br />
The CM LON has been designed to serve as a Slave module<br />
for the <strong>LOGO</strong>! controller. It must be connected to a 24 V<br />
AC/DC supply voltage.<br />
Please observe the relevant instructions that are found in the<br />
product information that was included with your equipment as<br />
well as the technical data regarding the permissible voltage<br />
tolerances, main frequency and current consumption.<br />
Connecting<br />
How to connect the CM LON to the power:<br />
CM LON ..... with CM LON ..... with<br />
DC supply AC supply<br />
Protect the CM LON with a<br />
80 mA/slow action fuse, if desired (recommended).<br />
CM LON<br />
10 J31069-D1263-U002-A2-7618
CM LON <strong>LOGO</strong>! Expansion Module<br />
2.2.2 Connecting the LON<br />
This connection is made using the two screw terminals A-B.<br />
RUN/STOP<br />
BUS<br />
6BK1 700-0BA10-0AA0<br />
Service<br />
A B LON<br />
CM LON<br />
J31069-D1263-U002-A2-7618 11<br />
X 2<br />
34<br />
You can start the programming by pressing the “Service ↓”<br />
button.<br />
NOTE<br />
Don't apply force when pressing the “Service ↓” button.<br />
When contact has been made, the LED will light up in<br />
orange.
CM LON <strong>LOGO</strong>! Expansion Module<br />
3. Putting the CM LON into operation<br />
A LONMARK certified application was loaded into the CM<br />
LON at the factory. Other applications can – where available<br />
– also be loaded.<br />
3.1 Step-by-step<br />
1. Interrupt the voltage to the <strong>LOGO</strong>!.<br />
(The <strong>LOGO</strong>! and its modules do not have power<br />
switches.)<br />
2. Mount the CM LON<br />
3. Connect the power supply to the CM LON.<br />
4. Connect the LON bus lines to the CM LON.<br />
5. Remove the label with the Neuron-ID from the CM LON<br />
and stick it on the network plan at the CM LON's installed<br />
location. (The Neuron-ID is also given as a bar code on<br />
the label.)<br />
6. Apply power to the <strong>LOGO</strong>! and CM LON.<br />
RUN/STOP<br />
BUS<br />
6BK1 700-0BA10-0AA0<br />
Service<br />
A B LON<br />
X 2<br />
34<br />
7. If multiple CM LONs have been installed, repeat Steps 1<br />
to 6 for each CM LON.<br />
CM LON<br />
12 J31069-D1263-U002-A2-7618
CM LON <strong>LOGO</strong>! Expansion Module<br />
8. To log a CM LON in on a LON Works network, you can<br />
either press the “Service” button or enter the Neuron-ID<br />
directly in the LON using the Installation Tool or by<br />
reading the label with a bar code scanner.<br />
9. The CM LON is then registered in the LON database and<br />
ready for operation.<br />
10. For further details regarding the LON installation, please<br />
read the corresponding documentation.<br />
3.2 The CM LON - operational status<br />
The CM LON is a <strong>LOGO</strong>! expansion module. This module<br />
has two LED displays:<br />
“RUN/STOP” LED Communication with the <strong>LOGO</strong>!<br />
“BUS” LED Service LED<br />
The “RUN/STOP” LED will light in green, red or orange.<br />
CM LON<br />
J31069-D1263-U002-A2-7618 13
CM LON <strong>LOGO</strong>! Expansion Module<br />
Green (RUN)<br />
LED Lights In<br />
Red (STOP) Orange<br />
The expansion module The expansion module The expansion<br />
is communicating with is not communicating module's initialization<br />
thedeviceontheleft. withthedeviceonthe<br />
left.<br />
phase<br />
Green<br />
LED BUS Lights In<br />
Red Orange<br />
Bus connection OK, Bus connection fault “Service” button<br />
communication<br />
functioning<br />
pressed<br />
L+ M<br />
AC/DC 24V<br />
CM LON<br />
RUN/STOP<br />
BUS<br />
6BK1 700-0BA10-0AA0 X2<br />
3 4<br />
Service<br />
A B LON<br />
CM LON<br />
14 J31069-D1263-U002-A2-7618
CM LON <strong>LOGO</strong>! Expansion Module<br />
3.3 Behavior in case of a fault<br />
<strong>LOGO</strong>! - Power failure<br />
If the power to the <strong>LOGO</strong>! fails or the communications with<br />
the <strong>LOGO</strong>! Master or the communications partner to the left<br />
is interrupted, the outputs will be set to 0. The “RUN/STOP”<br />
LED will light in RED after one second.<br />
<strong>LOGO</strong>! - Power returns<br />
The <strong>LOGO</strong>! will startup and the CM will send the<br />
parameterized status.<br />
CM - Power failure<br />
All of the inputs of the LON's <strong>LOGO</strong>! Master will be set by the<br />
<strong>LOGO</strong>! Master to 0.<br />
CM - Power returns<br />
All of the <strong>LOGO</strong>! Master outputs will be updated.<br />
BUS - Short-circuit or interruption<br />
The inputs and outputs will retain their last value until they<br />
receive a new one. After 5 seconds, the Bus LED will light in<br />
red.<br />
BUS - Restored<br />
When the BUS is restored, the CM remains neutral, i.e. it<br />
does not send any telegrams.<br />
CM LON<br />
J31069-D1263-U002-A2-7618 15
CM LON <strong>LOGO</strong>! Expansion Module<br />
4. Supported functions<br />
The CM LON handles the communications between:<br />
- The <strong>LOGO</strong>! and LON<br />
- Supports virtual inputs and outputs for the<br />
communication via the LON.<br />
4.1 Virtual inputs / outputs<br />
The standard CM LON application fills the complete <strong>LOGO</strong>!<br />
process image.<br />
A1 A2<br />
I1 I2 I3 I4 I5 I6 I7 I8<br />
<strong>LOGO</strong>! 12/24 RC CM LON<br />
Q1 Q2 Q3 Q4<br />
I1 I2 I3 I4 I5 I6 I7 I8<br />
I9 I10 I11 I12<br />
12/24RC DM8 AM2 CM LON<br />
Q1 Q2 Q3 Q4 Q5 Q6 Q7 Q8 A1 A2<br />
A3 ... A8<br />
I9 ... I24 Sensorik<br />
Q5 ... Q16 Aktorik<br />
CM LON<br />
16 J31069-D1263-U002-A2-7618<br />
LON<br />
A3 ... A8<br />
I13 ... I24<br />
Sensorik<br />
LON<br />
Q9 ... Q16 Aktorik
CM LON <strong>LOGO</strong>! Expansion Module<br />
1<br />
2<br />
3<br />
I9 Q9<br />
I1<br />
I14<br />
<strong>LOGO</strong>!<br />
I1 I2 I3 I4 I5 I6 I7 I8 I9I10I11I12<br />
&<br />
Q16<br />
Q6<br />
Q1 I13<br />
Q1 Q2 Q3 Q4 Q5 Q6 Q7 Q8<br />
DM 8 CM LON<br />
I13 ... I24<br />
Q9 ... Q16<br />
1. To map the <strong>LOGO</strong>! inputs (I1 to I8/I12) as outputs on the<br />
BUS, these must be joined with free virtual BUS outputs<br />
(Q5/Q9 to Q12) in the <strong>LOGO</strong>! application.<br />
2. Operations (basic functions BF / special functions SF)<br />
useable within the <strong>LOGO</strong>! application (feedback value).<br />
3. To access the <strong>LOGO</strong>! application (Q1 to Q4/Q8) directly<br />
via the bus communications, these must be joined with<br />
free virtual BUS inputs (I13 to I24) in the <strong>LOGO</strong>!<br />
application.<br />
CM LON<br />
J31069-D1263-U002-A2-7618 17<br />
LON
CM LON <strong>LOGO</strong>! Expansion Module<br />
4.2 Available network variables<br />
The CM LON's standard LON application contains the<br />
network variables described below.<br />
LonMark Node Object<br />
Quantity Name Type Description<br />
1 nviRequest SNVT_obj_request Request object mode<br />
2 nvoStatus SNVT_obj_status Output object status<br />
8 nvoFileDirectory SNVT_address File directory for direct<br />
read/write<br />
LonMark Controller Object<br />
SNVT Description<br />
SNVT_switch Switch light, alarm, window contact, free inputs / outputs<br />
value=0, state=0 ⇒ inactive<br />
value>0, state=1 ⇒ active<br />
SNVT_occupancy Occupancy:0=occupied⇒ 0<br />
1=not occupied ⇒ 1<br />
2=bypass ⇒ 0<br />
3=standby ⇒ 1<br />
SNVT_tod_event Scheduler program<br />
Just current state: 0=occupied<br />
3=standby<br />
SNVT_temp_p Room temperature<br />
SNVT_lux Brightness – lighting level<br />
SNVT_lev_percent Position<br />
Config Network Variables<br />
SCPT No. Description Name Assign- Default<br />
(Index)<br />
ment Setting<br />
maxSendTime 49 Send Heartbeat maxSendTimeDOxx Q5-Q16 0 min<br />
Assignment of the SNVT to the inputs and outputs<br />
Quantity SNVT Assignment<br />
8 _switch Q5 – Q12<br />
2 _occupancy Q13 – Q14<br />
2 _tod_event Q15 – Q16<br />
14 _switch I9 – I22<br />
2 _occupancy I23 – I24<br />
1 _temp_p AI8<br />
1 _lux AI7<br />
6 _switch; _lev_percent AI1 – AI6<br />
Digital outputs<br />
Digital inputs<br />
Analog inputs<br />
CM LON<br />
18 J31069-D1263-U002-A2-7618
CM LON <strong>LOGO</strong>! Expansion Module<br />
4.3 LON configuration parameters<br />
All of the digital outputs are configured with a “Send Heartbeat”.<br />
The LON application is configured using the Config Network<br />
Variables. The following CPTs are available.<br />
CPT Index Description Name Default<br />
SCPTmaxSendTime 49 Send Heartbeat maxSendTimeDO05 0 min<br />
SCPTmaxSendTime 49 Send Heartbeat maxSendTimeDO06 0 min<br />
SCPTmaxSendTime 49 Send Heartbeat maxSendTimeDO07 0 min<br />
SCPTmaxSendTime 49 Send Heartbeat maxSendTimeDO08 0 min<br />
SCPTmaxSendTime 49 Send Heartbeat maxSendTimeDO09 0 min<br />
SCPTmaxSendTime 49 Send Heartbeat maxSendTimeDO10 0 min<br />
SCPTmaxSendTime 49 Send Heartbeat maxSendTimeDO11 0 min<br />
SCPTmaxSendTime 49 Send Heartbeat maxSendTimeDO12 0 min<br />
SCPTmaxSendTime 49 Send Heartbeat maxSendTimeDO13 0 min<br />
SCPTmaxSendTime 49 Send Heartbeat maxSendTimeDO14 0 min<br />
SCPTmaxSendTime 49 Send Heartbeat maxSendTimeDO15 0 min<br />
SCPTmaxSendTime 49 Send Heartbeat maxSendTimeDO16 0 min<br />
CM LON<br />
J31069-D1263-U002-A2-7618 19
CM LON <strong>LOGO</strong>! Expansion Module<br />
4.4 Inputs / Outputs – special considerations<br />
Allocating the <strong>LOGO</strong>! inputs/outputs<br />
All of the inputs/outputs, which are physically allocated on the<br />
<strong>LOGO</strong>! or an expansion module, are not available for<br />
allocation as virtual inputs/outputs.<br />
Only the outputs on additional I/O modules can be issued in<br />
parallel to the LON.<br />
Using the <strong>LOGO</strong>! inputs / outputs on the CM<br />
LON<br />
To access the <strong>LOGO</strong>! outputs (Q1 to Q4) directly via the bus<br />
communications, these must be joined in the <strong>LOGO</strong>!<br />
application with free virtual BUS inputs.<br />
To map the <strong>LOGO</strong>! inputs (I1 - I8) as outputs on the BUS,<br />
these must be joined with free virtual BUS outputs in the<br />
<strong>LOGO</strong>! application.<br />
Feedback value<br />
Feedback variables are required for status displays for a<br />
variety of applications (primarily lighting applications).<br />
These are not directly supported by the CM LON.<br />
However, an internal operation using <strong>LOGO</strong>! inputs/outputs is<br />
enough to display the status information on the <strong>LOGO</strong>!.<br />
4.5 Alias table entries<br />
The CM LON supports 8 alias table entries.<br />
CM LON<br />
20 J31069-D1263-U002-A2-7618
CM LON <strong>LOGO</strong>! Expansion Module<br />
5. CM LON - Specifications<br />
Electrical Data<br />
Supply voltage 24 V AC 24 V DC<br />
Permissible range -15% +10% -15% +20%<br />
Current consumption max. 33 mA<br />
Data transmission rate - LON 78 kBaud<br />
Physical Construction<br />
Standard width 2SU<br />
Dimensions (W x H x D) 36 x 90 x 55 mm<br />
Weight approx. 50 g<br />
Mounting options 35 mm rail<br />
wall mounting<br />
Operational status display RUN/STOP LED for <strong>LOGO</strong>!<br />
communications<br />
BUS LED for LON communications<br />
Controls “Service” button S1<br />
Connections<br />
<strong>LOGO</strong>! connection Standard expansion interface<br />
For <strong>LOGO</strong>! 12/24 V and 110/240 V<br />
LON connection (TP/FT-10) 2 screw terminals (0.5 – 2.5 mm²)<br />
Max. torque 0.5 Nm<br />
Power supply 2 screw terminals (0.5 – 2.5 mm²)<br />
Max. torque 0.5 Nm<br />
Standard bus lines to use YCYM or J-Y(ST)Y (2 x 2 x 0.8 mm²)<br />
Environmental Conditions<br />
Permissible operating temperature 0°C to+55°C<br />
free convection<br />
Storage and transport temperatures -40°C to+70°C<br />
Humidity 95% at +25°C<br />
CM LON<br />
J31069-D1263-U002-A2-7618 21
CM LON <strong>LOGO</strong>! Expansion Module<br />
Safety<br />
Protection standard IP 20<br />
Radio interference suppression EN 55011 (Limit Value Class B)<br />
Certification<br />
CE<br />
LON MARK<br />
Overvoltage protection<br />
UL 508<br />
VDE 0631<br />
IEC 61131-2<br />
Fuse 80 mA slow action fuse<br />
Order Data<br />
<strong>LOGO</strong>! Expansion Module CM LON 6BK1700-0BA10-0AA00<br />
CM LON<br />
22 J31069-D1263-U002-A2-7618
CM LON <strong>LOGO</strong>! Expansion Module<br />
INDEX<br />
LON Local Operating Network<br />
SNVT Standard Network Variable Type<br />
CM LON<br />
J31069-D1263-U002-A2-7618 23
Siemens Aktiengesellschaft<br />
Automation and Drives<br />
Systems Engineering<br />
PO. 2355, D-90713 Fürth<br />
www.siemens.com Order No. J31069-D1262-U002-A2-7618


