

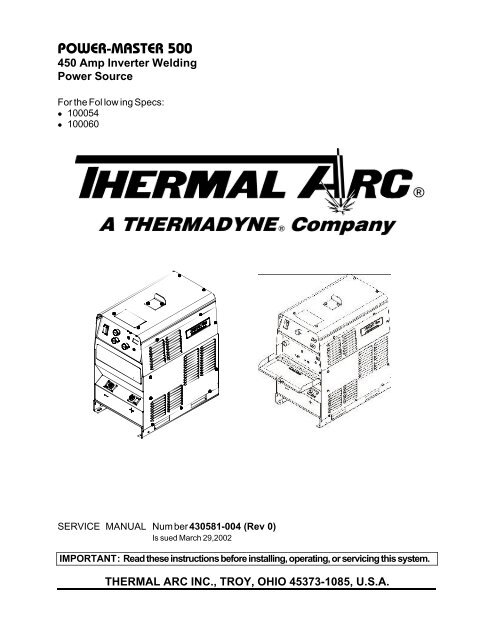
POWER-MASTER 500 - Victor Technologies
POWER-MASTER 500 - Victor Technologies
POWER-MASTER 500 - Victor Technologies

You also want an ePaper? Increase the reach of your titles
YUMPU automatically turns print PDFs into web optimized ePapers that Google loves.
<strong>POWER</strong>-<strong>MASTER</strong> <strong>500</strong><br />
450 Amp In verter Welding<br />
Power Source<br />
For the Fol low ing Specs:<br />
• 100054<br />
• 100060<br />
SER VICE MAN UAL Num ber 430581-004 (Rev 0)<br />
Is sued March 29,2002<br />
IMPORTANT: Read these instructions before installing, operating, or servicing this system.<br />
THERMAL ARC INC., TROY, OHIO 45373-1085, U.S.A.
New Ta ble of Con tents<br />
IN TRO DUC TION ...........................1<br />
How To Use This Man ual. ..................................1-1<br />
Equip ment Iden ti fi ca tion. ..................................1-1<br />
Re ceipt Of Equip ment .................................... 1-1<br />
ARC WELDING SAFETY IN STRUC TIONS AND WARN INGS. . . . 2<br />
PRE CAU TIONS DE SECURITE EN SOUDAGE A L’ARC ......2<br />
DE SCRIP TION OF EQUIP MENT ...................3<br />
Gen eral . . . . . . . . . . . . . . . . . . . . . . . . . . . . . . . . . . . . . . . . . . . . 3-1<br />
Spec i fi ca tions . . . . . . . . . . . . . . . . . . . . . . . . . . . . . . . . . . . . . . . . . 3-1<br />
Stan dard Fea tures . . . . . . . . . . . . . . . . . . . . . . . . . . . . . . . . . . . . . . 3-3<br />
De scrip tion of Con trols and Fea tures for Power-Mas ter <strong>500</strong> . . . . . . . . . . . . . . . 3-4<br />
De scrip tion of Con trols and Fea tures for Power-Mas ter <strong>500</strong>P . . . . . . . . . . . . . . 3-7<br />
De scrip tion of Pro gram ma ble Fea tures for Power-Mas ter <strong>500</strong>P . . . . . . . . . . . . . 3-10<br />
IN STAL LA TION. . . . . . . . . . . . . . . . . . . . . . . . . . . . 4<br />
Lo ca tion . . . . . . . . . . . . . . . . . . . . . . . . . . . . . . . . . . . . . . . . . . . . 4-1<br />
Volt age Change over . . . . . . . . . . . . . . . . . . . . . . . . . . . . . . . . . . . . . 4-1<br />
Con necting Welding Ma chine to Line Volt age . . . . . . . . . . . . . . . . . . . . . . . 4-2<br />
Con nec tion In struc tions ...................................4-2<br />
Grounding . . . . . . . . . . . . . . . . . . . . . . . . . . . . . . . . . . . . . . . . . . . 4-3<br />
Welding Leads . . . . . . . . . . . . . . . . . . . . . . . . . . . . . . . . . . . . . . . . 4-4<br />
MAIN TE NANCE. . . . . . . . . . . . . . . . . . . . . . . . . . . . 5<br />
TROU BLE SHOOTING ........................6<br />
Gen eral . . . . . . . . . . . . . . . . . . . . . . . . . . . . . . . . . . . . . . . . . . . . 6-1<br />
Ba sic Trou ble shooting .................................... 6-1<br />
Block Di a grams. . . . . . . . . . . . . . . . . . . . . . . . . . . . . . . . . . . . . . . . 6-1<br />
Con trol Board Con nec tor Sig nals. . . . . . . . . . . . . . . . . . . . . . . . . . . . . . 6-4<br />
Power Cir cuit Tests. . . . . . . . . . . . . . . . . . . . . . . . . . . . . . . . . . . . . . 6-6<br />
Semi con duc tor re place ment re quire ments. . . . . . . . . . . . . . . . . . . . . . . . . 6-7<br />
Con trol Cir cuit tests: . . . . . . . . . . . . . . . . . . . . . . . . . . . . . . . . . . . . . 6-9<br />
Cal i bra tion Pro ce dure .................................... 6-15<br />
RE PAIR PRO CE DURES . . . . . . . . . . . . . . . . . . . . . . . 7<br />
Out put Di ode Re place ment: . . . . . . . . . . . . . . . . . . . . . . . . . . . . . . . . 7-1<br />
IGBT Mod ule Re place ment: . . . . . . . . . . . . . . . . . . . . . . . . . . . . . . . . . 7-2<br />
PARTS LIST. . . . . . . . . . . . . . . . . . . . . . . . . . . . . . 8<br />
Equip ment Iden ti fi ca tion. ..................................8-1<br />
How To Use This Parts List . . . . . . . . . . . . . . . . . . . . . . . . . . . . . . . . . 8-1<br />
Di a grams ...............................9
<strong>POWER</strong>-<strong>MASTER</strong> <strong>500</strong> 430581-004<br />
INTRODUCTION<br />
How To Use This Manual<br />
This Service Man ual ap plies to just the spec i fi ca -<br />
tion or part num bers listed on the cover.<br />
To en sure safe op er a tion, read the en tire man -<br />
ual, in clud ing the chap ter on safety in struc tions<br />
and warn ings.<br />
Through out this man ual, the words WARNING,<br />
CAU TION, and NOTE may ap pear. Pay par tic u -<br />
lar at ten tion to the in for ma tion pro vided un der<br />
these head ings. These spe cial an no ta tions are<br />
eas ily rec og nized as fol lows:<br />
WARNING gives in for ma tion re -<br />
gard ing pos si ble per sonal in -<br />
jury. Warn ings will be en closed<br />
in a box such as this.<br />
CAU TION re fers to pos si ble equip ment<br />
dam age. Cau tions will be shown in bold<br />
type.<br />
NOTE of fers help ful in for ma tion con cern -<br />
ing cer tain op er at ing pro ce dures. Notes will<br />
be shown in ital ics.<br />
Equipment Identification<br />
The unit’s iden ti fi ca tion num ber (spec i fi ca tion or<br />
part num ber), model, and se rial num ber usu ally<br />
ap pear on a name plate at tached to the con trol<br />
panel. In some cases, the name plate may be at -<br />
tached to the rear panel. Equip ment which does<br />
not have a con trol panel such as gun and ca ble<br />
as sem blies are iden ti fied only by the spec i fi ca -<br />
tion or part num ber printed on the ship ping con -<br />
tainer. Re cord these num bers for fu ture<br />
ref er ence.<br />
Receipt Of Equipment<br />
When you re ceive the equip ment, check it<br />
against the in voice to make sure it is com plete<br />
and in spect the equip ment for pos si ble dam age<br />
due to ship ping. If there is any dam age, no tify the<br />
car rier im me di ately to file a claim. Fur nish com -<br />
plete in for ma tion con cern ing dam age claims or<br />
ship ping er rors to Thermal Arc, Or der De part -<br />
ment, 2200 Cor po rate Drive, Troy, Ohio<br />
45373-1085. In clude all equip ment iden ti fi ca tion<br />
num bers as de scribed above along with a full de -<br />
scrip tion of the parts in er ror.<br />
Move the equip ment to the in stal la tion site be -<br />
fore uncrating the unit. Use care to avoid dam ag -<br />
ing the equip ment when us ing bars, ham mers,<br />
etc., to uncrate the unit.<br />
WARNING: Do not use a weld -<br />
ing power source for pipe<br />
thaw ing.<br />
This (or any) weld ing power source is nei ther de -<br />
signed nor in tended to be used for thaw ing<br />
frozen pipes. Do not use it for this pur pose.<br />
Sym bols<br />
Mean ing of mark ings and graph i cal sym bols<br />
In crease/De crease<br />
Cir cuit Breaker<br />
AC Aux il iary Power<br />
Re mote<br />
Am per age<br />
Volt age<br />
Hertz<br />
Fre quency<br />
Neg a tive<br />
1-1
430581-004 <strong>POWER</strong>-<strong>MASTER</strong> <strong>500</strong><br />
1-2<br />
Pos i tive<br />
Di rect Cur rent (DC)<br />
Pro tec tive Earth (Ground)<br />
Line<br />
Line Con nec tion<br />
Aux il iary Power<br />
Re cep ta cle Rat ing-Auxiliary<br />
Power<br />
Sin gle Phase<br />
Three Phase<br />
Three Phase Static Fre quency<br />
Con verter-Transformer-Rectifier<br />
Dan ger ous Volt age<br />
Off<br />
On<br />
Panel/Lo cal<br />
Shielded Metal Arc Welding<br />
(SMAW)<br />
Gas Metal Arc Welding (GMAW)<br />
Gas Tung sten Arc Welding<br />
(GTAW)<br />
Air Car bon Arc Cut ting<br />
(CAC-A)<br />
Con stant Cur rent<br />
Con stant Volt age Or Con stant<br />
Po ten tial<br />
High Tem per a ture<br />
Dis tur bance<br />
Arc Force<br />
Touch Start (GTAW)<br />
Vari able In duc tance<br />
Ad di tional cop ies of this man ual may be pur -<br />
chased by con tact ing Ther mal Arc at the ad dress<br />
given above. In clude the Service Man ual num -<br />
ber and equip ment iden ti fi ca tion num bers.
ARC WELDING SAFETY IN STRUC TIONS AND WARN INGS<br />
ARC WELDING SAFETY IN STRUC TIONS AND WARN INGS<br />
In struc tion 830001<br />
PROTECT YOUR SELF AND OTHERS FROM POS SI BLE SE RI OUS IN JURY OR DEATH. KEEP CHILDREN AWAY. PACE M AKER<br />
WEARERS KEEP AWAY UN TIL CON SULTING YOUR DOC TOR. DO NOT LOSE THESE IN STRUC TIONS. READ OP ER ATING/IN STRUC -<br />
TION MAN UAL BE FORE IN STALLING, OP ER ATING OR SER VICING THIS EQUIP MENT.<br />
Welding prod ucts and weld ing pro cesses can cause se ri ous in jury or death, or dam age to other equip ment or prop erty, if the op er a tor does not<br />
strictly ob serve all safety rules and take pre cau tion ary ac tions.<br />
Safe prac tices have de vel oped from past ex pe ri ence in the use of weld ing and cut ting. These prac tices must be learned through study and train -<br />
ing be fore us ing this equip ment. Any one not hav ing ex ten sive train ing in weld ing and cut ting prac tices should not at tempt to weld. Cer tain of the<br />
prac tices ap ply to equip ment con nected to power lines; other prac tices ap ply to en gine driven equip ment.<br />
Safe prac tices are out lined in the Amer i can Na tional Stan dard Z49.1 en ti tled: SAFETY IN WELDING AND CUTTING . This pub li ca tion and other<br />
guides to what you should learn be fore op er at ing this equip ment are listed at the end of these safety pre cau tions.<br />
HAVE ALL IN STAL LA TION, OP ER A TION, MAIN TE NANCE, AND RE PAIR WORK PER FORMED ONLY BY QUAL IFIED PEO PLE.<br />
ELEC TRIC SHOCK can kill.<br />
Tou ching live elec tri cal parts can cause fa tal shocks<br />
or se vere burns. The elec trode and work cir cuit is<br />
elec tri cally live when ever the out put is on. The in put<br />
power cir cuit and ma chine in ter nal cir cuits are also<br />
live when power is on. In semi au to matic or au to -<br />
matic wire weld ing, the wire, wire reel, drive roll<br />
hous ing, and all metal parts touch ing the weld ing<br />
wire are elec tri cally live. In cor rectly in stalled or im -<br />
prop erly grounded equip ment is a haz ard.<br />
1. Do not touch live elec tri cal parts.<br />
2. Wear dry, hole-free in su lat ing gloves and body pro tec tion.<br />
3. In su late your self from work and ground us ing dry in su lat ing mats<br />
or cov ers.<br />
4. Dis con nect in put power or stop en gine be fore in stall ing or ser vic -<br />
ing this equip ment. Lock in put power dis con nect switch open, or<br />
re move line fuses so power can not be turned on ac ci den tally.<br />
5. Properly in stall and ground this equip ment ac cord ing to its<br />
Owner’s Man ual and na tional, state, and lo cal codes.<br />
ARC RAYS can burn eyes and skin;<br />
NOISE can dam age hear ing.<br />
Arc rays from the weld ing pro cess pro duce in tense<br />
heat and strong ul tra vi o let rays that can burn eyes<br />
and skin. Noise from some pro cesses can dam age<br />
hear ing.<br />
Welding or Cut ting<br />
Op er a tion<br />
Torch sol der ing<br />
Torch braz ing<br />
Ox y gen cut ting<br />
Light<br />
Me dium<br />
Heavy<br />
Gas weld ing<br />
Light<br />
Me dium<br />
Heavy<br />
Shielded metal-arc weld ing<br />
(stick) elec trodes<br />
ARC WELDING can be haz ard ous.<br />
6. Turn off all equip ment when not in use. Dis con nect power to<br />
equip ment if it will be left un at tended or out of ser vice.<br />
7. Use fully in su lated elec trode hold ers. Never dip holder in wa ter to<br />
cool it or lay it down on the ground or the work sur face. Do not<br />
touch hold ers con nected to two weld ing ma chines at the same<br />
time or touch other peo ple with the holder or elec trode.<br />
8. Do not use worn, dam aged, un der sized, or poorly spliced ca bles.<br />
9. Do not wrap ca bles around your body.<br />
10. Ground the workpiece to a good elec tri cal (earth) ground.<br />
11. Do not touch elec trode while in con tact with the work (ground) cir -<br />
cuit.<br />
12. Use only well-maintained equip ment. Re pair or re place dam aged<br />
parts at once.<br />
13. In con fined spaces or damp lo ca tions, do not use a welder with<br />
AC out put un less it is equipped with a volt age re ducer. Use<br />
equip ment with DC out put.<br />
14. Wear a safety har ness to pre vent fall ing if work ing above floor<br />
level.<br />
15. Keep all pan els and cov ers se curely in place.<br />
1. Wear a weld ing hel met fit ted with a proper shade of fil ter (see<br />
ANSI Z49.1 listed in Safety Stan dards) to pro tect your face and<br />
eyes when weld ing or watch ing.<br />
2. Wear ap proved safety glasses. Side shields rec om mended.<br />
3. Use pro tec tive screens or bar ri ers to pro tect oth ers from flash<br />
and glare; warn oth ers not to watch the arc.<br />
4. Wear pro tec tive cloth ing made from du ra ble, flame-resistant ma -<br />
te rial (wool and leather) and foot pro tec tion.<br />
5. Use ap proved ear plugs or ear muffs if noise level is high.<br />
Eye pro tec tion fil ter shade se lec tor for weld ing or cut ting (gog gles or hel met), from AWS A6.2-73.<br />
Elec trode Size<br />
Metal Thick ness<br />
or Welding Cur rent<br />
—<br />
—<br />
Un der 1 in., 25 mm<br />
1 to 6 in., 25-150 mm<br />
Over 6 in., 150 mm<br />
Un der 1/8 in., 3 mm<br />
1/8 to ½ in., 3-12 mm<br />
Over ½ in., 12 mm<br />
Un der 5/32 in., 4 mm<br />
5/32 to 1/4 in., 4 to 6.4 mm<br />
Over 1/4 in., 6.4 mm<br />
Fil ter<br />
Shade<br />
No.<br />
2<br />
3 or 4<br />
3 or 4<br />
4 or 5<br />
5 or 6<br />
4 or 5<br />
5 or 6<br />
6 or 8<br />
10<br />
12<br />
14<br />
Welding or Cut ting<br />
Op er a tion<br />
Gas metal-arc weld ing (MIG)<br />
Non-ferrous base metal<br />
Fer rous base metal<br />
Gas tung sten arc weld ing<br />
(TIG )<br />
Atomic hy dro gen weld ing<br />
Car bon arc weld ing<br />
Plasma arc weld ing<br />
Car bon arc air goug ing<br />
Light<br />
Heavy<br />
Plasma arc cut ting<br />
Light<br />
Me dium<br />
Heavy<br />
Elec trode Size<br />
Metal Thick ness<br />
or Welding Cur rent<br />
March 29, 2002 2-1<br />
All<br />
All<br />
All<br />
All<br />
All<br />
All<br />
Un der 300 Amp<br />
300 to 400 Amp<br />
Over 400 Amp<br />
Fil ter<br />
Shad<br />
e No.<br />
11<br />
12<br />
12<br />
12<br />
12<br />
12<br />
12<br />
14<br />
9<br />
12<br />
14
ARC WELDING SAFETY IN STRUC TIONS AND WARN INGS<br />
In struc tion 830001<br />
FUMES AND GASES can be haz ard ous<br />
to your health.<br />
Welding pro duces fumes and gases. Breathing<br />
these fumes and gases can be haz ard ous to your<br />
health.<br />
1. Keep your head out of the fumes. Do not breath the fumes.<br />
2. If in side, ven ti late the area and/or use ex haust at the arc to re -<br />
move weld ing fumes and gases.<br />
3. If ven ti la tion is poor, use an ap proved air-supplied res pi ra tor.<br />
WELDING can cause fire or ex plo sion.<br />
Sparks and spat ter fly off from the weld ing arc. The<br />
fly ing sparks and hot metal, weld spat ter, hot<br />
workpiece, and hot equip ment can cause fires and<br />
burns. Ac ci den tal con tact of elec trode or weld ing<br />
wire to metal ob jects can cause sparks, over heat ing,<br />
or fire.<br />
1. Pro tect your self and oth ers from fly ing sparks and hot metal.<br />
2. Do not weld where fly ing sparks can strike flam ma ble ma te rial.<br />
3. Re move all flammables within 35 ft (10.7 m) of the weld ing arc. If<br />
this is not pos si ble, tightly cover them with ap proved cov ers.<br />
FLYING SPARKS AND HOT METAL can<br />
cause in jury.<br />
Chipping and grind ing cause fly ing metal. As welds<br />
cool, they can throw off slag.<br />
CYL IN DERS can ex plode if dam aged.<br />
Shielding gas cyl in ders con tain gas un der high pres -<br />
sure. If dam aged, a cyl in der can ex plode. Since gas<br />
cyl in ders are nor mally part of the weld ing pro cess, be<br />
sure to treat them care fully.<br />
1. Pro tect com pressed gas cyl in ders from ex ces sive heat, me chan -<br />
i cal shocks, and arcs.<br />
2. In stall and se cure cyl in ders in an up right po si tion by chain ing<br />
them to a sta tion ary sup port or equip ment cyl in der rack to pre -<br />
vent fall ing or tip ping.<br />
ENGINE EX HAUST GASES can kill.<br />
Engines pro duce harm ful ex haust gases.<br />
4. Read the Ma te rial Safety Data Sheets (MSDSs) and the man u<br />
-<br />
fac turer’s in struc tion for met als, consumables, coat ings, and<br />
clean ers.<br />
5. Work in a con fined space only if it is well ven ti lated, or while wear -<br />
ing an air-supplied res pi ra tor. Shielding gases used for weld ing<br />
can dis place air caus ing in jury or death. Be sure the breath ing air<br />
is safe.<br />
6. Do not weld in lo ca tions near degreasing, clean ing, or spray ing<br />
op er a tions. The heat and rays of the arc can re act with va pors to<br />
form highly toxic and ir ri tat ing gases.<br />
7. Do not weld on coated met als, such as gal va nized, lead, or cad -<br />
mium plated steel, un less the coat ing is re moved from the weld<br />
area, the area is well ven ti lated, and if nec es sary, while wear ing<br />
an air-supplied res pi ra tor. The coat ings and any met als con tain -<br />
ing these el e ments can give off toxic fumes if welded.<br />
4. Be alert that weld ing sparks and hot ma te ri als from weld ing can<br />
eas ily go through small cracks and open ings to ad ja cent ar eas.<br />
5. Watch for fire, and keep a fire ex tin guisher nearby.<br />
6. Be aware that weld ing on a ceil ing, floor, bulk head, or par ti tion<br />
can cause fire on the hid den side.<br />
7. Do not weld on closed con tain ers such as tanks or drums.<br />
8. Con nect work ca ble to the work as close to the weld ing area as<br />
prac ti cal to pre vent weld ing cur rent from trav el ing long, pos si bly<br />
un known paths and caus ing elec tric shock and fire haz ards.<br />
9. Do not use welder to thaw frozen pipes.<br />
10. Re move stick elec trode from holder or cut off weld ing wire at con<br />
-<br />
tact tip when not in use.<br />
1. Wear ap proved face shield or safety gog gles. Side shields rec -<br />
om mended.<br />
2. Wear proper body pro tec tion to pro tect skin.<br />
3. Keep cyl in ders away from any weld ing or other elec tri cal cir cuits.<br />
4. Never al low a weld ing elec trode to touch any cyl in der.<br />
5. Use only cor rect shield ing gas cyl in ders, reg u la tors, hoses, and<br />
fit tings de signed for the spe cific ap pli ca tion; main tain them and<br />
as so ci ated parts in good con di tion.<br />
6. Turn face away from valve out let when open ing cyl in der valve.<br />
7. Keep pro tec tive cap in place over valve ex cept when cyl in der is in<br />
use or con nected for use.<br />
8. Read and fol low in struc tions on com pressed gas cyl in ders, as so -<br />
ci ated equip ment, and CGA pub li ca tion P-1 listed in Safety Stan -<br />
dards.<br />
ENGINES can be haz ard ous.<br />
1. Use equip ment out side in open, well-ventilated ar eas.<br />
2. If used in a closed area, vent en gine ex haust out side and away<br />
from any build ing air in takes.<br />
2-2 March 29, 2002
ARC WELDING SAFETY IN STRUC TIONS AND WARN INGS<br />
ENGINE FUEL can cause fire or<br />
ex plo sion.<br />
En gine fuel is highly flam ma ble.<br />
1. Stop en gine be fore check ing or add ing fuel.<br />
MOVING PARTS can cause in jury.<br />
Moving parts, such as fans, ro tors, and<br />
belts can cut fin gers and hands and catch<br />
loose cloth ing.<br />
SPARKS can cause BAT TERY GASES<br />
TO EX PLODE; BAT TERY ACID can burn<br />
eyes and skin.<br />
Bat teries con tain acid and gen er ate ex plo sive<br />
gases.<br />
STEAM AND PRES SUR IZED HOT<br />
COOL ANT can burn face, eyes, and skin.<br />
The cool ant in the ra di a tor can be very hot and un der<br />
pres sure.<br />
Safety in Welding and Cut ting, ANSI Stan dard Z49.1, from Amer i can<br />
Welding So ci ety, 550 N.W. LeJeune Rd., Mi ami, FL 33126.<br />
Safety and Health Stan dards, OSHA 29 CFR 1910, from Su per in ten<br />
-<br />
dent of Doc u ments, U.S. Gov ern ment Print ing Of fice, Wash ing ton,<br />
D.C. 20402.<br />
Rec om mended Safe Prac tices for the Prep a ra tion for Welding and<br />
Cut ting of Con tainers That Have Held Haz ard ous Sub stances , Amer -<br />
i can Welding So ci ety Stan dard AWS F4.1, from Amer i can Welding<br />
So ci ety, 550 N.W. LeJeune Rd., Mi ami, FL 33126.<br />
Na tional Elec tri cal Code, NFPA Stan dard 70, from Na tional Fire Pro -<br />
tec tion As so ci a tion, Batterymarch Park, Quincy, MA 02269.<br />
PRIN CI PAL SAFETY STAN DARDS<br />
In struc tion 830001<br />
2. Do not add fuel while smok ing or if unit is near any sparks or open<br />
flames.<br />
3. Al low en gine to cool be fore fuel ing. If pos si ble, check and add<br />
fuel to cold en gine be fore be gin ning job.<br />
4. Do not over fill tank — al low room for fuel to ex pand.<br />
1. Keep all doors, pan els, cov ers, and guards closed and se curely<br />
in place.<br />
2. Stop en gine be fore in stall ing or con nect ing unit.<br />
3. Have only qual i fied peo ple re move guards or cov ers for main te -<br />
nance and trou ble shoot ing as nec es sary.<br />
4. To pre vent ac ci den tal start ing dur ing ser vic ing, dis con nect neg a -<br />
tive (-) bat tery ca ble from bat tery.<br />
1. Al ways wear a face shield when work ing on a bat tery.<br />
2. Stop en gine be fore dis con nect ing or con nect ing bat tery ca bles.<br />
3. Do not al low tools to cause sparks when work ing on a bat tery.<br />
4. Do not use welder to charge bat ter ies or jump start ve hi cles.<br />
1. Do not re move ra di a tor cap when en gine is hot. Al low en gine to<br />
cool.<br />
2. Wear gloves and put a rag over cap area when re mov ing cap.<br />
3. Al low pres sure to es cape be fore com pletely re mov ing cap.<br />
WARNING: This prod uct, when used for weld ing or cut ting, pro duces fumes or gases which con tain chem i cals known to the State of<br />
Cal i for nia to cause birth de fects and, in some cases, can cer. (Cal i for nia Health & Safety Code Sec. 25249.5 et seq.)<br />
NOTE: Con sid er ations About Welding And The Ef fects Of Low Fre quency Elec tric And Mag netic Fi elds<br />
The fol low ing is a quo ta tion from the Gen eral Con clu sions Sec tion of the U.S. Con gress, Of fice of Tech nol ogy As sess ment, Bi o log i cal Ef fects of<br />
Power Fre quency Elec tric & Mag netic Fields — Back ground Pa per, OTA-BP-E-63 (Wash ing ton, DC: U.S. Gov ern ment Print ing Of fice, May<br />
1989): “... there is now a very large vol ume of sci en tific find ings based on ex per i ments at the cel lu lar level and from stud ies with an i mals and peo -<br />
ple which clearly es tab lish that low fre quency mag netic fields can in ter act with, and pro duce changes in, bi o log i cal sys tems. While most of this<br />
work is of very high qual ity, the re sults are com plex. Cur rent sci en tific un der stand ing does not yet al low us to in ter pret the ev i dence in a sin gle co -<br />
her ent frame work. Even more frus trat ing, it does not yet al low us to draw def i nite con clu s ions about ques tions of pos si ble risk or to of fer clear sci -<br />
ence-based ad vice on strat e gies to min i mize or avoid po ten tial risks.”<br />
To re duce mag netic fields in the work place, use the fol low ing pro ce dures:<br />
1. Keep ca bles close to gether by twist ing or tap ing them.<br />
2. Ar range ca bles to one side and away from the op er a tor.<br />
About Pace makers:<br />
3. Do not coil or drape ca bles around the body.<br />
4. Keep weld ing power source and ca bles as far away from body as<br />
prac ti cal.<br />
The above pro ce dures are among those also nor mally rec om mended for pace maker wear ers. Con sult your doc tor for com plete in for ma tion.<br />
Safe Han dling of Com pressed Gases in Cyl in ders, CGA Pam phlet<br />
P-1, from Com pressed Gas As so ci a tion, 1235 Jef fer son Da vis High -<br />
way, Suite 501, Arlington, VA 22202.<br />
Code for Safety in Welding and Cut ting, CSA Stan dard W117.2, from<br />
Ca na dian Stan dards As so ci a tion, Stan dards Sales, 178 Rexdale<br />
Bou le vard, Rexdale, On tario, Can ada M9W 1R3.<br />
Safe Prac tices for Oc cu pa tion and Ed u ca tional Eye and Face Pro tec -<br />
tion, ANSI Stan dard Z87.1, from Amer i can Na tional Stan dards In sti -<br />
tute, 1430 Broad way, New York, NY 10018.<br />
Cut ting and Welding Pro cesses, NFPA Stan dard 51B, from Na tional<br />
Fire Pro tec tion As so ci a tion, Batterymarch Park, Quincy, MA 02269.<br />
March 29, 2002 2-3
PRE CAU TIONS DE SECURITE EN SOUDAGE A L'ARC<br />
PRE CAU TIONS DE SECURITE EN SOUDAGE A L’ARC<br />
In struc tion 830002<br />
PROTEGEZ-VOUS, AINSI QUE LES AUTRES, CONTRE LES BLESSURES GRAVES POSSIBLES OU LA MORT. NE LAIS SEZ PAS LES<br />
EN FANTS S’APPROCHER, NI LES PORTEURS DE STIMULATEUR CARDIAQUE (A MOINS QU’ILS N’AIENT CONSULTE UN MEDECIN).<br />
CONSERVEZ CES IN STRUC TIONS. LISEZ LE MANUEL D’OPERATION OU LES IN STRUC TIONS AVANT D’INSTALLER, UTILISER OU<br />
ENTRETENIR CET EQUIPEMENT.<br />
Les produits et procédés de soudage peuvent sauser des blessures graves ou la mort, de même que des dommages au reste du matériel<br />
et à la propriété, si l’utilisateur n’adhère pas strictement à toutes les règles de sécurité et ne prend pas les précautions nécessaires.<br />
En soudage et coupage, des pra tiques sécuritaires se sont développées suite à l’expérience passée. Ces pra tiques doivent être ap prises<br />
par étude ou entraînement avant d’utiliser l’equipement. Toute personne n’ayant pas suivi un entraînement intensif en soudage et<br />
coupage ne devrait pas tenter de souder. Certaines pra tiques concernent les équipements raccordés aux lignes d’alimentation alors que<br />
d’autres s’adressent aux groupes électrogènes.<br />
La norme Z49.1 de l’American Na tional Stan dard, intitulée “SAFETY IN WELDING AND CUTTING” présente les pra tiques sécuritaires à suivre.<br />
Ce doc u ment ainsi que d’autres guides que vous devriez connaître avant d’utiliser cet équipement sont présentés à la fin de ces in struc tions de<br />
sécurité.<br />
SEULES DES PERSONNES QUALIFIEES DOIVENT FAIRE DES TRAVAUX D’INSTALLATION, DE REP A RA TION, D’ENTRETIEN ET<br />
D’ESSAI.<br />
L’ELECTROCUTION PEUT ETRE<br />
MORTELLE.<br />
Une décharge électrique peut tuer ou brûler<br />
gravement. L’électrode et le cir cuit de soudage sont<br />
sous ten sion dès la mise en cir cuit. Le cir cuit<br />
d’alimentation et les cir cuits internes de<br />
l’équipement sont aussi sous ten sion dès la mise en<br />
marche. En soudage automatique ou<br />
semi-automatique avec fil, ce der nier, le rou leau ou<br />
la bobine de fil, le logement des galets<br />
d’entrainement et toutes les pièces métalliques en<br />
con tact avec le fil de soudage sont sous ten sion. Un<br />
équipement inadéquatement installé ou<br />
inadéquatement mis à la terre est dangereux.<br />
1. Ne touchez pas à des pièces sous ten sion.<br />
2. Portez des gants et des vêtements isolants, secs et non troués.<br />
3. Isolez-vous de la pièce à souder et de la mise à la terre au moyen<br />
de tapis isolants ou autres.<br />
4. Déconnectez la prise d’alimentation de l’équipement ou arrêtez<br />
le moteur avant de l’installer ou d’en faire l’entretien. Bloquez le<br />
commutateur en cir cuit ouvert ou enlevez les fusibles de<br />
l’alimentation afin d’éviter une mise en marche accidentelle.<br />
5. Veuillez à in staller cet équipement et à le mettre à la terre selon le<br />
manuel d’utilisation et les codes nationaux, provinciaux et locaux<br />
applicables.<br />
LE RAYONNEMENT DE L′ARC PEUT<br />
BRÛLER LES YEUX ET LA PEAU; LE<br />
BRUIT PEUT ENDOMMAGER L′OUIE.<br />
L’arc de soudage produit une chaleur et des<br />
rayons ultraviolets intenses, susceptibles de<br />
brûler les yeux et la peau. Le bruit causé par<br />
certains procédés peut endommager l’ouïe.<br />
1. Portez une casque de soudeur avec filtre oculaire de nu ance<br />
appropriée (consultez la norme ANSI Z49 indiquée ci-après)<br />
LE SOUDAGE A L′ARC EST DANGEREUX<br />
6. Arrêtez tout équipement après us age. Coupez l’alimentation de<br />
l’équipement s’il est hors d’usage ou inutilisé.<br />
7. N’utilisez que des porte-électrodes bien isolés. Ne jamais<br />
plonger les porte-électrodes dans l’eau pour les refroidir. Ne<br />
jamais les laisser traîner par terre ou sur les pièces à souder. Ne<br />
touchez pas aux porte-électrodes raccordés à deux sources de<br />
cou rant en même temps. Ne jamais toucher quelqu’un d’autre<br />
avec l’électrode ou le porte-électrode.<br />
8. N’utilisez pas de câbles électriques usés, endommagés, mal<br />
épissés ou de sec tion trop pe tite.<br />
9. N’enroulez pas de câbles électriques autour de votre corps.<br />
10. N’utilisez qu’une bonne prise de masse pour la mise à la terre<br />
de la pièce à souder.<br />
11. Ne touchez pas à l’électrode lorsqu’en con tact avec le cir cuit de<br />
soudage (terre).<br />
12. N’utilisez que des équipements en bon état. Réparez ou<br />
remplacez aussitôt les pièces endommagées.<br />
13. Dans des espaces confinés ou mouillés, n’utilisez pas de source<br />
de cou rant alternatif, à moins qu’il soit muni d’un réducteur de<br />
ten sion. Utilisez plutôt une source de cou rant continu.<br />
14. Portez un harnais de sécurité si vous travaillez en hau teur.<br />
15. Fermez solidement tous les panneaux et les capots.<br />
pour vous protéger le vis age et les yeux lorsque vous soudez ou<br />
que vous observez l’exécution d’une soudure.<br />
2. Portez des lu nettes de sécurité approuvées. Des écrans latéraux<br />
sont recommandés.<br />
3. Entourez l’aire de soudage de rideaux ou de cloisons pour<br />
protéger les autres des coups d’arc ou de l’éblouissement;<br />
avertissez les observateurs de ne pas regarder l’arc.<br />
4. Portez des vêtements en matériaux ignifuges et durables (laine<br />
et cuir) et des chaussures de sécurité.<br />
5. Portez un casque antibruit ou des bouchons d’oreille approuvés<br />
lorsque le niveau de bruit est élevé.<br />
March 29, 2002 2-5
PRE CAU TIONS DE SECURITE EN SOUDAGE A L'ARC<br />
In struc tion 830002<br />
SE LEC TION DES NU ANCES DE FILTRES OCULAIRES POUR LA PRO TEC TION DES YEUX EN COUPAGE ET SOUDAGE<br />
( selon AWS A 8.2-73 )<br />
Opération<br />
de<br />
Coupage ou soudage<br />
Brasage tendre au cha lu meau<br />
Brasage fort au cha lu meau<br />
Oxycoupage<br />
mince<br />
moyen<br />
épais<br />
Soudage aux gaz<br />
mince<br />
moyen<br />
épais<br />
Soudage à l’arc avec<br />
elec trode enrobées (SMAW)<br />
Soudage à l’arc sous gaz<br />
avec fil plein (GMAW)<br />
métaux non-ferreux<br />
métaux ferreux<br />
Soudage à l’arc sous gaz<br />
avec électrode de tungstène (GTAW)<br />
Soudage à l’hydrogène<br />
atomique (AHW)<br />
Soudage à l’arc avec<br />
électrode de carbone (CAW)<br />
Soudage à l’arc Plasma (PAW)<br />
Gougeage Air-Arc avec<br />
électrode de carbone<br />
mince<br />
épais<br />
Coupage à l’arc Plasma (PAC)<br />
mince<br />
moyen<br />
épais<br />
LES VAPEURS ET LES FUMEES SONT<br />
DANGEREUSES POUR LA SANTE.<br />
Le soudage dégage des vapeurs et des fumées<br />
dangereuses à respirer.<br />
1. Eloignez la tête des fumées pour éviter de les respirer.<br />
2. A l’intérieur, assurez-vous que l’aire de soudage est bien<br />
ventilée ou que les fumées et les vapeurs sont aspirées à l’arc.<br />
3. Si la ven ti la tion est in ad e quate, portez un respirateur à<br />
adduction d’air approuvé.<br />
4. Lisez les fiches signalétiques et les consignes du fab ri cant rel a -<br />
tives aux métaux, aux produits consummables, aux<br />
revêtements et aux produits nettoyants.<br />
Di men sion d’électrode ou<br />
Epaisseur de métal ou<br />
Intensité de cou rant<br />
toutes con di tions<br />
toutes con di tions<br />
moins de 1 po. (25 mm)<br />
de 1 à 6 po. (25 à 150 mm)<br />
plus de 6 po. (150 mm)<br />
moins de 1/8 po. (3 mm)<br />
de 1/8 à 1/2 po. (3 à 12 mm)<br />
plus de 1/2 po. (12 mm)<br />
moins de 5/32 po. (4 mm)<br />
de 5/32 à 1/4 po. (4 à 6.4 mm)<br />
plus de 1/4 po. (6.4 mm)<br />
toutes con di tions<br />
toutes con di tions<br />
toutes con di tions<br />
toutes con di tions<br />
toutes con di tions<br />
toutes di men sions<br />
moins de 300 ampères<br />
de 300 à 400 ampères<br />
plus de 400 ampères<br />
Nu ance de<br />
de filtre<br />
oculaire<br />
2<br />
3 ou 4<br />
2 ou 3<br />
4 ou 5<br />
5 ou 6<br />
4 ou 5<br />
5 ou 6<br />
6 ou 8<br />
10<br />
12<br />
14<br />
2-6 March 29, 2002<br />
11<br />
12<br />
12<br />
12<br />
12<br />
12<br />
12<br />
14<br />
9<br />
12<br />
14<br />
5. Ne travaillez dans un espace confiné que s’il est bien ventilé;<br />
sinon, portez un respirateur à adduction d’air. Les gaz<br />
protecteurs de soudage peuvent déplacer l’oxygène de l’air et<br />
ainsi causer des mal aises ou la mort. Assurez-vous que l’air est<br />
propre à la res pi ra tion.<br />
6. Ne soudez pas à proximité d’opérations de dégraissage, de<br />
nettoyage ou de pulvérisation. La chaleur et les rayons de l’arc<br />
peuvent réagir avec des vapeurs et for mer des gaz hautement<br />
toxiques et ir ri tants.<br />
7. Ne soudez des tôles galvanisées ou plaquées au plomb ou au<br />
cad mium que si les zones à souder ont été grattées à fond, que<br />
si l’espace est bien ventilé; si nécessaire portez un respirateur à<br />
adduction d’air. Car ces revêtements et tout métal qui contient<br />
ces éléments peuvent dégager des fumées toxiques au mo -<br />
ment du soudage.
PRE CAU TIONS DE SECURITE EN SOUDAGE A L'ARC<br />
LE SOUDAGE PEUT CAUSER UN<br />
INCENDIE OU UNE EX PLO SION<br />
L’arc produit des étincellies et des pro jec tions. Les<br />
particules volantes, le métal chaud, les pro jec tions<br />
de soudure et l’équipement surchauffé peuvent<br />
causer un incendie et des brûlures. Le con tact<br />
accidentel de l’électrode ou du fil-électrode avec un<br />
objet métallique peut provoquer des étincelles, un échauffement<br />
ou un incendie.<br />
1. Protégez-vous, ainsi que les autres, contre les étincelles et du<br />
métal chaud.<br />
2. Ne soudez pas dans un endroit où des particules volantes ou<br />
des pro jec tions peuvent atteindre des matériaux inflammables.<br />
3. Enlevez toutes matières inflammables dans un rayon de 10, 7<br />
mètres autour de l’arc, ou couvrez-les soigneusement avec des<br />
bâches approuvées.<br />
LES ETINCELLES ET LES PRO JEC -<br />
TIONS BRULANTES PEUVENT<br />
CAUSER DES BLESSURES.<br />
LES BOUTEILLES ENDOMMAGEES<br />
PEUVENT EXPLOSER<br />
Les bouteilles contiennent des gaz protecteurs<br />
sous haute pression. Des bouteilles endommagées<br />
peuvent exploser. Comme les bouteilles font<br />
normalement partie du procédé de soudage,<br />
traitez-les avec soin.<br />
1. Protégez les bouteilles de gaz comprimé contre les sources de<br />
chaleur in tense, les chocs et les arcs de soudage.<br />
2. Enchainez verticalement les bouteilles à un sup port ou à un<br />
cadre fixe pour les empêcher de tomber ou d’être renversées.<br />
3. Eloignez les bouteilles de tout cir cuit électrique ou de tout<br />
soudage.<br />
LES GAZ D’ECHAPPEMENT DES<br />
MOTEURS PEUVENT ETRE MORTELS.<br />
Les moteurs produisent des gaz d’échappement<br />
no cifs.<br />
LE CAR BU RANT PEUR CAUSER UN<br />
INCENDIE OU UNE EX PLO SION.<br />
Le car bu rant est hautement in flam ma ble.<br />
1. Arrêtez le moteur avant de vérifier le niveau de<br />
car bu rant ou de faire le plein.<br />
In struc tion 830002<br />
4. Méfiez-vous des pro jec tions brulantes de soudage susceptibles<br />
de pénétrer dans des aires adjacentes par de petites ouvertures<br />
ou fis sures.<br />
5. Méfiez-vous des incendies et gardez un extincteur à portée de la<br />
main.<br />
6. N’oubliez pas qu’une soudure réalisée sur un plafond, un<br />
plancher, une cloison ou une paroi peut enflammer l’autre côté.<br />
7. Ne soudez pas un récipient fermé, tel un réservoir ou un baril.<br />
8. Connectez le câble de soudage le plus près pos si ble de la zone<br />
de soudage pour empêcher le cou rant de suivre un long<br />
parcours inconnu, et prévenir ainsi les risques d’électrocution et<br />
d’incendie.<br />
9. Ne dégelez pas les tuyaux avec un source de cou rant.<br />
10. Otez l’électrode du porte-électrode ou coupez le fil au<br />
tube-contact lorsqu’inutilisé après le soudage.<br />
11. Portez des vêtements protecteurs non huileux, tels des gants<br />
en cuir, une che mise épaisse, un pantalon re vers, des bottines<br />
de sécurité et un casque.<br />
Le piquage et le meulage produisent des particules métalliques<br />
volantes. En refroidissant, la soudure peut projeter du éclats de<br />
laitier.<br />
1. Portez un écran fa cial ou des lu nettes protectrices approuvées.<br />
Des écrans latéraux sont recommandés.<br />
2. Portez des vêtements appropriés pour protéger la peau.<br />
4. Empêchez tout con tact en tre une bouteille et une électrode de<br />
soudage.<br />
5. N’utilisez que des bouteilles de gaz protecteur, des détendeurs,<br />
des boyauxs et des raccords conçus pour chaque ap pli ca tion<br />
spécifique; ces équipements et les pièces connexes doivent<br />
être maintenus en bon état.<br />
6. Ne placez pas le vis age face à l’ouverture du robinet de la<br />
bouteille lors de son ouverture.<br />
7. Lais sez en place le cha peau de bouteille sauf si en uti li sa tion<br />
ou lorsque raccordé pour uti li sa tion.<br />
8. Lisez et respectez les consignes rel a tives aux bouteilles de gaz<br />
comprimé et aux équipements connexes, ainsi que la pub li ca -<br />
tion P-1 de la CGA, identifiée dans la liste de doc u ments<br />
ci-dessous.<br />
LES MOTEURS PEUVENT ETRE DANGEREUX<br />
1. Utilisez l’équipement à l’extérieur dans des aires ouvertes et<br />
bien ventilées.<br />
2. Ne faites pas le plein en fumant ou proche d’une source<br />
d’étincelles ou d’une flamme nue.<br />
3. Si c’est pos si ble, lais sez le moteur refroidir avant de faire le<br />
plein de car bu rant ou d’en vérifier le niveau au début du<br />
soudage.<br />
4. Ne faites pas le plein de car bu rant à ras bord: prévoyez de<br />
l’espace pour son ex pan sion.<br />
5. Faites at ten tion de ne pas renverser de car bu rant. Nettoyez tout<br />
car bu rant renversé avant de faire démarrer le moteur.<br />
March 29, 2002 2-7
PRE CAU TIONS DE SECURITE EN SOUDAGE A L'ARC<br />
In struc tion 830002<br />
DES PIECES EN MOUVEMENT<br />
PEUVENT CAUSER DES BLESSURES.<br />
Des pièces en mouvement, tels des ventilateurs, des<br />
ro tors et des courroies peuvent couper doigts et<br />
mains, ou accrocher des vêtements amples.<br />
1. Assurez-vous que les portes, les panneaux, les capots et les<br />
protecteurs soient bien fermés.<br />
2. Avant d’installer ou de con necter un système, arrêtez le moteur.<br />
DES ETINCELLES PEUVENT FAIRE<br />
EXPLOSER UN ACCUMULATEUR;<br />
L’ELECTROLYTE D’UN<br />
ACCUMU-LATEUR PEUT BRULER LA<br />
PEAU ET LES YEUX.<br />
Les accumulateurs contiennent de l’électrolyte<br />
acide et dégagent des vapeurs ex plo sives.<br />
LA VAPEUR ET LE LIQUIDE DE<br />
REFROIDISSEMENT BRULANT SOUS<br />
PRESSION PEUVENT BRULER LA<br />
PEAU ET LES YEUX.<br />
Le liquide de refroidissement d’un radiateur peut<br />
être brûlant et sous pression.<br />
Safety in Welding and Cut ting, norme ANSI Z49.1, Amer i can Welding<br />
So ci ety, 550 N.W. LeJeune Rd., Mi ami, FL 33128.<br />
Safety and Health Stan dards, OSHA 29 CFR 1910, Su per in ten dent<br />
of Doc u ments, U.S. Gov ern ment Print ing Of fice, Wash ing ton, D.C.<br />
20402.<br />
Rec om mended Safe Prac tices for the Prep a ra tion for Welding and<br />
Cut ting of Con tainers That Have Held Haz ard ous Sub stances,<br />
norme AWS F4.1, Amer i can Welding So ci ety, 550 N.W. LeJeune<br />
Rd., Mi ami, FL 33128.<br />
Na tional Elec tri cal Code, norme 70 NFPA, Na tional Fire Pro tec tion<br />
As so ci a tion, Batterymarch Park, Quincy, MA 02269.<br />
PRINCIPALES NORMES DE SECURITE<br />
3. Seules des personnes qualifiées doivent démonter des<br />
protecteurs ou des capots pour faire l’entretien ou le dépannage<br />
nécessaire.<br />
4. Pour empêcher un démarrage accidentel pen dant l’entretien,<br />
débranchez le câble d’accumulateur à la borne négative.<br />
5. N’approchez pas les mains ou les cheveux de pièces en<br />
mouvement; elles peuvent aussi accrocher des vêtements<br />
amples et des outils.<br />
6. Réinstallez les capots ou les protecteurs et fermez les portes<br />
après des travaux d’entretien et avant de faire démarrer le<br />
moteur.<br />
1. Portez toujours un écran fa cial en travaillant sur un<br />
accumu-lateur.<br />
2. Arrêtez le moteur avant de con necter ou de déconnecter des<br />
câbles d’accumulateur.<br />
3. N’utilisez que des outils anti-étincelles pour travailler sur un<br />
accumulateur.<br />
4. N’utilisez pas une source de cou rant de soudage<br />
pour charger un accumulateur ou survolter<br />
momentanément un véhicule.<br />
1. N’ôtez pas le bouchon de radiateur tant que le moteur n’est pas<br />
refroidi.<br />
2. Mettez des gants et posez un tor chon sur le bouchon pour l’ôter.<br />
3. Lais sez la pression s’échapper avant d’ôter complètement le<br />
bouchon.<br />
Safe Han dling of Com pressed Gases in Cyl in ders, doc u ment P-1,<br />
Com pressed Gas As so ci a tion, 1235 Jef fer son Da vis High way, Suite<br />
501, Arlington, VA 22202.<br />
Code for Safety in Welding and Cut ting , norme CSA W117.2 As so ci -<br />
a tion canadienne de nor mali sa tion, Stan dards Sales, 276 Rexdale<br />
Bou le vard, Rexdale, On tario, Can ada M9W 1R3.<br />
Safe Prac tices for Oc cu pa tion and Ed u ca tional Eye and Face Pro tec -<br />
tion , norme ANSI Z87.1, Amer i can Na tional Stan dards In sti tute, 1430<br />
Broad way, New York, NY 10018.<br />
Cut ting and Welding Pro cesses, norme 51B NFPA, Na tional Fire<br />
Pro tec tion As so ci a tion, Batterymarch Park, Quincy, MA 02269.<br />
2-8 March 29, 2002
<strong>POWER</strong>-<strong>MASTER</strong> <strong>500</strong> 430581-004<br />
DESCRIPTION OF EQUIPMENT<br />
General<br />
The Power-Master <strong>500</strong> is a pri mary in verter DC<br />
power source that can be used for con stant volt -<br />
age and con stant cur rent weld pro cesses. The<br />
out put is rated at 450 Amps/38 Volts at 100%<br />
duty cy cle and 560 Amps/42.4 Volts at 60% duty<br />
cy cle. The power source also pro vides 24VAC<br />
and 120VAC aux il iary out puts both rated at 10<br />
Amps.<br />
Specifications<br />
In put Data<br />
Line Fre quency: 50/60 HZ<br />
Out put Cur rent Range: 5 – 560 Amps<br />
Out put Volt age Range: 10 – 44 Volts<br />
Max i mum Out put Cur rent: 600 Amps<br />
Max i mum Open Cir cuit Volt age ( OCV): 70 Volts<br />
Op er ating Tem per a ture Range: 0 – 40 C<br />
In put Line Vari a tions: ± 10%<br />
Line Reg u la tion: ± 1%<br />
Load Reg u la tion: ± 1%<br />
Wa ter Pro tec tion Class: IP23S<br />
This ser vice man ual cov ers two vari a tions of the<br />
Power-Master. The pri mary dif fer ence be tween<br />
the two be ing in the front panel and weld ing con -<br />
trol fea tures. The Power-Master <strong>500</strong> is a multi<br />
pro cess ma chine for CC and CV weld ing pro -<br />
cesses. The Power-Master <strong>500</strong>P has pulse<br />
GMAW added along with sev eral pro gram ma ble<br />
fea tures. (See fea ture de scrip tions for de tails).<br />
Line Volt age Line Cur rent kVA Eff. PF Out put<br />
208 VAC/3 Phase 68 Amps 24.5 89% .83 450A/38V/100% Duty Cy cle<br />
230 VAC/3 Phase 62 Amps 24.7 90% .82 450A/38V/100% Duty Cy cle<br />
400 VAC/3 Phase 35 Amps 24.2 90% .84 450A/38V/100% Duty Cy cle<br />
460 VAC/3 Phase 30 Amps 23.9 91% .84 450A/38V/100% Duty Cy cle<br />
208 VAC/3 Phase 88 Amps 31.7 89% .88 560A/42.4/60% Duty Cy cle<br />
230 VAC/3 Phase 82 Amps 32.7 89% .87 560A/42.4/60% Duty Cy cle<br />
400 VAC/3 Phase 43 Amps 29.8 91% .86 560A/42.4/60% Duty Cy cle<br />
460 VAC/3 Phase 39 Amps 31.1 90% .88 560A/42.4/60% Duty Cy cle<br />
No load data<br />
208 VAC/3 Phase 0.38 Amps 0.13 KVA 0.09 kW<br />
230 VAC/3 Phase 0.33 Amps 0.13 KVA 0.09 kW<br />
400 VAC/3 Phase 0.19 Amps 0.13 KVA 0.09 kW<br />
460 VAC/3 Phase 0.17 Amps 0.13 KVA 0.09 kW<br />
Fig ure 3-1 shows the ba sic out put volt-amp char ac ter is tics of the Power-Master <strong>500</strong><br />
3-1
430581-004 <strong>POWER</strong>-<strong>MASTER</strong> <strong>500</strong><br />
3-2<br />
Fig ure 3-1
<strong>POWER</strong>-<strong>MASTER</strong> <strong>500</strong> 430581-004<br />
Standard Features<br />
The power source has the fol low ing stan dard<br />
fea tures.<br />
a. Short-Circuit Pro tec tion – The out put of the<br />
power source can be short cir cuited in any of the<br />
modes of op er a tion. This pro tec tion fea ture will<br />
in stantly limit the out put cur rent to a safe value, to<br />
as sure re li able op er a tion of the power source.<br />
b. Out put Over load Pro tec tion – The over load<br />
pro tec tion fea ture will limit the con tin u ous weld<br />
cur rent to the max i mum value listed in the spec i fi -<br />
ca tions for any of the modes of op er a tion. The<br />
ma chine will con tinue to op er ate but the cur rent<br />
will be lim ited to this max i mum value.<br />
c. Cooling Fan Con trol – The cool ing fans are<br />
de signed to op er ate only when re quired. They<br />
will come on when ever the out put contactor con -<br />
trol of the ma chine is on. The fans will come on for<br />
sev eral min utes when the ma chine is first turned<br />
on and will nor mally stay on for sev eral min utes<br />
af ter the out put contactor con trol has been<br />
switched off. The fans will turn off af ter sev eral<br />
min utes of in ac tiv ity, to min i mize the amount of<br />
Net weight: 154 LBS<br />
Fig ure 3-2 Power Source Di men sions<br />
dirt be ing drawn into the ma chine, as well as<br />
lengthen the life of the fans.<br />
d. Overtemperature Pro tec tion – If the ma -<br />
chine over heats be cause of blocked air flow, ex -<br />
ces sive am bi ent tem per a tures, failed fan, or<br />
other cause, the overtemperature pro tec tion will<br />
dis able the out put of the power source un til it has<br />
cooled down. If the overtemperature pro tec tion<br />
cir cuit op er ates, it will turn on the in di ca tor light<br />
on the front panel and the fans should con tinue to<br />
run un til the ma chine cools. The<br />
overtemperature cir cuit will re set it self au to mat i -<br />
cally once the ma chine has cooled.<br />
e. Multi-Voltage Op er a tion – The power source<br />
is de signed to op er ate from a wide range of in put<br />
line volt ages as given in the spec i fi ca tions. The<br />
ma chine can be re con fig ured for the dif fer ent line<br />
volt ages with a sim ple, rug ged volt age change -<br />
over panel ac ces si ble by re mov ing the left side<br />
panel of the ma chine. (See in stal la tion chap ter<br />
for de tailed in struc tions).<br />
3-3
430581-004 <strong>POWER</strong>-<strong>MASTER</strong> <strong>500</strong><br />
Description of Controls and<br />
Features for Power-Master <strong>500</strong><br />
Front Panel<br />
(See Fig ure 3-3)<br />
1– Con trol Power ON/OFF Switch: This cir cuit<br />
breaker/switch ac ti vates the con trols on the<br />
power source. When this switch is in the OFF po -<br />
si tion, the power source is in standby mode.<br />
There is still line volt age pres ent in ter nal to the<br />
ma chine, but the con trols are not en er gized. In<br />
the ON po si tion the con trol power is ap plied and<br />
the con trols are en er gized. In the ON po si tion the<br />
dig i tal dis play should be on. This cir cuit<br />
breaker/switch also pro tects the aux il iary 24 VAC<br />
and 120 VAC power in the case of an over load. If<br />
cir cuit breaker trips, de ter mine cause of over load<br />
be fore re set ting, al low breaker time to cool be -<br />
fore re set ting.<br />
2– Mode Se lect Switch: The mode se lect switch<br />
is a four-position switch used to se lect the weld<br />
pro cess. The four modes are as fol lows:<br />
3-4<br />
Fig ure 3-3 Front Panel<br />
Power-Mas ter <strong>500</strong><br />
GTAW mode: In this mode the power source op -<br />
er ates in con stant cur rent mode with a lift arc<br />
start ing cir cuit ac ti vated and arc force/in duc -<br />
tance dis abled. The lift arc cir cuit al lows the arc<br />
to be ini ti ated by mo men tarily touch ing the tung -<br />
sten to the work and then lift ing. The lift arc cir cuit<br />
lim its the “touch” cur rent to a low value and then<br />
switches to pre set cur rent af ter lift ing. The lift arc<br />
fea ture can be dis abled if de sired to al low<br />
“scratch” start ing by mov ing two jump ers in ter nal<br />
to the ma chine on the main con trol board. (See<br />
con fig u ra tion set tings un der In stal la tion in struc -<br />
tions chap ter of this man ual for an ex pla na tion of<br />
how to dis able the lift arc fea ture).<br />
SMAW mode: In this mode the power source op -<br />
er ates in con stant cur rent mode with the arc<br />
force con trol en abled.<br />
CAG mode: In this mode the power source op er -<br />
ates in con stant cur rent mode with arc force/in -<br />
duc tance con trol dis abled.<br />
GMAW mode: In this mode the power source op -<br />
er ates in con stant volt age mode with the in duc -<br />
tance con trol en abled. A Wire-Sharpening cir cuit<br />
is also ac tive to help con di tion the end of the wire<br />
when the weld is com plete to im prove the arc<br />
start on the next weld. The Wire-Sharpening fea -<br />
ture can be dis abled if de sired. (See con fig u ra -<br />
tion set tings un der In stal la tion in struc tions<br />
chap ter of this man ual for an ex pla na tion of how<br />
to dis able the Wire-Sharpening fea ture).<br />
3– Out put Contactor In di ca tor: This green light<br />
will be ON when ever the out put of the weld ing<br />
ma chine is en er gized.<br />
4 – Out put Contactor Switch: This switch is<br />
used to en er gize the out put of the ma chine.<br />
5– Overtemp In di ca tor: This am ber light will be<br />
ON when ever an overtemperature con di tion has<br />
been de tected in ter nal to the ma chine. This light<br />
will re main on with the fans run ning un til the unit<br />
cools down. If this light is on, the out put of the<br />
ma chine will be dis abled. Once the ma chine<br />
cools down this light will go off and the<br />
overtemperature con di tion will au to mat i cally re -<br />
set.<br />
6– Me ter Dis play: The dig i tal me ter is used to<br />
pre set the out put volt age or cur rent when the<br />
power source is not weld ing, and to dis play the<br />
ac tual amps or volts while weld ing. To pre set out -<br />
put cur rent (amps) for GTAW, SMAW or CAG,<br />
place me ter Amps/Volts switch in the Amps po si -<br />
tion and ad just the main Amps/Volts con trol pot.<br />
to the de sired cur rent. To pre set out put volts for<br />
GMAW, place the me ter Amps/Volts switch in the<br />
Volts po si tion and ad just the main Amps/Volts<br />
con trol pot. to the de sired volt age.
<strong>POWER</strong>-<strong>MASTER</strong> <strong>500</strong> 430581-004<br />
The me ter will au to mat i cally switch over to ac tual<br />
amps or volts while weld ing, de pend ing on the<br />
po si tion of the me ter Amps/Volts switch.<br />
7 – Me ter Amps/Volts Switch : This two-position<br />
tog gle switch is used to se lect whether the dig i tal<br />
me ter will dis play amps or volts. To pre set weld<br />
am per age for GTAW, SMAW or CAG, place this<br />
switch in the AMPS po si tion. To pre set weld volt -<br />
age for GMAW, place this switch in the VOLTS<br />
mode. Af ter an arc has been ini ti ated, this switch<br />
al lows ei ther ac tual weld amps or weld volts to be<br />
dis played on the me ter.<br />
8 – Re mote/Lo cal Switch: The re mote/lo cal<br />
tog gle switch is used to se lect ei ther front panel<br />
con trol of out put amps/volts (LO CAL mode), or<br />
re mote con trol of out put amps/volts through the<br />
19 pin or 14 pin re cep ta cles lo cated on the rear<br />
panel (RE MOTE mode). For GTAW mode, the<br />
max i mum out put cur rent must be pre set by the<br />
front panel Amps/Volts con trol pot. For all other<br />
modes, the re mote con trol is full out put of the ma -<br />
chine.<br />
9– Amps/Volts Con trol: This con trol pot. sets<br />
the out put amps or volts de pend ing on the weld<br />
pro cess. Clock wise is in creas ing out put. For all<br />
modes ex cept GTAW, this con trol is only ac tive<br />
when the LO CAL/RE MOTE switch is in the LO -<br />
CAL mode. For GTAW this con trol pot. is used to<br />
set the max i mum weld cur rent avail able to a foot<br />
pedal or hand con trol. To pre set max i mum out put<br />
for GTAW, place the LO CAL/RE MOTE switch in<br />
the LO CAL mode and set the max i mum de sired<br />
am per age on the dig i tal me ter. (The me ter<br />
amps/volts switch must be in the amps po si tion).<br />
Place the LO CAL/RE MOTE switch in the RE -<br />
MOTE mode to ac ti vate foot pedal con trol.<br />
10 – Arc Force/In duc tance Con trol: This con -<br />
trol pot. is ac tive for SMAW (Stick) and GMAW<br />
(Mig). In SMAW mode, this pot. con trols the<br />
amount of arc force or dig that the arc has. Max i -<br />
mum arc force is full clock wise, full coun -<br />
ter-clockwise is zero arc force. In GMAW mode,<br />
this be comes an in duc tance con trol. Max i mum<br />
in duc tance is full clock wise. Higher in duc tance<br />
set tings make the arc “softer” with less spat ter.<br />
Lower in duc tance set tings give a stron ger “driv -<br />
ing” arc. The in duc tance should be set ac cord ing<br />
to the type of wire and gas and de sired arc char -<br />
ac ter is tics de sired. Gen erally, the in duc tance<br />
con trol can be set at mid-range as a good start ing<br />
point.<br />
11 – Out put Neg a tive Ter mi nal: Con nec tion<br />
point for neg a tive weld ing lead.<br />
12 – Out put Pos i tive Ter mi nal: Con nec tion<br />
point for pos i tive weld ing lead.<br />
13 – Receptacle, 14 Pin: This re cep ta cle al lows<br />
the power source to in ter face with wire feed ers,<br />
and re mote con trols such as a foot pedal. This re -<br />
cep ta cle pro vides aux il iary power, contactor<br />
con trol for en er giz ing the out put of the power<br />
source, and re mote out put con trol. The pinout is<br />
as fol lows:<br />
A) 24 VAC aux il iary power high side<br />
B) 24 VAC Contactor cir cuit, (clo sure be tween<br />
pin A and pin B will en er gize out put).<br />
C) Re mote con trol max i mum (top side of<br />
re mote pot.)<br />
D) Con trol cir cuit com mon<br />
E) Re mote con trol in (wiper of re mote pot.,<br />
0 to 10 Volts).<br />
CV mode: 0 to 10 Volts gives 10 – 44 Volts<br />
CC mode: 0 to 10 Volts gives 5 – 560 Amps<br />
of out put.<br />
F) Scaled out put cur rent sig nal:<br />
Ifb = 100 Amps/Volt<br />
G) 24/115 VAC neu tral<br />
Fig ure 3-4 Rear Panel<br />
Power-Mas ter <strong>500</strong>P<br />
H) Out put volt age sig nal: 10 Volts/Volt<br />
3-5
430581-004 <strong>POWER</strong>-<strong>MASTER</strong> <strong>500</strong><br />
I) 115 VAC aux il iary power high side<br />
J) 115 VAC Contactor cir cuit, (clo sure be tween<br />
pin I and pin J will en er gize out put).<br />
K) Chas sis ground<br />
L) N/C<br />
M) N/C<br />
N) N/C<br />
14 – Receptacle, 19 Pin : This re cep ta cle al lows<br />
the power source to in ter face with wire feed ers,<br />
and re mote con trols such as a foot pedal. This re -<br />
cep ta cle pro vides aux il iary power, contactor con -<br />
trol for en er giz ing the out put of the power source,<br />
and re mote out put con trol. The pinout is as fol -<br />
lows:<br />
A) Contactor cir cuit (+15 Volts)<br />
B) Contactor cir cuit in, (clo sure be tween pin A<br />
and pin B will en er gize out put).<br />
C) Scaled out put volt age sig nal: Vfb = 10 Arc<br />
Volts/Volt<br />
D) 24 VAC aux il iary power high side<br />
E) 115 VAC aux il iary power high side<br />
F) 24/115 VAC neu tral<br />
G) Chas sis ground<br />
H) Re mote con trol max i mum (top side of<br />
re mote pot.)<br />
J) Re mote con trol in (wiper of re mote pot.,<br />
0 to 10 Volts).<br />
CV Mode: 0 to 10 Volts gives 0 – 44 Volts<br />
CC Mode: 0 to 10 Volts gives 0 – 560 Amps<br />
K) Re mote con trol min i mum (bot tom side of<br />
re mote pot.)<br />
L) Con trol cir cuit com mon<br />
M) Arc Es tab lished = +12 Volts<br />
N) Con trol cir cuit com mon<br />
P) 24 VAC aux il iary power high side<br />
(same as pin D)<br />
R) 24/115 VAC neu tral (same as pin E)<br />
S) N/C<br />
T) N/C<br />
U) Scaled out put cur rent sig nal:<br />
Ifb = 100 Amps/Volt<br />
V) N/C<br />
If a re mote con trol is plugged into both the 14 pin<br />
and 19 pin re cep ta cles the de vice plugged into<br />
the 19 pin re cep ta cle will have con trol over the<br />
out put cur rent or volt age. Ei ther de vice can con -<br />
trol the out put contactor cir cuit.<br />
3-6<br />
15– Du plex: This re cep ta cle can pro vide up to<br />
10 amps of 120 VAC aux il iary power for pow er -<br />
ing wire feed ers, wa ter circulators, etc.<br />
16. Fuse: This fuse pro tects the con trol trans -<br />
former in the power source. If the fuse opens it<br />
should be re placed with a like am per age and<br />
volt age, (20 amps, 600VAC).<br />
17– In put Power Ac cess : This open ing pro -<br />
vides ac cess to the in put ter mi nal block for the in -<br />
put ca ble. See in stal la tion chap ter of this man ual<br />
for de tailed in struc tions.
<strong>POWER</strong>-<strong>MASTER</strong> <strong>500</strong> 430581-004<br />
Description of Controls and<br />
Features for Power-Master <strong>500</strong>P<br />
Fig ure 3-5 Front Panel<br />
Power-Mas ter <strong>500</strong>P<br />
1 - Con trol Power ON/OFF Switch: This cir cuit<br />
breaker/switch ac ti vates the con trols on the<br />
power source. When this switch is in the OFF po -<br />
si tion, the power source is in standby mode. Line<br />
volt age is still pres ent in ter nal to the ma chine, but<br />
the con trols are not en er gized. In the ON po si -<br />
tion, power is ap plied to the con trol cir cuit of the<br />
power source. When ever the switch is in the ON<br />
po si tion, the dig i tal me ter dis plays are ac ti vated.<br />
This cir cuit breaker also pro tects the aux il iary 24<br />
VAC and 115 VAC power in case of an over load.<br />
If the cir cuit breaker trips, de ter mine the cause of<br />
the over load be fore re set ting.<br />
2. Out put Con trol: This con trol is used to set<br />
the out put volt age or am per age de pend ing on<br />
the op er at ing mode of the power source. For<br />
GTAW and SMAW modes, this con trol is used to<br />
pre set the am per age. For GMAW this con trol<br />
pre sets the weld ing volt age. For Pulse GMAW<br />
this con trol sets the pulse ref er ence, which is<br />
sim i lar in func tion to a volt age con trol.<br />
This con trol be comes in ac tive if RE MOTE con -<br />
trol is se lected, ex cept for GTAW mode. In<br />
GTAW mode this con trol is used to set the max i -<br />
mum weld ing cur rent avail able to the re mote<br />
con trol.<br />
3. Overtemp In di ca tor: This in di ca tor light will<br />
be on if the power source has over heated.<br />
When ever this light is on, the power source will<br />
be dis abled from weld ing, but the fans will con -<br />
tinue to run to cool the unit. Once the power<br />
source cools down, this light will au to mat i cally go<br />
off and the unit will be ready to weld. If this light<br />
co mes on, the cause of the over heat ing con di -<br />
tion should be in ves ti gated and re solved be fore<br />
con tin u ing.<br />
4. Amps Dis play: The top dis play shows pre set<br />
am per age for GTAW and SMAW modes when<br />
not weld ing. This dis play shows the ac tual weld -<br />
ing cur rent for all modes while weld ing. For<br />
GMAW and Pulsed-GMAW modes, the me ter<br />
will hold the last value at the end of the weld for<br />
up to 5 sec onds.<br />
5. Volts Dis play: The bot tom dis play shows<br />
pre set volt age for GMAW, and pre set pulse ref -<br />
er ence for Pulsed-GMAW, when not weld ing.<br />
The dis play will show ac tual weld ing volt age for<br />
all modes while weld ing. For GMAW and<br />
Pulsed-GMAW modes, the me ter will hold the<br />
last value at the end of the weld for up to 5 sec -<br />
onds.<br />
6. Mode Se lect Switch: The mode se lect<br />
switch is used to se lect one of the four built in op -<br />
er at ing modes of the power source. One of the<br />
four in di ca tor lights lo cated above the switch<br />
should be on at all times, in di cat ing the mode<br />
which is cur rently se lected. The four modes are<br />
as fol lows:<br />
GTAW mode: In this mode the power source op -<br />
er ates in con stant cur rent mode. The front panel<br />
con trol can be used to pre set the weld ing am per -<br />
age. If a foot pedal or other re mote con trol is<br />
used, then the front panel con trol is used to set<br />
the max i mum weld ing cur rent avail able to the<br />
foot pedal. For GTAW mode the arc force con trol<br />
is not ac tive.<br />
3-7
430581-004 <strong>POWER</strong>-<strong>MASTER</strong> <strong>500</strong><br />
A lift arc cir cuit is au to mat i cally ac ti vated for<br />
GTAW mode, un less dis abled in ter nally by<br />
jumper se lec tions on the con trol board (See in -<br />
stal la tion chap ter for jumper set tings). The lift arc<br />
cir cuit al lows the arc to be ini ti ated by mo men -<br />
tarily touch ing the tung sten to the work and then<br />
lift ing or rock ing the tung sten off the work. The lift<br />
arc cir cuit lim its the “touch” cur rent to a low value<br />
and then switches to the pre set cur rent af ter the<br />
arc is struck.<br />
SMAW mode: In this mode the power source op -<br />
er ates in con stant cur rent mode. The front panel<br />
con trol can be used to pre set the de sired weld ing<br />
am per age. The arc force con trol is ac ti vated for<br />
SMAW mode al low ing the amount of “dig” or arc<br />
force to be set by the arc force con trol. Max i mum<br />
arc force is full clock wise, full coun ter clock wise<br />
is zero arc force.<br />
GMAW mode: In this mode the power source op -<br />
er ates in con stant volt age mode. The front panel<br />
con trol can be used to pre set the de sired weld ing<br />
volt age. The in duc tance con trol is ac ti vated for<br />
GMAW mode. The in duc tance con trol al lows the<br />
arc char ac ter is tics to be ad justed. Max i mum in -<br />
duc tance is full clock wise. Higher in duc tance<br />
set tings make the arc “softer” with less spat ter.<br />
Lower in duc tance set tings give a stron ger “driv -<br />
ing” arc. Gen erally the in duc tance con trol can be<br />
set at mid range as a good start ing point.<br />
The GMAW mode also has a built in<br />
wire-sharpening cir cuit to help con di tion the end<br />
of the wire at the end of the weld. This fea ture re -<br />
duces the size of the ball on the end of the wire to<br />
im prove the next arc start. The wire sharp set -<br />
tings can be mod i fied or dis abled by us ing the<br />
pro gram mer in ter face.<br />
PULSED GMAW mode: In this mode the power<br />
source uses the built in pulse con trol for pulsed<br />
GMAW weld ing. The pulse con trol is fac tory pro -<br />
grammed with 24 dif fer ent pulse weld sched ules.<br />
The ac tive pulse sched ule is shown on the pulse<br />
sched ule dis play. The la bel on the in side of the<br />
con trol door shows the pulse sched ules as<br />
shipped from the fac tory. Sched ules 1 - 12 are<br />
pro grammed as stan dard (non AVC) and sched -<br />
ules 13-24 are pro grammed as AVC sched ules.<br />
The AVC sched ules pro vide for con trol of the arc<br />
length as the torch to work dis tance is var ied. In<br />
the pulsed GMAW mode the front panel out put<br />
con trol is used to pre set a pulse ref er ence for the<br />
pulse con trol cir cuit. The pulse sched ules can be<br />
mod i fied by us ing the pro gram mer in ter face.<br />
7. Arc Force/In duc tance Con trol: When the<br />
SMAW mode is se lected this con trol is ac ti vated<br />
3-8<br />
and al lows ad just ment of the amount of arc force<br />
or “dig”. Max i mum arc force is full clock wise, full<br />
coun ter clock wise is zero arc force. For GMAW<br />
mode this con trol can be used to ad just the<br />
amount of “in duc tance” in the cir cuit. Higher in -<br />
duc tance set tings make the arc “softer” with less<br />
spat ter. Lower in duc tance set tings give a stron -<br />
ger “driv ing” arc. Gen erally the in duc tance con -<br />
trol can be set at mid range as a good start ing<br />
point. For GTAW and PULSED-GMAW modes,<br />
this con trol is not ac tive.<br />
8. Contactor On In di ca tor: This in di ca tor light<br />
is on when ever the out put of the power source is<br />
en er gized, ei ther by the contactor switch on the<br />
front panel or by the re mote gun switch sig nal.<br />
9. Contactor Switch: This switch can be used<br />
to en er gize the out put of the power source, when<br />
a re mote gun switch is not be ing used. This<br />
switch would pri mar ily be used for SMAW weld -<br />
ing or GTAW weld ing with out a re mote pen dant<br />
or foot pedal.<br />
10. Pulse Sched ule Dis play: This two digit dis -<br />
play shows the cur rent se lected pulse GMAW<br />
weld ing sched ule. The cur rent sched ule can be<br />
changed by us ing the sched ule up and down se -<br />
lect but tons.<br />
11. Pulse Sched ule Se lect But tons: These<br />
two but tons can be used to se lect one of the built<br />
in pulse GMAW weld ing sched ules. These but -<br />
tons can only be used to change the pulse<br />
sched ule when the out put contactor is off, see<br />
de scrip tion 8 above.<br />
12. Re mote On Se lec tor: This but ton al lows<br />
the se lec tion of ei ther re mote con trol of the out -<br />
put or lo cal (front panel) con trol of the out put.<br />
The in di ca tor light next to the switch will be on if<br />
re mote con trol is se lected, and off if lo cal con trol<br />
is se lected. Re mote con trol is via ei ther the 19<br />
pin or 14 pin re cep ta cle on the rear panel of the<br />
power source.<br />
13. Pro gram mer Port: This port al lows the con -<br />
nec tion of the power source to a com puter for ac -<br />
cess ing the pro gram ma ble fea tures of the power<br />
source. This port is con fig ured for di rect con nec -<br />
tion to a se rial port on a com puter.<br />
14. Out put Neg a tive Ter mi nal: Con nec tion<br />
point for neg a tive weld ing lead.
<strong>POWER</strong>-<strong>MASTER</strong> <strong>500</strong> 430581-004<br />
15. Out put Pos i tive Ter mi nal : Con nec tion point<br />
for pos i tive weld ing lead.<br />
Fig ure 3-6 Rear Panel<br />
Power-Mas ter <strong>500</strong>P<br />
16. CAN Port: This se rial port is used for con -<br />
nec tion to a CAN com pat i ble Ther mal Arc wire<br />
feeder or other auxilliary de vice. All of the pro -<br />
gram ma ble fea tures of the power source can be<br />
ac cessed via this port.<br />
17. Receptacle, 14 Pin: This re cep ta cle al lows<br />
the power source to in ter face with wire feed ers,<br />
and re mote con trols such as a foot pedal. This re -<br />
cep ta cle pro vides aux il iary power, contactor con -<br />
trol for en er giz ing the out put of the power source,<br />
and re mote out put con trol. The pinout is as fol -<br />
lows:<br />
A) 24 VAC aux il iary power high side<br />
B) 24 VAC Contactor cir cuit, (clo sure be tween<br />
pin A and pin B will en er gize out put).<br />
C) Re mote con trol max i mum (top side of<br />
re mote pot.)<br />
D) Con trol cir cuit com mon<br />
E) Re mote con trol in (wiper of re mote pot.,<br />
0 to 10 Volts).<br />
CV mode: 0 to 10 Volts gives 10 – 44 Volts of<br />
out put.<br />
CC mode: 0 to 10 Volts gives<br />
5 – 560 Amps of out put.<br />
F) Scaled out put cur rent sig nal:<br />
Ifb = 100 Amps/Volt<br />
G) 24/115 VAC neu tral<br />
H) Out put volt age sig nal: 10 Volts/Volt<br />
I) 115 VAC aux il iary power high side<br />
J) 115 VAC Contactor cir cuit, (clo sure<br />
be tween pin I and pin J will en er gize out put).<br />
K) Chas sis ground<br />
L) N/C<br />
M) N/C<br />
N) N/C<br />
18. Receptacle, 19 Pin: This re cep ta cle al lows<br />
the power source to in ter face with wire feed ers,<br />
and re mote con trols such as a foot pedal. This re -<br />
cep ta cle pro vides aux il iary power, contactor<br />
con trol for en er giz ing the out put of the power<br />
source, and re mote out put con trol. The pinout is<br />
as fol lows:<br />
A) Contactor cir cuit (+15 Volts)<br />
B) Contactor cir cuit in, (clo sure be tween<br />
pin A and pin B will en er gize out put).<br />
C) Scaled out put volt age sig nal:<br />
Vfb = 10 Arc Volts/Volt<br />
D) 24 VAC aux il iary power high side<br />
E) 115 VAC aux il iary power high side<br />
F) 24/115 VAC neu tral<br />
G) Chas sis ground<br />
H) Re mote con trol max i mum (top side of re mote<br />
pot.)<br />
J) Re mote con trol in (wiper of re mote pot.,<br />
0 to 10 Volts).<br />
CV Mode: 0 to 10 Volts gives 0 – 44 Volts of<br />
out put.<br />
CC Mode: 0 to 10 Volts gives 0 – 560 Amps<br />
of out put.<br />
K) Re mote con trol min i mum (bot tom side of<br />
re mote pot.)<br />
L) Con trol cir cuit com mon<br />
M) Arc Es tab lished = +12 Volts<br />
N) Con trol cir cuit com mon<br />
P) 24 VAC aux il iary power high side (same as<br />
pin D)<br />
3-9
430581-004 <strong>POWER</strong>-<strong>MASTER</strong> <strong>500</strong><br />
R) 24/115 VAC neu tral (same as pin E)<br />
S) N/C<br />
T) N/C<br />
U) Scaled out put cur rent sig nal:<br />
Ifb = 100 Amps/Volt<br />
V) N/C<br />
If a re mote con trol is plugged into both the 14 pin<br />
and 19 pin re cep ta cles the de vice plugged into<br />
the 19 pin re cep ta cle will have con trol over the<br />
out put cur rent or volt age. Ei ther de vice can con -<br />
trol the out put contactor cir cuit.<br />
19. Du plex Re cep ta cle: This re cep ta cle can<br />
pro vide up to 10 amps of 120 VAC aux il iary<br />
power for pow er ing wire feed ers, wa ter<br />
circulators, etc.<br />
20. Fuse: This fuse pro tects the con trol trans -<br />
former in the power source. If the fuse opens it<br />
should be re placed with a like am per age and<br />
volt age, (20 amps, 600VAC).<br />
21. In put Power Ac cess: This open ing pro vides<br />
ac cess to the in put ter mi nal block for the in put ca -<br />
ble. See in stal la tion chap ter of this man ual for de -<br />
tailed in struc tions.<br />
Description of Programmable<br />
Features for Power-Master <strong>500</strong>P<br />
The fol low ing is a sum mary of the fea tures which<br />
are pro gram ma ble in the power source us ing the<br />
pro gram mer in ter face and the Power-Master<br />
pro gram ming soft ware.<br />
These fea tures only ap ply to the Power-Mas ter<br />
<strong>500</strong>P.<br />
1. Lock out fea tures: Any or all of the fol low ing<br />
con trols can be locked out on the Power-Master<br />
<strong>500</strong>P so they will have no af fect on the op er a tion<br />
of the ma chine. The ma chine will re main in what -<br />
ever mode or con di tion it is in be fore the fea ture is<br />
locked out.<br />
1.1 Mode Se lect Switch - Pre vents chang ing of<br />
the mode of op er a tion.<br />
1.2 Re mote On Switch - Pre vents chang ing of<br />
the re mote con trol fea ture.<br />
1.3 Sched ule Se lect Switches - Pre vents chang -<br />
ing of the pulse mig sched ule.<br />
3-10<br />
2. Re stricted out put ad just ment: The range of<br />
ad just ment of the out put of the power source can<br />
be re stricted for the var i ous modes of op er a tion.<br />
2.1 Amps Ad just Range Locked: A high and low<br />
am per age limit can be pro grammed which will<br />
limit the out put am per age ad just range. This am -<br />
per age ad just range is in ef fect for both GTAW<br />
and SMAW modes.<br />
2.2 Volts Ad just Range Locked: A high and low<br />
volt age limit can be pro grammed for GMAW<br />
modes which will limit the volt age ad just range of<br />
the power source.<br />
2.3 Pulse Ref er ence Range Locked: A high and<br />
low pulse ref er ence limit can be pro grammed<br />
which will limit the ad just range of the out put of<br />
the ma chine for the Pulsed-GMAW mode.<br />
3. Pulse Pa ram e ters: All 24 of the Pulsed<br />
GMAW sched ules can be mod i fied, to al low for a<br />
very flex i ble de sign of the op ti mum pulse wave -<br />
form. In ad di tion the arc start ing con di tions, and<br />
arc end con di tions can be mod i fied.<br />
4. Wire sharp: Both GMAW and Pulsed GMAW<br />
modes pro vide a wire sharp en ing se quence at<br />
the end of the weld to con di tion the end of the<br />
wire. The wire sharp en ing time and volt age can<br />
be mod i fied.<br />
5. Me ter Func tions: The me ter hold fea ture<br />
and me ter re fresh rate can both be mod i fied if de -<br />
sired.<br />
6. Soft ware Con trol: In ad di tion to the pro -<br />
gram ma ble fea tures of the Power-Master <strong>500</strong>P,<br />
the power source can be con trolled through ei -<br />
ther the pro gram mer port or the CAN port. This<br />
in cludes com plete con trol of the power source,<br />
such as mode, pulse sched ule, pulse pa ram e -<br />
ters, re mote/lo cal con trol, etc. Most of the fea -<br />
tures of the power source can be con trolled in<br />
real time un der live arc con di tions. For fur ther<br />
de tails please con sult Thermal Arc technical<br />
service
<strong>POWER</strong>-<strong>MASTER</strong> <strong>500</strong> 430581-004<br />
INSTALLATION<br />
Location<br />
Ad e quate air cir cu la tion is needed at all times in<br />
or der to as sure proper op er a tion. Pro vide a min -i<br />
mum of 12 inches (305 mm) of free airspace on<br />
all sides of the unit. Make sure that the ven ti la tor<br />
open ings are not obstructed. Ven ti la tion air flow<br />
is from rear to side.<br />
Voltage Changeover<br />
For proper op er a tion and to pre vent dam age to<br />
the ma chine, the volt age change over must be set<br />
ac cord ing to the in com ing AC line volt age. Re -<br />
move the left side panel of the ma chine to gain<br />
ac cess to the volt age change over board. Set the<br />
links to agree with one of the four avail able volt -<br />
age set tings. (See Fig ures 4-1 through 4-4).<br />
The four set tings are:<br />
200 VAC<br />
230 VAC<br />
400 VAC<br />
460 VAC<br />
1. Check the name plate of the ma chine for<br />
proper line volt age.<br />
2. Move the volt age links by loos en ing the nuts<br />
se cur ing the links in place. For 200 and 230 VAC<br />
set tings place the two links in the 200/230V po si -<br />
tions. For 400 and 460 VAC set tings place the<br />
two links di rectly on top of each other in the<br />
400/460V po si tion. See fig ures 4-1 through 4-4.<br />
Make sure that the con nec tions are prop erly<br />
tight ened.<br />
Fig ure 4-1<br />
Fig ure 4-2<br />
Fig ure 4-3<br />
Fig ure 4-4<br />
Fig ure 4-5<br />
4-1
430581-004 <strong>POWER</strong>-<strong>MASTER</strong> <strong>500</strong><br />
Dan ger: Elec tric shock can kill.<br />
Open the main wall dis con nect<br />
switch or breaker, be fore re mov ing<br />
any cov ers or ac cess pan els on the<br />
weld ing ma chine. Live volt age is<br />
still pres ent even with the front<br />
panel con trol switch OFF. Wait at<br />
least three full min utes af ter power<br />
has been re moved be fore re mov ing<br />
any cov ers or ac cess pan els to al -<br />
low ad e quate time for in ter nal ca -<br />
pac i tors to dis charge.<br />
Connecting Welding Machine to<br />
Line Voltage<br />
The in put power should be con nected to the unit<br />
through a fused dis con nect switch, or other suit -<br />
able dis con nect ing means fur nished by the user.<br />
Ac cess is pro vided in the rear panel of the ma -<br />
chine for the en try of the in put con duc tors.<br />
DANGER: ELEC TRIC SHOCK CAN<br />
KILL. Open the dis con nect switch,<br />
or breaker, and de ter mine that no<br />
volt age is pres ent, be fore con nect -<br />
ing wires be tween weld ing ma chine<br />
and power sup ply.<br />
4-2<br />
Line<br />
Volts Rated Line<br />
Amps<br />
200<br />
230<br />
400<br />
460<br />
88<br />
82<br />
43<br />
39<br />
Approx.<br />
Line<br />
Fuse Size<br />
Amps<br />
100<br />
100<br />
60<br />
60<br />
CAU TION: The method of in stal la tion,<br />
con duc tor size, and overcurrent pro tec -<br />
tion shall con form to the re quire ments<br />
of the lo cal elec tri cal code, the Na tional<br />
Elec tri cal Code, or other na tional codes,<br />
as ap pli ca ble. All in stal la tion wir ing and<br />
ma chine con nec tions shall be done by<br />
qual i fied per sons.<br />
Ta ble 4-1 pro vides min i mal in for ma tion for se lec -<br />
tion of line con duc tors, fuses, and the equip ment<br />
ground ing con duc tor. This in for ma tion is from<br />
the Na tional Elec tri cal Code NFPA 70-1981 Edi -<br />
tion. In stall this equip ment per the lat est edi tion,<br />
avail able from the Na tional Fire Pro tec tion As so -<br />
ci a tion, 470 At lan tic Av e nue, Boston, MA 02210.<br />
Connection Instructions<br />
1. Re move left side panel to gain ac cess to the in -<br />
put ter mi nal block and ground screw.<br />
2. Con nect the three phase power line to the ter -<br />
mi nal block as shown in Fig ure 4-5.<br />
3. Con nect the power sys tem safety ground to<br />
the the screw la beled PE GROUND lo cated on<br />
the base of the ma chine near the in put ter mi nal<br />
block as shown in Fig ure 4-6.<br />
4. Re place side panel.<br />
WARNING: Never con nect the<br />
safety ground screw to one of<br />
the three line phases. This<br />
would rep re sent a se ri ous elec -<br />
tri cal shock haz ard. The wir ing<br />
to this ma chine should be per -<br />
formed by a qual i fied per son<br />
only.<br />
Cop per<br />
Line Wire Size*<br />
No. 6 (16 mm2)<br />
No. 6 (16 mm2)<br />
No. 10 (6 mm2)<br />
No. 10 (6 mm2)<br />
Ta ble 4-1 Rec om mended Wire and Fuse Size Ta ble<br />
Cop per<br />
Grounding<br />
Con duc tor<br />
Min. Size<br />
No. 6 (16 mm2)<br />
No. 6 (16 mm2)<br />
No. 10 (6 mm2)<br />
No. 10 (6 mm2)<br />
*Con duc tor size shall be mod i fied as re quired for line volt age drop and am bi ent tem per a t ure. Sizes listed<br />
are based on 90°C con duc tor in su la tion, des ig nated as FEP, FEPB , RHH , and THHN.
<strong>POWER</strong>-<strong>MASTER</strong> <strong>500</strong> 430581-004<br />
Grounding<br />
The frame of this weld ing ma chine should be<br />
grounded for per son nel safety, and to as sure op -<br />
er a tion of the overcurrent pro tec tion. The<br />
ground ing method, and the equip ment ground ing<br />
con duc tor size and type shall con form to lo cal<br />
and na tional codes.<br />
For the Na tional Elec tri cal Code, the equip ment<br />
ground ing con duc tor shall be green, green with a<br />
yel low stripe, or bare.<br />
If flex i ble power ca ble is used, use a ca ble as -<br />
sem bly which in cludes the equip ment ground ing<br />
con duc tor. If me tal lic ar mored ca ble or con duit is<br />
used, the metal sheath ing or con duit must be ef -<br />
fec tively grounded per lo cal and na tional codes.<br />
Rub ber-tire mounted equip ment shall be<br />
grounded to con form to lo cal and na tional codes.<br />
The ground ing as sists in pro vid ing pro tec tion<br />
Fig ure 4-6<br />
against line volt age elec tri cal shock and static<br />
shock. The ground ing serves to dis charge the<br />
static elec tric charge which tends to build up on<br />
rub ber-tire mounted equip ment. This static<br />
charge can cause pain ful shock and lead to the<br />
er ro ne ous con clu sion that an elec tri cal fault ex -<br />
ists in the equip ment.<br />
If a sys tem ground is not avail able, con sult the<br />
elec tri cal code en force ment body for in struc -<br />
tions. The weld ing ma chine should be con nected<br />
to an ad e quate driven ground rod, or to a wa ter<br />
pipe that en ters the ground not more than 10 feet<br />
(3 me ters) from the ma chine.<br />
The equip ment ground ing con duc tor size is<br />
listed in Ta ble 4-1 as a guide if no lo cal or na -<br />
tional code is ap pli ca ble.<br />
At tach the equip ment ground ing con duc tor to the<br />
stud pro vided on the yoke panel. De ter mine that<br />
4-3
430581-004 <strong>POWER</strong>-<strong>MASTER</strong> <strong>500</strong><br />
the ground wire size is ad e quate be fore the ma -<br />
chine is op er ated.<br />
Welding Leads<br />
Con nect the weld ing leads to the out put bus bar<br />
ter mi nals of the power source. Se lec tion of the<br />
proper size of weld ing leads should be based<br />
upon both the rated ampacity of the wire as well<br />
as the volt age drop on the ca ble. When con sid er -<br />
ing volt age drop, the en tire loop (elec trode plus<br />
work lead) must be con sid ered.<br />
Re fer to Ta ble 4-2 as a ba sic guide line to the re -<br />
quired cop per ca ble sizes.<br />
As a gen eral rule, the weld ing ca bles should be<br />
kept as short as pos si ble and placed close to -<br />
gether. Try to avoid coil ing up the ca bles if pos si -<br />
ble. A dam aged or frayed ca ble should not be<br />
used, and all con nec tions must be prop erly tight -<br />
ened.<br />
4-4<br />
Avg. Welding<br />
Amps<br />
50 Feet<br />
(15.2 M)<br />
TO TAL LENGTH OF LEAD CIR CUIT IN FEET (AND ME TERS)<br />
(ELEC TRODE LEAD PLUS WORK LEAD)<br />
100 Feet<br />
(30.5 M)<br />
150 Feet<br />
(45.7 M)<br />
200 Feet<br />
(61.0 M)<br />
250 Feet<br />
(76.2 M)<br />
100 #4 (20mm2) #4 (20mm2) #2 (35mm2) #1 (50mm2) #1 (50mm2)<br />
150 #3 (25mm2) #3 (25mm2) #1 (50mm2) #1/0 (50mm2) #2/0 (70mm2)<br />
200 #2 (35mm 2 ) #2 (35mm 2 ) #1/0 (50mm 2 ) #2/0 (70mm 2 ) #3/0 (95mm 2 )<br />
250 #1 (50mm2) #1 (50mm2) #2/0 (70mm2) #3/0 (95mm2) #4/0 (120mm2)<br />
300 #1/0 (50mm2) #1/0 (50mm2) #3/0 (95mm2) #4/0 (120mm2) 2 - #2/0<br />
2 - (70mm2)<br />
350 #2/0 (70mm2) #2/0 (70mm2) #4/0 (120mm2) 2 - #2/0<br />
2 -(70mm 2)<br />
400 #3/0 (95mm 2 ) #3/0 (95mm 2 ) #4/0 (120mm 2 ) 2 - #2/0<br />
2 - (70mm2)<br />
450 #3/0 (95mm 2 ) #3/0 (95mm 2 ) #4/0 (120mm 2 ) 2 - #3/0<br />
2 - (95mm2)<br />
<strong>500</strong> #4/0 (120mm 2 ) #4/0 (120mm 2 ) 2 - #2/0<br />
2 - (70mm 2)<br />
550 #4/0 (120mm 2 ) #4/0 (120mm 2 ) 2 - #2/0<br />
2 - (70mm 2)<br />
600 #4/0 (120mm 2 ) #4/0 (120mm 2 ) 2 - #3/0<br />
2 - (95mm2)<br />
2 - #3/0<br />
2 - (95mm2)<br />
2 - #4/0<br />
2 - (120mm2)<br />
2 - #4/0<br />
2 - (120mm2)<br />
2 - #2/0<br />
2 - (70mm2)<br />
2 - #3/0<br />
2 - (95mm2)<br />
2 - #3/0<br />
2 - (95mm2)<br />
2 - #4/0<br />
2 - (120mm2)<br />
2 - #4/0<br />
2 - (120mm2)<br />
2 - #4/0<br />
2 - (120mm2)<br />
NOTE: Lead size shown is for 90°C (194°F) ca ble in su la tion, 30°C (86°F) am bi ent, and not over 4.5<br />
volts lead drop.<br />
Ta ble 4-2
<strong>POWER</strong>-<strong>MASTER</strong> <strong>500</strong> 430581-004<br />
Con fig u ra tion Set tings<br />
A. Lift Tig (Ap plies to both 100054 & 100060)<br />
The power source is con fig ured from the fac tory<br />
with the Lift-Arc start ing cir cuit ac tive for GTAW .<br />
This fea ture should be dis abled if an ex ter nal<br />
high volt age arc starter is be ing used to start the<br />
arc. To dis able the lift arc fea ture pro ceed as fol -<br />
lows:<br />
1. Turn off the power to the power source at the<br />
main dis con nect.<br />
2. Re move the top panel to gain ac cess to the<br />
con trol board. (see Fig ure 4-7).<br />
3. To dis able Lift-Arc place jumper plugs JP1 and<br />
JP2 if the OFF po si tion (pins 2 to 3 shorted).<br />
4. To re-enable Lift-Arc place jumper plugs JP1<br />
and JP2 back in the ON po si tion (1 to 2 shorted).<br />
5. Re place the top panel.<br />
Fig ure 4-7<br />
Lift TIG Jumpers<br />
4-5
430581-004 <strong>POWER</strong>-<strong>MASTER</strong> <strong>500</strong><br />
B. Wire-Sharpening for GMAW (Ap plies to<br />
100060 only)<br />
The power source is con fig ured from the fac tory<br />
with the Wire-Sharpening cir cuit ac tive for<br />
GMAW. This fea ture im proves arc start ing by re -<br />
duc ing the size of the ball on the wire at the end of<br />
the weld. To dis able this fea ture pro ceed as fol -<br />
lows:<br />
1. Turn off the power to the power source at the<br />
main dis con nect.<br />
2. Re move the top and side pan els to gain ac -<br />
cess to the dis play board. (see Fig ure 4-7).<br />
3. Re move the knobs and hard ware from the<br />
front panel to al low re moval of the dis play board.<br />
4. To dis able Wire-Sharpening place jumper<br />
plug JP1 in the OFF po si tion (pins 3 to 4 shorted).<br />
5. To re-en able Wire-Sharpening place jumper<br />
plug JP1 back in the ON po si tion (pins 1 to 2<br />
shorted).<br />
6. Re place board and pan els.<br />
4-6<br />
Fig ure 4-8<br />
Wire Sharpening Jumper
<strong>POWER</strong>-<strong>MASTER</strong> <strong>500</strong> 430581-004<br />
MAINTENANCE<br />
If this equip ment does not op er ate prop erly, stop<br />
work im me di ately and in ves ti gate the cause of<br />
the mal func tion. Main te nance work must be per -<br />
formed by an ex pe ri enced, qual i fied per son only.<br />
Any elec tri cal work must be per formed by an<br />
elec tri cian or other per son prop erly trained in ser -<br />
vic ing elec tri cal equip ment. Do not per mit un -<br />
trained per sons to in spect, clean or re pair this<br />
equip ment. Use only rec om mended re place -<br />
ment parts when ser vic ing this ma chine.<br />
Dan ger: HIGH VOLT AGE is pres ent<br />
in ter nally even with the con trol<br />
power switch in the OFF po si tion.<br />
Be fore in spect ing, clean ing, or ser -<br />
vic ing, dis con nect and lock out the<br />
in put power to the power source.<br />
Pe ri odically clean the in side of the weld ing power<br />
source by us ing clean dry com pressed air of not<br />
over 25 psi as nor mal pre ven tive main te nance.<br />
At the time of the clean ing, a full in spec tion of the<br />
weld ing ma chine and setup should be per -<br />
formed.<br />
The fol low ing check list can be used as a guide for<br />
rou tine main te nance.<br />
• Check warn ing la bels for read abil ity.<br />
• Check sheet metal pan els, all screws and fas -<br />
ten ers should be firmly se cured, heavily cor -<br />
roded pan els and fas ten ers or dam aged<br />
pan els should be re placed.<br />
• Check pri mary in put power wir ing to the ma -<br />
chine in clud ing ground. Re pair or re place any<br />
wires that have cracked or dam aged in su la tion<br />
or frayed con nec tions.<br />
• Check out put weld con nec tions in clud ing any<br />
con nec tions to wire feed ers, fix tures, etc.<br />
Loose or frayed con nec tions can cause over -<br />
heat ing of the out put ter mi nals, or ex ces sive<br />
volt age drop which may de grade weld ing per -<br />
for mance.<br />
• Check con trol ca ble con nec tions to the power<br />
source and wire feeder or other con trols.<br />
Dam aged ca bles can cause in ter mit tent prob -<br />
lems which are of ten dif fi cult to trou ble shoot.<br />
Ca bles should be re paired or re placed if dam -<br />
age is ev i dent.<br />
• Check all con trol switches and po ten ti om -<br />
eters. If any of the con trols are dam aged or<br />
bro ken they should be re placed. Most of the<br />
con trols on this ma chine are in te gral com po -<br />
nents to a cir cuit board, and will re quire re -<br />
place ment of the board.<br />
• In spect in ter nal wir ing of the weld ing ma chine<br />
for loose or frayed con nec tions, tighten or re -<br />
pair as nec es sary.<br />
• Check in ter nal con nec tions in clud ing cir cuit<br />
board con nec tors. Any loose or cor roded con -<br />
nec tions should be re paired.<br />
5-1
<strong>POWER</strong>-<strong>MASTER</strong> <strong>500</strong> 430581-004<br />
TROUBLESHOOTING<br />
General<br />
This man ual is in tended to be used by qual i fied,<br />
trained, ser vice tech ni cians. It’s pur pose is to<br />
give the ser vice tech ni cian an en hanced, de -<br />
tailed un der stand ing of the weld ing ma chine.<br />
This trou ble shoot ing sec tion is in tended to help<br />
de ter mine which com po nent or sub-as sem bly is<br />
faulty. This man ual only pro vides in for ma tion to<br />
the point of de ter min ing whether a cir cuit board is<br />
de fec tive, it does not pro vide in for ma tion to trou -<br />
ble shoot and re pair a cir cuit board.<br />
There are many out side in flu ences on the over all<br />
weld ing pro cess which can of ten point to wards a<br />
“de fec tive” weld ing power source. It is im por tant<br />
to make sure that these out side in flu ences are<br />
not the ac tual cause of a com plaint or faulty op er -<br />
a tion be fore trou ble shoot ing the weld ing power<br />
source.<br />
Some com mon things to look for are listed be low:<br />
In put power<br />
In cor rect volt age, blown fuses, loose con nec<br />
-<br />
tions, im proper volt age change over set ting.<br />
Im proper Op er a tion<br />
In cor rect switch po si tions (re mote/lo cal, mode,<br />
trig ger hold, volt age or wire feed set ting, in duc -<br />
tance set ting, pulse sched ule, etc. ), Loose, dam -<br />
aged or miss ing con trol or weld con nec tions.<br />
NOTE: The Power-Mas ter <strong>500</strong>P has a num ber of<br />
pro gram ma ble fea tures, in clud ing the abil ity to<br />
dis able front panel switches and limit the out put<br />
range of the ma chine. These fea tures can be<br />
pro grammed us ing an op tional soft ware pack age<br />
(GUS).<br />
Poor weld ing or start ing<br />
Shielding gas type, flow or con tam i na tion, in cor -<br />
rect weld po lar ity, wire feed ing prob lem (liner,<br />
feed rolls, tip, guides, etc. ), Torch to work dis -<br />
tance in cor rect, travel speed, torch an gle, etc.<br />
Basic Troubleshooting<br />
There are two gen eral types of prob lems or fail -<br />
ures which can oc cur with the Power-Mas ter.<br />
The first would re late to a fail ure within the power<br />
cir cuit, and the sec ond would be a con trol type<br />
prob lem.<br />
Power Cir cuit fail ure<br />
Typ i cal symp toms<br />
• Blown line fuses<br />
• No out put<br />
• Vi sual dam age to power com po nents<br />
Di ag nos tics:<br />
• Check in put rec ti fier<br />
• Check IGBT mod ules<br />
• Check out put di odes<br />
• Check ca pac i tor boards<br />
• Check in put contactors for dam aged con tacts<br />
Con trol cir cuit fail ure<br />
Typ i cal symp toms<br />
• Lack of out put con trol<br />
• Im proper op er a tion<br />
• Er ratic weld ing (rule out ex ter nal causes first)<br />
Di ag nos tics:<br />
Re fer to block di a gram, con trol board sig nal in -<br />
for ma tion and spe cific con trol tests to pin point<br />
trouble.<br />
Block Diagrams<br />
See the fol low ing pages.<br />
6-1
430581-004 <strong>POWER</strong>-<strong>MASTER</strong> <strong>500</strong><br />
6-2<br />
Fig ure 6-1<br />
Power-Mas ter <strong>500</strong> Block Di a gram (100060)
<strong>POWER</strong>-<strong>MASTER</strong> <strong>500</strong> 430581-004<br />
Fig ure 6-2<br />
Power-Mas ter <strong>500</strong> Pulse Block Di a gram (100054)<br />
6-3
430581-004 <strong>POWER</strong>-<strong>MASTER</strong> <strong>500</strong><br />
Control Board Connector Signals<br />
(For 830894 main con trol board)<br />
Con nec tor Volt age De scrip tion<br />
J1: 26 pin rib bon ca ble to front panel board<br />
J1-1 1V or 14V GTAW mode se lect, 1V = GTAW selected<br />
J1-2 1V or 14V SMAW mode se lect, 1V = SMAW selected<br />
J1-3 1V or 14V CAG or PULSE mode se lected, 1V = CAG or PULSE selected<br />
J1-4 1V or 14V GMAW mode se lected, 1V = GMAW selected<br />
J1-5 Arc force pot high side in SMAW mode<br />
J1-6 In duc tance pot high side in all modes ex cept SMAW<br />
J1-7 Arc force pot low side in SMAW mode<br />
J1-8 In duc tance pot low sidein all modes ex cept SMAW<br />
J1-9 1V or 14V Re mote/Lo cal, 1V = re mote selected<br />
J1-10 +15V Power supply<br />
J1-11 0V or 13.5V Contactor in put, +13.5V = in verter on<br />
J1-12 +10V High side ref er ence for front panel con trol pot.<br />
J1-13 0.07V or 2.22V Low side of front panel pot., 2.22 for GMAW, .07 for other modes<br />
J1-14 0 to 10V Wiper in put from front panel con trol pot.<br />
J1-15 0 to 6V Cur rent feed back, 100Amps/volt<br />
J1-16 0 to 6V Volt age feed back, 10Volts/volt<br />
J1-17 0 or 14V Arc es tab lished sig nal, 14V = arc established<br />
J1-18 0 or 15V Gun Switch sig nal, +15V = gun switch on<br />
J1-19 -15V Power supply<br />
J1-20 Common Sig nal common<br />
J1-21 +5V Power Supply<br />
J1-22 Over-tem per a ture light drive<br />
J1-23 0 to 10V Ref er ence output<br />
J1-24 0 to 13.5V Pulse or CAG con trol input<br />
J1-25 Common Sig nal common<br />
J1-26 0 to 10V Ref er ence in put to main board<br />
J2: 4 pin con nec tor to cur rent sensor<br />
J2-1 +15V Power sup ply to cur rent sensor<br />
J2-2 -15V Power sup ply to cur rent sensor<br />
J2-3 0 to 5V Out put cur rent, 4V = <strong>500</strong> Amps<br />
J2-4 Common Sig nal com mon for cur rent sensor<br />
J3: 2 pin con nec tor for out put volt age feedback<br />
J3-1 0 to +60V Pos i tive out put ter mi nal voltage<br />
J3-2 0 to -60V Neg a tive out put ter mi nal voltage<br />
J4: 12 po si tion con nec tor header for op tional wire stick de tect circuit<br />
J4-1 +5V Power sup ply to wire de tect circuit<br />
J4-2 Common Sig nal common<br />
J4-3 to J4-10 N/C<br />
J4-11 0 to +60V Pos i tive out put terminal<br />
J4-12 0 to -60V Neg a tive out put terminal<br />
J5: 5 po si tion to pri mary cur rent transformer<br />
J5-1 Cur rent trans former secondary<br />
J5-2 Cur rent transformer secondary<br />
J5-3 N/C<br />
J5-4 +15V In ter lock jumper<br />
J5-4 +15V In ter lock jumper<br />
6-4
<strong>POWER</strong>-<strong>MASTER</strong> <strong>500</strong> 430581-004<br />
J6: 4 po si tion to ther mo stats<br />
J6-1 +15V Power to thermostats<br />
J6-2 +15V From ther mo stat, 15V for nor mal operation<br />
J6-3 +15V From ther mo stat, 15V for nor mal operation<br />
J6-4 +15V From ther mo stat, 15V for nor mal operation<br />
J7: 8 po si tion to IGBT gate drive<br />
J7-1 to J7-5 0 or 14 VAC Gate drive sig nal #1<br />
J7-4 to J7-8 0 or 14 VAC Gate drive sig nal #2<br />
J8: 8 po si tion to IGBT gate drive<br />
J8-1 to J8-5 0 or 14VAC Gate drive sig nal #3<br />
J8-4 to J8-8 0 or 14 VAC Gate drive sig nal #4<br />
J9: 14 po si tion to contactors and fans<br />
J9-1 0 or 115VAC Main contactor coil drive<br />
J9-3 0 or 115VAC In rush contactor coil drive<br />
J9-5 115VAC neutral Neu tral com mon con nec tion<br />
J9-7 0 or 115VAC Fan drive<br />
J10: 16 po si tion rib bon to amphenol board<br />
J10-1 +15V Volt age sup ply to re mote gun switch<br />
J10-2 0 or +15V Gun switch in put, +15V = Gun switch on<br />
J10-3 0 to 6V Volt age teedback 10V/Volt<br />
J10-4 0 to 10V Re mote con trol maximum<br />
J10-5 0 to 10V Re mote con trol in put from 19 pin<br />
J10-6 0.07 or 2.22V Re mote con trol min i mum, 2.22V for GMAW mode<br />
J10-7 0 or 15V Arc es tab lished sig nal, +15V = arc established<br />
J10-8 0 to 6V Cur rent feed back 100 Amps/Volt<br />
J10-9 Common Con trol cir cuit common<br />
J10-10 0 to 10V Re mote con trol in put from 14 pin<br />
J10-11 0 to 6V Volt age feed back for 14 pin re mote, 10V/Volt<br />
J10-12 to J10-16 N/C<br />
J11: 4 po si tion AC volt age to board<br />
J11-1 21VAC Sup ply voltage<br />
J11-2 21VAC Sup ply voltage<br />
J11-3 Common Cir cuit com mon for sup ply voltages<br />
J12: 5 po si tion op tion connector<br />
J12-1 +15V Sup ply voltage<br />
J12-2 -15V Sup ply voltage<br />
J12-3 +5V Sup ply voltage<br />
J12-4 Common Power sup ply common<br />
J12-5 N/C<br />
Ta ble 6-1<br />
Con trol board in ter con nect sig nals<br />
6-5
430581-004 <strong>POWER</strong>-<strong>MASTER</strong> <strong>500</strong><br />
Power Circuit Tests<br />
Dan ger: HIGH VOLT AGE is pres ent<br />
in ter nally even with the con trol<br />
power switch in the OFF po si tion.<br />
Be fore in spect ing, clean ing, or ser -<br />
vic ing, dis con nect and lock out the<br />
in put power to the power source.<br />
The fol low ing test must be per formed with power<br />
dis con nected from the ma chine. These tests re -<br />
quire a dig i tal multi-me ter with a di ode checker.<br />
Note; Normally a good di ode will check in the<br />
range of 0.2 to 0.9 Volts in the for ward di rec tion<br />
de pend ing on the par tic u lar di ode.<br />
In put Rec ti fier test (see Fig ure 6-3 and con nec -<br />
tion di a gram)<br />
Ter mi nal 4 (+) to ter mi nal 1 (-) : Open<br />
Ter mi nal 4 (+) to ter mi nal 2 (-) : Open<br />
Ter mi nal 4 (+) to ter mi nal 3 (-) : Open<br />
Ter mi nal 4 (-) to ter mi nal 1 (+) : 0.2 - 0.9<br />
Ter mi nal 4 (-) to ter mi nal 2 (+) : 0.2 - 0.9<br />
Ter mi nal 4 (-) to ter mi nal 3 (+) : 0.2 - 0.9<br />
Ter mi nal 5 (+) to ter mi nal 1 (-) : 0.2 - 0.9<br />
Ter mi nal 5 (+) to ter mi nal 2 (-) : 0.2 - 0.9<br />
Ter mi nal 5 (+) to ter mi nal 3 (-) : 0.2 - 0.9<br />
Ter mi nal 5 (-) to ter mi nal 1 (+) : Open<br />
Ter mi nal 5 (-) to ter mi nal 2 (+) : Open<br />
Ter mi nal 5 (-) to ter mi nal 3 (+) : Open<br />
6-6<br />
Fig ure 6-3 In put rec ti fier<br />
IGBT Test: (See Fig ure 6-4 and con nec tion di a -<br />
gram).<br />
Note: Be cause of the ca pac i tor boards con -<br />
nected across the IGBTs they may ini tially show<br />
a short cir cuit when us ing the di ode checker, un til<br />
the ca pac i tors charge up.<br />
Check both IGBTs as fol lows:<br />
E2 (+) to C2E1 (-): 0.2 - 0.9<br />
E2 (-) to C2E1 (+): Open (See Note above)<br />
C2E1 (+) to C1 (-): 0.2 - 0.9<br />
C2E1 (-) to C1 (+): Open (See Note Above)<br />
Out put Di ode test:<br />
Fig ure 6-4 IGBT Mod ule<br />
Check the out put di odes at the out put weld ter mi -<br />
nals as fol lows:<br />
Pos i tive ter mi nal (+) to Neg a tive terminal (-):<br />
Open<br />
Pos i tive ter mi nal (-) to Neg a tive ter mi nal (+):<br />
0.2 - 0.9<br />
Ca pac i tor Board tests:<br />
The ca pac i tors can be checked us ing the di ode<br />
checker func tion on a dig i tal multi-me ter, with the<br />
power dis con nected from the ma chine. A good<br />
ca pac i tor will ini tially show a short and then go to<br />
an open cir cuit as the ca pac i tor charges up. If<br />
the me ter leads are then re versed the ca pac i tor<br />
will again show a short and go to an open as the<br />
ca pac i tor charges with the op po site po lar ity.<br />
Note: Check the IGBTs and in put rec ti fier first. If<br />
an IGBT is shorted it will have to be dis con nected<br />
from the ca pac i tor board be fore the ca pac i tor<br />
can be checked.
<strong>POWER</strong>-<strong>MASTER</strong> <strong>500</strong> 430581-004<br />
Check the four ca pac i tor banks us ing the di ode<br />
checker func tion on the me ter with power dis con -<br />
nected from the machine as fol lows:<br />
C1 to C2E1 top IGBT.<br />
C2E1 to E2 top IGBT.<br />
C1 to C2E1 bot tom IGBT.<br />
C2E1 to E2 bot tom IGBT.<br />
The ca pac i tor banks should have the fol low volt<br />
-<br />
age read ings when power is ap plied to the unit,<br />
by switch ing the front panel CON TROL <strong>POWER</strong><br />
switch ON.<br />
Note: The volt age must be checked with the<br />
OUT PUT CONTACTOR con trol OFF.<br />
C1(+) to C2E1(-) top IGBT : 140 to 180 VDC<br />
C2E1(+) to E2(-) top IGBT : 140 to 180 VDC.<br />
C1(+) to C2E1(-) bot tom IGBT: 140 to 180 VDC.<br />
C2E1(+) to E2(-) bot tom IGBT: 140 to 180 VDC.<br />
All read ings should be within 15 VDC of each<br />
other.<br />
DANGER: Use ex treme cau tion<br />
when mak ing mea sure ments in ter -<br />
nal to the ma chine. Pri mary volt age<br />
is pres ent in side the ma chine even<br />
with the CON TROL <strong>POWER</strong> switch<br />
in the OFF po si tion. Do not touch<br />
ex posed metal or wir ing con nec -<br />
tions if the main wall dis con nect is<br />
ac ti vated.<br />
Dan ger: Af ter power has been re -<br />
moved al low 2 min utes for the volt -<br />
age to de cay on the ca pac i tor<br />
banks.<br />
Semiconductor replacement<br />
requirements<br />
The fol low ing guide lines must be fol lowed when<br />
re plac ing one of the power semi con duc tors. This<br />
in cludes the in put rec ti fier mod ule, out put di ode,<br />
or IGBT mod ule.<br />
1. Re move the failed com po nent and thor oughly<br />
clean the heat sink area where the part mounts.<br />
2. Ap ply a thin layer of heat sink ther mal com -<br />
pound to the semi con duc tor mod ule.<br />
3. Tighten and torque the mount ing screws and<br />
ter mi nals per the chart be low.<br />
Note: It is im por tant to fol low the torque re quire -<br />
ments to avoid pos si ble dam age to the com po -<br />
nent<br />
Com po nent Torque<br />
Out put Diode<br />
Cen ter mount ing screw 15 in-lbs<br />
Outer mount ing screws 35 in-lbs<br />
Ter mi nal screws 35 in-lbs<br />
In put Rectifier<br />
Mount ing Screws 27 in-lbs<br />
Ter mi nal Screws 27 in-lbs<br />
IGBT Module<br />
Mount ing Screws 35 in-lbs<br />
Ter mi nal Screws 27 in-lbs<br />
Ta ble 6-2<br />
Semi con duc tor Torque Re quire ments<br />
6-7
430581-004 <strong>POWER</strong>-<strong>MASTER</strong> <strong>500</strong><br />
Ground<br />
Fig ure 6-5<br />
Main Con trol Board<br />
6-8
<strong>POWER</strong>-<strong>MASTER</strong> <strong>500</strong> 430581-004<br />
Control Circuit tests:<br />
Most of the con trol cir cuit mea sure ments can be<br />
made on the main con trol board. (See Fig ure 6-5)<br />
Note: Un less stated oth er wise, use TP4-2 as<br />
the ground or com mon con nec tion when<br />
mak ing mea sure ments on the con trol cir -<br />
cuits.<br />
Dan ger: The gate drive sig nals (T1,<br />
T2, R24-R27, J7 and J8, are all con -<br />
nected to the pri mary cir cuit, and<br />
are live when ever power is ap plied<br />
to the ma chine, even if the CON -<br />
TROL <strong>POWER</strong> switch is in the OFF<br />
po si tion. Switch off power at main<br />
dis con nect be fore unplugging J7<br />
and J8.<br />
Note: Dis con nect con nec tors J7, J8 and J9<br />
from the con trol board be fore mak ing the fol -<br />
low ing checks. This will keep the in put<br />
contactors off and keep from fir ing the gates<br />
on the IGBTs.<br />
Con nect pri mary power to the ma chine and turn<br />
the CON TROL <strong>POWER</strong> switch ON to power up<br />
the con trol cir cuit.<br />
1. Power Sup plies:<br />
TP2-6 to TP4-2 (GND): +15 VDC<br />
TP2-3 to TP4-2 (GND): -15 VDC<br />
6-9<br />
L1: 21 VAC<br />
L3: 21 VAC<br />
TP2-2 to TP4-2 (GND): +5 VDC<br />
If the power sup plies do not check ok, then dis -<br />
con nect the rib bon ca ble from J1 to iso late the<br />
main con trol board from the front panel board/s.<br />
If the power sup plies still do not check ok, ver ify<br />
that the proper AC volt age is com ing up to the<br />
board.<br />
L1 to TP4-2 (GND): 21 VAC<br />
L3 to TP4-2 (GND): 21 VAC<br />
L1 to L3: 42 VAC<br />
Fig ure 6-7<br />
AC power check<br />
Fig ure 6-6<br />
Power sup ply test points
430581-004 <strong>POWER</strong>-<strong>MASTER</strong> <strong>500</strong><br />
2. Ref er ence Cir cuit<br />
Set front panel to LO CAL (Re mote off) con -<br />
trol and mode to GMAW.<br />
Mea sure 10V_Ref. as main A/V con trol pot<br />
on front panel is var ied min to max.<br />
A) TP2-1 to TP4-2: 2.27 to 10.0 VDC<br />
Volts dis play on front panel reads 10 to 44<br />
Volts.<br />
B) For GTAW, SMAW modes:<br />
TP2-1 to TP4-2: 0.1 to 10.0 VDC<br />
Amps dis play on front panel reads 4 to 560<br />
Amps.<br />
C) For PULSE GMAW mode:<br />
TP2-1 to TP4-2: 0.1 to 10.0 VDC<br />
Volts Dis play on front panel reads 4 to 440.<br />
19 pin input<br />
Fig ure 6-8<br />
14 pin input<br />
Gun Switch Input<br />
If TP2-1 reads OK but front panel dis play is<br />
wrong then the prob lem is with the front<br />
panel board or rib bon ca ble inter-con nect..<br />
If TP2-1 is not OK, then make the fol low ing<br />
checks: (See Fig ure 6-8 be low)<br />
A) R195 top side: +10V all the time with or<br />
with out J1 plugged in.<br />
B) Min. ref RV2 bot tom side: 0.07 VDC for<br />
SMAW, GTAW, or PULSE, 2.22 VDC for<br />
GMAW or with J1 un plugged.<br />
C) Ref. in to main con trol board at R222 top<br />
side: 0.07 to 10 VDC for GTAW min to max,<br />
2.22 - 10 VDC min to max for GMAW. This is<br />
the ref er ence in put from the front panel.<br />
+10V<br />
Ref. In<br />
Re mote Max.<br />
Ref. Min.<br />
6-10
<strong>POWER</strong>-<strong>MASTER</strong> <strong>500</strong> 430581-004<br />
3. Gun Switch Cir cuit<br />
This is the gun switch from the 19/14 pin re mote<br />
re cep ta cle. To ac ti vate gun switch short Pins A &<br />
B on 19 pin re mote.<br />
A) Gun switch in put: D85-An ode +15VDC for gun<br />
switch on, 0V for gun switch off. (See Fig ure 6-8)<br />
B) Gun switch out put R131: +15VDC for gun<br />
switch on, 0V for gun switch off. (See Fig ure 6-9)<br />
6-11<br />
Gun Switch out -<br />
put<br />
Contactor In put<br />
sig nal<br />
4. Out put Contactor cir cuit:<br />
The contactor sig nal co mes from the front panel<br />
board to the main con trol board. It is based on the<br />
gun switch out put sig nal. This is the sig nal which<br />
ac tu ally turns the in verter on and off.<br />
A) With gun switch on (jumper A-B on 19 pin re -<br />
mote), R175 is 13.6 VDC, with gun switch off,<br />
R175 is 0VDC. (See Fig ure 6-9)<br />
B) Out put contactor switch on front panel should<br />
give the same re sults.<br />
C) With R175 at 13.6 VDC, D10-Cath ode should<br />
also be high (+15VDC), with R175 at 0,<br />
If gun switch in put is not pres ent to main con trol<br />
board that most likely in di cates a prob lem with ei -<br />
ther the amphenol board or the J10 rib bon ca ble.<br />
If the gun switch in put is pres ent but the gun<br />
switch out put is not cor rect, then the prob lem is<br />
with the main con trol board. (Note: J1 must be<br />
plugged in for this cir cuit to work)<br />
Fig ure 6-9<br />
D10-Cath ode should also be low. (See Fig ure<br />
6-10)<br />
D) With R175 at +13.6VDC, D10-An ode should<br />
be around 12VDC, with R175 at 0, D10-An ode<br />
should be 0.7. D10-An ode is the ON/OFF con trol<br />
sig nal to the PWM con trol ler chip.<br />
E) If D10-Cath ode is right but the An ode side is<br />
not, then check J5-4 to J5-5 jumper to make sure<br />
it is in place, and also make sure power sup plies<br />
are ok. Also make sure the ther mo stat light is not<br />
on. Any one of these con di tions can in hibit the in -<br />
verter cir cuit from run ning by keep ing D10-An -<br />
ode low.
430581-004 <strong>POWER</strong>-<strong>MASTER</strong> <strong>500</strong><br />
D10-Cathode<br />
D10-Anode<br />
5. Gate Sig nal Checks:<br />
Note: Re move jumper from pins A & B of 19 pin<br />
amphenol if it is still in place.<br />
A) Set ma chine for SMAW, LO CAL, pre set A/V<br />
for 100 amps.<br />
B) Check gate drive volt ages us ing dig i tal me ter<br />
set for AC volts.<br />
Gate Drive Signals<br />
Fig ure 6-10<br />
C) Use the CONTACTOR switch on the front<br />
panel to ac ti vate the gate drive. With<br />
CONTACTOR on the gate volt age should be ap -<br />
prox i mately 14.5 VAC (at 17KHz), with the<br />
CONTACTOR off, the gate volt age should read 0<br />
volts.<br />
D) Mea sure all four gate drive sig nals, J7-1 to<br />
J7-5, J7-4 to J7-8, J8-1 to J8-5 and J8-4 to J8-8.<br />
6-12
<strong>POWER</strong>-<strong>MASTER</strong> <strong>500</strong> 430581-004<br />
6. Re mote Con trol Checks:<br />
A) Jumper pins H and J to gether at 19 pin re mote<br />
re cep ta cle on rear panel.<br />
B) Se lect GMAW mode, and RE MOTE on front<br />
panel.<br />
C) TP2-1 10V Ref should mea sure +10VDC all<br />
the time.<br />
D) Switch to GTAW mode.<br />
E) TP2-1 should vary from 0.1 to 10 VDC as the<br />
front panel A/V con trol is var ied from min. to max.<br />
F) Re move jumper from pins H and J of 19 pin re -<br />
mote and jumper pin C to E on 14 pin re mote re -<br />
cep ta cle on the rear panel.<br />
7. Mode Checks:<br />
The fol low ing checks can be done to ver ify that<br />
the cor rect sig nals are com ing from the front<br />
panel board to the main con trol board. If a sig nal<br />
is not cor rect it most likely in di cates a prob lem<br />
with ei ther the front panel board or the rib bon ca -<br />
ble inter-con nect.<br />
For the fol low ing, if the mode is se lected the sig -<br />
nal should read around 1 Volt if it is not se lected it<br />
should read around 14 Volts.<br />
A) GTAW mode, check at R133 (See Fig ure<br />
6-11).<br />
6-13<br />
Arc es tab -<br />
lished<br />
GTAW<br />
SMAW<br />
Lo cal/<br />
Re mote<br />
GMAW<br />
CAG/<br />
Pulse<br />
G) In GTAW mode, TP2-1 should vary from 0.2 to<br />
10 VDC as the front panel con trol is var ied from<br />
min. to max.<br />
H) In GMAW mode, TP2-1 should read 10 VDC<br />
all the time.<br />
If ei ther of these are not cor rect, then ver ify that<br />
the main board is pro vid ing the cor rect volt age at<br />
RV3 (see Fig ure 6-8) for re mote max. This volt -<br />
age should be 10VDC all the time for GMAW<br />
mode, and should vary from 0.1 to 10VDC for<br />
GTAW mode as the front panel con trol is var ied<br />
from min. to max.<br />
If RV3 is ok, then ver ify that the re mote sig nal is<br />
mak ing it to the main board from the amphenol<br />
board. The in put from the 19 pin re mote is at<br />
R269, and the in put from the 14 pin re mote is at<br />
R276. (See Fig ure 6-8)<br />
B) SMAW mode, check at R145 (See Fig ure<br />
6-11).<br />
C) GMAW mode, check at R198 (See Fig ure<br />
6-11).<br />
D) CAG /PULSE mode, check at R200 (See Fig -<br />
ure 6-11)<br />
E) Check RE MOTE/LO CAL mode at R173 (See<br />
Fig ure 6-11). LO CAL = 14 Volts, RE MOTE = 1<br />
Volt.<br />
Fig ure 6-11
430581-004 <strong>POWER</strong>-<strong>MASTER</strong> <strong>500</strong><br />
8. Re lay Checks:<br />
K2 con trols the main contactor. K3 con trols the<br />
precharge in rush contactor, and K4 con trols the<br />
fans.<br />
A) Mea sure the con ti nu ity at J9 when power is<br />
first ap plied to the board.<br />
B) J9-3 to J9-5 checks shorted when power is<br />
first ap plied to the board, open af ter ap prox i -<br />
Fig ure 6-12<br />
mately 7 sec onds. This drives the in rush<br />
contactor.<br />
C) J9-1 to J9-5 checks open when power is first<br />
ap plied, checks shorted af ter ap prox i mately 4<br />
sec onds. This drives the main contactor.<br />
D) J9-7 to J9-5 checks open be fore power is ap -<br />
plied to the board, checks shorted as soon as<br />
power is ap plied. This drives the fans.<br />
J9-1: Main<br />
Contactor<br />
J9-3: In rush<br />
Contactor<br />
J9-5: Common<br />
J9-7: Fans<br />
6-14
<strong>POWER</strong>-<strong>MASTER</strong> <strong>500</strong> 430581-004<br />
9. Cur rent Feed back Ifb:<br />
Ver i fi ca tion of the Ifb sig nal re quires putt ing a<br />
load on the ma chine. Make sure that all con nec -<br />
tors are plugged into the board.<br />
Note: The fol low ing test is in tended as a sim ple<br />
ver i fi ca tion that the cir cuit is func tion ing. To ver -<br />
ify the cal i bra tion of the cur rent and volt age feed -<br />
back sig nals, see the cal i bra tion test later in this<br />
chap ter.<br />
A) Con nect to a load bank set for ap prox i mately<br />
200 amps at 24 volts.<br />
B) Set ma chine for SMAW mode, set Arc Force<br />
to min i mum. Set for LO CAL, and pre set to 200<br />
amps on front panel.<br />
C) With no load on the ma chine Ifb should read 0<br />
volts.<br />
D) En er gize the out put of the ma chine us ing the<br />
front panel contactor switch.<br />
E) TP2-5 Ifb should read 2 Volts, and the amps<br />
dis play on the front panel should read ap prox -i<br />
mately 200 amps.<br />
F) If TP2-5 is ok but the me ter does not read ac -<br />
tual amps cor rectly, then check the volt age feed -<br />
back as well as the arc es tab lished sig nal.<br />
G) If TP2-5 is not cor rect then ver ify the func tion -<br />
al ity and con nec tion of the cur rent sen sor de vice.<br />
It con nects to J2 on the main control board.<br />
H) With the plug dis con nected at the cur rent sen -<br />
sor and power off of the ma chine, the sen sor<br />
should show the fol low ing re sis tance;<br />
Pin 1 to pin 4 > 1 meg<br />
Pin 2 to pin 4 > 1 meg<br />
Pin 3 to pin 4 ap prox i mately 22K<br />
With the sen sor plugged in and power ap plied the<br />
sen sor should have the fol low ing volt ages:<br />
Pin 1 +15V sup ply<br />
Pin 2 -15V sup ply<br />
Pin 3 0 to 4 volts feed back sig nal<br />
Pin 4 cir cuit com mon (same as TP4-2)<br />
Note: If the cur rent sen sor is un plugged from the<br />
board or the sig nal line is bro ken then the ma -<br />
chine will not pro duce any out put and Ifb will<br />
mea sure ap prox i mately 14 Volts all the time.<br />
10. Volt age Feed back Vfb:<br />
Ver i fi ca tion of the Vfb sig nal re quires putt ing a<br />
load on the ma chine. Make sure that all con nec -<br />
tors are plugged into the board.<br />
Note: The fol low ing test is in tended as a sim ple<br />
ver i fi ca tion that the cir cuit is func tion ing. To ver -<br />
ify the cal i bra tion of the cur rent and volt age feed -<br />
back sig nals, see the cal i bra tion test later in this<br />
chap ter.<br />
A) Con nect to a load bank set for ap prox i mately<br />
200 amps at 24 volts.<br />
6-15<br />
B) Set ma chine for GMAW mode, Set to Lo cal<br />
con trol and pre set the out put to 24.0 volts.<br />
C) With no load on the ma chine Vfb should read<br />
0 volts.<br />
D) En er gize the out put us ing the GUN SWITCH<br />
in put (jumper A-B on the 19 pin amphenol re cep -<br />
ta cle on the rear panel). The gun switch must be<br />
used in stead of the front panel contactor switch<br />
or the volt age will not read cor rect.<br />
E) TP2-4 should read 2.4 Volts, and the front<br />
panel volts dis play should read ap prox i mately 24<br />
volts.<br />
F) If TP2-4 is ok but the front panel dis play is<br />
wrong then ver ify both cur rent feed back and arc<br />
es tab lished sig nals.<br />
G) If TP2-4 is not cor rect then ver ify that the out -<br />
put ter mi nal volt age is com ing up to the main<br />
con trol board at J3-1 (plus) to J3-2 (mi nus)<br />
11. Arc es tab lished cir cuit:<br />
Mea sure the arc es tab lished sig nal at R132 (See<br />
Fig ure 6-11).<br />
A) With no load on the ma chine, arc es tab lished<br />
should read 0 volts.<br />
B) With any load greater than ap prox i mately 4<br />
amps and 4 volts, arc es tab lished should read<br />
ap prox i mately 14 volts.<br />
Note: Arc es tab lished should also be pres ent on<br />
pin M of the 19 pin re mote re cep ta cle on the rear<br />
panel.<br />
Calibration Procedure<br />
Volt age and cur rent feed back cal i bra tion pro ce -<br />
dure:<br />
The fol low ing pro ce dure can be used to check<br />
the cal i bra tion of the Power-Mas ter.<br />
A re sis tive load bank set for ap prox i mately<br />
100Amps/24 Volts is re quired. A re sis tive ex ter -<br />
nal shunt and dig i tal me ter set to read av er age<br />
DC mil li volts is re quired to check the cur rent. A<br />
dig i tal me ter set to read av er age DC volts is re -<br />
quired to read the ma chine out put voltage.<br />
A) Set the Power-Mas ter to SMAW, LO CAL, and<br />
arc force set to min i mum.<br />
B) Pre set the out put am per age to 100.<br />
C) En er gize the out put us ing the gun switch in put<br />
(jumper A-B on the 19 pin re mote).<br />
D) Ver ify the am per age read ing on the<br />
Power-Mas ter is 100 ± 4 amps.
430581-004 <strong>POWER</strong>-<strong>MASTER</strong> <strong>500</strong><br />
E) Ad just the out put am per age con trol of the<br />
Power-Mas ter <strong>500</strong> un til the am per age dis play<br />
reads ex actly 100.<br />
F) Ver ify the ac tual load amps us ing the ex ter nal<br />
shunt. Load amps should be 100 ± 4 amps.<br />
There is no cal i bra tion ad just ment, if the cal i bra -<br />
tion is off then ei ther the cur rent sen sor or the<br />
con trol board is out of cal i bra tion. At 100 amps of<br />
load cur rent the cur rent sen sor out put should be<br />
0.80 Volts dc.<br />
G) De-en er gize the out put by re mov ing the gun<br />
switch sig nal.<br />
H) Set the ma chine to GMAW mode.<br />
I) Pre set the out put to 24.0 Volts.<br />
J) En er gize the out put us ing the gun switch in put.<br />
The contactor switch on the front panel can not<br />
be used or the volt age read ings will be off.<br />
K) Ver ify the volt age read ing on the front panel<br />
dis play is 24.0 ± 0.2 volts.<br />
L) Ad just the out put volt age con trol on the front<br />
panel of the Power-Mas ter un til the volt age dis -<br />
play reads ex actly 24.0 volts.<br />
M) Ver ify the out put ter mi nal volts di rectly on the<br />
cop per bus bar of the out put ter mi nal us ing the<br />
ex ter nal dig i tal me ter read ing av er age volts.<br />
Volt age should be 24.0 ± 0.5 Volts.<br />
N) If the volt age is out of cal i bra tion, it can be ad -<br />
justed with R68 on the main con trol board.<br />
6-16
<strong>POWER</strong>-<strong>MASTER</strong> <strong>500</strong> 430581-004<br />
REPAIR PROCEDURES<br />
Output Diode Replacement:<br />
The fol low ing pro ce dure should be used for re -<br />
plac ing a failed out put di ode mod ule.<br />
Step 2<br />
Step 1<br />
Step 3<br />
Step 1: Remove the two nuts securing the<br />
transformer bus bars to the diode bus bars.<br />
Step 2: Loosen the bolts on the other end of the<br />
two transformer bus bars. These bolts do not<br />
need to be removed. Pivot the two transformer<br />
bus bars to the side out of the way.<br />
Step 3: Re move the six bolts hold ing the di ode<br />
bus bars to the di odes. Let the bus bars hang<br />
free on the snub ber wires. It is not nec es sary to<br />
re move the wires.<br />
Step 4: Identify the failed diode module/s.<br />
Step 5: Remove the three mounting screws<br />
holding the diode to the heatsink .<br />
Step 6: Clean the heatsink area where the di ode<br />
mounts.<br />
Fig ure 7-1<br />
Out put Di ode As sem bly<br />
Step 5<br />
See steps 10 & 11<br />
See step 10<br />
Step 7. Ap ply a thin layer of ther mal com pound<br />
to the back of the di ode.<br />
Step 8. Mount di ode on heatsink and hand<br />
tighten mount ing screws. DO NOT TORQUE<br />
YET.<br />
Step 9. At tach bus bars to di odes and hand<br />
tighten.<br />
Step 10. Torque the di ode mount ing screws.<br />
(See Fig ure 7-1). Torque the cen ter mounting<br />
screw first, and then the two outer screws.<br />
Step 11. Torque the six screws hold ing the bus<br />
bars to the di odes (See Fig ure 7-1).<br />
Step 12. Re con nect the trans former bus bars.<br />
7-1
430581-004 <strong>POWER</strong>-<strong>MASTER</strong> <strong>500</strong><br />
IGBT Module Replacement:<br />
The fol low ing pro ce dure can be used to re place<br />
one of the IGBT mod ules. The IGBT can be re -<br />
placed with out re mov ing the ca pac i tor boards, if<br />
the ca pac i tor boards are still ok.<br />
Step 1: Re move the screws hold ing the trans -<br />
former leads to the IGBT mod ules. Re move the<br />
trans former leads from both mod ules so they can<br />
be po si tioned out of the way.<br />
Step 2: Re move the ther mo stat so it can be po si<br />
-<br />
tioned out of the way.<br />
Step 3: Dis con nect the gate drive con nec tor from<br />
the IGBT mod ule be ing re placed.<br />
Step 4: Re move the four mount ing screws hold -<br />
ing the IGBT to the heatsink.<br />
Step 5: Re move the two screws con nect ing the<br />
ca pac i tor boards to the IGBT. Re move the brass<br />
spacer from un der neath the ca pac i tor board<br />
lead.<br />
Step 6: Slide the IGBT up or down to clear the<br />
bus bars on the ca pac i tor boards, and re move<br />
the IGBT.<br />
Step 7: Clean the area of the heatsink where the<br />
IGBT mounts. This area must be free of con tam i -<br />
na tions which would pre vent the IGBT from<br />
mounting flush to the heatsink.<br />
7-2<br />
Step 1<br />
Step 2<br />
Step 1<br />
Step 4<br />
Fig ure 7-2<br />
IGBT Re place ment<br />
Step 5<br />
Step 3<br />
Step 8: Ap ply a thin layer of ther mal com pound to<br />
the back of the new IGBT mod ule.<br />
Step 9: Slide the new IGBT back in place.<br />
Step 10: Re as sem ble in re verse or der of re -<br />
moval. TORQUE MOUNTING SCREWS TO 35<br />
IN-LBS, AND TER MI NAL SCREWS TO 27<br />
IN-LBS.
<strong>POWER</strong>-<strong>MASTER</strong> <strong>500</strong> 430581-004<br />
PARTS LIST<br />
Equipment Identification<br />
All iden ti fi ca tion num bers as de scribed in the In -<br />
tro duc tion chap ter must be fur nished when or -<br />
der ing parts or mak ing in qui ries. This in for ma tion<br />
is usu ally found on the name plate at tached to the<br />
equip ment. Be sure to in clude any dash num bers<br />
fol low ing the Spec i fi ca tion or As sem bly num -<br />
bers.<br />
How To Use This Parts List<br />
The Parts List is a com bi na tion of an il lus tra tion<br />
and a cor re spond ing list of parts which con tains a<br />
The parts lists cov ers the mod els listed be low.<br />
100054: Power-Mas ter <strong>500</strong>P<br />
100060: Power-Mas ter <strong>500</strong><br />
break down of the equip ment into as sem blies,<br />
sub as sem blies, and de tail parts. All parts of the<br />
equip ment are listed ex cept for com mer cially<br />
avail able hard ware, bulk items such as wire, ca -<br />
ble, sleev ing, tub ing, etc., and per ma nently at -<br />
tached items which are sol dered, riv eted, or<br />
welded to other parts. The part de scrip tions may<br />
be in dented to show part re la tion ships.<br />
To de ter mine the part num ber, de scrip tion,<br />
quan tity, or ap pli ca tion of an item, sim ply lo cate<br />
the item in ques tion from the il lus tra tion and re fer<br />
to that item num ber in the cor re spond ing Parts<br />
List.<br />
8-1
430581-004 <strong>POWER</strong>-<strong>MASTER</strong> <strong>500</strong><br />
8-2<br />
Fig ure 8-1<br />
Ap plies to 100054 and 100060 mod els.
<strong>POWER</strong>-<strong>MASTER</strong> <strong>500</strong> 430581-004<br />
Fig ure 8-2<br />
Ap plies to 100054 and 100060 models<br />
8-3
430581-004 <strong>POWER</strong>-<strong>MASTER</strong> <strong>500</strong><br />
8-4<br />
Fig ure 8-3<br />
Ap plies to 100054 and 100060 mod els<br />
See fol low ing page for part num bers.
See Fig ure 8-3<br />
Ap plies to 100054 and 100060 mod els.
430581-004 <strong>POWER</strong>-<strong>MASTER</strong> <strong>500</strong><br />
8-6<br />
Fig ure 8-4<br />
Ap plies to 100054 and 100060 mod els.
<strong>POWER</strong>-<strong>MASTER</strong> <strong>500</strong> 430581-004<br />
Fig ure 8-5<br />
Ap plies to 100054 only.<br />
8-7
430581-004 <strong>POWER</strong>-<strong>MASTER</strong> <strong>500</strong><br />
8-8<br />
Fig ure 8-6<br />
Ap plies to 100054 only.
<strong>POWER</strong>-<strong>MASTER</strong> <strong>500</strong> 430581-004<br />
Fig ure 8-7<br />
Ap plies to 100060 only.<br />
8-9
430581-004 <strong>POWER</strong>-<strong>MASTER</strong> <strong>500</strong><br />
8-10<br />
Fig ure 8-8<br />
Ap plies to 100060 only.
<strong>POWER</strong>-<strong>MASTER</strong> <strong>500</strong> 430581-004<br />
Diagrams<br />
Model Spec i fi ca tion Number Sche matic and Con nec tion Di a -<br />
gram Numbers<br />
Power-Mas ter <strong>500</strong> 100060 830920, 830921<br />
Power-Mas ter <strong>500</strong>P 100054 830924, 830925<br />
9-1


