B7 S4 V-Flow - Evolution Motorsports
B7 S4 V-Flow - Evolution Motorsports
B7 S4 V-Flow - Evolution Motorsports

You also want an ePaper? Increase the reach of your titles
YUMPU automatically turns print PDFs into web optimized ePapers that Google loves.
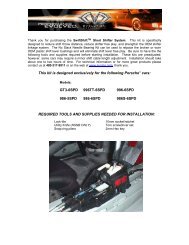
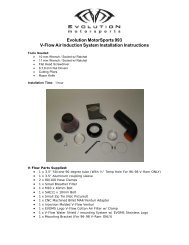
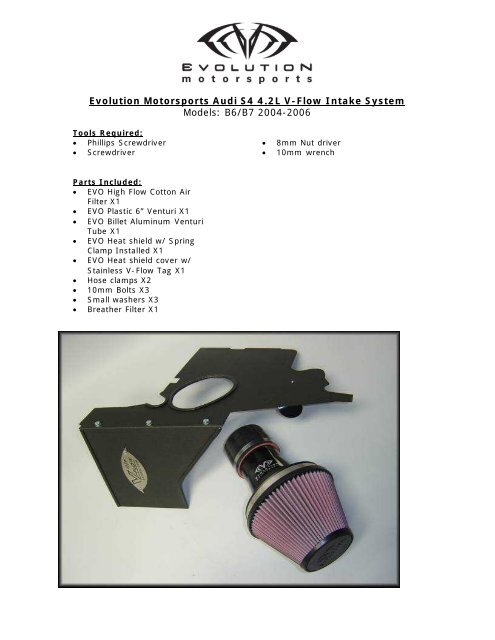
<strong>Evolution</strong> <strong>Motorsports</strong> Audi <strong>S4</strong> 4.2L V-<strong>Flow</strong> Intake System<br />
Models: B6/<strong>B7</strong> 2004-2006<br />
Tools Required:<br />
· Phillips Screwdriver<br />
· Screwdriver<br />
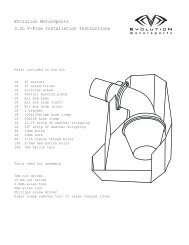
Parts Included:<br />
· EVO High <strong>Flow</strong> Cotton Air<br />
Filter X1<br />
· EVO Plastic 6” Venturi X1<br />
· EVO Billet Aluminum Venturi<br />
Tube X1<br />
· EVO Heat shield w/ Spring<br />
Clamp Installed X1<br />
· EVO Heat shield cover w/<br />
Stainless V-<strong>Flow</strong> Tag X1<br />
· Hose clamps X2<br />
· 10mm Bolts X3<br />
· Small washers X3<br />
· Breather Filter X1<br />
· 8mm Nut driver<br />
· 10mm wrench
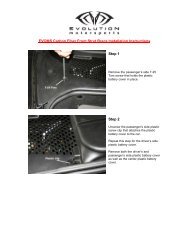
Remove the fresh air ducting that<br />
feeds into the factory airbox from<br />
the front grill. The ducting separates<br />
into two parts manually by hand.<br />
The portion of the duct that attaches<br />
to the front grill is held into place by<br />
two Phillips screws. Remove these<br />
and complete the disassembly of the<br />
fresh air ducting.<br />
Disconnect the secondary air pump<br />
hose from the OEM airbox. Squeeze<br />
the ends of the ring around the clip<br />
and pull.
The wiring harness that attaches to<br />
the airbox is held into place by<br />
several snap in connectors. You can<br />
use a screwdriver to pry them out.<br />
Remove the purge canister<br />
connected to the airbox, the entire<br />
rubber grommet holding the canister<br />
into place slides off the plastic arm.<br />
There is a line that runs along the<br />
airbox. It is held into place by a<br />
metal spring clip. The hose simply<br />
pulls out of the clip.
On the top of the box near the MAF<br />
housing is a snap clip that secures a<br />
fuel line. This clip opens towards the<br />
front corner of the car to free the<br />
line.<br />
The airbox is connected to the fender<br />
by an expanding clip. To remove the<br />
clip you can pull out the center pin<br />
and it will release from the fender.<br />
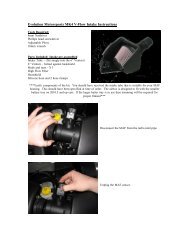
Disconnect the MAF sensor plug from<br />
the housing. Note: there is an arrow<br />
on the MAF housing that corresponds<br />
to a line on the rubber inlet hose.<br />
These must be re-aligned after<br />
installation
Loosen the hose clamp on the rubber<br />
hose connecting to the MAF housing.<br />
Remove screws holding MAF housing<br />
to airbox to await new tube<br />
installation. This will allow for easy<br />
adjustments when fitting the intake<br />
tube.<br />
For easiest removal, the airbox must<br />
be separated into two pieces to be<br />
removed from the car. Loosen all<br />
the screws holding the top of the<br />
airbox to the bottom half.<br />
The top section will easily disconnect<br />
from the bottom assembly once<br />
screws have been removed, you can<br />
now remove the filter
There is a vacuum line that connects<br />
to the back corner of the airbox<br />
(back corner of passenger side). If<br />
you follow this line there is a 2-way<br />
connector a few inches outside the<br />
box that can be disconnected.<br />
The bottom half of the airbox can<br />
now be removed from the car.<br />
There is a fresh air duct at the<br />
bottom that can be disconnected by<br />
slightly pulling the box towards the<br />
rear of the car, then upwards. The<br />
box is held in by rubber grommets so<br />
may require a little force.<br />
Remove the rubber grommets from<br />
the frame rail to prepare installation<br />
of the V-<strong>Flow</strong> heat shield.
Remove the 90-degree secondary air<br />
line connector.<br />
Install the EVOMS V-<strong>Flow</strong> heat shield<br />
in the car. The top cover attaches to<br />
the heat shield by 3x 10mm bolts<br />
with 3x small washers. This step and<br />
the next should be done<br />
simultaneously for easier fitment<br />
purposes.<br />
Install the EVO V-<strong>Flow</strong> air filter to<br />
the EVO plastic venturi, which is<br />
attached to the billet aluminum<br />
Venturi tube. Install this entire<br />
assembly as shown with the silicone<br />
hose and hose clamps. Make sure all<br />
hose clamps are tightened, and the<br />
MAF housing is aligned in its original<br />
position.
Install the supplied breather filter into<br />
the secondary air hose and secure to<br />
the spring clip already fastened to the<br />
heat shield.<br />
Reinstall the factory fresh air ducting<br />
and enjoy!!
Air Filter Cleaning and servicing:<br />
· Gently shake off<br />
and brush<br />
away excess<br />
dirt.<br />
· Spray on<br />
Cleaning<br />
Solution so<br />
that the filter is<br />
fully saturated,<br />
and<br />
let soak for 10<br />
minutes.<br />
· Rinse filter from<br />
the clean side<br />
to the dirty<br />
side until water<br />
comes through<br />
clear. Use only<br />
low pressure<br />
from a tap or<br />
hose.<br />
· Allow filter to<br />
dry. A fan may<br />
be used to<br />
speed process.<br />
· DO NOT use<br />
heated air<br />
blowers,<br />
compressed<br />
air, or open<br />
flame.<br />
· Make one careful<br />
application of<br />
Performance<br />
air filter Oil to<br />
each filter<br />
pleat.<br />
· Allow oil to seep<br />
into filter for<br />
20 minutes.<br />
· Re-oil any areas<br />
that still<br />
appear dry.<br />
· Do not over oil.<br />
CLEAN:<br />
Clean your EVO filter every 5,000 to 10,000 miles for normal driving, and more<br />
often for off-road and heavy dust conditions.<br />
CHECK YEARLY:<br />
If your annual mileage is low, check filter once a year to see if oiling is needed.