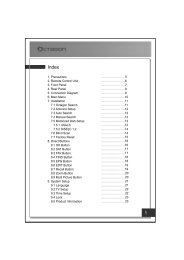
User's Manual - Freeviewshop.co.nz
User's Manual - Freeviewshop.co.nz
User's Manual - Freeviewshop.co.nz

You also want an ePaper? Increase the reach of your titles
YUMPU automatically turns print PDFs into web optimized ePapers that Google loves.
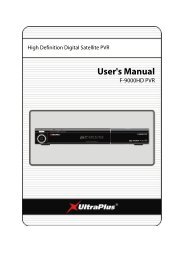
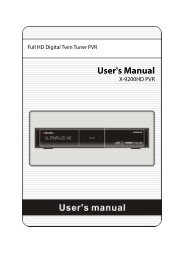
User’s <strong>Manual</strong><br />
XDSR385HD<br />
Full HD Digital Satellite Receiver<br />
Personal Video Re<strong>co</strong>rder<br />
• Please read this User’s <strong>Manual</strong> carefully before installing the receiver.<br />
• This document is subject to update without perior notice.<br />
• This document may be available in other languages. Please visit our<br />
website: http://www.xcruiser.net
The Lightning Flash with arrowhead symbol within an<br />
equilateral triangle, is intended to alert the user to the presence<br />
of un-insulated “dangerous voltage” within the product<br />
enclosure that may be of suicient magnitude to <strong>co</strong>nstitute a<br />
risk of shock to persons<br />
3. Copyright<br />
This manual is protected by <strong>co</strong>pyright<br />
laws.<br />
Copy, use and reproduction of this<br />
manual in part or whole without<br />
Manufacturer’s prior written approval are<br />
prohibited.<br />
7<br />
To reduce the risk of electric shock, do not remove the <strong>co</strong>ver (or back).<br />
No user serviceable parts are inside.<br />
Refer servicing to qualiied service personnel.<br />
4. Disclaimer<br />
The manufacturers, distributors and<br />
agents are not liable to any kind of<br />
damage caused by the use of the<br />
information <strong>co</strong>ntained in this manual.<br />
The instruction and descriptions which<br />
this manual <strong>co</strong>ntains are based on the<br />
time of this manual’s production.<br />
The manufacturer <strong>co</strong>nstantly updates it<br />
with new functions and technology.<br />
All the speciications are subject to<br />
change without prior notice.<br />
XDSR385HD<br />
The exclamation point within an equilateral triangle is intended<br />
to alert the user to the presence of important operating and<br />
maintenance (servicing) instructions in the literature ac<strong>co</strong>mpanying<br />
the product<br />
5. Trademarks<br />
HDMI, the HDMI logo and High-<br />
Deinition Multimedia Interface are<br />
trademarks or registered trademarks of<br />
HDMI Licensing LLC
2. Accessories<br />
9<br />
XDSR385HD<br />
User’s <strong>Manual</strong> Remote Controller RCA cable (Option)<br />
AAA size batteries X2 HDMI cable USB hub<br />
Adaptor TV mount bracket (Optional) IR extension (Optional)<br />
NOTE: If any accessories listed above are missing, <strong>co</strong>ntact the sales representative where you purchased this unit.<br />
It is ready to be mounted behind of the TV. Use the screws provided to hold the <strong>co</strong>mponents in place.
Hardware Description<br />
1. Front Panel Coniguration<br />
1. Display :<br />
The 4-digit shows channel number or menu state in<br />
normal mode, shows local time in standby mode.<br />
2. POWER Button:<br />
Press to switch between STANDBY and POWER ON<br />
modes.<br />
3. CH Up/Down Button:<br />
Press to change services in normal mode, to move<br />
the highlighted-bar UP/DOWN in menu mode.<br />
10<br />
XDSR385HD<br />
4. STANDBY / REMOTE Indication LED (RED / GREEN):<br />
The LED (RED) lights on in standby mode. / The LED<br />
(GREEN) lights on when a key on the Remote Control<br />
is pressed.<br />
5. Remote Sensor:<br />
Receives signal from remote <strong>co</strong>ntroller.
2. Rear Panel Coniguration<br />
1. IR extension : The 2.5mm mini plug is<br />
<strong>co</strong>nnected to the “IR Rec” jack to use IR<br />
extension when XDSR385HD is mounted<br />
with optional bracket. (Front remote<br />
sensor will not be operated when IR<br />
Extension is <strong>co</strong>nnected)<br />
2. PCMCIA : To receive other pay-tv service<br />
you need a CA-Module(Viaccess, Irdeto,<br />
Nagravison, etc.) and a smart card from<br />
the service provider.<br />
3. SMART CARD READER : Insert smart card for<br />
11<br />
encrypted service access.<br />
4. LNB IN: Use to <strong>co</strong>nnect a satellite antenna.<br />
5. LNB OUT: Use it when <strong>co</strong>nnecting to<br />
another STB for loop-through.<br />
6. RS-232C : Serial port for irmware update<br />
and data transfer.<br />
7. Ethernet : Local area network port for<br />
direct <strong>co</strong>mputer <strong>co</strong>nnection.<br />
8. USB : Use it when <strong>co</strong>nnecting to external<br />
USB storage device.<br />
XDSR385HD<br />
9. HDMI : Connects to the TV by using a<br />
HDMI cable for the best quality picture<br />
and audio.<br />
10. A/V OUT : Connects to the TV or VCR using<br />
a optional RCA cable (Stereo audio<br />
output / White, Red, Composite video<br />
output / Yellow)<br />
11. SPDIF : Connects to the audio system<br />
using a S/PDIF cable. (digital audio)<br />
12. D/C power socket : Connects the adaptor
12<br />
XDSR385HD<br />
3. Remote Control Unit 1. POWER: Turns the STB On/Of.<br />
2. MUTE / Resolution: Turns the sound On/Of. / To select the<br />
resolution format press and hold Resolution button. You will<br />
see the resolution menu. Each time you press the Resolution<br />
button, the resolution changes in the following sequence:<br />
576i > 576p > 720p > 1080i > 1080p by pressing the Exit button it<br />
turns the sound On/Of again.<br />
3. Numeric: Controls the numerical operation and service<br />
numbers directly.<br />
4. Subtitle: To show multilingual subtitle.<br />
5. Teletext: To show the digital teletext.<br />
6. OK or Service List: Show the service list in non-menu mode and<br />
select an item or <strong>co</strong>nirm in menu mode.<br />
7. ARROW Buttons<br />
a. Up & Down Buttons: To change the value of a selected item with<br />
preprogrammed values in menu.<br />
b. Left & Right Buttons: To move the cursor left and right in menu.<br />
8. Menu: To enter the main menu or to move to the previous<br />
menu.<br />
9. EXIT: Exit from the menu or pop-up window.<br />
10. Play List: To show the ile list in the USB Storage Device or<br />
Network Storage Device.
11. Favorite: To display the satellite group and the favorite groups.<br />
12. EPG (Electronic Program Guide): Show the TV/Radio program guide.<br />
13. Recall: Moves to previous service.<br />
14. Volume Up & Down: To change the Volume.<br />
15. Play / Time shift: Display the progress bar of playback when no<br />
progress bar is displayed. Start playback with normal speed.<br />
Return to normal speed from trick mode.<br />
16. Channel Up & Down: To change service channel.<br />
17. Pause: This key is used to pause the video. Press once more to<br />
resume the video.<br />
18. Rewind: Rewinds at high speed. Each time you press this button<br />
the rewind speed is increased.<br />
19. STOP: To stop time shifting, play back or re<strong>co</strong>rding.<br />
13<br />
XDSR385HD<br />
20. Fast Forward: Fasts forward at high speed. Each time you press this<br />
button the speed is increased.<br />
21. Previous File: To play the previous MP3 ile in MP3 play mode. This<br />
button is also used to jump back to beginning of re<strong>co</strong>rding<br />
during a playback.<br />
22. Re<strong>co</strong>rding: To start Re<strong>co</strong>rding.<br />
23. Next File: To play the next ile. This button is also used to jump to<br />
end of re<strong>co</strong>rding during a playback.<br />
24. Color Buttons<br />
a. RED: Used for special function in menu. RED key is used to sort<br />
lists in service list or go to previous day search in EPG or make/<br />
delete the current position as a bookmark.<br />
b. GREEN: Used for special function in menu. Green key is used to<br />
set favorites setting in service list or go to the next bookmark<br />
position.<br />
c. YELLOW: Used for special function in menu. Yellow key is used to<br />
ind service in service list or change the audio track.<br />
d. BLUE: Used for special function in menu. Blue key is used to set<br />
service list option in service list or display Multi-Picture.<br />
25. Page Up& Down: Move to the next or previous page if more than one<br />
page are available. This button also is change the location of sub<br />
picture in PIP.<br />
26. TV/RADIO: Switches between TV and Radio.<br />
27. Information: Shows the information of current program. If you press<br />
one more, detail information box will be shown.<br />
28. PIP Buttons<br />
a. PIP (Picture in Picture): To set PIP window.<br />
b. PIP Swap: Switching between main-picture and sub-picture<br />
c. PIP (Picture in Picture) Service List: To shown the sub-picture service list.
Guide of Functions<br />
1. Selecting a Service<br />
To select the desired service<br />
(channel), please refer to the<br />
instructions below.<br />
1.1 Using CH UP/DOWN buttons<br />
You can navigate between<br />
services by pressing CH UP/DOWN<br />
buttons. Whenever you press<br />
the CH UP (DOWN) button, current<br />
service will be changed to next/<br />
previous service. Please press<br />
CH UP or CH DOWN button until<br />
you ine the service you want to<br />
watch.<br />
1.2 Using Service List<br />
To select the desired service<br />
in the service list, you should<br />
irstly display the service list by<br />
pressing the OK button.<br />
Use the ARROW buttons to select<br />
a desired service and press the<br />
OK button.<br />
19<br />
You can see that the service is<br />
changed in the small screen on<br />
the top-right.<br />
To watch that service, press the<br />
OK button once more.<br />
To watch the previous service,<br />
press the EXIT button.<br />
In the Service List window,<br />
you can also select additional<br />
functions with the COLOR<br />
buttons. Press the RED button,<br />
and you can sort the services<br />
by the Alphabet, Transponder<br />
(TP), Group, Tuner and CAS<br />
(Conditional Access System).<br />
Press the GREEN button, and you<br />
can add the services to one of<br />
10 Favorite List.<br />
XDSR385HD<br />
Press the YELLOW button, and you<br />
can search & ind the service via<br />
a virtual keyboard.<br />
Press the BLUE button, and you<br />
can adjust service list option.<br />
1.3 Using Simple Service List<br />
If you press NUMERIC buttons or<br />
UP/DOWN ARROW button, instant<br />
service list will be displayed.<br />
Select the desired service by<br />
using the ARROW button, and<br />
press OK button to watch.<br />
You can also enter the service<br />
number directly by using the<br />
NUMERIC button.
1.4 Using Recent Service List<br />
To display recent service list,<br />
press the RECALL button for a<br />
short time.<br />
To return to the previous service<br />
that you were watching, press<br />
RECALL button twice or for a<br />
longer time.<br />
Choose the service from the<br />
recent service list, use the ARROW<br />
button to select, and then press<br />
the OK button.<br />
Press EXIT button to exit from<br />
the recent service list.<br />
2. Information Window<br />
If you want to view the<br />
information of the current<br />
service that you are watching,<br />
press INFO button. Then the<br />
Information window will be<br />
displayed.<br />
This Information window is<br />
automatically displayed when<br />
changing between the services.<br />
This window <strong>co</strong>ntains much<br />
useful information such as<br />
service number, service name,<br />
scrambled types of service,<br />
teletext, subtitle, Audio<br />
indication for Dolby Digital,<br />
Time duration of the service and<br />
so on.<br />
20<br />
By pressing INFO button once<br />
again, you can get more<br />
detailed information about the<br />
service.<br />
3. Multi-Picture Display.<br />
Press the BLUE button to display<br />
multiple pictures and use the<br />
RED button to select the display<br />
options for 9 or 12 multiple<br />
pictures.<br />
XDSR385HD<br />
4. Electronic Program<br />
Guide (EPG)<br />
Electronic Program Guide (EPG)<br />
allows you to see program<br />
schedule and program information<br />
from the service which<br />
includes this data as part of their<br />
transmission. Multiple services<br />
will be shown with a time line of<br />
programming events. The EPG<br />
supplies additional information<br />
of channel service, such<br />
as program listings, start/end<br />
times and detailed information<br />
about the program listings for<br />
all available services. The availability<br />
and details of information<br />
of these program details can be
Menu Map<br />
System Tools<br />
Coniguration<br />
31<br />
1. Storage Manager<br />
2. Timer Settings<br />
3. Service List Manager<br />
4. Data Transfer<br />
1. Re<strong>co</strong>rding Option<br />
2. Parental Control<br />
3. Display Setting<br />
4. Time Setting<br />
5. Language Setting<br />
6. A/V Output Setting<br />
Main Menu<br />
Installation<br />
Utilities<br />
XDSR385HD<br />
1. Dish Setting<br />
2. Positioner Setting<br />
3. Service Search<br />
4. Network Setting<br />
5. System Re<strong>co</strong>very<br />
6. System Information<br />
1. Calculator<br />
2. Calendar<br />
3. CAS<br />
4. Plugin<br />
5. Free TV+<br />
6. Internet TV+
& Channel De<strong>co</strong>der<br />
SpeciicationsTuner<br />
Input Connector<br />
Loop through out<br />
Frequency Range<br />
Input Impedance<br />
Signal Level<br />
LNB Power<br />
22KHz Tone<br />
DISEqC Control<br />
Demodulation<br />
Input Symbol Rate<br />
FEC De<strong>co</strong>der<br />
50<br />
F-type, IEC 169-24, Female<br />
F-type, IEC 169-24, Female<br />
950MHz ~ 2150MHz<br />
75Ω, unbalanced<br />
-65 to -25dBm<br />
13/18VDC, max.400mA<br />
(22±2)KHz, (0.6±0.2)V<br />
V1.0/1.2/USALS Compatible<br />
QPSK / 8PSK<br />
2 ~ 67.5 Ms/s(QPSK of DVB-S), 2 ~ 52.5 Ms/s(8PSK of DVB-S2)<br />
1/2, 2/3, 3/4, 5/6 and 7/8 with Constraint Length K=7(DVB-S)<br />
3/5, 2/3, 3/4, 4/5, 5/6, 8/9 and 9/10 (DVB-S2)<br />
MPEG Transport Stream A/V De<strong>co</strong>ding<br />
Transport Stream H.264(MPEG-4 part 10, MPEG-4/AVC and H26L)<br />
MPEG-II ISO/IEC 13818-2/11172-2<br />
Proile Level MPEG-4/AVC MP@L4, MPEG-II MP@HL<br />
Input Rate Max. 80Mbit/s<br />
Video Formats 4:3 Letter Box, 4:3 PanScan, 16: 9<br />
Video Resolution 720 x 576i, 720 x 576p, 720 x 480i, 720 x 480p,<br />
1280 x 720p, 1920 x 1080i, 1920 x 1080p(supports only HDMI)<br />
Audio De<strong>co</strong>ding Dolby Digital, MPEG-1 Layer 1,2 and 3<br />
Audio Mode Stereo/Joint stereo/Mono, Dolby AC-3<br />
Sampling Rate 32KHz, 44.1KHz and 48KHz (Ac<strong>co</strong>rding to input)<br />
Main System<br />
Main Processor<br />
Memory<br />
STi chipset<br />
Flash-ROM: 32 Mbyte, SDRAM: 256 Mbytes , EEPROM: 256 bytes<br />
XDSR385HD
Audio / Video & Data IN/OUT<br />
Front / Rear Panel<br />
Power Supply<br />
RCA<br />
HDMI<br />
OPTIC<br />
RS-232C<br />
USB<br />
Ethernet<br />
IR extension<br />
Slot<br />
Buttons<br />
Indicators<br />
Input Voltage<br />
Type<br />
Power Consumption<br />
Protection<br />
Physical Speciication<br />
Size (W x H x D)<br />
Weight (Net)<br />
Operating Temp.<br />
Storage Temp.<br />
CVBS Video Output, Audio L, R Output<br />
Video & Audio Output<br />
AC-3 Dolby Digital (SPDIF)<br />
9 pin D-SUB (Male) type, Transfer rate 115Kbps<br />
USB 2.0 Host Support<br />
TX 10/100M Base<br />
Removable IR extension<br />
Common interface & 1 Smart Card Slot (Rear)<br />
3 Buttons(Standby, CH UP/DOWN)<br />
1 LEDs (Standby, Power and Remote: DUAL TYPE)<br />
AC 100 ~ 240V, 50/60Hz<br />
ADAPTOR (12V,2A)<br />
Max.24W<br />
Separate Internal Fuse & Lighting protection<br />
220mm X 35mm X 145mm<br />
0.6 Kg<br />
0°C ~ +45°C<br />
-10°C ~ +70°C<br />
51<br />
XDSR385HD<br />
Speciications and features are subject to change without prior notice.