User guide - Fisher & Paykel
User guide - Fisher & Paykel
User guide - Fisher & Paykel

Create successful ePaper yourself
Turn your PDF publications into a flip-book with our unique Google optimized e-Paper software.
DishDrawer TM dishwasher<br />
DD24, DD60<br />
DD36, DD90 models<br />
<strong>User</strong> <strong>guide</strong><br />
US CA NZ AU GB IE
This user <strong>guide</strong> is an accompaniment to your ‘Quick start <strong>guide</strong>’ which is included<br />
with your dishwasher.<br />
For operating instructions, see your ‘Quick start <strong>guide</strong>’. If you no longer have your ‘Quick start<br />
<strong>guide</strong>’, you can download it from our local website, listed on the back cover.<br />
Refer to your ‘Quick start <strong>guide</strong>’ for information on:<br />
Starting a wash<br />
Wash programs and when to use them<br />
Controls<br />
Dos and don’ts of loading<br />
Preference options and how to change their settings
Contents<br />
Electrical connection (GB IE only) 2<br />
Safety and warnings 3<br />
Caring for your dinnerware 7<br />
Racking features 8<br />
Loading suggestions 12<br />
Water hardness and dishwashing 13<br />
Wash programs and detergent quantities 14<br />
Adding detergent 16<br />
Using rinse aid 18<br />
Water softener 19<br />
<strong>User</strong> maintenance instructions 22<br />
Troubleshooting 30<br />
If there is a fault 33<br />
How to attend to a fault<br />
Classic models 34<br />
Designer models 36<br />
Integrated models with badge 38<br />
Integrated models with remote control 40<br />
Warranty and service 42<br />
Wash program data 44<br />
Standards test<br />
USA and Canada 52<br />
New Zealand and Australia 54<br />
Great Britain and Ireland 56<br />
Important!<br />
SAVE THESE INSTRUCTIONS<br />
The models shown in this user <strong>guide</strong> may not be available in all markets and are<br />
subject to change at any time. For current details about model and specification<br />
availability in your country, please visit our local website listed on the back cover<br />
or contact your local <strong>Fisher</strong> & <strong>Paykel</strong> dealer.<br />
1
2<br />
Electrical connection (GB IE only)<br />
For Great Britain only<br />
Important!<br />
This appliance must be earthed.<br />
Fuse replacement<br />
The mains lead of this appliance is fitted with a<br />
BS 1363A 13 A fused plug. To change a fuse in<br />
this type of plug, use an ASTA approved fuse to<br />
BS 1362 type and proceed as follows:<br />
1 Remove the fuse cover and fuse.<br />
2 Fit the replacement 13A fuse into the fuse cover.<br />
3 Refit both into plug.<br />
Fuse cover<br />
Important!<br />
The fuse cover must be refitted when changing a fuse and if the fuse cover is lost, the plug<br />
must not be used until a correct replacement is fitted.<br />
Correct replacements are identified by the colour insert or the colour embossed in words on<br />
the base of the plug.<br />
Replacement fuse covers are available from your local electrical store.<br />
For the Republic of Ireland<br />
The information given in respect to Great Britain will frequently apply, but a third type of plug<br />
and socket is also used: the 2-pin, side earth type.<br />
Socket outlet / plug (valid for both countries)<br />
If the fitted plug is not suitable for your socket outlet, please contact an Authorised Service<br />
Agent. Please do not attempt to change the plug yourself. This procedure must be carried out<br />
by a qualified service technician in compliance with the manufacturer’s instructions and current<br />
standard safety regulations.<br />
Fuse
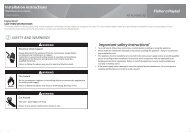
Safety and warnings<br />
Your dishwasher has been carefully designed to operate safely during normal dishwashing<br />
procedures. Please keep the following instructions in mind when you are using your dishwasher.<br />
IMPORTANT SAFETY INSTRUCTIONS<br />
WARNING! - When using your dishwasher, follow basic precautions, including the following:<br />
Read all instructions before using the dishwasher.<br />
The information in this manual must be followed to minimise the risk of fire or explosion or to<br />
prevent property damage, personal injury or loss of life.<br />
Use the dishwasher only for its intended function as described in this user <strong>guide</strong> and in your<br />
‘Quick start <strong>guide</strong>’.<br />
This appliance is intended to be used in household and similar applications such as:<br />
– staff kitchen areas in shops, offices and other working environments;<br />
– farm houses;<br />
– by clients in hotels, motels and other residential type environments;<br />
– bed and breakfast type environments.<br />
Use only detergents or rinse aid recommended for use in a domestic dishwasher and keep them<br />
out of reach of children. Check that the detergent dispenser is empty after the completion of each<br />
wash program.<br />
When loading items to be washed, locate sharp items so that they are not likely to damage the<br />
internal lid of the dishwasher and load sharp knives with the handle up to reduce the risk of cuttype<br />
injuries.<br />
Do not touch the filter plate (the round metal disc in the dishwasher base) during or immediately<br />
after use, as it may be hot from the heater plate underneath.<br />
Do not operate your dishwasher unless all enclosure panels are properly in place.<br />
Do not tamper with the controls.<br />
Do not abuse, sit on, stand in or on the drawer or dish rack of the dishwasher.<br />
The drawer should not be left in the open position since this could present a tripping hazard.<br />
The adjustable racks are designed to support cups, glasses and kitchen utensils. When the<br />
adjustable racks are in the drawer do not lean on or use them to support your body weight.<br />
To reduce the risk of injury, do not allow children to play in or on the dishwasher.<br />
Under certain conditions, hydrogen gas may be produced in a hot water heater system that has<br />
not been used for two weeks or more. HYDROGEN GAS IS EXPLOSIVE. If the hot water system has<br />
not been used for such a period, before using the dishwasher, turn on all hot water taps and let<br />
the water flow from each for several minutes. This will release any accumulated hydrogen gas. As<br />
the gas is flammable, do not smoke or use an open flame during this time.<br />
Remove the door to the washing compartment when removing an old dishwasher from service<br />
or discarding it.<br />
Some dishwasher detergents are strongly alkaline. They can be extremely dangerous if<br />
swallowed. Avoid contact with the skin and eyes and keep children away from the dishwasher<br />
when the door is open. Check that the detergent receptacle is empty after completion of the wash<br />
cycle.<br />
3
4 Safety and warnings<br />
IMPORTANT SAFETY INSTRUCTIONS<br />
Installation<br />
This dishwasher must be installed and located in accordance with the Installation instructions<br />
before it is used. If you did not receive Installation instructions with your dishwasher, you<br />
can order them by calling your Authorised Repairer or download them from our local <strong>Fisher</strong> &<br />
<strong>Paykel</strong> website, listed on the back cover.<br />
Installation and service must be performed by a qualified technician.<br />
If the power supply cord is damaged, it must be replaced by a dealer or Authorised Repairer or a<br />
similar qualified trades person in order to avoid a hazard.<br />
Ensure the dishwasher is secured to adjacent cabinetry using the brackets provided. Failure to do<br />
so may result in an unstable product, which may cause damage or injury.<br />
Do not operate this appliance if it is damaged, malfunctioning, partially disassembled or has<br />
missing or broken parts, including a damaged power supply cord or plug.<br />
Do not store or use petrol, or other flammable vapours and liquids in the vicinity of the<br />
dishwasher.<br />
Connect to a properly rated, protected and sized power supply circuit to avoid electrical overload.<br />
Make sure that the power supply cord is located so that it will not be stepped on, tripped over or<br />
otherwise subject to damage or stress.<br />
Do not install or store the dishwasher where it will be exposed to temperatures below freezing or<br />
exposed to weather.<br />
Do not use an extension cord or a portable electrical outlet device (e.g. multi-socket outlet box)<br />
to connect the dishwasher to the power supply.<br />
This appliance must be grounded. In the event of a malfunction or breakdown, grounding will<br />
reduce the risk of electric shock by providing a path of least resistance for electric current. This<br />
appliance is equipped with a cord having an equipment-grounding conductor and a grounding<br />
plug. The plug must be plugged into an appropriate outlet that is installed and grounded<br />
in accordance with all local codes and ordinances. WARNING - Improper connection of the<br />
equipment-grounding conductor can result in a risk of electric shock. Check with a qualified<br />
electrician or service representative if you are in doubt as to whether the appliance is properly<br />
grounded. Do not modify the plug provided with the appliance; if it will not fit the outlet, have a<br />
proper outlet installed by a qualified technician.<br />
If the dishwasher is installed as a permanently connected appliance:<br />
GROUNDING INSTRUCTIONS - This appliance must be connected to a grounded metal, permanent<br />
wiring system, or an equipment-grounding conductor must be run with the circuit conductors<br />
and connected to the equipment-grounding terminal or lead on the appliance.
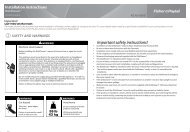
Safety and warnings<br />
IMPORTANT SAFETY INSTRUCTIONS<br />
Maintenance<br />
Disconnect the appliance from the power supply before any cleaning or maintenance.<br />
When disconnecting the appliance pull the plug rather than the power supply cord or junction of<br />
cord to avoid damage.<br />
Do not repair or replace any part of the appliance or attempt any servicing unless specifically<br />
recommended in this user <strong>guide</strong>. We recommend that you contact Customer Care to arrange<br />
service. See your ‘Service and warranty’ booklet for contact details.<br />
Keep the floor around your appliance clean and dry to reduce the possibility of slipping.<br />
Keep the area around/underneath your appliance free from the accumulation of combustible<br />
materials, such as lint, paper, rags and chemicals.<br />
Models with a remote control: Do not attempt to recharge, short-circuit, disassemble, heat or<br />
throw the remote control battery into a fire. Dispose of an old battery responsibly, keeping it out<br />
of reach of children.<br />
Operational<br />
Under no circumstances should you open the drawer whilst the dishwasher is in operation.<br />
Always press the button to pause and wait until you hear the three additional beeps before<br />
opening the drawer.<br />
The dishwasher must be used with the motor assembly, filter plate, drain filter and spray arm(s) in<br />
place. To identify what these parts are, see drawings in section ‘<strong>User</strong> maintenance instructions’ of<br />
this user <strong>guide</strong>.<br />
Take care when loading the drawer not to load dishware items so they prevent the internal lid<br />
from properly sealing with the drawer. Items should be placed so they do not protrude above<br />
and/or forced into the drawer, otherwise a service call may result.<br />
Household appliances are not intended to be played with by children. Children or persons with a<br />
disability which limits their ability to use the appliance, should have a responsible person instruct<br />
them in its use. The instructor should be satisfied that they can then use the appliance without<br />
danger to themselves or their surroundings.<br />
Close supervision is necessary if this appliance is used by or near children. Do not allow children<br />
to play inside, on or with this appliance or any discarded appliance.<br />
If a dishwasher cleaner is used, we would strongly recommend a wash program with detergent<br />
should be run immediately afterward, to prevent any damage to the dishwasher.<br />
The dishwasher is designed for washing normal household utensils. Items that are contaminated<br />
by petrol, paint, steel or iron debris, corrosive, acidic or alkaline chemicals are not to be washed in<br />
the dishwasher.<br />
If the dishwasher is not being used for long periods of time, turn the electricity and water supply<br />
to the dishwasher off.<br />
5
6 Safety and warnings<br />
IMPORTANT SAFETY INSTRUCTIONS<br />
Operational - models with remote control<br />
To prevent unauthorized use, keep the remote control out of reach of children.<br />
Make sure that you keep the remote away from water and steam. Do not immerse and take care<br />
not to drop the remote control into water. This may damage the parts or lead to malfunction.<br />
Damage or malfunction caused by exposure to water or steam is not covered by warranty.<br />
Do not drop, step on or otherwise impact the remote control. This may damage the parts or lead<br />
to malfunction.<br />
This device complies with part 15 of the FCC Rules. Operation is subject to the following two<br />
conditions: (1) This device may not cause harmful interference, and (2) this device must accept<br />
any interference received, including interference that may cause undesired operation.<br />
Do not tamper with or modify the remote control or the dishwasher in any way, as doing so will<br />
void the certification of the device.<br />
This device complies with Industry Canada licence-exempt RSS standard(s). Operation is subject<br />
to the following two conditions: (1) this device may not cause interference, and (2) this device<br />
must accept any interference, including interference that may cause undesired operation of the<br />
device.<br />
Complies with<br />
IDA Standards<br />
DB104887<br />
SAVE THESE INSTRUCTIONS
Caring for your dinnerware<br />
The combination of high temperatures and dishwasher detergent may cause damage to<br />
some items if they are washed in the dishwasher. Remember, if in any doubt about any aspect<br />
concerning items washed in the dishwasher, follow the instructions from the manufacturer of the<br />
items, or wash the item by hand.<br />
Cutlery & silverware<br />
All cutlery and silverware should be rinsed immediately after use to prevent tarnishing caused by<br />
some foods. The Rinse wash program is useful for this. Silver items should not come into contact<br />
with stainless steel, eg other cutlery. Mixing these items can cause staining. Remove silver cutlery<br />
from the dishwasher and hand dry it immediately after the program has finished.<br />
Aluminium<br />
Aluminium can be dulled by dishwasher detergent. The degree of change depends on the<br />
quality of the product.<br />
Other metals<br />
Iron and cast iron objects can rust and stain other items. Copper, pewter and brass tend to stain.<br />
Woodware<br />
Wooden items are generally sensitive to heat and water. Regular use in the dishwasher may<br />
cause deterioration over time. If in doubt, wash by hand.<br />
Glassware<br />
Most everyday glassware is dishwasher safe. Crystal, very fine and antique glassware may etch<br />
that is, become opaque. You may prefer to wash these items by hand.<br />
Plastic<br />
Some plastic may change shape or colour with hot water. Check manufacturer’s instructions<br />
about washing plastic items. Washable plastic items should be weighed down so they do not<br />
flip over and fill with water or fall through the base rack during the wash. Use the multi-purpose<br />
clip (supplied with some models only) to hold plastic items in place.<br />
Decorated items<br />
Most modern china patterns are dishwasher safe. Antique items, those with a pattern painted<br />
over the glaze, gold rims or hand painted china may be more sensitive to machine washing. If in<br />
doubt, wash by hand.<br />
Glued items<br />
Certain adhesives are softened or dissolved in machine washing. If in doubt, wash by hand.<br />
7
8<br />
Racking features<br />
Cutlery basket<br />
To reduce the risk of injury, we recommend loading knives and sharp utensils with handles<br />
facing up.<br />
Mix spoons, knives and forks within each section to stop cutlery nesting together and to ensure<br />
the water circulates freely.<br />
Keep stainless steel from touching silver cutlery to avoid staining.<br />
Removable small items container<br />
Small, light items like baby bottle teats are best placed into the small items container to prevent<br />
them from being displaced during the wash.<br />
You can extend your cutlery basket by clipping the container on its side.<br />
Cutlery baskets will vary depending on model.
Racking features<br />
Removable small items container<br />
To optimise the cutlery space within the basket, the small items container can be placed<br />
elsewhere on the base rack. If laid flat, make sure the solid plastic side is facing up.<br />
If you place a fully laden small items container under the adjustable racks, it is best to leave the<br />
rack space directly above the container empty: there may not be enough water reaching items<br />
that are placed there.<br />
Removable tablet tray<br />
If you are using dishwasher tablets, place them on the removable tablet tray, as shown.<br />
See also ‘Adding detergent’ for more information.<br />
Important!<br />
Dishwasher tablets should not be in direct contact with dishes or cutlery.<br />
9
10 Racking features<br />
Racking features will vary depending on model.<br />
Stemware notches<br />
These notches help support long-stemmed glassware.<br />
Glass supports<br />
These clip on the rack wires to give your tall glasses extra<br />
stability.<br />
Spacing-adjustable tines<br />
(DD24/DD60 models only)<br />
Designed to fit deep bowls (wide spacing) or small plates<br />
(narrow spacing), depending on adjustment.<br />
To adjust between wide and narrow spacings, slide the tines<br />
backward or forward by the handle at the front.<br />
Cup rack with folding support wire<br />
(DD36/DD90 models only)<br />
Fold the wire up to support tall glasses.
Racking features<br />
11<br />
Adjustable racks<br />
You can adjust these independently of each other to any height:<br />
1 Fold up to unlock the rack.<br />
2 Adjust the height to suit by sliding up or down.<br />
3 Fold down to lock in position.<br />
Fold the racks away if you need the space.<br />
Knife clip<br />
This clips onto the adjustable racks and supports knives and<br />
other utensils during the wash.<br />
Always ensure that knife blades are facing down.<br />
Multi-purpose clip<br />
(DD36/DD90 models only)<br />
This keeps flimsy items (eg plastic<br />
lids and bottles) or large platters<br />
and plates stable, so they cannot<br />
be dislodged during the wash.<br />
Slide the item between the<br />
prongs of the clip.<br />
Folding tines<br />
For optimum stability, place larger plates between the longer<br />
tines in the front.<br />
Release and fold the tine sections down towards each other if you<br />
need the space for pots or other large items.
12 Loading suggestions<br />
When loading your drawer, make sure that<br />
you place items so that water coming from the rotating spray arms below can reach all areas<br />
(wash performance will be reduced if it can’t)<br />
nothing blocks the water from getting to items on the adjustable racks<br />
glass and other fragile items are stable, so that they do not accidentally topple and break during<br />
the wash.<br />
How NOT to load your drawer<br />
Overcrowded and wash water will not<br />
reach some of the dinnerware.<br />
Cups, glasses and bowls must have their<br />
openings facing down.<br />
Ensure dishware items are not forced into<br />
or protrude out of the drawer, as this may<br />
prevent the internal lid of the drawer from<br />
properly sealing which could result in a<br />
service call.<br />
Locate sharp items safely to prevent injuring<br />
the user and damaging the lid assembly.<br />
Check the bottom of the cutlery basket to<br />
ensure sharp or pointed items have not come<br />
through as they may stop spray arm rotation.<br />
The plates are nesting together and wash<br />
water may not get through.<br />
Ensure cutlery are not nesting or stuck<br />
together. They need to be evenly spread<br />
out.<br />
Ensure cutlery has not fallen through the<br />
base rack and stopped the spray arms from<br />
rotating.<br />
The large bowl is blocking wash water<br />
reaching the adjustable racks.<br />
Large utensils should be on the adjustable<br />
racks so they do not become dislodged and<br />
stop the spray arms from rotating.<br />
Sharp or pointed items must be placed<br />
horizontally or with sharp edges/points<br />
facing down to avoid risk of injury.
What is water hardness?<br />
Water hardness and dishwashing<br />
Hard water is water with a high concentration of minerals such as calcium and magnesium. In<br />
soft water, this concentration is low. Water hardness varies by geographical location.<br />
How does water hardness affect dishwashing?<br />
Hard water can be detrimental to the performance of your dishwasher. Over time, glassware<br />
washed in hard water will become opaque and dishes will become spotted or covered in a white<br />
film. Using very hard water can cause dishwasher parts to fail over time.<br />
Naturally soft or softened water has no detrimental effects if used with the correct amount of<br />
detergent. However, excess detergent combined with hot, soft water may cause irreversible<br />
etching on glassware. Etching first appears as a rainbow-coloured film and—if allowed to<br />
continue—can make glassware permanently opaque.<br />
What can I do to minimise any detrimental effects?<br />
Contact your local water company to find out about water hardness in your area.<br />
If your home has hard water and your dishwasher has no built-in water softener…<br />
Follow the detergent quantity recommendations on the following pages.<br />
If available, use a detergent with high phosphate content. Phosphate softens the water and this<br />
improves wash results. If detergent with phosphate is not available, we recommend using multipurpose<br />
tablets.<br />
Use rinse aid. We recommend you turn the rinse aid setting to 5 to help improve wash<br />
performance.<br />
Use a dishwasher cleaner/descaler regularly, or whenever you notice a build-up of limescale<br />
deposits in your dishwasher.<br />
Important!<br />
We recommend fitting a water softener to the household water supply. If the water hardness in your<br />
home is above 250 ppm/14.6 gpg, a water softener has to be fitted to maintain the performance of your<br />
dishwasher.<br />
If your home has naturally soft or softened water…<br />
Avoid using too much detergent. Follow the quantity recommendations on the following pages.<br />
Ensure the drawer is not overloaded and water can reach all the dishes.<br />
13
14<br />
Wash programs and detergent quantities<br />
DD24/DD60 models<br />
Find out about water hardness in your home, then use the table below to determine how much<br />
detergent to use for each wash program. See also section ‘Water hardness and dishwashing’.<br />
For information on which program to use for your load, see your ‘Quick start <strong>guide</strong>’.<br />
The detergent dispenser has markings to help you measure the correct quantities. See following<br />
section ‘Adding detergent’.<br />
SOFTER<br />
HARDER<br />
Water hardness<br />
parts per million (ppm)<br />
grains per gallon (gpg)<br />
150 ppm or<br />
>9 gpg<br />
Wash programs Detergent quantities (per drawer)<br />
US CA NZ AU GB IE<br />
detergent<br />
dispenser<br />
marking<br />
grams grams<br />
Heavy 2/3 25 25<br />
Normal 2/3 25 25<br />
Fast 1/3 10 10<br />
Delicate 1/3 10 10<br />
Rinse - - -<br />
Heavy full 30<br />
Normal full 30<br />
Fast full 25<br />
Delicate full 30<br />
Rinse - -<br />
Heavy full 30<br />
Normal full 30<br />
Fast full 30<br />
Delicate full 30<br />
Rinse - -<br />
* If you have a a household water softener installed or your dishwasher has a built-in water softener, use the<br />
quantities recommended for water with a hardness under 100 ppm/6 gpg, irrespective of the water hardness<br />
in your area. See also section ‘Water softener’.
DD36/DD90 models<br />
Wash programs and detergent quantities<br />
Find out about water hardness in your home, then use the table below to determine how much<br />
detergent to use for each wash program. See also section ‘Water hardness and dishwashing’.<br />
For information on which program to use for your load, see your ‘Quick start <strong>guide</strong>’.<br />
The detergent dispenser has markings to help you measure the correct quantities. See following<br />
section ‘Adding detergent’.<br />
SOFTER<br />
HARDER<br />
Water hardness<br />
parts per million (ppm)<br />
grains per gallon (gpg)<br />
150 ppm or<br />
>9 gpg<br />
Wash programs Detergent quantities<br />
US CA NZ AU GB IE<br />
detergent<br />
dispenser<br />
marking<br />
grams grams<br />
Heavy full 30 30<br />
Normal full 25 25<br />
Fast 2/3 15 15<br />
Delicate 2/3 15 15<br />
Rinse - - -<br />
Heavy full 30<br />
Normal full 30<br />
Fast 2/3 20<br />
Delicate full 30<br />
Rinse - -<br />
Heavy full 30<br />
Normal full 30<br />
Fast full 30<br />
Delicate full 30<br />
Rinse - -<br />
* If you have a a household water softener installed or your dishwasher has a built-in water softener, use the<br />
quantities recommended for water with a hardness under 100 ppm/6 gpg, irrespective of the water hardness<br />
in your area. See also section ‘Water softener’.<br />
15
16<br />
Adding detergent<br />
Suitable detergents and where to place them<br />
Note: You may see other, equally suitable types of dishwasher detergent on the shelves of<br />
your supermarket. Read and follow the detergent manufacturer’s recommendations.<br />
Powdered dishwasher<br />
detergent<br />
pour into detergent<br />
dispenser<br />
Detergent<br />
dispenser<br />
Pouch packs of gel or powder<br />
place in detergent dispenser, but<br />
only if pack fits easily around prongs<br />
(pack must not be pierced)<br />
OR<br />
place on tablet tray in cutlery basket<br />
Latch<br />
Filling the detergent dispenser<br />
1 Press the latch down to open the dispenser.<br />
2 Check that the dispenser is empty and dry,<br />
then add detergent (do not place solid<br />
tablets in the dispenser). No detergent is<br />
needed for the Rinse program.<br />
3 Close the dispenser until it clicks shut. The<br />
detergent will automatically be released<br />
into the drawer during the wash program.<br />
Tablet tray<br />
Solid dishwasher tablets<br />
place on tablet tray in cutlery<br />
basket<br />
If the cutlery basket is not used for a particular<br />
load, place tablet or pouch pack in the bottom<br />
of the drawer.
Unsuitable detergents<br />
These types of detergent are not suitable and may damage your dishwasher or lead to a service<br />
call that is not covered by warranty.<br />
Important!<br />
Do not use these in your dishwasher!<br />
Liquid detergents<br />
Laundry detergents<br />
Hand washing liquids<br />
Soaps<br />
Disinfectants<br />
How much detergent to use<br />
Adding detergent<br />
For powdered detergent, refer to previous section ‘Wash programs and detergent quantities’ and<br />
follow the quantities relevant to your location and water hardness level. Use the markings to<br />
help you measure the correct quantities. For other types of detergent, follow the manufacturer’s<br />
recommendations.<br />
Full (30 grams)<br />
2/3 (20 grams)<br />
1/3 (10 grams)<br />
Notes on using tablets<br />
If you are using tablets, follow manufacturer instructions on the packet. Some tablets may not be<br />
suitable for all wash programs.<br />
Using tablets could improve wash performance in hard water areas.<br />
Make sure that tablets never get in direct contact with dishes or cutlery.<br />
If you are using dishwasher tablets with a built-in rinse aid component, you may need to reduce<br />
the rinse aid setting. See your ‘Quick start <strong>guide</strong>’ for instructions.<br />
Important!<br />
Dishwasher detergents are strongly alkaline. They can be extremely dangerous if swallowed. Avoid contact<br />
with the skin and eyes and keep children and infirm persons away from the dishwasher when it is open.<br />
Check that the detergent dispenser is empty after completion of the wash program.<br />
17
18 Using rinse aid<br />
We recommend using liquid rinse aid regularly to give the best drying results.<br />
Rinse aid gives a streak-free, sparkling clean look to glass and chinaware. It also prevents metal<br />
from tarnishing.<br />
The rinse aid dispenser is on the inside of the drawer, underneath the detergent dispenser.<br />
It holds approximately 1.7 fl oz / 50 ml of rinse aid.<br />
You may hear some unusual, high-pitched beeping when rinse aid is<br />
being dispensed. This is normal.<br />
When to refill rinse aid<br />
If the indicator glows or flashes bright red, refill rinse aid.<br />
If the indicator glows or flashes dimly or not at all, you do not<br />
need to refill: there is enough rinse aid for the wash.<br />
Note: Lighter coloured rinse aids will not dim the<br />
indicator as effectively as darker ones.<br />
How to refill rinse aid<br />
1 Turn the plug anticlockwise and remove.<br />
2 Pour rinse aid into the circular opening, taking care not to spill any<br />
into the drawer.<br />
Important!<br />
Any accidental spillages of rinse aid must be wiped up. If not wiped up,<br />
spilt rinse aid will cause excessive foaming, resulting in a service<br />
call that will not be covered by warranty.<br />
3 Refit the plug, then turn it clockwise back to its original position.<br />
Important!<br />
Make sure that the plug is closed tight, with its hand grip pointing<br />
straight ahead.<br />
How much rinse aid to use<br />
You may need to adjust the amount of rinse aid dispensed in<br />
each wash to suit your water conditions. The lowest setting<br />
is ‘1’, the highest is ‘5’. See the ‘Preference options’ section of<br />
your ‘Quick start <strong>guide</strong>’ for instructions on how to change<br />
the rinse aid setting.<br />
If there is excessive foam at the end of the wash, reduce the setting.<br />
If dishes are wet or streaky after drying, increase the setting.<br />
If you live in a hard water area and you have no water softener<br />
installed in your water supply or built into your dishwasher,<br />
we recommend adjusting the rinse aid setting to 5.<br />
Indicator<br />
light<br />
Plug<br />
Turn the plug<br />
anticlockwise.<br />
Remove the plug<br />
Pour rinse aid into<br />
the circular opening<br />
Refit the plug by turning<br />
it clockwise. Ensure it is<br />
closed tight.
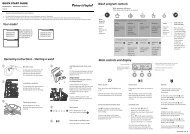
Setting up the water softener<br />
Important!<br />
Only some models (those with a letter ‘H’ in the model name) have a built-in water softener.<br />
Models with water softener are not currently available in New Zealand and Australia.<br />
Determine the water hardness in your local area<br />
Your local water company will be able to provide you with information. Identify the setting you<br />
require for your dishwasher from the water hardness table below. For example, if your water<br />
hardness is 500ppm, then the water softener setting on your dishwasher should be 4. Refer to<br />
the ‘Preference options’ section of your ‘Quick start <strong>guide</strong>’ for instructions on adjusting the water<br />
softener setting.<br />
Dishwasher<br />
setting<br />
Parts per<br />
million<br />
(ppm)<br />
Grains per<br />
gallon (gpg)<br />
Water softener<br />
o dH o fH o e / o Clark mmol/l<br />
0 0 - 100 0 - 6 0 - 5.6 0 - 10 0 - 7 0 - 0.1<br />
1 100 - 250 6 - 14 5.6 - 14 10 - 25 7 - 17.5 0.1 - 2.5<br />
2 250 - 350 14 - 20 14 - 19.6 25 - 35 17.5 - 24.5 2.5 - 3.5<br />
3 350 - 450 20 - 26 19.6 - 25.2 35 - 45 24.5 - 31.5 3.5 - 4.5<br />
4 450 - 550 26 - 32 25.2 - 30.8 45 - 55 31.5 - 38.5 4.5 - 5.5<br />
5 550 - 625 32 - 36 30.8 - 35 55 - 62 38.5 - 43.8 5.5 - 6.2<br />
19
20 Water softener<br />
Notes:<br />
If your water hardness is above 625ppm/36 gpg, we highly recommend you completely fill the<br />
detergent dispenser for all programs except Rinse and the rinse aid setting should be at 5. If your<br />
water hardness is above 625ppm/36 gpg, the wash performance of your dishwasher will decline.<br />
You may hear some unusual noises when the water softener is in operation, this is normal.<br />
How to fill the salt reservoir<br />
1 Open the drawer(s).<br />
2 Unscrew the salt reservoir cap by turning anticlockwise.<br />
3 Place the salt into the salt container and pour the contents into the salt reservoir.<br />
The salt reservoir can hold up to approximately 1 lb/0.5 kg of salt.<br />
4 Fit the cap tightly back into its original position.<br />
5 If you do not wash your dishes immediately after filling the salt reservoir, run a Rinse program to<br />
remove any salt water or spilt granules.<br />
Note:<br />
When filling the salt reservoir, you may notice water being displaced from the water softener<br />
overflow.<br />
Salt<br />
container<br />
Salt<br />
reservoir
Water softener<br />
Important!<br />
The water softener must always be filled with granular salt made especially for dishwasher water<br />
softening systems. We do not recommend the use of cooking salt like table salt, rock salt or<br />
pellets as they may contain impurities that will impair or diminish the life of the water softener.<br />
The salt reservoir<br />
Water softening can only take place when there<br />
is salt in the reservoir. The salt reservoir must<br />
be filled prior to using the dishwasher and<br />
whenever the salt indicator light is red.<br />
Salt indicator light<br />
If the salt indicator light is red, the salt reservoir is<br />
empty.<br />
If the salt indicator light is black, there is enough salt in the<br />
reservoir for the wash program that has been selected.<br />
Classic models only: The electronic display will<br />
also indicate when the salt reservoir is empty by<br />
displaying the salt symbol.<br />
Important!<br />
Do not pour detergent or rinse aid into the salt<br />
reservoir. Detergent and rinse aid will destroy<br />
the water softener.<br />
b<br />
a<br />
a Salt indicator light<br />
b Salt reservoir cap<br />
Salt only<br />
21<br />
NO Detergent NO Rinse Aid
22 <strong>User</strong> maintenance instructions - DD24/DD60 models<br />
Important!<br />
Disconnect the dishwasher from the power supply (unplug or switch off at the circuit breaker) and allow all<br />
its parts to cool before any cleaning or maintenance.<br />
Holiday time<br />
If the dishwasher is not going to be used for some time, we recommend you leave it clean and<br />
empty. Leave the drawer(s) ajar to allow air to circulate. Turn off both the power and water<br />
supply to the dishwasher.<br />
When using your dishwasher for the first time after a long period away, we recommend<br />
pouring 3 cups of water into the drawer before loading and starting a wash. This is to lubricate<br />
components that may have dried out during non-use.<br />
Cleaning the surfaces<br />
1 Wipe with a clean damp cloth. Take care not to wet the control panel.<br />
2 Dry with a clean lint-free cloth.<br />
Important!<br />
We do not recommend the use of the following cleaning aids on your dishwasher as they may damage the<br />
surfaces:<br />
Plastic or stainless steel scouring pads Abrasive, solvent, household cleaners<br />
Acid or alkaline cleaners Hand washing liquids or soap<br />
Stainless steel cleaners or polishes Laundry detergents or disinfectants<br />
Cleaning the drain filter, spray arm and filter plate<br />
We recommend that the drain filter is cleaned whenever there is evidence of food particles.<br />
The spray arm may need cleaning about once a month in normal use or more often should the<br />
need arise.<br />
The filter plate should not normally need cleaning. Food particles remaining on its surface can<br />
be wiped off with a clean, damp cloth.<br />
Spray arm<br />
Filter plate Drain filter
<strong>User</strong> maintenance instructions - DD24/DD60 models<br />
Important !<br />
If a dishwasher cleaner/descaler is used, you must run a wash program with detergent<br />
immediately afterward to prevent any damage to your dishwasher.<br />
The dishwasher must be used with the filter plate, drain filter and spray arm correctly in place.<br />
Cleaning the drain filter<br />
1 Unplug the dishwasher or turn it off at the power supply.<br />
2 To access the drain filter, lift up the plastic grid above it, as shown.<br />
3 Lift and remove the drain filter. It is normal to find some water under it.<br />
4 Empty, rinse clean under running water and replace back into the allocated space.<br />
5 Ensure the drain filter is flush with the filter plate , then lower the plastic grid back into place.<br />
6 Plug the dishwasher back in or turn it on at the power supply.<br />
23
24 <strong>User</strong> maintenance instructions - DD24/DD60 models<br />
Cleaning the spray arm and filter plate<br />
To remove and clean the spray arm and filter plate<br />
1 Unplug the dishwasher or turn it off at the power<br />
supply.<br />
2 Unclip the glass supports (if fitted) from the rack<br />
wires and fold all the adjustable racks away, so<br />
that they are upright and close to the top.<br />
3 Remove the base rack carefully. Lift from the back<br />
end first to prevent knocking the detergent and<br />
rinse aid dispenser.<br />
4 Lift the spray arm and shake any foreign material out.<br />
Rinse it clean under running water and wipe with a damp cloth.<br />
5 Lift and remove the drain filter.<br />
4<br />
6 In the centre of the filter plate there are two rings. Turn the outer ring anticlockwise, about a 1/8<br />
turn. This will release the filter plate.<br />
7 Lift the filter plate out. Remove any foreign material, wash in hot soapy water and rinse<br />
thoroughly in clean water, then wipe with a damp cloth. Take care handling the sharp outer edge<br />
of the filter plate.<br />
6<br />
Turn outer<br />
ring 1/8 turn<br />
5<br />
2<br />
3<br />
7<br />
1
<strong>User</strong> maintenance instructions - DD24/DD60 models<br />
To replace the filter plate and spray arm<br />
8 Before replacing the filter<br />
plate, ensure the O-ring is correctly<br />
O-ring<br />
positioned on the base, as shown.<br />
9 Orientate the filter plate and lower it into place:<br />
make sure its kidney-shaped hole aligns with<br />
the matching recess in the dishwasher base.<br />
10 Ensure the filter plate lies flat in the base, then<br />
lock it into position: turn the outer ring clockwise<br />
until the the marks align with each other and all three pin pairs firmly interlock, as shown.<br />
Important!<br />
The filter plate must not be able to move about freely.<br />
11 Replace the drain filter, ensuring it is flush with the filter plate.<br />
12 Replace the spray arm back onto the impeller.<br />
11<br />
13 Replace the base rack, lowering its front edge into position first.<br />
14 Plug the dishwasher back in or turn it on at the power supply.<br />
9<br />
Alignment marks<br />
Note: Where there is broken crockery or glass in the drawer, it must be carefully removed to<br />
prevent damage to the dishwasher.<br />
10<br />
12<br />
25<br />
Interlocking<br />
pin<br />
Outer ring
26 <strong>User</strong> maintenance instructions - DD36/DD90 models<br />
Important!<br />
Disconnect the dishwasher from the power supply (unplug or switch off at the circuit breaker) and allow all<br />
its parts to cool before any cleaning or maintenance.<br />
Holiday time<br />
If the dishwasher is not going to be used for some time, we recommend you leave it clean and<br />
empty. Leave the drawer ajar to allow air to circulate. Turn off both the power and water supply<br />
to the dishwasher.<br />
When using your dishwasher for the first time after a long period away, we recommend<br />
pouring 3 cups of water into the drawer before loading and starting a wash. This is to lubricate<br />
components that may have dried out during non-use.<br />
Cleaning the surfaces<br />
1 Wipe with a clean damp cloth. Take care not to wet the control panel.<br />
2 Dry with a clean lint-free cloth.<br />
Important!<br />
We do not recommend the use of the following cleaning aids on your dishwasher as they may damage the<br />
surfaces:<br />
Plastic or stainless steel scouring pads Abrasive, solvent, household cleaners<br />
Acid or alkaline cleaners Hand washing liquids or soap<br />
Stainless steel cleaners or polishes Laundry detergents or disinfectants<br />
Cleaning the drain filter, spray arm and filter plate<br />
We recommend that the drain filter is cleaned whenever there is evidence of food particles.<br />
The spray arm may need cleaning about once a month in normal use or more often should the<br />
need arise.<br />
The filter plate should not normally need cleaning. Food particles remaining on its surface can<br />
be wiped off with a clean, damp cloth.<br />
Wash pump housing<br />
Filter<br />
plate Drain filter<br />
Spray<br />
arm
<strong>User</strong> maintenance instructions - DD36/DD90 models<br />
Important !<br />
If a dishwasher cleaner/descaler is used, you must run a wash program with detergent<br />
immediately afterward to prevent any damage to your dishwasher.<br />
The dishwasher must be used with the filter plate, drain filter and spray arms correctly in place.<br />
Cleaning the drain filter<br />
1 Unplug the dishwasher or turn it off at the power supply.<br />
2 Ensure the tines above the drain filter are in the upright position.<br />
3 Lift and remove the drain filter. It is normal to find some water under it.<br />
4 Empty, rinse clean under running water and replace back into the allocated space.<br />
5 Ensure the drain filter is flush with the filter plate.<br />
6 Plug the dishwasher back in or turn it on at the power supply.<br />
10<br />
12<br />
27
28 <strong>User</strong> maintenance instructions - DD36/DD90 models<br />
Cleaning the spray arms and filter plate<br />
Ensure the dishwasher is cool before you start cleaning.<br />
To remove the base rack and spray arms<br />
1 Unplug the dishwasher or turn it off at the power supply.<br />
2 Take out the cutlery basket.<br />
3 Unclip the glass supports (if fitted) from the rack wires and fold all the adjustable racks away, so<br />
that they are upright and close to the top.<br />
4 Fold down all the tines.<br />
5 Remove the base rack carefully. Start lifting from the back first, tilting the rack as needed to clear<br />
the adjustable racks and the dispenser in the front.<br />
6 Unclip the spray arms off their mounting valves and shake any foreign material out.<br />
7 Rinse the spray arm clean under running water and wipe with a damp cloth.<br />
8 If necessary, wipe any soiling off the filter plate with a clean, damp cloth.<br />
Wash pump housing<br />
Spray arm<br />
Mounting valve<br />
Filter plate
<strong>User</strong> maintenance instructions - DD36/DD90 models<br />
To replace the spray arms and base rack<br />
9 Clip the spray arms back onto their mounting valves. Be careful that you don’t force them too<br />
hard and apply too much pressure on the wash pump housing. You should hear them click into<br />
place. Rotate them with your hand to check that they are located properly.<br />
10 Replace the base rack, lowering its front edge into position first.<br />
11 Clip the glass supports back on and arrange the racking back to your preference.<br />
12 Plug the dishwasher back in or turn it on at the power supply.<br />
Note: Where there is broken crockery or glass in the drawer, it must be carefully removed to<br />
prevent damage to the dishwasher.<br />
29
30 Troubleshooting<br />
Problem Possible cause What to do<br />
Unclean dishes<br />
Wash program unsuitable<br />
for the load.<br />
See your ‘Quick start <strong>guide</strong>’ for a suitable<br />
wash program, or the soils were too heavily<br />
baked on and dishes may need soaking.<br />
Spray arm unable to rotate. Ensure no items are obstructing the spray<br />
arm path.<br />
Drawer overloaded/<br />
incorrectly loaded.<br />
Refer to the section on loading.<br />
Filter plate/drain filter is<br />
incorrectly inserted.<br />
See section ‘<strong>User</strong> maintenance instructions’.<br />
Detergent put in the<br />
Detergent must be placed in the large<br />
wrong compartment of the compartment. See section ‘Adding detergent’<br />
dispenser.<br />
for information.<br />
Excess food not removed Scrape all food scraps off dinnerware prior to<br />
from dinnerware prior to<br />
loading.<br />
loading.<br />
Unsuitable detergent. Use detergents suitable for automatic<br />
dishwashers. See section ‘Adding detergent’<br />
for examples of suitable and unsuitable<br />
detergents.<br />
Not enough detergent. See section ‘Wash programs and detergent<br />
quantities’ or follow the detergent<br />
manufacturer’s instructions.<br />
Spray arm holes are blocked. Clean the spray arm.<br />
Filter plate/drain filter is<br />
blocked.<br />
Clean the filter plate and drain filter.<br />
Foaming Incorrect amount of<br />
See section ‘Wash programs and detergent<br />
detergent.<br />
quantities’ or follow the detergent<br />
manufacturer’s instructions.<br />
Too much egg in the wash<br />
load.<br />
Increase the amount of detergent.<br />
Rinse aid setting too high. Decrease the rinse aid setting.<br />
Rinse aid dispenser plug not Ensure that the rinse aid dispenser plug is<br />
closed properly.<br />
closed tight, with its hand grip pointing<br />
straight ahead. See section ‘Using rinse aid’.<br />
Water leaking Drain hose disconnected<br />
from waste pipe.<br />
Reconnect the drain hose to the waste pipe.<br />
Water inlet hose not<br />
properly connected.<br />
Ensure the inlet hose is connected securely.<br />
Other leaks. Turn water and power supplies to the<br />
dishwasher off. Call Customer Care or your<br />
Authorised Service Centre. See your ‘Service<br />
and warranty’ booklet for contact details.<br />
Rinse aid dispenser plug not Ensure that the rinse aid dispenser plug is<br />
closed properly.<br />
closed tight, with its hand grip pointing<br />
straight ahead. See section ‘Using rinse aid’.
Problem Possible cause What to do<br />
Drawer will not<br />
open (no beeping,<br />
no wash underway)<br />
Power failure<br />
during cycle<br />
Continuous<br />
beeping<br />
Intermittent<br />
beeping<br />
High-pitched,<br />
subtle beeping<br />
during a wash<br />
program<br />
Control buttons<br />
inside the drawer<br />
do not respond to<br />
touch<br />
Dishwasher will not<br />
start<br />
Fan noise<br />
coming from the<br />
dishwasher after a<br />
wash program has<br />
finished<br />
Fan noise starts<br />
up when I close<br />
the drawer, even<br />
though I didn’t start<br />
a new wash<br />
Childlock feature is on or<br />
the ‘Closed drawer autolock’<br />
option is on, or both.<br />
Power outage in your home<br />
or area.<br />
Troubleshooting<br />
31<br />
Turn the Childlock off. Hold down the /<br />
button until the symbol disappears from<br />
the display or the light above the /<br />
button goes out and/or press the /<br />
button to open the drawer.<br />
Wait until power resumes, cycle will restart in<br />
same part of wash program.<br />
A fault has occurred. Refer to section ‘If there is a fault’.<br />
Dishwasher is in pause<br />
mode.<br />
Rinse aid is being<br />
dispensed.<br />
Close the dishwasher and press the<br />
button to resume the program.<br />
This is normal and needs no action.<br />
Water over control buttons. Wipe the area dry.<br />
Power supply is not<br />
connected.<br />
The drawer is not closed<br />
properly.<br />
Models with three buttons<br />
on the front only: Keylock or<br />
Childlock feature is on.<br />
Connect the power supply.<br />
Ensure the drawer is firmly closed.<br />
button not pressed. Press the button.<br />
This is normal. The drying<br />
fan continues to run for a<br />
set period of time after a<br />
program has finished to<br />
assist with drying.<br />
This is normal. In some<br />
cases, the drying fan will<br />
run whenever the drawer is<br />
closed for a set period of<br />
time after a program has<br />
finished.<br />
Turn the Keylock or Childlock off. Hold<br />
down the / button until the symbol<br />
disappears from the display or the light<br />
above the / button goes out.<br />
No action required. The fan will automatically<br />
stop after the set time is over, or when the<br />
drawer is opened. In some cases, the fan may<br />
resume when the drawer is closed again.<br />
No action required. The fan will automatically<br />
stop after the set time is over.
32 Troubleshooting<br />
Problem Possible Cause What to do<br />
The wash program<br />
seems to have<br />
finished (the<br />
dishwasher is idle),<br />
but the end of<br />
wash beeps haven’t<br />
sounded and the<br />
drawer cannot be<br />
opened<br />
Water pooling on<br />
inner rim of drawer<br />
after a wash<br />
Water under the<br />
drain filter<br />
Excess water in the<br />
drawer<br />
Water marks on the<br />
dishes<br />
Drawer interior is<br />
stained<br />
The wash program is still<br />
underway. It is in a ‘quiet’<br />
phase that is needed for<br />
ensuring the best wash<br />
results.<br />
No action required. The program will<br />
transition into a more audible phase after the<br />
‘quiet’ phase is over.<br />
This is normal condensation. If there is any water over the control buttons,<br />
wipe dry.<br />
This is normal and needs no action.<br />
Drain hose(s) bent or Straighten the drain hose(s).<br />
kinked.<br />
Blocked filters. Clean the filter plate/drain filter. Refer to<br />
’<strong>User</strong> maintenance instructions’.<br />
Rinse aid depleted. Refill the rinse aid dispenser.<br />
Rinse aid setting too low. Increase the rinse aid setting.<br />
Dishwasher overloaded/<br />
incorrectly loaded.<br />
Refer to the section on loading.<br />
Some foods, like tomato<br />
based products, may stain<br />
the inside of the drawer.<br />
Pre-rinse dishes before placing in the drawer.<br />
Alternatively, using the Rinse program after<br />
adding the dishes may minimise staining.<br />
Dishes did not dry Incorrect loading. Ensure the dishes are not nesting together.<br />
No detergent<br />
dispensed<br />
Excessive motor<br />
noise<br />
Dishes were left in the<br />
drawer for several hours<br />
after a wash.<br />
We recommend unloading the dishes within<br />
a few hours after a wash program has<br />
finished, as the small amount of vapour left<br />
after the wash may -with time- resettle on<br />
dishes as condensation. Using rinse aid or<br />
increasing its setting may also help reduce<br />
this problem.<br />
Rinse aid depleted. Refill the rinse aid dispenser.<br />
Rinse aid setting too low. Increase the rinse aid setting.<br />
Eco wash program used. Choose a standard wash program.<br />
Detergent dispenser was<br />
wet when loaded.<br />
The filter plate and/or spray<br />
arm is incorrectly placed.<br />
Clean the dispenser and ensure it is dry<br />
before adding detergent.<br />
Refer to the ‘<strong>User</strong> maintenance instructions’<br />
section for details on correct placement.<br />
No water in the motor area. This usually occurs on the first use or when<br />
the dishwasher has not been used for long<br />
periods of time. Pour 3 cups of water into<br />
the drawer before running a wash program.
How do I know if there is a fault?<br />
If there is a fault<br />
Your dishwasher will self‐diagnose and let you know by beeping continuously and showing a<br />
fault code on the wash program panel inside the drawer (all models) and in the display (Classic<br />
models only) .<br />
What should I do if there is a fault?<br />
Check what kind of model you have and attend to the fault by following the appropriate<br />
flowchart following. You may be able to fix some of the faults yourself – with others, you will<br />
need to contact <strong>Fisher</strong> & <strong>Paykel</strong> Customer Care to organise a visit by a service technician.<br />
Classic models<br />
Go to Page 34<br />
Designer models<br />
Go to Page 36<br />
Integrated models with badge<br />
Go to Page 38<br />
33<br />
Integrated models with remote control<br />
Go to Page 40
34 How to attend to a fault ‐ Classic models<br />
If it’s a ‘U’ code<br />
U1: Turn on the water supply,<br />
then press to resume the wash<br />
program.<br />
U4: Attend to the fault on<br />
the other drawer. The drawer<br />
displaying U4 is not faulty.<br />
START HERE<br />
U6: Open the drawer and check the<br />
spray arm.<br />
Has the spray arm loosened or<br />
come off its mounting?<br />
YES<br />
Refit the spray<br />
arm following<br />
instructions in section<br />
‘<strong>User</strong> maintenance<br />
instructions’, then<br />
close the drawer and<br />
press to resume<br />
the wash program.<br />
Press to stop the beeping.<br />
Look up the fault code in the<br />
table opposite and note it<br />
down.<br />
NO<br />
Water pressure<br />
is too low. You<br />
may need to have<br />
a ‘4 litre’ valve<br />
installed on your<br />
water supply.<br />
Has the fault code disappeared?<br />
Has the dishwasher resumed<br />
normal operation?<br />
YES NO<br />
You have corrected the fault<br />
and can continue to use your<br />
dishwasher as normal.<br />
Press . Wait a few seconds, then<br />
press again.<br />
NO<br />
If it’s an ‘E’ code<br />
Has the fault code disappeared?<br />
YES<br />
The fault has<br />
reset. You can<br />
continue to use<br />
your dishwasher.<br />
Press . Another number will<br />
briefly appear in the display. Note<br />
this number down too. It will help<br />
<strong>Fisher</strong> & <strong>Paykel</strong> Customer Care<br />
identify the fault more precisely.<br />
Disconnect the dishwasher from the<br />
power supply (unplug or switch off at<br />
circuit breaker), turn off its water supply,<br />
then contact Customer Care with the<br />
fault code information. See your ‘Service<br />
and warranty’ booklet for contact details.
How to attend to a fault ‐ Classic models<br />
Display Fault Code Possible cause of fault<br />
U1<br />
U4<br />
U6<br />
U1 No water – the water supply hasn’t been<br />
turned on.<br />
U4 Fault in the other drawer preventing the<br />
use of this drawer.<br />
U6 The spray arm has loosened or come off<br />
its mounting, or water pressure is too<br />
low.<br />
Display Fault Code Possible cause of fault<br />
E1<br />
E2<br />
E3<br />
E4<br />
E5<br />
E6<br />
E7<br />
E8<br />
E9<br />
EC<br />
E1 Flood detected.<br />
E2 Motor fault.<br />
E3 Temperature sensor fault. You may need<br />
to have a tempering valve installed<br />
on your water supply, to ensure that<br />
incoming water is less than 65 o C (149 o F).<br />
E4 Heating element failed.<br />
E5 Fault with the internal lid of the<br />
dishwasher.<br />
E6 Fault with the drying fan.<br />
E7 Electronics fault—detergent dispensing<br />
system.<br />
E8 Electronics fault—other systems.<br />
E9 Electronics fault—controller.<br />
EC Electronics fault—communication<br />
between drawers.<br />
35
36<br />
How to attend to a fault ‐ Designer models<br />
If it’s a ‘U’ code<br />
U1: Turn on the water supply,<br />
then press to resume the wash<br />
program.<br />
U4: Attend to the fault on<br />
the other drawer. The drawer<br />
displaying U4 is not faulty.<br />
U6: Open the drawer and check the<br />
spray arm.<br />
Has the spray arm loosened or<br />
come off its mounting?<br />
YES<br />
Refit the spray arm<br />
following instructions<br />
in section ‘<strong>User</strong><br />
maintenance<br />
instructions’, then close<br />
the drawer and press<br />
to resume the wash<br />
program.<br />
YES<br />
START HERE<br />
Press to stop the beeping.<br />
Try to open the drawer<br />
(without using excessive force).<br />
YES<br />
Check which program indicators<br />
are lit on the wash program panel.<br />
Look up what fault code the<br />
indicators correspond to in the<br />
table opposite.<br />
Note down the code here:<br />
Has the fault code disappeared?<br />
Has the dishwasher resumed<br />
normal operation?<br />
Can the drawer be opened?<br />
NO<br />
Water pressure<br />
is too low. You<br />
may need to have<br />
a ‘4 litre’ valve<br />
installed on your<br />
water supply.<br />
You have corrected the fault and can<br />
continue to use your dishwasher as normal.<br />
NO<br />
YES<br />
NO<br />
If it’s an ‘E’ code<br />
Press . Wait a few<br />
seconds, then press<br />
again.<br />
Is the light above the<br />
button still red?<br />
NO, IT’S<br />
BLUE<br />
Press . Wait a few<br />
seconds, then press<br />
again.<br />
Is the light above the<br />
button still red?<br />
NO,<br />
IT’S<br />
BLUE<br />
Press . The Eco indicator and another set<br />
of program indicators will briefly light up on<br />
the wash program panel. Mark which ones<br />
in the diagram below. This information will<br />
help <strong>Fisher</strong> & <strong>Paykel</strong> identify the fault more<br />
precisely. Which other indicators light up<br />
when you press ?<br />
YES<br />
The fault<br />
has reset<br />
and you<br />
should<br />
now be able<br />
to open the<br />
drawer.<br />
You can<br />
continue to<br />
use it as<br />
normal.<br />
Disconnect the dishwasher from the<br />
power supply (unplug or switch off at<br />
circuit breaker), turn off its water supply,<br />
then contact Customer Care with the<br />
fault code information. See your ‘Service<br />
and warranty’ booklet for contact details.
How to attend to a fault ‐ Designer models<br />
Wash program panel Fault Code Possible cause of fault<br />
U1 No water – the water supply hasn’t been<br />
turned on.<br />
U4 Fault in the other drawer preventing the<br />
use of this drawer.<br />
U6 The spray arm has loosened or come off<br />
its mounting, or water pressure is too<br />
low.<br />
Wash program panel Fault Code Possible cause of fault<br />
E1 Flood detected.<br />
E2 Motor fault.<br />
E3 Temperature sensor fault. You may need<br />
to have a tempering valve installed<br />
on your water supply, to ensure that<br />
incoming water is less than 65 o C (149 o F).<br />
E4 Heating element failed.<br />
E5 Fault with the internal lid of the<br />
dishwasher.<br />
E6 Fault with the drying fan.<br />
E7 Electronics fault—detergent dispensing<br />
system.<br />
E8 Electronics fault—other systems.<br />
E9 Electronics fault—controller.<br />
EC Electronics fault—communication<br />
between drawers.<br />
37
38<br />
How to attend to a fault ‐ Integrated models with badge<br />
If it’s a ‘U’ code<br />
U1: Turn on the water supply,<br />
then press to resume the wash<br />
program.<br />
U4: Attend to the fault on<br />
the other drawer. The drawer<br />
displaying U4 is not faulty.<br />
U6: Open the drawer and check the<br />
spray arm.<br />
Has the spray arm loosened or<br />
come off its mounting?<br />
YES<br />
Refit the spray arm<br />
following instructions<br />
in section ‘<strong>User</strong><br />
maintenance<br />
instructions’, then close<br />
the drawer and press<br />
to resume the wash<br />
program.<br />
YES<br />
START HERE<br />
Press to stop the beeping.<br />
Try to open the drawer<br />
(without using excessive force).<br />
YES<br />
Check which program indicators<br />
are lit on the wash program panel.<br />
Look up what fault code the<br />
indicators correspond to in the<br />
table opposite.<br />
Note down the code here:<br />
Has the fault code disappeared?<br />
Has the dishwasher resumed<br />
normal operation?<br />
Can the drawer be opened?<br />
NO<br />
Water pressure<br />
is too low. You<br />
may need to have<br />
a ‘4 litre’ valve<br />
installed on your<br />
water supply.<br />
You have corrected the fault and can<br />
continue to use your dishwasher as normal.<br />
NO<br />
YES<br />
NO<br />
If it’s an ‘E’ code<br />
Press . Wait a few<br />
seconds, then press<br />
again.<br />
Is the light above the<br />
button still red?<br />
NO, IT’S<br />
GREEN<br />
Press . Wait a few<br />
seconds, then press<br />
again.<br />
Is the light above the<br />
button still red?<br />
NO,<br />
IT’S<br />
GREEN<br />
Press . The Eco indicator and another set<br />
of program indicators will briefly light up on<br />
the wash program panel. Mark which ones<br />
in the diagram below. This information will<br />
help <strong>Fisher</strong> & <strong>Paykel</strong> identify the fault more<br />
precisely. Which other indicators light up<br />
when you press ?<br />
YES<br />
The fault<br />
has reset<br />
and you<br />
should<br />
now be able<br />
to open the<br />
drawer.<br />
You can<br />
continue to<br />
use it as<br />
normal.<br />
Disconnect the dishwasher from the<br />
power supply (unplug or switch off at<br />
circuit breaker), turn off its water supply,<br />
then contact Customer Care with the<br />
fault code information. See your ‘Service<br />
and warranty’ booklet for contact details.
How to attend to a fault ‐ Integrated models with badge<br />
Wash program panel Fault Code Possible cause of fault<br />
U1 No water – the water supply hasn’t been<br />
turned on.<br />
U4 Fault in the other drawer preventing the<br />
use of this drawer.<br />
U6 The spray arm has loosened or come off<br />
its mounting, or water pressure is too<br />
low.<br />
Wash program panel Fault Code Possible cause of fault<br />
E1 Flood detected.<br />
E2 Motor fault.<br />
E3 Temperature sensor fault. You may need<br />
to have a tempering valve installed<br />
on your water supply, to ensure that<br />
incoming water is less than 65 o C (149 o F).<br />
E4 Heating element failed.<br />
E5 Fault with the internal lid of the<br />
dishwasher.<br />
E6 Fault with the drying fan.<br />
E7 Electronics fault—detergent dispensing<br />
system.<br />
E8 Electronics fault—other systems.<br />
E9 Electronics fault—controller.<br />
EC Electronics fault—communication<br />
between drawers.<br />
39
40<br />
How to attend to a fault ‐<br />
Integrated models with remote control<br />
If it’s a ‘U’ code<br />
Press on the wash<br />
program panel to stop<br />
the beeping, then<br />
follow the applicable<br />
instructions below.<br />
U1: Turn on the water supply,<br />
press , then close the drawer to<br />
resume the wash program.<br />
U4: Attend to the fault on<br />
the other drawer. The drawer<br />
displaying U4 is not faulty.<br />
U6: Open the drawer and check the<br />
spray arm.<br />
Has the spray arm loosened or<br />
come off its mounting?<br />
YES<br />
Refit the spray arm<br />
following instructions<br />
in section ‘<strong>User</strong><br />
maintenance<br />
instructions’, then close<br />
the drawer and press<br />
to resume the wash<br />
program.<br />
YES<br />
START HERE<br />
Try to open the drawer<br />
(without using excessive force).<br />
Can the drawer be opened?<br />
YES<br />
Check which program indicators<br />
are lit on the wash program panel.<br />
Look up what fault code the<br />
indicators correspond to in the<br />
table opposite.<br />
Note down the code here:<br />
NO<br />
Water pressure<br />
is too low. You<br />
may need to have<br />
a ‘4 litre’ valve<br />
installed on your<br />
water supply.<br />
Has the fault code disappeared?<br />
Has the dishwasher resumed<br />
normal operation?<br />
You have corrected the fault and can<br />
continue to use your dishwasher as normal.<br />
NO<br />
NO<br />
Disconnect the<br />
dishwasher from the<br />
power supply to stop<br />
the beeping, then<br />
contact Customer<br />
Care. See your<br />
‘Service and warranty’<br />
booklet for contact<br />
details.<br />
If it’s an ‘E’ code<br />
Press and hold until you<br />
hear a quick double beep.<br />
Do the fault code indicators<br />
and beeping come back in a<br />
few seconds?<br />
YES<br />
NO<br />
You have corrected<br />
the fault and can<br />
continue to use<br />
your dishwasher as<br />
normal.<br />
Press on the wash program panel.<br />
The Eco indicator and another set of<br />
program indicators will briefly light<br />
up. Mark which ones in the diagram<br />
below. This information will help<br />
<strong>Fisher</strong> & <strong>Paykel</strong> identify the fault more<br />
precisely. Which other indicators light<br />
up when you press ?<br />
Disconnect the dishwasher from the<br />
power supply (unplug or switch off at<br />
circuit breaker), turn off its water supply,<br />
then contact Customer Care with the<br />
fault code information. See your ‘Service<br />
and warranty’ booklet for contact details.
How to attend to a fault ‐<br />
Integrated models with remote control<br />
Wash program panel Fault Code Possible cause of fault<br />
U1 No water – the water supply hasn’t been<br />
turned on.<br />
U4 Fault in the other drawer preventing the<br />
use of this drawer.<br />
U6 The spray arm has loosened or come off<br />
its mounting, or water pressure is too<br />
low.<br />
Wash program panel Fault Code Possible cause of fault<br />
E1 Flood detected.<br />
E2 Motor fault.<br />
E3 Temperature sensor fault. You may need<br />
to have a tempering valve installed<br />
on your water supply, to ensure that<br />
incoming water is less than 65 o C (149 o F).<br />
E4 Heating element failed.<br />
E5 Fault with the internal lid of the<br />
dishwasher.<br />
E6 Fault with the drying fan.<br />
E7 Electronics fault—detergent dispensing<br />
system.<br />
E8 Electronics fault—other systems.<br />
E9 Electronics fault—controller.<br />
EC Electronics fault—communication<br />
between drawers.<br />
41
42 Warranty and service<br />
Before you call for service or assistance ...<br />
Check the things you can do yourself. Refer to the ‘Installation instructions’, ‘<strong>User</strong> <strong>guide</strong>’ and<br />
‘Quick start <strong>guide</strong>’ and check that:<br />
1 your product is correctly installed<br />
2 you are familiar with its normal operation.<br />
If after checking these points you still need assistance, please see you ‘Service and warranty’<br />
booklet for warranty information and Customer Care contact details, or contact us through our<br />
website listed on the back cover.<br />
<strong>Fisher</strong> & <strong>Paykel</strong> Appliances<br />
Model no Serial no.<br />
Copy this from the serial label of your dishwasher.<br />
The label is located inside cabinet, underneath the<br />
(top) drawer.<br />
Date of purchase<br />
Contact details Dealer name
44 Wash program data - DD24/DD60 models<br />
For information on which program to use for your load, see your ‘Quick start <strong>guide</strong>’.<br />
Wash cycle times indicated are approximate.<br />
USA & CANADA - Classic, Designer, and Integrated double models<br />
HEAVY<br />
(~127 mins)<br />
NORMAL<br />
(~128 mins)<br />
FAST<br />
(~53 mins)<br />
DELICATE<br />
(~82 mins)<br />
RINSE<br />
(~11 mins)<br />
pre-wash 120 o F pre-wash<br />
main wash 150 o F main wash 130 o F main wash 130 o F main wash 120 o F<br />
post-rinse x3 post-rinse post-rinse post-rinse x2<br />
final rinse 163oF final rinse 130oF final rinse 120oF final rinse 130oF drying phase drying phase drying phase<br />
HEAVY ECO<br />
(~107 mins)<br />
NORMAL ECO<br />
(~100 mins)<br />
FAST ECO<br />
(~35 mins)<br />
DELICATE ECO<br />
(~68 mins)<br />
main wash 150 o F main wash 120 o F main wash 115 o F main wash 115 o F<br />
post-rinse x3 post-rinse post-rinse post-rinse x2<br />
final rinse 150oF final rinse 125oF final rinse 115oF final rinse 120oF drying phase drying phase drying phase<br />
USA & CANADA - Integrated single models<br />
HEAVY<br />
(~163 mins)<br />
NORMAL<br />
(~164 mins)<br />
FAST<br />
(~82 mins)<br />
DELICATE<br />
(~118 mins)<br />
RINSE<br />
(~11 mins)<br />
pre-wash 120 o F pre-wash<br />
main wash 150 o F main wash 130 o F main wash 130 o F main wash 120 o F<br />
post-rinse x3 post-rinse post-rinse post-rinse x2<br />
final rinse 135 o F final rinse 130 o F final rinse 120 o F final rinse 130 o F<br />
drying phase drying phase drying phase drying phase<br />
HEAVY ECO<br />
(~158 mins)<br />
NORMAL ECO<br />
(~133 mins)<br />
FAST ECO<br />
(~62 mins)<br />
DELICATE ECO<br />
(~99 mins)<br />
main wash 150 o F main wash 120 o F main wash 115 o F main wash 115 o F<br />
post-rinse x3 post-rinse post-rinse post-rinse x2<br />
final rinse 135oF final rinse 125oF final rinse 115oF final rinse 120oF drying phase drying phase drying phase drying phase
Wash program data- DD24/DD60 models<br />
NEW ZEALAND & AUSTRALIA - Classic, Designer, and Integrated double models<br />
HEAVY<br />
(~124 mins)<br />
NORMAL<br />
(~128 mins)<br />
FAST<br />
(~49 mins)<br />
DELICATE<br />
(~92 mins)<br />
main wash 70 o C main wash 60 o C main wash 55 o C main wash 50 o C<br />
post-rinse x2 post-rinse post-rinse post-rinse x2<br />
final rinse 65oC final rinse 60oC final rinse 55oC final rinse 60oC drying phase drying phase drying phase<br />
HEAVY ECO<br />
(~120 mins)<br />
NORMAL ECO*<br />
(~149 mins)<br />
FAST ECO<br />
(~33 mins)<br />
DELICATE ECO<br />
(~80 mins)<br />
main wash 65 o C main wash 40 o C main wash 45 o C main wash 45 o C<br />
post-rinse x2 post-rinse post-rinse post-rinse x2<br />
final rinse 55oC final rinse 40oC final rinse 45oC final rinse 50oC drying phase drying phase drying phase<br />
NEW ZEALAND & AUSTRALIA - Integrated single models<br />
HEAVY<br />
(~170 mins)<br />
NORMAL<br />
(~174 mins)<br />
FAST<br />
(~83 mins)<br />
DELICATE<br />
(~128 mins)<br />
main wash 70 o C main wash 60 o C main wash 55 o C main wash 50 o C<br />
post-rinse x2 post-rinse post-rinse post-rinse x2<br />
final rinse 57oC final rinse 57oC final rinse 55oC final rinse 57oC drying phase drying phase drying phase drying phase<br />
HEAVY ECO<br />
(~166 mins)<br />
NORMAL ECO*<br />
(~189 mins)<br />
FAST ECO<br />
(~60 mins)<br />
DELICATE ECO<br />
(~111 mins)<br />
main wash 65 o C main wash 40 o C main wash 45 o C main wash 45 o C<br />
post-rinse x2 post-rinse post-rinse post-rinse x2<br />
final rinse 55oC final rinse 40oC final rinse 45oC final rinse 50oC drying phase drying phase drying phase drying phase<br />
*Reference program for energy label in compliance with AS/NZS 2007.<br />
RINSE<br />
(~11 mins)<br />
pre-wash<br />
RINSE<br />
(~11 mins)<br />
pre-wash<br />
45
46 Wash program data - DD24/DD60 models<br />
GREAT BRITAIN AND IRELAND<br />
HEAVY<br />
(~126 mins)<br />
NORMAL<br />
(~95 mins)<br />
FAST<br />
(~53 mins)<br />
DELICATE<br />
(~92 mins)<br />
main wash 70 o C main wash 65 o C main wash 55 o C main wash 50 o C<br />
post-rinse x2 post-rinse x2 post-rinse post-rinse x2<br />
final rinse 65oC final rinse 65oC final rinse 50oC final rinse 60oC drying phase drying phase drying phase<br />
HEAVY ECO<br />
(~121 mins)<br />
NORMAL ECO*<br />
(~159 mins)<br />
FAST ECO<br />
(~39 mins)<br />
DELICATE ECO<br />
(~87 mins)<br />
main wash 60 o C main wash 50 o C main wash 45 o C main wash 45 o C<br />
post-rinse x2 post-rinse post-rinse post-rinse x2<br />
final rinse 55oC final rinse 60oC final rinse 45oC final rinse 50oC drying phase drying phase drying phase<br />
*Reference program for energy label in compliance with EN50242 Regulations.<br />
RINSE<br />
(~11 mins)<br />
pre-wash<br />
Note:<br />
Wash times can vary depending on the incoming water temperature, ambient conditions, type<br />
of dish load and whether the drawer has been opened during the wash. Wash times are only<br />
APPROXIMATE on the electronic display and based on 120 o F (USA and Canada), 20 o C (New<br />
Zealand and Australia), or 15 o C (Great Britain and Ireland) incoming water.
48<br />
USA & CANADA - Designer models<br />
HEAVY<br />
(~141 mins)<br />
NORMAL<br />
(~148 mins)<br />
FAST<br />
(~58 mins)<br />
DELICATE<br />
(~85 mins)<br />
RINSE<br />
(~9 mins)<br />
pre-wash 120 o F pre-wash<br />
main wash 150 o F main wash 140 o F main wash 130 o F main wash 120 o F<br />
post-rinse x3 post-rinse x3 post-rinse post-rinse x2<br />
final rinse 163oF final rinse 150oF final rinse 140oF final rinse 130oF drying phase drying phase drying phase<br />
HEAVY ECO<br />
(~135 mins)<br />
NORMAL ECO<br />
(~113 mins)<br />
pre-wash<br />
FAST ECO<br />
(~39 mins)<br />
DELICATE ECO<br />
(~60 mins)<br />
main wash 140 o F main wash 120 o F main wash 115 o F main wash 115 o F<br />
post-rinse x3 post-rinse post-rinse post-rinse x2<br />
final rinse 150oF final rinse 150oF final rinse 115oF final rinse 120oF drying phase drying phase drying phase<br />
USA & CANADA - Integrated models<br />
HEAVY<br />
(~179 mins)<br />
NORMAL<br />
(~186 mins)<br />
FAST<br />
(~94 mins)<br />
DELICATE<br />
(~122 mins)<br />
RINSE<br />
(~9 mins)<br />
pre-wash 120 o F pre-wash<br />
main wash 150 o F main wash 140 o F main wash 130 o F main wash 120 o F<br />
post-rinse x3 post-rinse x3 post-rinse post-rinse x2<br />
final rinse 135 o F final rinse 135 o F final rinse 135 o F final rinse 130 o F<br />
drying phase drying phase drying phase drying phase<br />
HEAVY ECO<br />
(~173 mins)<br />
Wash program data - DD36/DD90 models<br />
For information on which program to use for your load, see your ‘Quick start <strong>guide</strong>’.<br />
Wash cycle times indicated are approximate.<br />
NORMAL ECO<br />
(~151 mins)<br />
pre-wash<br />
FAST ECO<br />
(~72 mins)<br />
DELICATE ECO<br />
(~95 mins)<br />
main wash 140 o F main wash 120 o F main wash 115 o F main wash 115 o F<br />
post-rinse x3 post-rinse post-rinse post-rinse x2<br />
final rinse 135oF final rinse 135oF final rinse 115oF final rinse 120oF drying phase drying phase drying phase drying phase
NEW ZEALAND & AUSTRALIA - Designer models<br />
HEAVY<br />
(~130 mins)<br />
NORMAL<br />
(~120 mins)<br />
FAST<br />
(~55 mins)<br />
DELICATE<br />
(~98 mins)<br />
main wash 70 o C main wash 50 o C main wash 55 o C main wash 50 o C<br />
post-rinse x2 post-rinse post-rinse post-rinse x2<br />
final rinse 65oC final rinse 60oC final rinse 60oC final rinse 60oC drying phase drying phase drying phase<br />
HEAVY ECO<br />
(~129 mins)<br />
NORMAL ECO*<br />
(~146 mins)<br />
FAST ECO<br />
(~45 mins)<br />
DELICATE ECO<br />
(~91 mins)<br />
main wash 60 o C main wash 42 o C main wash 45 o C main wash 45 o C<br />
post-rinse x2 post-rinse post-rinse post-rinse x2<br />
final rinse 55oC final rinse 43oC final rinse 45oC final rinse 50oC drying phase drying phase drying phase<br />
NEW ZEALAND & AUSTRALIA - Integrated models<br />
HEAVY<br />
(~168 mins)<br />
NORMAL<br />
(~158 mins)<br />
FAST<br />
(~91 mins)<br />
DELICATE<br />
(~136 mins)<br />
main wash 70 o C main wash 50 o C main wash 55 o C main wash 50 o C<br />
post-rinse x2 post-rinse post-rinse post-rinse x2<br />
final rinse 57oC final rinse 57oC final rinse 57oC final rinse 57oC drying phase drying phase drying phase drying phase<br />
HEAVY ECO<br />
(~166 mins)<br />
NORMAL ECO*<br />
(~177 mins)<br />
Wash program data- DD36/DD90 models<br />
FAST ECO<br />
(~78 mins)<br />
DELICATE ECO<br />
(~126 mins)<br />
main wash 60 o C main wash 42 o C main wash 45 o C main wash 45 o C<br />
post-rinse x2 post-rinse post-rinse post-rinse x2<br />
final rinse 55oC final rinse 43oC final rinse 45oC final rinse 50oC drying phase drying phase drying phase drying phase<br />
*Reference program for energy label in compliance with AS/NZS 2007.<br />
RINSE<br />
(~11 mins)<br />
pre-wash<br />
RINSE<br />
(~11 mins)<br />
pre-wash<br />
49
50<br />
GREAT BRITAIN AND IRELAND<br />
HEAVY<br />
(~126 mins)<br />
NORMAL<br />
(~95 mins)<br />
FAST<br />
(~60 mins)<br />
DELICATE<br />
(~99 mins)<br />
main wash 70 o C main wash 65 o C main wash 55 o C main wash 50 o C<br />
post-rinse x2 post-rinse x2 post-rinse post-rinse x2<br />
final rinse 65oC final rinse 65oC final rinse 60oC final rinse 60oC drying phase drying phase drying phase<br />
HEAVY ECO<br />
(~121 mins)<br />
Wash program data - DD36/DD90 models<br />
NORMAL ECO*<br />
(~179 mins)<br />
FAST ECO<br />
(~42 mins)<br />
DELICATE ECO<br />
(~92 mins)<br />
main wash 60 o C main wash 50 o C main wash 45 o C main wash 45 o C<br />
post-rinse x2 post-rinse post-rinse post-rinse x2<br />
final rinse 55oC final rinse 55oC final rinse 45oC final rinse 50oC drying phase drying phase drying phase<br />
*Reference program for energy label in compliance with EN50242 Regulations.<br />
RINSE<br />
(~11 mins)<br />
pre-wash<br />
Note:<br />
Wash times can vary depending on the incoming water temperature, ambient conditions, type<br />
of dish load and whether the drawer has been opened during the wash. Wash times are only<br />
APPROXIMATE on the electronic display and based on 120 o F (USA and Canada), 20 o C (New<br />
Zealand and Australia), or 15 o C (Great Britain and Ireland) incoming water.
52<br />
Standards test - DD24 models (USA & CANADA)<br />
The dishwashers are tested to various standards for wash performance using the parameters<br />
detailed below.<br />
Rinse agent setting 4<br />
Maximum place setting 10 for double models<br />
Water softener setting<br />
(for DD24-H models only)<br />
Height setting of adjustable racks<br />
Recommended loading pattern<br />
Top drawer<br />
6<br />
3<br />
3<br />
3<br />
3<br />
3<br />
5 2 4<br />
3<br />
3<br />
3<br />
3<br />
3<br />
2<br />
2<br />
2<br />
2<br />
4<br />
4<br />
4<br />
4<br />
1<br />
1<br />
1<br />
1<br />
1<br />
Cutlery basket<br />
Adjust the water softener to match the water<br />
hardness. Refer to the ‘Water softener’ section.<br />
Bottom drawer<br />
1 2 3 4 5 6<br />
5½”<br />
(140mm)
Standards test - DD36 models (USA & CANADA)<br />
The dishwashers are tested to various standards for wash performance using the parameters<br />
detailed below.<br />
Rinse agent setting 4<br />
Maximum place setting 9<br />
Accessories to be used in the<br />
dishwasher standards test<br />
Recommended loading pattern<br />
6 glasses under<br />
adjustable racks<br />
Cutlery basket<br />
53<br />
Base rack, folding tines, cutlery basket with cutlery<br />
grid, adjustable racks, glass supports, multipurpose<br />
clip. Use the multi-purpose clip to hold<br />
the platter<br />
1 1 2<br />
3 2 6<br />
1<br />
4 4 2 6<br />
1 5 4 4 2 3<br />
1 3 3 4 4 2 3<br />
1 3 4 3 2 3<br />
1 3 3 4 3 2 3<br />
1 3 4 3 2 3<br />
1 3 3<br />
2 3 1 2 3 4 5 6<br />
3 glasses<br />
4 cups under<br />
adjustable racks
54<br />
Standards test - DD60 models (NZ & AUSTRALIA)<br />
The dishwashers are tested to AS/NZS 2007 standards for both wash and dry performance, using<br />
the parameters detailed below.<br />
Wash program Normal Eco<br />
(At the end of the program, open the drawer 50 mm to<br />
improve the dry performance.)<br />
Detergent quantities 23.75g (main wash) per drawer<br />
Rinse aid setting 4<br />
Maximum place setting (per drawer) 7<br />
Accessories to be used in the Dishwasher<br />
standards test<br />
Height setting of adjustable racks<br />
Correct orientation of glass supports<br />
on both sides of drawer<br />
Recommended loading pattern<br />
Top and Bottom drawer<br />
3<br />
3<br />
3<br />
3<br />
Base rack, folding tines, spacing-adjustable tines,<br />
cutlery basket with cutlery grid, adjustable racks,<br />
glass supports.<br />
3 1<br />
3<br />
3<br />
1<br />
2<br />
1 5 4 2 4<br />
1 5 4 2 5<br />
1 5 4 2<br />
5 4 2<br />
1 5 4 2<br />
1 5 4 2<br />
Cutlery basket<br />
140mm<br />
1 2 3 4 5
Standards test - DD90 models (NZ & AUSTRALIA)<br />
The dishwashers are tested to AS/NZS 2007 standards for both wash and dry performance using<br />
the parameters detailed below.<br />
Wash programme<br />
Detergent quantities 26.25g (main wash)<br />
Normal Eco<br />
(At the end of the programme, open the drawer<br />
50 mm to improve the dry performance.)<br />
Rinse aid setting 4<br />
Maximum place setting 9<br />
Accessories to be used in the dishwasher<br />
standards test<br />
Height setting of adjustable racks<br />
Base rack, folding tines, cutlery basket with cutlery<br />
grid, adjustable racks, glass supports, multipurpose<br />
clip.<br />
Correct orientation of glass supports<br />
on both sides of drawer<br />
Recommended loading pattern<br />
1 bread-andbutter<br />
plate<br />
3 glasses<br />
H<br />
1 3<br />
2 1<br />
1 3 4<br />
5 2 3<br />
1 3 4<br />
5 2 2<br />
1 3 4<br />
5 2 5<br />
1 3 4<br />
5 2 5<br />
1 3 4<br />
5 2 4<br />
1 3 4<br />
5 2 4<br />
1 3 5<br />
2 4<br />
Cutlery basket<br />
1 saucer 3 cups + 1 glass under adjustable racks<br />
5 glasses under adjustable racks<br />
55<br />
H = 125 mm for the back<br />
right-hand adjustable rack<br />
H = 140 mm for all the<br />
other adjustable racks<br />
1 2 3 4 5
56<br />
Standards test - DD60 models (GREAT BRITAIN & IRELAND)<br />
The dishwashers are tested to EN50242 standards for both wash and dry performances using the<br />
parameters detailed below.<br />
Wash program Normal Eco<br />
Detergent quantities 2.5g (pre-wash) per drawer<br />
15.5g (main wash) per drawer<br />
Rinse aid setting 4<br />
Water softener setting Adjust the water softener to match the water<br />
hardness. Refer to the ‘Water softener’ and<br />
‘Option adjustments’ sections.<br />
Maximum place setting (per drawer) 6<br />
Accessories to be used in the Dishwasher<br />
standards test<br />
Height setting of adjustable racks<br />
Correct orientation of glass supports on<br />
both sides of drawer<br />
Recommended loading pattern<br />
Top and Bottom drawer<br />
Base rack, folding tines, spacing-adjustable tines,<br />
cutlery basket, adjustable racks, glass supports.<br />
8 8<br />
3<br />
3<br />
4 5<br />
3<br />
3<br />
3<br />
3<br />
small bowl<br />
between<br />
cutlery basket<br />
and first soup<br />
bowl<br />
1<br />
1<br />
1<br />
1<br />
1<br />
1<br />
4<br />
4<br />
4<br />
4<br />
4<br />
5<br />
5<br />
5<br />
5<br />
5<br />
7<br />
2 6<br />
2<br />
2<br />
2<br />
2<br />
2<br />
Cutlery basket<br />
140mm<br />
1 2 3 4 5 6 7 8
Standards test - DD90 models (GREAT BRITAIN & IRELAND)<br />
The dishwashers are tested to EN50242 standards for both wash and dry performances using the<br />
parameters detailed below.<br />
Wash programme Normal Eco<br />
Detergent quantities 5g (pre-wash)<br />
22g (main wash)<br />
Rinse aid setting 4<br />
Water softener setting Adjust the water softener to match the water<br />
hardness. Refer to the ‘Water softener’ and<br />
‘Option adjustments’ sections.<br />
Maximum place setting 9<br />
Accessories to be used in the dishwasher<br />
standards test<br />
Height setting of adjustable racks<br />
Correct orientation of glass supports<br />
on both sides of drawer<br />
Recommended loading pattern<br />
5 glasses under<br />
left-hand<br />
adjustable rack<br />
H<br />
Base rack, ‘slide-and-fold’ tines, cutlery basket<br />
with cutlery grid, adjustable racks, glass supports,<br />
multi-purpose clip.<br />
1 3 8<br />
8 2 6<br />
1 3 4<br />
5 2<br />
1 3 4<br />
5 2 3 2<br />
1 3 7 4<br />
5 2 5<br />
1 3 4<br />
5 2 5<br />
1 3 4<br />
5 2 4<br />
1 3 1 4<br />
5 2 4<br />
1 3 5<br />
2 4 1 2 3 4 5 6 7 8<br />
57<br />
H = 125 mm for the back<br />
right-hand adjustable rack<br />
H = 140 mm for all the<br />
other adjustable racks<br />
cup 2 glasses<br />
Cutlery basket<br />
small<br />
serving<br />
bowl<br />
cup<br />
2 glasses<br />
cup
www.fi sherpaykel.com<br />
www.fi sherpaykel.ca<br />
www.fi sherpaykel.co.nz<br />
www.fi sherpaykel.com.au<br />
www.fi sherpaykel.co.uk<br />
www.fi sherpaykel.ie<br />
Copyright © <strong>Fisher</strong> & <strong>Paykel</strong> 2012. All rights reserved.<br />
The product specifications in this booklet apply to the specific products<br />
and models described at the date of issue. Under our policy of continuous<br />
product improvement, these specifications may change at any time. You<br />
should therefore check with your Dealer to ensure this booklet correctly<br />
describes the product currently available.<br />
US CA NZ AU GB IE F&P PN - 590199 C<br />
11.2012