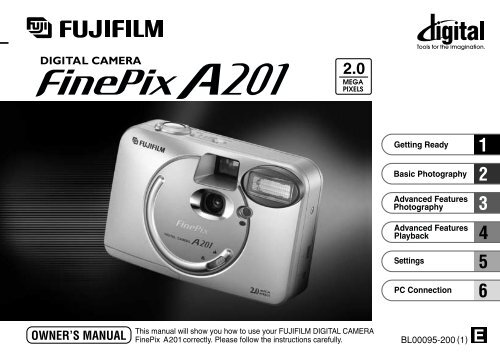
FinePix A201 Owner's Manual - Fujifilm USA
FinePix A201 Owner's Manual - Fujifilm USA
FinePix A201 Owner's Manual - Fujifilm USA

You also want an ePaper? Increase the reach of your titles
YUMPU automatically turns print PDFs into web optimized ePapers that Google loves.
2.0<br />
BL00095-200 (1)
Warning<br />
To prevent fire or shock hazard, do not expose the unit to rain or moisture. CAUTION<br />
— Consult the dealer or an experienced radio/TV<br />
technician for help.<br />
This symbol is intended to alert the user to<br />
This equipment has been tested and found to<br />
You are cautioned that any changes or<br />
the presence of uninsulated “dangerous<br />
comply with the limits for a Class B digital device,<br />
modifications not expressly approved in this<br />
voltage” within the product’s enclosure<br />
pursuant to Part 15 of the FCC Rules. These limits<br />
manual could void the user’s authority to operate<br />
that may be of sufficient magnitude to<br />
are designed to provide reasonable protection<br />
the equipment.<br />
constitute a risk of electric shock to<br />
against harmful interference in a residential<br />
persons.<br />
installation. This equipment generates, uses, and Notes on the Grant:<br />
CAUTION : TO REDUCE THE RISK OF ELECTRIC SHOCK.<br />
can radiate radio frequency energy and, if not To comply with Part 15 of the FCC rules, this<br />
This symbol is intended to alert the user<br />
DO NOT REMOVE COVER (OR BACK).<br />
installed and used in accordance with the product must be used with a <strong>Fujifilm</strong>-specified<br />
to the presence of important operating<br />
NO USER-SERVICEABLE PARTS INSIDE.<br />
instructions, may cause harmful interference to ferrite-core USB cable and DC supply cord.<br />
REFER SERVICING TO QUALIFIED SERVICE PERSONNEL.<br />
and maintenance (servicing) instructions<br />
radio communications. However, there is no<br />
in the literature accompanying the<br />
guarantee that interference will not occur in a<br />
The graphical symbols are located on the bottom<br />
For customers in Canada<br />
appliance.<br />
of the case.<br />
particular installation. If this equipment does cause<br />
harmful interference to radio or television CAUTION<br />
For customers in the U.S.A.<br />
reception, which can be determined by turning the This Class B digital apparatus complies with<br />
equipment off and on, the user is encouraged to Canadian ICES-003.<br />
FCC Statement<br />
try to correct the interference by one or more of<br />
This device complies with part 15 of the FCC<br />
the following measures :<br />
Rules. Operation is subject to the following two<br />
—<br />
conditions : (1)<br />
Reorient or relocate the receiving antenna.<br />
This device may not cause<br />
—<br />
harmful interference, and (2)<br />
Increase the separation between the<br />
this device must<br />
equipment and receiver.<br />
accept any interference received, including<br />
— Connect the equipment into an outlet on a<br />
interference that may cause undesired<br />
Please read the Safety Notes (➡P.81)<br />
circuit different from that to which the receiver is<br />
operation.<br />
and make sure you understand them<br />
connected.<br />
before using the camera.<br />
2 3
4<br />
Contents<br />
Warning ............................................................ 2<br />
Preface ............................................................. 6<br />
Camera Features and Accessories .................. 7<br />
Nomenclature .................................................... 8<br />
PREFACE ............................................................ 11<br />
Selecting the Language ................................... 11<br />
Attaching the Strap .......................................... 11<br />
LOADING THE BATTERIES ................................. 12<br />
LOADING THE SmartMedia ................................. 13<br />
REMOVING THE SmartMedia ............................. 14<br />
SWITCHING ON AND OFF ..................................... 15<br />
SETTING THE DATE AND TIME ............................. 16<br />
USING THE OPTIONAL AC POWER ADAPTER .... 1 Getting Ready<br />
18<br />
2 Basic Photography<br />
qTAKING PICTURES (AUTO MODE) ............... 19<br />
■Viewfinder Lamp Display ................................ 21<br />
Number of Available Shots ................................ 22<br />
FRAMING GUIDELINE FUNCTION ..................... 23<br />
r MACRO (CLOSE-UP) PHOTOGRAPHY ........ 24<br />
DIGITAL ZOOM ...................................................... 25<br />
3VIEWING YOUR IMAGES (PLAYBACK) ......... STILL IMAGE MODE<br />
26<br />
PLAYBACK ZOOM ................................................. 27<br />
MULTI-FRAME PLAYBACK .................................. 28<br />
ERASING SINGLE FRAME ................................... 29<br />
ADVANCED FEATURES PHOTOGRAPHY ........ 31<br />
■Photography mode specifications .................. 31<br />
SELECTING 1 AUTO OR 2 MANUAL ..... 32<br />
PHOTOGRAPHY MENU OPERATION ............ 33<br />
y FLASH ............................................................ 34<br />
AUTO Auto Flash Mode ................................. 34<br />
: Red-Eye Reduction ............................. 35<br />
y Forced Flash ....................................... 35<br />
u Suppressed Flash ............................... 36<br />
; Slow Synchro ...................................... 36<br />
l SELF-TIMER PHOTOGRAPHY ................... 37<br />
a EV (EXPOSURE COMPENSATION) ......... 39<br />
s WHITE BALANCE<br />
(SELECTING THE LIGHT SOURCE) ......... 40<br />
e MOVIE ........................................................... 3 Advanced Features Photography<br />
STILL IMAGE MODE<br />
PHOTOGRAPHY MENU<br />
MOVIE MODE<br />
41<br />
4 Advanced Features Playback<br />
PLAYING BACK MOVIES ..................................... 44<br />
■Playing back movies ....................................... 45<br />
g ERASING SINGLE • ALL<br />
FRAMES/FORMATTING ............................... 46<br />
f HOW TO SPECIFY PRINT OPTIONS ........ 48<br />
f DPOF DATE SETTING ................................ 49<br />
f DPOF SET FRAME ...................................... PLAYBACK MENU<br />
50<br />
SETTINGS .............................................................. 52<br />
■List of settings .................................................. 52<br />
■SET–UP menu options ................................... 52<br />
USING THE OPTION MENU ................................. 53<br />
Using SET–UP ................................................... 53<br />
djSETTING THE FILE SIZE AND QUALITY<br />
(COMPRESSION RATIO) ........................... 54<br />
d LCD MONITOR BRIGHTNESS ....................... 55<br />
POWER SAVE ....................................................... 5 Settings<br />
SET–UP<br />
56<br />
IN PC CONNECTION ............................................ 57<br />
DSC (Mass storage device) Mode .................... 57<br />
PC-CAM (camera) Mode ................................... 57<br />
CONNECTING AT DSC (MASS STORAGE DEVICE) MODE .... 58<br />
CONNECTING AT PC-CAMERA MODE ............. 60<br />
DISCONNECTING FROM THE PC<br />
(Important – always use this procedure.) ............. 6 PC Connection<br />
62<br />
System Expansion Options ............................... 64<br />
Accessories Guide ............................................. 65<br />
Notes on Using Your Camera Correctly ........... 67<br />
Notes on the Power Supply ............................... 68<br />
Applicable Batteries ......................................... 68<br />
Notes on the Batteries ..................................... 68<br />
Notes on Using the AC Power Adapter ......... 70<br />
Notes on the SmartMedia .............................. 71<br />
Warning Displays ............................................... 73<br />
Troubleshooting ................................................. 75<br />
Specifications ..................................................... 78<br />
Explanation of Terms ......................................... 80<br />
Safety Notes ....................................................... 81<br />
EC Declaration of Conformity ............................ 84<br />
5<br />
1<br />
2<br />
3<br />
4<br />
5<br />
6
Preface<br />
■ Test Shots Prior to Photography<br />
For particularly important photographs (such as weddings<br />
and overseas trips), always take a test photograph and view<br />
the image to make sure that the camera is functioning<br />
normally.<br />
h Fuji Photo Film Co., Ltd. cannot accept liability for any<br />
incidental losses (such as the costs of photography or the<br />
loss of income from photography) incurred as a result of<br />
faults with this product.<br />
■ Notes on Copyright<br />
Images recorded using your digital camera system cannot be<br />
used in ways that infringe copyright laws without the consent<br />
of the owner, unless intended only for personal use. Note that<br />
some restrictions apply to the photographing of stage<br />
performances, entertainments and exhibits, even when<br />
intended purely for personal use. Users are also asked to note<br />
that the transfer of memory cards containing images or data<br />
protected under copyright laws is only permissible within the<br />
restrictions imposed by those copyright laws.<br />
■ Liquid Crystal<br />
If the LCD monitor or display panel is damaged, take<br />
particular care with the liquid crystal in the monitor or panel.<br />
If any of the following situations arise, take the urgent action<br />
indicated.<br />
h If liquid crystal comes in contact with your skin<br />
Wipe the area with a cloth and then wash thoroughly with<br />
running water and soap.<br />
h If liquid crystal gets into your eye<br />
Flush the affected eye with clean water for at least<br />
15 minutes and then seek medical assistance.<br />
h If liquid crystal is swallowed<br />
quantities of water and induce vomiting. Then seek<br />
medical assistance.<br />
■ Notes on Electrical Interference<br />
If the camera is to be used in hospitals or aircrafts, please<br />
note that this camera may cause interference to other<br />
equipment in the hospital or aircraft. For details, please<br />
check with the applicable regulations.<br />
■ Handling Your Digital Camera<br />
This camera contains precision electronic components. To<br />
ensure that images are recorded correctly, do not subject<br />
the camera to impact or shock while an image is being<br />
recorded.<br />
■ Trademark Information<br />
h IBM PC/AT is a registered trademark of International<br />
Business Machines Corp. of the U.S.A.<br />
h iMac and Macintosh are registered trademarks of Apple<br />
Computer, Inc.<br />
h Windows is a registered trademark of the Microsoft<br />
Corporation of the U.S. registered in the U.S.A. and other<br />
countries. Windows is an abbreviated term referring to the<br />
Microsoft Windows Operating System.<br />
h SmartMedia is a trademark of Toshiba Corporation.<br />
h Other company or product names are trademarks or<br />
registered trademarks of the respective companies.<br />
Trademark Information.<br />
Camera Features and Accessories<br />
Features Accessories<br />
h Superb high-quality images from the 2.0-megapixel<br />
CCD with RGB Filter and high-resolution Fujinon lens.<br />
h Maximum recording resolution of 1600 × 1200 pixels<br />
(1.92 million pixels)<br />
h Compact and lightweight body<br />
h Wide range of photography applications (includes<br />
Macro function)<br />
h Automatic scene recognition, auto white balance and<br />
AE functions built in<br />
h Automatic high-precision flash built in with extensive<br />
flash control functionality<br />
h 2.5× digital zoom photography and up to 5× zoom<br />
playback functions<br />
h Easy operation using the Mode switch and 4-way<br />
“fg” button<br />
h Shoots movies (320 × 240 pixels without sound)<br />
h USB connection for quick and easy image file<br />
downloading (using the enclosed Interface Set)<br />
h Built-in PC Camera function<br />
h Runs on 2 ordinary AA batteries<br />
h Conforms to the new standard for digital camera file<br />
system ✽<br />
✽ Design rule for Camera File system.<br />
hLR6 AA-size alkaline Batteries (2)<br />
h16 MB, 3.3V SmartMedia (1)<br />
Supplied with:<br />
iAnti-static case (1)<br />
iIndex labels (1)<br />
hHand strap (1)<br />
hInterface Set (1)<br />
• CD-ROM: Software for <strong>FinePix</strong> VE (1)<br />
• Special USB cable with Noise Suppression core (1)<br />
• Software Quick Start Guide (1)<br />
hOwner’s <strong>Manual</strong> (this manual) (1)<br />
6 Flush your mouth thoroughly with water. Drink large<br />
7
Nomenclature ✽ Refer to the pages in parentheses for information on using the camera features.<br />
Mode switch<br />
Still image mode(P.19)<br />
Playback mode(P.26)<br />
Movie mode(P.41)<br />
Shutter button<br />
Viewfinder window<br />
Lens/Lens cover<br />
Self-timer lamp<br />
(P.38)<br />
POWER switch(P.15)<br />
Flash(P.34)<br />
Flash control<br />
sensor<br />
(Special USB)<br />
socket (P.58, 60)<br />
Viewfinder lamp(P.21)<br />
Viewfinder(P.20)<br />
LCD monitor(P.20)<br />
Tripod mount<br />
Battery cover(P.12)<br />
MENU/OK button<br />
Macro selector button(P.24)<br />
DC IN 3V<br />
(Power input)<br />
Battery compartment<br />
8<br />
socket(P.18)<br />
9<br />
button<br />
DISP button<br />
(P.23,28)<br />
Strap mount(P.11)<br />
BACK button<br />
SmartMedia slot(P.13)
Nomenclature<br />
Example of LCD Monitor Text Display:Still image<br />
Photography mode<br />
Date<br />
Macro<br />
Flash<br />
Zoom bar<br />
Example of LCD Monitor Text Display:Playback<br />
Playback mode<br />
EV<br />
White balance<br />
Number of remaining shots<br />
File size/Image quality<br />
Battery low warning<br />
Camera shake warning<br />
DPOF<br />
Playback frame number<br />
Battery low warning<br />
1 Getting Ready PREFACE<br />
Selecting the Language<br />
You can use the “SET–UP” screen on this<br />
camera to select ENGLISH or FRENCH as the<br />
LANGUAGE used for screen display (➡P.52).<br />
The screens in this manual are shown in<br />
ENGLISH.<br />
Attaching the Strap<br />
01 02<br />
1Pass the loop of this cord on the end of the<br />
strap through the strap mount.<br />
2Then pass the other end of the strap through<br />
the loop of the thin cord and pull the strap<br />
tight.<br />
Date<br />
10 11<br />
1
LOADING THE BATTERIES<br />
Compatible batteries<br />
Use two AA-size alkaline batteries or two AAsize<br />
nickel-metal hydride (Ni-MH) batteries.<br />
01<br />
03<br />
LOADING THE SmartMedia <br />
SmartMedia(sold separately)<br />
■ Only use 3.3V SmartMedia<br />
MG-4S ( 4MB), MG-16SW ( 16MB, ID)<br />
MG-8S ( 8MB), MG-32SW ( 32MB, ID)<br />
MG-16S (16MB), MG-64SW ( 64MB, ID)<br />
MG-32S (32MB), MG-128SW (128MB, ID)<br />
MG-64S (64MB)<br />
◆ Notes on Handling Batteries ◆<br />
hIt is recommended that you use same brand<br />
of alkaline batteries as those supplied with the<br />
camera.<br />
hDo not use different types of batteries or old<br />
and new batteries together.<br />
hYou cannot use lithium, manganese or nickelcadmium<br />
(Ni-Cd) batteries.<br />
02<br />
02<br />
hThe operating lives of alkaline batteries vary<br />
between brands and the life of batteries you<br />
purchase may be shorter than the alkaline<br />
Gold marking<br />
12<br />
batteries provided with the camera. Note also<br />
that due to the nature of alkaline batteries, the<br />
time for which they can be used is shorter in cold<br />
locations (at temperatures of +10°C (+50°F) or<br />
below). Consequently, Ni-MH batteries are<br />
recommended.<br />
hSoiling (fingerprints, etc) on the terminals of<br />
batteries can greatly reduce the time for which<br />
the batteries provide power.<br />
hYou will need the optional charger (➡P.65) to<br />
recharge Ni-MH batteries.<br />
hSee P.68 for notes on using batteries.<br />
1Slide the battery cover out and lift it open.<br />
2Insert the batteries correctly as indicated by<br />
the polarity icons.<br />
3Close the battery cover.<br />
●! Do not apply excessive force to the battery cover.<br />
●! Take care not to drop the batteries when you open<br />
or close the battery cover.<br />
●! You should carry a spare set of batteries (sold<br />
separately) when taking pictures.<br />
●! Image files cannot be recorded or erased if a writeprotect<br />
sticker is affixed to the SmartMedia.<br />
●! Operation of this camera is only guaranteed when it<br />
is used with FUJIFILM SmartMedia.<br />
●! Some 3.3V SmartMedia are labelled as “3V” or ID”<br />
cards.<br />
●! See P.71 – 72 for more information on SmartMedia.<br />
1Check that the camera is switched off. Then hold the<br />
camera so that the battery cover faces upwards and<br />
slide the cover out to open it.<br />
2Push the SmartMedia firmly into the SmartMedia<br />
slot as far as it will go.<br />
3Close the battery cover.<br />
●! If you open the battery cover while the camera is still<br />
switched on, the camera is automatically switched off to<br />
protect the SmartMedia.<br />
●! The SmartMedia will not slide fully into the slot if it is<br />
inserted facing the wrong way. Be careful not to apply<br />
undue force to the SmartMedia.<br />
13<br />
01<br />
03<br />
1
REMOVING THE SmartMedia SWITCHING ON AND OFF<br />
1 01<br />
02<br />
1Check that the indicator in the viewfinder is<br />
green and then switch the camera off.<br />
2Always ensure that the battery cover is facing<br />
upwards when you open it.<br />
2<br />
Grip the SmartMedia and pull it out, taking care<br />
that the batteries do not fall out of the camera.<br />
●! To protect the SmartMedia, always store it in the<br />
special anti-static case.<br />
◆ Printing Images and Downloading<br />
Images to a PC ◆<br />
1<br />
To switch the camera on and off, slide the “POWER”<br />
switch sideways. When you switch the camera on,<br />
the viewfinder lamp lights (green). If the date has<br />
been cleared, a confirmation message appears.<br />
H: The DATE/TIME setting screen appears (➡P.17).<br />
J: The camera remains in Still image, Movie or<br />
2<br />
Blank<br />
On Flashing<br />
With the LCD monitor on, you can check the<br />
remaining charge in the battery.<br />
1Battery has ample charge (No indicator<br />
displayed).<br />
2The battery charge is low. Have a new set of<br />
batteries ready.<br />
3The battery is exhausted. The display will<br />
shortly go blank and the camera will stop<br />
working. Replace or recharge the battery.<br />
●! In Still Image mode, the LCD monitor stays off when<br />
you switch the camera on.<br />
See P.23 for information on switching the LCD<br />
monitor on.<br />
●! If the battery charge is depleted, you may not be<br />
able to switch the LCD monitor on.<br />
14<br />
Never open the battery cover while the camera<br />
is still switched on as this could corrupt the<br />
image files on the SmartMedia or damage the<br />
SmartMedia itself.<br />
hSee P.48, 64 for information on printing<br />
images.<br />
hSee P.57 – 63 for information on downloading<br />
images to a PC.<br />
playback mode.<br />
●! If you do not set the date and time, this confirmation<br />
screen will appear each time you switch the camera on.<br />
●! Take care not to touch the lens when you switch the<br />
camera on as the lens cover opens when the<br />
camera is switched on.<br />
◆ Power Save Function ◆<br />
If the camera is not used for 2 minutes, this<br />
function automatically switches it off.<br />
When this function is enabled, the LCD monitor<br />
switches off to conserve battery power if the<br />
camera is not used in any way for 30 seconds<br />
(See P.56 for details).<br />
15<br />
1
SETTING THE DATE AND TIME<br />
1 01 03<br />
02<br />
2<br />
01 02<br />
3 01 02 4<br />
The “SET–UP” screen reappears. Press the<br />
“MENU/OK” button to complete the settings.<br />
1Press the “MENU/OK” button to display the 1The “SET–UP” screen appears. Use “a” or<br />
1Use “d” or “c” to select the desired item and then<br />
menu screen.<br />
“b” to select “DATE/TIME”.<br />
use “a” and “b” to correct the setting.<br />
2Use “g” button or “f” to select “SET–UP” 2Press “c”.<br />
2When you have finished setting the date and time,<br />
from the “dOPTION” menu.<br />
3Press the “MENU/OK” button.<br />
If the date was cleared and you selected<br />
“H”, proceed from step 3 (➡P.17).<br />
16<br />
●! See P.52 for more information on the “dOPTION”<br />
menu.<br />
●! If at least 10 minutes have passed since the AC<br />
power adapter was connected or the battery inserted<br />
and date and time set, then those settings will be<br />
maintained for roughly 12 hours even when the<br />
camera has no power supply (when the AC power<br />
adapter is disconnected and the battery is removed).<br />
press the “MENU/OK” button to confirm the setting.<br />
●! If you hold down “a” or “b”, the numbers change<br />
continuously.<br />
●! When the time displayed passes “12:00:00”, the<br />
AM/PM setting automatically switches.<br />
●! You cannot set the seconds. To set the time<br />
precisely, press the “MENU/OK” button when the<br />
time signal reaches zero.<br />
If the date was cleared and you selected<br />
“H”, the camera switches to still image or<br />
playback mode without returning to the<br />
“SET–UP” screen.<br />
17<br />
1
USING THE OPTIONAL AC POWER ADAPTER<br />
AC power adapter (optional)<br />
Always use a FUJIFILM AC Power Adapter AC-<br />
3V (➡P.65).<br />
Use the AC power adapter in situations when a<br />
loss of power will cause problems, such as<br />
during file downloading (via the USB<br />
connection). Using the AC power adapter also<br />
allows you to take pictures and play back<br />
images without worrying about depleting the<br />
batteries.<br />
DC IN 3V Socket<br />
Check that the camera is switched off. Plug the<br />
AC power adapter connector into the “DC IN 3V”<br />
socket and then plug the AC power adapter into<br />
the power outlet.<br />
2 Basic<br />
Photography<br />
STILL IMAGE MODE<br />
1 01 02 2<br />
1Set the Mode switch to “q”.<br />
2To take pictures using the LCD monitor, press<br />
the “DISP” button to switch the LCD monitor on.<br />
hFocal range: Approx. 80 cm (2.6 ft.) to infinity<br />
q TAKING PICTURES (AUTO MODE)<br />
●! See P.70 for notes on using the AC power adapter.<br />
●! Only connect or disconnect the AC power adapter<br />
when the camera is switched off.<br />
Connecting or disconnecting the AC power adapter<br />
while the camera is switched on temporarily<br />
●! The socket-outlet shall be installed near the<br />
equipment and shall be easily accessible.<br />
●! The shape of the plug and socket-outlet depends on<br />
the country of use.<br />
Loop the strap over your wrist, brace your<br />
elbows firmly against your body and hold the<br />
camera with both hands.<br />
●! For close-up shots, use the Macro setting (➡P.24).<br />
●! To minimize power consumption, use the viewfinder<br />
18<br />
interrupts the power supply to the camera, so that<br />
images or movies being shot at the time are not<br />
recorded. Failing to switch the camera off first can<br />
also result in damage to the SmartMedia or<br />
malfunctions during PC connection.<br />
Connecting the AC power adapter does not<br />
allow you to charge the Ni-MH batteries. Use<br />
the optional charger (➡P.65) to charge the Ni-<br />
MH batteries.<br />
●! If a “∞”, “”, “•”<br />
or “`” message appears, see P.73, 74.<br />
(switch the LCD monitor off) to take pictures.<br />
●! The image will be blurred if the camera moves when<br />
taking the picture (camera shake). When shooting in<br />
low-light conditions, use the flash (➡P.34) or a tripod to<br />
prevent blurred images due to camera shake. 19<br />
2
3<br />
STILL IMAGE MODE<br />
q TAKING PICTURES (AUTO MODE)<br />
Be careful to ensure that the lens, flash and<br />
flash control sensor are not obscured by your<br />
hands or the camera strap.<br />
4<br />
LCD monitor<br />
When you press the shutter button, the camera<br />
emits a short beep and takes the picture. The<br />
data is then recorded.<br />
●! When you press the shutter button, there is a very Red Flashing<br />
View Finder<br />
short delay before the picture is actually taken.<br />
●! The viewfinder lamp flashes orange while the flash is<br />
charging. If the LCD monitor is switched on, the<br />
●! If the lens, flash or flash control sensor is obscured<br />
by your fingers or the camera strap, you may not be<br />
able to obtain the correct brightness (exposure) for<br />
your shot.<br />
●! Check that the lens is clean. If it is dirty, clean the<br />
20 lens as described on P.67.<br />
Use the LCD monitor or viewfinder to locate your<br />
subject in the frame.<br />
●! To frame your shot precisely, you should take the<br />
picture using the LCD monitor.<br />
●! In some conditions it may be difficult to see your subject<br />
clearly on the LCD monitor. (Such as in sunny weather<br />
outdoors or when you are shooting dimly lit scenes.) In<br />
such situations, use the viewfinder to take the shot.<br />
screen may go dark for a moment. This is normal<br />
and does not indicate a fault.<br />
●! The flash charging time may increase when the battery<br />
charge getting lower.<br />
●! Since the amount of image data recorded is not fixed and<br />
varies depending on the subject (level of image detail,<br />
etc.), the number of available shots may not decrease<br />
after the image is recorded, or may decrease by 2.<br />
●! See P.73 – 74 for information on the warning displays.<br />
During image recording, the viewfinder lamp<br />
glows orange and you cannot take pictures.<br />
Note also that switching the camera off or<br />
opening the battery cover during image<br />
recording could corrupt the image files. 21<br />
5<br />
Beep<br />
■Viewfinder lamp display<br />
Color Status Meaning<br />
Green Lit<br />
Orange<br />
Lit<br />
Ready to shoot<br />
Image being recorded onto the<br />
SmartMedia.<br />
Flashing Flash charging<br />
h SmartMedia warning<br />
No SmartMedia loaded,<br />
SmartMedia not formatted,<br />
incorrect format, write-protect<br />
sticker used, SmartMedia full,<br />
SmartMedia error.<br />
✽ When the LCD monitor is<br />
switched on, details of the<br />
warning are displayed on the<br />
monitor (➡P.73 – 74).<br />
2
STILL IMAGE MODE<br />
q TAKING PICTURES (AUTO MODE)<br />
Number of Available Shots<br />
The number of available shots appears on the<br />
LCD monitor.<br />
●! See P.54 for information on changing the File Size<br />
and Quality settings.<br />
●! The factory default settings at shipment are 1M (File<br />
Size) and N (Quality: NORMAL).<br />
FRAMING GUIDELINE FUNCTION<br />
LCD monitor OFF<br />
Scene<br />
Use this frame when you want to position your<br />
main subject in the center of the frame or when<br />
you want to align your shot with the horizon.<br />
This feature provides a clear guide to the<br />
subject size and the overall balance of the shot<br />
so that you get exactly the shot you want.<br />
■ Standard number of shots per SmartMedia<br />
The number of shots may increase or decrease slightly depending on the type of subject. Note also that the larger<br />
LCD monitor ON<br />
the SmartMedia capacity, the greater the discrepancy between the standard number of shots and the actual number<br />
of shots.<br />
Framing Guideline displayed<br />
File Size<br />
8 1600 ✕ 1200<br />
9 1280 ✕ 960 0 640 ✕ 480<br />
Quality Mode<br />
FINE NORMAL BASIC FINE NORMAL NORMAL<br />
You can select the Framing Guide function in<br />
Image Data Size Approx.770KB Approx.390KB Approx.200KB Approx.620KB Approx.320KB Approx.130KB<br />
“q” Photography mode. The mode shown on<br />
4MB (MG-4S)<br />
4 9 19 6<br />
12<br />
30<br />
the LCD monitor switches each time you press<br />
8MB (MG-8S)<br />
16MB (MG-16S/SW)<br />
10<br />
20<br />
19<br />
39<br />
39<br />
75<br />
12<br />
25<br />
25<br />
49<br />
61<br />
122<br />
the “DISP” button. Press the “DISP” button to<br />
display the framing guideline.<br />
32MB (MG-32S/SW)<br />
64MB (MG-64S/SW)<br />
128MB (MG-128SW)<br />
41<br />
82<br />
166<br />
79<br />
159<br />
319<br />
152<br />
306<br />
613<br />
50<br />
101<br />
204<br />
99<br />
198<br />
398<br />
247<br />
497<br />
997<br />
●! The framing guideline is not recorded on the image.<br />
●! The lines in the scene frame roughly divide the<br />
recorded pixels into three parts horizontally and<br />
vertically. When the image is printed, the resulting<br />
22 ✽ The number of available shots are shown for formatted SmartMedia.<br />
print may be shifted slightly from the scene frame.<br />
23<br />
2
MACRO (CLOSE-UP) PHOTOGRAPHY<br />
Selecting Macro mode allows you to take closeup<br />
shots. If the flash is set to “AUTO” or “:Redeye<br />
Reduction mode”, it is automatically set to<br />
“uSuppressed Flash mode”.<br />
●Effective Photography Range:<br />
Approx. 8 cm to 13 cm (3.1 in to 5.1 in.).<br />
●! Using the camera width (about 10 cm or 4 in.) as a<br />
guide, ensure that the distance to the subject is<br />
between 8 cm and 13 cm (3.1 in to 5.1 in.). The<br />
camera will not focus on subjects outside this focal<br />
range.<br />
●! To use the flash, select the “y Forced Flash” or<br />
“; Slow Synchro” setting in the menu screen<br />
(➡P.35, 36). However, you may not be able to obtain<br />
the correct brightness (exposure) for your shot.<br />
●! When shooting in dark conditions, use a tripod to<br />
prevent camera shake.<br />
To switch to Macro mode, slide the Macro selector<br />
switch towards the Macro icon until it stops.<br />
“r” : The “5” icon appears on the LCD monitor<br />
and you can take close-up shots.<br />
“t” : Macro mode is cancelled and the camera<br />
is ready for normal shooting (➡P.19).<br />
1<br />
DIGITAL ZOOM<br />
You can use the digital zoom function for only<br />
“9” “0” Resolution (File Size) settings.<br />
Note that the digital zoom only functions when<br />
you use the LCD monitor to take shots.<br />
To zoom in on your subject, press “a ”<br />
([TELE). To zoom out, press “b” (]WIDE).<br />
2<br />
Zoom Bar<br />
A “zoom bar” appears on the LCD monitor.<br />
hDigital zoom focal distance (35 mm camera<br />
equivalent)<br />
9: Equivalent to approx. 36 mm – 45 mm<br />
Max. zoom scale: 1.25×<br />
0: Equivalent to approx. 36 mm – 90 mm<br />
Max. zoom scale: 2.5×<br />
24<br />
If you use the viewfinder to take a picture in<br />
Macro mode, the field visible through the<br />
viewfinder does not match the field actually<br />
photographed because the viewfinder and lens<br />
are in different positions. Accordingly, you<br />
should use the LCD monitor to take pictures in<br />
Macro mode.<br />
●! The LCD monitor automatically switches on.<br />
●! You cannot switch the LCD monitor off.<br />
●! When you cancel Macro mode, the LCD monitor<br />
remains on.<br />
●! You cannot use the digital zoom for resolutions of<br />
“8”.<br />
●! See P.54 for information on changing the file size<br />
setting.<br />
25<br />
2
1<br />
3 VIEWING YOUR IMAGES (PLAYBACK)<br />
01 02<br />
1Set the Mode switch to “3”.<br />
2You can use “c” and “d” to move forward<br />
and backward respectively through your<br />
images.<br />
●! When you set the Mode switch to “3 ”, the last<br />
image shot is displayed.<br />
2<br />
Frame number<br />
DPOF<br />
Normal playback<br />
No text displayed<br />
Multi-frame playback<br />
If you have specified DPOF settings, the “f”<br />
icon is displayed. The LCD monitor display<br />
changes each time you press the “DISP” button.<br />
●! See P.53 and 55 for more information on adjusting<br />
the brightness of the LCD monitor.<br />
PLAYBACK ZOOM<br />
1 2<br />
Pressing “a ” or “b ” during single-frame<br />
playback zooms in (enlarges) or out on a still<br />
image. When you use this function, a zoom bar<br />
is displayed.<br />
hZoom scales:<br />
8 1600 ×1200 pixel images: Max 5×<br />
9 1280 × 960 pixel images: Max 4×<br />
0 640 × 480 pixel images: Max 2×<br />
After you have zoomed in on your image,<br />
1Press the “DISP” button.<br />
2Use “a”, “b”, “d” and “c” to zoom in on<br />
different parts of the image.<br />
3Press the “DISP” button again to revert to<br />
zoomed display.<br />
◆ Images That Can be Viewed on the <strong>FinePix</strong> <strong>A201</strong> ◆<br />
You can use this camera to view (excluding some uncompressed data) images recorded on a<br />
●! Press the “BACK” button to return to normal<br />
unscaled display.<br />
●! You may not be able to use playback zoom for some<br />
images shot on other camera models.<br />
26<br />
<strong>FinePix</strong> <strong>A201</strong> or images recorded onto a 3.3V SmartMedia using a FUJIFILM <strong>FinePix</strong> series, MX series<br />
or DX series digital camera.<br />
●! Pressing “d ” or “c ” during zooming cancels<br />
zooming and moves to the next image.<br />
This is useful for such things as checking the<br />
focus after you take a shot.<br />
27<br />
Zoom bar<br />
01 03<br />
02<br />
2
MULTI-FRAME PLAYBACK<br />
1 2 01 02<br />
Normal playback<br />
No text displayed<br />
Multi-frame playback<br />
ERASING SINGLE FRAME<br />
1 2<br />
01 02<br />
Pressing the “DISP” button during playback<br />
switches the LCD monitor to the next display<br />
mode. Press the “DISP” button several times to<br />
select multi-frame (9-frame) playback.<br />
You cannot display text during multi-frame<br />
playback.<br />
2<br />
1Select a frame by using “d”, “c”, “a” and “b”<br />
1Set the Mode switch to “3”.<br />
Select “FRAME” in the “gERASE” menu and<br />
to move the cursor (the orange box) to the<br />
2Press the “MENU/OK” button to display the press the “MENU/OK” button.<br />
desired frame. Press “a” or “b” several times<br />
to switch to the previous page or the next<br />
page.<br />
2Press the “DISP” button to view the currently<br />
Menu screen on the LCD monitor.<br />
●! You cannot use multi-frame playback while a menu<br />
selected image at full size.<br />
is displayed.<br />
●! Playback zoom cannot be used with multi-frame<br />
28 playback.<br />
●! See P.46 for more details of the “gERASE” menu.<br />
29
3<br />
ERASING SINGLE FRAME<br />
Press “d” or “c” to display the image to be<br />
erased.<br />
4<br />
Press the “MENU/OK” button to erase the<br />
displayed image. When erasing is complete,<br />
the next image appears and the “¨”<br />
message is displayed.<br />
●! “≠” is displayed for frames with DPOF settings<br />
and they cannot be erased (➡ P.74).<br />
●! If the “– ” message appears, you<br />
cannot erase the frame. Use the camera on which<br />
the frame was protected to unprotect the frame.<br />
30 ●! Press the “BACK” button to cancel frame erasing.<br />
To continue erasing images, repeat the<br />
procedure from step 3 .<br />
31<br />
3<br />
Advanced Features<br />
Photography<br />
ADVANCED FEATURES PHOTOGRAPHY<br />
The “Advanced Features Photography” section introduces a range of camera functions that you can<br />
access by setting the Mode switch to “q” or “e”.<br />
■ Photography mode specifications<br />
Mode switch<br />
q Still image<br />
e Movie<br />
Photography mode Accessible menu settings<br />
1 AUTO (➡P.32)<br />
This is the easiest mode<br />
for taking pictures and can<br />
be used in a wide range of<br />
conditions.<br />
2 MANUAL (➡P.32)<br />
This mode allows you to<br />
set the “EV” and “White<br />
balance” settings.<br />
e Movie (➡P.41)<br />
In this mode, you can<br />
shoot up to 20 seconds of<br />
video at a time.<br />
y Flash (➡P.34)<br />
l Self-timer (➡P.37)<br />
y Flash (➡P.34)<br />
a EV (Exposure Compensation)<br />
(➡P.39)<br />
s White balance (Selecting the<br />
Light Source) (➡P.40)<br />
Factory<br />
default<br />
AUTO<br />
OFF<br />
AUTO<br />
0<br />
AUTO<br />
— —<br />
Shared menu<br />
settings<br />
dOPTION<br />
✽ See P.52 for<br />
more information<br />
on each of the<br />
settings.<br />
3
STILL IMAGE MODE<br />
SELECTING 1 AUTO OR 2 MANUAL<br />
1 2<br />
01 02 01 02<br />
1Set the Mode switch to “q”.<br />
2Press the “MENU/OK” button to display the<br />
menu on the LCD monitor.<br />
1 AUTO<br />
This is the easiest mode for taking pictures and<br />
can be used in a wide range of conditions.<br />
2 MANUAL<br />
This mode allows you to set the “EV” and “White<br />
balance” settings.<br />
1Use “a ”, “b ”, “d ” and “c ” to select<br />
“q AUTO” or “q MANUAL” from the<br />
“dOPTION” menu.<br />
2Press the “MENU/OK” button to confirm the<br />
selection.<br />
PHOTOGRAPHY MENU<br />
1Press the “MENU/OK” button to display the<br />
menu.<br />
2Use “d” and “c” to select the menu item and<br />
“a” and “b” to change the setting.<br />
PHOTOGRAPHY MENU OPERATION<br />
1 01 02 2<br />
setting display<br />
Press the “MENU/OK” button to confirm the<br />
selection.<br />
When you validate the settings, the respective<br />
icons appear at the top of the screen.<br />
●! The settings available in the menu screen differ<br />
●! See P.52 – 55 for more information on the “FILE<br />
depending on the still image mode. See P.31 for<br />
32 SIZE”, “SET–UP”, “LCD BRIGHTNESS” settings.<br />
details.<br />
33<br />
3
PHOTOGRAPHY MENU<br />
y FLASH<br />
This mode can be selected in the “1 • 2” still<br />
image modes.<br />
Use the flash mode that best suits your shot.<br />
h5 modes: “AUTO, :, y, u and ;”<br />
hEffective flash range (in “1 AUTO” mode):<br />
Approx. 0.8 m to 3 m (2.6 ft. to 9.8 ft.)<br />
AUTO Auto Flash Mode<br />
Use this mode for ordinary photography. The<br />
flash fires automatically as required by the<br />
shooting conditions.<br />
: Red-Eye Reduction<br />
Use this mode to ensure that the subject’s eyes<br />
appear natural when photographing people in<br />
low-light conditions. The flash fires automatically<br />
as required by the photography conditions.<br />
The flash fires a pre-flash just before the picture is<br />
taken and then fires again to take the actual picture.<br />
●! You cannot use this setting in Macro (close-up)<br />
photography.<br />
y Forced Flash<br />
Use this mode to photograph backlit scenes,<br />
such as a subject against a window or in the<br />
shade of a tree, or to obtain the correct colors<br />
when you are shooting under lighting such as<br />
fluorescent tubes. In this mode, the flash fires in<br />
bright as well as dark conditions.<br />
●! When you select a flash mode, you may find that the<br />
displayed image disappears and the screen goes<br />
dark because the flash is charging. In this event, the<br />
viewfinder lamp flashes orange.<br />
●! The flash charging time may increase if the charge<br />
remaining in the batteries is low.<br />
●! If you use the flash in very dusty environments,<br />
floating dust particles may appear as glowing white<br />
34 dots on your image.<br />
●! You cannot use this setting in Macro (close-up)<br />
photography.<br />
◆ Red-Eye Effect ◆<br />
When you use the flash to photograph people in low-light conditions, their eyes sometimes appear red in<br />
the picture. This is caused by the light of the flash reflecting off the inside of the eye. Use Red-Eye<br />
Reduction flash to effectively minimize the likelihood of the red-eye effect.<br />
Take the following measures also to make Red-Eye Reduction more effective :<br />
● Get the subjects to look at the camera. ● Get as close as possible to the subjects.<br />
35<br />
3
PHOTOGRAPHY MENU<br />
y FLASH<br />
1<br />
PHOTOGRAPHY MENU<br />
o SELF-TIMER PHOTOGRAPHY<br />
u Suppressed Flash<br />
Use this mode for photography using indoor<br />
; Slow Synchro<br />
This is a flash mode that uses a slow shutter<br />
This mode can be selected in the “1” still<br />
image mode.<br />
In this mode, a timer runs for roughly 10<br />
Beep<br />
lighting, for shots taken through glass, and for<br />
photography in venues such as theaters or at<br />
speed. This allows you to take pictures of people<br />
at night that clearly show both your subjects and<br />
seconds before the shutter is released. Use this<br />
mode for shots such as photographs of yourself.<br />
3<br />
indoor sporting events where the distance is too the night time backdrop.<br />
great for the flash to be effective. When you use<br />
Suppressed Flash, the Automatic White Balance<br />
function (➡P.80) operates so that natural colors<br />
are captured along with the ambience of the<br />
available light.<br />
Locate the subject in the LCD monitor or<br />
viewfinder and frame the shot. Then press the<br />
shutter button to trigger the self-timer.<br />
●! If you are shooting in Suppressed Flash mode in dark<br />
conditions, use a tripod to prevent camera shake.<br />
●! See P.74 for information on the camera shake<br />
36 warning.<br />
●! The image may be overexposed when you shoot<br />
bright scenes.<br />
●! Because a slow shutter speed is used, a tripod<br />
should be used to prevent camera shake.<br />
●! The self-timer is automatically cancelled in the<br />
following situations:<br />
i When you take a picture.<br />
i When you switch from the “1” photography mode<br />
to another mode.<br />
i When the camera is switched off.<br />
●! Do not stand in front of the camera when you press<br />
the shutter button as this will result in an incorrect<br />
brightness (exposure) setting for the shot. 37<br />
2
3<br />
PHOTOGRAPHY MENU<br />
o SELF-TIMER PHOTOGRAPHY<br />
The self-timer lamp lights steadily for<br />
approximately 5 seconds, blinks for another<br />
approximately 5 seconds and then takes the shot.<br />
4<br />
The LCD monitor counts down the time until the<br />
shot is taken.<br />
Self-timer mode is automatically cancelled after<br />
each shot.<br />
PHOTOGRAPHY MENU<br />
This mode can be selected in the “2 ” still<br />
image mode.<br />
Use the Brightness setting to obtain the optimum<br />
image brightness (exposure) when the subject is<br />
much brighter or darker than the background.<br />
hCorrection range: 11 steps<br />
(–1.5 EV to +1.5 EV in 0.3 EV increments)<br />
See P.80 for information on EV.<br />
a EV (EXPOSURE COMPENSATION)<br />
◆ Subjects for Which Exposure<br />
Adjustment is Particularly Effective ◆<br />
Guide to using + (positive) compensation<br />
h Copying of printed text (black characters on<br />
white paper) (+1.5 EV)<br />
h Backlit portraits (+0.6 EV to +1.5 EV)<br />
h Very bright scenes (such as snowfields) and<br />
highly reflective subjects (+0.9 EV)<br />
h Shots made up predominantly of sky<br />
(+0.9 EV)<br />
Guide to using – (negative) compensation<br />
h Spotlit subjects, particularly against dark<br />
backgrounds (–0.6 EV)<br />
h Copying of printed text (white characters on<br />
black paper) (–0.6 EV)<br />
h Scenes with low reflectivity, such as shots of<br />
pine trees or dark foliage (–0.6 EV)<br />
●! To stop the self-timer once it has started running,<br />
38 press the “BACK” button.<br />
●! The Brightness setting is disabled in the following<br />
situations:<br />
i When the flash is used in Auto or Red-Eye<br />
Reduction mode.<br />
i When dark scenes are shot in Forced Flash mode.<br />
39<br />
3
PHOTOGRAPHY MENU<br />
s WHITE BALANCE (SELECTING THE LIGHT SOURCE)<br />
1<br />
MOVIE MODE<br />
e MOVIE<br />
AUTO: Automatic adjustment<br />
(Shooting to show the ambience of the<br />
light source)<br />
c : Shooting outdoors in fine weather<br />
This mode can be selected in the “2 ” still<br />
x : Shooting in shade<br />
b : Shooting under “Daylight” fluorescent<br />
lamps<br />
n : Shooting under “Warm White” fluorescent<br />
lamps<br />
Set the Mode switch to “e”.<br />
The available shooting time and the “|”<br />
image mode.<br />
In Auto mode, the correct white balance may not<br />
, : Shooting under “Cool White” fluorescent<br />
lamps<br />
e Movie<br />
message are shown on the LCD monitor.<br />
be obtained for subjects such as close-ups of<br />
people’s faces and shots taken under a special<br />
light source.<br />
Change the white balance setting when you<br />
want to take a picture with the correct balance.<br />
See P.80 for more information on the white<br />
balance.<br />
40<br />
z : Shooting in incandescent light<br />
✽ The white balance setting is ignored when the flash is<br />
used. To achieve the desired effect in your shot, set<br />
the flash to Suppressed Flash mode (➡P.36).<br />
This mode allows you to shoot up to 20 seconds<br />
of movie at a time.<br />
hMovie format: Motion JPEG (➡P.80)<br />
320 × 240 pixels<br />
10 frames per second<br />
Without sound<br />
●! Select Macro mode for close-up shots (➡P.24).<br />
●! The shooting time per shot may be shorter than 20<br />
seconds depending on the available space on the<br />
SmartMedia.<br />
●! You cannot switch the LCD monitor off in this mode.<br />
●! In some cases, playback may not be possible on<br />
other camera models.<br />
3<br />
■ SmartMedia standard shooting time<br />
SmartMedia capacity Available shooting time<br />
MG-4S (4MB) Approx. 23 sec.<br />
MG-8S (8MB) Approx. 47 sec.<br />
MG-16S/SW (16MB) Approx. 94 sec.<br />
MG-32S/SW (32MB) Approx. 191 sec.<br />
MG-64S/SW (64MB) Approx. 385 sec.<br />
MG-128SW (128MB) Approx. 774 sec.<br />
✽ These movie shooting times are for newly formatted<br />
SmartMedia.<br />
41<br />
2
3<br />
MOVIE MODE<br />
e MOVIE<br />
Zoom bar<br />
You can use “a” and “b” to zoom in and out. A<br />
“zoom bar” is displayed on the LCD monitor.<br />
4<br />
When you press the shutter button, the camera<br />
starts shooting.<br />
5 6<br />
During shooting, “hREC” appears on the LCD<br />
monitor with a counter showing the remaining<br />
time displayed in the top-right corner.<br />
If you press the shutter button during shooting,<br />
shooting ends and the movie is stored on the<br />
SmartMedia.<br />
hDigital zoom focal distance (35 mm camera<br />
equivalent)<br />
Approx. 36 mm to 90 mm<br />
●! When you press the shutter button, there is a very<br />
brief delay before the camera starts shooting.<br />
●! You do not need to hold down the shutter button.<br />
●! The white balance is fixed during shooting, but the<br />
Max. zoom scale: 2.5×<br />
exposure varies automatically to suit the scene being<br />
42<br />
shot.<br />
The white balance is set automatically when<br />
you press the shutter button.<br />
●! Once the remaining time runs out, movie recording<br />
automatically stops and the movie is stored on the<br />
SmartMedia.<br />
●! The time required to record a 20 seconds movie<br />
(roughly 3 MB) is approximately 3 seconds.<br />
●! If you end shooting immediately after you start<br />
shooting, only 3 seconds of movie is shot. 43<br />
3
1<br />
4 Advanced<br />
Features Playback<br />
01<br />
1Set the Mode switch to “3”.<br />
2Use “d” or “c” to select the movie file.<br />
PLAYING BACK MOVIES<br />
02<br />
2<br />
01<br />
02<br />
1Press “b(])” to play the movie.<br />
2The LCD monitor shows the playback time<br />
and a playback progress bar.<br />
■ Playing back movies<br />
The movie automatically stops when playback ends.<br />
●! Movies cannot be played back using multi-frame<br />
playback. Use the “DISP” button to revert to normal<br />
◆ Compatible movie files ◆<br />
playback.<br />
The <strong>FinePix</strong> <strong>A201</strong> can play back movie files shot on a <strong>FinePix</strong> <strong>A201</strong> and movie files up to 20 seconds<br />
44<br />
Movies are displayed somewhat smaller than<br />
still images.<br />
●! If the subject of the movie is very bright, white<br />
streaks may appear on the image during playback.<br />
This is normal and is not a fault.<br />
long that were shot on a FUJIFILM digital camera and stored on a 3.3V SmartMedia. However, this<br />
camera cannot play back sound. If you attempt to play back a movie that is longer than 20 seconds, the<br />
“•” message appears and playback fails.<br />
45<br />
Playback<br />
Pause/Resume<br />
Stop<br />
Fast forward/Rewind<br />
Skip playback<br />
Control Description<br />
Rewind Forward<br />
When paused<br />
Pauses the movie during playback.<br />
Press this button again to resume playback.<br />
Stops playback.<br />
✽ Press “d” or “c” while movie playback is stopped to go back<br />
to the previous file or advance to the next file respectively.<br />
Press these during playback to skip forwards or backwards<br />
through the movie.<br />
i Each time you press “d” or “c” when the movie is paused,<br />
the movie advances or goes back one frame.<br />
i Hold down the button to move through the frames quickly.<br />
4
PLAYBACK MENU<br />
FRAME<br />
Erase only the selected file.<br />
●! The file for which “–” was displayed<br />
cannot be erased. Unprotect the frame using the<br />
camera on which the protection was first applied.<br />
●! “≠” is displayed for frames with DPOF<br />
settings and they cannot be erased (➡ P.74).<br />
ALL FRAMES<br />
All files are erased except those that are<br />
protected or that have DPOF settings. Copy any<br />
files that you want to keep to your PC<br />
beforehand.<br />
FORMAT<br />
g ERASING SINGLE • ALL FRAMES/FORMATTING<br />
Formatting erases all the files. Take particular<br />
care when formatting a SmartMedia as this<br />
procedure also erases all protected files and all<br />
files with DPOF settings. Copy any files that you<br />
want to keep to your PC beforehand.<br />
●! Formatting also erases protected files.<br />
1<br />
01 03 02<br />
1Press the "MENU/OK" button to display the<br />
menu.<br />
2Use “d” or “c” to select “gERASE” and then<br />
use “a ” or “b ” to select “FRAME”, “ALL<br />
FRAMES” or “FORMAT”.<br />
3Press the “MENU/OK” button.<br />
●! Press the “BACK” button to exit the menu.<br />
●! If a “∞”, “”, “•” Formatting erases all the data on the<br />
●! To cancel the frame erase procedure, press the<br />
SmartMedia, including protected files.<br />
46 or “`” message appears, see P.73, 74.<br />
“BACK” button.<br />
47<br />
2<br />
A confirmation message appears.<br />
In “FRAME” mode, use “d” or “c” to select the<br />
file and then press the “MENU/OK” button.<br />
When using “ALL FRAMES” or “FORMAT”,<br />
press the “MENU/OK” button.<br />
4
PLAYBACK MENU f HOW TO SPECIFY PRINT OPTIONS<br />
PLAYBACK MENU<br />
f DPOF DATE SETTING<br />
DPOF stands for Digital Print Order Format and refers to a format that is used for<br />
recording printing specifications for images shot using a digital camera on media such as<br />
SmartMedia. The recorded specifications include information on which frames are to be<br />
printed.<br />
This section gives a detailed description of how to order your prints with the <strong>FinePix</strong> <strong>A201</strong>.<br />
On the <strong>FinePix</strong> <strong>A201</strong>, you can specify only one print per image in the DPOF settings.<br />
✽ Note that some printers do not support date and time imprinting or specification of the<br />
number of prints.<br />
✽ Note that the warnings shown below may be displayed while you are specifying the<br />
prints.<br />
≠ (➡P.74)<br />
If the “≠” message appears, you cannot erase the frame. Cancel the “DPOF”<br />
settings and then try again<br />
ª (➡P.74)<br />
No more than 1000 frames can be specified on the same SmartMedia.<br />
1 2<br />
01 02 01 02<br />
This function allows you to select whether or not<br />
the date of shooting is included on the print.<br />
1Press the “MENU/OK” button to display the<br />
menu on the LCD monitor.<br />
2Use “d” or “c” to select “fDPOF”.<br />
1Use “b” to select “kDATE”.<br />
2Use “d” or “c” to specify “DATE ON” or<br />
“DATE OFF”. The selected setting is then valid<br />
for all frames with DPOF settings until the<br />
camera is switched off.<br />
Then specify the DPOF settings (➡P.50).<br />
48<br />
●! The DPOF menu options do not appear when a<br />
movie file is selected.<br />
●! You may not be able to specify DPOF settings for<br />
some still shots taken on other cameras.<br />
●! You must specify whether or not the date is included<br />
before you specify the DPOF settings.<br />
49<br />
4
1<br />
PLAYBACK MENU<br />
f DPOF SET FRAME<br />
01 03 02 2 01 3 01 02<br />
02<br />
When you have finished specifying the DPOF<br />
settings, always press the “MENU/OK” button to<br />
confirm the settings.<br />
If you press the “BACK” button, no DPOF<br />
settings are specified.<br />
You can only specify one print per frame (image) 1If you select a frame for which DPOF settings<br />
1Use “d” or “c” to display the frame for which<br />
in the DPOF settings.<br />
1Press the “MENU/OK” button to display the<br />
menu.<br />
2Use “d” or “c” to select “fDPOF”.<br />
3With “OK” selected, press the “MENU/OK”<br />
button.<br />
●! The DPOF menu options do not appear when a<br />
movie file is selected.<br />
●! You cannot specify printing for more than one print<br />
50 per frame.<br />
have already been specified, the<br />
“º” message appears.<br />
2Pressing the “MENU/OK” button erases all<br />
the DPOF settings already specified. You<br />
must then specify the DPOF settings again.<br />
●! Press the “BACK” button to leave the previous<br />
settings unchanged.<br />
●! You can check the previous settings by playing back<br />
the images (➡P.26).<br />
you want to specify DPOF settings.<br />
2Use “a” or “b” to select the setting for the<br />
frame to be printed. If you have selected the<br />
date setting, the “k” icon is displayed.<br />
●! DPOF settings cannot be specified for movies.<br />
●! Note that the “k” icon is not displayed during playback.<br />
●! “TOTAL” shows the total number of frames for which<br />
prints have been ordered.<br />
To specify more DPOF settings, repeat steps 01 and 02.<br />
●! You can only specify one print per frame in the<br />
DPOF settings. Note also that you can specify prints<br />
for up to 999 frames on the same SmartMedia.<br />
To Pressing specify the additional “MENU/OK” DPOF button settings, confirms repeat all the<br />
steps settings. 01 and You 02 cannot and select reset “SET” a portion for the frames of the<br />
to settings be printed. without resetting them all.<br />
51<br />
4<br />
4
5 Settings<br />
SETTINGS<br />
The “Settings” chapter looks at functions available from “dOPTION” in the “q” still Image, “e” movie<br />
and “3” playback.<br />
■ List of settings<br />
4 Still Image mode<br />
1 AUTO<br />
2 MANUAL<br />
j FILE SIZE (P.54)<br />
SET–UP<br />
LCD BRIGHTNESS (P.55)<br />
■ SET–UP menu options<br />
POWER SAVE ON/OFF<br />
USB MODE<br />
DATE/TIME<br />
h Movie mode<br />
—<br />
—<br />
—<br />
SET–UP<br />
LCD BRIGHTNESS (P.55)<br />
ON<br />
3 Playback mode<br />
—<br />
—<br />
—<br />
SET–UP<br />
LCD BRIGHTNESS (P.55)<br />
Settings<br />
Factory<br />
Display default<br />
Explanation<br />
DSC/PC CAM<br />
SET 3<br />
BEEP T LOW/HIGH/OFF<br />
DSC<br />
—<br />
LOW<br />
This is a function that reduces power consumption and<br />
then automatically switches the camera off to prevent<br />
battery depletion when the camera is not being used. See<br />
P.56 for details.<br />
See P.57 for details.<br />
You can use this to set the date and time. See P.16 for<br />
details.<br />
This setting selects the volume of the beep emitted by the<br />
camera during camera operation.<br />
USING THE OPTION MENU<br />
Photography<br />
01 03 02<br />
1Press the “MENU/OK” button to display the<br />
menu screen.<br />
2Use “d” or “c” to select “dOPTION” and “a”<br />
or “b” to select the desired setting.<br />
3Press the “MENU/OK” button to move to the<br />
selected setting.<br />
Using SET–UP<br />
01 02<br />
If you selected “SET–UP”, the “SET–UP” screen<br />
appears.<br />
1Use “a” or “b” to select the desired setting.<br />
2Use “d” or “c” to change the setting.<br />
Press the “MENU/OK” button to exit set-up.<br />
Select English or French as the language used for screen<br />
LANGUAGE ENGLISH/FRANCAIS ENGLISH<br />
52 display.<br />
●! For “DATE/TIME” press “c”.<br />
53<br />
Playback<br />
5
djSETTING THE FILE SIZE AND QUALITY (COMPRESSION RATIO)<br />
You can choose any combination of 3 file sizes<br />
and 3 image quality settings. Use the table below<br />
as a guide to the best settings for your shots.<br />
File size<br />
8 (1600 × 1200)<br />
9 (1280 × 960)<br />
0 (640 × 480)<br />
FINE NORMAL BASIC<br />
! ! @<br />
@ @ —<br />
— # —<br />
!: For printing the whole image at A5 size or<br />
printing a part of the image at A6 size<br />
@: For printing at A6 size<br />
#: For use via the Internet as an e-mail<br />
attachment, etc.<br />
Quality (compression ratio)<br />
Select “FINE” for better image quality and<br />
“BASIC” to increase the number of available<br />
shots.<br />
In most cases, the “NORMAL” setting provides<br />
more than adequate image quality.<br />
01 02<br />
1Use “a” or “b” to change the file size setting<br />
and “d” or “c” to change the quality setting.<br />
2Press the “MENU/OK” button to confirm the<br />
setting.<br />
d LCD MONITOR BRIGHTNESS<br />
1 2 01 02<br />
When you use the “LCD BRIGHTNESS” settings,<br />
an “adjustment bar” appears on the LCD monitor.<br />
1Use “d” or “c” to adjust the LCD monitor<br />
brightness.<br />
2Press the “MENU/OK” button to confirm the<br />
adjustment.<br />
●! The number of available shots varies depending on<br />
the combination of file size and quality settings you ●! To exit this procedure without changing the settings,<br />
●! To exit this procedure without changing the settings,<br />
54 select (➡P.22).<br />
press the “BACK” button.<br />
press the “BACK” button.<br />
55<br />
5
SET–UP<br />
POWER SAVE<br />
6 PC Connection<br />
IN PC CONNECTION<br />
PC Connection describes how to set up a USB connection and provides an overview of the functions<br />
available using a USB connection. Refer also to the Software Quick Start Guide booklet.<br />
DSC (Mass storage device) Mode<br />
PC-CAM (camera) Mode<br />
This mode provides a simple way to read images This function allows you to conduct videoconferencing<br />
from a SmartMedia and store images on to a sessions between PCs connected to the Internet.<br />
SmartMedia (➡P.58).<br />
This function can also be used to record video on a<br />
PC (➡P.60).<br />
hPower saving “ON” (default setting)<br />
Power consumption is kept to a minimum to<br />
To bring the camera out of sleep mode so that it<br />
is ready to shoot, press “d”, “c”, “a” or “b”.<br />
●! Videoconferencing is not available for Macintosh<br />
computers.<br />
prevent battery depletion. You should select the<br />
“ON” setting when you are using alkaline<br />
batteries.<br />
iIf the camera is not used for approximately 30<br />
seconds, the LCD switches off temporarily to reduce<br />
power consumption (Sleep mode).<br />
iOnce the camera is in Sleep mode, if it is left<br />
unused for a further 90 seconds, it is automatically<br />
switched off.<br />
iThe charging time for the flash increases slightly<br />
because the flash charging power is reduced.<br />
hPower saving “OFF”<br />
Batteries are more likely to run flat since no<br />
power reduction measures (sleep mode, etc.)<br />
are used. However, this function automatically<br />
switches the camera off if the camera is not<br />
56 used for approximately 2 minutes.<br />
This is useful since the camera is ready to shoot<br />
more quickly than when it is switched off and<br />
then on again. You can also take pictures when<br />
the camera is in sleep mode simply by pressing<br />
the shutter button.<br />
●! Power Save/Auto Power Off does not function when a<br />
USB connection is being used.<br />
●! You can also bring the camera out of sleep mode by<br />
pressing buttons other than “d”, “c”, “a” or “b”.<br />
The Sleep function does not operate when the<br />
LCD monitor is switched off, while you are<br />
setting the file size or when the camera is in<br />
SET–UP or Playback mode. However, if the<br />
camera controls are not used for 2 minutes, the<br />
camera automatically switches off.<br />
◆ The First Time You Connect Your Camera to a Computer ◆<br />
You must set up your computer as described below. Refer also to the Software Quick Start Guide<br />
booklet.<br />
Windows<br />
1Load the enclosed CD-ROM into your PC’s CD-ROM drive and install the application software.<br />
2With the CD-ROM loaded into your PC, select DSC connection mode and install the driver software.<br />
3With the CD-ROM loaded into your PC, select PC CAMERA connection mode and install the driver<br />
software.<br />
Macintosh<br />
Load the enclosed CD-ROM into the CD-ROM drive and install all the software.<br />
6<br />
57
CONNECTING AT DSC (MASS STORAGE DEVICE) MODE<br />
1 01 02 04<br />
1Load a SmartMedia containing images into<br />
your camera.<br />
2Slide the Power switch sideways to switch the<br />
camera on.<br />
3Set the “USB MODE” setting in the “SET–UP”<br />
menu to “DSC” (➡P.52, 53).<br />
4Slide the Power switch sideways to switch the<br />
camera off.<br />
2<br />
(Special USB)<br />
socket<br />
03 Camera<br />
DC IN 3Vsocket<br />
USB<br />
socket<br />
Computer<br />
1Switch your computer on.<br />
2Use the special USB cable to connect the camera to<br />
your computer.<br />
3Switch the camera on.<br />
If you are connecting your camera to a Windows<br />
PC for the first time, the “Add New Hardware<br />
Wizard” window opens and driver software<br />
installation begins (➡Software Quick Start Guide<br />
booklet).<br />
Always use the prescribed procedure when<br />
disconnecting or switching off the camera (➡P.62).<br />
Camera Operation Computer Operation<br />
iThe viewfinder lamp alternately blinks green<br />
and orange while the camera is communicating<br />
with your computer.<br />
i“DSC” appears on the LCD monitor.<br />
iPower Save/Auto Power Off does not function<br />
when a USB connection is being used.<br />
i<strong>FinePix</strong>Viewer automatically starts up.<br />
*Screen for Windows 98 SE<br />
iA removable disk icon appears and you can<br />
use your computer to transfer files to and from<br />
the camera.<br />
Windows Macintosh<br />
58<br />
●! You should use the optional AC power adapter when the<br />
camera is connected to your computer (➡P.18, 65). Loss<br />
of power during data transmission can prevent successful<br />
data downloading (It also preserves battery power).<br />
●! Ensure that you insert the USB cable plugs into the<br />
correct sockets.<br />
●! Push the cable plugs firmly into the connector sockets.<br />
●! Switch the camera off when you change the<br />
SmartMedia (➡P.62).<br />
●! Do not disconnect the USB cable when the camera<br />
is communicating with the computer. See P.62 for<br />
information on the disconnection procedure.<br />
If the above operations do not occur, you do<br />
not have the required software programs or<br />
drivers installed on your computer. Refer to the<br />
Software Quick Start Guide booklet and<br />
complete the required computer setup<br />
procedures. Then reconnect the camera to your<br />
computer.<br />
6<br />
59
CONNECTING AT PC-CAMERA MODE<br />
1 01 03 2<br />
02<br />
1Slide the Power switch sideways to switch the<br />
camera on.<br />
2Set the “USB MODE” setting in the “SET–UP”<br />
menu to “PC CAM” (➡P.52, 53).<br />
3Slide the Power switch sideways to switch the<br />
camera off.<br />
Camera<br />
(Special USB)<br />
socket<br />
DC IN 3Vsocket<br />
USB<br />
socket<br />
Computer<br />
1Switch your computer on.<br />
2Use the special USB cable to connect the camera to<br />
your computer.<br />
3Switch the camera on.<br />
If you are connecting your camera to a Windows<br />
PC for the first time, the “Add New Hardware<br />
Wizard” window opens and driver software<br />
installation begins (➡Software Quick Start Guide<br />
booklet).<br />
Always use the prescribed procedure when<br />
disconnecting or switching off the camera (➡P.62).<br />
●! You should use the optional AC power adapter when the<br />
camera is connected to your computer (➡P.18, 65). Loss<br />
of power during data transmission can prevent successful<br />
data downloading (It also preserves battery power).<br />
●! Ensure that you insert the USB cable plugs into the<br />
correct sockets.<br />
Camera Operation Computer Operation<br />
iThe viewfinder lamp alternately blinks green<br />
and orange while the camera is communicating<br />
with your computer.<br />
i“PC CAMERA” appears on the LCD monitor.<br />
iPower Save/Auto Power Off does not function<br />
when a USB connection is being used.<br />
i<strong>FinePix</strong>Viewer automatically starts up and the<br />
Picture Hello window opens (Windows only).<br />
* Screen for Windows 98 SE<br />
iYou can use software<br />
such as VideoImpression<br />
to view live images.<br />
* Macintosh screen<br />
●! Select Macro mode for close-up shots (➡P.24).<br />
60 Although the “5” icon is not displayed.<br />
●! Push the cable plugs firmly into the connector sockets.<br />
●! Do not disconnect the USB cable when the camera<br />
is communicating with the computer. See P.62 for<br />
information on the disconnection procedure.<br />
If the above operations do not occur, you do not<br />
have the required software programs or drivers<br />
installed on your computer. Refer to the Software<br />
Quick Start Guide booklet and complete the<br />
required computer setup procedures. Then<br />
reconnect the camera to your computer.<br />
61<br />
6
62<br />
DISCONNECTING FROM THE PC (Important — always use this procedure.)<br />
Always follow the procedure below before<br />
disconnecting the camera from your PC.<br />
1<br />
1Quit all applications (<strong>FinePix</strong>Viewer,<br />
VideoImpression, etc.) that are using the<br />
camera.<br />
2Check that the viewfinder lamp is glowing<br />
green (that the camera is not communicating<br />
with the computer).<br />
For a PC CAMERA connection, proceed to<br />
step .<br />
3<br />
●! Even after the “Copying...” message is no longer<br />
displayed on your computer, communication with the<br />
camera may still be in progress. Always check that<br />
the viewfinder lamp on the camera is glowing green<br />
and is no longer flashing.<br />
2<br />
Perform the steps shown below before you<br />
switch the camera off. This procedure<br />
differs depending on the operating system<br />
software (or PC) you are using.<br />
Windows 98 or 98 SE<br />
No PC operation is needed.<br />
Windows Me<br />
Left-click the Eject icon in the taskbar and eject<br />
“USB disk”.<br />
✽ Display this message and then click the “OK” button.<br />
Windows 2000 Professional<br />
Left-click the Eject icon in the taskbar and eject<br />
“USB Mass Storage”.<br />
✽ Display this message and then click the “OK” button.<br />
Macintosh<br />
Drag the “Removable drive” icon on the desktop<br />
to the Trash.<br />
3<br />
01<br />
Camera<br />
02<br />
(Special USB)<br />
socket<br />
DC IN 3Vsocket<br />
1Switch the camera off.<br />
2Unplug the special USB cable from the<br />
camera.<br />
●! If you are using Windows, you cannot disconnect the<br />
camera by right-clicking the removable disk icon (the<br />
camera) and selecting “Eject”. Always follow the<br />
proper procedure as given above before<br />
disconnecting the camera from your PC.<br />
63<br />
6
64<br />
System Expansion Options<br />
e By using the <strong>FinePix</strong> <strong>A201</strong> together with other optional FUJIFILM products, your system can be<br />
expanded to fill a wide range of uses.<br />
SmartMedia<br />
Floppy Disk Adapter (FlashPath)<br />
PC CARD<br />
ADAPTER<br />
PC Card Adapter<br />
Image Memory Card Reader<br />
Image Memory Card Reader<br />
<strong>FinePix</strong> <strong>A201</strong><br />
Digital Camera<br />
(Floppy disk drive)<br />
(PC card slot)<br />
(USB)<br />
(IEEE 1394)<br />
Digital Photo Printer<br />
(USB)<br />
Personal Computer<br />
(commercially available)<br />
(USB)<br />
TV monitor<br />
(commercially available)<br />
Accessories Guide<br />
e The optional accessories (sold separately) can make taking pictures with the <strong>FinePix</strong> <strong>A201</strong> even<br />
easier. For information on how to attach and use the accessories, refer to the instructions provided<br />
with the accessory used.<br />
h SmartMedia<br />
These are separately available SmartMedia cards.<br />
Use the following SmartMedia:<br />
h MG-4S: 4MB, 3.3V h MG-8S: 8MB, 3.3V h MG-16S/SW: 16MB, 3.3V<br />
h MG-32S/SW: 32MB, 3.3V h MG-64S/SW: 64MB, 3.3V h MG-128SW: 128MB, 3.3V<br />
✽ Some 3.3V SmartMedia are labelled as “3V” or “ID” cards.<br />
● AC Power Adapter AC-3V<br />
Use the AC power adapter when you want to take pictures or play back images<br />
for long periods or when the camera is connected to a computer.<br />
✽ The shape of the AC power adapter, the plug and socket outlet depend on the country.<br />
● <strong>Fujifilm</strong> Rechargeable Battery 2HR-3UF<br />
The 2HR-3UF includes 2 pieces of high-capacity AA-size Nickel Metal Hydride batteries.<br />
● <strong>Fujifilm</strong> Battery charger with Battery BK-NH (With Euro type or UK type plug)<br />
The BK-NH includes the quick battery charger BCH-NH and 2 Ni-MH batteries.<br />
The BCH-NH can charge 2 Ni-MH batteries in approximately 120 minutes.<br />
Up to 4 Ni-MH batteries can be charged simultaneously.<br />
● SC-FXA01<br />
This is a special case made of polyester that protects the camera against soiling,<br />
dust and minor impacts when it is being carried.<br />
65
Accessories Guide<br />
h FD-A2 Floppy Disk Adapter (FlashPath)<br />
This adapter is the same size and shape as a 3.5-inch floppy disk. You can copy<br />
the images on a SmartMedia to your PC simply by loading the SmartMedia into the<br />
floppy disk adapter and then inserting the adapter into your floppy disk drive.<br />
Compatible OS Compatible SmartMedia<br />
Windows 95/98/98SE/Me/NT4.0<br />
FD-A2<br />
5V/3.3V, 2MB to 128MB<br />
Mac OS 7.6.1 to 9.1<br />
Notes on Using Your Camera Correctly<br />
eBe sure to read this information in conjunction with “Safety Notes” (➡P.81), to ensure that you use<br />
your camera correctly.<br />
■ Places to Avoid<br />
card. In this event, remove the SmartMedia and wait a<br />
Do not store or use the camera in the following types of short time before using it again.<br />
h SM-R2 Image Memory Card Reader<br />
The SM-R2 provides a quick and easy way to transfer images back and forth<br />
between your PC and an image memory card (SmartMedia). The SM-R2 uses the<br />
USB interface for high-speed file transfer.<br />
h Compatible with Windows 98/98SE, Windows Me, Windows 2000 Professional<br />
or iMac and models that support USB as standard.<br />
h DM-R1 Image Memory Card Reader<br />
This device provides a simple way to transfer image data in either direction<br />
between your PC and an image memory card (SmartMedia or CompactFlash<br />
Type II (Microdrive-compatible)).<br />
The IEEE 1394 interface provides high-speed data transfer.<br />
h Compatible with Windows 98SE, Windows 2000 Professional (read-only), iMacDV<br />
locations:<br />
h Very humid, dirty or dusty places<br />
h In direct sunlight or in places subject to extreme<br />
temperature rises, such as in a closed car in summer.<br />
h Extremely cold places<br />
h Places subject to strong vibration<br />
h Places affected by smoke or steam<br />
h Places subject to strong magnetic fields (such as near<br />
motors, transformers or magnets)<br />
h In contact with chemicals such as pesticides or next to<br />
rubber or vinyl products for long periods of time<br />
■ Do not expose the camera to sand.<br />
The <strong>FinePix</strong> <strong>A201</strong> is particularly and adversely affected by<br />
sand. In sandy locations such as beaches or deserts, or in<br />
locations where there is wind borne sand, ensure that the<br />
camera is not exposed to sand. This can cause faults that<br />
may be irreparable.<br />
■ When the Camera is Unused for Long Periods<br />
If you do not intend to use the camera for a long period, of<br />
time remove the batteries and the SmartMedia card before<br />
storing the camera.<br />
■ Cleaning Your Camera<br />
h Use a blower brush to remove dust from the lens, LCD<br />
monitor screen or viewfinder as these surfaces, and then<br />
wipe lightly with a soft, dry cloth. If any soiling remains,<br />
apply a small amount of lens cleaning liquid to a piece of<br />
FUJIFILM lens cleaning paper and wipe gently.<br />
h Do not scratch hard objects against the lens, LCD<br />
monitor screen or viewfinder as these surfaces are easily<br />
damaged.<br />
h Clean the body of the camera with a soft, dry cloth. Do<br />
not use volatile substances such as thinners, benzine or<br />
insecticide, as these may react with camera body and<br />
cause deformation or remove the coating.<br />
66<br />
and Power Macintosh PCs with FireWire as a standard feature. Mac OS 8.5.1 to 9.0<br />
h PC-AD3 PC Card Adapter<br />
The PC Card Adapter allows the SmartMedia to be used as a PC Card Standard<br />
ATA-compliant (PCMCIA 2.1) PC card (Type II).<br />
h Compatible with SmartMedia of 5V/3.3V, 2MB to 128MB.<br />
PC CARD<br />
ADAPTER<br />
■ Notes on Condensation<br />
If the camera is carried suddenly from a cold location into a<br />
warm place, water droplets (condensation) may form on<br />
the inside of the camera or on the lens. When this occurs,<br />
switch the camera off and wait an hour before using the<br />
camera. Condensation may also form on the SmartMedia<br />
■ Using the Camera Overseas<br />
When travelling overseas, do not place your camera in the<br />
check-in baggage. Baggage handling at airports may<br />
subject baggage to violent shocks, and the camera may be<br />
damaged internally even when no external damage is<br />
visible.<br />
67
Notes on the Power Supply<br />
h Soil (such as fingerprints) on the battery terminals can excessively discharged and may no longer be usable<br />
markedly reduce the number of available shots. Carefully even when charged.<br />
wipe the battery terminals clean with a soft dry cloth before h Ni-MH batteries self-discharge even when not used.<br />
loading the batteries.<br />
Always charge Ni-MH batteries before using them. If the<br />
time for which a battery provides power shortens<br />
If any liquid at all leaks from the batteries, wipe the battery markedly when it has been correctly charged, this<br />
compartment thoroughly and then load new batteries.<br />
indicates that the battery has reached the end of its<br />
If any battery fluid comes into contact with your hands or effective life and should be replaced.<br />
clothing, flush the area thoroughly with water. Note that<br />
h Soiling (fingerprints, etc) on the terminals of Ni-MH<br />
battery fluid can cause loss of eyesight if it gets into your<br />
batteries can greatly reduce the number of available<br />
eyes. If this occurs, do not rub your eyes. Flush the fluid out<br />
shots. When this occurs, clean the terminals carefully<br />
with clean water and contact your physician for treatment.<br />
with a soft dry cloth. Then use up the remaining charge in<br />
■ Disposing of Batteries<br />
the batteries and recharge them.<br />
When disposing of batteries, do so in accordance with your h Newly purchased batteries or batteries that have been<br />
local waste disposal regulations.<br />
left unused for an extended period may not be fully<br />
charged. (This is indicated by the immediate display of<br />
■ Notes on Small Rechargeable Batteries (Ni-MH<br />
the battery low warning or a low number of available<br />
batteries)<br />
shots.) This is a normal characteristic of the batteries and<br />
h Always use the special battery charger to charge AA-size<br />
does not indicate a fault. Repeatedly charging and using<br />
Ni-MH batteries. Charge the batteries as described in the<br />
the batteries 3 or 4 times will restore them to a normal<br />
instructions provided with the battery charger.<br />
condition.<br />
h Do not use the battery charger to charge batteries other<br />
h If you repeatedly charge a Ni-MH battery before it is fully<br />
than those specified for use with the charger.<br />
discharged, it will suffer from the “memory effect”<br />
h Note that the batteries may feel warm immediately after<br />
being charged.<br />
h Ni-MH batteries are not charged at shipment. Be sure to<br />
charge the batteries before using them.<br />
h The camera mechanism is such that it draws a minute<br />
amount of current even when the camera is switched off.<br />
Take particular care not to leave Ni-MH batteries in the<br />
68 camera for a long period of time as they can become<br />
69<br />
✽ Applicable Batteries<br />
h Do not use batteries that are leaking, deformed,<br />
discolored or exhibit any other obvious abnormality.<br />
h AA-size alkaline, Ni-MH (nickel metal hydride) can be h Do not store batteries in very warm or moist locations.<br />
used with this camera.<br />
h Keep the batteries out of reach of babies and small<br />
Do not use AA-size manganese, lithium batteries in your children.<br />
<strong>FinePix</strong> <strong>A201</strong> because the heat generated by the h When loading the batteries into the camera, ensure that the<br />
batteries could damage the camera or cause battery polarity (+ and - ) is as indicated on the camera.<br />
malfunctions.<br />
h Do not use new batteries together with used batteries. In<br />
h The operating lives of alkaline batteries vary between the case of rechargeable batteries, do not use charged<br />
brands and the life of batteries you purchase may be and discharged batteries together. Do not use batteries<br />
shorter than the alkaline batteries provided with the of different types or brands together.<br />
camera.<br />
h If you do not intend to use the camera for a long period of<br />
time, remove the batteries from the camera. (Note that if<br />
the camera is left with the batteries removed, the time<br />
Notes on the Batteries<br />
and date settings are cleared.)<br />
Incorrect use of the batteries could cause them to leak, h The batteries may feel warm immediately after being<br />
become hot, ignite or burst. Always observe the used. Before removing the batteries, switch the camera<br />
precautions given below.<br />
off and wait until the batteries cool down.<br />
h Do not heat the batteries or throw them into a fire.<br />
h When replacing the batteries, always fit 2 new batteries.<br />
h Do not carry or store a battery with metal objects such as Here, 'new batteries' refers to either recently purchased<br />
necklaces or hairpins that could come into contact with unused alkaline batteries, or Ni-MH (nickel metal hydride)<br />
the metal positive + and negative - poles of the battery. batteries that have recently been fully recharged together.<br />
h Do not expose the batteries to fresh or sea water, and h In cold locations (at temperatures of +10°C/+50°F or below),<br />
,<br />
take particular care to keep the terminals dry.<br />
battery performance deteriorates and the time for which they<br />
causing the battery low warning to appear while there is<br />
h Do not attempt to deform, disassemble or modify the can be used shortens markedly. This is particularly true of<br />
still ample charge remaining in the battery. To restore the<br />
batteries.<br />
alkaline batteries. In cold conditions, put the batteries in your<br />
batteries to their normal condition, use up all the charge<br />
h Do not attempt to peel off or cut the battery casing.<br />
pocket or a similar place to warm them before loading them<br />
in the batteries before recharging them.<br />
h Do not drop, strike or otherwise subject the batteries to into the camera. If you use a body warmer to warm the<br />
✽Memory effect: A phenomenon affecting the battery<br />
strong impacts.<br />
batteries, ensure that they are not in direct contact with the<br />
characteristics such that the apparent battery capacity<br />
warmer.<br />
decreases.
70<br />
Notes on the Power Supply<br />
Notes on Using the AC Power Adapter<br />
Always use the AC-3V AC Power Adapter AC-3V (sold<br />
separately) with the <strong>FinePix</strong> <strong>A201</strong> Digital Camera.<br />
The use of an AC power adapter other than the AC-3V<br />
could result in damage to your camera.<br />
h Ensure that you do not touch the contact areas on the<br />
AC power adapter against any other metal object as this<br />
could cause a short circuit.<br />
h Do not plug the AC power adapter into the USB socket<br />
as this could damage your camera.<br />
h Do not plug in the AC power adapter while you are<br />
operating the camera using batteries. Switch the camera<br />
off first.<br />
h Do not load the batteries while you are operating the<br />
camera using the AC power adapter. Switch the camera<br />
off first.<br />
h If you disconnect the AC power adapter when there are<br />
no batteries in the camera, the date may be cleared. If<br />
this occurs, reset the date.<br />
Notes on the SmartMedia <br />
■SmartMedia<br />
The SmartMedia card supplied with your <strong>FinePix</strong> <strong>A201</strong><br />
camera is a new image recording medium developed<br />
especially for use in digital cameras. Each SmartMedia<br />
card contains a built-in semiconductor memory chip<br />
(NAND flash memory) which is used for storing digital<br />
image data.<br />
Because the data is stored electronically, the stored<br />
image data can be erased from the card and new data<br />
recorded.<br />
■SmartMedia with IDs<br />
The SmartMedia ID is a SmartMedia that has an<br />
individually assigned identification number. SmartMedia<br />
ID cards can be used with devices that use ID numbers<br />
for copyright protection or other purposes. This camera<br />
accepts SmartMedia ID cards in the same way as<br />
conventional SmartMedia cards.<br />
■Storing Data<br />
In the situations listed below, recorded data may be<br />
erased (destroyed). Please note that Fuji Photo Film<br />
Co., Ltd. accepts no responsibility whatsoever for the<br />
loss (destruction) of recorded data.<br />
✽When the SmartMedia is used incorrectly by the<br />
owner or a third party<br />
✽When the SmartMedia is exposed to static electricity<br />
or electrical noise<br />
✽When the SmartMedia cover is opened or the<br />
SmartMedia removed and the camera is then<br />
switched off during data recording, during data<br />
erasing (SmartMedia formatting) or during frame<br />
advance when images are being played back.<br />
Back up important data onto another medium.<br />
(MO disk, floppy disk, hard disk, etc.)<br />
■Notes on Handling SmartMedia<br />
h Take care to hold the SmartMedia straight when you<br />
load it into your camera.<br />
h Never remove the SmartMedia or switch the camera<br />
off during data recording, during data erasing<br />
(SmartMedia formatting) or during frame advance<br />
when images are being played back. These actions<br />
could result in damage to the SmartMedia.<br />
h Use only the SmartMedia specified for use with the<br />
<strong>FinePix</strong> <strong>A201</strong>. The use of other SmartMedia could<br />
damage the camera.<br />
h SmartMedia are precision electronic devices. Do not<br />
bend, drop, or subject SmartMedia to excessive<br />
shocks.<br />
h Do not use or store SmartMedia in environments<br />
likely to be affected by strong static electricity or<br />
electrical noise.<br />
71
72<br />
Notes on the SmartMedia<br />
h Do not use or store SmartMedia in very hot, humid or<br />
corrosive environments.<br />
h Take care not to touch the SmartMedia’s contact area<br />
or allow the area to become soiled. Use a dry lint-free<br />
cloth to wipe away any soiling that does occur.<br />
h To avoid damage caused by static electricity, always<br />
use the special static-free case provided during<br />
transportation or storage, or keep the SmartMedia in<br />
a storage case if available.<br />
h Do not carry SmartMedia in locations such as a<br />
trouser pocket. This could subject the SmartMedia to<br />
excessive force when you sit down, thereby<br />
damaging the SmartMedia.<br />
h The SmartMedia may feel warm when it is removed<br />
from the camera after extended periods of picture<br />
taking or image viewing. This is normal and does not<br />
indicate a fault.<br />
h Inserting a SmartMedia that is charged with static<br />
electricity into your camera may result in a camera<br />
malfunction. If this occurs, switch the camera off and<br />
then on again.<br />
h Affix the label onto the designated area of the card.<br />
Do not use third-party labels as this can lead to<br />
problems when the card is inserted or removed.<br />
h When you attach the label, take care that it does not<br />
cover any of the write-protect area.<br />
■Notes on Using SmartMedia with a PC<br />
h If you intend to take photos using a SmartMedia that<br />
has been used on a PC, format the SmartMedia on<br />
your camera.<br />
h When you format a SmartMedia in the camera and<br />
then shoot and record images, a directory (folder) is<br />
automatically created. Image data is then recorded in<br />
this directory.<br />
h Do not change or delete the directory (folder) names<br />
or file names on the SmartMedia from your PC as this<br />
will make it impossible to use the SmartMedia in your<br />
camera.<br />
h Always use the camera to erase image data on a<br />
SmartMedia.<br />
h To edit image data, copy the image data to the PC’s<br />
hard disk and then edit the copied data.<br />
■Specifications<br />
Type Image memory card for digital cameras<br />
(SmartMedia)<br />
Operating voltage 3.3V<br />
Conditions for use Temperature:<br />
0°C to +40°C (+32°F to +104°F)<br />
Humidity:<br />
80% or less (no condensation)<br />
Dimensions 37 mm × 45 mm × 0.76 mm<br />
(1.45 in. × 1.77 in. × 0.03 in.) (W × H × D)<br />
Warning Displays eThe table below lists the warnings that are displayed on the LCD monitor<br />
Warning Displayed Explanation Remedy<br />
(Lit red) (Flashing red)<br />
The batteries in the camera are fully<br />
depleted or very low on charge.<br />
There is no SmartMedia loaded, or<br />
the SmartMedia loaded is a 5-volt<br />
card.<br />
iThe SmartMedia is not formatted.<br />
iThe SmartMedia contact area is<br />
soiled.<br />
iCamera fault.<br />
iThe SmartMedia contact area is<br />
soiled.<br />
iThe SmartMedia is damaged.<br />
iThe SmartMedia format is incorrect.<br />
iCamera fault.<br />
The SmartMedia is fully recorded.<br />
The SmartMedia is write-protected.<br />
iAn attempt was made to playback a<br />
frame not recorded on this camera.<br />
iThe SmartMedia contact area is<br />
soiled.<br />
iYou attempted to play a movie<br />
with a recording time longer than<br />
20 seconds.<br />
Replace the batteries or have new batteries<br />
ready.<br />
Load the SmartMedia (3.3V) in the correct<br />
direction.<br />
iWipe the contact area on the SmartMedia with<br />
a soft dry cloth. It may be necessary to format<br />
the SmartMedia. If the error message is still<br />
displayed, replace the SmartMedia.<br />
iContact your FUJIFILM dealer.<br />
iWipe the contact area on the SmartMedia with<br />
a soft dry cloth. It may be necessary to format<br />
the SmartMedia. If the error message is still<br />
displayed, replace the SmartMedia.<br />
iContact your FUJIFILM dealer.<br />
Erase some images or use a SmartMedia that<br />
has ample free space.<br />
Use a SmartMedia that is not write-protected.<br />
iImages cannot be played back.<br />
iWipe the contact surface on the SmartMedia<br />
thoroughly with a soft, dry cloth. In some cases,<br />
you may have to format the SmartMedia.<br />
iYou cannot play back movies that are more<br />
than 20 seconds long.<br />
73
74<br />
Warning Displays eThe table below lists the warnings that are displayed on the LCD monitor<br />
Warning Displayed Explanation Remedy<br />
The playback frame number has<br />
reached 999–9999.<br />
iThe data could not be recorded<br />
due to a SmartMedia error or a<br />
connection error between the<br />
SmartMedia and camera.<br />
iThe photographed image cannot<br />
be recorded as it is too large to fit<br />
in the available space on the<br />
SmartMedia.<br />
There is a strong likelihood of<br />
camera shake because the shutter<br />
speed is slow.<br />
A protected frame was erased. Protected files cannot be erased. Unprotect the<br />
frame using the camera on which the protection<br />
was first applied.<br />
DPOF settings are specified for an<br />
image you tried to erase.<br />
Prints were specified for more than<br />
1000 frames in the DPOF frame<br />
settings.<br />
Take the shot using a formatted SmartMedia.<br />
iRe-insert the SmartMedia or switch the<br />
camera off and then on again.<br />
iUse a new SmartMedia.<br />
Use flash photography. However, a tripod<br />
should be used for some scenes and modes.<br />
To erase the image, specify “RESET” as the<br />
DPOF setting (➡P.50).<br />
The maximum number of frames for which<br />
prints can be specified on the same<br />
SmartMedia is 999.<br />
Troubleshooting eIf you think the camera is faulty, check the following once more<br />
Problem Cause Remedy<br />
No power. iThe battery is exhausted.<br />
iThe AC power adapter plug has come out<br />
of the power outlet.<br />
Power cuts out during<br />
operation.<br />
iReplace the batteries.<br />
iPlug the adapter back in.<br />
iThe battery is exhausted. iReplace the batteries.<br />
Battery runs out quickly. iYou are using the camera in extremely<br />
cold conditions.<br />
No photograph is taken<br />
when the shutter button<br />
is pressed.<br />
iThe terminals are soiled.<br />
iThe battery is flat.<br />
iNo SmartMedia is loaded.<br />
iThe SmartMedia is fully recorded.<br />
iThe SmartMedia is write-protected.<br />
iThe SmartMedia is not formatted.<br />
iThe SmartMedia contact area is soiled.<br />
iThe SmartMedia is damaged.<br />
iThe Power Save function has switched the<br />
camera off.<br />
iThe battery is exhausted.<br />
iPut the battery in your pocket or another<br />
warm place to heat it and then load it into<br />
the camera just before you take a picture.<br />
iWipe the battery terminals with a clean,<br />
dry cloth.<br />
iPurchase new batteries.<br />
iLoad a SmartMedia.<br />
iInsert a new SmartMedia or erase some<br />
unwanted frames.<br />
iRemove the write-protection.<br />
iFormat the SmartMedia.<br />
iWipe the SmartMedia contact area with a<br />
clean dry cloth.<br />
iLoad a new SmartMedia.<br />
iSwitch the camera on.<br />
iPurchase new batteries.<br />
75
76<br />
Troubleshooting eIf you think the camera is faulty, check the following once more<br />
Problem Cause Remedy<br />
Can’t use the flash to<br />
take pictures.<br />
The playback image is<br />
too dark even though<br />
the flash was used.<br />
iThe flash is set to Suppressed Flash<br />
mode.<br />
iYou pressed the shutter button while the<br />
flash was charging.<br />
iThe battery is exhausted.<br />
iThe subject is too far away.<br />
iYour fingers are obscuring the flash or<br />
flash control sensor.<br />
The image is blurred. iThe lens is dirty.<br />
iYou photographed a distant subject with<br />
the macro selector switch set to “r”.<br />
iYou took a close-up shot with the macro<br />
selector switch set to “t”.<br />
There is speckling on<br />
the image.<br />
I can’t format the<br />
SmartMedia.<br />
iThe shot was taken with a slow shutter<br />
speed (long exposure) in a high-temperature<br />
environment.<br />
iSet the flash to Auto, Red-Eye Reduction<br />
or Forced Flash mode.<br />
iWait until charging is completed before<br />
pressing the shutter button.<br />
iLoad a new battery.<br />
iMove closer to the subject.<br />
iHold the camera correctly.<br />
iClean the lens.<br />
iCancel Macro mode.<br />
iSet the camera to Macro mode.<br />
iThis is a characteristic of CCDs and does<br />
not indicate a camera fault.<br />
iThe SmartMedia is write-protected. iRemove the write-protection.<br />
Peel off the write-protect sticker)<br />
Problem Cause Remedy<br />
The ERASE ALL function<br />
does not erase all the<br />
frames.<br />
Frame erase does not<br />
erase the frame.<br />
Nothing happens when I<br />
use the Mode switch.<br />
When the camera is<br />
connected to a personal<br />
computer (PC), the shot<br />
image appears on the<br />
camera's LCD monitor.<br />
The camera no longer<br />
works correctly.<br />
iThe frame is protected.<br />
iDPOF settings are specified for some<br />
frames.<br />
iCamera malfunction.<br />
iThe battery exhausted.<br />
iThe special USB cable is not connected<br />
correctly to the PC or camera.<br />
iThe PC is not switched on.<br />
iThe camera has suffered an unforeseen<br />
problem.<br />
iUnprotect the frame using the camera on<br />
which the protection was first applied.<br />
iCancel the DPOF settings for the frame<br />
and try again.<br />
iBriefly remove the batteries or disconnect<br />
the AC power adapter. Then reload the<br />
batteries or reconnect the AC power<br />
adapter and try again.<br />
iPurchase new batteries.<br />
iSet up the camera and USB cable<br />
correctly.<br />
iSwitch the PC on.<br />
iRemove the battery briefly and then<br />
reload the battery and try again.<br />
77
78<br />
Specifications<br />
System<br />
h Model: Digital Camera <strong>FinePix</strong> <strong>A201</strong><br />
h CCD sensor:<br />
1/2.7-inch square pixel CCD with RGB Filter<br />
Number of total pixels: 2.11 million pixels<br />
h Number of effective pixels: 2.0 million pixels<br />
h Resolution:<br />
1600 × 1200 pixels/1280 × 960 pixels/640 × 480 pixels<br />
h File format:<br />
Still image: JPEG (Exif Ver.2.1), DPOF-compatible<br />
Movie: AVI format, Motion JPEG<br />
✽Design rule for Camera File system Compliant<br />
h Viewfinder<br />
Inverted Galiean finder; Frame coverag: 80%<br />
h Lens<br />
Fujinon optical fixed-focus lens<br />
h Storage media<br />
SmartMedia (3.3V, 2 to 128MB)<br />
h Focus distance<br />
f=5.5 mm (equivalent to 36 mm on a 35 mm camera)<br />
h Number of frames recorded<br />
File Size<br />
8 1600 ✕ 1200<br />
Quality Mode<br />
FINE<br />
Image Data Size<br />
4MB (MG-4S)<br />
8MB (MG-8S)<br />
16MB (MG-16S/SW)<br />
32MB (MG-32S/SW)<br />
64MB (MG-64S/SW)<br />
128MB (MG-128SW)<br />
h Exposure control<br />
64 zones TTL metering, Program AE<br />
(exposure compensation available in <strong>Manual</strong> mode)<br />
h Sensitivity<br />
Equivalent to ISO 100<br />
h White balance<br />
Auto (7 positions selectable in <strong>Manual</strong> mode)<br />
h Focal range<br />
Normal: Approx. 80 cm/2.6 ft. to infinity<br />
Macro: Approx. 8 cm – 13 cm/3.1 in. – 5.1 in.<br />
h Shutter speeds<br />
Variable-speed, 1/2 sec. to 1/1000 sec. (combined with<br />
mechanical shutter)<br />
h Flash (Auto flash using flash control sensor)<br />
Effective range : Approx. 0.8 m – 3.0 m (2.6 ft. – 9.8 ft.)<br />
Flash modes : Auto, Red-Eye Reduction, Forced Flash,<br />
Suppressed Flash, Slow Synchro<br />
h LCD monitor<br />
1.6-inches, 55,000-pixels D-TFD<br />
h Self-Timer<br />
10 sec. timer clock<br />
9 1280 ✕ 960 0 640 ✕ 480 Movie<br />
NORMAL BASIC FINE NORMAL NORMAL —<br />
Approx.770KB Approx.390KB Approx.200KB Approx.620KB Approx.320KB Approx.130KB —<br />
4 9 19 6 12 30 Approx. 23 sec.<br />
10 19 39 12 25 61 Approx. 47 sec.<br />
20 39 75 25 49 122 Approx. 94 sec.<br />
41 79 152 50 99 247 Approx.191 sec.<br />
82 159 306 101 198 497 Approx.385 sec.<br />
166 319 613 204 398 997 Approx.774 sec.<br />
Input/Output Terminals<br />
h (Special USB) socket<br />
USB (1) for image data output with a personal computer<br />
h DC IN 3V (Power input) socket<br />
Socket for specified AC power adapter<br />
Power Supply and Others<br />
h Power supply<br />
Use one of the following:<br />
• 2AA-size alkaline batteries<br />
• 2AA-size Ni-MH (nickel metal hydride) batteries (sold<br />
separately)<br />
• AC Power Adapter AC-3V (sold separately)<br />
h No. of available shots using battery (battery life)<br />
Battery type<br />
With LCD monitor With LCD monitor<br />
ON<br />
OFF<br />
Alkaline batteries<br />
Ni-MH batteries<br />
Approx. 150 frames<br />
HR-3UF<br />
✽<br />
Approx. 80 frames<br />
Approx. 250 frames ✽<br />
Approx. 150 frames<br />
(Condition: Power saving mode ON, with fully charged battery (Ni-MH))<br />
This indicates the number of available frames shot<br />
consecutively at room temperature with a flash use rate of<br />
50%. Note that these figures may vary depending on the<br />
ambient temperature and the amount of charge in the<br />
battery. The number of available shots or available<br />
shooting time will be lower in cold conditions.<br />
h Conditions for use<br />
Temperature: 0°C to +40°C (+32°F to +104°F); 80%<br />
humidity or less (no condensation)<br />
h Camera dimensions (W/H/D)<br />
98.5 mm × 64.5 mm × 40.5 mm/3.9 in. × 2.5 in. × 1.6in.<br />
(not including accessories and attachments)<br />
h Camera mass (weight)<br />
Approx. 145 g/5.1 oz.<br />
(not including accessories, batteries or SmartMedia)<br />
h Weight for photography<br />
Approx. 200 g/7.1 oz.<br />
(including batteries and SmartMedia)<br />
h Accessories<br />
See P.7<br />
h Optional Accessories<br />
See P.65, 66<br />
✽ These specifications are subject to change without notice.<br />
FUJIFILM shall not be held liable for damages resulting<br />
from errors in this Owner’s <strong>Manual</strong>.<br />
✽ The LCD monitor on your digital camera is manufactured<br />
using advanced high-precision technology. Even so, small<br />
bright points and anomalous colors (particularly around<br />
text) may appear on the monitor. These are normal display<br />
characteristics and do not indicate a fault with the monitor.<br />
This phenomenon will not appear on the recorded image.<br />
✽ The operation error may be caused in a digital camera by<br />
the strong radio interference (i. e. electric fields, static<br />
electricity, line noise, etc.).<br />
79
80<br />
Explanation of Terms<br />
DPOF: Digital Print Order Format<br />
DPOF is a format used for recording information on a storage media (image memory card, etc.) that allows<br />
you to specify which of the frames shot using a digital camera are printed and how many prints are made of<br />
each image.<br />
EV:<br />
A number that denotes exposure. The EV is determined by the brightness of the subject and sensitivity (speed) of<br />
the film or CCD. The number is larger for bright subjects and smaller for dark subjects. As the brightness of the<br />
subject changes, a digital camera maintains the amount of light hitting the CCD at a constant level by adjusting<br />
the aperture and shutter speed. When the amount of light striking the CCD doubles, the EV increases by 1.<br />
Likewise, when the light is halved, the EV decreases by 1.<br />
JPEG:<br />
Joint Photographics Experts Group<br />
A file format used for compressing and saving color images. The compression ratio can be selected, but the higher the<br />
compression ratio, the poorer the quality of the expanded image.<br />
Motion JPEG:<br />
A type of AVI (Audio Video Interleave) file format that handles images and sound as a single file. Images in<br />
the file are recorded in JPEG format. Motion JPEG can be played back by QuickTime 3.0 or later.<br />
PC Card:<br />
A generic term for cards that meet the PC Card Standard.<br />
PC Card Standard:<br />
A standard for PC cards determined by the PCMCIA.<br />
PCMCIA:<br />
Personal Computer Memory Card International Association (US).<br />
White Balance:<br />
Whatever the kind of the light, the human eye adapts to it so that a white object still looks white. On the other<br />
hand, devices such as digital cameras see a white subject as white by first adjusting the color balance to suit<br />
the color of the ambient light around the subject. This adjustment is called matching the white balance. A<br />
function that automatically matches the white balance is called an Automatic White Balance function.<br />
Safety Notes<br />
h To ensure that you use your <strong>FinePix</strong> <strong>A201</strong> camera<br />
correctly, read these Safety Notes and your Owner’s<br />
<strong>Manual</strong> carefully beforehand.<br />
h After reading these Safety Notes, store them in a safe<br />
place.<br />
About the Icons<br />
The icons shown below are used in this document to<br />
indicate the severity of the injury or damage that can result<br />
if the information indicated by the icon is ignored and the<br />
product is used incorrectly as a result.<br />
This icon indicates that death or<br />
WARNING serious injury can result if the<br />
information is ignored.<br />
This icon indicates that personal<br />
CAUTION injury or material damage can<br />
result if the information is ignored.<br />
The icons shown below are used to indicate the nature of<br />
the information which is to be observed.<br />
Triangular icons notify the user of information<br />
requiring attention (“Important”).<br />
Circular icons with a diagonal bar notify the user<br />
that the action indicated is prohibited<br />
(“Prohibited”).<br />
Filled circles with an exclamation mark notify the<br />
user of an action that must be performed<br />
(“Required”).<br />
WARNING<br />
When a fault arises, switch the camera<br />
off and then remove the batteries and<br />
disconnect the AC power adapter.<br />
Continued use of the camera when it is<br />
emitting smoke, is emitting any unusual<br />
odor, or is in any other abnormal state can<br />
cause a fire or electric shock.<br />
h Contact your FUJIFILM dealer.<br />
Do not allow water or foreign objects to<br />
enter the camera.<br />
If water or foreign objects get inside the<br />
camera, switch the camera off, remove the<br />
battery and disconnect and unplug the AC<br />
power adapter.<br />
Continued use of the camera can cause a<br />
fire or electric shock.<br />
h Contact your FUJIFILM dealer.<br />
Do not place the camera on an unstable<br />
surface.<br />
This can cause the camera to fall or tip over<br />
and cause injury.<br />
Do not use the camera in the bathroom<br />
or shower.<br />
This can cause a fire or electric shock.<br />
Unplug from<br />
power socket.<br />
Do not use in the<br />
bathroom or shower.<br />
81
82<br />
Safety Notes<br />
WARNING<br />
Never attempt to modify or disassemble<br />
the camera. (Never open the casing.)<br />
Do not use the camera when it has been<br />
dropped or the casing is damaged.<br />
This can cause a fire or electric shock.<br />
● Contact your FUJIFILM dealer.<br />
Never attempt to take pictures while in<br />
motion.<br />
Do not use the camera while you are<br />
walking or operating a moving car or other<br />
vehicle.<br />
This can result in you falling down or being<br />
involved in a traffic accident.<br />
Do not heat, modify or attempt to<br />
disassemble the batteries.<br />
Do not drop or subject the batteries to<br />
impacts.<br />
Do not attempt to recharge lithium or<br />
alkaline batteries.<br />
Do not store the batteries with metallic<br />
products.<br />
Any of these actions can cause the<br />
batteries to burst or leak and cause fire or<br />
injury as a result.<br />
Do not<br />
disassemble.<br />
WARNING<br />
Do not touch any metal parts of the<br />
camera during a thunderstorm.<br />
This can cause an electric shock due to<br />
induced current from the lightning discharge.<br />
Do not use the batteries except as<br />
specified.<br />
Load the batteries with the poles positioned<br />
as indicated by the + and - marks.<br />
Use only the batteries or AC power<br />
adapter specified for use with this<br />
camera.<br />
The use of other power sources can cause a fire.<br />
If the battery leaks and fluid gets into<br />
your eyes or comes into contact with<br />
your skin or clothing, this can cause<br />
injury or loss of eyesight. Immediately<br />
flush the affected area thoroughly with<br />
clean water and seek medical treatment.<br />
When discarding or storing batteries,<br />
cover the battery terminals with<br />
insulation tape.<br />
h Contact with other metallic objects or<br />
batteries could cause the batteries to<br />
ignite or burst.<br />
Keep out of the reach of small children.<br />
This product could cause injury in the hands<br />
of a child.<br />
Do not use this camera in locations<br />
severely affected by oil fumes, steam,<br />
humidity or dust.<br />
This can cause a fire or electric shock.<br />
Do not leave this camera in places<br />
subject to extremely high temperatures.<br />
Do not leave the camera in locations such<br />
as a sealed vehicle or in direct sunlight.<br />
This can cause a fire.<br />
Do not place heavy objects on the<br />
camera.<br />
This can cause the heavy object to tip over<br />
or fall and cause injury.<br />
Do not move the camera while the AC<br />
power adapter is still connected.<br />
This can damage the power cord or cables<br />
and cause a fire or electric shock.<br />
CAUTION CAUTION<br />
Do not cover or wrap the camera or the<br />
AC power adapter in a cloth or quilt.<br />
This can cause heat to build up and distort<br />
the casing or cause a fire.<br />
Remove the batteries and disconnect<br />
the AC power adapter when you are<br />
cleaning the camera or if you intend to<br />
leave the camera unused for a long<br />
period.<br />
Failure to do so can cause a fire or electric<br />
shock.<br />
Using a flash too close to a person’s<br />
eyes may temporarily affect the eyesight.<br />
Take particular care when photographing<br />
infants and young children.<br />
Request regular internal testing and<br />
cleaning for your camera.<br />
Build-up of dust in your camera can cause<br />
a fire or electric shock.<br />
h Contact your FUJIFILM dealer to request<br />
internal cleaning every 2 years.<br />
83
84<br />
EC Declaration of Conformity<br />
We<br />
Name : Fuji Photo Film (Europe) G.m.b.H.<br />
Address : Heesenstrasse 31<br />
40549 Dusseldorf, Germany<br />
declare that the product<br />
Product Name : FUJIFILM DIGITAL CAMERA <strong>FinePix</strong> <strong>A201</strong><br />
Manufacture’s Name : Fuji Photo Film Co., Ltd.<br />
Manufacture’s Address : 26-30, Nishiazabu 2-chome, Minato-ku,<br />
Tokyo 106-8620, Japan<br />
is in conformity with the following Standards<br />
Safety : EN60950<br />
EMC : EN55022 : 1998 Classe B<br />
EN55024 : 1998<br />
EN61000-3-2 : 1995 + A1:1998 + A2:1998<br />
following the provision of the EMC Directive (89/336/EEC, 92/31/EEC and<br />
93/68/EEC) and Low Voltage Directive (73/23/EEC).<br />
Dusseldorf, Germany September 1, 2001<br />
Place Date Signature/Managing Director<br />
Bij dit produkt zijn batterijen geleverd. Wanneer deze leeg zijn, moet u ze niet<br />
weggooien maar inleveren als KCA<br />
Memo
26-30, Nishiazabu 2-chome, Minato-ku, Tokyo 106-8620, Japan<br />
Printed on recycled paper.<br />
Printed in Japan FGS-103107-FG