Fldigi - Kambing UI
Fldigi - Kambing UI
Fldigi - Kambing UI

Create successful ePaper yourself
Turn your PDF publications into a flip-book with our unique Google optimized e-Paper software.
• License<br />
• Recognitions<br />
• Installing on<br />
Linux<br />
• Installing on<br />
Windows<br />
• Post<br />
Installation<br />
• Configuring<br />
• Rig Control<br />
• Menus<br />
• Operating<br />
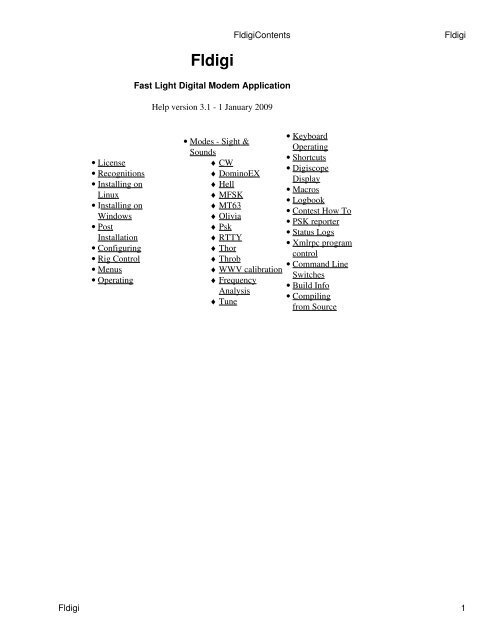
<strong>Fldigi</strong><br />
Fast Light Digital Modem Application<br />
Help version 3.1 - 1 January 2009<br />
<strong>Fldigi</strong>Contents <strong>Fldigi</strong><br />
• Keyboard<br />
• Modes - Sight &<br />
Operating<br />
Sounds<br />
• Shortcuts<br />
♦ CW<br />
• Digiscope<br />
♦ DominoEX<br />
Display<br />
♦ Hell<br />
• Macros<br />
♦ MFSK<br />
• Logbook<br />
♦ MT63<br />
• Contest How To<br />
♦ Olivia<br />
• PSK reporter<br />
♦ Psk<br />
• Status Logs<br />
♦ RTTY<br />
• Xmlrpc program<br />
♦ Thor<br />
control<br />
♦ Throb<br />
• Command Line<br />
♦ WWV calibration<br />
Switches<br />
♦ Frequency<br />
• Build Info<br />
Analysis<br />
• Compiling<br />
♦ Tune<br />
from Source<br />
<strong>Fldigi</strong> 1
License<br />
Copyright (c)<br />
• 2006, 2007, 2008 Dave Freese, W1HKJ<br />
• 2007, 2008 Stelios Bounanos, M0GLD<br />
• 2007, 2008 Leigh Klotz Jr., WA5ZNU<br />
This application is free software; you can redistribute it and/or modify it under the terms of the GNU Library<br />
General Public License as published by the Free Software Foundation; either version 2 of the License, or (at your<br />
option) any later version.<br />
This program is distributed in the hope that it will be useful, but WITHOUT ANY WARRANTY; without even<br />
the implied warranty of MERCHANTABILITY or FITNESS FOR A PARTICULAR PURPOSE. See the GNU<br />
Library General Public License for more details.<br />
You should have received a copy of the GNU Library General Public License along with the source code for<br />
fldigi; if not, write to the Free Software Foundation, Inc., 675 Mass Ave, Cambridge, MA 02139, USA.<br />
Contents<br />
<strong>Fldigi</strong>Contents License<br />
License 2
Recognitions<br />
This software would not have been possible without the contribution of many programmers who have given their<br />
best to the open source community. The application is built upon the foundation of the Fast Light Tool Kit<br />
(http://www.fltk.org), a wonderfully fast and efficient graphical user interface design library. Many have asked<br />
what the Fast Light means. There are probably as many answers as there are programmers using the toolkit. I<br />
prefer to think of it as lightning fast and light on the code size. Take a look at the size of the executable for fldigi<br />
and then compare it with similar applications. I think you will be surprised by how small it is for what it does.<br />
The current development team consists of:<br />
• Dave Freese - W1HKJ<br />
• Stelios Bounanos - M0GLD<br />
• Leigh Klotz - WA5ZNU<br />
• Stephane Fillod - F8CFE<br />
<strong>Fldigi</strong>Contents Recognitions<br />
Several authors have placed their digital modem code and signal processing code in the public domain and their<br />
source was either an inspiration or in some cases formed the backbone of the code used in <strong>Fldigi</strong>.<br />
• AE4JY - WinPsk - a windows application<br />
• Takuya OOURA - a generic Fast Fourier Transform for real valued data streams -<br />
http://momonga.t.u-tokyo.ac.jp/~ooura/fft.html<br />
• Tomi Manninen, OH2BNS - gmfsk - a great digital modem program for Linux<br />
• Hamish Moffatt, VK3SB - dominoEX code originally for gmfsk<br />
• Joe Veldhuis, KD8ATU - Olivia 2 tone and other mods.<br />
• Dr. Steven W. Smith - author of "Digital Signal Processing", who has kindly placed an entire book on<br />
digital signal processing on the internet. (http://www.dspguide.com)<br />
If you make a side-by-side comparison between gmfsk and fldigi source code you will see that they follow the<br />
same general structure. The primary difference is that gmfsk is written in the C language and uses the gnome/gtk<br />
libraries for the user interface. <strong>Fldigi</strong> is a C++ application that uses the Fast Light Tool Kit (Fltk) gui library. The<br />
design of <strong>Fldigi</strong> puts emphasis on separating the user interface from the sound card and transceiver input/output<br />
operations. Nearly all modern digital modem programs use a programming paradigm called "threads." Threads<br />
are light weight processes that share the same memory space, but each has its own stack. The use of threads<br />
makes the program look and feel responsive to the user while a lot of code is being executed in the background.<br />
Many of the modem source code files are C to C++ rewrites from the gmfsk application. They say that copying is<br />
the best form of flattery and gmfsk simply had the best explanations and the easiest source code to read and<br />
understand. The author had also spent several months creating improvements and fixing bugs in the original<br />
gmfsk application. That exercise was the impetus to create <strong>Fldigi</strong>. Gmfsk was becoming too difficult to modify<br />
without great effort. I also wanted to learn more about coding with threads ... fools rush in.<br />
The Fast Fourier Transform used by <strong>Fldigi</strong> is a rewrite of Takuya Ooura's C code. The rewrite is in C++ but you<br />
will see the strong resemblence to Takuya's original if you study both. Takuya's FFT code was also used in the<br />
Winpsk program. Some of the signal processing algorithms used in <strong>Fldigi</strong> are from Dr. Smith's book. His on-line<br />
publication is sufficient to allow you to become fluent in fft analysis and the creation of digital filters. I printed<br />
the relevant pdf files and then purchased the hard bound copy. Improvements to the original gmfsk signal<br />
processing algorithms can all be attributed to this excellent source.<br />
Recognitions 3
And last but certainly not least, I must thank the crew who perform alpha testing of the application. These are<br />
stalwart amateurs who risk their operating system and radio equipment in testing, testing and more testing. Their<br />
only reward is in being able to influence the design of the application and the fun of seeing it work and the bugs<br />
disappear. Thank you to:<br />
Call Name Call Name Call Name Call Name<br />
4Z5ST Boris K3GAU David KU1T Zibi VA3DB Dianne<br />
AA0HW Chuck K4XTT Victor KV9U Rick VE3IXI Dave<br />
AC7JN Dave K6KAR Kirk N0NB Nate VK2TMG Brett<br />
CT1DRB David K7BRK Chris N2AWG Rick VK4BDJ David<br />
CX7BF Walter K4RE Brian N4UM Tim W3NR Ed<br />
DF4OR Ekki K9AO Rick N4ZNV Mike W4ROS Ross<br />
DK1JBE Tom KB3FN Lynn N6WFL Jason W6JVE Jim<br />
DL6XAZ Fred KD0AR Mike N8FQ Joe WA3VPZ Marshal<br />
DL8FCL Walter KD4O Phil NN8B Don WA4SXZ Rich<br />
G0UZP Paul KD8DKT Mike NT1G Skip WB8ROL Gary<br />
G3TDJ Andy KE3Y Travis OZ4KK Erik WD4FDW Steve<br />
G6CKR Roger KH6TY Skip PA0R Rein WD4FNY Bill<br />
G8SQH David KL7NA Rob PA3GWH Richard WU9Q Bob<br />
and many others whose names are not listed, please accept my apology.<br />
All the testers were on different platforms and used different Linux distributions and Windows versions. They<br />
represent users that have transceivers capable of hamlib support and users who do not. They have varying<br />
interests from very slow speed CW to high speed keyboard full break-in CW, from RTTY contesters to PSK rag<br />
chewers. They have insisted that fldigi perform well under all of those operations. I have been amazed by the<br />
global distribution of the testing team. It is easy to think that the internet will be the death of amateur radio. On<br />
the contrary it opens up so many additional ways for us to be cooperative.<br />
Contents<br />
<strong>Fldigi</strong>Contents Recognitions<br />
Recognitions 4
Installing <strong>Fldigi</strong><br />
Precompiled Binary<br />
The precompiled binary is available with and without a dependency on PulseAudio. Unless you know that your<br />
system uses PulseAudio for its sound card service you should not download that version.<br />
You will need three shared libraries on your system, hamlib-1.2.7; libsamplerate; and libportaudio2. Use the<br />
libraries available for your linux distribution. Most current distributions use either deb or rpm files and can be<br />
accessed from a global repository. Building the libraries from source should be a last resort unless you are a<br />
knowledgable Linux user and have performed a library build from source in the past.<br />
Hamlib required<br />
You will need to have hamlib-1.2.7 installed on your system before fldigi can be executed. Most current<br />
distributions either have a deb or rpm distribution file for hamlib-1.2.7. If you must compile from source you can<br />
find it at:<br />
http://www.hamlib.org<br />
Follow the instructions in the source code top directory to compile, link and install the library.<br />
libsamplerate required<br />
You will need to have libsample installed on your system before fldigi can be executed. Most current<br />
distributions either have a deb or rpm distribution file for libsamplerate. If you must compile from source you can<br />
find it at:<br />
libsamplerate source<br />
Follow the instructions in the source code top directory to compile, link and install the library.<br />
PortAudio2 required<br />
You will need to have libportaudio2 installed on your system before fldigi can be executed. Most current<br />
distributions either have a deb or rpm distribution file for libportaudio2. If you must compile from source you can<br />
find it at:<br />
http://www.portaudio.com<br />
Follow the instructions in the source code top directory to compile, link and install the library.<br />
Installing fldigi<br />
<strong>Fldigi</strong>Contents Recognitions<br />
The static executables are tested on as many distributions as possible to insure that they work "out-of-the-box",<br />
but there are always a few Linux distributions that may have a missing link or library. The precompiled binaries<br />
have been tested and work correctly on all of the Debian and Ubuntu/Kubuntu distributions. They have also been<br />
tested and confirmed to work on Suse 10.1, and Mandriva 2007.<br />
Installing <strong>Fldigi</strong> 5
Download the tarball for the binary version and unpack to a directory on your HD such as $HOME/bin or some<br />
other convenient directory of your choosing. The least common denominator for unpacking a tarball is to<br />
download the file and save it to a convenient directory such as $HOME/downloads. Then open up a terminal<br />
window. Assuming you will be installing the executable to $HOME/bin do the following and that you have<br />
downloaded the tarball to $HOME/downloads<br />
cd<br />
cd bin<br />
tar xzf ../downloads/fldigi-D.dd.npa.bin.tgz<br />
where D.dd is the current version number as in 3.10<br />
You can create a link to the fldigi executable on your desktop using the fldigi.png icon located at<br />
http://www.w1hkj.com/fldigi-distro/fldigi-psk.png<br />
Creating a desktop link to an application is different for each desktop manager, so please refer to the<br />
documentation for your specific manager.<br />
The first time that you execute fldigi either from the command line or by clicking on the executable in a file<br />
manager or the desktop icon it will create a new directory and file:<br />
• $HOME/.fldigi<br />
• $HOME/.fldigi/macros.mdf<br />
You can edit the macros.mdf file to create custom macros that meet your operating requirements, but it is easier to<br />
use the built-in macro editor that fldigi provides.<br />
Contents<br />
<strong>Fldigi</strong>Contents Recognitions<br />
Precompiled Binary 6
Installing <strong>Fldigi</strong> on Windows<br />
The port of fldigi to the Windows operating system uses the POSIX layer provided by Cygwin. The application<br />
requires the dynamic link library for cygwin to be present in the same folder as fldigi.exe. There are no other<br />
dependencies as all of the other libraries are statically linked in the executable. The zipped folder that contains<br />
the fldigi.exe also has the required cygwin1.dll. This dynamic link library is different for XP / W2K than for<br />
Vista. Be sure that you download the correct zip file. You might also want to check to see if you have any<br />
existing cygwin1.dll files on your system. A conflict can only occur if you are trying to run two programs at the<br />
same time that use different cygwin1.dll's.<br />
Installing fldigi on windows is very simple. Just extract the zipped folder to one of your drives. It can be placed<br />
anywhere that is convenient for you to find; c:\fldigi-win32 or "c:\Documents and Settings\\My<br />
Documents" for example. My preference is to put the folder at the root of the C drive. Open up that folder and<br />
right click on the fldigi icon. Select "Send To\Desktop (create shortcut)" to create a short cut to fldigi on your<br />
desktop. is the name used to log in to windows. Be sure you have only one copy of cygwin1.dll (the<br />
one that came in your zipped file) on your computer. Strange things can and will occur if you have more than one<br />
copy of this file on your computer.<br />
Click on the desktop icon to start the application. Resize the main dialog to suit your screen. Adjust the Rx/Tx<br />
divider to your liking. Then set up the operator and sound card configuration items; configuring fldigi. When<br />
you have fldigi receiving and decoding signals you can exit the application which will allow you to save your<br />
configuration settings.<br />
Now open up the following folder using your windows file explorer if you do not have a login name and<br />
password:<br />
On XP C:\"Documents and Settings\\fldigi.files\"<br />
On W2K C:\"Documents and Settings\\fldigi.files\"<br />
On Vista C:\User\\fldigi.files\<br />
where is the name with which you log onto the computer.<br />
All of these files were generated by fldigi when it first started. The files with the extension pal are palette<br />
definition files. The file "macros.mdf" contains the macro definitions which you can change using the macro<br />
editor. fldigi.status and fldigi_def.xml are used for storing the application state and configuration items<br />
respectively. With the exception of the location of this folder the operation of fldigi on windows is identical to<br />
linux. In all instances where the help files make reference to $HOME/.fldigi you should be substitute the<br />
appropriate directory for XP or Vista.<br />
Please take the time to read and reread the on-line help file. Better yet download the Adobe Reader file so that<br />
you can view the help locally without needing access to the internet. <strong>Fldigi</strong> is a large complex program with<br />
many ways for the user to customize its operation to his or her hardware environment.<br />
Contents<br />
<strong>Fldigi</strong>Contents Installing <strong>Fldigi</strong> on Windows<br />
Installing <strong>Fldigi</strong> on Windows 7
New Installation<br />
fldigi's opening screen looks like the following when starting fldigi for the first time or when setting up a second<br />
or subsequent instance using the --config-dir command line switch.<br />
fldigi will create a working files folder, multiple sub folders and also populate them with a set of default files.<br />
The working files folder is different on the different OS.<br />
XP / W2K<br />
C:\Documents and<br />
Settings\\fldigi.files<br />
Vista C:\Users\\fldigi.files<br />
Linux /home//.fldigi<br />
<strong>Fldigi</strong>Contents New Installation<br />
After closing the application the working folder will contain the following folders and files:<br />
New Installation 8
The help, images, logs, scripts and temp folders will be empty. They will contain program created files as you<br />
use the program or you may post files in those folders for use by fldigi. Images to be sent with the MFSKpic<br />
mode should be placed in images. Your logbook database will appear in logs. If you are running on Linux then<br />
you can use various scripts to enhance the macro language that fldigi supports. The temp directory holds files that<br />
are transitory and you can safely delete those files between sessions. The 5 files that appear initially are:<br />
fldigi.prefs<br />
fldigiYYYYMMDD.log<br />
fldigi_def.xml<br />
frequencies2.txt<br />
status_log.txt<br />
contains variables that describe the status of fldigi when last used. This is an<br />
ASCII text file that you can safely read. You should not edit or change this file.<br />
this is an historical log of all the received and transmitted text during the day for<br />
which the log refers<br />
contains variables that relate to all of fldigi's configurable items. This is an<br />
ASCII text file that conforms with the XML specification. You can safely read<br />
this file but should not edit or change it.<br />
an ASCII text file that contains the default (and / or modified) entries for fldigi's<br />
rig control process<br />
a log of events for the most current fldigi execution. This file will contain<br />
information relative to any errors that my occur and is important for debugging<br />
purposes.<br />
The macros folder contains a single file: macros.mdf. This is an ASCII text file that contains the default macro<br />
definitions. After running fldigi for a while and creating your own sets of macro definitions there will be<br />
additional *.mdf files located here.<br />
The palettes folder contains the following files:<br />
<strong>Fldigi</strong>Contents New Installation<br />
New Installation 9
Each of these is a palette definition file that is used to modify the appearance of the waterfall. <strong>Fldigi</strong> has a palette<br />
editor that enables you to modify these default files or to create your own. The file format of these files is<br />
identical to the palette files used by DigiPan. The final color rendition might be a little different as a result of<br />
using different painting functions. The file digipan.pal contains:<br />
0; 0; 0<br />
0; 0; 62<br />
0; 0;126<br />
0; 0;214<br />
145;142; 96<br />
181;184; 48<br />
223;226;105<br />
254;254; 4<br />
255; 58; 0<br />
Don't bother trying to modify these using an editor. The palette editor is much easier to use and will keep you<br />
from wrecking havoc with the program.<br />
The easiest way to find the working files folder is to start fldigi and then select the menu item File/Show config.<br />
Contents<br />
<strong>Fldigi</strong>Contents New Installation<br />
New Installation 10
Configuring<br />
The first time you execute fldigi you should resize the main window to suit your screen dimensions. Then<br />
adjust the divider line between the Rx and Tx text widgets..<br />
<strong>Fldigi</strong> contains many configurable items, to specify operator data, user interface, and modem characteristics. The<br />
application also saves many state variables between executions. It will start up in the state that it was last used.<br />
You should initially configure the following:<br />
Operator <strong>UI</strong> Waterfall Modems Rig Audio Id Misc Callsign DB<br />
and<br />
Colors & Fonts<br />
When the program receives and transmits digital signals and your rig control is satisfactory then you can continue<br />
configuring other aspects of the program:<br />
Operator <strong>UI</strong> Waterfall Modems Rig Audio Id Misc Callsign DB<br />
You can configure each modem type to suit your particular operating needs, but the defaults should be<br />
satisfactory for most users.<br />
CW DominoEX FeldHell MT-63 Olivia Psk Rtty Thor<br />
<strong>Fldigi</strong>Contents Configuring<br />
To learn more about the characteristics of specific digital modes look here: Digital Modes, Sights & Sounds.<br />
When you have completed the configuration go to the Configure menu and select Save config or press the "Save<br />
Config" button on the configure dialog box. The program will write the file ~/.fldigi/fldigi_def.xml.<br />
Exit the program and restart it to test that your configuration was saved and is working correctly.<br />
Your fldigi install is now ready for you to start receiving and transmitting digital signals.<br />
<strong>Fldigi</strong> recognizes if any configuration changes are made and not saved. You will then be prompted to save the<br />
configuration when exiting the program.<br />
Contents<br />
Configuring 11
Configure Operator<br />
Enter your personal information on the Operator tab of the configuration dialog. This information is used by<br />
some of the macro expanders.<br />
The antenna information is required if you elect to report to the spotting web site,<br />
http://report.psk.gladstonefamily.net<br />
<strong>Fldigi</strong>Contents Configure Operator<br />
Your locator data is also used for automatically computing Azimuth to a remote locator when that is available<br />
from an on-line database Call query.<br />
Configure Operator 12
Waterfall Configuration<br />
Waterfall Configuration<br />
<strong>Fldigi</strong>Contents Waterfall Configuration<br />
The waterfall palette or color scheme can be altered to suit your personal tastes and visual needs. When fldigi is<br />
first started it creates a wide range of pre-built palettes in the $HOME/.fldigi folder. The "Load" button gives you<br />
access to those palettes. You may change any palette by clicking on the various color buttons beneath the palette<br />
sample. A color picker opens for you to select the color by various means including specifying the RGB values.<br />
If you create a palette that suits you better than any of the prebuilt ones you can "Save" the palette.<br />
The waterfall cursor is a set of markers on the frequency scale that are spaced a signal bandwidth apart. You<br />
can add a pair of lines that drop down from those two markers for the full height of the waterfall by selecting<br />
Cursor BW. You can add a center line cursor to this pair of BW line by selecting Cursor Center line. You can<br />
also add a set of BW lines that straddle the received signal tracking point by selecting Bandwidth tracks. All three<br />
of these options are color selectable. Click on the colored button below the check box and a color selection dialog<br />
will open.<br />
The frequency scale defaults to RF frequency. You can select to show audio frequencies<br />
You can monitor the transmitted audio waveform and also set the level of the monitored signal. This IS NOT<br />
your final transmitted signal!<br />
Waterfall Configuration 13
You can extinguish the display of received signals below a particular audio frequency.<br />
<strong>Fldigi</strong>'s waterfall FFT has a bin size of 1 Hz. With an FFT of 8192 and a sampling rate of 8000 it takes almost a<br />
second to accumulate enough data to perform the full FFT. A waterfall that dropped at one scan line per second<br />
would be hard on the viewer, so fldigi uses a first-in-first-out (FIFO) 8192 byte buffer for the FFT data. 512 byte<br />
audio blocks move through the buffer with each successive read of the sound card. The full buffer of 8192<br />
samples is used to compute the FFT. That means that data in the FFT can have a latency of 8 scans. This<br />
provides excellent frequency resolution but poor time resolution (the vertical waterfall appearance). The latency<br />
control allows you to select the number of 512 byte blocks that are used for the FFT. The default latency is set to<br />
4. You should be able to achieve a reasonable compromise between the time and frequency domain resolutions.<br />
FFT averaging can be used to smooth the waterfall display in the frequency domain.<br />
The FFT Prefilter or window function is used to reduce aliasing in the FFT computation. The default prefilter for<br />
the Fast Fourier Transform associated with the waterfall is Blackman. You can try the other windowing filter.<br />
Under some conditions you might prefer one of those. The Blackman window has proven best for my setup.<br />
The mouse behavior in the waterfall panel can be controlled to suit your particular operating style. You might<br />
want to replay the saved audio history everytime you either left click to select or right click to preview a particular<br />
signal. You can move the transceiver frequency in increments of 100 Hz by dragging the waterfall scale. You<br />
can also choose to insert a line of text into the Rx panel each time you left click a waterfall signal. The text can<br />
include expandable macro tags.<br />
The mouse wheel behavior can also be tailored to your liking:<br />
Contents<br />
<strong>Fldigi</strong>Contents Waterfall Configuration<br />
• None - no mouse wheel activity in waterfall panel<br />
• AFC range or BW - adjust the AFC range/BW up/down<br />
• Squelch level - adjust the squelch level up/down<br />
• Signal search - search up / down for next signal in current mode<br />
• Modem carrier - adjust the audio tracking point +/- Hz increments<br />
• Modem - select modem type from a full rotary of available modems<br />
• Scroll - move the waterfall left/right in 100 Hz increments (for 2x, 4x expanded waterfall view)<br />
Waterfall Configuration 14
Rig Control<br />
If your transceiver is capable of a serial stream command link then you may elect to use one of several rig control<br />
methods. Rig control is accomplished by either a separate rig control dialog or one which is docked:<br />
Both are shown on Windows Vista controlling the author's FT-450. The same control is used when the<br />
transceiver does not support CAT. When no CAT is available the control is simply a convenient way of keeping<br />
track of the transceiver USB/LSB frequency, the mode and the audio tracking point.<br />
The buttons control selecting, adding and deleting entries in the frequency/mode list.<br />
• add the current frequency / mode / audio track point to the list<br />
• select the current list entry<br />
• delete the highlighted entry from the list<br />
• delete all entries from the list<br />
<strong>Fldigi</strong>Contents Rig Control<br />
The browser list contains frequency, sideband, modem type and audio frequency. The list is saved when fldigi is<br />
shut down.<br />
The combo box on the left will allow the selection and control of the operating mode of the transceiver.<br />
The combo box on the right will allow the selection and control of the transceiver bandwidth.<br />
The frequency display is in fact a set of special buttons. Each digit may be left-clicked on the upper half to<br />
increment it by 1, or left-clicked on lower half to decrement it 1. The leading digits will follow suit if a decade<br />
rollover occurs. You can also place the mouse cursor on a digit and then use the mouse wheel to roll the<br />
frequency up and down.<br />
Manual entry of frequency can be accomplished by clicking on any digit and then entering the numeric value in<br />
KHz. Don't forget the decimal point if you are entering a fractional KHz value.<br />
The mode combobox, the bandwidth combobox and the frequency display also annunciate the current transceiver<br />
status. If you change operating mode on the transceiver, that will be annunciated in the respective combobox and<br />
fldigi will adjust any internal parameters accordingly. <strong>Fldigi</strong> queries the transceiver 10 times per second to<br />
maintain a lock step with the transceiver.<br />
Rig Control 15
Rig Configuration<br />
Hardware PTT control<br />
The simplest rig control is just being able to control the push to talk via an external transistor switch. You set this<br />
type of control on the first configuration tab for rig control.<br />
You select this operation by checking the "Use serial port PTT". Select the serial port from the list (fldigi will<br />
have searched for available ports). Then specify whether the h/w uses RTS or DTR and whether a + or - voltage<br />
is required to toggle PTT on. You can use a serial port for control with the RTS and DTR pins configured for<br />
you particular interface. The program allows you to use RTS, DTR or BOTH for the PTT signal. Press the<br />
Initialize button to start the serial port.<br />
RigCAT control<br />
<strong>Fldigi</strong>Contents Rig Configuration<br />
RigCAT is a rig control system similar to hamlib that was developed specifically for fldigi. It uses command /<br />
response definitions that are found in various rig.xml files. You can use a rig.xml file specific for your<br />
transceiver or write and test one yourself. The easiest way is to adapt an existing rig xml file for a rig that is<br />
similar to your own. ICOM almost identical command/response strings for all of its transceiver line. Yaesu rigs<br />
have nearly all used unique command/response structures until just recently. The TS-450, TS-950 and others<br />
share a similar set of commands and responses.<br />
Rig Configuration 16
RigCAT commands and responses are defined in a rig specific xml file which contains all of the required queries<br />
and responses in extended markup language format. Please read the specification document rigxml to learn more<br />
about this new way of building generic rig interface definitions and how they are used with fldigi. fldigi will look<br />
for a file in the $HOME/.fldigi/rigs directory for all files with extension ".xml". These contain definitions for the<br />
transceiver indicated by the file name, ie: FT-450.xml, IC-756PRO.xml, etc. You can download the appropriate<br />
xml files from the resource directory tree http://www.w1hkj.com/xmls or from the archives web page. Place the<br />
file in your rigs directory and fldigi will find it.<br />
You will need to specify how your PTT will be triggered. This can be using a CAT command, the RTS or DTR<br />
pins or none. None would be appropriate if you are using the rig's VOX or an outboard sound card interface such<br />
as the SignalLink SL-1+ which produces its own VOX type of PTT. In that case simply leave all of the PTT<br />
options unselected.<br />
If you are using a transceiver or a rig interface such as CI-V that echos all serial data you check off the<br />
"Commands are echoed" box. That will suppress fldigi trying to respond to a command it just sent to the<br />
transceiver.<br />
You may need to try various values of retries, retry interval, and command interval to achieve consistent rigcat<br />
control.<br />
Press the Initialize button after setting all of the parameters. If the settings are all correct fldigi should start<br />
receiving frequency information from the rig and annunciating them on the rig control frequency display.<br />
Hamlib CAT control<br />
<strong>Fldigi</strong>Contents Rig Configuration<br />
Hamlib is a set of standard libraries for interfacing to a large number of transceivers. The hamlib library system<br />
consists of a front end which acts on behalf of all rigs and backends which are specific to each rig. The fldigi<br />
implementation of hamlib differs on the various OS for which it is targeted. On the Unix/Linux based systems the<br />
hamlib is a shared library which the user must have installed on his or her system. This is the standard way of<br />
handling hamlib on Unix/Linux systems. On Windows the entire hamlib library has been compiled and statically<br />
linked into the application executable. No additional dynamic link libraries are necessary. This approach<br />
simplifies the installation of fldigi on Windows platforms.<br />
RigCAT control 17
Select your transceiver from the list of supported units. Then select the serial port and baud rate. If you are<br />
familiar with the hamlib library you can send various startup sequences to the rig using the advanced<br />
configuration. PTT control can be achieved using CAT commands or via DTR / RTS on the same port as the<br />
control comms. You might also need to specifiy whether RTS/CTS flow control is uses (Kenwood rigs use this<br />
quite often) or if Xon/Xoff flow control is used.<br />
You may need to try various values of retries, retry interval, and command interval to achieve consistent hamlib<br />
control.<br />
Press the Initialize button after setting all of the parameters. If the settings are all correct fldigi should start<br />
receiving frequency information from the rig and annunciating them on the rig control frequency display.<br />
Memory Mapped CAT & Xml-Rpc CAT<br />
Memory mapped control is selected if you are operating a Kachina 505DSP using the W1HKJ control software<br />
for that rig.<br />
Xml-Rpc allows third party software to control various aspects of fldigi operation including but not limited to rig<br />
control. If you are using a third party interface such as DxKeeper Bridge you might want to select this method of<br />
CAT.<br />
Contents<br />
<strong>Fldigi</strong>Contents Rig Configuration<br />
Hamlib CAT control 18
Sound Card Configuration<br />
Sound Card Configuration<br />
A few words about sound I/O on the PC. "You are in a maze of twisty little passages, all alike".<br />
PortAudio, PulseAudio and OSS are different ways in which fldigi can access your sound card through the<br />
various sound systems.<br />
OSS was the first audio backend in fldigi. It works with the Linux sound system of the same name, which has<br />
now been replaced by ALSA but is still supported via an emulation layer. Its only advantage, as an audio<br />
backend, is that it's simple and doesn't require any external libraries.<br />
The PortAudio backend was written subsequently to support OSS on Linux and FreeBSD, ALSA and JACK on<br />
Linux, CoreAudio on OS X, and also the various sound APIs on Windows -- all through the same PortAudio<br />
library.<br />
PulseAudio is more than an audio hardware access layer; refer to its website for a summary of what it does. <strong>Fldigi</strong><br />
supports it mainly because many Linux distributions are now integrating it with their desktops, but also because it<br />
has a few interesting features:<br />
• it can take care of the resampling and volume control for us,<br />
• it can stream audio over the network, and<br />
• it makes it easier to run multiple fldigi instances (all accessing the same sound card).<br />
In the future it might be possible to replace all of these with a single backend, without any loss of functionality,<br />
performance, sound system or platform support. That'll be the day! Until then:<br />
On Linux:<br />
• Use PulseAudio if your Linux distro ships it, and you already have the pulseaudio daemon running (this is<br />
the case with Fedora 8/9 and Ubuntu 8.04, probably also with openSUSE 11.0). Or if you want networked<br />
audio, etc. etc.<br />
• Otherwise, use PortAudio and select a device from the list(s). PortAudio is also the best way to access<br />
JACK, through which you can use other programs as audio sources/sinks -- particularly useful with SDR<br />
software. As with PulseAudio, you can select different capture and playback audio devices.<br />
• The OSS backend should be used only as a last resort. Note that it has not been updated to support<br />
user-configurable sample rates.<br />
On Windows:<br />
• Use the PortAudio and select the device from the list(s).<br />
<strong>Fldigi</strong>Contents Sound Card Configuration<br />
Sound Card Configuration 19
Select the SndCrd tab on the configuration dialog.<br />
On Linux <strong>Fldigi</strong> can interface to the sound card using either the OSS, the Portaudio, or the PulseAudio. Each of<br />
the appropriate libraries must be present on the computer to use that particular sound i/o.<br />
On Windows <strong>Fldigi</strong> uses the Portaudio sound driver only.<br />
<strong>Fldigi</strong>Contents Sound Card Configuration<br />
It is also possible to configure <strong>Fldigi</strong> with File I/O only, which is useful for testing the application without an<br />
interface to the sound card. In the File I/O only configuration you can record and playback audio files in a<br />
number of different formats including the "wav" format associated with the Windows operating system.<br />
The program will find all active sound cards and the associated drivers for both. Select the sound card and driver<br />
type that will be used with the program. I recommend using the PortAudio device driver if that is available on<br />
your Linux distribution.<br />
If PortAudio is selected then you can either allow the program to use the auto detect to determine the best sound<br />
card sampling rate, or you can pick from the drop down list. If you know your RX and TX sound card oscillator<br />
correction factors you can enter them now. If not you can determine the RX rate correction using a special WWV<br />
modem built into <strong>Fldigi</strong>. The decoder and encoder logic for each of the various modems require a specific sound<br />
card sample rate which may not be the the actual sound card sample rate. The conversion between the modem<br />
sample rate and the sound card sample rate is accomplished by one of a set of sample rate converters.<br />
Sound card oscillators may have a slight error in frequency that causes their sampling rate to not be the value<br />
specified. This error is usually small enough to be measured in a parts per million. <strong>Fldigi</strong> uses a technique called<br />
rate conversion to correct the sampled waveform for this error. The error can be measured and the correction<br />
Sound Card Configuration 20
<strong>Fldigi</strong>Contents Sound Card Configuration<br />
factor determined by using the WWV calibration modem. The supporting library used for the converter provides<br />
several different levels of conversion. The default, "Medium Sinc Interpolator" will be satisfactory for most<br />
sound cards. If you are running fldigi on a computer with limited cpu power you might find it necessary to select<br />
one of the more cpu efficient converters, either "Fastests Sinc Interpolator", "ZOH Interpolator", or "Linear<br />
Interpolator". Each gives progressively poorer performance but use fewer cpu cycles to perform the frequency<br />
conversion. For really problematic computers you might want to completely disable the converter. This is<br />
accomplished by setting the "RX ppm" and "TX ppm" to zero. You should also be sure that the cpu type is set to<br />
"Slow cpu" on the miscellaneous configuration tab.<br />
Mixer controls are only active on Linux. Select whether you will be using Line-In or Mic-In for the audio<br />
connection from the receiver output. <strong>Fldigi</strong> ALWAYS expects to use the Line-Out for driving the transmitter<br />
audio. Set the PCM level for your soundcard. If you check "Manage mixer" then the Tx and Rx "volume"<br />
controls on the main fldigi dialog will be active.<br />
Sound Card Configuration 21
Colors & Fonts<br />
<strong>Fldigi</strong>Contents Colors & Fonts<br />
"System colors" are set by command line switches. The default is black on a white background.<br />
From the Menu Configure/Defaults select the menu item Colors and Fonts and then select one of the following<br />
tabs.<br />
Freq Display<br />
The rig control panel uses a special button for each digit the<br />
represents the transceiver frequency. The buttons are<br />
responsive to mouse clicks on the upper and lower half with<br />
corresponding changes it that unit's value. Unit value is also<br />
controlled by the mouse wheel when the cursor is over a<br />
particular digit. Select the background and foreground colors<br />
to please your overall color scheme and for best visual acuity.<br />
The System colors are the same ones that are used by all<br />
input and output text controls.<br />
Func keys<br />
You can color code the macro (function key) buttons in<br />
groups of 4, F1-F4, F5-F8, and F9-F12. The background<br />
color for each group is adjusted by clicking the respective<br />
Bkgnd button. The text color for the buton labels is adjusted<br />
by clicking on the Label Txt button. The colors will change<br />
on these buttons and also on the main dialog as you make<br />
these adjustments. The Defaults button restores the colors as<br />
shown in this view.<br />
Text Ctrls<br />
The initial color, font and font-size for the Rx and Tx panel<br />
are the default values. You can always return to these by<br />
pressing the Defaults button. The background color, font and<br />
font-size are independently selectable. The Rx panel displays<br />
text in one of 5 colors:<br />
• normal received text - "Rx font" button<br />
• transmitted text - XMIT button<br />
• control characters - CTRL button<br />
• skipped characters (Tx ON/OFF in Tx pane) - SKIP<br />
button<br />
• quick view characters - ALTR button<br />
Colors & Fonts 22
<strong>Fldigi</strong>Contents Colors & Fonts<br />
Tab Colors<br />
Adjust the color of all tabs to suit your personal taste.<br />
Text Ctrls 23
User Interface Configuration<br />
<strong>Fldigi</strong>Contents User Interface Configuration<br />
<strong>Fldigi</strong> offers tips on the use of nearly every aspect of its operation. These are particularly useful when you first<br />
use the program, but after you are familiar with it's operation they tend to get in the way. You can turn them off<br />
by de-selecting "Show tooltips"<br />
Some users prefer to not have icons on the menu system. You can turn them off also.<br />
<strong>Fldigi</strong> offers three different look and feel based on the parent Fast Light Toolkit graphics interface; "base", "gtk+"<br />
and "plastic". These can be combined with command line specifiers for the default background and foreground<br />
colors to create a user unique look to fldigi. You will probably discover that the default colors and the gtk+ <strong>UI</strong><br />
scheme are to be preferred.<br />
<strong>Fldigi</strong> has a built in logbook. You can request to be prompted whenever there is an unsaved entry in the qso log<br />
area. You can also elect to whether to clear all of the qso fields when the log is saved or to leave them intact.<br />
Auto-fill Country and Azimuth uses the data found in the file "cnty.dat" that you should download and place in<br />
the fldigi default folder. You can force the callsign field to be upper case independent of capture or keyboard<br />
entry. You enter your default Transmit Power which is used for the logbook record.<br />
<strong>Fldigi</strong> has various ways to transfer data in the Rx panel to the qso logging fields. The default is to use a<br />
Shift-Left-Click paradigm. You can also use a double click method if you prefer. The Shift-Left-Click will still<br />
function.<br />
If you check the "Show callsign tooltips in received text" then the Rx text area will popup an information box<br />
whenever the mouse is held over a callsign for more than 2 seconds. The popup will look like one of the<br />
following:<br />
The data is derived by parsing the callsign and referral to both the logbook and the "cty.dat" file. If the station<br />
User Interface Configuration 24
was previously worked the operator's name and azimuth/distance will be computed from the logbook gridsquare<br />
entry (Loc). Otherwise the azimuth/distance is computed from the data in the cty.dat file.<br />
This file is maintained by, and can be downloaded from the following web site:<br />
http://www.country-files.com/<br />
Download the file and put it in your fldigi default files folder.<br />
<strong>Fldigi</strong>Contents User Interface Configuration<br />
Some aspects of the user interface will need a program restart to take effect. These include the waterfall width<br />
and the waterfall height. The digiscope can be docked as well as floating. It is used for traditional views of the<br />
digital signal, such as phase vector, rtty cross hairs etc. The rig control can be either docked or floating. Most<br />
users seem to prefer the docked rig control. Finally you can select to use check buttons (boxes) for the AFC and<br />
Squelch controls.<br />
<strong>Fldigi</strong> supports a generic but robust set of contest functions. In addition to serial-in and serial-out you can capture<br />
and transmit three exchange sequences unique to a specific contest. Enter the exchange you want to send for each<br />
of the three. You can force the RST in/out to always be 599. That seems to be a norm for many contests. When<br />
operating in a CW contest you can have fldigi send cut numbers, T for 0, N for nine.<br />
User Interface Configuration 25
The serial number can be set to use leading zeros. You can specifiy the starting number for the sequence and<br />
how many digits are sent, ie: 0024. Pressing Reset will set the starting number to the qso logging serial out field.<br />
See Contest How To for more info.<br />
You can check for duplicates by any combination of the specified named fields. You can also specify that the<br />
duplicate had to occur with a given time interval. Some VHF contests allow a duplicate CALL after a given time<br />
interval.<br />
Contents<br />
<strong>Fldigi</strong>Contents User Interface Configuration<br />
Contents 26
Id Configuration<br />
<strong>Fldigi</strong> offers several ways to identify the operator or mode that is being used. This is particularly useful when<br />
using a hard to recognize mode such as Thor, Olivia or MT63.<br />
Video Text<br />
Transmitted video text will appear as a sequence of characters on the waterfall. The text can be a brief mode<br />
identifier or some user specified text. You can use a small font that always appears as a 2 character wide<br />
sequence or a larger font that can be 1 to 4 characters wide. You should be aware that the video signal is a<br />
constant energy signal and the content will be spread across multiple characters. The highest s/n at the receiving<br />
end will be for 1 character wide video. Small font at 2 character width is next in s/n performance followed by 2<br />
character large font etc.<br />
Cw postamble<br />
You can transmit your callsign in CW as a postamble to all modes except of CW (a bit redundant to do that).<br />
Reed Solomon Identifier<br />
RSid, Reed Solomon Identifier, is a special transmission designed by Patrick Lindecker, F6CTE, for the modem<br />
program MultiPsk. It has been adapted to other modem programs. <strong>Fldigi</strong>'s implementation is compatible with the<br />
MultiPsk RSid, but provides a slight variation. If you enable the transmission of RSid by selecting that check<br />
box., it will occur at both the beginning and the end of a transmission. The detection of RSid normally only<br />
occurs in the near vicinity of the current waterfall tracking point. This cuts down on extraneous RSid detections<br />
when the band is crowded and several RSid signals might be present. If you want fldigi to search the entire<br />
waterfall for RSid signals you can do so by enabling the "Wide Search Detector". You start the search for a signal<br />
based on RS Id by using the main panel switch. You MUST click this button to disable the RS Id search if so RS<br />
Id signal is discovered. <strong>Fldigi</strong> will not transmit while the RS Id button in lit. RS Id Search is turned off when a<br />
signal is found. When this occurs the waterfall cursor will move the signal, the mode will change if necessary,<br />
and signal decoding will begin.<br />
.<br />
<strong>Fldigi</strong>Contents Id Configuration<br />
Id Configuration 27
Contents<br />
<strong>Fldigi</strong>Contents Id Configuration<br />
Contents 28
Miscellaneous Configuration<br />
The sweet spot is the audio frequency at which your transceiver provides the best filtering for a particular signal<br />
type. You can specify the value of the sweet spot for CW, RTTY and all others. You can also elect to have the<br />
audio cursor placed at the sweet spot when changing modes. The sweet spot is used for the QSY function.<br />
<strong>Fldigi</strong> allows you to automatically participate in a spotting network maintained by Philip Gladstone. You can see<br />
what the web based reporter looks like by visiting this web site: http://pskreporter.info/pskmap?W1HKJ or by<br />
simply selecting the menu item "Help / Reception reports..."<br />
<strong>Fldigi</strong> will continuously scan for spotted callsigns in the decoded text and send reports in the background if you<br />
check the "Automat..." option.<br />
Reports will also (or only) be sent when you log the QSO into the logbook.<br />
<strong>Fldigi</strong>Contents Miscellaneous Configuration<br />
If you have rig control enabled the reported rig frequency will also be sent to the spotting network. Do not<br />
change the Host and Port numbers unless these are changed by Philip.<br />
You need to press the Initialize to begin reporting spot information. You will receive a warning message if you<br />
did not enter your antenna information on the Operator tab.<br />
Miscellaneous Configuration 29
<strong>Fldigi</strong> manages multiple files that contain macro definitions. You may want to have the last used macro file be<br />
the one available the next time you start fldigi. If so, simply enable the "load last used Macro file on startup"<br />
check box. You can also choose to display which macro file was loaded at startup or when a new macro file is<br />
loaded. A brief message indicating which file was loaded will be written to the Rx text area if this option is<br />
selected.<br />
When fldigi is executed for the first time it does some tests to determine the performance factor for your central<br />
processor unit. If it determines that the cpu is below a critical speed it tries to compensate by modifying some of<br />
its timing and algorithms. If you are using a "slow" cpu the "Slow cpu" check box will be enabled. You can also<br />
manually check this box if you find that fldigi is not performing well on some of the more esoteric modes such as<br />
PSK250, MFSK32, etc.<br />
Contents<br />
<strong>Fldigi</strong>Contents Miscellaneous Configuration<br />
Contents 30
Callsign DB Configuration<br />
<strong>Fldigi</strong>Contents Callsign DB Configuration<br />
<strong>Fldigi</strong> will open a web browser to either QRZ.com or Hamcall.net with the contents of the QSO Call field used as<br />
a query string to the on line service. You may find that your default browser needs to be triggered twice on the<br />
first such query. That behavior seems to be associated with IE7 but not IE6 for example.<br />
If you have a CD with the QRZ database installed you can use that CD or its' stored contents on a hard drive.<br />
Simply specify where the CALLBK directory can be found and enable the QRZ radio button.<br />
If you are a paid subscriber to either QRZ or Hamcall xml database service then you can specify that fldigi use<br />
that service for all Callsign data base queries.<br />
Contents<br />
Callsign DB Configuration 31
Menus<br />
The menu heirarchy is:<br />
• Files<br />
<strong>Fldigi</strong>Contents Menus<br />
♦ Open Macros - open a macro definition file ... changes the MACRO keys<br />
immediately<br />
♦ Save Macros - save the current macro definitions to a designated file<br />
♦ Show config - open the OS native file explorer to the folder containing the fldigi<br />
operating files<br />
♦ Logs<br />
◊ Create a new logbook<br />
◊ Open an existing logbook<br />
◊ Save the current logbook<br />
◊ Merge current log with an ADIF file from another source<br />
◊ Export selected or all logbook records to an ADIF<br />
formated file<br />
◊ Export selected or all logbook records to a text file<br />
suitable for printing<br />
◊ Export selected or all logbook records to a tab delimited<br />
file<br />
◊ write all received and transmitted text to the file<br />
"fldigi.log" which will be in the $HOME/.fldigi<br />
directory<br />
♦ Audio<br />
◊ Rx Capture - allows capturing the incoming audio to a wav<br />
file<br />
◊ Tx Generate - allows capturing the generated tx audio to a<br />
wav file<br />
◊ Playback - playback a previously captured or generated wav<br />
file<br />
♦ Exit - exit the program closing down the various interfaces in a nice controlled<br />
manner.<br />
• Op Mode - the current operating mode will show as a highlighted menu item.<br />
♦ CW - receive CW 5 to 200 WPM and transmit on any audio frequency using<br />
AFCW<br />
♦ DominoEX<br />
◊ dominoex 4<br />
◊ dominoex 5<br />
◊ dominoex 8<br />
◊ dominoex 11 - the default calling mode for<br />
dominoEX<br />
◊ dominoex 16<br />
◊ dominoex 22<br />
♦ Feld<br />
Menus 32
♦ MFSK<br />
♦ MT-63<br />
♦ PSK<br />
♦ Olivia<br />
♦ RTTY<br />
♦ Thor<br />
<strong>Fldigi</strong>Contents Menus<br />
◊ mfsk 4<br />
(4 tones<br />
◊ mfsk 8<br />
◊ mfsk 11<br />
◊ mfsk 16<br />
◊ mfsk 22<br />
◊ mfsk 31<br />
◊ mfsk 32<br />
◊ mfsk 64<br />
◊ Feld-Hell<br />
◊ Slow-Hell<br />
◊ Feld-Hell X5<br />
◊ Feld-Hell X9<br />
◊ FSK-Hell (also called FM-Hell by<br />
some programs)<br />
◊ FSK-Hell105<br />
◊ Hell-80<br />
◊ MT63-500 - interleave & extended characters set on<br />
configuration tab<br />
◊ MT63-1000 "<br />
◊ MT63-2000 "<br />
◊ psk 31 - phase shift keying - 31.625 baud<br />
◊ qpsk 31 - quadrature phase shift keying -<br />
31.25 baud<br />
◊ psk 63 - phase shift keying - 63.25 baud<br />
◊ qpsk 63 - quadrature phase shift keying - 63.25<br />
baud<br />
◊ psk 125 - phase shift keying - 126.5 baud<br />
◊ qpsk 125 - quadrature phase shift keying -<br />
126.5 baud<br />
◊ psk 250 - phase shift keying - 253 baud<br />
◊ qpsk 250 - phase shift keying - 253 baud<br />
◊ 8/500 8 tone, 500 Hz wide signal format<br />
◊ 16/500 16 tone, 500 Hz wide signal format<br />
◊ 32/1000 32 tone, 1000 Hz wide signal format<br />
◊ Custom - tones and bandwidth configurable on<br />
Olivia tab<br />
◊ RTTY-45 45 Baud Baudot, 170 Hz shift, used primarily in U.S.<br />
◊ RTTY-50 50 Baud Baudot, 170 Hz shift, used primarily in Europe<br />
◊ RTTY-75 75 Baud Baudot, 800 Hz shift<br />
◊ Custom - Baud Rate, Baudot/ASCII, Shift etc configurable on<br />
RTTY tab<br />
Menus 33
• Configure<br />
• View<br />
• Help<br />
◊ Thor-4<br />
◊ Thor-5<br />
◊ Thor-8<br />
◊ Thor-16<br />
◊ Thor-22<br />
♦ Throb<br />
◊ Throb1<br />
◊ Throb2<br />
◊ Throb4<br />
◊ ThrobX-1<br />
◊ ThrobX-2<br />
◊ ThrobX-4<br />
♦ NBEMS modes<br />
<strong>Fldigi</strong>Contents Menus<br />
These are the recommended modes to use when fldigi is used with flarq<br />
to form the NBEMS, Narrow Band Emergency Message System.<br />
♦ WWV - special receive only modem used for calibrating sound card<br />
♦ Freq Anal - used for carrier detection and frequency measurement<br />
♦ Operator - open the operator configuration tab<br />
♦ Colors - Fonts - select the colors and fonts for various main dialog controls<br />
♦ User Interface - configure various aspects of the main fldigi dialog<br />
♦ Waterfall - open the waterfall configuration tab<br />
♦ Modems - open up modem configuration to the current modem tab<br />
♦ Rig Control - open the rig control configuration tab<br />
♦ Sound Card - open the sound card configuration tab<br />
♦ IDs - configure various IDentification signals that can be sent and received by<br />
fldigi<br />
♦ Misc - open the miscellaneous configuration tab (sweet spot definitions)<br />
♦ QRZ - open the QRZ/Hamlog access configuration tab<br />
♦ Save Config - write the current configuration to the file<br />
~/.fldigi/fldigi_def.xml<br />
♦ Digiscope - Opens up a resizeable, moveable scope display<br />
♦ MFSK Image - Opens the MFSK picture image (if being received)<br />
♦ PSK Browser - open the psk viewer dialog to display up to 30 simultaneously<br />
decoded psk signals<br />
♦ Rig Control - Opens up a dialog for controlling the transceiver interface. Menu<br />
item is not visibile if program is configured to use the docked rig control.<br />
♦ Logbook - Opens up the logbook dialog<br />
♦ Contest fields - Display alternate 2nd line in qso logging area; provides access to<br />
contest logging fields<br />
Menus 34
Spot button -<br />
♦ Beginners' Guide<br />
♦ On line documentation... - open up default browser to the on-line Help site<br />
♦ <strong>Fldigi</strong> web site... - open up default browser to the www.w1hkj.com primary<br />
web page<br />
♦ Reception reports... - open up browser to the http://pskreporter.info web<br />
page preset to your callsign<br />
♦ Command line options - display a list of all command line switches available<br />
to the fldigi user<br />
♦ Audio device info - displays information about all audio devices detected on<br />
the computer system<br />
♦ Build info - displays all relevant information regarding the compilation and<br />
link for the application - build info<br />
♦ Event log - opens a text display window that records various events<br />
depending on the level of reporting depth selected. This is a useful window<br />
for reporting problems with the program to the developers.<br />
♦ Check for updates... fldigi silently opens a download web site, checks and<br />
reports on whether a new version is available.<br />
♦ About - Version number and a little about the programmers<br />
RSID button - Pressing the "RSID" button puts fldigi into a special Reed Solomon Identification detection mode.<br />
Tune button - Pressing the "Tune" button causes fldigi to insert a tone at the current waterfall frequency. The<br />
peak-to-peak amplitude of this tone is the standard by which you should set your transmitter drive or adjust your<br />
antenna matching network.<br />
Contents<br />
<strong>Fldigi</strong>Contents Menus<br />
Menus 35
Operating Controls & Displays<br />
The main display for fldigi is the waterfall display shown above in color and in scale x1. The above display<br />
shows fldigi configured by invoking the following command line switches:<br />
fldigi -bg2 black -fg white -bg grey40 --wfall-height 150 --wfall-width 3000 --font sans:12<br />
The macro button colors are set to the default on the colors-fonts dialog.<br />
You don't have to remember all of those switch settings every time you start fldigi. Just enter them on the<br />
Command Line, Launcher tab for the desktop icon properties (Gnome desktop).<br />
Or from Windows XP on the Target Line, of the Shortcut tab for the properties dialog associated with the fldigi<br />
desktop icon. The fg, bg and bg2 specification on Windows is not the same as Linux. On Windows those three<br />
command line parameters need to be:<br />
-bg2 FFFFFF -fg 000000 -bg 606060<br />
<strong>Fldigi</strong>Contents Operating Controls & Displays<br />
where each color is specified by its RRGGBB component as a hexadecimal value.<br />
The button Wtr toggles the display between a waterfall and a spectrum display. This button acts as a rotary. Left<br />
clicking moves the display selection in one direction and right clicking in the other direction. The three display<br />
modes are Wtr - waterfall, FFT - spectrum (Fast Fourier Transform) and Sig - oscilloscope time domain. Let the<br />
mouse cursor hover over any one of the controls and a small hint box will open to help you navigate the various<br />
controls.<br />
The Norm button controls the speed of the waterfall drop. This is also a rotary type of button control. The<br />
speeds available are SLOW, NORM, FAST and PAUSE. The load on the cpu will be directly proportional to this<br />
selection. If your cpu is slow you might want to select the SLOW or PAUSE option for the waterfall.<br />
The scale control (X1, X2, X4) expands or contracts the view into the fast fourier transform that is displayed on<br />
the waterfall or the FFT display. fldigi always computes the FFT to a 1 Hz resolution, and displays the results<br />
according to the scale control.<br />
Operating Controls & Displays 36
X1 scale X2 scale X4 scale<br />
<strong>Fldigi</strong>Contents Operating Controls & Displays<br />
The next three controls are positional conrols for the waterfall. The waterfall can display 4096 data points, where<br />
each one can be thought of as a spectral line at the equivalent Hertz. The ratio is actually 8000/8192 and is related<br />
to the ratio of sound card sampling rate to Fast Fourier Transform length. This ratio changes for some modems<br />
that require a sampling rate other than 8000 Hz. The left arrow key will shift the display to the right (displays a<br />
lower section of the spectrum). The right arrow key moves the display higher in frequency. These two buttons<br />
are repeating buttons. Hold them down and the display slews at about 20 shifts / sec. The center button with the<br />
two vertical block lines is a "center the signal" button. The current cursor (red signal cursor in the waterfall) will<br />
be centered in the display area. NOTE: these controls are only functional if the current waterfall or spectrum<br />
view is smaller than the full view available. This is usually the case when the X2 or X4 expansion is selected.<br />
But it also might be the case when the width of the main dialog is reduced so that the waterfall display does not<br />
extend over the entire available width.<br />
Try moving the cursor around in the waterfall area. You will see a set of yellow cursor blocks that show the<br />
center point and bandwidth of the current operating mode (psk31 = 31.25 Hz for example). To capture a received<br />
signal just click near the signal and the AFC will perform a multi-step acquisition. This will be very fast and<br />
should not require additional operator intervention. Casual tuning You can take a look at any received signal on<br />
the waterfall by right-clicking and holding the mouse button on or near the signal. The modem will begin to<br />
decode that signal if it is in the currently selected mode. The text will be a unique color on the Rx text widget so<br />
that you can discern the difference between casual and normal tracking. Release the mouse button and the<br />
tracking returns to the previously selected normal tracking point.<br />
Audio History <strong>Fldigi</strong> maintains a history buffer of the received audio. This buffer is approximately 2 minutes in<br />
duration. After tracking commences on a signal you can decode the audio history for that signal. The audio<br />
history is invoked by a Ctrl-Left click anywhere on the waterfall. You can also invoke the audio history for the<br />
casual tuning mode by pressing Ctrl-Right click on the waterfall.<br />
The next control is your transceive audio frequency. In the display above you can see that the audio signal is<br />
1679 Hz. The red cursor is centered beneath 14071.679 Mhz. The transceiver was set to 14070 Mhz. The arrow<br />
key pairs move up/down in cycles and tens of cycles. You can fine tune the receive point using this control.<br />
The next two controls to the right of the audio frequency control are for the receive signal processing. The one<br />
that reads -10 is the max signal level for the waterfall/spectrum display. The one that reads 51 is for the range<br />
over which that control will display signals. Both of these are in dB. The default of -10 / 40 is a good starting<br />
point, but you need to adjust these for band conditions. You can see the impact of these controls most easily by<br />
putting the main display area in the spectrum mode. Changes in these controls will effect the waterfall instantly<br />
and for all past history displayed on the waterfall. You do not have to wait for new signal data to observe the<br />
effect.<br />
The QSY button is very specific to rigs interfaced with either hamlib or the memory mapped i/o. Each rig has a<br />
sweet spot associated with its bandwidth controller. For the Argonaut V this is 1100 Hz. For the the Kachina it is<br />
1000 Hz. As the transceivers bandwidth is changed the changes occur centered at this frequency. So .... let's say<br />
that I just started copying a rare dx at 1758 Hz and I wanted to put the signal at the sweet spot so I could easily<br />
narrow the receiver bandwidth. Click on the signal on the waterfall. Let the AFC capture and then press the QSY<br />
button. The tranceiver frequency will be shifted and the fldigi audio tracking point shifted in unison such that the<br />
signal is now at the receivers sweet spot. Very fast and very convenient! If you do not have hamlib enabled for<br />
your transceiver this button will be dimmed and not activated.<br />
The M> button allows you to store, recall and manage mode/frequency pairs. If you want to save the current<br />
Operating Controls & Displays 37
mode and frequency simply left click the button. A right click will enable a popup menu from which you can<br />
select a previously stored set. You can quickly move between modes and audio sub carrier using this technique.<br />
A shift-left click will clear the memory. When the popup menu is visible you left click on an entry to select it.<br />
You can shift-left click on an entry to delete that single entry.<br />
The T/R button should be self-explanatory. It's your transmit/receive button. Action is immediate, so if you were<br />
transmiting some text and hit the button the PTT is disabled, the transmit text area cleared and the program<br />
returned to receive mode. The T/R button is a "lighted button" that shows RED when transmitting. All other<br />
lighted buttons show YELLOW when they are in the active state.<br />
The Lck button locks the transmit audio frequency to its present value. You can then continue to QSY around<br />
your transmit position. I have used this to reply to a DX station that wanted a +500 Hz response. The DX was at<br />
690 Hz audio, and wanted a response at +500. I moved the display cursor (or the audio frequency control) to<br />
1190 Hz. Hit the Lck button and then went back to 690 with the waterfall cursor. Now the program is receiving<br />
on 690 Hz and transmitting on 1190 Hz. Caught him on the first try. Use this button also as a Master Station<br />
control. Not all rigs are equal in their VFO performance. Some exhibit a shift between receive and transmit. If<br />
this occurs then the stations find themselves chasing each other with every t/r exchange. Locking your transmit<br />
frequency with this control will inhibit that from happening. Be sure to disable the control when that qso is over<br />
or you may forget and transmit over top of another qso!<br />
If the "Lck" is enabled the TX frequency does not follow the AFC action applied to the RX frequency.<br />
For transceivers which are either hamlib or memmap enabled, if the "Qsy" button is pressed BOTH the RX and<br />
TX frequencies are changed to synchronize to where the RX was positioned.<br />
Perhaps some numbers will help to make that a little clearer.<br />
"Lck" Before "Qsy" After "Qsy"<br />
RX TX RX TX<br />
OFF 1002 / 7071.002 1002 / 7071.002 1500 / 7071.002 1500 / 7071.002<br />
ON 1002 / 7071.002 1000 / 7071.000 1500 / 7071.002 1500 / 7071.002<br />
ON 1000 / 7071.000 1800 / 7071.800 1500 / 7071.000 1500 / 7071.000<br />
<strong>Fldigi</strong>Contents Operating Controls & Displays<br />
With "Lck" off the TX audio frequency is always synchronized with the RX frequency.<br />
With "Lck" on the TX audio frequency is fixed with respect to the RX frequency UNLESS the "Qsy" button is<br />
pressed in which case it shifts to the RX frequency, the Transceiver VFO is shifted and both the RX and TX audio<br />
frequencies are shifted to put both into the middle of the transceiver passband. The TX continues to be locked,<br />
but at the new audio frequency.<br />
If the "Lck" is ON moving the cursor around will ONLY EFFECT the RX frequency and NOT the TX frequency.<br />
The AFC and SQL buttons enable or disable the respective function in the software. The slider just above the<br />
AFC & SQL controls is the squelch level control. The bar indicator just above it is the equivalent of received<br />
signal level and relates on a 1:1 basis with the squelch level slider. The SQL button illuminates YELLOW when<br />
the SQL is selected, but the signal is below the squelch level. It illuminates GREEN when the the SQL is selected<br />
and the signal is above the squelch level.<br />
The indicator just to the left of the AFC button is the overload indicator. It will be GREEN if your audio drive to<br />
Operating Controls & Displays 38
sound card is satisfactory, YELLOW if the audio signal is marginally high and turn red when it is in overload.<br />
Back down the mixer control or the audio pad from the rig to computer. <strong>Fldigi</strong> will not perform well if the sound<br />
card is over driven. You will see ghost signals on the waterfall and the modem decoders will not work correctly.<br />
Receive audio level should be adjusted so that the overload indicator does not illuminate red. When observing the<br />
received signals on the oscilloscope view you should expect that they do not exceed a peak-to-peak amplitude of<br />
3/4 of the full display height.<br />
Mode Status Indicators<br />
The lower left corner of the main display (MFSK-16) in the view above is actually a button disquised as a status<br />
panel. This button responds to the mouse in several ways:<br />
• Left Click - opens a quick pick list of associated modem types; you can switch to a new modem type from<br />
this popup menu<br />
• Right Click - opens the configuration dialog at the tab associated with the current modem type<br />
• Scroll Wheel - rotates forward and backwards through the various modem types in accordanced with the<br />
modem menu heirarchy. Stop at the one you want and you are now in that mode<br />
The next status indicator to the right provides information relative to the current modem, for PSK it indicates the<br />
received signal strength in dB.<br />
The third status indicator from the left provides additional information relative to the current modem, IMD for<br />
PSK measured in dB.<br />
Note that for PSK these values are only measured during periods when the PSK idle signal is being received.<br />
Contents<br />
<strong>Fldigi</strong>Contents Operating Controls & Displays<br />
Mode Status Indicators 39
CW Mode<br />
<strong>Fldigi</strong> generates CW using AFCW (A2).<br />
AFCW, A2 is generated by tone insertion into a transceiver operating in either USB (preferred) or LSB mode.<br />
The actual transmitted signal will be at the USB carrier + the audio frequency, or the LSB carrier - the audio<br />
frequency. If fldigi is tracking and receiving a CW signal on the waterfall your transmitted signal will be exactly<br />
on the frequency of the other operator. The CW generated this way has a nearly ideal attack and decay time,<br />
controlled by the software modem. But ... a caveat ... your transmitter must never be overdriven and it should<br />
have excellent opposite sideband suppression. Overdriving the transmitter can cause multiple audio signals<br />
within the SSB passband, and cause unwanted interference to other ops. The same is true for a poorly designed or<br />
adjusted transmitter with bad sideband suppression. I recommend having a trusted and knowledgable operator<br />
assist you when first trying A2 CW. Have them carefully look for evidence of your signal above and below your<br />
primary signal (by at least +/- 3 Khz). If there is no evidence of extra signals then your are set to go. If there is<br />
you might want to have the transceiver adusted for sideband suppression, or check to be sure you are not over<br />
driving the audio.<br />
This is what the A2 signal should look like with various settings of weight, Dash/Dot and Edge. The audio<br />
frequency is 400 Hz and the TxWPM is 100 WPM.<br />
Dash/Dot = 3.0, Edge = 0.0 Dash/Dot = 4.0, Edge = 0.0<br />
Dash/Dot = 3.0, Edge = 3 msec Dash/Dot = 3.0, Edge = 6 msec<br />
Dash/Dot = 3.0, Edge = 12 msec<br />
<strong>Fldigi</strong>Contents Operating Controls & Displays<br />
CW Mode 40
Changing the weight, dash/dot or edge of the waveform does not change the WPM at which the code is generated.<br />
When a conflict occurs between the various settings WPM takes first priority, and Edge second. In the above<br />
examples, the Edge setting could not exceed 12 msec even if the control were set higher than 12.0. The figures<br />
were generated by capturing the output data being sent to the sound card and then formatting it using Gnumeric.<br />
An oscilloscope photo of the signal is virtually identical.<br />
The setting for inter-character and inter-word spacings are fixed at 3 and 7 respectively. The 3 is achieved by<br />
sending a silent period of 1 dot (element) length at the beginning of each character and 2 at the end of each<br />
character (shown in the figures). This silent period is sufficient for most transceivers to respond to the PTT signal<br />
which occurs at the beginning of the transmission so that the first dit or dash is not lost in transmission.QRQ (high<br />
speed CW operation)<br />
You may wonder why fldigi can go as high as 200 WPM. It's hard to believe but there are CW operators who can<br />
decode 100+ WPM in their head. These operators also usually operate QSK (full breakin). A2 CW and PTT<br />
operation and QRQ/QSK are not a natural mix. But fldigi can be used for this type of operation if an external<br />
keyer is used. For that purpose the A2 Tx output from fldigi is full wave rectified and detected to create a keyline<br />
control. The outboard conversion from A2 to keyline requires a nearly square wave pulse output of audio at the<br />
CW keying rate. Setting the Edge control to 0.0 and then the audio frequency to about 1000 Hz provides the<br />
needed signal to effect this type of keyline control.<br />
If you are operating QSK with a separate receiver / transmitter you can very quickly stop your transmit signal<br />
with the TAB key. In the CW mode only the TAB key causes the program to skip over the remaining text in the<br />
transmit text buffer. The text that is skipped will be color coded blue. The program remains in the transmit mode<br />
(PTT enabled), but since the buffer is now empty no A2 CW signal is generated. Code transmission will then<br />
restart with the very next keyboard closure of a valid CW character. The Escape and Pause/Break keys still can<br />
be used to respectively abort and pause transmission.<br />
CW Prosigns<br />
The prosigns available in the CW mode are:<br />
PROSIGN KEYBOARD DISPLAYED AS<br />
AA ~ <br />
AR } <br />
AS % <br />
HM ^ <br />
INT & <br />
SK > <br />
KN < <br />
VE { <br />
Contents<br />
<strong>Fldigi</strong>Contents Operating Controls & Displays<br />
CW Prosigns 41
Using the FLdigi Qsk(Rt. Channel) function to key a<br />
transmitter<br />
Click on the Configure menu item to open the fldigi configuration dialog. Click on the Modems tab and then on the QSK tab.<br />
1. set the Pre Timing and Post Timing to zero,<br />
2. activate the QSK feature by clicking "QSK on right channel"<br />
Click the CW tab and adjust the CW settings to your preference.<br />
FLdigi is now ready to generate a 1600 hertz CW tone on the right channel of the stereo audio out of your sound card. The left channel will be the<br />
normal raised cosine shaped CW wave form that you may use for your side tone.<br />
The following circuit may be used to take the FLdigi QSK OUT signal from the right channel of your SOUND CARD to key your transmitter or a QSK<br />
circuit.<br />
NOTE:<br />
L1 - Radio Shack has two items that may be used for this isolation transformer.<br />
<strong>Fldigi</strong>Contents Operating Controls & Displays<br />
Using the FLdigi Qsk(Rt. Channel) function to key a transmitter 42
• Catalog # 270-054<br />
• Catalog # 273-1374<br />
Attach an audio cable from the Rt. Channel out of the your computer's SOUND CARD to the input of this QSK INTERFACE CIRC<strong>UI</strong>T (input of L1).<br />
Attach another cable from the output of this circuit to your Rig's Keying Jack.<br />
Every CW tone that is generated by FLdigi is rectified by this FULL WAVE VOLTAGE DOUBLER circuit. The resultant voltage turns the Q1 transistor<br />
on and "grounds" the collector, which takes the RIG'S CW KEYING JACK to ground and "keys" the transmitter.<br />
You can adjust the start and stop timing of the QSK circuit relative to the CW waveform with the "pre" and "post"<br />
settings.<br />
Contents<br />
<strong>Fldigi</strong>Contents Operating Controls & Displays<br />
Using the FLdigi Qsk(Rt. Channel) function to key a transmitter 43
CW Configuration<br />
<strong>Fldigi</strong> can send and receive morse code from 5 wpm to 200 wpm. The operating controls for CW are found on<br />
the Config/CW tab. You can open that tab by selecting the "Configure/Modems" menu item and the clicking on<br />
the Modems/CW tab. You can also open up the CW tab by first selecting CW as the operating mode and then<br />
clicking on the left-most item "CW" on the status bar at the bottom of the fldigi main window. During operation<br />
the Rx and Tx WPM settings are annunciated on the status bar in the two boxes next to the mode indicator.<br />
The CW decoder has a DSP filter than is implemented with a sin(x)/x impulse response. This is a very steep<br />
sided filter that is centered on the received signal in the audio passband. You can control the bandwidth of this<br />
filter using the BW control.<br />
<strong>Fldigi</strong> can track the incoming signal. Enable Rx WPM tracking by enabling the check box "Enable Tx Trkg".<br />
The tracking range (+/- Hz around the TxWPM setting) can be set using the "Rx Trkg Rng" control.<br />
The RxWPM controls are indicators and are not used for setting the operation of the CW decoder.<br />
The TxWPM sliding controller is used to set the transmit WPM. To make the setting easier two additional<br />
controls are provided. "Lower" sets the lower limit of the slider and "Upper" sets the upper limit of the slider.<br />
The resolution of the TxWPM slider is 1 WPM. The Lower/Upper controls are in in 5 WPM increments.<br />
The transmit encoder settings for WPM can also be adjusted with three hot keys:<br />
<strong>Fldigi</strong>Contents CW Configuration<br />
• Numeric keypad "+" increases the TxWPM by 1<br />
• Numeric keypad "-" decreases the TxWPM by 1<br />
• Numeric keypad "*" toggles between the selected TxWPM and a default WPM<br />
The "Default" control on the CW tab sets that default value. As shown above the TxWPM is 30 and the default is<br />
18. If during a QSO you needed to slow down to give the other op a better chance to copy what you are sending,<br />
just hit the "*" on the numeric keypad and the cw code will immediately switch to sending cw at the set default<br />
value (18 wpm in this example). Press the "*" again to return to back to the cw speed that you were previously<br />
using.<br />
CW Configuration 44
<strong>Fldigi</strong> generates CW using AFCW (A2). AFCW, A2 is generated by tone insertion into a transceiver operating in<br />
either USB (preferred) or LSB mode. The A2 signal is completely generated in the software so it is possible to<br />
control many aspects of the CW signal.<br />
QSK<br />
<strong>Fldigi</strong>Contents CW Configuration<br />
• Wt % control sets the weight of the CW. Normal CW is at 50% weight, ie: a dot is equal to the interval<br />
between dots or between code elements. It has a range of 20 to 80 percent.<br />
• Dash/Dot controls the relative weight between a dash and a dot. The standard for CW is 3 to 1. The dash<br />
is 3 times the length of a dot. Some operators prefer the sound of either a heavier or lighter sounding<br />
CW. This control can be adjusted from 2.5 to 4.0 in 0.1 increments.<br />
• The Edge control sets the rise and fall times of the CW waveform. The shape of the leading and trailing<br />
edges is that of a raised cosine. It can be set anywhere from 0.0 to 15.0 milliseconds in 0.1 millisecond<br />
increments. DO NOT operate A2 CW with the control set below 4 msec. This is the control that sets the<br />
effective bandwidth and sound of your CW. If the edge is too steep you will have a clicky signal and be<br />
the bane of the CW bands. The purpose of being able to set the edge to 0.0 or a very quick rise/fall time<br />
is explained below. A good setting for nice sounding CW at 40 WPM and below is 4 to 6 milliseconds.<br />
You might ask why fldigi doesn't simply provide a keyline output on one of the parallel port pins or on RTS or<br />
DTR via a comm port. The answer is quite simple. Linux is a multi-tasking operating system and the interaction<br />
between the OS and the application causes the timing to be adversely effected. The driver implementation of the<br />
audio sub system must be responsive and so the OS gives that sub system a very high priority in its multi-tasking<br />
structure.<br />
Many QSK operators use high speed diode antenna switching between receiver and antenna. fldigi generates a<br />
signal that can be used for that purpose. The left audio channel is always the AFCW signal. The right audio<br />
channel can be configured to generate a square wave signal that begins earlier and ends later than each of the CW<br />
elements. The square wave signal can be rectified and filtered to provide the diode switching signal for the Rx/Tx<br />
antenna switching.<br />
The right audio channel QSK signal is selected by checking the box and then adjusting the pre and post timing in<br />
millisecond increments. See CW Keying for additional information and a circuit which converts this signal into a<br />
keying waveform.<br />
Operating CW and additional notes on CW configuration is described in Operating CW.<br />
QSK 45
Contents<br />
<strong>Fldigi</strong>Contents CW Configuration<br />
Contents 46
DominoEX - Operating<br />
<strong>Fldigi</strong> can operate in the following DominoEX modes:<br />
• dominoEX-4<br />
• dominoEX-5<br />
• dominoEX-8<br />
• dominoEX-11<br />
• dominoEX-16, and<br />
• dominoEX-22<br />
The sound card sampling rate is 8000 Hz for the 4, 8 and 16 modes. It is 11025 Hz for the 5, 11 and 22 modes.<br />
This change in sound card sampling rate will be seen in the drop rate on the waterfall. See DominoEX Technical<br />
Description.<br />
The modem code for dominoEX uses a wide band multiple frequency detector that can lock on and detect the<br />
incoming signal even when badly mistuned. Frequency domain oversampling is used to allow proper tone<br />
detection with the need for AFC. The AFC control does not alter the decoder in any way.<br />
The waterfall and digiscope will appear as:<br />
The text displayed in the status area is the secondary text being sent by the transmitting station. When the<br />
keyboard buffer is empty the dominoEX modem transmits text from the secondary text buffer. Your secondary<br />
text buffer can be edited on the DominoEX configuration tab.<br />
The digiscope display represents the tone pairs moving through the tone filters. You can also use an alternate<br />
digiscope display (left click on the digiscope display area).<br />
In this display mode the red line represents the center of the multiple tone bins that are in the detector. The dots<br />
will be blurry if the AFC is not locked on and become very distinct when AFC lock has been achieved. The tone<br />
dots will move from bottom to top (opposite the direction of the waterfall).<br />
This is the same signal mistuned:<br />
<strong>Fldigi</strong>Contents DominoEX - Operating<br />
DominoEX - Operating 47
and with the signal badly mistuned:<br />
Contents<br />
<strong>Fldigi</strong>Contents DominoEX - Operating<br />
Contents 48
DominoEX Configuration<br />
Enter the secondary text. This text will be sent during periods when your keyboard is inactive (between letters for<br />
slow typists). The default for this text will be your callsign when you have entered that in the Operator<br />
configuration tab.<br />
Set the BW factor for the decoding prefilter. 2.0 should be adequate unless you are experiencing nearby<br />
continuous wave interference (CWI). You can enable and disable the prefilter with the checkbox. Please note<br />
that the filter requires additional cpu cycles. Older and slower cpu models might give better decoding with the<br />
filter disabled.<br />
<strong>Fldigi</strong> can send and receive FEC in accordance with the DomEX-FEC specification for MultiPsk. This type of<br />
FEC is achieved by some loss of non printing characters in the primary character set. It is therefore not usable as<br />
an FEC mode for ARQ (automatic repeat request) transmissions.<br />
The DominoEX decoder can detect the presence of CWI within the passband set by the BW factor. Increasing the<br />
CWI threshold increases the sensitivity to such interference. When the interference is detected the associated data<br />
is culled using a technique called puncturing.<br />
DominoEX operations are described in Operating DominoEX.<br />
Contents<br />
<strong>Fldigi</strong>Contents DominoEX Configuration<br />
DominoEX Configuration 49
Hell Modes<br />
All Hellschreiber modes are based on character scanning, reproducing characters in a similar way to a dot-matrix<br />
printer. This technique uses a digital transmission, yet allows the received result to be interpreted by eye, a similar<br />
concept to the reception of Morse by ear. The character is scanned upwards, then left to right. There are typically<br />
14 pixels (transmitted dot elements) per column (although single pixels are never transmitted) and up to seven<br />
columns per character including inter-character space.<br />
These remarkably simple modes are easy to use, easy to tune, and although not especially sensitive, are entirely<br />
suited to HF/VHF since they use no sync and the eye can discern the text even in high levels of noise. fldigi can<br />
operate in the following Hellschreiber modes:<br />
Mode Symbol Rate Typing Speed Duty Cycle Bandwidth<br />
Feld-Hell 122.5 baud ~ 2.5 cps (25 wpm) ~ 22% 350 Hz<br />
Slow Hell 14 baud ~ 0.28 cps (2.8 wpm) ~ 22% 40 Hz<br />
Feld-Hell X5 612.5 baud ~ 12.5 cps (125 wpm) ~ 22% 1750 Hz<br />
Feld-Hell X9 1102.5 baud ~ 22.5 cps (225 wpm) ~ 22% 3150 Hz<br />
FSK-Hell 245 baud ~ 2.5 cps (25 wpm) ~ 80% 490 Hz<br />
FSK-Hell 105 105 baud ~ 2.5 cps (25 wpm) ~ 80% 210 Hz<br />
Hell 80 245 baud ~ 5.0 cps (50 wpm) 100% 800 Hz<br />
Feld-Hell seems to be the most commonly used and use can usually be found on 80 and 40 meters at the high end<br />
of the digital sub bands. All of the Hellschreiber modes are described in detail with both waterfall and sound clips<br />
in the Sight and Sounds section. Feld-Hell look like this when being received by fldigi:<br />
Contents<br />
<strong>Fldigi</strong>Contents Hell Modes<br />
Feld-Hell, Slow Hell, Feld-Hell X5, and Feld-Hell X9 are all pulse<br />
modes. Extreme linearity is required in the transmit path in order to<br />
control the bandwidth of the transmitted signal. Feld-Hell X5,<br />
Feld-Hell X9 and Hell 80 should probably not be used on HF in the US.<br />
They can be used on VHF and UHF.<br />
Hell Modes 50
Feld Hell Configuration<br />
The Hellschreiber modes all use a video display that is basically a character-by-character facsimile. The shape of<br />
the characters is determined at the transmitting station. You can select from 15 different fonts, all of which have<br />
been designed for Feld Hell use. In normal use each dot of the character font is transmitted twice. You can<br />
increase the effective video s/n by transmitting the dots 2 or 3 times the normal. That is controlled by the<br />
Transmit width.<br />
FeldHell is a pulse amplitude modulated signal. The shape of the pulse is a raised cosine. This helps to control<br />
the bandwidth of the transmitted signal. It is customary to use a 4 millisecond risetime for the raised cosine,<br />
especially on HF. You can change that to 2 milliseconds. The video edges will be sharper, but the bandwidth<br />
twice as large. You might find 2 msec a better choice for VHF and above.<br />
<strong>Fldigi</strong> provides three controls for the receive function. The video is normally black on white. You can change<br />
that to white on black. You can also compress the horizontal scan rate of the video. You might find this effective<br />
in displaying received fonts that are broad (or if the other end is using a multiple dot transmit width).<br />
As you change Hellschreiber modes the optimum filter bandwidth will be set. You can change that and might<br />
find a narrower filter effective if you are experiencing CWI interference. FeldHell is susceptible to CWI. If you<br />
narrow the filter the received video will become blurred.<br />
Further reading on the Hellschreiber modes.<br />
Contents<br />
<strong>Fldigi</strong>Contents Feld Hell Configuration<br />
Feld Hell Configuration 51
MFSK<br />
MFSK16 and MFSK8 are multi-frequency shift keyed<br />
(MFSK) modes with low symbol rate. A single carrier of<br />
constant amplitude is stepped (between 16 or 32 tone<br />
frequencies respectively) in a constant phase manner.<br />
As a result, no unwanted sidebands are generated, and<br />
no special amplifier linearity requirements are<br />
necessary. The tones selected are set by the<br />
transmitted (4 or 5 bit) bit pattern and a gray-code table.<br />
The mode has full-time Forward Error Correction, so it is very robust. Tuning<br />
must be very accurate, and the software will not tolerate differences between<br />
transmit and receive frequency. The mode was designed for long path HF DX,<br />
and due to its great sensitivity is one of the best for long distance QSOs and<br />
skeds. MFSK8 has improved sensitivity, but is very difficult to tune, and suffers<br />
more from Doppler. It is useful as the band fades out.<br />
MFSK-32 and MFSK-64 are high baud rate and wide bandwidth modes designed for use on VHF and UHF.<br />
These are very useful for send large documents or files when some transmission errors are can be tolerated.<br />
This is an example of properly tuned MFSK16 signal with a s/n of approximately 9 dB.<br />
The same signal viewed with the waterfall expanded to the x2 factor.<br />
<strong>Fldigi</strong>Contents Feld Hell Configuration<br />
Contents 52
MFSK Picture Mode<br />
<strong>Fldigi</strong> can send and receive images using all MFSK baud rates. When operating with other modem programs you<br />
should limit sending pictures to the MFSK-16 baud rate. The program can send and receive MFSK images in<br />
both black and white and in 24 bit color. The transmisssion mode for MFSKpic is similar to FAX.<br />
Reception of an MFSKpic transmission is fully automatic. The MFSKpic transmission has a preamble sent which<br />
will be visible on the text screen. The preamble reads as "Pic:WWWxHHH;" or "Pic:WWWxHHHC;" for b/w or<br />
color respectively. The WWW and HHH are numbers specifying the width and height of the picture in pixels.<br />
The successful reception of a MFSKpic is highly dependent on s/n conditions. The data is transmitted as an FM<br />
modulated signal and is subject to burst and phase noise on the transmission path. It can provide excellent photo<br />
transmission on a really good path.<br />
This is an example of a photo received on a bench test. The received image is an<br />
exact replica of the transmitted image. The color depth is a full 24 bits.<br />
Images should be carefully selected for size before beginning a transmission. To<br />
calculate the transmit time for an image use the following formula:<br />
Time(sec) = W * H / 1000 for black and white<br />
Time(sec) = W * H * 3 / 1000 for color<br />
where the W and H are the dimensions of the photo in pixels. A 200 x 200 image<br />
will take 120 seconds to transmit in color and 40 seconds to transmit in b/w. The<br />
symbol rate for this mode is 1000 data bytes per second. The color image consists of<br />
3 bytes; red, blue and green for each pixel.<br />
This is an example of a picture received live on 80 meters (thanks K0OG)<br />
Received images are saved in the default folder $HOME/.fldigi/images (Linux) or<br />
/fldigi.files/images (Windows).<br />
Transmitting an Image<br />
<strong>Fldigi</strong>Contents Feld Hell Configuration<br />
MFSK Picture Mode 53
<strong>Fldigi</strong>Contents Feld Hell Configuration<br />
You can only transmit an image while in the MFSK-16 mode. The image<br />
can be prepared for transmission while in the receive mode. Right click in<br />
the transmit text box and select "Send Image" from the popup menu. This<br />
will open up the transmit image dialog which will be blank to start.<br />
Press the "Load" button and a file selection dialog will allow you to select<br />
a suitable image for transmit. The file selection dialog also has a preview<br />
capability so you will see what the image looks like.<br />
You may also open a window manager file browser and drag and drop an<br />
image to the center part of the Send image dialog.<br />
The "X1" button is a three-way toggle that allows you to transmit an<br />
image file in<br />
X1 - normal and compatible with other modem programs<br />
X2 - double speed, and<br />
X4 - quadruple speed. X2 and X4 are fldigi specific image modes.<br />
The Send image dialog after the image was drag and dropped onto the<br />
dialog.<br />
The properties box said this image was 120 x 119 24 bit color. So it<br />
should take 42.8 seconds to transmit in full color. You can send a color or<br />
a b/w image in either color mode or b/w mode. If you transmit a color<br />
image in b/w the program will convert the image before transmiting. If<br />
you transmit a b/w image as full color you are in effect transmitting<br />
redundant information, but it can be done. I selected the "XmtClr" button<br />
for a trial run. Pressing either the "XmtClr" or "XmtGry" will put the<br />
program and the transceiver into the transmit mode if it was in the receive<br />
mode. The image is cleared and then repainted as the transmission<br />
proceeds. You see the same image progression that the receiving station<br />
should see. The main display also displays the % completion on the status<br />
bar. Hold the mouse over either the XmtClr or the XmtGry button and the<br />
tooltip will tell you the transmit time for this image.<br />
You may abort the transmission at any time by pressing the "Abort Xmt"<br />
button. That will return you to the text mode for MFSK. You will then<br />
have to toggle the T/R button if you want to return to receive.<br />
The receiving program decodes the "Pic:110x119C;" as a color picture<br />
110 wide by 119 high. Here is shown being received on a computer<br />
running Vista Home Premium.<br />
Transmitting an Image 54
Picture with a slant<br />
This is what the waterfall will look like during the reception of an<br />
MFSK-16 image.<br />
The actual spectrum signature will vary with the image bytes being<br />
transmitted. The waterfall scale is in the x4 mode and the above<br />
photo was being transmitted in 24 bit color for this screenshot.<br />
The waterfall clearly shows that the image transmission is within<br />
the bandwidth occupied by MFSK-16.<br />
If either the send, receive or both ends of the transmission are using an uncalibrated sound card whose sampling<br />
rate is not an exact multiple of 8000 Hz the resulting picture at the receive end will appear slanted. The degree of<br />
slant is directly related to the accumulation of the frequency error at both ends of the transfer. Stations wishing to<br />
send and receive MFSKpic's should calibrate their sound card. The WWV calibration mode is used to measure<br />
and set the parts per million (ppm) correction factor for the sound card.<br />
Your sound system may be fully corrected, but the sending station may have an uncorrected sound card. You can<br />
usually correct for small errors in the following way. After the full picture is received move the mouse to bottom<br />
left or right corner of the slanted images (the corner that clearly visible). Then left click on that corner. The<br />
program will correct for the slant. The correction will not be perfect but it may help to make the image more<br />
viewable.<br />
Contents<br />
<strong>Fldigi</strong>Contents Feld Hell Configuration<br />
Picture with a slant 55
MT63<br />
MT63 is an Orthogonal Frequency Division Multiplexed mode consisting of 64 paralle carriers each carrying part<br />
of the transmitted signal. The tones are differential BPSK modulated. MT63 employs a unique highly redundant<br />
Forward Error Correction system which contributes to it robustness in the face of interference and facing. The<br />
tones have synchronous symbols, and are raised cosine moduled. This mode requires a very linear transmitter.<br />
Over-driving leads to excessive bandwidth and poorer reception.<br />
The mode is very tolerant of tuning and fldigi will handle as much as 100 Hz of mistuning. This is very important<br />
since MT63 is often used in very low Signal to Noise ratios. There are three standard modes:<br />
Mode Symbol Rate Typing Speed Bandwidth<br />
MT63-500 5.0 baud 5.0 cps (50 wpm) 500 Hz<br />
MT63-1000 10.0 baud 10.0 cps (100 wpm) 1000 Hz<br />
MT63-2000 20 baud 20.0 cps (200 wpm) 2000 Hz<br />
In addition there are two interleaver options (short and long) which can be set on the MT63 configuration tab.<br />
The default calling mode is MT63-1000. If the short interleaver is used then one can expect some compromise in<br />
robustness. The long interleaver results in somewhat excessive latency (delay between overs) for keyboard<br />
chatting. MT63-1000 with the long interleaver has a latency of 12.8 seconds.<br />
You can change from receive to transmit immediately upon seeing the other stations signal disappear from the<br />
waterfall. You do not need to wait until the receive text completes. Any remaining data in the interleaver will be<br />
flushed and the associated receive text printed quickly to the Rx pane. Tx will commence right after the buffer is<br />
flushed.<br />
MT63 is the only fldigi mode that does not allow random placement of the signal on the waterfall. Your transmit<br />
signal, and also the received signal should be centered at 750 Hz for MT63-500, 1000 Hz for MT63-1000, and<br />
1500 Hz for MT63-2000. If you click on the waterfall to move the tracking point it will be restored to the<br />
required position.<br />
The default mode, MT63-1000, looks like this on fldigi's waterfall.<br />
Contents<br />
<strong>Fldigi</strong>Contents MT63<br />
MT63 56
MT63 Configuration<br />
MT63 is an orthogonal frequency division multiplexed mode consisting of 64 parallel carriers each carrying a part<br />
of the transmitted signal. There are 3 bandwidths and baudrates that fldigi implements in MT-63:<br />
500 Hz - 5 baud,<br />
1000 Hz - 10 baud, and<br />
2000 Hz - 20 baud.<br />
The lowest frequency transmitted is always 500 Hz. If you have a scheduled MT63 qso or are trying to copy what<br />
you think is MT63 you should tune the signal so that the lowest observable signal is at 500 Hz. Long interleave<br />
and 8-bit extended characters are usually agreed upon before a qso exchange begins. The default is to use the<br />
long interleave. 8-bit extended characters allow the transmission of Latin-1 accented characters.<br />
MT63 is used extensively in the Military Affiliate Radio System (MARS).<br />
Contents<br />
<strong>Fldigi</strong>Contents MT63 Configuration<br />
MT63 Configuration 57
Olivia<br />
fldigi can operate on the following Olivia modes without special setup by the operator:<br />
Mode Symbol Rate Typing Speed Bandwidth<br />
Olivia 8-250 31.25 baud 1.46 cps (14.6 wpm) 250 Hz<br />
Olivia 8-500 62.5 baud 2.92 cps (29.2 wpm) 500 Hz<br />
Olivia 16-500 31.25 baud 1.95 cps (19.5 wpm) 500 Hz<br />
Olivia 32-1000 31.25 baud 2.44 cps (24.4 wpm) 1000 Hz<br />
Unusual combinations of symbol rate and bandwidth can be selected using the Olivia configuration tab.<br />
These are unconnected, simplex chat modes with full time Forward Error Correction. Olivia is a very robust<br />
mode with low error rates, but the penalty can be an annoyingly slow transfer of information. If you are a one<br />
finger typist then Olivia is your cup of tea. The tones are spaced the same as the baud rate, for example 31.25 Hz<br />
for the default baud rates. The default calling mode is 32-1000. It has the following appearance on fldigi's<br />
waterfall:<br />
Contents<br />
<strong>Fldigi</strong>Contents Olivia<br />
Olivia 58
Olivia Configuration<br />
Olivia is a family of MFSK modes with a high redundancy Forward Error Correction system similar to MT63.<br />
The family is very large, with 40 or more different options, which can make it very difficult to work out which is<br />
which. The mode works well on poor HF paths and has good sensitivity. There are three popular modes, which<br />
have 8-FSK, 16-FSK and 32-FSK, thus having three, four or five bits per symbol. These three modes can be<br />
selected without additional configurtion. The tone frequency spacing and integration period should always be left<br />
at 8 and 4 respectively unless you are experimenting with another station running an Olivia modem that can be<br />
changed. These must always be the same at both ends of the Olivia QSO. The modes have two serious<br />
shortcomings - excessive bandwidth combined with slow typing rate, and excessive latency which is the apparent<br />
typing delay caused by the integration period.<br />
Contents<br />
<strong>Fldigi</strong>Contents Olivia Configuration<br />
Olivia Configuration 59
Psk<br />
<strong>Fldigi</strong> supports the following Phase Shift Keying formats:<br />
Mode Symbol Rate Typing Speed Bandwidth<br />
BPSK31 31.25 baud 50 wpm 62.5 Hz<br />
BPSK63 62.5 baud 100 wpm 125 Hz<br />
BPSK125 125 baud 200 wpm 250 Hz<br />
BPSK250 250 baud 400 wpm 500 Hz<br />
QPSK31 31.25 baud 50 wpm 62.5 Hz<br />
QPSK63 62.5 baud 100 wpm 125 Hz<br />
QPSK125 125 baud 200 wpm 250 Hz<br />
QPSK250 250 baud 400 wpm 500 Hz<br />
These are narrow band low symbol rate modes using single carrier differential Binary Phase Shift Kying, BPSK,<br />
or Quadrature Phase Shift Keying, QPSK. In addition to the binary phase shift keying the signal is 100%<br />
raised-cosine amplitude modulated at the symbol rate. This reduces the power to zero at the phase change.<br />
Because of this amplitude modulation, the signal bandwidth is relatively narrow. Synchronization at the receiver<br />
is straightforward because it can be recovered from the amplitude information. Differential PSK is used to provide<br />
continuous phase changes when idle (to maintain sync), and by allowing the receiver to measure phase difference<br />
from symbol to symbol, to reduce the effects of ionospheric Doppler phase changes which modulate the signal.<br />
The slower modes are more affected by Doppler, and the QPSK modes are particularly affected.<br />
With no interleaver and limited coding length, the QPSK mode Forward Error Correction coding gain is limited,<br />
and under burst noise conditions on HF the performance is usually worse than the BPSK option at the same baud<br />
rate. In general the narrow-band BPSK modes work well on a quiet single-hop path, but give poor performance in<br />
most other conditions.<br />
PSK63 signal transmitting text data - oscilloscope / waterfall views<br />
QPSK63 signal transmitting text data - oscilloscope / waterfall views<br />
<strong>Fldigi</strong>Contents Psk<br />
The two oscilloscope views above clearly show the combined phase and amplitude modulation of these modes.<br />
With these modes, a very linear transmitter is required. Over-driven operation results in excessive bandwidth,<br />
poorer reception and difficult tuning. Overdrive usually occurs by having the audio signal much too large. The<br />
Sights & Sounds section has demonstrations of overdriven PSK signals. These are very sensitive modes and<br />
usually very little power is required. QRP operation of 80, 40, 30 and 20 meters can provide nearly 100% copy<br />
Psk 60
over multi-hop paths. In many instances PSK can provide better decoding than CW.<br />
Setting up for a good clean on air signal that will receive the accolades of your qso partners is easy. Follow the<br />
instructions on using the tune button and you will have a clean on signal.<br />
Good reception of PSK signals requires that the demodulator be phase locked to the incoming signal. <strong>Fldigi</strong> has<br />
both a fast acquire / slow tracking AFC system. Place the red bandwidth bar (see above) so that it overlies the<br />
desired signal and then press the left mouse button. The signal should quickly lock on a decoding should<br />
commence immediately. It is almost impossible to visually tell whether a BPSK or QPSK signal is being<br />
received. Under very high s/n you might be able to hear the difference, but that is even difficult for most<br />
operators. If you are not able to decode a signal that looks like a BPSK and the bandwidth of the signal matches<br />
the baud rate then it might be a QPSK signal. Just change mode a try reacquiring the signal.<br />
Contents<br />
<strong>Fldigi</strong>Contents Psk<br />
Contents 61
Psk Viewer<br />
The psk viewer dialog can help to locate a signal of interest on a busy band. The viewer can be visible at any<br />
time, but is only active when fldigi is in one of the psk modes. Open the viewer by clicking on the Viewer menu<br />
item.<br />
The psk viewer can decode up to 30 simultaneous signals. As each signal is acquired within a 100 Hz channel<br />
width it is printed on the associated line. The radio frequency (or audio if fldigi is not operating with CAT) of the<br />
signal is also shown on the line. The default behavior of the line of text is to scroll in a marquee fashion after the<br />
line buffer becomes full. The size of the line buffer is controlled by the width of the display.<br />
You can enter any text you want to search for in the "Find:" widget. This text can be a simple text snippit such as<br />
"CQ" or any regular expression.<br />
With a regex you can specify a more generic pattern, which means that you can match more things and your<br />
search is somewhat noise tolerant. Here is an example for a CQ from a US station (should match most callsigns):<br />
cq.+[aknw][a-z]?[0-9][a-pr-z][a-z]{1,2}<br />
This says "cq followed by at least one character, followed by one A, K, N, or W, followed by an optional letter,<br />
followed by a digit, followed by a letter that is not q, followed by one or two letters". The search is<br />
case-insensitive.<br />
All plain text is a valid regular expression, unless you really had been looking for these metacharacters:<br />
.[{()\*+?|^$<br />
These will have to be escaped with a backslash.<br />
<strong>Fldigi</strong>Contents Psk Viewer<br />
If you left click on a line of received text the waterfall frequency is adjusted to that value. The contents of the line<br />
of text is transferred to the Rx text widget, and the main Psk loop begins to track and decode that signal.<br />
Psk Viewer 62
Contents<br />
<strong>Fldigi</strong>Contents Psk Viewer<br />
Psk Viewer 63
PSK Configuration<br />
<strong>Fldigi</strong>Contents PSK Configuration<br />
You should set the acquisition search range for waterfall left click action. As you adjust this control you will see<br />
the red mode width change on the waterfall scale. You can also adjust this value by pointing the mouse to the<br />
waterfall. Hold down the Control key and rotate the mouse wheel. The search routine which finds the psk signal<br />
operates on a s/n threshold detector as well as recognizing the Psk phase modulation. You can adjust the<br />
acquisition signal to ratio threshold for the search routine.<br />
The PSK decoder estimates the signal to noise ratio, S/N, and the intermodulation distortion, IMD, of the received<br />
signal. This measurement is valid during periods when the other station is transmitting the idle signal. The<br />
estimates are displayed on the status bar. You can control how these values are displayed; clear or dim after NN<br />
seconds. Setting the seconds to 0 disables the clear/dim action.<br />
<strong>Fldigi</strong> can act as both a server and a client for PskMail, a separate application from fldigi. These two factors are<br />
in support of the PskMail server. If you operate fldigi as the modem for a PskMail Server you can specify that<br />
fldigi use the psk sweetspot and that its +/- automatic signal search range be limited by the number of Hertz<br />
entered in the Server search range control.<br />
PSK Configuration 64
<strong>Fldigi</strong> has a multi channel psk viewer that operates in all of the psk baud rates. You control the look and behavior<br />
of the viewer with these settings. The number of channels to be monitored can be set from 5 to 30, spaced by 100<br />
Hz increments. You specify where to start the monitoring with the Start frequency which has a range of 200 to<br />
1000 Hz. Each monitored signal is represented by horizontally scrolling text. Select Continuous scrolling for a<br />
marquee format. The text line will extinguish after the Inactivity timeout value in seconds is reached.<br />
The Psk Viewer operation is described here: Psk Viewer<br />
Contents<br />
<strong>Fldigi</strong>Contents PSK Configuration<br />
Contents 65
RTTY<br />
fldigi can operate on a wide range of RTTY symbol rates and bandwidths. The selection of symbol rate and<br />
bandwidth is made on the RTTY configuration tab. The three most common in amateur radio use can be selected<br />
from the mode menu. These are<br />
Mode Symbol Rate Typing Speed Bandwidth<br />
RTTY 45 45.45 baud 6.0 cps (60 wpm) 270 Hz<br />
RTTY 50 50.0 baud 6.6 cps (66 wpm) 270 Hz<br />
RTTY 75 75.0 baud 10.0 cps (100 wpm) 370 Hz<br />
These modes were a result of mechanical and electrical designs of the early TTY machines. The 45.45 baud and<br />
75 baud machines were for the US / Canadian market and used 60 Hz synchronous motors. The 50 baud<br />
machines were for the European market and used 50 Hz synchronous motors.<br />
fldigi can encode and decode many other symbol rates and bandwidths. "Custom" combinations are set up on the<br />
RTTY configuration tab. You probably will never have to do that unless you like experimenting with unusual<br />
RTTY modes.<br />
AFSK is not FSK<br />
<strong>Fldigi</strong>Contents PSK Configuration<br />
All of the modem signals that fldigi produces are audio signals. That includes the RTTY signal. fldigi can<br />
encode and decode an RTTY signal that is anywhere within the passband of the sideband transceiver. It is not<br />
limited to the traditional tone pairs around 2100 Hz. The following screen captures clearly show three<br />
side-by-side RTTY-45 signals with the middle one being tracked correctly. These signals were generated using<br />
fldigi's ability to save audio waveforms. The three RTTY signals were combined and then white noise added to<br />
create the three signals with s/n of approximately 10 dB.<br />
Waterfall centered at 1500 Hz Spectrum centered at 1500 Hz Digiscope<br />
Signal View<br />
Digiscope<br />
X-Hair View<br />
The decoding on any of the three signals was equal and very near 100% print. The decoder uses a hysterisis<br />
detector to help in noise burst rejection. It also uses AFC to track the signal. If a nearby CWI or RTTY signal<br />
drags the AFC you can disable it with the AFC button on the fldigi main dialog.<br />
To start decoding a signal simply left click on the signal and the AFC should lock on to the signal.<br />
DSP filtering is applied to the audio before decoding takes place. That process helps to reject nearby interference,<br />
other RTTY signals or CWI.<br />
You must operate your transceiver in the USB mode for the RTTY signal to be the correct polarity. You must<br />
also observe the requirement to maintain linearity in the transmit path.<br />
RTTY 66
It is possible to use fldigi to generate the keying waveform for use with an FSK type of transmitter. See Pseudo<br />
FSK for a description of how this can be accomplished.<br />
Contents<br />
<strong>Fldigi</strong>Contents PSK Configuration<br />
AFSK is not FSK 67
Using the FLdigi Pseudo FSK (Rt. Channel) function to key a<br />
transmitter<br />
Select the PseudoFSK check boxes.<br />
FLdigi is now ready to generate a 1000 hertz tone burst signal on the right channel of the stereo audio out of your sound card. This tone burst is on when the<br />
RTTY bit is on and off when the RTTY bit is off. The left channel will be the normal AFSK signal.<br />
The following circuit may be used to take the FLdigi PSEUDO-FSK signal from the right channel of your SOUND CARD to key your transmitter's FSK<br />
input line. You may find it necessary to invert the sense of the keying signal.<br />
NOTE:<br />
L1 Radio Shack has two items that may be used for this isolation transformer.<br />
Catalog # 270-054, and<br />
Catalog # 273-1374<br />
<strong>Fldigi</strong>Contents PSK Configuration<br />
Using the FLdigi Pseudo FSK (Rt. Channel) function to key a transmitter 68
Attach an audio cable from the Rt. Channel out of the your computer's SOUND CARD to the input of this FSK INTERFACE CIRC<strong>UI</strong>T (input of L1).<br />
Attach another cable from the output of this circuit to your Rig's Keying FSK Jack.<br />
<strong>Fldigi</strong>Contents PSK Configuration<br />
Every PSEUDO-FSK tone that is generated by FLdigi is rectified by this FULL WAVE VOLTAGE DOUBLER circuit. The resultant voltage turns the Q1<br />
transistor on and "grounds" the collector.<br />
Using the FLdigi Pseudo FSK (Rt. Channel) function to key a transmitter 69
RTTY / FSK Configuration<br />
<strong>Fldigi</strong> operates RTTY using AFSK and the<br />
transceiver set to USB. The RTTY signal can be transmitted anywhere within the USB passband of the<br />
transceiver.<br />
You can select from various Shifts, Bauds, Bits, Parity and Stop Bits for both AFSK and FSK keying of the<br />
transmitter. You can elect to have fldigi automatically insert a CFLF when it reaches character 72 on a line. You<br />
can also have it insert a CR-CR-LF sequence instead of the standard CR-LF sequence. This is very useful if you<br />
are communicating with someone using a hardware TTY printer. The extra carriage return will give the physical<br />
device time to move to the left margin before new characters arrive.<br />
The RTTY decoder maintains an internal AFC system for tracking the desired signal. Depending on operating<br />
conditions you may need to adjust the action of the AFC loop. Select from the Slow, Normal or Fast AFC loop.<br />
You can also disable AFC with the AFC button on the main panel.<br />
The Digiscope display can be defaulted to the X-scope or the Signal scope. The X-scope is similar to older<br />
hardware scopes that show the Mark/Space channel signals as quadrature signals.<br />
PseudoFSK selection generates an additional audio signal on the right channel. This signal is a burst tone at the<br />
FSK keying rate. You can full wave rectify and filter the signal so that it can be used as the FSK keyline signal to<br />
a rig that supports FSK transmissions. See Pseudo FSK for additional information and a suitable keying circuit.<br />
Contents<br />
<strong>Fldigi</strong>Contents PSK Configuration<br />
RTTY / FSK Configuration 70
Thor<br />
Thor is a new forward error correcting incremental frequency shift keyed communications mode. It was<br />
developed specifically to meet the needs of ARQ transfers in the HF spectrum. It is particularly well suited under<br />
conditions of atmospheric static noise. Thor borrows from two current modem technologies, MFSK and<br />
DominoEX. <strong>Fldigi</strong> can operate in the following Thor modes:<br />
• Thor-4 - double spaced mode<br />
• Thor-5 - double spaced mode<br />
• Thor-8 - double spaced mode<br />
• Thor-11 - single spaced mode<br />
• Thor-16, - single spaced mode and<br />
• Thor-22 - single spaced mode<br />
The sound card sampling rate is 8000 Hz for the 4, 8 and 16 modes. It is 11025 Hz for the 5, 11 and 22 modes.<br />
This change in sound card sampling rate will be seen in the drop rate on the waterfall. See: Thor Technical<br />
Description. Thor emits a distinctive double rising tone sequence at the beginning of each transmission. It is used<br />
to flush the receive decoder and also provides a visual and audibal clue to its being used.<br />
The modem code for Thor uses a wide band multiple frequency detector that can lock on and detect the incoming<br />
signal even when badly mistuned. Frequency domain oversampling is used to allow proper tone detection with<br />
the need for AFC. The AFC control does not alter the decoder in any way.<br />
The waterfall and digiscope will appear as:<br />
<strong>Fldigi</strong>Contents Thor<br />
The text displayed in the status area is the secondary text being sent by the transmitting station. When the<br />
keyboard buffer is empty the Thor modem transmits text from the secondary text buffer. Your secondary text<br />
buffer can be edited on the Thor configuration tab.<br />
The digiscope display is similar to the DominoEX display and represents the tone pairs moving through the tone<br />
filters. You can also use an alternate digiscope display (left click on the digiscope display area).<br />
Thor 71
In this display mode the red line represents the center of the multiple tone bins that are in the detector. The dots<br />
will be blurry if the AFC is not locked on and become very distinct when AFC lock has been achieved. The tone<br />
dots will move from bottom to top (opposite the direction of the waterfall).<br />
This is the same signal mistuned:<br />
and with the signal badly mistuned:<br />
Contents<br />
<strong>Fldigi</strong>Contents Thor<br />
Thor 72
Thor Configuration<br />
The decoder can detect and defeat a modest amount of CWI that is within the BW set by the BW factor.<br />
Increasing the CWI threshold increasing the sensitivity for this correction. The offending tones are punctured<br />
thereby rendering them null to the Viterbi decoder.<br />
Enter the secondary text. This text will be sent during periods when your keyboard is inactive (between letters for<br />
slow typists). The default for this text will be your callsign when you have entered that in the Operator<br />
configuration tab.<br />
Set the BW factor for the decoding prefilter. 2.0 should be adequate unless you are experiencing nearby<br />
continuous wave interference (CWI). You can enable and disable the prefilter with the checkbox. Please note<br />
that the filter requires additional cpu cycles. Older and slower cpu models might give better decoding with the<br />
filter disabled.<br />
Soft decode provides some additional decoder performance at the expense of more cpu cycles dedicated to the<br />
decoder.<br />
The DominoEX decoder can detect the presence of CWI within the passband set by the BW factor. Increasing the<br />
CWI threshold increases the sensitivity to such interference. When the interference is detected the associated data<br />
is culled using a technique called puncturing.<br />
Thor has been specifically designed to be used with ARQ text transmissions. It is also an easy to use keyboard<br />
chat mode. Thor operations are described in Operating Thor.<br />
Contents<br />
<strong>Fldigi</strong>Contents Thor Configuration<br />
Thor Configuration 73
Throb<br />
The THROB family of modes use two tones at a time. These tones are also amplitude modulated and can be a<br />
single tone for some symbols.<br />
The mode has no Forward Error Correction, and is difficult to tune. It is fairly sensitive and moderately robust.<br />
Keyboard-to-keyboard QSOs are reasonably fast. Tuning must be very accurate, and the software will not<br />
tolerate differences between transmit and receive frequency.<br />
The amplitude modulation component of THROB is a raised cosine AM modulation of each symbol. This<br />
combined with two tones transmitted at the same time, means that a very linear transmitter is required. It also<br />
gives the mode its very unique sound. You will never mistake Throb for any other mode.<br />
For THROB, nine tones are used, spaced 8 or 16 Hz. For THROBX, 11 tones are used, spaced 7.8125 or 15.625<br />
Hz.<br />
<strong>Fldigi</strong> supports the following Throb baud rates and tone spacings:<br />
Mode Symbol Rate Typing Speed Bandwidth<br />
THROB1 1.0 baud 1.0 cps (10 wpm) 72 Hz<br />
THROB2 5 2.0 baud 2.0 cps (20 wpm) 72 Hz<br />
THROB4 4.0 baud 4.0 cps (40 wpm) 144 Hz<br />
THROBX1 1.0 baud 1.0 cps (10 wpm) 94 Hz<br />
THROBX2 2.0 baud 2.0 cps (20 wpm) 94 Hz<br />
THROBX4 4.0 baud 4.0 cps (40 wpm) 188 Hz<br />
Waterfall appearance and the sound of each throb mode can be seen and heard at Sight & Sound.<br />
Contents<br />
<strong>Fldigi</strong>Contents Throb<br />
Throb 74
Digiscope Display - WWV mode<br />
The WWV mode is used to measure the offset of the sound card oscillator. It does this by comparing the timing<br />
loop for the sound card measurements against the clock tick signal that is transmitted by WWV and WWVH. The<br />
sampling rate for the sound card is set to 8000 samples / second. The sound card is also initialized to take<br />
samples in 512 blocks. This block sampling is what sets the basic timing mechanism for the thread that reads the<br />
sound card, sends data to the waterfall, and sends data to the modem signal processing functions. A process of<br />
filtering is used that simultaneously reduces the sampling rate. A single FIR - decimation in time type is used<br />
with a total time division of 8. The resulting signal is then power detected and further filtered with a filter called a<br />
moving average filter. The moving average is very good at detecting the edge of a pulse such as the 1 second tick<br />
transmitted by WWV. This output is then displayed in a manner very similar to a FAX signal. Each scan line<br />
represents the received signal over a 1 second interval. The bright white line is the time tick. You can see a very<br />
slight slope from left to right as the signal goes from top to bottom of the display.<br />
Open the configure dialog box to the "SndCrd" tab. You are going to be adjusting the "Rx corr Rate" while you<br />
observe the effect of this control on the slope of the time tick line.<br />
Tune in WWV or WWVH on 2.5, 5.0, 10.0 or 15.0 MHz in the AM mode. This seems to give the best signal<br />
view. Select the WWV modem and allow the data to begin to accumulate in the digiscope display. When you<br />
can clearly see the bright tick line, move the cursor to the bottom of the line and left click at that position. That<br />
will resync the digiscope display and put the ensuing tick marks at the center line red graticule.<br />
Then right click anywhere in the digiscope display. That changes the zoom level to show more detail regarding<br />
the slope of the time tick line. The zoom level increases by a factor of 5. Right clicking again restores the<br />
original zoom level. I recommend making the adjustments to the Rx corr Rate control in the x5 zoom level.<br />
If the slope of the time tick line is positive you will need to apply a negative value to the Rx corr Rate. If it is<br />
negative then a positive correction is needed.<br />
Start with a correction of 0 ppm and observe the slope. Try a value of 1000 ppm and observe the slope. Again,<br />
try a -1000 ppm correction and observe the slope. The following are some observations made on 10 MHz WWV,<br />
DCF-77 and RWM under less than ideal conditions.<br />
-1000 ppm WWV<br />
5x scale<br />
<strong>Fldigi</strong>Contents Digiscope Display - WWV mode<br />
0 ppm WWV<br />
5x scale<br />
+1000 ppm WWV<br />
5x scale<br />
ppm WWV<br />
5x scale<br />
Digiscope Display - WWV mode 75<br />
+120
WWV corrected<br />
20 minute trace<br />
5x scale<br />
0 ppm DCF-77<br />
1x scale<br />
RWM uncorrected<br />
1x scale<br />
0 ppm DCF-77<br />
5x scale<br />
RWM<br />
+25361 ppm<br />
1x scale<br />
+1000 ppm DCF-77<br />
1x scale<br />
RWM<br />
+25361 ppm<br />
5x scale<br />
+65 ppm DCF-77<br />
5x scale<br />
You can see that my sound card requires a positive correction since the slope is negative with a 0 ppm entry. The<br />
required correction of +120 ppm was determined by guessing the needed correction to be close to 1/10 of the<br />
-1000 ppm slope and then adjusting for a steady track along the red graticule. The DCF-77 images were provided<br />
by Walter, DL8FCL. The RWM images were provided by Andy G3TDJ.<br />
You can left click on the tick line anytime you want to recenter the signal. That will aid in making your visual<br />
observation.<br />
When you are finished, the Rx corr Rate entry is the correct one for your sound card. Save the configuration for<br />
future fldigi use.<br />
Andy also provided information on the RWM transmissions:<br />
RWM details extracted from http://www.irkutsk.com/radio/tis.htm<br />
Station RWM - Main characteristics<br />
Location: Russia, Moscow<br />
55 degr. 44' North , 38 degr. 12' East<br />
Standard frequencies : 4996, 9996 and 14996 kHz<br />
Radiated power: 5kW on 4996 and 9996 kHz; 8kW on 14996 kHz<br />
<strong>Fldigi</strong>Contents Digiscope Display - WWV mode<br />
Digiscope Display - WWV mode 76
Period of operation: 24 hours per day, except 08.00-16.00 msk for maintenance as below:<br />
on 4996 kHz : 1st wednesday of the 1st month of quater;<br />
on 9996 kHz : 2nd wednesday of the 1st month of the quater;<br />
on 14996 kHz : 3rd wednesday of each odd month;<br />
Coverage: 20 degr. - 120 degr. East<br />
35 degr. - 75 degr. North<br />
Time signals A1X are given every second of 100 ms duration with a frequency of 1 Hz. Minute pip is extended to<br />
500 ms.<br />
Hourly transmission schedule<br />
m s m s<br />
00:00 - 07:55 -- MON signals (no modulation)<br />
08:00 - 09:00 -- transmitter is signed off<br />
09:00 - 10:00 -- station's identification is sent by Morse Code<br />
10:00 - 19:55 -- A1X signals and identification of DUT1+dUT1<br />
20:00 - 29:55 -- DXXXW signals<br />
30:00 - 37:55 -- N0N signals (no modulation)<br />
38:00 - 39:00 -- transmitter is signed off<br />
39:00 - 40:00 -- station's identification is sent by Morse Code<br />
40:00 - 49:55 -- A1X signals and identification of DUT1+dUT1<br />
50:00 - 59:55 -- DXXXW signals<br />
Contents<br />
<strong>Fldigi</strong>Contents Digiscope Display - WWV mode<br />
Digiscope Display - WWV mode 77
Frequency Analyzer<br />
<strong>Fldigi</strong> can be used to accurately measure the frequency of a remote signal that is transmitting a steady carrier.<br />
I have set the sound card up using the WWV modem and have it adjusted for the proper PPM offset on receive. I<br />
followed the frequency calibration procedure that Icom recommends for the IC-746PRO, adjusting WWV at 10<br />
MHz for a zero beat.<br />
Then fldigi was used in the "Freq Analysis" mode to track the WWV carrier at 10 MHz. In this mode the decoder<br />
is merely a very narrow band AFC tracking filter. The filter bandwidth is set to 2 Hz and the tracking time<br />
constants to about 5 seconds. Future releases will probably make both of these user adjustable. When the signal<br />
is being tracked the digiscope (right hand display) will be a horizontal line. If the signal is very noisy and<br />
tracking difficult the digiscope will jump and become wavy. You can see from the above image that I am<br />
tracking about 0.22 Hz high on WWV. I have repeated this measurement at various times during the day and on<br />
various days with nearly the same result. So I am comfortable with knowing that my local oscillator is just a little<br />
low (that is why the Frequency reads high).<br />
ARRL frequently announces a frequency measurement test (FMT) which takes placde on 160, 80 and 40 meters.<br />
This is a chance to test your skills in frequency measurement. You should be able to make a submission to the<br />
FMT using this technique. Make corrections to the FMT transmission based upon your WWV measurement.<br />
You may have to adjust for other local oscillator effects as well. If you have some good ways to measure and<br />
correct for these I would be glad to share them with the other fldigi users.<br />
Contents<br />
<strong>Fldigi</strong>Contents Digiscope Display - WWV mode<br />
Frequency Analyzer 78
TUNE Mode<br />
Too often you see an overdriven signals on the digital sub-bands; multiple audio sidebands on PSK, splatter from<br />
overdriven MFSK and RTTY. There is absolutely no reason for a transceiver driven by fldigi to exhibit this type<br />
of performance. You can set up your computer / transceiver for good solid performance without excessive drive.<br />
The "TUNE" button generates a continuous single frequency audio signal at the exact frequency to which the<br />
waterfall cursor has been set. The peak amplitude of this signal is the peak amplitude of every modem signal<br />
generated by fldigi. None will exceed this value, even the simultaneous multi-tone modes like Throb. Every<br />
modern SSB transmitter uses some automatic level control ALC for preventing overdrive for SSB voice. A little<br />
overdrive on a voice channel can be tolerated to a degree. In fact, that is what an analog RF compressor does,<br />
overdrive and then subsequent filtering. But you absolutely cannot tolerate that with the digital modes. Here is<br />
the way to set up your transceiver for a clean signal. I recommend starting out with a dummy load, but an "off<br />
hour" for a band might work just as well if you do not have a dummy load.<br />
• For Windows users<br />
♦ Set your sound card output level to the minimum on the Windows mixer<br />
• For Linux users<br />
♦ Set your PCM level to about 80%<br />
♦ Set your Transmit Level control for minimum output level.<br />
• Enable the "Tune" mode in fldigi ... you do have CAT or PTT set up ...right?<br />
• Make sure your transceiver's speech compression control is OFF<br />
• Slowly bring up the Mixer audio out until your rig's ALC just starts to function (a light blinking or a<br />
meter showing this condition).<br />
• Reduce the Mixer audio output until the ALC is disabled.<br />
• You are now transmitting at maximum output power without distortion.<br />
You can use any level below this and be assured that your output signal will be clean. All digital signals that<br />
fldigi generates will be limited to this peak-to-peak voltage. You should always use the minimum power<br />
necessary to maintain good comms, remember that even if you are clean at 100 W you signal will be so strong<br />
among the QRP signals that it will overpower the AGC on many receivers that are working another digital station<br />
within the same SSB bandwidth that you are on. You will appreciate this the first time that you are working a<br />
weak PSK DX station and someone blasts through and captures your AGC.<br />
You should try the the above adjustments at different audio frequencies. Transceivers that achieve the SSB<br />
filtering with crystal or mechanical filters will have a considerable amount of variation across the passband of the<br />
filter. This will show up as a varying amount of ALC that is dependent on the audio frequency. Once you are<br />
comfortable with the process you can very quickly repeat the "Tune" and set the power for the frequency to which<br />
the waterfall is set.<br />
Contents<br />
<strong>Fldigi</strong>Contents Digiscope Display - WWV mode<br />
TUNE Mode 79
Keyboard Operation<br />
<strong>Fldigi</strong>Contents Digiscope Display - WWV mode<br />
The transmit buffer for fldigi is type ahead which means that you can be typing text while the program is sending<br />
an earlier part of your transmitted message. Newly entered text appears in black and text which has been<br />
transmitted is changed to red. You can backspace into the red area. When you do and the modem in use supports<br />
the BS character it will be sent to the receiving station. If you monitor PSK and MFSK signals you will often find<br />
operators backspacing over previously sent text. It's probably just as easy to just send XXX and retype that part<br />
of the message, but we have gotten used to word processors, email, etc. that allow us to send perfect (right) text,<br />
so we expect our digital modems to do the same. Let's see, what was that prosign often used in CW for oooops.<br />
All of the alpha numeric keys perform as you would expect, entering text into the transmit buffer. There is one<br />
very important exception:<br />
the caret "^" symbol. This is used in the macro expansion routine and also used by the transmit buffer evaluator.<br />
A ^r puts fldigi into receive mode. So you can enter the ^r (caret followed by the r) at the end of your transmit<br />
buffer and when the sent character cursor (red chars) gets to that point the program will clear the text and return to<br />
the receive mode.<br />
You can load the transmit buffer with any ASCII Text file of your choice. Merely right click in the buffer<br />
window and select from the pop-up menu. You can also short cut to the ^r from this popup.<br />
Many ops (including me) do not like to be tied to a mouse. The fldigi text widget supports some short cuts to<br />
make your life easier:<br />
• Pause/Break - a transmit / receive - pause button.<br />
♦ if you are in the receive mode and press the Pause/Break key the program will switch to the<br />
transmit mode. It will begin transmitting characters at the next point in the transmit buffer<br />
following the red (previously sent text). If the buffer only contains unsent text, then it will begin<br />
at the first character in the buffer. If the buffer is empty, the program will switch to transmit<br />
mode and depending on the mode of operation will send idle characters or nothing at all until<br />
characters are entered into the buffer.<br />
♦ if you are in the transmit mode and press the Pause/Break key the program will switch to the<br />
receive mode. There may be a slight delay for some modes like MFSK, PSK and others that<br />
require you to send a postamble at the end of a transmission. The transmit text buffer stays intact,<br />
ready for the Pause/Break key to return you to the transmit mode.<br />
♦ Think of the Pause/Break key as a software break-in capability.<br />
• Esc -<br />
♦ Abort transmission. - immediately returns the program to receive, sending the required postamble<br />
for those modes requiring it. The transmit buffer is cleared of all text.<br />
♦ Triple press on Esc - terminates the current transmission without sending a postamble - The<br />
PANIC button.<br />
• Ctrl-R will append the ^r (return to receive) at the end of the current text buffer.<br />
• Ctrl-T will start transmitting if there is text in the transmit text window.<br />
• Alt/Meta-R will perform the same function as the Pause/Break key<br />
• Tab moves the cursor to the end of the transmitted text (which also pauses tx). A tab press at that position<br />
moves the cursor to the character following the last one transmitted. CW operation is slightly different,<br />
see the help for CW.<br />
• Ctrl + three digits will insert the ASCII character designated by that entry.<br />
Keyboard Operation 80
Function Keys<br />
Keys F1 through F12 are used to invoke the macro F1 - F12. You can also just click on the macro key button<br />
associated with that function key. There are 4 sets of 12 macros. If you press the numbered button on the macro<br />
button bar the next set of macros are referenced by the F1 - F12. A right click on the numbered button provides a<br />
reverse rotation through the 4 sets of macro keys. The respective macro set can be made available by pressing the<br />
Alt-1, Alt-2, Alt-3 or Alt-4 key combination. Note that this is not Alt-F1 etc.<br />
Contents<br />
<strong>Fldigi</strong>Contents Digiscope Display - WWV mode<br />
Function Keys 81
Mouse & Keyboard Shortcuts<br />
<strong>Fldigi</strong> has a bewildering number of keyboard and mouse shortcuts, some of which may help make your particular<br />
style of operation more efficient. You do not need to know them all to make effective use of the program!<br />
• Main window<br />
♦ Text input fields<br />
Most text fields use a combination of CUA (PC) and Unix-style keybindings. Text can be<br />
marked, copied, pasted, saved to a file as well as transfer to other main panel controls. A right<br />
click on any text control will open a context sensitive menu for that particular control. A full list<br />
can be found on the FLTK web site.<br />
The received/transmitted text widgets use CUA key bindings with some modifications:<br />
◊ RX text<br />
This widget is read-only and ignores shortcuts that would modify its contents. See<br />
logbook for details on the Rx right click popup menu system.<br />
◊<br />
TX text<br />
The text that has already been sent is protected, but can be deleted one character at a time<br />
with the Backspace key. Right clicking on the Tx text panel opens the following popup<br />
menu:<br />
<strong>Fldigi</strong> Receiving<br />
Editing Tx text<br />
<strong>Fldigi</strong> Transmitting<br />
Select:<br />
Transmit put the program into the transmit operation<br />
Receive<br />
Abort<br />
Send<br />
image<br />
during a transmit or tune, end the transmit and restore<br />
receive operation<br />
during a transmit, receive without waiting for the<br />
modem to finish sending<br />
for MFSK only, send an image using MFSKpic mode<br />
Clear clear all of the text<br />
Cut delete the marked text (by left click drag over text)<br />
Copy copy the marked text to the clipboard<br />
Paste the clipboard text to the current text insertion point<br />
Insert file<br />
Word<br />
wrap<br />
<strong>Fldigi</strong>Contents Mouse & Keyboard Shortcuts<br />
select a file from file browser to insert in text at<br />
insertion point<br />
turn word wrap on/off<br />
The Tx panel is fully drag and drop aware. That means you can add a file to the transmit<br />
Mouse & Keyboard Shortcuts 82
♦ Waterfall display<br />
text by simply opening up a file manager (different for different OS and choice of<br />
desktop). Select the file from the manager and then drag and drop it onto the Tx panel.<br />
The mouse pointer will move the cursor insert point for the drop.<br />
A number of additional shortcuts can be found in the Keyboard Operation section.<br />
Most of fldigi's unusual shortcuts are specific to this widget.<br />
Waterfall display - Keyboard<br />
◊ Shift Left/Right move the b/w marker by 1 Hz<br />
◊ Ctrl Left/Right move the b/w marker by 10 Hz<br />
Waterfall display - Mouse<br />
◊ Left click/drag move the b/w marker to, and start decoding at the cursor frequency<br />
◊ Right click/drag as above, but return to previous position on release<br />
◊ Middle click toggle AFC<br />
◊ Ctrl-Left click replay audio history at b/w marker position<br />
◊ Ctrl-Right click replay at cursor frequency and return on button release<br />
◊ Ctrl-Middle click copy the frequency under the cursor to the currently selected (or first)<br />
channel in the PSK viewer, and select the next channel<br />
◊ Shift-Left click/drag same as unmodified left click; no signal search<br />
◊ Shift-Left click/drag likewise, with a return to the previous frequency when the button is<br />
released<br />
◊ Shift-mouse wheel move the squelch slider<br />
◊ Scroll wheel usage is dependent upon the configuration (see ConfigWaterfall)<br />
⋅ None - no mouse wheel activity in waterfall panel<br />
⋅ AFC range or BW - adjust the AFC range/BW up/down<br />
⋅ Squelch level - adjust the squelch level up/down<br />
⋅ Modem carrier - adjust the audio tracking point +/- Hz increments<br />
⋅ Modem - select modem type from a full rotary of available modems<br />
⋅ Scroll - move the waterfall left/right in 100 Hz increments (for 2x, 4x expanded<br />
waterfall view)<br />
⋅ Ctrl-mouse wheel change the AFC search width in PSK modes, or the bandwidth<br />
in CW and FeldHell<br />
♦ Waterfall "Store" button<br />
◊ Left click Add a new item for the current frequency and modem<br />
◊ Shift-Left click Delete all items<br />
◊ Middle click Select last item in menu<br />
◊ Right click Pop up menu<br />
⋅ Left/right click Select item (and switch to that frequency/modem)<br />
⋅ Shift-Left/right click Delete item<br />
⋅ Middle click Update (replace) item<br />
♦ Digiscope display<br />
<strong>Fldigi</strong>Contents Mouse & Keyboard Shortcuts<br />
Mouse & Keyboard Shortcuts 83
Contents<br />
• Rig control window<br />
◊ Mouse wheel Change AFC/BW, same as Ctrl-mouse wheel on the waterfall<br />
There are some shortcuts in addition to those described in the Rig Control<br />
♦ Frequency display<br />
♦ Frequency list<br />
• PSK viewer window<br />
<strong>Fldigi</strong>Contents Mouse & Keyboard Shortcuts<br />
◊ Left/Right arrow key change the frequency by one 1 Hz<br />
◊ Up/Down arrow key change the frequency by 10 Hz<br />
◊ Shift-Left click delete the line under the cursor<br />
◊ Middle click replace the line under the cursor with the current frequency/mode/modem<br />
♦ Besides the bindings mentioned in the Psk Viewer section, there are mouse shortcuts to change<br />
the nominal frequency of a viewer channel:<br />
◊ Middle click copy the current waterfall b/w marker frequency to the channel under the<br />
cursor, overwriting that channel's nominal frequency<br />
◊ Right click restore a channel's nominal frequency<br />
◊ Right click on Clear as above, for all channels<br />
Mouse & Keyboard Shortcuts 84
Digiscope Display<br />
<strong>Fldigi</strong> provides several different views of the decoded signal with its waterfall, text and a scope displays. The<br />
scope display is a separate moveable, resizeable dialog that is opened from the "View/Digiscope" menu item. If<br />
you have used a previous version of fldigi you will know that the digiscope was a part of the main display and<br />
adjacent to the waterfall. You can still have the digiscope displayed that way by setting the configuration for<br />
using a docked digiscope. For those modes in which more than one type of scope view is available you can have<br />
different views on the independent digiscopes.<br />
CW<br />
DominoEX / Thor<br />
MFSK<br />
Psk<br />
<strong>Fldigi</strong>Contents Digiscope Display<br />
The CW signal will consist of the time domain amplitude detected signal. The horizontal timing is<br />
dependent on CW speed, so that the display will appear similar independent of CW speed.<br />
DominoEX and Thor have two alternate views available on the digiscope display. You can<br />
toggle between the views by left clicking on the digiscope display area. The triangular view<br />
shows data propogation through the interleave filter. As signal s/n degrades this display will<br />
become more wavy.<br />
The second view is the decoded data stream viewed in the frequency domain. The dots will<br />
be very distinct when the signal is fully acquired and decoding properly. It will be fuzzy<br />
when the decoder is not locked or there is interference present.<br />
This is what you expect to see for all of the MFSK type modes. The number of steps in the slant<br />
lines will change with the various modes, but they will all have the same general appearance. If<br />
the signal is mistuned the sloped lines will become bowed and distorted.<br />
The digiscope display just to the right of the waterfall displays signal quality in various formats. The display for<br />
PSK modes is the vector scope:<br />
The display with no signal or below squelch The display with a normal psk31 AFC off and<br />
receive carrier<br />
Digiscope Display 85
level. If the SQL is off this display will be<br />
random vectors driven by noise.<br />
AFC off and receive carrier set above the<br />
center of the received signal.<br />
signal. The vector flips between 0<br />
and 6 o'clock<br />
AFC enabled, Fading History<br />
Display Mode Selected (left click on<br />
scope)<br />
set below the<br />
center of the<br />
received signal<br />
AFC enabled,<br />
Fading History /<br />
Amplitude<br />
Display Mode<br />
Selected (2nd<br />
left click on<br />
scope)<br />
You can see the effect of mistuning by slewing the carrier carrier control moving from low to high over the signal<br />
. You must do this with AFC off. Engage the AFC and the vectors will immediately snap to vertical positions.<br />
You can alter the appearance of the phase vectors by left clicking on the digiscope display. One click will give<br />
you a history of phase vectors that fade with time. A second click will give you a history of phase vectors that<br />
both fade with time and are amplitude significant. The third click returns you to the original phase vector display.<br />
The effect is the same with QPSK signals except you will see 4 vectors that are 90 degrees from each other.<br />
RTTY<br />
Contents<br />
<strong>Fldigi</strong>Contents Digiscope Display<br />
The signal can be viewed in two different ways on the digiscope. This is the time domain<br />
representation of the detected FSK signal. The two yellow lines represent the MARK and<br />
SPACE frequencies. This display is for Baudot, 45.45 baud, 182 Hz shift. If the<br />
tranmitting station were transmitting at 200 Hz shift the signal extremes would lie above<br />
and below the yellow lines. Try tuning across the RTTY signal with the AFC disabled.<br />
You will see the signal move above and below the yellow lines as you tune. Then enable<br />
the AFC and the signal should rapidly move into the center region of the display. This<br />
signal was about 3 - 6 dB above the noise floor. It looked marginal on the waterfall but<br />
still gave good copy.<br />
This is the other digiscope display for RTTY. You obtain this view by left clicking<br />
anywhere in the digiscope display window. You can toggle back and forth between these<br />
views. The MARK / SPACE frequencies are represented by the quadrature ellipses.<br />
When the RTTY signal is properly tuned in the lines will be in quadrature and aligned as<br />
shown. Tune across the RTTY signal and the MARK/SPACE lines will rotate around the<br />
center. If the sending station is using a shift that is smaller than you have the decoder<br />
setting then the two lines will close toward the NW/SE quadrants. If the sending station is<br />
using a shift that is greater than the decoder setting then the two lines will close toward the<br />
NE/SW quadrants.<br />
Psk 86
Macros<br />
Macros are short text statements that contain imbedded references to text data used by the program fldigi. Macro<br />
definition files(s) are located in the $HOME/.fldigi directory and all have the extention ".mdf". The default set of<br />
macros are contained in the file macros.mdf which is in the $HOME/.fldigi directory. <strong>Fldigi</strong> will create this file<br />
with a set of default macros on its first execution.<br />
<strong>Fldigi</strong> supports up to 48 macro definitions in sets of 12. Macro definitions are not recursive, that is; a macro<br />
cannot reference another macro or itself.<br />
The imbedded references are similar to those used by DigiPan and other fine modem programs. The imbedded<br />
reference is an uppercase plain text descriptor contained with the brackets.<br />
Reference definitions:<br />
my call remote call<br />
local date time Zone<br />
format : %x %H:%M%Z<br />
• %x is preferred short form date ie: MM/DD/YY<br />
or DD/MM/YYYY etc for your locale<br />
• %H is hour with leading 0<br />
• %M is minute with leading 0<br />
• %Z is abbreviated time zone ie: EDT or GMT<br />
current log time in Zulu HHMM format<br />
my frequency<br />
send waterfall video mode identifier<br />
send user specified video text<br />
send AFCW "DE " at end of transmission<br />
GMT date time Zone<br />
format : %x %H:%M %Z<br />
my locator remote locator<br />
my mode<br />
my name remote name<br />
my qth remote qth<br />
return to receive start transmit<br />
my RST remote RST<br />
insert current contest serial number into the text stream<br />
increment contest serial number<br />
decrement contest serial number<br />
contest exchange #1<br />
contest exchange #2<br />
contest exchange #3<br />
append the current data in the 1st status field; s/n for BPSK<br />
<strong>Fldigi</strong>Contents Macros<br />
• %x is preferred short form date ie: MM/DD/YY<br />
or DD/MM/YYYY etc for your locale<br />
• %H is hour with leading 0<br />
• %M is minute with leading 0<br />
• %Z is abbreviated time zone ie: EDT or GMT<br />
Macros 87
append the current data in the 2nd status field; imd for BPSK<br />
name cause program to change operating mode to named mode. Use the shorthand names that are in<br />
the pick list.<br />
submit QSO data to logbook program & clear the QSO data fields. This macro reference is not<br />
constrained to a particular position in the macro. The macro reference action takes place when macro is<br />
expanded, so effect is seen immediately after pressing the macro function key which contains this macro<br />
reference.<br />
causes fldigi to transmit an idle signal for NN seconds<br />
auto repeat this macro after NN seconds<br />
select this from the tag list; a file selection dialog opens for you to choose the file. Select your<br />
file to be inserted with this macro. The tag definition will be completed with the fully qualified filename inserted<br />
into the macro definition as in:<br />
<br />
The specified file will be opened and the text inserted into the Tx buffer when this macro is executed.<br />
select this from the tag list; a file selection dialog opens for you to choose the file. Select<br />
your macro file to be inserted with this macro. The tag definition will be completed with the fully qualified<br />
filename inserted into the macro definition as in:<br />
<br />
The new set of macros will be opened and replace the current one when this macro is executed.<br />
Local references are specified during the program configuration and can be changed during program operation.<br />
Remote references are all part of the qso log field definitions and are routinely changed from contact to contact.<br />
Global references are for items like Greenwich Mean Time.<br />
<strong>Fldigi</strong>Contents Macros<br />
The macros.mdf file can be edited with any ascii text editor such as kedit, gedit, geany, nano etc. But it is much<br />
easier to use the built-in macro editor provided in the program.<br />
Right click on any macro key (or the alternate set) and a macro editing dialog opens with the current copy of that<br />
macro and its label. This looks very similar to the DigiPan macro editor at the urging of Skip Teller, KH6TY.<br />
The Text box is a mini-editor with a very limited set of control functions. You can mark, bound and select text<br />
for deletion (ctrl-X), copy (ctrl-C), and paste (ctrl-V). Marked text can also be deleted with the delete or the<br />
backspace keys. Marked text modification can also be invoked by using the mouse right click after highlighting.<br />
Macros 88
The macro reference in the pick list can be transfered to the current editing cursor location. Highlight the desired<br />
macro reference and then press the double
There are 4 sets of 12 macro functions. You can move between the 4 sets using the keyboard and the mouse.<br />
1. Left click on the "1" button to move to set #2. Right click on the "1" button to move to set #4.<br />
2. Move the mouse to anywhere on the macro buttons. Use the scroll wheel to move forward & backward<br />
through the macro sets<br />
3. Press the Alt-1, Alt-2, Alt-3 or Alt-4 to immediately change to that macro set.<br />
• The label for CQ is "CQ @>|", denoting that both and are present in the macro text.<br />
• The label for QSO is "QSO @>>", denoting that only is present in the macro text.<br />
• The label for KN is "KN @||", denoting that only is present in the macro text.<br />
You could use any label that is symbolic to the function required. Refer to the FLTK web site for a full list of<br />
label types.<br />
If you modify the macros and do not save them ("Files/Save Macros" on the main window) fldigi will prompt you<br />
to save the macros when you exit the program if you have the "Nag me" option selected.<br />
The ... macro tag provides a way to create external shell scripts and programs that can interact<br />
with fldigi. See Exec Macro to learn more about the macro tag.<br />
Contents<br />
<strong>Fldigi</strong>Contents Macros<br />
Macros 90
Exec Macro<br />
The ... macro is designed to be used on the Linux OS as it supports fully functional pipes.<br />
Windows' version of file pipes is not fully POSIX compliant, but the function might work in the environment.<br />
Consider all that the following allows you to do from within fldigi and you might want to consider changing over<br />
to Linux.<br />
The macro defines an external child process (or processes) that will be called by fldigi when the macro<br />
key is invoked.<br />
Exported variables<br />
<strong>Fldigi</strong> exports a set of variables to the child process and adds ~/.fldigi/scripts to the PATH variable before running<br />
the shell code. This is the directory location for all executable scripts and programs which you might want to call<br />
from within the macro. Some examples will be given later. Open the macro editor for an undefined macro key<br />
and enter the following:<br />
• env | grep FLDIGI<br />
Save the macro; call it ENV. Then press the newly defined macro key. All of the exported variables will be<br />
shown in the transmit window.<br />
Here is an example of the results:<br />
FLDIGI_RX_IPC_KEY=9876<br />
FLDIGI_LOG_LOCATOR=FM02BT<br />
FLDIGI_TX_IPC_KEY=6789<br />
FLDIGI_LOG_RST_IN=<br />
FLDIGI_LOG_FREQUENCY=3581.000<br />
FLDIGI_AZ=108<br />
FLDIGI_MY_CALL=W1HKJ<br />
FLDIGI_LOG_TIME=2113<br />
FLDIGI_MY_NAME=Dave<br />
FLDIGI_VERSION=3.0preG<br />
FLDIGI_LOG_NOTES=<br />
FLDIGI_LOG_QTH=Mt Pleasant, SC<br />
FLDIGI_MY_LOCATOR=EM64qv<br />
FLDIGI_DIAL_FREQUENCY=3580000<br />
FLDIGI_CONFIG_DIR=/home/dave/.fldigi/<br />
FLDIGI_LOG_RST_OUT=<br />
FLDIGI_MODEM=BPSK31<br />
FLDIGI_LOG_CALL=KH6TY<br />
FLDIGI_MODEM_LONG_NAME=BPSK-31<br />
FLDIGI_AUDIO_FREQUENCY=1000<br />
FLDIGI_LOG_NAME=Skip<br />
FLDIGI_PID=14600<br />
FLDIGI_FREQUENCY=3581000<br />
<strong>Fldigi</strong>Contents Exec Macro<br />
All of the above envelope variables can be referenced in a shell script that is called from within fldigi.<br />
Exec Macro 91
Detection of existing scripts<br />
In anticipation of a collection of useful "fldigi scripts", the macro browser contains a macro line for each<br />
executable file found in the scripts directory.<br />
The EXEC macro allows the text that is read from the child process to be parsed for more fldigi macros. For<br />
example, try this macro:<br />
cat foo<br />
where foo is a file that contains:<br />
<br />
This may have some interesting uses but, if it is undesirable, it can be suppressed with an extra layer of<br />
redirection. Instead of command, you would use noexp command where<br />
noexp is the following very simple script:<br />
snip---------------------------------------<br />
#!/bin/bash<br />
echo -n ""<br />
"$@" # run the command<br />
r=$? # save its exit code<br />
echo -n ""<br />
exit $?<br />
snip---------------------------------------<br />
There are three additional MACRO definitions that expand the capability of the command: ,<br />
and .<br />
The and macros stop and resume the expansion of all strings. For example,<br />
would only expand the second . By wrapping the<br />
command output in this way we can be sure that no text will be expanded. You might even use<br />
"$@" | sed "s///g"<br />
if you feel paranoid.<br />
<strong>Fldigi</strong>Contents Exec Macro<br />
You can "fork and forget" with an exec macro defined as: exec command -args >/dev/null<br />
Any of the text that appears between the and can reference an executable program or shell<br />
command found in the ~/.fldigi/scripts directory.<br />
Any text output that is returned by the program or script program (or the result of the in-line command) is always<br />
returned to the transmit buffer and appears as appended to the transmit window.<br />
Detection of existing scripts 92
Querying an external database<br />
The command captures returned text from the external process and parses it for the following content:<br />
$NAMEtext_name$QTHtext_qth<br />
If either $NAME or $QTH is present the trailing text is transferred to the LOG_NAME or LOG_QTH widgets<br />
respectively. This means that you can create a script that accesses a local or net based database of callsign data<br />
and parse that data to form the above console output. <strong>Fldigi</strong> will accept that output, parse it and populate the<br />
associated log entries. Cool! Now for some examples. Here is a perl script that performs the above for the<br />
University of Alabama on-line callsign database, ualr-telnet.<br />
The matching macro key definition for the above is:<br />
ualr-telnet.pl $FLDIGI_LOG_CALL<br />
which I named "ualr ?"<br />
Google Earth Map<br />
Here is a really cool perl script, Google Earth Mapping, that accepts the current "Loc" field in the logging area<br />
and generates a Google Earth map which is displayed in your default browser. The macro call is<br />
map.pl<br />
Custom dates/times<br />
You can use to create custom date/time entries. For example, BARTG contesters use %H%M, but in<br />
other circumstances a user might prefer %H:%M or %H.%M etc.<br />
Create the following script file in the ~/.fldigi/scripts directory, call it mytime:<br />
snip---------------------------------------<br />
#!/bin/sh<br />
date --utc "+%H:%M"<br />
snip---------------------------------------<br />
<strong>Fldigi</strong>Contents Exec Macro<br />
date calls strftime, the same C function used by fldigi for the ZDT/LDT expansion, so it has an equally vast<br />
number of format strings to choose from. Look for them in its manual page.<br />
Give "mytime" execute permissions with a file manager or with chmod: chmod u+x ~/.fldigi/scripts/mytime.<br />
Test it on the command line and make sure it works correctly: ~/.fldigi/scripts/mytime<br />
Restart fldigi. The mytime script will now appear at the end of the list in the macro browser, and can be entered<br />
with the
Of course you could have entered:<br />
date --utc "+%H:%M"<br />
in the macro body text directly<br />
Many other uses for the ... macro pair can be imagined when used the with ENV parameters.<br />
For example you could send Azimuth data to an automated antenna rotor. The exported variables should be<br />
sufficient for a script writer to create custom loggers and clients.<br />
Contents<br />
<strong>Fldigi</strong>Contents Exec Macro<br />
Custom dates/times 94
QSO Logbook<br />
<strong>Fldigi</strong> maintains a large set of QSO logbook fields that will probably be sufficient for casual operating, contesting<br />
and some certificate logging. All of the fields that are captured in the logbook are maintained in an ADIF<br />
database that can be read by any logbook program that can read the ADIF text format.<br />
The complete set of logbook fields are:<br />
ADIF FIELD USE ADIF FIELD USE<br />
BAND QSO band (computed from frequency) STATE * contacted stations state<br />
CALL * contacted stations call sign QSLRDATE QSL received date<br />
COMMENT * comment field for QSO QSLSDATE QSL sent date<br />
COUNTRY * contacted stations DXCC entity name STX * QSO transmitted serial number<br />
DXCC contacted stations DXCC country code SRX * QSO received serial number<br />
FREQ * QSO frequency in MHz TIME_OFF * end time of QSO in HHMM format<br />
GRIDSQUARE<br />
contacted stations Maidenhead Grid<br />
Square (Loc)<br />
TIME_ON *<br />
start time of QSO in HHMM<br />
format<br />
MODE * QSO mode TX_PWR * power transmitted by this station<br />
NAME * contacted operators name IOTA Islands On The Air<br />
QSO_DATE * QSO date VE_PROV *<br />
RST_RCVD * received signal report XCHG1 *<br />
RST_SENT * sent signal report XCHG2 *<br />
2 letter abbreviation for Canadian<br />
Province<br />
free form contest exchange (free1<br />
in xlog)<br />
free form contest exchange (free2<br />
in xlog)<br />
QTH * contacted stations city XCHG3 * free form contest exchange<br />
* - these fields are either captured on the main dialog, computed from internal values, or determined by<br />
configuration<br />
The data in the fldigi logbook can be exported to external text files; ADIF, text, and CSV (comma separated<br />
value). The ADIF can be read by any ADIF compatible logbook program. The text output is suitable for use in a<br />
wordprocessor and for printing. The CSV can be read into many spreadsheet programs such as Excel, Open<br />
Office or Gnumeric.<br />
Digital modes signal reports<br />
<strong>Fldigi</strong>Contents QSO Logbook<br />
<strong>Fldigi</strong> does not enforce any rules on signal reporting. It could very well do so for many of the modes in which<br />
signal quality is inherently measured as a part of the decoder. Learning how to evaluate a signal, to properly<br />
report it, and then help in correcting deficiencies should be the goal of every amateur operator. Please read<br />
further on using both RST and RSQ signal reports.<br />
QSO Logbook 95
Capturing QSO data<br />
<strong>Fldigi</strong> supports two QSO capture panels. The first for casual QSO logging<br />
and the second for contest fields<br />
The frequency, Off (time off), and #Out are filled by the program. All the others can be populated by manual<br />
keyboard entry or by selection from the Rx panel. The time off, Off, is continuously update with the current<br />
GMT. The time on, On, will be filled in when the Call is updated, but can be modified later by the operator.<br />
A right click on the Rx panel brings up a context sensitive menu that will reflect which of the two QSO capture<br />
views you have open.<br />
Normal<br />
Short Menu<br />
Normal<br />
Long Menu<br />
Contest<br />
Short Menu<br />
<strong>Fldigi</strong>Contents QSO Logbook<br />
Contest<br />
Long Menu<br />
If you highlight text in the Rx pane then the menu selection will operate on that text. If you simply point to a<br />
word of text and right click then the menu selection will operate on the single word.<br />
Certain fields may also be populated with automatic parsing, Call, Name, Qth and Loc. You point to the Rx pane<br />
Capturing QSO data 96
<strong>Fldigi</strong>Contents QSO Logbook<br />
word and then either double-left-click or hold a shift key down and left click. The program will attempt to parse<br />
the word as a regular expression to populate the Call, Name, Qth, and Loc fields in that order. It may place some<br />
non standard calls into the Loc field if they qualify as a proper Maidenhead Grid Square, such as MM55CQ. That<br />
may be a special event station, but it also looks like a grid square locator value. You need to decide when that<br />
occurs and use the pop up menu for those special cases. The first non-Call non-Loc word will fill the Name field<br />
and subsequent qualify words will go into the Qth field.<br />
A highlighted section of text, can always be copied to the clipboard for subsequent pasting elsewhere. The Copy<br />
menu item will be active when text in the Rx pane has been highlighted. That text can also be saved to a file. Use<br />
the "Save as..." menu item for that purpose. All data fields in fldigi share a common set of keyboard shortcuts.<br />
Linux users will recognize these as familiar Emacs shortcuts. There is also a small popup menu that can be<br />
opened for each field by right clicking the contents with the mouse:<br />
Highlighted text will be overwritten when a paste is selected. Otherwise the clipboard will be pasted at the<br />
current cursor position.<br />
You can query on-line and local CD based data base systems for data regarding a Call. Set up your query using<br />
the Callsign Db configuration tab. You make the query by either clicking on the globe button, or selecing "Look<br />
up call" from the menu. The latter will also move the call to the Call field and make the query.<br />
If you have previously worked a station the logbook will be searched for the most recent qso and fill the Name,<br />
Qth and other fields from the logbook. If the logbook dialog is open that last qso will be selected for viewing in<br />
the logbook.<br />
You open the logbook by selecting from the View menu; View/Logbook. The logbook title bar will show you<br />
which logbook you currently have open. fldigi can maintain an unlimited (except for disk space) number of<br />
logbooks.<br />
Capturing QSO data 97
You can resize the dialog to suit your screen size and operating needs. <strong>Fldigi</strong> will remember the placement and<br />
size for subsequent use.<br />
You can create new entries, update existing entries, and delete entries using this dialog. You can also search for<br />
an entry by callsign. The browser can be sorted by Date, Callsign, Frequency or Mode. The sort can be forward<br />
or backward with the most recent being the default selected entry after each sort. You execute the sort by clicking<br />
on the column button at the top of the column to be sorted. Each click causes the sort to reverse. I like to view<br />
my log with the most recent at the top. You might want to view it with the most recent on the bottom.<br />
There are no frills such as keeping track of DXCC worked, fancy printouts etc. <strong>Fldigi</strong>'s logbook is primarily a<br />
capture function. You can export your data for use with an external database or for uploading to LOTW or eQSL.<br />
Data from those sources can also be used for importing into the logbook.<br />
The import and export functions are found on the main menu under Files/Logbook.<br />
Contents<br />
<strong>Fldigi</strong>Contents QSO Logbook<br />
Capturing QSO data 98
Contest How To<br />
<strong>Fldigi</strong>Contents Contest How To<br />
<strong>Fldigi</strong> supports a basic contesting format. Select the menu item View/Contest fields to see how the qso entry<br />
entry fields change for contest data. You will see that fldigi has fields to support received and sent contest<br />
numbers as well as generic contest exchange information.<br />
The serial number out (#Out) is automatically initialized and updated by the built-in serial number generator.<br />
You can enter the appropriate exchange information via the keyboard or mouse. Text in the Rx pane can be<br />
selected by the usual left-click-swipe of highlighting. Then right click anywhere after highlighting the desired<br />
text and a popup menu will appear allowing you to select the destination QSO field. Make your selection and the<br />
info is placed in the correct text box. Note that the popup menu changes with the QSO logging view and also<br />
with a change in "Quick entry". A full description is found in the description of operating the Logbook. The<br />
important thing to note for contest operation is that the Call, Serial #, Exchange 1, Exchange 2 and Exchange 3<br />
are all single word captures. That means you can point to the word representing the field, right click and select<br />
from the menu. You do not need to highlight the text for the word capture.<br />
To set up fldigi for contesting you will need to<br />
open configure contest. the 1st row contains what info you want sent with the appropriate macro tag. ie...if the<br />
contest requires rst and name you would fill in the x1 box with your name. you will also need to check the rst<br />
always 599 box as this is the de-facto signal report in contests.<br />
If you are participating in a cw contest you may want to select the "Send CW cut numbers", cut numbers is the<br />
norm for a CW contest. The cut numbers will send N for 9 and T for zero.<br />
The next box contains the needed requirements to use serial numbers for a contest. you will always want to use<br />
leading zeros, start with 1 and use 3 digits. Press reset to initialize the #Out QSO field to the Start number.<br />
Check the appropriate fields for determining if this is a duplicate call. DUPE will be displayed above the Call in<br />
the QSO logging area if a duplicate is detected. There are many choices to alert you to a duplicate contact. The<br />
duplicate is based on the logical AND of all of the fields to be checked. The DUPE is cleared when you press the<br />
clear QSO log button (the brush icon).<br />
After you have filled in all the required infomation, make sure you save and close.<br />
Remember YOU MUST click the Reset button in the Serial number panel for the serial number counter to be<br />
Contest How To 99
initialized. You should also press the QSO clear button (broom) in the qso entry widget for the other changes to<br />
take effect.<br />
It would be best to create a new log for each contest. You create a new log by selecting the menu item<br />
File/Logs/New logbook. The default new log name will be newlog.adif on Linux and newlog.adi on Windows.<br />
You can rename the new log file now or later by using the system file manager or when you save the log. The<br />
import/export feature of fldigi will allow you to export the log into your everday logging software or the built-in<br />
fldigi logbook.<br />
Restarting a contest session<br />
You might have closed down fldigi in the middle of a contest, everyone needs a break now and then. You then<br />
start fldigi and want to continue the contest. Here are the steps to insure that you continue operations with no<br />
glitches.<br />
• Load your macro file that contains your contest macros (more on that below)<br />
• Select the menu item View/Contest fields<br />
• Select the menu item View/Logbook<br />
• Make sure you have the contest logbook open ... if not then this is the time to open that logbook database.<br />
Select the menu item "File/Logs/Open logbook..." and find your log data file.<br />
• Look at the last record and check the serial number sent. Enter that number plus one in the Start entry on<br />
the config contest tab (see above).<br />
• Press the Reset button in that panel.<br />
You are ready to keep on contesting<br />
Remembering a contact<br />
If you are copying a potential contact but you are not being heard you can save fldigi's modem state using one of<br />
two methods<br />
1. double click the signal on the waterfall<br />
2. right click on the Rx panel and select "Insert divider"<br />
A line of text will be inserted at the end of the Rx text buffer. It will appear similar to this:<br />
<br />
<strong>Fldigi</strong>Contents Contest How To<br />
The date-time, the mode, the transceiver operating frequency and the audio offset will be recorded. The text line<br />
is in blue and behaves in a way that you might expect a url reference to behave in a web browser window. Work<br />
a few more contacts (even on a different band or frequency) and then scroll the Rx pane to that special divider.<br />
Left click on the line of text and fldigi will restore the transceiver to its frequency, change the mode to the saved<br />
mode and put the waterfall cursor at the audio offset frequency. Changing the transceiver frequency will only<br />
work if you are using CAT control of your transceiver. If you are not using CAT control the mode and waterfall<br />
cursor will still be restored.<br />
There is no limit to the number of divider lines that can be inserted into the Rx pane. They will all be removed<br />
when the Rx pane is cleared.<br />
Restarting a contest session 100
Saving the entire session<br />
Select the menu item "File/Logs/Log all RX/TX text". If this toggle menu is checked your entire session of<br />
received and sent text will be saved to a file in the fldigi default files folder. It will be given a name synonomous<br />
with the date and time is is started, ie: fldigi20081230.log. You can review this log by selecting the menu item<br />
"File/Show config" which will open your OS default file explorer to the fldigi files folder. The file is an ASCII<br />
text file.<br />
The format of the daily log is shown in Working Logs.<br />
Contesting Macro Tips<br />
OK, now we have fldigi setup for basic contesting, lets move on to some ideas on macros to use. I tend to make<br />
generic one size fits all macros. I recommend that you make a new macro file, mine is named contest.mdf, this<br />
will give you 48 macros to use based on the type of contest you are entering. Take a good look at the examples I<br />
have listed, you will notice there are no commas, hyphens or other extraneous items. I have seen just about every<br />
example of a poorly thought out macro there is or has ever been dreamed up. Classic examples are:<br />
• w3nr you are 599 in Alabama your serial number is 001-001-001 how copy ??<br />
• hello ed thanks for the call you are 599-599-001-001-001 qth Alabama back to you<br />
The list goes on and on. Just think, you have to try and capture the exchange, try it and you will see what I mean.<br />
When you enter a contest you have to decide whether you are going to sit on one frequency and call CQ (Run) or<br />
are you going to tune the band looking for stations to work (S&P). So lets set up some macros that should cover<br />
both cases.<br />
Several new macro tags have been created to facilitate contesting, these include the following tags.<br />
<br />
<br />
<br />
<br />
add QSO data to the<br />
logbook & clear the<br />
QSO data fields<br />
insert current contest<br />
serial number into the<br />
text stream<br />
increment contest<br />
serial number<br />
decrement contest<br />
serial number<br />
contest exchange #1<br />
contest exchange #2<br />
contest exchange #3<br />
<br />
<strong>Fldigi</strong>Contents Contest How To<br />
current log time in<br />
Zulu HHMM format<br />
See Macros for additional information on editing and using the fldigi macro system.<br />
Saving the entire session 101
RUN Macros<br />
We need just a few, starting with a CQ macro - Put this in the F1 key defintion<br />
<br />
cq test de cq k<br />
<br />
Notice that I left 2 spaces between my call and 3 spaces at the end before the k. This will make it easier for a<br />
station to grab my call and the k on the end elminates garbage characters before my macro finishes. The tx/rx are<br />
on seperate lines as I want to be sure my macro is on a line by itself and not mixed in with screen garbage.<br />
Now the exchange macro - Put this in the F2 key definition<br />
<br />
599 k<br />
<br />
Why do I have his call at the beginning as well as the end, to make sure I have copied his call correctly. You will<br />
also see that I have not as yet logged the contact,why, well are you sure he does not need to correct his call or ask<br />
for a repeat.<br />
You are asked to repeat the exchange, you can just re-send the exchange macro, this verfies all of the information.<br />
Now he sends you his info and if you have copied it correctly you need a TU macro. - Put this in the F3 key<br />
definition<br />
<br />
qsl tu qrz test k<br />
<br />
Here we have done all the necessary items to complete the exchange. Notice that I did not log the contact until<br />
after everything was correct. I have fldigi set to clear on save, so when the part of the macro executes the<br />
QSO area is cleared.<br />
Thats the end of my RUN macro setup, told you it was rather simplistic and generic.<br />
S&P Macros<br />
I rarely if ever use S&P, but there are times I need to, especially if my QSO rate drops while running. Again the<br />
macros are very generic with only the needed info. If band conditions warrant you may want to send your call 3<br />
times. Put this in the F5 key definition<br />
<br />
k<br />
<br />
Why just my call ?? Well I assume the other guy already knows his call !<br />
<strong>Fldigi</strong>Contents Contest How To<br />
RUN Macros 102
The exchange macro is basically the same as the RUN macro. Put this one in the F6 key definition<br />
<br />
599 k<br />
<br />
As you see I have not as yet logged the QSO or incremented the serial number. This is the final S&P macro. Put<br />
this one in the F7 key definition<br />
<br />
Now this is the most important macro you will ever need......trust me. Put it where you won't fail to find it. How<br />
about F9 ?<br />
<br />
agn agn k<br />
<br />
You will see that it is used many times during a contest, especially with weak stations and heavy QRN/QRM.<br />
Contents<br />
<strong>Fldigi</strong>Contents Contest How To<br />
S&P Macros 103
PSK Reporter<br />
The PSK reporter can generate reception reports from three different sources:<br />
• The decoded text<br />
• The log data<br />
• Data entered manually<br />
The configuration for the PSK reporter in in Misc/Spotting. PSKR needs the following fields from the Oper tab to<br />
be non-empty:<br />
1. Callsign (freeform because it's impossible to verify, and because we need to support SWLs without<br />
callsigns)<br />
2. Locator (standard 6 character format)<br />
3. Antenna info (freeform, should be kept reasonably short)<br />
Sources (1) and (2) are configurable from Misc/Spotting configuration tab, while (3) is always enabled. To keep<br />
the code sane, changing the PSKR options (or the above station info) does not take immediate effect. Instead, the<br />
Initialize button changes colour to indicate that the changes have not<br />
been applied. Clicking on the button will do so (or display an error) for the current and future sessions. This is<br />
similar to the Initialize buttons in the rig control configuration.<br />
Here are the options in some more detail:<br />
Automatically spot callsigns in decoded text<br />
The text that is sent to the main window or the PSK browser is continuously searched for callsigns. If this option<br />
is enabled, the main window gets a "Spot" light button that can toggle the auto-spotter on and off. It is<br />
automatically turned off when playback is selected in the Files menu. The main window text is not searched if the<br />
viewer is active, i.e., if it is displayed and the current modem is PSK.<br />
Send reception report when logging a QSO<br />
A reception report is queued for every QSO as soon as it's logged<br />
Report QRG (etc.)<br />
This makes the reception reports include the current rig frequency, adjusted for modem audio frequency and rig<br />
sideband. It does not need a click on "Initialize" to take effect. This needs to be an option because it is impossible<br />
to tell whether the user has real or "fake" rig control with 100% certainty. Besides that, users may want to run a<br />
dedicated spotter for a narrow modes sub-band, and in that case they won't have to synchronise fldigi's frequency<br />
display with the rig all that often.<br />
Host and port<br />
<strong>Fldigi</strong>Contents PSK Reporter<br />
With the port set to 14739 the reports will not be entered in the main database, but instead will be analysed and<br />
displayed here:<br />
PSK Reporter 104
http://pskreporter.info/cgi-bin/psk-analysis.pl<br />
Probably of no interest to anyone who is not hacking on a PSKR client but may be useful for debugging. The<br />
PSKR protocol uses UDP with no acknowledgements or retransmissions, so don't be surprised if the occasional<br />
report never makes it to the server. There should be enough coverage overlap to make packet loss irrelevant (and<br />
save a lot of bandwidth and CPU cycles).<br />
The spotter needs to see a repeated callsign within a short search window, but stations do not always repeat their<br />
callsigns. In addition, some operators like to be creative with their macros, and as a result some signals will<br />
decode 100% but the callsign will never be auto-captured. Such callsigns can be reported manually.<br />
The manual spotting is done by right-clicking the QRZ "globe" icon. This will generate a report for whatever is in<br />
the Call & Loc fields, so make sure that those are correct! You should also verify the frequency (e.g. by placing<br />
the waterfall marker on the signal being spotted).<br />
There is a confirmation popup that will open when you right click the "globe" button. The aim of course is to<br />
avoid accidentally sending rubbish reports to the PSK reporter database.<br />
Reception reports are filtered for duplicates among all data sources: a report is queued only once every hour for<br />
each callsign and frequency band. The queue is flushed every five minutes. You can see what the spotter is doing<br />
in the Event Log window or on the terminal if you set the log level to "Info". "Debug" will show all the gory<br />
details.<br />
There is a link to the pskreporter.info map page in the Help menu.<br />
Contents<br />
<strong>Fldigi</strong>Contents PSK Reporter<br />
Host and port 105
Working Logs<br />
<strong>Fldigi</strong> maintains a number of working log files that are found in its default folder. The default folder is easy to<br />
find, simply select the menu item "File/Show config" and your OS default files explorer will be opened to that<br />
location.<br />
Rx/Tx Capture File<br />
Everytime you start or stop fldigi that event is recorded in a daily log file. The daily log is name as:<br />
flidigYYYYMMDD.log<br />
where YYYYMMDD is the current GMT date. This log will also contain your entire session of Rx and Tx data<br />
annotated as to activity and timestamped. Here is a small example of the daily log:<br />
--- Logging started at Tue Dec 30 11:37:21 2008 UTC ---<br />
RX (2008-12-30 11:37Z): o ur property. No pwr even for a day is rough.<br />
TX (2008-12-30 11:39Z):<br />
TX (2008-12-30 11:39Z): CQ CQ CQ de W1HKJ W1HKJ W1HKJ<br />
TX (2008-12-30 11:40Z): CQ CQ CQ de W1HKJ W1HKJ W1HKJ pse k<br />
RX (2008-12-30 11:40Z): mG sk<br />
--- Logging stopped at Tue Dec 30 11:48:11 2008 UTC ---<br />
This log is appended to with each start and stop. That means that no data is ever overwritten.<br />
Status log<br />
A log of errors, warnings and status reports is written for each session. This file is overwritten each time the<br />
program is opened and subsequently closed. Its format is also ASCII text and will contain data such as:<br />
Q: main: fldigi 3.04BV log started on Tue Dec 30 05:47:10 2008<br />
W: dxcc_open: Could not read contest country file "/home/dave/.fldigi/cty.dat"<br />
<strong>Fldigi</strong>Contents Working Logs<br />
This data is identical to that which can be viewed with the event log dialog which is opened using the menu item<br />
"Help/Event log"<br />
Working Logs 106
There are five levels of event logging with increasing depth of reports:<br />
The default level for logging events is "warning."<br />
At the Debug level you will probably see more events than you need. You can select which events to suppress<br />
using the "Log sources" menu button. It defaults to all enabled.<br />
Contents<br />
<strong>Fldigi</strong>Contents Working Logs<br />
Status log 107
XmlRpc Control<br />
As of version 3.0, various aspects of <strong>Fldigi</strong>'s operation can be controlled remotely using XML-RPC. XML-RPC<br />
data is transported via simple HTTP and client implementations exist for most programming languages. A Perl<br />
client that can be used as a control script is included in the source tarball as scripts/fldigi-shell.<br />
The following command line arguments become available when XML-RPC support is compiled into fldigi, as<br />
described in the build instructions:<br />
--xmlrpc-server-address HOSTNAME<br />
Set the XML-RPC server address. The default is 127.0.0.1.<br />
--xmlrpc-server-port PORT<br />
Set the XML-RPC server port. The default is 7362.<br />
--xmlrpc-allow REGEX<br />
Allow only the methods whose names match REGEX<br />
--xmlrpc-deny REGEX<br />
Allow only the methods whose names don't match REGEX<br />
--xmlrpc-list<br />
List all available methods<br />
The --xmlrpc-deny and --xmlrpc-allow switches can be used as a simple access control mechanism. REGEX<br />
specifies a POSIX extended regular expression. This invocation disables the methods that may cause fldigi to<br />
transmit:<br />
--xmlrpc-deny 'main\.(tx|tune|run_macro)'<br />
By default all methods are allowed.<br />
The --xmlrpc-list switch outputs the method list and exits the program. If preceded by --xmlrpc-deny or<br />
--xmlrpc-allow, it shows the list of<br />
methods as filtered by those switches.<br />
The methods implemented in version 3.1 are listed below. The three columns are method name, signature<br />
(return_type:argument_types), and<br />
description. Refer to the XML-RPC specification for the meaning of the signature characters (briefly: n=nil,<br />
b=boolean, i=integer, d=double,<br />
s=string, 6=bytes, A=array, S=struct).<br />
fldigi.list A:n Returns the list of methods<br />
fldigi.name s:n Returns the program name<br />
fldigi.version_struct S:n Returns the program version as a struct<br />
fldigi.version s:n Returns the program version as a string<br />
fldigi.name_version s:n Returns the program name and version<br />
<strong>Fldigi</strong>Contents XmlRpc Control<br />
fldigi.config_dir s:n Returns the name of the configuration directory<br />
XmlRpc Control 108
modem.get_name s:n Returns the name of the current modem<br />
modem.get_names A:n Returns all modem names<br />
modem.get_id i:n Returns the ID of the current modem<br />
modem.get_max_id i:n Returns the maximum modem ID number<br />
modem.set_by_name s:s Sets the current modem. Returns old name<br />
modem.set_by_id i:i Sets the current modem. Returns old ID<br />
modem.set_carrier i:i Sets modem carrier. Returns old carrier<br />
modem.inc_carrier i:i Increments the modem carrier frequency. Returns the new carrier<br />
modem.get_carrier i:n Returns the modem carrier frequency<br />
modem.get_afc_search_range i:n Returns the modem AFC search range<br />
modem.set_afc_search_range n:i Sets the modem AFC search range. Returns the old value<br />
modem.inc_afc_search_range n:i Increments the modem AFC search range. Returns the new value<br />
modem.get_bandwidth i:n Returns the modem bandwidth<br />
modem.set_bandwidth n:i Sets the modem bandwidth. Returns the old value<br />
modem.inc_bandwidth n:i Increments the modem bandwidth. Returns the new value<br />
modem.get_quality d:n Returns the modem signal quality in the range [0:100]<br />
modem.search_up n:n Searches upward in frequency<br />
modem.search_down n:n Searches downward in frequency<br />
main.get_status1 s:n Returns the contents of the first status field (typically s/n)<br />
main.get_status2 s:n Returns the contents of the second status field<br />
main.get_sideband s:n Returns the current sideband<br />
main.set_sideband n:s Sets the sideband to USB or LSB<br />
main.get_frequency d:n Returns the RF carrier frequency<br />
main.set_frequency d:d Sets the RF carrier frequency. Returns the old value<br />
main.inc_frequency d:d Increments the RF carrier frequency. Returns the new value<br />
main.get_afc b:n Returns the AFC state<br />
main.set_afc b:b Sets the AFC state. Returns the old state<br />
main.toggle_afc b:n Toggles the AFC state. Returns the new state<br />
main.get_squelch b:n Returns the squelch state<br />
main.set_squelch b:b Sets the squelch state. Returns the old state<br />
main.toggle_squelch b:n Toggles the squelch state. Returns the new state<br />
main.get_squelch_level d:n Returns the squelch level<br />
main.set_squelch_level d:d Sets the squelch level. Returns the old level<br />
main.inc_squelch_level d:d Increments the squelch level. Returns the new level<br />
main.get_reverse b:n Returns the Reverse Sideband state<br />
main.set_reverse b:b Sets the Reverse Sideband state. Returns the old state<br />
main.toggle_reverse b:n Toggles the Reverse Sideband state. Returns the new state<br />
main.get_lock b:n Returns the Transmit Lock state<br />
<strong>Fldigi</strong>Contents XmlRpc Control<br />
main.set_lock b:b Sets the Transmit Lock state. Returns the old state<br />
main.toggle_lock b:n Toggles the Reverse Sideband state. Returns the new state<br />
XmlRpc Control 109
main.get_trx_status s:n Returns transmit/tune/receive status<br />
main.tx n:n Transmits<br />
main.tune n:n Tunes<br />
main.rsid n:n Waits for RSID<br />
main.rx n:n Receives<br />
main.abort n:n Aborts a transmit or tune<br />
main.run_macro n:i Runs a macro<br />
main.get_max_macro_id i:n Returns the maximum macro ID number<br />
log.get_frequency s:n Returns the Frequency field contents<br />
log.get_time_on s:n Returns the Time-On field contents<br />
log.get_time_off s:n Returns the Time-Off field contents<br />
log.get_call s:n Returns the Call field contents<br />
log.get_name s:n Returns the Name field contents<br />
log.get_rst_in s:n Returns the RST(r) field contents<br />
log.get_rst_out s:n Returns the RST(s) field contents<br />
log.get_serial_number s:n Returns the serial number field contents<br />
log.get_state s:n Returns the State field contents<br />
log.get_province s:n Returns the Province field contents<br />
log.get_country s:n Returns the Country field contents<br />
log.get_qth s:n Returns the QTH field contents<br />
log.get_band s:n Returns the current band name<br />
log.get_sideband s:n Returns the current sideband<br />
log.get_notes s:n Returns the Notes field contents<br />
log.get_locator s:n Returns the Locator field contents<br />
log.get_az s:n Returns the AZ field contents<br />
log.clear n:n Clears the contents of the log fields<br />
log.set_call n:s Sets the Call field contents<br />
text.get_rx_length i:n Returns the number of characters in the RX widget<br />
text.get_rx 6:ii Returns a range of characters (start, length) from the RX text widget<br />
text.clear_rx n:n Clears the RX text widget<br />
text.add_tx n:s Adds a string to the TX text widget<br />
text.add_tx_bytes n:6 Adds a byte string to the TX text widget<br />
text.clear_tx n:n Clears the TX text widget<br />
spot.get_auto b:n Returns the autospotter state<br />
spot.set_auto n:b Sets the autospotter state. Returns the old state<br />
spot.toggle_auto n:b Toggles the autospotter state. Returns the new state<br />
spot.pskrep.get_count i:n Returns the number of callsigns spotted in the current session<br />
Contents<br />
<strong>Fldigi</strong>Contents XmlRpc Control<br />
XmlRpc Control 110
Command Line Switches<br />
The following output is available by executing "flidig --help"<br />
Usage:<br />
fldigi [option...]<br />
fldigi options:<br />
--config-dir DIRECTORY<br />
Look for configuration files in DIRECTORY<br />
The default is: /home/dave/.fldigi/<br />
--rx-ipc-key KEY<br />
Set the receive message queue key<br />
May be given in hex if prefixed with "0x"<br />
The default is: 9876 or 0x2694<br />
--tx-ipc-key KEY<br />
Set the transmit message queue key<br />
May be given in hex if prefixed with "0x"<br />
The default is: 6789 or 0x1a85<br />
--arq-server-address HOSTNAME<br />
Set the ARQ TCP server address<br />
The default is: 127.0.0.1<br />
--arq-server-port PORT<br />
Set the ARQ TCP server port<br />
The default is: 3122<br />
--xmlrpc-server-address HOSTNAME<br />
Set the XML-RPC server address<br />
The default is: 127.0.0.1<br />
--xmlrpc-server-port PORT<br />
Set the XML-RPC server port<br />
The default is: 7362<br />
--xmlrpc-allow REGEX<br />
Allow only the methods whose names match REGEX<br />
--xmlrpc-deny REGEX<br />
Allow only the methods whose names don't match REGEX<br />
--xmlrpc-list<br />
List all available methods<br />
--debug-level LEVEL<br />
<strong>Fldigi</strong>Contents Command Line Switches<br />
Command Line Switches 111
Set the event log verbosity<br />
--version<br />
Print version information<br />
--help<br />
Print this option help<br />
Standard FLTK options:<br />
-bg COLOR, -background COLOR<br />
Set the background color<br />
-bg2 COLOR, -background2 COLOR<br />
Set the secondary (text) background color<br />
-di DISPLAY, -display DISPLAY<br />
Set the X display to use DISPLAY,<br />
format is ``host:n.n''<br />
-dn, -dnd or -nodn, -nodnd<br />
Enable or disable drag and drop copy and paste in text fields<br />
-fg COLOR, -foreground COLOR<br />
Set the foreground color<br />
-g GEOMETRY, -geometry GEOMETRY<br />
Set the initial window size and position<br />
GEOMETRY format is ``WxH+X+Y''<br />
** fldigi may override this setting **<br />
-i, -iconic<br />
Start fldigi in iconified state<br />
-k, -kbd or -nok, -nokbd<br />
Enable or disable visible keyboard focus in non-text widgets<br />
-na CLASSNAME, -name CLASSNAME<br />
Set the window class to CLASSNAME<br />
-ti WINDOWTITLE, -title WINDOWTITLE<br />
Set the window title<br />
Additional <strong>UI</strong> options:<br />
--font FONT[:SIZE]<br />
Set the widget font and (optionally) size<br />
The default is: sans:12<br />
<strong>Fldigi</strong>Contents Command Line Switches<br />
Command Line Switches 112
Rig Xml Howto<br />
This document describes the contents of the rig definition file “rig.xml”.<br />
A number of transceivers have rig defintion files written and tested which you may use. These are found in the<br />
xmls directory on this site: xml archives. You will find subdirectories by manufacturer which contain files named<br />
by rig type, ie: TS-850.xml. If you create, test and verify the proper operation for a transceiver not yet posted<br />
please share that with others by sending it as an attachment to w1hkj@w1hkj.com and I will post it on the web<br />
site. You are encouraged to study the various rig definition files to learn more about how they are organized.<br />
Comments are contained within the tag pair<br />
<br />
and may appear anywhere in the rig definition file The entire rig definition must be contained within the tag pair<br />
<br />
<br />
The text within the tag pair specifies the transceiver to which this file applies, as in:<br />
Icom 746 PRO<br />
The text within the tag pair is not used by the parser, but should as a<br />
minimum say who created and who tested the definition file, as in:<br />
<br />
Dave Freese W1HKJ Tested by: W1HKJ, Dave<br />
<br />
The text within the tag pair<br />
<br />
<br />
is not used by the parser, but should as a minimum state whether the definition file has been “Verifed”, is<br />
“Alpha”, what the Version and Date of creation or update, as in:<br />
Verified Version: 1.0 Date: 2007 Jan 5 <br />
The<br />
<br />
<br />
tag pair contains the text which will be displayed on the window decoration bar, as in:<br />
Rig Control - IC-746 PRO<br />
<strong>Fldigi</strong>Contents Rig Xml Howto<br />
Rig Xml Howto 113
The transceiver modes are specified within the tag pair. Each entry or element associated<br />
with a mode has a symbol name (text) and a way to specifiy what the data transfer consists of. The data transfer<br />
might be a single byte, multiple bytes, or aa string<br />
Example 1, for the Icom-746PRO<br />
<br />
LSB00<br />
USB01<br />
AM02<br />
CW03<br />
RTTY04<br />
FM05<br />
CW-R07<br />
RTTY-R08<br />
<br />
Example 2, for the Kenwood 850<br />
<br />
LSB31<br />
USB32<br />
CW33<br />
FM34<br />
AM35<br />
FSK36<br />
CW-R37<br />
FSK-R39<br />
<br />
Example 3, for the FT-100<br />
<br />
LSB00<br />
USB01<br />
CW02<br />
CW-R03<br />
AM04<br />
DIG05<br />
FM06<br />
W-FM07<br />
<br />
The modes which are supported by lower sideband in the transceiver are specified in the<br />
tar pair. The string data for the lsb modes must match those given in the modes<br />
id specifier For example in the Icom 746 Pro:<br />
<br />
LSB<br />
RTTY<br />
CW-R<br />
<br />
<strong>Fldigi</strong>Contents Rig Xml Howto<br />
If the transceiver data stream uses identically the same format for the bandwidth data then it is specified in<br />
Rig Xml Howto 114
the tag pair<br />
<strong>Fldigi</strong>Contents Rig Xml Howto<br />
Example for the Icom 746 Pro:<br />
<br />
5000<br />
10001<br />
15002<br />
20003<br />
25004<br />
30005<br />
35006<br />
40007<br />
45008<br />
50009<br />
60010<br />
70011<br />
80012<br />
90013<br />
100014<br />
110015<br />
120016<br />
130017<br />
140018<br />
150019<br />
160020<br />
170021<br />
180022<br />
190023<br />
200024<br />
210025<br />
220026<br />
230027<br />
240028<br />
250029<br />
260030<br />
270031<br />
280032<br />
290033<br />
300034<br />
310035<br />
320036<br />
330037<br />
340038<br />
350039<br />
360040<br />
<br />
If the bandwidth data stream is unique for send and receive data streams then they are specified separately with<br />
the tag pair for data sent to the transceiver, and the <br />
tag pair for data returned to the computer.<br />
Rig Xml Howto 115
Example: FT-100:<br />
<br />
30000<br />
50001<br />
240002<br />
600003<br />
<br />
<br />
30003<br />
50002<br />
240001<br />
600000<br />
<br />
<strong>Fldigi</strong> can parse and decode message returned from the transceiver that define 4 aspects of the transceiver<br />
operation:<br />
OK data accepted by the transceiver<br />
BAD data rejected by the transceiver<br />
MODE current operating mode of the transceiver<br />
BW current bandwidth setting of the transceiver<br />
FREQ frequency of the active vfo (might be either A or B for example)<br />
These are all contained within multiple tag pairs. This is an example of a fixed format<br />
message with no variable fields. It is the OK message sent back by the Icom-746 PRO:<br />
<br />
OK<br />
6<br />
FE FE E0 66<br />
FB<br />
FD<br />
<br />
The pair and the command defnition are mandatory. The field is<br />
mandatory and specifies the number of bytes contained in this reply. The above definition could also have been<br />
coded as:<br />
<br />
OK<br />
6<br />
FE FE E0 66 FB FD<br />
<br />
<strong>Fldigi</strong>Contents Rig Xml Howto<br />
When the reply contains variable data it is specified in a contained tag pair . This data field<br />
contains specifiers that describe the kind and size of the data. The tag pair may be one of:<br />
Rig Xml Howto 116
BINARY or<br />
DECIMAL<br />
This is an example for the reply to a mode query that is returned by the Icom-746 PRO:<br />
<br />
MODE specifies the response name<br />
8 8 bytes of data returned<br />
FE FE E0 66 4 bytes of preamble<br />
04 1 additional byte for preample<br />
<br />
BINARY binary data field of 1 byte<br />
1<br />
<br />
1 a variable field (data) not used<br />
FD 1 byte postamble<br />
<br />
<strong>Fldigi</strong>Contents Rig Xml Howto<br />
<strong>Fldigi</strong> rigcat will check for both the preample and postamble to insure that a valid reply has been sent by the<br />
transceiver.<br />
Rig Xml Howto 117
Google Map<br />
snip ------------ copy the following to ~/.fldigi/scripts/map.pl<br />
#!/usr/bin/perl<br />
# Author: Stelios Bounanos, M0GLD<br />
# Date: 20080625<br />
use warnings;<br />
use strict;<br />
use Getopt::Std;<br />
our $VERSION = "0.3141";<br />
our %opts = ( "e" => 0, "m" => 1, "z" => 4);<br />
cmdline();<br />
open(STDOUT, '>', "/dev/null");<br />
my $loc = exists($opts{'l'}) ? $opts{'l'} : $ENV{'FLDIGI_LOG_LOCATOR'};<br />
die "Invalid locator\n" unless ((defined($loc) && length($loc) =~ /[2-6]/));<br />
my $label = exists($opts{'t'}) ? $opts{'t'} : $ENV{'FLDIGI_LOG_CALL'};<br />
$label = $loc if (!defined($label) || $label eq "");<br />
my ($lon, $lat) = map { sprintf("%+.6f", $_) } mtoll($loc);<br />
if ($opts{'m'}) {<br />
my $url = "http://maps.google.com/maps?q=${lat},${lon}(${label})&t=p&z=$opts{'z'}";<br />
# $url =~ s/([(),])/sprintf("%%%02X", ord($1))/ge; # encode some chars<br />
exec("xdg-open", $url);<br />
die "Could not exec xdg-open: $!\n";<br />
}<br />
exit(0) unless ($opts{'e'});<br />
my $kml = (exists($ENV{'TMPDIR'}) ? $ENV{'TMPDIR'} : "/tmp") .<br />
"/" . $loc . ".kml";<br />
open(KML, '>', $kml) or die "Could not write $kml: $!\n";<br />
print KML
EOF<br />
;<br />
close(KML);<br />
########################################################################<br />
sub cmdline<br />
{<br />
$Getopt::Std::STANDARD_HELP_VERSION = 1;<br />
my $old_warn_handler = $SIG{__WARN__};<br />
$SIG{__WARN__} = sub { die $_[0]; };<br />
getopts('t:l:mz:e', \%opts);<br />
$SIG{__WARN__} = $old_warn_handler;<br />
}<br />
# Convert a 2, 4, or 6-character Maidenhead locator string<br />
# to decimal degrees. Return a (longitude, latitude) pair.<br />
sub mtoll<br />
{<br />
my $len = length($_[0]);<br />
$_[0] .= join("", ("A", "A", "0", "0", "A", "A")[$len .. 5]) if ($len < 6);<br />
$_[0] = uc($_[0]);<br />
die "Invalid locator\n" unless ($_[0] =~ /[A-R]{2}\d{2}[A-X]{2}/);<br />
}<br />
my @digits = split(//, $_[0]);<br />
my ($lon, $lat) = (-180, -90);<br />
$lon += (ord($digits[0]) - ord('A')) * 20 +<br />
(ord($digits[2]) - ord('0')) * 2 +<br />
(ord($digits[4]) - ord('A') + 0.5) / 12;<br />
$lat += (ord($digits[1]) - ord('A')) * 10 +<br />
(ord($digits[3]) - ord('0')) +<br />
(ord($digits[5]) - ord('A') + 0.5) / 24;<br />
return ($lon, $lat);<br />
sub HELP_MESSAGE<br />
{<br />
The default is \$FLDIGI_LOG_LOCATOR<br />
-m Show in Google Maps (default)<br />
-z Zoom level (Google Maps only)<br />
-e Write a Google Earth kml file in<br />
\$TMPDIR/LOC.kml<br />
EOF<br />
;<br />
}<br />
snip------------------------------------------------<br />
<strong>Fldigi</strong>Contents Google Map<br />
Google Map 120
parseUALR<br />
A simple parser to create a formated console output for fldigi's macro:<br />
snip------------------------------------------<br />
#include <br />
#include <br />
#include <br />
#include <br />
#include <br />
#include <br />
#include <br />
using namespace std;<br />
using std::cout;<br />
using std::cin;<br />
int main(int argc, char *argv[])<br />
{<br />
size_t pos = 0, pos2 = 0, pos3 = 0, pos4 = 0, pos5 = 0;<br />
string commandline = "";<br />
string name = "";<br />
string qth = "";<br />
string answer = "";<br />
char c = cin.get();<br />
while (!cin.eof()) {<br />
commandline += c;<br />
c = cin.get();<br />
}<br />
if (commandline.find("No match found") != string::npos)<br />
goto noresponse;<br />
pos = commandline.find(", ");<br />
if (pos == string::npos)<br />
goto noresponse;<br />
pos += 2;<br />
pos2 = commandline.find("\n", pos);<br />
if (pos2 == string::npos)<br />
goto noresponse;<br />
name = commandline.substr(pos, pos2 - pos);<br />
pos3 = name.find(32);<br />
if (pos3 != string::npos)<br />
name = name.substr(0, pos3);<br />
<strong>Fldigi</strong>Contents parseUALR<br />
parseUALR 121
for (size_t i = 1; i < name.length(); i++) name[i] = tolower(name[i]);<br />
answer = "$NAME";<br />
answer.append(name);<br />
pos4 = commandline.find(", ", pos2);<br />
pos4 = commandline.rfind( "\n", pos4);<br />
pos4 += 1;<br />
pos5 = commandline.find("\n", pos4);<br />
qth = commandline.substr(pos4, pos5 - pos4);<br />
answer.append("$QTH");<br />
answer.append(qth);<br />
cout
snip ------------ copy the following to ~/.fldigi/scripts/ualr-telnet.pl<br />
#!/usr/bin/perl<br />
# Author: Stelios Bounanos, M0GLD<br />
# Date: 20090103<br />
#<br />
# ualr-telnet is free software; you can redistribute it and/or modify<br />
# it under the terms of the GNU General Public License as published by<br />
# the Free Software Foundation; either version 3 of the License, or<br />
# (at your option) any later version.<br />
#<br />
# ualr-telnetl is distributed in the hope that it will be useful,<br />
# but WITHOUT ANY WARRANTY; without even the implied warranty of<br />
# MERCHANTABILITY or FITNESS FOR A PARTICULAR PURPOSE. See the<br />
# GNU General Public License for more details.<br />
#<br />
# You should have received a copy of the GNU General Public License<br />
# along with this program. If not, see .<br />
# ----------------------------------------------------------------------------<br />
use strict;<br />
use warnings;<br />
die "Usage: $0 CALLSIGN\n" unless (@ARGV == 1);<br />
use Net::Telnet ();<br />
sub error { print "\$NAME?\$QTH?\n"; exit(1); }<br />
my $t = new Net::Telnet( Host => "callsign.ualr.edu", Port => 2000, Timeout => 10,<br />
errmode => \&error );<br />
$t->open();<br />
$t->waitfor('/LOOKUP>.*$/');<br />
$t->print($ARGV[0]);<br />
$_ = $t->getline(); # blank line<br />
$_ = $t->getline(); # call<br />
error() if (m/No match found/);<br />
$_ = $t->getline(); # name<br />
chomp; s/.+,\s+//; s/\s.+$//;<br />
print "\$NAME$_";<br />
$_ = $t->getline(); # addr<br />
$_ = $t->getline(); # qth<br />
chomp;<br />
$_ =~ ",";<br />
$_ = $`;<br />
print "\$QTH$_\n";<br />
$t->waitfor('/LOOKUP>.*$/');<br />
<strong>Fldigi</strong>Contents parseUALR<br />
parseUALR 123
$t->print("bye");<br />
snip------------------------------------------------<br />
<strong>Fldigi</strong>Contents parseUALR<br />
parseUALR 124
RST & RSQ Reporting<br />
RST<br />
Is the traditional Readability, Strength, Tone reporting system used for CW operations for nearly as long as<br />
amateurs have enjoyed the airwaves.<br />
READABILITY<br />
1. Unreadable<br />
2. Barely readable, occasional words distinguishable<br />
3. Readable with considerable difficulty<br />
4. Readable with practically no difficulty<br />
5. Perfectly readable (that is 100% print in todays<br />
jargon)<br />
SIGNAL STRENGTH<br />
TONE<br />
RSQ<br />
1. Faint signals, barely perceptible<br />
2. Very weak signals<br />
3. Weak signals<br />
4. Fair signals<br />
5. Fairly good signals<br />
6. Good signals<br />
7. Moderately strong signals<br />
8. Strong signals<br />
9. Extremely strong signals<br />
1. Sixty cicle ac or less, very rough and broad<br />
2. Very rough ac, very harsh and broad<br />
3. Rough ac tone, rectified but not filtered<br />
4. Rough note, some trace of filtering<br />
5. Filtered rectified ac, but strongly ripple modulated<br />
6. Filtered tone, definite trace of ripple modulation<br />
7. Near pure tone, trace of ripple modulation<br />
8. Near perfect tone, slight trac of modulation<br />
9. Perfect tone, no trace of ripple, or modulation of<br />
any kind<br />
Give the report as RSQ for digiital modes, but especially BPSK and QPSK; see:<br />
http://www.psb-info.net/RSQ-Reporting-Table.html<br />
<strong>Fldigi</strong>Contents RST & RSQ Reporting<br />
RST & RSQ Reporting 125
READABILITY<br />
1. 0% undecipherable<br />
2. 20% occassional words distinguishable<br />
3. 40% consideralbe difficulty, many missed characters<br />
4. 80% practically no difficyulty, occasional missed characters<br />
5. 95%+ perfectly readable<br />
STRENGTH<br />
1. Barely perciptible trace<br />
2. Weak trace<br />
3. Moderate trace<br />
4. Strong trace<br />
5. Very strong trace<br />
QUALITY<br />
1. Splatter over much of the visible waterfall<br />
3. Multiple visible pairs<br />
5. One easily visible pair<br />
7. One barely visible pair<br />
9. Clean signal - no visible unwanted sidebar pairs<br />
<strong>Fldigi</strong>Contents RST & RSQ Reporting<br />
RSQ 126
Build Info<br />
The following is obtained by executing "fldigi --version"<br />
<strong>Fldigi</strong>Contents Build Info<br />
fldigi 3.10<br />
Copyright (c) 2008 Dave Freese, Stelios Bounanos, Leigh Klotz, and others<br />
License GPLv2+: GNU GPL version 2 or later <br />
This is free software: you are free to change and redistribute it.<br />
There is NO WARRANTY, to the extent permitted by law.<br />
System: Linux dell 2.6.24-22-generic #1 SMP Mon Nov 24 18:32:42 UTC 2008 i686<br />
Built on Tue Dec 30 15:29:17 CST 2008 by dave@dell with:<br />
gcc version 4.2.4 (Ubuntu 4.2.4-1ubuntu3)<br />
CFLAGS=-DLOCALEDIR="/usr/local/share/locale" -I. -I./include -I./irrxml -I./fileselector -DNDEBUG<br />
-pthread -I/usr/local/include -I/usr/local/include -I/usr/include/freetype2 -D_THREAD_SAFE -D_REENTRANT<br />
-I/usr/local/include -D_REENTRANT -I/usr/local/include -I/usr/include -pipe -Wall -fexceptions -O2<br />
-ffast-math -finline-functions -g -O2<br />
LDFLAGS=-L/usr/local/lib -lportaudio -lm -lpthread /usr/local/lib/libfltk_images.a -lpng -lz -ljpeg<br />
/usr/local/lib/libfltk.a -lXft -lpthread -ldl -lm -lXext -lX11 -L/usr/local/lib -lsndfile -lsamplerate -lpulse-simple<br />
-lpulse -L/usr/local/lib -lhamlib -lm -Wl,-Bstatic -L/usr/lib -lxmlrpc_server_abyss++ -lxmlrpc_server++<br />
-lxmlrpc_server_abyss -lxmlrpc_server -lxmlrpc_abyss -lpthread -lxmlrpc++ -lxmlrpc -lxmlrpc_util<br />
-lxmlrpc_xmlparse -lxmlrpc_xmltok -Wl,-Bdynamic -ldl -lrt<br />
Libraries:<br />
FLTK 1.1.9<br />
libsamplerate-0.1.2<br />
Hamlib version 1.2.7.1<br />
PortAudio V19-devel 1899<br />
libsndfile-1.0.17<br />
Build Info 127
Installing from Source<br />
You should only be building fldigi locally if the binary distribution does not work on your Linux distribution.<br />
Unless you are modifying the code or need to compile for debugging you will not have any additional<br />
functionality over the binary files. The source code for fldigi is very large and has a number of dependencies that<br />
must be satisfied before a successful compile. If you are not familiar with compiling and linking source code you<br />
should probably practice on a simpler package before treading these waters.<br />
To compile fldigi you will need:<br />
• A recent C++ compiler. The GNU C++ compilers in the 4.x series are known to work. Building with<br />
g++ 3.x requires the development headers for the Boost C++ library.<br />
• Version 1.1.x of the Fast Light Tool Kit (FLTK), with its development library and headers. Versions<br />
1.1.7 to 1.1.9 are known to work. FLTK's multi-threading support is required.<br />
• The samplerate (a.k.a. secret rabbit code) library.<br />
• The Independent JPEG Group's JPEG library, or the PNG library.<br />
You should also install the libraries and headers for PortAudio, the Portable audio I/O library.<br />
Additional features are enabled if the corresponding libraries are present on your system:<br />
• Support for rig control via hamlib is enabled if the hamlib development files are installed.<br />
• Audio file generation, capture and playback support is enabled if `configure' can find the sndfile library.<br />
• The PulseAudio sound backend is compiled if the development files for libpulse-simple, the PulseAudio<br />
simple API library, are present.<br />
• The embedded XML-RPC web server is enabled if `configure' can find the C++ bindings for the<br />
libxmlrpc-c3 library.<br />
Once you have installed the required packages, the following commands should be sufficient to compile fldigi and<br />
install it under /usr/local:<br />
./configure<br />
make<br />
make install (you may need superuser privileges for installation)<br />
The `install' target installs the executable, an icon, and a .desktop file. After installation, an fldigi launcher should<br />
appear somewhere in<br />
your applications menu.<br />
Mac OS X installation notes<br />
Mac OS X support was added in version 2.10. To run fldigi on OS X, you will need to create an app bundle. For<br />
this purpose, the Makefile has an `appbundle' target that can be used instead of `install':<br />
make appbundle<br />
<strong>Fldigi</strong>Contents Installing from Source<br />
Installing from Source 128
This target will generate two bundles inside the build directory (by default src/):<br />
1. mac-bundle/fldigi.app, which only contains the bare minimum that is required to run fldigi on the build<br />
system<br />
2. mac-libs-bundle/fldigi.app, which also includes copies of non-system libraries (such as PortAudio and<br />
FLTK) that the binary links to<br />
The configure script has some support for building universal x86/ppc binaries. Pass the following additional<br />
arguments to enable it:<br />
--enable-mac-universal --disable-dependency-tracking<br />
<strong>Fldigi</strong> has not been well tested on OS X. Any feedback, suggestions, or patches will be very welcome.<br />
Windows installation notes<br />
As of version 3.0, fldigi supports win32 systems via the Cygwin POSIX environment. To install cygwin, use the<br />
following installer link:<br />
http://www.cygwin.com/setup.exe<br />
Refer to the list of library requirements and install the corresponding cygwin packages. You will need at least the<br />
following:<br />
1. Base: (all base packages)<br />
2. Devel: binutils boost-devel fltk-devel gcc-g++ make pkg-config<br />
3. Graphics: libjpeg-devel libpng12-devel<br />
4. Libs: zlib<br />
Use the default "Curr" option for the package selection.<br />
PortAudio and libsamplerate are not available from Cygwin and must be compiled from source. If you wish to<br />
build easily redistributable binaries, configure these libraries for static linking, e.g. with<br />
`--enable-static --disable-shared'.<br />
After you have installed them in the desired location, remember to tell `pkg-config' how to find them, e.g. with<br />
export PKG_SEARCH_PATH=/usr/local/lib/pkgconfig<br />
To configure fldigi itself for static linking, use the following command:<br />
./configure --enable-static LDFLAGS=-static<br />
<strong>Fldigi</strong>Contents Installing from Source<br />
This will produce a binary that only depends on the cygwin library, which can be found in /bin/cygwin1.dll.<br />
Mac OS X installation notes 129
At the time of writing, fldigi has been built with the latest release of Cygwin, version 1.5.25. The binary runs on<br />
Windows 2000 and XP, however, a newer version of the cygwin1.dll library may be required for Vista. Version<br />
20080530 of the 1.7 pre-release snapshot has been tested and is known to work:<br />
http://cygwin.com/snapshots/<br />
Free Software Foundation Generic Installation Instructions.<br />
Contents<br />
<strong>Fldigi</strong>Contents Installing from Source<br />
Windows installation notes 130