Die folgenden Seiten sind nur für Complete Classical ... - Best Service
Die folgenden Seiten sind nur für Complete Classical ... - Best Service
Die folgenden Seiten sind nur für Complete Classical ... - Best Service

You also want an ePaper? Increase the reach of your titles
YUMPU automatically turns print PDFs into web optimized ePapers that Google loves.
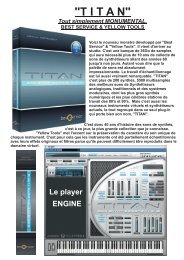
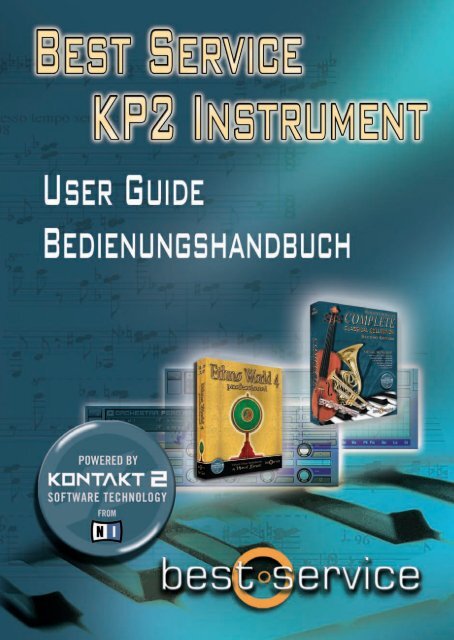
User Guide English<br />
<strong>Best</strong><strong>Service</strong> Product Installation page 03-05<br />
<strong>Best</strong> <strong>Service</strong> Player page 06-18<br />
CCC Instruments page 20-25<br />
Bedienungsanleitung Deutsch<br />
<strong>Best</strong><strong>Service</strong> Produkt Installation Seite 26-28<br />
<strong>Best</strong> <strong>Service</strong> Player Seite 29-41<br />
CCC Instrumente Seite 42-48<br />
More <strong>Best</strong> <strong>Service</strong> Products page 49-51<br />
Weiter Produkte von <strong>Best</strong> <strong>Service</strong> Seite 49-51
INSTALLATION:<br />
(If you want to read more about installation, plug-in formats and hosts, etc; please refer to the<br />
‘Kontakt Player 2 Manual’ on the installer disc.)<br />
A. INSTALLATION UNDER MAC OS X:<br />
If this <strong>Best</strong><strong>Service</strong> product is your fi rst KONTAKT PLAYER 2 (KP2) product, then the Player will be<br />
installed with the library. If you already own a KP 2 library, the Player installation will be skipped and<br />
just the library will be installed.<br />
Insert the <strong>Best</strong><strong>Service</strong> Player Install DVD into the DVD drive of your computer.<br />
Double-click the installation program INSTALL <strong>Best</strong><strong>Service</strong> Product to start it.<br />
The start screen appears fi rst. After clicking Continue and confi rming the License Agreement,<br />
a window opens where you can select the Installation Destination of the K2 Player, which will<br />
usually be the application folder on your system disk.<br />
Next is the Installation Type: You can choose ‘Easy Install’ if you want to install all formats<br />
(Standalone, AU, VST, RTAS) or ‘Custom Install’ if you want to (re)install just one or more<br />
items without installing everything again. Or if you know that you do not need certain items<br />
to be installed (like an RTAS installation, if you don’t use Protools). In this case, leave the<br />
necessary items unchecked.<br />
After choosing ‘install’ you will be asked to enter your name and serial number.<br />
After clicking ‘Continue’ you have will be asked to choose a destination folder for the Library,<br />
AFTERWARDS YOU HAVE TO DRAG THE REMAINING ‘NKX’-FILES FROM THE<br />
OTHER DVDS MANUALLY INTO THE LIBRARY FOLDER.<br />
The Library Path could look like this:.<br />
Finally ally you will be asked to start the NI <strong>Service</strong> Center for Authorizing your <strong>Best</strong><strong>Service</strong> Library Li<br />
-3-
C. AUTHORIZING THE LIBRARY<br />
After installing the library, it will run in demo mode (also called the grace period) for 30 days.<br />
When you launch KONTAKT PLAYER 2, the Browser will show a little caution icon to the left of the<br />
library title. Yellow means the library is running in demo mode. After a library has been properly registered,<br />
the caution icon disappears entirely. Red means the demo period has expired and the library can<br />
no longer be used until it has been registered.<br />
To authorize the library, you should use the Native Instruments <strong>Service</strong> Centre application, which<br />
was installed along with the KONTAKT PLAYER 2 software. <strong>Service</strong> Centre starts after initial use of<br />
<strong>Best</strong><strong>Service</strong> Product, you can also activate it through the Info box registration tab. For more information<br />
on how to use <strong>Service</strong> Centre please see the accompanying documents in the <strong>Service</strong> Centre<br />
application folder.<br />
D. FORMAT<br />
This <strong>Best</strong><strong>Service</strong> Product may be used as a standalone application and as a plug-in within a host<br />
sequencer.<br />
Standalone operation is ideal for situations in which this <strong>Best</strong><strong>Service</strong> Product is the only audio software<br />
you need to run on the computer, for example-live or if you just want to play.<br />
To use the <strong>Best</strong><strong>Service</strong> Player as a standalone application, go to the Program Files or Applications folder<br />
and launch Kontakt Player 2. When you do this, KP2 communicates directly with your computer‘s<br />
audio and MIDI hardware interfaces, therefore you have to go to the SETUP Menu and choose your<br />
audio and midi hardware.<br />
Used as a plug-in, KONTAKT PLAYER 2 works as a ‘module’ that can be used within a host sequencer.<br />
KP2 is available for use in VST, DXi and RTAS formats on the PC and in VST, AudioUnit (AU) and<br />
RTAS formats on the Macintosh. It depends on your sequencer, how you load the K2 Player. (take a<br />
look at the ‘Kontakt Player 2 Manual’ in the document folder)<br />
When the <strong>Best</strong><strong>Service</strong> Player is used as a plug-in in any of these formats, it‘s not necessary to set up<br />
Audio/MIDI settings. KP2 operates within the host sequencer, automatically receiving the MIDI that<br />
the host sequencer sends to it and sending back its audio output to the host sequencer. Because of this,<br />
settings regarding audio and MIDI interfaces as well as buffer sizes (latency), are governed by the host<br />
sequencer, not by KP2.<br />
-4-
INSTALLATION:<br />
(If you want to read more about installation, plug-in formats and hosts, etc; please refer to the<br />
‘Kontakt Player 2 Manual’ on the installer disc.)<br />
A. INSTALLATION UNDER MAC OS X:<br />
If this <strong>Best</strong><strong>Service</strong> product is your fi rst KONTAKT PLAYER 2 (KP2) product, then the Player will be<br />
installed with the library. If you already own a KP 2 library, the Player installation will be skipped and<br />
just the library will be installed.<br />
Insert the <strong>Best</strong><strong>Service</strong> Player Install DVD into the DVD drive of your computer.<br />
Double-click the installation program INSTALL <strong>Best</strong><strong>Service</strong> Product to start it.<br />
The start screen appears fi rst. After clicking Continue and confi rming the License Agreement,<br />
a window opens where you can select the Installation Destination of the K2 Player, which will<br />
usually be the application folder on your system disk.<br />
Next is the Installation Type: You can choose ‘Easy Install’ if you want to install all formats<br />
(Standalone, AU, VST, RTAS) or ‘Custom Install’ if you want to (re)install just one or more<br />
items without installing everything again. Or if you know that you do not need certain items<br />
to be installed (like an RTAS installation, if you don’t use Protools). In this case, leave the<br />
necessary items unchecked.<br />
After choosing ‘install’ you will be asked to enter your name and serial number.<br />
After clicking ‘Continue’ you have will be asked to choose a destination folder for the Library,<br />
AFTERWARDS YOU HAVE TO DRAG THE REMAINING ‘NKX’-FILES FROM THE<br />
OTHER DVDS MANUALLY INTO THE LIBRARY FOLDER.<br />
The Library Path could look like this:.<br />
Finally ally you will be asked to start the NI <strong>Service</strong> Center for Authorizing your <strong>Best</strong><strong>Service</strong> Library Li<br />
-5-
<strong>Best</strong> <strong>Service</strong> Germany <strong>Best</strong><strong>Service</strong>Player<br />
Thanks to the all-new Kontakt 2 engine,<br />
the <strong>Best</strong><strong>Service</strong>Player has amazing new<br />
possibilities.<br />
Almost every important function can be<br />
accessed through the script engine, and every<br />
important control can be activated and remote-controlled.<br />
<strong>Best</strong><strong>Service</strong>Player´s engine is built like a<br />
semi modular synthesizer, and gives you the<br />
possibility to manipulate sounds drastically.<br />
All common effects such as Reverb, Chorus,<br />
Phaser, Compressor, Filter and EQ are also<br />
included.<br />
Especially for Oriental music (but also for<br />
othe musical styles) a microtuning function<br />
was implemented.<br />
It allows you to create every tuning you can<br />
think of.<br />
The dual-harmonize-function enables you to<br />
create the popular octaver effect or any other<br />
harmonization effect.<br />
Take for example the AO Violins Dry. ‘Dry’<br />
versions are the untreated versions of<br />
<strong>Complete</strong> <strong>Classical</strong> Collection instruments.<br />
(Also possible in your <strong>Best</strong><strong>Service</strong> instrument<br />
like Ethno World 4 pro or in future<br />
releases)<br />
All effects are already plugged in, but not<br />
activated. You hear the instrument in its basic<br />
form, no sample is manipulated whatsoever.<br />
Only the response to velocity can be edited<br />
-6-<br />
Overview<br />
via the [Volume ] section. As in a synthesizer,<br />
an ADSR envelope is available for<br />
that purpose.<br />
Now, if you don’t know exactly what that<br />
is,don’t worry – we will explain it in detail<br />
later in the chapter [Volume ].<br />
As soon as you load a preset – an instrument<br />
in that case - you will see Kontakt’s performance<br />
view.<br />
Depending on the instrument you load you<br />
will see a corresponding instrument category<br />
icon.<br />
Every instrument of the <strong>Best</strong><strong>Service</strong>Player<br />
employs the same performance view. It is<br />
only the instrument category icon (a Violin in<br />
our example) that changes.<br />
Many instruments are internally divided into<br />
separate groups.Each playing style, e.g. staccato<br />
(short notes) or sustained, is in its own<br />
Kontakt group, and can be activated via a<br />
keyswitch.<br />
Hence, <strong>Best</strong><strong>Service</strong>Player gives you the<br />
possibility to play the instrument with your<br />
right hand, and switch between playing styles<br />
using your left hand. Obviously, the keyswitches<br />
can also be triggered via a sequencer.<br />
Group effects can be tweaked and saved for<br />
each keyswitch separately. This function will<br />
come in very<br />
handy if you, for example, want to use a filter<br />
on a specific playing style, but don’t want<br />
to affect the other groups. Or if you just<br />
want to adjust the ADSR envelope only for<br />
one single playing style.<br />
Don’t get confused by fancy words such as<br />
keyswitch, ADSR or LFO. In this manual<br />
we will explain each term in detail.
<strong>Best</strong> <strong>Service</strong> Germany <strong>Best</strong><strong>Service</strong>Player<br />
Loading an instrument in the new designed<br />
<strong>Best</strong><strong>Service</strong>Player is very easy.<br />
In the ‘Browser’ on the right you can see<br />
the <strong>Complete</strong> <strong>Classical</strong> Collection logo.<br />
(or the logo of another <strong>Best</strong><strong>Service</strong>Player<br />
-instrument).<br />
Loading an instrument<br />
Overview<br />
In case you don’t actually see the browser on the left, please press the ‘Browser’ button and<br />
it will appear.<br />
Then click on the little arrow next to ‘Instruments’.<br />
In our example we load a version of the Cello. As you can see there are a lot of menus. Use<br />
them to browse through the subfolders and find the instrument you want to load.<br />
-7-
<strong>Best</strong> <strong>Service</strong> Germany Edit All Button<br />
Good Button - Bad Button<br />
Overview<br />
A whole page for one knob? Yes, it’s necessary. This button is as<br />
powerful as it is dangerous. Not for your life or your studio – but<br />
for the settings of your instruments.<br />
If the Edit All button is enabled, all changes you<br />
make are applied to all groups, keyswitches or<br />
loops that are part of the instrument. That includes filter, envelope<br />
and tune settings. No matter what group you have been working<br />
on before, the settings are applied to all parts of the instrument.<br />
If the Edit All button is disabled, the changes are<br />
only applied to the currently selected group,<br />
loop or phrase (you can see which group is active in the keyswitch-window).<br />
Effects from the effects section such as reverb, echo or compressor<br />
are always affecting the whole instrument and are not affected<br />
by the Edit All button.<br />
And if you really get stuck, you can always reload your instrument.<br />
You can also use the RESET – GROUPS and RESET –<br />
EFFECTS dropdown menus to recall the initial settings.<br />
-8-
<strong>Best</strong> <strong>Service</strong> Germany Main Groups<br />
Let’s get an overview of the <strong>Best</strong><strong>Service</strong><br />
Player performance view, and define some<br />
terms that will re-appear throughout the<br />
manual.<br />
In order to keep it simple, we will look<br />
at the functions in the order they appear on<br />
the screen.<br />
The Keyswitch Window<br />
With keyswitches you can toggle between<br />
different playing styles of your instrument<br />
via keys from your midi keyboard.<br />
The keyswitch window always displays the<br />
currently active playing style.<br />
GROUP EFFECTS<br />
In this section you can adjust volume,<br />
tuning, filter and envelopes for each playing<br />
style.<br />
You can find everything to manipulate the<br />
tone and response of your instrument.<br />
MICROTUNING<br />
This section enables to you to fine tune<br />
individual keys of an octave.<br />
You can find tunings from different epochs<br />
and can even create your own tunings!<br />
-9-<br />
PERFORMANCE<br />
This section contains specific playing options<br />
that can alter your performance:<br />
legato mode, humanize and harmonize<br />
functions.<br />
EFFECTS<br />
This is the section where you can enable<br />
and adjust effects for the whole instrument.<br />
The effects are Reverb, Delay, Phaser,<br />
Equalizer, Compressor and Saturation.<br />
AUTOMATION<br />
Overview<br />
In this section you can find everything you<br />
need for automation via external midi controllers<br />
such as modulation wheel, knobs<br />
and faders.
<strong>Best</strong> <strong>Service</strong> Germany Group Effects<br />
Group Effects<br />
This page gives you easy access to the most<br />
important parameters of your instrument.<br />
Tune<br />
Adjust the tuning for either the whole<br />
instrument, or for separate keyswitches.<br />
Pan<br />
Adjusts the position of your instrument – or<br />
single playing styles – in the stereo field.<br />
Volume<br />
Adjusts the volume of your instrument, or<br />
of single playing styles.<br />
-10-<br />
Overview<br />
LP - ON/OFF and HP - ON/OFF<br />
Enables the Low and the High-Pass filter.<br />
Cutoff<br />
Adjusts the cutoff frequency. Starting from<br />
this frequency the filter will cut off the high<br />
frequencies.<br />
Resonance<br />
Boosts the frequencies around the cutoff<br />
frequency.<br />
Reset Group(s)<br />
Initializes the settings of<br />
all groups (playing styles).<br />
Please note: Usually it’s a better idea to reload<br />
the original instrument.
<strong>Best</strong> <strong>Service</strong> Germany Attack Effect<br />
Attack Effect<br />
Routes a staccato sample<br />
to any keyswitch to<br />
accentuate it. That gives you a harder attack.<br />
If you don´t see it, this feature is not implemented<br />
in your <strong>Best</strong><strong>Service</strong>Player and not<br />
available for your instrument.<br />
Volume<br />
Adjusts the volume of the attack sample.<br />
VeloVol<br />
‘Velocity Volume’ Defines how much<br />
impact velocity has on volume.<br />
VeloAtt<br />
‘Velocity Attack’ Together with the Attack<br />
knob, this setting adjusts the transient<br />
response of the instrument.<br />
Tune Attack<br />
Adjusts the tuning of the Attack playing<br />
style.<br />
Additional Attack - Attack<br />
Determines how fast the Attack effect reaches<br />
its maximum<br />
volume after you hit<br />
the key.<br />
-11-<br />
Overview<br />
Additional Attack - Decay<br />
Determines how fast<br />
the Attack effect’s<br />
volume drops to<br />
sustain level.<br />
Additional Attack - Sustain<br />
Adjusts the volume<br />
level the sample<br />
should reach after the<br />
decay phase.<br />
Additional Attack - Release<br />
Sets the time the<br />
Attack-sample continues<br />
to sound after<br />
you release the key.<br />
Equalizer<br />
You can also find an equalizer on the attack<br />
page. You can use it manipulate the sound<br />
of the attack sample.<br />
Equalizer Frequenz<br />
Sets the cutoff frequency<br />
of the EQ.<br />
Equalizer Bandwidth<br />
Adjusts the bandwidth<br />
of the EQ.<br />
Equalizer - Gain<br />
Use this to boost or cut<br />
frequencies around the<br />
set EQ frequency.
<strong>Best</strong> <strong>Service</strong> Germany Volume <br />
Volume <br />
In the Volume <br />
section you will find<br />
everything you need for adjusting the volume,<br />
and setting the response behavior of<br />
your instrument.<br />
Volume<br />
Velocity<br />
VelocityAttack<br />
Controls the volume<br />
of the whole instrument<br />
or the currently<br />
activated keyswitch.<br />
Adjusts the amount<br />
that the velocity<br />
changes the volume.<br />
Together with the<br />
Attack knob, this setting<br />
adjusts the transient<br />
response of the instrument.<br />
ADSR - Attack<br />
the key.<br />
ADSR - Decay<br />
Determines how fast<br />
the Attack effect reaches<br />
its maximum<br />
volume after you hit<br />
Determines how fast<br />
the Attack effect’s<br />
volume drops to<br />
sustain level.<br />
-12-<br />
ADSR - Sustain<br />
ADSR - Release<br />
Overview<br />
Adjusts the volume<br />
level the sample<br />
should reach after the<br />
decay phase.<br />
Sets the time the<br />
Attack-sample continues<br />
to sound after<br />
you release the key.<br />
LFO - Low Frequenz Oscillator<br />
Enables the Low<br />
Frequency Oscillator.<br />
On the Volume page, it is used to<br />
create a tremolo effect.<br />
LFO - Intensität<br />
LFO - Frequenz<br />
Sets the volume<br />
range of the LFO.<br />
Controls the LFO frequency,<br />
and therefore<br />
the speed of the tremolo<br />
effect.
<strong>Best</strong> <strong>Service</strong> Germany Tune & Effects<br />
Tune & Effects<br />
Tune – here you can<br />
adjust the instrument’s<br />
pitch. Instruments that contain<br />
loops or orchestra phrases employ additional<br />
Speed and Sample Start fields.<br />
Speed<br />
Controls the speed of<br />
the currently selected<br />
orchestral phrase.<br />
Depending on the<br />
source material, this can sound very good,<br />
but sometimes not so good.<br />
If you are not satisfied with the results, we<br />
recommend trying other time stretch algorithms<br />
such as the one in Cubase or<br />
Melodyne.<br />
Panorama<br />
field.<br />
Sample Start Offset<br />
Adjusts the position<br />
of the currently selected<br />
loop in the stereo<br />
By using this control<br />
you can determine the<br />
starting point of the<br />
phrase. Any point within the phrase can be<br />
chosen.<br />
-13-<br />
MaxSt - Maximaler Start Offset<br />
Overview<br />
In order to save CPU power, you can limit<br />
the maximum sample start offset.<br />
Tune<br />
Tune or detune individual phrases or keyswitches.<br />
Pitchbend - Range<br />
Adjusts the range of the PitchBend controller.<br />
LFO - Low Frequenz Oscillator<br />
LFO - Intensität<br />
LFO - Frequenz<br />
Enables the Low<br />
Frequency Oscillator.<br />
On the tune page, the LFO<br />
is used to create a vibrato<br />
effect.<br />
Sets the volume<br />
range of the LFO.<br />
Controls the LFO frequency,<br />
and the speed<br />
of the vibrato effect<br />
accordingly.
<strong>Best</strong> <strong>Service</strong> Germany Low/HighPass<br />
LowPass / HighPass <br />
By using the Low Pass / High Pass filter<br />
you can manipulate your instrument’s<br />
sound drastically.<br />
Low Pass cuts all the high frequencies,<br />
whereas High Pass cuts the low frequencies.<br />
Cutoff<br />
This knob sets the<br />
cutoff frequency. It<br />
determines the point<br />
from which either the<br />
high frequencies or the low frequencies get<br />
cut.<br />
Resonance<br />
Boosts the frequencies<br />
around the cutoff<br />
frequency.<br />
LP/HP - ADSR - Intensität<br />
Determines how<br />
much the ADSR<br />
curve affects the<br />
Low/High Pass Filter.<br />
LP/HP - ADSR - Attack<br />
Determines how long<br />
it will take the filter to<br />
reach the cutoff frequency<br />
after you hit<br />
the key.<br />
-14-<br />
Overview<br />
LP/HP - ADSR - Decay<br />
Sets the time the filter<br />
will take to drop<br />
to sustain level.<br />
LP/HP - ADSR - Sustain<br />
Sets the level the filter<br />
reaches after the<br />
decay phase.<br />
LP/HP - ADSR - Release<br />
Adjusts the time the<br />
filter takes to stop<br />
affecting the sound<br />
after you have<br />
released the key.<br />
LFO - Low Frequenz Oscillator<br />
LFO - Intensität<br />
LFO - Frequenz<br />
Enables the LFO.<br />
In this section it is used to<br />
modulate the cutoff frequency.<br />
Controls the intensity<br />
of the filter modulation.<br />
Sets the frequency of<br />
the LFO, and therefore<br />
the speed of the filter<br />
modulation.
<strong>Best</strong> <strong>Service</strong> Germany Microtuning<br />
Micrutuning<br />
Here you can access<br />
all the tuning functions<br />
that are available in Kontakt 2.<br />
Fine-tune single notes within an octave or<br />
detune the whole instrument – everything is<br />
possible.<br />
Select Key Menu<br />
Here you can select a<br />
key for your instrument.<br />
Here you have the possibility to fine-tune<br />
the tempered tuning in cents. +/- 200<br />
-15-<br />
Select Tuning Menu<br />
Overview<br />
In this menu you can<br />
choose between different<br />
tunings.<br />
You can also load<br />
your own tunings.<br />
They are called User 1<br />
to User 5.<br />
Save Tuning<br />
In this menu you can<br />
save your own tunings.<br />
Here you can draw the fine-tuning with<br />
your mouse.
<strong>Best</strong> <strong>Service</strong> Germany Performance<br />
Performance<br />
The performance page<br />
offers various options<br />
concerning the triggering and playback of<br />
the samples. You can decide if you want to<br />
trigger the samples via your keyboard or a<br />
MIDI controller. Furthermore, this page<br />
offers performance enhancing effects such<br />
as Legato and Glide, Humanize and the<br />
Harmonize function.<br />
Start Note<br />
The Start Note<br />
function gives you<br />
flexibility concerning<br />
the way your samples<br />
get triggered. In 98%<br />
of the cases you’ll probably want to trigger<br />
them by using your hand and a keyboard.<br />
However, <strong>Best</strong><strong>Service</strong>Player is very flexible,<br />
and gives you the possibility to use any<br />
controller you want for triggering samples.<br />
A common trigger other than a keyboard<br />
would be a breath controller.<br />
Controller Nummer<br />
If you choose ‘Controller’<br />
in the Start Note options, you can use this<br />
field to enter the ‘Start-Controller’.<br />
Start Offset<br />
As the controller doesn’t<br />
only make the sample louder or quieter, but<br />
actually starts the sample, it needs some<br />
time until it reaches the desired volume.<br />
Here you can adjust that offset in milliseconds.<br />
-16-<br />
Overview<br />
Legato<br />
Enables the Legato function. If Legato is<br />
on, the Harmonize function can’t be used.<br />
Fade<br />
The fade time sets the time between the<br />
start note and the next tied note.<br />
Glide<br />
The glide effect can be<br />
enabled via the sustainpedal<br />
(MIDI CC 64).<br />
Humanize<br />
Tuning randomly detunes notes in the set<br />
range.<br />
Humanize Settings<br />
Here you can find the different settings for<br />
the Humanize function.<br />
EQ-Humanize<br />
Adjusts the intensity of<br />
the humanize<br />
effect.<br />
Harmonize<br />
The harmonize<br />
function<br />
gives you the possibility to add up<br />
to two intervals in almost any pitch<br />
range. Harmonize doesn’t work when<br />
Legato is enabled.
<strong>Best</strong> <strong>Service</strong> Germany Effects<br />
Effects Section<br />
In this section you find a total of seven<br />
effect units. They affect the whole instrument.<br />
Compressor / Saturation<br />
The compressor reduces the dynamic range<br />
of your instrument. Reducing volume-peaks<br />
gives you the possibility to raise the overall<br />
volume of the instrument. This can help you<br />
to bring out an instrument in the mix.<br />
Saturation makes the sound ‘thicker’.<br />
Equalizer<br />
The EQ enables you to change the sound of<br />
your instrument subtly or drastically.<br />
-17-<br />
Delay - Echo<br />
Overview<br />
In conjunction with reverb, the delay can<br />
produce very realistic sounding room<br />
effects.<br />
Phaser / Chorus<br />
Here you can add a Phaser or Chorus to<br />
your instrument.<br />
Reverb - Hall<br />
Enables you to place your instrument in<br />
almost every desired room.
<strong>Best</strong> <strong>Service</strong> Germany Automation<br />
Automation<br />
On the Automation page you can<br />
assign almost every MIDI controller to<br />
every parameter in the <strong>Best</strong><strong>Service</strong><br />
Player. In order to avoid complications,<br />
please do not use MIDI controllers<br />
CC100 to CC119. The player already<br />
uses them internally.<br />
Dropdown Menu<br />
Above each of the eight<br />
possible controls, there is a<br />
dropdown menu containing<br />
almost every important parameter<br />
of the player.<br />
You don’t have to stick to<br />
these presets, though. It is<br />
totally up to you if you want to<br />
assign or erase controls.<br />
Automation Section<br />
If you want to assign<br />
a control yourself,<br />
press ‘Automation’<br />
in the Browser tab.<br />
Use left click to drag<br />
and drop any controller to any knob on<br />
the performance view.<br />
-18-<br />
Controller Info<br />
Overview<br />
In the ‘assigned<br />
to…’ window you<br />
can see the controls’<br />
pre-assignments.<br />
Controller Range<br />
With From/To you can limit<br />
the controller’s range. If you<br />
set the From-value higher than<br />
the To-value, the controller’s behavior will be<br />
inverted.<br />
Delete Controllers<br />
To delete a controller<br />
assignment, select it and press<br />
the ‘remove’ button. If you<br />
activate ‘Soft Takeover’ the selected parameter<br />
will not change until the external controller<br />
matches the parameter’s existing value.<br />
Routing Controllers<br />
In this section you can<br />
assign parameters to be<br />
controlled by your keyboard.<br />
You can choose<br />
between velocity, key<br />
position and random.<br />
Routing Menu<br />
For assigning any of these<br />
functions to a parameter,<br />
you have to assign it a<br />
controller number (CC)<br />
and then drag and drop the<br />
controller with that number<br />
onto this knob.
Following pages pages<br />
are<br />
only for<br />
<strong>Complete</strong> <strong>Classical</strong> Collection<br />
users<br />
-19-
<strong>Best</strong> <strong>Service</strong> Germany CCC-Instruments<br />
Naming of the Instruments:<br />
...FX ”Effects”<br />
If the instrument name contains “FX”, that<br />
means that at least one FX unit is activated<br />
(usually it’s the reverb). The modulation<br />
wheel controls the LFO -> tune modulation<br />
and creates a vibrato effect.<br />
...FX leg "Legato"<br />
Same as “FX”, plus the legato effect is<br />
enabled.<br />
...FX leg MW "Modulationwheel"<br />
“MW” means that the modulation wheel is<br />
controlling filter and volume.<br />
...FX ATT MW Attack"<br />
“ATT” means that the instrument contains<br />
at least one keyswitch that is linked to an<br />
Attack group.<br />
...VA FX “Velocity-Attack"<br />
“VA” means that velocity is modulating the<br />
attack time of the instrument. Lower velocity<br />
will cause longer attack times and therefore<br />
softer sample starts.<br />
-20-<br />
Overview<br />
...DRY “dry - no effects "<br />
“DRY” instruments make no use of effects.<br />
You hear the instrument’s original sound.<br />
...warm FX “warm "<br />
Warm means that the instrument uses the<br />
filter from PRO-53. It cuts the high end and<br />
boosts the lower mids in a unique way.<br />
Most people perceive the resulting sound as<br />
‘warm’.<br />
...X FX “crossfade"<br />
The ‘X’ means that a velocity cross-fade<br />
can be controlled via the modulation wheel.<br />
By using the MW, you can go from quiet to<br />
loud very smoothly.<br />
Basically, you can change each parameter, controller<br />
assignment and the naming of a CCC<br />
instrument. There is no problem with changing<br />
and renaming instruments. That way you can customize<br />
the instruments for your personal needs.<br />
You have to keep in mind though, not to change<br />
the folder structure or to move instruments. If you<br />
do, the player will not find the samples anymore.<br />
We recommend saving changed instruments<br />
under a different name. An easy way to do so is<br />
adding your initials either in front or after the<br />
instrument’s original name: ‘CH – 17 Violins warm’<br />
or ’14 Violins FX ATT MW – CH’.<br />
The library instruments’ names usually start with<br />
11, 21 or 31. Accordingly you could start the<br />
names of your own creations with 00 or 01. That<br />
way you can make perfectly clear which patches<br />
are yours, and which are from the original library.
<strong>Best</strong> <strong>Service</strong> Germany CCC-Content<br />
Overview<br />
Peter Siedlaczek's Advanced Orchestra Set<br />
The Extended Edition of the legendary Advanced Orchestra by Peter Siedlaczek has been<br />
improved in this essential package! Combining the original Advanced Orchestra library<br />
together with the Upgrade ‘97, the Advanced Orchestra Extended Edition is enjoyable and<br />
still very easy-to-use.<br />
String Ensembles:<br />
14 Violinen, 10 Violas, 8 Celli, 6 Bässe.<br />
Phrasings&Articulationen: Sustained Notes f & p, Con Sordino, Short Detaché 2x, Slow/Fast Gliss.,<br />
Grace Notes, Short Chords, Runs.<br />
Solo Strings:<br />
Violinen, Violas, Celli.<br />
Phrasings/Articulations: Sustained Notes f & p, Con Sordino, Short detaché 2x, Pizzicato 2x, Col<br />
Legno 2x, Tremolo f, Tremolo pp, Crescendo, Cresc. Tremolo, Trill, Glissando, Grace Notes, Short<br />
chords, Arpeggios.<br />
Woodwinds:<br />
3 Flöten, Solo Flöte, Alto Flöte, Piccolo Flöte, Oboe, English Horn, 3 Clarinetten, Bass Clarinette,<br />
Fagott.<br />
Phrasings & Articulations: Sustained Notes f & p, Staccato 2x, Grace Notes.<br />
Brass & Effects:<br />
Trompete, Solo Trompete, Piccolo Trompete, 3 Posaune, Solo Posaune, 4 French Horns, Solo French<br />
Horn, Tuba. Phrasings & Articulations: Sustained Notes f & p, Staccato 2x, Half & Whole Tone Trill,<br />
Crescendo, Runs.<br />
Percussion & Harp:<br />
Cymbals, Timpani, Gran Cassa, Snare, Tamtam, Gongs, Triangles, Vibraphone, Marimba,<br />
Xylophone, Orchestra + Tubular Bells, Harp. Perc.: Single Strokes, Tremolo, long/medium/short<br />
Cresc., Glissando; Harp: Glissandi - long, medium, short / major, minor.<br />
Very easy-to-use but with expanded capabilities thanks to the advantages of the newest software developments.<br />
Extensive use of key switching and direct-from-disc technology, new programs with multiple crescendo layers and<br />
instantaneous access to dozens of instruments and playing techniques.<br />
This complex yet compact and user-friendly sound library consists of all instrument groups of a large symphony<br />
orchestra. The strength of this sound material lies not only in its use in classical “real sounding” or “natural” structures<br />
and arrangements.<br />
Especially the complex phrasings and articulations, such as runs, trills or glissandi, are eminently suitable for all types<br />
of distortion and unorthodox treatment. Your imagination is free for experimentation.<br />
The included Upgrade ‘97 adds functionality and features new instruments that could not be included in the original<br />
library including Bass Flute, Harp Single Notes, Percussion (crotale, 2 wind chimes, 3 shell chimes, bamboo chimes,<br />
tambourines, claves, cowbells, castanets, temple blocks, japanese bowls) and Hollywood Strings.<br />
All volumes contain new velocity switch programs for better dynamic control over f and p playing techniques.<br />
-21-
<strong>Best</strong> <strong>Service</strong> Germany CCC-Content<br />
Peter Siedlaczek's Extended <strong>Classical</strong> Choir<br />
Overview<br />
Peter Siedlaczek`s "extended classical choir". voices sampled., long and<br />
short loops. men, women and mixed choir. clusters, glissandi, aahs,<br />
oohs, mmhs, hoos, homs, zzz.<br />
From the heart of Czechoslovakia comes one of the most haunting and inspiring sets of vocal sounds<br />
ever captured by a sampler. Wait till you hear the awesome vocal power, the range of rich timbres,<br />
and the sheer human emotion of this beautifully sampled 70-strong ensemble - working with a library<br />
like this is a moving experience.<br />
Peter Siedlaczek’s <strong>Classical</strong> Choir is an absolute masterpiece which crosses all musical dimensions.<br />
Featuring a philharmonic choir with worldwide credits. Up to 70 singers. Brilliantly recorded samples<br />
in an outstanding concert hall. Male, female and mixed choirs. Bass, tenor, alto and soprano<br />
voices.<br />
Peter Siedlaczek's Orchestral Colours<br />
Orchestral Colours created a new trend – the use of prepared, skilfull<br />
arranged orchestral building blocks. The result is a colourful mixture of<br />
hits, finales, passages, layers, atmospheres – a collection of ´miniworks´which<br />
are playable on any key.<br />
The incredible tonal richness of a symphony orchestra, its expressiveness, dynamic, or tis 'power',<br />
makes it the most mighty and versatile body of sound. it is no wonder that orchestral sounds have<br />
become an obligatory part of every modern musician´s collection of samples. From renowned producer<br />
Peter Siedlaczek, Orchestral Colours created a new trend - the use of prepared, skilfuly arranged<br />
orchestral building blocks.<br />
Peter Siedlaczek's Smart Violins<br />
A comprehensive collection of runs, disco licks and other patterns, as well as long notes<br />
and legato steps played at different intervals, performed by a large violin<br />
ensemble.<br />
Recorded in all keys and in different tempi (100, 120, 140 bpm)<br />
Outstanding construction tools for creating perfectly realistic leading<br />
violin lines playable in all keys.<br />
The idea is to provide a library of useful phrases for pop and dance production. There are three main<br />
phrase categories: Fast runs with four versions – straight ascending,<br />
straight descending, ´sawtooth´and ´wavy´. Second category - Slow phrases Third category – Disco<br />
Licks. Disco Licks are a collection of (36 in each key) micromelodies lasting between two and seven<br />
beats – not only for ´Disco´.<br />
-22-
<strong>Best</strong> <strong>Service</strong> Germany CCC-Content<br />
Peter Siedlaczek's Total Piano<br />
X Bonus Trax<br />
Overview<br />
<strong>Classical</strong> boesendorfer piano in outstanding Peter Siedlaczek quality.<br />
Brilliant and clear.<br />
Also prepared piano: unconventional playing techniques, thump tack<br />
piano, honky tonk piano, effects.<br />
On the one hand sturdy piano and grand piano sounds, on the other hand piano sounds you´ve never<br />
heard before. New and truly intersting sound structures, tailored for ease of use. Playable and inspiring.<br />
Orchestral Colours created a new trend – the use of prepared, skilfull arranged orchestral<br />
building blocks. The result is a colourful mixture of hits, finales, passages, layers, atmospheres<br />
– a collection of ´miniworks´which are playable on any key.<br />
X Elements<br />
Much more room for experimentals! With these instruments you get a lot of single samples<br />
taken from the different classical instruments, spread out across the whole keyboard and<br />
manipulated by the synthesis section of the CCC K2 player. Create your own atmospheric<br />
sound-textures and pads.<br />
Not always classical sounds are needed - Now you are the sound-designer!<br />
-23-
<strong>Best</strong> <strong>Service</strong> Germany Halls of Fame<br />
In order to see <strong>Best</strong><strong>Service</strong> Player’s output/aux<br />
configuration, press the ‘Output’<br />
button. Here you have the possibility to add<br />
effects directly to outputs, or plug them into<br />
aux channels, so you can add them proportionate<br />
to the mix.<br />
<strong>Best</strong><strong>Service</strong>Player Multis<br />
At this point we want to<br />
thank Wolfgang Lenden,<br />
producer of ‘HALLS OF<br />
FAME’, who allows us to<br />
provide you with 10 of his<br />
convolution-impulseresponses<br />
free of charge.<br />
All instruments, all settings that you adjust,<br />
and especially all work with the convolution<br />
reverb gets stored and loaded with multis.<br />
As the <strong>Best</strong><strong>Service</strong>Player handles convolution<br />
samples not quite as flexible as its<br />
bigger brother Kontakt 2, we created a few<br />
empty multis that already have different<br />
convolution reverbs plugged in.<br />
You can find them in Multis -> Empty<br />
Convolution Multis. In order to load a<br />
multi, open the multi menu and choose the<br />
desired instrument combination.<br />
In a multi, you can save several instruments and all<br />
their settings. Load the instruments and playing styles<br />
that you need and assign midi channels, outputs,<br />
volumes, pan, and effects. Save that configuration as<br />
a multi and create your own customized standard sets<br />
of instruments.<br />
-24-<br />
What is convolution reverb?<br />
Overview<br />
There have been thick books written about<br />
convolution reverb. I’ll try to make it short<br />
and non-scientific. One goes into a concert<br />
hall, a church, a bathroom or into the woods<br />
and ‘fires off’ an audio impulse. That can be<br />
a short impulse such as a gunshot, or a long<br />
tone that sweeps through the frequency<br />
spectrum. The ‘response’ of the room gets<br />
recorded and the resulting audio file is a<br />
‘fingerprint’ of the recorded environment.<br />
That ‘fingerprint’ can now be used to recreate<br />
the acoustics of that place in your<br />
studio, just as if you had been there to make<br />
your recordings in that place.<br />
<strong>Best</strong><strong>Service</strong>Player provides you with a simplified<br />
version of a convolution reverb. Of course there are<br />
more specialized programs that give you better quality,<br />
and work in true stereo mode. A real bargain for<br />
entering the world of convolution reverb is the<br />
GigaPulse VST plug-in and the Hall of Fame impulse<br />
responses. For only 300€ you get the quality of an<br />
effect unit worth a couple of thousand dollars. Yes –<br />
rude advertising – but also an incredibly cheap possibility<br />
for entering the world of the pros.
<strong>Best</strong> <strong>Service</strong> Germany Halls of Fame<br />
Output / Effekt-Rack<br />
If you want to add convolution reverb to an<br />
instrument, you have to load one of the<br />
empty multis from the ‘empty convolution<br />
multis’ first. Then load an instrument of<br />
your choice.<br />
On every instrument you find these three<br />
buttons:<br />
‘X’ is for deleting an instrument.<br />
‘-‘ is for minimizing the instrument<br />
view.<br />
‘AUX’ expands the four aux faders for<br />
your<br />
instrument.Each of the four Aux racks can<br />
have four different effects plugged in. By<br />
using the faders you adjust how much of the<br />
dry signalis sent to the effects.<br />
Loading and assigning an effect<br />
For each of the 10 pre-configured multis,<br />
Aux 1 has the convolution<br />
reverb plugged in. The<br />
multi’s name tells you<br />
details about the currently<br />
used convolution reverb<br />
and its length. Of course<br />
you can change and adjust<br />
the output / effect configuration.<br />
But don’t forget to<br />
use the aux faders on the<br />
-25-<br />
Overview<br />
instrument – otherwise you can adjust whatever<br />
you want, but you won’t hear any effect.<br />
Editing effects<br />
In order to see the<br />
convolution reverb editor, press the buttons<br />
‘show insert’ and ‘edit effects’. If the editor<br />
doesn’t appear, click<br />
on the “CU” field in the effect rack<br />
again.<br />
Here you can adjust reverb length, start<br />
point and effect mix. We recommend saving<br />
new settings as a new multi.<br />
Use the buttons ‘Early’ and ‘Late’<br />
for deciding what part of the sample<br />
gets manipulated by the three<br />
knobs below. ‘Early’ adjusts the<br />
early reflections, whereas ‘Late’<br />
alters the release phase of the convolution<br />
sample.<br />
Much room for experimentation!<br />
More detailed informations about Kontact 2<br />
Player functions you will find in the Kontakt<br />
Player 2 manual on the CCC DVD.<br />
At this point we want to thank Josef Natterer.<br />
Without his programming skills, many of the Player’s<br />
functions wouldn’t have been possible.<br />
Franz Schwentner - <strong>Best</strong> <strong>Service</strong>, October 2007<br />
Produced by Peter Siedlaczek<br />
Co-produced by Klaus Kandler - <strong>Best</strong> <strong>Service</strong><br />
Concept & Programming by Franz Schwentner<br />
Additional scripting by Josef Natterer
INSTALLATION:<br />
Deutsche Bedienungsanleitung<br />
(If you want to read more about installation, plug-in formats and hosts, etc; please refer to the<br />
‘Kontakt Player 2 Manual’ on the installer disc.)<br />
A. INSTALLATION UNTER MAC OS X:<br />
Falls dies ihr erstes KONTAKT PLAYER 2 Produkt ist, wird der Player zusammen mit der Produkt Library<br />
installiert. Sollten Sie bereits eine Kontakt Player 2 Library besitzen, wird die Player-Installation<br />
übersprungen und <strong>nur</strong> die Library <strong>für</strong> dieses Produkt installiert.<br />
Systemvoraussetzung ist Mac OS Tiger 10.4 ..<br />
Legen Sie die Produkt Installations DVD in das DVD-Laufwerk Ihres Computers. Öffnen<br />
Sie die DVD mit einem Doppel-Klick des <strong>Best</strong><strong>Service</strong> Produkt DVD-Symbols auf Ihrem<br />
Schreibtisch<br />
Mit einem Doppel-Klick auf den <strong>Best</strong><strong>Service</strong> Produkt Installer starten Sie das Installationsprogramm.<br />
Der Start Screen erscheint zuerst. Nach einem Klick auf Continue und einer <strong>Best</strong>ätigung der<br />
License Agreement mit Agree öffnet sich ein Fenster, in dem Sie den <strong>Best</strong>immungsort (Destination)<br />
des Kontakt Players 2 auswählen können. In der Regel wird die der Programm-Ordner<br />
ihrer Systemplatte sein.<br />
Es folgt die Auswahl des Installation Type: Sie können wählen zwischen einfacher Installation<br />
(Easy Install), falls Sie alle Plugin-Formate (Standalone, AU, VST, RTAS) installieren wollen,<br />
oder angepasster Installation (Custom Install), wenn Sie <strong>nur</strong> einige der Plugins (re)installieren<br />
wollen. Beispielsweise ist eine RTAS Installation nicht notwendig, wenn Sie kein Protools-<br />
System benutzen. In diesem Fall wählen Sie <strong>nur</strong> die Formate aus, die Sie installieren wollen.<br />
Nachdem Sie Install gewählt haben, müssen Sie Ihren Namen und die Seriennummer eingeben.<br />
<strong>Die</strong>se befi ndet sich auf der Hülle der Installations-DVD.<br />
Nach einem Klick auf Continue werden Sie nach dem Zielort (Destination Folder) <strong>für</strong> die<br />
Library gefragt, ANSCHLIESSEND MÜSSEN SIE DIE ‘NKX’-FILES DER ANDEEREN<br />
DVDS MANUELL IN DEN LIBRARY-ORDNER KOPIEREN.<br />
The Library Path could look like this:.<br />
Finally you will be asked to start the NI <strong>Service</strong> Center Cent Ce ter for Authorizing your <strong>Best</strong><strong>Service</strong> Library<br />
-26-
B. INSTALLATION UNTER WINDOWS XP<br />
Legen Sie die <strong>Best</strong><strong>Service</strong> Produkt Installations DVD in Ihr optisches Laufwerk ein.<br />
Benutzen Sie den Windows Explorer um sich den Inhalt der DVD anzeigen zu lassen<br />
Starten Sie die Installation mit einem Doppelklick auf <strong>Best</strong><strong>Service</strong> Produkt Setup.exe.<br />
Der Welcome Screen erscheint. Klicken Sie auf Next um mit der Installation fortzufahren.<br />
Nun sehen Sie den License Agreement Screen. Bitte lesen Sie den kompletten Text mit den<br />
Lizenzvereinbahrungen durch. Falls Sie diese akzeptieren, klicke Sie auf zur <strong>Best</strong>ätigung auf<br />
Accept. <strong>Die</strong> Installation wird dann fortgeführt.<br />
Nun erscheint ein Hinweis der besagt, dass während des Installationsvorgangs die “Basic<br />
Samples” der Library installiert werden. KOPIEREN SIE ANSCHLIESSEND ALLE .NKX<br />
DATEIEN DER RESTLICHEN DVDS IN DEN LIBRARY ORDNER.<br />
Im <strong>folgenden</strong> Fenster geben Sie bitten Ihren Namen und die Seriennummer ein.<br />
Nun können Sie die Komponenten wählen, die installiert werden sollen. Das Programm<br />
schlägt C:\Programme\<strong>Best</strong><strong>Service</strong>\KONTAKT PLAYER 2 als Standardpfad <strong>für</strong> den KON-<br />
TAKT PLAYER 2 vor; Sie können jedoch auch einen anderen Pfad wählen..<br />
Anschliessend schlägt der Installer einen Zielpfad <strong>für</strong> die Library und einen <strong>für</strong> die Installation<br />
des VST-PlugIns vor. Beachten Sie bitte, dass die Library je nach Produkt zwischen 11 und 30<br />
GByte freien Festplattenplatz benötigt.<br />
Nachdem der Kopiervorgang abgeschlossen wurde gibt Ihnen das Installationsprogramm<br />
einen entsprechenden Hinweis und Sie können wählen, ob Sie sich die Bedienungs-Anleitung<br />
anzeigen lassen wollen, den KONTAKT PLAYER 2 starten wollen oder ob Sie das NI <strong>Service</strong><br />
Center starten wollen.<br />
-27-
C. AUTORISIERUNG UND UPDATES<br />
Nach der Installation können Sie das <strong>Best</strong><strong>Service</strong> Produkt <strong>für</strong> eine Demophase von 30 Tagen ohne<br />
Autorisierung benutzen. Wenn Sie den KONTAKT PLAYER 2 starten, zeigt der Browser ein Rufzeichen<br />
links neben der Library-Überschrift. Befi nden Sie sich in der 30tägigen Demophase, dann ist das<br />
Rufzeichen gelb. Nach der Registrierung und Autorisierung des Produkts verschwindet es. Sollten Sie<br />
nach Ablauf der Demophase noch nicht autorisiert haben, kann das <strong>Best</strong><strong>Service</strong> Produkt nicht mehr<br />
benutzt werden, was durch ein rotes Rufzeichen angezeigt wird.<br />
<strong>Die</strong> Autorisierung erfolgt mit Native Instruments <strong>Service</strong> Center, einem Programm, das in der Regel<br />
zusammen mit KONTAKT PLAYER 2 installiert wird. Das <strong>Service</strong> Center startet beim erstmaligen<br />
Verwenden von Galaxy II, Sie können es auch über den Registrierungsbereich der Info Box in der<br />
Library Box starten. Weitere Informationen über die Verwendung des <strong>Service</strong> Centers erhalten Sie im<br />
dazugehörigen Manual im <strong>Service</strong> Center Ordner im Programm-Bereich.<br />
Der einfachste Weg, um zu erfahren, ob es neue Updates <strong>für</strong> das <strong>Best</strong><strong>Service</strong> Produkt und den Kontakt<br />
Player 2 gibt, ist der UPDATE MANAGER des NI <strong>Service</strong> Center. Starten Sie <strong>Service</strong> Center, gehen<br />
Sie zum HAUPTMENÜ und dann zum UPDATE MANAGER. Er zeigt Ihnen, ob es neue Updates<br />
gibt und unterstützt Sie beim Download und bei der Installation.<br />
D. FORMATE<br />
<strong>Die</strong>ses <strong>Best</strong><strong>Service</strong> Produkt arbeitet entweder als eigenständige Anwendung, oder als Plug-in in<br />
Verbindung mit anderen Programmen. <strong>Die</strong> Standalone-Anwendung ist ideal wenn das <strong>Best</strong><strong>Service</strong><br />
Produkt die einzige Audio-Software ist, die Sie auf ihrem Rechner installiert haben.<br />
Um den <strong>Best</strong><strong>Service</strong> Player standalone zu benutzen, gehen Sie zum „Programm“-Ordner und Kontakt<br />
Player 2. In diesem Fall kommuniziert der KP2 direkt mit den Audio- und Midi-Interfaces ihres Computers.<br />
Hierzu müssen Sie im SETUP Menu die entsprechende Audio- und Midi-Hardware auswählen.<br />
Im Plug-in-Betrieb wird das <strong>Best</strong><strong>Service</strong> Produkt zu einem Software-“Modul”, das sich in eine Host-<br />
Software wie zum Beispiel einen Sequenzer einklinkt.<br />
KP2 ist kompatibel <strong>für</strong> den Einsatz mit VST, DXi und RTAS Formaten auf dem PC and mit VST,<br />
AudioUnit (AU) und RTAS <strong>für</strong> den Einsatz auf Macintosh.<br />
Wenn der <strong>Best</strong><strong>Service</strong> Player als PlugIn eingesetzt wird, <strong>sind</strong> keine Audio/Midi-Einstellungen <strong>für</strong> den<br />
Player notwendig.<br />
-28-
<strong>Best</strong> <strong>Service</strong> Germany <strong>Best</strong><strong>Service</strong>Player<br />
<strong>Die</strong> aktuelle Version des <strong>Best</strong><strong>Service</strong>Players<br />
erhält durch die neue Kontakt 2 Engine bislang<br />
ungeahnte neue Möglichkeiten.. Nahezu jede<br />
wichtige Funktion ist durch die Kontakt Script-<br />
Engine erreichbar. Alle wichtigen Controller<br />
können aktiviert und ferngesteuert werden.<br />
Im Hintergrund arbeitet ein mächtiger<br />
Synthesizer, der es Ihnen erlaubt, sehr stark in<br />
den Grundsound der Instrumente einzugreifen.<br />
Alle wichtigen Effekte, wie Hall, Chorus,<br />
Phaser, Compressor, Filter und Equalizer <strong>sind</strong><br />
einsetzbar.<br />
Speziell <strong>für</strong> die Orientalische Musik - und<br />
nicht <strong>nur</strong> <strong>für</strong> diese - wurde die Microtune-<br />
Funktion eingebaut. <strong>Die</strong>se erlaubt es Ihnen,<br />
jede erdenkliche Stimmung zu erzeugen. <strong>Die</strong><br />
Dual-Harmonize-Funktion erlaubt es Ihnen,<br />
die gerne genutzte Oktavierung oder jedes<br />
erdenkliche Intervall zu erzeugen.<br />
Wählen Sie zB die AO Violins DRY, also<br />
die "trockene" Version eines Instruments<br />
der <strong>Complete</strong> <strong>Classical</strong> Collection, stellt<br />
dieses Instrument die Rohform eines<br />
<strong>Best</strong><strong>Service</strong>Player-Instruments dar. (Oder<br />
Sie nehmen in Ihrem Instrument einen<br />
“Effects-Reset” vor)<br />
Alle Effekte <strong>sind</strong> vorhanden aber nicht<br />
aktiviert. So klingt das Instrument in seiner<br />
Urform, kein Sample wird in irgendeiner<br />
Form klanglich manipuliert.<br />
Nur das Ansprechverhalten bei einem<br />
Tastatur-anschlag wird unter [Volume<br />
] beeinflusst. Wie bei einem<br />
Synthesizer steht Ihnen da<strong>für</strong> eine ADSR-<br />
Hüllkurve zur Verfügung. Wenn Sie jetzt<br />
noch nicht genau wissen, was es damit auf<br />
-29-<br />
Überblick<br />
sich hat macht das nichts - wir werden das<br />
im Abschnitt [Volume ] genauer<br />
erklären. Sobald Sie ein Preset - also das<br />
Instrument geladen haben, sehen Sie diese<br />
Oberfläche. Abhängig von der<br />
Instrumentengattung wird ein Instrumentenoder<br />
Gattungssymbol angezeigt.<br />
Jedes Instrument der <strong>Best</strong><strong>Service</strong>Player<br />
wird auf die gleiche Weise angezeigt, <strong>nur</strong><br />
die Instrumenten-Symbole (in diesem Fall<br />
die Violinen) werden pro Instrumenten-<br />
Gattung gewechselt.<br />
Viele Instrumente des <strong>Best</strong><strong>Service</strong>Players<br />
<strong>sind</strong> innerhalb eines Instruments in<br />
Gruppen (Groups) unterteilt. Jede einzelne<br />
Spielweise, wie z.B. gehaltene (sustained)<br />
oder kurze (staccato) Töne, stellt eine einzelne<br />
Gruppe dar und ist per Keyswitch<br />
(einem rot markierten, reservierten Bereich<br />
der Keyboardtastatur) umschaltbar.<br />
Damit ermöglicht es Ihnen der <strong>Best</strong><br />
<strong>Service</strong> Player, mit der rechten Hand zu<br />
spielen, während Sie mit der linken Hand<br />
von langen zu kurzen Tönen oder von<br />
Triller zu Tremolo schalten.<br />
Selbstverständlich lässt sich diese Funktion<br />
auch über ein Sequenzer-Programm fernsteuern.<br />
Gruppen-Effekte lassen sich <strong>für</strong> jeden<br />
Keyswitch getrennt einstellen und abspeichern.Das<br />
ist sicher nicht immer notwendig,<br />
könnte aber unter Umständen nützlich sein,<br />
falls Sie der einen Spielweise mit dem Filter<br />
zu Leibe rücken möchten, den anderen<br />
Gruppen aber nicht. Oder Sie <strong>sind</strong> mit der<br />
Hüllkurve - dem Ein- und Ausklingen der<br />
Spielweise nicht zufrieden.<br />
Lassen Sie sich von Begriffen wie<br />
Keyswitch, Hüllkurve oder LFO nicht verunsichern.<br />
Wir werden im Folgenden detailiert<br />
darauf eingehen.
<strong>Best</strong> <strong>Service</strong> Germany <strong>Best</strong><strong>Service</strong>Player<br />
Das Laden eines Instruments ist sehr einfach.<br />
Sobald Sie den <strong>Best</strong><strong>Service</strong>Player<br />
geöffnet haben, erscheint dieser Startbildschirm.<br />
Rechts - im so genannten Browser, sehen<br />
Sie das <strong>Complete</strong> <strong>Classical</strong> Collection II-<br />
Logo.<br />
(Sie sehen dort natürlich das Logo Ihres<br />
installierten <strong>Best</strong>service Instruments)<br />
Instrument laden<br />
Überblick<br />
Sollte der Browser, also die linke Spalte im PlugIn nicht sichtbar sein, klicken Sie einfach<br />
auf den Browser-Knopf.<br />
In diesem Fall laden wir eine Variante des Solo Cellos. Klicken Sie<br />
auf den Pfeil neben Instruments.<br />
Wie Sie sehen, gibt es jede Menge Menüs. Über den Pfeil nach dem Ordnernamen gelangen<br />
Sie über die Unterordner zum gewünschten Instrument. Eine Übersichtsliste finden Sie<br />
im Anhang.<br />
-30-
<strong>Best</strong> <strong>Service</strong> Germany Edit All Knopf<br />
Guter Knopf - Böser Knopf<br />
Überblick<br />
Eine Seite <strong>für</strong> einen Knopf? In diesem Fall ist das nötig. So<br />
mächtig dieser Knopf ist, so gefährlich ist er auch. Nicht <strong>für</strong> Ihr<br />
Leben oder <strong>für</strong> Ihre Anlage - aber <strong>für</strong> Ihre Einstellungen im<br />
Instrument.<br />
Ist der Edit - Knopf eingeschaltet, wirken sich<br />
alle Einstellungen unter den Group Effekts auf alle Gruppen,<br />
Keyswitches oder Loops aus, die sich im Instrument befinden.<br />
Das betrifft auch alle Filter, Hüllkurven und Tune-Einstellungen.<br />
Unabhängig davon, welcher Bereich gerade eingestellt ist, wirken<br />
Änderungen auf alle betroffenen Ebenen.<br />
Ist der Edit - Knopf ausgeschaltet, wirken die<br />
Änderungen auf die zuletzt gewählte (und im Keyswitch-Fenster<br />
angezeigte) Gruppe oder Loop/Phrase.<br />
Effekte aus dem EFFECTS - Bereich wie Hall, Echo,<br />
Compressor usw. wirken immer auf das ganze Instrument und<br />
<strong>sind</strong> nicht betroffen.<br />
Und sollten Sie tatsächlich mal nicht mehr weiter wissen, können<br />
Sie das betreffende Instrument immer noch erneut laden.<br />
Auch die RESET - GROUPS und RESET - EFFECTS Funktion<br />
setzt die Ausgangswerte auf einen Basiswert zurück.<br />
-31-
<strong>Best</strong> <strong>Service</strong> Germany Hauptgruppen<br />
Verschaffen wir uns erst einen Überblick<br />
über die Oberfläche des <strong>Best</strong><strong>Service</strong>Players<br />
und einigen uns auf ein paar Begriffe, die<br />
immer wieder auftauchen werden.<br />
Der Einfachheit halber gehen wir die<br />
Bereiche in der Reihenfolge ihres<br />
Auftretens durch.<br />
Das Keyswitch-Fenster<br />
"Tastatur-Umschaltung" - Mit Keyswitches<br />
schaltet man verschiedene Spielweisen<br />
eines Instruments per Keyboardtasten um.<br />
Im Keyswitch-Fenster wird die zuletzt<br />
gewählte Spielweise angezeigt.<br />
GROUP EFFECTS<br />
"Gruppen Effekte" -<br />
Bezeichnet den<br />
Bereich, in dem - <strong>für</strong> jeden Keyswitch<br />
getrennt - Lautstärke, Stimmung, Filter und<br />
Hüllkurven geregelt werden. Hier findet<br />
man alles, um das Klang und<br />
Ansprechverhalten eines Instruments zu<br />
manipulieren.<br />
MICROTUNING<br />
"Feinverstimmung" -<br />
Bezeichnet den<br />
Bereich, in dem einzelne Töne einer Oktave<br />
gezielt verstimmt werden können. Hier findet<br />
man Stimmungen verschiedenster<br />
Epochen und hat die Möglichkeit, eigene<br />
Stimmungen zu erzeugen.<br />
-32-<br />
PERFORMANCE<br />
Bezeichnet den Bereich, der <strong>für</strong> das<br />
Auslösen diverser Spieloptionen zuständig<br />
ist. Hier findet man spezielle Möglichkeiten<br />
Töne auszulösen. Den Legato Mode, die<br />
Humanize- und die Harmonize-Funktion.<br />
EFFECTS<br />
"Effekt-Bereich" - Bezeichnet den Bereich,<br />
in dem alle Effekte eines Instruments aktiviert<br />
und angepasst werden können. Hier<br />
finden Sie Hall, Echo, Chorus, Phaser,<br />
Equalizer, Compressor und Saturation.<br />
AUTOMATION<br />
Überblick<br />
In diesem Bereich findet sich alles, was<br />
man zum Automatisieren per externer<br />
Controller wie Modulationsrad oder Drehund<br />
Schieberegler braucht.
<strong>Best</strong> <strong>Service</strong> Germany Group Effects<br />
Group Effects<br />
Auf dieser Seite finden sich die wichtigsten<br />
Parameter <strong>für</strong> schnellen Zugriff.<br />
Tune<br />
<strong>Die</strong>nt zur Verstimmung eines Instruments<br />
oder eines einzelnen Keyswitch.<br />
Pan<br />
Regelt das Panorama eines Instruments<br />
oder einer einzelnen Spielweise.<br />
Volume<br />
Regelt die Lautstärke eines Instruments<br />
oder einer einzelnen Spielweise.<br />
-33-<br />
Überblick<br />
LP - ON/OFF and HP - ON/OFF<br />
Schaltet den Low- und den High Pass-Filter<br />
ein.<br />
Cutoff<br />
Mit diesem Regler<br />
stellen Sie die<br />
Eckfrequenz des Filters ein, ab der die<br />
Abschwächung der hohen Frequenzen einsetzen<br />
soll.<br />
Resonance<br />
Mit diesem Regler<br />
können Sie die Frequenzen um die<br />
Eckfrequenz herum anheben.<br />
Reset Group(s)<br />
Setzt die Einstellungen<br />
aller Gruppen<br />
(Spielweisen) eines<br />
Instruments auf einen<br />
Grundwert zurück.<br />
Meistens ist es aber besser das original<br />
Instrument erneut zu laden.
<strong>Best</strong> <strong>Service</strong> Germany Attack Effect<br />
Attack Effect<br />
Legt ein Stacatto-Sample als Akzent auf<br />
einen beliebigen Keyswitch. Das führt zu<br />
einem härteren Attack.<br />
Erscheint diese Seite nicht in Ihrem Player,<br />
ist diese Funktion nicht implementiert und<br />
nicht <strong>für</strong> Ihr Instrument erhältlich.<br />
Volume<br />
Regelt die Lautstärke der Attack - Samples<br />
VeloVol<br />
"VelocityVolume" - Lautstärkesteuerung<br />
per Tastaturanschlag<br />
VeloAtt<br />
"VelocityAttack" - Regelt in Verbindung<br />
mit dem Attack-Drehregler der Hüllkurve<br />
das Einschwingverhalten eines Instruments.<br />
Tune Attack<br />
<strong>Die</strong>nt zur gezielten Verstimmung der<br />
Attack-Spielweise.<br />
Additional Attack - Attack<br />
Damit bestimmen Sie<br />
wie schnell der<br />
Attack-Effekt nach<br />
dem Tastaturanschlag<br />
seine maximale Lautstärke erreicht.<br />
-34-<br />
Überblick<br />
Additional Attack - Decay<br />
Damit bestimmen Sie,<br />
wie schnell die<br />
Lautstärke des Attacks<br />
auf den Sustainwert<br />
zurückfällt.<br />
Additional Attack - Sustain<br />
Damit bestimmen Sie<br />
die Lautstärke, die<br />
nach Durchlaufen der<br />
Decayzeit erreicht<br />
werden soll.<br />
Additional Attack - Release<br />
Damit bestimmen Sie<br />
die Auskling-Zeit des<br />
Attacks, nach<br />
Loslassen der Taste.<br />
Equalizer<br />
In die Attack-Seite haben wir einen kleinen<br />
Equalizer eingebaut, mit dem sich die<br />
Klangfarbe der Attack-Samples manipulieren<br />
läßt.<br />
Equalizer Frequenz<br />
<strong>Die</strong> gewählte Eck-<br />
Frequenz des Equalizers.<br />
Equalizer Bandwidth<br />
<strong>Die</strong> Bandbreite der<br />
gewünschten Veränderung<br />
im Frequenzspektrum.<br />
Equalizer - Gain<br />
"Intensität"- Pluswerte<br />
verstärken den gewählten<br />
Frequenzbereich, Minuswerte schwächen den<br />
gewählten Bereich ab.
<strong>Best</strong> <strong>Service</strong> Germany Volume <br />
Volume <br />
Im Bereich Volume finden Sie alles,<br />
was Sie zur Lautstärkesteuerung und<br />
Einstellung des Abspielverhaltens benötigen.<br />
Volume<br />
Velocity<br />
Regelt die Lautstärke<br />
des Instrumentes bzw<br />
einer gewählten Keyswitch<br />
Gruppe<br />
Hier regeln Sie die<br />
Intensität der<br />
Anschlagdynamik.<br />
VelocityAttack<br />
"AttackVelocity" -<br />
Regelt in Verbindung<br />
mit dem Attack-<br />
Drehregler der Hüllkurve<br />
das Einschwingverhalten eines Instruments.<br />
ADSR - Attack<br />
Damit bestimmen Sie<br />
wie schnell das<br />
Instrument nach<br />
Anschlagen der Tastatur<br />
seine maximale Lautstärke erreicht.<br />
ADSR - Decay<br />
Damit bestimmen<br />
Sie, wie schnell die<br />
Lautstärke des<br />
Instruments auf den<br />
Sustainwert zurückfällt.<br />
-35-<br />
ADSR - Sustain<br />
werden soll.<br />
ADSR - Release<br />
Überblick<br />
Damit bestimmen Sie<br />
die Lautstärke die<br />
nach Durchlaufen der<br />
Decayzeit erreicht<br />
Damit bestimmen Sie<br />
die Auskling-Zeit<br />
des Instruments nach<br />
Loslassen der Taste.<br />
LFO - Low Frequenz Oscillator<br />
Schaltet den Low-<br />
Frequenz-Oszillator ein.<br />
<strong>Die</strong>nt hier im Volume Bereich zum<br />
Erzeugen zB. des Tremolo Effekts.<br />
LFO - Intensität<br />
LFO - Frequenz<br />
Regelt die Intensität<br />
des Ma-ximalausschlag<br />
des Os-zillators.<br />
Steuert die LFO<br />
Frequenz und somit<br />
die Tremologeschwindigkeit.
<strong>Best</strong> <strong>Service</strong> Germany Tune & Effects<br />
Tune & Effects<br />
"Grundstimmung" "Sample-Start"<br />
"PitchBend-Range" - hier regeln Sie die<br />
allgemeine Tonhöhe. Bei einigen In-strumenten,<br />
die Loops oder Orchester-phrasen<br />
enthalten, finden Sie einen Speed- ,<br />
SampleStart und ein separates Tune-Feld.<br />
Speed<br />
Regelt die<br />
Geschwindigkeit der<br />
aktuell angewählten<br />
Orchesterphrase.<br />
Das klingt - je nach Ausgangsmaterial mal<br />
gut und mal weniger gut. Bei "weniger gut "<br />
empfehlen wir die Timestretch-Al-gorithmen<br />
von zB. Cubase oder Melodyne zu nutzen.<br />
Panorama<br />
ten Loops ein.<br />
Sample Start Offset<br />
Damit stellen Sie die<br />
Panorama-Position<br />
des aktuell angewähl-<br />
Mit diesem Regler<br />
bestimmen Sie den<br />
Startpunkt der Phrase.<br />
Es läßt sich jeder beliebige Punkt innerhalb<br />
einer Phrase anwählen.<br />
-36-<br />
MaxSt - Maximaler Start Offset<br />
Überblick<br />
Hier läßt sich, um Rechenzeit zu sparen der<br />
Start-Offset Bereich eingrenzen.<br />
Tune<br />
Hiermit lassen sich je<br />
nach Instrument einzelne Phrasen oder<br />
Keyswitches verstimmen<br />
Pitchbend - Range<br />
Hier können Sie die Ausschlagsintensität<br />
des Pitchbend-Rades einstellen.<br />
LFO - Low Frequenz Oscillator<br />
LFO - Intensität<br />
LFO - Frequenz<br />
Schaltet den Low-<br />
Frequenz-Oszillator ein.<br />
<strong>Die</strong>nt hier im Tune-<br />
Bereich zum Erzeugen<br />
zB. des Vibrato-Effekts.<br />
Regelt die Intensität<br />
des Maximal-auschlag<br />
des Oszillators.<br />
Steuert die LFO<br />
Frequenz und somit<br />
das Vibrato.
<strong>Best</strong> <strong>Service</strong> Germany Low/HighPass<br />
LowPass / HighPass <br />
Mit dem LowPass- / HighPass Filter können<br />
Sie sehr stark in den Klangcharakter eines<br />
Instruments eingreifen. LowPass blendet von<br />
oben nach unten die hohen Freuenzen aus und<br />
läßt die tiefen Frequenzen passieren, während<br />
der High-Pass-Filter das Frequenzspectrum<br />
von unten her ausdünnt.<br />
Cutoff<br />
Mit diesem Regler<br />
stellen Sie die<br />
Eckfrequenz des<br />
Filters ein, ab der die<br />
Abschwächung der hohen Frequenzen einsetzen<br />
soll.<br />
Resonance<br />
Mit diesem Regler<br />
können Sie die<br />
Frequenzen um die<br />
Eckfrequenz herum<br />
anheben.<br />
LP/HP - ADSR - Intensität<br />
Mit diesem Regler<br />
regeln Sie die<br />
Intensität der<br />
Filtersteuerung.<br />
LP/HP - ADSR - Attack<br />
Damit bestimmen Sie,<br />
wie schnell der Filter<br />
nach An-schlagen der<br />
Tastatur geöffnet werden<br />
soll.<br />
-37-<br />
Überblick<br />
LP/HP - ADSR - Decay<br />
Damit bestimmen<br />
Sie, wie schnell der<br />
Filterwert auf den<br />
Sustainwert abnehmen<br />
soll.<br />
LP/HP - ADSR - Sustain<br />
Damit bestimmen Sie<br />
die Filterstellung die<br />
nach Durchlaufen der<br />
Decayzeit erreicht<br />
werden soll.<br />
LP/HP - ADSR - Release<br />
Damit bestimmen Sie<br />
die Zeit, die der Filter<br />
nach Loslassen der<br />
Taste hat, um zu<br />
schliessen.<br />
LFO - Low Frequenz Oscillator<br />
LFO - Intensität<br />
LFO - Frequenz<br />
Schaltet den Low-<br />
Frequenz-Oszillator ein.<br />
<strong>Die</strong>nt hier im Filter-<br />
Bereich zum Modulieren<br />
der Filterfrequenz.<br />
Regelt die Intensität<br />
des Maximalausschlag<br />
des Oszillators.<br />
Steuert die Frequenz<br />
und somit die Modulationsgeschwindigkeit.
<strong>Best</strong> <strong>Service</strong> Germany Microtuning<br />
Micrutuning<br />
Hier kommt Stimmung<br />
auf - aber erst<br />
wenn Sie Hand anlegen. Hier wird alles an<br />
Stimm-Möglichkeiten angeboten, was die<br />
Kontakt 2 Engine hergibt. Ob Sie einzelne<br />
Tasten innerhalb einer Oktave oder das<br />
gesamte Instrument verstimmen möchten -<br />
Alles ist möglich.<br />
Select Key Menu<br />
Hier stellen Sie die<br />
Basis-Tonart ein, <strong>für</strong><br />
die die spezielle<br />
Stimmung wirksam<br />
werden soll.<br />
Unten haben Sie die Möglichkeit, die<br />
Abweichung von der temperierten Stimmung in<br />
Cent-Werten einzutragen.<br />
-38-<br />
Select Tuning Menu<br />
Überblick<br />
In diesem Menü können<br />
Sie unter den verschiedensten<br />
Stimmungen wählen.<br />
Ausserdem können<br />
Sie hier Ihre eigenen<br />
Stimmungen abrufen.<br />
<strong>Die</strong>se werden unter<br />
User 1 bis 5 abgelegt.<br />
Save Tuning<br />
Im Menü unten haben Sie die Möglichkeit,<br />
eigene Stimmungen abzuspeichern.
<strong>Best</strong> <strong>Service</strong> Germany Performance<br />
Performance<br />
Performance bietet<br />
alles an, was mit dem<br />
Ansteuern und Abspielen der Samples zu<br />
tun hat. Neben der Auswahl, ob Sie die<br />
Noten per Tastatur oder einem Controller<br />
ansteuern finden Sie hier die Legato und<br />
Glide, die Humanize und die Harmonize-<br />
Funktion.<br />
Start Note<br />
<strong>Die</strong> Start Note<br />
Funktion ermöglicht<br />
das flexible<br />
Einstarten von<br />
Samples. In 98<br />
Prozent aller Fälle wird das wohl mit der<br />
Hand und der Tastatur eines Keyboards<br />
geschehen. Da es viele User gibt, die auch<br />
mit Breath-Controll arbeiten und wir darüber<br />
hinaus flexible bleiben wollten, gibt es<br />
die Möglichkeit, jeden beliebigen<br />
Controller zu aktivieren.<br />
Controller Nummer<br />
Haben Sie unter Start<br />
Note - Controller - eingetragen, können Sie<br />
hier den gewünschten "Start"- Controller<br />
eingeben.<br />
Start Offset<br />
Da der Controller das Sample nicht wie üblich<br />
<strong>nur</strong> lauter oder leiser macht, sondern tatsächlich<br />
von Anfang an startet, braucht er etwas<br />
Zeit um die gewünschte Velocitystufe zu erreichen.<br />
Hier gestehen Sie ihm diese Zeit zu.<br />
-39-<br />
Überblick<br />
Legato<br />
<strong>Die</strong>nt zum Einschalten<br />
der Legato-Funktion. Wird Legato eingeschaltet,<br />
ist die Harmonize-Funktion nicht aktivierbar.<br />
Fade<br />
<strong>Die</strong> Fade Zeit regelt den Übergang von der<br />
Start Note zur ersten gebundenen Note.<br />
Glide<br />
Der Glide-Effekt kann per<br />
Sustainpedal CC 64 ausgelöst<br />
werden.<br />
Humanize<br />
Tuning verstimmt gespielte Noten innerhalb<br />
des eingestellten Bereichs zufällig.<br />
Humanize Settings<br />
Hier finden Sie verschieden Settings der<br />
Harmonizefunktion.<br />
EQ-Humanize<br />
Regelt die Intensität des<br />
Humanize Effekts.<br />
Harmonize<br />
<strong>Die</strong> Harmonize-Funktion bietet<br />
Ihnen die<br />
Möglichkeit,<br />
bis zu zwei Intervalle in nahezu<br />
beliebiger Tonhöhe zuzuschalten.<br />
Harmonize funktioniert nicht bei aktivierterLegatofunktion.
<strong>Best</strong> <strong>Service</strong> Germany Effects<br />
Effects Section<br />
In diesem Bereich finden Sie insgesamt 7<br />
Effektgeräte. <strong>Die</strong>se wirken auf das ganze<br />
Instrument.<br />
Compressor / Saturation<br />
Der Compressor dient zum Komprimieren<br />
von Audiosignalen und kann zum Beispiel<br />
zum Hervorheben eines Instruments<br />
benutzt werden.<br />
Saturation dient zum "Sättigen" - also zum<br />
Andicken des Klanges.<br />
Equalizer<br />
Der Equalizer erlaubt feine bis drastische<br />
Eingriffe in das Klangbild eines<br />
Instruments.<br />
-40-<br />
Delay - Echo<br />
Überblick<br />
Der Echoeffekt - in Verbindung mit dem<br />
Reverb - Hall Effekt lassen sich glaubhafte<br />
Raumeffekte erzeugen.<br />
Phaser / Chorus<br />
Hiermit können Sie Ihr Instrument mit<br />
einem Chorus oder Phaser Effekt versehen.<br />
Reverb - Hall<br />
Der Reverb Effekt. Das Hallgerät erlaubt es<br />
Ihnen, Ihr Instrument in nahezu in jedem<br />
gewünschten Raum zu platzieren.
<strong>Best</strong> <strong>Service</strong> Germany Automation<br />
Automation<br />
Auf der Automations-Seite läßt sich nahezu<br />
jeder beliebige MIDI-Controller einem<br />
Parameter des <strong>Best</strong><strong>Service</strong>Players zuordnen.<br />
Da wir <strong>für</strong> interne Zwecke die<br />
Controller 100 bis 119 nutzen, bitten wir<br />
Sie, diese nicht zu verwenden, um unliebsame<br />
Effekte zu vermeiden.<br />
Dropdown Menu<br />
Über jedem der 8 möglichen<br />
Controllern läßt sich<br />
ein Auswahlmenü öffnen, in<br />
welchem Sie nahezu jeden<br />
wichtigen Parameter des<br />
CCC Players finden werden.<br />
Sie müssen sich nicht darauf<br />
beschränken, die Voreinstellungen<br />
zu nutzen. Es steht<br />
Ihnen völlig frei, Controller zu<br />
belegen oder zu<br />
löschen.<br />
Automation Section<br />
Um selbst einen<br />
Controller zu belegen,<br />
schalten Sie im<br />
Browser auf Auto.<br />
Wählen Sie einen<br />
Controller aus, indem Sie ihn mit der linken<br />
gehaltenen Maustaste auf den<br />
gewünschten Drehregler ziehen.<br />
-41-<br />
Controller Info<br />
Überblick<br />
Im "assingned to..."<br />
Fenster können Sie die<br />
bereits vorhandenen<br />
Belegungen ablesen.<br />
Controller Range<br />
Mit From/To können Sie den<br />
Regelbereich des Controllers<br />
einschränken. Ist der From-<br />
Wert größer als der To-Wert, <strong>sind</strong> umgekehrte<br />
Regelwege möglich.<br />
Delete Controllers<br />
Um eine Automations-<br />
Zuordnung zu entfernen, wählen<br />
Sie sie aus und klicken dann auf<br />
die Schaltfläche Remove.Wenn Sie Soft<br />
Takeover einschalten, ändern sich Parameter so<br />
lange nicht, bis ihr Wert mit dem eines externen<br />
Controllers übereinstimmt.<br />
Routing Controllers<br />
In diesem Bereich können<br />
Sie Parameter auch mit<br />
der Tastatur steuern. Sie<br />
haben die Wahl zwischen<br />
Velocity, Tastaturposition<br />
und "Zufall" Random.<br />
Routing Menu<br />
Um diese Funktion anzuwenden,<br />
müssen Sie ihr eine<br />
Controllernummer (to CC)<br />
zuweisen und den<br />
Controller mit dieser<br />
Nummer aus dem Menü auf<br />
den Drehregler ziehen.
<strong>Die</strong> <strong>folgenden</strong> <strong>Seiten</strong><br />
<strong>sind</strong> <strong>nur</strong> <strong>für</strong><br />
<strong>Complete</strong> <strong>Classical</strong> Collection<br />
User<br />
-42-
<strong>Best</strong> <strong>Service</strong> Germany Instruments<br />
Naming of the Instruments:<br />
...FX ”Effekt”<br />
Ein "FX" im Namen bedeutet, dass bei diesem<br />
Instrument mindestens ein Effektgerät<br />
aktiviert ist. Im Normalfall ist dies das<br />
Hallgerät (Reverb). Das Modulationsrad steuert<br />
den Tune-LFO und erzeugt ein Vibrato.<br />
...FX leg "Legato"<br />
Ein "FX leg" im Namen bedeutet, dass bei<br />
diesem Instrument zusätzlich die Legato-<br />
Funktion aktiviert ist.<br />
...FX leg MW "Modulationrad"<br />
Ein "MW" im Namen bedeutet, dass bei<br />
diesem Instrument das Modulationsrad<br />
Filter und Lautstärke steuert.<br />
...FX ATT MW Attack"<br />
Ein "ATT" im Namen bedeutet, dass bei<br />
diesem Instrument mindestens eine<br />
Keyswitch-Gruppe mit einer Attack-<br />
Gruppe verbunden wurde.<br />
...VA FX “Velocity-Attack"<br />
Ein "VA" im Namen bedeutet, dass bei diesem<br />
Instrument die Anschlagstärke <strong>für</strong> das<br />
sanftere oder stärkere Einstarten des<br />
Instruments sorgt.<br />
-43-<br />
Überblick<br />
...DRY trocken "<br />
Ein "DRY" im Namen bedeutet, dass bei<br />
diesem Instrument nichts an Effekten angewendet<br />
wurde. Das Instrument klingt absolut<br />
trocken und unbehandelt.<br />
...warm FX “warm "<br />
Ein "warm" im Namen bedeutet, dass (<strong>nur</strong>!)<br />
bei diesem Instrument der Kontakt Pro 53<br />
Filter zum Einsatz kommt. <strong>Die</strong>ser sorgt im<br />
hohen Frequenzbereich <strong>für</strong> eine - als warm<br />
empfundene Absenkung, während in den<br />
unteren Mitten eine Anhebung erfolgt.<br />
...X FX “crossfade"<br />
Ein "X" im Namen bedeutet, dass bei diesem<br />
Instrument ein X-fade (Crossfade),<br />
also eine Überblendung per Modulations-<br />
Rad möglich ist. Somit kann man stufenlos<br />
von leise nach laut überblenden.<br />
Grundsätzlich lassen sich bei allen Instrumenten die<br />
einzelnen Parameter, die Controllerzuordnung oder<br />
die Beschriftung ändern.<br />
Sie dürfen ohne weiteres Instrumente abändern<br />
und umbenennen. Somit lassen sich alle<br />
Instrumente ihren Bedürfnissen anpassen. Sie müssen<br />
<strong>nur</strong> darauf achten, dass die Ordnerstruktur nicht<br />
zerstört wird, oder Instrumente verschoben werden.<br />
Sonst findet der Player die Samples nicht mehr.<br />
Wir empfehlen, dass Sie Ihre Änderungen grundsätzlich<br />
unter einem neuen Namen abspeichern.<br />
Dazu reicht es schon, Ihre Initialen voran oder nachzustellen.<br />
ZB. "CH-17 Violins warm" oder " 14<br />
Violins FX ATT MW - CH" kennzeichnet eindeutig<br />
Ihre Sounds.<br />
Da die Nummerierung der Instrumente meistens bei<br />
11, 21, 31 usw startet könnten Sie ihre eigenen<br />
Kreationen auch mit 00, 01 usw beginnen lassen<br />
und somit <strong>für</strong> Sie eindeutig kennzeichnen.
<strong>Best</strong> <strong>Service</strong> Germany CCC-Content<br />
Überblick<br />
Peter Siedlaczek's Advanced Orchestra Set<br />
- das Klangmaterial eines gesamten Symphonieorchesters mit einer Vielzahl verschiedener<br />
Spielweisen. Klänge einzelner Instrumentengruppen oder Solo-<br />
Instrumente aus denen sich unzählige, auch komplexe und verblüffend realistisch<br />
klingende Strukturen arrangieren lassen!<br />
String Ensembles:<br />
14 Violinen, 10 Violas, 8 Celli, 6 Bässe.<br />
Phrasings&Articulationen: Sustained Notes f & p, Con Sordino, Short Detaché 2x,<br />
Slow/Fast Gliss, Grace Notes, Short Chords, Runs.<br />
Solo Strings:<br />
Violinen, Violas, Celli.<br />
Phrasings/Articulations: Sustained Notes f & p, Con Sordino, Short detaché 2x, Pizzicato<br />
2x, Col Legno 2x, Tremolo f, Tremolo pp, Crescendo, Cresc. Tremolo, Trill, Glissando,<br />
Grace Notes, Short chords, Arpeggios.<br />
Woodwinds:<br />
3 Flöten, Solo Flöte, Alto Flöte, Piccolo Flöte, Oboe, English Horn, 3 Clarinetten, Bass<br />
Clarinette, Fagott.<br />
Phrasings & Articulations: Sustained Notes f & p, Staccato 2x, Grace Notes.<br />
Brass & Effects:<br />
Trompete, Solo Trompete, Piccolo Trompete, 3 Posaune, Solo Posaune, 4 French Horns,<br />
Solo French Horn, Tuba. Phrasings & Articulations: Sustained Notes f & p, Staccato 2x,<br />
Half & Whole Tone Trill, Crescendo, Runs.<br />
Percussion & Harp:<br />
Cymbals, Timpani, Gran Cassa, Snare, Tamtam, Gongs, Triangles, Vibraphone, Marimba,<br />
Xylophone, Orchestra + Tubular Bells, Harp. Perc.: Single Strokes, Tremolo, long/medium/short<br />
Cresc., Glissando; Harp: Glissandi - long, medium, short / major, minor.<br />
Hier findet man das Klangmaterial eines gesamten Symphonieorchesters. Es handelt sich hier um Klänge einzelner<br />
Instrumentengruppen oder Solo-Instrumente, also um die Grundbausteine eines großen Symphonieorchesters,<br />
aus denen sich unzählige, auch komplexe und verblüffend realistisch klingende Strukturen arrangieren lassen.<br />
Echter und realistischer als je zuvor. <strong>Die</strong> Library beinhaltet selbstverständlich nicht <strong>nur</strong> alle kurzen und langen, in<br />
zwei Dynamikstufen gespielte Noten, sondern auch - je nach Instrument - in allen Tonlagen gespielte Triller,<br />
Vorschlagsnoten, schnelle Läufe, Arpeggios, Crescendi, Glissandi - also die häufigsten und wichtigsten Spielarten,<br />
die sich jedoch mit "normalen" Samples gar nicht, oder <strong>nur</strong> mit sehr mäßigen Ergebnissen imitieren lassen.<br />
Besondere Aufmerksamkeit richtete man nicht <strong>nur</strong> auf die technische Klangqualität, sorgfältige Auswahl der<br />
Studioakustik und der Mikrofone sowie deren Plazierung, sondern auch auf die Soundquelle selbst. <strong>Die</strong> mitwirkenden<br />
Musiker - Mitglieder international anerkannter Symphonieorchester - entlockten ihren hochqualitativen<br />
Meisterinstrumenten die optimalen Klangergebnisse. Selbstverständlich fehlt auch nicht eine kleine Sammlung<br />
unkonventioneller Spielarten, außergewöhnlicher Klänge und Effekte!<br />
-44-
<strong>Best</strong> <strong>Service</strong> Germany CCC-Content<br />
Peter Siedlaczek's Extended <strong>Classical</strong> Choir<br />
Überblick<br />
Ob multigesampelte Ahh, Ohh, Rrr, Zzz..-Chöre (in Terz-Schritten) ,<br />
oder ausgefallene Vocal Effekte (Cluster, Vibrato, Glissando, Crossfade,<br />
Flüstern....), ob Männer, Frauen oder gemischt, alles hier drinn und von<br />
Peter Siedlaczek.<br />
Wer einmal mit dieser einzigartigen "Vocal Power" gearbeitet hat, wird die Sounds nicht mehr missen<br />
mögen. Für die Produktion verpflichtete Peter Siedlaczek einen international bekannten Chor<br />
mit 70 Personen.<br />
Erstklassige Aufnahmetechnik und ein Konzertsaal mit hervorragender Akustik. Klassische Chöre,<br />
Männer, Frauen- & gemischter Chor in Terz-Schritten. Bass, Tenor, Alt und Sopran. Ensembles,<br />
Clusters, Sustained Notes, Syllables, Words, Glissandi, Percussive, Pianissimo - eine wahre<br />
Fundgrube. Konsonanten wie "ZZZ", "RRR", "SSS<br />
Peter Siedlaczek's Orchestral Colours<br />
Gemafreie orchestrale Klangelemente (3-7 sec.lang) von Peter Siedlaczek. Klangbausteine<br />
fertig zum Einsatz, von Dance bis Pop, Filmvertonung bis Multimedia! Orchestrale<br />
Phrasen, Effekte, Impressionen, Finals, Hits, Flächen sowie in Bpm eingespielte Loop<br />
Elemente. Mit dieser Produktion schrieb Peter Siedlaczek Geschichte<br />
und übertrug das bei Drum Loops schon lange bekannte Konzept, fertig<br />
einsetzbarer Bausteine, auch auf klassische Musik. Das Ergebnis <strong>sind</strong><br />
fertig einsetzbare orchestrale Klangelemente, die auch ohne klassische<br />
Vorbildung die eigene Sinfonie Wirklichkeit werden lassen. Alle<br />
Klangelemente <strong>sind</strong> 3-7 Sekunden lang und gemafrei einsetzbar.<br />
Ein riesiges Reservoir an Hits, Finales, Orchester Passagen, Layers, Atmosphären und in Bpm eingespielte<br />
Loop Elemente, in allen Tonlagen spielbar. Kein Wunder, dass Orchestral Colours schnell<br />
zu einem Standardwerk wurde und zu jeder Sampler-Grundausstattung gehören sollte.<br />
Einsatzbereich von Klassik, Dance und Pop bis Filmvertonung und Multimedia!<br />
Peter Siedlaczek's Smart Violins<br />
Was bisher mit keiner String-Library möglich war schafft "Smart<br />
Violins": Realistische Melodiephrasen, Läufe und Discolicks!<br />
Aufgenommen in allen Tonarten und in verschiedenen Tempi (100, 120,<br />
140 BPM) <strong>sind</strong> die von einem 16köpfigen Violinenensemble perfekt<br />
eingespielten Samples beliebig und sogar mehrstimmig miteinander<br />
kombinierbar!<br />
Recorded Ergänzt durch in all diverse keys and Multisamples in different (short, tempi sustained, (100, 120, Oktav-Glissando 140 bpm) Outstanding u.a.) eröffnet construction "Smart<br />
tools Violins" for eine creating unglaubliche perfectly Vielfalt realistic an leading Möglichkeiten, violin lines ganz playable individuell in Streicherarrangements all keys.<br />
zu<br />
kreieren und phantastisch klingen zu lassen!<br />
<strong>Die</strong> Vollversion bietet sämtliche Tonarten.<br />
-45-
<strong>Best</strong> <strong>Service</strong> Germany CCC-Content<br />
Peter Siedlaczek's Total Piano<br />
X Bonus Trax<br />
Brillanter klassischer Flügel in Peter Siedlaczek-Qualität.<br />
Überblick<br />
Mit dabei Pop-Piano, Präpariertes Piano, unkonventionelle<br />
Spieltechniken, Thumb Tack, Honky Tonk, Klaviereffekte.<br />
Einerseits handfeste Klavier- und Flügel-Sounds, andererseits Klavierklänge wie man sie noch nicht<br />
gehört hat, getrimmt auf Nutzbarkeit neuer und wirklich interessanter Klangformen. Spielbar und<br />
inspirierend.<br />
Eine kleine Auswahl an Bonussounds aus den Advanced Media Serien von <strong>Best</strong> <strong>Service</strong>.<br />
Natur-Aufnahmen aus der BlueBox Serie von <strong>Best</strong> <strong>Service</strong><br />
Orchester- und Ambient-Aufnahmen aus der Advanced Composer Serie.<br />
Synth-Ambiences und Pad-Sounds aus diversen <strong>Best</strong><strong>Service</strong> Libraries.<br />
X Elements<br />
Bei den X Elements handelt es sich um - aus den einzelnen klassischen Instrumenten entnommenen<br />
- Einzelsamples, die mit der Synthese-Einheit des Kontakt 2 Players in synthetische<br />
Flächensounds verwandelt wurden. Somit lassen sich sehr atmosphärische<br />
Flächensounds erzeugen, die sich gut zum Unterlegen bei Filmmusikarbeiten eignen. Auch<br />
in Verbindung mit den klassischen Instrumenten lassen sich interessant klingende<br />
Klanggebilde aufbauen. Raum <strong>für</strong> Experimente lassen sie genug!
<strong>Best</strong> <strong>Service</strong> Germany Halls of Fame<br />
An dieser Stelle möchten wir<br />
uns bei Wolfgang Lenden, dem<br />
Producer der "HALLS OF<br />
FAME" bedanken, der uns<br />
erlaubt hat, dass wir Ihnen 10<br />
seiner Convolution-IR-<br />
Impulse-Responses kostenlos<br />
zur Verfügung stellen dürfen.<br />
Klicken Sie in der Browserleiste auf<br />
Outputs, um das Output/Aux-Rack zu öffnen.<br />
Hier ist es möglich, unabhängig von<br />
den Möglichkeiten der Instrumente, zusätzliche<br />
Effekte zu aktivieren und diese entweder<br />
auf die Ausgänge direkt, oder aber<br />
gezielt über AUX 1-4, den einzelnen<br />
Instrumenten anteilig zuzumischen.<br />
Kontakt Multis<br />
Alle Instrumente, alle Einstellungen, die<br />
Sie vornehmen und vor allem, alle<br />
Aktivitäten die mit dem Convolution-<br />
Reverb in Zusammenhang stehen, werden<br />
in Multis gespeichert oder über Multis geladen.<br />
Da der Kontakt 2 Player mit<br />
Convolution-Samples nicht ganz so flexibel<br />
umgeht, wie sein größerer Bruder Kontakt 2<br />
haben wir einige leere, aber bereits mit<br />
einem Convolution-Sample bestückte<br />
Multis erstellt. <strong>Die</strong>se finden Sie im Ordner<br />
>Multis > Empty Convolution Multis.Um<br />
ein Multi zu laden, öffnen Sie das<br />
Multimenü und wählen die gewünschte<br />
Instrumenten-Kombination.<br />
Sie können in einem Multi mehrere Instrumente mit<br />
beliebigen Einstellungen zusammenfassen. Laden Sie<br />
alles, was Sie an Instrumenten oder Spielweisen benötigen<br />
und ordnen Sie Midikanäle, Ausgänge, Lautstärke,<br />
Panorama und Effekte zu. Damit lassen sich<br />
Standardsets, die Sie öfter benötigen laden und speichern.<br />
-47-<br />
Was ist ein Convolution Hall?<br />
Überblick<br />
Da gibt es dicke Bücher, die das treffend<br />
beschreiben. Ich versuche das mal unwissenschaftlich<br />
kurz und bündig. Man geht in<br />
eine Konzerthalle, Kirche, in ein<br />
Badezimmer oder in den Wald und "feuert"<br />
einen Audio-Impuls ab. Das kann ein kurzer<br />
Impuls oder ein langer Ton sein, der das<br />
Frequenzspektrum durchfährt. Was dabei<br />
geschieht, wird per Mikrofon aufgenommen<br />
und bildet den Raum oder die<br />
Umgebung so genau ab, dass man dieses<br />
Klangverhalten zuhause in seinem<br />
Tonstudio zur Verfüngung hat. Als wäre<br />
man vor Ort genau in diesem Raum und<br />
würde darin seine Aufnahmen machen.<br />
Kontakt 2 stellt einen - vereinfachten - Convolution-<br />
Reverb zur Verfügung. Natürlich gibt es<br />
Spezialprogramme die das besser und vor allem im<br />
True-Stereo-Modus können. Der günstigste Einstieg<br />
in die Welt des so genannten Faltungshalls - jetzt mal<br />
in deutsch - gelingt Ihnen mit dem Erwerb des<br />
Tascam GigaPulse als VST-PlugIn und den<br />
Hallfahnen der Halls of Fame. Um es mal auf den<br />
Punkt zu bringen. Für etwa 300.- Euro annähernd die<br />
Qualität eines mehrere Tausend Euro teuren<br />
Effektgeräts.Ja! - Unverschämte Werbung - aber auch<br />
eine unverschämt günstige Möglichkeit, in die<br />
Effektqualität-Sphäre der Profis vorzudringen.
<strong>Best</strong> <strong>Service</strong> Germany Halls of Fame<br />
Output / Effekt-Rack<br />
Um ein Instrument mit einem Convolution<br />
Effekt zu belegen, laden Sie sich zuerst<br />
eines der leeren Multiprogramme aus dem<br />
Ordner "Empty Convolution Multis".<br />
Laden Sie ein Instrument Ihrer Wahl.<br />
An jedem Instrument finden Sie diese 3<br />
Schaltmöglichkeiten.<br />
"X" dient zum Ausschalten.<br />
"-" dient zum Verkleinern.<br />
"AUX" - dient zum Ausklappen der 4<br />
Auxregler an jedem Instrument.<br />
Man kann jedes der 4 Aux-Racks mit<br />
je 4 Effekten bestücken. Mit diesen 4<br />
Schiebereglern bestimmen Sie den Anteil<br />
des Effekts <strong>für</strong> dieses Instrument.<br />
Einen Effekt laden und zuordnen<br />
In allen der 10 vorkonfigurierten Convolution Multis<br />
ist der Aux Weg 1 (also der<br />
"Effektweg") mit dem<br />
Convolution-Reverb belegt. Aus<br />
dem Namen des Multis können<br />
Sie den Typ der Umgebung und<br />
die Länge des Halls ablesen.<br />
Selbstverständlich steht es<br />
Ihnen frei, Ihre eigene<br />
Belegung zu wählen.<br />
Vergessen Sie in diesem<br />
Zusammenhang den Aux-<br />
-48-<br />
Überblick<br />
Regler am Instrument nicht - sonst können<br />
Sie unten einstellen was Sie wollen - Sie<br />
würden keinen Effekt zu hören kriegen.<br />
Effekt editieren<br />
Um sich den<br />
Convolution Hall Editor anzeigen zu lassen,<br />
wählen Sie die Knöpfe "Show Insert" und<br />
"Edit Effekt" an. Sollte Ihnen nichts angeboten<br />
werden klicken Sie mit der Maus<br />
noch einmal auf das "CU" im Effekt-<br />
Slot.<br />
Hier können Sie nun die Halllänge, Startzeit<br />
und den Effektanteil anpassen.<br />
Mit den Schaltern Early und Late bestimmen<br />
Sie, welchen Bereich der<br />
Hallfahne Sie mit den 3 darunter<br />
liegenden Funktionen beeinflussen.<br />
"Early" beeinflusst die Early-<br />
Reflections, während "Late" auf<br />
die Ausklangphase des Halleffekts wirkt.<br />
Viel Raum <strong>für</strong> Experimente.<br />
Mehr Informationen finden Sie im Kontakt 2<br />
Player Manual auf der DVD.<br />
An dieser Stelle einen herzlichen Dank an Josef Natterer,<br />
ohne dessen Programmierfähigkeiten viele Funktionen<br />
dieses Players nicht realisierbar gewesen wären.<br />
Franz Schwentner , Oktober 2007<br />
Produced by Peter Siedlaczek<br />
Co-produced by Klaus Kandler - <strong>Best</strong> <strong>Service</strong><br />
Concept & Programming by Franz Schwentner - <strong>Best</strong><br />
<strong>Service</strong><br />
Additional scripting by Josef Natterer
Now YOU are<br />
the conductor!<br />
The most affordable, useful and<br />
comprehensive collection of the<br />
finest classical sounds: mixed choir,<br />
strings, woodwinds, brass, percussion,<br />
harp, mallets, piano, prepared piano, ready-to-use tools, orchestral excerpts,<br />
performances and effects. An extremely versatile, inspiring, portable tool for every<br />
composer, arranger and producer.<br />
Kontakt 2 Player<br />
Comprehensive and<br />
easy-to-use virtual<br />
string orchestra.<br />
14 violins, 10 violas, 8 cellos &<br />
6 double basses. Spontaneous,<br />
playful and intuitive handling. <strong>Complete</strong>ly new material recorded with three different<br />
mit set-ups, providing ambient, normal and dry samples. 17 GB of great sounding<br />
samples in 5 lenghts and 3 or 4 dynamic layers. Immediate access to nearly all the<br />
playing techniques via key switching. New, scriptpowered program group<br />
"Advanced Legato" enables very realistic phrasing and legato transitions.<br />
-49-
Six of the best basses<br />
ever released<br />
Chris Hein - Bass is an outstanding, sampled<br />
virtual instrument. Thousands of samples,<br />
up to 42 articulations and dynamics<br />
all in one preset per instrument. With about<br />
20.000 samples and 12,7 GB content, it's<br />
the largest available bass-library. Huge<br />
effect section. Kontakt 2 player included.<br />
E-Bass Pick � E-Bass Slap � E-Bass Fretless � Upright-Bass Steel String � Upright-Bass<br />
Nylon String � Upright-Bass Gut String<br />
While our guitars gently weep...<br />
Chris Hein - Guitar is an outstanding, sampled<br />
virtual guitar library. Thousands of<br />
samples, many articulations and dynamics<br />
all in one preset per instrument. With about<br />
40.000 samples and 18 GB content, its<br />
the largest available guitar library. Thanks<br />
to Native Instruments genius script feature,<br />
Chris Hein - Guitar is easy to control<br />
Kontakt 2 player included.<br />
E-Guitar Clean � E-Guitar Blues � E-Guitar Chorus � Jazz Guitar Plectrum � Jazz Guitar<br />
Finger Steel Guitar Plectrum � Nylon Guitar Finger � Banjo � Mandolin.<br />
Trumpet, Trombone, Saxes<br />
Chris Hein - Horns is an outstanding virtual<br />
sampled brass instrument library.<br />
Alt-Sax, Tenor-Sax, Trumpet, Trombone &<br />
Trumpet-Section � ca. 20.000 Samples<br />
� 3,5 GB content � 4.500 - 6.000<br />
Samples per instrument � Up to 44 different<br />
playing techniques � All playing techniques<br />
in one programm with up to 44<br />
keyswitches � Up to 20 Velocities per<br />
note - a choice of up to 189 variations per note � 35 intelligent MIDI controllers included<br />
� reverb, delay, chorus & 3-band EQ included � New control features.<br />
-50-
More than 200 ethnic<br />
instruments.<br />
ETHNO WORLD 4 PROFESSIONAL<br />
contains more than 200 professionally<br />
recorded ethnic instruments and more<br />
than 14,000 high quality samples in the following categories:<br />
Bowed instruments, stringed instruments, woodwind and<br />
brass, key instruments, bell type instruments, metal type instruments,<br />
world drums, world percussion, gongs and bowls, and<br />
the new category of voices. Therefore, ETHNO WORLD 4<br />
PROFESSIONAL with its 10 gigabytes of samples is one of the<br />
most extensive ethnic library in the world.<br />
Three world-class<br />
grand pianos<br />
The long awaited successor of the<br />
SOS 5 star awarded Galaxy<br />
Steinway 5.1, extended with two<br />
more world-class grand pianos.<br />
Equipped with the Kontakt 2 engine<br />
for an ultra realistic playing experience<br />
and a specially designed user<br />
interface, allowing simple, but very<br />
flexible sound configuration and<br />
creative sound design. 3 world-class<br />
grand pianos: Galaxy Steinway 5.1<br />
(real surround and stereo version)<br />
Vienna Grand Imperial (96 keys and incredible low end) German Baby Grand (beautiful 'singing' tone, built in<br />
1929) - more than 6000 samples of a Steinway D, a Bösendorfer Imperial and a 1929 Blüthner Baby Grand.<br />
-51-