X BOX Service Manual.pdf - Genius
X BOX Service Manual.pdf - Genius
X BOX Service Manual.pdf - Genius
Create successful ePaper yourself
Turn your PDF publications into a flip-book with our unique Google optimized e-Paper software.
KYE SYSTEMS CORP<br />
<strong>Service</strong> <strong>Manual</strong><br />
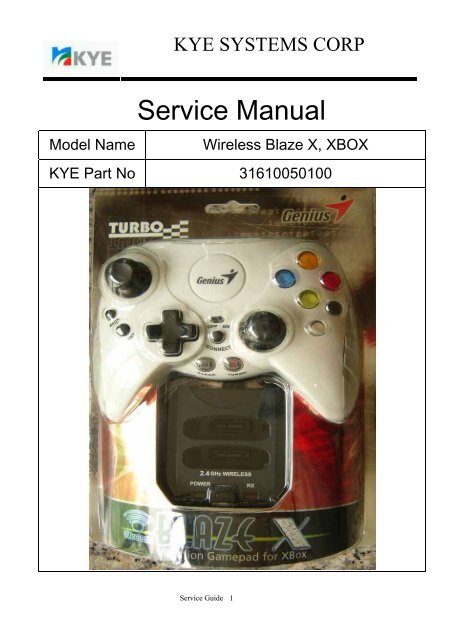
Model Name Wireless Blaze X, X<strong>BOX</strong><br />
KYE Part No 31610050100<br />
<strong>Service</strong> Guide 1
KYE SYSTEMS CORP<br />
Contents<br />
1. Revision Record -----------------------------------------------------------------------------------------3<br />
2. Maintain Guide -------------------------------------------------------------------------------------------4<br />
2.1 Introduction -------------------------------------------------------------------------------------------4<br />
2.2 Necessary tools -------------------------------------------------------------------------------------4<br />
2.3 Safety attention --------------------------------------------------------------------------------------4<br />
3. How to handle defective returns ---------------------------------------------------------------------5<br />
3.1 Procedure ---------------------------------------------------------------------------------------------5<br />
3.2 Problem description --------------------------------------------------------------------------------6<br />
3.3 Problem solve ----------------------------------------------------------------------------------------7<br />
4. Assemble & Disassemble ------------------------------------------------------------------------------11<br />
4.1 How to assemble and disassemble the pad surface ---------------------------------------11<br />
4.2 How to assemble and disassemble the PCB ------------------------------------------------12<br />
4.3 How to assemble and disassemble theMinistick VR & Ministick ------------------------13<br />
4.4 How to replace the Motors ------------------------------------------------------------------------14<br />
4.5 How to replace the Led ----------------------------------------------------------------------------15<br />
4.6 How to replace the D-Pad and Rubber --------------------------------------------------------16<br />
4.7 How to assemble and disassemble the Receiver surface --------------------------------17<br />
4.8 How to replace the Receiver Led ---------------------------------------------------------------18<br />
4.9 How to replace the Receiver connect rubber ------------------------------------------------18<br />
5. Appendix 1. Part list ---------------------------------------------------------------------------------------19<br />
<strong>Service</strong> Guide 2
KYE SYSTEMS CORP<br />
1. Revision Record<br />
Date Version Name Approve<br />
2005 / 12 / 12 1.1 Cindy Chu Leo Hsu<br />
<strong>Service</strong> Guide 3
KYE SYSTEMS CORP<br />
2. Maintain Guide<br />
2.1 Introduction<br />
Please pay attention to this guide, and follow the information to prevent resulting<br />
damage.<br />
2.2 Necessary tools<br />
<br />
<br />
<br />
<br />
<br />
<br />
Screwdriver<br />
Tweezers<br />
Solder<br />
Solder torch<br />
Tin-Sucker<br />
Pincers<br />
2.3 Safety attention<br />
2.3.1 When staying for long time, please cheek electric and power circuit.<br />
2.3.2 Place it in flat surface and prevent it from vibration.<br />
2.3.3 Don’t drop and jolt this pad.<br />
2.3.4 Keep this pad away when the pad is wet or high temperature.<br />
3. How to handle defective returns<br />
<strong>Service</strong> Guide 4
KYE SYSTEMS CORP<br />
3.1 Procedure<br />
Received<br />
Defective Pad<br />
Test & Check<br />
Problem<br />
Analyze possible<br />
Malfunction causes<br />
Function NG<br />
Frame the solutions<br />
And methods<br />
Function ok<br />
Replace necessary<br />
Defective parts<br />
Test all functions to<br />
check the pad is ok<br />
Return the pad to<br />
customers<br />
3.2 Problem Description<br />
<strong>Service</strong> Guide 5
KYE SYSTEMS CORP<br />
No. Problem Description<br />
3.2.1 Ministick is<br />
malfunction<br />
a. Can’t control ministick correctly and<br />
completely<br />
b. Ministick is not working<br />
3.2.2 Motors are not<br />
working<br />
a. One or both of two motors is not working<br />
b. Any motor’s rotation is incorrect<br />
c. Motor’s cable was broken<br />
d. Switch is not working<br />
3.2.3 PAD Led a. Led isn’t bright<br />
b. led is twinkling<br />
3.2.4 D-Pad a. The function is incorrect.<br />
b. D-Pad is broken<br />
c. D-Pad’s rubber is broken<br />
3.2.5 Receiver Led a. Led isn’t bright<br />
b. led is twinkling<br />
3.2.6 Receiver Rubber a. Receiver rubber is broken<br />
3.3 Problem Solve<br />
<strong>Service</strong> Guide 6
KYE SYSTEMS CORP<br />
3.3.1 Ministick is malfunction<br />
Problem<br />
Ministick out of function<br />
Analyze the<br />
problem<br />
Mechanics<br />
Electronics<br />
Judge the problem<br />
causes<br />
c. Incorrect using causes<br />
the mechanics of<br />
ministick being broken.<br />
d. Out of life<br />
a. Using too long time causes<br />
the value of VR’s function<br />
is becoming instable<br />
b. Out of life<br />
Solution<br />
Replace the<br />
Ministick<br />
Replace the<br />
Ministick<br />
3.3.2 Motors are not working<br />
<strong>Service</strong> Guide 7
KYE SYSTEMS CORP<br />
Problem<br />
Motor is not working<br />
Analyze the<br />
problem<br />
Mechanics<br />
Electronics<br />
Judge the problem<br />
causes<br />
a. Out of life a. The cord between the<br />
motor and the PCB is fall<br />
off.<br />
Solution<br />
Replace the<br />
motor<br />
Re-solder the<br />
cord<br />
3.3.3 Led problem<br />
<strong>Service</strong> Guide 8
KYE SYSTEMS CORP<br />
Problem<br />
LED isn’t bright<br />
Analyze the<br />
problem<br />
Mechanics<br />
Electronics<br />
Judge the problem<br />
causes<br />
b. Out of life b. The cord between the<br />
Led and the PCB is fall<br />
off.<br />
Solution<br />
Replace the Led<br />
Re-solder the<br />
cord<br />
3.3.4 D-Pad problem<br />
<strong>Service</strong> Guide 9
KYE SYSTEMS CORP<br />
Problem<br />
D-Pad function is error<br />
Analyze the<br />
problem<br />
Mechanics<br />
Electronics<br />
Judge the problem<br />
causes<br />
a. Incorrect using causes the<br />
r D-pad being broken.<br />
b. Out of life<br />
a. Using too long time causes<br />
the value of rubber function<br />
is becoming instable<br />
e. Out of life<br />
Solution<br />
Replace the D-Pad<br />
Replace the<br />
Rubber<br />
4. Assemble & Disassemble<br />
<strong>Service</strong> Guide 10
KYE SYSTEMS CORP<br />
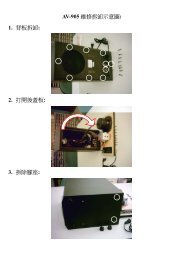
4.1 How to assemble and disassemble the Pad surface<br />
Procedure<br />
Graphics<br />
1. Disassemble<br />
a. Turn over the pad<br />
b. Put the pad on the flat<br />
c. Remove the screws<br />
Attention:<br />
Please to put a cloth to prevent<br />
pad surface during the procedure.<br />
2. Assemble<br />
a. Compose all parts<br />
according to disassemble<br />
drawing.<br />
b. Lock all screws firmly<br />
4.2 How to assemble and disassemble the PCB<br />
<strong>Service</strong> Guide 11
KYE SYSTEMS CORP<br />
Procedure<br />
1. Disassemble<br />
a. Remove the screws for<br />
disassemble the PCB<br />
Graphics<br />
Attention:<br />
Please take care other part<br />
during the procedure.<br />
2. Assemble<br />
a. Lock the screws<br />
4.3 How to Replace the Ministick VR & Ministick<br />
Procedure<br />
Graphics<br />
<strong>Service</strong> Guide 12
KYE SYSTEMS CORP<br />
1. Remove<br />
a. Disassemble the game pad<br />
b. Take off the mini-stick hat from the the<br />
PCB.<br />
a. Suck the point of weld of the<br />
resonator by Tin-Sucker.<br />
b. Remove the defective Ministick VR<br />
by Tweezers<br />
2. Replace<br />
a. Insert the same spec, complete<br />
Ministick on the correct hole<br />
3. Solder<br />
a. Solder the Ministick VR.<br />
b. Check all points of solder is ok.<br />
4. Replace<br />
a. Put a right mini-stick hat to the<br />
ministick VR and make sure that it<br />
position matches the VR.<br />
4.4 How to Replace the Motor<br />
Procedure<br />
Graphics<br />
<strong>Service</strong> Guide 13
KYE SYSTEMS CORP<br />
1. Remove<br />
a. Suck the point of weld of the Motor’s<br />
cord by Tin-Sucker<br />
b. Remove the defective Motor by<br />
Tweezers<br />
2. Replace<br />
a. Change a all right Motor<br />
b. Solder the cord with the new Motor<br />
3. Solder<br />
a. Put the new Motor into the seat<br />
b. Check all points of solder is ok.<br />
4.5 How to Replace the LED<br />
Procedure<br />
Graphics<br />
<strong>Service</strong> Guide 14
KYE SYSTEMS CORP<br />
1. Remove<br />
a. Suck the point of weld of the LED<br />
by Tin-Sucker<br />
b. Remove the defective LED by<br />
Tweezers<br />
2. Replace<br />
a. Insert the same spec, complete<br />
LED on the right hole<br />
3. Solder<br />
a. Solder the Led<br />
b. Check all points of solder is<br />
ok.<br />
4.6 How to Replace the D-PAD and D-Pad Rubber<br />
Procedure<br />
Graphics<br />
<strong>Service</strong> Guide 15
KYE SYSTEMS CORP<br />
1. Remove<br />
a. Disassemble the game pad<br />
b. Take off the D-PAD rubber, and<br />
D-Pad in turn<br />
2. Replace<br />
a. Put a right D-pad and a D-PAD<br />
rubber in turn.<br />
Note:<br />
The position of the membrane<br />
must be correct with the D-PAD<br />
4.7 How to assemble and disassemble the Receiver surface<br />
Procedure<br />
Graphics<br />
<strong>Service</strong> Guide 16
KYE SYSTEMS CORP<br />
3. Disassemble<br />
a. Turn over the Receiver<br />
b. Put the Receiver on the flat<br />
c. Remove the screws<br />
Attention:<br />
Please to put a cloth to prevent Receiver<br />
surface during the procedure.<br />
4. Assemble<br />
a. Compose all parts according to<br />
disassemble drawing.<br />
b. Lock all screws firmly<br />
4.8 How to Replace the Receiver LED<br />
Procedure<br />
Graphics<br />
<strong>Service</strong> Guide 17
KYE SYSTEMS CORP<br />
1. Remove<br />
a. Suck the point of weld of the LED<br />
by Tin-Sucker<br />
b. Remove the defective LED by<br />
Tweezers<br />
2. Replace<br />
a. Insert the same spec, complete<br />
LED on the right hole<br />
3. Solder<br />
a. Solder the Led Check all points of<br />
solder is ok.<br />
4.9 How to Replace the Receiver Connect Rubber<br />
Procedure<br />
Graphics<br />
1. Remove<br />
a. Disassemble the game Receiver<br />
b. Take off the Receiver Connect<br />
rubber,<br />
2. Replace<br />
Put a right a Receiver Connect rubber in<br />
turn.<br />
5. Appendix 1. Part List<br />
<strong>Service</strong> Guide 18
KYE SYSTEMS CORP<br />
N0. PHOTO Part No. Name Remark<br />
1 D220300131 Led(DiP)<br />
Power<br />
LED ,<br />
Turbo Led<br />
2 EMD4420101 Motor 5T<br />
3 EMD4420201 Motor 2T<br />
4 RVD1030101 VR 3D w/SW<br />
For<br />
ministick<br />
VR<br />
<strong>Service</strong> Guide 19
KYE SYSTEMS CORP<br />
5 M441P00601 Stick Cap +<br />
6 M441P00701 Stick Cap O<br />
7 RVD1030210 For Left -Trig set<br />
8<br />
RVD1030101<br />
For Right-Trig set<br />
9 M441P00401 D-Pad<br />
<strong>Service</strong> Guide 20
KYE SYSTEMS CORP<br />
1.Back<br />
/Start/<br />
10<br />
1. M442R00301<br />
2. M441R00101<br />
1. Rubber ZH383 for<br />
2. 4Key Rubber PAD<br />
Connect<br />
/ RX<br />
connect<br />
11 M441R00201<br />
6 * key Rubber for<br />
A/B/X/Y/WHT/BLK<br />
12 M441R00301<br />
2 * key Rubber for<br />
turbo +Clear<br />
13 A441F01001 TX PCBA<br />
14 A441F20001 RX PCBA<br />
<strong>Service</strong> Guide 21
KYE SYSTEMS CORP<br />
15<br />
1. D250300231<br />
2. D220300231<br />
1. Led(Dip)GRN for<br />
RX<br />
2. 2.Led(Dip) Red for<br />
RX<br />
<strong>Service</strong> Guide 22


