3M(tm) RelyX(tm) ARC
3M(tm) RelyX(tm) ARC
3M(tm) RelyX(tm) ARC

You also want an ePaper? Increase the reach of your titles
YUMPU automatically turns print PDFs into web optimized ePapers that Google loves.
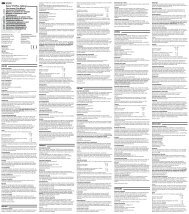
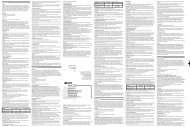
<strong>3M</strong> R ELYX <strong>ARC</strong> ADHESIVE R ESIN C EMENT<br />
P OST C EMENTATION T ECHNIQUE<br />
P RODUCTS R EQUIRED:<br />
■ Endodontic Post<br />
■ <strong>3M</strong> Scotchbond Etchant<br />
■ <strong>RelyX</strong> <strong>ARC</strong> resin cement<br />
■ <strong>3M</strong> Single Bond Dental Adhesive System<br />
■ Paper Points (for removal of excess material) ■ <strong>3M</strong> Curing Light 2500 or <strong>3M</strong> Curing Light XL 3000<br />
■ <strong>3M</strong> <strong>RelyX</strong> Ceramic Primer<br />
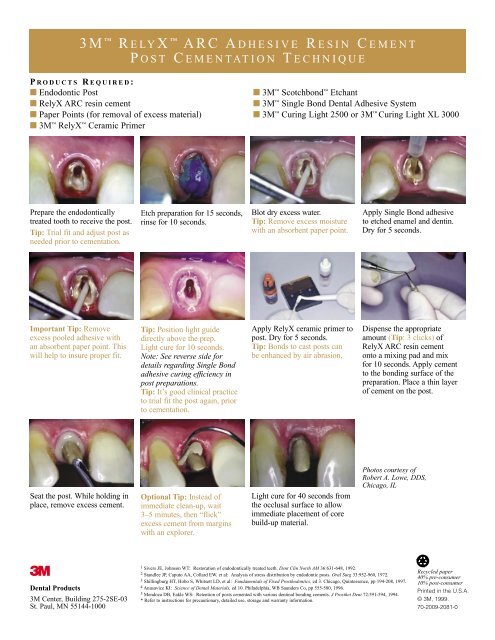
Prepare the endodontically<br />
treated tooth to receive the post.<br />
Tip: Trial fit and adjust post as<br />
needed prior to cementation.<br />
Etch preparation for 15 seconds,<br />
rinse for 10 seconds.<br />
Blot dry excess water.<br />
Tip: Remove excess moisture<br />
with an absorbent paper point.<br />
Apply Single Bond adhesive<br />
to etched enamel and dentin.<br />
Dry for 5 seconds.<br />
Important Tip: Remove<br />
excess pooled adhesive with<br />
an absorbent paper point. This<br />
will help to insure proper fit.<br />
Tip: Position light guide<br />
directly above the prep.<br />
Light cure for 10 seconds.<br />
Note: See reverse side for<br />
details regarding Single Bond<br />
adhesive curing efficiency in<br />
post preparations.<br />
Tip: It’s good clinical practice<br />
to trial fit the post again, prior<br />
to cementation.<br />
Apply <strong>RelyX</strong> ceramic primer to<br />
post. Dry for 5 seconds.<br />
Tip: Bonds to cast posts can<br />
be enhanced by air abrasion,<br />
Dispense the appropriate<br />
amount (Tip: 3 clicks) of<br />
<strong>RelyX</strong> <strong>ARC</strong> resin cement<br />
onto a mixing pad and mix<br />
for 10 seconds. Apply cement<br />
to the bonding surface of the<br />
preparation. Place a thin layer<br />
of cement on the post.<br />
Seat the post. While holding in<br />
place, remove excess cement.<br />
Optional Tip: Instead of<br />
immediate clean-up, wait<br />
3–5 minutes, then “flick”<br />
excess cement from margins<br />
with an explorer.<br />
Light cure for 40 seconds from<br />
the occlusal surface to allow<br />
immediate placement of core<br />
build-up material.<br />
Photos courtesy of<br />
Robert A. Lowe, DDS,<br />
Chicago, IL<br />
3<br />
Dental Products<br />
<strong>3M</strong> Center, Building 275-2SE-03<br />
St. Paul, MN 55144-1000<br />
1 Sivers JE, Johnson WT: Restoration of endodontically treated teeth. Dent Clin North AM 36:631-648, 1992.<br />
2 Standlee JP, Caputo AA, Collard EW. et al: Analysis of stress distribution by endodontic posts. Oral Surg 33:952-960, 1972.<br />
3 Shillingburg HT, Hobo S, Whitsett LD, et al: Fundamentals of Fixed Prosthodontics, ed 3. Chicago, Quintessence, pp 194-208, 1997.<br />
4 Anusavice KI: Science of Dental Materials, ed 10. Philadelphia, WB Saunders Co, pp 555-580, 1996.<br />
5 Mendoza DB, Eakle WS: Retention of posts cemented with various dentinal bonding cements. J Prosthet Dent 72:591-594, 1994.<br />
* Refer to instructions for precautionary, detailed use, storage and warranty information.<br />
Recycled paper<br />
40% pre-consumer<br />
10% post-consumer<br />
Printed in the U.S.A.<br />
© <strong>3M</strong>, 1999.<br />
70-2009-2081-0