EXPANDABLE BOOSTER SEAT - Babylove
EXPANDABLE BOOSTER SEAT - Babylove
EXPANDABLE BOOSTER SEAT - Babylove

You also want an ePaper? Increase the reach of your titles
YUMPU automatically turns print PDFs into web optimized ePapers that Google loves.
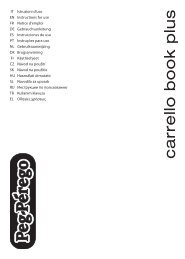
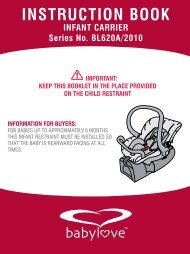
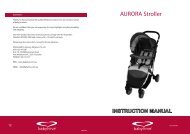
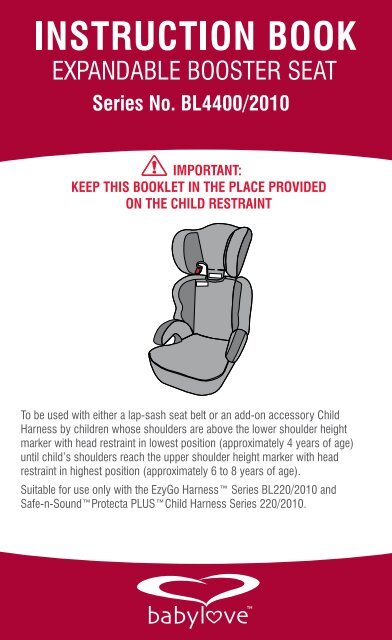
<strong>EXPANDABLE</strong> <strong>BOOSTER</strong> <strong>SEAT</strong><br />
Series No. BL4400/2010<br />
IMPORTANT:<br />
KEEP THIS BOOKLET IN THE PLACE PROVIDED<br />
ON THE CHILD RESTRAINT<br />
To be used with either a lap-sash seat belt or an add-on accessory Child<br />
Harness by children whose shoulders are above the lower shoulder height<br />
marker with head restraint in lowest position (approximately 4 years of age)<br />
until child’s shoulders reach the upper shoulder height marker with head<br />
restraint in highest position (approximately 6 to 8 years of age).<br />
Suitable for use only with the EzyGo Harness Series BL220/2010 and<br />
Safe-n-SoundProtecta PLUSChild Harness Series 220/2010.
INDEX<br />
INTRODUCTION & IMPORTANT INFORMATION<br />
PAGE<br />
3 INTRODUCTION AND IMPORTANT INFORMATION<br />
4<br />
6<br />
8<br />
10<br />
11<br />
12<br />
14<br />
18<br />
30<br />
31<br />
32<br />
36<br />
37<br />
39<br />
WARNINGS<br />
SHOULDER HEIGHT MARKERS AND A GROWING CHILD<br />
FEATURES<br />
SUITABLE FOR USE<br />
HOW TO SETUP<br />
HOW TO INSTALL<br />
HOW TO USE - WITH <strong>SEAT</strong> BELT<br />
HOW TO USE - WITH CHILD HARNESS<br />
THE NEXT RESTRAINT<br />
CARE AND MAINTENANCE<br />
HOW TO REMOVE/REPLACE COVER<br />
PRE-INSTALLATION OF ANCHOR FITTING<br />
<strong>BOOSTER</strong> <strong>SEAT</strong> INFORMATION<br />
PRECAUTIONS AND IN CASE OF ACCIDENT<br />
This Booster Seat is designed for use by children from approximately 4 years<br />
of age up to approximately 6 to 8 years of age in vehicles using a lap-sash<br />
seat belt or with a seat belt and Child Harness. The Booster Seat must not<br />
be used with just a lap only seat belt as the upper body of the child is not<br />
protected. It must be used with a lap-sash seatbelt.<br />
This Booster Seat is fitted with the VERSATETHERcatch that allows it to be<br />
used with compatible Child Harnesses. The Booster Seat and Child Harness<br />
can be used with either a lap or lap-sash seatbelt.<br />
Only the <strong>Babylove</strong> EzyGo Harness Series BL220/2010 or<br />
Safe-n-Sound Protecta PLUSChild Harness Series 220/2010 Child<br />
Harness are suitable for use with this product. No other Harness is suitable<br />
with this Booster Seat.<br />
A child that is not tall enough to reach the lower shoulder height marker in<br />
their seat with in-built harness will be too small for this Booster Seat. This<br />
Booster Seat should be used until the child no longer fits in the seat or the<br />
child can sit in the car’s seat with their lower leg able to hang over the seat<br />
cushion.<br />
This Booster Seat is not designed to be reclined.<br />
CAREFULLY READ ALL THE INSTRUCTIONS FOR INSTALLATION.<br />
IN THE EVENT OF DOUBT ABOUT THE METHOD OF INSTALLATION,<br />
CONSULT NURSERY ELEGANCE PTY LTD OR A CHILD RESTRAINT FITTING<br />
STATION AUTHORIZED BY A RELEVANT TRANSPORT AUTHORITY. IN NEW<br />
ZEALAND, CONTACT THE AGENT FOR THE VEHICLE.<br />
THIS RESTRAINT MUST BE USED IN CARS WITH FORWARD FACING<br />
<strong>SEAT</strong>S WITH A LAP-SASH <strong>SEAT</strong> BELT OR WITH A <strong>SEAT</strong> BELT AND CHILD<br />
HARNESS.<br />
No child restraint can guarantee absolute protection from injury in every<br />
crash. However, to ensure that your child gets all the protection designed into<br />
the restraint PLEASE READ AND FOLLOW THESE INSTRUCTIONS EXACTLY.<br />
Always store the instruction book in the pocket attached to the cover for<br />
future reference.<br />
2 3
• Use the restraint exactly as shown in the instructions.<br />
• Supervision of children is needed because they may be able to undo<br />
buckles and adjusters.<br />
• DO NOT LEAVE CHILDREN UNATTENDED IN THE CAR.<br />
• Do not alter or modify this restraint, use only recommended parts and<br />
accessories.<br />
• Repairs must only be done by the manufacturer or agent.<br />
• Do not allow the restraint to come into contact with polishes, oils, bleach<br />
and other chemicals.<br />
• Destroy the restraint if it has been in a severe crash, even if no damage is<br />
visible.<br />
• DO NOT USE WITH JUST A LAP BELT. You must use with lap-sash seat<br />
belt, or with a seat belt and Child Harness.<br />
• The lap part of the seat belt must be firmly across the thighs and sash<br />
straps fitted diagonally across the chest and on the shoulder.<br />
• If used with a Child Harness, the lap strap of the seatbelt must be adjusted<br />
firmly first, and then the harness, so that the lap-strap is not lifted off the<br />
child’s lap when the harness is adjusted.<br />
• DO NOT USE THIS RESTRAINT WITHOUT THE COVER.<br />
• IF AN AIRBAG IS FITTED IN THE <strong>SEAT</strong>ING POSITION WHERE THE CHILD<br />
RESTRAINT IS TO BE FITTED, FOLLOW THE VEHICLE MANUFACTURER’S<br />
WARNINGS AND INSTRUCTIONS.<br />
• Regularly check the restraint components, straps and other fitments for<br />
correct function, cracking & condition. Seek prompt repair.<br />
• Straps may be damaged by unsecured cargo in a collision. Secure or<br />
remove hazardous cargo before using this strap. Hatch-back or wagon: Do<br />
not use the child restraint where this strap may fall into a split in the seat<br />
back. Always attach hook and remove slack.<br />
• Securely stow all heavy objects, feeding bottles, cup holders, etc that<br />
could become missiles during an accident and cause injury to any<br />
occupant.<br />
• The restraint should not be purchased or sold as a second hand item.<br />
It is recommended not to use child restraints older than 10 years as the<br />
protection in an accident may be reduced.<br />
• THIS RESTRAINT MUST BE ATTACHED TO A CHILD RESTRAINT<br />
ANCHORAGE POINT IN THE CAR. REFER TO CAR OWNER’S HANDBOOK<br />
FOR LOCATION OF ANCHORAGE POINTS. REFER TO A CHILD RESTRAINT<br />
FITTING STATION IF NO ANCHORAGE POINTS ARE IN THE MOTOR CAR.<br />
• THIS RESTRAINT IS NOT SUITABLE FOR USE WHERE THE ANCHORAGE<br />
STRAP MAY FALL INTO A SPLIT IN THE <strong>SEAT</strong> BACK. (E.G. HATCHBACK<br />
OR WAGON).<br />
• Do not store in areas that may get hot, like in car boots, roof space, beside<br />
shed walls which get hot in summer. Do not place heavy items on top of<br />
the seat as this may distort the plastic<br />
:<br />
DO NOT LEAVE CHILDREN UNATTENDED IN THE CAR.<br />
4<br />
5
SHOULDER HEIGHT MARKERS &<br />
A GROWING CHILD<br />
SHOULDER HEIGHT MARKERS &<br />
A GROWING CHILD<br />
IMPORTANT: Follow this advice.<br />
Label A<br />
Smaller Child - Lower Shoulder Height Marker<br />
Label B<br />
Label A<br />
SMALLER CHILD<br />
Shoulders must not be<br />
below the Lower Shoulder<br />
Height Marker (label A) when the<br />
headrest is the lowest position.<br />
Height label maybe behind the child’s back.<br />
From approximately 4 years of age.<br />
TALLER CHILD<br />
Shoulders must not be<br />
above the Upper Shoulder<br />
Height Marker (label B) when the<br />
headrest is in the highest position.<br />
To approximately 6 to 8 years of age.<br />
When moving from a child restraint with in-built harness the child’s shoulders<br />
will be in line with or above the lowest marker (label A) with the headrest in<br />
the lowest position, if the child’s shoulders are below this marker the child<br />
needs to be in a child seat with an in-built harness.<br />
Label B<br />
Larger Child - Upper Shoulder Height Marker<br />
Label A<br />
Label B<br />
The seat can be used until the child’s shoulders reaches the top marker<br />
(label B) with the headrest fully raised. Usually the shoulder will contact the<br />
bottom of the headrest, it is then time to move to the next form of restraint.<br />
For maximum safety continue to use this seat as long as the child fits in it.<br />
Once the child no longer fits, move to the next form of child restraint, see<br />
page 30.<br />
6<br />
Front of Vehicle<br />
Note: These heights also apply<br />
if you are using a Child Harness<br />
with this Booster Seat.<br />
7
FEATURES<br />
FEATURES<br />
12 13 14<br />
11<br />
1<br />
1<br />
2<br />
Car’s Anchor Fitting<br />
Adjustable Height Headrest<br />
10<br />
9<br />
2<br />
3<br />
4<br />
3<br />
4<br />
5<br />
Shoulder slots for use with Child Harness<br />
Car Seat Belt<br />
Armrest (on each side)<br />
6<br />
Booster Seat Belt path label (each side)<br />
6<br />
5<br />
6<br />
7<br />
8<br />
Padded Cover for Comfort<br />
Headrest Adjustment lever<br />
7<br />
9<br />
Shoulder Height Markers<br />
10<br />
Seat Belt path label & Sash Guide (each side of headrest)<br />
11<br />
Upper Anchorage Strap Adjuster<br />
12<br />
Upper Anchorage Storage Band<br />
13<br />
Adjustable Upper Anchorage Strap<br />
Front of Vehicle<br />
8<br />
14<br />
Attachment Clip with VERSATETHER Catch<br />
8<br />
9
SUITABLE FOR USE<br />
HOW TO SETUP<br />
To be used with either a lap-sash seatbelt or an add-on accessory Child<br />
Harness by children whose shoulders are above the lower shoulder height<br />
marker with the head restraint in the lowest position (approximately 4 years<br />
of age) until their shoulders reach the upper shoulder height marker with the<br />
head restraint in the highest position (approximately 6 to 8 years of age).<br />
Continue to use this child restraint until child reaches the limit. Children are<br />
safest in a Booster Seat until their shoulders reach the upper shoulder height<br />
marker of the Booster Seat.<br />
Do not use this restraint until child’s shoulders are above the lower shoulder<br />
height marker with the head restraint in the lowest position.<br />
Just using a seatbelt is not recommended for children that have outgrown<br />
this seat. Use a larger Booster Seat.<br />
THIS RESTRAINT MUST BE USED IN CARS WITH FORWARD-FACING<br />
<strong>SEAT</strong>S WITH A LAP-SASH <strong>SEAT</strong> BELT OR WITH A <strong>SEAT</strong> BELT AND CHILD<br />
HARNESS.<br />
ADJUSTING THE HEADREST<br />
A. The headrest can be adjusted to lock into different height locations.<br />
Remove the child from the seat to adjust the headrest, if the headrest is stiff<br />
you may need to remove the seat from vehicle to adjust the headrest.<br />
B. Pull lever out to adjust the headrest position up or down, ensure that the<br />
bottom of the sash guide is level with or just above your child’s shoulder but<br />
not more than 30mm above.<br />
10<br />
• If your vehicle is not fitted with an anchor point, please contact a Safety<br />
Restraint Fitting Station authorised by the relevant State Government Body<br />
for correct fitment of the restraint. In New Zealand contact the agent for<br />
the vehicle. The upper anchorage strap must be attached to an anchorage<br />
point using an extension strap if necessary.<br />
• DO NOT USE WITH JUST A LAP BELT. You must use with lap-sash seat<br />
belt, or with a seat belt and Child Harness.<br />
• Do not use the restraint without the Upper Anchorage Strap attached.<br />
• Do not use in a front seat, unless it has a child restraint anchorage point<br />
and your child is over 4 years of age or in accordance with the applicable<br />
Road Rules in your region.<br />
• Do not use on any vehicle seat which faces sideways or rearwards.<br />
• To ensure all safety information is provided, only use replacement covers<br />
for this Booster Seat supplied by <strong>Babylove</strong>.<br />
Less than 30mm<br />
Greater than 30mm<br />
The headrest position will need to be checked with the child sitting in the<br />
seat. If not correct then adjust to the next position and recheck the fit on the<br />
child. This adjustment will need to be repeated as the child grows.<br />
Note: Where a child Harness is fitted, you may need to adjust the shoulder<br />
strap length.<br />
11
HOW TO INSTALL<br />
HOW TO INSTALL<br />
INSTALLING INTO VEHICLE<br />
Locate the child restraint anchorage fitting in<br />
the car that is directly behind seat location<br />
in the rear seats. Refer to the car Owners<br />
Manual. If there is no anchorage fitting then<br />
refer to pages 34 and 37 for assistance in<br />
adding an anchor fitting.<br />
Adjust the headrest to the correct height for<br />
your child (refer to page 11).<br />
Position the Booster Seat in the car facing<br />
forward in the chosen seating position.<br />
Lengthen the upper anchorage strap by<br />
pressing the adjuster button (1) and pulling<br />
the strap (2). Hook the attachment clip of<br />
the Upper anchorage Strap to the anchor<br />
fitting in the vehicle. Make sure to remove<br />
multiple twists from the upper anchorage<br />
strap. THIS UPPER ANCHORAGE STRAP<br />
MUST ALWAYS BE FITTED WHEN<br />
THE CHILD RESTRAINT IS USED IN A<br />
VEHICLE.<br />
Pull the Upper Anchorage Adjuster Strap (3)<br />
to just remove slack. Do not tighten causing<br />
the Booster Seat base to lift off the vehicle<br />
seat.<br />
Attachment Clip<br />
Car’s Anchor<br />
Fitting<br />
1<br />
2<br />
Storage<br />
Band<br />
3<br />
ALWAYS roll up excess strap tightly<br />
and use storage band to neatly store<br />
away from child’s reach.<br />
Note: In some car’s, the car’s<br />
headrest may need to be raised or<br />
even removed to allow the Booster<br />
Seat to sit correctly, the vehicle<br />
headrest may also interfere with the<br />
routing of the upper anchorage strap.<br />
If removed, store the vehicle headrest<br />
in a safe place but ALWAYS refit once<br />
the Booster Seat is no longer used.<br />
Storage<br />
Band<br />
Roll up tightly so<br />
the webbing is thick<br />
enough to be held<br />
in the storage band.<br />
Pull to remove slack<br />
Always attach hook and remove slack.<br />
12<br />
13
HOW TO USE<br />
USE WITH <strong>SEAT</strong>BELT<br />
USING LAP-SASH <strong>SEAT</strong> BELT (WITHOUT Child HARNESS)<br />
With the Booster Seat fitted to the<br />
vehicle as described on the previous<br />
page, push backrest to touch the<br />
car’s seat back and ensure the upper<br />
anchorage strap is connected.<br />
Sit your child on the seat. Ensure the<br />
headrest is set to the correct height for<br />
your child. (See page 11).<br />
Position the lap-sash belt over the<br />
child ensuring the lap portion is<br />
positioned over the thighs of the<br />
child and ensure the lap and sash<br />
are under the armrests following the<br />
red seat belt path labels marked:<br />
<strong>BOOSTER</strong> <strong>SEAT</strong>BELT PATH<br />
Fit the sash portion of the belt across<br />
the child’s chest and through the sash<br />
guide (red <strong>BOOSTER</strong> <strong>SEAT</strong>BELT PATH<br />
label) on the headrest as shown.<br />
IMPORTANT:<br />
ALWAYS USE THIS SASH GUIDE.<br />
Engage seat belt buckle and tongue<br />
ensuring there are no twists in the belt. If<br />
the seat belt buckle is adjustable, adjust<br />
the buckle as low as possible away<br />
from the child.<br />
Sash belt<br />
across the<br />
chest<br />
Ensure lap<br />
portion<br />
under<br />
armrest<br />
Red <strong>BOOSTER</strong> <strong>SEAT</strong>BELT<br />
PATH Label<br />
Ensure both<br />
lap and sash<br />
belts are under<br />
the armrest on<br />
buckle side<br />
<strong>SEAT</strong>BELT<br />
<strong>BOOSTER</strong><br />
PATH<br />
Red <strong>BOOSTER</strong> <strong>SEAT</strong>BELT<br />
PATH Label<br />
Engage<br />
buckle<br />
Adjust lap and sash portion of seat belt<br />
firmly but comfortably across the child’s<br />
lap and chest.<br />
If using the Inertia Reel Retractor seat belt,<br />
adjust the lap portion of the seat belt firmly<br />
around the child and Booster Seat, then let<br />
the slack sash portion retract up into the<br />
sash retractor.<br />
HOW TO USE<br />
IMPORTANT:<br />
Always ensure the seat belt is correctly restraining the child on the Booster<br />
Seat. The sash must NEVER be under the arm or behind the back of the child.<br />
The lap belt must ALWAYS be firmly on the child’s thighs and not on their<br />
abdomen.<br />
The child should always sit upright and not slump so that the lap belt is<br />
across the top of the thighs.<br />
:<br />
USE WITH <strong>SEAT</strong>BELT<br />
DO NOT LEAVE CHILDREN UNATTENDED IN THE CAR.<br />
Sash Guide<br />
14 15
HOW TO USE<br />
USE WITH <strong>SEAT</strong>BELT<br />
WARNING : A sash belt under the<br />
arm or behind the back is dangerous.<br />
IMPORTANT:<br />
Do not use these areas for<br />
the seat belt or Child Harness<br />
HOW TO USE<br />
USE WITH <strong>SEAT</strong>BELT<br />
<strong>SEAT</strong> BELT UNDER THE ARM<br />
IS DANGEROUS<br />
Sash-belt through<br />
the sash guide.<br />
Lap belt must always<br />
be firm on the thighs.<br />
The child must not<br />
slump or slouch.<br />
<strong>SEAT</strong> BELT BEHIND THE BACK<br />
IS DANGEROUS<br />
Headrest adjusted<br />
so it is close to the<br />
shoulders. Seat belt<br />
across the chest.<br />
TO REMOVE CHILD<br />
Disengage seat belt tongue and buckle. Remove<br />
belt from child. When Booster Seat is not being<br />
used, secure in position, by engaging seat belt<br />
over the Booster Seat or store in a safe place.<br />
IMPORTANT:<br />
Use seat belt to hold the child restraint when not<br />
in use.<br />
<strong>SEAT</strong>BELT<br />
<strong>BOOSTER</strong><br />
PATH<br />
16<br />
IMPORTANT:<br />
Always ensure that the seat belt is fitted firmly to the child’s hips and thighs<br />
and the sash belt is diagonally across the chest.<br />
NOTE: Seat belt extenders should not be used if the seat belt is not long<br />
enough to fit around the child. If a seat belt extender is used then the seat belt<br />
buckle must not be in contact with the child.<br />
17
HOW TO USE<br />
USE WITH CHILD HARNESS<br />
USING WITH A CHILD HARNESS<br />
This Booster Seat is only suitable for use with <strong>Babylove</strong> EzyGo Harness<br />
Series BL220/2010 or Safe-n-SoundProtecta PLUSHarness Series<br />
220/2010. Refer to the instruction book supplied with the Child Harness for<br />
full details of using and installing the Child Harness. When installing the Child<br />
Harness into the vehicle and Booster Seat, connect the upper anchorage<br />
strap to the VERSATETHER Catch on the Booster Seat’s upper tether strap<br />
(as shown below).<br />
If required, use the extension strap supplied with the child harness for all<br />
other instances to attach the harness to anchor points in the luggage area<br />
such as the vehicle floor or ceiling. Not suitable for most other styles of child<br />
safety harnesses.<br />
INSTALLING BABYLOVE EzyGO HARNESS INTO VEHICLE<br />
WITHOUT EXTENSION STRAP<br />
Hook the Child Harness attachment clip (1) onto VERSATETHER Catch (2).<br />
Then hook attachment clip (3) onto anchor fitting. Ensure that none of the<br />
straps are twisted and not passing over any sharp edges.<br />
1<br />
1. Attachment Clip from Child Harness.<br />
2. VERSATETHER Catch.<br />
3. Booster Seat Attachment Clip.<br />
3 4. Anchor Fitting in the car.<br />
HOW TO USE<br />
INSTALLING BABYLOVE EzyGO HARNESSWITH<br />
EXTENSION STRAP INTO VEHICLE<br />
An adjustable extension strap is supplied with the Child Harness. Hook<br />
the EzyGo Harnessclip first onto the extension strap catch, then hook<br />
the extension strap hook onto the VERSATETHER Catch on the Booster<br />
Seat’s upper anchorage strap as shown below. Ensure that none of the<br />
straps are twisted or catching on sharp edges. Tighten the Booster Seat’s<br />
upper anchorage strap (refer to page 12) then remove excess slack from the<br />
extension strap by pulling the adjuster strap as illustrated below.<br />
Attachment Clip attaches to<br />
the VERSATETHER Catch 7<br />
2<br />
1<br />
3<br />
Pull to remove<br />
slack<br />
7<br />
6<br />
5<br />
Pull to remove<br />
slack<br />
Rotate the<br />
Adjuster to<br />
lengthen<br />
4<br />
USE WITH CHILD HARNESS<br />
3<br />
18<br />
1<br />
1<br />
2<br />
2<br />
3<br />
Child Harness Attachment Clip attaches to<br />
the VERSATETHERCatch<br />
NOTE:<br />
Do not use the VERSATETHERcatch on the Child Harness Clip (1).<br />
VERSATETHERcatch (2) is only for use with a Child Harness.<br />
4<br />
Pull to<br />
lengthen<br />
To lengthen the Adjustable Extension strap<br />
rotate the adjuster and pull the main strap.<br />
1. Attachment clip from the Child Harness<br />
2. VERSATETHER Catch<br />
3. Booster Seat Attachment Clip<br />
4. Anchor Fitting in the Car<br />
5. Adjustable Extension Strap<br />
6. Extension Strap Catch<br />
7. Extension Strap Attachment Clip<br />
19
HOW TO USE<br />
HOW TO USE<br />
USE WITH CHILD HARNESS<br />
CHOOSING METHOD OF INSTALLATION<br />
The Harness can be installed using either of the following methods.<br />
Method 1 - Using a lap-sash seat belt in conjunction with Gated Slide<br />
(provided with Child Harness) to convert to a lap belt.<br />
Method 2 - Using lap seat belt.<br />
Before installing the Harness determine which method of installation is<br />
required and follow instructions carefully.<br />
REFER TO THE CHILD HARNESS INSTRUCTIONS FOR FULL DETAILS ON<br />
HOW TO USE AND INSTALL THE CHILD HARNESS<br />
C. Lengthen the Child Harness<br />
using the adjuster under the cover<br />
(see the Child Harness instructions<br />
on the adjustment method). Press<br />
the Adjuster button (1) on the<br />
adjuster and pull the shoulder<br />
strap (2)<br />
Attachment Clip<br />
USE WITH CHILD HARNESS<br />
Left hand Strap<br />
Cross Strap<br />
Adjuster under cover<br />
2<br />
1<br />
INSTALLING THE HARNESS<br />
Decide which seating position you are<br />
going to use and which seat belt type<br />
is installed in that position. If using a<br />
lap-sash seat belt then a Gated Slide must<br />
be used.<br />
A. Ensure the headrest is set to the correct<br />
height for your child (See page 11).<br />
B. Hook the attachment clip to the anchor<br />
fitting and tighten (refer page 12). Make<br />
sure to remove any twists from the<br />
upper anchorage strap. THIS UPPER<br />
ANCHORAGE STRAP MUST ALWAYS BE<br />
FITTED WHEN THE CHILD RESTRAINT IS<br />
USED IN A VEHICLE.<br />
Hook attachment clip to the<br />
anchor fitting in the Car.<br />
D. Feed the left hand harness strap and<br />
attachment clip through the right hand slot of the<br />
Booster Seat cover.<br />
Pass the left<br />
hand Strap and<br />
Attachment Clip<br />
through the right<br />
hand slot<br />
20<br />
21
HOW TO USE<br />
HOW TO USE<br />
USE WITH CHILD HARNESS<br />
E. Then feed the left hand harness<br />
strap back through the left hand slot<br />
in the Booster Seat cover, keeping<br />
the attachment clip at the back of the<br />
Booster Seat.<br />
Feed left hand Child<br />
Harness Strap & Cross<br />
Strap through left hand<br />
slot of Booster Seat<br />
cover.<br />
Hook the Attachment Clip<br />
onto VERSATETHER<br />
Catch<br />
F. Hook the harness Attachment Clip onto the<br />
VERSATETHER Catch.<br />
Ensure shoulder<br />
straps are of<br />
equal length.<br />
USE WITH CHILD HARNESS<br />
The harness shoulder strap will now be around the neck of the headrest.<br />
NOTE: The shoulder straps must be in the slots which are nearest to the<br />
child’s shoulder’s but not lower than the child’s shoulders. As there are<br />
only one set of slots in the cover the shoulder strap slots will be correctly<br />
positioned provided the headrest is set to the correct height for your child<br />
(refer to page 11).<br />
Child<br />
Harness<br />
Straps<br />
Neck<br />
Slots in cover<br />
22<br />
Rear view of Booster Seat showing harness<br />
straps feeding through the headrest cover slots<br />
Booster<br />
Seat’s upper<br />
anchorage<br />
strap<br />
23
HOW TO USE<br />
USE WITH CHILD HARNESS<br />
USING LAP-SASH <strong>SEAT</strong> BELT WITH CHILD SAFETY<br />
HARNESS.<br />
(Using Gated Slide provided with Child Harness.)<br />
Refer to the Harness instructions for fitting<br />
the gated slide to the lap-sash seat belt.<br />
Once fitted, position the gated slide near<br />
to the child (under the armrest) but not<br />
touching the child. Thread the converted<br />
lap-sash seat belt through the harness<br />
strap loops as shown left. Ensure there<br />
are no twists in the harness, cross strap<br />
and seat belt.<br />
Important Note: Some vehicle seat belts<br />
are too short and you may experience<br />
some difficulty fitting the converted<br />
lap-sash around your child. If so, adjust<br />
the gated slide nearer to your child,<br />
(ensure the slide does not touch your<br />
child). This may provide more belt length<br />
to fit your child, but if the belt still will<br />
not fit, try another location in the vehicle,<br />
e.g.. side seat. If the vehicle seatbelts are<br />
still too short, then contact the vehicle<br />
manufacturer for advice on longer seat<br />
belts.<br />
Outer<br />
strap.<br />
Inner<br />
strap.<br />
Faces<br />
towards<br />
child.<br />
Converted<br />
lap-sash<br />
seat belt.<br />
Position the<br />
Gated Slide<br />
under the<br />
armrest but<br />
not touching<br />
the child.<br />
HOW TO USE<br />
FITTING THE GATED SLIDE TO THE LAP-SASH <strong>SEAT</strong> BELT<br />
A. Hold the lap and sash straps<br />
together and fold as shown right.<br />
Slide the inner strap into the Gated<br />
Slide followed by the outer strap.<br />
B. The two straps should slide freely<br />
in the Gated Slide slot.<br />
C. Repeat previous step A for the other<br />
slot in the Gated Slide.<br />
Outer<br />
strap.<br />
USE WITH CHILD HARNESS<br />
Inner<br />
strap.<br />
Faces<br />
towards<br />
child.<br />
A<br />
B<br />
C<br />
24<br />
25
HOW TO USE<br />
HOW TO USE<br />
USE WITH CHILD HARNESS<br />
D. Feed the straps through<br />
the Gated Slide to remove any<br />
slack.<br />
E. There may be two types of Gated<br />
Slides available, Curved and Flat.<br />
Curved<br />
Flat<br />
Hollow side<br />
towards child.<br />
Sash belt<br />
portion<br />
Lap belt<br />
portion<br />
When fitting the Curved Gated Slide, the seat belt route can only go one way,<br />
as shown right.<br />
D<br />
E<br />
METHOD 2: USING LAP <strong>SEAT</strong> BELT<br />
WITH CHILD HARNESS.<br />
Adjust the headrest to align with the top shoulder<br />
slots of the restraint. Fit the Child Harness as<br />
shown above. Then connect the cross strap as<br />
shown below. Thread the lap seat belt through the<br />
harness strap loops as shown right.<br />
NOTE: Seat belt extenders should not be used if the<br />
seat belt is not long enough to fit around the child.<br />
If a seat belt extender is used then the seat belt<br />
buckle must not be in contact with the child.<br />
Connect the Child Harness to the VERSATETHER<br />
Catch as detailed on page 18 or 19.<br />
A. With the child seated, place each of the harness<br />
straps over each shoulder.<br />
B. Feed the Right hand strap (loop end) into the<br />
cross strap loop to connect the two sides.<br />
C. Feed the adult belt (lap belt or converted lap/<br />
sash) through the harness loops, ensuring that the<br />
cross strap loop does not disconnect. Also ensure<br />
there are no twists in the harness, cross strap and<br />
seat belt<br />
1. Left Hand Harness Strap<br />
2. Right Hand Harness Strap<br />
3. Storage strap<br />
4. Cover Pad<br />
5. Right Hand Harness Strap Loop<br />
6. Cross Strap Loop<br />
7. Cross Strap<br />
8. Booster Seat Upper Anchorage Strap<br />
9. Car’s Anchor Fitting<br />
4<br />
Pull to remove<br />
slack<br />
6 7<br />
26 27<br />
5<br />
USE WITH CHILD HARNESS<br />
3<br />
2<br />
1<br />
9<br />
8
HOW TO USE<br />
HOW TO USE<br />
USE WITH CHILD HARNESS<br />
D. Engage the seat belt tongue to the<br />
buckle and adjust the seat belt to sit<br />
firmly but comfortably around the child's<br />
pelvis. The seat belt buckle should be<br />
located as low as possible below the<br />
child's hip.<br />
E. With the lap belt (or converted lap/<br />
sash) adjusted to be a firm fit on the<br />
child's thighs, then adjust the Child<br />
Harness to remove all slack in the<br />
shoulder straps. Once adjusted, further<br />
adjustments are necessary only to<br />
the upper extension straps and to<br />
accommodate the growth of the child.<br />
F. Finally, roll up the free end of the<br />
harness’s adjuster strap, secure using<br />
the storage strap, then place it into the<br />
top of the adjuster and close the cover<br />
pad.<br />
Pull<br />
adjuster<br />
strap to<br />
remove<br />
slack<br />
Fold the adjuster strap and<br />
secure with Storage strap.<br />
Adjuster Cover<br />
Storage Strap<br />
IMPORTANT:<br />
If used with a Child Harness, the lap strap of the seat belt must be adjusted<br />
firmly first, and then the harness, so that the lap-strap is not lifted off the<br />
child’s lap when the harness is adjusted.<br />
Remove slack in the Harness shoulder straps as shown on the previous page.<br />
TO REMOVE CHILD<br />
Disengage seat belt tongue and buckle and remove harness and belt from<br />
child. When Booster Seat is not being used, secure in position, by engaging<br />
seat belt over the Booster Seat or store in a safe place.<br />
NOTE: It maybe easier to unthread the car seat belt out of the loops before<br />
lifting the harness over the child’s head.<br />
Once the child is too large for the Booster Seat , the Child Harness can still be<br />
used and is a significant safety device for children in a lap only seat belt. Refer<br />
to the Child Harness instruction book.<br />
IMPORTANT:<br />
Use seat belt to hold the child restraint when not in use.<br />
:<br />
USE WITH CHILD HARNESS<br />
Lift over<br />
Child’s head<br />
G. To lengthen the harness at any time,<br />
fully press the Adjuster Button (1) whilst<br />
pulling the shoulder strap (2) upwards.<br />
2<br />
1<br />
DO NOT LEAVE CHILDREN<br />
UNATTENDED IN THE CAR.<br />
IMPORTANT:<br />
The Gated Slide must be removed from<br />
the seat belt if the Booster Seat and Child<br />
Harness are no longer used in the car to<br />
allow other users to use the seatbelt as a<br />
lap-sash seatbelt.<br />
28<br />
29
THE NEXT RESTRAINT<br />
CARE & MAINTENANCE<br />
Next type of restraint that can be used in the car for your child.<br />
When your child has outgrown the seat, you can then either use:<br />
Just the car's<br />
lap-sash seatbelt.<br />
Or you can use a Child<br />
Harness and lap seat<br />
belt. Lap seat belts can<br />
be dangerous without a<br />
Child Harness.<br />
REGULAR CARE OF THIS RESTRAINT:<br />
Please check the following items regularly to ensure the safety of your child:<br />
A. Check the webbing for fraying.<br />
B. Ensure there are no cracks in moulding or the plastic moulding.<br />
C. If any part of the restraint is cracked or broken, seek repair immediately or<br />
replace the child restraint.<br />
D. Clean the cover and the seat regularly.<br />
HOW TO CLEAN<br />
Use only mild soap and water with a moist cloth to clean all metal and plastic<br />
parts of the Booster Seat.<br />
Do not use harsh cleaners, polishes, oils, bleach or other chemicals.<br />
COVER<br />
The Booster Seat has a cover made from flame retardant fabric and is<br />
removable for cleaning. Washing and care instructions are on the care label<br />
attached to the cover. Refer to the following pages for instructions on how to<br />
remove and replace the cover.<br />
Connect the hook and loop parts so that the cover is not damaged in the<br />
wash.<br />
Or you can use<br />
a narrow Booster Seat<br />
suitable for children up<br />
to 8-10 years of age. An<br />
accessory Child Harness<br />
may be used.<br />
30<br />
31
CARE AND MAINTENANCE<br />
CARE AND MAINTENANCE<br />
TO REMOVE COVER<br />
Follow the sequence below A to F. to remove the cover.<br />
B. Peel top away from shell<br />
E. Peel centre<br />
cover away<br />
from shell<br />
TO REPLACE COVER<br />
1. Align and fit bottom cover over base of Booster Seat.<br />
2. Re-attach elastic loops (D).<br />
3. Fit and align top cover over headrest.<br />
4. Fit and align centre cover over backrest.<br />
5. Ensure all loops and clips, and hook and loop are fastened on both Left and<br />
Right sides of seat.<br />
6. You will need to fit the Booster Seat back in the car and attach the upper<br />
anchorage strap. Adjust the headrest.<br />
F. Peel bottom cover away<br />
from shell<br />
A. Undo<br />
Hook and<br />
Loop<br />
C. Undo<br />
Hook and<br />
Loop<br />
VEHICLE INSTALLATION ACCESSORIES<br />
(Available from retailers of <strong>Babylove</strong> products)<br />
EXTRA ANCHOR KITS: Are available if using the restraint in additional<br />
vehicles.<br />
Re-order number: K402/a<br />
EXTENSION STRAPS: May be required for vehicles without a fixed parcel<br />
shelf.<br />
Re-order number: K304 (length 300mm)<br />
or K305 (length 600mm).<br />
D. Unhook<br />
elastic loops<br />
32<br />
33
PRE-INSTALLATION OF ANCHOR FITTING<br />
PRE-INSTALLATION OF ANCHOR FITTING<br />
Consult the vehicle owner's handbook for location of anchorage fittings<br />
or anchorage points and the possible use of spacers. Some vehicles may<br />
have an anchor fitting fitted by the vehicle manufacturer. If anchorage points<br />
cannot be found refer to car manufacturer or local child restraint fitting station<br />
or traffic authority for optimum position of anchorage point and the use of<br />
spacers.<br />
IMPORTANT WARNING:<br />
THE ATTACHMENT CLIP COVER MUST ALWAYS BE USED AS IT PREVENTS<br />
THE RISK OF INCORRECT FITMENT OF THE ATTACHMENT CLIP TO THE<br />
ANCHOR FITTING. ALWAYS ENSURE THAT THE ATTACHMENT CLIP IS<br />
CORRECTLY ENGAGED TO THE ANCHOR FITTING AND NOT HOOKED OR<br />
FITTED TO ANY OTHER OBJECT BEFORE EACH USE OF THE RESTRAINT.<br />
THIS IS ESPECIALLY IMPORTANT IN VEHICLES SUCH AS STATION WAGONS,<br />
VANS, HATCH BACKS OR VEHICLES WITHOUT A FIXED PARCEL SHELF,<br />
SINCE THE ANCHOR POINT IS USUALLY NOT VISIBLE.<br />
IMPORTANT INSTALLATION NOTE:<br />
In some vehicles the anchor fitting in the rear vertical panel can only be<br />
installed in one way. Please refer to vehicle owner's handbook or a child<br />
restraint fitting station for correct method.<br />
Front of Vehicle<br />
Extension Strap distance to be measured.<br />
Length 300mm (Use <strong>Babylove</strong> part K304 or equivalent)<br />
Length 600mm (Use <strong>Babylove</strong> part K305 or equivalent)<br />
Available from retailers of <strong>Babylove</strong> products.<br />
45°<br />
Distance to measure<br />
to the anchor point<br />
Adjustable upper<br />
Anchorage Strap<br />
Correct engagement of attachment clip<br />
to anchor fitting when attachment clip<br />
cover is used.<br />
34<br />
The shaded areas of this diagram illustrate the possible locations of the<br />
anchor fitting. Within each shaded area is an anchor fitting showing the<br />
correct way to install the fitting. Ensure the anchor fitting is aligned as<br />
illustrated unless stated otherwise in the vehicle Owners handbook.<br />
35
PRE-INSTALLATION OF ANCHOR FITTING<br />
PRE-INSTALLATION OF ANCHOR FITTING<br />
36<br />
IF THE CAR IS FITTED WITH CHILD<br />
RESTRAINT ANCHORAGE POINT<br />
Locate the anchorage point behind the<br />
Fig.1.<br />
rear seating position. (consult the car<br />
owners handbook for the location of<br />
the anchorage point). The anchorage<br />
point should be directly behind and<br />
central to the restraint. Remove thread<br />
plug from the parcel shelf/floor/roof,<br />
etc. and install anchor bolt and fitting Vehicle trim<br />
as shown in Fig.1.<br />
CAUTION: DO NOT OVERTIGHTEN<br />
ANCHOR BOLT. OVERTIGHTENING<br />
MAY FRACTURE OR BREAK BOLT. MAXIMUM<br />
TORQUE IS 20 N.M. (14.75 ft.lb.)<br />
Note: Minimum of five full turns of anchor bolt<br />
is required before tightening force is applied.<br />
IF THE CAR IS NOT FITTED WITH CHILD<br />
RESTRAINT ANCHORAGE POINTS<br />
For Sedans only - Drill 9mm diameter<br />
hole in the parcel shelf on the centre<br />
line of the seating position as shown<br />
in Fig.3. Before drilling the hole,<br />
check the underside for accessibility.<br />
Install the anchor bolt as shown in<br />
Fig.2.<br />
For vehicles other than Sedans - In<br />
Australia, consult your nearest child<br />
restraint fitting station or traffic<br />
authority for vehicle inspection to<br />
find the best, correct position for the<br />
placement of the anchorage point,<br />
and for the correct attachment bolt<br />
length and use of spacers. In New<br />
Zealand, consult the agent for the<br />
vehicle.<br />
UPPER ANCHORAGE FITTING<br />
Attachment Bolt<br />
Lock washer<br />
Anchor fitting<br />
Spacer(s) if<br />
required<br />
Vehicle metal<br />
structure<br />
Front of Vehicle<br />
UPPER ANCHORAGE<br />
FITTINGS FOR SEDANS ONLY<br />
Fig.2.<br />
Attachment Bolt<br />
Vehicle trim<br />
Anchor fitting<br />
Spacer(s) if<br />
required<br />
Vehicle metal<br />
structure<br />
Reinforcing<br />
washer (cone<br />
downwards)<br />
Lock washer<br />
Secure nut<br />
Note to Queensland purchasers: The installation of anchorage points must<br />
be approved by authorised officers appointed by Queensland Transport.<br />
Authorised officers can be sourced from all Queensland Transport Customer<br />
Service and Queensland Ambulance Service Centres.<br />
ONLY USE A 5/16 UNC GRADE 5 BOLT. IF<br />
THE BOLT IS NOT THE CORRECT LENGTH<br />
THE CAR MANUFACTURER’S HAND BOOK<br />
CAN PROVIDE ADVICE ON THE CORRECT<br />
LENGTH BOLT.<br />
CHILD RESTRAINTS MUST NOT BE<br />
ATTACHED TO UNSOUND METAL<br />
OR TO WOOD, OR SYNTHETIC<br />
STRUCTURES. WHEN DRILLING 9<br />
MM HOLE DO NOT DRILL THROUGH<br />
FUEL LINES, FUEL TANKS,<br />
ELECTRICAL WIRING, OR RADIO<br />
SPEAKERS.<br />
WEBBING STRAPS MUST BE<br />
PROTECTED FROM SHARP<br />
CORNERS AND EDGES. THE<br />
ANCHOR FITTING MUST BE USED<br />
ONLY AS DESCRIBED ABOVE. IT<br />
MUST NOT BE HOOKED ONTO ANY<br />
OTHER OBJECT.<br />
Note: Marking on<br />
the top of a Grade 5<br />
Bolt.<br />
Front of Vehicle<br />
200mm<br />
min.<br />
Fig.3.<br />
Centre line of<br />
seating position<br />
37
<strong>BOOSTER</strong> <strong>SEAT</strong> INFORMATION<br />
PRECAUTIONS<br />
The backrest may partially disengage from the base if the backrest falls<br />
backwards when out of the car, possibly when transferring the Booster<br />
Seat. To re-engage align both base and backrest, lift backrest slightly whilst<br />
pushing down on base and clip in.<br />
Whilst still pushing base down bring backrest forward until base and backrest<br />
are clipped together and the backrest can now be rotated to its intended<br />
position.<br />
Precautions to prevent reducing the safety offered by<br />
this Booster Seat.<br />
1. Ensure the seatbelt is used and fitted correctly. The lap belt must be on<br />
thighs and not the abdomen and the sash belt must always be across the<br />
chest.<br />
2. Always thread the sash belt through sash guide.<br />
3. Do not cause the seat to be reclined in any way.<br />
4. Ensure the child does not slouch or slump where the sash belt is across<br />
the abdomen. This is dangerous.<br />
5. Do not place the seatbelt behind the back or under the arm. It is<br />
dangerous.<br />
38<br />
HOW TO REMOVE <strong>BOOSTER</strong> <strong>SEAT</strong> FROM VEHICLE<br />
A. Disconnect the attachment clip whilst lifting the seat slightly to slacken<br />
the upper anchorage strap. (This allows the seat to be put back with no<br />
adjustment if it is in the same vehicle).<br />
B. If a Harness is used, feed car seat belt out through harness loops, and if<br />
required feed Child Harness out of the shoulder slots in the cover to remove<br />
the Child Harness front the seat.<br />
Attachment Clip<br />
Press spring to release.<br />
Car’s Anchor<br />
Fitting<br />
IMPORTANT:<br />
The Gated Slide must be removed from the seat belt if the Booster Seat and<br />
Child Harness are no longer used in the car so that adults maybe able to use<br />
the seat belt correctly.<br />
6. Do not use the seat belt in any other way other than following the red<br />
<strong>BOOSTER</strong> <strong>SEAT</strong>BELT PATH seat belt path labels.<br />
7. Ensure that if you are using a child safety harness that the lap belt is<br />
firm on the child’s thighs and not on the abdomen. Do not tighten the Child<br />
Harness tether strap, just remove slack.<br />
8. Ensure you advise the child not to undo the seat belt buckle unless told to<br />
do so.<br />
IN CASE OF ACCIDENT<br />
If your restraint has been involved in a severe crash, you should destroy the<br />
restraint even if no damage is obvious. Some insurance companies offer<br />
vehicle insurance which covers or partially covers the replacement of your<br />
child restraint. Contact your insurance company for further details.<br />
Your insurance company may require you to keep the child restraint for<br />
assessment, but do not use the child restraint after a severe crash.<br />
39
We reserve the right to alter this product without notice in our constant endeavor for improvement.<br />
©2007-2011 Nursery Elegance Pty. Ltd.<br />
<strong>Babylove</strong>, EzyGo Trademarks are the property of Nursery Elegance Pty Ltd.<br />
Safe-n-Sound and VERSA-TETHER trademarks are the property of Britax Childcare Pty Ltd.<br />
VERSATETHER Trademark is used by permission of Britax Childcare Pty Ltd.<br />
This product is covered by Australian and Overseas patents and applications.<br />
Patents Pending.<br />
P/No. 2200592/A