Installation and Operations Manual - Intaeco
Installation and Operations Manual - Intaeco
Installation and Operations Manual - Intaeco

Create successful ePaper yourself
Turn your PDF publications into a flip-book with our unique Google optimized e-Paper software.
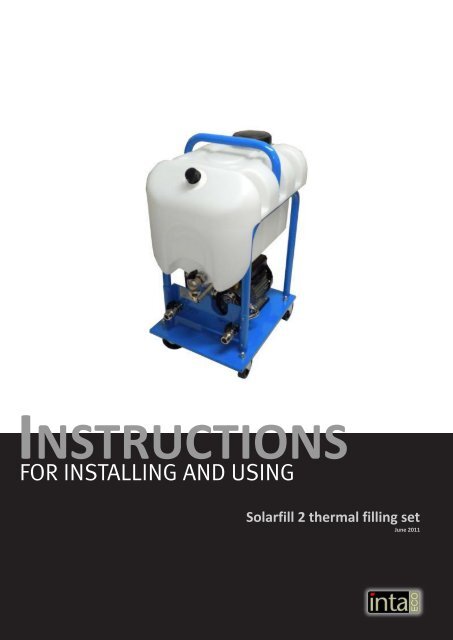
INSTRUCTIONS<br />
FOR INSTALLING AND USING<br />
Solarfill 2 thermal filling set<br />
June 2011
Solarfill 2 operating instructions<br />
Introduction<br />
The <strong>Intaeco</strong> Solarfill 2 is a solar thermal filling set designed to make the filling <strong>and</strong> flushing of aqueousglycol<br />
based systems easy.<br />
Solarfill 2 features a robust trolley type design, with swivel wheels allowing it to be easily manoeuvred<br />
into position in the plant room.<br />
Key features<br />
Increased capacity 30 litre solar fluid tank with large lid for easy filling<br />
New 0.5 Hp pump<br />
Reduced noise level during operation<br />
Filling port with shut-off ball valve <strong>and</strong> flexible connection hose<br />
Flushing/de-aeration port with shut-off ball valve & flexible hose<br />
Clear large capacity bowl filter replaces old “Y” strainer<br />
Pressure gauge<br />
High output filling pump with cast iron body <strong>and</strong> brass manifold<br />
Variable pressure regulator to set fill pressure<br />
Inlet for connection to an external tank<br />
Optional manual pump for pressurising (without electrical power)<br />
By employing the Solarfill 2, cleaning, draining, venting <strong>and</strong> filling of pipe systems is made much easier<br />
<strong>and</strong> can take place in a single operation. It’s also no longer necessary to work on the roof adjacent to<br />
the solar array <strong>and</strong> solar air vents on the roof can be omitted from the system design. System debris<br />
can also be flushed out through the inbuilt strainer.<br />
Instructions for use<br />
Fill the tank here with the Glycol/water pre-mix.<br />
Do not seal airtight during the operation as the object is to remove the air.<br />
Tank<br />
Connect the Solarfill return<br />
hose here (from pump station)<br />
Filling method<br />
- ball valve closed<br />
solar fluid in<br />
Pressure<br />
gauge<br />
air & debris out<br />
Connect the Solarfill flow hose<br />
here (to the pump station)<br />
Bowl filter<br />
flexible connection<br />
hoses<br />
Filling pump<br />
Outlet with<br />
isolation valve<br />
Inlet (when tank is not<br />
used) with isolation<br />
valve
Solarfill 2 operating instructions<br />
Read before operating Solarfill 2<br />
Never run the pump set unmanned<br />
Avoid running the pump without fluid<br />
Hot fluid returning from the collectors can pose a scalding risk. Temperatures can exceed 60°C<br />
On sunny days, cover the collectors or avoid filling the system during the hottest part of the day<br />
Ensure the flexible connection pipes are fitted to the correct connections on the pump set <strong>and</strong> system<br />
Only use on aqueous <strong>and</strong> aqueous-glycol systems<br />
If required, clean or flush the solar fluid tank with the strainer open<br />
Use bund trays <strong>and</strong> avoid operation with wet h<strong>and</strong>s<br />
Filling <strong>and</strong> flushing<br />
These instructions should be used in conjunction with the instructions for the components contained within the<br />
solar thermal installation.<br />
Before filling <strong>and</strong> flushing, carry out system checks <strong>and</strong> ensure the solar expansion vessel has the correct gas<br />
charge.<br />
1. Securely fit the connection hoses to the solar thermal system. Use the connections on the solar pump<br />
station, if installed.<br />
2. When using the integral tank, use a funnel <strong>and</strong> a bund tray <strong>and</strong> carefully fill the integral tank. When using<br />
IBC or external solar fluid containers or tanks, dip the flexible inlet hose in the container.<br />
3. Depending on the source of the fluid, either open the isolation valve below the integral tank or the<br />
isolation valve at the side of the pump set outlet. Whichever one is open - the other must be shut.<br />
4. Open the outlet isolation valve.<br />
5. Close the isolation valve between the flushing <strong>and</strong> filling points on the solar pump station.<br />
6. Open the flushing <strong>and</strong> filling isolation valves on the solar pump station.<br />
7. Switch on the Solarfill pump set <strong>and</strong> refill the tank when necessary. Always turn the pump off when<br />
refilling the tank. There is no need to use the isolation valves as there is a non-return valve on the<br />
discharge side of the filling pump.<br />
8. Fill <strong>and</strong> flush until there are no more bubbles visible in the integral tank. Then, continue for 15 minutes to<br />
deaerate.<br />
9. Close the flushing isolation valve <strong>and</strong> pressurize to the required fill pressure.<br />
10. Switch off the filling pump <strong>and</strong> shut off the filling isolation valve on the solar pump station.<br />
11. Where vents are used, deaerate the system <strong>and</strong> recharge using the filling pump set when necessary.<br />
12. Switch on the solar circulation pump using manual output on the solar controller <strong>and</strong> allow it to run for 1<br />
hour.<br />
13. Deaerate again using vents where provided <strong>and</strong> refill to required pressure if necessary.<br />
14. Shut-off the inlet <strong>and</strong> outlet isolation valves on the filling set.<br />
15. Carefully remove the connection pipes from the solar pump station, avoid spills using a bucket or<br />
container. Then, drain down the flexible pipes.<br />
Important: Most collector manufacturers<br />
recommend not to fill the system when the<br />
collectors are hot. Therefore, either fill the system<br />
during times of the day when the collectors are<br />
cooler (i.e. 1st thing in the morning or late<br />
afternoon) or better still, cover the collectors.<br />
Solar pump<br />
station<br />
T<br />
T<br />
P<br />
Solarfill filling<br />
pump set
Solarfill 2 operating instructions<br />
Troubleshooting<br />
Defect<br />
The motor does not start<br />
The electric motor is running but<br />
the pump is not producing<br />
pressure<br />
The over-heat safety switch cuts<br />
out the electric motor<br />
Hose connections leaking<br />
On system test, pressure is lost<br />
Cause<br />
There is no voltage<br />
The capacitor is ineffective<br />
Low supply voltage or line drop<br />
The filter is clogged<br />
The suction tube is clogged<br />
The pump is by-passing the system<br />
System is not in pressurise test<br />
configuration<br />
Excessive overheating of the electric<br />
motor<br />
The electric motor is damaged<br />
The seals are damaged<br />
Check the hose seals first before<br />
checking the system for leaks. If no<br />
leaks, then check the system.<br />
Remedy<br />
Check fuses or loose contacts <strong>and</strong> check the value<br />
of line voltage<br />
Replace the part<br />
Increase the voltage within the nominal limits<br />
specified<br />
Clean the filter<br />
Remove & clean. Check seals are undamaged<br />
Check valve positions on the pump station<br />
Shut the out valve on the pump station. Pressurise<br />
to 4 bar, turn off system inlet <strong>and</strong> outlet valves, then<br />
turn off the electric power<br />
Check voltage <strong>and</strong> fan<br />
Contact <strong>Intaeco</strong> Customer Services<br />
Replace seals<br />
Tighten joints<br />
Technical details<br />
Max. flow rate<br />
Max. pressure<br />
Size<br />
Connections<br />
Weight<br />
Electrical<br />
Min. Glycol temp.<br />
Max. Glycol temp.<br />
23 litres per minute<br />
5 bar g<br />
390mm d x 320mm w x<br />
780mm h (with wheels)<br />
¾" BSP male<br />
15.5kg when empty<br />
230v/110v options<br />
Net frequency 50Hz<br />
Motor IP55<br />
+05°C<br />
+35°C
Solarfill 2 operating instructions<br />
Component Parts<br />
Position<br />
1<br />
2<br />
3<br />
4<br />
5<br />
6<br />
7<br />
8<br />
9<br />
10<br />
11<br />
12<br />
13<br />
14<br />
15<br />
16<br />
17<br />
18<br />
19<br />
20<br />
21<br />
22<br />
23<br />
24<br />
25<br />
26<br />
27<br />
28<br />
29<br />
30<br />
31<br />
32<br />
33<br />
34<br />
Description<br />
Cap<br />
Gasket<br />
Hexagon nut<br />
H<strong>and</strong>le<br />
Washer<br />
Cap ¾"<br />
Seal<br />
Tank<br />
Tap 90<br />
Tank st<strong>and</strong><br />
Screw<br />
Console plate<br />
Screw<br />
Tap straight<br />
Hexagon nut<br />
Washer<br />
Screw<br />
Base support<br />
Wheel<br />
Hexagon nut<br />
Washer<br />
Hexagon nut<br />
Anti-vibration<br />
Outlet tube<br />
Nipples<br />
O-ring<br />
Pressure gauge<br />
Pump<br />
Washer<br />
Screw<br />
Tube filter<br />
Nipples<br />
Filter<br />
Inlet tube<br />
Quantity<br />
1<br />
1<br />
2<br />
1<br />
4<br />
2<br />
12<br />
1<br />
1<br />
2<br />
4<br />
1<br />
4<br />
2<br />
2<br />
4<br />
4<br />
1<br />
4<br />
4<br />
4<br />
4<br />
2<br />
1<br />
2<br />
2<br />
1<br />
1<br />
4<br />
4<br />
1<br />
2<br />
1<br />
1<br />
<strong>Intaeco</strong> Limited<br />
Airfield Industrial Estate, Hixon, Staffordshire ST18 0PF<br />
t: 01889 272190 f: 01889 272191<br />
e: sales@intaeco.co.uk w: www.intaeco.co.uk