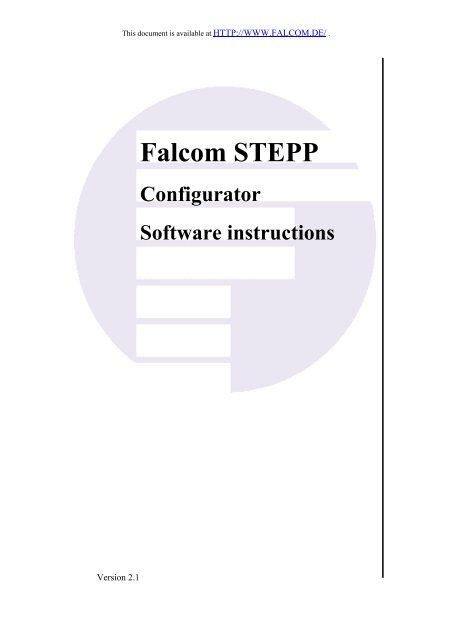
Falcom STEPP Configurator Software instructions
Falcom STEPP Configurator Software instructions
Falcom STEPP Configurator Software instructions

Create successful ePaper yourself
Turn your PDF publications into a flip-book with our unique Google optimized e-Paper software.
This document is available at HTTP://WWW.FALCOM.DE/ .<br />
<strong>Falcom</strong> <strong>STEPP</strong><br />
<strong>Configurator</strong><br />
<strong>Software</strong> <strong>instructions</strong><br />
Version 2.1
<strong>STEPP</strong>-CONFIGURATOR VERSION 2.1<br />
Index of contents<br />
0 CHAPTER 1........................................................................4<br />
0.1 <strong>STEPP</strong> CONFIGURATOR OVERVIEW ......................................................................................... 4<br />
1 CHAPTER 2........................................................................5<br />
1.1 THE FALCOM <strong>STEPP</strong> STARTER KIT.................................................................................................. 5<br />
2 CHAPTER 3........................................................................6<br />
2.1 <strong>STEPP</strong> CONFIGURATOR SOFTWARE................................................................................................. 6<br />
2.1.1 Installation on Microsoft Windows Systems ................................................................................. 6<br />
2.1.2 Installation on GNU/Linux Systems.............................................................................................. 6<br />
2.1.2.1 JRE Installation.............................................................................................................................................. 6<br />
2.1.2.2 Stepp <strong>Configurator</strong> <strong>Software</strong> Installation....................................................................................................... 6<br />
2.1.2.3 Serial Ports .................................................................................................................................................... 7<br />
2.1.3 Running the Stepp <strong>Configurator</strong> <strong>Software</strong>..................................................................................... 7<br />
2.1.3.1 Console .......................................................................................................................................................... 8<br />
3 CHAPTER 4......................................................................10<br />
3.1 <strong>STEPP</strong> DEVICE CONFIGURATION ................................................................................................... 10<br />
3.1.1 Device Settings ............................................................................................................................ 10<br />
3.1.2 Messages...................................................................................................................................... 12<br />
3.1.2.1 Time, Displacement and Speed Condition.................................................................................................... 12<br />
3.1.3 Authorized Numbers.................................................................................................................... 13<br />
3.1.4 Voice Call Settings ...................................................................................................................... 14<br />
3.1.5 Alarms ......................................................................................................................................... 14<br />
3.1.5.1 Digital Alarms.............................................................................................................................................. 15<br />
3.1.5.2 Analog Alarms.............................................................................................................................................. 16<br />
3.1.6 Geofencing................................................................................................................................... 17<br />
3.1.7 History ......................................................................................................................................... 19<br />
3.1.7.1 Acquiring History......................................................................................................................................... 19<br />
3.1.8 Allowed Protocols ....................................................................................................................... 20<br />
3.1.9 Applying the Configuration......................................................................................................... 22<br />
3.1.10 Setting the Digital Outputs .......................................................................................................... 23<br />
4 CHAPTER 5......................................................................24<br />
4.1 <strong>STEPP</strong> DEVICE STATUS ................................................................................................................. 24<br />
4.1.1 GSM Status.................................................................................................................................. 24<br />
4.1.2 Location Information ................................................................................................................... 24<br />
4.1.3 Inputs and Outputs....................................................................................................................... 24<br />
5 CHAPTER 6......................................................................27<br />
5.1 GSM CONNECTION TO A <strong>STEPP</strong> DEVICE....................................................................................... 27<br />
5.1.1 Temporary Connections............................................................................................................... 28<br />
6 APPENDIX A....................................................................31<br />
6.1 FALCOM <strong>STEPP</strong> DEVICE PROGRAMMING INTERFACE .................................................................... 31<br />
6.1.1 A-1 N MEA sentences Transmitted by Stepp Device.............................................................. 31<br />
6.1.2 A.2 Configuring the Stepp Device............................................................................................. 35<br />
6.1.2.1 A.2.1 Reading the Configuration................................................................................................................ 37<br />
6.1.3 A.3 Acquiring History ............................................................................................................... 38<br />
6.1.4 A.4 Initiating a GSM Connection .............................................................................................. 38<br />
6.1.5 A.5 SMS Messages.................................................................................................................... 38<br />
7 APPENDIX B....................................................................41<br />
7.1 CONFIGURATION COMMANDS - FOR FALCOM <strong>STEPP</strong>................................................................... 41<br />
This confidential document is the property of FALCOM GmbH and may not be copied or circulated without permission.<br />
Page 1
<strong>STEPP</strong>-CONFIGURATOR VERSION 2.1<br />
7.1.1 SMS Commands .......................................................................................................................... 42<br />
7.1.2 Extended NMEA Commands – for FALCOM <strong>STEPP</strong> only....................................................... 48<br />
Version history:<br />
Version number Author Changes<br />
2.0 Fadil Beqiri - Initial version<br />
2.1 Fadil Beqiri - Chapter 7 added.<br />
This confidential document is the property of FALCOM GmbH and may not be copied or circulated without permission.<br />
Page 2
<strong>STEPP</strong>-CONFIGURATOR VERSION 2.1<br />
Cautions<br />
Information furnished herein by FALCOM is believed to be accurate<br />
and reliable. However, no responsibility is assumed for its use. Also<br />
the information contained herein is subject to change without notice.<br />
Please, read carefully the safety precautions.<br />
If you have any technical questions regarding this document or the<br />
product described in it, please contact your vendor.<br />
General information about FALCOM and its range of products is<br />
available at the following internet address: http://www.falcom.de/<br />
Trademarks<br />
All terms mentioned in this document that are known to be trademarks or<br />
service marks have been appropriately capitalized. Use of a term in this<br />
document should not be regarded as affecting the validity of any<br />
trademark or service mark.<br />
AMP is a trademark of AMP Inc.<br />
INFOPORT is a trademark of Whitaker Corporation.<br />
Microsoft and Windows are trademarks of Microsoft Corporation.<br />
Molex and Micro-Fit 3.0 are trademarks of Molex, Inc.<br />
Red Hat is a trademark of Red Hat, Inc.<br />
Sun Microsystems and Java are trademarks of Sun Microsystems, Inc.<br />
Copyright<br />
The <strong>Falcom</strong> <strong>STEPP</strong> hardware and softwares description are<br />
copyrighted by FALCOM GmbH with all rights reserved. No part of<br />
this user’s guide may be produced in any form without the prior<br />
written permission of FALCOM GmbH.<br />
FALCOM GmbH.<br />
No patent liability is assumed with respect to the use of the information<br />
contained herein.<br />
This confidential document is the property of FALCOM GmbH and may not be copied or circulated without permission.<br />
Page 3
<strong>STEPP</strong>-CONFIGURATOR VERSION 2.1<br />
0 Chapter 1<br />
0.1 <strong>STEPP</strong> CONFIGURATOR Overview<br />
The <strong>Falcom</strong> Stepp device is an easy-to-setup GSM/GPS terminal. It can be<br />
configured for use in a wide range of applications including automatic<br />
vehicle location, fleet management and vehicle security and recovery.<br />
General information about <strong>Falcom</strong> and its products is available at the<br />
<strong>Falcom</strong> home page at http://www.falcom.de/. The latest versions of the<br />
Stepp device firmware, configuration software and manuals can also be<br />
found at the <strong>Falcom</strong> home page.<br />
Configuration of the Stepp device can be done using a PC in combination<br />
with a Stepp starter kit or via a GSM connection, either using a data call or<br />
SMS messages.<br />
A GSM data connection can be made to the Stepp device for real time<br />
tracking. The device can also send SMS messages in various situations, for<br />
example if a vehicle equipped with the device goes out of a pre-configured<br />
region. Other than real-time tracking, the device can also be used to store<br />
parameters such as location and speed. The stored history can be retrieved at<br />
a later time, or over a GSM data call.<br />
Voice calls can be made to and from the Stepp device. The device also<br />
provides four digital outputs, four digital inputs, two analog inputs and<br />
digital inputs for the ignition and battery status in a car. Each of the inputs<br />
can be configured to trigger the device to send an SMS message or initiate a<br />
data or voice call.<br />
Chapter 2 explains how to connect the Stepp device to a PC using a Stepp<br />
starter kit, while Chapter 3 explains how to install the Stepp <strong>Configurator</strong><br />
software. Chapter 4 describes how to use the Stepp <strong>Configurator</strong> to<br />
configure the Stepp device. Chapter 5 shows what status information the<br />
Stepp <strong>Configurator</strong> gives about a Stepp device, while Chapter 6 shows how<br />
to use the Stepp <strong>Configurator</strong> to communicate with a Stepp device using a<br />
GSM modem. The Stepp device programming interface is described in<br />
Appendix A. Remotely programming the Stepp device via SMS and $PSRF<br />
commands is described in Appendix B.<br />
Please note that, the help file attached to the “<strong>Falcom</strong> Stepp <strong>Configurator</strong>”<br />
software, is identical to this manual, except chapter 7.<br />
This confidential document is the property of FALCOM GmbH and may not be copied or circulated without permission.<br />
Page 4
<strong>STEPP</strong>-CONFIGURATOR VERSION 2.1<br />
1 Chapter 2<br />
1.1 The <strong>Falcom</strong> Stepp Starter Kit<br />
The Stepp device can be obtained as a single unit or as part of a starter kit.<br />
The device has two antenna plugs, one for GSM and one for GPS. The<br />
device has a slot where a GSM SIM can be used. The SIM would be used<br />
for GSM communication to the device. The device also has a Molex Micro-<br />
Fit 3.0 socket and an AMP INFOPORT Series III header. The Molex socket<br />
gives access to the power input and signals such as the inputs and outputs.<br />
The AMP header gives access to signals such as the microphone, the<br />
speaker and the RS232 serial connection.<br />
The Stepp starter kit provides an environment for evaluating and<br />
configuring the Stepp device. The kit can be used to emulate the final<br />
hardware setup used when the device is installed. Connecting the device to<br />
the evaluation board gives easy access to the device connections.<br />
The components of the starter kit are listed below.<br />
<strong>Falcom</strong> Stepp device<br />
<strong>Falcom</strong> Stepp evaluation board<br />
power module<br />
GSM/GPS antenna<br />
microphone and speaker<br />
Molex Micro-Fit 3.0 plugs cable<br />
AMP INFOPORT Series III connector and DB15 plug cable<br />
DB9 RS232 serial cable<br />
software CD<br />
The kit can be setup using the procedure below.<br />
1. Connect both antenna plugs to the corresponidng plugs on the Stepp<br />
device.<br />
2. Connect the AMP connector on the cable to the AMP header on the<br />
Stepp device. Connect the DB15 plug on the other end of the cable to<br />
the respective socket on the evaluation board.<br />
3. Connect a Molex plug on the cable to the socket on the Stepp device.<br />
Connect the plug on the other end of the cable to the respective socket<br />
on the evaluation board.<br />
4. Connect the speaker and microphone to the respective sockets on the<br />
evaluation board.<br />
5. Use the serial cable to connect the evaluation board to a serial port on<br />
the PC.<br />
6. Connect the power module to the evaluation board and to the ac power<br />
supply.<br />
For more informatione about the hardware installation please refer to the<br />
“stepp_1.4.3_sw_eng.pdf” manual which is available on the <strong>Falcom</strong>’s<br />
homepage:<br />
http://www.falcom.de/ service/downloads/manual/<strong>Falcom</strong> <strong>STEPP</strong><br />
This confidential document is the property of FALCOM GmbH and may not be copied or circulated without permission.<br />
Page 5
<strong>STEPP</strong>-CONFIGURATOR VERSION 2.1<br />
2 Chapter 3<br />
2.1 Stepp <strong>Configurator</strong> <strong>Software</strong><br />
The Stepp <strong>Configurator</strong> version 2.0 software can be installed from the<br />
software CD. The software can be installed on Microsoft Windows systems<br />
or GNU/Linux systems. The Stepp <strong>Configurator</strong> requires the Java 2<br />
Runtime Environment (JRE) version 1.4 or later. The JRE is copyrighted by<br />
Sun Microsystems, Inc., a nd is available on the Sun Microsystems Java<br />
home page at http://java.sun.com/.<br />
The JRE is also available on the software CD.<br />
2.1.1 Installation on Microsoft Windows Systems<br />
Insert the software CD in the CD-ROM drive and mount it. We will assume<br />
that the software CD is mounted on /mnt/cdrom on the system; if the mount<br />
point is different, the path names below must be updated accoringly.<br />
If the JRE version 1.4 or later is not installed on the system, it must be<br />
installed before the Stepp <strong>Configurator</strong> can be used. The JRE is available on<br />
the software CD. If a suitable JRE is already installed, skip Section 2.1.2.1.<br />
2.1.2 Installation on GNU/Linux Systems<br />
Insert the software CD in the CD-ROM drive and mount it. We will assume<br />
that the software CD is mounted on /mnt/cdrom on the system; if the mount<br />
point is different, the path names below must be updated accordingly.<br />
If the JRE version 1.4 or later is not installed on the system, it must be<br />
installed before the Stepp <strong>Configurator</strong> can be used. The JRE is available on<br />
the software CD.<br />
If a suitable JRE is already installed, skip Section 2.1.2.1.<br />
2.1.2.1 JRE Installation<br />
Follow the installation <strong>instructions</strong> as given by Sun Microsystems. The<br />
<strong>instructions</strong> are located at /mnt/cdrom/linux/jre/install-linux.html.<br />
It is possible to choose either a self-exctracting binary file installation or an<br />
rpm package installation. The respective installation files are located at<br />
/mnt/cdrom/linux/jre/j2re-1_4_2_04-linux-i586.bin and<br />
/mnt/cdrom/linux/jre/j2re-1_4_2_04-linux-i586-rpm.bin<br />
2.1.2.2 Stepp <strong>Configurator</strong> <strong>Software</strong> Installation<br />
The Stepp <strong>Configurator</strong> is located in the /mnt/cdrom/linux/steppconfig<br />
directory in the software CD. To install the software on the hard drive, copy<br />
the steppconfig directory and its contents to any location on the hard drive<br />
as follows cp -R /mnt/cdrom/linux/steppconfig <br />
This confidential document is the property of FALCOM GmbH and may not be copied or circulated without permission.<br />
Page 6
<strong>STEPP</strong>-CONFIGURATOR VERSION 2.1<br />
2.1.2.3 Serial Ports<br />
On GNU/Linux systems, permissions are needed to access the serial ports<br />
and the locking mechanisms. This may be different on various distributions;<br />
contact the distributor to find out how to set the required permissions. On<br />
some distributions, users would have the required permissions by default.<br />
On other distributions, such as Red Hat systems, it might be necessary to<br />
add the users who need to use the Stepp <strong>Configurator</strong> to the uucp and lock<br />
groups.<br />
2.1.3 Running the Stepp <strong>Configurator</strong> <strong>Software</strong><br />
Before running the Stepp <strong>Configurator</strong>, make sure that the hardware is set<br />
up as described in Chapter 2. Switch on the Stepp device by switching on<br />
the V+ and ACCU switches on the evaluation board.<br />
To run the software on Microsoft Windows systems, choose <strong>Falcom</strong> Stepp<br />
<strong>Configurator</strong> from the Start menu. To run the software on GNU/Linux<br />
systems, execute SteppConfig from the steppconfig directory.<br />
As soon as the program is executed, a dialog will prompt for the serial port<br />
where the Stepp device is connected as seen in Figure 3.1. Choose the serial<br />
port in the Modem/Device drop-down list box and click Connect.<br />
Figure 3.1: The New Connection dialog.<br />
The main window for the Stepp <strong>Configurator</strong> should appear. The<br />
configurator has two tabs, one which gives the Stepp device status and one<br />
which is used to configure the Stepp device.<br />
If the same serial port is going to be used for several sessions, the Stepp<br />
<strong>Configurator</strong> can be set to remember the serial port name. Choose<br />
<strong>Configurator</strong>→Preferences and select the Ports tab, which is shown in<br />
Figure 3.2. Other than choosing the default port, it is also possible to set the<br />
Stepp <strong>Configurator</strong> to start automatically, without confirming which serial<br />
port to open.<br />
This confidential document is the property of FALCOM GmbH and may not be copied or circulated without permission.<br />
Page 7
<strong>STEPP</strong>-CONFIGURATOR VERSION 2.1<br />
Figure 3.2: The ports preferences.<br />
The Stepp device transmits GPS NMEA sentences and other Stepp device<br />
specific NMEA sentences. A copy of the sentences received from the Stepp<br />
device can be sent to another serial port by enabling the Send received data<br />
option in the New Connection dialog (see Figure 3.1) or the Ports tab in the<br />
preferences (see Figure 3.2).<br />
To start the second instance of the Stepp <strong>Configurator</strong>, choose<br />
<strong>Configurator</strong>→New. A dialog will prompt for a second serial port.<br />
2.1.3.1 Console<br />
The Stepp <strong>Configurator</strong> communicates to the Stepp device using NMEA<br />
sentences. To monitor the sentences being sent to and from the Stepp<br />
device, choose View→Console. The console is shown in Figure 3.3. The<br />
sentences sent by the Stepp device are shown in a regular weight font, while<br />
the sentences sent by the Stepp <strong>Configurator</strong> are shown in a bold font.<br />
To send an NMEA sentence to the Stepp device, type the sentence in the<br />
text field. The NMEA checksum is calculated and appended to the sentence<br />
automatically. To send the sentence, press Enter or click Send. The<br />
sentences used to configure the Stepp device are described in Appendix A.<br />
While using the console, it is possible to clear the display (click Clear),<br />
capture the received sentences to a file (click Capture) or pause the console<br />
display (click Stop). It is also possible to filter the lines using a regular<br />
expression. Clearing the console, pausing the console display or filtering<br />
using regular expressions has no effect on capturing. While capturing, all<br />
received sentences are appended to a capture file.<br />
This confidential document is the property of FALCOM GmbH and may not be copied or circulated without permission.<br />
Page 8
<strong>STEPP</strong>-CONFIGURATOR VERSION 2.1<br />
Figure 3.3: The Stepp <strong>Configurator</strong> console.<br />
The capture file and other preferences can be set by choosing<br />
<strong>Configurator</strong>→Preferences and selecting the Console tab, which is shown<br />
in Figure 3.4.<br />
The number of lines buffered in the console can be adjusted. The echoing<br />
(displaying) of sentences sent by the Stepp <strong>Configurator</strong> (including<br />
sentences typed in the console text field) can be disabled. The line<br />
termination can also be changed from the defualt carriage return and line<br />
feed (CR LF). The line termination affects the sentences typed in the<br />
console text field only. Changing the line termination from the default (CR<br />
LF) might cause the Stepp device to ignore the sentences.<br />
Figure 3.4: The console preferences.<br />
This confidential document is the property of FALCOM GmbH and may not be copied or circulated without permission.<br />
Page 9
<strong>STEPP</strong>-CONFIGURATOR VERSION 2.1<br />
3 Chapter 4<br />
3.1 Stepp Device Configuration<br />
To configure the Stepp device, start the Stepp <strong>Configurator</strong> (see Chapter 3)<br />
and select the Configuration tab. There will be a selection of panels, each<br />
giving access to a section of configuration parameters. The panels available<br />
are listed below.<br />
Device settings<br />
Messages<br />
Authorized numbers<br />
Voice call settings<br />
Alarms<br />
– Analog inputs<br />
Geofencing<br />
– Messages<br />
History<br />
Allowed protocols<br />
Note that changes done to the configuration are not applied immediately; to<br />
apply the configuration to the Stepp device see Section 3.1.9.<br />
3.1.1 Device Settings<br />
The device settings are general device configuration parameters. The device<br />
settings panel can be seen in Figure 4.1.<br />
This confidential document is the property of FALCOM GmbH and may not be copied or circulated without permission.<br />
Page 10
<strong>STEPP</strong>-CONFIGURATOR VERSION 2.1<br />
Figure 4.1: The device settings configuration panel.<br />
The device settings are described below.<br />
Device identifier<br />
This is a name given to the Stepp device. When the device sends an SMS<br />
messages, it identifies itself using this identifier.<br />
SIM PIN<br />
This is the PIN used by the Stepp device to register the installed SIM, if<br />
the SIM is set to require a PIN.<br />
SMS password<br />
If an SMS password is set, the Stepp device will not accept commands<br />
via SMS without the password.<br />
Switch off GSM<br />
The GSM module in the Stepp device can drain the car battery. When the<br />
car ignition is turned off, the GSM module will be switched off after the<br />
time given in this field.<br />
Set geofencing master region<br />
It is possible to set the geofencing master region (see Section 3.1.6) as<br />
soon as the ignition is turned off. If this option is set, switching off the<br />
ignition will set the geofencing master region to an area with the given<br />
This confidential document is the property of FALCOM GmbH and may not be copied or circulated without permission.<br />
Page 11
<strong>STEPP</strong>-CONFIGURATOR VERSION 2.1<br />
radius centred at the location at the time of switch off. The text field will<br />
be sent in any message correspoding to the new master region.<br />
3.1.2 Messages<br />
The Stepp device can be configured to send SMS messages periodically.<br />
The messages panel can be seen in Figure 4.2.<br />
Figure 4.2: The messages configuration panel<br />
The Messages enabled check box must be set in order to use the message<br />
feature. An SMS message is sent to the specified GSM terminal number<br />
when the specified minimum number of satellites are visible and the<br />
condition specified in Section 3.1.2.1 is satisfied. The SMS message may<br />
contain up to two NMEA sentences (see Section 3.1.8). Messages are not<br />
sent more frequently than one message every 30 seconds.<br />
3.1.2.1 Time, Displacement and Speed Condition<br />
In order to satisfy the time, displacement and speed condition, either all the<br />
enabled limits from the first three limits are satisfied or any of the enabled<br />
limits from the last three limits is satified. For example, the settings in<br />
Figure 4.2, indicate that a message can be sent if<br />
since the last message was sent, at least 3,600 seconds (1 hour) have<br />
passed and the vehicle has travelled for at least 10,000 meters (10<br />
kilometers), or<br />
This confidential document is the property of FALCOM GmbH and may not be copied or circulated without permission.<br />
Page 12
<strong>STEPP</strong>-CONFIGURATOR VERSION 2.1<br />
the vehicle has travelled for at least 100,000 meters (100 kilometers)<br />
since the last message was sent, or<br />
the speed is higher than 120 kph.<br />
For another example, see Section 3.1.7.<br />
3.1.3 Authorized Numbers<br />
The authorized numbers give restriced access to the Stepp device via a GSM<br />
connection. The authorized numbers panel can be seen in Figure 4.3.<br />
Figure 4.3: The authorized numbers configuration panel.<br />
The Stepp device can accept voice calls, data calls and SMS messages via<br />
GSM. Accepting all incoming calls and messages, however, is insecure. To<br />
prevent the Stepp device from accepting all calls and messages, it is possible<br />
to set up to ten authorized numbers. If no authorized numbers are set, the<br />
device accepts all incoming calls and messages.<br />
For each authorized number, choose what type of connection the Stepp<br />
device can accept. This can be an SMS message, a data call, a voice call or a<br />
listen call. A listen call is similar to a voice call, but the Stepp device does<br />
not send any audio to the speaker. Thus, the caller can receive audio but<br />
cannot transmit audio.<br />
This confidential document is the property of FALCOM GmbH and may not be copied or circulated without permission.<br />
Page 13
<strong>STEPP</strong>-CONFIGURATOR VERSION 2.1<br />
3.1.4 Voice Call Settings<br />
The voice call settings control the Stepp device response to an authorized<br />
incoming voice call. The voice call settings panel can be seen in Figure 4.4.<br />
The voice call settings are described below.<br />
Ringer melody<br />
The ringer melody is used to signal an incoming voice call. Note that the<br />
Stepp device answers automatically after ringing. To disable ringing,<br />
choose no melody, otherwice choose one of nine different melodies to be<br />
sounded on the speaker or buzzer.<br />
Microphone and Speaker level<br />
The microphone level and the speaker volume can be adjusted using<br />
these settings.<br />
3.1.5 Alarms<br />
Figure 4.4: The voice call settings configuration panel.<br />
The alarms send a notification on specified events at the Stepp device<br />
inputs. Alarms can be triggered by the four digital inputs, the car battery<br />
(digital), the car ignition (digital) and the two analog inputs.<br />
This confidential document is the property of FALCOM GmbH and may not be copied or circulated without permission.<br />
Page 14
<strong>STEPP</strong>-CONFIGURATOR VERSION 2.1<br />
3.1.5.1 Digital Alarms<br />
The panel for digital input alarms can be seen in Figure 4.5.<br />
Figure 4.5: The digital alarms configuration panel.<br />
Each input can be set to trigger an alarm. An alarm can be set to initiate a<br />
data call, voice call or listen call. A listen call is similar to a voice call, but<br />
the Stepp device does not send any audio to the speaker. Otherwise, the<br />
alarm can be set to send an SMS message. Further details can be set for each<br />
alarm by clicking Details. The details dialog is shown in Figure 4.6. Any<br />
digital input alarm can be set to be triggered on the rising edge, falling edge<br />
or both. If the alarm is set to send an SMS message, some text can be setup<br />
to be sent in the message. One or two NMEA sentences (see Section 3.1.8)<br />
can also be sent in the message.<br />
This confidential document is the property of FALCOM GmbH and may not be copied or circulated without permission.<br />
Page 15
<strong>STEPP</strong>-CONFIGURATOR VERSION 2.1<br />
Figure 4.6: The digital alarms configuration details dialog.<br />
3.1.5.2 Analog Alarms<br />
The panel for analog input alarms can be seen in Figure 4.7.<br />
Figure 4.7: The analog alarms configuration panel.<br />
The analog input alarms are similar to the digital input alarms. The details<br />
are not given in a separate dialog; they are given in the analog alarms<br />
configuration panel itself. The triggering method is also different for the<br />
analog input alarms. Give a range of acceptable input values, and whenever<br />
the analog input goes beyond the limit an alarm is triggered.<br />
This confidential document is the property of FALCOM GmbH and may not be copied or circulated without permission.<br />
Page 16
<strong>STEPP</strong>-CONFIGURATOR VERSION 2.1<br />
3.1.6 Geofencing<br />
The Stepp device supports geofencing, monitoring if the vehicle is within<br />
some configured region. The geofencing panel can be seen in Figure 4.8.<br />
Figure 4.8: The geofencing configuration panel.<br />
The Stepp device geofencing works by sending messages similar to the<br />
messages described in Section 3.1.2. There is a panel similar to the one<br />
shown in Figure 4.2 to set the message parameters for geofencing messages.<br />
The Stepp device can store up to 100 regions, one of which is the master<br />
region. Although the maximum number of regions is 100, it is not advisable<br />
to use more than 20 regions.<br />
To insert or remove the master region, set or reset the Master enabled<br />
checkbox. If the master region is enabled, all other regions are ignored; if<br />
the master region is disabled, all the regions are considered. Other regions<br />
can be inserted or removed by clicking Insert or Remove. To browse the<br />
regions, click Next or Previous, or click Master to go to the master region.<br />
Each region is rectangular, with a North, a South, an East and a West<br />
boundary.<br />
The geofencing regions control whether the messages specified in the<br />
geofencing messages configuration panel are sent or not. If a region is<br />
configured to send messages when inside (using the When drop-down list<br />
box), messages are sent only when the vehicle is inside the region. If a<br />
region is configured to send messages when outside, messages are sent only<br />
This confidential document is the property of FALCOM GmbH and may not be copied or circulated without permission.<br />
Page 17
<strong>STEPP</strong>-CONFIGURATOR VERSION 2.1<br />
when the vehicle is outside the region. A region can also be configured to<br />
send messages both when inside or outside.<br />
When the vehicle goes in or out of a region, a message is sent immediately,<br />
even if the conditions specified in the geofencing messages configuration<br />
panel are not met. For example, if the messages were configured to be sent<br />
every 30 minutes, and only 5 minutes have passed since the last message<br />
was sent, the crossing of a region boundary would still cause a message to<br />
be sent.<br />
Although regions are rectangular, several regions can be linked using the<br />
ID. If several regions have the same ID, they are considered as one region.<br />
Thus, going from a region to another region with the same ID does not<br />
trigger a message to be sent.<br />
Region editing can be done using the numerical values for the latitude and<br />
longitude or using maps. Click Add to add a map to the map collection. The<br />
Add Map dialog is shown in Figure 4.9. The map should be in cylindrical<br />
equidistant projection. To add a new map, give a name to the map, specify<br />
the locations of the map edges and give the image file.<br />
Figure 4.9: Adding a geofencing map.<br />
To edit regions on a map, select the map from the Maps list and click Show.<br />
The map viewer is shown in Figure 4.10. To add a new region using the<br />
map viewer, click on the map and drag the pointer. To move or resize<br />
regions, drag the region border or corners respectively. To delete a region,<br />
right click on the region's border and choose Delete.<br />
This confidential document is the property of FALCOM GmbH and may not be copied or circulated without permission.<br />
Page 18
<strong>STEPP</strong>-CONFIGURATOR VERSION 2.1<br />
3.1.7 History<br />
Figure 4.10: The geofencing map viewer.<br />
The Stepp device can be configured to store history depending on various<br />
conditions. The history panel can be seen in Figure 4.11.<br />
Figure 4.11: The history configuration panel.<br />
When history logging is enabled and the minimum number of satellites is<br />
visible, history records will be stored depending on the time, displacement<br />
and speed conditions as described in section 3.1.2.1. The history records<br />
would be NMEA sentences as specified in Section 3.1.8. The settings in<br />
Figure 4.11 indicate that a history record can be stored if<br />
since the last history record was stored, at least 300 seconds (5<br />
minutes) have passed and the vehicle has travelled for at least 1,000<br />
meters (1 kilometer), or<br />
3600 seconds (1 hour) have passed since the last history record was<br />
stored, or<br />
the speed is higher than 100 kph.<br />
3.1.7.1 Acquiring History<br />
To acquire the history that the Stepp device has stored, choose<br />
Tools→Acquire History. The Acquire History dialog is shown in Figure<br />
4.12. Choose the starting time and date for the history records to be<br />
acquired; any records which were stored earlier than the selected time will<br />
not be acquired. The number of sentences to acquire can be limited, or else<br />
all the sentences available can be acquired. The acquired history is saved in<br />
the chosen file.<br />
This confidential document is the property of FALCOM GmbH and may not be copied or circulated without permission.<br />
Page 19
<strong>STEPP</strong>-CONFIGURATOR VERSION 2.1<br />
Figure 4.12: The Acquire History dialog.<br />
To clear all stored history records from the Stepp device memory, choose<br />
Tools→Clear History. To send the acquired history sentences from a file to<br />
a serial port, choose Tools→Send History.<br />
3.1.8 Allowed Protocols<br />
The Stepp device can send a set of allowed NMEA sentences every second<br />
(5 seconds in the case of GPGSM). The allowed protocols panel can be seen<br />
in Figure 4.13. The NMEA sentences the Stepp device is capable of giving<br />
are listed below.<br />
This confidential document is the property of FALCOM GmbH and may not be copied or circulated without permission.<br />
Page 20
<strong>STEPP</strong>-CONFIGURATOR VERSION 2.1<br />
Figure 4.13: The allowed protocols configuration panel.<br />
GPGGA<br />
GPS Fix Data — includes time, position, GPS quality and number of<br />
satellites in use.<br />
GPRMC<br />
Recommended Minimum Specific GPS Data—includes time and date,<br />
position, speed and heading.<br />
GPGSV<br />
GPS Satellites in View — includes the number of satellites in view and<br />
their elavation, azimuth and signal-to-noise ratio.<br />
GPGSA<br />
GPS DOP and Active Satellites — includes the list of satellites being<br />
used.<br />
GPGLL<br />
Geographic Position in Latitude/Longitude—includes the time and<br />
position.<br />
Figure 4.14: Applying everything or just the changes.<br />
This confidential document is the property of FALCOM GmbH and may not be copied or circulated without permission.<br />
Page 21
<strong>STEPP</strong>-CONFIGURATOR VERSION 2.1<br />
GPIOP<br />
Stepp Device Input/Output Ports — includes the status of the input and<br />
output ports.<br />
GPGSM<br />
Stepp Device GSM Status—includes the GSM operator and reception<br />
status.<br />
Development information<br />
Information used for debugging the Stepp device operation; this does not<br />
give NMEA sentences. Any combination of the above sentences can be<br />
selected. If some of the NMEA sentences are disabled, however, the<br />
status given by the Stepp <strong>Configurator</strong> (see Chapter 5) will be<br />
incomplete. For example, if GPIOP is disabled, the status of the digital<br />
inputs cannot be know.<br />
3.1.9 Applying the Configuration<br />
Changes made in the configuration panels are not applied immediately to<br />
the Stepp device. To apply the configuration, click Apply. A dialog will ask<br />
wether to apply all the configuration or just the changes, as seen in Figure<br />
4.14. If Apply All is chosen, all the Stepp device configuration will be<br />
updated to reflect the configuration in the configuration panels. This option<br />
is suitable for setting a completely new configuration. If, on the other hand,<br />
Apply Changes is chosen, the current Stepp device configuration is<br />
retained, and only the updated fields are changed. This is suitable for a small<br />
change in the configuration. To read the configuration from the Stepp<br />
device, click Read. Reading the configuration is recommended before<br />
making small changes in the configuration. To undo all changes since last<br />
read, click Revert. To reset the configuration to default values, click<br />
Default. Note that to reset the Stepp configuration to default values, it is<br />
necessary to apply the whole configuration after clicking Default.<br />
Figure 4.15: Setting the Stepp device outputs.<br />
This confidential document is the property of FALCOM GmbH and may not be copied or circulated without permission.<br />
Page 22
<strong>STEPP</strong>-CONFIGURATOR VERSION 2.1<br />
3.1.10 Setting the Digital Outputs<br />
To control the digital outputs, choose Tools→Set Outputs. The Set<br />
Outputs dialog is shown in Figure 4.15. For each output, there is a selection<br />
of the following items.<br />
No Change<br />
Do not change the current output behaviour.<br />
Off<br />
Switch the output off.<br />
On<br />
Switch the output on.<br />
Pulse<br />
Switch the output on for the duration of the pulse, then switch the output<br />
off. The duration of the pulse can be set in seconds.<br />
Square Wave<br />
The output will oscillate between the on and off state. The durations of<br />
the on and off state can be set in seconds.<br />
This confidential document is the property of FALCOM GmbH and may not be copied or circulated without permission.<br />
Page 23
<strong>STEPP</strong>-CONFIGURATOR VERSION 2.1<br />
4 Chapter 5<br />
4.1 Stepp Device Status<br />
The Status tab in the Stepp <strong>Configurator</strong> main window shows the current<br />
state of the Stepp device, provided that the NMEA sentences are enabled<br />
(see Section 3.1.8). The status tab is shown in Figure 5.1. The status can be<br />
monitored, but it cannot be changed directly through the Status tab.<br />
4.1.1 GSM Status<br />
In the GSM status section, the Stepp device GSM connection status is<br />
shown. The GSM network provider and the signal quality are given.<br />
4.1.2 Location Information<br />
The location information section gives the latitude, longitude and altitude. It<br />
also gives the speed and heading. GPS satellite information can be obtained<br />
by clicking GPS Details. The Satellite Diagram tab (see Figure 5.2) gives<br />
a visual map of the visible satellites, showing a visual representation of the<br />
elevation and azimuth for each visible satellite. The Signal to Noise Ratio<br />
tab (see Figure 5.3) shows the received signal quality for each of the visible<br />
satellites.<br />
4.1.3 Inputs and Outputs<br />
In the inputs and outputs section, the status of the Stepp device IO ports is<br />
shown. The four available digital inputs are represented by check boxes; a<br />
check is present if the respective input is high. The four digital outputs<br />
given by the Stepp device are also represented by check boxes. The values<br />
at the two analog inputs is shown.<br />
This confidential document is the property of FALCOM GmbH and may not be copied or circulated without permission.<br />
Page 24
<strong>STEPP</strong>-CONFIGURATOR VERSION 2.1<br />
Figure 5.1: The Status tab.<br />
The ignition and car battery states are represented by check boxes. The<br />
voltage level of the Stepp device backup battery is also shown.<br />
Figure 5.2: The satellite diagram.<br />
This confidential document is the property of FALCOM GmbH and may not be copied or circulated without permission.<br />
Page 25
<strong>STEPP</strong>-CONFIGURATOR VERSION 2.1<br />
Figure 5.3: The signal to noise ratio for the visible satellites.<br />
This confidential document is the property of FALCOM GmbH and may not be copied or circulated without permission.<br />
Page 26
<strong>STEPP</strong>-CONFIGURATOR VERSION 2.1<br />
5 Chapter 6<br />
5.1 GSM Connection to a Stepp Device<br />
So far, we have only considered a Stepp device connected to a PC using a<br />
Stepp evaluation board. The Stepp <strong>Configurator</strong> can also communicate with<br />
a deployed Stepp device via GSM. A GSM modem such as the <strong>Falcom</strong><br />
Twist GSM modem is needed to communicate to a deployed Stepp device.<br />
To communicate to a Stepp device using a GSM modem, start the Stepp<br />
<strong>Configurator</strong> giving the serial port where the modem is connected. The<br />
Stepp <strong>Configurator</strong> software will detect the modem and start in the<br />
connection mode. The main window now has a Connection tab as well. The<br />
Connection tab is shown in Figure 6.1.<br />
The modem status section gives details about the GSM modem network<br />
status. The Stepp <strong>Configurator</strong> can keep a list of deployed Stepp devices.<br />
This list is displayed in the car section. To edit the list, choose View→Car<br />
List. The car list editor is shown in Figure 6.2. Any name can be used for a<br />
car, for example, the registration number can be used as the car name. A<br />
voice call number and a data call number can then be associated with each<br />
car. These numbers would be the network numbers for the SIM used in the<br />
Stepp device in the car. It is not necessary to have both numbers, for<br />
example, the data call feature may be unavailable. To communicate to a<br />
Stepp device, either select a car from the car list or type in the network<br />
number corresponding to the device. Once the Stepp device is selected, a<br />
voice call or data call can be initiated, provided the GSM modem network<br />
number is authorized (see Section 3.1.3). If a data call is started, the Stepp<br />
<strong>Configurator</strong> can be used just as if the Stepp device were connected to the<br />
PC using the Stepp evaluation board.<br />
This confidential document is the property of FALCOM GmbH and may not be copied or circulated without permission.<br />
Page 27
<strong>STEPP</strong>-CONFIGURATOR VERSION 2.1<br />
Figure 6.1: The Connection tab.<br />
5.1.1 Temporary Connections<br />
The longer a data call is, the higher the network charges. It is possible to set<br />
up a data call and hang up automatically before and after performing a task,<br />
minimizing the connection time. Some tasks can also be performed using<br />
SMS messages rather than data calls. Consider the task of changing some<br />
configuration. If there is a data connection, proceed as if the Stepp device<br />
was connected to the PC using the Stepp evaluation board. If there is no data<br />
connection, however, a temporary connection might be necessary. Change<br />
the configuration as required, then click Apply and choose to apply the<br />
changes only. The changes cannot be applied without a connection to the<br />
Stepp device, so the Stepp <strong>Configurator</strong> will ask for a temporary<br />
This confidential document is the property of FALCOM GmbH and may not be copied or circulated without permission.<br />
Page 28
<strong>STEPP</strong>-CONFIGURATOR VERSION 2.1<br />
Figure 6.2: The car list.<br />
Figure 6.3: Setting up a temporary connection.<br />
connection setup, as seen in Figure 6.3. When setting up a temporary<br />
connection, either choose a car from the car list or type in the network<br />
number. It is possible to communicate to the Stepp device via SMS<br />
messages or via a data call. When connecting using SMS messages, the<br />
SMS password might be necessary (see Section 3.1.1). When connect using<br />
a data call, it is necessary to specify wether or not to hang up after the<br />
operation is ready. Temporary connections can be used for the operations<br />
listed below.<br />
• Reading and applying configuration.<br />
This confidential document is the property of FALCOM GmbH and may not be copied or circulated without permission.<br />
Page 29
<strong>STEPP</strong>-CONFIGURATOR VERSION 2.1<br />
• Acquiring history (data call only).<br />
• Clearing history.<br />
• Setting the outputs.<br />
This confidential document is the property of FALCOM GmbH and may not be copied or circulated without permission.<br />
Page 30
<strong>STEPP</strong>-CONFIGURATOR VERSION 2.1<br />
6 Appendix A<br />
6.1 <strong>Falcom</strong> Stepp Device Programming Interface<br />
The Stepp <strong>Configurator</strong> communicates to the Stepp device using NMEA<br />
sentences and SMS messages. NMEA sentences are transmitted via a serial<br />
port using the Stepp evaluation board or via a GSM data call using a GSM<br />
modem. SMS messages are transmitted using a GSM modem. This<br />
appendix describes the NMEA sentences and SMS messages used by the<br />
Stepp device. An NMEA sentece starts with a ‘$’ character and sentence<br />
identifier. This is followed by several fields separated by commas. An<br />
optional checksum (required by the Stepp device) can be appended. The<br />
checksum consists of the ‘*’ character followed by two hexadecimal digits.<br />
A sentence is terminated by a carriage return and line feed.<br />
The checksum hexadecimal digits represent the exclusive or of the ASCII<br />
value of the characters in the sentence, excluding the ‘$’ and ‘*’ characters.<br />
The Stepp <strong>Configurator</strong> console (see Section 2.1.3.1) automatically<br />
calculates and appends the checksum to the NMEA sentences.<br />
For more information about the configuration of <strong>Falcom</strong> <strong>STEPP</strong> remotely<br />
via SMS refer to the Chapter 7. There you will find a comprehensive<br />
overview of all SMS and NMEA commands including examples, too.<br />
6.1.1 A-1 N MEA sentences Transmitted by Stepp Device<br />
The Stepp device transmits NMEA sentences every second, depending on<br />
the configuration (see Section 3.1.8).<br />
The identifiers for the NMEA sentences transmitted by the Stepp device are<br />
listed below.<br />
GPGGA<br />
GPRMC<br />
GPGSV<br />
GPGSA<br />
GPGLL<br />
GPIOP<br />
GPGSM<br />
The sentences mentioned above are described in the Tables A.2–A.10. Note<br />
that the GPGSM sentence can be given in one of three different modes. The<br />
first field is used to identify the mode. Mode 0 indicates that the sentence<br />
gives the GSM module status. Mode 1 indicates that an SMS message was<br />
received. Mode 2 indicates that there was an incoming call. Thus, there are<br />
three tables for GPGSM. The formats used are described in Table A.1. If a<br />
format is not described below, it should be taken verbatim.<br />
Format<br />
hhmmss.ss<br />
ddmmyy<br />
ddmm.mmmm<br />
dddmm.mmmm<br />
dd.dddddd<br />
Description<br />
Time: hh hours, mm minutes, ss.ss seconds.<br />
Date: day dd, month mm, year yy.<br />
Latitude: dd degrees, mm.mmmm minutes.<br />
Longitude: ddd degrees, mm.mmmm minutes.<br />
Latitude/longitude: dd.dddddd degrees.<br />
This confidential document is the property of FALCOM GmbH and may not be copied or circulated without permission.<br />
Page 31
<strong>STEPP</strong>-CONFIGURATOR VERSION 2.1<br />
dd'mm'ss"<br />
x<br />
xx<br />
x.x<br />
hh<br />
bbbbbbbb<br />
a<br />
"a"<br />
<br />
Table A.1: Field formats.<br />
Latitude/longitude: dd degrees, mm minutes, ss seconds<br />
Integer.<br />
Integer having exactly two digits (using leading zeros).<br />
Number including fraction.<br />
Two-digit hexadecimal number (using uppercase A–F).<br />
Eight-digit binary number.<br />
ASCII text.<br />
ASCII text in quotation marks.<br />
Carriage return and line feed.<br />
Field Description Format<br />
Start of sentence<br />
$GPGGA<br />
1 UTC time hhmmss.ss<br />
2 Latitude ddmm.mmmm<br />
3 Latitude direction (N/S) a<br />
4 Longitude dddmm.mmmm<br />
5 Longitude direction (W/E) a<br />
6 GPS fix quality:<br />
x<br />
0: invalid<br />
1: GPS fix<br />
2: DGPS fix<br />
7 Number of satellites in use xx<br />
8 Horizontal dilution of precision (relative accuracy x.x<br />
of horizontal position)<br />
9 Altitude above mean sea level (geoid) x.x<br />
10 Altitude units (meters) M<br />
11 Height of geoid above earth ellipsoid x.x<br />
12 Geoid height units (meters) M<br />
13 Time since last DGPS update (seconds) x<br />
14 DGPS reference station ID xxxx<br />
Checksum<br />
*hh<br />
Sentence terminator<br />
<br />
Table A.2: The GPGGA sentence.<br />
Field Description Format<br />
Start of sentence<br />
$GPRMC<br />
1 UTC time hhmmss.ss<br />
2 Position validity (A: valid, V: invalid) a<br />
3 Latitude ddmm.mmmm<br />
4 Latitude direction (N/S) a<br />
5 Longitude dddmm.mmmm<br />
6 Longitude direction (W/E) a<br />
7 Speed (knots) x.x<br />
8 Heading (degrees) x.x<br />
9 Date ddmmyy<br />
10 Magnetic variation (degrees) x.x<br />
11 Magnetic variation direction (W/E) a<br />
Checksum<br />
*hh<br />
This confidential document is the property of FALCOM GmbH and may not be copied or circulated without permission.<br />
Page 32
<strong>STEPP</strong>-CONFIGURATOR VERSION 2.1<br />
Sentence terminator<br />
Table A.3: The GPRMC sentence.<br />
<br />
Field Description Format<br />
Start of sentence<br />
$GPGSV<br />
1 Number of messages (1 to 3) x<br />
2 Message number (1 to 3) x<br />
3 Number of satellites in view (1 to 12) xx<br />
4 Satellite PRN number xx<br />
5 Satellite elevation (degrees) (00 to 90), may be null xx<br />
6 Satellite azimuth (degrees) (000 to 359), may be null xxx<br />
7 Satellite signal to noise ratio in dB (00 to 99), may be xx<br />
null<br />
8–11 Similar to 4–7 for next satellite, may all be null<br />
12–15 Similar to 4–7 for next satellite, may all be null<br />
16–19 Similar to 4–7 for next satellite, may all be null<br />
Checksum<br />
*hh<br />
Sentence terminator<br />
<br />
Table A.4: The GPGSV sentence.<br />
Field Description Format<br />
Start of sentence<br />
$ GPGSA<br />
1 Operating mode:<br />
a<br />
M: Manual, operate in 3-D mode.<br />
A: Automatically choose 2-D or 3-D mode.<br />
2 Fix mode:<br />
x<br />
1: Fix not available<br />
2: 2-D fix<br />
3: 3-D fix<br />
3–14 PRN numbers of satellites in use (unused fields null) xx,xx, . . .<br />
15 Position dilution of precision x.x<br />
16 Horizontal dilution of precision x.x<br />
17 Vertical dilution of precision x.x<br />
Checksum<br />
*hh<br />
Sentence terminator<br />
<br />
Table A.5: The GPGSA sentence.<br />
Field Description Format<br />
Start of sentence<br />
$GPGLL<br />
1 Latitude ddmm.mmmm<br />
2 Latitude direction (N/S) a<br />
3 Longitude dddmm.mmmm<br />
4 Longitude direction (W/E) a<br />
Checksum<br />
*hh<br />
Sentence terminator<br />
<br />
Table A.6: The GPGLL sentence.<br />
Field Description Format<br />
Start of sentence<br />
$GPIOP<br />
1 Inputs: 8–1 (1: on, 0: off) bbbbbbbb<br />
This confidential document is the property of FALCOM GmbH and may not be copied or circulated without permission.<br />
Page 33
<strong>STEPP</strong>-CONFIGURATOR VERSION 2.1<br />
1–4: Inputs 1–4<br />
5–6: Unused<br />
7: Car battery status<br />
8: Ignition status<br />
2 Outputs: 8–1 (1:on, 0: off)<br />
bbbbbbbb<br />
1–4: Outputs 1–4<br />
5–8: Unused<br />
3 Analog input 1 (V) x.x<br />
4 Analog input 2 (V) x.x<br />
5 Backup battery level (V) x.x<br />
Checksum<br />
*hh<br />
Sentence terminator<br />
<br />
Table A.7: The GPIOP sentence.<br />
Field Description Format<br />
Start of sentence<br />
$GPGSM<br />
1 GSM status mode: 0 x<br />
2 Registration (1:registered, 0: unregistered) b<br />
3 GSM status x<br />
4 Network operator name "a"<br />
5 GSM field strength (0 to 31) 0: $-$113 dB 31: $-$51 dB x<br />
6 Area code a<br />
7 Cell ID a<br />
Checksum<br />
*hh<br />
Sentence terminator<br />
<br />
Table A.8: The GPGSM sentence in GMS status mode.<br />
Field Description Format<br />
Start of sentence<br />
$GPGSM<br />
1 SMS message received mode: 1 x<br />
2 Sender number a<br />
3 Sender phonebook entry "a"<br />
4 SMS message text "a"<br />
Checksum<br />
*hh<br />
Sentence terminator<br />
<br />
Table A.9: The GPGSM sentence in SMS message received mode.<br />
Field Description Format<br />
Start of sentence<br />
$GPGSM<br />
1 Received call mode: 2 x<br />
2 Call type:<br />
a<br />
D: data call<br />
V: voice call<br />
A: listen call<br />
3 Caller number a<br />
4 Caller phonebook entry "a"<br />
Checksum<br />
*hh<br />
Sentence terminator<br />
<br />
Table A.10: The GPGSM sentence in received call mode.<br />
This confidential document is the property of FALCOM GmbH and may not be copied or circulated without permission.<br />
Page 34
<strong>STEPP</strong>-CONFIGURATOR VERSION 2.1<br />
6.1.2 A.2 Configuring the Stepp Device<br />
NMEA sentences can be used to send commands or configuration data to<br />
the Stepp device. The Stepp <strong>Configurator</strong> console can be used to send the<br />
sentences to the device. The console can also be used to monitor the<br />
sentences used by the Stepp <strong>Configurator</strong> itself while configuring the<br />
device. The Stepp device is configured using the $PSRF108 sentence. The<br />
sentence format is<br />
$PSRF108,=[: …]*hh<br />
One sentence can have several configuration settings, separated by colons.<br />
A value can be assigned to each configuration parameter; to clear the<br />
configuration value of a parameter, give the parameter name without a<br />
value, as shown below.<br />
$PSRF108,*hh<br />
The different possibilities for the name and the corresponding<br />
formats are given in Table A.11. See Chapter 4 for more detailed<br />
explanations of the parameters.<br />
Parameter<br />
NAME<br />
PIN<br />
PWD<br />
IGN<br />
MSG<br />
TEL<br />
Value and Description<br />
The name given to the Stepp device.<br />
The PIN for the SIM used in the Stepp device.<br />
The SMS password.<br />
,, The actions taken when the ignition is<br />
switched off.<br />
: Time (in seconds) to switch GSM off after the ignition is<br />
switched off.<br />
: Geofencing master region radius (in meters) after ignition<br />
is switched off (0 disables feature).<br />
: Text to be sent in messages controlled by above master<br />
region.<br />
,,,,,,,,<br />
Periodic messages sent depending on time, distance and speed.<br />
: Can be S (SMS message), D (data call), V (voice call) or A<br />
(listen call).<br />
: Destination number for messages.<br />
: Minimum number of visible satellites to send.<br />
, , : Combined time, distance and speed<br />
conditions. If all these three limits are exceeded, a message will be<br />
sent. Any null value is ignored.<br />
, , : Time, distance and speed. If any of these<br />
three limits is exceeded, a message will be sent. Any null value is<br />
ignored.<br />
: NMEA sentences sent in SMS messages (e.g., RMC). Can<br />
be null, one NMEA identifier, or two NMEA identifiers separated by<br />
a ‘+’ character (e.g., RMC+IOP).<br />
The authorized network numbers.<br />
: The entry index (0–9).<br />
: Can be S, D, V or A.<br />
This confidential document is the property of FALCOM GmbH and may not be copied or circulated without permission.<br />
Page 35
<strong>STEPP</strong>-CONFIGURATOR VERSION 2.1<br />
RING<br />
VOL<br />
KEY<br />
IN<br />
GEO<br />
GEOMSG<br />
LOG<br />
: The authorized number.<br />
The ringer melody. 0 gives no melody. 1–9 each give a<br />
different melody on the speaker. To use the buzzer rather than the<br />
speaker, add 10.<br />
,Set the speaker and microphone levels.<br />
: The speaker level from 0 (silent) to 15 (loudest).<br />
: The microphone level from 0 (silent) to 15 (loudest).<br />
,,, The digital input<br />
alarms.<br />
: The input index. The index can be 1–4 for the four digital<br />
inputs, 7 for the car battery and 8 for the ignition.<br />
: Can be S, D, V or A.<br />
: The number where the alarm is sent.<br />
: The text sent if the alarm type is SMS.<br />
: NMEA sentences sent if the alarm type is SMS.<br />
: The edge that triggers the alarm. Can be 1 (rising edge), 2<br />
(falling edge) or 3 (both).<br />
,,,, The analog<br />
input alarms.<br />
: The analog input index. The index can be 1–2 for the two<br />
analog inputs.<br />
: Can be S, D, V or A.<br />
: The number where the alarm is sent.<br />
: The text sent if the alarm type is SMS.<br />
: The minimum value before triggering.<br />
: The maximum value before triggering.<br />
: NMEA sentences sent if the alarm type is SMS.<br />
,,,,,,The<br />
geofencing regions.<br />
: The region index (00–99). The 00 region is the master<br />
region.<br />
: The text is sent in any message related to the respective<br />
region.<br />
: The region ID.<br />
, , , : The region boundaries.<br />
: Controls when to send messages related to the region (in<br />
addition to the messages when a region boundary is crossed). Can be<br />
0 (send when vehicle is outside region), 1 (when inside) or 2 (both).<br />
,,,,,,,,Messages sent by geofencing system. See<br />
MSG.<br />
,,,,,,<br />
History logging depending on time, distance and speed.<br />
: Minimum number of visible satellites to store.<br />
, , : Combined time, distance and speed<br />
conditions. If all these three limits are exceeded, a history record will<br />
be stored. Any null value is ignored.<br />
, , : Time, distance and speed. If any of these<br />
three limits is exceeded, a history record will be stored. Any null<br />
value is ignored.<br />
This confidential document is the property of FALCOM GmbH and may not be copied or circulated without permission.<br />
Page 36
<strong>STEPP</strong>-CONFIGURATOR VERSION 2.1<br />
PORTS<br />
PORT<br />
COORD<br />
P1#..,P2 …<br />
P4#..The output ports behaviour.<br />
: Behaviour type. A means off. E means on. I gives a single<br />
pulse. Z gives a periodic square wave. By setting an output to I, the<br />
output will be set to E for a given time, then it will be set to A.<br />
: The single pulse duration or the positive half cycle<br />
duration of the square wave in fifths of a second.<br />
: The negative half cycle duration of the square wave in<br />
fifths of a second.<br />
,,Set the behaviour of one of the output<br />
ports.<br />
: The output port index (1–4).<br />
: Can be A, E, I or Z.<br />
, : Time in seconds.<br />
The format used for latitude and longitude coordinates. Can<br />
be NMEA (ddmm.mmmm), DECIMAL (dd.dddddd) or MIN_SEC<br />
(dd'mm'ss").<br />
Table A.11: The configuration parameters.<br />
To set the allowed protocols, use<br />
$PSRF103,,00,,01*hh<br />
where is the sentence period in seconds (0 to disable) and <br />
is:<br />
00 GPGGA<br />
01 GPGLL<br />
02 GPGSA<br />
03 GPGSV<br />
04 GPRMC<br />
07 GPIOP<br />
08: GPGSM<br />
To switch the development information on or off, use<br />
$PSRF105,*hh<br />
where is 0 for off and 1 for on.<br />
6.1.2.1 A.2.1 Reading the Configuration<br />
To read the current parameters, send the sentence<br />
$PSRF108,CNF*49<br />
to the device. The device will return a list of the set configuration<br />
parameters, in the form<br />
$CONFIG,=*hh<br />
To read the allowed protocols configuration information, look for the<br />
sentence staring with<br />
$CONFIG,NMEA<br />
This confidential document is the property of FALCOM GmbH and may not be copied or circulated without permission.<br />
Page 37
<strong>STEPP</strong>-CONFIGURATOR VERSION 2.1<br />
Any allowed protocol would have its identifier in the above sentence,<br />
followed by its period in seconds. If, for example, GPRMC is being<br />
transmitted every second, the above sentence would contain the string<br />
RMC.1<br />
6.1.3 A.3 Acquiring History<br />
To acquire stored history records, use the command<br />
$PSRF109,0,,,,*hh<br />
where and (ddmmyy and hhmmss) give the time for<br />
the first history record and and give the time for the<br />
last history record to be acquired. Note that sending any sentence to the<br />
Stepp device while acquiring history stops the acquiring process. It is also<br />
possible to use the command in the form<br />
$PSRF109,0,,*hh<br />
in which all the history records after the start time are acquired.<br />
The Stepp device starts transmission of the history records using the<br />
sentence<br />
$GPLOG,1,,<br />
where and give the time of the first history record. The<br />
device stops the transmission using the sentence<br />
$GPLOG,0,,<br />
To clear all the history records from the Stepp device memory, use the<br />
command<br />
$PSRF108,LOG=CLR*26<br />
6.1.4 A.4 Initiating a GSM Connection<br />
An NMEA sentence can be used to initiate a GSM connection using the<br />
following command.<br />
$PSRF110,,*hh<br />
where can be S, D, V or A to indicate an SMS, data call, voice call<br />
or listen call, is the number to connect to and is the text<br />
to be sent if the connection type is SMS.<br />
6.1.5 A.5 SMS Messages<br />
SMS messages can be used to configure the Stepp device, to request specific<br />
information such as the position and to instruct the device to initiate a GSM<br />
connection such as a data call.<br />
The NMEA sentences mentioned in Section 6.1.2 (A-2) can be sent to the<br />
Stepp device via SMS. If more than one NMEA sentence are to be sent in<br />
one SMS message, they should be separated by a carriage return and line<br />
feed. Note that if an SMS password is enabled, NMEA sentences starting<br />
with $PSRF108 are not accepted via SMS.<br />
This confidential document is the property of FALCOM GmbH and may not be copied or circulated without permission.<br />
Page 38
<strong>STEPP</strong>-CONFIGURATOR VERSION 2.1<br />
If an SMS password is enabled, it should be included in SMS messages after<br />
the message header. The password is indicated as<br />
[password]<br />
in the messages described below, indicating that it is an optional field.<br />
To configure the Stepp device via SMS, send a message in the format<br />
&CNF [password] UNIT = [: …]<br />
The and fields are described in Table A.11.<br />
It is also possible to configure some of the parameters using the format<br />
&CNF [password] <br />
Only the NAME, KEY, IN and PORT parameters<br />
are accepted in this format. Additionaly, the PWD parameter may be<br />
configured using the format<br />
& CNF [password] PASS <br />
The GPS system can be reset to a particular latitude and longitude using the<br />
message<br />
&CNF [password] START ,<br />
The geofencing master region can be set to an area centred at the present<br />
location using the message<br />
&CNF [password] WATCH ,<br />
The area will have the a radius of in meters. Any messages sent<br />
corresponding to the new master region would include the text specified in<br />
.<br />
The Stepp device position can be requested, either for just one time or<br />
periodically, using the message<br />
&REQ [password] POS [period]<br />
The position (an SMS message containing the GPGGA and GPRMC<br />
NMEA sentences) is returned to the message sender. If no period is given,<br />
the position is sent once. If a period is given (in seconds), the MSG<br />
parameter is modified so that the position is sent periodically. If the period<br />
is set to 0, the periodic messages are stopped.<br />
To read the Stepp device configuration, send the message<br />
&REQ [password] CNF<br />
The Stepp device will respond by a message in the format<br />
CNF <br />
where is the device identifier (NAME parameter) and<br />
contains the system parameters separated by colons. If the<br />
configuration does not fit in one message, it is sent in several messages. In<br />
this case, CNF is replaced by CNFxx, where xx is the message index<br />
starting from 00. In the last message, CNF is replaced by ENDxx.<br />
The Stepp device can be instructed to start a GSM connection. The device<br />
will start a data connection if it receives the message<br />
&REQ [password] CONNECT [number]<br />
This confidential document is the property of FALCOM GmbH and may not be copied or circulated without permission.<br />
Page 39
<strong>STEPP</strong>-CONFIGURATOR VERSION 2.1<br />
If a number is not given, the device will start a data connection to the SMS<br />
message sender. Changing CONNECT with PHONE1 or PHONE2 will<br />
cause the device to initiate a listen call or voice call respectively.<br />
This confidential document is the property of FALCOM GmbH and may not be copied or circulated without permission.<br />
Page 40
<strong>STEPP</strong>-CONFIGURATOR VERSION 2.1<br />
7 Appendix B<br />
7.1 Configuration commands - for <strong>Falcom</strong> <strong>STEPP</strong><br />
In Table B.1 you will find an overview of the commands for SMS remote<br />
configuration of a <strong>Falcom</strong> <strong>STEPP</strong>.<br />
In Table B.2 you will find an overview of the NMEA commands for remote<br />
configuration of a <strong>Falcom</strong> <strong>STEPP</strong>.<br />
Please read the corresponded commentary for all configuration commands<br />
(including SMS and NMEA commands) having (a,b,c,d or f) symbol. The<br />
command having that symbol are not supported to all <strong>Falcom</strong> <strong>STEPP</strong><br />
Firmware.<br />
The SMS and NMEA commands included in the chapters and could not be<br />
used by <strong>Falcom</strong> Stepp <strong>Configurator</strong> software. In order to use them you need<br />
a Mobile phone SMS-enabled or another terminal software (such as<br />
HyperTerminal or <strong>Falcom</strong><strong>STEPP</strong>, where a suitable GSM modem, such as<br />
the <strong>Falcom</strong> SWING or a software compatible device (<strong>Falcom</strong> TANGO,<br />
<strong>Falcom</strong> A2D-1), has to be connected to the your PC).<br />
This confidential document is the property of FALCOM GmbH and may not be copied or circulated without permission.<br />
Page 41
<strong>STEPP</strong>-CONFIGURATOR VERSION 2.1<br />
7.1.1 SMS Commands<br />
All SMS commands have to be sent in uppercase (capital letter)<br />
otherwise the configuration will not be accepted.<br />
Commands<br />
&REQ [PWD] POS n<br />
&REQ [PWD] POS (a)<br />
s,fmit,fmat,dmi,dma,smi,s<br />
ma,Protocol1Protocol2<br />
&REQ [PWD] CNF<br />
Description<br />
Request vehicle position every (n) min.<br />
If n = 0, only one position request will be started.<br />
Example l : &REQ password POS 0<br />
Example 2 : &REQ password POS 5<br />
Example 3 : &REQ POS 10<br />
Parameter description (see history parameters)<br />
s = Min. number of satellite<br />
fmit = FixMinTime //unit is [s]<br />
fmat = FixMaxTime //unit is [s]<br />
dmi = Distance Minimum //unit is [m]<br />
dma = Distance Maximum //unit is [m]<br />
smi = Speed Minimum //unit is [km/h]<br />
sma =Speed Maximum //unit is [km/h]<br />
Protocol1Protocol2= up to two different protocols can be used<br />
(e.g. RMCIOP).<br />
HINT: After the configuration via SMS by<br />
using this command, the first position from<br />
the FALCOM <strong>STEPP</strong> will be sent after 30 sec<br />
(provided the other parameters are<br />
implemented). The FALCOM <strong>STEPP</strong> does not<br />
evaluate the other parameters before 30 sec.<br />
are over. (See examples below).<br />
Configure and request vehicle position every (fmit) sec.<br />
The fmit parameter has to be ≥ 30 the unit is .<br />
If fmit < 30, this parameter will be ignored and it will be set to 30<br />
sec.<br />
Example l : &REQ password POS 0,0,0,0,0,0,0,RMCIOP<br />
//polling position, send RMC and IOP protocols<br />
immediately.<br />
Example 2 : &REQ password POS 4,0,0,0,50,25,50,RMC<br />
//polling position, send RMC protocol after 30<br />
sec, and if the other parameters are implemented.<br />
Example 3 :&REQ password POS 4,30,0,0,50,25,50,<br />
RMC // polling position, send only RMC protocol<br />
after 30 sec, and if the other parameters are<br />
implemented.<br />
Example 4 :&REQ password POS 4,60,0,0,50,25,50,<br />
GGAIOP // polling position, send GGA and IOP<br />
protocols after 60 sec, and if the other parameters<br />
are implemented.<br />
The following protocol types can be used:<br />
− GGA, GLL, GSA, GSV, RMC, IOP,GSM<br />
Request vehicle configuration<br />
Example 1 : &REQ password CNF<br />
Example 2 : &REQ CNF<br />
a This new command is available on the FALCOM <strong>STEPP</strong> with Firmware version 1.05.<br />
This confidential document is the property of FALCOM GmbH and may not be copied or circulated without permission.<br />
Page 42
<strong>STEPP</strong>-CONFIGURATOR VERSION 2.1<br />
&CNF [PWD] UNIT<br />
Name=Value[:Name=Value]<br />
...[:Name=Value]<br />
The below parameter are<br />
available:<br />
PIN<br />
NAME<br />
RING<br />
PWD<br />
PORT1..4<br />
KEY1..8<br />
IN1-2<br />
TEL0..9<br />
VOL<br />
LOG<br />
&CNF [PWD] UNIT<br />
ACK (c) [=Value]<br />
&CNF [PWD] UNIT<br />
GPSRESET (c) [=Value]<br />
&CNF [PWD] UNIT<br />
GSMRESET (c) [=Value]<br />
&CNF [PWD] UNIT<br />
GSMCALL (c) [=Value]<br />
Example:<br />
&CNF password UNIT PIN=1234<br />
&CNF password UNIT NAME=name<br />
&CNF password UNIT RING=2 //Ringer melody 2<br />
&CNF password UNIT PWD=password<br />
&CNF password UNIT PORT1=Z,1,1<br />
&CNF password UNIT KEY1=S123456,Alarm Input 1,RMC<br />
&CNF password UNIT TEL0=+4912345678<br />
&CNF password UNIT VOL=10,12<br />
&CNF password UNIT LOG=4,5,3600,0,0,0,0<br />
&CNF password UNIT IGN=15<br />
&CNF password UNIT IN1= S123456,Alarm Analogue1,2,3,IOP<br />
//This command sets the range of values min “2” and max”<br />
3” on Analogue input 1. If Analogue 1goes out of range (2<br />
or 3), an alarm SMS “Alarm Analogue1” will be<br />
transmited to the ”123456” target mobile phone with<br />
attached GPIOP value protocol (for more details, please<br />
read carefully chapter 3.2.3.1.4 Fehler! Verweisquelle<br />
konnte nicht gefunden werden.).<br />
It is possible to combine several parameters:<br />
Example 1 : &CNF passwort UNIT TEL1=S123:VOL=7,10<br />
(TEL1 123 is saved at the position 1 of the autorized list. The flag<br />
S is for SMS.)<br />
A phone number can be deleted from the authorized list by<br />
sending the command below.<br />
Example 3 : &CNF passwort UNIT TEL1<br />
After the command is accepted the SEPP delate the phone<br />
number which is saved at the position 1.<br />
Example:<br />
&CNF password UNIT ACK=0 //confirmation SMS is disabled.<br />
&CNF password UNIT ACK=1 // confirmation SMS is enabled.<br />
Example:<br />
&CNF password UNIT GPSRESET=3 // the GPS core will be reset<br />
every 3 minutes, if no satellites are in view.<br />
Example:<br />
&CNF password UNIT GSMRESET=2 // the GSM core will be<br />
reset afer 2 minutes, if no data can be received from <strong>STEPP</strong> device via<br />
data connection.<br />
Hint: The countdown starts after receiving “Connect 9600 ...”<br />
and no data can be transmitted.<br />
Example:<br />
&CNF password UNIT GSMCALL=10 // when a data connection is<br />
established and message “Connect 9600” is received, the <strong>Falcom</strong><br />
<strong>STEPP</strong> waits additionally 10 seconds before it sends the pre-defined<br />
protocols.<br />
c This new command is available on the FALCOM <strong>STEPP</strong> with Firmware version 1.4.<br />
c This new command is available on the FALCOM <strong>STEPP</strong> with Firmware version 1.4.<br />
c This new command is available on the FALCOM <strong>STEPP</strong> with Firmware version 1.4.<br />
c This new command is available on the FALCOM <strong>STEPP</strong> with Firmware version 1.4.<br />
This confidential document is the property of FALCOM GmbH and may not be copied or circulated without permission.<br />
Page 43
<strong>STEPP</strong>-CONFIGURATOR VERSION 2.1<br />
&CNF [PWD] UNIT MSG<br />
= ,<br />
s,fmit,fmat,dmi,dma,smi,s<br />
ma,Protocol1Protocol2<br />
&CNF [PWD] NAME<br />
Name<br />
&CNF [PWD] PASS<br />
Password<br />
&CNF [PWD] KEY<br />
[[Flag]Target telephone<br />
number, [Alarm text],<br />
[Protocol1Protocol2]<br />
KEY1..4 – Alarm input 1..4<br />
KEY5 – not supported<br />
KEY6 - not supported<br />
KEY7 – Vehicle battery<br />
KEY8 – Ignition (Clip 15)<br />
at ignition lock<br />
protocol types<br />
-GGA, GLL, GSA, GSV,<br />
RMC, IOP, GSM<br />
Parameter description (see history parameters)<br />
Flag = Denotes the type of alarm which will be sent.<br />
Tel = Target phone number<br />
s = Min. number of satellite<br />
fmit = FixMinTime //unit is [s]<br />
fmat = FixMaxTime //unit is [s]<br />
dmi = Distance Minimum //unit is [m]<br />
dma = Distance Maximum //unit is [m]<br />
smi = Speed Minimum //unit is [km/h]<br />
sma =Speed Maximum //unit is [km/h]<br />
Protocol1Protocol2= up to two different protocols can be used<br />
(e.g. RMCIOP).<br />
You can configure your <strong>Falcom</strong> <strong>STEPP</strong> via SMS (Example<br />
1) to send its positions (GPS protocols) to the target<br />
telephone number, set of the intervals (fmit, fmat).<br />
The flag can be also another target phone number<br />
(Example 2). The <strong>Falcom</strong> <strong>STEPP</strong> will transfer its GPS<br />
protocols (RMCIOP) to the (0125156105) user.<br />
Example 1: &CNF [PWD] UNIT MSG<br />
=S132345678,4,60,0,0,0,0,0,RMCIOP //The<br />
protocols GPRMC & GPIOP will be transmitted<br />
periodically every 60 seconds to the destination<br />
number 132345678, if the number of satellites in view<br />
is at least 4.<br />
Example 2: &CNF [PWD] UNIT MSG<br />
=S0125156105,4,60,0,0,0,0,0,RMCIOP // The<br />
protocols will be transferred via SMS to the given<br />
number.<br />
The following protocol types can be used:<br />
GGA, GLL, GSA, GSV, RMC, IOP,GSM<br />
To stop transfering of protocols the command below is to be sent<br />
to <strong>Falcom</strong> <strong>STEPP</strong>:<br />
&REQ POS 0<br />
or<br />
&CNF UNIT MSG (without parameters)<br />
Give the target device a name<br />
Example 1 : &CNF password NAME MyCar1<br />
Example 2 : &CNF NAME MyCar2<br />
Define a password for the target device<br />
Example 1 : &CNF password PASS PasswordNew<br />
Example 2 : &REQ PASS PasswordNew<br />
(Example 2 – if no password has been defined yet)<br />
Please note that if an SMS password is enabled, NMEA sentences<br />
starting with $PSRF108 are not accepted via SMS.<br />
Flag:<br />
- S – SMS – Only an alarm SMS is sent.<br />
- A – Alarm call – An alarm call is established in case of an alarm<br />
- V – Voice call – A voice call is established in case of an alarm.<br />
- D –Data call – A data call is is established in case of an alarm.<br />
Target Telephone number:<br />
Telephone number where the alarm is to be sent to<br />
Alarm text:<br />
−<br />
This text is sent as an alarm SMS to the target telephone<br />
number.<br />
The following protocol types can be used:<br />
− GGA, GLL, GSA, GSV, RMC, IOP, GSM<br />
Example 1 : &CNF password KEY0 S123,Alarm1,GGARMC<br />
Example 2 : &CNF KEY3 V123<br />
Example 1 : &CNF KEY7 S123,Alarm1,RMC<br />
This confidential document is the property of FALCOM GmbH and may not be copied or circulated without permission.<br />
Page 44
<strong>STEPP</strong>-CONFIGURATOR VERSION 2.1<br />
&CNF [PWD] KEY<br />
[[Flag]Target telephone<br />
number, [Alarm text],<br />
[Protocol1Protocol2],[Active]<br />
KEY1..4 – Alarm input 1..4<br />
KEY5 – not supported<br />
KEY6 - not supported<br />
KEY7 – Vehicle battery<br />
KEY8 – Ignition (Clip 15)<br />
at ignition lock<br />
protocol types<br />
-GGA, GLL, GSA, GSV,<br />
RMC, IOP, GSM<br />
&CNF [PWD] PORT<br />
Flag[,Time1][,Time2]<br />
&REQ [PWD] CONNECT<br />
<br />
Parameter: Target phone<br />
number<br />
&REQ [PWD] PHONE1<br />
<br />
&REQ [PWD] PHONE2<br />
<br />
&REQ [PWD]<br />
START (b) Lat Lon<br />
Flag:<br />
- S – SMS – Only an alarm SMS is sent.<br />
- A – Alarm call – An alarm call is established in case of an alarm<br />
- V – Voice call – A voice call is established in case of an alarm.<br />
- D –Data call – A data call is is established in case of an alarm.<br />
Target Telephone number:<br />
Telephone number where the alarm is to be sent to<br />
Alarm text:<br />
− This text is sent as an alarm SMS to the target telephone<br />
number.<br />
The following protocol types can be used:<br />
− GGA, GLL, GSA, GSV, RMC, IOP, GSM<br />
The following configuration can be done:<br />
1 ► LOW to HIGH //active<br />
2 ► HIGH to LOW //active<br />
3 ►( LOW to HIGH) and (HIGH to LOW) //active<br />
Example 1 : &CNF password KEY1 S123,Alarm1,GGARMC,1<br />
Example 1 : &CNF password KEY2 S123,Alarm1,RMC,2<br />
Example 1 : &CNF password KEY3 S123,Alarm1,RMC,3<br />
Flag:<br />
− E = Port ON<br />
− A= Port OFF<br />
− I = Port ON for [Time1] sec.(impulse)<br />
− Z= Port periodically ON/OFF<br />
for [Time1] ON and for [Time2] OFF<br />
Example 1 : &CNF password PORT1 Z,1,1<br />
Example 2 : &CNF PORT1 A // Port1 OFF<br />
Example 3 : &CNF PORT1 E // Port1 ON<br />
Example 4 : &CNF PORT1 I,5 // Port1 ca. 5sec. ON (if Port1 was<br />
off) or Port1 ca. 5sec OFF (if Port1 was ON)<br />
Initiates a return call from the device as a data call and transfers<br />
the set GPS protocols (Example 1, 2).<br />
The target phone number can be also other receiver (Example 3).<br />
The <strong>Falcom</strong> <strong>STEPP</strong> will transfer its GPS positions to the<br />
(0221345789) user.<br />
Example 1 : &REQ password CONNECT 1234567<br />
Example 2 : &REQ CONNECT +491234567<br />
Example 3 : &REQ password CONNECT 0221345789<br />
Initiates a return call from the device as an alarm or voice call.<br />
Example 1 : &REQ password PHONE2 //callback<br />
Example 2 : &REQ PHONE1 12345 // Alarm call<br />
Example 3 : &REQ PHONE2 12345 // Voice call<br />
This command resets the GPS receiver and GSM engine of the<br />
FALCOM <strong>STEPP</strong>.<br />
Example 1 : &REQ password START<br />
The user can also use the folowing command with defined latitude<br />
and longitude (if the user knows the FALCOM <strong>STEPP</strong> coordinates)<br />
for a quick position fix.<br />
Example 2 : &REQ password START 50.70 10.98<br />
50.70 → Latitude (unit is )<br />
10.98 → Longitude (unit is )<br />
b This new command is available on the FALCOM <strong>STEPP</strong> with Firmware version 1.0.5.<br />
This confidential document is the property of FALCOM GmbH and may not be copied or circulated without permission.<br />
Page 45
<strong>STEPP</strong>-CONFIGURATOR VERSION 2.1<br />
&CNF UNIT (c)<br />
GEO01=<br />
RegionName,<br />
Region ID,<br />
Lattitude UL,<br />
Longitude UL,<br />
Latitude LR,<br />
Longitude LR,<br />
AlarmType<br />
Parameter description:<br />
GEO01 - String, which determines an area. The first three<br />
characters are predefined (constant string), the<br />
last two digits have to be added. Up to 99 areas<br />
are<br />
possible.<br />
RegionName – String, optional region name up to20 characters<br />
are available.<br />
Region ID – Optional positive number, which identifies an<br />
area. It can be same one for different areas which are<br />
overlapped to each other.<br />
Lattitude UL – three different formats for Latitude can be used<br />
(degrees, minutes,secondes or decimal or NMEA<br />
format).<br />
Longitude UL – see previous parameter<br />
Latitude LR - see previous parameter<br />
Longitude LR - see previous parameter<br />
AlarmType –<br />
number, indicate the type of activation(0, 1, 2 are<br />
possible)<br />
0 - means the alarm is issued by leaving the<br />
defined zone.<br />
1 - means the alarm is issued by entering into the<br />
defined zone.<br />
2 - means the alarm is issued by entering and<br />
leaving the defined zone. (see examples below).<br />
!!!! Please note that, you have to configure the destination number<br />
where the SMS alarm should be sent to. This could be done by<br />
using the command &CNF UNIT<br />
MSG=S012345678,3,0,0,0,0,0,0,RMCGGA). Finally configure<br />
the geo-fencing via SMS command as described below.<br />
Example 1:<br />
&CNF UNIT<br />
GEO01=Ilmenau,01,50.69181,10.89674,50.67472,10.94447, 0<br />
A SMS alarm message is issued, when <strong>STEPP</strong> enters and leaves<br />
the pre-defined area.<br />
Example 2:<br />
&CNF UNIT<br />
GEO02=Langewiesen,02,50.68175,10.95133,50.66715,10.98726, 1<br />
A SMS alarm message is issued, when <strong>STEPP</strong> enters the predefined<br />
area.<br />
Note: If <strong>STEPP</strong> is pre-configured via SMS (&CNF [PWD] UNIT<br />
MSG) to deliver SMS periodically, then the <strong>STEPP</strong> will send<br />
Messages periodically till it leaves the current area.<br />
Example 3:<br />
&CNF UNIT<br />
GEO03=Manebach,03,50.68505,10.85257,50.67375,10.86674,2<br />
A SMS alarm message is issued, when <strong>STEPP</strong> enters and leaves<br />
the pre-defined area.<br />
c This new command is available on the FALCOM <strong>STEPP</strong> with Firmware version 1.6.<br />
This confidential document is the property of FALCOM GmbH and may not be copied or circulated without permission.<br />
Page 46
<strong>STEPP</strong>-CONFIGURATOR VERSION 2.1<br />
&CNF WATCH (c)<br />
Radius,<br />
AlarmText<br />
Parameter description:<br />
Radius: Optional positive number, unit is meter. Place<br />
the vehicle into a restricted square zone, whereby<br />
the current position (including Latitude and<br />
Longitude) of the FALCOM <strong>STEPP</strong> are the<br />
center of circle and “Radius” is the radius of.<br />
cycle.<br />
AlarmText: String, the SMS message which will be sent from<br />
the FALCOM <strong>STEPP</strong> terminal to the pre-defined<br />
call number (see &CNF UNIT MSG).<br />
Optional, up to 20 character length.<br />
Example1:<br />
&CNF WATCH 200,The car is stolen<br />
This command activate a Master Region.<br />
A SMS alarm message is issued, if the vehicle fitted with<br />
FALCOM <strong>STEPP</strong> moves beyond the pre-defined Master Region<br />
(with a radius from 200 m). Please note that, if a Master Region is<br />
activated, the others set areas are deactivated (if previously have<br />
been activated).<br />
Example2:<br />
&CNF WATCH 0<br />
This command deactivate the Master Region and automatically<br />
activate the other set areas (if previously have been deactivated).<br />
Name<br />
Alarmtext<br />
Protocol1<br />
Protocol2<br />
Table 22: SMS configuration commands and remote request commands<br />
Received alarm SMS from <strong>Falcom</strong> <strong>STEPP</strong><br />
[Name(Max40)][Alarmtext(Max 20)] Protocol1 Protocol2<br />
Configured vehicle name<br />
Configured alarm text<br />
configured protocols<br />
The following protocol types can be used:<br />
-GGA, GLL, GSA, GSV, RMC, IOP,GSM<br />
The default delimiter can be replaced with user<br />
configurable delimiter by setting the DEL parameter to an<br />
ASCII value (i.e. 32 for space and 13 for CR).<br />
Example:<br />
White car AlarmImput1<br />
$GPRMC,103530.000,A,5040.3986,N,01058.8636,E,0.06,171.45,290903,,*04<br />
$GPIOP,11000001,00000000,4.82,3.69,4.06*72<br />
Table B.1: Received alarm SMS from <strong>STEPP</strong><br />
c This new command is available on the FALCOM <strong>STEPP</strong> with Firmware version 1.6.<br />
This confidential document is the property of FALCOM GmbH and may not be copied or circulated without permission.<br />
Page 47
<strong>STEPP</strong>-CONFIGURATOR VERSION 2.1<br />
7.1.2 Extended NMEA Commands – for FALCOM <strong>STEPP</strong> only<br />
Commands<br />
$PSRF108,parameter=<br />
value[:parameter=<br />
value]*XX<br />
$PSRF109,rawData,<br />
date,time,*xx<br />
Description<br />
Parameter Configuration<br />
Command format: Parameter=Value<br />
Separate several parameters with “:”<br />
Supporting parameters:<br />
PIN – PIN number of SIM card<br />
NAME – Vehicle name<br />
PWD - Password for SMS configuration<br />
TEL[0-9] – Entry of a telephone number in list of “authorized<br />
telephone numbers”<br />
VOL – Volume adjustment for Audio<br />
LOG – History parameter "numSat,minTime,maxTime,<br />
minDist,maxDist,minSpeed,maxSpeed"<br />
KEY[1..8] – Configuration alarm inputs<br />
Example 1: $PSRF108,PIN=1234:TEL0=012345:CNF*76<br />
Example 2: $PSRF108,LOG=4,5,3600,0150,000,000,000:VOL=12,14*33<br />
$PSRF108,KEY1=012345,Alarm 1,RMC*15<br />
Request history from <strong>Falcom</strong> <strong>STEPP</strong><br />
rawData : 0 = NMEA Format, 1 = Binary Format<br />
date = Date in DDMMYY format<br />
time = Time in HHMMSS format<br />
$PSRF103<br />
Commands to switch<br />
ON/OFF the supported<br />
NMEA protocols<br />
Example 1: $PSRF109,0,280103,155811*32<br />
Request history for 28.Januar 2003<br />
start time 15:58:11<br />
Switch OFF/ON NMEA protocols:<br />
$GPGGA – OFF: $PSRF103,00,00,00,01*24<br />
$GPGGA – ON : $PSRF103,00,00,01,01*25<br />
$GPGLL – OFF: $PSRF103,01,00,00,01*25<br />
$GPGLL – ON : $PSRF103,01,00,01,01*24<br />
$GPGSA – OFF: $PSRF103,02,00,00,01*26<br />
$GPGSA – ON : $PSRF103,02,00,01,01*27<br />
$GPGSV – OFF: $PSRF103,03,00,00,01*27<br />
$GPGSV – ON : $PSRF103,03,00,01,01*26<br />
$GPRMC – OFF: $PSRF103,04,00,00,01*20<br />
$GPRMC – ON : $PSRF103,04,00,01,01*21<br />
This confidential document is the property of FALCOM GmbH and may not be copied or circulated without permission.<br />
Page 48
<strong>STEPP</strong>-CONFIGURATOR VERSION 2.1<br />
$PSRF108, (c)<br />
GEO01=<br />
RegionName,<br />
Region ID,<br />
Lattitude UL,<br />
Longitude UL,<br />
Latitude LR,<br />
Longitude LR,<br />
Indicator<br />
<br />
Parameter description:<br />
GEO01 - String, which determines an area. The first three<br />
characters are predefined (constant string), the last<br />
two digits have to be added. Up to 99 areas are<br />
possible.<br />
RegionName – String, optional region name up to20 characters can be<br />
entered.<br />
Region ID – Optional positive number, which identifies an area. It<br />
can be the same for different areas which are<br />
overlapped to each other.<br />
Lattitude UL – three different formats for Latitude can be used<br />
(degrees, minutes,secondes or decimal or NMEA<br />
format).<br />
Longitude UL – see previous parameter<br />
Latitude LR - see previous parameter<br />
Longitude LR - see previous parameter<br />
Indicator –<br />
number, indicates the type of activity(0,1,2 are<br />
possible)<br />
0- means the alarm is issued by leaving the zone<br />
1- means the alarm is issued by entering the zone<br />
2- means the alarm is issued by entering and leaving<br />
the zone. (see examples below)<br />
- the string over which the checksum has to be<br />
calculated.<br />
Example 1:<br />
$PSRF108,GEO01=LANGEWIESEN,001,50.68175,10.95133,50.6671<br />
5,10.98726,0<br />
A SMS alarm message is issued, when <strong>STEPP</strong> enters and leaves the<br />
pre-defined area.<br />
Example 2:<br />
$PSRF108,GEO01=LANGEWIESEN,001,50.68175,10.95133,50.6671<br />
5,10.98726,1<br />
A SMS alarm message is issued, when <strong>STEPP</strong> enters the pre-defined<br />
area.<br />
Note: If <strong>STEPP</strong> is pre-configured via SMS (&CNF [PWD] UNIT<br />
MSG) to deliver SMS periodically, then the <strong>STEPP</strong> will send Messages<br />
periodically till it leaves the current area.<br />
Example 3:<br />
$PSRF108,GEO01=LANGEWIESEN,001,50.68175,10.95133,50.6671<br />
5,10.98726,2<br />
A SMS alarm message is issued, when <strong>STEPP</strong> enters and leaves the<br />
pre-defined area<br />
Table B.2: Extended NMEA commands<br />
c This new command is available on the FALCOM <strong>STEPP</strong> with Firmware version 1.6.<br />
This confidential document is the property of FALCOM GmbH and may not be copied or circulated without permission.<br />
Page 49