Gangland Manual 2.4.04.qxd
Gangland Manual 2.4.04.qxd
Gangland Manual 2.4.04.qxd

You also want an ePaper? Increase the reach of your titles
YUMPU automatically turns print PDFs into web optimized ePapers that Google loves.
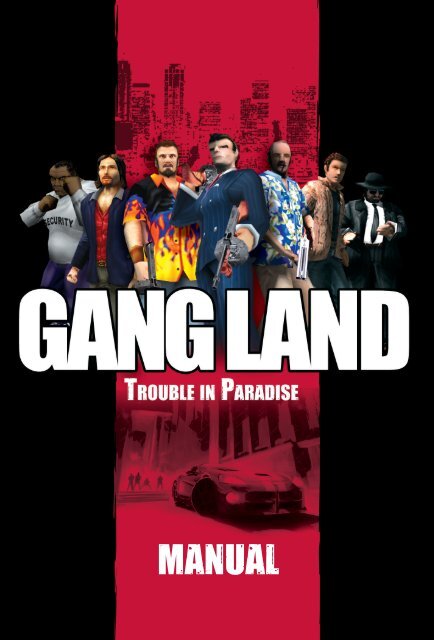
MANUAL
Prologue<br />
One hot night in Palermo, Italy, a terrible fight broke out in one of the streets<br />
of the old town. The sound of gunfire, screams, and yelling filled the night<br />
air; the next morning Chico Mangano was found, shot dead, on the<br />
pavement.<br />
A gun was located close to the scene and with the evidence of two<br />
eyewitnesses; the conclusion was that three of Chico’s brothers, Romano,<br />
Angelo, and Sonny were responsible for the murder...<br />
Police began an intensive manhunt to find the three brothers but failed.<br />
They had vanished.<br />
Two years passed on the small Mediterranean Island and one day Grandpa<br />
Mangano received a phone call from far away.<br />
The call was from his eldest son, Vincenzo Mangano, who had left Sicily<br />
decades ago. Vincenzo said that the three brothers had been seen alive and<br />
well in the same city that Vincenzo lived.<br />
Grandpa Mangano dispatched his fifth grandson to start working for<br />
Vincenzo, and then, when he was strong and powerful, to hunt down and<br />
kill the three murderous brothers.<br />
He sent him to America, to Paradise City, and the fifth brothers’ name was<br />
Mario...<br />
3
Table of Contents<br />
GETTING STARTED<br />
SYSTEM REQUIREMENTS . . . . . . . . . . . . . . . . . . . . . . . . . . . . . . . . . . . . . . . . .5<br />
INSTALLATION . . . . . . . . . . . . . . . . . . . . . . . . . . . . . . . . . . . . . . . . . . . . . . . . . .5<br />
LAUNCHING . . . . . . . . . . . . . . . . . . . . . . . . . . . . . . . . . . . . . . . . . . . . . . . . . . . .5<br />
BASIC GAME CONTROLS<br />
USING THE CAMERA . . . . . . . . . . . . . . . . . . . . . . . . . . . . . . . . . . . . . . . . . . . . .6<br />
USING THE MINIMAP . . . . . . . . . . . . . . . . . . . . . . . . . . . . . . . . . . . . . . . . . . . .6<br />
CONTROLLING THE UNITS . . . . . . . . . . . . . . . . . . . . . . . . . . . . . . . . . . . . . . .7<br />
STEERING THE VEHICLES . . . . . . . . . . . . . . . . . . . . . . . . . . . . . . . . . . . . . . . .8<br />
WALKTHROUGH<br />
GAMING DISCIPLINES . . . . . . . . . . . . . . . . . . . . . . . . . . . . . . . . . . . . . . . . . . . .9<br />
STARTING YOUR FIRST SINGLEPLAYER MISSION . . . . . . . . . . . . . . . . .10<br />
DON’T SPEND VINCENZO’S MONEY . . . . . . . . . . . . . . . . . . . . . . . . . . . . .10<br />
EXTORTING & TAKING OVER BUSINESSES . . . . . . . . . . . . . . . . . . . . . . .10<br />
ACQUIRING RESOURCES . . . . . . . . . . . . . . . . . . . . . . . . . . . . . . . . . . . . . . . .11<br />
COLLECTING MONEY . . . . . . . . . . . . . . . . . . . . . . . . . . . . . . . . . . . . . . . . . . .11<br />
HIRING PEOPLE . . . . . . . . . . . . . . . . . . . . . . . . . . . . . . . . . . . . . . . . . . . . . . . . .11<br />
GAINING EXPERIENCE POINTS (XP) . . . . . . . . . . . . . . . . . . . . . . . . . . . . . .12<br />
HOW TO GET SOME WHEELS . . . . . . . . . . . . . . . . . . . . . . . . . . . . . . . . . . . .12<br />
HINTS & OBJECTIVES . . . . . . . . . . . . . . . . . . . . . . . . . . . . . . . . . . . . . . . . . . . .12<br />
HOW TO STAY ALIVE . . . . . . . . . . . . . . . . . . . . . . . . . . . . . . . . . . . . . . . . . . .12<br />
LOSING THE GAME . . . . . . . . . . . . . . . . . . . . . . . . . . . . . . . . . . . . . . . . . . . . .14<br />
COMBAT HINTS . . . . . . . . . . . . . . . . . . . . . . . . . . . . . . . . . . . . . . . . . . . . . . . . .14<br />
ADVANCED GAMEPLAY<br />
EXTORTING & TAKING OVER OPPONENT BUSINESSES . . . . . . . . . . . .15<br />
TAKING OVER AN OPPONENT SAFEHOUSE . . . . . . . . . . . . . . . . . . . . . .15<br />
HOW TO GET UNDERBOSSES FOR YOUR FAMILY . . . . . . . . . . . . . . . . .15<br />
HOW TO INFILTRATE AN OPPONENT . . . . . . . . . . . . . . . . . . . . . . . . . . . .16<br />
GRANTING FAVORS . . . . . . . . . . . . . . . . . . . . . . . . . . . . . . . . . . . . . . . . . . . . .16<br />
GAME LOBBY INTERFACE<br />
PROFILE . . . . . . . . . . . . . . . . . . . . . . . . . . . . . . . . . . . . . . . . . . . . . . . . . . . . . . . .17<br />
SINGLEPLAYER . . . . . . . . . . . . . . . . . . . . . . . . . . . . . . . . . . . . . . . . . . . . . . . . .17<br />
MULTIPLAYER . . . . . . . . . . . . . . . . . . . . . . . . . . . . . . . . . . . . . . . . . . . . . . . . . .18<br />
HIGHSCORES & RANKINGS . . . . . . . . . . . . . . . . . . . . . . . . . . . . . . . . . . . . . .19<br />
OPTIONS . . . . . . . . . . . . . . . . . . . . . . . . . . . . . . . . . . . . . . . . . . . . . . . . . . . . . . .19<br />
IN-GAME USER INTERFACE<br />
SELECTION HUB . . . . . . . . . . . . . . . . . . . . . . . . . . . . . . . . . . . . . . . . . . . . . . . .20<br />
THE MINI MAP . . . . . . . . . . . . . . . . . . . . . . . . . . . . . . . . . . . . . . . . . . . . . . . . . .21<br />
THE CHARACTER DETAIL . . . . . . . . . . . . . . . . . . . . . . . . . . . . . . . . . . . . . . .21<br />
“FUNCTION BAR” ACTIONS . . . . . . . . . . . . . . . . . . . . . . . . . . . . . . . . . . . . .22<br />
THE PRIMARY RESOURCES . . . . . . . . . . . . . . . . . . . . . . . . . . . . . . . . . . . . . .23<br />
4
THE SECONDARY RESOURCES . . . . . . . . . . . . . . . . . . . . . . . . . . . . . . . . . . .24<br />
IN-WORLD ACTIONS . . . . . . . . . . . . . . . . . . . . . . . . . . . . . . . . . . . . . . . . . . . .25<br />
CHARACTER MARKERS . . . . . . . . . . . . . . . . . . . . . . . . . . . . . . . . . . . . . . . . .28<br />
VINCENZO / PHONE ICON . . . . . . . . . . . . . . . . . . . . . . . . . . . . . . . . . . . . . .30<br />
IN-GAME DIALOGS . . . . . . . . . . . . . . . . . . . . . . . . . . . . . . . . . . . . . . . . . . . . .30<br />
ESCAPE DIALOG . . . . . . . . . . . . . . . . . . . . . . . . . . . . . . . . . . . . . . . . . . . . . . . .32<br />
FAMILY MEMBERS<br />
MAIN CHARACTERS . . . . . . . . . . . . . . . . . . . . . . . . . . . . . . . . . . . . . . . . . . . .33<br />
VINCENZO (NPC BOSS) . . . . . . . . . . . . . . . . . . . . . . . . . . . . . . . . . . . . . . . . . .34<br />
THE WIVES . . . . . . . . . . . . . . . . . . . . . . . . . . . . . . . . . . . . . . . . . . . . . . . . . . . . .35<br />
THE CHILDREN / UNDERBOSSES . . . . . . . . . . . . . . . . . . . . . . . . . . . . . . . .36<br />
BASIC UNITS . . . . . . . . . . . . . . . . . . . . . . . . . . . . . . . . . . . . . . . . . . . . . . . . . . . .38<br />
SUPER UNITS . . . . . . . . . . . . . . . . . . . . . . . . . . . . . . . . . . . . . . . . . . . . . . . . . . .40<br />
STORE MANAGERS . . . . . . . . . . . . . . . . . . . . . . . . . . . . . . . . . . . . . . . . . . . . . .43<br />
WORKERS & COLLECTORS . . . . . . . . . . . . . . . . . . . . . . . . . . . . . . . . . . . . . .44<br />
LIFE IN THE CITY<br />
THE LAW . . . . . . . . . . . . . . . . . . . . . . . . . . . . . . . . . . . . . . . . . . . . . . . . . . . . . . .45<br />
THE PROSPECTS . . . . . . . . . . . . . . . . . . . . . . . . . . . . . . . . . . . . . . . . . . . . . . . .46<br />
THE INTERNATIONAL MAFIA CONNECTIONS . . . . . . . . . . . . . . . . . . .56<br />
OTHER MAFIA BOSSES . . . . . . . . . . . . . . . . . . . . . . . . . . . . . . . . . . . . . . . . . .47<br />
THE STORE MANAGERS AND THEIR HIRED MUSCLE . . . . . . . . . . . . .49<br />
THE CIVILIANS . . . . . . . . . . . . . . . . . . . . . . . . . . . . . . . . . . . . . . . . . . . . . . . . .50<br />
THE NEWSPAPER BOYS . . . . . . . . . . . . . . . . . . . . . . . . . . . . . . . . . . . . . . . . . .51<br />
THE PRIESTS . . . . . . . . . . . . . . . . . . . . . . . . . . . . . . . . . . . . . . . . . . . . . . . . . . . .51<br />
PROPERTY<br />
BUSINESSES . . . . . . . . . . . . . . . . . . . . . . . . . . . . . . . . . . . . . . . . . . . . . . . . . . . . .52<br />
VEHICLES . . . . . . . . . . . . . . . . . . . . . . . . . . . . . . . . . . . . . . . . . . . . . . . . . . . . . .56<br />
WEAPONS . . . . . . . . . . . . . . . . . . . . . . . . . . . . . . . . . . . . . . . . . . . . . . . . . . . . . .58<br />
QUICKLISTS<br />
PRIMARY & SECONDARY ATTACKS . . . . . . . . . . . . . . . . . . . . . . . . . . . . . .62<br />
DEFAULT KEY ASSIGNMENTS . . . . . . . . . . . . . . . . . . . . . . . . . . . . . . . . . . .62<br />
ACTIONS ACCESSED FROM THE FUNCTION BAR . . . . . . . . . . . . . . . . .63<br />
MAIN CHARACTER LEVELS . . . . . . . . . . . . . . . . . . . . . . . . . . . . . . . . . . . . .64<br />
GENERAL UNIT LEVELS . . . . . . . . . . . . . . . . . . . . . . . . . . . . . . . . . . . . . . . . .64<br />
TECHNICAL and CUSTOMER SUPPORT . . . . . . . . . . . . . . . . . . . . . .65<br />
CREDITS . . . . . . . . . . . . . . . . . . . . . . . . . . . . . . . . . . . . . . . . . . . . . . . . . . .65<br />
BIG MAMA’S MEATBALL RECIPE . . . . . . . . . . . . . . . . . . . . . . . . . . .69<br />
5
WELCOME TO GANGLAND<br />
<strong>Gangland</strong> is not your usual real-time strategy game. It’s a game that offers a<br />
totally new gaming style mixing the three genres: real-time strategy (RTS),<br />
role-playing game (RPG), and simulation (SIM), with a large dose of high<br />
paced action. You must move fast in combat and make tactical use of the<br />
environment, use med-kits, reload your guns, and crouch or take cover with<br />
the right timing to stay alive. So, before you start the game, you should put<br />
on your best suit, clean your guns, bake some pizza and then prepare<br />
yourself for some serious mobster action.<br />
Enjoy!<br />
6
GETTING STARTED<br />
SYSTEM REQUIREMENTS<br />
Minimum system requirements<br />
Windows 98 / 98SE / ME / 2000 / XP<br />
Pentium III/Athlon 600 MHz or higher<br />
128MB system RAM (Not shared with video card)<br />
1 Gig free hard drive space<br />
Video Card: Nvidia GeForce or ATI Radeon based graphics cards w/64MB on card<br />
(only 32MB required on video card for single player). (The Intel Extreme onboard graphics card<br />
will work as long as the user has more than 128MB system RAM as that card shares system<br />
memory. Also this is the Intel onboard graphics for newer Intel chipsets, the game will not work<br />
on the Intel 810 onboard graphics used in the older chipsets.)<br />
12X or faster CD-ROM drive<br />
56K modem for Internet play<br />
With the minimum system requirements, the user must set the game detail to lowest settings, and it’s<br />
recommended that the game resolution is lowered to 800x600.<br />
Recommended system requirements<br />
Pentium 4/Athlon 1.1GHz of higher<br />
512MB RAM<br />
1 Gig free hard drive space<br />
Nvidia GeForce 2 or higher/ATI Radeon 7000 or higher based graphics card or better<br />
w/128MB on card<br />
12X or faster CD-ROM drive<br />
Broadband access for Internet play<br />
INSTALLATION<br />
To install <strong>Gangland</strong>, place the <strong>Gangland</strong> CD in the CD-ROM drive. If your<br />
computer has auto-run capability, the <strong>Gangland</strong> installer will automatically<br />
appear on your screen. Otherwise, you will have to run the setup.exe file<br />
manually from the root directory of the <strong>Gangland</strong> CD. Then follow the<br />
instructions of the installer wizard.<br />
LAUNCHING<br />
Make sure the <strong>Gangland</strong> CD is in the CD-ROM drive. Launch the<br />
game from the start menu or the link on the desktop.<br />
7
BASIC GAME CONTROLS<br />
To get the best possible gameplay you must learn to navigate within<br />
the game, so please read this section carefully.<br />
USING THE CAMERA<br />
Movement of the camera is both dynamic and user-controlled,<br />
enabling you to rotate, zoom, pan, and scroll. This way, you can see<br />
any point of view you require.<br />
Zooming<br />
Zoom Out: Scroll down on the mouse wheel or press “-”<br />
Zoom In: Scroll up on the mouse wheel or press “+”<br />
Rotating and Panning<br />
To rotate, hold down the ALT key or the middle mouse button (if you use a<br />
three-button mouse), while moving your mouse towards the angle you want<br />
to view. Keys “V” and “B” are by default assigned to rotating the camera 90<br />
degrees clockwise or counter clockwise.<br />
Scrolling on the Map<br />
Move the cursor to the edge of the map to scroll in that direction,<br />
for alternative scrolling, hold down “Spacebar” while moving your mouse.<br />
Follow-Camera on Vehicles<br />
While driving a vehicle, there are two kinds of camera settings you can<br />
choose for the follow-camera: The default fixed camera that always stays<br />
behind the vehicle, and the free camera that allows you to rotate the camera<br />
around the vehicle. In order to toggle between the two camera modes press<br />
“E” while the vehicle is selected.<br />
USING THE MINI MAP<br />
Using the Mini Map to Scroll<br />
Place the cursor over the mini map, at the location on the map you want to<br />
go to, and then press the left mouse button to change the world view to the<br />
selected location.<br />
8
Alerts on the Mini Map<br />
Green alerts on the mini map will guide you to the target(s). Various<br />
markers like ‘arrows’ and ‘skulls’ will be shown in-world for you to easily<br />
identify the targets; whether a store manager is to be extorted or a snitch<br />
needs to be ‘whacked’. When the order has been carried out you should go<br />
back to Vincenzo and get new orders.<br />
CONTROLLING THE UNITS<br />
Selecting a Unit<br />
You can select a unit by left-clicking on it with your mouse cursor. You can<br />
select multiple units by holding down the shift key and left-clicking on the<br />
units or you can hold down the left mouse button and drag a frame around<br />
the units. Dragging a frame around units to select them does not include<br />
units that are fortifying a building or sitting by the desk in the safe house.<br />
To include these units in this kind of selection you must press and hold<br />
down “Z” while you drag the frame.<br />
For selection of units, you can also use the selection hub (see ‘In-game User<br />
Interface - Selection Hub’).<br />
You can only select your own people or store managers of businesses that<br />
you have taken over. Store managers can only be selected exclusively.<br />
Your people are marked with a solid ring and the store managers with a<br />
dashed ring around the unit’s feet colored in your team color. Units marked<br />
with a dotted ring in your color are Vincenzo’s people and cannot be<br />
selected.<br />
Selecting Multiple Units<br />
Drag a frame around the units you want to select. You cannot scroll on the<br />
map while multi selecting. You can also Force Select multiple units.<br />
Grouping Units and Selecting Groups<br />
Select a group of units, then hold down the Ctrl key, and press any number<br />
between 0 and 9. To re-select the group later on, press the designated<br />
number key. Pressing the number key twice will center view on the first<br />
character within the group.<br />
Moving Units<br />
Left-click to select the unit(s), then right-click on any<br />
point in the world or in the mini map, and the unit(s)<br />
will move to that point.<br />
Click once to walk and twice to run!<br />
9
Talking<br />
You can talk with many of the characters in Paradise City. Most<br />
importantly, you can talk with your uncle Vincenzo to get<br />
orders, and store managers to extort or take over businesses.<br />
Characters can talk to the store manager in the arms dealer<br />
in order to buy weapons. To talk, select the main character<br />
and right-click on any other character. A talk icon will<br />
appear when you can talk.<br />
Attacking (and other actions)<br />
Select the unit(s) and right-click on any target. An icon will<br />
appear on the mouse cursor to indicate what the default action<br />
will be depending on the situation and the target (also see<br />
“In-World Actions”). You can always force the units to attack<br />
the target by holding down the Ctrl key. All actions are carried<br />
out either by right clicking on a target, or by using the function keys to use<br />
med-kits, reload, sit/stand etc. (also see “Actions in the Function Bar”).<br />
STEERING THE VEHICLES<br />
Selecting a Vehicle<br />
You select a vehicle by left-clicking on it while someone is inside. The<br />
vehicle cannot be selected if there is no unit inside. In addition, vehicles<br />
cannot be selected or grouped together with other units. While the vehicle is<br />
selected, the camera will be fixed on it. To free the camera you must deselect<br />
the vehicle either by selecting another unit, or left-clicking on the<br />
ground.<br />
Moving a Vehicle<br />
To drive a car you must have at least one person inside it. You operate the<br />
car by using the keyboard. Default keys assigned are: “W” for forward, “A”<br />
to turn left, “D” to turn right, and “S” to brake or reverse.<br />
Doing a ‘Drive-by’<br />
You can shoot from vehicles that have shooting positions. The number of<br />
shooting positions in vehicles varies. Vehicles with just one shooting<br />
position can only shoot to one side. While steering the vehicle with the<br />
keyboard, you control shooting with the mouse. Move the mouse cursor<br />
over the target and hold down the right mouse button to keep shooting<br />
towards the cursor. Anyone within line of fire will be hit. Release the right<br />
mouse button to stop shooting.<br />
10
WALKTHROUGH<br />
If you are not yet familiar with the game controls please refer to the previous<br />
section “Basic Game Controls” before you continue with this walkthrough.<br />
GAMING DISCIPLINES<br />
There are four different gaming disciplines in <strong>Gangland</strong>. Each one is<br />
designed to be a fun and challenging experience.<br />
Single player Conquests<br />
The story of Mario who is sent to America to hunt down and kill his three<br />
brothers is told throughout 16 conquests taking place in the different areas<br />
of Paradise City. The conquests evolve around building your family,<br />
earning money and fighting other families.<br />
Single player Challenges<br />
In between the conquests are 12 challenges. Challenges are short action<br />
packed games that unlock special characters that can be used in the<br />
conquests. In challenges you get a team with which you must complete the<br />
challenge.<br />
Multiplayer Conquests<br />
In multiplayer conquests you can battle against the computer or human<br />
players in a race to build the strongest family, to earn the most money and<br />
to eliminate the other families. There are 20 conquest maps to play on. In<br />
four of these conquests all players start out working for their uncle and must<br />
soon work their way up to become boss of the family.<br />
Multiplayer Shootouts<br />
In Multiplayer Shootouts it’s not about earning money, generating resources<br />
or building a family. These short games are solely about using a small team<br />
to hunt down and whack the other players (use the cars!:)). Shootouts can<br />
only be played with other human players.<br />
11
STARTING YOUR FIRST SINGLEPLAYER<br />
MISSION<br />
Start by launching the game. Name the default profile, make sure<br />
that the keyboard and mouse settings are as you would like them,<br />
and then select ‘Play’ from the Singleplayer menu. You now see the<br />
Singleplayer high-scores - these will be empty the first time you<br />
play the game. Choose the difficulty level ‘Easy Campaign’ using<br />
the buttons to the lower left. Missions can be chosen from the lower<br />
middle selection. Only the first mission will be available in the<br />
beginning but as you complete the missions, the succeeding ones<br />
will become unlocked. Choose the first conquest mission then<br />
press the checkmark in the lower right of the screen to launch the<br />
game. You have now launched the first mission of the easy<br />
Singleplayer campaign. Press the start button when it appears to<br />
the lower right of the intro splash screen.<br />
When the mission starts, select Mario, the main character, who is standing<br />
in the middle of the screen. Then go inside the building in front of him and<br />
have him talk to the guy sitting behind the desk (Mario’s uncle, Vincenzo).<br />
He will give Mario orders, which Mario has to follow to keep Vincenzo<br />
happy. Select Mario, right-click on Vincenzo to talk to him, and a dialog will<br />
pop up. Read the order carefully then go out and make Mario carry out the<br />
order.<br />
DON’T SPEND VINCENZO’S MONEY<br />
In this first mission, you should not do business on your own; in later<br />
missions you will have more freedom of choice. Don’t spend the money that<br />
Vincenzo has given to you to take over a business on anything else but that.<br />
Uncle Vincenzo really doesn’t like to be cheated! If you run out of money<br />
and still have to take over a business for Vincenzo, you will have to find<br />
alternative income. One way to get quick money is to hunt down collectors<br />
(from other families) and take their bags full of money. If your main<br />
character is the boss, the easiest way to get money is to go and extort some<br />
businesses.<br />
EXTORTING & TAKING OVER BUSINESSES<br />
If you are told to extort or take over a business, you must go to the targeted<br />
business and talk to the store manager. A dialog will pop up with the choice<br />
to either extort or take over the business. Store managers have hired their<br />
own protection; they may decide to say no to your hostile approach and<br />
have their guys shoot at you or try to beat you up. The store manager’s hired<br />
12
Hint: Select: To select, either left-click or drag selection<br />
‘muscle’ are standing inside the building and blend in with other citizens<br />
making it sometimes hard to assess the opposition. Be ready to run out of<br />
the building if the opposition is too ‘hard’. Extorting a business gives you<br />
25% of the revenue and resources, whereas taking over the business means<br />
that you pay a single payment to become a partner and have the store<br />
manager work for you as a ‘front-man’. You will then take home 50% of the<br />
revenue and resources, and receive the full benefit from the business. Illegal<br />
operations will be built in the backroom only if you have taken over the<br />
business. The only way to buy or acquire weapons for your family is to take<br />
over an arms dealer.<br />
ACQUIRING RESOURCES<br />
Resources are acquired automatically from the businesses (not all) that<br />
produce resources. Mainly you should make sure that you have at least one<br />
arms dealer as they produce all the primary resources such as bullets and<br />
med-kits. The secondary resources are generally used for trade with<br />
international connections. (Also see the section: ‘Property - Businesses’)<br />
COLLECTING MONEY<br />
Money is collected automatically from the various businesses; the store<br />
managers will hire collectors to take the money to the safehouse. The money<br />
is not available to be spent until the collector puts the money into the safe<br />
located in the safehouse. However, if you do not wish to wait for the<br />
collector, you can use your main character to collect directly. The main<br />
character doesn’t have to go back to the safehouse with the money and can<br />
spend it right away.<br />
HIRING PEOPLE<br />
It is always a good idea to hire as many gangsters as you can afford. If you<br />
have empty slots in the selection hub (in the upper left of the screen just to<br />
the right of main character’s portrait) you can hire more people (as<br />
your leadership level increases, so do your slots). Basic units can<br />
be hired in the restaurants and speakeasy’s once the<br />
businesses are extorted or taken over. Units who are<br />
ready to be hired have a money icon rotating over<br />
their heads. Just select your main character, then<br />
right-click on the unit to hire (you have to be at<br />
close range), and he/she will join your family if<br />
you have enough money. If you have a lawyer<br />
child, you can use him to recruit people off the<br />
13
streets. (Also, see ‘Family Members - The Children under Family<br />
Members’).<br />
GAINING EXPERIENCE POINTS (XP)<br />
All characters gain experience points (XP) by shooting and<br />
hitting people. XP are distributed in three categories: Combat,<br />
Leadership, and Business Flair. A certain amount of XP is needed<br />
to climb to the next level. A higher level in Combat means higher<br />
accuracy and more hit-points; higher levels in Business Flair<br />
results in higher revenue from businesses; higher levels in<br />
Leadership opens up more unit slots so you can hire and control<br />
more units. Finally, each of the four brothers, Mario, Angelo,<br />
Sonny, and Romano all have their own individual level<br />
progressions (also see ‘Quick-lists - Main Character Levels and<br />
General Unit Levels’).<br />
HOW TO GET SOME WHEELS<br />
In order to get a vehicle you must either steal one (by using a thief unit), or<br />
buy one from the international connections when they offer you one.<br />
HINTS & OBJECTIVES<br />
Press the ESC-key to show the objectives and hints to help you complete the<br />
mission.<br />
HOW TO STAY ALIVE<br />
Paradise City is a rough place and in order to stay alive you should follow<br />
certain ‘rules of thumb’:<br />
Use the Environment<br />
During combat, it’s a good idea to take cover behind tables, counters, and<br />
trashcans; likewise, standing in the middle of the street when fighting, will<br />
get you killed very quickly. Use ‘Crouch/Stand’ - F3 to crouch behind<br />
garbage bins etc. when you are fired at, then stand up to return fire.<br />
Heal<br />
When a unit’s health drops below 50% their movement and aiming accuracy<br />
becomes significantly deteriorated. Therefore, you should keep an eye on<br />
your med-kit supply at all times. Use F1 to heal a wounded unit and be sure<br />
to take cover while you do that.<br />
Ammunition<br />
Like med-kits, ammo is delivered by the ‘Arms Dealers’. There are three<br />
14
Hint: Walk/Run: Single-click to walk. Double-click to run.<br />
kinds of ammo: Normal Bullets, Dum-dums, and Explosive Tipped Bullets.<br />
You can switch between the bullet types by clicking on the bullet icons on<br />
the left of the screen. Switching bullet types has an instant effect on your<br />
units. Always make sure you have enough ammo to last throughout a gun<br />
battle, alternatively keep a low profile.<br />
Choose the Right Kind of Attack<br />
Some units have two attack modes: Primary & Secondary. Press F4 to toggle<br />
between attack modes. Some secondary attack modes require specific<br />
resources such as Explosives (also see ‘Quick-lists - Primary & Secondary<br />
Attacks’)<br />
Reload<br />
Use F2 to reload your weapons. It’s a good idea always to make sure your<br />
guns are loaded to the max before entering battle. Having to reload while<br />
under attack is not recommended.<br />
Fortify<br />
Henchmen, gunmen, bodyguards, and snipers have the ability to fortify the<br />
safehouses, residential, and office buildings you own.<br />
Just right click on the desk or counter, and the selected units will stand<br />
behind the windows shooting out on any of your opponents passing by.<br />
Fortifying units have enhanced accuracy and are impossible to hit from the<br />
outside by anyone but the Sniper unit.<br />
Beware of the Police<br />
The police in Paradise City are just as crooked as any Mafioso. The Chief of<br />
Police will regularly visit your safe-house and ask for a bribe; be sure to pay<br />
him on time or you will have the entire police force looking for you. Also, be<br />
very careful when you decide to shoot in the streets; any nearby police will<br />
engage you instantly in combat, and this could easily become the reason for<br />
your early departure from this world.<br />
Look out for Drive-bys<br />
Do not let your units stand unprotected in the streets unless you<br />
have a good purpose for doing this. They risk being<br />
run-over by a car or shot during a drive-by. If you<br />
see a car cruising around you can be sure it’s<br />
loaded with trigger-happy Mafioso ready to<br />
gun you down.<br />
Escape a Damaged Vehicle<br />
When a vehicle is hit, it gets damaged. The<br />
15
vehicle will automatically use any available stolen spare-parts<br />
resources in order to repair itself when it’s damaged (stolen spareparts<br />
are acquired from the Garage). If the vehicle catches fire, it will<br />
be beyond repair, and you must get out of the car and move away<br />
from it as fast as possible before the car explodes. Remaining inside<br />
the car will result in a sure death.<br />
Run, Baby, Run!<br />
When you are over powered, it’s not shameful to run from the scene<br />
of a battle. All that matters is survival! Entering one of your own<br />
buildings and locking the door may buy you some time as your<br />
opponents will have to pick the lock or blow the door away before<br />
they can get to you. When units run it affects their stamina. When<br />
stamina reaches zero the unit can not run and must rest in order to<br />
increase stamina.<br />
LOSING THE GAME<br />
You must keep your main character alive at all times, whether you are<br />
playing in Single player or Multiplayer mode. If your main character dies<br />
your game is over. In Single player mode, you may have to keep someone<br />
else alive as well; for example, in early conquests (1-4), Vincenzo must<br />
survive or you will fail the mission and will have to start again.<br />
You should always guard your safe house well. If you lose your last safe<br />
house, you will have five minutes to take back your safe house or find a new<br />
one. If time runs out, you lose the game. Game Over!<br />
COMBAT HINTS<br />
Combat in <strong>Gangland</strong> is like<br />
big-city guerrilla warfare.<br />
Below is an example of<br />
combat scene. Red is pushing<br />
blue back towards the blue<br />
safe house, and blue is losing<br />
since red is taking much<br />
better advantage of the<br />
environment.<br />
Red player’s main character<br />
(Mario) is placed in safety<br />
behind some garbage bins in<br />
the lower right corner, and should the course of the battle take an<br />
unsuspected turn, he will have the possibility to escape the fight. The<br />
16
Hint: Talk: Select Mario and right-click on target.<br />
bouncer is running towards the car to take cover, and the three henchmen<br />
are well protected against bullets and the dynamite thrown by the bomber.<br />
The street girl behind the dumpster is just waiting for the right moment to<br />
run up and stun the opponents.<br />
Blue will soon lose this battle since their units are standing in the middle of<br />
the street with no cover or protection.<br />
The player that best uses the environment; heals, reloads, and moves at the<br />
right time will win. The player who fights in the middle of the street will<br />
soon bleed to death...<br />
ADVANCED GAMEPLAY<br />
EXTORTING & TAKING OVER OPPONENT BUSINESSES<br />
To extort or take over a business already controlled by another family, you<br />
must first terminate every enemy unit inside including the store manager.<br />
When they are all dead, or have run away and only your men remain, the<br />
colored building marker in the mini map becomes gray indicating that the<br />
building is neutral and is ready to be extorted or taken-over by you.<br />
Remember to always look for enemies in the back room. Your units have to<br />
go to the back room to have visibility there. If they can’t, then the back room<br />
has not yet been built and there cannot be any enemy units hiding there.<br />
TAKING OVER AN OPPONENT SAFEHOUSE<br />
In order to take over a safe house you must first get rid of all opposition that<br />
sit by the desk in the safe house.<br />
HOW TO GET UNDERBOSSES FOR YOUR FAMILY<br />
The only characters that can become underbosses of the<br />
family are the main character’s own children. When they<br />
grow up, they automatically take their place as the second in<br />
command of the family. Getting underbosses is a fairly<br />
long process. You first need to find a suitable woman and<br />
have your main character propose to her. Your main<br />
character needs to be boss of the family and have his<br />
own safe house or she will turn him down,<br />
otherwise, she will ask for a big and expensive<br />
ring. Buy the ring for her if you can afford it; then<br />
they will be engaged and she will follow the main<br />
character around until they get married. Go to the church<br />
and right-click on the priest to get married. As you exit the<br />
17
church, she will instantly go back to the safehouse. Now that they are<br />
married, they can mate and have children. Right-click on the wife to<br />
have them start to mate. They will go to the back of the safehouse and<br />
upstairs (not accessible to the player!). After some time they will<br />
return with a child. The wife will walk with the child until he or she<br />
grows up and becomes an underboss of the family. The children<br />
cannot be killed; however, the wife can (so protect her), resulting in<br />
the child running to his or her father (the main character) and staying<br />
with him wherever he goes until he or she grows up (you don’t want<br />
this to happen). Getting an underboss opens up two new unit slots<br />
enabling your family to expand.<br />
HOW TO INFILTRATE AN OPPONENT<br />
The first step of infiltration is to hire an infiltrator; these are offered by<br />
international connections. Select the infiltrator then find an opponent<br />
gunman or henchman and right-click on the target. The infiltrator will then<br />
impersonate the gunman or henchman. To the infiltrated player, the<br />
character will look and behave the same as before. The only difference is<br />
now you can overrule any orders issued to the impersonated character. You<br />
now have a mole in the opponent family, which can be used for intelligence<br />
only, or used to make surprise attacks on other characters. You could even<br />
use him to go after other families, possibly breaking alliances, and even<br />
starting a war without anyone knowing it was you who really did it. This<br />
devious strategy is well worth the effort!<br />
GRANTING FAVORS<br />
When your main character is the boss of the family, some characters will<br />
occasionally come and ask for a favor. By granting and performing this<br />
favor, the character will, in turn, owe you one. He then becomes selectable<br />
and you can order him to do anything, just as you would with your other<br />
units. The only difference is that your opponents will only recognize him as<br />
they would any prospect. Because of this, he is a very powerful unit that can<br />
be used for gathering intelligence or making surprise attacks. Bear in mind<br />
that when using this unit, any behavior that doesn’t fit a prospect, like<br />
unmotivated attacks or running in the streets for no reason, can be detected<br />
by the other players and will, potentially, blow your cover.<br />
18
Hint: Rotate Camera: Hold down ALT-key and move the mouse.<br />
GAME LOBBY INTERFACE<br />
PROFILE<br />
The profile menu enables you<br />
to create a new profile or<br />
select an existing one.<br />
Here you can view the four<br />
brothers and decide which<br />
one of them you would like to<br />
use in Multiplayer games. As<br />
the Singleplayer storyline is<br />
centered on Mario, he will<br />
automatically be selected if<br />
you choose to play the<br />
Singleplayer campaign.<br />
The progress of unlocking<br />
characters from Singleplayer challenges is shown in this view. Click on the<br />
difficulty level indicator and toggle to see the unlocked characters for the<br />
different difficulty levels.<br />
A profile can be renamed at any time by entering a new name in the name<br />
field, in the upper left of the view.<br />
Each profile keeps track of personal keyboard and mouse settings. Click on<br />
the keyboard button to view the key settings for the selected profile and to<br />
change the default keys (also see ‘Quick-lists - Default Key Assignments’).<br />
Click on the mouse button to view and alter the mouse settings for the<br />
selected profile.<br />
SINGLEPLAYER<br />
The Singleplayer mode<br />
consists of two different types<br />
of games: Conquests and<br />
Challenges. 16 Conquests<br />
form the main storyline<br />
where you will do business,<br />
hire soldiers, and perform<br />
tasks whereas 12 Challenges<br />
focus on combat and will<br />
unlock new characters if<br />
completed well enough.<br />
Completing a Conquest mission unlocks the next conquest and usually<br />
19
unlocks a challenge as well. You can go back and play any of the<br />
completed and unlocked missions at any time. The XP and level the<br />
main character achieves is auto-saved every time you complete a<br />
mission, and this will be your main character’s starting point in the<br />
succeeding mission. If too many of your units die during a mission,<br />
you will receive a unit slot penalty in the succeeding missions; i.e.,<br />
for every ten dead units who have died during the played mission,<br />
one unit slot will become blocked in the succeeding missions. Going<br />
back to redo early missions may get you to a higher level, adding<br />
more available unit slots in the later missions, only if you were able<br />
to do better than the last time you played that mission.<br />
In the lower left part of the screen, you can choose between easy,<br />
normal and hard difficulty settings. In the centre of the screen you<br />
choose between the missions. You can only play conquest and<br />
challenge missions that have been completed or unlocked. To the<br />
right, you can see the best conquest results for accumulating XP, having<br />
children, keeping under bosses and units alive and blocked slots. This<br />
information will allow you to decide to do the mission over again to get<br />
better results, as it will affect all subsequent missions.<br />
MULTIPLAYER<br />
Play against friends or foes on 24 different multiplayer maps. There are two<br />
kinds of Multiplayer modes: 20 Conquests and 4 Shootouts. In multiplayer<br />
Conquests,<br />
all participating players must<br />
build their own mobster<br />
empire and rid the city of all<br />
opposition. In Multiplayer<br />
Shootouts, there is no empirebuilding;<br />
it’s action all the<br />
way as the players each get a<br />
small group of men, and<br />
maybe a car, with no<br />
possibility to hire new men,<br />
and must fight until the last<br />
man standing.<br />
There can be up to 8 players playing together on local area network (LAN)<br />
or online via the internet. To play a multiplayer game, choose to either host<br />
a new game, or join a game hosted by someone else. When joining, you can<br />
view hosted games on LAN or ONLINE, and join the game of your choice.<br />
Either click on the Refresh LAN or Refresh Online Button, select the desired<br />
20
Hint: Heal: Press "F1" to heal!<br />
game, and click on “Join”. Hosting players must remember to announce the<br />
game on LAN or Online to allow other players to join in. The Hosting player<br />
does not need to wait for other players to fill up all slots for a given map, he<br />
can start the game at any time since AI players automatically fill up any<br />
vacant slots when launching a game. The slots for other players that are<br />
about to join the game will be shown in red for a little while before the<br />
player’s profile name will appear. If the host decides to start the game whilst<br />
players are joining, they will be blocked and AI players will take their place.<br />
If the hosting player wants to change the selected map, they must first click<br />
the ‘cancel’ button, thereby removing the game from the ‘join game’ list. If<br />
the hosting player selects a map that supports fewer players than have<br />
already joined the game, the additional players names that joined last will<br />
turn red and will be blocked when the game is started. The game can be reannounced<br />
at any time on LAN or Online. The hosting player may start the<br />
game in ‘skirmish mode’ by omitting announcement on the network.<br />
The Multiplayer Conquests are played like the Singleplayer Conquests, with<br />
the build-up scenario; whereas in Multiplayer Shootouts, you will only<br />
concentrate on combat. Each player is offered the same specific selection of<br />
units and must fight each other until the last man is standing.<br />
Some of the multiplayer maps offer team-play where players must cooperate<br />
to win the game. The numbers preceding the player names indicate<br />
the team they are playing on. Double-click on the name to change team<br />
number. The game cannot be started if all players are on the same team.<br />
If you need to manually block a player from the game you can select the<br />
player’s name and press the highlighted “X” button.<br />
HIGH-SCORES & RANKINGS<br />
High-scores and rankings are recorded for every mission in single player, as<br />
well as multiplayer games. They are recorded in four categories: Combat,<br />
Business, Kills’n’skills and Hall of Shame.<br />
The high-scores and rankings are map specific, therefore the<br />
view changes when you select another map.<br />
OPTIONS<br />
Default display, graphics, and sound settings<br />
can be changed here and the credits can also be<br />
viewed. You also have the option to quit the<br />
game from this menu, too.<br />
The Display Settings allow you to<br />
switch between the OpenGL and<br />
Direct3D libraries, select the resolution and refresh<br />
21
ate and fine-tune the gamma correction and brightness.<br />
The Graphics Settings cover a wide range of settings that can<br />
optimize performance by changing level of detail. There are<br />
five categories of detail that can be adjusted independently:<br />
Texture Resolution, Lightning, Shadows, Mirrors, and<br />
Particle Effects. You can set the overall level of detail to<br />
low, medium or high for easy adjustment to optimize<br />
performance on your computer configuration. If you have<br />
a low-end computer (one that is close to the minimum<br />
requirements) you should choose the low setting for<br />
overall level of detail.<br />
The Sound Settings allow you to change the master volume<br />
and the individual volume of the music, sound effects and<br />
speech.<br />
IN-GAME USER INTERFACE<br />
SELECTION HUB<br />
The selection hub, viewed<br />
across the top of the upper<br />
left part of the screen, shows<br />
your main character, the<br />
underbosses and soldiers and<br />
consists of different portrait<br />
windows with some<br />
information attached. You<br />
use the selection hub to easily<br />
locate and select any of the<br />
family members. You can left<br />
click on any of the portraits to<br />
select the unit, and hold<br />
down the shift-key to select<br />
multiple units. Double clicking on a portrait will center the camera view on<br />
the unit ‘in-world’. Your main character is located to the upper left corner.<br />
As you have children, they will be placed to right of their father. Under a<br />
portrait, a green indicator shows the status of the character’s health. Under<br />
that is another indicator that shows the amount of XP the character has. If<br />
you press “S”, the “Health Bar” will be replaced with a Stamina Bar (white).<br />
All characters in the selection hub can have a star in their portrait indicating<br />
their combat skill level.<br />
22
Hint: Mini map: Alerts and targets are shown in the mini map!<br />
THE MINI MAP<br />
The mini map in the upper right of the screen is an important tool when you<br />
need to find your way through the streets of Paradise City. Your own units<br />
are shown as little dots in your player color. Enemies are shown in their<br />
colors. Police are shown as white dots and civilians and prospects as grey<br />
dots. Businesses have solid outlines in team colors if they are taken over and<br />
dashed if they are extorted and all neutral businesses have gray outlines.<br />
When you get an assignment where you need to kill someone, blow up a<br />
building, protect someone, etc., an alert will be shown in the mini map<br />
showing you where to go.<br />
The mini map only shows part of the city. If you can’t see the area of interest<br />
in the mini map, you may have to search the mini map to find it. Alerts will<br />
appear on the border of the mini map to guide you in the right direction.<br />
You can navigate the mini map by left-clicking on a location or you can<br />
scroll by pressing and holding down the right mouse button in the mini map<br />
while you move the mouse.<br />
There are three types of blinking alerts in the colors red, green, and blue.<br />
Red means that someone is attacking you. Green means that you have a task<br />
that can be solved at this point. Blue points out who has to be killed as a<br />
favor.<br />
All of the bosses are shown in the mini map using a discrete, team colored,<br />
crosshair making them easier for the player to locate.<br />
THE CHARACTER DETAIL<br />
The character detail is located in the lower left of the screen, when at least<br />
one character is selected, and gives different information about the first<br />
selected character. It shows how much ammo a character has loaded in his<br />
weapon, resources, money the character may be carrying and<br />
their personal kill count.<br />
23
“FUNCTION BAR” ACTIONS<br />
In the Function Bar, you will find some of the actions your family members<br />
can perform. By default, these are activated by using the function keys F1-<br />
F5 on the keyboard. According to the character type, and the situation, the<br />
available actions in the Function Bar will change.<br />
Use Med-kit<br />
Press F1 or “E” to use med-kits to heal the selected units.<br />
Reload<br />
Press F2 or “R” for reload.<br />
Crouch/Stand<br />
These icons reflect the state of the currently selected units, whether<br />
they are standing, crouching, or a mix. Press F3 or “C” to have all<br />
the selected units change state to either crouch or stand.<br />
Primary/Secondary Weapon<br />
These icons reflect the currently used weapon state. Press F4 or “F”<br />
to toggle primary and secondary weapons.<br />
Toggle Auto-Fire (Individual Characters)<br />
Default reaction for units is to fire at any enemies they see. You can<br />
overrule this behavior and have your units hold their fire. Press F5<br />
to toggle between hold fire and auto-fire.<br />
Lock Door<br />
While you have selected a store manager of one the businesses you have<br />
taken over, or the main character or one of the underbosses sitting by the<br />
desk in the safehouse, you can press F1 to lock the door of the building.<br />
Everybody will be thrown out. The business will not yield any revenue<br />
and the safehouse will not allow collectors to return money.<br />
Go to the Mattresses<br />
Going to the Mattresses is a mafia term for preparing to go war. Press F2<br />
to lock the doors of all your buildings. (Also see Lock Door above)<br />
24
Hint: Sit down: Press "F3" to sit down! It boosts accuracy!<br />
Put out Contract<br />
When you select the main character while sitting by the desk in the<br />
safehouse, you can press F3 to put out a contract on any target. When the<br />
cursor changes, you must right-click on the preferred target. A sum of<br />
money is be subtracted from your stash, and awarded to anyone who kills<br />
the target.<br />
Toggle Auto-Fire (Whole Family)<br />
When you select the main character while sitting by the desk in the<br />
safehouse, you can press F4 to toggle between having all the family<br />
members hold fire unless directly shot at, or to shoot at enemies as soon<br />
as they see them.<br />
Leave Vehicle<br />
While you have selected a vehicle, you can press F1 to have all units that<br />
are inside exit the vehicle.<br />
Toggle Liquor Sales<br />
Select the store manager in one of your restaurants with a speakeasy built<br />
in the back to toggle the sales of liquor. Selling liquor will reduce your<br />
stock of liquor and enhance the revenue of the speak-easy.<br />
PRIMARY RESOURCES<br />
These resources are as important to the family as breathing. Primary<br />
resources are produced and delivered by the Arms Dealers in Paradise City<br />
and must be obtained at any cost. Primary Resources are:<br />
Money<br />
Med-kits<br />
You need money for almost everything. You need money to hire or bribe<br />
people, buy weapons, take over businesses, and much more.<br />
Med-kits are used to heal wounds and as you are very likely to be<br />
wounded in Paradise City, you can never have too many Med-kits.<br />
Explosives<br />
Used by certain units and meant for blowing things up.<br />
Chemicals<br />
Used by certain units to poison, gas, or stun opponents.<br />
25
Ammunition<br />
Normal, Dum-dum, and Explosive Tipped bullets are shown to the left of<br />
the screen. Normal bullets apply the least damage and explosive tipped the<br />
most. Unfortunately, the Arms Dealer produces mostly normal bullets, and<br />
fewer of the Explosive Tipped or Dum-dum variety. You can switch<br />
between bullet types by left-clicking on the appropriate icon at any point of<br />
time.<br />
Normal Bullets<br />
Normal bullets inflict simple damage. Click the icon to have all your units<br />
use this kind of ammo.<br />
Dum-dum Bullets<br />
Dum-dum bullets inflict serious damage. Click the icon to have all your<br />
units use this kind of ammo.<br />
Explosive Tipped Bullets<br />
These bullets are extremely powerful and inflict deadly damage. Click the<br />
icon to have all your units use this kind of ammo.<br />
SECONDARY RESOURCES<br />
The different shops in Paradise City produce various resources that can be<br />
sold or traded for other resources. Secondary resources differ from area to<br />
area in Paradise City, and are shown on the right side of the screen. All<br />
secondary resources are used to make deals with international connections.<br />
Most resources are either illegally produced or stolen.<br />
Liquor<br />
Produced in Distilleries and sold in speak-easies to enhance revenue or<br />
used to trade with International Connections<br />
Jewelry<br />
Jewelry comes from the Jewelers. They are usually made from stolen<br />
parts, or unmodified stolen jewelry.<br />
Fashion Clothes<br />
Fake designer clothes are produced in the Fashion Boutiques and can be<br />
sold to International Connections.<br />
26
Hint: Ammo: Always keep an eye on your ammo stash!<br />
Vehicle Spare-Parts<br />
Vehicle spare-parts are produced at the Garage. Either they are fake<br />
brands, or stolen from vehicles that customers have in for a repair.<br />
Luxury Food<br />
The only legal resource produced when you have an import/export<br />
business. All Luxury Food items are made from the finest delicacies.<br />
Antiques<br />
Stolen antiques of various kinds are stocked at the warehouses.<br />
Stolen Goods<br />
Stolen goods are delivered by Pawn Shops.<br />
Embarrassing Pictures<br />
Embarrassing pictures that can be used for blackmail are taken of the<br />
customers at the Hotels and Brothels.<br />
IN-WORLD ACTIONS<br />
All characters have a wide range of actions that they can perform. In general,<br />
you just select the character and right-click on the preferred target. Then the<br />
character will perform the default action for that target. When the mouse<br />
cursor is over the target the cursor will change to one of the action icons<br />
below.<br />
Move To<br />
Any selectable character can move except for store managers who can<br />
never move, and stunned characters that cannot move until the stun-effect<br />
wears off. Right-click on any location to move to that location. Single click<br />
to walk and double click to run.<br />
Attack<br />
ground.<br />
Right-click on any target to attack. Hold down CTRL key, then right-click,<br />
to force attack. Units using explosives can force attack the<br />
Receive Blessing<br />
Right-click on the priest to receive a blessing.<br />
27
Heal<br />
Big Mamma is the only unit who has the ability to heal others without<br />
using any of the med-kit resources. Right-click on the target to start<br />
healing.<br />
Bodyguard<br />
Select a Gunman or a Bodyguard then right-click on one of your own<br />
units to bodyguard that unit.<br />
Pay Bribe<br />
Lawyers can pay civilians to serve as the family’s informants. They work<br />
as moving radars, i.e., you get to see what they can see as they walk<br />
around in the city.<br />
Hire<br />
Right-click on the target to recruit into the family. The lawyer can recruit<br />
prospects right off the streets.<br />
Collect<br />
The main character (when he is the boss of the family) can collect money<br />
directly from any of the businesses extorted or taken over.<br />
Pick up Briefcase / Crate<br />
Right-click on briefcases and crates to pick them up. Briefcases contain<br />
money and crates contain primary resources.<br />
Place Time-Bomb<br />
Bombers can place time bombs to blow away whole buildings. Right-click<br />
on the desk, counter, or machinery inside the target building.<br />
Disarm Time-Bomb<br />
Bombers can also disarm bombs. However, you need to be fast to do this<br />
since the bomb will not wait on you. Right-click on the bomb to disarm it.<br />
Place C4<br />
Bombers can place C4 on locked doors to blow them away. Right-click on<br />
the locked door and watch it disappear.<br />
28
Hint: Reload: Always reload your weapons at the right time!<br />
Select Contract Target<br />
The main character can put out contracts, while sitting by the desk in the<br />
safehouse. Right-click on the target to put out contract. (Also, see Put out<br />
Contract above).<br />
Enter Vehicle<br />
Right-click on one of your vehicles to have the selected units enter the<br />
vehicle.<br />
Fortify<br />
Gunmen, henchmen, bodyguards, and snipers can fortify buildings to<br />
defend an area. Right-click on the desk in the safehouse, or the counter in<br />
the residential and office buildings to fortify those.<br />
Impersonate<br />
The infiltrator can impersonate gunmen, henchmen, and policemen.<br />
Right-click on the target to slit his throat and take over his identity<br />
Steal<br />
Select a thief and right-click on any target to pick their pockets.<br />
Pick Lock<br />
Thieves can get into cars and hardwire them as well as picking the locks<br />
of locked doors in buildings.<br />
Talk<br />
Right-click on the target to talk. Either a dialog will appear or you will get<br />
your answer in-world.<br />
Can’t Talk<br />
If you are not within range, you cannot talk.<br />
Propose Marriage<br />
Talking to one of the three types of the three types of civilians,<br />
“Intellectual Wife”, “Sporty Wife”, and “Sophisticated Wife”, results in a<br />
marriage proposal. However, they will not even consider looking at your<br />
main character if he is not the boss of the family and doesn’t have his own<br />
safehouse.<br />
29
Get Married<br />
When your main character is engaged, they are ready to go to church and<br />
get married. Select the main character and right-click on the priest to get<br />
married.<br />
Mate<br />
When the main character is married, you can select him and right-click on<br />
his wife. They will go upstairs in the safehouse and after a while she will<br />
give birth to a child.<br />
Sit in the office<br />
Select the boss or one of his underbosses (grownup children) and rightclick<br />
on the desk in the safehouse. He will then be seated in front of the<br />
desk and will have access to the phone.<br />
CHARACTER MARKERS<br />
Markers appear above the characters’ head depending on their<br />
current state. Team markers appear as a ring on the ground<br />
just below the character.<br />
Character is for Hire<br />
When a character is ready to enter the family, money will rotate above the<br />
character’s head. The main character and the under bosses can all hire<br />
characters.<br />
Wants to Talk<br />
Civilians in need of a favor will come to your safe house and wait for a<br />
while. Select the main character and right-click on the character to talk to<br />
him and either accept or decline to grant him a favor.<br />
30
Hint: Secondary Attack: Use (F4) if things heat up!<br />
Be my Eye<br />
Civilians can be hired as informants by the Lawyer to report to the family<br />
what they see. When civilians are hired, the eye icon will appear above<br />
their heads and they become moving “mini radars”.<br />
Record Holder<br />
Characters that have broken a record will receive a trophy. It will appear<br />
rotating above the record holder’s head for all players to see.<br />
Level Up in Combat<br />
When characters level up in combat, they will receive a star appearing<br />
above their head.<br />
Level Up in Business Flair<br />
When the main character levels up in business flair, he will receive a coin<br />
appearing in the UI main character portrait.<br />
Family Team Marker<br />
A solid team marker is marking all family members. The color of the team<br />
marker indicates which player is in charge of the unit. The units are<br />
selectable and controllable.<br />
Worker Team Marker<br />
All workers have this team marker. They cannot be selected or controlled.<br />
The store manager however can be selected to access specific<br />
store<br />
functions in the function bar, but he cannot move.<br />
Vincenzo Team Marker<br />
Vincenzo and all the family members under his control have a dotted<br />
team marker in the same color as the player. The player cannot control<br />
characters with this team marker.<br />
Impersonating Another Character<br />
The infiltrator will have a double team marker, when he is impersonating<br />
a character. The outer circle is in your own color while the inner circle is<br />
in the color of the family you have infiltrated. This indicates that he will<br />
be selectable and controllable by the other family but you can always<br />
overrule any orders given to the character.<br />
31
VINCENZO / PHONE ICON<br />
When Vincenzo is the boss, you will see a Vincenzo Icon in the lower right<br />
of the screen. Your current orders are shown above him. When your main<br />
character is the boss and has his own safe-house you will see a phone icon<br />
instead of Vincenzo. When international connections, snitches and others<br />
call you, you can answer the phone by left clicking on the phone icon. You<br />
cannot answer the phone unless you have a boss or underboss sitting by the<br />
desk in one of your safehouses. Current tasks and a history of information<br />
are listed above the phone icon.<br />
IN-GAME DIALOGS<br />
Vincenzo Dialog<br />
When you talk to your Uncle a dialogue<br />
will appear. Depending on the situation, he<br />
will give you an assignment, congratulate<br />
you, or call you bad things.<br />
Extort/Take over Dialog<br />
A family can’t exist without a steady cash<br />
flow and some basic resources. To get<br />
these commodities you need to either<br />
extort or take over the shops in Paradise<br />
City.<br />
Extort means that the Store Manager will<br />
pay you (maybe) 25% of his income and<br />
resources.<br />
On the other hand, taking over a shop will<br />
give you 50% but it costs you money, as<br />
you need to pay the Store Manager to become his partner. When you Take<br />
Over a shop the Store Manager will automatically begin expanding the<br />
businesses with the money you gave him; he will hire workers, collectors,<br />
etc., and will build backroom businesses. You need to take over Arms<br />
Dealers before you can purchase weapons.<br />
32
Hint: Stamina: Run decreases Stamina! Press "Q" to monitor!<br />
Buy Weapons Dialog<br />
When you want to buy a new weapon,<br />
you select one or more units, and rightclick<br />
on the Store Manager in an Arms<br />
Dealer - remember you have to take over<br />
the store before you can purchase<br />
weapons. The buy weapons dialogue then<br />
appears, and if you have the cash, you can<br />
equip your characters with some pretty<br />
nasty toys. Click on one of the character<br />
type icons to see what weapons that<br />
character type can use, and press the “Buy” button to make the purchase.<br />
International Connection Dialog<br />
When you’re the Boss, you draw attention from Mafia Branches from all<br />
over the world. These international<br />
organizations will call you up on the<br />
phone and offer you all sorts of deals,<br />
involving resources, super units, vehicles,<br />
special weapons, and money. These offers<br />
are often the only way to get your hands<br />
on some of the really good stuff. Be aware<br />
that some bosses get very mad if they feel<br />
you tried to cheat them or you don’t keep<br />
your promises.<br />
Propose to get Married Dialog<br />
Getting married is expensive but the only way to have<br />
children. First, you need to find a suitable woman, and<br />
get engaged. When you propose to her, she may<br />
turn you down or ask for an expensive<br />
engagement ring. Paying for the ring allows<br />
you to go to the church to get married. As<br />
husband and wife, you can now mate. This is a<br />
requirement if you are to have children!<br />
33
MAIN CHARACTER DETAIL<br />
The main character detail shows the<br />
experience and progress of the main<br />
character. Either click on the health and XP<br />
area of the boss portrait in the selection<br />
hub (in the upper left of the screen), or just<br />
press default assigned key “G”.<br />
ESCAPE DIALOG<br />
At anytime during the game you can press the ESC-key to show the in-game<br />
lobby. From here, you can restart or end<br />
the mission. Alternatively, you can quit<br />
the game entirely. This is also where you<br />
can find your current game objectives and<br />
hints to help you complete the mission.<br />
GAME STATUS<br />
Press the TAB-key to see who is getting the most kills and the best new<br />
highscores, who are dead and who are still alive!<br />
34
Hint: Resources: Keep an eye on your ammo, medkits etc.<br />
FAMILY MEMBERS<br />
MAIN CHARACTERS<br />
Mario<br />
Mario is the second eldest of the brothers and probably the most righteous.<br />
He would prefer to solve a conflict without a fight but has no fear to enter<br />
one if the cause is right. He is not the best of gunslingers but he is strong and<br />
fast.<br />
Mario<br />
Hitpoints: Very High<br />
Visual Range: Long<br />
Movement: Fast<br />
Stamina: High<br />
Accuracy: High<br />
Skill: Extort / Take-over / Marry / Mate<br />
Primary: Fist<br />
Secondary: Throw Dynamite<br />
Romano<br />
Romano is the eldest of the brothers and the best businessman. Romano will<br />
do business with anyone who can pay the price and deliver the goods, and<br />
has no scruples when it comes to earning money. He is tall, very strong, and<br />
his preferred weapon is the Sniper Rifle.<br />
Romano<br />
Hitpoints: High<br />
Visual Range: Long<br />
Movement: Medium<br />
Stamina: High<br />
Accuracy: High<br />
Skill: Extort / Take-over / Marry / Mate<br />
Primary: Handgun / Shotgun / Sniper Rifle<br />
Secondary: Throw Gas Grenade<br />
Angelo<br />
Angelo is the pretty boy of the family. His brothers always teased him<br />
because he looked like a girl when they were kids, but he learned to use his<br />
looks to his advantage, and became by far the most charismatic of the<br />
brothers. Angelo’s preferred weapon is the double-barreled shotgun.<br />
35
Angelo<br />
Hitpoints: Very High<br />
Visual Range: Medium<br />
Movement: Medium<br />
Stamina: High<br />
Accuracy: High<br />
Skill: Extort / Take-over / Marry / Mate<br />
Primary: Handgun / 2x Handgun / Double Barreled Shotgun<br />
Secondary: Throw Gas Grenade<br />
Sonny<br />
Sonny is the wild child in the family. When they were kids, it was always<br />
Sonny who got into trouble and always Romano and Mario who had to get<br />
him out. Sonny was born with a love for guns, and is absolutely the best<br />
marksman among the brothers. He has no fear whatsoever, and will enter a<br />
fight just for the heck of it. Sonny is specialized in using two Tommy guns<br />
at the same time!<br />
Sonny<br />
Hitpoints: High<br />
Visual Range: Medium<br />
Movement: Fast<br />
Stamina: Medium<br />
Accuracy: High<br />
Skill: Extort / Take-over / Marry / Mate<br />
Primary: 2x Semi Handgun / Tommy gun / 2x Tommy gun<br />
Secondary: Throw Dynamite<br />
VINCENZO (NPC BOSS)<br />
Vincenzo is your employer in Paradise City. He’s the four brothers’ uncle,<br />
and until recently, the only living relative in America. Vincenzo moved to<br />
America shortly after your parents died and has tried to make a living in the<br />
promised land ever since. Vincenzo is a short tempered, violent man who<br />
will kill anyone standing in his way with his dual 44 Magnums.<br />
Vincenzo<br />
NPC<br />
Hitpoints: High<br />
Accuracy: High<br />
Primary: 2x Semi-automatic Handgun<br />
36
Hint: Control Car: Use keys on keyboard & shoot with mouse.<br />
THE WIVES<br />
There are three different types of women to marry in Paradise City. The<br />
more gifted a woman is the higher the marriage contribution and the better<br />
children she’ll deliver, which means that children can be born with more or<br />
less XP and skills. The wives are NPC’s and therefore cannot be directly<br />
controlled by the player. When the main character is engaged to one of the<br />
women she will follow him around wherever he goes. However, none of the<br />
women will ever join him in the car as they regard it as a deathtrap and<br />
would much rather walk to church than be taken for a death-ride!<br />
The Intellectually Gifted Wife<br />
Should the intellectual wife deliver a Lawyer then that Lawyer would be<br />
better than normal Lawyers. The intellectual woman can be recognized by<br />
her glasses and blue dress.<br />
Intellectual Wife<br />
NPC<br />
Hitpoints: Low<br />
Movement: Medium<br />
Skill: Have Children (Lawyer will be gifted)<br />
The Sophisticated Wife<br />
If the sophisticated lady delivers a Seductress, the Seductress will be more<br />
beautiful than normal Seductresses and therefore better at convincing men<br />
to follow her. The sophisticated lady wears high heels and a black dress.<br />
Sophisticated Wife<br />
NPC<br />
Hitpoints: Low<br />
Movement: Medium<br />
Skill: Have Children (Seductress will be gifted)<br />
37
The Sporty Wife<br />
If the sporty woman delivers an Enforcer, the Enforcer will be more gifted<br />
than normal Enforcers. The sporty woman wears jeans and a small top.<br />
Sporty Wife<br />
NPC<br />
Hitpoints: Medium<br />
Movement: Fast<br />
Skill: Have Children (Enforcer will be gifted)<br />
NOTE: If a wife dies whilst raising a child, the child will have to be raised by the<br />
father. This will decrease some of his attributes making him slower and more<br />
inaccurate until the child is fully grown.<br />
THE CHILDREN / UNDERBOSSES<br />
Lawyer<br />
The Lawyer is an exceptional businessman. If placed in a business he will<br />
radically enhance revenue of that business. If placed in office he will slightly<br />
enhance revenue of all businesses near and around the safehouse. Apart<br />
from being good at earning money, the Lawyer can also hire civilians to<br />
work as informants, and he can hire prospects right off the street. The<br />
Lawyer is slow but robust and only has his briefcase to use as a weapon.<br />
Lawyer as a Child<br />
NPC<br />
Movement: Medium<br />
Skill: Grows up to be a Lawyer and underboss of the family<br />
38
Hint: Enter Car: Select characters and right-click on car.<br />
Lawyer<br />
Hitpoints: High<br />
Visual Range: Short<br />
Movement: Slow<br />
Stamina: Low<br />
Accuracy: High<br />
Skill: Enhance Revenue, Hire/Bribe people off the streets<br />
Primary: Suit Case<br />
Secondary: None<br />
Seductress<br />
Because of her beauty, the Seductress can convince male units to work for<br />
the family for free! She can also convince cops to turn the other way if they<br />
act aggressively. She’s fast but has only few hit-points.<br />
Seductress as a Child<br />
NPC<br />
Movement: Fast<br />
Skill: Grows up to be a seductress and underboss<br />
Seductress<br />
Hitpoints: Medium<br />
Visual Range: Long<br />
Movement: Fast<br />
Stamina: Medium<br />
Skill: Seduction, Male units don’t attack automatically<br />
Primary: Seduce<br />
Secondary: None<br />
Enforcer<br />
The Enforcer is a killing machine! He is one of the few who can effectively<br />
use two Tommy guns at the same time. He is fast, robust and very accurate.<br />
39
Enforcer as a Child<br />
NPC<br />
Movement: Fast<br />
Skill: Grows up to be an enforcer and underboss<br />
Enforcer<br />
Hitpoints: High<br />
Visual Range: Long<br />
Movement: Fast<br />
Stamina: High<br />
Accuracy: Medium<br />
Skill: None<br />
Primary: Tommy gun<br />
Secondary: None<br />
NOTE: When a child grows up he/she becomes an underboss in the family and<br />
opens new unit slots to further expand the family.<br />
BASIC UNITS<br />
There are four types of basic units to be hired in Paradise City: Streetgirls,<br />
Henchmen, Gunmen, and Bouncers. These characters live in town and hang<br />
around as prospects. When they are ready to join your family they will tell<br />
you, and a money icon is shown above their head.<br />
Street girl<br />
Street girls are very fast and highly effective against single<br />
units. They use pepper spray to incapacitate their opponent.<br />
You can hire Streetgirls when they hang around in<br />
Restaurants.<br />
Hitpoints: Low<br />
Visual Range: Long<br />
Movement: Very Fast<br />
Stamina: High<br />
Accuracy: High<br />
Skill: None<br />
Primary: Spray<br />
Secondary: None<br />
40
Hint: Cover: Everything can be used as cover in a gunfight!<br />
Bouncer<br />
Bouncers often hang around in restaurants where they can be<br />
hired. They are slow but very powerful at close range. If they<br />
get close enough to their targets, they can incapacitate and<br />
soon kill them with their bare hands. Bouncers are very<br />
effective with baseball bats as well.<br />
Hitpoints: High<br />
Visual Range:<br />
Movement: Slow<br />
Stamina: High<br />
Accuracy: High<br />
Skill: Discover Stealth Units<br />
Primary: Fist (Stun Hit)<br />
Secondary: None<br />
Gunman<br />
The gunman can be hired in the Speak-easy in the back of the<br />
Restaurant. They are very useful long-range units who can<br />
fortify buildings and bodyguard other units.<br />
Hitpoints: Medium<br />
Visual Range: Long<br />
Movement: Fast<br />
Stamina: High<br />
Accuracy: High<br />
Skill: Fortify, Bodyguard<br />
Primary: 2x Handgun<br />
Secondary: None<br />
Henchman<br />
The Henchman is hired in the Speak-easy in the back of the<br />
Restaurant. Using his trusted Tommy gun, he excels in<br />
combat.<br />
Hitpoints: Medium<br />
Visual Range: Long<br />
Movement: Fast<br />
Stamina: Medium<br />
Accuracy: Low<br />
Skill: Fortify<br />
Primary: Tommy gun<br />
Secondary: None<br />
41
SUPER UNITS<br />
Most super units don’t live in Paradise City, and can only be hired through<br />
International Connections. There are 12 different super units, each of them<br />
with special skills and weapons (also see “Character Attributes” and<br />
“Primary/Secondary Attacks”)<br />
Assassin<br />
Offered by Jewish Mob<br />
Hitpoints: Medium<br />
Visual Range: Medium<br />
Movement: Medium<br />
Stamina: Medium<br />
Accuracy: High<br />
Skill: Stealth<br />
Primary: Poison<br />
Secondary:<br />
Bazooka Unit<br />
Offered by Columbian Mob<br />
Hitpoints: Medium<br />
Visual Range: Long<br />
Movement: Slow<br />
Stamina: Low<br />
Accuracy: Medium<br />
Skill: None<br />
Primary: Fist<br />
Secondary: Bazooka<br />
Big Mamma<br />
Offered by Sicilian Mob<br />
Hitpoints: Medium<br />
Visual Range: Medium<br />
Movement: Slow<br />
Stamina: High<br />
Accuracy: Medium<br />
Skill: Heal others<br />
Primary: Double-Barreled Shotgun<br />
Secondary: None<br />
42
Hint: Status: Press TAB to see Game Stats.<br />
Black Widow<br />
Offered by Chinese Mob<br />
Hitpoints: Medium<br />
Visual Range: Long<br />
Movement: Fast<br />
Stamina: High<br />
Accuracy: Medium<br />
Skill: None<br />
Primary: Uzi<br />
Secondary: None<br />
Bodyguard<br />
Offered by Black Mob<br />
Hitpoints: High<br />
Visual Range: Long<br />
Movement: Fast<br />
Stamina: High<br />
Accuracy: High<br />
Skill: Bodyguard / Fortify<br />
Primary: 2x handgun<br />
Secondary: None<br />
Bomber<br />
Offered by Russian Mob<br />
Hitpoints: Medium<br />
Visual Range: Medium<br />
Movement: Fast<br />
Stamina: Medium<br />
Accuracy: Medium<br />
Skill: Stealth<br />
Primary: Throw dynamite / Place Time-bomb / C4<br />
Secondary: None<br />
Businessman<br />
Offered by Jewish Mob<br />
Hitpoints: Very Low<br />
Visual Range: Short<br />
Movement: Slow<br />
Stamina: Low<br />
Accuracy: N/A<br />
Skill: Enhance Revenue<br />
Primary: None<br />
Secondary: None<br />
43
Infiltrator<br />
Offered by Columbian Mob<br />
Hitpoints: Medium<br />
Visual Range: Long<br />
Movement: Fast<br />
Stamina: Medium<br />
Accuracy: High<br />
Skill: Stealth, Impersonate (henchman/gunman)<br />
Primary: Knife (Slit throat and take over identity)<br />
Secondary: None<br />
Ninja<br />
Offered by Japanese Mob<br />
Hitpoints: Medium<br />
Visual Range: Long<br />
Movement: Fast<br />
Stamina: High<br />
Accuracy: High<br />
Skill: Stealth (never shows on minimap)<br />
Primary: Ninjitsu (stun hit / no stealth)<br />
Secondary: Sai (stab / stealth)<br />
Sniper<br />
Offered by Russian Mob<br />
Hitpoints: Low<br />
Visual Range: Very Long<br />
Movement: Medium<br />
Stamina: Medium<br />
Accuracy: Very High<br />
Skill: Fortify<br />
Primary: Sniper Rifle<br />
Secondary: None<br />
Super Bouncer<br />
Offered by Black Mob<br />
Hitpoints: Very High<br />
Visual Range: High<br />
Movement: Medium<br />
Stamina: High<br />
Accuracy: High<br />
Skill: Reveal stealth units<br />
Primary: Fist (stun hit)<br />
Secondary: None<br />
Upgrades: Baseball Bat / Spiked<br />
44
Hint: Zoom: Use mouse wheel to zoom<br />
Thief<br />
Offered by Sicilian Mob<br />
Hitpoints: Very Low<br />
Visual Range: Medium<br />
Movement: Fast<br />
Stamina: Medium<br />
Accuracy: High<br />
Skill: Stealth<br />
Primary: Steal<br />
Secondary: Gas grenade<br />
STORE MANAGERS<br />
When you “Take Over” a business, the Store Manager becomes part of the<br />
family (the store manager can be selected but cannot move). He will then<br />
automatically begin to expand the business by hiring workers and collectors<br />
and building backs. If the Store Manager and the workers die, you lose the<br />
business, and the income, and a new neutral Store Manager will take over<br />
the business. So protecting Store Managers is very important!<br />
Store manager<br />
Managing restaurants, ...<br />
Hitpoints: Low<br />
Movement: None<br />
Skill: Manages store<br />
Store manager<br />
Managing distilleries, ...<br />
Hitpoints: High<br />
Movement: None<br />
Skill: Manages store<br />
45
Store manager<br />
Managing jewelers, ...<br />
Hitpoints: Low<br />
Movement: None<br />
Skill: Manages store<br />
WORKERS & COLLECTORS<br />
Workers and collectors are non-player characters and therefore cannot be<br />
controlled by the player.<br />
Dancer<br />
NPC<br />
Works in speak-easies and attracts more customers to the<br />
place enhancing the revenue.<br />
Hitpoints: Low<br />
Primary: Handgun<br />
Prostitute<br />
NPC<br />
Works in brothels and both attracts more people to the place<br />
as well as gathering information used for blackmail.<br />
Hitpoints: Low<br />
Primary: Handgun<br />
Distiller<br />
NPC<br />
Works in distilleries producing liquor<br />
Hitpoints: Medium<br />
Primary: Handgun<br />
46
Hint: Stun: Bouncers can stun targets!<br />
Loan shark<br />
NPC<br />
Works in the backroom of pawn shops where they provide<br />
loans with considerable interests.<br />
Hitpoints: High<br />
Primary: Fist<br />
Croupier<br />
NPC<br />
Works in gambling dens and casinos servicing gamblers who<br />
will lose all their money to you, and then go to the loan shark<br />
and ask for loans.<br />
Hitpoints: Low<br />
Primary: Handgun<br />
Collector<br />
NPC<br />
Collects from the family’s businesses and returns to the<br />
safehouse with the money.<br />
Hitpoints: Medium<br />
Primary: None<br />
LIFE IN THE CITY<br />
THE LAW<br />
The Law is ever present in town and in some areas more than others. If you<br />
commit crimes such as shooting in the streets and killing people the police<br />
will react without mercy and try to take you down. The more trouble you<br />
make the higher your wanted level will become. In addition, the higher your<br />
wanted level is, the more the police will be looking for you. The Chief of<br />
Police is as crooked as any gangster and will come to you occasionally with<br />
his lackeys and ask for a bribe. In cases of very high wanted level, the F.B.I.<br />
will come and take care of business.<br />
Hint: Listen to the Newspaper Boy to hear how wanted you are!<br />
47
Chief of Police<br />
NPC<br />
Hitpoints: High<br />
Visual Range: Medium<br />
Movement: Slow<br />
Stamina: Low<br />
Accuracy: Medium<br />
Skill: None<br />
Primary: Semi-automatic handgun<br />
Secondary: None<br />
Policeman<br />
NPC<br />
Hitpoints: Medium<br />
Visual Range: Short<br />
Movement: Slow<br />
Stamina: Medium<br />
Accuracy: High<br />
Skill: None<br />
Primary: Handgun<br />
Secondary: None<br />
F.B.I. Agent<br />
NPC<br />
Hitpoints: Medium<br />
Visual Range: Very Long<br />
Movement: 175/530<br />
Stamina: High<br />
Accuracy: Very High<br />
Skill: None<br />
Primary: 2x semi-automatic handgun<br />
Secondary: None<br />
THE PROSPECTS<br />
Prospects live in Paradise City and hang around in restaurants and in the<br />
backs of some businesses. When they are ready to join your family, they will<br />
tell you (also indicated by a money icon rotating above their heads).<br />
THE INTERNATIONAL MAFIA CONNECTIONS<br />
When you become the boss of the family, International Connections will<br />
begin to contact you over the phone offering all kinds of deals. It is only<br />
through these deals that you will get super cars and super units. Be sure to<br />
respect the deals though or International Bosses will surely punish you!<br />
48
Hint: Money bags: Right-click to pick up!<br />
OTHER MAFIA BOSSES<br />
Throughout the Singleplayer campaign, you will encounter many different<br />
mafia factions. Some you will ally with, and others you must defeat. If you<br />
kill the boss of the family, you will have put an end to their reign, and all the<br />
remaining family members will scatter and become prospects once more.<br />
Columbian Boss<br />
NPC<br />
Hitpoints: High<br />
Visual Range: Long<br />
Movement: Fast<br />
Stamina: Medium<br />
Accuracy: High<br />
Skill: None<br />
Primary: Uzi<br />
Secondary: None<br />
Russian Boss<br />
NPC<br />
Hitpoints: High<br />
Visual Range: Very Long<br />
Movement: Fast<br />
Stamina: High<br />
Accuracy: High<br />
Skill: None<br />
Primary: Shotgun<br />
Secondary: None<br />
Black Boss<br />
NPC<br />
Hitpoints: Low<br />
Visual Range: Short<br />
Movement: Medium<br />
Stamina: Medium<br />
Accuracy: High<br />
Skill: None<br />
Primary: Shotgun<br />
Secondary: None<br />
49
Chinese Boss<br />
NPC<br />
Hitpoints: Medium<br />
Visual Range: Medium<br />
Movement: Fast<br />
Stamina: Medium<br />
Accuracy: High<br />
Skill: Reveal Stealth<br />
Primary: Uzi<br />
Secondary: None<br />
Japanese Boss<br />
NPC<br />
Hitpoints: High<br />
Visual Range: Very Long<br />
Movement: Fast<br />
Stamina: High<br />
Accuracy: High<br />
Skill: None<br />
Primary: 2x handgun<br />
Secondary: None<br />
Sicilian Boss<br />
NPC<br />
Hitpoints: Medium<br />
Visual Range: Short<br />
Movement: Fast<br />
Stamina: Medium<br />
Accuracy: High<br />
Skill: None<br />
Primary: Tommy gun<br />
Secondary: None<br />
Jewish Boss<br />
NPC<br />
Hitpoints: Low<br />
Visual Range: Medium<br />
Movement: Fast<br />
Stamina: High<br />
Accuracy: High<br />
Skill: None<br />
Primary: 2x handgun<br />
Secondary: None<br />
50
Hint: Dough: Never ever misuse the dough Vincenzo gives you!<br />
THE STORE MANAGERS AND THEIR HIRED MUSCLE<br />
The store managers manage the businesses throughout the city. They are the<br />
ones you either extort for 25%, or offer a single payment to get in on half of<br />
the action. However, store managers have their own protection and may<br />
choose to turn you down and have their hired muscle try to take you out.<br />
Store managers hire either security guards or some hoodlum types to<br />
protect their businesses. Security guards usually work in the high-end<br />
businesses such as jewelers and banks, whereas hoodlums protect smaller<br />
businesses such as restaurants and garages.<br />
Hoodlum Leader<br />
NPC<br />
Hitpoints: High<br />
Visual Range: Long<br />
Movement: Fast<br />
Stamina: Medium<br />
Accuracy: standard<br />
Skill: None<br />
Primary: Shotgun<br />
Secondary: None<br />
Security Guard<br />
NPC<br />
Hitpoints: High<br />
Visual Range: Long<br />
Movement: Fast<br />
Stamina: Medium<br />
Accuracy: standard<br />
Skill: None<br />
Primary: Baton / handgun<br />
Secondary: None<br />
51
THE CIVILIANS<br />
Civilians are peaceful law abiding people who just want to live a quiet life.<br />
Some can be paid to keep an eye out for everything happening in the<br />
neighborhood while others can be married.<br />
Civilian Male<br />
NPC<br />
Hitpoints: Low<br />
Movement: Medium<br />
Skill: None<br />
Civilian Female<br />
NPC<br />
Hitpoints: Low<br />
Movement: Medium<br />
Skill: None<br />
Construction Worker<br />
NPC<br />
Hitpoints: Low<br />
Movement: Slow<br />
Skill: None<br />
Hint: Avoid killing civilians, as it will drastically increase your wanted level with<br />
the police!<br />
52
Hint: Rotate Camera 90: Press “V” and “B” to rotate camera!<br />
THE NEWSPAPER BOYS<br />
This little kid delivers important news about stuff going on in the city such<br />
as when somebody has been killed, or when the police are intensifying their<br />
search for wanted characters. It may be worthwhile to stop and listen to<br />
what he has to say.<br />
Newspaper Boy<br />
NPC<br />
Hitpoints: Low<br />
Movement: Medium<br />
Skill: Announces News Bulletins<br />
THE PRIESTS<br />
The Priest can be found in the churches in the city. He is the one to go to<br />
when you want to get married to your fiancé or just to get your units<br />
blessed.<br />
Priest<br />
NPC<br />
Hitpoints: Low<br />
Skill: Bless, Marry<br />
Preacher<br />
NPC<br />
Hitpoints: Low<br />
Skill: Bless, Marry<br />
53
PROPERTY<br />
BUSINESSES<br />
Good businesses are needed to keep a strong family and there are plenty of<br />
opportunities to start, build, and develop businesses in Paradise City that<br />
generate income or resources. Some businesses generate cash, some<br />
resources, and others generate both.<br />
Restaurant<br />
Speak-easy<br />
The restaurant is your basic business where you can recruit<br />
basic units for your gang.<br />
Revenue: Low-Medium<br />
Workers: Collector<br />
Resources: None<br />
Recruitment: Streetgirls, bouncers<br />
Special: Recruit Big Mammas from medium restaurants (when<br />
the character is unlocked)<br />
Speak-easies are built in the backroom of the restaurant. This<br />
is where people get their daily dose of liquor while watching<br />
the dance show.<br />
Revenue: High<br />
Workers: Dancers<br />
Resources: None<br />
Recruitment: Gunmen and henchmen<br />
Arms Dealer<br />
You need the arms dealer to provide the family with ammo<br />
and med-kits so guard it well.<br />
Revenue: Low-Medium<br />
Workers: Collector<br />
Resources: Ammo, explosives, chemicals, med-kits<br />
Recruitment: None<br />
Special: Units can buy weapons here.<br />
Gambling Den<br />
Gambling Dens are built in the backroom of the Arms Dealer.<br />
This is where people go to spend all their money. There is<br />
absolutely no way anyone can win since the house is cheating.<br />
Revenue: High<br />
Workers: Croupier<br />
Resources: None<br />
Recruitment: None<br />
Special: None<br />
54
Hint: Catch Running Targets: Use Streetgirls!<br />
Hotel<br />
The hotel also works as a low-end brothel where people pay<br />
for rooms by the hour. The people using this hourly service<br />
risk having their picture taken with hidden cameras then<br />
blackmailed with it later.<br />
Revenue: Low-Medium<br />
Workers: Collector<br />
Resources: Embarrassing Pictures used for Blackmail<br />
Recruitment: None<br />
Special: None<br />
Brothel<br />
Brothels are built in the backroom of the Hotel. Several of the<br />
outstanding citizens find their way to this joyful place, which<br />
they will soon regret since every embarrassing moment will be<br />
caught on tape, and may be used for blackmail later.<br />
Revenue: High<br />
Workers: Prostitutes<br />
Resources: More Embarrassing Pictures<br />
Recruitment: None<br />
Special: None<br />
Pawnshop<br />
Sometimes people just have to get money fast so they pawn all<br />
their good stuff at ridiculously low prices. In addition, local<br />
thieves provide stolen goods that can be sold off to<br />
international connections.<br />
Revenue: Low<br />
Workers: Collector<br />
Resources: Stolen Goods<br />
Recruitment: Thieves (when character unlocked)<br />
Special: None<br />
Loan shark<br />
Loan sharks are built in the backroom of the Pawnshop.<br />
People who need money, that can’t find it anywhere else,<br />
come here to ask for loans with high interests. They are<br />
usually compulsive gamblers who have nothing to pawn and<br />
cannot see any other solution than to try their luck once more.<br />
This time with the family’s money.<br />
Revenue: High<br />
Workers: Shylock<br />
Resources: None<br />
Recruitment: Thief<br />
Special: None<br />
55
Garage<br />
Customers who have their car repaired in this shop will come<br />
home with a lighter car. Stolen vehicle spare-parts can be used<br />
to repair your own cars, or sold to international connections.<br />
Revenue: Low<br />
Workers: Collector<br />
Resources: Stolen Vehicle Spare Parts<br />
Recruitment: None<br />
Special: None<br />
Distillery<br />
Distilleries produce illegal liquor sold in speak-easies. Liquor<br />
can also sold to international connections.<br />
Revenue: None<br />
Workers: Distillers, Collector<br />
Resources: Liquor<br />
Recruitment: None<br />
Special: None<br />
Giant Restaurant<br />
The giant restaurant is a great location for the recruitment of<br />
new prospects. Together with fair revenue, this makes the<br />
giant restaurant well worth the money.<br />
Revenue: Medium<br />
Workers: Collector<br />
Resources: None<br />
Recruitment: Streetgirls, bouncers, gunmen, and henchmen<br />
Special: None<br />
Casino<br />
The casino is where all the high rollers go to gamble. Casinos<br />
are legal establishments. Hence, taxes are paid for each dollar<br />
earned. However, extensive skimming ensures very high<br />
revenue after all.<br />
Revenue: Very High<br />
Workers: Croupiers, Collector<br />
Resources: None<br />
Recruitment: None<br />
Special: None<br />
56
Import/Export<br />
For once, this is a completely legal business. As anyone knows<br />
all Mafiosi just loves good food. Getting into this business<br />
allows you to get your hands on the best food items you can<br />
get. In addition, international connections will buy these food<br />
items.<br />
Revenue: Low<br />
Workers: Collector<br />
Resources: Luxury Foods<br />
Recruitment: None<br />
Special: None<br />
Jeweler<br />
The jeweler is a lucrative business. The jewelry produced to<br />
sell to international connections is either stolen, or made from<br />
parts taken off customers’ jewelry that are in for a repair.<br />
Revenue: Medium<br />
Workers: Collector<br />
Resources: Jewelry<br />
Recruitment: None<br />
Special: None<br />
Fashion Boutique<br />
Cheap, fake designer suits and dresses are sold here at full<br />
price.<br />
Revenue: Medium<br />
Workers: Collector<br />
Resources: Fashion Clothes<br />
Recruitment: None<br />
Special: None<br />
Warehouse<br />
The warehouse stocks stolen antiques of different sorts.<br />
Antique furniture, paintings, cutlery, and much more can be<br />
sold to international connections.<br />
Revenue: None<br />
Workers: Collector<br />
Resources: Antiques<br />
Recruitment: None<br />
Special: None<br />
57
Residential Building<br />
Residential buildings can be used as defensive structures. Buy<br />
a residential and place some henchmen or gunmen inside to<br />
fortify the building. They will shoot out through the windows<br />
at enemies passing by.<br />
Revenue: None<br />
Workers: None<br />
Resources: None<br />
Recruitment: None<br />
Special: Can be Fortified<br />
Office Building<br />
Office buildings, like residential buildings, can be used as<br />
defensive structures.<br />
Revenue: None<br />
Workers: None<br />
Resources: None<br />
Recruitment: Businessman<br />
Special: Can be Fortified<br />
Safehouse<br />
This is the family’s headquarters and is where all the money<br />
earned from the family’s businesses must be collected. The<br />
boss or one of his children must sit here by the desk to answer<br />
any phone calls.<br />
Special: Can be Fortified<br />
NOTE: NPC businesses such as banks and museums cannot be bought.<br />
VEHICLES<br />
The fastest and safest way to get around town is by car. Cars can be stolen<br />
or acquired via the International Connections. Cars are driven with the<br />
keyboard and fired from with the mouse. Some cars are slow and some fast;<br />
some cars are heavily armored and some are not.<br />
58
Runabout<br />
The Runabout is a smart little car that is definitely worth<br />
acquiring for use in the narrow streets of Little Italy.<br />
Armor: Very Light<br />
Speed: Medium<br />
Handling: Excellent<br />
Capacity: 2<br />
Firing positions: 2<br />
Streetcar<br />
The Street Car is a medium-sized car with some capability for<br />
drive-by hits.<br />
Armor: Light<br />
Speed: Medium<br />
Handling: Good<br />
Capacity: 2<br />
Firing positions: 2<br />
Truck<br />
The Truck can be used to move a large group of units into<br />
enemy territory without having to worry too much about the<br />
opposition on the way due to the heavy armor.<br />
Armor: Heavy<br />
Speed: Very Slow<br />
Handling: Very Bad<br />
Capacity: 8<br />
Firing positions: 0<br />
Citycar<br />
The City Car Is the ultimate hitmobile used for drive-by hits<br />
Armor: Medium<br />
Speed: Medium<br />
Handling: Good<br />
Capacity: 4<br />
Firing positions: 4<br />
59
Sports Car<br />
The Sports Car is the fastest of all the cars available. With a<br />
capacity to carry only two people, this car is best used for<br />
quick sting operations.<br />
Armor: heavy<br />
Speed: Very Fast<br />
Handling: Good<br />
Capacity: 2<br />
Firing positions: 2<br />
Military Vehicle<br />
The Military Vehicle is a heavily armored car that has<br />
everything it takes for safe trip out and back again. Its only<br />
drawback is that it’s very slow.<br />
Armor: Very Heavy<br />
Speed: Slow<br />
Handling: Bad<br />
Capacity: 4<br />
Firing positions: 4<br />
Police Car<br />
The Police Car is a great car to use to get around.<br />
Armor: Heavy<br />
Speed: Fast<br />
Handling: Good<br />
Capacity: 4<br />
Firing positions: 4<br />
WEAPONS<br />
Weapons can be bought at the arms dealer where each of your units can be<br />
armed individually.<br />
Baseball Bat<br />
Range: Short<br />
Damage: High<br />
Accuracy: High<br />
Special: Stun<br />
Upgrades: Spikes<br />
60
Baton<br />
Range: Short<br />
Damage: High<br />
Accuracy: High<br />
Special: Stun<br />
Upgrades: None<br />
Hunting Knife<br />
Range: Very short<br />
Damage: High<br />
Accuracy: High<br />
Special: None<br />
Upgrades: None<br />
Sai<br />
Range: Very short<br />
Damage: High<br />
Accuracy: High<br />
Special: None<br />
Upgrades: None<br />
Pepper Spray<br />
Range: Very short<br />
Damage: Low<br />
Accuracy: High<br />
Special: Stun<br />
Upgrades: Acid<br />
Poison<br />
Range: Very Short<br />
Damage: Medium<br />
Accuracy: High<br />
Special: Continuous damage<br />
Upgrades: None<br />
Derringer<br />
Range: Medium<br />
Damage: Medium<br />
Accuracy: Low<br />
Rounds: 6<br />
Special: None<br />
Upgrades: None<br />
61
Revolver<br />
Range: Medium-Long<br />
Damage: Medium<br />
Accuracy: Medium<br />
Rounds: 6<br />
Special: None<br />
Upgrades: Scope<br />
Semi-automatic Handgun<br />
Range: Long<br />
Damage: High<br />
Accuracy: Medium<br />
Rounds: 12<br />
Special: None<br />
Upgrades: Scope<br />
Shotgun<br />
Range: Short/Medium<br />
Damage: Very High<br />
Accuracy: High<br />
Rounds: 5<br />
Special: None<br />
Upgrades: None<br />
Double Barreled Shotgun<br />
Range: Short/Medium<br />
Damage: Very High<br />
Accuracy: High<br />
Rounds: 2<br />
Special: None<br />
Upgrades: None<br />
Sniper Rifle<br />
Range: Very Long<br />
Damage: Very High<br />
Accuracy: Very High<br />
Rounds: 1<br />
Special: None<br />
Upgrades: Scope / Silencer<br />
62
Tommy gun<br />
Range: Medium/Long<br />
Damage: High<br />
Accuracy: Low<br />
Rounds: 25<br />
Special: None<br />
Upgrades: Silencer<br />
Uzi<br />
Range: Long<br />
Damage: High<br />
Accuracy: Medium<br />
Rounds: 30<br />
Special: None<br />
Upgrades: None<br />
Gas Grenade<br />
Range: Medium<br />
Damage: None<br />
Accuracy: Low<br />
Special: Stuns in area<br />
Upgrades: None<br />
Dynamite<br />
Range: Medium<br />
Damage: Very High<br />
Accuracy: Low<br />
Special: None<br />
Upgrades: None<br />
Time Bomb<br />
Range: None<br />
Damage: Extremely High<br />
Accuracy: Extremely High<br />
Special: Blow up buildings<br />
Upgrades: None<br />
Bazooka<br />
Range: Long<br />
Damage: Very High<br />
Accuracy: Medium<br />
Special: None<br />
Upgrades: None<br />
63
QUICKLISTS<br />
PRIMARY & SECONDARY ATTACKS<br />
UNIT PRIMARY ATTACK SECONDARY ATTACK<br />
Mario Normal Shot Throw Dynamite<br />
Angelo Normal Shot Throw Gas Grenade<br />
Romano Normal Shot Throw Gas Grenade<br />
Sonny Normal Shot Throw Dynamite<br />
Enforcer Normal Shot None<br />
Lawyer Hit with Suitcase None<br />
Seductress Seduce None<br />
Bouncer Stun Hit None<br />
Gunman Two Guns None<br />
Henchman Tommy gun None<br />
Street girl Spray None<br />
Assassin Poison None<br />
Bazooka UnitHit Fire Bazooka<br />
Big Mamma Shotgun None<br />
Black Widow Two Uzis None<br />
Bodyguard Two Guns None<br />
BomberTime BombThrow Dynamite<br />
Businessman None None<br />
Infiltrator Slit Throat (Impersonate) None<br />
Ninja Stun Hit and Kick Stab (Stealth)<br />
Sniper Sniper Rifle None<br />
Super Bouncer Stun Hit None<br />
Thief Steal Throw Gas Grenade<br />
DEFAULT KEY ASSIGNMENTS<br />
CHARACTER CONTROL<br />
Turn selected characters left<br />
Turn selected characters right<br />
Turn selected characters forward<br />
Turn selected characters backward<br />
Show Stamina<br />
Use med-kit<br />
Reload<br />
KEY<br />
“A”<br />
“D”<br />
“W”<br />
“S”<br />
“Q”<br />
“E”<br />
“R”<br />
64
VEHICLE CONTROL<br />
Turn Left<br />
Turn Right<br />
Accelerate<br />
Brake / Reverse<br />
Toggle Rotation<br />
KEY<br />
“A”<br />
“D”<br />
“W”<br />
“S”<br />
“E”<br />
GENERAL CONTROL<br />
Rotate Camera 90° Clockwise<br />
Rotate Camera 90° Counter-Clockwise<br />
Master Volume Up<br />
Master Volume Down<br />
Force Select<br />
Toggle Boss Detail View<br />
KEY<br />
“V”<br />
“B”<br />
PgUp<br />
PgDn<br />
“Z” + Left-Click<br />
“G”<br />
OTHER CONTROL<br />
FIXED KEY<br />
Rotate Camera<br />
ALT + Move Mouse<br />
Move Camera<br />
SPACE + Move Mouse<br />
Force Attack<br />
CTRL + Right-Click<br />
Toggle Select<br />
SHIFT + Left-Click<br />
Define Group CTRL + 1-9<br />
Select Group 1-9<br />
Context Buttons (Function Bar)<br />
F1-F5<br />
Show Game Statistics<br />
TAB<br />
FUNCTION BAR USED BY SITUATION KEY (DEF.)<br />
Use Med Kit All Normal F1<br />
Reload All Normal F2<br />
Crouch/Stand All Normal F3<br />
Pri./Sec. Weapon All Normal F4<br />
Toggle Auto-fire All Normal F5<br />
Lock Door Boss & Underboss By desk in Safehouse F1<br />
Go to the Mattresses Boss & Underboss By desk in Safehouse F2<br />
Put out Contract Boss & Underboss By desk in Safehouse F3<br />
Toggle auto-fire Boss & Underboss By desk in Safehouse F4<br />
(whole family)<br />
Shut & Lock Business Store Manager Taken over biz F1<br />
65
Toggle Liquor Sales Store Manager Speak-easy built F4<br />
Toggle Recruitment Store Manager Taken over biz F5-F8<br />
All Leave Vehicle Vehicle Anyone inside F1<br />
Individual Leave Vehicle Anyone inside F5-F12<br />
Vehicle<br />
MAIN CHARACTER LEVELS<br />
The schematic shows how much XP is needed for each level and the<br />
categories each of the four brothers will advance.<br />
LEVELS XP ROMANO MARIO ANGELO SONNY<br />
0 0 Basic Basic Basic Basic<br />
1 2000 Business Leadership Combat Combat<br />
2 4000 Business Leadership Leadership Combat<br />
3 6000 Leadership Business Business Business<br />
4 8000 Combat Combat Combat Leadership<br />
5 11000 Business Leadership Leadership Combat<br />
6 14000 Combat Combat Business Business<br />
7 17000 Combat Combat Combat Business<br />
8 20000 Leadership Business Leadership Leadership<br />
9 24000 Business Leadership Business Combat<br />
10 28000 Combat Combat Combat Business<br />
11 32000 Business Leadership Leadership Combat<br />
12 36000 Leadership Business Business Leadership<br />
13 40000 Leadership Business Combat Leadership<br />
14 45000 Business Leadership Leadership Leadership<br />
15 50000 Leadership Business Business Leadership<br />
16 55000 Leadership Business Leadership Business<br />
17 60000+ Combat Combat Business Business<br />
GENERAL UNIT LEVELS<br />
All secondary units (everybody but the main characters) have two combat<br />
levels that they advance.<br />
LEVEL XP ALL UNITS<br />
1 1500 Combat<br />
2 6000 Combat<br />
66
TECHNICAL and CUSTOMER SUPPORT<br />
For all inquiries regarding <strong>Gangland</strong>, please send a mail to<br />
support@gangland-lejeu.com<br />
CREDITS<br />
PRODUCERS<br />
Benedict Ødemotland & Adam Gregersen<br />
LINE PRODUCERS<br />
Henrik Münther & Andreas Ammitzbøll<br />
GAME DESIGNERS<br />
Adam Gregersen & Benedict Ødemotland<br />
ADDITIONAL DESIGNERS<br />
Andreas Ammitzbøll<br />
Henrik Münther<br />
Jacob Nordahl<br />
LEAD PROGRAMMER<br />
Henrik Münther<br />
PROGRAMMERS<br />
Heine Gundersen<br />
Mikael Garde Nielsen<br />
Michael Rasmussen<br />
Mads Parviz Nyholm<br />
Lasse Jul Nielsen<br />
Dino Christian Patti<br />
Mikkel Fennestad<br />
Odin Jensen<br />
67
LEAD ARTIST<br />
Andreas Ammitzbøll<br />
ARTISTS<br />
Timothy “The Bastard” Evison<br />
Thomas Finn<br />
David Nilsson<br />
Mogens Skjold Overbeck<br />
Timmi Klügel<br />
LEVEL DESIGNERS<br />
Andreas Ammitzbøll<br />
Adam Gregersen<br />
Dino Christian Patti<br />
Jacob Nordahl<br />
SCRIPTERS<br />
Dino Christian Patti<br />
Lasse Jul Nielsen<br />
SOUND PRODUCER<br />
Heine Gundersen<br />
SOUND FX<br />
Epic Sound / David Filskov<br />
VOICE CASTING & DIRECTION<br />
AudioGodz / Lani Minella<br />
VOICE TALENTS<br />
Chris Wilcox<br />
Dave Rivas<br />
Jon St. John<br />
Lani Minella<br />
Marc Biagi<br />
Ryan Drummond<br />
Bill Corkery<br />
MUSIC COMPOSED AND PRODUCED BY<br />
Thomas Finn<br />
LEAD TESTER<br />
Jacob Nordahl<br />
68
GAME BALANCING<br />
Andreas Ammitzbøll<br />
Henrik Münther<br />
Benedict Ødemotland<br />
Bjarne Svanberg<br />
QUALITY ASSURANCE<br />
Absolute Quality Inc.<br />
QA Manager<br />
Calvin Grove<br />
Project Lead<br />
Eric “Da Cap’M” Konzal<br />
Project Second<br />
Fran Katsimpiris<br />
Testers<br />
Joe Aliberti<br />
Nathan Briggs<br />
Dan Gleason<br />
John Kuhn<br />
Matt Kutrik<br />
Timothy Lamb<br />
Clint McCaul<br />
Anthony Sideris<br />
Paul Stone<br />
Compatibility Lead Tester<br />
Nathan Conn<br />
EXTERNAL BETA-TESTERS<br />
Anders Vinderslev<br />
Anders Højgaard<br />
Andreas Møller<br />
Andreas Brink<br />
Bjarne Svanberg<br />
Henrik Aamann<br />
Jan Rækby Pedersen<br />
Kim Laugesen<br />
Mikkel Gjøl<br />
Nikolaj Brodersen Hansen<br />
69
Nikhil Patel<br />
Thomas Sørensen<br />
Thomas Højgaard<br />
MARKETING & PUBLIC RELATIONS<br />
Christian Majgaard<br />
Jacob Nordahl<br />
Adam Gregersen<br />
Benedict Ødemotland<br />
MANAGING DIRECTOR<br />
Christian Majgaard<br />
FOUNDERS OF MEDIAMOBSTERS<br />
Adam Gregersen, Benedict Ødemotland & Christian Majgaard<br />
PUBLISHED BY<br />
Whiptail Interactive<br />
COVER ART AND PACKAGING LAYOUT<br />
Todd ‘3rd nipple’ Young<br />
Thomas ‘the cucumber’ Evans<br />
TECHNICAL SUPPORT<br />
NVIDIA<br />
ATI<br />
SPECIAL THANKS TO<br />
All the supporting family members of the team<br />
ETERNAL THANKS TO<br />
The Guardian Angels who are watching over us<br />
PROPRIETARY TECHNOLOGIES<br />
This product contains software technology licensed from GameSpy<br />
Industries, Inc. © 1999-2003 GameSpy Industries, Inc. All rights reserved.<br />
FMOD sound and music system, copyright © Firelight Technologies Pty,<br />
Ltd., 1994-2003.<br />
70
Big Mamma’s Meatballs<br />
For the Meatballs:<br />
1 lb. Beef (minced/ground etc.)<br />
1 lb. Ground Pork or Veal (minced/ground etc.)<br />
2 Cloves Garlic - minced or chopped finely<br />
2 Tbs. Fresh Chopped Parsley<br />
2 Tbs. Grated Parmesan Cheese<br />
1 large egg, beaten<br />
1 Cup bread crumbs (not too fresh but not stale)<br />
1/2 Cup Water and Salt & Pepper to taste<br />
Mix all (leave a small portion of both meat for the sauce) the above<br />
together in a bowl. Then, with your fingers form balls the size of<br />
ping-pong balls. If they are too sticky dust with flour and if too<br />
dry add more water before rolling. Set to one side whilst you<br />
make the sauce.<br />
For The Sauce:<br />
3-4 Tbs. Extra Virgin Olive Oil and a little butter<br />
2 Cloves of Garlic – Minced or chopped finely (more garlic can be added if required)<br />
1 Large Onion or two smaller ones - chopped finely<br />
1 Fresh stalk of celery, finely chopped<br />
Salt & Pepper (freshly ground black)<br />
1/4 Cup Chopped Basil<br />
1/2 Tbs. Oregano fresh if possible but dried is fine.<br />
1/2 Tbs. Thyme – fresh if possible but dried is fine.<br />
1/4 Cup Chopped Fresh Parsley<br />
2 - 6 oz. Cans Tomato Paste<br />
1 Large Can of chopped Tomatoes<br />
About 4 Cups water and a glass of red wine.<br />
3 Tbs. Grated Parmesan Cheese<br />
Fresh spaghetti pasta – try not to use dried if possible.<br />
Fry (in a large skillet or frying pan) the meat saved from the meatball ingredients in the<br />
hot oil until well browned, should take a minute at most. Add the garlic, onion, and<br />
celery and sauté until tender. Add the paste, tomatoes, water and herbs, stir and bring<br />
to a slow boil. Season the sauce with (freshly milled) black pepper and salt.<br />
Turn mixture down to a simmer and stir in the wine. Drop the prepared meatballs into<br />
the sauce. Do not stir for the first 15 minutes or so until the meatballs begin to firm up.<br />
Continue to cook for 2 hours, stirring (with care) occasionally, and adding extra water<br />
(and a little more wine if preferred) as needed if the sauce becomes too thick.<br />
Although it sounds cliché spaghetti is still the best pasta to serve with this dish and I<br />
would recommend fresh pasta over dried. Serve with a fresh rocket salad, some warm<br />
(garlic if preferred) bread and fresh parmesan.<br />
Serve with a good red wine, Chianti if you wish but I prefer a Barolo.<br />
Salute! Buon appetito!<br />
71
NOTES<br />
72
NOTES<br />
73