Download Project PDF - Henry Glass & Co
Download Project PDF - Henry Glass & Co
Download Project PDF - Henry Glass & Co

Create successful ePaper yourself
Turn your PDF publications into a flip-book with our unique Google optimized e-Paper software.
78” x 87 1/2”<br />
49 West 37th Street<br />
New York, NY 10018<br />
tel: 212-686-5194 fax: 212-532-3525<br />
toll free 1-800-294-9495<br />
www.henryglassfabrics.com<br />
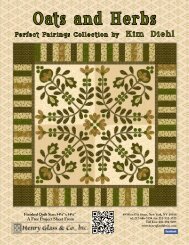
To view the entire collection and download a free pattern, please visit our website at www.henryglassfabrics.com
7306-11 7306-44 7307-99<br />
7305-99 Panel<br />
7307-88 7307-44 7307-89<br />
7307-66 7307-42 7308-11<br />
7308-43 7309-66 7309-11<br />
7309-44 7310-88 7310-99<br />
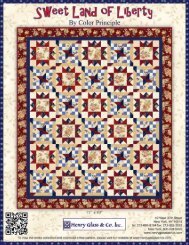
Early Riser Quilt<br />
78” x 87 ½”<br />
Designed by Sue Falkowski<br />
(3 panels) 7305-99 Panel (15 Roosters)<br />
3 yd 7306-11 Teal Border Stripe<br />
½ yd 7306-44 Cream Border Stripe<br />
1 ⅝ yd 7307-99 Black Multi Swirl<br />
1 ¼ yd 7307-88 Red Multi Swirl<br />
⅝ yd 7307-44 Cream Multi Swirl<br />
⅛ yd 7307-89 Red Swirl<br />
⅛ yd 7307-66 Green Swirl<br />
1 yd 7307-42 Cream Swirl<br />
⅛ yd 7308-11 Teal Berry<br />
⅛ yd 7308-43 Gold Berry<br />
⅛ yd 7309-66 Green Tile<br />
¼ yd 7309-44 Gold Tile<br />
1 ⅛ yd 7310-88 Red Flower<br />
5 ½ yds Backing
Early Riser by <strong>Co</strong>lor Principle<br />
Quilt designed by Sue Falkowski<br />
78” x 87 ½”<br />
Please read through all instructions before beginning.<br />
WOF = width of the fabric. The floral border stripe is cut from the length of the fabric.<br />
QST=quarter square triangle<br />
Seams allowance is ¼”.<br />
Press in the direction of the arrows or toward the darker fabric.<br />
Cutting Requirements<br />
Rooster Panel<br />
(15) 8 1 ⁄2” squares centered on rooster<br />
Cream Swirl 7307-42 (star background)<br />
(3) 5 ¼” x WOF strips, cut into (15) 5 ¼” squares, cut<br />
twice on diagonal = 60 QST<br />
(4) 2 ½” x WOF strips, cut into (60) 2 ½” squares<br />
Red Swirl 7307-89<br />
(10) 3 ¼” squares, cut twice on diagonal = 40 QST (star<br />
points)<br />
Green Swirl 7307-66<br />
(6) 3 ¼” squares, cut twice on diagonal = 24 QST<br />
(star points)<br />
Green Tile 7309-66<br />
(6) 3 ¼” squares cut twice on diagonal = 24 QST (star<br />
points)<br />
Teal Berry 7308-11<br />
(4) 3 ¼” squares cut twice on diagonal = 16 QST (star<br />
points)<br />
Gold Berry 7308-43<br />
(4) 3 ¼” squares cut twice on diagonal = 16 QST (star<br />
points)<br />
Black Multi swirl 7307-99<br />
(3) 3 ¼” x WOF strips, cut into (30) 3 ¼” squares, cut<br />
twice on diagonal = 120 QST (star points)<br />
(17) 2” x WOF strips, cut into (71) 2” x 8 1 ⁄2” pieces<br />
(sashing)<br />
Gold Tile 7309-44<br />
(3) 2” x WOF strips, cut into (42) 2” squares (posts)<br />
Cream Multi Swirl 7307-44 first inner border<br />
(6) 3” x WOF strips, pieced end to end and cut into:<br />
(2) 3” x 59” strips<br />
(2) 3” x 54 ½” strips<br />
Red Multi Swirl 7307-88 second inner border<br />
(10) 2” x WOF strips, pieced end to end and cut into:<br />
(4) 2” x 100” strips<br />
(9) 2 1 ⁄2” x WOF strips pieced together end to end for<br />
binding<br />
Teal Border Stripe 7306-11 third inner border<br />
(4) identical 7 1 ⁄2” x 100” length of fabric strips.***<br />
From remainder, fussy cut (7) 4 ½”squares floral<br />
bouquet motifs<br />
Cream Border Stripe 7306-44<br />
Fussy cut (8) 4 ½” squares floral bouquet motifs<br />
Red Flower 7310-88 outer border<br />
(9) 4” x WOF strips pieced together end to end and cut<br />
(2) 4” x 78 1 ⁄2” strips<br />
(2) 4” x 81” strips<br />
***Mitered Border<br />
Cut (4) 7 1 ⁄2” identical border strips from the length of the<br />
fabric. Sew a 2” x 100” strip of red multi swirl fabric to the<br />
edge opposite the red stripe on the border print. Make four.<br />
This narrow border will be the fabric edge sewn to the quilt<br />
top.<br />
To miter the corners, place a corner of the quilt face up on<br />
a pressing surface. Extend the ends of the borders. Fold<br />
under the border on top at a 45° angle. Press. Use a ruler to<br />
be check your 45° angle. Fold the quilt right sides together<br />
and pin the border along the fold line, matching the seams.<br />
This is your stitching guide. Sew, matching the seams. Trim<br />
excess and press. Repeat with the remaining corners.<br />
Quilt Front<br />
Turn Under<br />
Quilt Back<br />
Stitch<br />
©2010 <strong>Henry</strong> <strong>Glass</strong> & <strong>Co</strong>. www.henryglassfabrics.com
<strong>Co</strong>nstruction<br />
Star Blocks - 8” finished, make 15<br />
Star Points<br />
1. Sew black multi swirl 3 ¼” QST triangles to red swirl 3 ¼” QST. Sew four units with<br />
black multi swirl on the right and four with the black on the left. There will be a total<br />
of (8) star point units.<br />
2. Sew star point units to each side of a background 5 ¼” QST. Be sure that the black<br />
multi swirl fabric is placed as shown. Make four. Trim points; this will measure<br />
2 ½” x 4 ½”. Sew one of the pieced star point units to each side of the 4 ½” center<br />
square. Add a 2 ½” background square to the ends of the remaining star point units.<br />
Add these to the top and bottom of the block.<br />
Make 8<br />
Make 4<br />
Make 15 blocks, using assorted green tile, green multi swirl, teal & gold berries with the<br />
black multi swirl for star points.<br />
Assemble Quilt top<br />
Arrange the star blocks alternating with rooster squares into six rows. Refer to picture of<br />
quilt for placement.<br />
Sew (6) 2” x 8 1 ⁄2” sashing strips and (5) blocks together in each row. Press toward the<br />
sashing strips.<br />
Sew (6) 2” gold posts and (5) 2” x 8 1 ⁄2” sashing strips together in (7) rows as shown.<br />
Press toward the sashing.<br />
Sew the rows together to complete the quilt top.<br />
Make 15<br />
Borders<br />
First Inner Border<br />
Sew 3” x 59” cream multi swirl border strips to sides of the quilt top, press toward the borders. Add the 3”x 54 1 ⁄2”<br />
top and bottom border strips. Press toward the borders.<br />
Mitered border<br />
(Prepare border as directed in cutting instructions) Shorten two prepared border pieces to a length of 90” for the top<br />
and bottom.<br />
Match the center point of the sides of the quilt top with the center point of the side border strips, aligning the<br />
narrow red multi swirl print with the edge of the quilt top. Pin. Begin and end sewing the border strip ¼” from<br />
each end of the quilt top. Backstitch to secure the seams. Add the shorter top and bottom border strips in the same<br />
manner. Miter the corners.<br />
Outer Border<br />
Sew a 4” x 81” red floral strip to each side of the quilt top. Add the 4” x 78 ½” top and bottom strips.<br />
Layer, quilt & bind with 2 1 ⁄2” strips of red multi swirl. Press toward the borders.<br />
©2010 <strong>Henry</strong> <strong>Glass</strong> & <strong>Co</strong>. www.henryglassfabrics.com