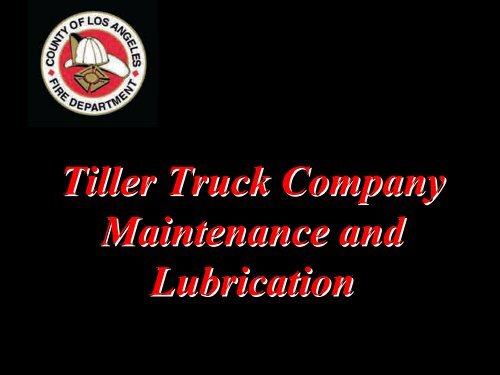
Truck Maintenance and Lubrication
Truck Maintenance and Lubrication
Truck Maintenance and Lubrication

Create successful ePaper yourself
Turn your PDF publications into a flip-book with our unique Google optimized e-Paper software.
Tiller <strong>Truck</strong> Company<br />
<strong>Maintenance</strong> <strong>and</strong><br />
<strong>Lubrication</strong>
Why are we here?<br />
To learn proper maintenance <strong>and</strong> lubrication<br />
procedures to avoid costly repairs <strong>and</strong> out-ofservice<br />
time.
Tiller <strong>Truck</strong><br />
Reliability<br />
•The modern day fire apparatus is a very<br />
sophisticated <strong>and</strong> extensive piece of<br />
firefighting equipment. Its reliable function is<br />
vital for fire ground operations. To ensure<br />
reliable performance, daily inspections <strong>and</strong><br />
maintenance schedules need to be followed.
Tiller <strong>Truck</strong><br />
Reliability<br />
•Without regular maintenance, the reliability<br />
of the apparatus will suffer <strong>and</strong> the repairs<br />
will become time consuming <strong>and</strong> costly.
THANK YOU!<br />
To all the fire mechanics that keep our<br />
trucks rolling!
Responsibility<br />
•Vehicle Operators<br />
–Shall perform all daily <strong>and</strong> Pre-Trip inspections<br />
–Shall adhere to all maintenance schedules<br />
–Shall ensure the usage of correct fluid <strong>and</strong><br />
amounts
Responsibility<br />
•Site supervisors<br />
–Shall ensure the vehicle operator<br />
•Checks <strong>and</strong> maintains the vehicle properly<br />
•Operates the vehicle safely<br />
–Assigns a responsible person if no one<br />
permanently assigned
The Law<br />
• As operators of commercial vehicles, the law requires that<br />
a Pre-Trip inspection be completed every morning prior to<br />
moving the vehicle.<br />
• Following that Pre-Trip inspection, a “Circle-of-Safety”<br />
shall be preformed each time the vehicle is moved after an<br />
extended stop.<br />
– Code of Federal Regulations Title 49<br />
• Part 390 - Federal Motor Carrier Safety Regulations<br />
• Part 396 - Inspection, repair, <strong>and</strong> maintenance<br />
– California Vehicle Code, California Commercial Driver H<strong>and</strong>book<br />
– NFPA 1915 & 1002
Pre-Trip Inspection<br />
(Includes, but is not limited to the following)<br />
• Overall appearance <strong>and</strong><br />
condition<br />
• All lights, signals, <strong>and</strong><br />
reflectors<br />
• Windows <strong>and</strong> mirrors<br />
• Compartment <strong>and</strong> cab doors<br />
• Equipment attached<br />
• Engine fluids<br />
• Engine belts<br />
• Engine components<br />
• Fuel system<br />
• Pumping equipment<br />
• Suspension components<br />
• Tire <strong>and</strong> wheels<br />
• Drive line / Drive train<br />
• Frame<br />
• Brake systems<br />
• Air brake leakage test<br />
• Steering components<br />
• All gauges<br />
• Safety devices<br />
• Apparatus logs<br />
* For more information contact the<br />
Department DMV Coordinator
Out Of Service<br />
Criteria<br />
• NFPA<br />
– Seatbelt issues (broken, torn,<br />
broken buckles)<br />
– Tire problems (same as Pre-Trip)<br />
– Class 3 leaks (Axles, steering,<br />
transmissions)<br />
– Contaminated fuel or coolant<br />
– Air filter restriction<br />
– Ignition malfunctions<br />
– Clutch, transmission, shift linkage<br />
broken or missing parts<br />
– Automatic transmission over<br />
heating<br />
– Air brake problems<br />
– Hydraulic brake leaks (Class 2)<br />
• California Commercial Driver<br />
H<strong>and</strong>book<br />
– All NFPA requirements<br />
– 1/4 spring missing, shifted, broken<br />
– Steering wheel free play of 10<br />
degrees<br />
* For more information contact the<br />
Department DMV Coordinator
Leak Classes<br />
• Class 1 - Leakage of fluid, as indicated by wetness or discoloration,<br />
NOT great enough to form drops.<br />
• Class 2 - Leakage of fluid great enough to form drops, but NOT<br />
enough to cause drops to fall from item being inspected.<br />
• Class 3 - Leakage of fluid great enough to cause drops to fall from<br />
item being inspected.
Photo Broken<br />
Torque Arm / Spring<br />
• Note torque arm / spring is<br />
completely broken<br />
• Usually torque arm /<br />
springs will only crack<br />
• Very common occurrence<br />
• Causes<br />
– Fast driving / turning<br />
– Rapid acceleration<br />
– Speed bumps<br />
– Overloaded vehicles<br />
12
Photo Popped Air Bag<br />
Suspension<br />
• Air bag completely<br />
destroyed<br />
• Many times they will<br />
only have a hole in<br />
them <strong>and</strong> leak<br />
• Look for<br />
– Shifted appearance of<br />
vehicle<br />
– H<strong>and</strong>ling problems<br />
13
Photo Cracked Wheel<br />
• This wheel was cracked<br />
through 3 lug nuts<br />
• Personnel complained of<br />
steering problems <strong>and</strong><br />
squeaking / cracking noises<br />
for 2 weeks.<br />
• This is a front steering wheel<br />
• Covered <strong>and</strong> concealed by a<br />
wheel cap.<br />
14
Photo Missing<br />
Pitman Arm - Steering<br />
• This vehicle was check out by a<br />
mechanic hours before leaving<br />
a brush fire.<br />
• While returning to the station,<br />
steering became loose<br />
• This was noted at the station.<br />
• Note<br />
– Missing bolt<br />
– Space between pitman arm <strong>and</strong><br />
steering box<br />
– 1/4 inch more, steering would<br />
be completely gone.<br />
15
Tiller <strong>Truck</strong><br />
<strong>Maintenance</strong> &<br />
<strong>Lubrication</strong><br />
• Break time<br />
16
AL – 6A<br />
Apparatus Daily<br />
Checklist
Safety Equipment<br />
• Extinguishers
Safety Equipment<br />
• Flares/Triangles
Safety Equipment<br />
• Fuses/Circuit Breakers
Safety Equipment<br />
• Seatbelts/Airbags
Brake System<br />
• Brake Test<br />
– Cut out < 130 psi<br />
– Cut in > 85 psi<br />
– Static Air 2/60 or 3/60<br />
– Applied Air 3/60 or<br />
4/60<br />
– Low Air > 60 psi<br />
– Pop Out > 20 psi<br />
– Recovery < 45 seconds<br />
– Parking / Emergency
Brake System<br />
• Brake<br />
Lining/Drums/Rotors
Brake System<br />
• Brake Hoses
Brake System<br />
• Brake Chambers
Brake System<br />
• Slack Adjusters < 1”
Wheels/Tires<br />
• Space (duals)
Wheels/Tires<br />
• Tires (C,I,D)<br />
Condition, Inflation,<br />
Depth of tread. 2/32”<br />
rear/drive tires, 4/32”<br />
front & tiller/steering<br />
tires
Wheels/Tires<br />
• Axle Seals
Wheels/Tires<br />
• Rims/Lug Nuts
Undercarriage<br />
• Exhaust
Undercarriage<br />
• Fuel Tank / Fuel<br />
Gauges
Undercarriage<br />
• Frame
Undercarriage<br />
• Drive Line
Undercarriage<br />
• Steering Components
Undercarriage<br />
• Springs / Mounts
Undercarriage<br />
• Shocks / Air Bags /<br />
Mounts
Undercarriage<br />
• Axles
In Cab<br />
• Heater / Defroster
In Cab<br />
• Horns / Sirens
In Cab<br />
• Wipers & Washers
• Windshield &<br />
Windows<br />
In Cab
• Mirrors<br />
In Cab
• Parking Brake<br />
In Cab
In Cab<br />
• Steering Wheel /<br />
Column
• Gear Shifter<br />
In Cab
In Cab<br />
• Gauges<br />
– Air Brakes<br />
– Volts / Amps<br />
– Oil Pressure<br />
– Temperature
Engine<br />
Compartment<br />
• Hoses / Lines
Engine<br />
Compartment<br />
• Air Compressor /<br />
Brake Fluid
Engine<br />
Compartment<br />
• Belts / Pulleys
Engine<br />
Compartment<br />
• Power Steering Fluid
Engine<br />
Compartment<br />
• Coolant
Engine<br />
Compartment<br />
• Oil
Exterior<br />
• Batteries <strong>and</strong> Boxes
• Mud Flaps<br />
Exterior
• Equipment<br />
Exterior
Exterior<br />
• Pump & Pump Panel
• Body<br />
Exterior
Exterior<br />
• Lights / Reflectors<br />
– Emergency (Reds)<br />
– Brake<br />
– Marker<br />
– Reverse<br />
– Turn / Four Way<br />
– Tail<br />
– Head
Tiller <strong>Truck</strong><br />
<strong>Maintenance</strong> &<br />
<strong>Lubrication</strong><br />
• Break time<br />
60
AL – 6B<br />
Apparatus / Equipment<br />
Daily Checklist
Trailer - Class A<br />
• 5 th Wheel System<br />
– Catwalk<br />
– Platform / Kingpin /<br />
Gap<br />
– Release Arm<br />
– Safety Lock Jaw<br />
– Mounting Bolts
Trailer – Class A<br />
• Brakes<br />
– Lining / Drums /<br />
Rotors<br />
– Brake Hoses<br />
– Brake Chambers<br />
– Slack Adjusters
Trailer – Class A<br />
• Wheels / Tires<br />
– Space (Duals)<br />
– Tires / Space (I,C,D)<br />
– Axle Seals<br />
– Rims / Lug Nuts
Trailer – Class A<br />
• Mud Flaps<br />
• Frame<br />
• Shocks / Air Bags /<br />
Mounts<br />
• Springs / Mounts<br />
• Doors / Equipment<br />
• L<strong>and</strong>ing Gear
Trailer – Class A<br />
• Lights / Reflectors
Aerial<br />
• Generator<br />
• Hydraulic Fluid<br />
• Aerial Nozzle<br />
• Water Pipe / Hoses<br />
• PTO
Aerial<br />
• Outriggers / Pads<br />
• Turntable
Aerial<br />
• Safety Pins / Locks
Aerial<br />
• Ladder<br />
• Ladder Controls
Aerial<br />
• Ladder<br />
– Raise<br />
– Rotate<br />
– Extend<br />
– Return<br />
» weekly
Passenger<br />
• Loading Lights<br />
• Baggage Area<br />
• Seat Belts<br />
• Seating<br />
• Emergency Exits<br />
• Passenger Entry Doors
Pumping<br />
Apparatus<br />
• Foam Systems<br />
• Hose<br />
– H<strong>and</strong><br />
– Supply
Pumping<br />
Apparatus<br />
• Pump<br />
– Plumbing<br />
– Valves / H<strong>and</strong>les<br />
– Pump Panel Gauges<br />
– Priming Pump<br />
– Relief Valves<br />
– Main Pump
AL – 9A<br />
<strong>Lubrication</strong> Record
Weekly<br />
<strong>Lubrication</strong><br />
• Lubricate <strong>and</strong> Check<br />
- Fuel Separator
Clutch Linkage Clevis<br />
Pins<br />
• Lubricate all areas<br />
– Engine oil or dripless oil<br />
77
Photo of Clutch Linkage /<br />
Clevis Pins<br />
• 1981 American La<br />
France<br />
• Note arrows<br />
– Clutch cable<br />
– Clevis pins<br />
78
Throttle<br />
• Check<br />
– Pivot point<br />
– Linkage<br />
• Lubricate with engine oil or dripless oil<br />
79
Discharge Gate Control<br />
Linkages<br />
• Lubricate all areas with engine oil or<br />
dripless oil<br />
– Linkage<br />
– Ball joints<br />
– Clevis pins<br />
– Bell cranks<br />
– Guides<br />
80
Fuel Separator<br />
• Check for contamination<br />
– Water<br />
– Debris<br />
• Drain as needed<br />
81
Monthly<br />
<strong>Lubrication</strong><br />
• Allison Trans Fluid<br />
Inspection<br />
• Main Fire Pump Trans<br />
Oil Inspection
Monthly<br />
<strong>Lubrication</strong><br />
• Differential Oil<br />
Inspection<br />
• Radiator Fins Cleaned<br />
• Steering Column<br />
Lubricated<br />
• Steering Gear Oil/<br />
Power Steering Fluid<br />
Inspection
Differential Oil<br />
• Check level with a wire<br />
• Fill<br />
– Normal<br />
• Less than 2 inches low<br />
– Not normal - Notify area mechanic immediately<br />
• Over 2 inches low<br />
– 85/140 differential oil<br />
– Check with <strong>and</strong> notify area mechanic<br />
84
Photo of Rear<br />
Differential<br />
• KME<br />
85
Photo of Rear<br />
Differential<br />
• 1995 KME<br />
• Note arrow<br />
– Oil fill / check<br />
86
Hydraulic Brake Fluid<br />
Reservoir<br />
• If equipped<br />
– Check fluid level<br />
• Normal<br />
– 1/4 inch from top<br />
87
Automatic<br />
Transmission Fluid<br />
• Check level at operating temperature<br />
• Cycle transmission through all gears to fill clutch cavities<br />
• Check as per indicated - usually on dip stick<br />
– Some indicate “park”<br />
– Other indicate “neutral”<br />
• Ensure parking brake is applied<br />
• Normal level<br />
– Between “add” <strong>and</strong> “full”<br />
• Fill only at operating temperature<br />
88
Automatic<br />
Transmission Fluid<br />
• If equipped with an auto-check capability such as the newer KME<br />
apparatus<br />
– Heat up transmission by driving<br />
– Cycle the transmission through the gears<br />
– Place into “neutral”<br />
– Push both the up <strong>and</strong> down arrows simultaneously<br />
– Read the shift indicator<br />
• OK = Good proper level<br />
• HI = High<br />
• LO = Low<br />
– If high or low, there will be a code to follow<br />
89
Radiator Fins<br />
• Clean with compressed air<br />
– Back to front<br />
• Do NOT obstruct radiator air intake<br />
90
Steering Box Gear Oil<br />
• 1977 American La France 3-axle trucks<br />
– Lubricated by the power steering fluid<br />
– No maintenance check required<br />
• All other Engines, <strong>Truck</strong>s, <strong>and</strong> Quints<br />
– Lubricated by power steering fluid<br />
– No maintenance check required<br />
91
Photo of Steering Box<br />
Left<br />
Right<br />
• KME Quint<br />
• Note<br />
– There is a steering box<br />
on both side of the<br />
front axle<br />
92
Photo of Steering Box<br />
• Steering column<br />
to steering box<br />
linkage<br />
• Note U-Joints<br />
93
Photo of Steering Box<br />
• KME Quint<br />
– Tiller axle steering<br />
94
Steering Column<br />
• Apparatus with U-Joints in steering column<br />
– Lubricate with chassis lube<br />
95
Photo of Steering<br />
Column<br />
• 1989 KME “Kovach”<br />
• Note arrows<br />
– U-Joints on column<br />
96
Power Steering<br />
Reservoir<br />
• Check fluid level<br />
– Check while engine at operating temperature<br />
– Normal<br />
• 1/2 to 1 inch below top<br />
• Fluid type<br />
– Engines, <strong>Truck</strong>s, <strong>and</strong> Quints<br />
• 15W40 engine oil<br />
97
2 Month<br />
<strong>Lubrication</strong><br />
• Chassis Lubricated<br />
• Engine Breather Tube<br />
• Control Cables<br />
• Pump Panel Controls<br />
• Main Fire Pump
Photo of Rear Drive<br />
Line<br />
KME Quint<br />
99
2 Month<br />
<strong>Lubrication</strong><br />
• Drive Line Slip Joints/<br />
U-Joints<br />
• Disc Brakes<br />
** (Mechanic Only)
Picture of Slip Joint /<br />
Spline<br />
• Note arrows.<br />
– Zerk fitting fill<br />
– Relief hole<br />
101
Photo of Brake System<br />
• 2006 KME<br />
• Note arrow<br />
– Slack adjuster<br />
• Note 2 air lines<br />
– Indicates maxi / spring<br />
brake system<br />
– Rear brakes<br />
• Note 90 ° angle<br />
– Applied position<br />
102
Photo of Brake<br />
System<br />
• KME Quint<br />
• Photo from front<br />
of front axle<br />
103
Photo of Brake System<br />
• KME Quint<br />
• Photo from front<br />
of front axle<br />
104
6 Month or 6,000 mile<br />
<strong>Lubrication</strong><br />
• Oil<br />
• Oil Filter<br />
• PCV Valve<br />
(6 mos/5,000 mi.)<br />
• Air Compressor Filter<br />
(6 mos/5,000 mi.)
Yearly or 12,000 mile<br />
<strong>Lubrication</strong><br />
• Cummins/Caterpillar<br />
Fan Hubs<br />
• Spark Arrestors
<strong>Lubrication</strong><br />
Preparation<br />
• Prior to the lubrication process always<br />
– Inspect the supply of lubricants for<br />
• Contamination<br />
– Dirt<br />
– Water<br />
– Other greases, oils, foreign material<br />
– Inspect dispensing equipment<br />
• Function <strong>and</strong> cleanliness<br />
– Measuring cans<br />
– Funnels<br />
– Grease guns<br />
107
Zerk Grease<br />
Fittings<br />
• Clean the area with a rag<br />
– Prevent the contamination of new grease<br />
108
Photo of Zerk Fitting<br />
• Arrow is pointing at the<br />
nipple of the Zerk fitting.<br />
• Grease is to be applied<br />
with a grease gun.<br />
• Always replace cap after<br />
lubrication is completed.<br />
109
Fill Plugs<br />
• Types<br />
– Square lug<br />
– Recessed square<br />
– Large stamped sheet metal plug<br />
• Never remove or loosen a screw or<br />
bolt provided with a lock nut. This<br />
would indicate an adjustment point,<br />
NOT a fill plug.<br />
110
Removing Fill Plugs<br />
• Clean the area with a rag<br />
– Prevent contamination of new oil<br />
111
Fitting or Plug<br />
Problems<br />
• Have them replaced if<br />
– Broken<br />
– Damaged<br />
– Missing<br />
• By<br />
– Area mechanic<br />
– Yourself<br />
• Do not use a damaged fitting or plug<br />
112
Clean Up<br />
• Always clean up excess grease <strong>and</strong> oil from<br />
parts so it :<br />
– Does not attract dirt<br />
– Does not get thrown around onto other parts<br />
– Keeps vehicle <strong>and</strong> yourself looking<br />
professional<br />
– Is easier to detect problems <strong>and</strong> damage during<br />
inspections<br />
113
Breather Tubes<br />
• What are they?<br />
– Small flexible tubes to ventilate enclosed casings<br />
• Locations<br />
– Top of units<br />
• Differentials<br />
• St<strong>and</strong>ard transmissions<br />
• Engine crankcase<br />
• Pump transmissions<br />
• Purpose<br />
– Prevent pressure build up inside the unit<br />
– Prevent lubricant from escaping / leaking from seals <strong>and</strong> gaskets<br />
114
Breather Tubes<br />
• <strong>Maintenance</strong><br />
– General<br />
• Keep clean <strong>and</strong> clear<br />
• Do NOT kink tubes<br />
– Periodic cleaning by area mechanic or during PM maintenance<br />
– Station personnel<br />
• Engine crankcase<br />
– Wash with solvent<br />
– Dry with compressed air<br />
» Every 60 days<br />
» 1,000 miles<br />
» After operation in dusty conditions<br />
115
Weight / Strain /<br />
Pressure<br />
• Relieve when lubricating when possible<br />
– Bushings <strong>and</strong> bearings<br />
– Jack up vehicle<br />
– Release brakes<br />
• Ensure chock block installed<br />
– Move part being lubricated<br />
116
Photo of Engine<br />
Oil Plug<br />
2006 KME<br />
Note arrow<br />
– Drain plug<br />
117
PCV<br />
Positive Crankcase<br />
Ventilator Valve<br />
• Replacement<br />
– County owned vehicles (F <strong>and</strong> 49000)<br />
• By area mechanic<br />
– Every 6 months<br />
– Every 5,000 miles<br />
118
• Notify area mechanic<br />
– Continued reading of<br />
13 or more inches of<br />
restriction<br />
– Continued reading in<br />
the red<br />
• Locations<br />
– In cab on dash<br />
– Pump panel<br />
Restriction Gauges /<br />
Indicators<br />
119
Tiller <strong>Truck</strong><br />
<strong>Maintenance</strong> &<br />
<strong>Lubrication</strong><br />
• Break time<br />
120
AL – 9B<br />
Aerial<br />
<strong>Lubrication</strong> Record
Weekly<br />
Aerial <strong>Lubrication</strong><br />
• Check & Lubricate<br />
– Ladder Rollers<br />
– Ladder Guides<br />
– Ladder fly support<br />
pads<br />
– Ladder Extension<br />
/Retraction Cables<br />
– Ladder Cable Drum<br />
– Ladder Angle Indicator
Weekly<br />
Aerial <strong>Lubrication</strong><br />
• Check & Lubricate<br />
– Ladder Water Way<br />
– Turntable Center Pin<br />
– 5 th Wheel Assembly<br />
– Outriggers<br />
** Inspect Hydraulic Oil
Aerial <strong>Lubrication</strong><br />
Instructions<br />
Dsc01146.jpg<br />
Dsc01146.jpg<br />
Dsc01146.jpg
Weekly<br />
Aerial Equipment<br />
• Lubricate<br />
– Ladder rollers<br />
– Ladder guides<br />
– Fly supports<br />
– Ladder extension /<br />
retraction cable<br />
– Cable drum<br />
– Ladder angle indicator<br />
– Ladder water way<br />
– Turntable center pin<br />
– Hydraulic oil<br />
– 5th Wheel Assembly<br />
– Outriggers<br />
– Heel Pin / Bushings<br />
(1998-2007) KME
Ladder Rollers<br />
Weekly<br />
• Lubricate with chassis lube<br />
– Zerk fittings located in the ends of the roller<br />
support shafts
Ladder Rollers<br />
Weekly<br />
• Grease gun zerk<br />
fittings
Ladder Guides<br />
Weekly<br />
• Lubricate with<br />
“Molykote”(Molly<br />
Dri-Lube) spray lube<br />
– Furnished by area<br />
mechanic
Ladder Cable <strong>and</strong><br />
Cable Drum<br />
Weekly<br />
• Cable<br />
– Lubricated with chain <strong>and</strong><br />
cable lube aerial spray<br />
• Furnished by area<br />
mechanic<br />
– Check for cable damage<br />
• Cable Drum<br />
– Lubricate ends with chassis<br />
lube<br />
• Until visible
Ladder Angle<br />
Indicator<br />
Weekly<br />
• Lubricated with<br />
WD40
Ladder Water Way<br />
Weekly<br />
• Wipe down with an<br />
oily rag
Turntable Center Pin<br />
Weekly<br />
• Lubricated with<br />
chassis lube
Hydraulic Oil<br />
Weekly<br />
• Check level<br />
– Each week<br />
– After extensive use<br />
• Check for<br />
contamination<br />
– Report to area<br />
mechanic
Aerial Ladder <strong>Truck</strong><br />
5th Wheel Assembly<br />
Weekly<br />
• Note Zerk fittings<br />
• Lubricate with chassis<br />
lube<br />
• Until visible around joints
Aerial Ladder <strong>Truck</strong><br />
Outrigger<br />
Weekly<br />
KME<br />
Seagrave<br />
• Zerk fitting on outrigger<br />
– Seagrave<br />
• KME – No zerk fitting<br />
• Lubricate with chassis<br />
lube<br />
• Until visible around<br />
joints
Heel Pin / Bushings<br />
KME Quint<br />
Weekly<br />
• Start with the right aerial ladder heel pin bushing with the<br />
ladder in the bedded position <strong>and</strong> pump chassis lube grease<br />
into the right zerk fitting.<br />
• Elevate the ladder 10-degrees <strong>and</strong> pump more chassis lube<br />
grease into the zerk fitting<br />
• Continue to raise the ladder in 10-degree increments <strong>and</strong><br />
add chassis lube grease at each position until the ladder<br />
reaches the 90-degree point.<br />
• Use a h<strong>and</strong> pump grease gun <strong>and</strong> chassis lube grease.<br />
• Do NOT attempt to lubricate the ladder while it is in motion.
Heel Pin / Bushings<br />
KME Quint<br />
Weekly (continued)<br />
Weekly<br />
• With the ladder in the 90-degree position, change<br />
to the left aerial ladder heel pin bushing. Pump<br />
chassis lube grease into the left zerk fitting.<br />
• Lower the ladder 10-degrees <strong>and</strong> pump more<br />
chassis lube grease into the zerk fitting<br />
• Continue to lower the ladder in 10-degree<br />
increments <strong>and</strong> add chassis lube grease at each<br />
position until the ladder reaches the bedded<br />
position.<br />
• Use a h<strong>and</strong> pump grease gun <strong>and</strong> chassis lube<br />
grease.<br />
• Do NOT attempt to lubricate the ladder while it is<br />
in motion.
Monthly<br />
Aerial <strong>Lubrication</strong><br />
• Lubricate Turntable<br />
Support Rollers
6 Month<br />
Aerial <strong>Lubrication</strong><br />
• Clean Ladder<br />
• Lubricate Ladder<br />
• Lubricate Turntable<br />
Ring Gear
Aerial Ladder Cleaning<br />
Instructions (6(<br />
6 Months)<br />
• Ladder Cleaning<br />
– Clean with solvent<br />
– Remove all old lubricant from ladder<br />
– Wash with water<br />
– Thoroughly dry<br />
• Ladder <strong>Lubrication</strong><br />
– Re-lubricate as per instructions<br />
– Turntable<br />
– Lubricate rotation ring gears<br />
• Chassis lube applied with a brush or spray
Hydraulic Oil<br />
Change<br />
• Ladder <strong>Truck</strong>s/ Quints<br />
(every 3 years)
Tiller <strong>Truck</strong><br />
<strong>Maintenance</strong> &<br />
<strong>Lubrication</strong><br />
• Break time<br />
142
Repairs<br />
• Vehicle preparation<br />
– Remove all personal <strong>and</strong> Department equipment<br />
– Remove log books<br />
– Pumping Apparatus<br />
• Shall leave intact<br />
– 50 feet 1 inch hose (minimum)<br />
– 1 inch nozzle (minimum)<br />
– Full water tank<br />
– Suction caps<br />
• Form 173 (Request for Services)
Repairs<br />
- Form 173<br />
• Completed stating specific problems<br />
• Distribution<br />
– Copy of Form 173 to “Shops” with apparatus<br />
– Original through channels to Support Services<br />
– “Follow-Up” (yellow) copy to station file<br />
– “File” (pink) copy will be returned as proof of receipt<br />
– Upon work completion, fill out bottom of “Follow-Up”<br />
(yellow) copy – “work completed” - <strong>and</strong> return it to<br />
Support Services
Tire Repair<br />
• All tires brought in by Utilities for exchange<br />
or repair shall :<br />
– Be turned in at Fire Shops<br />
– Have the vehicle number clearly marked on the<br />
wheel (NOT the tire)<br />
– Have damage area marked on the tire<br />
– Have an accompanying Form 47
Tire Repair<br />
• If no tire is available<br />
– Fill out a Form 47 <strong>and</strong> leave tire<br />
• Station <strong>and</strong> Battalion Headquarters will be notified when it is<br />
ready for pick up.<br />
• NOTE - Must bring the original Form 47 back to get tire.<br />
– Battalion Headquarters SHALL have spare tires.<br />
– Each station SHALL have spare tires for the equipment<br />
assigned <strong>and</strong> at least one for each position (AKA –<br />
Front <strong>and</strong> Rear)
Emergency Spare Tire<br />
• Available at Battalion Headquarters if none<br />
available at the assigned station
Tire Changing<br />
• All operators of fire apparatus, support vehicles, <strong>and</strong><br />
transports are responsible for changing flat, damaged, or<br />
worn out tires.<br />
– Front tires<br />
– Rear tires<br />
– Rear outside dual tires<br />
• NOTE - Rear inside dual tire is to be replaced or changed by<br />
the area mechanic.<br />
• NOTE - If three (3) or more tires are needed, notify the area<br />
mechanic.
Tire Changing<br />
• 1998 – 2000 KME apparatus<br />
– Utilize a hub piloted wheel that requires only<br />
one (1) set of ten (10) flanged wheel nuts to<br />
secure both dual wheels.<br />
• Contact area mechanic prior to changing wheels /<br />
tires.<br />
• CAUTION - Run up blocks CAN NOT be used to<br />
change the outside rear dual wheels / tires on the<br />
1998 <strong>and</strong> newer KME apparatus.
Tire Changing<br />
• 2006 <strong>and</strong> newer KME apparatus<br />
– Utilize a lug piloted wheel that requires only<br />
one (1) set of ten (10) flanged wheel nuts to<br />
secure both dual wheels.<br />
• Contact area mechanic prior to changing wheels /<br />
tires.<br />
• CAUTION - Run up blocks CAN NOT be used<br />
to change the outside rear dual wheels / tires on<br />
the 1998 <strong>and</strong> newer KME apparatus.
Tire Changing<br />
• Always retighten wheel nuts after first 50 to<br />
100 miles of operation after a tire change.
Emergency Repairs<br />
– For after hours or emergency assistance,<br />
contact Dispatch at (323) 881-2455 for the duty<br />
mechanic (R41).