Cheat Sheet - ETC
Cheat Sheet - ETC
Cheat Sheet - ETC

Create successful ePaper yourself
Turn your PDF publications into a flip-book with our unique Google optimized e-Paper software.
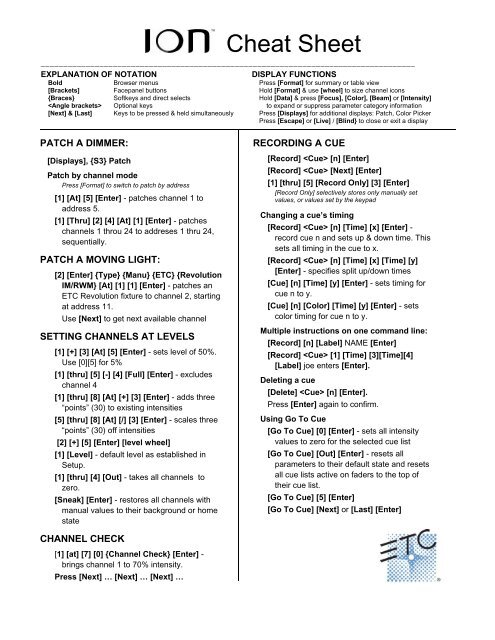
<strong>Cheat</strong> <strong>Sheet</strong><br />
___________________________________________________________________________________<br />
EXPLANATION OF NOTATION DISPLAY FUNCTIONS<br />
Bold Browser menus Press [Format] for summary or table view<br />
[Brackets] Facepanel buttons Hold [Format] & use [wheel] to size channel icons<br />
{Braces} Softkeys and direct selects Hold [Data] & press [Focus], [Color], [Beam] or [Intensity]<br />
Optional keys to expand or suppress parameter category information<br />
[Next] & [Last] Keys to be pressed & held simultaneously Press [Displays] for additional displays: Patch, Color Picker<br />
Press [Escape] or [Live] / [Blind} to close or exit a display<br />
PATCH A DIMMER:<br />
[Displays], {S3} Patch<br />
Patch by channel mode<br />
Press [Format] to switch to patch by address<br />
[1] [At] [5] [Enter] - patches channel 1 to<br />
address 5.<br />
[1] [Thru] [2] [4] [At] [1] [Enter] - patches<br />
channels 1 throu 24 to addreses 1 thru 24,<br />
sequentially.<br />
PATCH A MOVING LIGHT:<br />
[2] [Enter] {Type} {Manu} {<strong>ETC</strong>} {Revolution<br />
IM/RWM} [At] [1] [1] [Enter] - patches an<br />
<strong>ETC</strong> Revolution fixture to channel 2, starting<br />
at address 11.<br />
Use [Next] to get next available channel<br />
SETTING CHANNELS AT LEVELS<br />
[1] [+] [3] [At] [5] [Enter] - sets level of 50%.<br />
Use [0][5] for 5%<br />
[1] [thru] [5] [-] [4] [Full] [Enter] - excludes<br />
channel 4<br />
[1] [thru] [8] [At] [+] [3] [Enter] - adds three<br />
“points” (30) to existing intensities<br />
[5] [thru] [8] [At] [/] [3] [Enter] - scales three<br />
“points” (30) off intensities<br />
[2] [+] [5] [Enter] [level wheel]<br />
[1] [Level] - default level as established in<br />
Setup.<br />
[1] [thru] [4] [Out] - takes all channels to<br />
zero.<br />
[Sneak] [Enter] - restores all channels with<br />
manual values to their background or home<br />
state<br />
CHANNEL CHECK<br />
[1] [at] [7] [0] {Channel Check} [Enter] -<br />
brings channel 1 to 70% intensity.<br />
Press [Next] … [Next] … [Next] …<br />
RECORDING A CUE<br />
[Record] [n] [Enter]<br />
[Record] [Next] [Enter]<br />
[1] [thru] [5] [Record Only] [3] [Enter]<br />
[Record Only] selectively stores only manually set<br />
values, or values set by the keypad<br />
Changing a cue’s timing<br />
[Record] [n] [Time] [x] [Enter] -<br />
record cue n and sets up & down time. This<br />
sets all timing in the cue to x.<br />
[Record] [n] [Time] [x] [Time] [y]<br />
[Enter] - specifies split up/down times<br />
[Cue] [n] [Time] [y] [Enter] - sets timing for<br />
cue n to y.<br />
[Cue] [n] [Color] [Time] [y] [Enter] - sets<br />
color timing for cue n to y.<br />
Multiple instructions on one command line:<br />
[Record] [n] [Label] NAME [Enter]<br />
[Record] [1] [Time] [3][Time][4]<br />
[Label] joe enters [Enter].<br />
Deleting a cue<br />
[Delete] [n] [Enter].<br />
Press [Enter] again to confirm.<br />
Using Go To Cue<br />
[Go To Cue] [0] [Enter] - sets all intensity<br />
values to zero for the selected cue list<br />
[Go To Cue] [Out] [Enter] - resets all<br />
parameters to their default state and resets<br />
all cue lists active on faders to the top of<br />
their cue list.<br />
[Go To Cue] [5] [Enter]<br />
[Go To Cue] [Next] or [Last] [Enter]
<strong>Cheat</strong> <strong>Sheet</strong><br />
___________________________________________________________________________________<br />
SUBMASTERS<br />
Recording to a submaster<br />
[Record] [Sub] [5] [Enter] - records the<br />
current stage state to sub 5.<br />
[Record Only] [Sub] [5] [Enter] - records the<br />
manual intensities of the current stage state<br />
to sub 5.<br />
[Record Only] [Sub] [5] [Label] [blue]<br />
[Enter]<br />
Loading Submasters<br />
[Cue] [5] [Sub] [4] [Enter] - loads the intensity<br />
contents of cue 5 to Sub 5.<br />
[Cue] [1] [thru] [5] [Sub] [1] [thru] [Enter] -<br />
sequentially loads cues 1 thru 5 to subs 1<br />
thru 5.<br />
Clearing a submaster<br />
[Delete] [Sub] [5] [Enter] [Enter] - deletes the<br />
contents of sub 5<br />
GROUPS – no longer store intensity information<br />
[1] [thru] [8] [Record] [Group] [5] [Enter] -<br />
records selection to group 5<br />
[Record Only] [Group] [5] [Enter] - records<br />
the manual intensities of the current stage<br />
state to group 5.<br />
[Group] [5] [Enter] - selects group 5.<br />
PALETTES AND PRESETS<br />
Palettes & presets are referenced data. Four palette types:<br />
Intensity, Focus, Color, Beam A reference that includes a<br />
mix of categories is a Preset.<br />
[Record] [Focus Palette] [1] [Enter] - stores<br />
all focus values for any channels that have<br />
non-default focus parameters to FP 1.<br />
[Record Only] [Color Palette] [3] [Enter] -<br />
stores only manual color palette data to color<br />
palette 3.<br />
[Displays] [Color Picker] - opens the color<br />
picker. Set using the encoders or matching<br />
to gel references<br />
[Group 5] [Beam] [5] - sets the channels in<br />
group 5 to Beam Palette 5.<br />
SAVING A SHOW<br />
Press [Displays] or click in the Browser<br />
To save the show you are working on, File><br />
Save> and press [Select].<br />
To create a new show file, File> New> and<br />
press [Select].<br />
To save an existing show to a different location<br />
or with a different name, File> Save As> and<br />
press [Select].<br />
EFFECTS (CHASES)<br />
Using Preprogrammed Effects<br />
[1] [Thru] [10] [Effect] [915] [Enter] - This will<br />
have channels 1 – 10 ramp intensity up and<br />
down…<br />
Creating a step Effect<br />
[Effect] [Effect] opens the effects list<br />
[Effect] [1] [Enter] sets the effect number<br />
{Step-based} assigns the effect as a<br />
step effect<br />
{Step} [1] [Thru] [6] [Enter] defines the<br />
number of steps<br />
[Page►] or right arrow over to the Channel<br />
column<br />
[1] [thru] [1] [2] [Enter] specifies the<br />
channels<br />
Use page arrows to access “Step time”. Enter<br />
the desired step time: [1]<br />
Page arrow to the In Time column and enter a<br />
dwell time: [1]<br />
Page arrow to the Dwell Time column and<br />
enter a dwell time: [1]<br />
Page arrow to the Decay Time column. Enter a<br />
decay time: [.] [2] [5]<br />
Page arrow to the On State column and enter<br />
the percentage: [1] [0] [0]<br />
Page arrow to the Off State column and enter<br />
the percentage: [5]<br />
Adjust any of the details from the CIA by<br />
pressing the appropriate detail button in the<br />
properties display and making changes