You also want an ePaper? Increase the reach of your titles
YUMPU automatically turns print PDFs into web optimized ePapers that Google loves.
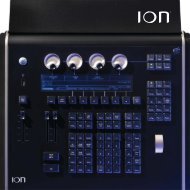
<strong>Cheat</strong> <strong>Sheet</strong> ~ Obsession<br />
___________________________________________________________________________________<br />
BASIC OPERATIONS<br />
Patching dimmers to channels<br />
In the Patch by Dimmer display:<br />
1. Press [n] to select dimmers.<br />
2. Press [At] or [Chan] [n] [Enter] to select<br />
channels and complete the command.<br />
In Patch by Channel display:<br />
1. Press [n] to select channels.<br />
2. Press [Dim] [n] [Enter] to select dimmers<br />
and finish.<br />
Unpatching dimmers<br />
In any Patch display:<br />
1. Press [S3], Unpatch.<br />
2. Press [n] to select dimmers and [Enter].<br />
Setting channels at levels<br />
Do any of these in the Live display:<br />
• Press [n] [At] [#] [Enter].<br />
• Press [n] [Full] [Enter].<br />
• Press [n] [Out]. Instead of [Out], you may<br />
use [Level], [+10] or [–10].<br />
• Press [n] and move the Level wheel.<br />
Recording a cue<br />
1. Set channels at levels.<br />
2. Press [Record] {Cue} [#] [Enter].<br />
Changing a cue’s attributes<br />
To record a cue in Live with split fade times:<br />
1. Set channels at levels.<br />
2. Press [Record] [Cue] [n].<br />
3. Press [Time] [#][/][#] [Enter]. Omit the first<br />
[#] to change only downfade. Omit the<br />
second [#] to change only upfade. Omit [/]<br />
and the second [#] to change both equally.<br />
You may enter multiple instructions on one<br />
command line: [Cue] [1] [Wait] [5] [Time]<br />
[3][/][4] [Label] joe enters [Enter].<br />
Deleting a cue<br />
In the Live or Blind display:<br />
1. Press [S6], Delete Cue, [n] [Enter].<br />
2. Press [Enter] again to confirm.<br />
Recording a submaster<br />
In the Live display:<br />
1. Set channels at levels.<br />
2. Press [Record] [Sub] [n] [Enter]. You may<br />
press the sub’s bump button instead of [n]<br />
[Enter].<br />
Unloading (clearing) a submaster<br />
In the Sub display:<br />
1. Press [Sub] [S6], Unload Sub, [n] [Enter]<br />
2. Press Enter again to confirm.<br />
SAVING AND MACROS<br />
Saving show to diskette<br />
In the Setup display:<br />
1. Press [3], Disk Functions, [1], Store<br />
show, [Enter] [Enter] to save to diskette.<br />
2. Press [4], Hard Drive Functions, [S2],<br />
Store show, [Enter] [Enter] to save to the<br />
hard drive.<br />
Learning a Macro (Saving show to diskette)<br />
In the Live or Blind display:<br />
1. Press [Learn] [7] [Enter].<br />
2. Press [3], Disk Functions, [1], Store<br />
show, [Enter] [Enter].<br />
3. Press [Store Macro]<br />
To play the macro, press [M7].
<strong>Cheat</strong> <strong>Sheet</strong> ~ Obsession<br />
___________________________________________________________________________________<br />
EFFECTS (CHASES)<br />
Creating a 5-step chase<br />
In the Effect display:<br />
1. Press [4] [Enter] to create effect 4.<br />
2. Press [1] [Thru] [5] [Enter].<br />
3. Press [1] [Thru] [1][0] [Enter] to assign 10<br />
channels to the 5 steps<br />
Testing an effect<br />
In Effect display:<br />
1. Press [S7], Edit Features, [S7], Test<br />
Effect, [Enter].<br />
2. Press [F8] to end the test.<br />
Assigning effect attributes<br />
1. Press [S5], Attributes.<br />
2. Select attributes by pressing softkeys.<br />
Notes: Effects are either Positive or Negative. They<br />
may also be set with Alternate, Reverse, Bounce,<br />
Build and Random attributes. Attribute keys are<br />
toggles—press to set or remove.<br />
Recording the effect into a cue<br />
In the the Live display (or in Blind):<br />
1. Press [Record] [Cue] [n].<br />
2. Press [Effect] [4] [XXXX] [Enter].<br />
Note: [XXXX] represents any of the five effect<br />
commands: Start, Pause, Resume, Fade or Stop.<br />
MOVING LIGHT FIXTURES<br />
Copying personalities to your show<br />
From the Setup display:<br />
1. Press [1][3], Moving Light Functions,<br />
[Enter] [1], Personality Setup, [Enter].<br />
2. Press [S1], Hard Drive, [Enter].<br />
3. Press [n] to select personalities.<br />
4. Press [S7], Copy To, [S3], Show, [Enter].<br />
Patching fixtures<br />
From the Setup display:<br />
1. Press [1][3], Moving Light Functions,<br />
[Enter] [1], Fixture Patch, [Enter].<br />
2. Press [n] to select fixtures.<br />
3. Press [S1], Personality, [n] [Enter] to<br />
specify a personality.<br />
4. Press [S2], Start Channel, [n] [Enter] to<br />
specify the start channel.<br />
5. Press [S3], DMX512 Start, [n][/][n] [Enter]<br />
to specify the DMX port and port address.<br />
Setting fixtures at levels<br />
In the ML Live display, set attribute levels:<br />
1. using the same techniques used to set<br />
channel levels.<br />
• Press [n] [At] [5][0].<br />
• Press [n] [S1], Attribute, [n] [Full].<br />
2. using the encoder, trackpad or<br />
touchscreen level-setting devices<br />
• Press [n] [S1], Attribute, [n] and use a<br />
level-setting device.<br />
3. after naming a category.<br />
• Press [n] [Category] [Set]. Replace<br />
[Category], with [Position], [Beam], [Image],<br />
[Color] or [None] and use level-setting<br />
devices.<br />
4. with reference to a group or a focus group.<br />
• Press [n] [S1], Attribute, [n] [At]<br />
[Group] [n].<br />
• Press [n] [S1], Attribute, [n] [At]<br />
[Focus Group], [n].<br />
5. at library levels<br />
• Press [n] [S1], Attribute, [n] [S2],<br />
Library, [n].<br />
Recording a group, focus group or library<br />
In Live or ML Live:<br />
1. Set channels and/or fixtures at levels.<br />
2. Press [Record] [Group] [n] [Enter].<br />
3. Press [Record] [Focus Group] [n] [Enter].<br />
4. Press [Record] [S2], Library, [n] [Enter].