
You also want an ePaper? Increase the reach of your titles
YUMPU automatically turns print PDFs into web optimized ePapers that Google loves.
<strong>jQuery</strong> <strong>Tutorial</strong> <strong>for</strong> <strong>Beginners</strong>: <strong>Nothing</strong> <strong>But</strong> <strong>the</strong> <strong>Goods</strong><br />
Not too long ago I wrote an article <strong>for</strong> Six Revisions called “Getting Started with <strong>jQuery</strong>” that covered some important<br />
things (concept-wise) that beginning <strong>jQuery</strong> developers should know. This article is <strong>the</strong> complete opposite; <strong>the</strong>re’s no<br />
concepts, no principles, and very little lecturing -- just some straight example code with brief descriptions<br />
demonstrating what you can do with <strong>jQuery</strong>.<br />
This fast-paced tutorial should be able to get beginners up and running with <strong>jQuery</strong> very quickly, while also providing a<br />
good overview of what <strong>jQuery</strong> is capable of (although <strong>jQuery</strong>’s capabilities go far beyond this beginning tutorial).<br />
Keep in mind that this tutorial is just a bunch of straight<strong>for</strong>ward, superficial code examples and very brief explanations<br />
<strong>for</strong> beginners who want to avoid all <strong>the</strong> jargon and complexities. <strong>But</strong> I still highly recommend that all beginners get<br />
past this stuff by means of a good book, some more in-depth tutorials online, or by using <strong>the</strong> <strong>jQuery</strong> documentation.<br />
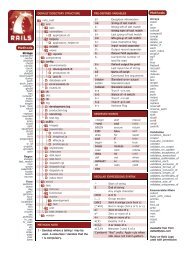
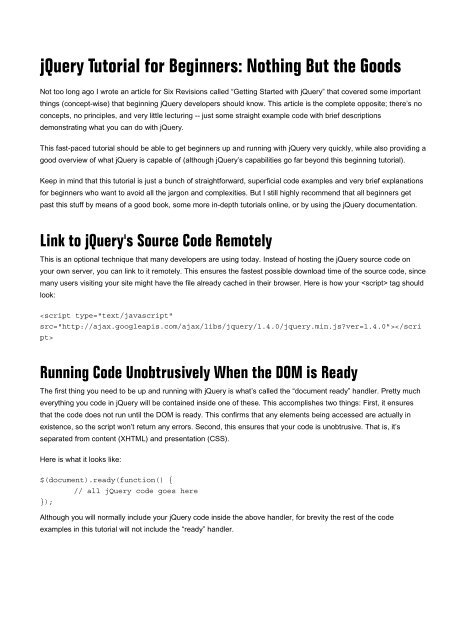
Link to <strong>jQuery</strong>'s Source Code Remotely<br />
This is an optional technique that many developers are using today. Instead of hosting <strong>the</strong> <strong>jQuery</strong> source code on<br />
your own server, you can link to it remotely. This ensures <strong>the</strong> fastest possible download time of <strong>the</strong> source code, since<br />
many users visiting your site might have <strong>the</strong> file already cached in <strong>the</strong>ir browser. Here is how your tag should<br />
look:<br />
<br />
Running Code Unobtrusively When <strong>the</strong> DOM is Ready<br />
The first thing you need to be up and running with <strong>jQuery</strong> is what’s called <strong>the</strong> “document ready” handler. Pretty much<br />
everything you code in <strong>jQuery</strong> will be contained inside one of <strong>the</strong>se. This accomplishes two things: First, it ensures<br />
that <strong>the</strong> code does not run until <strong>the</strong> DOM is ready. This confirms that any elements being accessed are actually in<br />
existence, so <strong>the</strong> script won’t return any errors. Second, this ensures that your code is unobtrusive. That is, it’s<br />
separated from content (XHTML) and presentation (CSS).<br />
Here is what it looks like:<br />
$(document).ready(function() {<br />
// all <strong>jQuery</strong> code goes here<br />
});<br />
Although you will normally include your <strong>jQuery</strong> code inside <strong>the</strong> above handler, <strong>for</strong> brevity <strong>the</strong> rest of <strong>the</strong> code<br />
examples in this tutorial will not include <strong>the</strong> “ready” handler.
Selecting Elements in <strong>jQuery</strong><br />
The <strong>jQuery</strong> library allows you to select elements in your XHTML by wrapping <strong>the</strong>m in $("") (you could also use single<br />
quotes), which is <strong>the</strong> <strong>jQuery</strong> wrapper. Here are some examples of “wrapped sets” in <strong>jQuery</strong>:<br />
$("div"); // selects all HTML div elements<br />
$("#myElement"); // selects one HTML element with ID "myElement"<br />
$(".myClass"); // selects HTML elements with class "myClass"<br />
$("p#myElement"); // selects HTML paragraph element with ID "myElement"<br />
$("ul li a.navigation");<br />
// selects anchors with class "navigation" that are nested in list items<br />
<strong>jQuery</strong> supports <strong>the</strong> use of all CSS selectors, even those in CSS3. Here are some examples of alternate selectors:<br />
$("p > a"); // selects anchors that are direct children of paragraphs<br />
$("input[type=text]"); // selects inputs that have specified type<br />
$("a:first"); // selects <strong>the</strong> first anchor on <strong>the</strong> page<br />
$("p:odd"); // selects all odd numbered paragraphs<br />
$("li:first-child"); // selects each list item that's <strong>the</strong> first child in its list<br />
<strong>jQuery</strong> also allows <strong>the</strong> use of its own custom selectors. Here are some examples:<br />
$(":animated"); // selects elements currently being animated<br />
$(":button"); // selects any button elements (inputs or buttons)<br />
$(":radio"); // selects radio buttons<br />
$(":checkbox"); // selects checkboxes<br />
$(":checked"); // selects checkboxes or radio buttons that are selected<br />
$(":header"); // selects header elements (h1, h2, h3, etc.)<br />
Manipulating and Accessing CSS Class Names<br />
<strong>jQuery</strong> allows you to easily add, remove, and toggle CSS classes, which comes in handy <strong>for</strong> a variety of practical<br />
uses. Here are <strong>the</strong> different syntaxes <strong>for</strong> accomplishing this:<br />
$("div").addClass("content"); // adds class "content" to all elements<br />
$("div").removeClass("content"); // removes class "content" from all elements<br />
$("div").toggleClass("content");<br />
// toggles <strong>the</strong> class "content" on all elements (adds it if it doesn't exist, //<br />
and removes it if it does)<br />
You can also check to see if a selected element has a particular CSS class, and <strong>the</strong>n run some code if it does. You<br />
would check this using an if statement. Here is an example:<br />
if ($("#myElement").hasClass("content")) {<br />
// do something here<br />
}<br />
You could also check a set of elements (instead of just one), and <strong>the</strong> result would return "true" if any one of <strong>the</strong><br />
elements contained <strong>the</strong> class.
Manipulating CSS Styles with <strong>jQuery</strong><br />
CSS styles can be added to elements easily using <strong>jQuery</strong>, and it's done in a cross-browser fashion. Here are some<br />
examples to demonstrate this:<br />
$("p").css("width", "400px"); // adds a width to all paragraphs<br />
$("#myElement").css("color", "blue") // makes text color blue on element #myElement<br />
$("ul").css("border", "solid 1px #ccc") // adds a border to all lists<br />
Adding, Removing, and Appending Elements and Content<br />
There are a number of ways to manipulate groups of elements with <strong>jQuery</strong>, including manipulating <strong>the</strong> content of<br />
those elements (whe<strong>the</strong>r text, inline elements, etc).<br />
Get <strong>the</strong> HTML of any element (similar to innerHTML in JavaScript):<br />
var myElementHTML = $("#myElement").html();<br />
// variable contains all HTML (including text) inside #myElement<br />
If you don't want to access <strong>the</strong> HTML, but only want <strong>the</strong> text of an element:<br />
var myElementHTML = $("#myElement").text();<br />
// variable contains all text (excluding HTML) inside #myElement<br />
Using similar syntax to <strong>the</strong> above two examples, you can change <strong>the</strong> HTML or text content of a specified element:<br />
$("#myElement").html("This is <strong>the</strong> new content.");<br />
// content inside #myElement will be replaced with that specified<br />
$("#myElement").text("This is <strong>the</strong> new content.");<br />
// text content will be replaced with that specified<br />
To append content to an element:<br />
$("#myElement").append("This is <strong>the</strong> new content.");<br />
// keeps content intact, and adds <strong>the</strong> new content to <strong>the</strong> end<br />
$("p").append("This is <strong>the</strong> new content.");<br />
// add <strong>the</strong> same content to all paragraphs<br />
<strong>jQuery</strong> also offers use of <strong>the</strong> commands appendTo(), prepend(), prependTo(), be<strong>for</strong>e(), insertBe<strong>for</strong>e(), after(), and<br />
insertAfter(), which work similarly to append() but with <strong>the</strong>ir own unique characteristics that go beyond <strong>the</strong> scope of<br />
this simple tutorial.<br />
Dealing with Events in <strong>jQuery</strong><br />
Specific event handlers can be established using <strong>the</strong> following code:<br />
$("a").click(function() {<br />
// do something here<br />
// when any anchor is clicked<br />
});<br />
The code inside function() will only run when an anchor is clicked. Some o<strong>the</strong>r common events you might use in<br />
<strong>jQuery</strong> include:<br />
blur, focus, hover, keydown, load, mousemove, resize, scroll, submit, select.
Showing and Hiding Elements with <strong>jQuery</strong><br />
The syntax <strong>for</strong> showing, hiding an element (or toggling show/hide) is:<br />
$("#myElement").hide("slow", function() {<br />
}<br />
// do something once <strong>the</strong> element is hidden<br />
$("#myElement").show("fast", function() {<br />
}<br />
// do something once <strong>the</strong> element is shown<br />
$("#myElement").toggle(1000, function() {<br />
// do something once <strong>the</strong> element is shown/hidden<br />
}<br />
Remember that <strong>the</strong> "toggle" command will change whatever state <strong>the</strong> element currently has, and <strong>the</strong> parameters are<br />
both optional. The first parameter indicates <strong>the</strong> speed of <strong>the</strong> showing/hiding. If no speed is set, it will occur instantly,<br />
with no animation. A number <strong>for</strong> "speed" represents <strong>the</strong> speed in milliseconds. The second parameter is an optional<br />
function that will run when <strong>the</strong> command is finished executing.<br />
You can also specifically choose to fade an element in or out, which is always done by animation:<br />
$("#myElement").fadeOut("slow", function() {<br />
}<br />
// do something when fade out finished<br />
$("#myElement").fadeIn("fast", function() {<br />
// do something when fade in finished<br />
}<br />
To fade an element only partially, ei<strong>the</strong>r in or out:<br />
$("#myElement").fadeTo(2000, 0.4, function() {<br />
// do something when fade is finished<br />
}<br />
The second parameter (0.4) represents "opacity", and is similar to <strong>the</strong> way opacity is set in CSS. Whatever <strong>the</strong> opacity<br />
is to start with, it will animate (fadeTo) until it reaches <strong>the</strong> setting specified, at <strong>the</strong> speed set (2000 milliseconds). The<br />
optional function (called a "callback function") will run when <strong>the</strong> opacity change is complete. This is <strong>the</strong> way virtually<br />
all callback functions in <strong>jQuery</strong> work.
<strong>jQuery</strong> Animations and Effects<br />
You can slide elements, animate elements, and even stop animations in mid-sequence. To slide elements up or<br />
down:<br />
$("#myElement").slideDown("fast", function() {<br />
}<br />
// do something when slide down is finished<br />
$("#myElement").slideUp("slow", function() {<br />
}<br />
// do something when slide up is finished<br />
$("#myElement").slideToggle(1000, function() {<br />
// do something when slide up/down is finished<br />
}<br />
To animate an element, you do so by telling <strong>jQuery</strong> <strong>the</strong> CSS styles that <strong>the</strong> item should change to. <strong>jQuery</strong> will set <strong>the</strong><br />
new styles, but instead of setting <strong>the</strong>m instantly (as CSS or raw JavaScript would do), it does so gradually, animating<br />
<strong>the</strong> effect at <strong>the</strong> chosen speed:<br />
$("#myElement").animate(<br />
{<br />
opacity: .3,<br />
width: "500px",<br />
height: "700px"<br />
}, 2000, function() {<br />
// optional callback after animation completes<br />
}<br />
);<br />
Animation with <strong>jQuery</strong> is very powerful, and it does have its quirks (<strong>for</strong> example, to animate colors, you need a special<br />
plugin). It's worth taking <strong>the</strong> time to learn to use <strong>the</strong> animate command in-depth, but it is quite easy to use even <strong>for</strong><br />
beginners.<br />
This is Just <strong>the</strong> Beginning<br />
There is so much more you can do with <strong>jQuery</strong> beyond <strong>the</strong>se basics I've introduced here. I highly recommend that all<br />
developers buy a good book on <strong>jQuery</strong>, and also take <strong>the</strong> time to learn some important JavaScript concepts (like<br />
anonymous functions, closures, scope, etc.) in order to be able to use <strong>jQuery</strong> in a more powerful way.<br />
And please note that I've introduced a lot of commands and syntaxes in a very superficial manner, without explaining<br />
many of <strong>the</strong> problems you could have with some of <strong>the</strong>se, so if you do run into problems, you can check out<br />
<strong>the</strong> <strong>jQuery</strong> documentation.