Excel Quick Reference Card
Excel Quick Reference Card
Excel Quick Reference Card

Create successful ePaper yourself
Turn your PDF publications into a flip-book with our unique Google optimized e-Paper software.
PowerSchool<br />
Mac OS X<br />
Safari<br />
Currently, the ability to automatically export<br />
information from PowerSchool into <strong>Excel</strong> is<br />
unavailable in Safari; however, you can use<br />
the following procedure to quickly transfer<br />
information from the browser to an <strong>Excel</strong><br />
spreadsheet each time you export<br />
information.<br />
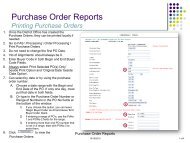
1. Export information from PowerSchool<br />
using <strong>Quick</strong> Export, Export Using<br />
Template, Direct Database Export, or Direct<br />
Database Access.<br />
2. The information appears in your web<br />
browser.<br />
3. Choose File > Save As. Save the<br />
information on your desktop.<br />
4. Control-click the exported file on your<br />
desktop and choose Open With > Other.<br />
5. On the Choose Application dialog, choose<br />
All Applications from the Enable pop-up<br />
menu and select Microsoft <strong>Excel</strong>.<br />
6. Click Open.<br />
Firefox<br />
1. Use <strong>Quick</strong> Export to export data from<br />
PowerSchool.<br />
2. On the “Opening student.export.text” dialog,<br />
select “Open with” and click Choose.<br />
3. Select Microsoft <strong>Excel</strong> on the Choose Helper<br />
Application dialog and click Open.<br />
4. Select the “Do this automatically for files like<br />
this from now on” checkbox.<br />
5. Click OK.<br />
Netscape<br />
1. Choose Preferences from the Netscape menu.<br />
2. Click Helper Applications in the Navigator<br />
section.<br />
3. Click New Type.<br />
4. Enter text/ps-export in the MIME type and<br />
Extension fields.<br />
5. Enter PowerSchool Export in the Description<br />
field.<br />
6. Click Choose.<br />
7. Choose Microsoft <strong>Excel</strong>.<br />
8. Click OK.<br />
9. Click OK on the Preferences dialog.<br />
10. Use <strong>Quick</strong> Export to export data from<br />
PowerSchool.<br />
11. On the “Opening student.export.text” dialog,<br />
select “Open with the default application<br />
(Microsoft <strong>Excel</strong>).”<br />
12. Click OK.<br />
Using PowerSchool and <strong>Excel</strong><br />
<strong>Quick</strong> <strong>Reference</strong> <strong>Card</strong><br />
Internet Explorer<br />
1. Choose Preferences from the Explorer menu.<br />
2. Click File Helpers.<br />
3. Click Add.<br />
4. Enter PowerSchool Export in the Description<br />
field.<br />
5. Enter text/ps-export in the Extension and<br />
MIME type fields.<br />
6. Click Browse in the File Type Section.<br />
7. Choose Microsoft <strong>Excel</strong>.<br />
8. Enter TEXT in the “File type” field.<br />
9. Choose View with Application from the How<br />
to Handle pop-up menu.<br />
10. Click OK.<br />
11. Click OK on the Internet Explorer Preferences<br />
window.<br />
12. Use <strong>Quick</strong> Export to export data from<br />
PowerSchool.<br />
13. Locate the file you exported on your desktop.<br />
14. Select the file and choose Show Info from the<br />
File menu (Command-I).<br />
15. Choose Open with Application from the popup<br />
menu.<br />
16. Click the application icon and choose<br />
Microsoft <strong>Excel</strong>.<br />
17. Click Change All.<br />
18. Click Continue.<br />
Copyright © 2007 Pearson Education, Inc., or its affiliates.<br />
All rights reserved.
PowerSchool<br />
Using PowerSchool and <strong>Excel</strong><br />
<strong>Quick</strong> <strong>Reference</strong> <strong>Card</strong><br />
Windows<br />
Internet Explorer<br />
1. Use <strong>Quick</strong> Export to export data from<br />
PowerSchool.<br />
2. Save the export file to your desktop.<br />
3. Locate the export file on your desktop.<br />
4. Right-click on the file’s icon.<br />
5. Choose Open With from the pop-up<br />
menu.<br />
6. Click Choose Program.<br />
7. Choose <strong>Excel</strong>.<br />
8. Click the “Always use the selected<br />
program to open this kind of file”<br />
checkbox.<br />
9. Click OK.<br />
Firefox<br />
1. Use <strong>Quick</strong> Export to export data from<br />
PowerSchool.<br />
2. On the “Opening student.export.text” dialog,<br />
select “Open with” and click Choose.<br />
3. Select Microsoft <strong>Excel</strong> on the Choose Helper<br />
Application dialog and click Open.<br />
4. Select the “Do this automatically for files like<br />
this from now on” checkbox.<br />
5. Click OK.<br />
Netscape<br />
1. Choose Preferences from the Edit menu.<br />
2. Click Helper Applications in the Navigator<br />
section.<br />
3. Click New Type.<br />
4. Enter PowerSchool Export in the<br />
Description of type field.<br />
5. Enter xls in the File extension field.<br />
6. Enter text/ps-export in the MIME type<br />
field.<br />
7. Click OK.<br />
8. Click OK on the Preferences window.<br />
Copyright © 2007 Pearson Education, Inc., or its affiliates.<br />
All rights reserved.