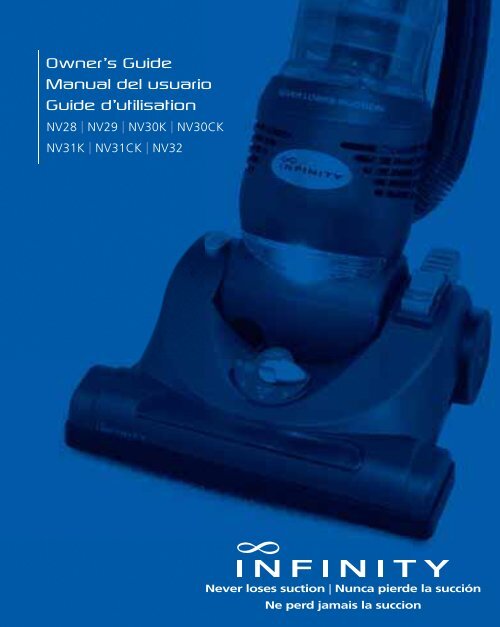
Owner's Guide Manual del usuario Guide d'utilisation - Shark
Owner's Guide Manual del usuario Guide d'utilisation - Shark
Owner's Guide Manual del usuario Guide d'utilisation - Shark

Create successful ePaper yourself
Turn your PDF publications into a flip-book with our unique Google optimized e-Paper software.
Owner’s <strong>Guide</strong><br />
<strong>Manual</strong> <strong>del</strong> <strong>usuario</strong><br />
<strong>Guide</strong> d’utilisation<br />
NV28 | NV29 | NV30K | NV30CK<br />
NV31K | NV31CK | NV32
Thank you for<br />
purchasing the<br />
Infinity Upright<br />
Vacuum.<br />
Contents<br />
English<br />
Important Safety Instructions 2<br />
Getting Started 4<br />
Using the Vacuum 6<br />
Transporting the Vacuum 7<br />
Cleaning with the Vacuum Accessories 8<br />
Emptying the Dust Cup Assembly 10<br />
Proper Care of Your Infinity Upright Vacuum 11<br />
Troubleshooting 12<br />
Checking for Blockages 13<br />
Maintenance 14<br />
Warranty and Registration 16<br />
TOLL FREE: 1-888-668-9600<br />
www.infinityvac.com 1
IMPORTANT SAFETY INSTRUCTIONS<br />
SAVE THESE INSTRUCTIONS For Household Use Only<br />
When using an electrical appliance, basic<br />
safety precautions should always be<br />
observed, including the following:<br />
READ ALL INSTRUCTIONS BEFORE<br />
USING YOUR INFINITY UPRIGHT<br />
VACUUM.<br />
WARNING:<br />
To reduce the risk of electric shock,<br />
the two-pronged power cord plug<br />
is polarized [one prong is larger<br />
than the other]; it will fit into the<br />
outlet only one way. DO NOT<br />
force into outlet or try to modify<br />
to fit.<br />
WARNING: TO REDUCE THE RISK OF ELECTRIC SHOCK OR INJURY.<br />
DO NOT USE OUTDOORS OR ON WET SURFACES:<br />
General Electrical Safety:<br />
Unplug from electrical outlet when not in use and before servicing.<br />
DO NOT use vacuum with a damaged cord or plug.<br />
DO NOT pull or carry vacuum by the cord.<br />
DO NOT unplug by pulling on cord; to unplug, grasp the plug, not the cord.<br />
DO NOT handle plug or vacuum cleaner with wet hands.<br />
DO NOT run the vacuum over the power cord.<br />
DO NOT use the cord as a handle.<br />
DO NOT close a door on the cord.<br />
DO NOT pull cord around sharp corners.<br />
DO NOT leave appliance when plugged in.<br />
Keep cord away from heated surfaces.<br />
Turn off all controls before plugging or unplugging vacuum cleaner.<br />
Hose Attachments:<br />
DO NOT use if air flow is restricted; if the air paths, the hose, or the extension<br />
tube become blocked, turn the vacuum cleaner off. Remove all obstructions<br />
before you turn on the unit again.<br />
Keep the end of the hose, wands and other openings away from face and body.<br />
Keep rotating brush and suction openings away from hair, face, fingers,<br />
uncovered feet or loose clothing.<br />
Only use manufacturer’s recommended attachments.<br />
General Use:<br />
Use only as described in this manual.<br />
DO NOT put any objects into openings.<br />
Keep your work area well lit.<br />
Keep the vacuum moving over the carpet surface at all times to avoid damaging<br />
the carpet fibers.<br />
DO NOT place vacuum on unstable surfaces such as chairs or tables.<br />
DO NOT allow young children to operate the vacuum or use as a toy.<br />
DO NOT use vacuum cleaner if it has been dropped, damaged, left outdoors, or<br />
submerged in water. Return to EURO-PRO Operating LLC for examination, repair,<br />
or adjustment.<br />
2 TOLL FREE: 1-888-668-9600
English<br />
Cyclonic Chamber/Dust Cup/Filters:<br />
Before turning on the vacuum:<br />
• Make sure that dust cup, cyclonic chamber and all filters are in place after<br />
routine maintenance.<br />
• Make sure that all components and filters are thoroughly dry after routine<br />
cleaning.<br />
• Only use filters and accessories provided by EURO-PRO Operating LLC<br />
[Failure to do so will void the warranty.]<br />
General Cleaning:<br />
DO NOT run the vacuum over large-sized objects.<br />
DO NOT pick up hard or sharp objects such as glass, nails, screws or coins that<br />
could damage the vacuum cleaner.<br />
DO NOT pick up smoking or burning objects such as hot coals, cigarette butts, or<br />
matches.<br />
DO NOT pick up flammable or combustible materials such as lighter fluid,<br />
gasoline, kerosene or use in areas where they may be present.<br />
DO NOT pick up toxic solutions such as chlorine bleach, ammonia, or drain<br />
cleaner.<br />
DO NOT use in an enclosed space where vapors are present from paint, paint<br />
thinner, moth-proofing substances, flammable dust or other explosive or toxic<br />
materials.<br />
DO NOT vacuum up any liquids.<br />
DO NOT immerse vacuum cleaner in water or other liquids.<br />
DO NOT use outdoors or on wet surfaces; use only on dry surfaces.<br />
Use extra care when cleaning on stairs.<br />
www.infinityvac.com<br />
3
Getting Started<br />
1<br />
a<br />
b<br />
2<br />
5<br />
c<br />
d<br />
4<br />
e<br />
f<br />
g<br />
3<br />
*h *i<br />
Along with your upright unit, you will<br />
find the following components:<br />
a Detachable Handle (Ergonomic Grip)<br />
b Telescopic Wand<br />
c Cleaning Attachments<br />
d Upper Hose Holder<br />
e Extra Filters<br />
f Super Stretch Hose<br />
g Spare Motor Belt<br />
*Note: depending on the mo<strong>del</strong> you<br />
select, your Infinity comes with a Pet Hair<br />
Power Brush (h) and Low Reach Bare Floor<br />
Brush (i) that are kept in a separate<br />
accessory bag.<br />
Your Infinity Upright is a snap to<br />
assemble:<br />
1 Lock into upright position.<br />
2 Attach the Upper Hose Holder: use a<br />
Phillips Head screwdriver to remove<br />
the screw attached to the vacuum<br />
body.<br />
3 Place the Upper Hose Holder into the<br />
slot; screw the holder onto the<br />
vacuum body.<br />
4 Slide the Telescopic Wand into the<br />
upright unit to click in place.<br />
5 Slide the Detachable Handle onto<br />
the Telescopic Wand.<br />
4 TOLL FREE: 1-888-668-9600
English<br />
6<br />
7 8<br />
6 Attach each end of the Super Stretch<br />
Hose to the vacuum and press into<br />
Upper Hose Holder for easy storage.<br />
IMPORTANT:<br />
To prevent vacuum<br />
from tipping, secure<br />
hose in lower holder.<br />
7 Store Crevice Tool and Upholstery/<br />
Dusting Brush on the unit.<br />
8 When storing your vacuum, wind<br />
cord around the two cord holders<br />
and secure with cord clip:<br />
• Quick Cord release at the top of<br />
the unit – place in the upright<br />
position.<br />
• Second holder [fixed] near the<br />
base.<br />
To release the cord, turn the Quick<br />
Cord release to the left or right.<br />
www.infinityvac.com<br />
5
Using the Vacuum<br />
Your Infinity Upright Vacuum is a<br />
versatile tool that can be used to clean<br />
bare floor surfaces or carpets – with the<br />
click of a button.<br />
Lock vacuum into the upright position.<br />
Plug in the vacuum.<br />
Bare Floors<br />
Bare Floors<br />
(and Tools)<br />
1<br />
Carpets<br />
Carpets<br />
5<br />
1<br />
4<br />
3<br />
2<br />
1<br />
2<br />
3<br />
1 Set the Height Adjustment Dial.<br />
When cleaning bare floors:<br />
Set Height Adjustment Dial at 1<br />
When cleaning carpets:<br />
Adjust the Height Adjustment Dial<br />
from 1 to 5 , depending on your<br />
carpet style (low pile/scatter rugs,<br />
plush carpets, deep pile carpets).<br />
• Select lowest setting for maximum<br />
cleaning.<br />
• Select higher settings for easier<br />
pushing on thicker carpets.<br />
2 Set the Brush Roll Pedal for bare<br />
floors/tools or carpets.<br />
When cleaning bare floors:<br />
Depress bare floors/tools side of<br />
pedal [forward] to lock the brush roll.<br />
When cleaning carpets:<br />
Depress carpets side of pedal [back]<br />
to engage the brush roll.<br />
3 Step on Handle Release Pedal to<br />
release unit from locked position.<br />
6 TOLL FREE: 1-888-668-9600
Transporting the Vacuum<br />
English<br />
Lock vacuum into the upright position.<br />
Unplug the vacuum.<br />
Wind cord around the two cord holders.<br />
Secure Super Stretch Hose in both<br />
hose holders.<br />
2<br />
1<br />
4<br />
4 Step on Power Button to turn unit on<br />
and off.<br />
Push to vacuum.<br />
Note: If vacuum is difficult to push,<br />
adjust the Height Adjustment Dial<br />
until vacuum glides easily over the<br />
carpet surface.<br />
1 To roll the vacuum:<br />
Hold the Detachable Handle<br />
(Ergonomic Grip) and tilt unit back<br />
on wheels.<br />
2 To carry the vacuum:<br />
Make sure unit is locked into the<br />
upright position.<br />
Lift by the Dust Cup Assembly<br />
Handle (carry handle).<br />
CAUTION:<br />
DO NOT use the Detachable Handle<br />
(Ergonomic Grip) to carry unit.<br />
CAUTION:<br />
When lifting or carrying, DO NOT<br />
press Dust Cup Assembly release<br />
button.<br />
www.infinityvac.com<br />
7
Cleaning with the Vacuum Accessories<br />
Before cleaning with your accessories:<br />
Lock vacuum into upright position.<br />
Secure Super Stretch Hose in the lower<br />
hose holder to prevent tipping.<br />
Change the<br />
Brush Roll Pedal<br />
to the bare floors/<br />
tools position.<br />
DO NOT pull vacuum cleaner<br />
around by the hose.<br />
DO NOT overextend the hose<br />
beyond its reach.<br />
Vacuum Accessories<br />
Your vacuum comes a Detachable<br />
Handle and Telescopic Wand. Use<br />
one or the other to attach your<br />
cleaning accessories.<br />
Super Stretch Hose –<br />
extends so that you can<br />
reach the length of a<br />
typical staircase.<br />
a<br />
*<br />
Crevice Tool – this tool is used for<br />
cleaning between cushions, under<br />
radiators and baseboards, or hardto-reach<br />
crevices and corners.<br />
Upholstery/Dusting Brush – this tool can be used with or without<br />
the Dusting Brush attachment.<br />
Attach or remove the Dusting Brush with one snap. With the Dusting<br />
Brush in place, you can dust a variety of surfaces from furniture and<br />
window blinds to lamp shades and book shelves; without the Dusting<br />
Brush attachment, use the tool to remove dust and/or pet hairs from<br />
upholstery surfaces and carpeted stairs.<br />
Using the Detachable Handle:<br />
Lock vacuum into upright position.<br />
Press the Detachable Handle release<br />
button (a) to release handle.<br />
The Detachable Handle and Super<br />
Stretch Hose are now separate from the<br />
Telescopic Wand.<br />
Push the selected cleaning tool into the<br />
handle.<br />
8 TOLL FREE: 1-888-668-9600
English<br />
c<br />
b<br />
*<br />
*<br />
Using the Telescopic Wand:<br />
Lock vacuum into upright position.<br />
Press the Telescopic Wand release<br />
button (b).<br />
Hold Telescopic Wand and pull out of<br />
unit.<br />
Push the selected cleaning tool onto the<br />
end of the wand.<br />
Press the Telescopic Height Adjustment<br />
Button (c) to adjust wand to desired<br />
length.<br />
*Note: depending on the mo<strong>del</strong> you select, your Infinity comes with a Pet Hair Power<br />
Brush and Low Reach Bare Floor Brush that are kept in a separate accessory bag.<br />
Pet Hair Power Brush – this unique tool has dual felt strips<br />
along the cleaning surface that are designed for heavy-duty pet<br />
hair removal.<br />
Low Reach Bare Floor Brush – only use this tool with the<br />
Telescopic Wand. The Bare Floor Brush is used when you need<br />
to clean floor surfaces such as hardwood, hardwood laminates,<br />
and tile. The soft natural bristles provide an easy-glide action<br />
to protect all bare floor surfaces.<br />
Note: you should only use the Low Reach Bare Floor Brush with the Telescopic Wand.<br />
To order additional parts and accessories, go to www.infinityvac.com or call<br />
1-888-668-9600. Note: some parts may be available at your local Infinity retailer.<br />
www.infinityvac.com<br />
9
Emptying the Dust Cup Assembly<br />
For best results empty the Dust Cup<br />
Assembly after each use; empty several<br />
times during prolonged usage.<br />
Or empty the Dust Cup Assembly when<br />
it reaches the MAX fill line; NEVER<br />
OVER-FILL THE DUST CUP.<br />
Lock vacuum into upright position.<br />
Turn vacuum off.<br />
CAUTION:<br />
Unplug the vacuum;<br />
failure to do so<br />
Might result in<br />
electric shock.<br />
3<br />
1<br />
2<br />
4<br />
To empty the Dust Cup Assembly:<br />
1 Grip carry handle and press the Dust<br />
Cup release button to remove Dust<br />
Cup Assembly.<br />
2 Insert Dust Cup Assembly deep<br />
inside trash receptacle to contain<br />
dust and debris.<br />
Press the Dust Cup Door release<br />
button; tap container gently to<br />
dislodge and release dust and<br />
debris.<br />
3 Snap door in place.<br />
4 Position Dust Cup Assembly at a<br />
forward angle over unit and then<br />
snap into place.<br />
10 TOLL FREE: 1-888-668-9600
Proper Care of Your Infinity Upright Vacuum<br />
English<br />
For proper care, consult the table to the<br />
right for the maintenance schedule of<br />
your Cyclonic Chamber and Filters.<br />
Lock vacuum into upright position.<br />
Turn vacuum off.<br />
CAUTION:<br />
Unplug the vacuum;<br />
failure to do so<br />
might result in<br />
electric shock.<br />
Remove Dust Cup Assembly.<br />
1<br />
Component<br />
Maintenance Schedule<br />
Date Purchased:<br />
1 Cyclonic Chamber Empty every 3 to 5 months, under normal use<br />
2 Foam and Felt Filters (2) Wash every 3 to 5 months, under normal use<br />
3 HEPA Filter Tap clean every 3 years for optimum performance<br />
1 Cleaning the Cyclonic Chamber:<br />
Twist Cyclonic Chamber to the left (counter clockwise) to unlock and separate from<br />
Dust Cup (a).<br />
Press Cyclonic Chamber Release Button to open the bottom door (b).<br />
Gently tap open Cyclonic Chamber over trash receptacle to release dust and then<br />
close chamber door.<br />
Position Cyclonic Chamber onto Dust Cup; line up the solid arrows on the back (c).<br />
Twist Cyclonic Chamber to the right (clockwise) until the top solid arrow lines up with<br />
the bottom open arrow (d) to lock.<br />
a<br />
b<br />
c<br />
d<br />
2<br />
3<br />
2 Washing the Foam and Felt Filters:<br />
Remove the Foam and the Felt Filters from the Filter Holder.<br />
Rinse in lukewarm water until water runs clear.<br />
Squeeze filters and let air dry for 24 hours before replacing; do not use hairdryer or<br />
other heating methods to dry. Insert replacement filters while others are drying.<br />
DO NOT operate the vacuum without ALL the filters in place.<br />
DO NOT operate vacuum with WET filters.<br />
3 Cleaning the HEPA Filter:<br />
Lift up the Foam/Felt Filter Holder to access the HEPA Filter.<br />
Lift out the HEPA Filter Unit.<br />
Tap vigorously against a firm surface to dislodge residual dust particles.<br />
NOTE: Your white Foam, Felt,and HEPA Filters will discolor over time; this is normal<br />
and will not affect the performance of the filters.<br />
www.infinityvac.com<br />
11
Troubleshooting<br />
WARNING: to reduce the risk of electric shock,<br />
the power cord must be disconnected before<br />
performing maintenance/troubleshooting checks.<br />
Problem<br />
Suggested Action<br />
Vacuum will not run.<br />
Check to see if plugged in properly.<br />
Check circuit breaker/fuse.<br />
Check On/Off switch.<br />
If vacuum still does not run, see Resetting the Motor<br />
Thermostat on page 14.<br />
Vacuum is not picking up dirt.<br />
Check the Dust Cup.<br />
Check the Filters.<br />
Check Height Adjustment Dial setting; see Using the<br />
Vacuum on page 6.<br />
If the Dust Cup doesn’t need cleaning, check for blockages; see<br />
Checking for Blockages on next page.<br />
Vacuum pushes scatter rugs (lightweight, movable rugs) on<br />
carpets setting.<br />
Vacuum too hard to push on carpets setting.<br />
Vacuum turns off on its own.<br />
Headlight is off.<br />
Brush roll does not engage when pedal is in carpets position.<br />
Move carpet-to-floor pedal to bare floors/tools to disengage<br />
the Brush Roll.<br />
Raise Height Adjustment Dial setting until vacuum glides easily<br />
over carpet; see Using the Vacuum on page 6.<br />
Motor Thermostat needs to be reset; see Resetting the Motor<br />
Thermostat on page 14.<br />
Change bulb; see Changing the Headlight Bulb on page 14.<br />
Check to see if belt is broken or improperly installed.<br />
Change belt, if broken; see Replacing the Power Nozzle<br />
Drive Belt on page 14.<br />
Airflow is restricted.<br />
Check for blockages; see Checking for Blockages on<br />
next page.<br />
Check attachments for suction strength; clear blockages,<br />
as required.<br />
12 TOLL FREE: 1-888-668-9600
Checking for Blockages<br />
English<br />
Blockages may cause your vacuum to<br />
overheat and shut down. If so, clear the<br />
blockages, then follow the instructions<br />
for Resetting the Motor Thermostat<br />
on page 14.<br />
WARNING: Never insert sharp<br />
objects into any opening to clear an<br />
obstruction.<br />
IMPORTANT: Damages caused<br />
while clearing or attempting to clear<br />
blockages are not covered under<br />
your product’s limited warranty.<br />
Unplug the<br />
vacuum before<br />
checking for<br />
blockages.<br />
Reassemble all parts securely before<br />
operating vacuum.<br />
2<br />
1<br />
1 Detachable Handle:<br />
Lock vacuum into upright position.<br />
Remove Detachable Handle and Telescopic Wand;<br />
disconnect the hose.<br />
Check both openings on the Detachable Handle, hose,<br />
and wand for clogs.<br />
2 Dust Cup Air Duct:<br />
Lock into upright position.<br />
Remove Dust Cup Assembly and empty Dust Cup,<br />
if necessary.<br />
Disconnect the Super Stretch Hose.<br />
Check Air Duct behind Dust Cup for clogs; clear before<br />
replacing Dust Cup Assembly.<br />
3 Intake Opening behind the Brush Roll:<br />
Lock vacuum and lay flat.<br />
Check opening behind the Brush Roll for clogs.<br />
Clear the opening.<br />
Clear the Brush Roll; use scissors to carefully cut<br />
away threads, hair or other debris that might be<br />
trapped in the bristles.<br />
4 Nozzle Hose Connector:<br />
Remove Dust Cup Assembly.<br />
Lock vacuum, lay flat and turn over.<br />
Use a Phillips Head screwdriver to:<br />
a Remove 2 screws from the access port cover and remove.<br />
b Remove 2 screws to release the Nozzle Hose.<br />
1<br />
2<br />
3<br />
3 4<br />
a<br />
Check Nozzle Hose for clogs.<br />
b<br />
www.infinityvac.com<br />
13
Maintenance<br />
Changing the Headlight Bulb<br />
You will need to order replacement<br />
bulbs from: www.infinityvac.com<br />
or contact Customer Service at:<br />
1-888-668-9600.<br />
Turn power off.<br />
Unplug the vacuum.<br />
Unlock vacuum and lay flat.<br />
Insert a Flathead screwdriver into one of<br />
the two top slots of the Headlight Cover;<br />
gently pry off cover from slots.<br />
Pull out the used light bulb.<br />
Replacing the Power Nozzle<br />
Motor Belt<br />
If the brush roll does not engage when<br />
the carpet-to-floor pedal is in the<br />
carpets position, the belt may be worn<br />
or broken.<br />
To remove worn or damaged Belt:<br />
IMPORTANT: Depress carpets side<br />
of pedal [back] to engage the brush<br />
roll for proper belt alignment.<br />
If pedal is in the bare floors/tools<br />
position the belt will not align<br />
properly on the belt shifter and will<br />
break.<br />
Grasp both sides of the Brush Roll; with<br />
even tension, partially remove the right<br />
side from the side holder first then the<br />
left (c).<br />
Then lift up the Brush Roll to relieve<br />
tension on the belt.<br />
c<br />
Push new light bulb into place.<br />
Slide bottom tabs of the cover in first;<br />
then snap top slots into place.<br />
Resetting the Motor Thermostat<br />
Your Infinity Upright Vacuum is equipped<br />
with a protective Motor Thermostat. If<br />
the motor should overheat, the<br />
thermostat shuts off the power.<br />
To reset the Motor Thermostat:<br />
Press the On/Off Button once to turn<br />
power off.<br />
Unplug the vacuum.<br />
Check for clogged hose or filter; unclog<br />
hose and replace filter. Refer to<br />
Checking for Blockages on page13.<br />
Wait 45 minutes for vacuum to cool;<br />
then plug in the vacuum.<br />
Press the On/Off Button to start the<br />
vacuum.<br />
Note: if vacuum still does not start,<br />
contact Customer Service at:<br />
1-888-668-9600.<br />
carpets<br />
2<br />
Turn power off.<br />
Unplug the vacuum.<br />
Remove Dust Cup Assembly.<br />
Lock vacuum, lay flat and turn over.<br />
Use Flathead screw driver [or a coin] to<br />
turn three screws on the belt and brush<br />
roll cover counter clockwise (a) to<br />
unlock.<br />
Remove Belt and Brush Roll Cover (b).<br />
a<br />
b<br />
Slip Belt off the Brush Roll.<br />
Remove Belt from the motor-driven<br />
shaft (d).<br />
d<br />
With the Brush Roll free, inspect for any<br />
hair build-up or string; if present, carefully<br />
cut out with scissors; take care not to<br />
damage the bristles.<br />
14 TOLL FREE: 1-888-668-9600
English<br />
To replace new Belt:<br />
Slide one end of the new Belt over the<br />
motor-driven shaft (e).<br />
Slide second end of the Belt around<br />
Brush Roll (f).<br />
fe<br />
Push both ends all the way into the side<br />
holders at the same time.<br />
Cleaning the Pet Hair Power<br />
Brush<br />
Slide locking latch (k) forward.<br />
Gently tilt brush housing upward to open.<br />
IMPORTANT: DO NOT force; it will not<br />
open all the way.<br />
k<br />
Partially insert the right end of the roller<br />
into one side holder (g).<br />
f<br />
Center Belt on motor-driven shaft; test<br />
Brush Roll for easy turning.<br />
Line up the 4 tabs on the Belt and Brush<br />
Roll Cover with the slots on the Power<br />
Nozzle (i); push into place.<br />
Remove debris from turbine wheel and air<br />
passage.<br />
Ordering Replacement Parts<br />
To order additional parts and accessories,<br />
go to www.infinityvac.com or call<br />
1-888-668-9600. Note: some parts may<br />
be available at your local Infinity retailer.<br />
g<br />
Part<br />
Motor Belt<br />
Part No.<br />
1102-FP<br />
Headlight Bulb<br />
1088-FP<br />
Foam and Felt Filters<br />
1083-FP<br />
Partially insert the left end into the other<br />
side holder (h).<br />
Turn the three locking screws clockwise<br />
(j) to tighten.<br />
i<br />
HEPA Filter<br />
Telescopic Wand<br />
Detachable Handle<br />
Super Stretch Hose<br />
1082-FP<br />
1121-FP<br />
1119-FP<br />
1120-FP<br />
Upper Hose Holder<br />
1086-FP<br />
Crevice Tool<br />
Upholstry/Dusting Brush<br />
1084-FP<br />
j<br />
Pet Hair Power Brush<br />
Low Reach Bare Floor Brush<br />
1097-FP<br />
h<br />
www.infinityvac.com<br />
15
Warranty and Registration<br />
Your Infinity Upright Vacuum<br />
comes with a Five year limited<br />
warranty.<br />
FOR CANADIAN CONSUMERS ONLY<br />
Please fill out and mail the Owner<br />
Registration Card within ten (10) days<br />
of purchase. The registration will enable<br />
us to contact you in the unlikely event of<br />
a product safety notification. By<br />
returning this card you acknowledge to<br />
have read and understood the<br />
instructions for use, and warnings set<br />
forth in the accompanying instructions.<br />
EURO-PRO FIVE-YEAR (5) LIMITED WARRANTY<br />
EURO-PRO Operating LLC warrants this product to be free from defects in material and<br />
workmanship for a period of five (5) years from the date of the original purchase, when<br />
utilized for normal household use, subject to the following conditions, exclusions and<br />
exceptions.<br />
If your appliance fails to operate properly while in use under normal household conditions<br />
within the warranty period, return the complete appliance and accessories, freight prepaid<br />
to:<br />
• U.S.: EURO-PRO Operating LLC<br />
For customer service support call 1-800-798-7398<br />
or visit www.euro-pro.com<br />
• Canada: EURO-PRO Operating LLC<br />
4400 Bois Franc, St. Laurent, Québec H4S 1A7<br />
Manufactured by:<br />
EURO-PRO Operating LLC<br />
Copyright© Euro-Pro Operating LLC 2008<br />
Printed in China<br />
If the appliance is found to be defective in material or workmanship, EURO-PRO<br />
Operating LLC will repair or replace it free of charge. Proof of purchase date and $16.99<br />
to cover the cost of return shipping and handling must be included.*<br />
Non-durable parts including, without limitation, filters, brushes and electrical parts which<br />
normally require replacement are specifically excluded from warranty.<br />
The liability of EURO-PRO Operating LLC is limited solely to the cost of the repair or<br />
replacement of the unit at our option. This warranty does not cover normal wear of parts<br />
and does not apply to any unit that has been tampered with or used for commercial<br />
purposes. This limited warranty does not cover damage caused by misuse, abuse,<br />
negligent handling or damage due to faulty packaging or mishandling in transit. This<br />
warranty does not cover damage or defects caused by or resulting from damages from<br />
shipping or repairs, service or alterations to the product or any of its parts, which have<br />
been performed by a repair person not authorized by EURO-PRO Operating LLC.<br />
This warranty is extended to the original purchaser of the unit and excludes all other legal<br />
and/or conventional warranties. The responsibility of EURO-PRO Operating LLC if any, is<br />
limited to the specific obligations expressly assumed by it under the terms of the limited<br />
warranty. In no event is EURO-PRO Operating LLC liable for incidental or consequential<br />
damages of any nature whatsoever. Some states do not permit the exclusion or limitation<br />
of incidental or consequential damages, so the above may not apply to you.<br />
This warranty gives you specific legal rights, and you may also have other rights which<br />
vary from state to state or province to province.<br />
*IMPORTANT: Carefully pack item to avoid damage in shipping. Be sure to include<br />
proof of purchase date and to attach tag to item before packing with your name,<br />
complete address and phone number with a note giving purchase information, mo<strong>del</strong><br />
number and what you believe is the problem with item. We recommend you insure the<br />
package (as damage in shipping is not covered by your warranty). Mark the outside of<br />
your package “ATTENTION CUSTOMER SERVICE”. We are constantly striving to<br />
improve our products, therefore the specifications contained herein are subject to<br />
change without notice.<br />
16<br />
TOLL FREE: 1-888-668-9600
English<br />
Owner Registration Card<br />
FOR CANADIAN CONSUMERS ONLY<br />
Please fill out and mail this sheet within ten (10) days of purchase. The<br />
registration will enable us to contact you in the unlikely event of a product<br />
safety notification. By returning this card you acknowledge to have read<br />
and understood the instructions for use, and warnings set forth in the<br />
accompanying instructions. Mail to the following address:<br />
• Canada: EURO-PRO Operating LLC<br />
4400 Bois Franc, St. Laurent, Québec H4S 1A7<br />
Owners Name:<br />
Address:<br />
City: Prov.: Postal Code:<br />
Date Purchased:<br />
Name of Store:<br />
Vacuum Mo<strong>del</strong>:
U.S.:<br />
EURO-PRO Operating LLC<br />
Boston, MA 02465<br />
Canada:<br />
EURO-PRO Operating LLC<br />
4400 Bois Franc<br />
Ville St. Laurent, Québec H4S 1A7<br />
1-888-668-9600<br />
www.infinityvac.com<br />
COPYRIGHT© EURO-PRO OPERATING LLC 2008<br />
DERECHOS RESERVADOS© EURO-PRO OPERATING LLC 2008<br />
TOUS DROITS RÉSERVÉS © EURO-PRO OPERATING LLC 2008<br />
PRINTED IN CHINA<br />
IMPRESO EN CHINA<br />
IMPRIMÉ EN CHINE REV. 080220