Instruction Manual PM090 - The Sharper Image
Instruction Manual PM090 - The Sharper Image
Instruction Manual PM090 - The Sharper Image

You also want an ePaper? Increase the reach of your titles
YUMPU automatically turns print PDFs into web optimized ePapers that Google loves.
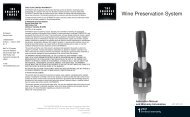
Komfort Massage Chair<br />
<strong>Instruction</strong> <strong>Manual</strong> <strong>PM090</strong>
Thank you for purchasing the <strong>PM090</strong> Komfort Massage Chair.<br />
Before using your massage chair, please read the contents of this<br />
instruction manual and refer to it when needed.<br />
Table of Contents<br />
Komfort Features ................................................. 2<br />
Safety Precautions .............................................. 3-4<br />
Chair Components .............................................. 5-6<br />
Chair Installation & Moving .................................. 7-9<br />
Grounding <strong>Instruction</strong>s ........................................ 10<br />
Chair Specifications ............................................. 11<br />
Operation Guide ................................................... 12-16<br />
Troubleshooting & Product Maintenance ............. 17<br />
Warnings .............................................................. 18<br />
Consumer Warranty ............................................. 18-20<br />
Warranty Card (Attachment)<br />
1
Prosepra <strong>PM090</strong> Komfort Massage Chair<br />
<strong>The</strong> Komfort Massage Chair is controlled by a microcomputer that performs a variety<br />
of intelligent massage techniques and combinations that are designed to soothe sore<br />
muscles, alleviate stress and fatigue, increase metabolism and energy, and improve<br />
blood circulation.<br />
01<br />
Komfort Features<br />
<strong>The</strong>rapeutic massage includes: kneading, tapping, rolling, dual-action and<br />
vibration techniques.<br />
● Invigorating air pressure system in calves and feet.<br />
● Three pre-programmed massage sessions.<br />
● Partial massage options for any part of the back.<br />
● Ability to manually adjust massage rollers to desired location for kneading and<br />
tapping techniques.<br />
● Extended footrest automatically adjusts to user’s height.<br />
● Automatic angle adjustment for back and footrest.<br />
● Backrest manually adjusts to fit user’s height.<br />
● Fifteen-minute program duration with automatic shut-off.<br />
● User-friendly LED remote controller.<br />
● Ergonomically designed for optimum Komfort.<br />
● Uniquely designed s-track to follow the contour of your back.<br />
2
02<br />
Safety Precautions<br />
When using the massage chair, basic precautions should always be followed to<br />
reduce the risk of electric shock, burns, fire or injury to persons. Please read the<br />
following precautions before using the massage chair.<br />
* Make sure the power plug is securely inserted into a proper electrical outlet to<br />
reduce the risk of short-circuit and fire.<br />
* Always unplug the massage chair from the electrical outlet immediately after<br />
using and before cleaning.<br />
* DO NOT use the massage chair in areas where the humidity is high such as a<br />
sauna or steam room.<br />
* DO NOT use the massage chair outdoors and avoid areas with direct sunlight.<br />
* If the electricity is off, turn the power switch to the OFF position and unplug the<br />
massage chair from the electrical outlet to prevent any damages to your chair<br />
when the electricity comes back on.<br />
* Never plug/unplug the power cord plug socket with wet hands.<br />
* Close and continuous supervision is necessary when the massage chair is used<br />
by, on or near children or disabled persons.<br />
* No more than one person should use the massage chair at a time.<br />
* <strong>The</strong> massage chair is intended for use as described in the <strong>Instruction</strong> <strong>Manual</strong>. Do<br />
not use any attachments other than those recommended by the manufacturer.<br />
* DO NOT attempt to stand or sit on the backrest, armrest or footrest in order to<br />
prevent accident, injury or damage to the chair.<br />
* Avoid falling asleep while using the massage chair.<br />
* Always keep the massage chair clean, and never insert any objects into or<br />
around the gaps of the massage chair.<br />
* DO NOT move the massage chair by pulling on the power supply cord.<br />
* Make sure there are no children, pets or other obstacles behind or underneath<br />
the massage chair.<br />
* If you find any rips or tears in the fabric of the massage chair contact the service<br />
department and stop using the chair immediately.<br />
3
* This massage chair is designed for household use and should not be used in<br />
non-residential settings.<br />
* Please consult your doctor if you are in doubt as to whether or not you should<br />
use this massage chair.<br />
* Please consult a doctor before using the massage chair if you are pregnant,<br />
undergoing any medical treatment, using a medical electronic device such as a<br />
pacemaker, or are experiencing any of the following: Malignant tumor, heart<br />
disease, back pain, abnormal or curved back bone, osteoporosis, or acute illness.<br />
* If you experience pain while using the massage chair, stop using the chair<br />
immediately and consult your doctor.<br />
* Never use a massage function on swollen or inflamed parts of the body.<br />
* DO NOT use the massage chair for more than 30 minutes at a time.<br />
* DO NOT use the massage chair where aerosol (spray) products are being used<br />
or where oxygen is being administered.<br />
* This massage chair is a non-professional product designed to provide a comfortable<br />
massage and should not be substituted for appropriate medical treatment.<br />
4
03<br />
Chair Components<br />
Backrest<br />
Remote Controller<br />
Spare pad<br />
Wheels<br />
Side Panel<br />
5
MASSAGING POSITION<br />
Roller<br />
6
04<br />
Chair Installation & Moving<br />
Step 1:<br />
When setting up the chair, make sure there is at least two feet of space behind the<br />
backrest and two feet of space in front of the footrest.<br />
at least 2 ft.<br />
at least 2 ft.<br />
PIC 1<br />
Step 2:<br />
Unfold the backrest until you hear a “click” sound.<br />
Note: To refold the backrest, press the “stopper” as demonstrated in PIC 2.<br />
PIC 2<br />
7
Step 3:<br />
Install the seat pad by connecting the vibration<br />
socket point as demonstrated in PIC 3.<br />
Step 4:<br />
Connect the wire plugs. See PIC 4.<br />
PIC 3<br />
PIC 4<br />
Step 5:<br />
Install the remote controller stand by tightening<br />
the screws as demonstrated in PIC 5.<br />
Step 6:<br />
Attach the backrest pad and the pillow pad as<br />
demonstrated PIC 6.<br />
a) Attached the backrest pad with the zipper.<br />
b) Attached the pillow pad with using the hook and loop fasters.<br />
PIC 5<br />
A<br />
B<br />
PIC 6<br />
Step 7: (optional)<br />
Remove the spare pad located in the<br />
backrest cover for a deeper massage.<br />
8
Moving the chair<br />
1. Restore the footrest to its original position.<br />
2. Hold down on the top of the backrest and tilt approximately 45 degrees. Move the<br />
chair using the wheels as the fulcrum.<br />
Note:<br />
1) Always return the footrest to its original length and restore it to its original position<br />
before moving the chair. Otherwise, injury during movement may result.<br />
2) Do not move the chair while a person is seated on it.<br />
3) Place a mat on the floor and gently roll the chair over it to avoid damaging the floor.<br />
wheels<br />
wheels<br />
9
05<br />
Grounding <strong>Instruction</strong>s<br />
Fully insert the plug into an appropriate outlet.<br />
An improper equipment-grounding conductor may result in electric shock. Contact<br />
a qualified electrician if you are not sure that the product is properly grounded. Do<br />
not modify the plug that is included with the massage chair. If the plug does not fit<br />
the outlet, contact a qualified electrician to install an outlet to fit the massage chair<br />
plug.<br />
10
06<br />
Chair Specifications<br />
Description<br />
Model No.<br />
Rated Voltage<br />
Rated Frequency<br />
Rated Power Consumption<br />
Timer<br />
Max Time Rate<br />
Dimensions(LxWxH)<br />
Weight<br />
Length of Wire<br />
Usage Condition<br />
Storage Condition<br />
Specifications<br />
<strong>PM090</strong><br />
120V AC<br />
60Hz<br />
180W<br />
15 minutes<br />
60 minutes<br />
Shipping dimensions: 47.5" x 30" x 33"<br />
Reclined dimensions:72" x 29.5" x 27.5"<br />
Upright dimensions:53.5" x 29.5" x 45"<br />
Gross weight: 183 Ibs<br />
Net weight: 143 Ibs<br />
Controller wire: 1 m<br />
Power supply wire: 2.2 m<br />
Temperature: 10°~40°<br />
Humidity: 30-85 RH<br />
Temperature: 20°~60°<br />
Humidity: 30-85 RH<br />
11
07<br />
Operation Guide<br />
12
Insert the power cord plug into an electrical outlet.<br />
Turn the power switch to the “I” position for idle mode.<br />
Three functions are available in idle mode: ON/OFF, Recline, Restore.<br />
1. ON/OFF<br />
Press this button to automatically recline the backrest and to automatically elevate<br />
the footrest to a specified position. When the chair has stopped moving, any<br />
massage function button may be pressed.<br />
Press the ON/OFF button again to stop all massage functions and to return the<br />
massage rollers to their original position.<br />
Note: <strong>The</strong> angle of the backrest and the footrest may be adjusted by press or to the<br />
desired position.<br />
2/3. Recline/Restore<br />
Angle Adjustment Control Button For Backrest and Footrest<br />
Press this button once to adjust the backrest and the footrest to comfortable<br />
position.<br />
Press the button again to confirm the position.<br />
4/5/6. Auto Program<br />
<strong>The</strong> three pre-programmed massage sessions are activated by pressing the<br />
buttons: RELAX,THERAPY,AIR.<br />
<strong>Manual</strong> Back Massage Programming<br />
7. Kneading<br />
Kneading Function Start/Stop Control Button-3 levels of intensity.<br />
Press this button once to activate the kneading function for a full back massage at<br />
medium intensity.<br />
Press the button again to stop the kneading massage function.<br />
Press the INTENSITY button to adjust the kneading intensity while the kneading<br />
function is activated.<br />
8. Tapping<br />
Tapping Function Start/Stop Control Button – 3 sizes of width & 3 levels of intensity<br />
13
Press this button once to activate the tapping function for a full back massage at<br />
medium width and intensity.<br />
Press the button again to stop the tapping massage function.<br />
Press the WIDTH button and the INTENSITY button to adjust the tapping width and<br />
the tapping intensity while the tapping function is activated.<br />
9. Dual-Action<br />
Dual –Action Function Start/Stop Control Button-3 levels of intensity.<br />
Press this button once to activate the dual-action function for a full back massage<br />
at medium intensity.<br />
Press the button again to stop the dual-action massage function.<br />
Press the INTENSITY button to adjust the massage intensity while the dual-action<br />
function is activated.<br />
10. Swedish<br />
Swedish Function Start/Stop Control Button-3 levels of intensity.<br />
Press this button once to activate the Swedish function for a full back massage at<br />
medium intensity.<br />
Press the button again to stop the Swedish massage function.<br />
Press the INTENSITY button to adjust the massage intensity while the Swedish<br />
function is activated.<br />
11. Rolling<br />
Rolling Function Start/Stop Control Button – 3 sizes of width & 3 levels of intensity<br />
Press this button once to activate the rolling function for a full back massage at<br />
medium width and intensity.<br />
Press the button again to stop the rolling massage function.<br />
Press the WIDTH button to the INTENSITY button to adjust the rolling width and<br />
rolling intensity while the rolling function is activated.<br />
Note: kneading, tapping, dual-action and rolling functions cannot be combined.<br />
Setting Spot or Localized Back Massage<br />
12. Spot<br />
Spot Back Massage<br />
Press this button once to activate the massage rollers.<br />
14
Press the▲/▼ button to select a spot massage for any part of the back.<br />
Press the button again to stop the spot massage function and to resume the full<br />
back massage function.<br />
Note: <strong>The</strong> spot massage is not operable when the rolling function is activated<br />
13. Partial<br />
Partial Back Massage<br />
Press this button once to activate the massage rollers. <strong>The</strong> massage rollers<br />
perform the partial massage with an 8 cm (3.1”) range of movement.<br />
Press the ▲ or ▼ button to select a partial massage for any part of the back.<br />
Press the button again to stop the partial massage function and to resume the full<br />
back massage function<br />
14. ▲/▼<br />
Position Adjustment Button for Spot or Partial Massage<br />
When the spot or partial massage functions are activated these buttons will move<br />
the massage rollers.<br />
Press and hold the ▲ or ▼ button to move the massage rollers up or down.<br />
Release the ▲ or ▼ button when the desired position is achieved.<br />
15. Width<br />
Width Adjustment Buttons for Tapping and Rolling Functions<br />
When the tapping and rolling functions are activated this button will adjust the width<br />
of movement to medium, narrow or wide in the following sequence: M
17. Seat<br />
Seat Vibration Control Button<br />
Press this button to activate the seat vibration function.<br />
Press the button again to stop the seat vibration function.<br />
18. Calves<br />
Calves Air Squeeze and Vibration Control Button<br />
Press this button to adjust the air squeeze and vibration functions in the calves to<br />
high, medium or low in the following sequence: M
08<br />
Troubleshooting & Product Maintenance<br />
This massage chair is controlled by a microcomputer and is susceptible to power<br />
surges of +10 to -10%.<br />
<strong>The</strong> following situations may display in the event of a power surge:<br />
Situation<br />
<strong>The</strong> massage chair is connected<br />
to the power supply but is not<br />
functioning.<br />
<strong>The</strong> remote control works, but the<br />
massage chair is not functioning.<br />
Solution<br />
1. Check to see that the plug is well<br />
connected and working.<br />
2. Make sure that the massage chair<br />
switch is turned to the “I” position.<br />
<strong>The</strong> massage chair may have<br />
overheated due to prolonged use.<br />
Turn off the power and allow the chair<br />
to cool for 30-50 minutes.<br />
Both the remote control and the<br />
massage chair are not functioning.<br />
1. Make sure the chair is plugged<br />
into a working outlet.<br />
2. Turn the power OFF and then ON<br />
again.<br />
If you continue to have problems, please read the warranty card and contact the<br />
service department.<br />
17
09<br />
Warnings<br />
* Do not use water and other cleaning detergents on the massage chair.<br />
* Do not stack, stab, slit or harshly pull on the surface of the massage chair.<br />
* Gently press the buttons during operation and avoid hitting the buttons with<br />
hard objects.<br />
* Pull out the power supply plug after each use.<br />
* Do not use the massage chair for more than 30 minutes at a time.<br />
10 CONSUMER WARRANTY<br />
Note: Prosepra has contracted service and repair program to Cozzia at<br />
1-866-599-7788. You must call this number to report any malfunction and<br />
service issues. Please do not call Prosepra for the mentioned issues. Please<br />
mail you warranty card to Cozzia service center.<br />
Our products have the following warranty: massage chairs, motion upholstery<br />
and home theater massage seating provide a one year in-home service warranty<br />
and a two-year parts warranty. Customer service will not issue Return Material<br />
Authorizations (RMAs) for products. Our products will be either repaired by the<br />
consumer or by an in-home technician. Customer service will not issue Return<br />
Material Authorizations (RMAs) for buyer’s remorse.<br />
SERVICE AND TECHNICAL SUPPORT<br />
Consumers may contact the customer service department at 1-866-599-7788 between<br />
8:30 am and 6:00 pm EST, Monday through Friday for warranty or service issues.<br />
Consumers are required to provide the unit serial number and dated proof of purchase<br />
(sales receipt) when they contact the service department regarding a repair.<br />
Customer service representative will attend to most consumer inquiries, but in some<br />
cases a technical service specialist will provide advanced support.<br />
Non-warranty repair is provided on a "per incident" basis. Customer service will verify<br />
that the unit has failed and provide instructions for repairing a unit. All applicable<br />
repairs, parts, shipping, handling, local tax and a "per incident" fee will be charged for<br />
non-warranty repairs and support calls.<br />
18
Proof of purchase (original receipt) is required for all warranty repairs or service.<br />
PRODUCT REPAIRS<br />
Many our product repairs may be performed by the consumer in their own home<br />
with parts and instructions supplied by the manufactruer such as remote controller<br />
replacements that don’t require a technician.<br />
Canadian consumers may contact the customer service department at<br />
1-866-599-7788 between 8:30 am and 6:00 pm EST, Monday through Friday for<br />
warranty or service issues.<br />
● Floor Models and Demonstration Units have a prorated warranty period<br />
that begins the day the model is placed on the floor and connected to an<br />
electrical outlet by the retail partner. Proof of purchase is required in order<br />
to obtain warranty service and parts. Non-warranty parts and service are<br />
available at a “per incident” charge.<br />
● Warranty Coverage Period - Warranty coverage starts at the time that the<br />
consumer PURCHASES their chair. Proof of purchase is required for all<br />
warranty repairs. <strong>The</strong> warranty time period is measured by continuous<br />
calendar days based on a seven-day week.<br />
● Field Service – Customer service department will diagnose and schedule an<br />
authorized service provider to repair the chair in the consumer's residence.<br />
● Parts - All parts deemed necessary for repairs will be shipped to the<br />
consumer at no charge by the service department.<br />
CONSUMER WARRANTY LIMITATIONS AND EXCLUSIONS<br />
● Warranties are only valid in the 48 contiguous United States and Canada<br />
and are contingent upon the consumer operating the chair according to the<br />
corresponding instruction manual.<br />
● <strong>The</strong> warranty only applies to our products and does not include any<br />
accessories or enhancements.<br />
● Field service requires pre-approval and must be performed by authorized<br />
field service personnel. Field service is only available in the United States<br />
and in major metropolitan areas in Canada.<br />
19
● Softening of foams and filling composites in pillows, pads and memory<br />
foam occurs naturally and does not constitute a defect under this warranty.<br />
● Fading, wear and piling of fabrics occurs naturally and does not constitute<br />
a defect under this warranty.<br />
● Natural markings, grain and dye variations in leather do not constitute a<br />
defect under this warranty.<br />
● Warranties do not cover any loss or damage resulting from improper<br />
installation, unauthorized repairs or modifications, improper use of<br />
electrical/power supply, loss of power, dropped product, a malfunction or<br />
damage of an operating part from failure to provide manufacturer's<br />
recommended maintenance, transportation damage, theft, abuse, misuse,<br />
neglect, vandalism or environmental conditions (fire, floods, rust, corrosion,<br />
sand, dirt, windstorm, hail, earthquake or exposure to weather conditions),<br />
loss of use during the period the product is at a repair facility, or otherwise<br />
awaiting parts or repair.<br />
● Damage due to shipping and handling does not constitute a defect under<br />
this warranty.<br />
● Under no circumstance shall the manufacturer or its representatives be<br />
liable for indirect, consequential or incidental damages (including damages<br />
for lost profits, business interruption, bodily injury, medical and the like),<br />
even if any party has been advised of the possibility of such damages.<br />
● Warranties are non-transferable and shall be in lieu of any other warranty,<br />
express or implied, including but not limited to any implied warranty or<br />
merchantability or fitness for particular use.<br />
● Our sole liability and the purchaser's exclusive remedy shall be for the<br />
repair, or at customer service’s option, for the replacement of the<br />
defective part. Not withstanding the above, if replacements parts for<br />
defective materials are not available, the manufacturer reserves the right<br />
to make substitutions in lieu of repair or replacement.<br />
● All warranties begin on the DATE OF PURCHASE; no allowance or<br />
extension is offered for delivery and/or installation.<br />
● Warranties do not apply to rental, business, commercial, institutional, or<br />
other non-residential users.<br />
20
Warranty Card<br />
WARRANTY REGISTRATION FORM<br />
Product Serial No. (located on product):<br />
Purchase Price:<br />
Model No:<br />
Date Purchased:<br />
First Name:<br />
Last Name:<br />
Address:<br />
City: State: Zip:<br />
Phone:<br />
Email:<br />
Please mail to: Warranty Department<br />
Cozzia LLC.<br />
3280 Pointe Parkway,<br />
Suite #2400, Norcross, GA 30092, USA<br />
Telephone Number:1-866-599-7788