
Create successful ePaper yourself
Turn your PDF publications into a flip-book with our unique Google optimized e-Paper software.
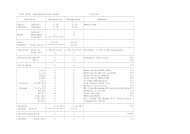
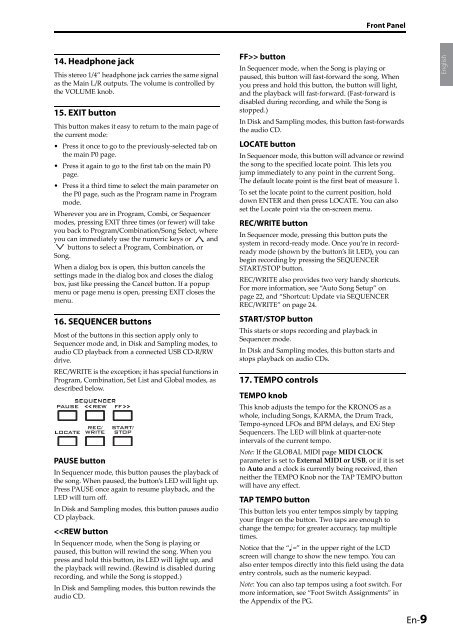
Front Panel<br />
14. Headphone jack<br />
This stereo 1/4” headphone jack carries the same signal<br />
as the Main L/R outputs. The volume is controlled by<br />
the VOLUME knob.<br />
15. EXIT button<br />
This button makes it easy to return to the main page of<br />
the current mode:<br />
• Press it once to go to the previously‐selected tab on<br />
the main P0 page.<br />
• Press it again to go to the first tab on the main P0<br />
page.<br />
• Press it a third time to select the main parameter on<br />
the P0 page, such as the Program name in Program<br />
mode.<br />
Wherever you are in Program, Combi, or Sequencer<br />
modes, pressing EXIT three times (or fewer) will take<br />
you back to Program/Combination/Song Select, where<br />
you can immediately use the numeric keys or and<br />
buttons to select a Program, Combination, or<br />
Song.<br />
When a dialog box is open, this button cancels the<br />
settings made in the dialog box and closes the dialog<br />
box, just like pressing the Cancel button. If a popup<br />
menu or page menu is open, pressing EXIT closes the<br />
menu.<br />
16. SEQUENCER buttons<br />
Most of the buttons in this section apply only to<br />
Sequencer mode and, in Disk and Sampling modes, to<br />
audio CD playback from a connected USB CD‐R/RW<br />
drive.<br />
REC/WRITE is the exception; it has special functions in<br />
Program, Combination, Set List and Global modes, as<br />
described below.<br />
PAUSE button<br />
In Sequencer mode, this button pauses the playback of<br />
the song. When paused, the button’s LED will light up.<br />
Press PAUSE once again to resume playback, and the<br />
LED will turn off.<br />
In Disk and Sampling modes, this button pauses audio<br />
CD playback.<br />
button<br />
In Sequencer mode, when the Song is playing or<br />
paused, this button will fast‐forward the song. When<br />
you press and hold this button, the button will light,<br />
and the playback will fast‐forward. (Fast‐forward is<br />
disabled during recording, and while the Song is<br />
stopped.)<br />
In Disk and Sampling modes, this button fast‐forwards<br />
the audio CD.<br />
LOCATE button<br />
In Sequencer mode, this button will advance or rewind<br />
the song to the specified locate point. This lets you<br />
jump immediately to any point in the current Song.<br />
The default locate point is the first beat of measure 1.<br />
To set the locate point to the current position, hold<br />
down ENTER and then press LOCATE. You can also<br />
set the Locate point via the on‐screen menu.<br />
REC/WRITE button<br />
In Sequencer mode, pressing this button puts the<br />
system in record‐ready mode. Once you’re in recordready<br />
mode (shown by the button’s lit LED), you can<br />
begin recording by pressing the SEQUENCER<br />
START/STOP button.<br />
REC/WRITE also provides two very handy shortcuts.<br />
For more information, see “Auto Song Setup” on<br />
page 22, and “Shortcut: Update via SEQUENCER<br />
REC/WRITE” on page 24.<br />
START/STOP button<br />
This starts or stops recording and playback in<br />
Sequencer mode.<br />
In Disk and Sampling modes, this button starts and<br />
stops playback on audio CDs.<br />
17. TEMPO controls<br />
TEMPO knob<br />
This knob adjusts the tempo for the KRONOS as a<br />
whole, including Songs, KARMA, the Drum Track,<br />
Tempo‐synced LFOs and BPM delays, and EXi Step<br />
Sequencers. The LED will blink at quarter‐note<br />
intervals of the current tempo.<br />
Note: If the GLOBAL MIDI page MIDI CLOCK<br />
parameter is set to External MIDI or USB, or if it is set<br />
to Auto and a clock is currently being received, then<br />
neither the TEMPO Knob nor the TAP TEMPO button<br />
will have any effect.<br />
TAP TEMPO button<br />
This button lets you enter tempos simply by tapping<br />
your finger on the button. Two taps are enough to<br />
change the tempo; for greater accuracy, tap multiple<br />
times.<br />
Notice that the “q =” in the upper right of the LCD<br />
screen will change to show the new tempo. You can<br />
also enter tempos directly into this field using the data<br />
entry controls, such as the numeric keypad.<br />
Note: You can also tap tempos using a foot switch. For<br />
more information, see “Foot Switch Assignments” in<br />
the Appendix of the PG.<br />
En-9<br />
Español<br />
Deutsch<br />
Français<br />
English