
You also want an ePaper? Increase the reach of your titles
YUMPU automatically turns print PDFs into web optimized ePapers that Google loves.
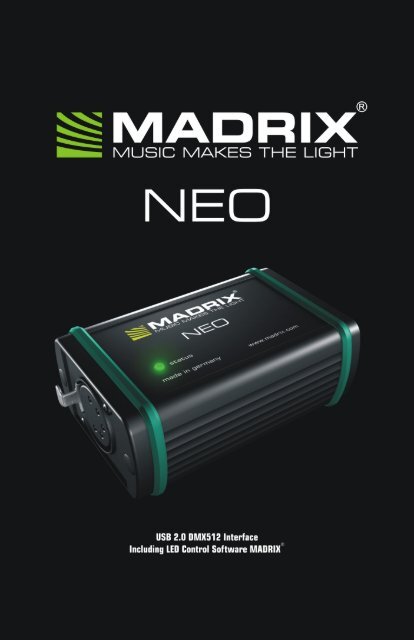
MADRIX ® NEO —<br />
Quick Start Guide & User Manual<br />
4 th Edition, Last Update: March 2011<br />
Thank You for Purchasing MADRIX ® NEO<br />
Please read this manual carefully and thoroughly before using the<br />
MADRIX ® NEO. Make sure that you fully understand all information.<br />
This MADRIX ® NEO quick start guide is available in English. The<br />
MADRIX ® software and its user manuals are also available in English.<br />
Made in Germany<br />
Imprint<br />
inoage GmbH<br />
Fetscherplatz 5<br />
01307 Dresden<br />
Germany<br />
Managing Directors: Christian Hertel, Sebastian Pinzer, Sebastian Wissmann<br />
HR B 29795<br />
http://www.madrix.com<br />
info@madrix.com<br />
Phone +49 351 482 056 30<br />
Fax +49 351 482 056 31
Copyright Information And Disclaimer<br />
© 2011 inoage GmbH. All Rights Reserved.<br />
Information in this manual is subject to change at any time and without prior<br />
notice. Reproduction, adaptation, or translation without prior written<br />
permission is prohibited.<br />
inoage GmbH does not grant guarantee on validity for a particular reason, the<br />
marketability, or other properties of the product. There is no way to assert a<br />
claim to inoage GmbH, neither in the legal way nor in other ways. inoage<br />
GmbH is not responsible for damages, including all disadvantages that are not<br />
just limited to the loss of sales, but that are caused due to the use of the<br />
product, due to the loss of serviceability of the product, due to misuse,<br />
happenings, circumstances, or actions that inoage GmbH does not have<br />
influence on, no matter if the damages as well as consequential damages are<br />
direct or indirect; whether they are special damages or others, nor if the<br />
damage is caused by the owner of the guarantee or third persons.<br />
Trademark Credits<br />
Microsoft ® , Windows ® are U.S. registered trademarks of Microsoft<br />
Corporation. All other products mentioned herein may be trademarks of their<br />
respective companies. MADRIX ® is a registered trademark.<br />
Package Contents<br />
1x MADRIX ® NEO – DMX512 interface<br />
1x USB cable<br />
1x CD-ROM with MADRIX ® – software and driver<br />
1x Quick start guide<br />
Please check the package contents and the interface after unpacking (Please<br />
look for broken pins, cracks in the case, or if you can hear loose parts inside<br />
the device, etc.)! Contact your supplier if something is missing or damaged.<br />
Do not use the device if it seems to be damaged!
Safety Instructions And Warranty<br />
Two years of warranty are granted to the purchaser of this product.<br />
Warranty applies to constructional fault, material defect, or incorrect<br />
assembly the manufacturer has caused or is to be held responsible for.<br />
Warranty will be void if the interface is opened, modified, damaged through<br />
inappropriate handling and wrong usage, damaged through electric current or<br />
damaged through any other cause.<br />
Please follow the instructions to avoid mishandling, damage to the device, or<br />
personal damage:<br />
It is recommended to always use an opto-isolator/opto-coupler splitter. Avoid<br />
voltage on the DMX lines/cables at all times. Do not remove any parts from<br />
the unit including the plug ground pin or connect to an ungrounded circuit.<br />
Beware that the interface works with electrical power. Only use the device in<br />
dry environments (indoor use). Do not use the interface in humid<br />
environments and avoid contact with water or any other liquids. Turn off the<br />
power if you are not using the device for a long time.<br />
There are no user serviceable parts inside the interface. Repair service lies<br />
only within the responsibilities of the manufacturer. If the interface appears<br />
to be defective, please contact your dealer. After expiration of the warranty<br />
period, you may contact your supplier or the manufacturer to have the unit<br />
repaired against payment of an individual service fee.<br />
The interface has two ports. Only connect devices, cables, and connectors to<br />
the USB port and XLR plug using connectors of the same type as the port. Do<br />
not use inapplicable equipment.<br />
This device should be operated by professionals. The device is not designed to<br />
be used by non-professionals or children.<br />
End-Of-Life<br />
This electrical device needs to be disposed of properly. Do not throw<br />
the device into normal trash when the end-of-life has been reached.<br />
Please recycle packing material whenever possible.
CE And RoHS Declaration Of Conformity<br />
The device complies with the requirements set<br />
forth in the council Directive of the law of the Member States relating to<br />
electromagnetic compatibility (2004/108/EC), the Low Voltage Directive<br />
(2006/95/EC), and the Directive on restriction of the use of certain<br />
hazardous substances in electrical and electronic equipment (2002/95/EC)<br />
(RoHS). The compliance with these three Directives has been evaluated in<br />
accordance to the following standards: EN 55011 (1998) + A1 (2000) +<br />
A2 (2003), EN 55024 (1998) + A1 (2001) + A3 (2003), EN 61000-4-2<br />
(2001), EN 61000-4-3 (2001), EN 61000-4-4 (2001), and EN 61000-4-6<br />
(2001).<br />
FCC Declaration Of Conformity<br />
The device has passed the following tests of compliance:<br />
FCC (2003) - Title 47, Part 15, class A, Radio frequency devices.<br />
This device complies with part 15 of the FCC Rules. Operation is subject to<br />
the following two conditions: (1) This device may not cause harmful<br />
interference, and (2) this device must accept any interference received,<br />
including interference that may cause undesired operation.<br />
Usage<br />
In general, this device is designed to be operated as a hardware control<br />
interface to be set up between a computer and various types of controllable<br />
lights via DMX512 (USB-to-DMX). Do not use the interface for any other,<br />
deviant purpose.<br />
The device can be connected to and disconnected from the computer during<br />
use and without a reboot (Hot Swapping & Plug and Play).<br />
Up to 60 interfaces can be connected to a USB host controller and used at<br />
the same time while maintaining a stable and high frame rate (Frame Rate<br />
Stability). Active USB 2.0 ports are required in this case.
Technical Details<br />
Power Supply:<br />
USB:<br />
DMX512:<br />
Plug:<br />
Case:<br />
Dimensions:<br />
Weight:<br />
5V DC, 500mA, Power over USB<br />
USB 2.0, type B plug<br />
512 DMX channels input or output<br />
5-pin, female, XLR, NEUTRIK<br />
Metal enclosure<br />
78 mm x 59 mm x 35 mm (length by width by height)<br />
100 g<br />
PLEASE ALWAYS CONNECT EVERY NEO TO AN ACTIVE USB 2.0<br />
PORT OR USE AN USB 2.0 HUB WITH ITS OWN POWER SUPPLY.<br />
System Requirements<br />
Dual-core processor with at least 2.0 GHz, 1024 MB RAM, 200 MB free<br />
harddisk space, screen resolution of 1024 x 768, and one free USB 2.0 port.<br />
A sound card is optional (required for Sound2Light and Music2Light).<br />
To access the full range of features, it is recommended to install the<br />
MADRIX ® software provided with the NEO. Software updates are free of<br />
charge for the purchaser of this product for MADRIX 2.x versions. The latest<br />
MADRIX ® software including drivers and the latest quick start guide are<br />
available online at http://www.madrix.com<br />
PLEASE INSTALL THE SOFTWARE AND DRIVERS FROM THE<br />
CD BEFORE YOU CONNECT THE MADRIX ® NEO TO YOUR PC.<br />
Supported Operating Systems<br />
The MADRIX ® NEO comes with software and drivers for the following<br />
operating systems. The MADRIX ® software is officially compatible with<br />
Windows ® 7. Windows ® XP requires Service Pack 1 (SP1).<br />
Microsoft ® Windows ® XP | Vista | 7<br />
Compatible with 32 bit and 64 bit
1. Installing The Software And Drivers<br />
Insert the CD that comes with the MADRIX ® NEO into the CD-ROM drive of<br />
your operational computer. The MADRIX ® software setup will launch<br />
automatically. Follow the on-screen installation instructions as described<br />
below.<br />
DO NOT CONNECT THE MADRIX ® NEO TO YOUR COMPUTER<br />
BEFORE INSTALLING THE SOFTWARE.<br />
Please click 'Next' to start the installation. You may end the process at any<br />
time by clicking ‘Cancel’.<br />
The 'License Agreement' will appear. It outlines the terms you are agreeing to<br />
when you install the software. You must accept these terms in order to<br />
continue.<br />
Please click 'I Agree'.
The next window offers the chance to select which components and which<br />
drivers you want to install. A description is given for each item. Please make<br />
sure to select ‘MADRIX’ and ‘Interface Driver’, which are the most important<br />
components for operating the MADRIX ® NEO.<br />
Please click 'Next'.<br />
The next section called 'Destination Folder' allows you to select the location<br />
on your hard drive where the software will be installed. Please choose a<br />
location and then click 'Install'.<br />
The installation process may take a few minutes.<br />
When the 'Complete' window appears, click 'Next'.<br />
Afterwards, click 'Finish' to complete the installation process.
2. Connecting The MADRIX ® NEO To Your PC<br />
Now, please use the provided USB cable to connect the MADRIX ® NEO to a<br />
free USB 2.0 port of your computer.<br />
If the MADRIX ® NEO driver has been installed properly, the LED will now fade<br />
between red and green. Start the MADRIX ® software (if not yet done).<br />
You can check your NEO setup within the MADRIX ® software. Go to the menu<br />
'Preferences' 'Device Manager' and select the tab 'DMX Devices'. Now,<br />
press ‘Rescan For Devices’. The NEO interface will appear ready in the list.<br />
Using The MADRIX ® NEO As DMX-IN Interface<br />
You can use this interface to send or receive DMX data via MADRIX ® . If you<br />
want to use DMX-IN, please use a Male to Male 3-pin or 5-pin XLR Gender<br />
Changer. Then, go to the menu 'Preferences' 'Device Manager' and select<br />
the tab 'DMX Devices'. Select your interface and activate ‘Enable’ and ‘Input’<br />
in the ‘Settings’ section. Press ‘Apply’. In the next step, configure your NEO<br />
to control MADRIX ® remotely under 'Preferences' 'Device Manager' <br />
'DMX Input'. Choose an entry in the list (Universe 1 to 8), select your ‘DMX-<br />
IN Device’, and activate ‘Remote’. Then, choose one of the input protocols in<br />
the section ‘Remote Control’ and press ‘Apply’. Close the window with ‘Ok’.
Description Of LED Codes<br />
The following table describes the codes of the status LED.<br />
COLOR<br />
red + blinking green<br />
fading between<br />
red + green<br />
orange<br />
red<br />
STATUS<br />
Sending or receiving DMX data.<br />
→ The interface works correctly.<br />
Connected to USB; Drivers installed correctly.<br />
→ The interface works. No DMX data is sent.<br />
Connected to USB; No drivers installed.<br />
→ Please reinstall software and drivers<br />
or try using a different USB port.<br />
Hardware ERROR<br />
→ Please contact your dealer.<br />
3-Pin Or 5-Pin XLR Connector Layout<br />
The images below outline the general pin layout of 5-pin or 3-pin XLR ports.<br />
5-Pin Description 3-Pin<br />
1 Shield / Ground<br />
2 DMX –<br />
3 DMX +<br />
4 Spare<br />
5 Spare<br />
Support And MADRIX ® Help And Manual<br />
For more information you can open the MADRIX ® Help and Manual (the<br />
software user guide) by pressing “F1” on your keyboard while using the<br />
MADRIX ® software. Separate documentation files are automatically installed<br />
with the software as well.<br />
In case of further questions concerning handling of the NEO or technical<br />
problems, please read the MADRIX ® Help and Manual first, contact your<br />
dealer, or have a look at the website: http://www.madrix.com<br />
You can also contact info@madrix.com directly.
Frequently Asked Questions (FAQs)<br />
Do I need a MADRIX ® NEO and a MADRIX ® KEY?<br />
No. The MADRIX ® software license for 512 DMX channels data output is<br />
already included. The MADRIX ® KEY is not necessary for operating the<br />
MADRIX ® NEO. However, you may connect both to your computer to use<br />
their output features together.<br />
Is it possible to use more than one MADRIX ® NEO?<br />
Yes. Up to 60 NEOs can be connected to a USB host controller and used at<br />
the same time. Please connect every NEO to an active USB 2.0 port or use<br />
an USB 2.0 hub with a power supply.<br />
Does the NEO work in stand-alone mode?<br />
No. The NEO needs to be connected to a personal computer.<br />
Can I use a mobile computer instead of a desktop computer?<br />
Yes. Mobile computers, such as laptops/notebooks, may be used to run the<br />
MADRIX ® software. Please pay attention to the system requirements.<br />
Can I use other software apart from MADRIX ® to control lights?<br />
No. The recommended software is MADRIX ® .<br />
Can I use this interface to control lasers, moving heads, or scanners?<br />
No. The software is not designed for such an application.<br />
What does the blinking LED mean?<br />
Please read the chapter “Description Of LED Codes” in this quick start guide.<br />
Can I repair the MADRIX ® NEO myself?<br />
No. Do not attempt any repairs. Any attempt will void your warranty! Please<br />
contact your dealer if the device seems to be defective.<br />
What can I do if my interface does not work anymore during the<br />
warranty period?<br />
Please contact your dealer.