Strand 500 Series Console Tutorial - Grand Stage Company
Strand 500 Series Console Tutorial - Grand Stage Company
Strand 500 Series Console Tutorial - Grand Stage Company

You also want an ePaper? Increase the reach of your titles
YUMPU automatically turns print PDFs into web optimized ePapers that Google loves.
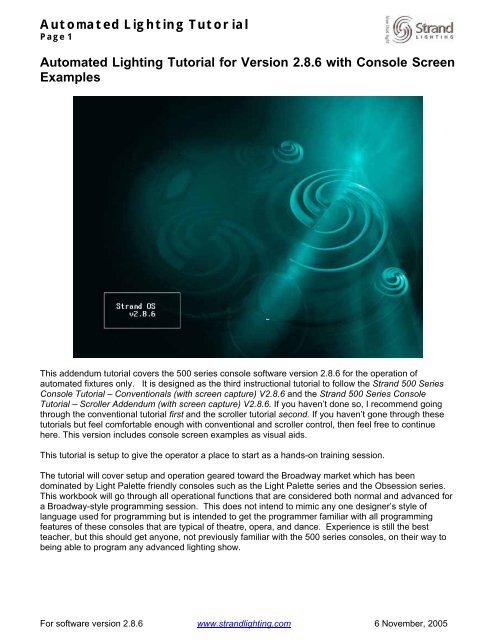
Automated Lighting <strong>Tutorial</strong><br />
Page 1<br />
Automated Lighting <strong>Tutorial</strong> for Version 2.8.6 with <strong>Console</strong> Screen<br />
Examples<br />
This addendum tutorial covers the <strong>500</strong> series console software version 2.8.6 for the operation of<br />
automated fixtures only. It is designed as the third instructional tutorial to follow the <strong>Strand</strong> <strong>500</strong> <strong>Series</strong><br />
<strong>Console</strong> <strong>Tutorial</strong> – Conventionals (with screen capture) V2.8.6 and the <strong>Strand</strong> <strong>500</strong> <strong>Series</strong> <strong>Console</strong><br />
<strong>Tutorial</strong> – Scroller Addendum (with screen capture) V2.8.6. If you haven’t done so, I recommend going<br />
through the conventional tutorial first and the scroller tutorial second. If you haven’t gone through these<br />
tutorials but feel comfortable enough with conventional and scroller control, then feel free to continue<br />
here. This version includes console screen examples as visual aids.<br />
This tutorial is setup to give the operator a place to start as a hands-on training session.<br />
The tutorial will cover setup and operation geared toward the Broadway market which has been<br />
dominated by Light Palette friendly consoles such as the Light Palette series and the Obsession series.<br />
This workbook will go through all operational functions that are considered both normal and advanced for<br />
a Broadway-style programming session. This does not intend to mimic any one designer’s style of<br />
language used for programming but is intended to get the programmer familiar with all programming<br />
features of these consoles that are typical of theatre, opera, and dance. Experience is still the best<br />
teacher, but this should get anyone, not previously familiar with the <strong>500</strong> series consoles, on their way to<br />
being able to program any advanced lighting show.<br />
For software version 2.8.6 www.strandlighting.com 6 November, 2005
Automated Lighting <strong>Tutorial</strong><br />
Page 2<br />
Table of Contents<br />
Automated Lighting <strong>Tutorial</strong> for Version 2.8.6 with <strong>Console</strong> Screen Examples .......................................... 1<br />
Table of Contents........................................................................................................................................ 2<br />
<strong>Tutorial</strong> Syntax ............................................................................................................................................ 4<br />
Understanding the <strong>Strand</strong> Attribute System ................................................................................................ 5<br />
Fixture Library ............................................................................................................................................. 6<br />
Fixture Library Access ............................................................................................................................. 6<br />
Fixture Library Editing.............................................................................................................................. 8<br />
Patch ........................................................................................................................................................... 9<br />
Patching Automated Fixtures................................................................................................................... 9<br />
Single Fixture ....................................................................................................................................... 9<br />
Range of Fixtures............................................................................................................................... 10<br />
Invert Pan / Tilt................................................................................................................................... 10<br />
Delete Fixture Patch........................................................................................................................... 11<br />
Replace One Type of Fixture with Another ........................................................................................ 12<br />
Setup Options............................................................................................................................................ 14<br />
Tracker Preset ....................................................................................................................................... 14<br />
Auto Move While Dark ........................................................................................................................... 14<br />
Live Control ............................................................................................................................................... 16<br />
Locking Pan and Tilt .............................................................................................................................. 17<br />
Speed Multiplier ..................................................................................................................................... 17<br />
ATC Page.................................................................................................................................................. 18<br />
Display Order......................................................................................................................................... 18<br />
Attribute Groupings................................................................................................................................21<br />
Rotary Window ...................................................................................................................................... 21<br />
Attribute Filters....................................................................................................................................... 23<br />
Recording Preset Focus Groups ............................................................................................................... 25<br />
Group Layout ......................................................................................................................................... 25<br />
Utility Groups...................................................................................................................................... 25<br />
Show Groups ..................................................................................................................................... 26<br />
Building Groups ..................................................................................................................................... 27<br />
In Preview .......................................................................................................................................... 27<br />
In Live................................................................................................................................................. 29<br />
Preset Focus Group Display Options .................................................................................................... 31<br />
Standard Group Display..................................................................................................................... 31<br />
Preset Display .................................................................................................................................... 31<br />
Control................................................................................................................................................ 32<br />
Copying Info from One Fixture to All Fixtures........................................................................................ 33<br />
Quick Access for Palettes...................................................................................................................... 35<br />
Access by Group Number .................................................................................................................. 35<br />
Access by Text................................................................................................................................... 35<br />
Access by Macros on Submaster Bump Buttons ............................................................................... 36<br />
Build Macros ...................................................................................................................................... 37<br />
Writing Cues .......................................................................................................................................... 39<br />
Accessing Preset Focus Groups........................................................................................................ 39<br />
Recording Cues ................................................................................................................................. 40<br />
Part Cues ........................................................................................................................................... 41<br />
Creating the Part ............................................................................................................................ 42<br />
Assigning Attributes to a Part: Manually......................................................................................... 43<br />
Assigning Attributes to a Part: Using Attribute Filters..................................................................... 44<br />
Updating ................................................................................................................................................ 46<br />
Updating Cues ................................................................................................................................... 46<br />
For software version 2.8.6 www.strandlighting.com 6 November, 2005
Automated Lighting <strong>Tutorial</strong><br />
Page 3<br />
Updating Groups ................................................................................................................................47<br />
Live ................................................................................................................................................. 47<br />
Preview........................................................................................................................................... 47<br />
Preview with Live............................................................................................................................ 48<br />
Magic Update: Overview ................................................................................................................ 50<br />
Magic Update: By Channel List ...................................................................................................... 50<br />
Magic Update: By Attribute Filter.................................................................................................... 53<br />
Magic Update: Globally .................................................................................................................. 53<br />
Shape Generator ................................................................................................................................... 55<br />
Add Shape Channels in Patch ........................................................................................................... 55<br />
Add Shape Channels to ATC Pages.................................................................................................. 57<br />
Add Shape Channels to Attribute Filters ............................................................................................ 58<br />
Access the Shape Groups ................................................................................................................. 59<br />
Clearing Shapes from Fixtures Live ................................................................................................... 60<br />
Example: Can Can Offset .................................................................................................................. 62<br />
Time to Play ....................................................................................................................................... 63<br />
For software version 2.8.6 www.strandlighting.com 6 November, 2005
Automated Lighting <strong>Tutorial</strong><br />
Page 4<br />
<strong>Tutorial</strong> Syntax<br />
This font and box indicates the syntax for standard hard key input.<br />
Any > indicates a soft key that is a level below the previous soft key.<br />
Any {bracketed} text indicates a hard display key that should be pressed. The display tile is at the<br />
upper right hand portion of the console.<br />
Any (enclosed) text indicates a soft key that should be pressed.<br />
Any “quoted” text indicates keyboard entry that will label a cue, group, or the like.<br />
On the screen captures, I will also draw a circle around the area of the screen that has the appropriate<br />
information.<br />
During the tutorial, perform the keystrokes when listed. This will keep you in the proper screen as you go<br />
through the text and allow you to maximize your benefit from the lesson.<br />
Even with the powerful features of the <strong>500</strong> <strong>Series</strong> consoles, it must be simple to operate the simple<br />
things. Here is where we will start…<br />
Another thing, some screen shots will be from Windows, these are just text files and the visual format<br />
does not change the content in any way. Most of the screen shots are based on a 2 screen system, if<br />
you only have 1 monitor your screens may vary.<br />
For software version 2.8.6 www.strandlighting.com 6 November, 2005
Automated Lighting <strong>Tutorial</strong><br />
Page 5<br />
Understanding the <strong>Strand</strong> Attribute System<br />
Here is the attribute list found in the fixture library. To access the fixture library…<br />
{MORE} (NOTES DISP>) (LOAD FILE>) (FIXT LIB)<br />
Note: Scroll down until you see this attribute list on screen.<br />
This list of attributes is consistent within the world of <strong>Strand</strong>’s automated luminaire control. With this<br />
system, pan is always attribute 3, gobo is always attribute 8 and so on. This consistency of attributes<br />
allows you to change fixtures (as needed for tours) and all the cue data will stay the same within the<br />
show file. Any combination of any attributes can run any DMX-based moving light that’s out there. It’s<br />
just a matter of choosing the <strong>Strand</strong> attribute number that you want and relating it to the appropriate<br />
parameter of the fixture in the right order. The attribute order is based on the DMX table from the fixture<br />
manufacturer.<br />
For software version 2.8.6 www.strandlighting.com 6 November, 2005
Automated Lighting <strong>Tutorial</strong><br />
Page 6<br />
Fixture Library<br />
The fixture library itself holds a total of 99 fixtures from many different manufacturers. With more than 99<br />
fixtures out there, you may find that a fixture that you need isn’t currently in the library. Not to<br />
fear….<strong>Strand</strong> has many libraries on their website that are built by manufacturer so start there for fixture<br />
info. Otherwise, it’s simple to build a fixture yourself or email <strong>Strand</strong> for help.<br />
The library is just a text file so the information can be edited quickly and easily as needed. Let’s take a<br />
look at the beginning of the fixture library.<br />
Fixture Library Access<br />
In case you are not already there…<br />
{MORE} (NOTES DISP>) (LOAD FILE) (FIXT LIB)<br />
Note: The # at the beginning of the line indicates a remark statement. This isn’t the default fixture library.<br />
It’s the Vari*Lite library from the website.<br />
It starts by giving you remark statements. At the beginning of this file is a key, or legend, of the<br />
information to follow.<br />
For software version 2.8.6 www.strandlighting.com 6 November, 2005
Automated Lighting <strong>Tutorial</strong><br />
Page 7<br />
Below you will find that the actual fixture data within the library is broken down into 6 columns exampled<br />
above.<br />
hAtt – is the attribute number from the attribute list. (3 for pan, 4 for tilt…)<br />
Steps – is the number of steps or frames that an attribute has. A color wheel might have 11 steps, a<br />
gobo wheel might have 8 steps. One rule though, since attributes can never be off, frame 0 is a position.<br />
NDim – determines if this attributes is dimmable or not.<br />
Max – sets the maximum DMX value for this attribute.<br />
Min – sets the minimum DMX value for this attribute.<br />
Profile – assigns a profile to this attribute when its fixture is patched.<br />
See picture with icons on the next page.<br />
Next is a partial list of fixtures that are in this library. The example listed is the Vari*Lite library that is on<br />
the website.<br />
Note: This is only a partial fixture list for this library file.<br />
Scrolling down below all the remark statements, you will get to the actual content of the fixture library file.<br />
Let’s break this down…<br />
For software version 2.8.6 www.strandlighting.com 6 November, 2005
Automated Lighting <strong>Tutorial</strong><br />
Page 8<br />
Fixture Number<br />
needed to patch<br />
Attribute<br />
number<br />
from the list<br />
at the<br />
beginning of<br />
the file. The<br />
“x” means<br />
that it is a<br />
16 bit<br />
attribute.<br />
Fixture Name…the first 6<br />
letters should be unique.<br />
Profile: the profile number<br />
will be automatically<br />
patched to that attribute.<br />
DMX Start: beginning<br />
of the DMX string.<br />
Usually 0.<br />
Number of<br />
frames. Notice<br />
that gobo and<br />
color have 25<br />
steps.<br />
Dim or Non-Dim:<br />
0 = dim,<br />
1 = non-dim<br />
DMX End: The end<br />
of the DMX string.<br />
Usually 255.<br />
Fixture Library Editing<br />
Editing the fixture library is simple. It’s just a text file so use your keyboard to edit current fixtures or add<br />
new ones. Just remember that your softkeys (cut line, copy line and paste line) can help you.<br />
Take the DMX table from any fixture and determine what <strong>Strand</strong> attribute numbers that you want to<br />
control the fixtures parameters. If the first parameter is Control, then use 20 (Reset). If the second one is<br />
Pan, then use 3. if the third one is Pan Fine, then use x3. Just continue until you have your list and then<br />
input into the fixture library. It’s that simple!<br />
For software version 2.8.6 www.strandlighting.com 6 November, 2005
Automated Lighting <strong>Tutorial</strong><br />
Page 9<br />
Patch<br />
Just remember that with a <strong>Strand</strong> console, patching is always Dimmer @ Channel ENTER. Patching a<br />
moving light is just an extension of that. DMX number @ Channel (@FIXTURE) Fixture Number ENTER.<br />
Patching Automated Fixtures<br />
Most production electricians that I work with like to separate the automated fixtures to a different universe<br />
that the universe that is used for dimmers. This is often universe 1 for dimmers and universe 2 and up for<br />
movers. We’ll use this format in the patch example.<br />
The first thing that I like to do when patching to multiple universes is set the desk to show me universe<br />
and DMX output numbers versus dimmer number. So instead of typing in 513, I type in 2.1. The 2 or the<br />
number left of the period is the universe number and the .1 or the number to the right of the period is the<br />
DMX number. So the first DMX address in the 2 nd universe is 2.1. Here is how you change your<br />
display…<br />
Single Fixture<br />
{PATCH} (SET>) (DMX/OUTPUT) (
Automated Lighting <strong>Tutorial</strong><br />
Page 10<br />
press Next or Last and you’ll cycle through all the fixtures in the library. When the right one is selected,<br />
just press Enter.<br />
Range of Fixtures<br />
A range of fixtures can be patched as well. This will minimize the keystrokes that are needed for<br />
patching multiple fixtures.<br />
2.14 @ 2 THRU 4 (@FIXTURE) 19 ENTER<br />
This took the next available DMX address in universe 2 and patched the VL5 to channels 2 thru 4.<br />
Notice that I didn’t have to identify the starting address of every fixture. The software did that for me.<br />
This way, I can patch the show and then give the patch information to the electrician to address the<br />
fixtures.<br />
Invert Pan / Tilt<br />
I always make sue that the lights are working intuitively on the trackball. So that when I roll the trackball<br />
upstage, the fixture moves upstage as well. If it doesn’t, then I usually need to invert the tilt on the unit.<br />
2.1 (@FIXTURE) (INVERT TILT) ENTER<br />
For software version 2.8.6 www.strandlighting.com 6 November, 2005
Automated Lighting <strong>Tutorial</strong><br />
Page 11<br />
Notice that the softkeys change once you press @FIXTURE. Invert Tilt is now available as a soft key.<br />
Once it is accepted, the labels for the tilt attributes change to cyan from blue. This lets you know that<br />
these attributes have been inverted.<br />
Also notice the other softkeys available now. Swap Pan & Tilt does just that. Pan now controls tilt and tilt<br />
now controls pan. Invert Pan should be used if the light pans right when you roll the trackball to the left.<br />
Just invert what is necessary on all fixtures until you have intuitive movement for everyone. It will make<br />
your life much easier for programming.<br />
A quick note…If the fixtures are not oriented properly, don’t program cues prior to inverting pan<br />
and tilt. This WILL insure that the lights will be pointing in the wrong direction so make sure they<br />
are oriented correctly prior to cueing.<br />
Delete Fixture Patch<br />
If you need to delete a fixture, it’s as simple as following the old LightPalette syntax for getting rid of a<br />
command…just expanded a little for the moving light world.<br />
2.1 (@FIXTURE) ENTER<br />
Unpatching a fixture does just that. But you should take note that it doesn’t delete the channels. All the<br />
show data (cue, group, sub and fx) are still within the console. It’s just that the channel doesn’t control<br />
anything because a fixture isn’t patched.<br />
For software version 2.8.6 www.strandlighting.com 6 November, 2005
Automated Lighting <strong>Tutorial</strong><br />
Page 12<br />
This leads to the next item.<br />
Replace One Type of Fixture with Another<br />
If you program a show that moves and some of your equipment changes, all you have to do is unpatch<br />
one type of moving light and patch in another. The first step was accomplished above by unpatching the<br />
VL5. Now if another wash light is going to be used, like a Mac600, you can just patch that new fixture to<br />
the old channel number.<br />
2.1 @ 4 (@FIXTURE) 46 ENTER<br />
For software version 2.8.6 www.strandlighting.com 6 November, 2005
Automated Lighting <strong>Tutorial</strong><br />
Page 13<br />
This patched the Mac 600 in its place. Now, as long as the attributes are the same, then all the show<br />
data will still be there. Different manufactures deal with fixtures differently so there may be variation in<br />
the show data based on the physical differences in the fixtures. Allow time to convert the data<br />
appropriately.<br />
Just repeat patching your fixtures until you have all your moving lights patched for your show. Make sure<br />
that all pans and tilts are inverted properly before we move on.<br />
FYI, I’ll repatch the Mac 600 back to a VL5 for the remainder of the tutorial.<br />
For software version 2.8.6 www.strandlighting.com 6 November, 2005
Automated Lighting <strong>Tutorial</strong><br />
Page 14<br />
Setup Options<br />
There are some setup options that I recommend to facilitate automated fixture programming. See the<br />
screen below…<br />
This is the way I like my User Setup screen. You don’t have to copy it exactly but the important setup<br />
selection is the display option – Smart Channel Display. Set that to Tracker Preset.<br />
Tracker Preset<br />
Tracker is the moving light application for the <strong>Strand</strong> operating software. Tracker Preset will allow you to<br />
see the Preset Focus Groups for moving lights. You’ll see what this looks like when we go to the Live<br />
display.<br />
Auto Move While Dark<br />
Let’s not forget about Auto Move While Dark. That lovely feature that was discussed in the Scroller<br />
Addendum tutorial. Set it and forget it!<br />
{REPORT} (ADV SETUP>) (SHOW SETUP)<br />
For software version 2.8.6 www.strandlighting.com 6 November, 2005
Automated Lighting <strong>Tutorial</strong><br />
Page 15<br />
{LIVE}<br />
While running cues, the console will look ahead one cue and one cue only. Any automated fixtures that<br />
have intensity in the next cue will be automatically set to the attribute values for the next cue in the<br />
default time that was set in the Show Setup screen shown above.<br />
I’ve used my default values for the settings. The fade time will determine how fast or slow the fixtures<br />
move and the delay time sets the amount of time that the console holds before it processes the auto<br />
move after the previous cue completes.<br />
For software version 2.8.6 www.strandlighting.com 6 November, 2005
Automated Lighting <strong>Tutorial</strong><br />
Page 16<br />
Live Control<br />
Let’s go to Live and see what we have.<br />
{LIVE}<br />
Note: This screen will differ from yours as it is a screen shot from an actual Broadway show.<br />
This shows the conventional screen but notice a few things. I only have the channels that I’m actually<br />
using showing. This is because I only patch the channels that I’m using. This is NOT just a display<br />
option. All other channels have actually been deleted.<br />
Also notice that most of the channels numbers are in cyan or white. (Cyan for LightPalette – white for<br />
GeniusPro) This represents a standard intensity channel. Some of the channels are in light grey. This<br />
represents an intelligent fixture. An intelligent fixture can be anything from a Leko with a scroller up to a<br />
moving light or media server. If you capture one of the intelligent channels, Tracker Preset will show you<br />
the rest. The number under the intensity value location for channels 15 thru 17 indicate a color wheel or<br />
color scroller.<br />
Let’s capture our first moving light and see what we have…<br />
1 ENTER<br />
For software version 2.8.6 www.strandlighting.com 6 November, 2005
Automated Lighting <strong>Tutorial</strong><br />
Page 17<br />
Attribute name from<br />
Fixture Library<br />
First 6 characters of<br />
fixture name<br />
Red: Intensity wheel<br />
Channel<br />
Number<br />
Yellow: Trackball<br />
Grey Box: Encoder Wheels<br />
Attribute<br />
numbers from<br />
Fixture Library<br />
Text color matches inside<br />
the encoder thumb wheels<br />
Note: Pan and Tilt have two attribute controls but only one attribute listing. That’s because, the second<br />
attribute for each is 16bit and has been combined on the same encoder.<br />
Locking Pan and Tilt<br />
You can choose to lock Pan and Tilt if you ever need to just move just the X or the Y on the unit.<br />
HOLD THE CENTER TEAL KEY ABOVE THE TRACKBALL<br />
TOGGLE THE LEFT TEAL KEY ABOVE THE TRACKBALL<br />
Now there is a flag on the bottom right of the cue list that says PAN LOCKED and the appropriate<br />
attribute is in grey on the channel screen’s attribute list.<br />
Toggle the left teal key again while holding down the center teal key and it will release it. Repeat for the<br />
right teal key and the tilt will lock.<br />
Speed Multiplier<br />
You can also hold down the center teal key and move the trackball. This multiplies the rate of movement.<br />
For software version 2.8.6 www.strandlighting.com 6 November, 2005
Automated Lighting <strong>Tutorial</strong><br />
Page 18<br />
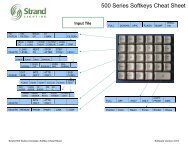
ATC Page<br />
The ATC or Attribute Control Page is a simple text document that allows flexibility in how the automated<br />
fixtures are controlled, displayed and filtered for recording. There are 3 sections to the ATC Page. We’ll<br />
go into each one at a time but first, let’s access the file.<br />
{MORE} (NOTES DISP) (LOAD FILE) (ATC PAGE)<br />
Note: to return to this screen after going back to Live, press LAST SCREEN<br />
The remark statements at the beginning of the file give the details of the information contained within the<br />
file. I’ll go through this file in the order that I edit the file…not in the order of the information presented.<br />
Display Order<br />
The display order allows the flexibility of determining the display order of the attributes. Scroll down until<br />
you find the information displayed below…<br />
For software version 2.8.6 www.strandlighting.com 6 November, 2005
Automated Lighting <strong>Tutorial</strong><br />
Page 19<br />
D1 – stands for Display 1 and that is for the display of user 1 which is always the main console. With the<br />
line below it blank or default, this means that you are seeing the attribute information in numerical order -<br />
1 thru 126. Since we have VL5s, let’s assume that we want to change that display order and we want<br />
Frost to appear below CMY and that all the speed channels want to be moved below reset. Simply input<br />
the numerical order that you want. Scroll your cursor to the line below [D1] and type this in…<br />
1, 3>4, 11>13, 10, 20, 17>19, 2>126<br />
What you have done is set the attribute order numerically. You inputted the specific info; now let the<br />
software do the tedious math. Press (Save File) and watch the screen.<br />
(SAVE FILE)<br />
The software has fixed all of the syntax for you to make that a legal entry. Here is what you should see…<br />
For software version 2.8.6 www.strandlighting.com 6 November, 2005
Automated Lighting <strong>Tutorial</strong><br />
Page 20<br />
To see the fruits of your labor, go to Live and press Live again 3 times total. What this will do is refresh<br />
your Tracker Preset screen to show the new order…<br />
For software version 2.8.6 www.strandlighting.com 6 November, 2005
Automated Lighting <strong>Tutorial</strong><br />
Page 21<br />
The really nice thing about this feature is that if you are on a multiple desk system, you can add D2 for<br />
the 2 nd user and so on. The maximum is 5 consoles on a system so you can have 5 user lists. This is<br />
great for a programmer that wants one list and a designer that wants another order.<br />
Attribute Groupings<br />
There are two line groupings in the ATCPAGE.LIB. Each of these groupings is an ATC Page. They allow<br />
the flexibility to determine which grouping of attributes work together on the encoders. To understand<br />
this better, let’s see how these are used.<br />
From the Live screen, go to the 3 teal keys that are above the trackball. If you press the right one of the<br />
three, the attribute selection will move down the ATC Pages list.<br />
On my console, this is what I get…<br />
Now, it’s the Reset and Speed attributes that are on the encoders where it was CMY and Frost on the<br />
earlier set. If you press the left teal key, it will go back to the previous assignment.<br />
Rotary Window<br />
Now look at the cue list screen. (This assumes you have a 2 monitor setup) in the upper right hand<br />
corner at the “Rotary Window”. This will show you the DMX values rather than the percentages for the<br />
attribute values. The important thing for now is look at the Page info. It says 53/93. This tells us that the<br />
encoders are using ATC Page 53 and the highest numbered ATC Page is 93. If you page through using<br />
the right and left teal keys, the encoder assignments will change as the page number changes.<br />
For software version 2.8.6 www.strandlighting.com 6 November, 2005
Automated Lighting <strong>Tutorial</strong><br />
Page 22<br />
Also, if you press and hold the center teal key above the trackball and look at your softkeys, you’ll see<br />
that these are ATC Pages for encoder assignments. Pressing any of these softkeys will assign that<br />
attribute grouping to the encoder wheels. The softkeys are accessing ATC Pages 51 thru 56.<br />
Now let’s go back to the ATC Page and see what we can edit to help our encoder assignments. If you<br />
haven’t gone to any other page, you can just press Last Screen to get back.<br />
LAST SCREEN<br />
Scroll down until you find a page that looks similar to this. You’ll find different ATC Pages since the file<br />
that I’m using has already been modified for this production.<br />
For software version 2.8.6 www.strandlighting.com 6 November, 2005
Automated Lighting <strong>Tutorial</strong><br />
Page 23<br />
ATC Page Name<br />
ATC<br />
Page<br />
Number<br />
Attribute<br />
assigned to<br />
level wheel<br />
2 Attributes<br />
assigned to the X<br />
and Y of the<br />
trackball<br />
4 Attributes assigned to<br />
the encoder wheels from<br />
top to bottom.<br />
Editing this file is easy, just change the ATC Page number, name or attribute number that the appropriate<br />
device is controlling. If you look at the one that has been highlighted, 53 is the Attribute Map number and<br />
since this is within the range of 51 through 56, it shows up on the softkeys when the center teal key is<br />
pressed. I have named it CMY because it assigns Frost, Cyan, Magenta and Yellow to the White, Blue,<br />
Red (or orange) and Purple encoders in that order.<br />
Create as many ATC Pages as you need. You’ll probably notice that many ATC Pages already exist in<br />
your file. Some are specific to fixtures where some are generic to attribute groupings. You can also<br />
delete ones that you don’t use. That is something that I do. I don’t want to use the right and left teal keys<br />
and page thru a bunch of ATC Pages that I never use. Just use the Cut Line, Copy Line and Paste Line<br />
soft keys to help in editing. Just remember to press Save File when you are done. If you forget to…don’t<br />
worry. It automatically saves. I like to do it so that it I see the console fix any formatting issues.<br />
Attribute Filters<br />
The attribute filters allow the flexibility of filtering out information for recording of preset focus groups.<br />
When you press the @ATT key, the attribute filters show up on your softkeys.<br />
@ATT<br />
Attribute filters F1 thru F6 appear on your softkeys. If you need more, attribute filters F7 thru F10 are<br />
available on the 520i. They are your center 4 teal keys. Just watch the screen menus. Attribute filters F7<br />
thru F12 are available on the 530i and 550i on your center grouping of teal keys.<br />
For software version 2.8.6 www.strandlighting.com 6 November, 2005
Automated Lighting <strong>Tutorial</strong><br />
Page 24<br />
These attribute filters can be edited quickly and easily to filter the attributes that you want to group<br />
together. Look toward the beginning of the ATC Page for the filters.<br />
Press the<br />
@ATT key<br />
and these<br />
filters<br />
appear on<br />
the soft<br />
keys<br />
Filter Name<br />
List of attributes<br />
numerically that want to<br />
be included in the filter<br />
Shown here is an ATC Page that has been edited. Notice that any numerical list can be included in any<br />
filter. Just setup what is needed for speed of programming.<br />
For software version 2.8.6 www.strandlighting.com 6 November, 2005
Automated Lighting <strong>Tutorial</strong><br />
Page 25<br />
Recording Preset Focus Groups<br />
Preset Focus Groups are groups that allow cue data to reference back to the group data for attributes<br />
only. The way this works is lights are placed in the correct color groups, gobo groups and position<br />
groups and then the current state is recorded as a cue. Once recorded, the cue is now referencing the<br />
preset focus groups. If you change the info in the groups, then all cue data is automatically updated.<br />
Remember that preset focus groups are from 1 to 750. Groups from 751 and up are NOT preset focus<br />
groups as well as point groups.<br />
Group Layout<br />
Although not mandatory, I recommend defining a group layout for your show. This is just a numerical<br />
framework that makes it easier to catalog your show groups. There are two main categories for these<br />
listed below.<br />
Utility Groups<br />
Utility groups are programming tools that prepare the lights for creating show content groups. There are<br />
two main utility groups that I use: Home and Clear.<br />
Home takes the light back to a default position without affecting other attributes. If the light is a yoke<br />
based fixture (not a mirror unit) and the fixture is hung on a standard electric where the housing is square<br />
to the electric, then this will be pan at 50 and tilt at 50. Some programmers refer to this as 50/50. Using<br />
this group orients the light straight down and rotates the yoke until its square to the electric. This usually<br />
has the yoke running stage left to stage right. If the light is a mirror unit, then the pan and tilt values can<br />
be anything you want. Just have the fixture focused where you would like for its home position.<br />
Clear takes all other attributes to a default position. Iris, Focus, Color, Gobo, Shutters…everything else<br />
goes to a default position. For Color and Gobo this will be zero so there is no color or gobo present. For<br />
Iris it could be open (Full), it could be closed (0) or 50% or anything in between. Just put it where you<br />
want it to be as a place to start. For Focus, this could be a value that would give you a hard edge or<br />
maybe a soft edge. You get the idea. I also include the reset channel at the manufacturer’s required<br />
value to have the lamp on.<br />
These groups are not meant to be part of show content so I place them outside the range of preset focus<br />
groups. Home is Group 751 and Clear is Group 752. You are also not limited to these two utility groups.<br />
If you wish you have a Clear Color group then record just color info into a Group 753. If you want a Clear<br />
Gobo group, then record the gobo info at 0 as Group 754. Remember that for a Clear Gobo group you<br />
might want focus as part of it, you might not. I usually make this determination based on the type of show<br />
that I’m doing. The main this is that I don’t always assume the groups and the info in the groups will be<br />
the same for every show. Adjust the data to apply to the show as you need it.<br />
Below is an example of utility groups that I used on a Broadway show.<br />
For software version 2.8.6 www.strandlighting.com 6 November, 2005
Automated Lighting <strong>Tutorial</strong><br />
Page 26<br />
Show Groups<br />
Show groups are groups that contain show data for programming the cues. These usually break down<br />
into positions, colors and gobos as a minimum. On some shows, I might include FX groups, beam<br />
groups, iris groups and anything else that the show requires. On the example below, notice how I<br />
predefined my group numbering scheme so that each new item type starts with the next hundred.<br />
For software version 2.8.6 www.strandlighting.com 6 November, 2005
Automated Lighting <strong>Tutorial</strong><br />
Page 27<br />
Building Groups<br />
In Preview<br />
Let’s start by building our utility groups. I usually build those blind in preview. The example is based on<br />
10 VL5s that have been patched as channels 1 thru 10. Just adjust your channel numbers accordingly if<br />
you don’t have the same fixtures patched.<br />
{PREVIEW}<br />
GROUP 751 ENTER ENTER<br />
1.3 THRU 10.4 @ 5 ENTER<br />
Notice that I captured the attributes that I wanted just by typing them in. The number on the left side of<br />
the point is the channel. The number on the right side of the point is the attribute number. Also notice<br />
that “THRU” worked on both sides of the point so that 1.3 thru 10.4 is actually processing 1 thru 10 but<br />
only .3 (pan) thru .4 (tilt).<br />
I always like to press clear afterwards so that I can see the actual values not selected.<br />
CLEAR<br />
For software version 2.8.6 www.strandlighting.com 6 November, 2005
Automated Lighting <strong>Tutorial</strong><br />
Page 28<br />
Note: White values are the only ones that are actually values in the group. Grey values are legal<br />
attributes that don’t have values in this particular group.<br />
Now let’s build the clear group.<br />
GROUP 752 ENTER ENTER<br />
1.10 THRU 10.20 @ 0 ENTER<br />
CLEAR<br />
For software version 2.8.6 www.strandlighting.com 6 November, 2005
Automated Lighting <strong>Tutorial</strong><br />
Page 29<br />
Depending on the fixtures that you have patched, your syntax will change to include a wider range of<br />
attributes. That syntax was used because the fixtures were VL5s. Just reference your numerical<br />
attribute list on the left side of the channel page.<br />
In Live<br />
Building groups in Live is easy using the attribute filters. Let’s build a position group first. Select the unit,<br />
turn it on, move the unit into position, record the group. Let’s see how…<br />
1 ON<br />
TRACKBALL THE UNIT INTO POSITION<br />
1 RECORD GROUP 1 @ATT (POSITION) TEXT “CAFÉ” ENTER<br />
@ GROUP 1 ENTER<br />
So the first thing was channel one was captured and turned on. Then the unit was moved into position<br />
over the “Café” table. Now let’s breakdown the next syntax…<br />
Action Item #<br />
The 1 st Attribute Filter<br />
Channel<br />
List to be<br />
recorded<br />
1 RECORD GROUP 1 @ATT (POSITION) TEXT CAFÉ ENTER<br />
Item<br />
Access<br />
Attribute<br />
Filters<br />
For<br />
the<br />
Label<br />
Label<br />
content<br />
Finishes the<br />
command.<br />
Now that we see all the different components to this syntax, let’s talk about the options.<br />
For software version 2.8.6 www.strandlighting.com 6 November, 2005
Automated Lighting <strong>Tutorial</strong><br />
Page 30<br />
Channel List: With a channel list, the following action will only apply to the channels in the channel list. If<br />
this is excluded, the command string would start w/ Record. This means that it would take all fixtures in<br />
the show that have position attributes.<br />
RECORD: That’s the action for this command. You could change this out for Update.<br />
Item: This could be changed so that you are recording into a Cue or Sub rather than a Group.<br />
Item #: Choose any number that you want. Groups can be numbered from 1 to 999. If you use point<br />
groups like 1.1, then it will NOT be a preset focus group. Only whole numbers are preset focus groups.<br />
Also there are utility groups in the 900s range. These are defaults.<br />
@ATT: This changes the softkeys to access the attribute filters.<br />
(POSITION): This is the first attribute filter that is in the ATCPAGE.LIB.<br />
TEXT: So that the group can be labeled at the same time that it is created. This step is optional.<br />
“CAFÉ”: Just the content of the label.<br />
ENTER: Finishes the command syntax.<br />
Notice that the last line of the previous example was “@ GROUP 1 ENTER”. Prior to that command, the<br />
group was recorded but the fixture was not accessing the group. This tells the fixture to access or go to<br />
the group. If the data on screen is numerical, then it is NOT accessing the focus group. If the data<br />
shows the label then it IS accessing the group.<br />
Now let’s repeat this recording process for a color group.<br />
1 ON<br />
ROLL THE BLUE WHEEL FOR THE CYAN COLOR FLAG<br />
1 RECORD GROUP 101 @ATT (COLOUR) TEXT CYAN MIX ENTER<br />
@ GROUP 101 ENTER<br />
Note: depending on your ATC Pages, Cyan may be on a different encoder.<br />
For software version 2.8.6 www.strandlighting.com 6 November, 2005
Automated Lighting <strong>Tutorial</strong><br />
Page 31<br />
Just repeat this process for all colors that are needed in the show. You can also repeat this process<br />
using other attribute filters for gobos, shutters, focus, and iris…whatever you want! Just remember to set<br />
the attribute filters that you want to use in the ATC Page.<br />
Preset Focus Group Display Options<br />
Standard Group Display<br />
You have different group displays that can help you view the group information in different ways.<br />
The view above where you see the group text is the standard group display.<br />
Preset Display<br />
By pressing Shift + the Group Display button at the same time, you can toggle through the group display<br />
options.<br />
SHIFT {GROUP}<br />
For software version 2.8.6 www.strandlighting.com 6 November, 2005
Automated Lighting <strong>Tutorial</strong><br />
Page 32<br />
Note: Notice the red flag at the bottom right hand corner of your cue list that says Preset Display<br />
This is now displaying the group number first, then the group text because sometimes it’s easier to deal<br />
with group number info.<br />
Control<br />
Let’s see what other options there are…<br />
SHIFT {GROUP}<br />
For software version 2.8.6 www.strandlighting.com 6 November, 2005
Automated Lighting <strong>Tutorial</strong><br />
Page 33<br />
Note: Notice the red flag at the bottom right hand corner of your cue list that says Control<br />
This shows the percentage values first, then the group text because sometimes, you just want to know<br />
what the mix values are on colors.<br />
SHIFT {GROUP}<br />
Pressing Shift + Group Display again will toggle you back to the default group display.<br />
Copying Info from One Fixture to All Fixtures<br />
So we have stored our CYAN MIX color for channel 1. What if we want to copy this to all of our VL5s?<br />
{GROUP}<br />
TRACKBALL TO GROUP 101<br />
2 THRU 10 @ (COPYFROM) 1 ENTER<br />
CLR<br />
For software version 2.8.6 www.strandlighting.com 6 November, 2005
Automated Lighting <strong>Tutorial</strong><br />
Page 34<br />
Note: This is the view prior to pressing CLR. Once you press CLR, all the recorded info shows up in white<br />
vs the grey info.<br />
For software version 2.8.6 www.strandlighting.com 6 November, 2005
Automated Lighting <strong>Tutorial</strong><br />
Page 35<br />
Quick Access for Palettes<br />
Now that you have built several colors, let’s talk about the different ways to access those preset focus<br />
groups.<br />
Access by Group Number<br />
The traditional way to access any preset focus groups is by group number.<br />
LIVE<br />
1 @ GROUP 1 ENTER<br />
Access by Text<br />
It may not always be convenient to access the group by number. Another way to access the group info<br />
would be by the text label.<br />
1 @ TEXT CY ENTER<br />
For software version 2.8.6 www.strandlighting.com 6 November, 2005
Automated Lighting <strong>Tutorial</strong><br />
Page 36<br />
When @ TEXT is entered, the console is now looking for group label info to access the groups for you.<br />
As you enter each key, it will text match at the bottom of your screen. When the correct group label is<br />
matched, you can stop entering text and just press Enter. That’s why I only typed in “CY” for Cyan Mix.<br />
My favorite thing to do is to mix color groups and label them 68R for Roscolux 68 and 201L for<br />
Lee 201. By saving the manufacturers letter for the last, I can input the label text from the<br />
console’s numerical keypad rather than searching on the keyboard. Try it and see how you like it!<br />
Access by Macros on Submaster Bump Buttons<br />
If you like to work with palettes, the way to setup them up is to turn the submaster bump buttons into<br />
macro buttons. The first step is to build the groups and we have already learned how to do that. The<br />
second step is to switch the bump buttons over to macros.<br />
{SUB}<br />
TRACKBALL OVER TO THE BUMP COLUMN UNDER SUB 1<br />
CHANGE FROM FLSH TO MAC<br />
For software version 2.8.6 www.strandlighting.com 6 November, 2005
Automated Lighting <strong>Tutorial</strong><br />
Page 37<br />
Now these subs will fire the macro equal to the sub number plus 100. So Sub 1 will fire Macro 101, Sub<br />
24 will fire Macro 124 and so on. There is also a second page of these macros. If you hold down the<br />
Shift key, the bump buttons will access the sub number plus 300.<br />
The only thing left is building the macros themselves.<br />
Build Macros<br />
Let’s go into the Macro screen and build the macros in preview.<br />
{MACRO}<br />
MACRO 101 ENTER ENTER<br />
@ GROUP 101 ENTER<br />
For software version 2.8.6 www.strandlighting.com 6 November, 2005
Automated Lighting <strong>Tutorial</strong><br />
Page 38<br />
Note: This is an example from a Broadway show. Your actual Macros and macro content may vary.<br />
Just continue this format for all macros that need to be written.<br />
I usually decide before I start writing macros how I want to break down the submaster panels. I’ll<br />
usually do 1 thru 12 as colors, 13 thru 24 as gobos, with the shift version of 1 thru 12 as positions<br />
and the shift version of 13 thru 24 as gobo effects, beam and iris groups.<br />
Remember that writing the macros without a leading channel number will allow the macro to work with<br />
any combination of moving lights. Just put in the channel list prior to pressing the sub bump button. That<br />
will run that macro for all the selected channels.<br />
For software version 2.8.6 www.strandlighting.com 6 November, 2005
Automated Lighting <strong>Tutorial</strong><br />
Page 39<br />
Writing Cues<br />
I spend a lot of time building preset focus groups for several reasons. 1. Its faster programming than<br />
moving a light into position or mixing a color every time. 2. When I look at my moving light screens,<br />
seeing text based info is much more useful that numerical info.<br />
Below is a look at a cue in preview. It shows the first 10 channels of VL5s in the recorded positions for<br />
Cue 5. Notice that all fixtures are referencing a position group. This is evident by the text as well as the<br />
black box surrounding the data.<br />
Let’s talk about accessing those groups a little more.<br />
Accessing Preset Focus Groups<br />
We’ve learned the 3 ways to access the preset focus groups so you just need to choose the most<br />
intuitive way for you when building cues.<br />
Below is a sample screen shot after I have placed a few lights into position and colors using preset focus<br />
groups.<br />
For software version 2.8.6 www.strandlighting.com 6 November, 2005
Automated Lighting <strong>Tutorial</strong><br />
Page 40<br />
Remember the 3 ways of access the groups…<br />
@ GROUP 1 ENTER – for accessing the group by number.<br />
@ TEXT CYAN ENTER – for accessing the group by text.<br />
Pressing Sub Bump Buttons – for accessing the groups via pallets.<br />
Recording Cues<br />
Recording cues with moving lights is no different than recording cues with conventional units. When you<br />
set your levels and attributes using the preset focus groups just record!<br />
RECORD 11 ENTER<br />
GOTO ENTER<br />
For software version 2.8.6 www.strandlighting.com 6 November, 2005
Automated Lighting <strong>Tutorial</strong><br />
Page 41<br />
Note: I recorded this as Cue 11 then gave it a GOTO command. This allows me to see all info in the<br />
proper colors.<br />
I chose to record this as Cue 11 but you can record to any cue you wish. When the cue is recorded, all<br />
info will be cyan. This is to let you know that the channel info has been stored as a cue. By forcing a<br />
GOTO command with GOTO ENTER, I now see all info in its proper colors. Purple is up, green is down;<br />
cyan is tracking and blue is changed attribute info. Remember that attributes can never be off so up or<br />
down don’t relate to attributes. We only want to know if the attribute info is the same (cyan) or different<br />
(blue).<br />
Part Cues<br />
Part cues are a fabulous way to have channel levels get to the completed results of a cue in different<br />
times. Many people find part cues confusing but I hope to clear up any issues and convert any nonbelievers<br />
in part cues because there are huge advantages over using multiple cues and assigning<br />
autofollows. In this example, we will have the color move in its own part at a different rate and to come up<br />
later than the other attributes.<br />
First, a few rules about part cues…<br />
There is a limit of 12 parts per cue.<br />
Each part goes toward your total capacity of 2000 cue parts per show on a <strong>500</strong> series console.<br />
All parts start at the same time. They don’t start after the previous part completes.<br />
If you start by building Part 2, then Part 1 will be the base part. (Previous desks like LightPalette and<br />
Obsession use Part 8 as the base.)<br />
Each part can have its own time, delay, effect, macro and text assigned to it.<br />
Advantages…<br />
For software version 2.8.6 www.strandlighting.com 6 November, 2005
Automated Lighting <strong>Tutorial</strong><br />
Page 42<br />
When I need to edit a part cue, I just make my changes and Update the cue. I don’t have to worry about<br />
tracking my changes through multiple cues.<br />
Some designers use part cues in a consistent format for automated fixtures. For example Part 5 is<br />
always pan and tilt, Part 6 is always color, Part 7 is always gobo…that sort of thing. If the show is<br />
programmed like this, then one can always tell when live moves and color are happening simply by<br />
looking at the cue sheet. This is great for stage managers.<br />
The most popular and easiest way to write a part cue is to first record the cue as a regular cue. Then<br />
create the parts in preview. Then assign certain channels (or attributes) to the appropriate part. After<br />
that, just adjust the time and you’ve got it.<br />
Creating the Part<br />
Let’s get into the appropriate cue and create the parts.<br />
{PREVIEW} CUE 11 ENTER<br />
CUE (PART) 2 ENTER ENTER<br />
Note: The screen shot is taken prior to the final ENTER.<br />
Once you have created the additional part, use the NEXT and LAST keys to look at the differences in<br />
data between the two parts.<br />
For software version 2.8.6 www.strandlighting.com 6 November, 2005
Automated Lighting <strong>Tutorial</strong><br />
Page 43<br />
Notice that all the data is in a background color in the newly created part. This indicates that the data<br />
resides in another part. Now we need to place the correct data in the new part.<br />
To place conventional channels into a part, it is simply CHAN LIST ENTER. ( 51 THRU 55 ENTER) But<br />
with attributes it’s more specific.<br />
Assigning Attributes to a Part: Manually<br />
To assign attributes of a channel to a part manually, just type the channel info and then press enter.<br />
2.11 THRU .13 ENTER<br />
CLR<br />
For software version 2.8.6 www.strandlighting.com 6 November, 2005
Automated Lighting <strong>Tutorial</strong><br />
Page 44<br />
Note: the screenshot was taken before pressing CLR<br />
Pressing CLR will show you the actual data. While some attributes may be white (for hard values) and<br />
some may be blue (for changed values) that’s normal. This is because going from one color mix to<br />
another may not change all attributes. If they don’t change then the attributes will be in white. If they do<br />
change, the attributes will be blue.<br />
Now let’s change the color for channel 6 using the attribute filters.<br />
Assigning Attributes to a Part: Using Attribute Filters<br />
Here we use the Softblock command to move data around in part cues by taking advantage of the<br />
attribute filters.<br />
This is the command if you are on a 550 or 530…<br />
6 @ATT (Colour) (SOFTBLOCK)<br />
…and this is the command if you are on a 520…<br />
6 @ATT (Colour) REC MODE (SOFTBLOCK)<br />
The difference in syntax is because the 520 doesn’t have a center LCD screen and pressing REC MODE<br />
brings up the Softblock softkey on the softkey LCD screen.<br />
For software version 2.8.6 www.strandlighting.com 6 November, 2005
Automated Lighting <strong>Tutorial</strong><br />
Page 45<br />
While in Preview and in the right part (the current part is always listed at the beginning of the command<br />
line on both screens) it’s easy to change time and add a delay if you want.<br />
TIME 8 DELAY 3 ENTER<br />
For software version 2.8.6 www.strandlighting.com 6 November, 2005
Automated Lighting <strong>Tutorial</strong><br />
Page 46<br />
Remember; just repeat this process for all the parts that you want for the cue up to the maximum of 12.<br />
When you return to the cue during the rehearsal process and make changes to any part cue, Update<br />
rather than Record. Update will only take changed values (levels in red) while Record will always store<br />
the entire state of the rig. This will record into the part that the karat is on and corrupt your part cue.<br />
Of course, if that mistake gets made, you can always UNDO RECORD ENTER and then update as is<br />
appropriate.<br />
Updating<br />
Updating Cues<br />
The general practice that I use is to Record the cue the first time and then Update after that. The main<br />
reason is that record always takes the entire state of the system and stores it. Update only takes<br />
changed values. This means that update ignores subs, FX and other cues that are running.<br />
Let’s talk about updating moving lights by looking at a cue that contains attribute content.<br />
I can easily see what my fixtures are doing because of my group data. If I need channel 1 to be in my<br />
DSC group instead of the Café group then I just place the light in my DSC group and update.<br />
1 ON<br />
@ TEXT “D” ENTER<br />
For software version 2.8.6 www.strandlighting.com 6 November, 2005
Automated Lighting <strong>Tutorial</strong><br />
Page 47<br />
When the lights are set, just Update…<br />
UPDATE ENTER<br />
Update will update the cue that has the karat. This will be the current cue that you are in. Update will<br />
update to Track or Cue Only depending on the default mode that you are in. Look at the top of the cue<br />
list for this information.<br />
Now let’s talk about editing the group data through cues.<br />
Updating Groups<br />
Live<br />
To update a group live, just alter the info and update the group calling out the channel number and group<br />
number…<br />
TRACKBALL TO MOVE THE FIXTURE HEAD<br />
1 UPDATE GROUP 2 @ATT (Position) ENTER<br />
This will update channel 1’s position info into group 2.<br />
Preview<br />
For software version 2.8.6 www.strandlighting.com 6 November, 2005
Automated Lighting <strong>Tutorial</strong><br />
Page 48<br />
If you want to change info in Preview, just go into Preview and change the info manually. Let’s say that<br />
you need to add 2 points of Cyan to the Cyan Mix group which is Group 101.<br />
{PREVIEW}<br />
GROUP 101 ENTER<br />
1.11 @ 57 ENTER<br />
CLR<br />
Preview with Live<br />
Note: This screen shot was taken prior to pressing CLR.<br />
Another option for updating in Preview, is to make the changes Live, go into Preview, and then pull the<br />
info from Live.<br />
{LIVE}<br />
1 ENTER<br />
ROLL THE BLUE ENCODER (CYAN ATTRIBUTE) TO A LEVEL OF 59<br />
For software version 2.8.6 www.strandlighting.com 6 November, 2005
Automated Lighting <strong>Tutorial</strong><br />
Page 49<br />
See that the Cyan attributes is no longer referencing the preset focus group? You can tell by the<br />
numerical data vs the text data shown on the Live screen. Now let’s go in the Preview screen and pull<br />
the info live.<br />
1.11 @ {LIVE} ENTER<br />
For software version 2.8.6 www.strandlighting.com 6 November, 2005
Automated Lighting <strong>Tutorial</strong><br />
Page 50<br />
This example pulled just one attribute but you can pull any channel, combination of channels or<br />
combination of attributes this way.<br />
Magic Update: Overview<br />
This is one of my favorite new features…Magic Update. Magic Update remembers all attributes<br />
references to preset focus groups. When you change the attributes live using the trackball and the<br />
encoder wheels, it keeps a reference to the last preset focus group that it was in so that updating groups<br />
is intelligent and easy.<br />
Magic Update: By Channel List<br />
Let’s go Live and into Cue 11 and see what we have on screen. You’re cue content will vary from mine.<br />
So here we have a cue that has 5 VL5s accessing 5 different position groups and 3 different color<br />
groups. I’ll turn them on one at a time and make adjustments as needed.<br />
For software version 2.8.6 www.strandlighting.com 6 November, 2005
Automated Lighting <strong>Tutorial</strong><br />
Page 51<br />
Here I’ve adjusted channel 1’s position and the cyan wheel of the color group CYAN MIX. Now I’ll adjust<br />
the other fixtures.<br />
So all the channels that are in red have been selected and we know they have been adjusted by seeing<br />
the attributes that have numerical data vs showing us the text data. With the labels showing, we are<br />
seeing that the fixtures are referencing the preset focus groups. Once we adjust the information live with<br />
the trackball and encoders, the data is no longer referencing the preset focus groups. We could update<br />
For software version 2.8.6 www.strandlighting.com 6 November, 2005
Automated Lighting <strong>Tutorial</strong><br />
Page 52<br />
the cue here but then the cue would have raw data rather than group references and that’s not what we<br />
want to do here. What we want is to update the groups that have been adjusted but this can get<br />
complicated. Channels 1 and 6 alone have adjusted references for 4 groups (1 position group and 1<br />
color group each) and we still have other units. This is where the magic part comes in with magic update.<br />
1 + 3 THRU 4 + 6 UPDATE GROUP ENTER ENTER<br />
Note: This screen was captured prior to the second ENTER.<br />
Now look at your screen, all attributes are back to referencing the same preset focus group. The<br />
difference is that the groups now have the new data in all of the groups!<br />
For software version 2.8.6 www.strandlighting.com 6 November, 2005
Automated Lighting <strong>Tutorial</strong><br />
Page 53<br />
The console magically keeps track of every attribute for every channel. When you change attribute info<br />
Live, it remembers the last group that it referenced so you can update globally without having to worry<br />
about which groups each attribute was last referencing.<br />
Magic Update: By Attribute Filter<br />
Magic Update can also be done by attribute filter.<br />
The scenario is similar to before, you are in a cue and several moving lights need to be adjusted for<br />
position info and for color info. After you adjust, you realize that you only need to update the position info<br />
and not the color info. So the command would be…<br />
UPDATE GROUP @ATT (Position) ENTER ENTER<br />
There are 2 differences in this command syntax. 1. I didn’t provide a leading channel list. Therefore the<br />
Update command applied to all channels that have the filtered attributes. In this case, Position. 2. I<br />
added an attribute filter so that the update process would filter out everything “except” what is in the<br />
Position filter. Therefore it updated red values (changed values) for all channels that have attributes .3<br />
and .4.<br />
Magic Update: Globally<br />
There is a very powerful version of this command that works by taking everyone.<br />
UPDATE GROUP ENTER ENTER<br />
For software version 2.8.6 www.strandlighting.com 6 November, 2005
Automated Lighting <strong>Tutorial</strong><br />
Page 54<br />
But beware. In certain situations, this command can be TOO powerful because it doesn’t discriminate<br />
between preset focus groups and non-preset focus groups. Therefore, if you have taken one fixture to<br />
Home and or Clear, and you move to another fixture that is referencing a preset focus group and then<br />
you use the global version of this command, it could contaminate your preset focus groups with the Home<br />
and or Clear group data. Because of this, I recommend NEVER using the global version of this<br />
command. Be selective. It will serve you better in the long run.<br />
For software version 2.8.6 www.strandlighting.com 6 November, 2005
Automated Lighting <strong>Tutorial</strong><br />
Page 55<br />
Shape Generator<br />
The Shape Generator will create shapes of movement for automated fixtures. The shape generator adds<br />
additional attributes to the chosen fixtures. These new attributes allow you to apply values to the fixtures<br />
that enable them to move in prebuilt patterns. The attributes that are added are…<br />
PProfile (.91) – assigns a profile to pan. See profile display for specific profiles.<br />
TProfile (.92) – assigns a profile to tilt. See profile display for specific profiles.<br />
PSize (.93) – determines the size of the pan movement in a percentage value.<br />
TSize (.94) – determines the size of the tilt movement in a percentage value.<br />
PSpeed (.95) – determines the speed of the pan movement.<br />
TSpeed (.96) – determines the speed of the tilt movement.<br />
PPhase (.97) – multiple fixtures can act on a different point for pan while running a shape.<br />
TPhase (.98) - multiple fixtures can act on a different point for tilt while running a shape.<br />
PTRotate (.99) – rotates the current movement clockwise from 0 (12 o’clock) to Full (clockwise to 12<br />
o’clock)<br />
Now for a little explanation…<br />
Profile – assigns a specific profile to either pan or tilt. Just look at your profile display to see what each<br />
profile is. If a shape like circle assigns pan and tile the profile 96, then the light is assigning the sine<br />
wave profile to pan and tilt.<br />
Size – changes the range of the movement. 0 is no movement while Full is maximum movement.<br />
Speed – how fast the fixture moves.<br />
Phase – fixtures can act differently while they all are running the same shape. One example would be, if<br />
2 fixtures are doing a circle and both are moving clockwise, one of the fixtures could take its tilt out of<br />
phase by 50% and then it would be doing the same circle counterclockwise or mirroring the other unit.<br />
Rotate - a value of 25 would rotate the movement to 3 o’clock and 75 would be 9 o’clock.<br />
Add Shape Channels in Patch<br />
The first step is to add the shape channels to the fixtures that need them.<br />
{PATCH} (CHAN>)<br />
1 THRU 10 (ADD SHAPE)<br />
For software version 2.8.6 www.strandlighting.com 6 November, 2005
Automated Lighting <strong>Tutorial</strong><br />
Page 56<br />
Note: the bottom right hand window is showing the progress of the shape channel that it is currently<br />
adding.<br />
Don’t worry about seeing the attributes listed in patch, the software keeps this hidden since it’s something<br />
that the fixtures don’t have.<br />
Just go back to Live and let’s refresh the screen to show the new attributes.<br />
{LIVE} CLR<br />
1 ENTER<br />
For software version 2.8.6 www.strandlighting.com 6 November, 2005
Automated Lighting <strong>Tutorial</strong><br />
Page 57<br />
Now that we have the attributes patched, let’s see about controlling these new attributes.<br />
Add Shape Channels to ATC Pages<br />
There is a very good chance that the ATC Page is already setup for the shape attributes, but let’s just<br />
make sure.<br />
{MORE} (NOTES DISPLAY) (LOAD FILE) (ATCPAGE)<br />
For software version 2.8.6 www.strandlighting.com 6 November, 2005
Automated Lighting <strong>Tutorial</strong><br />
Page 58<br />
If not there, just set up 2 ATC pages for shapes. This example shows page numbers 91 and 92 but use<br />
what you want. There are 9 attributes for shapes and only 4 encoder wheels. Instead of setting up an<br />
additional atc page for just one encoder, I put attribute 99 (PTRotate) on the wheel. This keeps my atc<br />
pages to a minimum without losing functionality.<br />
Add Shape Channels to Attribute Filters<br />
While here in the ATC Page, let’s make sure that there is an attribute filter setup for the shape channels.<br />
Just scroll up from here to the filter keys.<br />
For software version 2.8.6 www.strandlighting.com 6 November, 2005
Automated Lighting <strong>Tutorial</strong><br />
Page 59<br />
This ATC Page has the Shape filter setup as F10. This would be the far right of the four teal macros on<br />
the 520i. The screen menus will show you the filters after you press @ATT. Again, place this on any<br />
filter that you choose.<br />
Access the Shape Groups<br />
As to assessing the shapes groups, all prebuilt shapes are groups. The groups are as follows…<br />
Group 992.1 – Circle<br />
Group 992.2 – Can Can<br />
Group 992.3 – Triangle<br />
Group 992.4 – Square<br />
Group 992.8 – Figure of Eight<br />
To apply them to the fixtures, just treat them like any other group.<br />
1 THRU 5 @ GROUP 992.1 ENTER<br />
For software version 2.8.6 www.strandlighting.com 6 November, 2005
Automated Lighting <strong>Tutorial</strong><br />
Page 60<br />
If you have the fixtures as do I, then you have them at their Home position with the Circle shape. But the<br />
fixtures are not doing a circle. Let me explain as there is physics involved here. In order for a yoke<br />
based fixture to do a circle, both the pan and the tilt must be able to move freely and when the light is<br />
pointed straight down only the tilt moves freely. In order for a yoke based fixture to do a circle, the head<br />
of the unit must be perpendicular to the yoke. Basically, it must be pointed straight out…not down. Just<br />
use the trackball and tilt the fixtures straight up until the head is perpendicular to the yoke and you will<br />
see what I mean.<br />
Let me point something out here. You have the ability for the fixtures to do their shape around any center<br />
point. That means that you can still move the fixture live or using your position preset focus groups. Feel<br />
free to experiment with this until you get the hang of it.<br />
Clearing Shapes from Fixtures Live<br />
To have any fixture or combination of fixtures stop their movement. Just type…<br />
1 THRU 5 @ATT (SHAPE) .<br />
For software version 2.8.6 www.strandlighting.com 6 November, 2005
Automated Lighting <strong>Tutorial</strong><br />
Page 61<br />
Just to confirm…that was 1 THRU 5 @ATT (SHAPE) . or POINT. Using any attribute filter, you can clear<br />
out any attribute set by typing Channel List @ATT (Filter) Point.<br />
For software version 2.8.6 www.strandlighting.com 6 November, 2005
Automated Lighting <strong>Tutorial</strong><br />
Page 62<br />
Example: Can Can Offset<br />
Let’s say that VL5s 1 thru 5 are in a straight line on the same electric and that you want them doing the<br />
Can Can which is simply a shape that tilts the units back and forth from point a to point b based on the<br />
size. But you don’t want the fixtures all doing the same shape in unison. You want them offset so that<br />
each fixture goes after the previous. Here’s where the @RANGE command and the following table can<br />
help.<br />
First, let’s have the fixtures doing the Can Can.<br />
1 THRU 5 @ GROUP 992.2<br />
Now let’s offset the tilt phase using the table below and the @RANGE command. Basically, the table tells<br />
us that if you have 5 lights that you want to offset the phase<br />
Steps / No of Lights 2 3 4 5 6 7 8 9 10<br />
1 0% 0% 0% 0% 0% 0% 0% 0% 0%<br />
2 50% 33% 25% 20% 17% 14% 13% 11% 10%<br />
3 67% 50% 40% 33% 29% 25% 22% 20%<br />
4 75% 60% 50% 43% 38% 33% 30%<br />
5 80% 67% 57% 50% 44% 40%<br />
6 83% 71% 63% 56% 50%<br />
7 86% 75% 67% 60%<br />
8 88% 78% 70%<br />
9 89% 80%<br />
10 90%<br />
1.98 THRU 5.98 SHIFT @ 0 THRU 80 ENTER<br />
For software version 2.8.6 www.strandlighting.com 6 November, 2005
Automated Lighting <strong>Tutorial</strong><br />
Page 63<br />
Note: SHIFT @ will give you the @RANGE command<br />
This will now have them doing the Can Can one at a time going down the line like the Rockettes!<br />
Time to Play<br />
Now that you have learned automated luminaire control on the <strong>500</strong> series console, it’s time to play. Just<br />
experiment with the shape generator library and using the @RANGE command with the phase attributes.<br />
You’ll be amazed at the complex movements that can be programmed quickly.<br />
Good luck and happy programming!<br />
For software version 2.8.6 www.strandlighting.com 6 November, 2005