Manual (pdf) - Sunbeam
Manual (pdf) - Sunbeam
Manual (pdf) - Sunbeam

You also want an ePaper? Increase the reach of your titles
YUMPU automatically turns print PDFs into web optimized ePapers that Google loves.
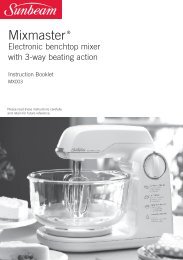
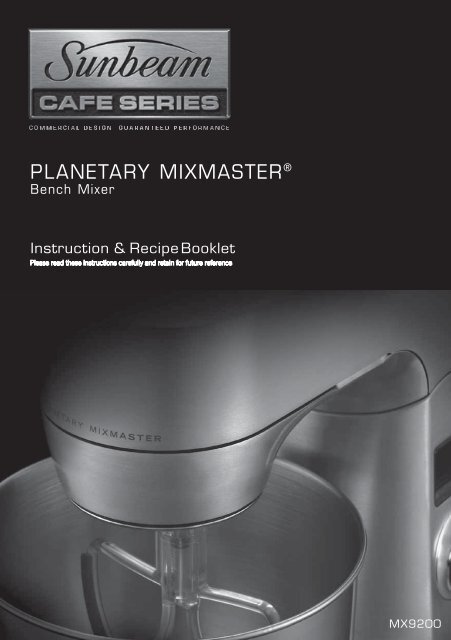
PLANETARY MIXMASTER ®<br />
Bench Mixer<br />
Instruction & Recipe Booklet<br />
MX9200
Heading<br />
Sub Heading<br />
Body copy with not indent applied.<br />
• Bullet copy Bullet copy Bullet copy Bullet<br />
copy Bullet copy Bullet copy Bullet copy<br />
Bullet copy<br />
1 scoop ice cream – any flavour<br />
2 tablespoons topping<br />
2
Contents<br />
<strong>Sunbeam</strong>’s Safety Precautions 2<br />
Congratulations 3<br />
Features of your Café Series ®<br />
Planetary Mixmaster ® 4<br />
Using your Café Series ®<br />
Planetary Mixmaster ® 6<br />
Safety Mechanisms 11<br />
Mixing Guide 12<br />
Oven Temperature Guide 13<br />
Care and Cleaning 14<br />
Troubleshooting Guide 15<br />
Ingredients 16<br />
Cookery Tips for Best Results 17<br />
Making a Successful Dough 19<br />
Recipes 21<br />
Important instructions – retain for<br />
future use.<br />
1
<strong>Sunbeam</strong>’s Safety Precautions<br />
SAFETY PRECAUTIONS FOR YOUR SUNBEAM<br />
CAFE SERIES ® PLANETARY MIXMASTER ®<br />
BENCH MIXER.<br />
• Never remove beater, Scrapemaster spatula<br />
beater, whisk or dough hook when the appliance<br />
is in operation.<br />
• Ensure fingers are kept well away from moving<br />
beater, Scrapemaster spatula beater, whisk or<br />
dough hook.<br />
• Ensure that the bowl is secured and locked onto<br />
the base of the Planetary Mixmaster ® Bench<br />
Mixer before commencing mixing.<br />
<strong>Sunbeam</strong> are very safety conscious when designing<br />
and manufacturing consumer products, but it is<br />
essential that the product user also exercise care<br />
when using an electrical appliance. Listed below are<br />
precautions which are essential for the safe use of<br />
an electrical appliance:<br />
• Read carefully and save all the instructions<br />
provided with an appliance.<br />
• Always turn the power off at the power outlet<br />
before you insert or remove a plug. Remove by<br />
grasping the plug - do not pull on the cord.<br />
• Turn the power off and remove the plug when the<br />
appliance is not in use and before cleaning.<br />
• Do not use your appliance with an extension cord<br />
unless this cord has been checked and tested by<br />
a qualified technician or service person.<br />
• Always use your appliance from a power outlet of<br />
the voltage (A.C. only) marked on the appliance.<br />
• This appliance is not intended for use by young<br />
children or infirm persons unless they have been<br />
adequately supervised by a responsible adult to<br />
ensure that they can use the appliance safely.<br />
• Young children should be supervised to ensure<br />
that they do not play with the appliance.<br />
• Never leave an appliance unattended while in<br />
use.<br />
• Do not unlock or remove the mixing bowl from the<br />
base of the Planetary Mixmaster ® Bench Mixer<br />
whilst in use.<br />
• Never tilt back the head of the Planetary<br />
Mixmaster ® Bench Mixer whilst the appliance is<br />
in operation.<br />
• When using extremely heavy loads the appliance<br />
should not be operated for more than 3 minutes.<br />
This does not apply to the recipes detailed in this<br />
booklet.<br />
• Ensure long hair is tied back and young children<br />
are not near the bowl.<br />
• Do not use an appliance for any purpose other<br />
than its intended use.<br />
• Do not place an appliance on or near a hot gas<br />
flame, electric element or on a heated oven.<br />
Do not place on top of any other appliance.<br />
• Do not let the power cord of an appliance hang<br />
over the edge of a table or bench top or touch any<br />
hot surface.<br />
• Do not operate any electrical appliance with a<br />
damaged cord or after the appliance has been<br />
damaged in any manner. If damage is suspected,<br />
return the appliance to the nearest <strong>Sunbeam</strong><br />
Appointed Service Centre for examination, repair<br />
or adjustment.<br />
• For additional protection, <strong>Sunbeam</strong> recommend<br />
the use of a residual current device (RCD)<br />
with a tripping current not exceeding 30mA in<br />
the electrical circuit supplying power to your<br />
appliances.<br />
• Do not immerse the appliance in water or any<br />
other liquid unless recommended.<br />
• This appliance is intended to be used in<br />
household and similar applications such as: staff<br />
kitchen areas in shops, offices and other working<br />
environments; farm houses; by clients in hotels,<br />
motels and other residential type environments;<br />
bed and breakfast type environments.<br />
If you have any concerns regarding the performance and use of your appliance,<br />
please visit www.sunbeam.com.au or contact the <strong>Sunbeam</strong> Consumer Service Line.<br />
Ensure the above safety precautions are understood.<br />
2
Congratulations<br />
Congratulations on the purchase of your<br />
<strong>Sunbeam</strong> Café Series ® Planetary Mixmaster ®<br />
Bench Mixer.<br />
The <strong>Sunbeam</strong> Café Series ® delivers quality,<br />
style and superior performance capturing<br />
the essence of the commercial kitchen.<br />
Inspired by heavy-duty equipment found in<br />
restaurants, cafes and bars, the <strong>Sunbeam</strong><br />
Café Series ® is built to last. It brings<br />
together a range of appliances designed<br />
to expertly create authentic café food and<br />
beverages at home.<br />
Uncompromising blends of stainless steel,<br />
brass and die-cast alloy characterise the<br />
range. This combined with advanced<br />
technology and functional design, guarantee<br />
the performance, that each product will<br />
surpass expectations.<br />
The <strong>Sunbeam</strong> Café Series ® Planetary<br />
Mixmaster ® Bench Mixer is designed with<br />
quality die-cast metal components and<br />
includes many features that make mixing at<br />
home easy.<br />
3
Features of your Café Series ®<br />
Planetary Mixmaster ®<br />
Bench Mixer<br />
4<br />
1000W motor<br />
Powerful motor achieves thorough mixing results.<br />
Full die-cast metal body with sintered metal gears<br />
The heavy duty die-cast metal body combined<br />
with sintered metal gears deliver quality, style and<br />
superior performance.<br />
Planetary mixing action<br />
Enables the mixing attachment (beater,<br />
Scrapemaster spatula beater, whisk or dough<br />
hook) to rotate whilst travelling around the inside of<br />
the bowl, and reach all areas of the bowl ensuring<br />
ingredients are completely mixed.<br />
Slow start<br />
The mixing speed is gradually increased to prevent<br />
ingredients splashing out of the mixing bowl.<br />
Splashguard with pouring chute<br />
Splashguard prevents ingredients from spilling out<br />
of the mixing bowl. The pouring chute allows adding<br />
ingredients directly into the mixing bowl without<br />
having to stop the mixer and lifting the mixer head.<br />
Stainless steel mixing bowl<br />
The 4.5L litre mixing bowl is ideal for mixing large<br />
or small quantities of ingredients.<br />
It features a handle for ease of use.<br />
Cord storage<br />
For added convenience the unused cord length<br />
can easily be pushed into the base of the mixer<br />
for storage.<br />
Pause / Start button<br />
Allows you to instantly stop the mixer to assess the<br />
mixing progress and/or add additional ingredients<br />
without affecting the timer.<br />
Carrying grips<br />
Grips at both sides of the mixer base allow for easy<br />
carrying.
Die-cast alloy dough hook<br />
Takes the hard work out of kneading dough and<br />
other heavy mixtures.<br />
Stainless steel whisk<br />
Perfect for whisking cream, egg whites, light<br />
batters and packet cake mixes.<br />
Head release with in-built safety feature<br />
The mixer head can be easily released and lifted<br />
with one hand. It tilts upwards and locks securely<br />
into position to allow easy insertion and removal<br />
of the mixing bowl and attachments. The in-built<br />
safety feature ensures that the mixer only starts<br />
when the mixer head is tilted downwards and<br />
securely locked in. Lifting the mixer head during<br />
the mixing process will automatically cut power to<br />
the motor.<br />
Scrapemaster spatula beater<br />
Excels at combining ingredients and<br />
simultaneously scrapes the sides and the<br />
bottom of the mixing bowl, virtually eliminating<br />
hand-scraping and batter build-up on the<br />
blade. Superior bowl clearance also makes this<br />
attachment ideal for smaller mixing quantities.<br />
Die-cast alloy beater<br />
Provides maximum aeration for creaming butter<br />
and sugar, and is also ideal for mixing heavy cake<br />
mixes.<br />
LCD screen with timer<br />
LCD screen displays mixing time and speed<br />
setting. Timer function can be set to count up or<br />
down as required.<br />
Buttons<br />
' ' and ' ' buttons can be used to choose<br />
the desired mixing duration, or to set the<br />
kitchen timer.<br />
Speed control dial with 12 variable settings<br />
The combination of 12 electronic speeds and a<br />
powerful torque control motor ensures superior<br />
mixing control and maintains speed, regardless of<br />
the mixing load.<br />
5
Using your Café Series ® Planetary<br />
Mixmaster ® Bench Mixer<br />
Before using your Planetary Mixmaster ® Bench<br />
Mixer<br />
Before using your Planetary Mixmaster ®<br />
Bench Mixer for the first time, remove any<br />
packaging material and promotional labels<br />
or tags. Please also remove the plastic<br />
plug pin cover before using the mixer. It<br />
is recommended to wash the mixing bowl,<br />
beater, Scrapemaster spatula beater, whisk<br />
and dough hook in warm soapy water with a<br />
soft cloth. Rinse and dry thoroughly.<br />
Set-up<br />
Before assembling your Planetary Mixmaster ®<br />
Bench Mixer, be sure the power cord is<br />
unplugged from the power outlet. Position<br />
the mixer on a level, dry surface such as a<br />
bench top.<br />
1. Press the ‘head release’ button, located at<br />
the rear of the mixer head. This will release<br />
the mixer head out of its locked position.<br />
Ease the mixer head backwards until it<br />
locks into its tilt position (Fig. 1).<br />
– Scrapemaster spatula beater<br />
for smaller amounts of mixture<br />
or for faster creaming of butter<br />
and sugar and heavy cake<br />
mixes. Also great for folding<br />
ingredients<br />
– Whisk for whisking cream, egg<br />
whites, light batters and packet<br />
cake mixes.<br />
– Dough hook for kneading dough<br />
and other heavy mixtures.<br />
3. Attach the selected mixing attachment onto<br />
the mixing shaft, aligning the groove in<br />
the top of the attachment such that it keys<br />
into the locking pin on the shaft. Push the<br />
attachment upwards over the locking pin<br />
and turn clockwise until securely locked in<br />
(Fig 2).<br />
2.<br />
1.<br />
Figure 2<br />
Note: Be sure the attachment is locked firmly<br />
in place.<br />
Figure 1<br />
2. Select the desired attachment depending<br />
on the mixing task to be performed:<br />
– Beater for creaming butter and<br />
sugar, plus mixing heavy cake<br />
mixes.<br />
Figure 3<br />
6
Using your Café Series ® Planetary Mixmaster ® Bench Mixer<br />
continued<br />
Figure 4<br />
4. Place the bowl on the base with the handle<br />
facing you. Then gently rotate the bowl<br />
in a clockwise direction until it locks into<br />
position (Fig 3). The bowl should feel firm<br />
with no movement.<br />
5. Lower the mixer head with the selected<br />
mixing attachment in place into the mixing<br />
bowl. Press the ‘head release’ button to<br />
un-lock it from its position and ease the<br />
mixer head down (Fig. 4).<br />
Using your Planetary Mixmaster ® Bench Mixer<br />
1. Position the mixer on a level, dry<br />
surface such as a bench top. Ensure the<br />
mixing bowl is in place and the desired<br />
attachment is inserted.<br />
2. Plug the power cord into a 230/240 Volt<br />
AC power outlet.<br />
3. A beep will sound and the LCD screen<br />
will light up to inform you that the mixer<br />
is now switched on. The LCD screen<br />
will flash three times and the timer will<br />
display “00:00”. The screen will also<br />
display the speed setting. If the LCD<br />
displays a speed setting other than “0”<br />
and continues to flash, you may turn the<br />
speed control dial anti-clockwise to the<br />
“0” position to re-set the speed setting.<br />
4a. If using the splashguard, add ingredients<br />
to the mixing bowl through the pouring<br />
shoot.<br />
4b. If using the mixer without the<br />
splashguard, release the mixer head<br />
out of its locked position and ease it<br />
backwards until it locks into its tilt<br />
position. Add ingredients to the mixing<br />
bowl. Then, un-lock the mixer head and<br />
lower it forward into the mixing bowl.<br />
5. Turn the speed control dial clockwise to<br />
commence mixing (Fig. 6), or, if a speed<br />
is already set, press the button.<br />
Figure 5<br />
6. The splashguard can now be placed over<br />
the bowl if desired (Fig 5).<br />
Figure 6<br />
7
Using your Café Series ® Planetary Mixmaster ® Bench Mixer<br />
continued<br />
The LCD screen will display the chosen speed<br />
setting. Instructions for mixing speeds for<br />
each type of mixture are shown in the ‘Mixing<br />
Guide’ on page 12.<br />
6. When mixing is complete, turn the speed<br />
control dial anti-clockwise to the ‘0’<br />
position (Fig. 7) and unplug the cord from<br />
the power outlet.<br />
Figure 7<br />
7. Remove the splashguard if positioned on<br />
the bowl.<br />
8. Press the ‘head release’ button and ease<br />
the mixer head back until it is locked into<br />
the tilt back position<br />
(see Figure 1 on page 6).<br />
9. To remove the particular mixing<br />
attachment, push it upwards, turn it anticlockwise,<br />
then pull it downwards (Fig 8).<br />
Pause mode<br />
At any stage during your mixing task you<br />
can pause the mixer. This enables you to<br />
assess the mixing progress, scrape any food<br />
mixture down the sides of the mixing bowl<br />
with a spatula, or add additional ingredients -<br />
without affecting the timer.<br />
Pause the mixer during operation by pressing<br />
the at the front of the speed control<br />
dial.<br />
The time on the LCD screen will flash<br />
continuously, displaying the mixing time at<br />
which the mixer has been paused.<br />
In pause mode, you are able to reset or<br />
adjust the timer if desired. Please see details<br />
on the Count-up and Count-down timer<br />
features below.<br />
To resume your mixing task, simply press<br />
the button again. The mixer will<br />
resume mixing at the same speed setting,<br />
and the timer will resume counting up/down<br />
depending on your selection made.<br />
2.<br />
1.<br />
3.<br />
8<br />
Figure 8
Using your Café Series ® Planetary Mixmaster ® Bench Mixer<br />
continued<br />
Count-up timer<br />
The count up timer informs you how long<br />
your ingredients have been mixing for. The<br />
next time you mix the same ingredients you<br />
can then set the count-down timer for the<br />
specific time.<br />
As soon as you start mixing, the timer will<br />
automatically start to count up.<br />
The maximum mixing time is 20 minutes<br />
and will be displayed on the LCD screen as<br />
“20:00” (twenty minutes, zero seconds).<br />
The mixer will automatically stop mixing after<br />
20 minutes and beep twice.<br />
The screen will flash for about 5 seconds.<br />
The timer will automatically re-set to<br />
“00:00”.<br />
The LCD screen will display the speed<br />
setting that it stopped at and this setting will<br />
continue to flash.<br />
If you pause the mixer at any time during the<br />
mixing process by pressing the button<br />
at the front of the speed control dial, the<br />
mixing time displayed on the LCD screen will<br />
flash until you resume mixing by pressing the<br />
button again.<br />
To reset the timer to “00:00”, turn the speed<br />
control dial anti-clockwise to the “0” location<br />
or, when paused, press the ‘+’ and ‘-’ buttons<br />
simultaneously.<br />
Count-down timer<br />
The count-down timer is especially useful<br />
when following a recipe that specifies mixing<br />
times.<br />
The ‘+’ and ‘-’ buttons allow you to choose<br />
the desired mixing duration. Press the<br />
‘+’ button and you will add 30 seconds.<br />
Press the ‘-’ button and you will reduce the<br />
previously set mixing time by 30 seconds.<br />
For example, if a recipe calls to “beat for<br />
2 minutes”, you can set the count-down<br />
timer to 2 minutes. Simply press the ‘+’<br />
button until “02:00” is displayed on the LCD<br />
screen, i.e. press the ‘+’ button four times.<br />
If you would like to change the countdown<br />
time after your initial setup, press the<br />
button, then press the ‘+’ and ‘-’ buttons to<br />
increase or reduce the mixing time to the<br />
nearest 30 sec increment.<br />
For example, you set the count-down timer<br />
to 3 minutes and turn the speed control dial<br />
to start mixing on a chosen speed. After 1<br />
minute, 25 seconds, you pause the mixer by<br />
pressing the button. The LCD displays<br />
the remaining count-down time of 01:35. If<br />
you now press the ‘+’ button once to increase<br />
the mixing time, the display will show 02:00<br />
(which is the nearest 30 sec increment).<br />
To reset the timer to “00:00”, turn the speed<br />
control dial anti-clockwise to the “0” location<br />
or, when paused, press the ‘+’ and ‘-’ buttons<br />
simultaneously.<br />
When the chosen mixing time is completed,<br />
the mixer will beep twice to inform you that<br />
the time has expired. It will stop mixing<br />
automatically. The timer display “00:00”<br />
and the LCD screen will flash for about 5<br />
seconds. The LCD screen will display the<br />
speed setting that it stopped at and this<br />
setting will continue to flash.<br />
9
Using your Café Series ® Planetary Mixmaster ® Bench Mixer<br />
continued<br />
If you need to resume mixing, simply press<br />
the button or, alternatively, reset the<br />
mixer by turning the dial to “0”, and then<br />
turn the dial clockwise.<br />
Kitchen Timer function<br />
The timer function can be used without<br />
mixing as a kitchen timer or stopwatch.<br />
Timer: Set the time as described in the<br />
Count-down timer section on page 9, then<br />
press the button while the dial is in “0”<br />
(i.e. no speed selected).<br />
When the set time expires, the mixer<br />
will beep and the LCD screen will flash<br />
continuously until the button is pressed.<br />
Stopwatch: Simply press the button<br />
whilst in “0” (i.e. no speed selected). The<br />
maximum time the LCD screen can display<br />
is 90 minutes and will be displayed on the<br />
LCD screen as “90:00” (ninety minutes, zero<br />
seconds).<br />
When the maximum time has been reached,<br />
the mixer will beep and the time display on<br />
the LCD screen will flash continuously until<br />
the button is pressed.<br />
To reset the timer to zero (“00:00”), press<br />
the button, then press the ‘+’ and ‘-’<br />
buttons simultaneously.<br />
10
Safety Mechanisms<br />
Thermo cut-off – temperature overload<br />
The mixer is equipped with a self-resetting<br />
safety device which safeguards against<br />
overheating the motor with excessive<br />
loads. If overheating occurs, the mixer<br />
will automatically activate the overheating<br />
protection device and switch itself off. The<br />
mixer will beep and the screen will flash<br />
continuously. Switch the mixer off and<br />
unplug it from the power point. Release the<br />
mixer head and tilt it back until it is locked<br />
into the tilt back position. Let the mixer rest<br />
for 30 min.<br />
Electronic protection cut-out<br />
If the mixing load is too heavy for the<br />
selected speed and prevents the attachment<br />
from rotating, the mixer will cut-out to<br />
prevent damage to the unit. If the LCD<br />
screen flashes fast and continuously, the<br />
motor has not been able to achieve or<br />
maintain the set speed. In this case, unplug<br />
the mixer and remove some of the mixture<br />
from the bowl, working in batches.<br />
Mixer head safety mechanism<br />
The mixer head must be locked down or the<br />
motor will not operate. If the mixer head is<br />
tilted upwards during operation, the mixer<br />
will automatically stop. This is a safety<br />
mechanism to avoid injury. To resume your<br />
mixing task, lock the mixer head back down<br />
and press the button.<br />
Standby mode<br />
The mixer will automatically switch off the<br />
LCD screen after 20 minutes to save power.<br />
To exit the standby mode, press any button or<br />
turn the dial.<br />
11
Mixing Guide<br />
Please keep in mind that the various mixing tasks and related speeds, listed in the table<br />
below, may vary slightly from recipe to recipe. Please refer to it regularly as you develop your<br />
understanding of how different ingredients interact when mixing.<br />
SPEED SETTING RANGE<br />
LOW<br />
1-4<br />
MIXING TASK<br />
FOLDING & KNEADING<br />
Combining or initial mixing of ingredients<br />
Folding<br />
Kneading – doughs (pastry, bread, scones, etc.)<br />
MEDIUM<br />
5-7<br />
LIGHT MIXING<br />
Kneading – heavy doughs<br />
Beating – sugar and butter, cake mixes<br />
HIGH<br />
8-10<br />
CREAMING & BEATING<br />
Whisking – light batters<br />
Beating – heavy batters/icing<br />
VERY HIGH<br />
11-12<br />
WHIPPING & AERATING<br />
Whisking – egg whites/cream<br />
NOTES:<br />
For most recipes, it is better to begin<br />
your mixing on a slower speed until the<br />
ingredients begin combining, then move to<br />
the appropriate speed range for the particular<br />
task.<br />
Generally, there is not one set speed for an<br />
entire recipe. You will need to change the<br />
speed of the mixer depending on what stage<br />
of the recipe you are working on. This is<br />
communicated in the recipe section.<br />
When mixing larger quantities you may<br />
need to increase the mixer speed due to the<br />
amount of mixing required and the larger<br />
load on the machine.<br />
When building up a recipe that requires<br />
the addition of dry ingredients, such as<br />
flour, slow the speed down whilst these<br />
ingredients are being added to avoid a snow<br />
storm effect. Once the additional ingredients<br />
begin combining then slowly increase to the<br />
appropriate speed for the particular mixing<br />
task.<br />
12
Oven Temperature Guide<br />
For your information, the following temperature settings are included as a guide.<br />
DESCRIPTION OF<br />
OVEN TEMPERATURES<br />
Degrees Celcius °C Degrees Farenheit °F Gas Mark<br />
Very Slow 120 250 ½<br />
Slow 140-150 300 1-2<br />
Moderately Slow 160 325 3<br />
Moderate 180 350 4<br />
Moderately hot 200 400 6<br />
Hot 220 425 8<br />
Very Hot 240 475 9<br />
Note: If using fan forced ovens be sure to turn the temperature down by 20°C.<br />
Also check recipes at the back of this booklet.<br />
13
Care and Cleaning<br />
Before cleaning your <strong>Sunbeam</strong> Café Series ®<br />
Planetary Mixmaster ® Bench Mixer, ensure<br />
that the power is turned off at the power<br />
outlet, then remove the plug.<br />
Wipe over the outside area of the Planetary<br />
Mixmaster ® Bench Mixer including the head<br />
and base, with a dampened cloth and polish<br />
with a soft dry cloth.<br />
Wipe any excess food particles from the<br />
power cord.<br />
<strong>Sunbeam</strong> recommends to wash the mixing<br />
bowl, splashguard, beater, Scrapemaster <br />
spatula beater, whisk and dough hook in<br />
warm soapy water and wipe dry – use a<br />
brush if necessary to remove any sticky food<br />
particles.<br />
All plastic components deteriorate through<br />
prolonged dishwasher use. However, parts of<br />
your Café Series ® Planetary Mixmaster ® are<br />
tolerant to dishwasher use. These include<br />
the stainless steel mixing bowl, beater,<br />
Scrapemaster spatula beater, whisk and<br />
dough hook.<br />
Note: Place only on the top rack of the<br />
dishwasher.<br />
Maintenance Service<br />
Your <strong>Sunbeam</strong> Café Series ® Planetary<br />
Mixmaster ® Bench Mixer should be regularly<br />
checked. After approximately four years<br />
of domestic use, the grease in the gear<br />
compartment should be examined. We<br />
suggest at that time you send the mixer to<br />
your nearest <strong>Sunbeam</strong> Appliance Service<br />
Centre to ensure efficient, correct servicing.<br />
Storage<br />
Keep your <strong>Sunbeam</strong> Café Series® Planetary<br />
Mixmaster® Bench Mixer in a convenient<br />
position on your kitchen bench ready for use<br />
at all times. Place the beater, Scrapemaster <br />
spatula beater, whisk and dough hook in the<br />
mixing bowl as storage of these attachments<br />
in a drawer with other kitchen equipment<br />
may cause damage.<br />
Note: Never wind the power cord around the<br />
mixer after use as the warmth from the motor<br />
may cause damage to the power cord. For<br />
added convenience the unused cord length<br />
can easily be pushed into the base of the<br />
mixer for storage.<br />
Stainless steel whisk<br />
After washing the stainless steel whisk, the<br />
outer wire may have moved out of position<br />
and become misaligned (see Figure 9).<br />
Please clip the outer wire back into position<br />
(see Figure 10).<br />
Figure 9 Figure 10<br />
14
Troubleshooting Guide<br />
Problem Possible Cause What to do<br />
Motor will not start. Motor is over-heated. Unplug and allow motor to cool, (the mixer head<br />
should be cool to touch).<br />
Motor is over-heated.<br />
Mixer head does not<br />
lock down properly.<br />
Attachment is<br />
hitting the bowl.<br />
Mixer is moving on<br />
the benchtop.<br />
Cannot use or set<br />
the timer, but the<br />
motor will start when<br />
the speed dial is<br />
being turned.<br />
Mixer head is not<br />
locked down properly.<br />
Use of a high speed<br />
for a long time.<br />
Mixture too heavy.<br />
Mixing quantity too<br />
large.<br />
Thick mixture is<br />
preventing the<br />
attachment from<br />
going all the way<br />
down into the bowl.<br />
Attachment is not<br />
inserted correctly.<br />
Mixing bowl is not<br />
locked into the base<br />
properly.<br />
Chosen speed is too<br />
high for the mixture.<br />
Mixture caught up in<br />
the attachment.<br />
Flour or spills on<br />
bench top.<br />
‘+’ button, ‘-‘ button<br />
or Pause/Start button<br />
was depressed when<br />
the unit was switched<br />
on.<br />
Move mixture in mixing bowl to the side of the<br />
attachment, to allow the attachment to go all the<br />
way into the bowl.<br />
Unplug and allow motor to cool, (the mixer head<br />
should be cool to touch).<br />
Try mixing in batches.<br />
Move mixture in mixing bowl to the side of the<br />
attachment, to allow the attachment to go all the<br />
way into the bowl.<br />
Remove the attachment and try inserting again.<br />
Refer to the instructions in this booklet if needed.<br />
Lock bowl into position. Refer to the instructions<br />
in this booklet if needed.<br />
Lower the speed or mix in batches.<br />
Scrape down the attachment and continue mixing.<br />
Clean and dry benchtop as well as the mixer base.<br />
Unplug from the power outlet for 5-10 seconds,<br />
then plug in again ensuring no buttons are<br />
pressed.<br />
If this problem persists, there may be food<br />
particles or liquid in the switch. The unit is<br />
safe to use in this mode, however <strong>Sunbeam</strong><br />
recommends to take the product to an authorised<br />
service centre. For a complete list of <strong>Sunbeam</strong>’s<br />
authorised service centres visit our website www.<br />
sunbeam.com.au or www.sunbeam.co.nz<br />
or call: Australia: 1300 881 861<br />
New Zealand: 0800 786 232<br />
15
Heading Ingredients<br />
Measuring Ingredients<br />
Careful and correct measurement of all<br />
ingredients is essential for recipe success<br />
(particularly when baking). Australian<br />
Standard Metric cup and spoon measures are<br />
used in all recipes in the book. All cup and<br />
spoon measurements should be level.<br />
• One metric tablespoon is equal to 20mls.<br />
• One metric teaspoon is equal to 5mls.<br />
• One liquid cup measurement is equal to<br />
250mls.<br />
• All eggs used in our recipes are extra large<br />
(59g) eggs, unless otherwise specified.<br />
The following are some hints on measuring<br />
ingredients.<br />
When measuring wet ingredients, always<br />
use a measuring jug or if measuring small<br />
quantities, use a standard metric measuring<br />
spoon. Place the measuring jug on a level<br />
surface and check the measurement at eye<br />
level.<br />
When measuring dry ingredients, always use a<br />
standard metric measuring cup or standard<br />
metric measuring spoon. Shake gently to<br />
ensure there are no air pockets and level the<br />
surface with a knife or metal spatula. Never<br />
tap the cup on the bench or pack in the<br />
ingredients (unless specified); this will give<br />
an inaccurate measurement.<br />
Note: crush any lumps, particularly in<br />
bicarbonate of soda or sugar before<br />
measuring.<br />
When measuring other ingredients, always<br />
weigh in grams using metric scales. To<br />
ensure an accurate reading, always remember<br />
to “tare” the scales back to zero with the<br />
empty container before adding any food.<br />
Tips for substituting Ingredients<br />
• Unsalted butter is best for cake baking,<br />
however it can be substituted with salted<br />
butter or margarine if necessary. Margarine<br />
may slightly alter the texture of the final<br />
result.<br />
• Self raising flour = plain flour + baking<br />
powder (1 cup self raising flour = 1 cup<br />
plain flour + 2 teaspoons baking powder)<br />
• 1 cup plain flour + 1 teaspoon baking<br />
powder = ½ cup plain flour + ½ cup self<br />
raising flour<br />
• When substituting wheat flour with gluten<br />
free flour, the best results are usually<br />
achieved in recipes that have a small<br />
amount of flour.<br />
• Commercial baking powders can contain<br />
wheat starch. If you are allergic to wheat,<br />
you can make you own. Baking powder<br />
= 1 teaspoon bicarbonate of soda + 2<br />
teaspoons cream of tartar<br />
• Icing sugar mixture can contain wheat<br />
starch (this prevents it going lumpy). If you<br />
have a gluten intolerance, pure icing sugar<br />
can be used instead.<br />
• Sultanas can be substituted with equal<br />
measure of another dried fruit (best if they<br />
are chopped to size).<br />
• Golden syrup can be substituted with equal<br />
measure of treacle or molasses<br />
• 1 cup buttermilk = 1 cup fresh milk + 2<br />
teaspoons vinegar or lemon juice.<br />
• Milk can be substituted with soy milk. It<br />
can sometimes also be replaced with fruit<br />
juice acting as the liquid component.<br />
• 7g dry yeast (1 sachet) = 15g compressed<br />
yeast<br />
16
Cookery Tips for Best Results<br />
General tips<br />
• Before starting any recipe carefully read it<br />
through from beginning to end.<br />
• Ensure you have all ingredients and<br />
utensils before you start.<br />
• Refrigerated ingredients such as butter,<br />
cream cheese and eggs should be at<br />
room temperature for best results (unless<br />
otherwise specified). Set these out ahead<br />
of time. If you forget to remove butter from<br />
the fridge, use the coarse side of a grater<br />
to grate the butter. This will assist the<br />
mixer and soften the butter faster.<br />
• Always adjust the oven shelf to the desired<br />
position and then preheat oven to baking<br />
temperature recommended in the recipe.<br />
Get to know your oven. Most ovens have<br />
“hotspots” and it may be necessary to<br />
turn food or swap shelves during cooking.<br />
However, be aware that every time you<br />
open the oven, the temperature drops.<br />
Only open the oven if necessary and be<br />
sure to close the door quickly.<br />
• Break eggs into a small bowl before adding<br />
to mixture. This eliminates the chance of<br />
contaminating mixture with shells or rotten<br />
eggs.<br />
• All recipes have been carefully developed<br />
and tested, but should you find it<br />
necessary to alter the ingredients or tin,<br />
you must allow for a variation in cooking<br />
time. Always test for doneness in baked<br />
goods before removing from oven or other<br />
cooking appliance.<br />
• During mixing, ingredients may splash to<br />
the sides of the bowl. Pause the mixer and<br />
use a rubber or plastic spatula to scrape<br />
the bowl. NEVER USE A KNIFE, METAL<br />
SPOON OR FORK, as these can damage<br />
the beater and bowl. A light scraping after<br />
the addition of each ingredient assists in<br />
achieving efficient mixing.<br />
Tips for cakes, biscuits and slices<br />
• When cooked, a cake should shrink slightly<br />
from the pan.<br />
• When testing most cakes (not sponges,<br />
fruitcakes or cheesecakes), gently touch<br />
the surface; it should feel firm. At this<br />
stage, remove the cake from the oven and<br />
close the oven door to retain the heat.<br />
Insert a thin skewer into the deepest<br />
part of the cake. When cake is done, no<br />
uncooked mixture should adhere to it.<br />
• Testing cake doneness should be done<br />
quickly. If the cake needs to be returned<br />
to the oven, the oven door should be<br />
open for minimal amount of time. Rapid<br />
temperature change may cause an<br />
undercooked cake to sink in the middle<br />
• For most types of biscuits, you can test<br />
if they are cooked by gently pushing the<br />
biscuit on the tray with your finger. If it<br />
moves without breaking, the biscuit is<br />
cooked.<br />
• Do not over beat any mixture. Be careful<br />
that you only mix/blend mixtures for the<br />
specified time. When folding, do so until<br />
just combined. Over beating or mixing can<br />
cause toughness, close texture, excessive<br />
shrinkage or effect rising.<br />
• Curdling can sometimes occur when<br />
adding eggs to a mixture. If this happens,<br />
continue with the recipe as it will come<br />
back together when the dry ingredients are<br />
added.<br />
• If cakes begin to overbrown, cover the top<br />
loosely with foil to protect it from the top<br />
element of the oven.<br />
• To obtain the greatest volume when beating<br />
egg whites, be sure the bowl and beater<br />
are completely clean and dry before use.<br />
The smallest amount of grease or water can<br />
prevent the whites from aerating.<br />
17
Heading<br />
Cookery Tips for Best Results continued<br />
• The term “soft peaks” means that the egg<br />
white barely supports itself. When the head<br />
of the mixer is lifted, the egg white mixture<br />
will curl and may fall from the beater.<br />
• The term “firm peaks” means that the egg<br />
white holds its shape. When the head of<br />
the mixer is lifted, the egg white mixture<br />
will remain pointy and firm.<br />
• When making pavlova or other meringues,<br />
always use caster sugar as it dissolves<br />
much easier than other coarser sugars.<br />
Sugar should begin being added at soft<br />
peaks. If you wait until the egg whites<br />
reach firm peaks and are dry, it will take<br />
longer to dissolve the sugar.<br />
• To test if sugar is dissolved, rub a small<br />
quantity of mixture between your fingertips.<br />
If it feels grainy, continue beating until<br />
smooth.<br />
• In general, cakes should be cooled on a<br />
wire rack after the suggested standing<br />
time. The standing time is to prevent<br />
the freshly baked cake from splitting or<br />
cracking when removed from the pan.<br />
• Fruit cakes and various other heavy cakes,<br />
such as mud cakes, are best cooled in the<br />
pan. Due to the weight of these cakes,<br />
turning out while still warm will cause<br />
them to split. Cooling in the pan also<br />
keeps them moist.<br />
• Sponges should be removed from the pan<br />
as soon as they come out of the oven.<br />
• Most biscuits are best cooled on the baking<br />
tray.<br />
18
Heading Making a Successful Dough<br />
Yeast<br />
Yeast is a raising agent used in dough. It<br />
is a microscopic living organism that grows<br />
rapidly in suitable warm, moist conditions.<br />
The yeast feeds on sugar and expels carbon<br />
dioxide which expands the gluten framework.<br />
When foaming yeast, the liquid should be<br />
warm; about 26°C. If the liquid is too cold it<br />
will retard the yeast growth. If it is too hot it<br />
will kill the yeast.<br />
Preparing the yeast<br />
For the dry yeast to be activated it needs<br />
to ferment. To do this, place warm liquid<br />
and sugar into a bowl. Add dry yeast and<br />
mix. Stand in a warm, draft-free place<br />
until mixture starts to foam or bubble. This<br />
process will take about 10 minutes.<br />
Note: If dried yeast has not been stored<br />
properly, has been exposed to light, extreme<br />
heat, or is out of date, it may be dead or<br />
inactive and it will not ferment. If the yeast<br />
does not foam, your dough will not rise.<br />
Preparing the dough<br />
1. Insert dough hook (refer to page 6). Place<br />
the dry ingredients into the bowl and lock<br />
the bowl onto the base.<br />
2. Turn the speed dial to low speed (1-4),<br />
and gradually add the liquid ingredients<br />
(including the pre-prepared yeast mixture)<br />
to the bowl. When the ingredients start<br />
to form a ball, stop the mixer and use a<br />
rubber or plastic spatula to scrape down<br />
the sides of the bowl if necessary.<br />
3. Knead on low speed (1-4) (depending on<br />
the amount of dough) until smooth and<br />
elastic; for about 5-8 minutes.<br />
4. Transfer dough to a large, well greased<br />
mixing bowl. Cover the bowl with a light<br />
cloth or plastic wrap and place it in a<br />
warm, draft-free area until the dough<br />
doubles in size.<br />
5. Plunge fist into the centre of the risen<br />
dough to punch out excess air. Fold outer<br />
edges into the centre and turn dough out<br />
onto a lightly floured surface. Cut and<br />
shape dough to form buns, rolls or freeform<br />
loaves and place on prepared baking trays.<br />
Alternatively, place dough into prepared<br />
bread tins. For pizza dough, it is now ready<br />
to be rolled, topped and baked.<br />
6. For the final rising of the bread dough,<br />
cover the shaped dough with a light cloth<br />
and place in a warm, draft-free area until<br />
doubled in size again. Glaze and bake.<br />
19
Making a Successful Dough continued<br />
Heading<br />
Tips<br />
To add interest to breads.<br />
• Brush dough with a little milk and sprinkle<br />
loaves or buns with poppy, caraway or<br />
sesame seeds before baking.<br />
• Sprinkle loaves with shredded cheese<br />
during the last few minutes of baking.<br />
• Drizzle cooled, sweet tea rings or buns<br />
with icing, or dust with icing sugar before<br />
serving.<br />
Glazes<br />
Glazes may be brushed over the dough<br />
before, during or after baking.<br />
For a shiny crust, brush with cream or<br />
evaporated milk before baking; or with warm<br />
sieved apricot jam after baking.<br />
For a glossy crust, brush with beaten egg<br />
white before baking.<br />
For a matt finish, brush with melted butter or<br />
margarine after baking.<br />
Questions & Answers:<br />
Q. My mixture seems a little dry and crumbly.<br />
Do I need to add more water?<br />
A. Some flour tends to absorb or want more<br />
moisture/liquid, especially on warm or humid<br />
days. Add more water, a drop at a time, until<br />
you reach a smooth ball/dough.<br />
Q. I added too much water and my dough is<br />
very sticky, what can I do?<br />
A. If the dough is smooth without lumps,<br />
add a little flour at a time and knead the<br />
dough until it is smooth, soft to the touch<br />
and bounces back when pressed with the tip<br />
of your finger. Dough should not be sticky to<br />
touch.<br />
Q. My yeast did not bubble or foam, why?<br />
A. The yeast may be dead or inactive, in<br />
which case you will need to replace it. This<br />
occurs when the liquid added or the standing<br />
position was too hot or too cold. It can also<br />
be because the yeast is out of date. If the<br />
yeast does not foam, your dough will not rise.<br />
Q. My dough did not rise, why?<br />
A. If the yeast fermented properly, you may<br />
just need to place the bowl in a warmer<br />
position. Covering the bowl with plastic wrap,<br />
and ensuring the area is draft free may help.<br />
In winter, your dough will take longer to rise.<br />
20
Heading Recipes<br />
Choc-Hazelnut Pancakes<br />
4 cups plain flour<br />
¾ cup caster sugar<br />
3 ¾ cups buttermilk<br />
3 eggs<br />
Butter, for frying<br />
Hazelnut spread, to serve<br />
Whipped cream and roasted hazelnuts, to<br />
serve<br />
1. Place the flour, sugar, buttermilk and eggs<br />
in the Stainless Steel Mixing Bowl. Using<br />
the Whisk, mix on low speed (1-4) until<br />
combined. Increase to medium speed (5-7)<br />
and mix until smooth.<br />
2. Heat a large non-stick frying pan on<br />
medium heat. Lightly grease with a little<br />
butter. Spoon ¹/ ³ cup of the mixture into<br />
the pan and tilt pan to form a circle.<br />
Cook until bubbles begin to appear on<br />
the surface. Flip pancake and cook for<br />
a further minute. Repeat with remaining<br />
batter.<br />
3. Serve pancakes with hazelnut spread,<br />
whipped cream and roasted hazelnuts.<br />
Basic Cookie Dough<br />
500g butter, room temperature, chopped<br />
1 ½ cups icing sugar<br />
2 teaspoons vanilla essence<br />
4 cups plain flour<br />
1 cup custard powder<br />
¹/ ³ cup milk<br />
1. Preheat oven to moderate (180°C/160°C<br />
fan-forced). Grease and line baking trays.<br />
2. Place butter, sugar and vanilla in the<br />
Stainless Steel Mixing Bowl. Using the<br />
Beater, mix on medium speed (5-7) until<br />
smooth and creamy.<br />
3. Add flour, custard powder and milk. Mix on<br />
low speed (1-4) until combined.<br />
4. Divide dough in half. Wrap in plastic and<br />
refrigerate for 30 minutes.<br />
5. Roll each portion of dough between 2<br />
sheets of baking paper to 5mm thick. Use<br />
a 5cm round cutter to cut rounds from<br />
dough. Place cookies on prepared trays and<br />
bake for about 10-12 minutes swapping<br />
trays halfway through cooking. Cool on<br />
trays.<br />
Variations:<br />
Orange and poppy seed cookies – Replace the<br />
vanilla essence with 2 teaspoons of orange<br />
juice, 1 teaspoon of orange rind and 1<br />
tablespoon of poppy seeds.<br />
Choc chip cookies – Add 1 cup of choc chips<br />
in with the flour. Don’t roll dough, but roll 1<br />
tablespoons of the cookie dough mixture into<br />
balls and slightly flatten onto the trays.<br />
21
Recipes continued<br />
Lemon Slice<br />
125g butter, room temperature<br />
1 ¼ cups icing sugar mixture<br />
1 ¼ cups plain flour<br />
3 eggs<br />
1 cup caster sugar<br />
1 teaspoon finely grated lemon rind<br />
½ cup lemon juice<br />
1. Preheat oven to moderate (180°C/160°C<br />
fan-forced). Grease and line a 23cm square<br />
pan with baking paper, extended 2cm<br />
above the edge of the pan.<br />
2. Place butter and icing sugar in the<br />
Stainless Steel Mixing Bowl. Using the<br />
Scrapemaster spatula beater, beat on<br />
medium speed (5-7) for 1 minute or until<br />
smooth and creamy. Add 1 cup of the<br />
flour and mix on low speed (1) until just<br />
combined.<br />
3. Press mixture evenly over the base of<br />
prepared pan. Bake for about 15 minutes<br />
or until browned lightly.<br />
4. Meanwhile, place eggs, caster sugar,<br />
remaining flour, rind and juice in the<br />
Stainless Steel Mixing Bowl. Using the<br />
Whisk, mix on medium speed (5-7) until<br />
combined. Pour egg mixture over hot base.<br />
5. Bake for about 20 minutes or until firm.<br />
Cool in pan.<br />
Honey, Cranberry and Pistachio Nougat<br />
2 sheets edible rice paper<br />
½ cup honey<br />
2 ½ cups caster sugar<br />
¹/ ³ cup water<br />
500g liquid glucose<br />
2 egg whites, room temperature<br />
1 ½ cups pistachios, toasted<br />
½ cup craisins (dried cranberries)<br />
1. Lightly grease a 20cm square cake pan.<br />
Line the base of the pan with 1 sheet of<br />
rice paper, trimming to fit.<br />
2. Combine honey, sugar, water and glucose<br />
in a medium saucepan. Stir over medium<br />
heat, without boiling, until sugar dissolves.<br />
Bring to boil. Do not stir after this point.<br />
Using a candy thermometer, cook until<br />
mixture reaches 140°C. Immediately<br />
remove from heat.<br />
3. Using the Whisk, beat egg whites on very<br />
high speed (11-12) until firm peaks form.<br />
Reduce to medium speed (5-7) and slowly<br />
add the sugar syrup in a thin, steady<br />
stream. Once all the sugar syrup has been<br />
added, continue beating for a further<br />
minute. Add the pistachios and cranberries<br />
and stir to combine.<br />
4. Quickly spoon into prepared pan, using<br />
a spatula to scrape the bowl. A spoon<br />
dipped in hot water will help you spread<br />
the nougat quickly. Top with the remaining<br />
sheet of rice paper and gently press to<br />
flatten.<br />
5. Set aside to cool at room temperature for<br />
about 6 hours or until set. Remove from<br />
pan and cut into small squares to serve.<br />
22
Recipes continued<br />
Coconut Marshmallows<br />
¹/ ³ cup gelatine<br />
4 cups caster sugar<br />
2 teaspoons lemon juice<br />
2 cups shredded coconut, lightly toasted<br />
1. Combine gelatine and 1 cup of cold water.<br />
Stand for 5 minutes<br />
2. Stir sugar and 2 cups of hot water in a<br />
large saucepan over low heat until sugar<br />
dissolves. Bring to boil. Add gelatine<br />
mixture; simmer, uncovered for 20<br />
minutes. Cool to room temperature.<br />
3. Transfer sugar mixture to the Stainless<br />
Steel Mixing Bowl. Add juice. Using the<br />
Whisk, begin beating on low speed (1).<br />
Gradually increase to very high speed (12)<br />
over 15 minutes. Mixture should be very<br />
thick and hold its shape.<br />
4. Rinse a 20cm x 30cm lamington pan<br />
with cold water; do not dry. Spread<br />
marshmallow mixture into pan. Sprinkle<br />
with enough coconut to cover the surface.<br />
Allow to set at room temperature for 2<br />
hours or until firm.<br />
5. Cut marshmallow into squares using a wet<br />
knife; toss in remaining coconut.<br />
Sweet Brioche Makes: 8<br />
¼ cup luke-warm milk<br />
2 teaspoons (7g sachet) dry yeast<br />
¼ cup caster sugar<br />
2 ¼ cups plain flour,<br />
1 teaspoons ground cinnamon<br />
Pinch salt<br />
3 eggs<br />
125g butter, room temperature, cut into<br />
cubes<br />
Approximately ¹/ ³ cup plain flour, extra<br />
½ cup sultanas<br />
1 egg yolk, lightly whisked<br />
1 tablespoon caster sugar, extra<br />
1. Combine the milk, yeast and ½ teaspoon<br />
of the sugar in a small bowl. Set aside in a<br />
warm place for about 10 minutes or until<br />
frothy.<br />
2. Place remaining sugar, flour, cinnamon and<br />
salt in the Stainless Steel Mixing Bowl.<br />
Add yeast mixture and eggs.<br />
3. Using the Dough Hook, knead on low speed<br />
(2) for about 1 minute or until combined.<br />
Continue kneading for a further 5 minutes.<br />
4. Add 2-3 pieces of butter to dough mixture<br />
and continue kneading, adding a little<br />
butter at a time until well incorporated. If<br />
dough begins to lose its “ball” shape, add<br />
as much of the extra flour as necessary to<br />
keep it combined. Knead in the sultanas.<br />
This step should take a total of 4 minutes.<br />
5. Remove dough from bowl; wash and dry<br />
bowl, then return dough to bowl. Cover; set<br />
aside in a warm, draft-free place for about<br />
1 hour or until doubled in size.<br />
23
Recipes continued<br />
6. Preheat oven to moderately hot<br />
(200°C/180°C fan-forced). Line 2 oven<br />
trays with baking paper.<br />
7. Plunge your fist into the dough and using<br />
the Dough Hook, knead again on low speed<br />
(2) for 1 minute or until smooth.<br />
8. Divide dough into 8 even portions. Work<br />
each dough portion into a smooth ball and<br />
place on prepared trays. Set aside in a<br />
warm, draft-free place for 30 minutes.<br />
9. Brush each brioche with extra egg yolk<br />
and sprinkle with extra sugar. Bake for<br />
15 minutes or until golden and cooked<br />
through.<br />
Orange Drops Makes: About 40<br />
185g butter, room temperature<br />
1 cup caster sugar<br />
1 teaspoon finely grated orange rind<br />
1 egg<br />
2 cups plain flour<br />
½ teaspoon baking powder<br />
½ cup breakfast marmalade<br />
1. Preheat oven to moderate (180°C/160°C<br />
fan-forced). Grease and line oven trays with<br />
baking paper.<br />
2. Using the Beater, mix butter, sugar and<br />
orange rind on medium speed (5-7) for<br />
about 2 minutes or until creamy. Add egg<br />
and mix well.<br />
3. Add the flour and baking powder and mix<br />
on low speed (1-4) for about 30 seconds or<br />
until combined.<br />
4. Roll 2 teaspoons of the mixture into balls,<br />
flatten slightly and place on prepared trays.<br />
Press you finger into the middle of each<br />
ball to make an indent. Spoon ½ teaspoon<br />
of marmalade into each indent.<br />
5. Bake for 10 minutes or until cooked.<br />
Remove from oven. Cool on wire racks.<br />
24
Recipes continued<br />
Golden Syrup and Walnut Scrolls Makes: 12<br />
2 ¼ cups self-raising flour<br />
1 tablespoon caster sugar<br />
100g butter, chopped<br />
²/ ³ cup milk<br />
1 egg<br />
1 cup walnuts, chopped<br />
½ cup slivered almonds<br />
¹/ ³ cup firmly packed brown sugar<br />
1 teaspoon ground cinnamon<br />
¼ cup golden syrup<br />
1. Preheat oven to moderately hot<br />
(200°C/180°C fan-forced). Lightly grease a<br />
19cm x 29cm slice pan.<br />
2. Using the Scrapemaster spatula beater,<br />
mix flour, sugar and half of the butter on<br />
low speed (1-4) until combined.<br />
3. Add milk and egg. Using the Dough Hook,<br />
knead on low speed (1-4) to form a soft<br />
sticky dough. Knead for a further 1 minute.<br />
4. Turn onto a clean, floured bench and roll<br />
dough into a 30cm x 40cm rectangle.<br />
Sprinkle with walnuts, almonds, brown<br />
sugar and cinnamon. Dot with remaining<br />
butter. Roll dough tightly from the long<br />
side to form a log. Trim ends and cut into<br />
12 even slices.<br />
5. Place slices, cut side up into prepared pan.<br />
Bake for about 25 minutes or until golden,<br />
turning halfway through cooking. Remove<br />
from pan and drizzle with golden syrup.<br />
Serve warm.<br />
Apple Tea Cake<br />
125g butter, room temperature<br />
1 teaspoon vanilla<br />
½ cup brown sugar<br />
2 eggs<br />
½ cups plain flour<br />
¹/ ³ cup milk<br />
2 green apples, peeled, cored, thinly sliced<br />
2 teaspoons raw sugar<br />
½ teaspoon cinnamon<br />
¼ cup apricot jam, warmed<br />
1. Preheat oven to moderately slow<br />
(160°C/140°C fan-forced). Grease and line<br />
a 22cm round spring form tin with baking<br />
paper.<br />
2. Using the Beater, mix butter, vanilla and<br />
sugar until creamy. Gradually add the eggs<br />
and beat well. Add the flour and milk. Mix<br />
on low speed (1-4) until combined. Spoon<br />
mixture into prepared pan.<br />
3. Arrange apples over cake mixture. Sprinkle<br />
with raw sugar and cinnamon. Bake for<br />
50 minutes. Remove from oven, brush<br />
with warm jam and bake for a further 10<br />
minutes or until cooked when tested. Serve<br />
with whipped cream.<br />
25
Recipes continued<br />
Cheats Tiramisu<br />
1 ¼ cups espresso<br />
2 tablespoons caster sugar<br />
¼ cup coffee flavoured liqueur (Tia Maria or<br />
Kahlua)<br />
600ml tub thickened cream<br />
¼ cup icing sugar mixture<br />
2 teaspoons vanilla essence<br />
250g sponge finger biscuits<br />
50g dark chocolate, grated<br />
1. Combine coffee, caster sugar and liqueur<br />
in a bowl. Cool.<br />
2. Place cream, icing sugar and vanilla in<br />
the Stainless Steel Mixing Bowl. Using the<br />
Whisk, whip on very high speed (11-12)<br />
until soft peaks form.<br />
3. Dip one sponge finger into cooled coffee<br />
mixture. Remove from liquid and spread<br />
one side with a little cream. Place sideways<br />
in an 8-cup capacity serving dish. Dip a<br />
second sponge finger in coffee mixture,<br />
spread with a little cream and lay next to<br />
the first. Repeat with remaining sponge<br />
fingers, coffee mixture and cream. If there<br />
is any remaining coffee mixture once all<br />
the biscuits have been dipped, pour this<br />
over the biscuits.<br />
4. Spread top with remaining cream and<br />
smooth surface. Sprinkle with chocolate;<br />
cover and refrigerate overnight.<br />
Upside Down Pear and Almond Cake<br />
¹/ ³ cup slivered almonds<br />
1 ¼ cups firmly packed brown sugar<br />
1 large pear, peeled, cored, thinly sliced<br />
185g butter, room temperature<br />
3 eggs<br />
¼ cup plain flour<br />
1 ¾ cups almond meal<br />
1. Preheat oven to moderately hot<br />
(200°C/180°C fan-forced). Grease and line<br />
a 22cm round cake pan with baking paper.<br />
2. Sprinkle the almonds and ¼ cup of the<br />
sugar over the base of the pan. Evenly top<br />
with pear slices.<br />
3. Using the Beater, beat butter and<br />
remaining sugar on medium speed (5-7)<br />
for about 3 minutes or until light and<br />
fluffy. Beat in eggs one at a time. Add flour<br />
and almond meal and mix on low speed<br />
(1-4) until combined.<br />
4. Pour mixture into pan. Bake for about 35<br />
minutes or until cooked when tested. Stand<br />
for 10 minutes before turning upside down<br />
onto a wire rack. Serve warm or cold with<br />
whipped cream.<br />
26
Recipes continued<br />
White Chocolate Layered Butter Cake<br />
185g butter, room temperature<br />
1 ½ teaspoons vanilla extract<br />
1 ¾ cups caster sugar<br />
4 eggs<br />
1 ½ cups plain flour<br />
¾ cup self-raising flour<br />
2 teaspoons cocoa powder<br />
¾ teaspoon bicarbonate soda<br />
¾ cup milk<br />
1. Preheat oven to moderately slow<br />
(160°C/140°C fan-forced). Grease and line<br />
a deep, 20cm round cake pan, extending<br />
the baking paper 3cm above the rim of the<br />
pan.<br />
2. Place ingredients in the Stainless Steel<br />
Mixing Bowl. Using the Scrapemaster <br />
spatula beater, mix on low speed (1) for<br />
about 30 seconds or until just combined.<br />
Increase to low speed (4) and beat for 1<br />
minute. Pour mixture into prepared pan.<br />
3. Bake for about 1 ½ hours or until cooked<br />
when tested with a skewer. Stand in pan<br />
for 5 minutes before turning onto a wire<br />
rack to cool.<br />
4. When cool, split cake horizontally into 3<br />
even sized disks. Layer and cover with<br />
white chocolate ganache. Top with fresh<br />
berries and chocolate curls to decorate.<br />
White Chocolate Ganache<br />
1 cup cream<br />
600g white chocolate, chopped<br />
1. Bring cream to boil in a medium saucepan<br />
and immediately remove from heat.<br />
2. Stir through chocolate until melted. Cover;<br />
refrigerate, stirring occasionally until<br />
spreadable consistency.<br />
Chocolate Chocoholic Cake<br />
1 ½ cups water<br />
2 ¼ cups caster sugar<br />
185g butter, room temperature<br />
¼ cup cocoa powder<br />
¾ teaspoon bicarbonate of soda<br />
2 ¼ cups self-raising flour<br />
3 eggs<br />
1. Preheat oven to moderate (180°C/160°C<br />
fan-forced). Grease and line a 22cm square<br />
cake pan with baking paper.<br />
2. Combine water, sugar, butter, cocoa and<br />
soda in a large saucepan. Stir over heat<br />
without boiling until sugar dissolves and<br />
butter is melted. Bring to boil then reduce<br />
heat to low. Simmer uncovered for 4<br />
minutes being careful the saucepan doesn’t<br />
overflow. Transfer to the Stainless Steel<br />
Mixing Bowl; cool to room temperature.<br />
3. Add flour to the bowl. Using the<br />
Scrapemaster spatula beater, beat on low<br />
speed (1) until combined. Add eggs and<br />
beat on low speed (4) until combined. Pour<br />
mixture into prepared pan.<br />
4. Bake for about 1 hour or until cooked when<br />
tested. Stand in pan for 5 minutes before<br />
turning onto a wire rack to cool. Top with<br />
rich fudge frosting.<br />
Rich fudge frosting<br />
90g butter<br />
¹/ ³ cup water<br />
½ cup caster sugar<br />
1 ½ cups icing sugar mixture<br />
¹/ ³ cup cocoa powder<br />
1. Combine the butter, water, caster sugar<br />
in a small saucepan. Stir over low heat<br />
27
Recipes continued<br />
without boiling until sugar dissolves. Sift<br />
icing sugar and cocoa into a bowl, then<br />
gradually stir in hot butter mixture. Cover<br />
then refrigerate for about 20 minutes or<br />
until frosting is cool and thickens. Beat<br />
with a wooden spoon until spreadable.<br />
Ricotta Baked Cheesecake<br />
90g butter, room temperature<br />
¼ cup caster sugar<br />
1 egg<br />
1 ¼ cups plain flour<br />
¼ cup self-raising flour<br />
750g fresh ricotta<br />
1 cup caster sugar, extra<br />
5 eggs, extra<br />
3 teaspoons finely grated lemon rind<br />
1 tablespoon lemon juice<br />
1. Grease a 22cm springform tin and line the<br />
base with baking paper.<br />
2. Using the Scrapemaster spatula beater,<br />
beat butter, sugar and egg on low speed<br />
(4) until combined.<br />
3. Add flours and beat on low speed (1) until<br />
combined. Using the back of a spoon,<br />
press mixture over the base of prepared<br />
tin. Refrigerate for 30 minutes.<br />
4. Preheat oven to moderately hot<br />
(200°C/180°C fan-forced). Bake for 15<br />
minutes. Remove from oven and press base<br />
down with a clean tea towel. Cool.<br />
5. Reduce oven temperature to moderately<br />
slow (160°C/140°C fan-forced).<br />
6. Place ricotta, extra sugar, extra eggs, rind<br />
and juice in the Stainless Steel Mixing<br />
Bowl. Using the Whisk, mix on high speed<br />
(8-10) until smooth.<br />
7. Pour into tin and bake for about 1 hour or<br />
until set but still wobbly in the centre.<br />
Turn the oven off. Cool cake in the oven<br />
with the door ajar. Refrigerate for several<br />
hours before serving dusted with icing<br />
sugar.<br />
28
Recipes continued<br />
Macadamia Meringue Cake<br />
6 egg whites<br />
Pinch salt<br />
1 ½ cups caster sugar<br />
1 teaspoons vanilla extract<br />
1 teaspoon white vinegar<br />
Filling<br />
300mls pure cream<br />
1 teaspoon vanilla extract<br />
½ cup icing sugar<br />
250g marscapone<br />
100g roasted macadamias, chopped<br />
1. Preheat oven to very slow (120°C/100°C<br />
fan-forced).<br />
2. Grease and line 2 oven trays with baking<br />
paper. Mark a 22cm circle on each tray.<br />
3. Using the Whisk, beat egg whites and salt<br />
on very high speed (11-12) until soft peaks<br />
form.<br />
4. Add sugar, a small amount at a time,<br />
whisking until thick and glossy. Add vanilla<br />
and vinegar and whisk until just combined.<br />
5. Divide the mixture evenly between<br />
prepared trays. Spread evenly onto marked<br />
circles.<br />
6. Bake for about 1 ½ hrs or until firm and<br />
slightly browned. Turn off oven. Cool<br />
meringues completely in the oven with the<br />
door ajar.<br />
7. To make filling, use the Whisk attachment<br />
to whip cream, vanilla and icing sugar<br />
on high speed (11-12). Stir through<br />
marscapone and macadamias.<br />
8. To assemble, sandwich meringue disks<br />
together with cream mixture. Dust with<br />
icing sugar and top with fresh berries.<br />
Jam Scone Ring<br />
2 cups self-raising flour<br />
1 tablespoon caster sugar<br />
30g butter, room temperature<br />
¾ cup milk<br />
1 egg yolk<br />
2 tablespoons apricot jam, warmed<br />
½ cup finely chopped dried apricots<br />
1. Preheat oven to moderately hot<br />
(200°C/180°C fan-forced). Grease and line<br />
an oven tray with baking paper.<br />
2. Using the Scrapemaster spatula beater,<br />
mix flour, sugar and butter on low speed<br />
(2) until combined.<br />
3. Add milk and egg yolk. Using the Dough<br />
Hook, knead on low speed (2) to form a<br />
soft sticky dough<br />
4. Turn onto a clean, floured bench and roll<br />
dough into a 30cm x 40cm rectangle.<br />
Spread jam over dough and scatter with<br />
apricots. Roll dough from the long side to<br />
form a log. Place on the prepared tray and<br />
curve to form a ring. Press ends together to<br />
seal.<br />
5. Bake for about 25-30 minutes or until<br />
cooked. Serve warm, dusted with sifted<br />
icing sugar.<br />
29
Recipes continued<br />
30<br />
Sticky Toffee Pudding<br />
200g pitted dates, chopped<br />
1 ½ teaspoons baking powder<br />
¹/ ³ cup boiling water<br />
125g butter, room temperature<br />
1 cup firmly packed brown sugar<br />
2 eggs<br />
1 ½ cups plain flour<br />
¼ cup milk<br />
1. Place the dates, baking powder and boiling<br />
water in a bowl. Set aside for 10 minutes.<br />
2. Preheat oven to moderate (180°C/160°C<br />
fan-forced). Grease and line a 20cm square<br />
cake pan with baking paper.<br />
3. Using the Scrapemaster spatula beater,<br />
mix the butter and sugar on medium speed<br />
(5-7) for about 2 minutes or until creamy.<br />
Gradually add the eggs and beat well.<br />
Add the flour, milk and date mixture.<br />
Mix on medium speed (5-7) until just<br />
combined.<br />
4. Spoon mixture into prepared pan and<br />
bake for 40 minutes or until cooked when<br />
tested.<br />
5. Serve pudding with warm toffee sauce<br />
(see following recipe).<br />
Toffee Sauce<br />
200g butter<br />
1 cup pure cream<br />
1 cup firmly packed brown sugar<br />
1. Place all ingredients in a small saucepan.<br />
Stir over medium heat until melted and<br />
combined. Simmer for 3 minutes.<br />
Lemon Thyme and Cheese Focaccia Makes: 2<br />
200mls luke-warm water<br />
½ teaspoon sugar<br />
2 teaspoons (7g sachet) dry yeast<br />
2 cups plain flour<br />
1 teaspoons salt<br />
1 ½ tablespoons (30mls) olive oil<br />
1 tablespoon finely chopped fresh lemon<br />
thyme<br />
½ cup grated cheddar cheese<br />
1 tablespoon milk<br />
Sea Salt flakes<br />
1. Combine the water, sugar and yeast in a<br />
jug; stir to combine. Cover mixture and<br />
place in a warm area for about 10 minutes<br />
until the mixture is frothy.<br />
2. Place the flour and salt in the Stainless<br />
Steel Mixing Bowl. Add the yeast mixture<br />
and olive oil. Using the Dough Hook, mix<br />
on low speed (1-2) for about 2 minutes or<br />
until combined and mixture forms a ball.<br />
Continue kneading for 8 minutes.<br />
3. Remove dough from the bowl. Lightly<br />
grease the bowl and return dough.<br />
Cover; allow to rise in a warm area for<br />
about 1 hour or until doubled in size.<br />
4. Preheat oven to moderately hot<br />
(200°C/180°C fan-forced). Grease and line<br />
2 oven trays with baking paper.<br />
5. Punch the dough with your fist to knock<br />
out the air. Cut the dough in half. Roll<br />
each piece on a lightly floured surface into<br />
a 20 x 25cm rectangle. Place on prepared<br />
trays. Sprinkle thyme and cheese over<br />
each focaccia, leaving a 1cm border. Brush<br />
borders with a little water, then fold in half<br />
to make 2 long rectangles. Press edges
Recipes continued<br />
together, score 3 times across the top.<br />
Brush with milk and sprinkle with sea salt.<br />
6. Bake for 15-20 minutes or until cooked<br />
through. Serve warm, cut into pieces.<br />
Cheesy Spinach Scrolls Makes: 12<br />
2 cups self-raising flour<br />
1 tablespoon caster sugar<br />
50g butter, chopped<br />
¾ cup milk<br />
250g frozen spinach, thawed<br />
1 cup pizza cheese<br />
100g feta cheese, crumbled<br />
1. Preheat oven to moderately hot<br />
(200°C/180°C fan-forced). Lightly grease<br />
and line a 22cm square cake pan.<br />
2. Using the Scrapemaster spatula beater,<br />
mix flour, sugar and butter on speed 2 for<br />
about 2 minutes or until combined.<br />
3. Add milk and using the Dough Hook, knead<br />
on speed 2 for about 1 minute or until a<br />
soft sticky dough is formed.<br />
4. Turn onto a clean, floured bench and roll<br />
dough into a 30cm x 40cm rectangle.<br />
Squeeze excess moisture from spinach<br />
with your hands. Chop coarsely and pat dry<br />
with absorbent paper towel. Sprinkle pizza<br />
cheese, spinach and feta over dough. Roll<br />
tightly from the long side. Trim ends and<br />
cut into 12 even slices.<br />
5. Place scrolls, cut-side up in prepared pan.<br />
Bake for about 25 minutes or until cooked<br />
through. Serve warm.<br />
Basic Pizza Dough Makes: 2 large pizzas<br />
150ml luke-warm water<br />
1 teaspoon sugar<br />
2 teaspoons (7g sachet) dry yeast<br />
2 cups plain flour<br />
½ teaspoon salt<br />
2 tablespoon olive oil<br />
1. Combine the water, sugar and yeast in a<br />
jug; stir to combine. Cover mixture and<br />
place in a warm area for about 10 minutes<br />
until the mixture is frothy.<br />
2. Place the flour and salt in the Stainless<br />
Steel Mixing Bowl. Add the yeast mixture<br />
and olive oil. Using the Dough Hook, mix<br />
on low speed (1-2) for about 2 minutes or<br />
until combined and mixture forms a ball.<br />
Continue to knead on low speed (1-2) for a<br />
further 8 minutes.<br />
3. Remove dough from the bowl. Lightly<br />
grease the bowl and return dough. Cover;<br />
allow to rise in a warm area for about 1<br />
hour or until doubled in size.<br />
4. Punch the dough with your fist to knock<br />
out the air. Cut the dough in half. Take one<br />
piece and roll on a lightly floured surface<br />
into a rough round. Place on a lightly<br />
greased pizza tray and stretch the dough to<br />
fit the tray. Repeat with remaining dough.<br />
Cover; allow to stand for 20-30 minutes.<br />
Top as desired.<br />
Tip: if you prefer a thick pizza crust, use this<br />
dough quantity to make 1 pizza instead.<br />
31
Recipes continued<br />
Supreme Pizza<br />
Makes: 2 large pizzas<br />
1 quantity basic pizza dough<br />
¼ cup pizza sauce<br />
2 cups pizza cheese<br />
¼ cup finely chopped fresh basil<br />
½ red onion, thinly sliced<br />
1 small red capsicum, thinly sliced<br />
100g button mushrooms, thinly sliced<br />
100g shaved ham, torn<br />
¼ cup pitted kalamatta olives<br />
1. Prepare basic pizza dough according to<br />
recipe.<br />
2. Preheat oven to very hot (240°C/220°C<br />
fan-forced).<br />
3. Spread pizza sauce over bases. Sprinkle<br />
with half of the cheese. Top with remaining<br />
ingredients and sprinkle with remaining<br />
cheese.<br />
4. Cook pizza, for about 15 minutes or until<br />
bases are golden and cheese has melted.<br />
Potato and Rosemary Pizza<br />
Makes: 2 large pizzas<br />
1 quantity basic pizza dough<br />
1 tablespoon olive oil<br />
1 clove garlic, crushed<br />
Salt and pepper, to taste<br />
2 cups pizza cheese<br />
200g new potatoes, very thinly sliced<br />
1 tablespoon finely chopped fresh rosemary<br />
1. Prepare basic pizza dough according to<br />
recipe.<br />
2. Preheat oven to very hot (240°C/220°C<br />
fan-forced).<br />
3. Combine olive oil and garlic in a small<br />
bowl. Using the back of a spoon, spread<br />
oil mixture evenly over pizza bases. Season<br />
with salt and pepper.<br />
4. Sprinkle bases with half of the cheese.<br />
Top with potato slices and rosemary.<br />
Sprinkle with remaining cheese.<br />
5. Cook pizza, for about 15 minutes or until<br />
bases are golden and cheese has melted.<br />
Tip: Use a mandolin or V-slice to cut potato<br />
very thinly. Potatoes may not cook if not cut<br />
thin enough. If you can’t cut the potatoes<br />
very thinly, you may need to par-cook them in<br />
the microwave before placing on the pizza.<br />
32
Recipes continued<br />
Gourmet Vegetarian Pizza<br />
Makes: 2 large pizzas<br />
1 quantity basic pizza dough<br />
¼ cup pizza sauce<br />
2 cups pizza cheese<br />
¼ cup finely chopped fresh basil<br />
½ red onion, thinly sliced<br />
½ cup bottled char-grilled capsicum,<br />
drained, chopped<br />
100g button mushrooms, thinly sliced<br />
½ cup sun-dried tomatoes, drained, chopped<br />
¼ cup pitted kalamatta olives<br />
1. Prepare basic pizza dough according to<br />
recipe.<br />
2. Preheat oven to very hot (240°C/220°C<br />
fan-forced).<br />
3. Spread pizza sauce over bases. Sprinkle<br />
with half of the cheese. Top with remaining<br />
ingredients and sprinkle with remaining<br />
cheese.<br />
4. Cook pizza, for about 15 minutes or until<br />
bases are golden and cheese has melted.<br />
33
Notes
Notes
The <strong>Sunbeam</strong><br />
5 Year Motor<br />
Guarantee<br />
<strong>Sunbeam</strong> has built its reputation<br />
on manufacturing quality electrical<br />
appliances. Our Cafe Series ® Planetary<br />
Mixmaster ® Bench Mixer is constructed<br />
from the highest quality materials. So much<br />
so, we guarantee our Bench Mixer motor<br />
for five (5) years against faulty materials<br />
or manufacture. This guarantee is just<br />
another expression of our confidence in<br />
the way we make appliances at <strong>Sunbeam</strong>.<br />
In order to be eligible for this guarantee,<br />
you must retain your receipt as proof of<br />
purchase.<br />
Your Cafe Series ® Planetary Mixmaster ®<br />
Bench Mixer is covered for the first year<br />
against faulty material or manufacture<br />
by the <strong>Sunbeam</strong> 12 Month Replacement<br />
Guarantee. Should you experience any<br />
difficulties with your appliance within<br />
this 12 Month period, please phone our<br />
customer service line for advice on 1300<br />
881 861 in Australia, or 0800 786 232 in<br />
New Zealand.<br />
The <strong>Sunbeam</strong> (5) five year motor guarantee<br />
begins from date of purchase and extends<br />
for four years beyond the 12 Month<br />
Replacement Guarantee. It covers only<br />
the motor, guaranteeing it against faulty<br />
materials or manufacture. It does not cover<br />
damage caused by accident, misuse or<br />
being used in a manner not in accordance<br />
with the Instruction Book. Similarly, this<br />
motor guarantee does not cover freight or<br />
any other costs incurred in making a claim.<br />
If a fault should develop with the motor<br />
after the period covered by the 12 Month<br />
Replacement Guarantee, please call<br />
<strong>Sunbeam</strong> Customer Service on the number<br />
listed below or send a written claim to<br />
<strong>Sunbeam</strong> at the address listed below.<br />
On receipt of your claim, <strong>Sunbeam</strong> will<br />
advise you on how to obtain a replacement<br />
motor if your motor is defective.<br />
Alternatively, you can return the Cafe<br />
Series ® Planetary Mixmaster ® Bench Mixer<br />
to any of <strong>Sunbeam</strong>’s authorised service<br />
centres, together with your receipt. The<br />
service centre will examine the motor and<br />
if it is faulty or defective, the motor will be<br />
replaced free of charge.<br />
For a complete list of <strong>Sunbeam</strong>’s authorised<br />
service centres visit our website or call:<br />
<strong>Sunbeam</strong> Corporation Ltd.<br />
Australia<br />
www.sunbeam.com.au<br />
1300 881 861<br />
Units 5 & 6, 13 Lord Street<br />
Botany NSW 2019 Australia<br />
<strong>Sunbeam</strong> Corporation Ltd.<br />
New Zealand<br />
www.sunbeam.co.nz<br />
0800 786 232<br />
26 Vestey Drive, Mt Wellington<br />
Auckland, New Zealand<br />
The benefits given to you by this guarantee<br />
are in addition to your other rights and<br />
remedies under any laws which relate to<br />
the appliance.<br />
Our goods come with guarantees that<br />
cannot be excluded under the Australian<br />
Consumer Law and under the New Zealand<br />
Consumer Guarantees Act. In Australia you<br />
are entitled to a replacement or refund for<br />
a major failure and for compensation for<br />
any other reasonably foreseeable loss or<br />
damage. You are also entitled to have the<br />
goods repaired or replaced if the goods fail<br />
to be of acceptable quality and the failure<br />
does not amount to a major failure.<br />
IMPORTANT NOTE<br />
<strong>Sunbeam</strong> agrees to replace the motor in<br />
the event of the motor developing a fault or<br />
defect, within the four years after the<br />
12 Month Replacement Guarantee.<br />
As your Cafe Series ® Planetary Mixmaster ®<br />
Bench Mixer needs to be assessed at a<br />
<strong>Sunbeam</strong> authorised service centre, it will<br />
not be accepted through retail stores.<br />
If using the Cafe Series ® Planetary<br />
Mixmaster ® Bench Mixer for commercial<br />
use this motor guarantee is limited to 12<br />
months from the date of purchase.
12 Month Replacement Guarantee<br />
In the unlikely event that this appliance develops any malfunction<br />
within 12 months of purchase (3 months commercial use) due<br />
to faulty materials or manufacture, we will replace it for you free<br />
of charge.<br />
Should you experience any difficulties with<br />
your appliance, please phone our customer<br />
service line for advice on 1300 881 861 in<br />
Australia, or 0800 786 232 in New Zealand.<br />
Alternatively, you can send a written claim<br />
to <strong>Sunbeam</strong> at the address listed below.<br />
On receipt of your claim, <strong>Sunbeam</strong> will<br />
seek to resolve your difficulties or, if the<br />
appliance is defective, advise you on how<br />
to obtain a replacement or refund.<br />
Your <strong>Sunbeam</strong> 12 Month Replacement<br />
Guarantee naturally does not cover misuse<br />
or negligent handling and normal wear and<br />
tear.<br />
Similarly your 12 Month Replacement<br />
Guarantee does not cover freight or any other<br />
costs incurred in making a claim. Please<br />
retain your receipt as proof of purchase.<br />
The benefits given to you by this guarantee<br />
are in addition to your other rights and<br />
remedies under any laws which relate to the<br />
appliance.<br />
Our goods come with guarantees that cannot<br />
be excluded under the Australian Consumer<br />
Law and under the New Zealand Consumer<br />
Guarantees Act.<br />
In Australia you are entitled to a<br />
replacement or refund for a major failure and<br />
for compensation for any other reasonably<br />
foreseeable loss or damage. You are also<br />
entitled to have the goods repaired or<br />
replaced if the goods fail to be of acceptable<br />
quality and the failure does not amount to<br />
a major failure.<br />
Should your appliance require repair or<br />
service after the guarantee period, contact<br />
your nearest <strong>Sunbeam</strong> service centre.<br />
For a complete list of <strong>Sunbeam</strong>’s authorised<br />
service centres visit our website or call:<br />
Australia<br />
www.sunbeam.com.au<br />
1300 881 861<br />
Units 5 & 6, 13 Lord Street<br />
Botany NSW 2019 Australia<br />
New Zealand<br />
www.sunbeam.co.nz<br />
0800 786 232<br />
26 Vestey Drive, Mt Wellington<br />
Auckland, New Zealand
Need help with your appliance?<br />
Contact our customer service team or visit<br />
our website for information and tips on<br />
getting the most from your appliance.<br />
In Australia<br />
Visit www.sunbeam.com.au<br />
Or call 1300 881 861<br />
In New Zealand<br />
Visit www.sunbeam.co.nz<br />
Or call 0800 786 232<br />
is a registered trademark.<br />
‘Cafe Series’ logo and words are registered trademarks of<br />
<strong>Sunbeam</strong> Corporation.<br />
‘Mixmaster’ is a registered trademark of <strong>Sunbeam</strong><br />
Corporation.<br />
‘Scapemaster’ is a trademark of <strong>Sunbeam</strong> Corporation.<br />
Made in China. Designed and engineered in Australia.<br />
Due to minor changes in design or otherwise, the product<br />
may differ from the one shown in this leaflet.<br />
© Copyright. <strong>Sunbeam</strong> is a registered Corporation Limited trademark. 2006.<br />
ABN 45 000 006 771<br />
Units 5 & 6, 13 Lord Street<br />
Botany NSW 2019 Australia<br />
Unit 3, Building D<br />
26 Vestey Drive<br />
Mt Wellington Auckland<br />
New Zealand<br />
12/08<br />
<strong>Sunbeam</strong> Corporation is a division of GUD Holdings Ltd. 08/11