
You also want an ePaper? Increase the reach of your titles
YUMPU automatically turns print PDFs into web optimized ePapers that Google loves.
■Warning and Alert:<br />
Warning<br />
• Do not proceed to the assembly of the line while electrifying.<br />
• Circuit & change <strong>com</strong>ponents between entering shutting down the power supply and stopping<br />
showing CHARGE LED light of the Servo driver.<br />
• The output of Servo drive [U, V, W] must NOT touch the AC power.<br />
Alert<br />
• Install the fan if the temperature around is too high while the Servo driver is installed in the<br />
Control Board.<br />
• Do not proceed to the Anti-Pressure-Test to the Servo driver.<br />
• Confirm the quick stop function is available before operate servo drive.<br />
• Matching up machine to change the user parameter setting before machine performs. If there is<br />
no according correct setting number, it could lead to out of control or breakdown.<br />
Safety proceeding:<br />
Check the covering letter detail before installing, running, maintaining and examining. Furthermore,<br />
only the profession-qualified people can proceed to the line-assembly.<br />
Safety proceeding in the covering letter discriminate between “Warning”&”Alert”.<br />
Alarm<br />
Indicating the possibility dangerous situation. It could cause the death or serious<br />
damage if being ignored.<br />
!<br />
Warning<br />
Indicating the possibility dangerous situation. It could cause smaller or lighter<br />
human injured and damage of equipment.<br />
Read this covering letter detail before using Servo driver.<br />
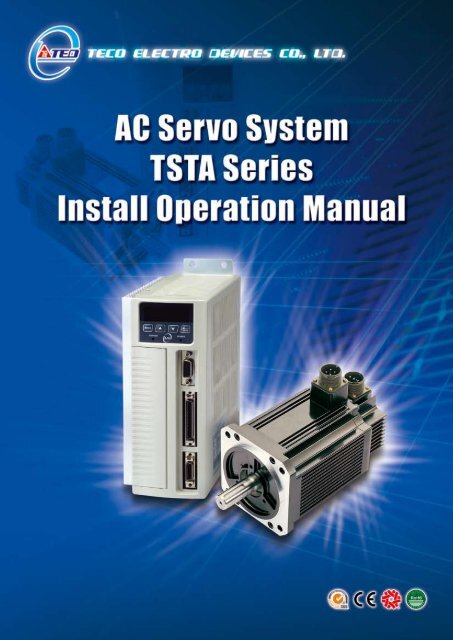
First of all, thank you for using TED Servo Driver TSTA Series (“TSTA” for short) and Servo Motors.<br />
TSTA can be controlled by digital board or PC, and provide excellent performance for a wide range of<br />
applications and different requirement from customers.<br />
i
Read this covering letter before using TSTA. Contents of the letter <strong>com</strong>prises:<br />
• Servo System checking, installing and procedure of assembly line.<br />
• Controller procedure for digital board, status displaying, unusual alarm and strategy<br />
explanation.<br />
• Servo System control function, running testing and procedures adjusted.<br />
• Explanation for all parameter of Servo Driver.<br />
• Standard specification of TSTA Series.<br />
In order to daily examine, maintain and understand the reason of unusual situation and handle<br />
strategy, please put this covering letter in safe place to read it anytime.<br />
P.S: The end user should own this covering letter, in order to make the Servo Driver bring the best<br />
performance .<br />
ii
Contents<br />
Chapter 1 Checking and Installing<br />
1-1 Checking Products..........................................................................................................................1-1<br />
1-1-1 Confirming with Servo Drives..............................................................................................1-1<br />
1-1-2 Confirming with Servomotors..............................................................................................1-2<br />
1-2 Appearance and Panel Board.........................................................................................................1-3<br />
1-3 A Brief Introduction of Operation for Drives.................................................................................1-4<br />
1-4 Conditions for Installation of Drives .............................................................................................1-5<br />
1-4-1 Environmental Conditions....................................................................................................1-5<br />
1-4-2 Direction and Distance..........................................................................................................1-6<br />
1-5 Conditions for Installation of Servomotors ..................................................................................1-7<br />
1-5-1 Environmental Conditions....................................................................................................1-7<br />
1-5-2 Method of Installation ...........................................................................................................1-7<br />
1-5-3 Others .....................................................................................................................................1-8<br />
Chapter 2 Wiring<br />
2-1 Basic Wiring for Servo System ......................................................................................................2-1<br />
2-1-1 Wiring for Main Circuit and Peripheral Devices.................................................................2-1<br />
2-1-2 Wiring for Servo Drives ........................................................................................................2-2<br />
2-1-3 Specifications of Wiring .......................................................................................................2-3<br />
2-1-4 Motor Terminal Layout..........................................................................................................2-4<br />
2-1-5 Typical Wiring for Motor and Main Circuit ..........................................................................2-6<br />
2-1-6 TB Terminal ............................................................................................................................2-7<br />
2-1-7 Wiring for Mechanical Brake. ...............................................................................................2-8<br />
2-2 I/O Terminal ......................................................................................................................................2-9<br />
2-2-1 Output Signals from the Servo pack .................................................................................2-10<br />
2-2-2 Encoder Connector (CN2) Terminal Layout......................................................................2-23<br />
2-3 Typical Circuit Wiring Examples..................................................................................................2-25<br />
2-3-1 Position Control Mode (Pe Mode) (Line Driver). .............................................................2-25<br />
2-3-2 Position Control Mode (Pe Mode) (Open Collector). .......................................................2-26<br />
2-3-3 Position Control Mode (Pi Mode).......................................................................................2-27<br />
2-3-4 Speed Control Mode (S Mode). ..........................................................................................2-28<br />
2-3-5 Torque Control Mode (T Mode). .........................................................................................2-29<br />
Chapter 3 Panel Operator / Digital Operator<br />
3-1 Panel Operator on the Drives.........................................................................................................3-1<br />
3-2 Signal Display. .................................................................................................................................3-6<br />
3-2-1 Status Display..........................................................................................................................3-6<br />
3-2-2 Diagnosis.................................................................................................................................3-7<br />
Chapter 4 Trial Operation<br />
4-1 Trial Operation for Servomotor without Load. .............................................................................4-2<br />
4-2 Trial Operation for Servomotor without Load from Host Reference .........................................4-5<br />
4-3 Trial Operation with the Servomotor Connected to the Machine ...............................................4-9<br />
iii
Chapter 5 Control Functions<br />
5-1 Control Mode Selection. .................................................................................................................5-1<br />
5-2 Torque Mode ....................................................................................................................................5-2<br />
5-2-1 Analog Ratio ..........................................................................................................................5-3<br />
5-2-2 Adjusting the Reference Offset............................................................................................5-4<br />
5-2-3 Linear Acceleration and Deceleration ................................................................................5-5<br />
5-2-4 Output Direction ....................................................................................................................5-6<br />
5-2-5 Internal Torque Limit.............................................................................................................5-7<br />
5-2-6 Limiting Servomotor Speed during Torque Control ..........................................................5-7<br />
5-2-7 Additional Torque Control Functions..................................................................................5-8<br />
5-3 Speed Mode .....................................................................................................................................5-9<br />
5-3-1 Setting Parameters .............................................................................................................5-10<br />
5-3-2 Analog Ratio ........................................................................................................................5-11<br />
5-3-3 Adjusting the Reference Offset..........................................................................................5-11<br />
5-3-4 Limiting Speed with Analog Reference.............................................................................5-12<br />
5-3-5 Encoder Signal Output .......................................................................................................5-12<br />
5-3-6 Smoothing............................................................................................................................5-14<br />
5-3-7 Definition of CW and CCW .................................................................................................5-17<br />
5-3-8 Speed Loop Gain.................................................................................................................5-18<br />
5-3-9 Notch Filter...........................................................................................................................5-19<br />
5-3-10 Limiting Servomotor Torque during Speed Control.......................................................5-21<br />
5-3-11 Gain Switched ..................................................................................................................5-22<br />
5-3-12 Other Functions ...............................................................................................................5-29<br />
5-4 Position Mode................................................................................................................................5-31<br />
5-4-1 External Pulse Command ...................................................................................................5-32<br />
5-4-2 Internal Position Command................................................................................................5-34<br />
5-4-3 Electronic Gear....................................................................................................................5-37<br />
5-4-4 Smoothing Acceleration ....................................................................................................5-41<br />
5-4-5 Definition of Direction.........................................................................................................5-42<br />
5-4-6 Gain Adjustment..................................................................................................................5-42<br />
5-4-7 Deleting the Pulse Offset....................................................................................................5-43<br />
5-4-8 Original Home......................................................................................................................5-44<br />
5-4-9 Other Position Functions ...................................................................................................5-53<br />
5-5 Gain Adjustment............................................................................................................................5-54<br />
5-5-1 Automatic Adjusting...........................................................................................................5-57<br />
5-5-2 Manual Adjusting.................................................................................................................5-60<br />
5-5-3 Improving Resonance.........................................................................................................5-61<br />
5-6 Other Functions.............................................................................................................................5-62<br />
5-6-1 Programmable I/O Functions .............................................................................................5-62<br />
5-6-2 Switching Control Mode .....................................................................................................5-65<br />
5-6-3 Auxiliary Functions .............................................................................................................5-65<br />
5-6-4 Brake Mode ..........................................................................................................................5-66<br />
5-6-5 Timing Diagram of Mechanical Brake ...............................................................................5-66<br />
5-6-6 CW/CCW Inhibit Function ..................................................................................................5-68<br />
iv
5-6-7 Selecting the External Regeneration Resistor .................................................................5-69<br />
5-6-8 Fan Setting...........................................................................................................................5-73<br />
5-6-9 Analog Monitor ....................................................................................................................5-73<br />
5-6-10 Paramerter .........................................................................................................................5-74<br />
Chapter 6 Parameter Function<br />
6-1 Explanation of Parameter Group ..................................................................................................6-1<br />
6-2 Parameter Display Table................................................................................................................6-2<br />
Chapter 7 Communications Function<br />
7-1 RS232 & RS485 ............................................................................................................................7-1<br />
7-1-1 Communication wiring ..........................................................................................................7-1<br />
7-1-2 RS232 Communication Protocol and Format .....................................................................7-2<br />
7-1-3 Modbus <strong>com</strong>munication protocol for RS-485 ....................................................................7-5<br />
7-2 Communication Address table.....................................................................................................7-16<br />
Chapter 8 Troubleshooting<br />
8-1 Alarm Display Table ........................................................................................................................8-1<br />
8-2 Troubleshooting of Alarm and Warning........................................................................................8-3<br />
Chapter 9 Specifications<br />
9-1 Specifications and Dimension for Servo Drives ........................................................................9-1<br />
9-2 Specifications and Dimension for Servomotors ..........................................................................9-7<br />
Appendix A - Peripheral for Servo motors.......................................................................... A-1<br />
v
Chapter 1 Checking and Installing<br />
1-1 Checking Products<br />
Our Servo Pack have already <strong>com</strong>pletely been functionally examined before leaving the factory. In order to protect the<br />
products from the damage during transportation, please check the items below before sealing off the pack:<br />
• Check if the models of servo driver and motor are the same with the models of ordering.<br />
(About the model explanation, please check the chapters below)<br />
• Check if there are damage or scrape out side of the servo driver and motor.<br />
(If there is any damage during transportation, do not power ON)<br />
• Check if there are any bad assembly or slipped <strong>com</strong>ponent in the Servo Drive and Motor<br />
• Check if the Motor’s rotor and shaft can be rotated smoothly by hand<br />
(The Servo Motor with Mechanical-Brake can not be rotated directly)<br />
• There must be the “QC”-seal in each servo drive, if not, please do not proceed Power ON.<br />
If there is any bug or irregular under the situation above, please contact TED’s Local sales representative or distributor<br />
instantly.<br />
1-1-1 Confirming with Servo Drives<br />
TSTA – 15 A<br />
Drive Series:<br />
TSTA SERIES<br />
Drive Model:<br />
15 / 20 / 30 / 50 / 75<br />
P.S : Maximum output power<br />
15 : 400 W 50 : 2 KW<br />
20 : 750 W 75 : 3 KW<br />
30 : 1 KW<br />
AC Input Voltage<br />
A : single phase 110V<br />
B: single phase 220V<br />
C: single/3 phase 220V<br />
D: 3 phase 220V<br />
1-1
1-1-2 Confirming with Servo Motors<br />
TSB 07 301 C - 2 N H 3 *<br />
Motor Series:<br />
TSB<br />
TSC<br />
Frame sizes:<br />
04: 42<br />
06: 60<br />
07: 76<br />
08: 86<br />
13: 130<br />
Rated power<br />
050: 50 W<br />
101:100W<br />
201: 200 W<br />
301: 300 W<br />
401: 400 W<br />
551 550 W<br />
751: 750W<br />
102: 1 KW<br />
152: 1.5 KW<br />
202: 2 KW<br />
302: 3 KW<br />
Optional:<br />
N:None<br />
B :Brake<br />
G:Gear Box<br />
Others<br />
Lead Wire length<br />
A:Military Conn.<br />
3:300mm long<br />
Encolder:<br />
F : 2000 ppr<br />
H:2500ppr<br />
L : 8192 ppr<br />
Motor Speed:<br />
A: 1000 rpm<br />
B: 2000 rpm<br />
C: 3000 rpm<br />
H: 1500 rpm<br />
AC input voltage<br />
2:single phase220V<br />
3: 3 phase 220V<br />
1-2
1-2 Appearance and Panel Board<br />
TSTA-15 / TSTA-20<br />
TSTA-30<br />
TSTA-50 / TSTA-75<br />
Key Board<br />
External Regenerative<br />
Resistor Terminal<br />
Internal Regenerative<br />
Resistor Terminal<br />
1-3
1-3 A Brief Introduction of Operation for Drives<br />
There are many kinds of control-mode. The detail modes display as fellow:<br />
Name Mode Explanation<br />
Single<br />
Mode<br />
Position Mode<br />
(External Pulse<br />
Command)<br />
Position Mode<br />
(Internal Position<br />
Command)<br />
Speed Mode<br />
Torque Mode<br />
Multiple Mode<br />
Pe<br />
Pi<br />
S<br />
T<br />
Pe-S<br />
Pe-T<br />
S-T<br />
Position control for the servo motor is achieved via an external<br />
pulse <strong>com</strong>mand. Position <strong>com</strong>mand is input from CN1.<br />
Position control for the servo motor is achieved via by 16<br />
<strong>com</strong>mands stored within the servo controller. Execution of the<br />
16 positions is via Digital Input signals.<br />
Speed control for the servo motor can be achieved via<br />
parameters set within the controller or from an external analog<br />
-10 ~ +10 Vdc <strong>com</strong>mand. Control of the internal speed<br />
parameters is via the Digital Inputs. A maximum of three steps<br />
speed can be stored internally.<br />
Torque control for the servo motor can be achieved via<br />
parameters set or from an external analog -10 ~ +10 Vdc<br />
<strong>com</strong>mand.<br />
Pe and S can be switched by digital-input-contact-point.<br />
Pe and T can be switched by digital-input-contact-point.<br />
S and T can be switched by digital-input-contact-point.<br />
1-4
1-4 Conditions for Installation of Drives<br />
1-4-1 Environmental Conditions<br />
The product should be kept in the shipping carton before installation. In order to retain the warranty coverage, the<br />
AC drive should be stored properly when it is not to be used for an extended period of time. Some storage suggestions<br />
are:<br />
• Ambient Temperature: 0 ~ + 55 ℃; Ambient Humidity: Under 85% RH (Under the condition of no frost).<br />
• Stored Temperature: - 20 ~ + 85 ℃; Stored Humidity: Under 85%RH (Under the condition of no frost).<br />
• Vibrating: Under 0.5 G.<br />
• Do not mount the servo drive or motor in a location where temperatures and humidity will exceed specification.<br />
• To avoid the insolation.<br />
• To avoid the erosion of grease and salt.<br />
• To avoid the corrosive gases and liquids.<br />
• To avoid the invading of airborne dust or metallic particles.<br />
• When over 1 Drives are installed in control panel, enough space have to be kept to get enough air to prevent the<br />
heat; the fan also must be installed, to keep the ambient temperature under 55 ℃.<br />
• Please Install the drive in a vertical position, face to the front, in order to prevent the heat.<br />
• To avoid the metal parts or other unnecessary things falling into the drive when installing.<br />
• The drive must be stable by M5 screws.<br />
• When there were the vibrating items nearby, please using vibration-absorber or installing anti-vibration- rubber, if<br />
the vibration can not be avoided.<br />
• When there is any big-size magnetic switch, welding machines or other source of interference. Please install the<br />
filter. When the filter is installed, we must install the insulation transformer.<br />
1-5
1-4-2 Direction and Distance<br />
Fan<br />
Fan<br />
1-6
1-5 Conditions for Installation of Servo Motors<br />
1-5-1 Environmental Conditions<br />
• Ambient Temperature: 0 ~ + 40 ℃; Ambient humidity: Under 90% RH (No Frost).<br />
• Storage Temperature: - 20 ~ + 60 ℃; Storage temperature: Under 90%RH (No Frost).<br />
• Vibration: Under 2.5 G.<br />
• In a well-ventilated and low humidity and dust location.<br />
• Do not store in a place subjected to corrosive gases, liquids, or airborne dust or metallic particles.<br />
• Do not mount the servo motor in a location where temperatures and humidity will exceed specification.<br />
• Do not mount the motor in a location where it will be subjected to high levels of electromagnetic radiation.<br />
1-5-2 Method of Installation<br />
1. Horizontal Install: Please let the cable-cavity downside to prevent the water or oil or other liquid flow into the servo<br />
motor.<br />
Attention<br />
BRAKE<br />
Encoder<br />
2. Vertical Install: If the motor shaft is side-up installed and mounted to a gear box, please pay attention to and avoid the<br />
oil leakage from the gear box.<br />
1-7
1-5-3 Notice for install motor<br />
1. Please using oil-seal-motor to avoid the oil from reduction gear flowing into the motor through the motor shaft.<br />
2. The cable need to be kept dry.<br />
3. Please fixing the wiring cable certainly, to avoid the cable ablating or breaking.<br />
4. The extending length of the shaft shall be enough, otherwise there will be the vibration from motor operating.<br />
Wrong Example<br />
Correct Example<br />
5. Please do not beat the motor when installing or taking it apart. Otherwise the shaft and the encoder of backside will<br />
be damaged.<br />
Attention:<br />
Brake<br />
Encoder<br />
1-8
Chapter 2 Wiring<br />
2-1 Basic Wiring for Servo System<br />
2-1-1 Wiring for Main Circuit and Peripheral Devices<br />
200W~1KW Single Phase/3 Phase 200~230VAC<br />
2KW~3KW 3 Phase 200~230VAC<br />
No Fuse Break<br />
PC<br />
Noise Filter<br />
Bectromagnetic<br />
Contactor (MC)<br />
PLC / PC BASE or<br />
Motion Module<br />
CN1<br />
For I/O Connection<br />
CN2<br />
For Encoder Connection<br />
External braking resistor is<br />
connected to P and PC<br />
Circuit between PC and P1 is<br />
open<br />
Servo motor<br />
2-1
2-1-2 Wiring for Servo Drives<br />
• The wire material must go by “Wiring Specifications.”<br />
• Wiring Length: Command Input Wire: Less than 3m.<br />
Encoder Input Wire: Less than 20m.<br />
The Wiring goes by the shortest length.<br />
• Please wire according to the standard wiring schema. Don’t connect if no using.<br />
• Motor output terminal (U,V,W) must be connected correctly. Otherwise the servo motor will abnormally function.<br />
• Shielded cable must be connected to FG terminal.<br />
• Don’t install the capacitor or Noise Filter at the output terminal of servo drive.<br />
• At the control-output-signal relay, the direction of surge absorb diode must be correctly connected, otherwise it<br />
can not output signal, and cause the protect loop of emergency-stop abnormal.<br />
• Please do these below to avoid the wrong operation from noise:<br />
Please install devices such as the insulated transformer and noise filter at the input power.<br />
Keep more than 30 cm between Power wire (power cable or motor cable…etc.) and signal cable, do not<br />
install them in the same conduit.<br />
• Please set “emergency-stop switch” to prevent abnormal operation.<br />
• After wiring, check the connection-situation of each joint (ex: loose soldering, soldering point short, terminal order<br />
incorrect…etc.). Tighten the joints to confirm if surly connected to the servo drive, if the screw is tight. There can<br />
not be the situations such as cable break, cable pulled and dragged, or be heavily pressed.<br />
* Especially pay attention to the polarity between servo motor wiring and encoder.<br />
• There is no necessary to add extra regeneration resistance under general situation. If there is any need or<br />
problem, please connect to distributor or manufacturer.<br />
2-2
2-1-3 Specifications of Wiring<br />
Connection Terminal<br />
Servo Drives and Wire Specifications<br />
Connection<br />
Terminal<br />
Mark<br />
(Sign)<br />
Name of Connect<br />
Terminal<br />
TSTA-15 TSTA-20 TSTA-30 TSTA-50 TSTA-75<br />
R, S, T Main Power Terminal<br />
2.0mm ²<br />
A.W.G.14<br />
2.0mm ²<br />
A.W.G.14<br />
2.0mm ²<br />
A.W.G.14<br />
2.0mm ²<br />
A.W.G.14<br />
3.5mm ²<br />
A.W.G.12<br />
TB<br />
Terminal<br />
U, V, W Motor Terminal<br />
r, s Power-Control Terminal<br />
2.0mm ²<br />
A.W.G.14<br />
1.25mm²<br />
A.W.G.16<br />
2.0mm ²<br />
A.W.G.14<br />
1.25mm²<br />
A.W.G.16<br />
2.0mm ²<br />
A.W.G.14<br />
1.25mm²<br />
A.W.G.16<br />
2.0mm ²<br />
A.W.G.14<br />
1.25mm²<br />
A.W.G.16<br />
3.5mm ²<br />
A.W.G.12<br />
1.25mm²<br />
A.W.G.16<br />
1<br />
FG<br />
Ground<br />
2.0mm ²<br />
A.W.G.14<br />
2.0mm ²<br />
A.W.G.14<br />
2.0mm ²<br />
A.W.G.14<br />
2.0mm ²<br />
A.W.G.14<br />
3.5mm ²<br />
A.W.G.12<br />
Connect<br />
Terminal<br />
Connect<br />
Point No.<br />
26,27,28<br />
30,31<br />
33,34<br />
Connect Point Name TSTA-15 TSTA-20 TSTA-30 TSTA-50 TSTA-75<br />
Speed / Torque<br />
Command Input<br />
Analog Monitor Output 1<br />
& 2<br />
Power Output +15V &<br />
-15V<br />
0.2mm ² or 0.3mm ² -> Twisted-pair-cable connecting to the Analog<br />
Grounding wire (including shield cable)<br />
CN1<br />
Joint<br />
Control<br />
Signal<br />
CN2<br />
Joint of<br />
motor<br />
encoder<br />
29,32,44 Analog Ground Terminal<br />
1~13 General Analog Input<br />
18~25,43 General Analog Output<br />
45,46,<br />
48,49<br />
24V Power &<br />
I/O Ground<br />
14~17 Position Command Input<br />
35~40 Encoder Signal Output<br />
1,2 Output 5V<br />
3,4<br />
Output Grounding wire of<br />
power supply<br />
5~18 Encoder Signal Input<br />
0.2mm ² or 0.3mm ² -> Twisted-pair-cable connecting to the I/O<br />
Grounding wire (including shield cable)<br />
0.2mm ² or 0.3mm ² -> Twisted-pair-cable (including shield cable)<br />
0.2mm ² or 0.3mm ² -> Twisted-pair-cable (including shield cable)<br />
RS232<br />
Joint of<br />
Communic<br />
ation<br />
2,3 Data transfer & receive<br />
5<br />
Communication<br />
grounding wire<br />
0.2mm ² or 0.3mm ² -> Twisted-pair-cable (including shield cable)<br />
1,4,6,8 Floating —<br />
P.S.: 1. Please pay attention to the NFB and the capacity of noise filter when using multi ServoDrives.<br />
2. CN1 ->50 Pins (3M Co.)<br />
3. CN2 -> 20 Pins (3M Co.)<br />
4. RS232 -> 9 Pins D-type Joint.<br />
2-3
2-1-4 Motor Terminal Layout<br />
A Table of Motor-Terminal Wiring<br />
(1) General Joint:<br />
Terminal Symbol Color Signal<br />
1 Red U<br />
2 White V<br />
3 Black W<br />
4 Green FG<br />
Brake control wire<br />
Fine red DC +24V<br />
Fine yellow<br />
0V<br />
(2)Military Specifications Joint (No Brake):<br />
Terminal Color Signal<br />
A Red U<br />
D<br />
A<br />
B White V<br />
C Black W<br />
C<br />
B<br />
D Green FG<br />
(3)Military Specifications Joint (Brake):<br />
Terminal Color Signal<br />
B Red U<br />
F<br />
A<br />
G White V<br />
E Black W<br />
E<br />
G<br />
B<br />
C Green FG<br />
A Fine red DC +24V<br />
BK control wire<br />
F Fine yellow<br />
0V<br />
D<br />
C<br />
2-4
Table of Motor-Encoder Wiring<br />
(1)General Joint:<br />
Terminal Symbol Color Signal<br />
1 White +5V<br />
2 Black 0V<br />
3 Green A<br />
4 Blue /A<br />
5 Red B<br />
6 Purple /B<br />
7 Yellow Z<br />
8 Orange /Z<br />
9 Shield FG<br />
(2) Military Specifications Joint<br />
Terminal Symbol Color Signal<br />
B White +5V<br />
I Black 0V<br />
A Green A<br />
C Blue /A<br />
H Red B<br />
D Purple /B<br />
G Yellow Z<br />
E Orange /Z<br />
F Shield FG<br />
2-5
2-1-5 Typical Wiring for Motor and Main Circuit<br />
* The Wiring Example of Single Phase Main Power (Less than 1KW)<br />
* The Wiring Example of 3 Phase Main Power (More than 1KW)<br />
Power OFF<br />
Power ON<br />
MC/a<br />
MC<br />
NFB<br />
3 Phase 220V<br />
Power Filter<br />
MC/R<br />
MC/S<br />
MC/T<br />
r<br />
s<br />
R<br />
S<br />
T<br />
TB1<br />
TB1<br />
U<br />
V<br />
W<br />
FG<br />
P<br />
PC<br />
Red<br />
White<br />
Black<br />
Green<br />
R<br />
External<br />
Regeneration<br />
BK Resistance<br />
M<br />
PG<br />
FG<br />
CN2<br />
2-6
2-1-6 TB Terminal<br />
Name<br />
Control circuit power input<br />
terminal<br />
Main circuit power input<br />
terminal<br />
External regeneration<br />
resistance terminal<br />
Regeneration terminal<br />
<strong>com</strong>mon point<br />
Internal regeneration<br />
resistance terminal<br />
Motor-power output<br />
terminal<br />
Motor-case grounding<br />
terminal<br />
Terminal<br />
Sign<br />
r<br />
s<br />
R<br />
S<br />
T<br />
P<br />
PC<br />
P1<br />
U<br />
V<br />
W<br />
FG<br />
Detail<br />
Connecting to external AC Power.<br />
Single Phase 200~230VAC +10 ~ -15% , 50/60Hz ±5%<br />
Connecting to external AC Power.<br />
Single / 3 Phase 200~230VAC +10 ~ -15% , 50/60Hz ±5%<br />
Please refer to Cn012 to see resistance value, when using external<br />
regeneration resistance. After installing regeneration resistance, set the<br />
resistance power in Cn012.<br />
*If NOT using external regeneration resistance, PC-P1 is a short<br />
circuit, do not connect P terminal.<br />
*When using external regeneration, equip regeneration resistance<br />
between PC-P, do not connect P1 terminal.<br />
Motor terminal wire is red<br />
Motor terminal wire is white<br />
Motor terminal wire is black<br />
Motor terminal wire is green or yellow-green.<br />
2-7
2-1-7 Wiring for Mechanical Brake<br />
Release BRAKE:<br />
• 200/300/400/750W series: Use Red wire and yellow wire connecting to DC +24V voltage (No polarity)<br />
• 550/1K/1.5K/2K/3KW series: BK outputs from A & C of Motor Power Joint, servo motor can operate<br />
normally after releasing the brake.<br />
200/300/<br />
400/750W<br />
Yellow Wire<br />
Red Wire<br />
550/1K/<br />
1.5K/2K/3KW<br />
A<br />
C<br />
Encoder<br />
Brake<br />
Encoder<br />
Brake<br />
2-8
2-2 I/O Terminal<br />
There are 3 groups of I/O terminal, which contain RS232 <strong>com</strong>munication terminal, CN1 control signal terminal and<br />
CN2 encoder terminal. The diagram below displays all positions for the terminal.<br />
2-9
2-2-1 Output Signals from the Servopack<br />
(1) Diagram of CN1 Terminal:<br />
P.S.:<br />
1. If there is unused terminal, please do not connect it or let it be the relay terminal.<br />
2. The Shielded Wire of I/O cable should connect to the ground.<br />
2-10
(2) CN1 Signal Name and Explanation:<br />
(a) General I/O Signal:<br />
Explanation of General I/O Signal Function<br />
Signal<br />
Position Pulse<br />
Command Input<br />
Position Symbol<br />
Command Input<br />
Open Collector<br />
Position Command<br />
Power Input.<br />
Speed / Torque<br />
Analog Command<br />
Input<br />
Torque Control Speed<br />
Limit Command /<br />
CCW Torque<br />
Command Limit<br />
CW Torque<br />
Command Limit<br />
Analog Monitor<br />
Output 1<br />
Analog Monitor<br />
Output 2<br />
Function<br />
Symbol<br />
Pin No.<br />
Pulse 14<br />
/Pulse 15<br />
Sign 16<br />
/Sign 17<br />
Wired<br />
Mode<br />
IO3<br />
OPC 41 IO3<br />
SIN 26<br />
PIC 27<br />
NIC 28<br />
IO5<br />
Signal<br />
Function<br />
Symbol<br />
Pin No.<br />
Encoder Output<br />
A-Phase<br />
PA 35<br />
Encoder Output / A<br />
Phase<br />
/PA 36<br />
Encoder Output<br />
B-Phase<br />
PB 37<br />
Encoder Output<br />
/B-Phase<br />
/PB 38<br />
Encoder Output<br />
Z-Phase<br />
PZ 39<br />
/Z-Phase /PZ 40<br />
Analog Signal<br />
Ground Terminal<br />
+15Vdc Output<br />
Terminal<br />
-15Vdc Output<br />
Terminal<br />
DigitaI input Com<br />
Terminal<br />
AG 29,32,44<br />
+15V 33<br />
-15V 34<br />
DICOM 47<br />
MON1 30 +24Vdc Output IP24 45<br />
MON2 31<br />
IO6<br />
+24Vdc Com<br />
Terminal<br />
IG24 46,48,49<br />
Home Signal Output ZO 43 IO2<br />
Shielded Wire<br />
Connect Point<br />
FG 50<br />
Wired<br />
Mode<br />
IO4<br />
2-11
Explanation of General I/O Signal Function<br />
Signal Name<br />
Position Pulse<br />
Command Input<br />
Position Sign<br />
Command Input<br />
Open Collect<br />
Position Command<br />
PW Input<br />
Speed Analog<br />
<strong>com</strong>mand Input<br />
Torque Analog<br />
Command Input<br />
Torque Control<br />
Speed Limit<br />
Command<br />
CCW Torque Limit<br />
Command<br />
CW Torque Limit<br />
Command<br />
Analog Monitor<br />
Output 1<br />
Analog Monitor<br />
Output 2<br />
Encoder Output A<br />
Phase<br />
Encoder Output / A<br />
Phase<br />
Encoder Output B<br />
Phase<br />
Encoder Output / B<br />
Phase<br />
Encoder Output Z<br />
Phase<br />
Encoder Output / Z<br />
Phase<br />
Home Signal<br />
Output<br />
Analog Signal<br />
Ground Terminal<br />
+15V PW Output<br />
Terminal<br />
-15V PW Output<br />
Terminal<br />
DI PW Conmen<br />
Terminal<br />
Function<br />
Symbol<br />
Pulse<br />
/Pulse<br />
Sign<br />
/Sign<br />
OPC<br />
SIN<br />
PIC<br />
NIC<br />
MON1<br />
MON2<br />
PA<br />
/PA<br />
PB<br />
/PB<br />
PZ<br />
/PZ<br />
Mode I/O Operation and Function Chapter<br />
Pe<br />
Pe<br />
S<br />
T<br />
T<br />
S<br />
S<br />
ALL<br />
ALL<br />
ALL<br />
The Driver can receive 3 kinds of Command below:<br />
. (Pulse)+ (Sign)<br />
. (CCW)/ (CW)Pulse<br />
.AB Phase pulse<br />
When open collect input in position <strong>com</strong>mand, OPC and IP24<br />
can be close, and using internal 24V power and resistor.<br />
In Speed Mode, when external speed <strong>com</strong>mand is operated at<br />
SPD1=0, SPD2=0, input the voltage range: -10V~+10V, Sn216<br />
can be set input voltage: ±10V’s Motor output speed.<br />
2-12<br />
5-4-1<br />
―<br />
5-3-1<br />
5-3-2<br />
5-3-3<br />
5-3-4<br />
5-2-1<br />
5-2-2<br />
In Torque Mode, input the voltage range -10~+10V, Tn103 can<br />
be set input voltage ±10V’s motor output torque.<br />
In Torque Mode, when external speed limit is operated at input<br />
connect point SPD1=0 & SDP2=0(P.S), input voltage range: 5-2-6<br />
0~+10V, 10V’s speed limit stands for motor’s ratio speed.<br />
In Speed Mode, when external torque limit is be used at input<br />
connect point TLMT=1(P.S.) , input voltage range: 0~+10V, to<br />
5-3-10<br />
input 10V will limit the motor CCW torque having 300% of ratio<br />
torque.<br />
In Speed Mode, when external torque limit is be used at input<br />
connect point TLMT=1(P.S.), input voltage range: -10~0V, to<br />
5-3-10<br />
input -10V will limit the motor CW torque have 300% of ratio<br />
torque.<br />
Operating the motor to control the current speed to transform<br />
the voltage output in accordance with the rate (±10V/1.5 times<br />
ratio speed) CCW stands for positive voltage, CW negative<br />
voltage.<br />
Operating the motor to control the current torque to transform<br />
the voltage output in accordance with the rate (±10V/3.5 times<br />
ratio torque) CCW torque stands for positive voltage, CW<br />
negative voltage.<br />
Outputting the Motor Encoder Signal through pulse per rotation<br />
handle. The pulse quantity of every rotating can be set in<br />
Cn005.<br />
When “1” is set in Cn004, it is CCW rotation from the motor load<br />
terminal direction, and A Phase gets 90 degree ahead B Phase.<br />
Signal Output is Line Driver.<br />
ZO ALL Z Phase Open Collector output connect point. ―<br />
AG<br />
ALL<br />
+15V ALL<br />
-15V ALL<br />
Analog signal grounding: CN1 - > Pin 26、27、28、30、31、<br />
33、34.<br />
To provide ±15V output power (Max. 10mA), which can be used<br />
in servo drive – external voltage <strong>com</strong>mand. Suggestion: Using<br />
the variable resistance which is more than 3kΩ.<br />
DICOM ALL Digital input power supplement <strong>com</strong>mon terminal. ―<br />
5-6-9<br />
5-6-9<br />
5-3-5<br />
―<br />
―
Signal Name<br />
Function<br />
Symbol<br />
Mode I/O Operation and Function Chapter<br />
+24V PW Output IP24 ALL +24V power output terminal(Max. 0.2A). ―<br />
+24V PW Ground<br />
Terminal<br />
Shielded Wire<br />
Connect Point<br />
IG24 ALL +24V power grounding terminal ―<br />
FG ALL Connect to Shield wire of signal cable. ―<br />
P.S.: “1” stands for “close loop with IG24”; “0” stands for “open loop with IG24”.<br />
PW is abbreviation of Power<br />
2-13
(b) Digital I/O Signal:<br />
For many kinds of application, the digital input/output terminal layout of all operation mode are accordingly<br />
different. In order to provide more functions, our drives can provide multi terminal layout settings. Users can set these<br />
functions for application.<br />
Digital input terminal layout provides 13 (Pin1~13) programmable terminal; digital output terminal provides 4<br />
(Pin18~21) programmable terminals. The diagram below shows the default digital input/output terminal placement<br />
and functions. Please refer to 5-6-1 to check related parameters setting.<br />
Default Digital Input Terminal placement Functions and Wired Mode<br />
Signal<br />
Function<br />
Sign<br />
Pin<br />
No.<br />
Wired<br />
Mode<br />
Signal<br />
Function<br />
Sign<br />
Pin<br />
No.<br />
Wired<br />
Mode<br />
Servo ON DI-1 SON 1 Servo Lock DI-8 LOK 8<br />
Alarm reset DI-2 ALRS 2<br />
Emergency<br />
Stop<br />
DI-9 EMC 9<br />
PI/P Switch DI-3 PCNT 3<br />
CCW<br />
Operation Limit<br />
CW<br />
Operation Limit<br />
External Torque<br />
Limit<br />
Pulse error<br />
amount delete<br />
DI-4 CCWL 4<br />
DI-5 CWL 5<br />
DI-6 TLMT 6<br />
DI-7 CLR 7<br />
IO1<br />
Internal speed<br />
<strong>com</strong>mand /<br />
Limit select 1<br />
Internal speed<br />
<strong>com</strong>mand /<br />
Limit select 2<br />
Control Mode<br />
Switch<br />
Reverse<br />
Direction<br />
Speed<br />
Command<br />
DI-10 SPD1 10<br />
DI-11 SPD2 11<br />
DI-12 MDC 12<br />
DI-13 SPDINV 13<br />
―<br />
IO1<br />
Default Digital Input Terminal Layout Functions and Wired Mode<br />
Signal<br />
Function<br />
Sign<br />
Pin<br />
No.<br />
Wired<br />
Mode<br />
Signal<br />
Function<br />
Sign<br />
Pin<br />
No.<br />
Wired<br />
Mode<br />
Servo ready DO-1 RDY 18<br />
Torque limit/<br />
Alarm code A0<br />
DO-5 LM/A0 22<br />
Alarm DO-2 ALM 19<br />
Zero speed DO-3 ZS 20<br />
IO2<br />
P action /<br />
Alarm code A1<br />
Operation limit/<br />
Alarm code A2<br />
DO-6 PC/A1 23<br />
DO-7 ST/A2 24<br />
IO2<br />
Fix position DO-4 INP 21<br />
Base Block/<br />
Alarm code A3<br />
DO-8 BB/A3 25<br />
2-14
Digital Input Function<br />
(Except CCWL and CWL are high electric potential, other terminal layout are low electric potential. Please refer<br />
to 5-6-1 to see related parameters)<br />
Signal Name<br />
Function<br />
Sign<br />
Mode I/O Function Chapter<br />
Servo On SON ALL<br />
Abnormal Reset ALRS ALL<br />
PI/P switch PCNT Pi/Pe/S<br />
CCW<br />
Operation limit<br />
CW<br />
Operation limit<br />
External torque<br />
limit<br />
Pulse error<br />
amount delete<br />
CCWL<br />
CWL<br />
TLMT<br />
CLR<br />
ALL<br />
ALL<br />
Pi/Pe/S<br />
Pi/Pe<br />
Servo lock LOK S<br />
Emergency stop EMC ALL<br />
SON and IG24 close loop: Servo ON ; SON and IG24 open loop:<br />
Servo OFF. Attention: Before power on, the input connect point<br />
SON (servo on) can not be operated to avoid danger.<br />
ALRS and IG24 close loop: Relieving the stop-situation from of<br />
abnormality. But the abnormality of encoder or memory will<br />
cause the same alarm again. Please reset power after the<br />
abnormality is eliminated.<br />
PCNT and IG24 close loop will cause the speed loop control<br />
transforming to ratio control from ratio integration control.<br />
Connect to CCW over travel detector: CCWL and IG24 close loop;<br />
open loop with IG24 -> CCW over travel operates.<br />
Connect to CW over travel detector: CWL and IG24 close loop;<br />
open loop with IG24 -> CW over travel operates.<br />
TLMT and IG24 close loop will cause the motor-output-torque-limit<br />
to stay in the <strong>com</strong>mand-voltage range of<br />
torque-limit-terminal-layout (PIC、NIC).<br />
When CLR and IG24 close loop, delete the pulse amount in the<br />
Position Error Counter.<br />
When LOK and IG24 close loop will transform speed control mode<br />
into position control mode in order to lock the motor at the last<br />
position.<br />
When EMC and IG24 close loop: Emergency stop -> Servo Off and<br />
exit the rotating statue, and Cn008 will decide if the dynamic Brake<br />
operates.<br />
5-6-3<br />
5-6-4<br />
8-1<br />
5-3-11<br />
5-4-8<br />
5-6-3<br />
5-6-4<br />
5-4-8<br />
5-6-3<br />
5-6-4<br />
5-3-10<br />
5-4-7<br />
5-3-12<br />
5-6-4<br />
Internal speed<br />
<strong>com</strong>mand / limit<br />
select 1<br />
Internal speed<br />
<strong>com</strong>mand / limit<br />
select 2<br />
SPD1<br />
SPD2<br />
S/T<br />
SPD2<br />
SPD1<br />
0 0<br />
Speed<br />
Command<br />
(Speed Mode)<br />
External<br />
<strong>com</strong>mand(SIN)<br />
Speed Limit<br />
Command<br />
(Torque Mode)<br />
External limit(PIC)<br />
0 1 Sn201 Tn105<br />
1 0 Sn202 Tn106<br />
5-2-6<br />
5-3-1<br />
1 1 Sn203 Tn107<br />
Internal speed setting and limit:<br />
“1”: Close loop with IG24<br />
“0”: Open loop with IG24<br />
2-15
Digital Input Function Explanation<br />
(Except CCWL and CWL are the high electric potential, other terminal layout are the low electric potential,<br />
please refer to 5-6-1 to check related parameters setting)<br />
Signal Name<br />
Function<br />
Symbol<br />
Mode I/O Function Chapter<br />
Control Mode<br />
Switch<br />
MDC<br />
When MDC and IG24 close loop, current control mode will<br />
Pe/S/T<br />
transform into default control mode, please refer to Cn001.<br />
Position<br />
When INH and IG24 close loop, position <strong>com</strong>mand input does<br />
INH Pe<br />
Command Limit<br />
not operate (do not accept external pulse <strong>com</strong>mand).<br />
Speed Command<br />
When SPDINV and IG24 close loop in speed mode, setting<br />
SPDINV S<br />
Counter Wise<br />
rotating speed will be<strong>com</strong>e counter-wise rotating speed.<br />
Gain Select G-SEL<br />
When G-SEL and IG24 close loop, first stage control gain<br />
Pi/Pe/S<br />
switch to the second control gain.<br />
Electric gear ratio: select explanation:<br />
5-1<br />
5-6-2<br />
5-4-1<br />
5-3-7<br />
5-3-11<br />
Electric Gear ratio<br />
Numerator 1~2<br />
GN1<br />
GN2<br />
Pi/Pe<br />
GN2 GN1 Electric Gear ratio Numerator<br />
0 0 Pn302<br />
0 1 Pn303<br />
1 0 Pn304<br />
1 1 Pn305<br />
5-4-3<br />
Internal Position<br />
Command<br />
Trigger<br />
Internal Position<br />
Command Hold<br />
PTRG<br />
PHOLD<br />
Pi<br />
Pi<br />
Home SHOME Pi/Pe<br />
External Origin ORG Pi<br />
“1”: Close loop with IG24<br />
“0”: Open loop withIG24<br />
When PTRG and IG24 close loop (positively-triggered), the<br />
motor will select related position <strong>com</strong>mand to operate in<br />
accordance with the terminal layout POS1~POS4.<br />
When PHOLD and IG24 close loop(positively-triggered), the<br />
motor will stay holding.<br />
When SHOME and IG24 close loop(positively-triggered),<br />
HOME function operates<br />
When ORG and IG24 close loop(positively-triggered), server<br />
will use this as external reference point for home position<br />
returning.<br />
5-4-8<br />
5-4-8<br />
5-4-8<br />
5-4-8<br />
2-16
Digital Input Function Explanation<br />
(Except CCWL and CWL are the high electric potential, other terminal layout are the low electric potential,<br />
please refer to 5-6-1 to check related parameters setting)<br />
Signal Name<br />
Internal Position<br />
Command select<br />
1~4<br />
Function<br />
Symbol<br />
POS1<br />
POS2<br />
POS3<br />
POS4<br />
Mode I/O Function Chapter<br />
Pi<br />
Internal position <strong>com</strong>mand select :<br />
POS1 POS2 POS3 POS4<br />
Internal Position<br />
Command select<br />
0 0 0 0 Pn317, Pn318<br />
0 0 0 1 Pn320, Pn321<br />
0 0 1 0 Pn323, Pn324<br />
0 0 1 1 Pn326, Pn327<br />
0 1 0 0 Pn329, Pn330<br />
0 1 0 1 Pn332, Pn333<br />
0 1 1 0 Pn335, Pn336<br />
0 1 1 1 Pn338, Pn339<br />
1 0 0 0 Pn341, Pn342<br />
1 0 0 1 Pn344, Pn345<br />
1 0 1 0 Pn347, Pn348<br />
1 0 1 1 Pn350, Pn351<br />
1 1 0 0 Pn353, Pn354<br />
1 1 0 1 Pn356, Pn357<br />
1 1 1 0 Pn359, Pn360<br />
1 1 1 1 Pn362, Pn363<br />
5-4-2<br />
Internal position <strong>com</strong>mand select explanation:<br />
“1”: close loop with IG24<br />
“0”: open loop with IG24<br />
Torque Command<br />
Counter Clock<br />
Wise<br />
TRQINV<br />
T<br />
When TRQINV and IG24 close loop in torque mode, setting<br />
torque <strong>com</strong>mand output wise be<strong>com</strong>es counter wise output.<br />
5-2-4<br />
2-17
Digital Output Function Explanation<br />
(The terminal layout here from this explanation are all the low electric potential, please refer to 5-6-1 to check<br />
parameter settings)<br />
Signal Name<br />
Function<br />
Symbol<br />
Servo Ready RDY ALL<br />
Alarm ALM ALL<br />
Zero Speed ZS S<br />
BK Signal BI ALL<br />
In Speed INS S<br />
In Position INP Pi/Pe<br />
Mode I/O Function Chapter<br />
Main power and control power input are normal. Under the<br />
situation of no alarm, terminal layouts RDY and IG24 close<br />
loop.<br />
If normally operates, the terminal layouts ALM and IG24 open<br />
loop. When alarm occurs, protection-function operates, the<br />
terminal and IG24 close loop.<br />
When the motor speed is less than the speed from Sn215, the<br />
terminal layout ZS and IG24 close loop.<br />
When Cn008 is set “1” or “3” and the servo on, the terminal<br />
layout BI and IG24 close loop; when servo off , terminal layout<br />
and IG24 open loop. (When this terminal layout is generally<br />
applied, it is the Brake relay, which is connected to control<br />
motor).<br />
When the motor speed has achieved the setting speed from<br />
Cn007, INS and IG24 close loop.<br />
When the amount of position error counter is less than the<br />
amount range which is set in Pn307, INP and IG24 close loop.<br />
―<br />
―<br />
5-3-12<br />
5-6-4<br />
5-6-5<br />
5-3-12<br />
5-4-9<br />
Home HOME Pi/Pe When HOME is ac<strong>com</strong>plished, HOME and IG24 close. 5-4-8<br />
Limiting Torque/<br />
Alarm No. 0<br />
LM/A0<br />
ALL<br />
P in Action /<br />
Alarm No.1 PC/A1 Pe/Pi/S<br />
Server in Limiting/<br />
Alarm No.2<br />
Base Block/<br />
Alarm No.3<br />
ST/A2<br />
BB/A3<br />
ALL<br />
ALL<br />
When motor output torque is limited by internal torque limit<br />
amount (Cn010&Cn011) or external torque limit <strong>com</strong>mand<br />
(PIC&NIC). LM/A0 and IG24 close loop.<br />
When alarm occurs, this terminal layout is alarm code output<br />
A0.<br />
When speed loop is ratio(P)-control, PC/A1 and IG24 close<br />
loop.<br />
When alarm occurs, this terminal layout is alarm code output<br />
A1.<br />
When CCW or CW operation-limit occurs, ST/A2 and IG24 close loop.<br />
When alarm occurs, this terminal layout is alarm code output A2<br />
When servo motor has not be operated, BB/A3 and IG24 close<br />
loop.<br />
When alarm occurs, this terminal layout is alarm code output A3<br />
8-1<br />
8-1<br />
8-1<br />
8-1<br />
2-18
(3) CN1 Interface Circuit and Wire Mode:<br />
The diagram below introduces all interface circuit of CN1 and wire-method of host controller.<br />
(a) Digital input interface circuit (IO1):<br />
Digital input interface circuit can be operated by relay or collector transistor circuit. The relay should be the low<br />
electric current, in order to avoid the faulty contacting. External voltage: 24V.<br />
Internal 24V Power<br />
External 24V Power<br />
Servo Driver<br />
DC24V<br />
IP24<br />
CN1-45<br />
i=4.3mA<br />
5.6KΩ<br />
CN1-47<br />
DICOM<br />
SON<br />
IG24<br />
CN1-49<br />
(b) Digital Output Interface Circuit(IO2):<br />
When using external power, please attention to the power polarity. Adverse polarity will case circuit damage.<br />
Digital output is “Open Collector”. The maximum of external voltage is 24V; and the maximum electric current is<br />
10mA.<br />
Internal 24V Power<br />
External 24V Power<br />
2-19
(c) Pulse Command Input Interface Circuit(IO3):<br />
Suggesting to use the input method of Line Driver to send the pulse <strong>com</strong>mand. The maximum input <strong>com</strong>mand<br />
frequency is 500kpps. Using the input method of Open Collector will cause the decrease of input <strong>com</strong>mand<br />
frequency, the maximum input <strong>com</strong>mand frequency is 200kpps. The servo provides only 24V power, and other<br />
power should be prepared. Adverse polarity of power will cause the servo damage. The maximum of External<br />
power (Vcc) is 24V limited. Input current is about 8~15mA. Please refer to the examples below to select<br />
resistance. Please refer to 5-4-1 to check pulse input <strong>com</strong>mand timing.<br />
Line Driver pulse <strong>com</strong>mand input<br />
Open Collector pulse <strong>com</strong>mand input<br />
The max. frequency of line driver type pulse <strong>com</strong>mand<br />
Maximum input <strong>com</strong>mand frequency of open collector is<br />
is 500kpps<br />
200kpps<br />
Open Collector (Internal 24V)<br />
Open Collector – Selection of input Resistance<br />
Servo Driver<br />
IP24<br />
CN1-45<br />
DC24V<br />
OPC<br />
CN1-41<br />
2KΩ<br />
Pulse<br />
Sign<br />
/Pulse<br />
/Sign<br />
330Ω<br />
1KΩ<br />
External Power<br />
Vcc=24V<br />
R=2KΩ<br />
External Power<br />
Vcc=12V<br />
R=750Ω<br />
External Power<br />
Vcc=5V<br />
R=100Ω<br />
CN1-49<br />
IG24<br />
The maximum input <strong>com</strong>mand frequency of open<br />
collector is 200kpps<br />
2-20
(d) Encoder Output Interface Circuit (IO4):<br />
Encoder output interface circuit is the output method of Line Driver, please let end terminal<br />
resistance(R=200~330Ω) connect to Line Receiver input terminal.<br />
Encoder Output Interface Circuit (Line Driver)<br />
(e) Analog Input Interface Circuit(IO5):<br />
There is sometimes ripple inside the servo internal power. Adverse external power polarity will cause severe<br />
damage. Maximum external power voltage (Vc) should be less than12V; terminal input voltage should not more<br />
than10V. Over voltage will cause damage. When using internal power of server, user need to choose the<br />
resistance(suggestion: more than 3KΩ), which maximum current is less than 10mA.<br />
SIN Input impedance: 15KΩ<br />
PIC Input impedance: 40KΩ<br />
NIC Input impedance: 20KΩ<br />
Analog Input Interface Circuit<br />
2-21
(f) Analog Output Interface Circuit(IO6):<br />
The maximum current of analog output is 5mA, so user need to choose the device, which Impedance is larger.<br />
Analog Input Interface Circuit<br />
Servo Driver<br />
TG<br />
AG<br />
V<br />
2-22
2-2-2 Encoder Connector (CN2) Terminal Layout<br />
(1) Diagram of CN2 Terminal:<br />
(a) Diagram of Fewer Wiring Type Encoder:<br />
(b) Diagram of non-Fewer Wiring Type Encoder:<br />
P.S.: Do not wire to the terminal, which is un-operated.<br />
2-23
(2) Name and Explanation of I/O Signal:<br />
Encoder Output<br />
No. and Color<br />
Pin<br />
No.<br />
Signal Name<br />
Code<br />
General<br />
Joint<br />
Plug-in<br />
Joint<br />
Terminal Layout Function<br />
9 wires<br />
(fewer<br />
wiring)<br />
15 wires<br />
(non-fewer<br />
wiring)<br />
Output<br />
No.<br />
1<br />
2<br />
3<br />
4<br />
Power output<br />
+ Terminal<br />
Power output<br />
- Terminal<br />
+5V white Red B<br />
0V Black Black I<br />
5V Power for encoder (provided from driver).<br />
When the cable is more than 20m, user should<br />
separately use 2 cables to avoid decreasing<br />
voltage of encoder. When the cable is more<br />
than 30m, please contact to the distributorship.<br />
5 A Green Green A<br />
A Phase encoder<br />
6<br />
input A /A Green<br />
Blue<br />
C<br />
White<br />
7 B Phase encoder<br />
B Red Gray H<br />
8<br />
input /B Pink Gray white D<br />
9 Z Yellow Yellow G<br />
Z Phase encoder<br />
10<br />
input /Z Yellow<br />
Orange<br />
E<br />
white<br />
11 U Brown<br />
U Phase encoder<br />
12<br />
input /U Brown<br />
white<br />
13 V Phase encoder<br />
V Blue<br />
14<br />
input /V Blue white<br />
15 W Orange<br />
W Phase encoder<br />
16<br />
input /W Orange<br />
white<br />
Encoder A Phase: From motor terminal to the<br />
driver.<br />
Encoder B Phase: From motor terminal to the<br />
driver.<br />
Encoder Z Phase: From motor terminal to the<br />
driver.<br />
When using fewer-wiring-type motor, do<br />
not wire.<br />
When using fewer-wiring-type motor, do<br />
not wire.<br />
When using fewer-wiring-type motor, do<br />
not wire.<br />
17<br />
18<br />
19<br />
No operated<br />
Do not wire.<br />
20<br />
Shielded wire<br />
terminal layout<br />
FG Shielded net wire F<br />
Shielded wire, which is connected to the signal<br />
wire.<br />
2-24
2-3 Typical Circuit Wiring Examples<br />
2-3-1 Position Control Mode (Pe Mode) (Line Driver)<br />
Pe mode =External pulse positioning <strong>com</strong>mand<br />
2-25
2-3-2 Position Control Mode (Pe Mode) (Open Collector)<br />
Pe mode =External pulse positioning <strong>com</strong>mand<br />
2-26
2-3-3 Position Control Mode (Pe Mode) (Pi Mode)<br />
R<br />
S<br />
T<br />
NFB<br />
Supply<br />
Filter<br />
Internal +24V DC<br />
IP24<br />
R<br />
S<br />
T<br />
r<br />
s<br />
FG<br />
45<br />
DC 24V<br />
SERVO<br />
C<br />
N<br />
4<br />
P<br />
PC<br />
P1<br />
RS232<br />
PC<br />
Regeneration resistor<br />
Servo ON (SON)<br />
CCW Limit ( CCWL)<br />
CW Limit (CWL)<br />
Emergency stop (EMC)<br />
HOME ( SHOME)<br />
External Torque Limit (TLMT)<br />
Position Trigger (PTRG)<br />
Alarm Clear ( ALRS)<br />
Position Hold ( PHOLD)<br />
Position Select 1 (POS1)<br />
Position Select 2 (POS2)<br />
Digital input <strong>com</strong>mon<br />
+24V ground<br />
CCW Torque Limit<br />
Analog Grounding<br />
CW Torque Limit<br />
DICOM<br />
DI-1<br />
DI-4<br />
DI-5<br />
DI-9<br />
DI-3<br />
DI-6<br />
DI-12<br />
DI-2<br />
DI-8<br />
DI-10<br />
DI-11<br />
IG24<br />
PIC<br />
AG<br />
NIC<br />
47<br />
1<br />
4<br />
5<br />
9<br />
3<br />
6<br />
12<br />
2<br />
8<br />
10<br />
11<br />
48<br />
27<br />
29<br />
28<br />
R1<br />
R1<br />
R1<br />
R1<br />
R1<br />
R1<br />
R1<br />
R1<br />
R1<br />
R1<br />
R1<br />
20KΩ<br />
R2<br />
20KΩ<br />
R2<br />
DC24V<br />
U<br />
V<br />
W<br />
FG<br />
C<br />
N<br />
2<br />
35 PA<br />
36 /PA<br />
37 PB<br />
38 /PB<br />
39 PZ<br />
40 /PZ<br />
43<br />
48<br />
45<br />
18<br />
19<br />
20<br />
21<br />
22<br />
23<br />
24<br />
25<br />
49<br />
30<br />
32<br />
31<br />
Z0<br />
IG24<br />
DO-1<br />
DO-2<br />
DO-3<br />
DO-4<br />
DO-5<br />
DO-6<br />
DO-7<br />
DO-8<br />
IG24<br />
MON1<br />
AG<br />
MON2<br />
R4<br />
LOAD<br />
LOAD<br />
LOAD<br />
LOAD<br />
LOAD<br />
LOAD<br />
LOAD<br />
LOAD<br />
+Vc Origin Output<br />
*Max Vc:24V<br />
Vc=24V, R4=4.7KΩ<br />
Vc=12V, R4=2.4KΩ<br />
Vc=5V, R4=1.0KΩ<br />
SERVO<br />
MOTOR<br />
Encoder<br />
Encoder Output A Phase<br />
Encoder Output /A Phase<br />
Encoder Output B Phase<br />
Encoder Output /B Phase<br />
Encoder Output Z Phase<br />
Encoder Output /Z Phase<br />
Servo Ready (RDY)<br />
Alam(ALM)<br />
HOME (HOME)<br />
Positioning Completed(INP)<br />
Limiting Torque/Alarm Code 0<br />
P in Action/Alarm Code 1<br />
Servo in limit/ Alarm Code 2<br />
Base Block /Alarm Code 3<br />
Analog Monitor Output 1<br />
Analog Grounding<br />
Analog Monitor Output 2<br />
Max Voltage: 24V<br />
Max Output Current :10mA<br />
Max Output Current 5mA<br />
33<br />
34<br />
+15V<br />
-15V<br />
+15V PW output (AG)<br />
-15V PW output (AG)<br />
Max Output Current 10mA<br />
Shield ground<br />
FG<br />
50<br />
Pi mode =Internal position <strong>com</strong>mand<br />
2-27
2-3-4 Speed Control Mode (S Mode)<br />
R<br />
S<br />
T<br />
NFB<br />
Servo ON (SON)<br />
CCW Limit (CCWL)<br />
CW Limit (CWL)<br />
Emergency stop ( EMC)<br />
PI/P Switch (PCNT)<br />
Torque Limit ( TLMT)<br />
Model Control (MDC)<br />
Alarm Clear(ALRS)<br />
Look (LOK)<br />
Speed 1 (SP1)<br />
Speed 2 (SP2)<br />
Reverse Control (SPDINV)<br />
Analog Speed Input (±10V)<br />
Supply<br />
Filter<br />
Internal +24V DC<br />
Digital input <strong>com</strong>mon<br />
+24V ground<br />
CCW Torque Limit<br />
Analog Ground<br />
CW Torque Limit<br />
Analog Ground<br />
IP24<br />
DICOM<br />
DI-1<br />
DI-4<br />
DI-5<br />
DI-9<br />
DI-3<br />
DI-6<br />
DI-12<br />
DI-2<br />
DI-8<br />
DI-10<br />
DI-11<br />
DI-13<br />
IG24<br />
PIC<br />
AG<br />
NIC<br />
SIN<br />
AG<br />
R<br />
S<br />
T<br />
r<br />
s<br />
FG<br />
45<br />
47<br />
1<br />
4<br />
5<br />
9<br />
3<br />
6<br />
12<br />
2<br />
8<br />
10<br />
11<br />
13<br />
48<br />
27<br />
29<br />
28<br />
26<br />
29<br />
DC 24V<br />
R1<br />
R1<br />
R1<br />
R1<br />
R1<br />
R1<br />
R1<br />
R1<br />
R1<br />
R1<br />
R1<br />
R1<br />
20KΩ<br />
R2<br />
20KΩ<br />
R2<br />
20KΩ<br />
R2<br />
SERVO<br />
DC24V<br />
C<br />
N<br />
4<br />
P<br />
PC<br />
P1<br />
U<br />
V<br />
W<br />
FG<br />
C<br />
N<br />
2<br />
35 PA<br />
36 /PA<br />
37 PB<br />
38 /PB<br />
39 PZ<br />
40 /PZ<br />
43<br />
48<br />
45<br />
18<br />
19<br />
20<br />
21<br />
22<br />
23<br />
24<br />
25<br />
49<br />
30<br />
32<br />
31<br />
Z0<br />
IG24<br />
DO-1<br />
DO-2<br />
DO-3<br />
DO-4<br />
DO-5<br />
DO-6<br />
DO-7<br />
DO-8<br />
IG24<br />
RS232<br />
MON1<br />
AG<br />
MON2<br />
R4<br />
LOAD<br />
LOAD<br />
LOAD<br />
LOAD<br />
LOAD<br />
LOAD<br />
LOAD<br />
LOAD<br />
PC<br />
Regeneration resistor<br />
+Vc<br />
SERVO<br />
MOTOR<br />
Encoder<br />
Encoder Output A Phase<br />
Encoder Output /A Phase<br />
Encoder Output B Phase<br />
Encoder Output /B Phase<br />
Encoder Output Z Phase<br />
Encoder Output /Z Phase<br />
External supply<br />
*Max Vc=24V<br />
Vc=24V, R4=4.7KΩ<br />
Vc=12V, R4=2.4KΩ<br />
Vc=5V, R4=1.0KΩ<br />
Servo Ready (RDY)<br />
Alam(ALM)<br />
Zero Speed (ZS)<br />
In Speed (INS)<br />
Limiting Torque/Alarm Code 0<br />
P in Action/Alarm Code 1<br />
Servo in limit/ Alarm Code 2<br />
Base Block /Alarm Code 3<br />
Analog Monitor Output 1<br />
Analog Grounding<br />
Analog Monitor Output 2<br />
Max Voltage: 24V<br />
Max Output Current :10mA<br />
Max Output Voltage 5mA<br />
33<br />
34<br />
+15V<br />
-15V<br />
+15V PW output (AG)<br />
-15V PW output (AG)<br />
Max Output Current 10mA<br />
Shield ground<br />
FG<br />
50<br />
2-28
2-3-5 Torque Control Mode (T Mode)<br />
R<br />
S<br />
T<br />
NFB<br />
Supply<br />
Filter<br />
Internal +24V DC<br />
IP 24<br />
R<br />
S<br />
T<br />
r<br />
s<br />
FG<br />
45<br />
DC 24V<br />
SERVO<br />
C<br />
N<br />
4<br />
P<br />
PC<br />
P1<br />
RS232<br />
PC<br />
Regeneration resistor<br />
Servo ON(SON)<br />
CCW Limit(CCWL)<br />
CW Limit(CWL)<br />
Emergency stop(EMC)<br />
Model Control(MDC)<br />
Alarm Clear(ALRS)<br />
Torque Inverse(TRQINV)<br />
Speed 1 (SPD1)<br />
Speed 2(SPD2)<br />
Torque CW Selecting (RS1)<br />
Torque CCW Selecting (RS2)<br />
Digital input <strong>com</strong>mon<br />
DICOM<br />
+24 V ground<br />
Torque Control<br />
Speed Limit(0~10V)<br />
Analog Ground<br />
DI-1<br />
DI-4<br />
DI-5<br />
DI-9<br />
DI-12<br />
DI-2<br />
DI-8<br />
DI-10<br />
DI-11<br />
DI-6<br />
DI-7<br />
IG24<br />
PIC<br />
AG<br />
47<br />
1<br />
4<br />
5<br />
9<br />
12<br />
2<br />
8<br />
10<br />
11<br />
6<br />
7<br />
48<br />
27<br />
29<br />
R1<br />
R1<br />
R1<br />
R1<br />
R1<br />
R1<br />
R1<br />
R1<br />
R1<br />
R1<br />
R1<br />
20KΩ<br />
R2<br />
DC24V<br />
U<br />
V<br />
W<br />
FG<br />
C<br />
N<br />
2<br />
35 PA<br />
36 /PA<br />
37 PB<br />
38 /PB<br />
39 PZ<br />
40 /PZ<br />
43<br />
48<br />
45<br />
18<br />
19<br />
20<br />
21<br />
22<br />
23<br />
24<br />
25<br />
49<br />
Z0<br />
IG24<br />
DO-1<br />
DO-2<br />
DO-3<br />
DO-4<br />
DO-5<br />
DO-6<br />
DO-7<br />
DO-8<br />
IG24<br />
R4<br />
LOAD<br />
LOAD<br />
LOAD<br />
LOAD<br />
LOAD<br />
LOAD<br />
LOAD<br />
LOAD<br />
Encoder Output A Phase<br />
Encoder Output /A Phase<br />
Encoder Output B Phase<br />
Encoder Output /B Phase<br />
Encoder Output Z Phase<br />
Encoder Output /Z Phase<br />
SERVO<br />
MOTOR<br />
Encoder<br />
+VcExternal supply<br />
*Max Vc=24V<br />
Vc=24V , R4=4.7KΩ<br />
Vc=12V, R4=2.4KΩ<br />
Vc=5V, R4=1.0KΩ<br />
Servo Ready ( RDY)<br />
Alam( ALM)<br />
Zero Speed (ZS)<br />
In Speed (INS)<br />
Limiting Torque /Alarm Code 0<br />
P in Action /Alarm Code 1<br />
Servo in limit / Alarm Code 2<br />
Base Block /Alarm Code 3<br />
Max Voltage: 24V<br />
Max Output Current :10mA<br />
Torque Input (±10V)<br />
Analog Ground<br />
SIN<br />
AG<br />
26<br />
29<br />
20KΩ<br />
R2<br />
30<br />
32<br />
31<br />
MON1<br />
AG<br />
MON2<br />
Analog Monitor Output 1<br />
Analog Grounding<br />
Analog Monitor Output 2<br />
Max Output Current 5mA<br />
33<br />
34<br />
+15V<br />
-15V<br />
+15V PW output (AG)<br />
-15V PW output (AG)<br />
Max Output Current 10mA<br />
Shield ground<br />
FG<br />
50<br />
2-29
Chapter 3 Panel Operator / Digital Operator<br />
3-1 Panel Operator on the Drives<br />
The operator keypad & display contains a 5 digit 7 segment display, 4 control keys<br />
and two status LED displays.<br />
Power status LED (Green) is lit when the power is applied to the unit.<br />
Charge LED (Red) Indicate the capacitor ‘s charge status of main circuit. power on to light up Charge LED<br />
and gradual dark when internal power capacitors are discharged <strong>com</strong>plete.<br />
Do NOT wire or assemble to the servo drive before Charge LED is off.<br />
Key Name Function Keys Description<br />
MODE/SET<br />
INCREMENT<br />
DECREMENT<br />
DATA SETTING<br />
&<br />
DATA ENTER<br />
1. To select a basic mode, such as the status display mode, utility<br />
function mode, parameter setting mode, or monitor mode.<br />
2. Returning back to parameter selection from data-setting screen.<br />
1. Parameter Selection.<br />
2. To increase the set value.<br />
3. Press and at the same time to clear ALARM.<br />
1. To confirm data and parameter item.<br />
2. To shift to the next digit on the left.<br />
3. To enter the data setting (press 2 sec.)<br />
3-1
After power on, MODE button can be used to select 9 groups of parameter.<br />
By pressing the Mode key repeatedly once at a time you can scroll trough the displays below.<br />
Step Key LED Display after Operation Description<br />
1 Power on Drive status parameters.<br />
2 Diagnostic parameters.<br />
3 Alarm parameters.<br />
4 System Control parameters.<br />
5 Torque Control parameters.<br />
6 Speed Control parameters.<br />
7 Position Control parameters.<br />
8 Quick set up parameters.<br />
9 Multi function I/O ( programmable Inputs/Outputs) Parameters.<br />
10 Return to Drive status parameters.<br />
3-2
Once the first parameter in a parameter group is displayed use Increment or Decrement keys to<br />
select the required parameter then use Enter key in order to view and alter the parameter setting,<br />
once this is done then press Enter key again to save the change.<br />
Notes: On each parameter display the first digit will be flashing, the enter key can be used<br />
to move between digits.<br />
Example procedures are shown below: -<br />
Ex: Setting Speed Parameter Sn203 to 100rpm.<br />
Step Key LED Display after Operation Description<br />
1 Power On Display status of servo drive<br />
2 Press MODE-Key 6 times to select Sn 201<br />
3 Press INCRMENT- Key twice Sn203 is displayed.<br />
4<br />
To view the Sn203 preset value by press ENTER-Key for 2<br />
seconds<br />
5 Shift to the second digit by press ENTER- Key once<br />
6 Shift to next Digit by press ENTER-Key once again<br />
7<br />
Change the digit preset value by press the DECREMET-Key<br />
twice<br />
8<br />
To save the altered preset value, Press the ENTER- Key for 2<br />
seconds until “SET”is displayed briefly and then display is<br />
returned to parameter Sn203<br />
Following example shows the sequence where a parameter preset value is displayed<br />
When no change is made and it is skip back to the original parameter by pressing the Mode-Key.<br />
Step Key LED Display after Operation Description<br />
1 Power ON When power on drive status parameter will display<br />
2 Pressing MODE-Key 6 times, Sn 201 will be displayed.<br />
3 Pressing INCRMENT- Key twice Sn203 is displayed.<br />
4 To view the Sn203 preset press ENTER-Key for 2 seconds.<br />
5<br />
No change is made and LED display return to last select parameter<br />
Sn203, press MODE-Key once skip<br />
Some of the data entry in this drive are in the format shown below, for these data the Most significant digit<br />
3-3
will be shown by the Capital letter “H” as shown below.<br />
Ex: Home search function in position mode Pn365 = 0212. Each digit of this preset for Pn365 parameter<br />
defines a selection for a specific function.<br />
Bit0 corresponds to a selection for parameter Pn 365.0 and bit1 setting for Pn 365.1 … etc.<br />
Parameter Pn 365 Format for the 5 digits data value is shown below:<br />
Display of Positive and Negative values:<br />
Description of Positive/Negative Display<br />
For negative numbers with 4 digits or less, the negative sign is<br />
displayed In the most significant digit as shown.<br />
Ex: Sn201 (Internal Speed Command 1).<br />
For negative numbers with 5 digits the negative sign is indicated by<br />
displaying all the 5 decimal points on the display.<br />
Ex: Pn317(Internal Position Command 1- Rotation number)<br />
Display of Positive Display of Negative<br />
3000 -3000<br />
30000 -30000<br />
Setting a negative value.<br />
(1) If the negative value has 4 digits or less follow the steps in the example below:<br />
Ex: Sn201(Internal speed <strong>com</strong>mand 1)= preset speed of 100 to –100 rpm.<br />
Step Key LED Display after Operation Description<br />
1 Power ON On” power on “ Drive Status parameter is displayed.<br />
2 Pressing MODE-Key 5 times, Sn 201 will be displayed.<br />
3 To view the Sn201 preset press ENTER-Key for 2 seconds.<br />
4<br />
5<br />
or<br />
To move to the most significant digit press the ENTER-Key<br />
4 times.<br />
Use INCREMENT Or DECREMENT key until<br />
the minus sign ( _ ) is displayed. You can toggle between – and<br />
+ by this key.<br />
6<br />
To save the altered preset value, Press the ENTER- Key for 2<br />
seconds until “SET”is displayed briefly and then<br />
display is returned to parameter Sn201.<br />
If the negative value has 5 digits follow the steps in the example below:<br />
Ex: Pn317 (internal position preset <strong>com</strong>mand 1) set to a negative value -10000 revolutions.<br />
3-4
Step Control Keys LED Display after Operation Description<br />
1 Power On On” power on “ Drive Status parameter is displayed.<br />
2<br />
Pressing MODE-Key 6 times, position parameter Pn 301 will<br />
be displayed.<br />
3 Use INCREMENT- Key to display Pn317.<br />
4 To view the Pn317 preset press ENTER-Key for 2 seconds.<br />
5<br />
6<br />
7<br />
To move to the most significant digit press the ENTER-Key<br />
4 times.<br />
Press DECREMENT-Key once to set the most significant digit<br />
To 1. And press the DECREMENT-Key once again.<br />
All 5 decimal points will light up to indicate a negative number.<br />
To save the altered preset value, Press the ENTER- Key for 2<br />
seconds until “SET”is displayed briefly and then<br />
display is returned to parameter Pn 317.<br />
Alarm Reset from the Keypad.<br />
All alarm displays can be cleared from the keypad without a need for an external Alarm clear (Reset) signal.<br />
Ex. Under voltage Alarm AL-01.<br />
Step Control Key LED Display after Opertion Description<br />
1 Alarm Under voltage Alarm AL-01 is displayed.<br />
2<br />
To clear Alarm:-<br />
Remove input contact SON (Servo On).<br />
Then press INCREMENT-Key and DECREMENT-Key<br />
at the same time.<br />
The display will show RESET briefly and then returns back to<br />
parameter display.<br />
3-5
3-2 Signal Display<br />
3-2-1 Status Display<br />
Following parameters can be used to display drive and motor Status.<br />
Parameter<br />
Signal<br />
Displayed Unit Description<br />
Un-01 Actual motor speed rpm Actual Motor Speed is displayed in rpm.<br />
Un-02 Actual motor torque %<br />
It displays the torque as a percentage of the rated torue.<br />
Ex: 20 are displayed. It means that the motor torque output is 20% of<br />
rated torque.<br />
Un-03 Regenerative load ratio % Value for the processable regenerative power as 100% .<br />
Un-04 Accumulated load ratio % Value for the rated torque as 100%.<br />
Un-05 Max load rate % Max value appeared on accumulated load rate<br />
Un-06 Speed <strong>com</strong>mand rpm Speed <strong>com</strong>mand is displayed in rpm.<br />
Un-07 Position error counter value pulse<br />
Error between position <strong>com</strong>mand value and the actual position<br />
feedback.<br />
Un-08 Position feedback pulse counter pulse The accumulated number of pulses from the motor encoder.<br />
Un-09 External voltage <strong>com</strong>mand V External analog voltage <strong>com</strong>mand value in volts.<br />
Un-10 Main circuit Vdc Bus Voltage V DC Bus voltage in Volts.<br />
Un-11<br />
Un-12<br />
External speed limit <strong>com</strong>mand<br />
value<br />
External CCW Torque limit<br />
<strong>com</strong>mand value<br />
rpm<br />
%<br />
Display external speed limit <strong>com</strong>mand value in rpm.<br />
Ex: Display 100. Means current external CCW torque limit <strong>com</strong>mand is<br />
set to 100 %.<br />
Un-13<br />
External CW Torque limit <strong>com</strong>mand<br />
value<br />
%<br />
Ex: Display 100. Means current external CW toque limit <strong>com</strong>mand is set<br />
to 100%.<br />
Un-14<br />
Motor feed back – Rotation value<br />
(absolute value)<br />
rev<br />
After power on, it displays motor rotation number as an absolute value.<br />
Un-15<br />
Motor feed back – Less then 1<br />
After power on, it displays the pulse number for less than a revolution of<br />
pulse<br />
rotation pulse value(absolute value) the motor as an absolute value.<br />
Un-16<br />
Pulse <strong>com</strong>mand – rotation<br />
value(absolute value)<br />
rev<br />
After power on, it displays pulse <strong>com</strong>mand input rotation number in<br />
absolute value.<br />
Un-17<br />
Pulse <strong>com</strong>mand – Less then 1<br />
After power on, it displays pulse <strong>com</strong>mand input for less than a rotation.<br />
pulse<br />
rotation pulse value(absolute value) pulse value is an absolute value.<br />
Un-18 Torque <strong>com</strong>mand %<br />
Un-19 Load inertia x0.1<br />
It displays the torque <strong>com</strong>mand as a percentage of the rated torque.<br />
Ex: Display. 50.Means current motor torque <strong>com</strong>mand is 50% of rated<br />
torque.<br />
When Cn002.2=0(Auto gain adjust disabled), it displays the current<br />
preset load inertia ratio from parameter Cn025.<br />
When Cn002.2=1(Auto gain adjust enabled), it displays the current<br />
estimated load inertia ratio.<br />
3-6
3-2-2 Diagnostic function<br />
Following diagnostics parameters are available:<br />
Parameter<br />
Signal<br />
Name and Function<br />
dn-01 Control mode display<br />
dn-02 Output terminal status<br />
dn-03 Input terminal status<br />
dn-04 Software version (CPU version)<br />
dn-05 JOG mode operation<br />
dn-06 Reserve function<br />
dn-07 Auto offset adjustment of external analog <strong>com</strong>mand voltag<br />
dn-08 Servo model code<br />
dn-09 ASIC software version display<br />
dn-01 (Control Mode Display)<br />
Access dn-01 to display the selected control mode.<br />
Control mode display description is listed in the table below:<br />
Control Mode<br />
dn-01 ( Control mode display)<br />
Torque control-T<br />
Speed control-S<br />
Position control<br />
(External pulse <strong>com</strong>mand)-Pe<br />
Position/Speed control switch-Pe/S<br />
Speed/Torque control switch-S/T<br />
Position/Torque control switch-Pe/T<br />
Position control<br />
(Internal position <strong>com</strong>mand) -Pi<br />
3-7
dn-02 (Output terminal status)<br />
Use dn-02 to check the status of output terminals.<br />
Output status display is described below:<br />
When output terminal signal has a low logic level (close loop with IG24),<br />
the corresponding LED will be on.<br />
When output terminal signal has a high logic level (open loop with IG24),<br />
the corresponding LED will be off.<br />
Table below shows the functions of the digital outputs.<br />
DO-1~DO-4 are programmable outputs. Default settings are shown below.<br />
DO-5~DO-8 are fix function outputs. ( non-programmable)<br />
For programmable output list see section 5-6-1.<br />
LED No. Output terminal number Default function<br />
1 DO-1 RDY<br />
2 DO-2 ALM<br />
3 DO-3 ZS<br />
4 DO-4 INP<br />
5 DO-5 LM/A0<br />
6 DO-6 PC/A1<br />
7 DO-7 ST/A2<br />
8 DO-8 BB/A3<br />
Note: To set the logic state (High or Low) of for programmable digital outputs refer<br />
to section 5-6-1.<br />
For the DO-5~DO-8 ( non-programmable) terminals are active when logic is low.<br />
3-8
dn-03 (Input terminals status)<br />
Use dn-03 to check the status of Input terminals.<br />
Digital Input status display is described below:<br />
10<br />
9<br />
8<br />
7<br />
6<br />
5<br />
4<br />
3<br />
2<br />
1<br />
LED Number<br />
When Input terminal signal has a low logic level (close loop with IG24), the corresponding LED will be on.<br />
When Input terminal signal has a high logic level (open loop with IG24), the corresponding LED will be off.<br />
Table below shows the functions of the digital input.<br />
DI-1 ~ DI -10 are programmable Inputs. Default settings are shown below.<br />
For programmable function list see section 5-6-1.<br />
LED Number Input terminal number Default function<br />
1 DI-1 SON<br />
2 DI -2 ALRS<br />
3 DI -3 PCNT<br />
4 DI -4 CCWL<br />
5 DI -5 CWL<br />
6 DI -6 TLMT<br />
7 DI -7 CLR<br />
8 DI -8 LOK<br />
9 DI -9 EMC<br />
10 DI -10 SPD1<br />
3-9
dn-04 (Version of Software)<br />
Use dn-04 to view the current software version of the Servo drive.<br />
Software version can be checked as below:<br />
Step Keys LED Display Description<br />
1 Power On On” power on Drive Status is displayed.<br />
2 Press MODE-Key twice to view diagnostics parameter dn-01.<br />
3 Press INCREMENT-Key 3 times to display dn-04.<br />
4<br />
Press ENTER-Key for 2 seconds to view the software version.<br />
(Software version: 2.00)<br />
5<br />
Press MODE-Key once to return to dn-04 and parameter<br />
selection.<br />
dn-05 (JOG Operation)<br />
Use dn-05 to JOG the motor. Jog is activated by following the steps below:<br />
Note: JOG speed is in accordance with setting of Sn201(internal speed <strong>com</strong>mand 1).<br />
Ensure that the required speed is set in Sn201 before executing this function.<br />
Warning: Motor will be agitated run as soon as JOG <strong>com</strong>mand is activated.<br />
without the need for SON input (Servo On signal).<br />
Step Key LED display Description<br />
1 Power on On” power on Drive Status is displayed.<br />
2 Press MODE-Key once to view diagnostics parameter dn-01.<br />
3 Press INCREMENT-Key 4 times to display dn-5.<br />
4<br />
5<br />
6<br />
7<br />
Press ENTER-Key for 2 seconds to enter JOG MODE.<br />
Motor will power on immediately.<br />
Press INCREMENT-Key, motor will run in the pre-defined<br />
positive direction.<br />
Press DECREMENT-Key, motor will run in the pre-defined<br />
negative direction.<br />
Press MODE-Key once to return to dn-05 and parameter<br />
selection.<br />
Motor stoped the excitation immediately.<br />
3-10
dn-07 (Auto offset adjustment of external analog <strong>com</strong>mand voltage)<br />
If the external torque or speed analog <strong>com</strong>mand is set to 0V and the motor is rotating slowly,<br />
this is due to analog input zero offset, use dn-07 to auto adjust this offset and stop the motor rotating.<br />
Follow the steps below:<br />
Step Key LED Display Description<br />
Insert a link between analog <strong>com</strong>mand terminal SIN(CN1-26) and Analog Ground terminal<br />
1<br />
AG(CN1-29) before proceeding.<br />
2 Power on On” power on “ Drive Status is displayed.<br />
3 Press MODE-Key twice into diagnostics parameter dn-01.<br />
4 Press INCREMENT-Key 6 times to display dn-7.<br />
5 Press ENTER-Key for 2 seconds to enter dn-07<br />
6<br />
7<br />
Press INCREMENT-Key once to set to 1<br />
(Enable auto offset adjustment).<br />
To save the altered preset value and activate auto offset adjust,<br />
Press the ENTER- Key for 2 seconds until “SET”is displayed<br />
briefly and then display is returned to parameter dn-07.<br />
To save this offset value, please select parameters Tn104 or<br />
Sn217 as required and press the ENTER-Key.<br />
Tn107 for analog torque <strong>com</strong>mand.<br />
Sn217 for analog speed <strong>com</strong>mand.<br />
3-11
dn-08 (Servo motor Model Code display)<br />
Use dn-08 to display servo motor code and check the servo drive and motor <strong>com</strong>patibility according to the table<br />
below.<br />
If the dn08 preset is not according to the list below then contact your supplier.<br />
The motor model code is stored in parameter Cn30.<br />
dn-08 Display<br />
Motor Standards<br />
Cn030 Setting Encoder<br />
Drive Model Motor Model Watt Speed<br />
Specification<br />
(W) (rpm)<br />
H1111 TSC04101C-3NT3 2500<br />
100 3000<br />
H0112<br />
TSC04101C-3NL3<br />
8192<br />
H0121 TSB07301C-2NH3 2500<br />
300 3000<br />
H0122<br />
TSB07301C-2NL3<br />
8192<br />
H0130 6CC201G-3DEBE 2000<br />
H1133 TST06201C-3NT3 200 3000 2500<br />
TSTA-15<br />
H1134<br />
TST06201C-3NL3<br />
8192<br />
H0140 6CC401G-3DEBE 2000<br />
H1141 TSC06401C-3NT3 2500<br />
H0142 TSC06401C-3NL3 400 3000 8192<br />
H1143 TST06401C-3NT3 2500<br />
H1144<br />
TST06401C-3NL3<br />
8192<br />
H0211 TSB08751C-2NH3 2500<br />
750 3000<br />
H0212<br />
TSB08751C-2NL3<br />
8192<br />
H0220 6CC401G-3DEBE 2000<br />
H1221 TSC06401C-3NT3 2500<br />
H0222 TSC06401C-3NL3 400 3000 8192<br />
H1223 TST06401C-3NT3 2500<br />
H1224<br />
TST06401C-3NL3<br />
8192<br />
TSTA-20<br />
H0230 8CC751G-3DEBE 2000<br />
H1233 TST08751C-3NT3 750 3000 2500<br />
H1234<br />
TST08751C-3NL3<br />
8192<br />
H0241 TSB13551A-3NHA 2500<br />
1000<br />
H0242<br />
TSB13551A-3NLA<br />
8192<br />
550<br />
H0251 TSB13551B-3NHA 2500<br />
1500<br />
H0252<br />
TSB13551B-3NLA<br />
8192<br />
3-12
dn-08 Display<br />
Motor Standards<br />
Cn030 Setting Drives Model Motor Model Watt<br />
(W)<br />
Speed<br />
(rpm)<br />
Encoder<br />
Specification<br />
H0310 8CC751C-3DEBE 2000<br />
H1313 TST08751C-3NT3 750 3000 2500<br />
H1314<br />
TST08751C-3NL3<br />
8192<br />
H0321 TSB13102A-3NHA 2500<br />
1000<br />
H0322<br />
TSB13102A-3NLA<br />
8192<br />
H0331 TSB13102B-3NHA 2500<br />
2000<br />
H0332<br />
TSB13102B-3NLA<br />
8192<br />
1000<br />
H0341 TSB13102H-3NHA 2500<br />
1500<br />
H0342<br />
TSTA-30<br />
TSB13102H-3NLA<br />
8192<br />
H0351 TSB13102C-3NHA 2500<br />
3000<br />
H0352<br />
TSB13102C-3NLA<br />
8192<br />
H0361 TSB13152A-3NHA 2500<br />
1000<br />
H0362<br />
TSB13152A-3NLA<br />
8192<br />
H0371 TSB13152B-3NHA 2500<br />
1500 2000<br />
H0372<br />
TSB13152B-3NLA<br />
8192<br />
H0381 TSB13152C-3NHA 2500<br />
3000<br />
H0382<br />
TSB13152C-3NLA<br />
8192<br />
H0511 TSB13152A-3NHA 2500<br />
1000<br />
H0512<br />
TSB13152A-3NLA<br />
8192<br />
H0521 TSB13152B-3NHA 2500<br />
1500 2000<br />
H0522<br />
TSB13152B-3NLA<br />
8192<br />
H0531 TSB13152C-3NHA 2500<br />
TSTA-50<br />
3000<br />
H0532<br />
TSB13152C-3NLA<br />
8192<br />
H0541 TSB13202B-3NHA 2500<br />
2000<br />
H0542<br />
TSB13202B-3NLA<br />
8192<br />
2000<br />
H0551 TSB13202C-3NHA 2500<br />
3000<br />
H0552<br />
TSB13202C-3NLA<br />
8192<br />
H0711 TSB13302B-3NHA 2500<br />
2000<br />
H0712<br />
TSB13302B-3NLA<br />
8192<br />
TSTA-75<br />
3000<br />
H0721 TSB13302C-3NHA 2500<br />
3000<br />
H0722<br />
TSB13302C-3NLA<br />
8192<br />
3-13
Chapter 4 Trial Operation<br />
Before proceeding with trial run, please ensure that all the wiring is correct.<br />
Trial run description below covers the operation from keypad and also from an external controller such as a PLC.<br />
Trial run with external controller speed control loop (analog voltage <strong>com</strong>mand) and position control loop<br />
(external pulse <strong>com</strong>mand).<br />
(1) No-load servo motor. Trial run (Reference:4-1)<br />
A. Servo Drive wiring and motor installation B. Purpose of trial run<br />
Confirm if the items below are correct:<br />
.Drives power cable wiring<br />
.Servo Motor wiring<br />
.Encoder wiring<br />
.Setting servo motor rotation direction and speed<br />
(2) No-load servo motor with a host controller. Trial run (Reference:4-2)<br />
A. Servo drive wiring and motor installation B. Purpose of trial run<br />
Confirm if the items below are correct:<br />
.Control signal wiring between host controller and servo<br />
drive.<br />
. Servo motor rotation direction, speed and rotating<br />
number .<br />
.Brake function, operation limit function and protection<br />
function.<br />
(3) Servo motor connected to load and controlled by a host controller. Trial run (Reference:4-3)<br />
A. Servo drive wiring and motor installation B. Purpose of trial run<br />
Confirm if the items below are correct:<br />
.Servo motor rotation direction, speed and<br />
mechanical operation range.<br />
.Set related control parameters.<br />
4-1
4-1 Trial Operation Servo motor without Load<br />
To carry out a successful trial run follow the steps below and ensure that drive wiring is correct and as specified.<br />
Warning!<br />
In order to prevent potential damage,prior to trial run ensure that the driven<br />
mechanism, couplings and belts etc are disconnected from the motor.<br />
1. Installation of servo motor.<br />
Ensure that the motor is installed securely so that there is no movement and vibration during trial run.<br />
2. Wiring.<br />
Check servo drive 、motor power connections and motor encoder connection.<br />
No control signal wiring is required of this stage thus remove connector (CN1) from the servo drive.<br />
3. Servo drive power.<br />
Apply power to servo drive. If the display shows any Alarm message such as graph below then refer to Alarm<br />
contents of chapter 8 to identify the cause.<br />
AL-14 is caused by Input terminals CCWL (Counter clockwise Limit) and CWL (Clockwise Limit)<br />
being activated at the same time.<br />
See (the default setting of high or low input logic state according to the description in section 5-6-1 ).<br />
Because of the alarm, the servo can not operate normally.<br />
Set the parameter Cn002.1=1 to disable the drive limit function temporarily during trial run period.<br />
4-2
Steps for setting parameter Cn002.1 ( CCWL &CWL Rotation limit selection).<br />
Setp Keys LED Display Description<br />
1 Power on On” power on “ Drive Status is displayed.<br />
2 Press MODE-Key 4 times to display Cn001.<br />
3 Press INCREMENT-Key once to display Cn002.<br />
4<br />
Press ENTER-Key for 2 secs to display the preset value of<br />
Cn002. Note: Cn 002 includes 4 digits corresponding to<br />
Cn002.0,Cn002.1,Cn002.2 & Cn002.3.<br />
5 Press ENTER-Key once to move to the 2 nd digit for (Cn 002.1).<br />
6<br />
Press INCREMENT- Key once to adjust the 2 nd digit to 1.<br />
Disable the function of external limits CCWL and CWL.<br />
7<br />
To save the setting value by<br />
Press the ENTER- Key for 2 seconds until “SET”is displayed<br />
briefly and then display is returned to parameter Cn-002.<br />
After ac<strong>com</strong>plish these steps, reset the power. If there are any other alarms then<br />
refer to section 8-2 (Clearing Alarms). Once there is no alarms then operate the drive again.<br />
If any of the alarms can not be cleared, please contact your local supplier for assistance.<br />
4. Mechanical Brake Release.<br />
When a brake type servo motor is used then must release the brake before starting trial run<br />
by applying 24vdc voltage to brake terminals.<br />
5. Keypad Trial run (JOG function).<br />
Jog function can be used to check if motor speed and rotation direction is correct.<br />
Parameters Sn 201(internal speed <strong>com</strong>mand 1) and Cn004 (motor rotation direction selection)<br />
Can be used to set the required speed and direction.<br />
Warning!<br />
Set the required JOG speed before the trial run otherwise the motor will run at the default speed set in<br />
parameter Sn201(internal speed <strong>com</strong>mand 1).<br />
Warning!<br />
Regardless of external SON (servo on) is active of not, Servo motor will get excitation as soon as JOG is<br />
activated.<br />
4-3
Steps for setting JOG function:<br />
Step Keys LED Display Description<br />
1 Power on On” power on “ Drive Status is displayed.<br />
2 Press MODE-Key twice to view diagnostics parameter dn-01.<br />
3 Press INCREMENT-Key 4 times to display dn-5.<br />
4<br />
5<br />
6<br />
7<br />
Press ENTER-Key for 2 seconds to enter JOG MODE.<br />
Motor will power on immediately.<br />
Press INCREMENT-Key, motor will run in the pre-defined<br />
positive direction.<br />
Press DECREMENT-Key, motor will run in the pre-defined<br />
negative direction.<br />
Press MODE-Key once to return to dn-05 and parameter<br />
selection.<br />
Motor power will be turned off immediately.<br />
4-4
4-2 Trial Operation for Servo motor without Load from Host Reference<br />
Check and ensure that all power connections to the drive and motor and control signal connection between<br />
the host controller and the drive are correct.Motor must be mechanically disconnected from the load.<br />
Following section describes the trial run when using a host controller such as a PLC.<br />
Two trial runs have been discussed. Speed control mode ( Section B) and Position control mode ( Section C).<br />
Section A shows the connections and SON signal (servo on) requirements for both trial runs.<br />
A. Launching Servo motor<br />
Example wiring diagram:<br />
Speed Control(Cn001=1)<br />
Position Control(Cn001=2)<br />
IP24<br />
DICOM<br />
SON<br />
CCWL<br />
CWL<br />
IG24<br />
SIN<br />
AG<br />
Servo Drives<br />
CN1-45<br />
CN1-47<br />
CN1-1<br />
CN1-4<br />
CN1-5<br />
CN1-48<br />
CN1-26<br />
CN1-32<br />
Servo Motor<br />
M<br />
IP24<br />
DICOM<br />
SON<br />
CCWL<br />
CWL<br />
IG24<br />
Pulse<br />
/Pulse<br />
Sign<br />
/Sign<br />
Servo Drives<br />
CN1-45<br />
CN1-47<br />
CN1-1<br />
CN1-4<br />
CN1-5<br />
CN1-48<br />
CN1-14<br />
CN1-15<br />
CN1-16<br />
CN1-17<br />
Servo Motor<br />
M<br />
a. Disable Analog Input <strong>com</strong>mand terminals.<br />
Speed control mode: Link analog input terminal SIN to 0V terminal (AG).<br />
Position control mode: Link external pulse <strong>com</strong>mand terminals “Pulse” to ”/Pulse” and “Sign” to<br />
“/Sign”.<br />
b. Enable Servo ON Signal<br />
Connect SON terminal to IG 24 (0V) terminal (Digital Ground).<br />
On drive power up servo will be turned on. Now check for any Alarms. If any alarms then refer to<br />
Chapter 8-2 for how to reset the Alarms.<br />
4-5
B. Trial run in Speed control mode(Cn001=1).<br />
1. Wiring check:<br />
Check and ensure that all power cable and control signal connections are correct as shown below.<br />
To be able to adjust the speed for test connect a potentiometer between terminals SIN (analog input voltage)<br />
and AG (Analog Ground). Set the analog input voltage to 0V. (No speed reference).<br />
Servo Drive<br />
IP24<br />
CN1-45<br />
DICOM<br />
CN1-47<br />
SON<br />
CCWL<br />
CWL<br />
IG24<br />
SIN<br />
AG<br />
CN1-1<br />
CN1-4<br />
CN1-5<br />
CN1-48<br />
CN1-26<br />
CN1-32<br />
Servo Motor<br />
2. Apply Servo on.<br />
Apply power to the drive and activate (SON) signal by switching SON terminal to IG24 (input digital Ground).<br />
If the motor rotates slowly, while the speed analog input voltage is 0 volts<br />
then use dn-07 function to auto offset adjustment for the analog input value. (refer to section 3-2-2).<br />
3. Check the relationship between motor speed and the analog input speed <strong>com</strong>mand.<br />
Increase the analog speed input voltage gradually (by potentiometer) and monitor the actual motor speed by<br />
parameter Un0-01.<br />
Check if motor rotation direction is correct and if necessary set it by parameter Cn004.<br />
Check for correctness of analog speed <strong>com</strong>mand ratio in relation to the preset in parameter (Sn216) and<br />
analog speed <strong>com</strong>mand limit as set in parameter (Sn218).<br />
Finally, switch off SON signal (turn off the servo motor).<br />
4-6
4. Connection with a host controller.<br />
Check and ensure that the wiring for the servo drive and host controller, speed analog signal input (SIN), and<br />
encoder output (PA, /PA, PB, /PB, PZ, /PZ) are all correct and according to the diagram below:<br />
5. Confirm the rotation number and encoder output of Servo Motor.<br />
Use parameter Un-14 to check if the Motor feed back (number of revolutions) per minute is correct and the<br />
same as number of revolutions sent by the host controller.<br />
If there is any difference then check and make sure that parameter Cn005 ( Encoder ppr) is set correctly.<br />
Once this is <strong>com</strong>plete remove SON signal to switch off power to the motor.<br />
4-7
C. Position control mode trial run (Cn001=2).<br />
1. Wiring:<br />
Check and ensure that all power connections to the drive and motor and control signal connections are correct as<br />
diagram below.<br />
2. Setting electronic gear ratio.<br />
Set electronic gear ratio parameters Pn302~Pn306 as required for the positioning application.<br />
(refer to section 5-4-3).<br />
Note: Electronic gear ratio parameter can be used to scale the <strong>com</strong>mand output pulse.<br />
This would be useful in transmission applications where move distance per move <strong>com</strong>mand pulse<br />
has to be scaled due to mechanical requirements.<br />
3. Apply Servo on.<br />
Apply power to the drive and activate (SON) signal by switching SON terminal to IG24 (input digital Ground).<br />
4. Confirm motor speed, direction and number of revolutions.<br />
Apply a low-speed pulse <strong>com</strong>mand from the host controller to the servo drive so that the servo motor<br />
operates at low-speed.<br />
Compare the number of pulses per revolution from parameters Un-15 ( motor feed back pulse ppr)<br />
and Un-17 (Input <strong>com</strong>mand ppr) these should be the same.<br />
Compare the number of revolutions using parameters Un-14 ( motor feed back rotation number) and<br />
Un-16 (pulse <strong>com</strong>mand rotation number) these should be the same.<br />
If there are differences then adjust electronic gear ratio parameters Pn302~Pn306 as required and test<br />
again until the result is satisfactory.<br />
If the direction of motor rotation is incorrect then check and if necessary set parameter Pn 301.0<br />
(position pulse <strong>com</strong>mand types).<br />
Also check and if necessary set parameter Pn314 (Position <strong>com</strong>mand direction selection).<br />
Once the test result is correct then remove SON signal. (Power to the motor is switched off).<br />
4-8
4-3 Trial Operation with the Servo motor Connected to the Machine<br />
Servo drive parameters must be set correctly otherwise damage to machinery and potential injury<br />
may result.<br />
Do not close to the machine after temporary power loss, the machine may restart unexpected.<br />
Please take the measures highlighted in the section below before trial run with load.<br />
Consider the Mechanical system requirements and set the parameters appropriate for control by the host<br />
controller.<br />
Ensure that the rotation direction and speed are suitable for the Mechanical system.<br />
Steps required for Trial run.<br />
1. Ensure that the ServoDrive Power is off.<br />
2. Connect the servo motor to the load shaft.<br />
Refer to Chapter 1-5 to check the installation guidelines for the servo motor.<br />
3. Gain adjustment for the servo control loop.<br />
Refer to Chapter 5-5 for details.<br />
4. Trial run with a host controller.<br />
Run <strong>com</strong>mand is to be signaled by the host controller.<br />
Refer to Chapter 4-2 to choose the required trial run mode (Speed control or position control modes)<br />
according to the application and set and adjust the parameters if necessary for the application.<br />
5. Repeat adjusting and record the set parameter values.<br />
Repeat steps 3 and 4 until the mechanical system is operating satisfactorily then<br />
record the Gain value and the parameters changes for the future use.<br />
4-9
Chapter 5 Control Functions<br />
5-1 Control Mode Selection<br />
There are three control modes in the servo drive, torque, speed and position modes can be selected<br />
individually or as a <strong>com</strong>bination according to the selection table below:<br />
Parameter Name Setting Description<br />
★ Cn001<br />
Control mode<br />
selection<br />
Torque control<br />
0 To use one analog voltage <strong>com</strong>mand signal to control<br />
torque. Please refer to 5-2.<br />
Speed control<br />
1 Input contacts SPD1 and SPD2 can be used to select 4<br />
-steps of speed. Please refer to section 5-3-1.<br />
Position control (External pulse <strong>com</strong>mand)<br />
Four separate selectable pulse <strong>com</strong>mand types are<br />
2<br />
possible<br />
to control position. Please refer to section 5-4-1.<br />
3<br />
Position / Speed control switch<br />
Input contact MDC can be used to switch between<br />
position<br />
& speed control. Please refer to section 5-6-2.<br />
Speed / Torque control switch<br />
4 Input contact MDC can be used to switch between speed<br />
& torque control. Please refer to section 5-6-2.<br />
Position / Torque control switch<br />
5<br />
6<br />
Input contact MDC can be used to switch between<br />
position<br />
& torque control. Please refer to section 5-6-2.<br />
Position control (internal position <strong>com</strong>mand)<br />
Input contacts POS 1~POS 4 can be used to select 16<br />
programmable preset position <strong>com</strong>mands to control<br />
position. Please refer to 5-4-2.<br />
New setting will be<strong>com</strong>e effective after RESET the power.<br />
Default<br />
Value<br />
Control<br />
Mode<br />
2 ALL<br />
5-1
5-2 Torque mode<br />
Torque mode is used in applications such as printing machines, coil wiring machines, injection molding<br />
machines and specific application that requiring torque control.<br />
Diagram below shows the torque control process diagram.<br />
Analog voltage torque <strong>com</strong>mand is applied to the drive input terminals as shown below:<br />
Caution!<br />
Care should be taken in selection of required torque direction CW/CCW.<br />
Please refer to Chapter 5-2-4.<br />
5-2
5-2-1 Analog Torque <strong>com</strong>mand Ratio.<br />
Analog torque <strong>com</strong>mand ratio can be used to adjust the relationship between<br />
Input voltage torque <strong>com</strong>mand and actual torque <strong>com</strong>mand.<br />
Parameter Name Default Unit Setting range Control Mode<br />
Tn103<br />
Analog torque<br />
<strong>com</strong>mand ratio<br />
300 %/10V 0~300 T<br />
Setting example: refer to the following diagram.<br />
1. With Tn103 set to 300, a torque <strong>com</strong>mand input voltage of 10V, corresponds to<br />
300% of rated torque. For input voltage of 5V, actual torque <strong>com</strong>mand will be 150% of rated torque.<br />
2. With Tn03 set to 200 , a torque <strong>com</strong>mand input voltage of 10V, corresponds to<br />
200% of rated torque. For input voltage of 5V, actual torque <strong>com</strong>mand will be 100%.<br />
300<br />
Torque<br />
Command (%)<br />
200<br />
100<br />
-10<br />
-5<br />
-100<br />
5<br />
10<br />
Input Voltage (V)<br />
-200<br />
-300<br />
Slope is set by Tn103<br />
5-3
5-2-2 Adjusting the analog torque <strong>com</strong>mand offset<br />
For a torque <strong>com</strong>mand of 0V, motor could possibly be rotating slowly.<br />
To rectify this effect by adjusting offset value in parameter Tn104 or use auto offset adjust feature.<br />
(Please refer to section 3-2-2).<br />
Note : To check and set the offset to zero, insert a link between analog torque <strong>com</strong>mand contact<br />
SIN(CN1-26) and analog ground contact AG (CN1-29).<br />
Parameter Name Default Unit Setting range Control mode<br />
Tn104<br />
Analog torque<br />
<strong>com</strong>mand offset<br />
0 mV -10000~10000 T<br />
Input Voltage (V)<br />
Bias Voltage<br />
Torque Command (%)<br />
5-4
5-2-3 Torque <strong>com</strong>mand linear acceleration and deceleration<br />
An smooth torque <strong>com</strong>mand can be achieved by enabling acceleration /Deceleration parameter Tn101.<br />
Parameter Name Setting Description<br />
★ Tn101<br />
Linear acceleration/<br />
deceleration method<br />
0 Disable<br />
1 Enable<br />
Torque <strong>com</strong>mand accelleration/deceleration time,<br />
is the time taken for the torque to rise from zero to the required level by Tn102.<br />
As per diagram below:-<br />
Parameter Name Default Unit Setting Range<br />
★ Tn102<br />
Linear acceleration<br />
/deceleration time period<br />
New setting will be<strong>com</strong>e effective after RESET the power.<br />
Torque Command<br />
Control<br />
mode<br />
T<br />
Control<br />
mode<br />
1 msec 1~50000 T<br />
Rated Torque<br />
Command<br />
Required Torque<br />
Command<br />
Tn102<br />
Time (ms)<br />
Setting examples:<br />
(1) To achieve 50% of rated torque output in 10msec:<br />
100%<br />
Tn102 = 10(msec) × = 20(msec)<br />
50%<br />
(2) To achieve 75% of rated torque output in 10msec:<br />
100%<br />
Tn102 = 10(msec) × = 13(msec)<br />
75%<br />
5-5
5-2-4 Definition of torque direction<br />
In torque mode, torque direction can be defined by one of the following three methods.<br />
(1) Input contacts RS1, RS2. (torque <strong>com</strong>mand CW/CCW selectable by programmable input)<br />
(2) Parameter Cn004. (motor rotation direction )<br />
(3) Input contact TRQINV. (reverse torque <strong>com</strong>mand)<br />
Caution !<br />
All 3 methods can be active at the same time.<br />
User must ensure that correct selections are made for these three selections.<br />
Input Contact<br />
Control<br />
Description<br />
RS2 RS1<br />
mode<br />
0 0 Zero torque<br />
0 1<br />
Rotation in the current torque <strong>com</strong>mand<br />
direction<br />
T<br />
1 0 Reverse the current torque <strong>com</strong>mand direction<br />
1 1 Zero torque<br />
Note: RS2 and RS1 contact status “1” (ON) and “0” (OFF).<br />
Please check 5-6-1 to set the required high /Low signal levels ( PNP/NPN) .<br />
Parameter<br />
Signal<br />
Name Setting Description<br />
No. Torque Control Speed Control<br />
Control<br />
mode<br />
Motor rotation<br />
direction (load end)<br />
CCW<br />
0 Counter Clockwise (CCW) Counter Clockwise (CCW)<br />
Cn004<br />
1 Clockwise (CW) Counter Clockwise (CCW)<br />
S/T<br />
CW<br />
2 Counter Clockwise (CCW) Clockwise (CW)<br />
3 Clockwise (CW) Clockwise (CW)<br />
Input contact TRQINV Description Control<br />
mode<br />
Rotation in current torque <strong>com</strong>mand<br />
0<br />
direction<br />
T<br />
1 Reverse torque <strong>com</strong>mand direction<br />
Note: Input contacts status “1” (ON) and “0” (OFF).<br />
Please refer to 5-6-1 to set the required high /Low signal levels ( PNP/NPN) selection.<br />
5-6
5-2-5 Internal Torque Limit<br />
In torque Control mode, user can set internal torque limit values as required.<br />
Set as below:-<br />
Parameter Name Default Unit Setting range Control mode<br />
Cn010<br />
Cn011<br />
CCW Torque<br />
<strong>com</strong>mand limit<br />
CW Torque<br />
<strong>com</strong>mand limit<br />
300 % 0~300 ALL<br />
-300 % -300~0 ALL<br />
5-2-6 Limiting Servomotor Speed during Torque Control<br />
In torque control, input contacts SPD1 and SPD2 can be used for selecting one of the two<br />
methods below for setting speed limits.<br />
(1) External Analog <strong>com</strong>mand ( Default) Signal is applied to terminals PIC & AG ( pins 27& 29 on CN1)<br />
(2) Selection of Three presentable Limits (Tn105~Tn107) according to the table below.<br />
Caution! For achieving smooth speed response please refer to section 5-3-6.<br />
Input contact SPD2<br />
Input contact<br />
SPD1<br />
0 0<br />
0 1<br />
1 0<br />
1 1<br />
Speed limit <strong>com</strong>mand<br />
External analog<br />
<strong>com</strong>mand<br />
PIC(CN1-27)<br />
Internal speed limit1<br />
Tn105<br />
Internal speed limit2<br />
Tn106<br />
Internal speed limit3<br />
Tn107<br />
Control<br />
mode<br />
Note: Input contacts status “1” (ON) and “0” (OFF).<br />
Please check 5-6-1 to set the required high /Low signal levels ( PNP/NPN) selection.<br />
T<br />
Below is the external analog speed limit <strong>com</strong>mand wiring diagram:<br />
Internal presentable speed limit parameters for torque control mode are listed below:<br />
These preset limits apply to both CW & CCW directions.<br />
Parameter Name Default Unit Setting range Control mode<br />
Tn105 Internal speed limit 1 100 rpm 0~3000 T<br />
Tn106 Internal speed limit 2 200 rpm 0~3000 T<br />
Tn107 Internal speed limit 3 300 rpm 0~3000 T<br />
P.S also refer to page 6-11 for detail.<br />
5-7
5-2-7 Additional torque control functions<br />
Torque Output Monitor<br />
When the torque level in CW or CCW directions be<strong>com</strong>es greater than the value set in<br />
Tn108 (torque level monitor value), the output contact INT is active.<br />
Parameter Name Default Unit Setting range Control mode<br />
Tn108<br />
Torque output monitor<br />
level<br />
100 % 0~300 ALL<br />
Note: Input contacts status “1” (ON) and “0” (OFF).<br />
Please check 5-6-1 to set the required high /Low signal levels (PNP/NPN) selection.<br />
Torque Smoothing Filter<br />
Torque vibration can be diminution by setting an appropriate value in Cn034 (Torque <strong>com</strong>mand smoothing<br />
filter), In the other hand, this will cause a delay in the response time of the torque loop.<br />
Parameter Name Default Unit Setting range Control mode<br />
Cn034<br />
Torque smoothing<br />
filter<br />
0 Hz 0~1000 ALL<br />
5-8
5-3 Speed Mode<br />
Speed Mode is necessary for applications that require precisely speed control, such as weaving, drilling<br />
and CNC type machines.Diagrams below shows the speed control system in two parts.<br />
First stage shows Speed processing and conditioning and the second stage shows the Speed controller<br />
With PI/P control modes, and controller1&2 selection and interface with torque control stage.<br />
Speed Command Processor<br />
Analog Speed Command<br />
Ratio<br />
Analog Speed Command Limit<br />
Once Smooth<br />
AC/deceleration<br />
Sn206<br />
Speed<br />
Rotating Direction<br />
Host Controllor<br />
A/D<br />
Sn216<br />
Sn217<br />
Bias Adjusting<br />
Sn218<br />
Linear<br />
AC/deceleration<br />
Cn004<br />
Input Contact<br />
SPDINV<br />
Speed Controller<br />
Cn005<br />
Sn201~Sn203<br />
Sn208~Sn210<br />
Speed Feed Back<br />
Encoder Signal<br />
Encode-ratio Output<br />
Internal Speed Command<br />
S-Curve<br />
AC/deceleration<br />
Sn205<br />
AC/deceleration Method<br />
Speed Controller<br />
Analog Torque Limit<br />
A/D<br />
Speed Command<br />
From Speed<br />
Processor<br />
Speed<br />
Feed Back<br />
Smooth Filter<br />
Cn032<br />
Resonance filter<br />
Cn013, Cn014<br />
Gain switch method<br />
Speed Controller 1<br />
Sn211, Sn212<br />
Speed Controller 2<br />
Sn213, Sn214<br />
Input Contact<br />
Analog Torque Limit<br />
Internal Torque<br />
Limit<br />
Cn010, Cn011<br />
Torque Control<br />
Loop<br />
Cn015~Cn024<br />
Speed Feed Back<br />
5-9
5-3-1 Selection for speed <strong>com</strong>mand<br />
In Speed control, input contacts SPD1 and SPD2 can be used for selecting one of the two methods below<br />
for setting speed limits.<br />
(1) External Analog <strong>com</strong>mand (Default) : Analog signal is input from terminals SIN & AG (pins 26& 29 on<br />
CN1)<br />
(2) Internal speed <strong>com</strong>mand: Selection of Three presentable Limits according to the table below.<br />
.<br />
Input Contact SPD2 Input Contact SPD1<br />
0 0<br />
0 1<br />
1 0<br />
1 1<br />
Speed Command<br />
External analog <strong>com</strong>mand<br />
SIN(CN1-26)<br />
Internal speed <strong>com</strong>mand 1<br />
Sn201<br />
Internal speed <strong>com</strong>mand 2<br />
Sn202<br />
Internal speed <strong>com</strong>mand 3<br />
Sn203<br />
Control<br />
Mode<br />
Note: Input contacts status “1” (ON) and “0” (OFF).<br />
Please check 5-6-1 to set the required high /Low signal levels (PNP/NPN) selection.<br />
S<br />
Diagram below shows the external analog speed <strong>com</strong>mand wiring:<br />
Internal presetable speed limit parameters for speed <strong>com</strong>mand mode are listed below:<br />
These preset limits apply to both CW & CCW directions.<br />
Parameter Name Default Unit Setting range Control mode<br />
Sn201<br />
Sn202<br />
Sn203<br />
Internal speed<br />
<strong>com</strong>mand 1<br />
Internal speed<br />
<strong>com</strong>mand 2<br />
Internal speed<br />
<strong>com</strong>mand 3<br />
100<br />
200<br />
300<br />
rpm -3000~3000 S<br />
5-10
5-3-2 Analog speed <strong>com</strong>mand Ratio<br />
Analog speed <strong>com</strong>mand ratio can be used to adjust the relationship between<br />
Input voltage speed <strong>com</strong>mand and actual speed <strong>com</strong>mand.<br />
Parameter Name Default Unit Setting range Control mode<br />
Sn216<br />
Analog speed<br />
<strong>com</strong>mand ratio<br />
3000 rpm/10V 100~4500 S<br />
Setting Example:<br />
(1) With Sn216 set to 3000, a speed <strong>com</strong>mand input voltage of 10V, corresponds to<br />
3000rpm; for an input voltage of 5V speed <strong>com</strong>mand will be 1500rpm.<br />
(2) With Sn216 set to 2000, a speed <strong>com</strong>mand input voltage of 10V, corresponds to 2000rpm,<br />
for an input voltage of 5 volts speed <strong>com</strong>mand will be 1000rpm.<br />
5-3-3 Adjusting the analog reference offset<br />
For a speed <strong>com</strong>mand of 0V, motor could possibly be rotating slowly.<br />
To rectify this effect by adjusting offset value manually in parameter Sn217 or use auto offset adjust feature.<br />
(Please refer to section 3-2-2).<br />
Note : To check and set the offset to zero, insert a link between analog torque <strong>com</strong>mand contact<br />
SIN(CN1-26) and analog ground contact AG (CN1-29).<br />
Parameter Name Default Unit Setting range Control mode<br />
Sn217<br />
Analog speed<br />
<strong>com</strong>mand offset<br />
adjust<br />
0 mV -10000~10000 S<br />
5-11
Refer to the following diagrams:<br />
Input Voltage (V)<br />
Input Voltage (V)<br />
Bias Voltage<br />
Bias Voltage<br />
Adjusting Value<br />
Speed Command(rpm)<br />
Speed Command(rpm)<br />
5-3-4 Analog reference for speed <strong>com</strong>mand limit<br />
A maximum limit for analog speed can be set by Sn218.<br />
Parameter Name Default Unit Setting range Control mode<br />
Sn218<br />
Analog speed<br />
<strong>com</strong>mand limit<br />
Rate rpm<br />
x 1.02<br />
rpm 100~4500 S<br />
5-3-5 Encoder Signal Output<br />
Servo motor encoder pulse signal can be output to a host controller to establish an external control loop.<br />
Set the required encoder Pulse Per Revolution (PPR) in parameter Cn005.<br />
Default output value is the actual encoder PPR.<br />
5-12
Parameter Name Default Unit Setting range<br />
★Cn005<br />
Encoder pulse<br />
output scale<br />
Encoder<br />
Pulse Per<br />
Revolution<br />
New setting will be<strong>com</strong>e effective after re-cycling the power.<br />
Encoder pulse output terminal description:<br />
Pin<br />
PA<br />
/PA<br />
PB<br />
/PB<br />
PZ<br />
/PZ<br />
Name<br />
Encoder pulse output A Phase<br />
signal<br />
Encoder pulse output /A Phase<br />
signal<br />
Encoder pulse output B Phase<br />
signal<br />
Encoder pulse output /B Phase<br />
signal<br />
Encoder pulse output Z Phase<br />
signal<br />
Encoder pulse output /Z Phase<br />
signal<br />
Control<br />
mode<br />
pulse 1~ Encoder PPR ALL<br />
Pin NO. of<br />
CN1<br />
CN1-35<br />
CN1-36<br />
CN1-37<br />
CN1-38<br />
CN1-39<br />
CN1-40<br />
Control<br />
mode<br />
ALL<br />
90<br />
90<br />
PA<br />
PA<br />
PB<br />
PB<br />
PZ<br />
PZ<br />
TIME<br />
TIME<br />
5-13
5-3-6 Smoothing the speed <strong>com</strong>mand<br />
Sn205 can be used to eliminate speed overshoot and motor vibration by selecting one of the<br />
acceleration /deceleration methods which is suitable for the application from the table below.<br />
Parameter Name Setting Description<br />
Sn205<br />
Speed<br />
<strong>com</strong>mand<br />
accel/decel<br />
smooth<br />
method<br />
0 Disable accel/decel smooth function<br />
1 Smooth accel/decel according to parameter Sn206<br />
2 Linear accel/decel according to parameter Sn207<br />
3 S-curve accel /decel according to parameter Sn208<br />
Control<br />
mode<br />
S<br />
Above three methods of Acceleration/deceleration are described below.<br />
(1)Speed <strong>com</strong>mand smooth ac/deceleration:<br />
Set Sn205=1 to enable the use of speed <strong>com</strong>mand smooth acceleration/deceleration function.<br />
Parameter Name Default Unit Setting range<br />
Sn206<br />
Speed <strong>com</strong>mand smooth<br />
accel/decel time Constant<br />
Control<br />
mode<br />
1 msec 1~10000 S<br />
Smooth acceleration/deceleration time corresponds to the time in which the speed <strong>com</strong>mand increases from 0 to<br />
63.2% as shown in diagram below.<br />
5-14
Setting example:<br />
(1) To achieve 95% of speed <strong>com</strong>mand output in 30msec:<br />
Set<br />
30(msec)<br />
Sn206 =<br />
= 10(msec)<br />
- ln(1- 95%)<br />
(2) To achieve 75% of speed <strong>com</strong>mand output in 30msec:<br />
30(msec)<br />
Set Sn206 =<br />
= 22(msec)<br />
- ln(1- 75%)<br />
ln= Natural log<br />
(2)Speed <strong>com</strong>mand linear acceleration/deceleration function:<br />
Set Sn205=2 to enable the use of speed <strong>com</strong>mand linear acceleration/deceleration function.<br />
Parameter Name Default Unit Setting range<br />
Sn207<br />
Speed <strong>com</strong>mand linear<br />
accel/decel time constant<br />
Control<br />
mode<br />
1 msec 1~50000 S<br />
Linear acceleration/deceleration time corresponds to the time in which the speed increases (linearly)<br />
from zero to the rated speed. As shown in the diagram below.<br />
Speed Command<br />
Rated Speed Command<br />
Current Speed Command<br />
Sn207<br />
Time(ms)<br />
Setting examples:<br />
(1) To achieve 50% of rated speed output in 10msec:<br />
100%<br />
Set Sn207 = 10(msec) × = 20(msec)<br />
50%<br />
(2) To achieve 75% of rated speed output in 10msec:<br />
100%<br />
Set Sn207 = 10(msec) × = 13(msec)<br />
75%<br />
5-15
S-Curve Speed Command Acceleration/Deceleration:<br />
Set Sn205=3 to enable the use of S-Curve speed <strong>com</strong>mand ac/deceleration function.<br />
Parameter Name Default Unit Setting range Control mode<br />
Sn208<br />
Sn209<br />
Sn210<br />
S-Curve speed <strong>com</strong>mand<br />
accel/decel time setting<br />
S-Curve speed <strong>com</strong>mand<br />
acceleration time setting<br />
S-Curve speed <strong>com</strong>mand<br />
deceleration time setting<br />
1 msec 1~1000 S<br />
200 msec 0~10000 S<br />
200 msec 0~10000 S<br />
In applications where normal acceleration/deceleration on ramp up or ramp down bring in vibration of the<br />
mechanical system. S- curve acceleration/deceleration parameters could help to reduce vibration as<br />
diagram below:<br />
Speed Command (rpm)<br />
ts=Sn208<br />
ta=Sn209<br />
td=Sn210<br />
ts<br />
ta<br />
ts<br />
ts<br />
td<br />
ts<br />
Time (ms)<br />
Caution! Setting Rule:<br />
t<br />
a<br />
2<br />
> t<br />
s<br />
,<br />
s<br />
t d t ><br />
2<br />
5-16
5-3-7 Setting rotation direction<br />
Motor rotation direction in speed mode can be set by parameter Cn004 (Motor rotation direction) and input<br />
contact SPDINV according to the tables below.<br />
Caution!<br />
Both methods can be operated at the same time.<br />
Ensure that these parameters are set correctly for the required direction.<br />
Parameter Name Setting Description<br />
Motor rotation<br />
direction (observation<br />
from load side).<br />
No. Torque control Speed control<br />
0 Counter Colckwise (CCW) Counter Colckwise (CCW)<br />
Control<br />
mode<br />
Cn004<br />
CCW<br />
1 Colckwise (CW) Counter Colckwise (CCW)<br />
S/T<br />
CW<br />
2 Counter Colckwise (CCW) Colckwise (CW)<br />
3 Colckwise (CW) Colckwise (CW)<br />
Input contact<br />
SPDINV<br />
Description<br />
Control<br />
mode<br />
0 Rotation by speed <strong>com</strong>mand direction.<br />
1 Rotation by reverse speed <strong>com</strong>mand direction.<br />
S<br />
Note: Input contacts status “1” (ON) and “0” (OFF).<br />
Please check 5-6-1 to set the required high /Low signal levels (PNP/NPN) selection.<br />
5-17
5-3-8 Speed Loop Gain<br />
In speed mode there are two speed controller loops,<br />
with separate Gain ( P) and Integral (I) functions.<br />
Speed controllers 1 or 2 can be selected by setting one of the multi- function input terminals,<br />
to selection G-SEL or by setting one of the parameters Cn20-Cn24 as required.<br />
Please refer to section 5-3-11 section B for more details.<br />
Parameter Name Default Unit Setting range<br />
Control<br />
mode<br />
Sn211 Speed loop gain 1 40 Hz 10~450 Pe/Pi/S<br />
Sn212 Speed loop integral time constant 1 100<br />
x0.2<br />
ms<br />
1~500 Pe/Pi/S<br />
Sn213 Speed loop gain 2 40 Hz 10~450 Pe/Pi/S<br />
Sn214 Speed loop integral time constant 2 100<br />
x0.2<br />
ms<br />
1~500 Pe/Pi/S<br />
Diagram below shows the speed controller.<br />
Setting a high speed loop gain or a lower speed loop integral time provides a faster speed control response<br />
time.<br />
For more details refer to section 5-5.<br />
<br />
Kv<br />
1<br />
<br />
1 <br />
TS<br />
i <br />
Kv: Speed Loop Gain (Hz)<br />
Ti: Speed Loop Integral<br />
Time Constant (sec)<br />
5-18
5-3-9 Notch Filter<br />
The function of the Notch filter is to suppress mechanical system resonance.<br />
Resonance occurs due to low mechanical system rigidity (high springiness) of transmission systems used<br />
with servo motors such as couplings, bearings, lead screws, etc.<br />
Enter the mechanical system vibration (resonance frequency) in parameter Cn013 (Notch Filter frequency)<br />
and adjust Cn014 to set the filter bandwidth scaling factor.<br />
Lower the setting of Cn014 value, wider is the notch filter frequency bandwidth. The adjustment required<br />
depends on the application.<br />
Caution!<br />
If Cn013 is set to “0” the Notch filter is disabled.<br />
Parameter<br />
Name<br />
Defaul<br />
t<br />
Unit Setting range Control mode<br />
Cn013 Notch Filter frequency 0 Hz 0~1000 Pi/Pe/S<br />
Cn014<br />
Notch Filter Band Width<br />
Scaling factor<br />
7 X 1~100 Pi/Pe/S<br />
5-19
Gain<br />
Gain<br />
The Response Line for Resonance<br />
Resonant Frequency<br />
Response Line for Notch Filter<br />
Q1<br />
Q2<br />
Q3<br />
Q1>Q2>Q3<br />
Cn014(Notch Filter-Quality Factor)<br />
Cn013<br />
(Notch Filter-Frequency<br />
Frequency<br />
Frequency<br />
Gain<br />
After adding Notch Filter<br />
Frequency<br />
5-20
5-3-10 Torque limit of speed control mode<br />
In speed mode, the motor torque limit input contact TLMT could be used to select one of the two methods<br />
below:<br />
(1) Internal toque limit: Using default Cn010 (CCW Torque <strong>com</strong>mand limit ) and<br />
Cn011(CW Torque <strong>com</strong>mand limit ).<br />
(2) External analog <strong>com</strong>mand: Using two separate analog voltage <strong>com</strong>mand signals at input terminals<br />
PIC(CN1-27) to limit CCW torque and NIC(CN1-28) to limit CW torque.<br />
As shown in the table below:<br />
Input contact<br />
TLMT<br />
CCW torque <strong>com</strong>mand limit<br />
source<br />
CW torque <strong>com</strong>mand limit<br />
source<br />
Control<br />
mode<br />
0 Cn010 Cn011 ALL<br />
1<br />
External analog <strong>com</strong>mand<br />
PIC(CN1-27)<br />
External analog <strong>com</strong>mand<br />
NIC(CN1-28)<br />
Pi/Pe/S<br />
Note: Input contacts status “1” (ON) and “0” (OFF).<br />
Please check 5-6-1 to set the required high /Low signal levels ( PNP/NPN) selection.<br />
Caution!<br />
To use external analog torque <strong>com</strong>mand limit , If analog torque <strong>com</strong>mand limit is greater than<br />
internal torque <strong>com</strong>mand limit, the internal torque <strong>com</strong>mand limit has the priority over external<br />
analog torque <strong>com</strong>mand limit.<br />
Internal Torque <strong>com</strong>mand limit is set as below.<br />
Parameter Name Default Unit Setting range<br />
Control<br />
mode<br />
Cn010 CCW torque <strong>com</strong>mand limit 300 % 0~300 ALL<br />
Cn011 CW torque <strong>com</strong>mand limit -300 % -300~0 ALL<br />
The diagram below shows the external analog torque limit <strong>com</strong>mand wiring:<br />
5-21
5-3-11 Gain Switched<br />
PI/P control mode selection (Section A)<br />
Automatic gain 1& 2 switch (Section B)<br />
The selection of PI/P control mode switch and Automatic gain 1& 2 switch by parameters or from input<br />
terminals can be used in following conditions.<br />
(1) In speed control, to restrain acceleration/deceleration overshooting.<br />
(2) In position control, to restrain oscillations and decrease the adjusting time.<br />
(3) To decrease the possible noise caused by using Servo Lock function.<br />
(A) Switching between PI/P Control modes<br />
Switch over from PI to P mode is determined by setting of parameter Cn015.0 and according to<br />
the selection options below:<br />
Parameter<br />
Signal<br />
Cn015.0<br />
Name Setting Description<br />
PI/P control<br />
mode<br />
switch<br />
0<br />
1<br />
2<br />
3<br />
4<br />
Switch from PI to P if the torque <strong>com</strong>mand is<br />
greater than Cn016<br />
Switch from PI to P if the speed <strong>com</strong>mand is<br />
greater than Cn017<br />
Switch from PI to P if the acceleration <strong>com</strong>mand is<br />
greater than Cn018<br />
Switch from PI to P if the position error is greater<br />
than Cn019<br />
Switch from PI to P by the input contact PCNT.<br />
Set one of the multi function terminals to option 03.<br />
Control<br />
mode<br />
Pi/Pe/S<br />
Parameter Name Default Unit Setting range<br />
Cn016<br />
Cn017<br />
Cn018<br />
Cn019<br />
PI/P control mode switch by<br />
(torque <strong>com</strong>mand)<br />
PI/P control mode switch by<br />
(speed <strong>com</strong>mand)<br />
PI/P control mode switch by<br />
(acceleration)<br />
PI/P control mode switch by<br />
(position error value)<br />
Control<br />
mode<br />
200 % 0~399 Pi/Pe/S<br />
0 rpm 0~4500 Pi/Pe/S<br />
0 rps/s 0~18750 Pi/Pe/S<br />
0 pulse 0~50000 Pi/Pe/S<br />
5-22
(1) PI to P mode switch over by <strong>com</strong>paring Torque <strong>com</strong>mand.<br />
When the Torque <strong>com</strong>mand is less than Cn016 PI control is selected.<br />
When the Torque <strong>com</strong>mand is greater than Cn016 P control is selected..<br />
As shown in diagram below:<br />
(2) PI to P mode switch over by <strong>com</strong>paring Speed <strong>com</strong>mand.<br />
When the Speed <strong>com</strong>mand is less than Cn017 PI control is selected.<br />
When the Speed <strong>com</strong>mand is greater than Cn017 P control is selected.<br />
As shown in diagram below:<br />
PI/P -Mode Switching Condition<br />
(Speed Command)<br />
Speed<br />
5-23
(3) PI to P mode switch over by <strong>com</strong>paring Acceleration <strong>com</strong>mand.<br />
When the Acceleration <strong>com</strong>mand is less than Cn018 PI control is selected.<br />
When the Acceleration <strong>com</strong>mand is greater than Cn018 P control is selected.<br />
As shown in diagram below:<br />
Speed<br />
Cn018<br />
PI/P-Mode Switching Condition<br />
(Acceleration)<br />
Acceleration Command<br />
(4) PI to P mode switch over by <strong>com</strong>paring Position Error value.<br />
When the Position Error value is less than Cn019 PI control is selected.<br />
When the Position Error value is greater than Cn019 P control is selected.<br />
As shown in diagram below:<br />
(5) PI to P mode switch over by PCNT input contact.<br />
When the PCNT input contact is open PI control is selected.<br />
When the PCNT input contact is closed P control is selected.<br />
Note: Input contacts status “1” (ON) and “0” (OFF).<br />
Please check 5-6-1 to set the required high /Low signal levels (PNP/NPN) selection.<br />
Switch PI/P<br />
by PCNT input contact<br />
1<br />
0<br />
Status of contact PCNT<br />
Enable<br />
PI control<br />
P control<br />
PI control<br />
5-24
(B) Automatic gain 1& 2 switching<br />
Selection of Automatic gain 1& 2 switch with different P&I Gains is possible by setting<br />
Parameter Cn 015.1 to one of the selections listed in the table below.<br />
Parameter Cn 020 can be use for setting a switch delay time between different gains. (Gain 1 and 2)<br />
Parameter Name Setting Description<br />
Control<br />
Mode<br />
0<br />
Switch from gain 1 to 2 if torque <strong>com</strong>mand is greater<br />
than Cn021.<br />
1<br />
Switch from gain 1 to 2 if speed <strong>com</strong>mand is greater<br />
than Cn022.<br />
Cn015.1 Automatic<br />
Switch from gain 1 to 2 if acceleration <strong>com</strong>mand is<br />
2<br />
gain 1& 2<br />
greater than Cn023.<br />
Pi/Pe/S<br />
switch<br />
Switch from gain 1to2 if position error value is<br />
3<br />
greater than Cn024.<br />
Switch from gain 1 to 2 by input contact G-SEL. Set<br />
4 one of the multi function terminals to option 15 of<br />
Hn501.<br />
Parameter Name Default Unit Setting Range<br />
Control<br />
Mode<br />
Cn020<br />
Automatic gain 1& 2 switch<br />
delay time.<br />
0 x0.2 msec 0~10000 Pi/Pe/S<br />
Cn021<br />
Cn022<br />
Cn023<br />
Cn024<br />
Automatic gain 1& 2<br />
switch condition<br />
(torque <strong>com</strong>mand)<br />
Automatic gain 1& 2<br />
switch condition<br />
(speed <strong>com</strong>mand)<br />
Automatic gain 1& 2<br />
switch condition<br />
(acceleration <strong>com</strong>mand)<br />
Automatic gain 1& 2<br />
switch condition<br />
(position error value)<br />
200 % 0~399 Pi/Pe/S<br />
0 rpm 0~4500 Pi/Pe/S<br />
0 rps/s 0~18750 Pi/Pe/S<br />
0 pulse 0~50000 Pi/Pe/S<br />
Note: Gain 1 : is consisted of Pn310(position loop gain 1), Sn211(speed loop gain 1 ) and<br />
Sn212(Speed loop integral time 1).<br />
Gain 2 : is consisted of Pn311(position loop gain 2), Sn213(speed loop gain 2) and<br />
Sn214(Speed loop integral time 2 ).<br />
5-25
(1) Automatic gain 1&2 switch condition ( by torque <strong>com</strong>mand ).<br />
When torque <strong>com</strong>mand is less than Cn021 , Gain 1 is selected.<br />
When torque <strong>com</strong>mand is greater than Cn021, Gain 2 is selected<br />
When Gain 2 is active and torque <strong>com</strong>mand be<strong>com</strong>es less than Cn021 system will automatically switch back<br />
to Gain 1 the switch time delay can be set by Cn020.<br />
As shown in the diagram below:<br />
(2) Automatic gain 1&2 switch condition (by Speed <strong>com</strong>mand ).<br />
When speed <strong>com</strong>mand is less than Cn022 Gain 1 is selected.<br />
When speed <strong>com</strong>mand is greater than Cn022 Gain 2 is selected.<br />
When Gain 2 is active and speed <strong>com</strong>mand be<strong>com</strong>es less than Cn022 system will automatically switch back<br />
to Gain 1 the switch time delay can be set by Cn020.<br />
| As shown in the diagram below :<br />
5-26
(3) Automatic gain 1&2 switch condition (by Acceleration <strong>com</strong>mand ).<br />
When acceleration <strong>com</strong>mand is less than Cn023 Gain 1 is selected.<br />
When acceleration <strong>com</strong>mand is greater than Cn023 Gain 2 is selected.<br />
When Gain 2 is active and acceleration <strong>com</strong>mand be<strong>com</strong>es less than Cn023 system will automatically<br />
switch back to Gain 1 the switch time delay can be set by Cn020.<br />
| As shown in the diagram below :<br />
(4) Automatic gain 1&2 switch condition (by Position error value ).<br />
When position error value is less than Cn024 Gain 1 is selected.<br />
When position error value is greater than Cn024 Gain 2 is selected.<br />
When Gain 2 is active and position error value be<strong>com</strong>es less than Cn024 system will automatically switch<br />
back to Gain 1 and the switch time delay can be set by Cn020.<br />
| As shown in the diagram below :<br />
Speed<br />
Cn024<br />
Switching Condition of<br />
2 Stages Gain Mode<br />
(Position Error Value)<br />
Position Error Value<br />
Cn020<br />
Delay Time<br />
Gain 1 Gain 2<br />
Gain 1<br />
5-27
(5) Automatic gain 1&2 switch condition by G-SEL input contact.<br />
When the G-SEL input contact is open Gain 1 is selected.<br />
When G-SEL input contact is closed Gain 2 is selected.<br />
When G-SEL input contact opens again then Gain 1 is selected and switch delay time can be set by Cn20.<br />
As shown in the diagram below :<br />
Use Input Contact G-SEL to<br />
Switch 2 Stages Gain Mode<br />
1<br />
0<br />
Input Contact G-SEL Statu<br />
Motion<br />
Cn020<br />
Delay Time<br />
Gain 1 Gain 2<br />
Gain 1<br />
Note: Input contacts status “1” (ON) and “0” (OFF).<br />
Please refer to 5-6-1 for setting required high /Low signal levels (PNP/NPN) selection.<br />
5-28
5-3-12 Other Functions<br />
When the speed level in CW or CCW directions be<strong>com</strong>es greater than the value set in<br />
Cn007 (Speed reached preset), the output contact INS operates.<br />
Speed reached preset<br />
Parameter<br />
Name Default Unit Setting Range Control Mode<br />
Signal<br />
Speed reached Rated rpm<br />
Cn007<br />
rpm 0~4500 S/T<br />
preset<br />
× 1/3<br />
Note: Input contacts status “1” (ON) and “0” (OFF).<br />
Please check section 5-6-1 to set the required high /Low signal levels (PNP/NPN) selection.<br />
5-29
Zero Speed preset<br />
When the speed is less than the speed set in Sn215 (Value of ZS), the output contact ZS operates.<br />
Parameter<br />
Signal<br />
Name Default Unit Setting Range Control Mode<br />
Sn215 Value of zero speed 50 rpm 0~4500 S<br />
Note: Input contacts status “1” (ON) and “0” (OFF)<br />
Please check section 5-6-1 to set the required high /Low signal levels (PNP/NPN) selection.<br />
To Zero the speed <strong>com</strong>mand according to preset level in Sn215 set Sn204 to selection 1.<br />
Parameter<br />
Signal<br />
Name Setting Description<br />
Control<br />
Mode<br />
Sn204<br />
Zero Speed<br />
selection<br />
0 No action<br />
1<br />
Regard Speed <strong>com</strong>mand as Zero. (According to Sn215<br />
setting).<br />
S<br />
Zero speed<br />
preset level<br />
Speed Command<br />
Previous Speed Command<br />
Set the speed<br />
preset level as<br />
Zero speed<br />
Adjusted Speed Command<br />
Servo Lock<br />
In speed mode: the Servo Lock is used to lock servo motor when input voltage <strong>com</strong>mand is not at 0V.<br />
When input contact LOK operates: The control mode changes to internal position control mode, it temporarily<br />
stop motor rotation. Please refer to section 5-6-1 for setting input contact LOK function.<br />
5-30
Speed Feed Back Smooth Filter<br />
When there is system abnormal vibration or noise, Set Cn032 (speed feed back smoothing filter)<br />
to restrain vibration or noise. Addition of this filter will delay the speed response of servo system.<br />
Parameter<br />
Signal<br />
Cn032<br />
Name Default Unit Setting Range Control Mode<br />
Speed feed back<br />
smoothing filter<br />
500 Hz 1~1000 Pe/Pi/S<br />
5-4 Position mode<br />
Position control mode is used for high-precision applications on machinery such as machine tools.<br />
The Position control mode offers two methods of control.<br />
External pulse input position <strong>com</strong>mand<br />
Internal position <strong>com</strong>mand.<br />
In external pulse <strong>com</strong>mand input mode, the positioning <strong>com</strong>mand is signaled to the drive by a host Controller<br />
to achieve a fixed position.<br />
In internal position <strong>com</strong>mand mode, 16 preset position <strong>com</strong>mands can be set by parameters<br />
(Pn317~Pn364),<br />
and can be activated by use of input contacts POS1 ~ POS4.<br />
Set parameter Cn001 (control mode selection) as required according to the table below.<br />
Parameter<br />
Signal<br />
Name Setting Description<br />
Position control (External pulse <strong>com</strong>mand)<br />
2 Using one pulse <strong>com</strong>mand signal to control position.<br />
★Cn001<br />
Control mode<br />
Please refer to 5-4-3.<br />
selection<br />
Position control (Internal pulse <strong>com</strong>mand)<br />
6 Use input contacts to select 16 programmable preset<br />
position <strong>com</strong>mands. Please refer to 5-4-2.<br />
Control<br />
Mode<br />
New setting will be<strong>com</strong>e effective after re-cycling the power.<br />
The diagram below shows the position loop control. Detailed functions are described in the following chapters.<br />
ALL<br />
5-31
5-4-1 External Pulse Command<br />
Four types of external position pulse <strong>com</strong>mand signals can be interfaced,<br />
These can be selected from the list below.<br />
Position pulse signal logic can be selected Positive or negative as required.<br />
Parameter<br />
Signal<br />
Name Setting Description<br />
0 (Pulse)+(Sign)<br />
Control<br />
Mode<br />
★Pn301.0<br />
Position pulse<br />
<strong>com</strong>mand selection<br />
1 (CCW)and (CW) pulse<br />
2 AB-Phase Pulsex2<br />
Pe<br />
3 AB-Phase Pulsex4<br />
★Pn301.1<br />
Position pulse 0 Positive Logic<br />
<strong>com</strong>mand logic<br />
selection 1 Negative Logic<br />
Pe<br />
New setting will be<strong>com</strong>e effective after re-cycling the power.<br />
Position pulse<br />
<strong>com</strong>mand types<br />
Positive Logic<br />
Negative Logic<br />
CCW Command CW Command CCW Command CW Command<br />
(Pulse)+<br />
(Sign)<br />
(CCW)/<br />
(CW) Pulse<br />
AB-Phase Pulse<br />
5-32
Two types of pulse <strong>com</strong>mand can be connected, (Open collector) and (Line driver).<br />
Please refer to section 2-2-1 for the pulse wiring method.<br />
Pulse <strong>com</strong>mand timing should be in accordance with the time sequence standard below.<br />
Pulse Command<br />
Types<br />
Time Sequence Diagram of Pulse Command<br />
Time Standard<br />
Line Driver:<br />
t1, t2 ≦ 0.1μs<br />
(Pulse)+ Pulse<br />
t3 > 3μs<br />
T<br />
t3 t3<br />
t1<br />
τ ≧ 1.0μs<br />
(τ/T) ≦ 50%<br />
(Sign)<br />
t2 t<br />
t2<br />
OpenCollector:<br />
Sign<br />
t1, t2 ≦ 0.2μs<br />
t3 > 3μs<br />
τ ≧ 2.0μs<br />
(τ/T) ≦ 50%<br />
LineDrive:<br />
t1, t2 ≦ 0.1μs<br />
t1<br />
T<br />
t3 > 3μs<br />
τ ≧ 1.0μs<br />
Pulse<br />
(CCW)/<br />
(τ/T) ≦ 50%<br />
(CW) Pulse<br />
t2 t<br />
OpenCollector:<br />
Sign<br />
t1, t2 ≦ 0.2μs<br />
t3<br />
t3 > 3μs<br />
τ ≧ 2.0μs<br />
(τ/T) ≦ 50%<br />
LineDrive:<br />
t1<br />
t1, t2 ≦ 0.1μs<br />
τ ≧ 1.0μs<br />
Pulse<br />
(τ/T) ≦ 50%<br />
AB-Phase Pulse<br />
Sign<br />
t2<br />
T<br />
t<br />
OpenCollector:<br />
t1, t2 ≦ 0.2μs<br />
τ ≧ 2.0μs<br />
(τ/T) ≦ 50%<br />
Position <strong>com</strong>mand can be disabled ( Inhibited) by extrernal input contact INH.<br />
Input Contact<br />
INH<br />
Description<br />
Control<br />
Mode<br />
0 Position Pulse <strong>com</strong>mand enabled<br />
1 Position Pulse <strong>com</strong>mand disabled<br />
Pe<br />
Note: Input contacts status “1” (ON) and “0” (OFF)<br />
Please check section 5-6-1 to set the required high /Low signal levels ( PNP/NPN) selection.<br />
5-33
5-4-2 Internal Position Command<br />
In internal position <strong>com</strong>mand mode, 16 preset position <strong>com</strong>mands can be set by parameters<br />
(Pn317~Pn364), and can be activated by use of input contacts POS1 ~ POS4.<br />
Preset positions are programmable and can be selected according to the table below:<br />
Position<br />
Command<br />
POS4 POS3 POS2 POS1 Position Command Parameter<br />
P1 0 0 0 0<br />
P2 0 0 0 1<br />
P3 0 0 1 0<br />
P4 0 0 1 1<br />
P5 0 1 0 0<br />
P6 0 1 0 1<br />
P7 0 1 1 0<br />
P8 0 1 1 1<br />
P9 1 0 0 0<br />
P10 1 0 0 1<br />
P11 1 0 1 0<br />
P12 1 0 1 1<br />
P13 1 1 0 0<br />
P14 1 1 0 1<br />
P15 1 1 1 0<br />
P16 1 1 1 1<br />
Rotation Number<br />
Pulse Number<br />
Rotation Number<br />
Pulse Number<br />
Rotation Number<br />
Pulse Number<br />
Rotation Number<br />
Pulse Number<br />
Rotation Number<br />
Pulse Number<br />
Rotation Number<br />
Pulse Number<br />
Rotation Number<br />
Pulse Number<br />
Rotation Number<br />
Pulse Number<br />
Rotation Number<br />
Pulse Number<br />
Rotation Number<br />
Pulse Number<br />
Rotation Number<br />
Pulse Number<br />
Rotation Number<br />
Pulse Number<br />
Rotation Number<br />
Pulse Number<br />
Rotation Number<br />
Pulse Number<br />
Rotation Number<br />
Pulse Number<br />
Rotation Number<br />
Pulse Number<br />
Pn317<br />
Pn318<br />
Pn320<br />
Pn321<br />
Pn323<br />
Pn324<br />
Pn326<br />
Pn327<br />
Pn329<br />
Pn330<br />
Pn332<br />
Pn333<br />
Pn335<br />
Pn336<br />
Pn338<br />
Pn339<br />
Pn341<br />
Pn342<br />
Pn344<br />
Pn345<br />
Pn347<br />
Pn348<br />
Pn350<br />
Pn351<br />
Pn353<br />
Pn354<br />
Pn356<br />
Pn357<br />
Pn359<br />
Pn360<br />
Pn362<br />
Pn363<br />
Position<br />
Speed<br />
Parameter<br />
Pn319<br />
Pn322<br />
Pn325<br />
Pn328<br />
Pn331<br />
Pn334<br />
Pn337<br />
Pn340<br />
Pn343<br />
Pn346<br />
Pn349<br />
Pn352<br />
Pn355<br />
Pn358<br />
Pn361<br />
Pn364<br />
5-34
For internal positioning mode there are two types of moves incremental move or absolute move,<br />
selectable byparameter Pn316 as below.<br />
Parameter<br />
Signal<br />
★Pn316<br />
Name Setting Description<br />
Internal position 0 Absolute mode<br />
<strong>com</strong>mand mode<br />
selection 1 Incremental mode<br />
Control<br />
Mode<br />
New setting will be<strong>com</strong>e effective after re-cycling the power.<br />
Example below shows the difference between absolute and incremental moves.<br />
For two pulse <strong>com</strong>mands of 10 pulse position pulse <strong>com</strong>mand and followed with another 20 pulse,<br />
the traveled positions will be different.<br />
Pi<br />
PTRG. (Position Trigger).<br />
Once any preset position is selected by input contacts POS1~POS4 then require a trigger signal (PTRG)<br />
from the input contact , enable PTRG to start operation.<br />
Diagram below shows an example for 4 different absolute encoders.<br />
Note: Input contacts status “1” (ON) and “0” (OFF)<br />
Please check section 5-6-1 to set the required high /Low signal levels (PNP/NPN) selection.<br />
5-35
PHOLD. (Position Hold)<br />
The Position <strong>com</strong>mand can be inhibited (Held) at any time by input contact signal PHOLD.<br />
Once PHOLD is initiated the motor will decelerate and stop.<br />
As soon as the input contact PTRG is triggered again the original position <strong>com</strong>mand will be Completed.<br />
Diagram below shows PHOLD function with incremental encoder.<br />
CLR ( Clear position <strong>com</strong>mand).<br />
If the CLR input is activated when a position <strong>com</strong>mand is in process then the motor will stop immediately<br />
and the remaining positioning pulses will be cleared. Parameter Pn315 must be set to 1or 2 as required<br />
( refer to section 5-4-7).<br />
Once the PTRG input contact is activated again then a new position <strong>com</strong>mand will be started according to<br />
the selection of input contacts POS1~POS4.<br />
Note: Input contacts status “1” (ON) and “0” (OFF)<br />
Please check section 5-6-1 to set the required high /Low signal levels (PNP/NPN) selection.<br />
5-36
5-4-3 Electronic Gear<br />
Electronic gear ratio parameter can be used to scale the <strong>com</strong>mand output pulse.<br />
This would be useful in transmission applications where move distance per move <strong>com</strong>mand pulse<br />
has to be scaled due to mechanical requirements.<br />
Diagram and notes below describe the electronic gear ratio effect.<br />
Example of a transmission device and calculations that show the required number of pulses from a<br />
host controller to move the table by 10mm.<br />
Encoder pulse per<br />
revolution(PPR)=2000<br />
Screw Pitch = 5mm. (Move distance for<br />
1revolution of screw)<br />
Calculations without Electronic Gear Ratio<br />
Calculations with Electronic Gear Ratio<br />
1.One rotation of ball screw = Table move distance of For Calculating the number of pulses <strong>com</strong>mand required,<br />
5mm.<br />
Setting of Electronic gear ratio see next chapter.<br />
2. If the table is required to move 10mm, then Ball Electronic gear ratio can be set according to the required<br />
screw needs to rotate by (10mm ÷ 5 mm/rev)= 2 move distance per move <strong>com</strong>mand pulse.<br />
Revs<br />
For example:<br />
3. Command pulses required to cause one revolution:- 1. One Pulse <strong>com</strong>mand = Move distance of 1μm.<br />
= Encoder ppr × ( Internal multiplication factor). 2. If the Motion Table needs to move 10mm,<br />
= 2000 ppr x 4 = 8000 pulses.<br />
Then the required <strong>com</strong>mand pulses from a Host Controller<br />
4.So the Command pulses required to move 10mm (2 is<br />
revs):-<br />
= 10mm ÷ 1μm / Pulse.= 10000 Pulses.<br />
= 8000 pulses x 2 ( revs) = 16000 Pulses.<br />
Once the move distance per pulse and the Electronic<br />
gear ratio is known then the required number of pulse<br />
Number of <strong>com</strong>mand pulses for an specific move <strong>com</strong>mand can be calculated.<br />
distance can be calculated according to the formula<br />
below:<br />
= Number of Ball Screw Revs x (Encoder ppr x 4).<br />
5-37
Electronic Gear Ratio Calculation<br />
Follow the Steps below:<br />
1. Define the requirements of the positioning system<br />
Establish the following:<br />
Move distance per one revolution of load shaft.<br />
Servo motor Encoder ppr (Pulse Per Revolution). (please refer to section 1-1-2 Servo Motor Standards).<br />
Motor / load Shaft deceleration ratio.<br />
2. Move distance per one move <strong>com</strong>mand pulse.<br />
Define the move distance caused by the transmission system as a result of, one move <strong>com</strong>mand pulse from<br />
the host controller.<br />
Ex: When 1 Pulse Command move = 1μm<br />
If the Host Controller gives a move <strong>com</strong>mand of 2000 pulses, the transmission device will move by: -<br />
2000pulse × 1um/pulse = 2mm (The Electronic Gear Ratio must be set correctly).<br />
3. Calculate the Electronic Gear Ratio<br />
Calculate the Electronic Gear Ratio according to the formula below:-<br />
Electronic Gear Ratio =<br />
Encoder ppr ( Pulse Per Revolution) x 4<br />
Move distance per load shaft revolution ÷ Move distance per <strong>com</strong>mand Pulse<br />
If the deceleration ratio between motor and load shaft is<br />
(m = Motor Rotating number , n= Load Shaft Rotating Value), Then the formula for Electronic Gear Ratio is:<br />
n<br />
m<br />
Encoder ppr ( Pulse Per Revolution) x 4<br />
Electronic Gear Ratio =<br />
Move distance per load shaft revolution ÷ Move distance per <strong>com</strong>mand Pulse<br />
X<br />
m<br />
n<br />
Warning!<br />
The calculated Electronic Gear Ratio must be according to the conditions below,<br />
otherwise the servo drive and motor will not function correctly.<br />
1<br />
200<br />
≤ Electronic eGearRatio ≤<br />
200<br />
5-38
4.Parameter Setting for Electronic Gear Ratio<br />
Setting gear ratio Numerator and denominator parameters:<br />
Numerator and denominator values of the calculated electronic gear ratio must be entered in the required<br />
parameters.<br />
These two values have to be integer and with a value within the specified range in the table below.<br />
Parameter<br />
Setting Control<br />
Name Default Unit<br />
Signal<br />
Range Mode<br />
Pn302 Numerator of Electronic Gear Ratio 1 1 X 1~50000 Pi/Pe<br />
Pn303 Numerator of Electronic Gear Ratio 2 1 X 1~50000 Pi/Pe<br />
Pn304 Numerator of Electronic Gear Ratio 3 1 X 1~50000 Pi/Pe<br />
Pn305 Numerator of Electronic Gear Ratio 4 1 X 1~50000 Pi/Pe<br />
★Pn306 Denominator of Electronic Gear Ratio 1 X 1~50000 Pi/Pe<br />
New setting will be<strong>com</strong>e effective after re-cycling the power.<br />
This device provides 4 selections of Numerator for Electronic Gear Ratio.<br />
Input contacts GN1 and GN2 can be used to select the required Numerator for the Electronic Gear Ratio<br />
According to the table below.<br />
Input<br />
Contact GN2<br />
Input Contact<br />
GN1<br />
Numerator of Electronic Gear Ratio<br />
Control<br />
Mode<br />
0 0<br />
0 1<br />
1 0<br />
1 1<br />
Numerator of Electronic Gear Ratio 1<br />
Pn302<br />
Numerator of Electronic Gear Ratio 2<br />
Pn303<br />
Numerator of Electronic Gear Ratio 3<br />
Pn304<br />
Numerator of Electronic Gear Ratio 4<br />
Pn305<br />
Pi/Pe<br />
Note: Input contacts status “1” (ON) and “0” (OFF)<br />
Please check 5-6-1 to set the required high /Low signal levels (PNP/NPN) selection.<br />
5-39
Electronic Gear Ratio setting examples<br />
Transmission System<br />
Pulse Value of 1 Rotating for<br />
Encoder=2000pulse/rev<br />
Load Shaft<br />
Servo Motor<br />
Ball Screw<br />
Mechanical Disc<br />
Distance of 1 Rotating for Ball<br />
Screw = 5mm<br />
Deceleration Ratio-1/5<br />
Pulse Value of Rotating for Encoder<br />
= 2500pulse/rev<br />
Transmission Belt<br />
Setting Process<br />
1. Main positioning specifications:<br />
a) Load Shaft(Ball Screw) pitch<br />
move distance per revolution= 5mm<br />
b) Motor Encoder ppr ( Pulse per revolution) =<br />
2000pulses<br />
2. Move distance per one pulse of move Command.<br />
Moving Distance of 1 Pulse Command =1μm<br />
3. Calculation of the Electronic Gear Ratio:<br />
2000pulse<br />
/ rev×<br />
4 8000<br />
Electronic Gear Ration =<br />
=<br />
5mm/<br />
rev ÷ 1um/<br />
pulse 5000<br />
4. Set the parameter of Electronic Gear Ratio:<br />
Numerator of Electronic Gear Ratio = 8000<br />
Denominator of Electronic Gear Ratio = 5000<br />
1. Main positioning specifications:<br />
a) Deceleration Ratio=1/5<br />
b) Load Shaft(Mechanical Disc)Move Value per one<br />
revolution=360 ゚<br />
Motor Encoder ppr ( Pulse per revolution)= 2500 pulses<br />
2. Move distance per one pulse of move Command.<br />
Distance for 1Pulse Command =0.1 ゚<br />
3. Calculation of the Electronic Gear Ratio:<br />
2500pulse<br />
/ rev×<br />
4 5 50000<br />
Electronic Gear Ratio =<br />
× =<br />
360° ÷ 0.1°<br />
/ pulse 1 3600<br />
4. Set the parameter of Electronic Gear Ratio:<br />
Numerator of Electronic Gear Ratio = 50000<br />
Denominator of Electronic Gear Ratio =3600<br />
1. Main positioning specifications:<br />
a) Deceleration Ratio=1/8<br />
b) Load Shaft ( Idler) Move Value per revolution.<br />
= 3.14 × 100mm = 314mm<br />
c) Motor encoder ppr ( Pulse Per Revolution) =<br />
8192pulse<br />
2. Move distance per pulse of move Command.<br />
Distance for 1Pulse Command =10μm<br />
3. Calculation the Electronic Gear Ratio:<br />
8192 pulse / rev×<br />
4 8 262144<br />
Electronic Gear Ratio =<br />
× =<br />
314mm<br />
÷ 10um/<br />
pulse 1 31400<br />
4. Set the parameter of Electronic Gear Ratio:<br />
Reduction of the fraction to make the Numerator and<br />
Denominator less than 50000.<br />
Numerator of Electronic Gear Ratio<br />
32768<br />
Denominator of Electronic Gear Ratio<br />
3925<br />
5-40
5-4-4 Smooth Acceleration<br />
Using the One Time Smooth Acceleration/Deceleration of Position Command”<br />
It smoothes the position pulse <strong>com</strong>mand frequency.<br />
Parameter<br />
Signal<br />
★Pn313<br />
Name Default Unit Setting Range Control Mode<br />
Position <strong>com</strong>mand<br />
Accel/Decel Time<br />
Constant<br />
New setting will be<strong>com</strong>e effective after re-cycling the power.<br />
0 msec 0~10000 Pi/Pe<br />
Time Constant of One Time Smooth Acceleration/Deceleration of Position Command:<br />
The Time in which The Position Pulse Frequency increases (one time) from zero to 63.2% of Position Pulse<br />
Command Frequency.<br />
Frequency of Position<br />
Pulse Command (%)<br />
100<br />
Frequency of Position Pulse Command<br />
63.2<br />
50<br />
Pn313<br />
Time (ms)<br />
Setting Examples:<br />
(1) To achieve 95% of Position Pulse Command Frequency Output in 30msec:<br />
30(msec)<br />
Pn313 =<br />
= 10(msec)<br />
- ln(1- 95%)<br />
(2) To achieve 75% of Position Pulse Command Frequency Output in 30msec:<br />
30(msec)<br />
Pn313 =<br />
= 22(msec)<br />
- ln(1- 75%)<br />
Note:Above curve is a logarithmic<br />
ln = Natural log.<br />
5-41
5-4-5 Definition of Direction<br />
In position mode, user can use Pn314 (Position Command Direction Definition) to define motor rotation<br />
direction. The setting is showed as follow:<br />
Parameter<br />
Signal<br />
★Pn314<br />
Name Setting Description<br />
Definition of position<br />
<strong>com</strong>mand direction (from<br />
motor load end)<br />
CCW<br />
CW<br />
0 Clockwise (CW)<br />
1 Counter Clockwise (CCW)<br />
Control<br />
Mode<br />
Pi<br />
Pe<br />
New setting will be<strong>com</strong>e effective after re-cycling the power.<br />
5-4-6 Gain Adjustment<br />
The table below shows the parameters for adjusting the position loop.<br />
Two position loop gains can be selected from input contact terminals according to table below.<br />
For selection methods refer to section. 5-3-11.<br />
Parameter<br />
Signal<br />
Name Default Unit Setting Range<br />
Control<br />
Mode<br />
Pn310 Position Loop Gain1 40 1/s 1~450 Pe/Pi<br />
Pn311 Position Loop Gain 2 40 1/s 1~450 Pe/Pi<br />
Pn312 Position Feed-Forward Gain 0 % 0~100 Pe/Pi<br />
Cn033 Speed Feed-Forward Smooth Filter 40 Hz 0~1000 Pe/Pi<br />
Diagram below shows the position controller. Adjust a higher gain value can reduse response time.<br />
Position Feed-Forward Gain can also be used to shorten the positioning time.<br />
refer to section 5-5 for Position Loop Gain Adjustment methods.<br />
Position Controllor<br />
K pff<br />
Filter<br />
Position Pulse<br />
Command<br />
K p<br />
Encoder Pulse Feed Back<br />
Kp<br />
: Position Loop Gain (1/s)<br />
Kpff<br />
: Position Loop<br />
Feed-Forward Gain (%)<br />
5-42
5-4-7 Clear the Pulse Offset<br />
In position control mode, parameter Pn315 (Pulse Error clear mode) has three modes can be select.<br />
CLR input contact is used to clear the pulse error as required according to the list below.<br />
Parameter Name Setting Description<br />
Pn315<br />
Pulse Error Clear<br />
Mode<br />
0<br />
1<br />
2<br />
When Input CLR contact, clears the pulse error<br />
value.<br />
When Input CLR contact to cancels the position<br />
<strong>com</strong>mand, Stops the motor rotating, the pulse error<br />
value is cleared and mechanical Home signal is<br />
reset.<br />
When Input CLR contact to cancels the position<br />
<strong>com</strong>mand, stops the motor rotating and the pulse<br />
error value is cleared.<br />
Note: Input contacts status “1” (ON) and “0” (OFF)<br />
Please check 5-6-1 to set the required high /Low signal levels (PNP/NPN) selection.<br />
Control<br />
Mode<br />
Pe<br />
Pi<br />
Pe<br />
Pi<br />
5-43
5-4-8 Original Home<br />
Home routine is used to find and set a reference point for correct positioning.<br />
To set a HOME reference position, one of input contacts ORG (external sensor input), CCWL, or CWL can be<br />
used.<br />
An encoder Z phase (marker pulse) can also be used as home reference and can be search by CW or CCW<br />
direction. Following Home routine selections are available for setting parameter Pn 365.0.<br />
Parameter Name Setting Description<br />
Control<br />
Mode<br />
0<br />
Once the home routine is activated, motor will search for Home<br />
Position switch in 1 st preset speed in CCW direction.<br />
Input contacts CCWL or CWL can be used as the Home Reference<br />
Switch.<br />
Once Home reference switch is detected and <strong>com</strong>plete, input contacts<br />
CCWL and CWL will act as limits input contact again.<br />
Note:<br />
When using this function, 1 or 2 setting of Pn365.1 is not allowable.<br />
Cn002.1 (CCWL & CWL Input terminal function) must to set as 0.<br />
1<br />
Once the home routine is activated, motor will search for Home<br />
Position switch in 1 st preset speed in CW direction.<br />
Input contacts CCWL or CWL can be used as the Home Reference<br />
Switch.<br />
Once Home reference switch is detected and <strong>com</strong>plete, input contacts<br />
CCWL and CWL will act as limits input contact again.<br />
Note:<br />
When using this function, 1 or 2 setting of Pn365.1 is not allowable.<br />
Cn002.1 (CCWL & CWL Input terminal function) must to set as 0.<br />
Pn365.0<br />
On activation of<br />
Home input<br />
contact,<br />
It sets the<br />
search<br />
direction<br />
and Home<br />
reference.<br />
(Setting for<br />
home routine)<br />
2<br />
3<br />
4<br />
5<br />
Once the home routine is activated , motor will search for Home<br />
Position switch in 1 st preset speed in CCW direction and sets the input<br />
contact ORG (external sensor input) as a Home reference when ORG<br />
contact is activated.<br />
If Pn365.1=2, it will directly find the closest Rising-Edge of ORG<br />
to be the Home position (without a need for Home reference),then it<br />
stops in accordance with Pn365.3 setting.<br />
Once the home routine is activated , motor will search for Home<br />
Position switch in 1 st preset speed in CW direction and sets the input<br />
contact ORG (external sensor input) as a Home reference when ORG<br />
contact is activated.<br />
If Pn365.1=2, it will directly find the closest Rising-Edge of ORG<br />
to be the Home position (without a need for Home reference),then it<br />
stops in accordance with Pn365.3 setting.<br />
Once the home routine is activated , motor will search for Home<br />
position in 1st preset speed in CCW direction and sets the Home<br />
reference<br />
Servo drive start to find the Home position of the nearest Z phase.<br />
(No need for Home reference)<br />
When using this function, set Pn365.1=2 .<br />
After finished setting of Z Phase to the Home position, for the stop<br />
method refer to the setting of Pn365.3.<br />
Once the home routine is activated , motor will search for Home<br />
position in 1st preset speed in CW direction and sets the Home<br />
reference<br />
Servo drive start to find the Home position of the nearest Z phase.<br />
(No need for Home reference)<br />
When using this function, set Pn365.1=2 .<br />
After finished setting of Z Phase to the Home position, for the stop<br />
method refer to the setting of Pn365.3.<br />
Pi/Pe<br />
5-44
Parameter Name Setting Description<br />
Pn365.1<br />
Pn365.2<br />
Pn365.3<br />
Once Reference<br />
Home switch or<br />
Signal, is found<br />
set search<br />
method<br />
for the Home<br />
position.<br />
Setting of<br />
Home Routine<br />
Start method<br />
Stopping mode<br />
after finding<br />
Home signal.<br />
Once the Home Reference switch or signal is detected,<br />
motor reverses direction in 2 nd speed to find the nearest Z<br />
0<br />
Phase pulse and sets this as the Home position,<br />
then stops in accordance with Pn365.3 setting method.<br />
Once the Home Reference switch or signal is detected,<br />
motor Continues in its direction in 2 nd speed to find the<br />
1<br />
nearest Z Phase pulse and sets this as the Home position,<br />
then stops in accordance with Pn365.3 setting method.<br />
When Pn365.0=2 or 3, it finds the rising edge of ORG to be the<br />
Home position, then stops in accordance with Pn365.3;<br />
2<br />
When Pn365.0=4 or 5, it finds Z Phase pulse to be the Home,<br />
then stops in accordance with Pn365.3.<br />
0 Homing routine is Disabled.<br />
On power up and activation of Servo on the home routine is<br />
started automatically.<br />
1 This method is useful for applications that do not require<br />
repeated home routines. No external home reference switch is<br />
required.<br />
Use SHOME input contact to start a home routine.<br />
2 In position mode, SHOME can be used to start a home routine<br />
at any moment.<br />
After detecting the Home signal, it sets this position to be the<br />
Home reference (Un-14 encoder feed back rotating number and<br />
Un-15 encoder feed back pulse number are all 0), motor<br />
0<br />
decelerates and stops.<br />
Then it reverses direction in 2 nd speed to detect the Home<br />
Position again then it decelerates and stops..<br />
After detecting the Home signal, it sets this position to be the<br />
Home reference (Un-14 encoder feed back rotating number and<br />
1<br />
Un-15 encoder feed back pulse number are all 0), motor<br />
decelerates and stops.<br />
Control<br />
Mode<br />
Pi/Pe<br />
Pi/Pe<br />
Pi/Pe<br />
Home Mode selection table<br />
Pn365.0 / Pn 365.1 selections can be made for each application as required according to the table<br />
below:-<br />
Pn365.0<br />
Pn365.1 0 1 2 3 4 5<br />
0<br />
1<br />
2<br />
HOME routine available<br />
HOME routine not available.<br />
5-45
Additional Home routine parameters<br />
Home search speed parameters 1st (Fast) and 2 nd (Slow) speeds are set according to table below:<br />
Parameter<br />
Signal<br />
Name Default Unit Setting Range Control Mode<br />
Pn366<br />
1 st preset high speed of<br />
HOME<br />
100 rpm 0~2000 Pi/Pe<br />
Pn367 2 nd preset low speed of HOME 50 rpm 0~500 Pi/Pe<br />
Parameters Pn368 and Pn 369 provide Home position offset feature for applications where<br />
the machine mechanical home position is a different position to the detected home position.<br />
This offset can be achieved by setting the two parameters below.<br />
Once the detected home position is found in accordance with Pn365 (Home routine mode),<br />
then it will search by number of revolutions and pulses set in Pn368 and Pn 369 to find the<br />
new off set Home position.<br />
Parameter<br />
Signal<br />
Pn368<br />
Pn369<br />
Name Default Unit Setting Range<br />
HOME Position Offset.<br />
(No of Revolutions)<br />
HOME position Bias Pulse<br />
value (No of pulses)<br />
Control<br />
Mode<br />
0 rev -30000~30000 Pi/Pe<br />
0 pulse -32767~32767 Pi/Pe<br />
5-46
Home routine Timing Chart<br />
During the Home routine if the SON (Servo On) is not activated or any alarm happens,<br />
Home routine is stopped and Home Complete output contact is reset (Cleared).<br />
Pn365.2=1<br />
(After Power ON, Home function will be automatically<br />
operated when first time Servo ON)<br />
Turn ON<br />
Pn365.2=2<br />
(SHOME triggers HOME)<br />
Power<br />
Turn ON<br />
Power<br />
Output Contact RDY<br />
1<br />
Output Contact RDY<br />
1<br />
Input Contact SON<br />
1<br />
Input Contact SON<br />
1<br />
Input Contact SHOME<br />
1<br />
Process of Home<br />
Output Contact Home<br />
Into the Process of<br />
Home<br />
1<br />
Process of Home<br />
Output Contact Home<br />
Into the Process of<br />
Home<br />
1<br />
Time<br />
Time<br />
Note: Input contacts status “1” (ON) and “0” (OFF)<br />
Please check 5-6-1 to set the required high /Low signal levels ( PNP/NPN) selection.<br />
5-47
Home Routine Speed /Position Timing Charts<br />
Following Sections Show the Speed/Position Timing charts according to Pn 365.0 and Pn365.1 selections.<br />
Pn365.0<br />
Pn365.1<br />
0 1 2 3 4 5<br />
0 (1) (2) (1) (2)<br />
1 (3) (4)<br />
2 (5) (6) (7) (8)<br />
No Home routine<br />
(1)<br />
Pn365.0=0 or 2 (After starting HOME routine, run CCW in 1 st<br />
(CCWL, CWL or ORG).<br />
preset high speed for HOME Reference<br />
Pn365.1=0(After finding HOME Reference, reverse direction in 2 nd<br />
for the nearest Z Phase pulse to be set as the HOME position).<br />
preset low speed to search<br />
Pn365.2=2(Input Contact SHOME to Start Home routine).<br />
Pn365.3=0(Reverse search for HOME position).<br />
5-48
(2)<br />
Pn365.0=1or 3. After starting the HOME routine, run CW in 1 st preset high speed to search for HOME<br />
Reference (CWL, CCWL or ORG).<br />
Pn365.1=0 . After finding HOME Reference, reverse direction in 2 nd preset low speed to search for the<br />
nearest Z Phase pulse to be set as the HOME position.<br />
Pn365.2=2 . Input Contact SHOME Starts the Home routine.<br />
Pn365.3=0. Reverse search for HOME position.<br />
Speed<br />
Pn367<br />
(2 nd Stage<br />
low speed)<br />
Pn365.1=0<br />
Position<br />
Pn365.3=0<br />
Z-Phase Pulse of<br />
Motor Encoder<br />
Pn365.0=1<br />
Pn366 (1 st Stage<br />
high Speed)<br />
Input Contacts CWL, CCWL<br />
or ORG<br />
1<br />
Pn365.0=3<br />
Input Contact SHOME<br />
1<br />
Pn365.2=2<br />
(3)<br />
Pn365.0=2. After starting HOME routine, run CCW in 1 st preset high speed to search for HOME Reference<br />
(ORG).<br />
Pn365.1=1. After finding HOME Reference, continues in the same direction in 2 nd preset low speed to find<br />
the nearest Z Phase to be set as the HOME position.<br />
Pn365.2=2 Input Contact SHOME Starts the HOME routine.<br />
Pn365.3=0 Reverse search for HOME position<br />
5-49
(4)<br />
Pn365.0=3(After Starting HOME routine, run CW in 1 st preset high speed to search for HOME<br />
Reference.( ORG)<br />
Pn365.1=1. After finding HOME Reference, continues in the same direction in 2 nd preset low speed to find<br />
the nearest Z Phase to be set as the HOME position.<br />
Pn365.2=2 Input Contact SHOME Starts the HOME routine.<br />
Pn365.3=0 Reverse search for HOME position<br />
Speed<br />
Pn365.3=0<br />
Pn367 (2 nd Stage low speed)<br />
Position<br />
Pn366 (1 st Stage High Speed)<br />
Pn365.1=1<br />
Z-Phase Pulse of<br />
Motor Encoder<br />
Input Contact ORG<br />
1<br />
Pn365.0=3<br />
1<br />
Input Contact SHOME<br />
Pn365.2=2<br />
5-50
(5)<br />
Pn365.0=2. After Starting HOME routine, run CCW in 1 st preset high speed to search for HOME<br />
Reference.( ORG).<br />
Pn365.1=2 After Finding the HOME Reference, the Rising Edge of ORG sets the HOME Position.<br />
Pn365.2=2 Input Contact SHOME Starts the HOME routine.<br />
Pn365.3=0 Reverse search for HOME position<br />
Speed<br />
Pn366 (1 st stage high speed)<br />
Pn365.3=0<br />
Input Contact ORG<br />
Position<br />
Pn367 (2 nd stage low speed)<br />
Pn365.1=2<br />
1<br />
Pn365.0=2<br />
Input Contact SHOME<br />
1<br />
Pn365.2=2<br />
(6)<br />
Pn365.0=3. After Starting HOME routine, run CW in 1 st preset high speed to search for HOME<br />
Reference.( ORG).<br />
Pn365.1=2 After Finding the HOME Reference, the Rising Edge of ORG sets the HOME Position.<br />
Pn365.2=2 Input Contact SHOME Starts the HOME routine.<br />
Pn365.3=0 Reverse search for HOME position<br />
Speed<br />
Pn367 (2 nd stage low speed)<br />
Position<br />
Pn365.3=0<br />
Pn366 (1 st stage high speed)<br />
Input Contact ORG<br />
Pn365.1=2<br />
1<br />
Pn365.0=3<br />
Input Contact SHOME<br />
1<br />
Pn365.2=2<br />
5-51
(7)<br />
Pn365.0=4. After Starting HOME routine, run CCW in 1 st preset high speed to search for the nearest Z phase<br />
pulse.<br />
Pn365.1=2 After Finding the Z phase pulse, set this position as the HOME position.<br />
Pn365.2=2 Input Contact SHOME Starts the HOME routine.<br />
Pn365.3=0 Reverse search for HOME position<br />
Speed<br />
Pn366 (1 st stage high speed)<br />
Pn365.3=0<br />
Position<br />
Z-Phase Pulse of<br />
Motor Encoder<br />
Pn367 (2 nd stage low speed)<br />
Pn365.1=2<br />
Pn365.0=4<br />
Input Contact SHOME<br />
1<br />
Pn365.2=2<br />
(8)<br />
Pn365.0=5. After Starting HOME routine, run CW in 1 st preset high speed to search for the nearest Z phase<br />
pulse.<br />
Pn365.1=2. After Finding the Z phase pulse, set this position as the HOME position.<br />
Pn365.2=2 Input Contact SHOME Starts the HOME routine.<br />
Pn365.3=0 Reverse search for HOME position<br />
Speed<br />
Pn367 (2 nd stage low speed)<br />
Position<br />
Pn365.3=0<br />
Pn366 (1 st stage high speed)<br />
Z-Phase Pulse of<br />
Motor Encoder<br />
Pn365.1=2<br />
Pn365.0=5<br />
Input Contact SHOME<br />
1<br />
Pn365.2=2<br />
5-52
5-4-9 Other Position Function<br />
In position (Position Complete)<br />
As long as the position error value (counts) is less than the pulse counts set in<br />
Pn307 (Position Complete value) then INP output contact will be activated.<br />
Parameter Name Default Unit Setting Range<br />
Control<br />
Mode<br />
Pn307 Position Complete value 10 pulse 0~50000 Pi/Pe<br />
Speed Command<br />
Speed<br />
Motor Speed<br />
Pn307<br />
Position Complete Value<br />
Position Incorrect Value<br />
pulse<br />
1<br />
INP Statue<br />
0<br />
Note: Input contacts status “1” (ON) and “0” (OFF)<br />
Please check 5-6-1 to set the required high /Low signal levels (PNP/NPN) selection.<br />
Position error alarm<br />
When the Position error value is greater than the preset pulse value of Pn308 (Positive position error level) or<br />
Pn309 (Negative position error level) this will generate AL-11 (Position error) signal.<br />
Parameter Name Default Unit Setting Range<br />
Control<br />
Mode<br />
Pn308 Positive position error level 50000 pulse 0~50000 Pi/Pe<br />
Pn309 Negative position error level 50000 pulse 0~50000 Pi/Pe<br />
5-53
5-5 Gain Adjustment<br />
The Servo controller provides 3 control loops as diagram shown below:<br />
Control methods are: Current Control, Speed Control and Position Control.<br />
Host<br />
Controllor<br />
Position<br />
Controllor<br />
Speed<br />
Controllor<br />
Current<br />
Controllor<br />
Power<br />
Circuit<br />
SM<br />
PG<br />
Diagram above shows the three control loops.<br />
Current ( Inner loop), Speed ( middle loop) and position (outer loop).<br />
Theoretically, the bandwidth of inner control loop must be higher than the bandwidth of the outer control loop,<br />
otherwise, the whole control system will be<strong>com</strong>e unstable, and cause vibration or abnormal response.<br />
The relationship between the band width for these three control loops is as follows:<br />
Current Loop (Inner) > Speed Loop (Middle)>Position Loop (outer).<br />
The default current control bandwidth has already been set for optimum response, So Only speed and<br />
position control loop gains may be adjusted.<br />
Table below shows the Gain adjustment parameters for the three control loops.<br />
Parameter Name Default Unit Setting Range<br />
Control<br />
Mode<br />
Sn211 Speed Loop Gain 1 40 Hz 10~450 Pe/Pi/S<br />
Sn212<br />
Speed Loop Integration Time<br />
Constant 1<br />
100<br />
x0.2<br />
msec<br />
1~500 Pe/Pi/S<br />
Sn213 Speed Loop Gain 2 40 Hz 10~450 Pe/Pi/S<br />
Sn214<br />
Speed Loop Integration Time<br />
Constant 2<br />
100<br />
x0.2<br />
msec<br />
1~500 Pe/Pi/S<br />
Pn310 Position Loop Gain 1 40 1/s 1~450 Pe/Pi<br />
Pn311 Position Loop Gain 2 40 1/s 1~450 Pe/Pi<br />
Pn312<br />
Position Loop Feed-Forward<br />
Gain<br />
0 % 0~100 Pe/Pi<br />
Cn025 Load Inertia Ratio 40 x0.1 0~1000 Pe/Pi/S<br />
5-54
Speed Loop Gain<br />
Speed Loop Gain has a direct effect on the response Bandwidth of Speed Control Loop.<br />
Under the condition of no vibration or noise, when higher is the Speed Loop Gain Value is setting speed<br />
response is be<strong>com</strong>ing faster.<br />
If Cn025 (Load Inertia Ratio) is correctly set then,<br />
Speed Loop Bandwidth = Sn211 (Speed Loop Gain1) or Sn213 (Speed Loop Gain2).<br />
Load Inertia Ratio Formula is as below:<br />
Speed Loop Integration Time Constant<br />
Integral element in Speed Control Loop eliminates the steady state error.<br />
Under the condition of no vibration or noise, reducing the speed loop Integral Time Constant can enhance<br />
system rigidity. If the Load Inertia Ratio is very high or the system has vibration factors, ensure that the Speed<br />
Loop Integral Time Constant is also high enough, otherwise the mechanical system would produce<br />
resonance easily.<br />
Integral Time Constant for Speed Loop can be set using the formula below:<br />
1<br />
Sn212(Integral<br />
Time constant 1of Speed Loop) ≥ 5×<br />
2π<br />
× Sn211(Speed Loop Gain 1)<br />
Setting Example:<br />
Assume: Cn025 (Load Inertia Ratio) is correctly set, If target Speed Loop Bandwidth 100Hz,<br />
set Sn211(Speed Loop Gain 1)=100(Hz) then<br />
1<br />
Sn212 (Integral Time Constant 1of Speed Loop) ≥ 5×<br />
= 40 ( × 0.2msec)<br />
2π<br />
× 100<br />
5-55
Position Loop Gain<br />
Position Loop Gain has a direct effect on the response speed of Position Loop.<br />
Under the condition that there is no vibration or noise from servo motor, increasing the Position Loop Gain<br />
Value can enhance the response speed and hence reduce the positioning time.<br />
Position Loop Feed-Forward Gain<br />
Using Position Loop Feed-Forward Gain can enhance the response speed.<br />
If the Feed-Forward Gain value is setting too high, overshooting could occur and cause the INP (In Position)<br />
output contact to switch ON and OFF repeatedly.<br />
SO monitor Speed Curve and INP (In Position Signal) at the same time then increase Feed-Forward Value<br />
slowly.<br />
If Position Loop Gain is too high, Feed-Forward function will be insignificant.<br />
Quick Parameters for Gain adjustment<br />
Quick Gain adjust parameters are available for setting manually.<br />
The related Gain Adjust parameters are listed in the Quick-Parameter leaflet for convenient reference.<br />
Quick adjust parameters once altered are saved and be<strong>com</strong>e effective immediately,<br />
without pressing the Enter-Key. The table below shows the Gain Adjust Quick-Parameters.<br />
Parameter<br />
Name Default Unit Setting Range<br />
Control<br />
Mode<br />
◆qn401 Speed Loop Gain 1 40 Hz 10~450 Pe/Pi/S<br />
◆qn402<br />
Integral Time Constant 1 of<br />
Speed Loop<br />
100<br />
x0.2<br />
msec<br />
1~500 Pe/Pi/S<br />
◆qn403 Speed Loop Gain 2 40 Hz 10~450 Pe/Pi/S<br />
◆qn404<br />
Integral Time Constant 2 of<br />
Speed Loop<br />
100<br />
x0.2<br />
msec<br />
1~500 Pe/Pi/S<br />
◆qn405 Position Loop Gain 1 40 1/s 1~450 Pe/Pi<br />
◆qn406 Position Loop Gain 2 40 1/s 1~450 Pe/Pi<br />
◆qn407<br />
Position Loop Feed-Forward<br />
Gain<br />
Be<strong>com</strong>e effective immediately without pressing Enter-Key<br />
0 % 0~100 Pe/Pi<br />
5-56
5-5-1 Automatic Adjusting<br />
This device provides ON-LINE Auto tuning, which can quickly and precisely measure Load Inertia<br />
and adjust the Gain automatically. Setting is according to the table below:<br />
Parameter Name Setting Description<br />
Cn002.2<br />
Auto tuning<br />
0 Auto tuning Disabled<br />
1 Enable Auto tuning<br />
When Cn002.2 is set to 0 (Auto tuning Disabled), following Gain adjust parameters must be set.<br />
Control<br />
Mode<br />
Pe/Pi/S<br />
Parameter<br />
Signal<br />
Name<br />
Cn002.2<br />
Auto tuning<br />
Sn211 Speed Loop Gain 1<br />
Sn212 Speed-loop Integral time constant 1<br />
Sn213 Speed loop Gain 2<br />
Sn214 Speed loop Integral time constant 2<br />
Pn310 Position Loop Gain 1<br />
Pn311 Position Loop Gain 2<br />
Pn312<br />
Position Loop Feed-Forward Gain<br />
When Cn002.2 is set to 1 auto tuning is enabled and the Servo controller will adjust the Servo Gain in<br />
accordance with Cn026 (Rigidity Setting) and the measured Load Inertia Ratio by monitor parameter Un-19<br />
(Load Inertia Ratio), when the Load Inertia Ratio is be<strong>com</strong>es stable,<br />
Then set 0 in Cn002.2 to cancel Auto tuning. At this moment, servo controller will record the measured Load<br />
Inertia Ratio into Cn025 (Load Inertia Ratio).<br />
If servo drive is used in a applications where there is no significant load variations, then monitor Un-19 (Load<br />
Inertia Ratio) if this is stable then it is re<strong>com</strong>mended that Auto tuning is not used.<br />
5-57
Apply conditions of Auto tuning<br />
The Servo drive provides Auto tuning and uses an advanced control technique “ON-LINE” to measure the<br />
Load Inertia Ratio to control the system to achieve default speed or Position Response Bandwidth.<br />
System must <strong>com</strong>ply with the conditions below, so that the Auto tuning can operate normally.<br />
(1) The timing from stop to 2000rpm needs be less than 1 second.<br />
(2) Motor speed is larger than 200rpm.<br />
(3) Load Inertia needs be 100 times less than the inertia of the motor.<br />
(4) External force or the variation of inertia ratio can not be excessive.<br />
Rigidity Setting<br />
When Auto tuning is used, set the Rigidity Level depending on the various Gain settings for applications<br />
such as those listed below:<br />
Rigidity<br />
Setting<br />
Cn026<br />
Position Loop<br />
Gain<br />
Pn310 [1/s]<br />
Speed Loop<br />
Gain<br />
Sn211 [Hz]<br />
Speed-loop Integral<br />
time constant 1<br />
Sn212 [x0.2msec]<br />
1 15 15 300<br />
2 20 20 225<br />
3 30 30 150<br />
4 40 40 100<br />
5 60 60 75<br />
6 85 85 50<br />
7 120 120 40<br />
8 160 160 30<br />
9 200 200 25<br />
A 250 250 20<br />
Mechanical<br />
Rigidity<br />
Low<br />
Middle<br />
High<br />
Application<br />
Machines driven by timing<br />
Belt, Chain or Gear: Large<br />
Moving Table, Conveyor Belt.<br />
The machines driven by<br />
Ballscrew through<br />
decelerator: Ordinary<br />
machines, Mechanics arms,<br />
robot arms, conveyor.<br />
The machines driven by<br />
Ballscrew: High precision<br />
Machines, Metal engraving<br />
Machine, Insertion Machine<br />
and IC inspection Machine.<br />
5-58
Process for Auto tuning<br />
The Diagram below show the process for Auto tuning.<br />
Note: After Auto tuning is <strong>com</strong>plete Set 0 in Cn002.2, otherwise it will not record the present<br />
measured Load Inertia Ratio.<br />
If the power is cut off during Auto tuning then when the power is established, Servo controller will use<br />
the previously recorded setting of Load Inertia Ratio which is stored in parameter Cn025.<br />
5-59
5-5-2 Manual Adjustting<br />
Manual Gain adjustment is made available for applications when<br />
auto tune is not providing a good and stable system response, Or a system where there is no<br />
significant load variations and the auto tune is not used.<br />
Manual Gain Adjustment in Speed control Mode<br />
Step 1: Set Rigidity level in parameter Cn 26 (See section 5-5-1 for the selection table) and Cn25.<br />
Step 2: If the Servo system includes a host controller which is used for positioning control, then it’s position<br />
loop Gain should be set lower, relative to the servo drive Gain.<br />
Step 3: Adjusting Speed Loop Gain 1 (Sn211):<br />
a) Increase Sn212 (Integral Time Constant 1of Speed Loop). Set a higher value than default or the set<br />
value when auto tune was unsuccessful.<br />
b) Increase the Speed Loop Gain (Sn211) until there is no vibration or noise.<br />
c) Then decrease the Speed Loop Gain (Sn211) slowly and increase Position Loop Gain of Host<br />
Controller until there is no vibration or noise.<br />
Step 4: Adjusting Speed Loop Integral Time Constant 1 (Sn212):<br />
Set the Integral Time Constant of Speed Loop for minimum time setting that without causing mechanical<br />
vibration.<br />
Step 5: Finally, Slowly adjust the Speed Loop Gain, Position Loop Gain of Host Controller and Integral Time<br />
Constant of Speed Loop until the servo system provides the best response.<br />
Manual Gain Adjustment in Position Control mode<br />
Step 1: Set Rigidity level in parameter Cn 26 (See section 5-5-1 for the selection table) for the correct Load<br />
Inertia Ratio.<br />
Step 2: Decrease Position Loop Gain 1 (Pn 310).<br />
Set a lower value than default or the set value when auto tune was unsuccessful.<br />
Set a relatively higher value in Sn212 (Integral Time Constant 1 of Speed Loop).<br />
Step 3: Adjust Speed Loop Gain 1(Sn211).<br />
Increase the Speed Loop Gain until there is no vibration or noise.<br />
Step 4: Adjusting Position Loop Gain 1 (Pn310).<br />
Slowly decrease the Speed Loop Gain again, then increase the Position Loop Gain until there is no<br />
vibration or noise.<br />
Step 5: Adjusting Speed Loop Integral Time Constant 1 (Sn212).<br />
Set the Integral Time Constant of Speed Loop for a minimum time without causing mechanical vibration.<br />
Step 6: Finally, slowly adjusting the Speed Loop Gain, Position Loop Gain and the Integral Time Constant of<br />
Speed Loop until the servo system provides the best response.<br />
5-60
5-5-3 Improving Resonance<br />
The Servo drive provides the function of Gain Switching and Position Loop Feed-Forward Gain<br />
to improve system response.<br />
Note: Both of these features must be used correctly to improve system response, otherwise<br />
the response will be<strong>com</strong>e worse. Refer to the description below:<br />
Gain Switch<br />
Following Gain Switching features are provided:-<br />
a) Speed Loop Gain PI/P Switching<br />
b) 2-stage Gain Switching.<br />
Purposes list:<br />
(1) To restrict overshoot during acceleration/deceleration in speed control.<br />
(2) Reducing the in position oscillations and providing shorter settling time in position control.<br />
(3) Decrease the noise caused when using Servo Lock.<br />
For further details refer to section 5-3-11.<br />
Position Loop Feed-Forward Gain<br />
Position Loop Feed-Forward Gain can be used to reduce the error result from position control and improve<br />
the response speed.<br />
Position loop Feed forward gain and position loop gain should be matched with. If adjusting to higher position<br />
loop gain, the feed fordward gain can be ignored. Oppositly, if the loop gain value is setting for a relatively low<br />
level, adjust position loop feed forward gain will improve system response time obviously.<br />
The adjustment steps are as follows:<br />
Step 1: Refer to the procedures in sections 5-5-1~5-5-2 to adjust Speed and Position Gain.<br />
Step 2: Increase Pn312(Position Feed-Forward Gain) slowly, and observe the INP ( Output Signal of In<br />
Position) at the same time and INP output should be activated faster.<br />
Note: The Position Loop Feed-Forward Gain can not be set too high, otherwise it will cause speed<br />
overshooting and INP (In Position output signal) will be switching On/Off repeatedly.<br />
5-61
5-6 Other Functions<br />
5-6-1 Programmable I/O Functions<br />
Digital Inputs.<br />
There are 13 DI (Digital Inputs) contacts and 4 DO (Digital Outputs) contacts which<br />
are programmable as listed below:-<br />
Parameter Name Setting Description<br />
★Hn501.0<br />
★Hn501.1<br />
DI-1<br />
Digital Input 1<br />
programmable<br />
Functions<br />
Signal<br />
01 SON Servo On<br />
02 ALRS Alarm Reset<br />
03 PCNT PI/P Switching<br />
04 CCWL CCW Limit<br />
Contactor Function<br />
05 CWL CW Limit<br />
06 TLMT External Torque Limit<br />
07 CLR Clear Pulse Error Value<br />
08 LOK Servo Lock<br />
09 EMC Emergency Stop<br />
0A SPD1 Speed 1<br />
0B SPD2 Speed 2<br />
0C MDC Control Mode Switch<br />
0D INH Position Command Inhibit<br />
0E SPDINV Speed Inverse<br />
0F G-SEL Gain Select<br />
10 GN1<br />
Electronic Gear Ratio<br />
Numerator 1<br />
11 GN2<br />
Electronic Gear Ratio<br />
Numerator 2<br />
12 PTRG Position Trigger<br />
13 PHOLD Position Hold<br />
14 SHOME Start Home<br />
15 ORG<br />
Home Position Reference<br />
(Origin)<br />
16 POS1 Internal Position select 1<br />
17 POS2 Internal Position select 2<br />
18 POS3 Internal Position select 3<br />
19 POS4 Internal Position select 4<br />
1A TRQINV Torque Inverse<br />
1B RS1 Torque CW Selecting<br />
1C RS2 Torque CCW Selecting<br />
New setting will be<strong>com</strong>e effective after re-cycling the power.<br />
Control<br />
Mode<br />
ALL<br />
Parameter<br />
Signal<br />
★Hn501.2<br />
Name Setting Description<br />
DI-1<br />
Logic State<br />
NO/NC Selection<br />
New setting will be<strong>com</strong>e effective after re-cycling the power.<br />
0<br />
1<br />
Input contact state. NO (Normally Open).<br />
Connecting (IG24) to inputs, enables the<br />
selected function.<br />
Input contact state. NC (Normally Closed).<br />
Disconnecting (IG24) from inputs, enables<br />
the selected function.<br />
Control<br />
Mode<br />
ALL<br />
Digital Inputs 2 to 13 (Hn 502 to Hn 513). Are programmable and the logic state NO/NC can also be<br />
selected same as that shown for digital input 1. See Hn501.<br />
5-62
Parameter Name Description<br />
★Hn502 DI-2 Programmable<br />
★Hn503 DI-3 Programmable<br />
★Hn504 DI-4 Programmable<br />
★Hn505 DI-5 Programmable<br />
★Hn506 DI-6 Programmable<br />
★Hn507 DI-7 Programmable<br />
★Hn508 DI-8 Programmable<br />
Refer to Hn501 for programmable options.<br />
★Hn509 DI-9 Programmable<br />
★Hn510 DI-10 Programmable<br />
★Hn511 DI-11 Programmable<br />
★Hn512 DI-12 Programmable<br />
★Hn513 DI-13 Programmable<br />
Control<br />
Mode<br />
ALL<br />
Warning! If any of programmable Inputs of DI-1 ~ DI-13 are set for the same type of function<br />
then the logic state selection ( NO or NC selection) for these inputs must be the same type.<br />
Otherwise an Alarm will be displayed. AL-07 (Multi-function contact setting error).<br />
5-63
Digital Outputs.<br />
There are 4 programmable Digital Outputs according to the table below:<br />
Parameter Name Setting Description<br />
★Hn514.0<br />
★Hn514.1<br />
★Hn514.2<br />
DO-1 Logic<br />
state<br />
DO-1<br />
Code<br />
01 RDY Servo Ready<br />
02 ALM Alarm<br />
03 ZS Zero Speed<br />
04 BI Brake Signal<br />
05 INS In Speed<br />
06 INP In Position<br />
07 HOME HOME<br />
08 INT In Torque<br />
Contactor functions<br />
0 Close, when the output is activated.<br />
1 Open, when the output is activated..<br />
Control<br />
Mode<br />
ALL<br />
ALL<br />
Parameter Name Description<br />
★Hn515<br />
★Hn516<br />
★Hn517<br />
DO-2 Programmable<br />
DO-3 Programmable<br />
DO-4 Programmable<br />
Refer to Hn514 for programmable options.<br />
Control<br />
Mode<br />
New setting will be<strong>com</strong>e effective after re-cycling the power.<br />
Warning!<br />
When programmable DO-1 ~ DO-4 are set for the same type of function alarm will be displayed.<br />
AL-07 (Multi-function contact setting error).<br />
ALL<br />
5-64
5-6-2 Switch for the Control Mode<br />
Set one of the programmable input terminals to MDC (Control mode) selection.<br />
The input then will select the preset control mode, which is set by Parameter Cn001.<br />
Selections are listed below:<br />
Parameter Name Setting Description<br />
★Cn001<br />
Control Mode<br />
Selection<br />
3<br />
MDC Input off<br />
Position Control<br />
(External Pulse Command)<br />
MDC Input On<br />
Speed Control<br />
4 Speed Control Torque Control<br />
5<br />
Position Control<br />
(External Pulse Command)<br />
Torque Control<br />
New setting will be<strong>com</strong>e effective after re-cycling the power.<br />
Please check 5-6-1 to setting the input contact required high /Low signal levels (PNP/NPN<br />
selection).<br />
Control<br />
Mode<br />
ALL<br />
5-6-3 Auxiliary Functions<br />
Function of Input Contacts SON, CCWL and CWL can be set according to the list below:-<br />
Parameter Name Setting Description Control Mode<br />
★Cn002.0<br />
Cn002.1<br />
SON<br />
(Servo ON )<br />
0<br />
CCWL and CWL<br />
(Counter Clockwise<br />
&<br />
Clockwise Limits) 1<br />
New setting will be<strong>com</strong>e effective after re-cycling the power.<br />
0 Use input contact SON to switch Servo On。<br />
1<br />
Servo on with Power on.<br />
SON input contact not required.<br />
CCWL and CWL(external limits) are effective.<br />
CCW and CW rotation is inhibited by<br />
CCWL&CWL.<br />
CCWL and CWL(external limits) are<br />
ineffective.<br />
CCW&CW rotation is not limited by<br />
CCWL&CWL.<br />
ALL<br />
ALL<br />
5-65
5-6-4 Brake Mode<br />
Brake function for servo motor and the external mechanical brake if it is used can be set according to the table<br />
below. Set the brake mode as required for Servo off, Emergency Stop and CCW/CW rotation inhibit functions.<br />
Parameter Name Setting Description<br />
Dynamic Brake<br />
Mechanical Brake<br />
Control<br />
Mode<br />
0 Disable Disable<br />
Cn008<br />
Brake<br />
Modes<br />
1 Disable Enable<br />
ALL<br />
2 Enable Disable<br />
3 Enable Enable<br />
Note!<br />
When the CCW/CW Drive Inhibit occur, the Cn009 has the higher priority than Cn008.<br />
Example:<br />
If Cn008 is set to 0 or 1 which means (no Dynamic Brake).<br />
BUT Cn009= 1 (with Dynamic Brake), then the dynamic brake will be effective( enabled).<br />
5-6-5 Timing Diagram of Mechanical Brake<br />
In applications with vertical loading, if the power is turned off, to prevent the load from falling<br />
due to gravity, a servo motor with electro-mechanical brake can be used.<br />
This servo drive provides a brake output (BI) which can be used for controlling the external brake.<br />
Timing of brake output signal can be set by parameter Cn003 (Output Time for electro-mechanical Brake).<br />
Typical Circuit Diagram<br />
CN2<br />
5-66
Timing for Brake output signal<br />
Set the required time for the operation of brake output signal (BI) according to the following.<br />
BI output can be used to control the function of an external electro-mechanical brake.<br />
Parameter Name Default Default Setting Range Control Mode<br />
Cn003<br />
Output time setting for<br />
Mechanical Brake<br />
Signal<br />
0 msec -2000~2000 ALL<br />
Note!<br />
To use brake output signal set Cn008 (Brake mode) to selections 1 or 3 as required.<br />
When the servo system has vertical loading, please set Cn003 to a Positive Number.<br />
For definition of a time value with a positive or a negative sign refer to the following<br />
notes and timing diagrams.<br />
(1) Cn003 set to a time value with a Positive sign.<br />
AS soon as the input contact SON is switched on, Servo on is activated at the same time,<br />
then after a time delay set by parameter Cn003,Output Contact BI is switched on. (Signal to release the<br />
brake).<br />
When SON input contact is switched off, BI output contact is also switched off (Signal to operate the<br />
brake).<br />
Then after a time delay set by parameter Cn003, Servo ON is de-activated.<br />
(2) Cn003 set to a time value with a Negative sign.<br />
AS soon as the input contact SON is switched on, Output Contact BI is switched on at the same time.<br />
(Signal to release the brake). then after a time delay set by parameter Cn003, Servo on is activated.<br />
When SON input contact is switched off, Servo ON is de-activated at the same time.<br />
then after a time delay set by parameter Cn003, Output Contact BI is switched off. (Signal to operate the<br />
brake).<br />
1<br />
1<br />
1<br />
1<br />
1<br />
1<br />
Note: Input contacts status of above time sequence diagram “1” (ON) and “0” (OFF).<br />
Please check 5-6-1 to set the required high /Low signal levels (PNP/NPN) selection.<br />
5-67
5-6-6 CW/CCW Drive Inhibit Function<br />
Stopping method of the servo motor as a result of CW/CCW Inhibit function<br />
can be selected according to the list below:<br />
Parameter Name Setting Description<br />
★Cn009<br />
CW/CCW drive<br />
inhibit<br />
0<br />
1<br />
When torque limit reached the setting value of<br />
(Cn010,Cn011), servo motor deceleration to<br />
stop in the zero clamp status.<br />
Deceleration by using dynamic brake to stop<br />
then hold in dynamic brake status. Cn009 setting<br />
has priority over Cn008 setting, it require<br />
re-cycling power to take effect after setting<br />
changed.<br />
Control<br />
Mode<br />
ALL<br />
2<br />
Once max torque limit (± 300% ) is detected then<br />
deceleration to stop with zero clamp.<br />
New setting will be<strong>com</strong>e effective after re-cycling the power.<br />
Note!<br />
When the Drive Inhibit occurs in CCW/CW, the Cn009 has the higher priority than Cn008.<br />
Example:<br />
If Cn008 is set to 0 or 1 which means (without Dynamic Brake).<br />
BUT Cn009= 1 (with Dynamic Brake), then the dynamic brake will be effective( enabled).<br />
5-68
5-6-7 Selecting for External Regeneration Resistor<br />
In applications where a high inertia load is stopped rapidly, motor will generate an energy, which is regenerate<br />
power back to the servo drive (Regeneration energy)<br />
(1) Short deceleration time with heavy loads.<br />
(2) In vertical load applications.<br />
(3) High inertia rotary load applied to the motor shaft.<br />
Part of the regeneration power will be absorbed by the drive main smoothing capacitors<br />
If there is too much regeneration power which can not be totally absorbed by the capacitor then regeneration<br />
resistors can be used to absorb the excess power.<br />
Built-in Regeneration Resistor specification is as below table.<br />
Drive Model<br />
Built-in Regeneration<br />
Resistor Specifications<br />
Resistance(Ω)<br />
Power(W)<br />
The Regeneration<br />
Power(W) absorbed by<br />
the built in Resistor<br />
(Average Power)<br />
Minimum allowed<br />
Resistance Value<br />
(Ω)<br />
TSTA-15 50 60 24 50<br />
TSTA-20 50 60 24 41<br />
TSTA-30 25 60 24 23<br />
TSTA-50 20 200 80 15<br />
TSTA-75 12.5 200 80 9<br />
Built-in Regeneration Resistor<br />
The Regeneration Resistor which is built-in this device can absorb the Regeneration Power from<br />
acceleration and deceleration running or Vertical Loading.<br />
But for applications that the large load inertia causes the motor shaft to rotate, an external regeneration<br />
Resistor must be installed to protect the servo drive otherwise the servo drive can not function correctly.<br />
Select the resistor according to the specified values and if installing regeneration resistors in a parallel way to<br />
have more power absorb capacibility.<br />
Ensure that the total resistance value does not smaller than the minimum resistance listed in the<br />
table above.<br />
5-69
Setting for the Power of External Regeneration Resistor<br />
When using external regeneration resistor, the power value (Watts) must be set in parameter Cn012.<br />
Parameter Name Default Unit Setting Range Control Mode<br />
Cn012<br />
Watts setting for<br />
External Regeneration<br />
Resistor<br />
60 ~150 W 0~10000 ALL<br />
Wiring for External Regeneration Resistor<br />
When external Regeneration Resistor is used, must remove the link between PC and P1 on TB1 Terminal.<br />
Then the resistor should be installed between terminals P and PC.<br />
For safety, use of resistors with thermal protection is re<strong>com</strong>mended.<br />
The thermal switch contact can then be interlocked to disable drive or remove power if necessary.<br />
Refer to connection diagram below:<br />
When installing Regeneration Resistors care must be taken as the resistor absorbs the regeneration power,<br />
and it is possible to generate the high temperatures above 100°C.<br />
Provide the necessary cooling and use appropriate high temperature wires and ensure there has enough<br />
space between regeneration resistor and other materials.<br />
5-70
Assess for an external resistor and calculate for the power consumption:<br />
Use the table below to determine, if an external regeneration Resistor is necessary.<br />
The table below shows the permitted number of no load operation cycles per minute for various servo motors<br />
in regeneration condition.<br />
Defination of “ No load operation cycles”:<br />
The servo motor, accerlate from 0 speed to rated speed and deceleration from the rated speed to 0 speed.<br />
(No load)<br />
The regeneration energy capacity (in Joules) which can be absorbed by the built-in resistor during no load<br />
acceleration/deceleration period, refer to the table list below.<br />
Drive Model<br />
Motor Model<br />
Permitted number of<br />
no load operation cycles/min<br />
Main Capacitor<br />
energy absorption capacity<br />
in Joules. E (J).<br />
C<br />
TSTA-15<br />
TSTA-20<br />
TSTA-30<br />
TSTA-50<br />
TSTA-75<br />
TSB07301C 433<br />
6CC201G 1775<br />
TSC06401C 1004<br />
TSB08751C 118<br />
TSC06401C 1004<br />
8CC751G 321<br />
TSB13551A 411<br />
TSB13551H 186<br />
8CC751G 321<br />
TSB13102A 213<br />
TSB13102B 102<br />
TSB13102H 95<br />
TSB13152A 145<br />
TSB13152B 73<br />
TSB13152C 45<br />
TSB13152A 484<br />
TSB13152B 245<br />
TSB13152C 152<br />
TSB13202B 178<br />
TSB13302B 121<br />
TSB13302C 79<br />
6<br />
9<br />
13<br />
13<br />
18<br />
5-71
Calculation for the allowable operation cycles per minute by motor speed and inertia.<br />
The formula below should be used to to calculate the permitted number of cycles/min<br />
in regenerative mode in accordance with the actual loading and the running speed of the motor.<br />
No load operation cycles<br />
Allowable operation cycle/min. =<br />
×<br />
Rated Speed<br />
(<br />
)<br />
(1+<br />
α )<br />
MaxRunningSpeed<br />
2<br />
α= Load Inertia / Motor Inertia<br />
If the required number of cycles /min is higher than the calculated value then an external<br />
regeneration resistor must be installed.<br />
Calculation of the external regeneration resistor power (Watts).<br />
Calculate the resistor watts according to the information and formulas below:<br />
(Energy consumed by the motor internally is ignored).<br />
Speed<br />
Running<br />
Speed<br />
Torque<br />
t D<br />
Time(s)<br />
T L<br />
T<br />
Cycle<br />
Time(s)<br />
Step Item Formula Description<br />
E<br />
M<br />
: Working Energy of Servo system (J)<br />
1<br />
Calculate the working Energy of<br />
J<br />
2<br />
T<br />
: Inertia applied to the motor shaft<br />
E = /182<br />
the servo system.<br />
M<br />
J<br />
T<br />
ωrm<br />
(<br />
2<br />
3<br />
4<br />
5<br />
Calculate the Energy<br />
consumption by the load during<br />
deceleration.<br />
Calculate the Energy absorbed by<br />
internal main capacitor.<br />
Calculate the Energy which<br />
regeneration resistor consumes<br />
Calculate the Power for<br />
regeneration resistor<br />
E = ( π / 60)<br />
ω<br />
L<br />
rm<br />
T<br />
EC<br />
Check the diagram above<br />
L<br />
t<br />
D<br />
2<br />
kg • m )<br />
ω<br />
rm<br />
: Motor running Speed(rpm)<br />
E<br />
L<br />
: The Energy during deceleration (J)<br />
T<br />
L<br />
: Loading Torque(Nm)<br />
t : The Time from deceleration to stopping(s)<br />
D<br />
E<br />
E E - ( E + E ) R<br />
P<br />
R<br />
=<br />
M L C<br />
= ( E / T ) / 0.4<br />
R<br />
R R<br />
C<br />
: The Energy absorbed by the main<br />
capacitor (J)<br />
E : The Energy which Regeneration Resistor<br />
consumes (J)<br />
P : Regeneration Resistor Power(W)<br />
T : Operating cycle for servo system(s)<br />
Note 1 : 0.4 in the formula for P<br />
R<br />
corresponds to 40% regeneration duty cycle.<br />
Note 2: If the E<br />
L<br />
can not be calculated, then let E<br />
L<br />
= 0 , then calculate ER .<br />
In applications with regenerative loads, which cause reverse torque, a large amount of energy will flow back to<br />
the driver.<br />
5-72
In such applications, calculate ER and hence regeneration resistor power according to the formula below.<br />
Item Formula Description for Symbols<br />
E<br />
G<br />
: Working Energy during the regenerative<br />
period. (J)<br />
Calculate the working Energy<br />
ω<br />
rm , G<br />
: Motor running speed during the<br />
during the continuous E<br />
G<br />
= ( π / 60) ωrm,<br />
GTGt<br />
G regenerative period . (rpm)<br />
regenerative period.<br />
T<br />
G<br />
: Loading Torque during the regenerative<br />
period (Nm)<br />
t : Regenerative Time. (s)<br />
G<br />
The formula for step 4 in the previous table will be:<br />
E = E - ( E + E ) + E<br />
R<br />
M<br />
L<br />
C<br />
G<br />
5-6-8 Fan Setting<br />
Availabel models that equipped with the fan ( TSTA-50 & TSTA-75 ).<br />
Parameter Name Setting Description<br />
0 Auto-run by internal temperature sensor.<br />
Control<br />
Mode<br />
Cn031<br />
Cooling fan running<br />
mode<br />
1 Run when Servo ON<br />
2 Always Running.<br />
ALL<br />
3 Disabled.<br />
5-6-9 Analog Monitor<br />
There are two analog output signals which can be used to monitor running Speed, Torque, Current and<br />
Position as follows:<br />
Parameters Name & Function Default Unit<br />
Analog monitor output selection (MON1)<br />
Setting<br />
Explanation<br />
0 Speed feedback<br />
Setting<br />
Range<br />
Control<br />
Mode<br />
Cn006.0<br />
Cn006.1<br />
1 Torque control<br />
2 Speed control<br />
3 Pulse <strong>com</strong>mand input<br />
4 Position deviation value<br />
5 Electrical angle<br />
6 Main circuit (Vdc Bus) voltage<br />
Analog monitor output selection MON2<br />
Refer to Cn006.0 for setting this parameter<br />
2<br />
0<br />
X<br />
0<br />
│<br />
6<br />
ALL<br />
5-73
Circuit diagram for analog monitor shows below:<br />
Analog monitor output zero offset can be adjusted by parameters Cn027&Cn028 as below.<br />
Parameter Name Default Unit Setting Range Control Mode<br />
Cn027<br />
Cn028<br />
Analog Monitor 1<br />
Offset adjustment<br />
Analog Monitor 2<br />
Offset adjustment<br />
4 x40mV -250~250 ALL<br />
4 x40mV -250~250 ALL<br />
Analog Monitor<br />
Output Voltage (V)<br />
Adjusting Value for<br />
Bias Voltage<br />
Time<br />
5-6-10 Factory setting parameter<br />
This parameter can reset all parameter settings to default value (factory reset).<br />
Parameter<br />
Signal<br />
★Cn029<br />
Name Setting Description<br />
0 Disabled<br />
Reset parameters<br />
1 All parameters are reset to default values.<br />
Control<br />
Mode<br />
ALL<br />
New setting will be<strong>com</strong>e effective after re-cycling the power.<br />
5-74
Chapter 6 Parameter<br />
6-1 Explanation of Parameter groups.<br />
There are 9 groups of parameters as listed below.<br />
Symbol<br />
Un-xx<br />
dn-xx<br />
AL-xx<br />
Cn-xx<br />
Tn1xx<br />
Sn2xx<br />
Pn3xx<br />
qn4xx<br />
Hn5xx<br />
Description<br />
Status Display Parameters.<br />
Diagnostics Parameters.<br />
Alarm Parameters<br />
System Parameters<br />
Torque Control Parameters<br />
Speed Control Parameters<br />
Position Control Parameters<br />
Quick Set-up Parameters<br />
Multi-function I/O parameters<br />
Control Mode Code<br />
Signal<br />
Control Mode<br />
ALL All Control Mode<br />
Pi Position Control Mode(Internal Positional Command )<br />
Pe Position Control Mode(External Pulse Command)<br />
S Speed Control Mode<br />
T Torque Control Mode<br />
Definition of Symbols.<br />
Symbol<br />
★<br />
◆<br />
Explanation<br />
Parameter be<strong>com</strong>es effective after recycling the power.<br />
Parameter is Effective without pressing the Enter key.<br />
6-1
6-2 Parameter Display Table<br />
System Parameters<br />
Parameter Name & Function Default Unit<br />
★Cn001<br />
Control Mode selection<br />
Setting<br />
Explanation<br />
0 Torque Control<br />
1 Speed Control<br />
2 Position Control (external pulse Command)<br />
3 Position/Speed Control Switching<br />
4 Speed/Torque Control Switching<br />
5 Position/Torque Control Switching<br />
Position Control (internal position<br />
6<br />
Command)<br />
SON (Servo On) Input contact function<br />
★Cn002.0 Setting<br />
Explanation<br />
0 Input Contact, Enables SON (Servo On).<br />
Input Contact has no function.<br />
1<br />
(SON is enabled when Power on).<br />
CCWL & CWL Input contact function.<br />
Setting<br />
Explanation<br />
Cn002.1 CCWL and CWL input contacts are able to<br />
0<br />
control the drive inhibit of CCW and CW.<br />
CCWL & CWL input contacts are not able to<br />
1 control CCW and CW drive inhibit. CCW and<br />
CW drive inhibit is disable.<br />
Auto Tuning<br />
Cn002.2 Setting<br />
Explanation<br />
0 Continuously Auto Tuning is Disable<br />
1 Continuously Auto Tuning is Enabled.<br />
EMC reset mode selection<br />
Setting<br />
Explanation<br />
Reset EMC signal is only available in Servo<br />
Off condition (SON contact is open) and<br />
0 reset AL-09 by ALRS signal.<br />
P.S.) It is NOT allow to reset when SON is<br />
★Cn002.3 applied.<br />
When EMC status is released, AL-09 can be<br />
reset on both Servo ON and Servo OFF<br />
conditions.<br />
1<br />
Attention!<br />
Ensure that the speed <strong>com</strong>mand are<br />
removed before the alarm is reset to avoid<br />
motor unexpected start.<br />
2 X<br />
0 X<br />
0 X<br />
0 X<br />
0 X<br />
Setting<br />
Range<br />
0<br />
│<br />
6<br />
0<br />
│<br />
1<br />
0<br />
│<br />
1<br />
0<br />
│<br />
1<br />
0<br />
│<br />
1<br />
Control<br />
Mode<br />
ALL<br />
Chapter<br />
5-1<br />
5-6-2<br />
ALL 5-6-3<br />
Pi<br />
Pe<br />
S<br />
ALL<br />
5-5-1<br />
6-2
Parameter Name & Function Default Unit Setting<br />
Range<br />
Output time setting for Mechanical Brake Signal<br />
Brake Signal Timing Sequence:<br />
Control<br />
Mode<br />
Chapter<br />
Cn003<br />
0 msec<br />
-2000<br />
│<br />
2000<br />
ALL 5-6-5<br />
Implementation a pin for dynamic brake signal(BI) as a<br />
output signal before to perform this function. Refer to<br />
sequence diagram above.<br />
Note: Signal logic level status: 1 = ON. 0 = OFF.<br />
Refer to section5-6-1 for setting contact the high & Low<br />
logic levels.<br />
Motor rotate direction.(Inspect from the load side)<br />
CCW<br />
CW<br />
When Torque or Speed Command value is Positive, the<br />
setting of Motor retation direction are:<br />
Cn004<br />
Setting<br />
0<br />
Torque Control<br />
Counter<br />
ClockWise(CCW)<br />
1 ClockWise (CW)<br />
2<br />
Counter<br />
ClockWise (CCW)<br />
Explanation<br />
Speed Control<br />
Counter<br />
ClockWise (CCW)<br />
Counter<br />
ClockWise (CCW)<br />
ClockWise(CW)<br />
0 X<br />
0<br />
│<br />
3<br />
S<br />
T<br />
5-2-4<br />
5-3-7<br />
3 ClockWise (CW) ClockWise (CW)<br />
6-3
Parameter Name & Function Default Unit<br />
★Cn005<br />
Encoder pulse output scale.<br />
For default set to the rated encoder number of pulses<br />
per revolution, such as 2500ppr.<br />
Encoder ppr can be scaled by setting a ppr in the range<br />
of 1 to the rated ppr of the encoder for scaling purpose.<br />
PPR = Pulse per revolution.<br />
Ex:encorder rated precision is 2000 ppr, If you<br />
setting Cn005 =1000, the output is 1000ppr.<br />
Analog monitor output selection MON1<br />
Encoder<br />
pulse per<br />
rotation<br />
pulse<br />
Setting<br />
Range<br />
1<br />
│<br />
Encoder<br />
pulse per<br />
rotation<br />
Control<br />
Mode<br />
Chapter<br />
ALL 5-3-5<br />
Setting<br />
Explanation<br />
Cn006.0<br />
Cn006.1<br />
Cn007<br />
Cn008<br />
★Cn009<br />
0 Speed feedback<br />
1 Torque control<br />
2 Speed control<br />
3 Pulse <strong>com</strong>mand input<br />
4 Position deviation value<br />
5 Electrical angle<br />
6 Main circuit (Vdc Bus) voltage<br />
Analog monitor output selection MON2<br />
Refer to Cn006.0 for setting this parameter<br />
Speed reached preset.<br />
Speed preset level for ClockWise or Counter<br />
ClockWise rotation.<br />
When the speed is greater then preset level in Cn007<br />
the Speed reached output signal INS will be activated..<br />
Brake Mode<br />
Selectable Brake modes for Servo off, EMC and<br />
CCW/CW drive inhibit.<br />
Setting<br />
Explanation<br />
Dynamic brakes Mechanical brakes<br />
0 No No<br />
1 No Yes<br />
2 Yes No<br />
3 Yes Yes<br />
CW/CCW drive inhibit mode<br />
Setting<br />
Explanation<br />
When torque limit reached the setting value of<br />
0 (Cn010,Cn011), servo motor deceleration to<br />
stop in the zero clamp condition.<br />
Deceleration by using dynamic brake to stop<br />
then hold in dynamic brake status. Cn009<br />
1 setting has priority over Cn008 setting, it<br />
require re-cycling power to take effect after<br />
setting changed.<br />
Once max torque limit (± 300% ) is detected<br />
2 then deceleration to stop, zero clamp is<br />
applied when stop.<br />
2<br />
0<br />
Rate rpm<br />
× 1/3<br />
X<br />
rpm<br />
2 X<br />
0 X<br />
0<br />
│<br />
6<br />
0<br />
│<br />
4500<br />
0<br />
│<br />
3<br />
0<br />
│<br />
2<br />
ALL 5-6-9<br />
S<br />
T<br />
5-3-12<br />
ALL 5-6-4<br />
ALL 5-6-6<br />
6-4
Parameter Name & Function Default Unit Setting<br />
Range<br />
CCW Torque <strong>com</strong>mand Limit.<br />
0<br />
Cn010 Ex: For a torque limit in CCW direction which is twice the 300 % │<br />
rated torque , set Cn10=200.<br />
300<br />
CW Torque <strong>com</strong>mand Limit.<br />
-300<br />
Cn011 Ex: For a torque limit in CW direction which is twice the -300 % │<br />
rated torque , set Cn11=-200.<br />
0<br />
Power setting for External Regeneration Resistor<br />
Refer to section 5-6-7 to choose external Regen resister 60<br />
0<br />
Cn012 and set its power specification in Watts of Cn012.<br />
/ W │<br />
P.S.)This default value will change depend on servo 150 10000<br />
model.<br />
Frequency of resonance Filter ( Notch Filter).<br />
0<br />
Cn013 Enter the vibration frequency in Cn013, to eliminate 0 Hz │<br />
system mechanical vibration.<br />
1000<br />
Cn014<br />
Cn015.0<br />
Cn015.1<br />
Band Width of the Resonance Filter.<br />
Adjusting the band width of the frequency, lower the band<br />
width value in Cn014, restrain frequency Band width will<br />
be wider.<br />
PI/P control switch mode.<br />
Setting<br />
0<br />
1<br />
2<br />
3<br />
4<br />
Explanation<br />
Switch from PI to P if the torque <strong>com</strong>mand is<br />
larger than Cn016.<br />
Switch from PI to P if the speed <strong>com</strong>mand is<br />
larger than Cn017.<br />
Switch from PI to P if the acceleration rate is<br />
larger than Cn018.<br />
Switch from PI to P if the position error is larger<br />
than Cn019.<br />
Switch from PI to P be the input contact PCNT.<br />
Set one of the multi function terminals to option<br />
03.<br />
Automatic gain 1& 2 switch<br />
Setting<br />
0<br />
1<br />
2<br />
3<br />
4<br />
Explanation<br />
Switch from gain 1 to 2 if torque <strong>com</strong>mand is<br />
greater than Cn021.<br />
Switch from gain 1 to 2 if speed <strong>com</strong>mand is<br />
greater than Cn022.<br />
Switch from gain 1 to 2 if acceleration <strong>com</strong>mand<br />
is greater than Cn023.<br />
Switch from gain 1 to 2 if position error value is<br />
greater than Cn024.<br />
Switch from gain 1 to 2 by input contact G-SEL.<br />
Set one of the multi function terminals to option<br />
15.<br />
7 X<br />
4 X<br />
4 X<br />
1<br />
│<br />
100<br />
0<br />
│<br />
4<br />
0<br />
│<br />
4<br />
Control<br />
Mode<br />
ALL<br />
ALL<br />
Chapter<br />
5-2-5<br />
5-3-10<br />
5-2-5<br />
5-3-10<br />
ALL 5-6-7<br />
Pi<br />
Pe<br />
S<br />
Pi<br />
Pe<br />
S<br />
Pi<br />
Pe<br />
S<br />
5-3-9<br />
5-3-9<br />
5-3-11<br />
6-5
Parameter Name & Function Default Unit<br />
Cn016<br />
Cn017<br />
Cn018<br />
PI/P control mode switch by Torque Command<br />
Set the Cn015.0=0 first.<br />
If Torque Command is less than Cn016 PI control is<br />
selected.<br />
If Torque Command is greater than Cn016 P control is<br />
selected.<br />
PI/P control mode switch by Speed Command<br />
Set the Cn015.0=1 first.<br />
If Speed Command is less than Cn017 PI control is<br />
selected.<br />
If Speed Command is greater than Cn017 P control is<br />
selected.<br />
PI/P control mode switch by accelerate Command<br />
Set the Cn015.0=2 first.<br />
If Acceleration is less than Cn018 PI control is<br />
selected.<br />
If Acceleration is greater than Cn018 P control is<br />
selected.<br />
200 %<br />
0 rpm<br />
0 rps/s<br />
Setting<br />
Range<br />
0<br />
│<br />
399<br />
0<br />
│<br />
4500<br />
0<br />
│<br />
18750<br />
Control<br />
Mode<br />
Pi<br />
Pe<br />
S<br />
Pi<br />
Pe<br />
S<br />
Pi<br />
Pe<br />
S<br />
Chapter<br />
5-3-11<br />
5-3-11<br />
5-3-11<br />
PI/P control mode switch by position error number<br />
Cn019<br />
Set the Cn015.0=3 first.<br />
If Position error value is less than Cn019 PI control is<br />
selected.<br />
If Position error value is greater than Cn019 P control is<br />
selected.<br />
0 pulse<br />
0<br />
│<br />
50000<br />
Pi<br />
Pe<br />
S<br />
5-3-11<br />
Cn020<br />
Automatic gain 1& 2 switch delay time.<br />
Speed loop 2 to speed loop 1, Change over delay,<br />
when two control speed loops ( P&I gains 1 & 2) are<br />
used.<br />
0<br />
x02<br />
msec<br />
0<br />
│<br />
10000<br />
Pi<br />
Pe<br />
S<br />
5-3-11<br />
Cn021<br />
Cn022<br />
Automatic gain 1& 2 switch condition (Torque<br />
<strong>com</strong>mand)<br />
Set Cn015.1=0 first.<br />
When torque <strong>com</strong>mand is less than Cn021 , Gain 1 is<br />
selected.<br />
When torque <strong>com</strong>mand is greater than Cn021, Gain 2<br />
is selected<br />
When Gain 2 is active and torque <strong>com</strong>mand be<strong>com</strong>es<br />
less than Cn021 setting value, system will<br />
automatically switch back to Gain 1 switch time delay<br />
can be set by Cn020.<br />
Automatic gain 1& 2 switch condition (Speed<br />
Command)<br />
Set the Cn015.1=1 first.<br />
When speed <strong>com</strong>mand is less than Cn022 Gain 1 is<br />
selected.<br />
When speed <strong>com</strong>mand is greater than Cn022 Gain 2<br />
is selected.<br />
When Gain 2 is active and speed <strong>com</strong>mand be<strong>com</strong>es<br />
less than Cn022 setting value, system will<br />
automatically switch back to Gain 1 the switch time<br />
delay can be set by Cn020.<br />
200 %<br />
0 rpm<br />
0<br />
│<br />
399<br />
0<br />
│<br />
4500<br />
Pi<br />
Pe<br />
S<br />
Pi<br />
Pe<br />
S<br />
5-3-11<br />
5-3-11<br />
6-6
Parameter Name & Function Default Unit<br />
Cn023<br />
Cn024<br />
Cn025<br />
Cn026<br />
Automatic gain 1& 2 switch condition<br />
(Acceleration Command)<br />
Set Cn015.1=2 first.<br />
When accel. <strong>com</strong>mand is less than Cn023 Gain 1 is<br />
selected.<br />
When accel. <strong>com</strong>mand is greater than Cn023 Gain 2 is<br />
selected.<br />
When Gain 2 is active and acceleration <strong>com</strong>mand<br />
be<strong>com</strong>es less than Cn023 system will automatically<br />
switch back to Gain 1 the switch time delay can be set<br />
by Cn020.<br />
* accel. is acceleration<br />
Automatic gain 1& 2 switch condition (Position<br />
error value)<br />
Set Cn015.1=3 first.<br />
When position error value is less than Cn024 Gain 1 is<br />
selected.<br />
When position error value is greater than Cn024 Gain 2<br />
is selected.<br />
When Gain 2 is active and position error value<br />
be<strong>com</strong>es less than Cn024 system will automatically<br />
switch back to Gain 1 and the switch time delay can be<br />
set by Cn020.<br />
Load-Inertia ratio<br />
LoadInertiaToMotor(J<br />
)<br />
LoadInerti aRatio =<br />
L<br />
× 100%<br />
MotorRotorInertia(J<br />
M<br />
)<br />
Rigidity Setting<br />
When Auto tuning is used, set the Rigidity Level<br />
depending on the various Gain settings for<br />
applications such as those listed below:<br />
Explanation<br />
Setting<br />
Position Loop<br />
Gain<br />
Pn310 [1/s]<br />
Speed Loop<br />
Gain<br />
Sn211 [Hz]<br />
Speed Loop<br />
Integral-Time<br />
Constant<br />
Sn212<br />
[x0.2msec]<br />
1 15 15 300<br />
2 20 20 225<br />
3 30 30 150<br />
4 40 40 100<br />
5 60 60 75<br />
6 85 85 50<br />
7 120 120 40<br />
8 160 160 30<br />
9 200 200 25<br />
A 250 250 20<br />
0 rps/s<br />
0 pulse<br />
40 x0.1<br />
4 X<br />
Setting<br />
Range<br />
0<br />
│<br />
18750<br />
0<br />
│<br />
50000<br />
0<br />
│<br />
1000<br />
1<br />
│<br />
A<br />
Control<br />
Mode<br />
Pi<br />
Pe<br />
S<br />
Pi<br />
Pe<br />
S<br />
Pi<br />
Pe<br />
S<br />
Pi<br />
Pe<br />
S<br />
Chapter<br />
5-3-11<br />
5-3-11<br />
5-5<br />
5-5-1<br />
6-7
Parameter Name & Function Default Unit<br />
Analog monitor output 1, Offset adjustment<br />
Analog monitor output zero offset can be adjusted by<br />
parameter. Cn027 as below.<br />
Setting<br />
Range<br />
Control<br />
Mode<br />
Chapter<br />
Cn027<br />
4<br />
x40<br />
mV<br />
-250<br />
│<br />
250<br />
ALL 5-6-9<br />
Cn028<br />
★Cn029<br />
★Cn030<br />
Cn031<br />
Cn032<br />
Cn033<br />
Cn034<br />
Cn035<br />
Analog monitor output 2, offset adjustment<br />
Analog monitor output 2, zero offset can be adjusted by<br />
parameter. Cn028. See diagram for Monitor 1 above.<br />
Reset parameters.<br />
Setting<br />
Explanation<br />
0 Disabled<br />
Reset all Parameters to default ( Factory<br />
1<br />
setting)<br />
Servo motor model code<br />
Servo model code can be display and checked with<br />
parameter dn-08, refer 3-2-2 dn-08 table for more<br />
information.<br />
Attention:Before operate your servo motor., check this<br />
parameter setting is <strong>com</strong>patible for servo drive and<br />
motor. If there has any in<strong>com</strong>patible problem contact<br />
supplier for more information.<br />
Cooling fan running modes<br />
(Available for TSTA-50 & TSTA-75)<br />
Setting<br />
Explanation<br />
0 Auto-run by internal temperature sensor.<br />
1 Run when Servo ON<br />
2 Always Running.<br />
3 Disabled.<br />
Speed feed back smoothing filter<br />
Restrain sharp vibration noise by the setting and this<br />
filter also delay the time of servo response.<br />
Speed Feed-forward smoothing filter<br />
Smooth the speed feed-forward <strong>com</strong>mand.<br />
Torque <strong>com</strong>mand smoothing filter<br />
Restrain sharp vibration noise by the setting and this<br />
filter delay the time of servo response.<br />
Panel display content selection<br />
Select display content for LED panel for power on status.<br />
Setting<br />
Explanation<br />
Display data set and drive status parameter. Refer<br />
0<br />
3-1<br />
Display Un-01 ~ Un-19 content. Refer 3-2-1 for<br />
more information.<br />
1<br />
│<br />
19<br />
Ex:Set Cn035=1, when power on it display the<br />
actual speed of motor. (content of Un-01)<br />
4<br />
x40<br />
mV<br />
0 X<br />
-250<br />
│<br />
250<br />
0<br />
│<br />
1<br />
ALL 5-6-9<br />
ALL 5-6-10<br />
Default X X ALL 3-2-2<br />
0 X<br />
500 Hz<br />
40 Hz<br />
0 Hz<br />
0 X<br />
0<br />
│<br />
3<br />
1<br />
│<br />
1000<br />
1<br />
│<br />
100<br />
0<br />
│<br />
1000<br />
0<br />
│<br />
19<br />
ALL 5-6-8<br />
Pe<br />
Pi<br />
S<br />
Pe<br />
Pi<br />
5-3-12<br />
5-4-6<br />
ALL 5-2-7<br />
ALL<br />
3-1<br />
3-2-1<br />
6-8
Parameter Name & Function Default Unit<br />
Cn036<br />
Cn037.0<br />
Cn037.1<br />
Cn038<br />
Cn039<br />
Cn040<br />
Servo ID number<br />
When using Modbus for <strong>com</strong>munication,each servo<br />
units has to setting a ID number. repeated ID number<br />
will lead to <strong>com</strong>munication fail.<br />
Modbus RS-485 braud rate setting<br />
Setting<br />
Explanation<br />
0 4800<br />
1 9600<br />
2 19200<br />
3 38400<br />
4 57600<br />
5 115200<br />
PC Software RS-232 braud rate setting<br />
Setting<br />
Explanation<br />
0 4800<br />
1 9600<br />
2 19200<br />
3 38400<br />
Communication protocol<br />
Setting<br />
Explanation<br />
0 7 , N , 2 ( Modbus , ASCII )<br />
1 7 , E , 1 ( Modbus , ASCII )<br />
2 7 , O , 1 ( Modbus , ASCII )<br />
3 8 , N , 2 ( Modbus , ASCII )<br />
4 8 , E , 1 ( Modbus , ASCII )<br />
5 8 , O , 1 ( Modbus , ASCII )<br />
6 8 , N , 2 ( Modbus , RTU )<br />
7 8 , E , 1 ( Modbus , RTU )<br />
8 8 , O , 1 ( Modbus , RTU )<br />
Communication time-out dection<br />
Setting non-zero value to enable this function,<br />
<strong>com</strong>munication Time should be in the setting period<br />
otherwise alarm message of <strong>com</strong>munication time-out<br />
will show. Setting a zero value to disable this function.<br />
Communication response delay time<br />
Delay Servo response time to master control unit.<br />
1 X<br />
1 bps<br />
1 bps<br />
0 X<br />
0 sec<br />
0<br />
0.5<br />
msec<br />
Setting<br />
Range<br />
0<br />
│<br />
254<br />
0<br />
│<br />
5<br />
0<br />
│<br />
3<br />
0<br />
│<br />
8<br />
0<br />
│<br />
20<br />
0<br />
│<br />
255<br />
Control<br />
Mode<br />
Chapter<br />
ALL 7<br />
ALL 7<br />
ALL 7<br />
ALL 7<br />
ALL 7<br />
ALL 7<br />
6-9
Torque-Control Parameter<br />
Parameter Name & Function Default Unit<br />
★Tn101<br />
Linear acceleration/deceleration method<br />
Setting<br />
Explanation<br />
0 Disabled.<br />
1 Enabled.<br />
Linear accel/decel time period.<br />
Time taken for the torque-<strong>com</strong>mand to linearly<br />
accelerate to the rated torque level or Decelerate to<br />
zero torque .<br />
0 X<br />
Setting<br />
Range<br />
0<br />
│<br />
1<br />
Control<br />
Mode<br />
Chapter<br />
T 5-2-3<br />
★Tn102<br />
1 msec<br />
1<br />
│<br />
50000<br />
T 5-2-3<br />
Analog Torque Command Ratio<br />
Slope of voltage <strong>com</strong>mand / Torque <strong>com</strong>mand can be<br />
adjusted.<br />
Tn103<br />
300<br />
%<br />
10V<br />
0<br />
│<br />
300<br />
T 5-2-1<br />
6-10
Parameter Name & Function Default Unit<br />
Torque Command, analog input voltage offset<br />
The offset amount can be adjusted by this parameter.<br />
Setting<br />
Range<br />
Control<br />
Mode<br />
Chapter<br />
Tn104<br />
Input Voltage (V)<br />
Offset<br />
Voltage<br />
0 mV<br />
-10000<br />
│<br />
10000<br />
T 5-2-2<br />
Torque<br />
Command (%)<br />
Tn105<br />
Preset Speed Limit 1. ( Torque control mode)<br />
In Torque control, input contacts SPD1 and SPD2 can<br />
be used to select Preset speed limit 1. As follows:<br />
Input Contact SPD2 Input Contact SPD1<br />
0 1<br />
100 rpm<br />
0<br />
│<br />
3000<br />
T 5-2-6<br />
Tn106<br />
Note: Input contacts status “1” (ON) and “0” (OFF).<br />
Refer to 5-6-1 to set high or low input logic levels.<br />
Preset Speed Limit 2. ( Torque control mode)<br />
In Torque control, input contacts SPD1 and SPD2 can<br />
be used to select Preset speed limit 2. As follows:<br />
Input Contact SPD2 Input Contact SPD1<br />
1 0<br />
Note: Input contacts status “1” (ON) and “0” (OFF)<br />
Refer to 5-6-1 to set high or low input logic levels.<br />
200 rpm<br />
0<br />
│<br />
3000<br />
T 5-2-6<br />
Tn107<br />
Tn108<br />
Preset Speed Limit 3. ( Torque control mode)<br />
In Torque control, input contacts SPD1 and SPD2 can<br />
be used to select Preset speed limit 3. As follows:-<br />
Input Contact SPD2 Input Contact SPD1<br />
1 1<br />
Note: Input contacts status “1” (ON) and “0” (OFF)<br />
Refer to 5-6-1 to set high or low input logic levels.<br />
Torque output monitor value<br />
When the torque level in CW or CCW direction<br />
be<strong>com</strong>e greater then this value setting, the output<br />
contact INT operate.<br />
300 rpm<br />
0 %<br />
0<br />
│<br />
3000<br />
0<br />
│<br />
300<br />
T 5-2-6<br />
ALL 5-2-7<br />
6-11
Speed-Control Parameter<br />
Parameter Name & Function Default Unit<br />
Sn201<br />
Sn202<br />
Sn203<br />
Sn204<br />
Sn205<br />
Internal Speed Command 1<br />
In Speed control, input contacts SPD1 and SPD2 can<br />
be used to select 3 sets of internal speed <strong>com</strong>mand,<br />
select for speed <strong>com</strong>mand 1 contact status shows<br />
below:<br />
Input Contact SPD2 Input Contact SPD1<br />
0 1<br />
Note: Input contacts status “1” (ON) and “0” (OFF)<br />
Refer to 5-6-1 to set high or low input logic levels.<br />
Internal Speed Command 2<br />
In Speed control, input contacts SPD1 and SPD2 can<br />
be used to select 3 sets of internal speed <strong>com</strong>mand,<br />
select for speed <strong>com</strong>mand 2 contact status shows<br />
below:<br />
Input Contact SPD2 Input Contact SPD1<br />
1 0<br />
Note: Input contacts status “1” (ON) and “0” (OFF)<br />
Refer to 5-6-1 to set high or low input logic levels.<br />
Internal Speed Command 3<br />
In Speed control, input contacts SPD1 and SPD2 can<br />
be used to select 3 sets of internal speed <strong>com</strong>mand,<br />
select for speed <strong>com</strong>mand 3 contact status shows<br />
below:<br />
Input Contact SPD2 Input Contact SPD1<br />
1 1<br />
Note: Input contacts status “1” (ON) and “0” (OFF).<br />
Refer to 5-6-1 to set high or low input logic levels.<br />
Zero Speed selection Enable or Disable the zero<br />
speed preset parameter Sn215.<br />
Setting<br />
Explanation<br />
No Action. ( Sn215 zero preset is not<br />
0<br />
effective).<br />
1 Set the preset value in Sn215 as zero speed.<br />
Speed <strong>com</strong>mand accel/decel smooth method.<br />
Setting<br />
Explanation<br />
0 By Step response<br />
Smooth Acceleration/deceleration according<br />
1<br />
to the curve defined by Sn206.<br />
Linear accel/decel time constant .Defined by<br />
2<br />
Sn207<br />
S curve for Acceleration/deceleration. Defined<br />
3<br />
by Sn208.<br />
100 rpm<br />
200 rpm<br />
300 rpm<br />
0 X<br />
0 X<br />
Setting<br />
Range<br />
-3000<br />
│<br />
3000<br />
-3000<br />
│<br />
3000<br />
-3000<br />
│<br />
3000<br />
0<br />
│<br />
1<br />
0<br />
│<br />
3<br />
Control<br />
Mode<br />
Chapter<br />
S 5-3-1<br />
S 5-3-1<br />
S 5-3-1<br />
S 5-3-12<br />
S 5-3-6<br />
6-12
Parameter Name & Function Default Unit<br />
Speed <strong>com</strong>mand smooth accel/decel time<br />
Constant.<br />
Set Sn205=1 to enable this function then set the time<br />
period for the speed to rise to 63.2% of the full speed.<br />
Setting<br />
Range<br />
Control<br />
Mode<br />
Chapter<br />
Sn206<br />
1 msec<br />
1<br />
│<br />
10000<br />
S 5-3-6<br />
Speed <strong>com</strong>mand linear accel/decel time constant.<br />
Set Sn205=2 to enable this function then set the time<br />
period for the speed to rise linearly to full speed.<br />
Speed Command (%)<br />
100<br />
Ratio Speed<br />
Sn207<br />
50<br />
Speed Command<br />
1 msec<br />
1<br />
│<br />
50000<br />
S 5-3-6<br />
Sn207<br />
Time (ms)<br />
6-13
Parameter Name & Function Default Unit<br />
S curve speed <strong>com</strong>mand acceleration and<br />
deceleration time setting.<br />
Set Sn205=3 to enable this function.<br />
In the period of Acc/Dec , drastic speed changing<br />
might cause vibration of machine. S curve speed<br />
<strong>com</strong>mand acc/dec time setting has the effect to<br />
smooth acc/dec curve.<br />
Speed Command (rpm)<br />
Setting<br />
Range<br />
Control<br />
Mode<br />
Chapter<br />
Sn208<br />
ts=Sn208<br />
ta=Sn209<br />
td=Sn210<br />
1 msec<br />
1<br />
│<br />
1000<br />
S 5-3-6<br />
ts<br />
ta<br />
ts<br />
ts<br />
td<br />
ts<br />
Time<br />
Sn209<br />
Sn210<br />
Sn211<br />
t<br />
Rule for the setting: a<br />
t<br />
> t<br />
s<br />
, d<br />
> t<br />
s<br />
2 2<br />
S curve speed <strong>com</strong>mand acceleration time setting.<br />
Refer Sn208<br />
S curve speed <strong>com</strong>mand deceleration time setting.<br />
Refer Sn208<br />
Speed loop Gain 1<br />
Speed loop gain has a direct effect on the frequency<br />
response bandwidth of the Speed-control loop.<br />
Without causing vibration or noise Speed-loop-gain<br />
can be increased to obtain a faster speed response.<br />
200 msec<br />
200 msec<br />
40 Hz<br />
0<br />
│<br />
5000<br />
0<br />
│<br />
5000<br />
10<br />
│<br />
450<br />
S 5-3-6<br />
S 5-3-6<br />
Pi<br />
Pe<br />
S<br />
5-3-8<br />
5-5<br />
If Cn025 (load Inertia ratio) is set correctly, the<br />
speed-loop-bandwidth will equal to speed-loop-gain.<br />
Speed-loop Integral time 1<br />
Sn212<br />
Speed loop integral element can eliminate the steady<br />
speed error<br />
and react to even slight speed variations.<br />
Decreasing Integral time can improve system rigidity.<br />
The formula below shows the relationship between<br />
Integral time and Speed loop Gain.<br />
1<br />
SpeedLoopIntegrationTimeCons tan t ≥ 5 ×<br />
2π × SpeedLoopGa<br />
100<br />
x0.2<br />
ms<br />
1<br />
│<br />
500<br />
Pi<br />
Pe<br />
S<br />
5-3-8<br />
5-5<br />
6-14
Parameter<br />
Sn213<br />
Sn214<br />
Sn215<br />
Speed loop Gain 2<br />
Refer to Sn211<br />
Speed loop Integral time 2<br />
Refer to Sn212<br />
Name & Functions<br />
Value of zero speed<br />
Set the zero speed range in Sn215<br />
When the actual speed is lower than Sn215 value, Output<br />
contact ZS is activated.<br />
Analog Speed Command Ratio<br />
Slope of voltage <strong>com</strong>mand / Speed <strong>com</strong>mand can be<br />
adjusted.<br />
Defaul<br />
t<br />
Unit<br />
40 Hz<br />
100<br />
x0.2<br />
msec<br />
50 rpm<br />
Settin<br />
g<br />
Range<br />
10<br />
│<br />
450<br />
1<br />
│<br />
500<br />
0<br />
│<br />
4500<br />
Control<br />
Mode<br />
Pi<br />
Pe<br />
S<br />
Pi<br />
Pe<br />
S<br />
Chapter<br />
5-3-8<br />
5-5<br />
5-3-8<br />
5-5<br />
S 5-3-12<br />
Sn216<br />
Rate<br />
rpm<br />
rpm<br />
/10V<br />
100<br />
│<br />
4500<br />
S 5-3-2<br />
Analog Speed Command offset adjust<br />
The offset amount can be adjusted by this parameter.<br />
Input Voltage (V)<br />
Sn217<br />
Offset<br />
Voltage<br />
0 mV<br />
-10000<br />
│<br />
10000<br />
S 5-3-3<br />
Speed<br />
Command (rpm)<br />
Sn218<br />
Analog speed <strong>com</strong>mand limited<br />
Setting Sn218 for limit the highest speed <strong>com</strong>mand of<br />
analog input.<br />
Rate<br />
rpm x<br />
1.02<br />
rpm<br />
100<br />
│<br />
4500<br />
S 5-3-4<br />
6-15
Position Control Parameter<br />
Parameter Name & Function Default Unit<br />
Position pulse <strong>com</strong>mand selection<br />
Setting<br />
Explanation<br />
★Pn301.0<br />
0 (Pulse)+(Sign)<br />
1 (CCW)/(CW) Pulse<br />
2 AB-Phase pulse x 2<br />
3 AB-Phase pulse x 4<br />
Position- Pulse Command Logic<br />
★Pn301.1 Setting<br />
Explanation<br />
0 Positive Logic<br />
1 Negative Logic<br />
Selection for <strong>com</strong>mand receive of drive inhibit<br />
mode<br />
★Pn301.2 Setting Explanation<br />
When drive inhibit occurs, record value of<br />
0<br />
position <strong>com</strong>mand input coherently.<br />
When drive inhibit occurs, ignore the value of<br />
1<br />
position <strong>com</strong>mand.<br />
Electronic Gear Ratio Numerator 1<br />
Use input contacts GN1 & GN2 to select one of four<br />
electronic Gear Ratio Numerators.<br />
To select Numerator 1, the statue of the input-contacts<br />
GN1 & GN2 should be as follows:<br />
Pn302<br />
Pn303<br />
Pn304<br />
Input Contact GN2 Input Contact GN1<br />
0 0<br />
Note: Input contacts status “1” (ON) and “0” (OFF).<br />
Refer to 5-6-1 to set high or low input logic levels.<br />
Electronic Gear Ratio Numerator 2<br />
Use input contacts GN1 & GN2 to select one of four<br />
electronic Gear Ratio Numerators.<br />
To select Numerator 2, the statue of the input-contacts<br />
GN1 & GN2 should be as follows:<br />
Input Contact GN2 Input Contact GN1<br />
0 1<br />
Note: Input contacts status “1” (ON) and “0” (OFF).<br />
Refer to 5-6-1 to set high or low input logic levels.<br />
Electronic Gear Ratio Numerator 3<br />
Use input contacts GN1 & GN2 to select one of four<br />
electronic Gear Ratio Numerators.<br />
To select Numerator 3, the statue of the input-contacts<br />
GN1 & GN2 should be as follows:<br />
Input Contact GN2 Input Contact GN1<br />
1 0<br />
Note: Input contacts status “1” (ON) and “0” (OFF).<br />
Refer to 5-6-1 to set high or low input logic levels.<br />
0 X<br />
0 X<br />
0<br />
X<br />
1 X<br />
1 X<br />
1 X<br />
Setting<br />
Range<br />
0<br />
│<br />
3<br />
0<br />
│<br />
1<br />
0<br />
│<br />
1<br />
1<br />
│<br />
50000<br />
1<br />
│<br />
50000<br />
1<br />
│<br />
50000<br />
Control<br />
Mode<br />
Chapter<br />
Pe 5-4-1<br />
Pi<br />
Pe<br />
Pi<br />
Pe<br />
Pi<br />
Pe<br />
Pi<br />
Pe<br />
5-4-1<br />
5-4-3<br />
5-4-3<br />
5-4-3<br />
6-16
Parameter Name & Function Default Unit<br />
Pn305<br />
★Pn306<br />
Pn307<br />
Pn308<br />
Pn309<br />
Pn310<br />
Pn311<br />
Pn312<br />
Electronic Gear Ratio Numerator 4<br />
Use input contacts GN1 & GN2 to select one of four<br />
electronic Gear Ratio Numerators.<br />
To select Numerator 4, the statue of the input-contacts<br />
GN1 & GN2 should be as follows:<br />
Input Contact GN2 Input Contact GN1<br />
1 1<br />
Note: Input contacts status “1” (ON) and “0” (OFF).<br />
Refer to 5-6-1 to set high or low input logic levels.<br />
Electronic Gear Ratio Denominator<br />
Set the calculated Electronic Gear Ratio Denominator<br />
in Pn 306. ( Refer to section 5-4-3).<br />
Final Electronic Gear Ratio should <strong>com</strong>ply with the<br />
formula below.<br />
1<br />
≤ Electronic GearRatio ≤ 200<br />
200<br />
Position <strong>com</strong>plete value<br />
Set a value for In position output signal.<br />
When the Position pulse error value is less then Pn307<br />
output-contact INP (In position output signal) will be<br />
activated.<br />
“Incorrect position” Error band Upper limit.<br />
When the Position error value is higher then number of<br />
pulses set in Pn308, an Alarm message<br />
AL-11(Position error value alarm) will be displayed.<br />
Incorrect position” Error band lower limit.<br />
When the Position error value is lower then number of<br />
pulses set in Pn309, an Alarm message<br />
AL-11(Position error value alarm) will be displayed.<br />
Position Loop Gain 1<br />
Without causing vibration or noise on the mechanical<br />
system the position loop gain value can be increased<br />
to speed up response and shorten the positioning time.<br />
Generally, the position loop bandwidth should not be<br />
higher then speed loop bandwidth. The relationship is<br />
according to the formula below:<br />
SpeedLoopGain<br />
PositionLo opGain ≤ 2π<br />
×<br />
5<br />
Position Loop Gain 2<br />
Refer to Pn310<br />
Position Loop Feed Forward Gain<br />
It can be used to reduce the track error of position<br />
control and speed up the response.<br />
If the feed forward gain is too large, it might cause<br />
speed<br />
Overshoot and in position oscillations which result in<br />
the repeated ON/OFF operation of the output contact<br />
INP(“In Position”output signal).<br />
1 X<br />
1 X<br />
10 pulse<br />
50000 pulse<br />
50000 pulse<br />
40 1/s<br />
40 1/s<br />
0 %<br />
Setting<br />
Range<br />
1<br />
│<br />
50000<br />
1<br />
│<br />
50000<br />
0<br />
│<br />
50000<br />
0<br />
│<br />
50000<br />
0<br />
│<br />
50000<br />
1<br />
│<br />
450<br />
1<br />
│<br />
450<br />
0<br />
│<br />
100<br />
Control<br />
Mode<br />
Pi<br />
Pe<br />
Pi<br />
Pe<br />
Pi<br />
Pe<br />
Pi<br />
Pe<br />
Pi<br />
Pe<br />
Pi<br />
Pe<br />
Pi<br />
Pe<br />
Pi<br />
Pe<br />
Chapter<br />
5-4-3<br />
5-4-3<br />
5-4-9<br />
5-4-9<br />
5-4-9<br />
5-4-6<br />
5-5<br />
5-4-6<br />
5-5<br />
5-4-6<br />
5-5<br />
6-17
Parameter Name & Function Default Unit<br />
Position <strong>com</strong>mand smooth<br />
Acceleration/Deceleration Time Constant<br />
Set the time period for the Position <strong>com</strong>mand pulse<br />
frequency to rise from 0 to 63.2%.<br />
Setting<br />
Range<br />
Control<br />
Mode<br />
Chapter<br />
Position Pulse Command Frequency (%)<br />
★Pn313<br />
100<br />
63.2<br />
Position Pulse Command Frequency<br />
10 msec<br />
0<br />
│<br />
10000<br />
Pi<br />
Pe<br />
5-4-4<br />
50<br />
Pn313<br />
Time (ms)<br />
Positioning Command Direction Definition<br />
CCW<br />
CW<br />
★Pn314<br />
Pn315<br />
Setting<br />
Explanation<br />
0 (CW) .Clockwise<br />
1 (CCW). Counter Clockwise<br />
Pulse Error Clear Modes.<br />
Setting<br />
Explanation<br />
Once CLR signal is activated, it eliminates,<br />
0<br />
the Pulse error amount.<br />
Once CLR signal is activated, following takes<br />
place:<br />
The position <strong>com</strong>mand is cancelled.<br />
1<br />
Motor rotation is interrupted<br />
Pulse error amount is cleared.<br />
Machine home reference is reset<br />
Once CLR signal is activated, following takes<br />
place:-<br />
2 The position <strong>com</strong>mand is cancelled..<br />
Motor rotation is interrupted<br />
Pulse error amount is cleared.<br />
1 X<br />
0 X<br />
0<br />
│<br />
1<br />
0<br />
│<br />
2<br />
Pi<br />
Pe<br />
Pe<br />
Pi<br />
Pe<br />
Pi<br />
5-4-5<br />
5-4-7<br />
6-18
Parameter Name & Function Default Unit<br />
Internal Position Command Mode<br />
Setting<br />
Explanation<br />
★Pn316<br />
0 Absolute Position<br />
1 Incremental Position<br />
Internal Position Command Hold (PHOLD)<br />
program select<br />
Setting<br />
Explanation<br />
★Pn316.1 When PHOLD is active then received PTRG<br />
0 signal. servomotor will be proceed internal<br />
posistion <strong>com</strong>mand from PHOLD position.<br />
When PHOLD is active then received PTRG<br />
1 signal. Servomotor will operate interal position<br />
<strong>com</strong>mand of current selection.<br />
Internal Position Command 1 – Rotation Number<br />
Set the Rotation number of the internal Position<br />
Pn317 Command 1<br />
Use input contacts POS1~POS4 to select Refer to<br />
5-4-2.<br />
Internal Position Command 1 - Pulse Number<br />
Set the rotation pulse number of internal position<br />
Pn318<br />
Command 1<br />
Internal Position Command 1 =Pn317(Rotation Number)<br />
x<br />
Pulse number of One Rotate x 4 + Pn318(Pulse number)<br />
Internal Position Command 1 - Move Speed<br />
Pn319 Setting the Move Speed of internal Position Command<br />
1<br />
Internal Position Command 2-Rotation Number<br />
Pn320<br />
Please refer to Pn317<br />
Pn321<br />
Pn322<br />
Pn323<br />
Pn324<br />
Pn325<br />
Pn326<br />
Pn327<br />
Pn328<br />
Internal Position Command 2-Pulse Number<br />
Please refer to Pn318<br />
Internal Position Command 2-Move Speed<br />
Please refer to Pn319<br />
Internal Position Command 3-Rotation Number<br />
Please refer to Pn317<br />
Internal Position Command 3-Pulse Number<br />
Please refer to Pn318<br />
Internal Position Command 3-Move Speed<br />
Please refer to Pn319<br />
Internal Position Command 4 -Rotation Number<br />
Please refer to Pn317<br />
Internal Position Command 4-Pulse Number<br />
Please refer to Pn318<br />
Internal Position Command 4-Move Speed<br />
Please refer to Pn319<br />
0 X<br />
0 X<br />
0 rev<br />
0 pulse<br />
0 rpm<br />
0 rev<br />
0 pulse<br />
0 rpm<br />
0 rev<br />
0 pulse<br />
0 rpm<br />
0 rev<br />
0 pulse<br />
0 rpm<br />
Setting<br />
Range<br />
0<br />
│<br />
1<br />
0<br />
│<br />
1<br />
-30000<br />
│<br />
30000<br />
-32767<br />
│<br />
32767<br />
0<br />
│<br />
3000<br />
-30000<br />
│<br />
30000<br />
-32767<br />
│<br />
32767<br />
0<br />
│<br />
3000<br />
-30000<br />
│<br />
30000<br />
-32767<br />
│<br />
32767<br />
0<br />
│<br />
3000<br />
-30000<br />
│<br />
30000<br />
-32767<br />
│<br />
32767<br />
0<br />
│<br />
3000<br />
Control<br />
Mode<br />
Chapter<br />
Pi 5-4-2<br />
Pi 5-4-2<br />
Pi 5-4-2<br />
Pi 5-4-2<br />
Pi 5-4-2<br />
Pi 5-4-2<br />
Pi 5-4-2<br />
Pi 5-4-2<br />
Pi 5-4-2<br />
Pi 5-4-2<br />
Pi 5-4-2<br />
Pi 5-4-2<br />
Pi 5-4-2<br />
Pi 5-4-2<br />
6-19
Parameter Name & Function Default Unit<br />
Pn329<br />
Pn330<br />
Pn331<br />
Pn332<br />
Pn333<br />
Pn334<br />
Pn335<br />
Pn336<br />
Pn337<br />
Pn338<br />
Pn339<br />
Pn340<br />
Pn341<br />
Pn342<br />
Pn343<br />
Pn344<br />
Pn345<br />
Internal Position Command 5 -Rotation Number<br />
Please refer to Pn317<br />
Internal Position Command 5-Pulse Number<br />
Please refer to Pn318<br />
Internal Position Command 5-Move Speed<br />
Please refer to Pn319<br />
Internal Position Command 6 -Rotation Number<br />
Please refer to Pn317<br />
Internal Position Command 6-Pulse Number<br />
Please refer to Pn318<br />
Internal Position Command 6-Move Speed<br />
Please refer to Pn319<br />
Internal Position Command 7 -Rotation Number<br />
Please refer to Pn317<br />
Internal Position Command 7-Pulse Number<br />
Please refer to Pn318<br />
Internal Position Command 7-Move Speed<br />
Please refer to Pn319<br />
Internal Position Command 8 -Rotation Number<br />
Please refer to Pn317<br />
Internal Position Command 8-Pulse Number<br />
Please refer to Pn318<br />
Internal Position Command 8-Move Speed<br />
Please refer to Pn319<br />
Internal Position Command 9 -Rotation Number<br />
Please refer to Pn317<br />
Internal Position Command 9-Pulse Number<br />
Please refer to Pn318<br />
Internal Position Command 9-Move Speed<br />
Please refer to Pn319<br />
Internal Position Command 10 -Rotation Number<br />
Please refer to Pn317<br />
Internal Position Command 10-Pulse Number<br />
Please refer to Pn318<br />
0 rev<br />
0 pulse<br />
0 rpm<br />
0 rev<br />
0 pulse<br />
0 rpm<br />
0 rev<br />
0 pulse<br />
0 rpm<br />
0 rev<br />
0 pulse<br />
0 rpm<br />
0 rev<br />
0 pulse<br />
0 rpm<br />
0 rev<br />
0 pulse<br />
Settin<br />
g<br />
Range<br />
-30000<br />
│<br />
30000<br />
-32767<br />
│<br />
32767<br />
0<br />
│<br />
3000<br />
-30000<br />
│<br />
30000<br />
-32767<br />
│<br />
32767<br />
0<br />
│<br />
3000<br />
-30000<br />
│<br />
30000<br />
-32767<br />
│<br />
32767<br />
0<br />
│<br />
3000<br />
-30000<br />
│<br />
30000<br />
-32767<br />
│<br />
32767<br />
0<br />
│<br />
3000<br />
-30000<br />
│<br />
30000<br />
-32767<br />
│<br />
32767<br />
0<br />
│<br />
3000<br />
-30000<br />
│<br />
30000<br />
-32767<br />
│<br />
32767<br />
Control<br />
Mode<br />
Chapter<br />
Pi 5-4-2<br />
Pi 5-4-2<br />
Pi 5-4-2<br />
Pi 5-4-2<br />
Pi 5-4-2<br />
Pi 5-4-2<br />
Pi 5-4-2<br />
Pi 5-4-2<br />
Pi 5-4-2<br />
Pi 5-4-2<br />
Pi 5-4-2<br />
Pi 5-4-2<br />
Pi 5-4-2<br />
Pi 5-4-2<br />
Pi 5-4-2<br />
Pi 5-4-2<br />
Pi 5-4-2<br />
6-20
Parameter Name & Function Default Unit<br />
Internal Position Command 10-Move Speed<br />
Pn346<br />
Please refer to Pn319<br />
0 rpm<br />
Internal Position Command 11 -Rotation Number<br />
Pn347<br />
Please refer to Pn317<br />
0 rev<br />
Internal Position Command 11-Pulse Number<br />
Pn348<br />
Please refer to Pn318<br />
0 pulse<br />
Internal Position Command 11-Move Speed<br />
Pn349<br />
Please refer to Pn319<br />
0 rpm<br />
Internal Position Command 12-Rotation Number<br />
Pn350<br />
Please refer to Pn317<br />
0 rev<br />
Internal Position Command 12-Pulse Number<br />
Pn351<br />
Please refer to Pn318<br />
0 pulse<br />
Internal Position Command 12-Move Speed<br />
Pn352<br />
Please refer to Pn319<br />
0 rpm<br />
Internal Position Command 13 -Rotation Number<br />
Pn353<br />
Please refer to Pn317<br />
0 rev<br />
Internal Position Command 13-Pulse Number<br />
Pn354<br />
Please refer to Pn318<br />
0 pulse<br />
Internal Position Command 13-Move Speed<br />
Pn355<br />
Please refer to Pn319<br />
0 rpm<br />
Internal Position Command 14 -Rotation Number<br />
Pn356<br />
Please refer to Pn317<br />
0 rev<br />
Internal Position Command 14-Pulse Number<br />
Pn357<br />
Please refer to Pn318<br />
0 pulse<br />
Internal Position Command 14-Move Speed<br />
Pn358<br />
Please refer to Pn319<br />
0 rpm<br />
Internal Position Command 15 -Rotation Number<br />
Pn359<br />
Please refer to Pn317<br />
0 rev<br />
Internal Position Command 15-Pulse Number<br />
Pn360<br />
Please refer to Pn318<br />
0 pulse<br />
Internal Position Command 15-Move Speed<br />
Pn361<br />
Please refer to Pn319<br />
0 rpm<br />
Internal Position Command 16 -Rotation Number<br />
Pn362<br />
Please refer to Pn317<br />
0 rev<br />
Setting<br />
Range<br />
0<br />
│<br />
3000<br />
-30000<br />
│<br />
30000<br />
-32767<br />
│<br />
32767<br />
0<br />
│<br />
3000<br />
-30000<br />
│<br />
30000<br />
-32767<br />
│<br />
32767<br />
0<br />
│<br />
3000<br />
-30000<br />
│<br />
30000<br />
-32767<br />
│<br />
32767<br />
0<br />
│<br />
3000<br />
-30000<br />
│<br />
30000<br />
-32767<br />
│<br />
32767<br />
0<br />
│<br />
3000<br />
-30000<br />
│<br />
30000<br />
-32767<br />
│<br />
32767<br />
0<br />
│<br />
3000<br />
-30000<br />
│<br />
30000<br />
Control<br />
Mode<br />
Chapter<br />
Pi 5-4-2<br />
Pi 5-4-2<br />
Pi 5-4-2<br />
Pi 5-4-2<br />
Pi 5-4-2<br />
Pi 5-4-2<br />
Pi 5-4-2<br />
Pi 5-4-2<br />
Pi 5-4-2<br />
Pi 5-4-2<br />
Pi 5-4-2<br />
Pi 5-4-2<br />
Pi 5-4-2<br />
Pi 5-4-2<br />
Pi 5-4-2<br />
Pi 5-4-2<br />
Pi 5-4-2<br />
6-21
Parameter Name & Function Default Unit<br />
Pn363<br />
Pn364<br />
Pn365.0<br />
Internal Position Command 16-Pulse Number<br />
Please refer to Pn318<br />
Internal Position Command 16-Move Speed<br />
Please refer to Pn319<br />
Setting for HOME routine.<br />
Setting<br />
Explanation<br />
Once the home routine is activated, motor will s<br />
for Home Position switch in 1 st speed in CCW<br />
direction.<br />
Input contacts CCWL or CWL can be used as<br />
Home Reference Switch.<br />
Once Home reference switch is detected, then<br />
0<br />
Contacts CCWL and CWL will act as normal M<br />
limits again.<br />
Note:<br />
When using this function, Pn365.1 can not be s<br />
or 2. Cn002.1 ( selection for CCWL and CWL<br />
be set to set to 0.<br />
Once the home routine is activated, motor will<br />
search for Home<br />
Position switch in 1 st speed in CW direction.<br />
Input contacts CCWL or CWL can be used as<br />
the Home Reference Switch.<br />
Once Home position is detected, then input<br />
1 contacts CCWL and CWL will act as normal<br />
max. limits again.<br />
Note:<br />
When using this function, Pn365.1 can not be<br />
set to 1 or 2.<br />
Cn002.1 ( selection for CCWL and CWL)<br />
must be set to 0.<br />
Once the home routine is activated , motor will<br />
search for Home position switch in 1 st speed in<br />
CCW direction and sets the Home<br />
reference position as soon as the input contact<br />
ORG is activated.<br />
2<br />
If Pn365.1=2, it will directly find the closest<br />
Rising-Edge of ORG to be the Home position<br />
(without a need for Home Reference),<br />
then it stops in accordance with Pn365.3<br />
setting.<br />
Once the home routine is activated , motor will<br />
search for Home<br />
Position switch in 1 st speed in CW direction<br />
and sets the reference Home position as soon<br />
as the input contact ORG is activated.<br />
3<br />
If Pn365.1=2, it will directly find the closest<br />
rising -Edge of ORG to be the Home position<br />
(without a need for Home reference),<br />
then it stops in accordance with Pn365.3<br />
setting.<br />
0 pulse<br />
0 rpm<br />
0 X<br />
Setting<br />
Range<br />
-32767<br />
│<br />
32767<br />
0<br />
│<br />
3000<br />
0<br />
│<br />
5<br />
Control<br />
Mode<br />
Chapter<br />
Pi 5-4-2<br />
Pi 5-4-2<br />
Pi<br />
Pe<br />
5-4-8<br />
6-22
Parameter Name & Functions Default Unit<br />
Pn365.0<br />
Pn365.1<br />
Pn365.2<br />
Once the home routine is activated , motor will<br />
search for Home<br />
position in 1 st speed in CCW direction and<br />
sets the Home reference position as soon as<br />
4 the nearest Z (marker pulse) is detected.<br />
When using this function, set Pn365.1=2 .<br />
After setting the Z Phase to be the Home, it<br />
stops in accordance with the setting of<br />
Pn365.3.<br />
Once the home routine is activated , motor will<br />
search for Home position in 1 st speed in CW<br />
direction and sets the Home reference<br />
position as soon as the nearest Z (marker<br />
5 pulse) is detected.<br />
When using this function, set Pn365.1=2 .<br />
After setting the Z Phase to be the Home, it<br />
stops in accordance with the setting of<br />
Pn365.3.<br />
Once Reference Home switch or Signal, is found it<br />
sets the search method for the Home position.<br />
Setting<br />
Explanation<br />
Once the Home Reference switch or signal is<br />
detected, motor reverses direction in 2 nd<br />
speed to find the nearest Z. Phase pulse and<br />
0<br />
sets this as the Home position,<br />
then stops in accordance with Pn365.3<br />
setting method.<br />
Once the Home Reference switch or signal is<br />
detected, motor Continues in its direction in<br />
1 2 nd speed to find the nearest Z Phase pulse<br />
and sets this as the Home position, then stops<br />
in accordance with Pn365.3 setting method.<br />
When Pn365.0=2 or 3, it finds the rising edge<br />
of ORG to be the Home position, then stops in<br />
accordance with Pn365.3.<br />
2<br />
When Pn365.0=4 or 5, it finds Z Phase pulse<br />
to be the Home, then stops in accordance<br />
with Pn365.3.<br />
Setting of Home Routine Start method<br />
Setting<br />
Explanation<br />
0 Homing routine is Disabled.<br />
On power up and activation of Servo on the<br />
home routine is started automatically.<br />
1 This method is useful for applications that do<br />
not require repeated home routines. No<br />
external home reference switch is required.<br />
Use SHOME input contact to start a home<br />
routine.<br />
2<br />
In position mode, SHOME can be used to<br />
start a home routine at any moment.<br />
0 X<br />
0 X<br />
0 X<br />
Setting<br />
Range<br />
0<br />
│<br />
5<br />
0<br />
│<br />
2<br />
0<br />
│<br />
2<br />
Control<br />
Mode<br />
Pi<br />
Pe<br />
Pi<br />
Pe<br />
Chapter<br />
5-4-8<br />
5-4-8<br />
6-23
Parameter Name & Function Default Unit<br />
Pn365.3<br />
Pn366<br />
Pn367<br />
Pn368<br />
Pn369<br />
Setting of stopping mode after finding Home<br />
signal.<br />
Setting<br />
Explanation<br />
After detecting the Home signal, it sets this<br />
position to be the Home reference (Un-14<br />
encoder feed back rotating number and<br />
Un-15 encoder feed back pulse number are<br />
0<br />
all 0), motor decelerates and stops.<br />
Then it reverses direction in 2 nd speed to<br />
detect the Home Position again then it<br />
decelerates and stops..<br />
After detecting the Home signal, it sets this<br />
position to be the Home reference (Un-14<br />
1 encoder feed back rotating number and<br />
Un-15 encoder feed back pulse number are<br />
all 0), motor decelerates and stops.<br />
Machine Home reference search speed. 1 st speed<br />
( Fast)<br />
HOME Refeence search speed . Speed 1.<br />
Machine Home position search speed. 2 nd Speed<br />
(Slow)<br />
Home position search speed . Speed 2.<br />
Home position offset . Number of revolutions.<br />
Once the searched home position is found in<br />
accordance with Pn365 (Home routine mode), then it<br />
will search by a number of revolutions and pulses set in<br />
parameters Pn368 and Pn 369 to find the new (off set)<br />
Home position.<br />
Home position offset . Number of Pulses.<br />
Home Offset position = Pn368(Rotate Number) x<br />
Number of Encoder Pulse per Rotation x 4<br />
+ Pn369(Pulse Number)<br />
0 X<br />
100 rpm<br />
50 rpm<br />
0 rev<br />
0 pulse<br />
Setting<br />
Range<br />
0<br />
│<br />
1<br />
0<br />
│<br />
2000<br />
0<br />
│<br />
500<br />
-30000<br />
│<br />
30000<br />
-32767<br />
│<br />
32767<br />
Control<br />
Mode<br />
Pi<br />
Pe<br />
Pi<br />
Pe<br />
Pi<br />
Pe<br />
Pi<br />
Pe<br />
Pi<br />
Pe<br />
Chapter<br />
5-4-8<br />
5-4-8<br />
5-4-8<br />
5-4-8<br />
5-4-8<br />
6-24
Quick Set-up Parameters<br />
Parameter Name & Function Default Unit<br />
◆qn401<br />
◆qn402<br />
◆qn403<br />
◆qn404<br />
◆qn405<br />
◆qn406<br />
◆qn407<br />
Speed Loop Gain 1. ( Same function as Sn211)<br />
Speed loop gain has a direct effect on the frequency<br />
response bandwidth of the Speed-control loop.<br />
Without causing vibration or noise Speed-loop-gain<br />
can be increased to obtain a faster speed response.<br />
If Cn025 (load Inertia ratio) is correctly set, the<br />
speed-loop-bandwidth will equal to speed-loop-gain.<br />
Speed-loop Integral time 1. (Same function as<br />
Sn212)<br />
Speed loop integral element can eliminate the steady<br />
speed error<br />
and react to even slight speed variations.<br />
Decreasing Integral time can improve system rigidity.<br />
The formula below shows the relationship between<br />
Integral time and Speed loop Gain.<br />
1<br />
SpeedLoopIntegrationTimeCons tant<br />
≥ 5×<br />
2π × SpeedLoopGain<br />
Speed Loop Gain 2.<br />
(Same function as<br />
Sn213)<br />
Refer to qn401<br />
Speed Loop Integration Time Constant 2.<br />
(Same function as Sn214)<br />
Refer to qn402<br />
Position Loop Gain 1.<br />
(Same function as<br />
Pn310)<br />
Without causing vibration or noise on the mechanical<br />
system the position loop gain value can be<br />
increased to speed up response and shorten the<br />
positioning time.<br />
Generally, the position loop bandwidth should not be<br />
higher then speed loop bandwidth. The relationship<br />
is according to the formula below:<br />
SpeedLoopGain<br />
PositionLo opGain ≤ 2π<br />
×<br />
5<br />
Position Loop Gain 2<br />
(Same function as<br />
Pn311)<br />
Please refer to qn405<br />
Position Loop Feed Forward Gain<br />
It can be used to reduce the follow up error of<br />
position control and speed up the response.<br />
If the feed forward gain is too large, it might cause<br />
speed<br />
Overshoot and in position oscillations which result in<br />
the repeated ON/OFF operation of the output<br />
contact<br />
INP(“In Position” output signal).<br />
40 Hz<br />
100<br />
x0.2<br />
ms<br />
40 Hz<br />
100<br />
x0.2<br />
ms<br />
40 1/s<br />
40 1/s<br />
0 %<br />
Setting<br />
Range<br />
10<br />
│<br />
450<br />
1<br />
│<br />
500<br />
10<br />
│<br />
450<br />
1<br />
│<br />
500<br />
1<br />
│<br />
450<br />
1<br />
│<br />
450<br />
0<br />
│<br />
100<br />
Control<br />
Mode<br />
Pi<br />
Pe<br />
S<br />
Pi<br />
Pe<br />
S<br />
Pi<br />
Pe<br />
S<br />
Pi<br />
Pe<br />
S<br />
Pi<br />
Pe<br />
Pi<br />
Pe<br />
Pi<br />
Pe<br />
Chapter<br />
5-3-8<br />
5-5<br />
5-3-8<br />
5-5<br />
5-3-8<br />
5-5<br />
5-3-8<br />
5-5<br />
5-4-6<br />
5-5<br />
5-4-6<br />
5-5<br />
5-4-6<br />
5-5<br />
6-25
Multi-Function Input Parameters<br />
All digital inputs D1 to D13 are programmable and can be set to one of the funhctions listed below.<br />
Hn 501 which includes Hn 501.0 ,Hn501.1, Hn501.2 is used for digital input 1 ( D1-1).<br />
Hn502 to Hn513 are used for setting digital inputs 2 to 13.( D1-2 to D1-13).<br />
Parameter Name & Function Default Unit<br />
★Hn501.0<br />
★Hn501.1<br />
★Hn501.2<br />
DI-1<br />
Seting<br />
Explanation<br />
Signal<br />
Functions<br />
01 SON Servo On<br />
02 ALRS Alarm Reset<br />
03 PCNT PI/P Switching<br />
04 CCWL CCW Limit<br />
05 CWL CW Limit<br />
06 TLMT External Torque Limit<br />
07 CLR Clear Pulse Error Value<br />
08 LOK Servo Lock<br />
09 EMC Emergency Stop<br />
0A SPD1 Speed 1<br />
0B SPD2 Speed 2<br />
0C MDC Control Mode Switch<br />
0D INH Position Command Inhibit<br />
0E SPDINV Speed Inverse<br />
0F G-SEL Gain Select<br />
10 GN1<br />
Electronic Gear Ratio Numerator<br />
1<br />
11 GN2<br />
Electronic Gear Ratio Numerator<br />
2<br />
12 PTRG Position Trigger<br />
13 PHOLD Position Hold<br />
14 SHOME Start Home<br />
15 ORG<br />
Home Position Reference<br />
(Origin)<br />
16 POS1 Internal Position select 1<br />
17 POS2 Internal Position select 2<br />
18 POS3 Internal Position select 3<br />
19 POS4 Internal Position select 4<br />
1A TRQINV Torque Inverse<br />
1B RS1 Torque CW Selecting<br />
1C RS2 Torque CCW Selecting<br />
DI-1 Logic State. NO/NC Selection<br />
Setting<br />
Explanatoin<br />
Input contact state. NO (Normally Open).<br />
0 Connecting (IG24) to inputs, enables the<br />
selected function.<br />
1 Input contact state. NC (Normally Closed).<br />
Disconnecting (IG24) from inputs, enables<br />
the selected function.<br />
★New setting will be<strong>com</strong>e effective after re-cycling the power.<br />
01 X<br />
0 X<br />
Setting<br />
Range<br />
01<br />
│<br />
26<br />
0<br />
│<br />
1<br />
Control<br />
Mode<br />
Chapter<br />
ALL 5-6-1<br />
Warning! If any of programmable Inputs of DI-1 ~ DI-13 are set for the same type of function<br />
then the logic state selection ( NO or NC selection) for these inputs must be the same type.<br />
Otherwise an Alarm will be displayed. AL-07 (Abnormal DI/DO programming).<br />
6-26
Parameter<br />
Signal<br />
★Hn502<br />
★Hn503<br />
★Hn504<br />
★Hn505<br />
★Hn506<br />
★Hn507<br />
★Hn508<br />
★Hn509<br />
★Hn510<br />
★Hn511<br />
★Hn512<br />
★Hn513<br />
DI-2<br />
Plearse refer to Hn501<br />
DI-3<br />
Plearse refer to Hn501<br />
DI-4<br />
Plearse refer to Hn501<br />
DI-5<br />
Plearse refer to Hn501<br />
DI-6<br />
Plearse refer to Hn501<br />
DI-7<br />
Plearse refer to Hn501<br />
DI-8<br />
Plearse refer to Hn501<br />
DI-9<br />
Plearse refer to Hn501<br />
DI-10<br />
Plearse refer to Hn501<br />
DI-11<br />
Plearse refer to Hn501<br />
DI-12<br />
Plearse refer to Hn501<br />
DI-13<br />
Plearse refer to Hn501<br />
Name & Function Default Unit<br />
★New setting will be<strong>com</strong>e effective after re-cycling the power.<br />
002 X<br />
003 X<br />
104 X<br />
105 X<br />
006 X<br />
007 X<br />
008 X<br />
009 X<br />
00A<br />
00B<br />
00C<br />
00E<br />
X<br />
X<br />
X<br />
X<br />
Setting<br />
Range<br />
001<br />
│<br />
11C<br />
001<br />
│<br />
11C<br />
001<br />
│<br />
11C<br />
001<br />
│<br />
11C<br />
001<br />
│<br />
11C<br />
001<br />
│<br />
11C<br />
001<br />
│<br />
11C<br />
001<br />
│<br />
11C<br />
001<br />
│<br />
11C<br />
001<br />
│<br />
11C<br />
001<br />
│<br />
11C<br />
001<br />
│<br />
11C<br />
Control<br />
Mode<br />
Chapter<br />
ALL 5-6-1<br />
ALL 5-6-1<br />
ALL 5-6-1<br />
ALL 5-6-1<br />
ALL 5-6-1<br />
ALL 5-6-1<br />
ALL 5-6-1<br />
ALL 5-6-1<br />
ALL 5-6-1<br />
ALL 5-6-1<br />
ALL 5-6-1<br />
ALL 5-6-1<br />
Warning! If any of programmable Inputs of DI-1 ~ DI-13 are set for the same type of function<br />
then the logic state selection ( NO or NC selection) for these inputs must be the same type.<br />
Otherwise an Alarm will be displayed. AL-07 (Abnormal DI/DO programming).<br />
6-27
Parameter Name & Function Default Unit<br />
★Hn514.0<br />
★Hn514.1<br />
DO-1<br />
Setting<br />
Explanation<br />
Signal<br />
Functions<br />
01 RDY Servo Ready<br />
02 ALM Alarm<br />
03 ZS Zero Speed<br />
04 BI Brake Signal<br />
05 INS In Speed<br />
06 INP In Position<br />
07 HOME HOME<br />
08 INT In Torque<br />
DO-1<br />
★Hn514.2 Setting<br />
Explanation<br />
0 Close, when the output is activated.<br />
1 Open, when the output is activated.<br />
DO-2<br />
★Hn515<br />
Plearse refer to Hn514<br />
★Hn516<br />
★Hn517<br />
DO-3<br />
Plearse refer to Hn514<br />
DO-4<br />
Plearse refer to Hn514<br />
New setting will be<strong>com</strong>e effective after re-cycling the power.<br />
01 X<br />
0 X<br />
002 X<br />
003 X<br />
006 X<br />
Setting<br />
Range<br />
01<br />
│<br />
08<br />
0<br />
│<br />
1<br />
001<br />
│<br />
108<br />
001<br />
│<br />
108<br />
001<br />
│<br />
108<br />
Control<br />
Mode<br />
Chapter<br />
ALL 5-6-1<br />
ALL 5-6-1<br />
ALL 5-6-1<br />
ALL 5-6-1<br />
Warning! If any of programmable Inputs of DI-1 ~ DI-13 are set for the same type of function<br />
then the logic state selection ( NO or NC selection) for these inputs must be the same type.<br />
Otherwise an Alarm will be displayed. AL-07 (Abnormal DI/DO programming).<br />
6-28
Parameter<br />
Signal<br />
Name & Function Default Unit<br />
Digital input control method selection.<br />
Select digital input (13 pins) control method by<br />
external terminal or <strong>com</strong>munication. Convert Binary<br />
code to Hex code for setting this parameter. DI and<br />
binary bits table as below.<br />
Ex. DI-1 is bit 0 and DI-13 is bit 12.<br />
DI-[ ] DI-13 DI-12<br />
……<br />
…<br />
DI-1<br />
bit 12 11<br />
……<br />
…<br />
0<br />
Binary code representation:<br />
→” 0 “ Digital input control by external terminal.<br />
Hn518<br />
→” 1 “ Digital input control by <strong>com</strong>munication.<br />
H0000 X<br />
Set H0000 for Hn518 represent DI-1 ~ DI-13 are<br />
controlled by external terminal and set H1FFF<br />
represent all terminal is controlled by<br />
<strong>com</strong>munication.<br />
Ex. Set DI (1, 3, 6, 10, 12) for <strong>com</strong>munication control<br />
other pins by external terminal;<br />
The corresponding binary code is :[0 1010 0010<br />
0101] convert to Hex code is : [H 0A25]for entering<br />
parameter.<br />
For the setting Bit0 (DI-1) is control by<br />
<strong>com</strong>munication and Bit1 (DI-2) is control by external<br />
terminal ….etc<br />
Setting<br />
Range<br />
H0000<br />
│<br />
H1FFF<br />
(HEX)<br />
Control<br />
Mode<br />
ALL<br />
Chapter<br />
5-6-1<br />
7<br />
Hn519<br />
Setting digital input status in <strong>com</strong>munication<br />
mode<br />
Change Hn519 Hex code for setting digital input<br />
status of <strong>com</strong>munication control mode; Setting<br />
method refer Hn518.<br />
Binary code representation:<br />
“0” : digital input contact OFF<br />
“1” : digital input contact ON<br />
Set H0000 for Hn518 represent DI-1 ~ DI-13 are<br />
controlled by external terminal and set H1FFF<br />
represent all terminal is controlled by<br />
<strong>com</strong>munication.<br />
P.S.)This parameter should co-operate with<br />
Hn518.<br />
H0000<br />
X<br />
H0000<br />
│<br />
H1FFF<br />
(HEX)<br />
ALL<br />
5-6-1<br />
7<br />
6-29
Display Parameter<br />
Parameter<br />
Signal<br />
Display Unit Explanation<br />
Un-01 Actual Motor Speed rpm Motor Speed is displayed in rpm.<br />
Un-02 Actual Motor Torque %<br />
Un-03 Regenerative load rate %<br />
Un-04 Accumulated load rate %<br />
It displays the torque as a percentage of the rated torue.<br />
Ex: 20 are displayed. It means that the motor torque output is 20% of<br />
rated torque.<br />
Value for the processable regenerative power as 100% .<br />
Displays regenerative power consumption in 10-s cycle.<br />
Value for the rated torque as 100%.<br />
Displays effective torque in 10-s cyle.<br />
Un-05 Max load rate % Max value of accumulated load rate<br />
Un-06 Speed Command rpm Speed <strong>com</strong>mand is displayed in rpm.<br />
Un-07 Position Error Value pulse<br />
Error between position <strong>com</strong>mand value and the actual position<br />
feedback.<br />
Un-08 Position Feed-back Value pulse The accumulated number of pulses from the encoder.<br />
Un-09 ExternalVoltage Command V External analog voltage <strong>com</strong>mand value in volts.<br />
Un-10<br />
Un-11<br />
(Vdc Bus)Main Loop<br />
Voltage<br />
External Spped Limit<br />
Command Value<br />
V<br />
rpm<br />
DC Bus voltage in Volts.<br />
External speed limit value in rpm.<br />
Un-12<br />
External CCW Torque Limit<br />
Command Value<br />
%<br />
Ex: Display 100. Means current external CCW torque limit <strong>com</strong>mand is<br />
set to 100 %.<br />
Un-13<br />
External CW Torque<br />
LimitCommand Value<br />
%<br />
Ex: Display 100. Means current external CW toque limit <strong>com</strong>mand is set<br />
to 100%.<br />
Un-14<br />
Motor feed back – Rotation<br />
value (absolute value)<br />
rev<br />
After power on, it displays motor rotation number as an absolute value.<br />
Un-15<br />
Motor feed back – Less<br />
then 1 rotation pulse<br />
value(absolute value)<br />
pulse<br />
After power on, it displays the number of pulses for an in<strong>com</strong>plete<br />
revolution of the motor as an absolute value.<br />
Un-16<br />
Pulse <strong>com</strong>mand – rotation<br />
value(absolute value)<br />
rev<br />
After power on, it displays pulse <strong>com</strong>mand input rotation number in<br />
absolute value.<br />
Un-17<br />
Pulse <strong>com</strong>mand – Less<br />
then 1 rotation pulse<br />
value(absolute value)<br />
pulse<br />
Un-18 Torque <strong>com</strong>mand %<br />
Un-19 Load inertia x0.1<br />
After power on, it displays pulse <strong>com</strong>mand input for an in<strong>com</strong>plete<br />
rotation. pulse value is an absolute value.<br />
It displays the torque <strong>com</strong>mand as a percentage of the rated torque.<br />
Ex: Display. 50.Means current motor torque <strong>com</strong>mand is 50% of rated<br />
torque.<br />
When Cn002.2=0(Auto gain adjust disabled), it displays the current<br />
preset load inertia ratio from parameter Cn025.<br />
When Cn002.2=1(Auto gain adjust enabled), it displays the current<br />
estimated load inertia ratio.<br />
6-30
Diagnosis Parameter<br />
Parameter Name & Function Chapter<br />
dn-01 Selected control mode<br />
dn-02 Output terminal signal status.<br />
dn-03 Input terminal signal status.<br />
dn-04 Software version<br />
3-2-2<br />
dn-05 JOG mode operation<br />
dn-06 Hold position.<br />
dn-07 Auto offset adjustment of external analog <strong>com</strong>mand volta<br />
dn-08 Servo model code.<br />
6-31
7-1-2 RS-232 Communication protocol and format<br />
Baud rate 9600bps (Selection by Cn037.1 )<br />
Parity<br />
No<br />
Data bit 8<br />
Stop bit 1<br />
※ Symbol H in folling sentence is for Hex representation.<br />
(1) Read a word from servo drive Function code format: R5XxSs<br />
Xx : A request to read register “ Xx ” from slave device( Unit :Byte, Hex representation)<br />
Ss : Check Sum Ss =’R’+’5’+’X’+’x’ ( Unit :Byte、Hex representation)<br />
Ex1: Read register address 30H and<br />
( Convert『R530』into ASCII codes )<br />
Check Sum=52H+35H+33H+30H=EA H<br />
R 5 3 0<br />
Obtain Function code for read register address 30H:『R530EA』<br />
Servo drive response : %XxYySs<br />
Ss is Check Sum, Ss=’%’+’X’+’x’+’Y’+’y’<br />
Response message of example 1:<br />
0008H is the data store in register address 30H:<br />
Check Sum=25H+30H+30H+30H+38H=EDH<br />
% 0 0 0 8<br />
Drive response message:『%0008ED』<br />
* When function code incorrect , drive response :『!』(ASCII code: 21H )<br />
7-2
(2) Read consecutive 2 words from drive Function code format: L5NnSs<br />
Nn : A request to read register “ Nn ” from slave device ( Unit :Byte, Hex representation)<br />
Ss : Check Sum、Ss =’L’+’5’+’N’+’n’ ( Unit : Byte, Hex representation)<br />
Ex2: Read data from register address 60H and<br />
( Convert『L560』into ASCII codes )<br />
Check Sum=4CH+35H+36H+30H=E7<br />
L 5 6 0<br />
Obtain Function code for read register address 60H:『L560E7』<br />
Servo drive response: %XxYyAaBbSs<br />
Ss is Check Sum,Ss=’%’+’X’+’x’+’Y’+’y’ +’A’+’a’+’B’+’b’<br />
XxYy is the data store in register address Nn+1,<br />
AaBb is the data store in register address Nn<br />
Response message of example 2:<br />
0001 000AH is the data store in register 60H<br />
Check Sum=25H+30H+30H+30H+31H+30H+30H +30H+41H=1B7H<br />
% 0 0 0 1 0 0 0 A<br />
Drive response message:『%0001000AB7』<br />
* When function code incorrect , drive response :『!』(ASCII code: 21H )<br />
7-3
(3) Write a word to drive Function code format: W5XxYyZzSs<br />
Xx : Address for write data ( Unit :Byte、Hex representation)<br />
YyZz : Writes the data contents ( Unit :word, Hex representation)<br />
Ss : Check Sum,Ss =’W’+’5’+’X’+’x’+’Y’+’y’+’Z’+’z’ ( Unit :Byte, Hex representation)<br />
Ex3:Write data 0008H to register 30H<br />
( Convert『W5300008』into ASCII codes )<br />
Check Sum=57H+35H+33H+30H+30H+30H+30H+38H=1B7H<br />
W 5 3 0 0 0 0 8<br />
Obtain Function code for write data 0008H to register 30H : 『W5300008B7』<br />
Drive response message :『%』(ASCII code :25H)<br />
* When function code incorrect , drive response :『!』(ASCII code: 21H )<br />
(4) Write consecutive 2 words to drive Function code format: M5NnXxYyAaBbSs<br />
Nn : Address for write data( Unit :Byte、Hex representation)<br />
XxYy : Writes the data contents of address Nn+1 ( Unit :Word、Hex representation)<br />
AaBb : Writes the data contents of address Nn ( Unit :Word、Hex representation)<br />
Ss : Check Sum , Ss =’M’+’5’+’N’+’n’+’X’+’x’+’Y’+’y’+’A’+’a’+’B’+’b’ ( Unit :Byte、Hex representation)<br />
Ex4: Write data 0002 000BH to register 60H<br />
( Convert『M5600002000B』into ASCII codes )<br />
Check Sum=4DH+35H+36H+30H+30H+30H+30H+32H+30H+30H+30H+42H =27CH<br />
M 5 6 0 0 0 0 2 0 0 0 B<br />
Obtain Function code for write data 0002000BH to register 60H:『M5600002000B7C』<br />
Drive response message:『%』(ASCII code :25H )<br />
* When function code incorrect , drive response :『!』(ASCII code: 21H )<br />
7-4
7-1-3 Modbus <strong>com</strong>munication protocol for RS-485<br />
The MODBUS protocol allows an easy <strong>com</strong>munication within types of network architectures,before start to<br />
<strong>com</strong>munication with slave device, set the ID number ( Cn036 ) for Servo drive respectively, server distinguish ID<br />
number for controlling specific client station.<br />
Standard Modbus networks <strong>com</strong>bine two transmission modes: ASCII or RTU: ASCII(American Standard Code<br />
for information interchange) Mode and RTU (Remote Terminal Unit) Mode, Use Cn038 to select ASCII or RTU<br />
mode.<br />
Coding method<br />
ASCII Mode<br />
8-bits Data consist of two ASCII code.<br />
Ex: Data 26H 1-byte , the ’26’ convert to ASCII code is include character ’2‘ and ’6’ <br />
ASCII Chart ( 0 ~ 9 and A ~ F ):<br />
Character ‘0’ ‘1’ ‘2’ ‘3’ ‘4’ ‘5’ ‘6’ ‘7’<br />
ASCII code(Hex) 30H 31H 32H 33H 34H 35H 36H 37H<br />
Character ‘8’ ‘9’ ‘A’ ‘B’ ‘C’ ‘D’ ‘E’ ‘F’<br />
ASCII code(Hex) 38H 39H 41H 42H 43H 44H 45H 46H<br />
RTU Mode<br />
Each 8bits is consist of 2 Hex number (4-bits per Hex number).<br />
Ex.: Data 26H, the data length is 1-byte.<br />
7-5
ASCII Mode Framing<br />
10 bits Frame (7-bits Data)<br />
7N2<br />
Start<br />
bit<br />
0 1 2 3 4 5 6<br />
Stop<br />
bit<br />
Stop<br />
bit<br />
←--- Data:7 bits ---→<br />
←------- Character Frame:10 bits -------→<br />
7E1<br />
Start<br />
bit<br />
0 1 2 3 4 5 6<br />
Even<br />
parity<br />
Stop<br />
bit<br />
←--- Data:7 bits ---→<br />
←-------- Character Frame:10 bits -------→<br />
7O1<br />
Start<br />
bit<br />
0 1 2 3 4 5 6<br />
Odd<br />
parity<br />
Stop<br />
bit<br />
←--- Data:7 bits ---→<br />
←-------- Character Frame:10 bits -------→<br />
11 bits Frame(8-bits Data)<br />
8N2<br />
Start<br />
bit<br />
0 1 2 3 4 5 6 7<br />
Stop<br />
bit<br />
Stop<br />
bit<br />
←--- Data:8 bits ---→<br />
←-------- Character Frame:11 bits -------→<br />
8E1<br />
Start<br />
bit<br />
0 1 2 3 4 5 6 7<br />
Even<br />
parity<br />
Stop<br />
bit<br />
←--- Data:8 bits ---→<br />
←-------- Character Frame:11 bits -------→<br />
8O1<br />
Start<br />
bit<br />
0 1 2 3 4 5 6 7<br />
Odd<br />
parity<br />
Stop<br />
bit<br />
←--- Data:8 bits ---→<br />
←-------- Character Frame:11 bits -------→<br />
7-6
ASCII Mode Framing<br />
Symbol Name Description<br />
STX Comm. start 3AH, Char ’:‘<br />
ADR<br />
Slave address<br />
Include 2 ASCII code within 1-byte<br />
Comm. add : 1 ~ 254 convert to Hex representation ;<br />
Ex. Servo drive ADR is No.20 convert to 14H ;<br />
ADR = ’1‘ , ‘4’ → ’1‘ = 31H , ‘4’ = 34H<br />
Function Code Function code<br />
Include 2 ASCII code within 1-byte<br />
Function codes..03H:Read the register contents,<br />
06H:Write Single Register , 08H:Diagnostic function,<br />
10H:Write Multipile Registers<br />
DATA(n-1)<br />
n-word = 2n-byte (ASCII numbers : 4n ), n≦30<br />
│<br />
Data<br />
The format of data is depend on Function code<br />
DATA(0)<br />
LRC Check code Include 2 ASCII code within 1-byte<br />
END 1 END 1 (CR) 0DH;Char ’ \ r ‘<br />
END 0 END 0 (LF) 0AH;Char ’ \ n ‘<br />
RTU Mode<br />
Symbol Name Description<br />
STX Comm. start Excess <strong>com</strong>m. loss time setting 10ms<br />
ADR<br />
Slave address<br />
1-byte<br />
Comm. address : 1 ~ 254,convert to Hex representation ;<br />
Ex. Comm. address = 20 convert representation to 14 Hex, ADR<br />
= ’14H’<br />
Function Code Function code<br />
1-byte<br />
Function codes..03H:Read the register contents,<br />
06H:Write Single Register , 08H:Diagnostic function,<br />
10H:Write Multipile Registers<br />
DATA(n-1)<br />
n-word = 2n-byte;n≦30<br />
│<br />
Data<br />
The format of data is depend on Function code<br />
DATA(0)<br />
CRC-Low Checking code-LO 1-byte<br />
CRC-High Checking code-HI 1-byte<br />
END 0 End 0 Excess <strong>com</strong>m. loss time setting 10ms<br />
7-7
Common function codes<br />
03H:Read the register contents<br />
Continuous read N words. * Largest number of N is 29 (1DH)<br />
Ex.: Read two words ( register 0200H and 0201H ) from Slave address 01H.<br />
ASCII Mode<br />
Query PC Servo Response Servo PC OK) Servo PC (ERROR)<br />
STX ‘ : ’ STX ‘ : ’ STX ‘ : ’<br />
ADR<br />
‘ 0 ’ ‘ 0 ’ ‘ 0 ’<br />
ADR<br />
ADR<br />
‘ 1 ’<br />
‘ 1 ’<br />
‘ 1 ’<br />
Function Code<br />
‘ 0 ’ ‘ 0 ’ Function ‘ 8 ’<br />
Function Code<br />
‘ 3 ’<br />
‘ 3 ’<br />
Code ‘ 3 ’<br />
‘ 0 ’ Data length ‘ 0 ’ Exception ‘ 0 ’<br />
(Hi)<br />
Register<br />
‘ 2 ’<br />
(byte) ‘ 4 ’<br />
code ‘ 2 ’<br />
ADD.<br />
‘ 0 ’ ‘ 0 ’ ‘ 7 ’<br />
(Lo)<br />
Data of (Hi)<br />
LRC<br />
‘ 0 ’<br />
‘ 0 ’<br />
‘ A ’<br />
0200H<br />
‘ 0 ’ ‘ B ’ END1 (CR) (0DH)<br />
(Lo)<br />
Data length ‘ 0 ’<br />
‘ 1 ’ END0 (LF) (0AH)<br />
(word) ‘ 0 ’ ‘ 1 ’<br />
Data of (Hi)<br />
‘ 2 ’<br />
‘ F ’<br />
0201H<br />
‘ F ’ ‘ 4 ’<br />
LRC<br />
(Lo)<br />
‘ 8 ’<br />
‘ 0 ’<br />
END1 (CR) (0DH) ‘ E ’<br />
LRC<br />
END0 (LF) (0AH)<br />
‘ 8 ’<br />
END1 (CR) (0DH)<br />
END0 (LF) (0AH)<br />
RTU Mode<br />
Query PC Servo Response Servo PC (OK) Servo PC (ERROR)<br />
ADR 01H ADR 01H ADR 01H<br />
Function Code 03H Function Code 03H Function Code 83H<br />
Register (Hi) 02H Data (Byte) 04H Exception 02H<br />
ADD (Lo) 00H Data of (Hi) 00H CRC(Lo) C0H<br />
Data length 00H<br />
0200H (Lo) BAH CRC(Hi) F1H<br />
(word) 02H Data of (Hi) 1FH<br />
CRC(Lo) 04H<br />
0201H (Lo) 40H<br />
CRC(Hi) 07H CRC(Lo) A3H<br />
CRC(Hi) D4H<br />
7-8
06H:Write Single Register<br />
Write a word into register.<br />
Ex..Write data (0064H) into register address 0200H and slave ADR= 01<br />
ASCII Mode<br />
Query PC Servo Response ServoPC (OK) Servo PC (ERROR)<br />
STX ‘ : ’ STX ‘ : ’ STX ‘ : ’<br />
ADR<br />
‘ 0 ’ ‘ 0 ’ ‘ 0 ’<br />
ADR<br />
ADR<br />
‘ 1 ’<br />
‘ 1 ’<br />
‘ 1 ’<br />
Function Code<br />
‘ 0 ’ ‘ 0 ’ Function ‘ 8 ’<br />
Function Code<br />
‘ 6 ’<br />
‘ 6 ’<br />
Code ‘ 6 ’<br />
‘ 0 ’ ‘ 0 ’ Exception ‘ 0 ’<br />
(Hi)<br />
(Hi)<br />
Register<br />
‘ 2 ’ Register<br />
‘ 2 ’<br />
code ‘ 3 ’<br />
ADD<br />
‘ 0 ’ ADD.<br />
‘ 0 ’ ‘ 7 ’<br />
(Lo)<br />
(Lo)<br />
LRC<br />
‘ 0 ’<br />
‘ 0 ’<br />
‘ 6 ’<br />
‘ 0 ’ ‘ 0 ’ END1 (CR) (0DH)<br />
Write data ‘ 0 ’ Write data ‘ 0 ’ END0 (LF) (0AH)<br />
(word) ‘ 6 ’ (word) ‘ 6 ’<br />
‘ 4 ’<br />
‘ 4 ’<br />
LRC<br />
‘ 9 ’ ‘ 9 ’<br />
LRC<br />
‘ 3 ’<br />
‘ 3 ’<br />
END1 (CR) (0DH) END1 (CR) (0DH)<br />
END0 (LF) (0AH) END0 (LF) (0AH)<br />
RTU Mode<br />
Query PC Servo Response Servo PC (OK) Servo PC (ERROR)<br />
ADR 01H ADR 01H ADR 01H<br />
Function Code 06H Function Code 03H Function Code 86H<br />
Registe<br />
r<br />
(Hi) 02H Registe (Hi) 02H<br />
ADD (Lo) 00H<br />
r ADD.<br />
Exception<br />
03H<br />
code<br />
(Lo) 00H CRC(Lo) 02H<br />
Write data 00H Write data 00H CRC(Hi) 61H<br />
(word) 64H<br />
(word) 64H<br />
CRC(Lo) 89H CRC(Lo) 89H<br />
CRC(Hi) 99H CRC(Hi) 99H<br />
7-9
08H:Diagnostic function<br />
The sub-function code 0000H is able to check <strong>com</strong>munication signal between Master and Slaver. Data<br />
content is random value.<br />
Ex: Use the diagnostic function for ID=01H<br />
ASCII Mode<br />
Query PC Servo Response Servo PC (OK) Servo PC (ERROR)<br />
STX ‘ : ’ STX ‘ : ’ STX ‘ : ’<br />
ADR<br />
‘ 0 ’ ‘ 0 ’ ‘ 0 ’<br />
ADR<br />
ADR<br />
‘ 1 ’<br />
‘ 1 ’<br />
‘ 1 ’<br />
Function Code<br />
‘ 0 ’ ‘ 0 ’ Function ‘ 8 ’<br />
Function Code<br />
‘ 8 ’<br />
‘ 8 ’<br />
Code ‘ 8 ’<br />
‘ 0 ’ ‘ 0 ’ Exception ‘ 0 ’<br />
Sub- (HI)<br />
Sub- (HI)<br />
‘ 0 ’<br />
‘ 0 ’<br />
code ‘ 3 ’<br />
Function<br />
Function<br />
‘ 0 ’ ‘ 0 ’ ‘ 7 ’<br />
(Lo)<br />
(Lo)<br />
LRC<br />
‘ 0 ’<br />
‘ 0 ’<br />
‘ 4 ’<br />
‘ A ’ ‘ A ’ END1 (CR) (0DH)<br />
Data<br />
‘ 5 ’ Data<br />
‘ 5 ’ END0 (LF) (0AH)<br />
(word) ‘ 3 ’ (word)<br />
‘ 3 ’<br />
‘ 7 ’<br />
‘ 7 ’<br />
LRC<br />
‘ 1 ’ ‘ 1 ’<br />
LRC<br />
‘ B ’<br />
‘ B ’<br />
END1 (CR) (0DH) END1 (CR) (0DH)<br />
END0 (LF) (0AH) END0 (LF) (0AH)<br />
RTU Mode<br />
Query PC Servo Response Servo PC (OK) Servo PC (ERROR)<br />
ADR 01H ADR 01H ADR 01H<br />
Function Code 08H Function Code 08H Function Code 88H<br />
Sub-<br />
Sub-<br />
Exception<br />
(HI) 00H (HI) 00H<br />
Function<br />
Function<br />
code<br />
03H<br />
(Lo) 00H<br />
(Lo) 00H CRC(Lo) 06H<br />
Data A5H Data A5H CRC(Hi) 01H<br />
(word) 37H<br />
(word) 37H<br />
CRC(Lo) DAH CRC(Lo) DAH<br />
CRC(Hi) 8DH CRC(Hi) 8DH<br />
7-10
10H:Write Multipile Registers<br />
Continuously write N words to register. * Largest number of N is 27 (1BH)<br />
Ex.: Write data (0064H) and (012CH) into register address 100H and 101H respectively.<br />
ASCII Mode<br />
Query PC Servo Response Servo PC (OK) Servo PC (ERROR)<br />
STX ‘ : ’ STX ‘ : ’ STX ‘ : ’<br />
ADR<br />
‘ 0 ’ ‘ 0 ’ ‘ 0 ’<br />
ADR<br />
ADR<br />
‘ 1 ’<br />
‘ 1 ’<br />
‘ 1 ’<br />
Function Code<br />
‘ 1 ’ ‘ 1 ’ Function ‘ 9 ’<br />
Function Code<br />
‘ 0 ’<br />
‘ 0 ’<br />
Code ‘ 0 ’<br />
‘ 0 ’ ‘ 0 ’ Exception ‘ 0 ’<br />
(HI)<br />
(HI)<br />
Register<br />
‘ 1 ’ Register<br />
‘ 1 ’<br />
code ‘ 2 ’<br />
ADD<br />
‘ 0 ’ ADD<br />
‘ 0 ’ ‘ 6 ’<br />
(Lo)<br />
(Lo)<br />
LRC<br />
‘ 0 ’<br />
‘ 0 ’<br />
‘ D ’<br />
‘ 0 ’ ‘ 0 ’ END1 (CR) (0DH)<br />
Data length ‘ 0 ’ Data length ‘ 0 ’ END0 (LF) (0AH)<br />
(word) ‘ 0 ’ (word) ‘ 0 ’<br />
‘ 2 ’<br />
‘ 2 ’<br />
Byte counters ‘ 0 ’ ‘ E ’<br />
LRC<br />
(byte) ‘ 4 ’<br />
‘ C ’<br />
‘ 0 ’ END1 (CR) (0DH)<br />
(HI)<br />
ADD.<br />
‘ 0 ’ END0 (LF) (0AH)<br />
0100H<br />
‘ 6 ’<br />
(Lo)<br />
‘ 4 ’<br />
‘ 0 ’<br />
(HI)<br />
ADD.<br />
‘ 1 ’<br />
0101H<br />
‘ C ’<br />
(Lo)<br />
‘ 2 ’<br />
LRC<br />
‘ 5 ’<br />
‘ 7 ’<br />
END1 (CR) (0DH)<br />
END0 (LF) (0AH)<br />
7-11
RTU Mode<br />
Query PC Servo Response Servo PC (OK) Servo PC (ERROR)<br />
ADR 01H ADR 01H ADR 01H<br />
Function Code 10H Function Code 10H Function Code 90H<br />
Register<br />
ADD<br />
(HI) 01H Register (HI) 01H<br />
(Lo)<br />
Data length<br />
(word)<br />
00H<br />
ADD<br />
Exception<br />
code<br />
02H<br />
(Lo) 00H CRC(Lo) CDH<br />
00H Data length 00H CRC(Hi) C1H<br />
02H<br />
(word)<br />
02H<br />
Byte counters 04H CRC(Lo) 40H<br />
Data<br />
(HI) 00H CRC(Hi) 34H<br />
0100H (Lo) 64H<br />
Data<br />
(HI)<br />
01H<br />
0101H (Lo) 2CH<br />
CRC(Lo)<br />
CRC(Hi)<br />
BFH<br />
ADH<br />
LRC (ASCII Mode ) and CRC (RTU Mode) Check methods<br />
LRC Checking:<br />
ASCII Mode LRC (Longitudinal Redundancy Check) checking method<br />
The LRC is calculated by adding together successive 8–bit bytes of the message, discarding any carries.<br />
Ex. add ADR, Function code, register address and data contents together, if it get the sum 19DH then discard<br />
carrier ”1” and find two’s <strong>com</strong>plement for 9DH to obtain LRC code.<br />
Ex: Execute diagnostic function for Servo drive ID =01H<br />
STX ‘ : ’ ‘ A ’<br />
‘ 0 ’ ‘ 5 ’<br />
ADR<br />
Data (word)<br />
‘ 1 ’ ‘ 3 ’<br />
‘ 0 ’<br />
‘ 7 ’<br />
Function code<br />
‘ 8 ’ ‘ 1 ’<br />
LRC<br />
‘ 0 ’<br />
‘ B ’<br />
(HI)<br />
‘ 0 ’ END1 (CR) (0DH)<br />
Sub-function<br />
‘ 0 ’ END0 (LF) (0AH)<br />
(Lo)<br />
‘ 0 ’<br />
01H+08H+00H+00H+A5H+37H = E5H<br />
Two’s <strong>com</strong>plement for E5H is 1BH ; derive LRC code: ‘ 1 ’ , ‘ B ’<br />
7-12
CRC Checking:<br />
CRC check code is from Slave Address to end of the data. The calculation method is<br />
illustrated as follow:<br />
(1) Load a 16-bit register with FFFF hex (all1’s). Call this the CRC register.<br />
(2) Exclusive OR the first 8-bit byte of the message with the low-order byte of the 16-bit<br />
CRC register, putting the result in the CRC register.<br />
(3) Shift the CRC register one bit to the right (toward the LSB), Zero-filling the MSB,<br />
Extract and examines the LSB.<br />
(4) (If the LSB was 0): Repeat Steps (3) (another shift) (If the LSB was 1):<br />
Exclusive OR the CRC register with the polynomial value A001 hex (1010 0000<br />
0000 0001).<br />
(5) Repeat Steps (3) and (4) until 8 shifts been performed. When this is done, a <strong>com</strong>plete<br />
8-bit byte will be processed.<br />
(6) Repeat Steps (2) through (5) for next 8-bit byte of the message, Continue doing this<br />
until all bytes have been processed. The final content of the CRC register is the CRC value.<br />
Placing the CRC into the message:<br />
When the 16-bit CRC (2 8-bit bytes) is transmitted in the message, the low-order byte<br />
will be transmitted first, followed by the high-order byte, For example, if the CRC value<br />
is 1241 hex, the CRC-16 (Low) put the 41h, the CRC-16 (Hi) put the 12h.<br />
Example:<br />
An example of a C language function performing CRC generation is shown on the following<br />
pages. All of the possible CRC values are preloaded into two arrays, which are simply indexed<br />
as the function increments through the message buffer. One array contains all of the 256<br />
possible CRC values for the high byte of the 16-bit CRC field, and the other array contains all<br />
of the values for the low byte.<br />
Indexing the CRC in this way provides faster execution than would be achieved by calculating a<br />
new CRC value with each new character from the message buffer.<br />
Note<br />
This function performs the swapping of the high/low CRC bytes internally. The bytes are<br />
already swapped in the CRC value that is returned from the function.<br />
Therefore the CRC value returned from the function can be directly placed into the message for<br />
transmission.<br />
The function takes two arguments:<br />
unsigned char *puchMsg ; A pointer to the message buffer containing binary data<br />
to be used for generating the CRC<br />
unsigned short usDataLen ; The quantity of bytes in the message buffer.<br />
The function returns the CRC as a type unsigned short.<br />
7-13
CRC Generation Function<br />
unsigned short CRC16(puchMsg, usDataLen)<br />
unsigned char *puchMsg ;<br />
unsigned short usDataLen ;<br />
{<br />
unsigned char uchCRCHi = 0xFF ;<br />
unsigned char uchCRCLo = 0xFF ;<br />
unsigned uIndex ;<br />
/* message to calculate CRC upon*/<br />
/* quantity of bytes in message*/<br />
/* high byte of CRC initialized*/<br />
/* low byte of CRC initialized*/<br />
/* will index into CRC lookup table*/<br />
while (usDataLen--)<br />
{<br />
uIndex = uchCRCHi ^ *puchMsgg++ ;<br />
uchCRCHi = uchCRCLo ^ auchCRCHi[uIndex} ;<br />
uchCRCLo = auchCRCLo[uIndex] ;<br />
}<br />
return (uchCRCHi
Low-Order Byte Table<br />
/* Table of CRC values for low-order byte */<br />
static char auchCRCLo[] = {<br />
0x00, 0xC0, 0xC1, 0x01, 0xC3, 0x03, 0x02, 0xC2, 0xC6, 0x06, 0x07, 0xC7, 0x05, 0xC5, 0xC4,<br />
0x04, 0xCC, 0x0C, 0x0D, 0xCD, 0x0F, 0xCF, 0xCE, 0x0E, 0x0A, 0xCA, 0xCB, 0x0B, 0xC9, 0x09,<br />
0x08, 0xC8, 0xD8, 0x18, 0x19, 0xD9, 0x1B, 0xDB, 0xDA, 0x1A, 0x1E, 0xDE, 0xDF, 0x1F, 0xDD,<br />
0x1D, 0x1C, 0xDC, 0x14, 0xD4, 0xD5, 0x15, 0xD7, 0x17, 0x16, 0xD6, 0xD2, 0x12, 0x13, 0xD3,<br />
0x11, 0xD1, 0xD0, 0x10, 0xF0, 0x30, 0x31, 0xF1, 0x33, 0xF3, 0xF2, 0x32, 0x36, 0xF6, 0xF7,<br />
0x37, 0xF5, 0x35, 0x34, 0xF4, 0x3C, 0xFC, 0xFD, 0x3D, 0xFF, 0x3F, 0x3E, 0xFE, 0xFA, 0x3A,<br />
0x3B, 0xFB, 0x39, 0xF9, 0xF8, 0x38, 0x28, 0xE8, 0xE9, 0x29, 0xEB, 0x2B, 0x2A, 0xEA, 0xEE,<br />
0x2E, 0x2F, 0xEF, 0x2D, 0xED, 0xEC, 0x2C, 0xE4, 0x24, 0x25, 0xE5, 0x27, 0xE7, 0xE6, 0x26,<br />
0x22, 0xE2, 0xE3, 0x23, 0xE1, 0x21, 0x20, 0xE0, 0xA0, 0x60, 0x61, 0xA1, 0x63, 0xA3, 0xA2,<br />
0x62, 0x66, 0xA6, 0xA7, 0x67, 0xA5, 0x65, 0x64, 0xA4, 0x6C, 0xAC, 0xAD, 0x6D, 0xAF, 0x6F,<br />
0x6E, 0xAE, 0xAA, 0x6A, 0x6B, 0xAB, 0x69, 0xA9, 0xA8, 0x68, 0x78, 0xB8, 0xB9, 0x79, 0xBB,<br />
0x7B, 0x7A, 0xBA, 0xBE, 0x7E, 0x7F, 0xBF, 0x7D, 0xBD, 0xBC, 0x7C, 0xB4, 0x74, 0x75, 0xB5,<br />
0x77, 0xB7, 0xB6, 0x76, 0x72, 0xB2, 0xB3, 0x73, 0xB1, 0x71, 0x70, 0xB0, 0x50, 0x90, 0x91,<br />
0x51, 0x93, 0x53, 0x52, 0x92, 0x96, 0x56, 0x57, 0x97, 0x55, 0x95, 0x94, 0x54, 0x9C, 0x5C,<br />
0x5D, 0x9D, 0x5F, 0x9F, 0x9E, 0x5E, 0x5A, 0x9A, 0x9B, 0x5B, 0x99, 0x59, 0x58, 0x98, 0x88,<br />
0x48, 0x49, 0x89, 0x4B, 0x8B, 0x8A, 0x4A, 0x4E, 0x8E, 0x8F, 0x4F, 0x8D, 0x4D, 0x4C, 0x8C,<br />
0x44, 0x84, 0x85, 0x45, 0x87, 0x47, 0x46, 0x86, 0x82, 0x42, 0x43, 0x83, 0x41, 0x81, 0x80,<br />
0x40<br />
} ;<br />
Exception Codes<br />
When <strong>com</strong>munication error occur , servo drive is returned with an error code and<br />
Function code+80H return to the ModBus host controller.<br />
Code Name Description<br />
01 ILLEGAL FUNCTION<br />
The function code received in the query is not an allowable action<br />
for the server (or slave).<br />
The data address received in the query is not an allowable<br />
02 ILLEGAL DATA ADD.<br />
address for the server (or slave).<br />
A value contained in the query data field is not an allowable value<br />
03 ILLEGAL DATA VALUE<br />
for server (or slave).<br />
04<br />
SLAVE DEVICE An unrecoverable error occurred while the server (or slave) was<br />
FAILURE attempting to perform the requested action.<br />
05 RTU CHECK FAILURE RTU mode: CRC check error<br />
06<br />
ASCII CHECK<br />
FAILURE<br />
ASCII mode: LRC check error or no end code(CRLF)<br />
7-15
7-2 Communication address table<br />
All parameters allow to write data by <strong>com</strong>munication excluding display parameters.<br />
System parameters<br />
RS485<br />
Address<br />
RS232<br />
Parameter<br />
0001 510H Cn001 Control Mode<br />
Name of parameter<br />
0002 51DH Cn002 DI Contacts function and Auto tunning<br />
0003 511H Cn003 Output time setting for Mechanical Brake Signal<br />
0004 512H Cn004 Motor rotation direction<br />
0005 513H Cn005 Encoder pulse output scale<br />
0006 514H Cn006 Analog Monitor output Selection<br />
0007 515H Cn007 Value for Speed reached<br />
0008 516H Cn008 Brake Modes<br />
0009 517H Cn009 CW/CCW Drive inhibit<br />
000A 518H Cn010 CCW Torque <strong>com</strong>mand limit<br />
000B 519H Cn011 CW Torque <strong>com</strong>mand limit<br />
000C 51AH Cn012 Power setting for external Re-generation resistor<br />
000D 5DEH Cn013 Frequency of Notch Filter (Resonance Filter)<br />
000E 5DFH Cn014 Band Width of the Resonance Filter.<br />
000F 58FH Cn015 Gain selection.<br />
0010 5F8H Cn016 PI/P control switch Mode (Torque Command)<br />
0011 5F9H Cn017 PI/P control switch Mode (Speed Command)<br />
0012 5FAH Cn018 Switch-condition in PI/P mode (accelerate Command )<br />
0013 5FBH Cn019 PI/P control switch Mode (position error number)<br />
0014 53CH Cn020 Automatic Gain 1 & 2 switch delay time<br />
0015 53DH Cn021 Automatic Gain 1 & 2 switch condition (Torque <strong>com</strong>mand)<br />
0016 53EH Cn022 Automatic Gain 1 & 2 switch condition (Speed Command)<br />
0017 53FH Cn023<br />
Automatic Gain 1 & 2 switch condition (Acceleration<br />
Command)<br />
0018 540H Cn024 Automatic Gain 1 & 2 switch condition (Position error value)<br />
0019 587H Cn025 Load-Inertia ratio<br />
001A 5D0H Cn026 Rigidity Setting<br />
001B 58BH Cn027 Analog monitor output 1 for offset adjustment<br />
001C 58CH Cn028 Analog monitor output 2 for offset adjustment<br />
001D 5FDH Cn029 Reset Parameter<br />
001E 50BH Cn030 Servo motor model code<br />
001F 50EH Cn031 Cooling fan running mode<br />
0020 546H Cn032 Speed feed-back smoothing filter<br />
0021 51EH Cn033 Speed Feed-forward smoothing filter<br />
0022 5B8H Cn034 Torque <strong>com</strong>mand smoothing filter<br />
0023 541H Cn035 Panel display content selection<br />
Address Parameter Name of parameter<br />
7-16
RS485 RS232<br />
0024 51BH Cn036 Servo ID number<br />
0025 544H Cn037 Braud rate setting for (Modbus RS-485 / PC Software RS-232)<br />
0026 545H Cn038 Communication protocol selection<br />
0027 567H Cn039 Communication time-out dection time<br />
0028 579H Cn040 Communication response delay time<br />
Torque control parameters<br />
Address<br />
RS485 RS232<br />
Parameter<br />
Name of parameter<br />
0101 520H Tn101 Linear acceleration/deceleration method selection<br />
0102 523H Tn102 Linear acceleration/deceleration time period<br />
0103 521H Tn103 Analog Torque Command Ratio<br />
0104 522H Tn104 Analog torque <strong>com</strong>mand offset<br />
0105 526H Tn105 Internal Speed Limit 1<br />
0106 527H Tn106 Internal Speed Limit 2<br />
0107 528H Tn107 Internal Speed Limit 3<br />
0108 5CDH Tn108 Torque output monitor value<br />
Speed control parameters<br />
Address<br />
RS485 RS232<br />
Parameter<br />
Name of parameter<br />
0201 536H Sn201 Internal Speed Command 1<br />
0202 537H Sn202 Internal Speed Command 2<br />
0203 538H Sn203 Internal Speed Command 3<br />
0204 529H Sn204 Zero Speed preset selection<br />
0205 52AH Sn205 Speed <strong>com</strong>mand acceleration / deceleration methods<br />
0206 52BH Sn206<br />
Speed <strong>com</strong>mand Smooth acceleration/deceleration-time<br />
constant<br />
0207 52CH Sn207<br />
Speed <strong>com</strong>mand Linear acceleration/deceleration time<br />
constant<br />
0208 52DH Sn208<br />
S curve speed <strong>com</strong>mand acceleration and deceleration time<br />
setting<br />
0209 52EH Sn209 S curve speed <strong>com</strong>mand acceleration time setting<br />
020A 52FH Sn210 S curve speed <strong>com</strong>mand deceleration time setting<br />
020B 530H Sn211 Speed loop Gain 1<br />
020C 531H Sn212 Speed-loop Integral time constant 1<br />
020D 53AH Sn213 Speed loop Gain 2<br />
020E 53BH Sn214 Speed loop Integral time constant 2<br />
020F 532H Sn215 Value of zero speed<br />
7-17
RS485<br />
Address<br />
RS232<br />
Parameter<br />
Name of parameter<br />
0210 533H Sn216 Analog Speed Command Ratio<br />
0211 534H Sn217 Analog Speed Command offset adjust<br />
0212 599H Sn218 Analog Speed Command Limit<br />
Position control parameters<br />
RS485<br />
Address<br />
RS232<br />
Parameter<br />
Name of parameter<br />
0301H 550H Pn301<br />
Position <strong>com</strong>mand selection (for pulse type、logic and<br />
drive inhizibit )<br />
0302H 560H Pn302 Electronic Gear Ratio Numerator 1<br />
0303H 561H Pn303 Electronic Gear Ratio Numerator 2<br />
0304H 562H Pn304 Electronic Gear Ratio Numerator 3<br />
0305H 563H Pn305 Electronic Gear Ratio Numerator 4<br />
0306H 554H Pn306 Electronic Gear Ratio Denominator<br />
0307H 552H,553H Pn307 Position <strong>com</strong>plete value<br />
0308H 556H,557H Pn308 Position error band upper limit<br />
0309H 558H,559H Pn309 Position error band lower limit<br />
030AH 55AH Pn310 Position Loop Gain 1<br />
030BH 551H Pn311 Position Loop Gain 2<br />
030CH 55BH Pn312 Position Loop Feed Forward Gain<br />
030DH 55CH Pn313 Position <strong>com</strong>mand Smooth Accel/Decel time constant<br />
030EH 55DH Pn314 Position Command Direction definition<br />
030FH 51FH Pn315 Position Pulse error clear mode<br />
0310H 50DH Pn316 Internal Position Command Mode<br />
0311H 568H Pn317 Internal Position Command 1-Rotation Number<br />
0312H 569H Pn318 Internal Position Command 1-Pulse Number<br />
0313H 56AH Pn319 Internal Position Command 1-Move Speed<br />
0314H 56BH Pn320 Internal Position Command 2-Rotation number<br />
0315H 56CH Pn321 Internal Position Command 2-Pulse Number<br />
0316H 56DH Pn322 Internal Position Command 2-Move Speed<br />
0317H 56EH Pn323 Internal Position Command 3-Rotation number<br />
0318H 56FH Pn324 Internal Position Command 3-Pulse Number<br />
0319H 575H Pn325 Internal Position Command 3-Moving Speed<br />
031AH 576H Pn326 Internal Position Command 4-Rotation number<br />
031BH 577H Pn327 Internal Position Command 4-Pulse Number<br />
031CH 578H Pn328 Internal Position Command 4-Move Speed<br />
031DH 59CH Pn329 Internal Position Command 5-Rotation Number<br />
031EH 59DH Pn330 Internal Position Command 5-Pulse Number<br />
7-18
Address<br />
RS485 RS232<br />
Parameter<br />
Name of parameter<br />
031FH 59EH Pn331 Internal Position Command 5- Move Speed<br />
0320 59FH Pn332 Internal Position Command 6-Rotation Number<br />
0321 5A0H Pn333 Internal Position Command 6-Pulse Number<br />
0322 5A1H Pn334 Internal Position Command 6- Move Speed<br />
0323 5A2H Pn335 Internal Position Command 7-Rotation Number<br />
0324 5A3H Pn336 Internal Position Command 7-Pulse Number<br />
0325 5A4H Pn337 Internal Position Command 7- Move Speed<br />
0326 5A5H Pn338 Internal Position Command 8-Rotation Number<br />
0327 5A6H Pn339 Internal Position Command 8-Pulse Number<br />
0328 5A7H Pn340 Internal Position Command 8- Move Speed<br />
0329 5A8H Pn341 Internal Position Command 9-Rotation Number<br />
032A 5A9H Pn342 Internal Position Command 9-Pulse Number<br />
032B 5AAH Pn343 Internal Position Command 9- Move Speed<br />
032C 5ABH Pn344 Internal Position Command 10-Rotation Number<br />
032D 5ACH Pn345 Internal Position Command 10-Pulse Number<br />
032E 5ADH Pn346 Internal Position Command 10-Move Speed<br />
032F 5AEH Pn347 Internal Position Command 11-Rotation Number<br />
0330 5AFH Pn348 Internal Position Command 11-Pulse Number<br />
0331 5B3H Pn349 Internal Position Command 11-Move Speed<br />
0332 5E0H Pn350 Internal Position Command 12-Rotation Number<br />
0333 5E1H Pn351 Internal Position Command 12-Pulse Number<br />
0334 5E3H Pn352 Internal Position Command 12-Move Speed<br />
0335 5E4H Pn353 Internal Position Command 13-Rotation Number<br />
0336 5E5H Pn354 Internal Position Command 13- Pulse Number<br />
0337 5E6H Pn355 Internal Position Command 13- Move Speed<br />
0338 5E7H Pn356 Internal Position Command 14-Rotation Number<br />
0339 5E8H Pn357 Internal Position Command 14- Pulse Number<br />
033A 5E9H Pn358 Internal Position Command 14- Move Speed<br />
033B 5EAH Pn359 Internal Position Command 15-Rotation Number<br />
033C 5EBH Pn360 Internal Position Command 15- Pulse Number<br />
033D 5ECH Pn361 Internal Position Command 15- Move Speed<br />
033E 5EDH Pn362 Internal Position Command 16- Rotation Number<br />
033F 5EEH Pn363 Internal Position Command 16- Pulse Number<br />
0340 5EFH Pn364 Internal Position Command 16-Move Speed<br />
0341 54AH Pn365 Setting for HOME routine<br />
0342 54BH Pn366 1 st preset speed of HOME (high speed)<br />
0343 54CH Pn367 2 nd preset speed of HOME ( low speed )<br />
0344 54DH Pn368 HOME Position Offset. (No of Revolutions)<br />
0345 54EH Pn369 HOME – Bias Pulse value (No of pulses)<br />
7-19
Quick Setup parameters<br />
Address<br />
RS485 RS232<br />
Parameter<br />
Name of parameter<br />
0401 530H qn401 Speed Loop Gain 1<br />
0402 531H qn402 Integral Time constant for Speed Loop 1<br />
0403 53AH qn403 Speed Loop Gain 2<br />
0404 53BH qn404 Integral Time constant for Speed Loop 2<br />
0405 55AH qn405 Position Loop Gain 1<br />
0406 551H qn406 Position Loop Gain 2<br />
0407 55BH qn407 Position Loop Feed-Forward Gain<br />
Multi-function programmable contact parameter<br />
Address<br />
RS485 RS232<br />
Parameter<br />
Name of parameter<br />
0501 5C0H Hn501 DI-1 Pragrammable digital inupt<br />
0502 5C1H Hn502 DI-2 Pragrammable digital inupt<br />
0503 5C2H Hn503 DI-3 Pragrammable digital inupt<br />
0504 5C3H Hn504 DI-4 Pragrammable digital inupt<br />
0505 5C4H Hn505 DI-5 Pragrammable digital inupt<br />
0506 5C5H Hn506 DI-6 Pragrammable digital inupt<br />
0507 5C6H Hn507 DI-7 Pragrammable digital inupt<br />
0508 5C7H Hn508 DI-8 Pragrammable digital inupt<br />
0509 5C8H Hn509 DI-9 Pragrammable digital inupt<br />
050A 5C9H Hn510 DI-10 Pragrammable digital inupt<br />
050B 5CAH Hn511 DI-11 Pragrammable digital inupt<br />
050C 5CBH Hn512 DI-12 Pragrammable digital inupt<br />
050D 5CCH Hn513 DI-13 Pragrammable digital inupt<br />
050E 5F4H Hn514 DO-1 Pragrammable digital output<br />
050F 5F5H Hn515 DO-2 Pragrammable digital output<br />
0510 5F6H Hn516 DO-3 Pragrammable digital output<br />
0511 5F7H Hn517 DO-4 Pragrammable digital output<br />
0512 5CEH Hn518 Digital input control method selection<br />
0513 5FFH Hn519 Digital input status control in <strong>com</strong>munication mode<br />
7-20
Display parameters<br />
Address<br />
RS485 RS232<br />
Parameter<br />
Name of parameter<br />
0601 6E4H Un-01 Actual Motor Speed<br />
0602 9B6H Un-02 Actual Motor Torque<br />
0603 691H Un-03 Regenerative load rate<br />
0604 693H Un-04 Accumulated load rate<br />
0605 694H Un-05 Max load rate<br />
0606 678H Un-06 Speed Command<br />
0607 65CH Un-07 Position Error Value<br />
0608 688H Un-08 Position Feed-back Value<br />
0609 632H Un-09 ExternalVoltage Command<br />
060A 6B7H Un-10 (Vdc Bus) Main Loop Voltage<br />
060B 695H Un-11 External Spped Limit Command Value<br />
060C 6C0H Un-12 External CCW Torque Limit Command Value<br />
060D 6C1H Un-13 External CW Torque Limit Command Value<br />
060E 8BBH Un-14 Motor feed back – Rotation value (absolute value)<br />
060F 8BAH Un-15<br />
Motor feed back – Less then one rotation pulse<br />
value(absolute value)<br />
0610 8C5H Un-16 Pulse <strong>com</strong>mand – rotation value(absolute value)<br />
0611 8C4H Un-17<br />
Pulse Command-Pulse value less than one<br />
rotation(Absolute value)<br />
0612 67EH Un-18 Torque <strong>com</strong>mand<br />
0613 844H Un-19 Load inertia ratio<br />
7-21
Chapter 8 Troubleshooting<br />
8-1 Alarm functions<br />
The Alarm codes are displayed in a format such as that shown below. For any Alarm messages , refer to this<br />
section for identify the cause and dispel the error. to reset the Alarm message by following pages description.<br />
If this is not possible for any reason then contact your local supplier for assistance.<br />
Alarm Status Display:<br />
For Alarm List refer to the section 8-2. In the example above AL-01 indicate (Under Voltage)<br />
There is also an Alarm history which can record ten entry of alarm record.<br />
History record is listed as alarm history record table shows.<br />
Alarm History Record<br />
Display<br />
AL -<br />
A1 -<br />
A2 -<br />
A3 -<br />
A4 -<br />
A5 -<br />
A6 -<br />
A7 -<br />
A8 -<br />
A9 -<br />
Explanation<br />
The Latest Alarm.<br />
Previous First Alarm.<br />
Previous Second. Alarm.<br />
Previous Third Alarm.<br />
Previous Fourth Alarm.<br />
Previous Fifth Alarm.<br />
Previous Sixth Alarm.<br />
Previous Seventh Alarm.<br />
Previous Eighth Alarm.<br />
Previous Ninth Alarm.<br />
Latest record<br />
Earliest record<br />
Note: is denotation of the Alarm Codes.<br />
8-1
Example:<br />
Following table are procedures to access the alarm history record parameter.<br />
Steps Key LED Display Procedures<br />
1 Turn On<br />
the Power<br />
On” power on “ Drive Status parameter is displayed.<br />
2 Press MODE key to enter the Alarm History record.<br />
3<br />
4<br />
Press Key to view the Alarm 1 message that previously<br />
happened and the alarm code is “03” (Overload)<br />
Press Key again to view Alarm 2 message and repeat<br />
this to see entire alarm history list.<br />
In this example Alarm code is 01. (Under voltage)<br />
5 Press MODE key once to view System Parameters.<br />
Repeat this to select all other available parameters.<br />
8-2
8-2 Troubleshooting of Alarm and Warning<br />
Alarm<br />
Code<br />
Alarm Name<br />
and Description<br />
Corrective Actions<br />
Reset<br />
Method<br />
00 Normal — —<br />
01<br />
02<br />
03<br />
04<br />
Under-voltage<br />
The main circuit<br />
voltage is below its<br />
minimum specified<br />
value. (190Vac)<br />
Over-voltage<br />
(Regeneration error)<br />
1. The main circuit<br />
voltage is exceeded<br />
maximum allowable<br />
value. (410V)<br />
2. Regeneration<br />
voltage is too high.<br />
Motor Over-load<br />
The drive has<br />
exceeded its rated<br />
load during<br />
continuous operation.<br />
When the loading is<br />
equal to 2 times of<br />
rated loading, alarm<br />
occurs within 10sec.<br />
Drive Over-current<br />
Drive main circuit<br />
Over current or<br />
Transistor error.<br />
Use multi-meter to check<br />
whether the input voltage is<br />
within the specified limit. If it can<br />
not be solved, there may be<br />
failure inside the Drive.<br />
1. Use multi-meter to check<br />
whether the input voltage is<br />
within the specified limit.<br />
2. Check the Parameter Cn012 if<br />
it is setting correctly.<br />
3. If this alarm appears during<br />
operation.<br />
Extend ac/deceleration time<br />
or reduce load ratio in the<br />
permitted range. Otherwise,<br />
an external regeneration<br />
resistor is needed.<br />
(Please contact your supplier<br />
for assistance.)<br />
1. Check connection for Motor<br />
terminal s (U,V,W) and<br />
Encoder.<br />
2. Adjust the Drive gain, If gain is<br />
not correctly adjusted, it would<br />
cause motor vibration and<br />
large current will lead to motor<br />
over load.<br />
3. Extend acc/deceleration time<br />
or reduce load ratio in the<br />
permitted range.<br />
1. Check connection of the motor<br />
cable (U,V,W) and encoder.<br />
Check power cable<br />
connection. Refer to the<br />
diagram in Chapter 2.<br />
2. Turn off the power, and turn on<br />
again after 30 min. If the alarm<br />
still exists, there may be<br />
power module malfunction or<br />
noise consider the drive for<br />
test and repair.<br />
Turn<br />
ALRS(DI)<br />
ON<br />
Turn<br />
ALRS(DI)<br />
ON<br />
Turn<br />
ALRS(DI)<br />
ON<br />
Reset<br />
Power<br />
Supply<br />
Fault Status Digital Output<br />
CN1-25<br />
BB/A3<br />
CN1-24<br />
ST/A2<br />
CN1-23<br />
PC/A1<br />
CN1-22<br />
LM/A0<br />
If there is no Alarm, CN1-22~CN1-25<br />
operates in accordance with default<br />
function. Please refer to 2-2-1.<br />
1 1 1 0<br />
1 1 0 1<br />
1 1 0 0<br />
1 0 1 1<br />
8-3
Alarm<br />
Code<br />
Alarm Name<br />
and Description<br />
Encoder ABZ<br />
phase signal<br />
error<br />
05 Motor’s encoder<br />
failure or encoder<br />
connection<br />
problem.<br />
Encoder UVW<br />
phase signal<br />
error<br />
06 Motor’s encoder<br />
failure or encoder<br />
connection<br />
07<br />
problem.<br />
Multi-function<br />
contact setting<br />
error<br />
Input/output<br />
contacts function<br />
setting error.<br />
Memory Error<br />
08 Parameter write-in<br />
error<br />
09<br />
Emergency Stop<br />
When the input<br />
contact point EMC<br />
is activated.<br />
Alarm 09 appears.<br />
Motor<br />
over-current<br />
10 Motor current is 4<br />
times greater than<br />
rated current.<br />
Corrective Actions<br />
1.Check the motor’s encoder<br />
connections.<br />
2.Check the encoder if short circuit,<br />
poor solder joints or break.<br />
3.Check the encoder signal terminals<br />
CN2-1 and CN2-2. ( power cable 5v)<br />
1. Check parameters Hn501~Hn513,<br />
trigger level selected by 2 nd digit of<br />
Hn 501 to 513 should be the same<br />
for all inputs DI-1~DI-13.<br />
2.Check parameters setting of Hn514<br />
~ Hn517 should NOT be the same<br />
for outputs contact DO-1~DO-4.<br />
Disconnect all <strong>com</strong>mand cable then<br />
re-cycle the power. If alarm still<br />
occurs, it means the Drive was failure.<br />
1. Disable Emergency stop signal<br />
input.<br />
2. Internal mal-function.<br />
Ensure that all connection are<br />
correct, refer to Chapter 2 Power<br />
and motor circuit diagrams<br />
connection.<br />
Control wiring diagrams.<br />
1.Check if the motor wiring U,V,W)and<br />
encoder wiring correct or not.<br />
2.Internal interference and<br />
mal-function. Ensure that all<br />
connection are correct ,refer to<br />
Chapter 2 Power and motor circuit<br />
diagrams.<br />
Reset<br />
Method<br />
Reset<br />
Power<br />
Supply<br />
Reset<br />
Power<br />
Supply<br />
Reset<br />
Power<br />
Supply<br />
Reset<br />
Power<br />
Supply<br />
Turn<br />
ALRS(DI)<br />
ON<br />
Turn<br />
ALRS(DI)<br />
ON<br />
CN1-25<br />
BB/A3<br />
Alarm Status Digital Output<br />
CN1-24<br />
ST/A2<br />
CN1-23<br />
PC/A1<br />
CN1-22<br />
LM/A0<br />
1 0 1 0<br />
1 0 0 1<br />
1 0 0 0<br />
0 1 1 1<br />
0 1 1 0<br />
0 1 0 1<br />
8-4
Alarm<br />
Code<br />
11<br />
12<br />
Alarm Name<br />
and Description<br />
Corrective Actions<br />
Position error 1. Increase the position loop gain<br />
(Pn310 and Pn311) setting value.<br />
The deviation<br />
2. Increase in position tolerance value<br />
between Pulse<br />
by (Pn307) for a better motor<br />
<strong>com</strong>mand and<br />
response.<br />
encoder feed back<br />
3. Extend the time of ac/deceleration<br />
( position error) is<br />
or reduce load inertia in the<br />
greater than the<br />
permitted range.<br />
setting of Pn308 or<br />
4. Check if the motor wiring (U,V,W)<br />
Pn309.<br />
is correct.<br />
Motor over speed<br />
Motor’s speed is<br />
1.5 times more<br />
then motor’s rated<br />
speed.<br />
CPU Error<br />
13 Control system<br />
Mal-function.<br />
14<br />
15<br />
1. Reduce the speed <strong>com</strong>mand.<br />
2. Electronic gear ratio is incorrect<br />
check and set correctly.<br />
3. Adjust speed loop gains (Sn211 &<br />
Sn213) for a better motor<br />
response.<br />
Turn off the power. Turn on again after<br />
30min. If error alarm still exists, this<br />
may be due to external interference.<br />
Refer to the chapter 2 Motor 、 power<br />
cable and control signals connections.<br />
Drive disable 1. Remove input contact signal<br />
When input CCWL or CWL.<br />
contacts 2. Check all input wiring for correct<br />
CCWL & CWL connections.<br />
are operated at the 3. For the selected High /Low logic<br />
same time this potential settings refer to Section<br />
alarm occurs. 5-6-1.<br />
Drive overheat<br />
Power transistor<br />
temperature<br />
exceed 90°C.<br />
Over-load for a long duration will<br />
cause driver overheat, check and<br />
reset operation system.<br />
Reset<br />
Method<br />
Turn<br />
ALRS<br />
(DI)<br />
ON<br />
Turn<br />
ALRS<br />
(DI)<br />
ON<br />
Reset<br />
Power<br />
Supply<br />
Turn<br />
ALRS<br />
(DI)<br />
ON<br />
Turn<br />
ALRS<br />
(DI)<br />
ON<br />
CN1-25<br />
BB/A3<br />
Alarm Status Digital Output<br />
CN1-24<br />
ST/A2<br />
CN1-23<br />
PC/A1<br />
0 1 0<br />
CN1-22<br />
LM/A0<br />
0 0 1 1<br />
0 0 1 0<br />
0 0 0 1<br />
0 0 0 0<br />
0<br />
8-5
Alarm Reset Methods<br />
1. carry out the suggestions below to reset Alarm.<br />
(a) Reset by input signal: Once the cause of Alarm is rectified,<br />
disable SON signal (Switch off Servo ON), then activate input signal ALRS.<br />
Alarm condition should be cleared and the drive will be ready for operation.<br />
Reference 5-6-1 for setting SON and Alarm signal.<br />
(b) Reset from Keypad : Once the cause of Alarm is rectified,<br />
disable SON signal (Switch off Servo ON), then press the buttons and at the same time to reset<br />
Alarm and the drive will be ready for operation.<br />
2. Power reset: Once the cause of Alarm is rectified, disable SON signal (Switch off Servo ON) and re-cycling<br />
power.<br />
Alarm condition can be reset and the drive will be ready for operation.<br />
Waning!<br />
1) Before applying power rest , ensure that SON is off ( SON signal is removed first) to prevent danger.<br />
2) Ensure that the speed <strong>com</strong>mands are removed before the alarm is reset, otherwise the motor may<br />
run abruptly once the alarm signal is reset.<br />
8-6
Chapter 9 Specifications<br />
9-1 Specifications and Dimension for Servo Drives<br />
Servo motor for TSTA- 15C 20C 30C 50D 75D<br />
Servo motor capacity [KW] Max. 0.4 0.8 1.0 2.0 3.0<br />
Continuous output<br />
current [A rms]<br />
3.5 4.4 5.16 9.18 14.00<br />
Max. output current [A rms] 10.5 13.8 15.50 27.50 42.00<br />
Main Circuit<br />
Single/Three Phase 170 ~ 253Vac Three Phase 170 ~ 253Vac<br />
Input<br />
R/S/T<br />
50/60Hz ±5%<br />
50/60Hz ±5%<br />
Power<br />
Control Circuit<br />
Single Phase 200 ~ 230Vac<br />
Supply<br />
R/S<br />
50/60Hz ±5%<br />
Cooling System Natural Air Cooling Fan Cooling<br />
Control of Main Circuit<br />
Three-phase full-wave rectification IGBT- SVPWM Control<br />
Control Mode<br />
Position(Pulse input), Position (Internal control), Speed, Torque, Position/Speed,<br />
Speed/Torque, Position/Torque,<br />
Resolution of<br />
Encoder Feedback<br />
Incremental type: 2000ppr / 2500ppr / 8192ppr<br />
Regeneration /Dynamic Brake<br />
Builted-in (brake Transistor and brake resistor)<br />
Panel and operation key<br />
5 digital seven-segment display ; four function key.<br />
Communication interface<br />
RS-232 / RS- 485 (Modbus protocol)<br />
9-1
Position<br />
Control<br />
Mode<br />
Command Source<br />
External Pulse Control / 16-Stage internal register control<br />
Type<br />
Positive/Negative Edge Trigger Type : CW/CCW, CLK+DIR, A Phase + B<br />
Phase<br />
Input<br />
Pulse<br />
Waveform<br />
Line Driver(+5V), Open Collector<br />
Max.<br />
Frequency<br />
500 KHz(Line Driver) / 200 KHz(Open Collector)<br />
Electronice Gear 1/200≦ A/B ≦200 ( A=1~50000, B=1~50000 )<br />
Position Smoothing<br />
Ripple Time Constant 0~10sec<br />
Constant<br />
(Time Constant 0~10 sec)<br />
(Input Ripple Filtering)<br />
Final Position<br />
Tolerance<br />
0~50000 Pulse<br />
(In Position)<br />
Torque Limit Operation<br />
Feed Forward<br />
Compensation<br />
Command Source<br />
Analog voltage input<br />
range<br />
Input Impedance<br />
Set by Parameters<br />
Set by Parameters<br />
External Analog Command / 3-Stage internal Parameters<br />
±10Vdc<br />
Approx.10k ohm<br />
Speed<br />
Control<br />
Mode<br />
Speed Control Range<br />
Speed fluctuation Rate<br />
Zero Speed Command<br />
Limit of Speed up or<br />
down<br />
P/PI switch<br />
1:5000(Internal speed control) / 1:2000(External analog voltage control)<br />
-0.03% or less at Load fluctuation 0 to 100% (at Rated Speed)<br />
0.2% or less at power fluctuation ±10% (at Rated Speed)<br />
0.5% or less at ambient temperature fluctuation 0 ℃ to 50 ℃ (at Rated Speed)<br />
0~3000rpm<br />
Line and speed up or down, time constant 0~50sec, smoothing time constant<br />
0~10sec<br />
Switch by control Terminal Input<br />
Speed Reached<br />
0~3000rpm<br />
Servo Lock<br />
Set by Parameters (Switch to lock on Position Command)<br />
Torque Limit<br />
Frequency Response<br />
Characteristic<br />
Set by Parameters<br />
Max. 400Hz<br />
9-2
Torque<br />
Control<br />
Mode<br />
Voltage Command<br />
Input Impedance<br />
Torque Time<br />
Constant<br />
0~±10Vdc / 0~±3000rpm<br />
About 10k ohm<br />
Time Constant 0~50sec<br />
Position<br />
Output<br />
Output<br />
Type<br />
Encoder<br />
Ratio<br />
A, B, Z Line Drive Output<br />
1 ~ 8192 Encoder Ratio (any Arbitrary Value)<br />
Digital<br />
DI[NPN/<br />
PNP]<br />
Input<br />
DO<br />
Output<br />
Servo ON, P/PI switching, inhibit forward/reverse drive, error pulse clear, servo<br />
lock, Emergency stop, internal speed choice, run mode switching, inhibit position<br />
Optional<br />
<strong>com</strong>mand, gain switching, electronic gear ratio setting, internal position<br />
Input<br />
<strong>com</strong>mand choice, internal position <strong>com</strong>mand trigger, internal position <strong>com</strong>mand<br />
To 13<br />
pause, original point positioning, return to original point, external torque limit,<br />
ports<br />
control model switching, forward/reverse switching, internal speedsetting, inhibit<br />
pulse <strong>com</strong>mand<br />
Fix Output Reached Torques Limits, In Position, Forward/Reverse Drive Inhibit, Base Block,<br />
To 4 Ports<br />
Alarm Bit Output<br />
Optional<br />
Servo Motor Warning, Servo Ready, Zero Speed, Positioning Completed, Speed<br />
Input to 4<br />
Reach, Brake interlock, Home Completed<br />
ports<br />
Analog Monitoring Output<br />
Protection Function<br />
Altitude<br />
Monitor Signal can be set by Parameters.<br />
Overcurrent, Over Voltage, Undervoltage, Overheat, Overload, Overspeed,<br />
Excessive deviation, decoder abnormal, rise again abnormal, Memory abnormal<br />
Sea level 1000m below<br />
Environment<br />
Install Location<br />
Temperature<br />
Indoor (avoiding direct sunshine) no erosion air (avoiding oil gases, inflammable<br />
gas and dust)<br />
Operating Temperature 0~ 55 o C , storage Temperature: -20 ~ +85 o C<br />
Humidity<br />
Operating, storage below 90% RH<br />
Vibration Below 0.5G<br />
9-3
※ Dimension for TSTA-15 and TSTA-20<br />
9-4
※ Dimension for TSTA-30<br />
9-5
※ Dimension for TSTA-50 and TSTA-75<br />
9-6
9-2 Specifications and Dimension for Servomotors<br />
Description for Servo Motor Type Number<br />
TSB 07 301 C - 2 N H 3 *<br />
Motor Series:<br />
TSB<br />
TSC<br />
Frame sizes:<br />
04: 42<br />
06: 60<br />
07: 76<br />
08: 86<br />
13: 130<br />
Rated power<br />
050: 50 W<br />
101:100W<br />
201: 200 W<br />
301: 300 W<br />
401: 400 W<br />
551 550 W<br />
751: 750W<br />
102: 1 KW<br />
152: 1.5 KW<br />
202: 2 KW<br />
302: 3 KW<br />
Optional:<br />
N:None<br />
B :Brake<br />
G:Gear Box<br />
Others<br />
Lead Wire length<br />
A:Military Conn.<br />
3:300mm long<br />
Encolder:<br />
F : 2000 ppr<br />
H:2500ppr<br />
L : 8192 ppr<br />
Motor Speed:<br />
A: 1000 rpm<br />
B: 2000 rpm<br />
C: 3000 rpm<br />
H: 1500 rpm<br />
AC input voltage<br />
2:single phase220V<br />
3: 3 phase 220V<br />
9-7
TSB 07/08 SERIES<br />
SPECIFICATION<br />
1(kgf.cm)=0.0980665(N.m) 1(gf.cm.s 2 )=0.980665(kg.cm 2 )<br />
● To customize motors, please contact with us or our agent.<br />
9-8
TSB 07/08 SERIES<br />
DIMENSION<br />
9-9
TSB 13 SERIES<br />
SPECIFICATION<br />
1(kgf.cm)=0.0980665(N.m) 1(gf.cm.s 2 )=0.980665(kg.cm 2 )<br />
● To customize motors, please contact with us or our agent.<br />
9-10
TSB 13 SERIES<br />
SPECIFICATION<br />
1(kgf.cm)=0.0980665(N.m) 1(gf.cm.s 2 )=0.980665(kg.cm 2 )<br />
● To customize motors, please contact with us or our agent.<br />
DIMENSION<br />
9-11
Appendix A: Peripheral for Servo motors<br />
Part No. Description Model<br />
DTY2C3MMDR20P0000<br />
Encoder Connector (3M 20pin)<br />
DTY2C3MMDR50P0000<br />
I/O Connector (3M 50pin)<br />
DTY3FAMPUVW000000<br />
Power Connector + PIN<br />
(AMP 4pin)<br />
DTY3FAMPP0PG000000<br />
Encoder Connector + PIN<br />
(AMP 9pin)<br />
DTY3CMS08A2004S00<br />
Power Connector (MS 4pin)<br />
DTY3CMS08A2018S00<br />
Encoder Connector (MS 9pin)<br />
DTY3CMS06A2004S00<br />
Power Connector (MS 4pin)<br />
DTY3CMS06A2018S00<br />
Encoder Connector (MS 9 pin)<br />
DTY3FCB01MUVWCB00<br />
DTY3FCB03MUVWCB00<br />
DTY3FCB05MUVWCB00<br />
DTY3FCB10MUVWCB00<br />
DTY3FCB01M0PGCB00<br />
DTY3FCB03M0PGCB00<br />
DTY3FCB05M0PGCB00<br />
DTY3FCB10M0PGCB00<br />
1M Power Cable (AMP)<br />
3M Power Cable (AMP)<br />
5M Power Cable (AMP)<br />
10M Power Cable (AMP)<br />
1M Encoder Cable (AMP+3M)<br />
3M Encoder Cable (AMP+3M)<br />
5M Encoder Cable (AMP+3M)<br />
10M Encoder Cable (AMP+3M)<br />
A-1
Part No. Description Model<br />
DTY3FCB01MUVWMB00<br />
DTY3FCB03MUVWMB00<br />
DTY3FCB05MUVWMB00<br />
DTY3FCB10MUVWMB00<br />
DTY3FCB01M0PGMB00<br />
DTY3FCB03M0PGMB00<br />
DTY3FCB05M0PGMB00<br />
DTY3FCB10M0PGMB00<br />
1M L-type Power Cable (MSL)<br />
3M L-type Power Cable (MSL)<br />
5M L-type Power Cable (MSL)<br />
10M L-type Power Cable (MSL)<br />
1M L-type Encoder Cable<br />
(MSL+D-SUB)<br />
3M L-type Encoder Cable<br />
(MSL+D-SUB)<br />
5M L-type Encoder Cable<br />
(MSL+D-SUB)<br />
10M L-type Encoder Cable<br />
(MSL+D-SUB)<br />
A-2