
You also want an ePaper? Increase the reach of your titles
YUMPU automatically turns print PDFs into web optimized ePapers that Google loves.
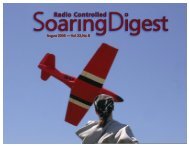
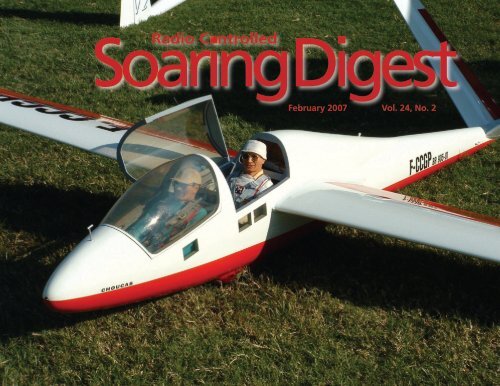
Soaring<br />
Radio C ntrolled<br />
Digest<br />
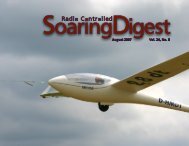
February <strong>2007</strong> Vol. 24, No. 2
CONTENTS<br />
February <strong>2007</strong><br />
Vol. 24, No. 2<br />
3 RC Soaring Digest Editorial<br />
4 Soldering for R/C Sailplanes<br />
An outline of tools, materials, and techniques.<br />
By Russ Light, Seattle Area Soaring Society.<br />
13 60th MAAA Nationals<br />
The Model Aeroplane Association of Australia Nationals<br />
was held at Albury-Wodonga NSW, December 28th 2006<br />
- January 4th <strong>2007</strong>. Coverage courtesy Chris Adams, with<br />
reporting by Gerry Carter (CD) and John Skinner.<br />
20 Have Sailplane - Will Travel — The Easy Rider<br />
A sailplane of modest size which is stowable and durable<br />
enough to survive handling in the back of the family van.<br />
By Tom Nagel.<br />
23 Breguet Br-903 Choucas in 1:3 Scale<br />
A beautiful scale model built by Arnold Hoffman of Freiburg<br />
Germany is detailed by its current owner, Rick Briggs.<br />
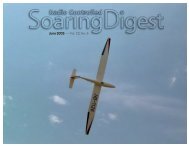
Front cover: The cockpit area of a 1:3 scale Breguet Br–903 "Choucas," built<br />
by Arnold Hofmann of Freiburg Germany, and now owned by Rick Briggs of<br />
Southern California. Rick provides more information on this model starting on<br />
page 23 of this issue. Photo by Doug Hackett.<br />
FujiFilm FinePix 3800, ISO 100, 1/420 sec, f8.2.<br />
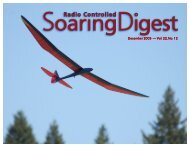
Dave Shaw's Astro Jeff 26<br />
This beautiful big glider from the 1970's is an excellent<br />
candidate for today's Nostalgia and RES events.<br />
By Dave Shaw<br />
Two Tangent ASH-26s at Cuesta Ridge 30<br />
Photo by Dave Copple<br />
Yeti - a 34 inch CNC sloper — an update 31<br />
Airframe <strong>com</strong>plete and better servos installed, the<br />
successful maiden flights are described by Dave Locke<br />
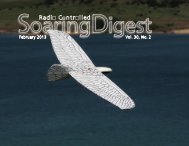
PZL Krosno KR-03A Puchatek, s/n 03-24, N289S 33<br />
A walk-around of a tandem two-place glider owned by the<br />
Illini Glider Club, Monticello Illinois. An excellent candidate<br />
for aerotow, slope, or winch launching, and aerobatics<br />
capable. Photos by Mark Nankivil<br />
Sled Driver Chronicles — How did you get<br />
so much stuff? Vacuum Bagging, Part 1 45<br />
If you want to get into vacuum bagging, and do so<br />
inexpensively, here's what you need. By Jay Decker<br />
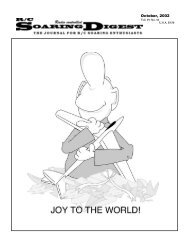
Back cover: The gorgeous Acacia 2 of Greg Dakin. Greg achieved<br />
the fastest time of 39.96 secs and was runner up at the sixth event<br />
of the 2006 BMFA F3F League, the UK national league for F3F<br />
models. Greg's performance in 2006 saw a renewed interest in this<br />
pretty yet very strong F3F ship. Photo by Michael Shellim.<br />
Pentax *ist DS, ISO 200, 1/1500 sec, f5.6, 103mm<br />
<br />
R/C Soaring Digest<br />
R/C Soaring Digest
R/C Soaring Digest<br />
Managing Editors, Publishers<br />
Contributors<br />
Photographers<br />
Contact<br />
B 2 Kuhlman<br />
Chris Adams, Gerry Carter, & John Skinner<br />
Chris Boultinghouse<br />
Dave Copple<br />
Jay Decker<br />
Dave Garwood<br />
Russ Light<br />
Dave Locke<br />
Tom Nagel<br />
Mark Nankivil<br />
Dave Shaw<br />
Jerry Slates<br />
Dave Garwood<br />
Dave Beardsley<br />
Gregory Luck<br />
Mark Nankivil<br />
Michael Shellim<br />
rcsdigest@themacisp.net<br />
Web: http://www.rcsoaringdigest.<strong>com</strong><br />
Yahoo! group: <strong>RCSoaring</strong>Digest<br />
AIM screen name: <strong>RCSD</strong>igest<br />
Microsoft Messenger: rcsdigest<br />
————————————————————<br />
R/C Soaring Digest (<strong>RCSD</strong>) is a reader-written monthly publication<br />
for the R/C sailplane enthusiast and has been published since January<br />
1984. It is dedicated to sharing technical and educational information.<br />
All material contributed must be exclusive and original and not infringe<br />
upon the copyrights of others. It is the policy of <strong>RCSD</strong> to provide accurate<br />
information. Please let us know of any error that significantly affects the<br />
meaning of a story. Because we encourage new ideas, the content of each<br />
article is the opinion of the author and may not necessarily reflect those of<br />
<strong>RCSD</strong>. We encourage anyone who wishes to obtain additional information<br />
to contact the author.<br />
Copyright © <strong>2007</strong> R/C Soaring Digest<br />
Published by B2Streamlines <br />
All rights reserved<br />
In the Air<br />
We mentioned availablity of the small Submissions.pdf at the<br />
end of our editorial last month. Since then, we've received<br />
articles and photos from several readers, one new to <strong>RCSD</strong>.<br />
Given that this is the first contribution any of these readers have<br />
made to any publication, the response is especially gratifying<br />
Thanks, guys!<br />
We have some exciting articles and stunning photos planned for<br />
future issues of <strong>RCSD</strong>, but there's always room for more. If you<br />
are considering contributing to <strong>RCSD</strong>, but have been held back<br />
for some reason, we encourage you to send in what you have.<br />
We and other <strong>RCSD</strong> contributors are standing by to assist you in<br />
getting your article ready for publication.<br />
Our windstorms, snow and rain have been making national<br />
news. We have, however, been able to do some backyard flying<br />
a few times with our Alula2. It's now on its second gear set in its<br />
second elevator servo, but still going strong. What a great little<br />
glider!<br />
This last month has been an active one for FAI, the worlwide<br />
aviation governing body, and records for model aircraft. We've<br />
listed all of the most recent records in this issue on page 7.<br />
Interestingly, one record (No. 14045) was announced as a new<br />
claim just the day before the record ratification announcement<br />
was published (see page 51). All three of these recently<br />
ratified records now belong to U.S. pilots and crew.<br />
Time to build another sailplane!<br />
February <strong>2007</strong>
Soldering for R/C Sailplanes<br />
An outline of tools, materials, and techniques<br />
Russ Light, Seattle Area Soaring Society<br />
This article is based on a two-part<br />
PowerPoint® presentation given by<br />
Russ to the Seattle Area Soaring Society,<br />
November 2006 and January <strong>2007</strong>.<br />
• TOOLS<br />
Soldering irons and tips, solder, soldering<br />
flux, holding vise, wire stripper/diagonal<br />
wire cutter, surface preparation tools, heat<br />
gun, heat shrink tubing, volt-ohm meter<br />
• MATERIALS<br />
Solder, flux, cleaning iron tips, desoldering<br />
• TECHNIQUES<br />
Basic soldering, wire splicing, wiring<br />
harnesses, DB-9 connector, Deans Ultra<br />
connector, control linkages<br />
<br />
SOLDERING IRONS, ETC.<br />
Pencil type (AC and battery powered, 20 to<br />
30 watts) and gun type (75 or more watts).<br />
Gas type not re<strong>com</strong>mended.<br />
PENCIL TYPE IRONS<br />
American Beauty Little Dandy Model 3108,<br />
20-30 Watts, $60.<br />
Applications - electronics, small gauge<br />
wiring, connectors<br />
SOLDERING GUN<br />
Weller 7200, 75 Watts, $33<br />
Applications - control linkages and heavy<br />
gauge wiring<br />
SOLDERING STATIONS<br />
Weller WESD51PU power unit with PES51<br />
soldering pencil, H50 stand, ETA tip<br />
and sponge, 350°F to 850°F, 50 Watts,<br />
approximately $150<br />
Applications - electronics, small gauge<br />
wiring, connectors<br />
PORTABLE SOLDERING IRONS<br />
Battery powered soldering irons are not a<br />
substitute for a good AC powered iron.<br />
SOLDER<br />
The Weller soldering station.<br />
Tin-lead (60/40) with rosin flux core or<br />
acid flux core. The rosin flux type has been<br />
the standard for electronics until the recent<br />
move to leadless solders.<br />
R/C Soaring Digest
A typical tin-lead (60/40) solder with rosin<br />
flux in the core. Available in one pound rolls.<br />
Silver solder gives a stronger joint with a<br />
higher melting temperature.<br />
Lead-free solder is be<strong>com</strong>ing increasingly<br />
available. The two main alloys are variants<br />
of tin-copper and tin-silver-copper. These<br />
alloys have higher melting temperatures and<br />
wet metal surfaces more slowly,. The joints<br />
also look different in that the surfaces are<br />
not as reflective as tin-lead joints. The flux<br />
chemistries that worked well with a leaded<br />
process are not the best fit for lead-free<br />
soldering. Always use lead-free <strong>com</strong>patible<br />
fluxes when working with lead-free solder.<br />
Wonder Solder is a rosin flux solder which<br />
<strong>com</strong>es in 0.031" and 0.050" diameters.<br />
One pound spool of 0.050" is $39.00, 10<br />
feet is $4.00; one pound spool of 0.031" is<br />
$44.00, 10 feet is $2.00.<br />
Cardas Solder Quad Eutectic Roll Solder<br />
is an ultra pure, tin/lead/silver/copper,<br />
February <strong>2007</strong><br />
0.032" solder, with an activated rosin core<br />
or organic water base flux. Available in 1 lb.<br />
or 100 gr. rolls.<br />
SURFACE PREPARATION<br />
Purpose: Remove oxide layer on metals to<br />
be soldered. This increases the ability of<br />
wetting (alloying) the solder to the metal.<br />
Abrasion with a diamond file<br />
Cleaning (degreasing) with isopropyl<br />
alcohol or acetone<br />
SOLDERING FLUX<br />
Purpose: The flux produces an acid upon<br />
heating. Different fluxes produce different<br />
levels/types of acid and at different<br />
temperatures. The acid is designed to<br />
remove oxides from the metal surfaces to<br />
be soldered.<br />
Rosin type is made from pine sap and<br />
produces mild organic acid (abietic acid)<br />
‘‘Acid’’ type (paste flux) is the stronger class<br />
of flux; often a form of hydrochloric acid.<br />
(The paste form has zinc chloride.) This is<br />
good for making difficult oxides dissolve<br />
so difficult metals like stainless steel can<br />
be solder-wetted. This type of flux should<br />
be cleaned away from parts after use with<br />
baking soda, isopropyl alcohol and a small<br />
amount of dish soap.<br />
DESOLDERING<br />
This process can be ac<strong>com</strong>plished using<br />
either desoldering wicks or a vacuum bulb.<br />
HOLDING VISE (THE THIRD HAND)<br />
Desoldering wick<br />
Purpose: Some kind of “third hand” is<br />
essential for soldering. Most bad solder<br />
joints are due to not holding the parts still<br />
during the cooling process. A good holding<br />
vise for electronics work is the Panavise<br />
Model 350, about $60. I have found it to be<br />
the most versatile for soldering and many<br />
other modeling activities.<br />
Panavise Model 350
WIRE STRIPPER<br />
Typical wire stripper<br />
A good quality wire stripper is essential.<br />
Buy one that has specific wire gauges, not<br />
variable gauges.<br />
Be sure its designed for stranded wires, not<br />
solid wire.<br />
You’re looking for a 16-26 stranded wire<br />
stripper like the Newark InOne No.: 58F587,<br />
Ideal Part No.: 45 45-121, about $15.<br />
Always test the wire being used to<br />
determine the best hole. Wire insulation<br />
depth can vary so AWG rating can<br />
sometimes be misleading.<br />
Keep wire and tool at 90 degrees.<br />
Do not use a stripped wire if the wire<br />
strands are cut into and fall off. Servo wire is<br />
very small gauge (standard is AWG 26) and<br />
you need all the strands.<br />
WIRE CUTTER<br />
The wire cutter should be able to cut flush<br />
against circuit boards, etc. Try the Newark<br />
Typical wire cutter<br />
InOne Part No.: 50F172, Xcelite/Cooper<br />
Tools No.: 170M, about $7.<br />
HEAT GUN<br />
A Monokote heat gun works fine for<br />
heatshrink tubing. Its disadvantage is that<br />
the air is highly distributed as <strong>com</strong>pared<br />
to a <strong>com</strong>mercial heat gun designed<br />
specifically for heat shrink applications. Use<br />
the focus attachment and set the gun for<br />
heat temperature by closing the rear vents.<br />
Protect airplane parts from excessive heat<br />
by using aluminum foil or sheeting to divert<br />
hot air.<br />
I do not re<strong>com</strong>mend using the soldering<br />
iron or re<strong>com</strong>mend open flame for heat<br />
shrink. The heat is not applied evenly and<br />
the temperature is too high.<br />
VOLT-OHM METER<br />
A volt-ohm meter is very useful for checking<br />
continuity of wiring harnesses, voltage of<br />
battery packs, current consumption, etc.<br />
Cost anywhere from around $20 to $100.<br />
SOLDERING DO’S<br />
– Do tin all wires<br />
– Do ensure materials can be held in<br />
place during soldering and cooling<br />
– Do clean tip for each solder joint<br />
– Do tin soldering iron tip before each<br />
joint<br />
– Do heat materials then apply solder<br />
– Do make sure the finished joint is<br />
smooth and shiny<br />
– Do allow joint to cool naturally<br />
– Do use rosin core solder<br />
SOLDERING DON’TS<br />
– Don’t use acid flux for wire or<br />
connectors<br />
– Don’t use wrong wattage iron or tip<br />
– Don’t apply too much heat, get in<br />
and out<br />
– Don’t forget to put heatshrink onto<br />
wire before soldering<br />
– Don’t leave sharp or jagged tailings,<br />
retouch with iron<br />
– Don’t blow on joint to cool it<br />
– Don’t jiggle during cooling<br />
– Don’t be lazy and not redo a<br />
connection that you know is marginal<br />
<br />
R/C Soaring Digest
A B C<br />
A dirty tip (A) can be easily cleaned. Heat iron and apply flux paste, clean. Then “tin’’with rosin solder (B). (C) Clean tip between application.<br />
SOLDERING IRON MAINTENANCE<br />
Use 400 grit sandpaper or ScotchBrite to<br />
clean badly oxidized tips<br />
Heat iron and apply flux paste, clean.<br />
Repeatedly ‘‘tin’’ with rosin solder, and clean<br />
tip between application.<br />
TINNING<br />
Always tin a wire before soldering.<br />
Strip the wire to the proper length, hold<br />
wire in a vise. Clean soldering iron tip and<br />
tin.<br />
Timing is everything. Touch the iron tip to<br />
the exposed wire and quickly feed a small<br />
amount of solder into the tip while running<br />
the tip over the length of exposed wire.<br />
The stranded wire should quickly receives<br />
the solder, <strong>com</strong>pletely covering the exposed<br />
wire so it is smooth and continuous.<br />
A small bead will often form at the end of<br />
the wire. This bead should be removed. Trim<br />
with sharp diagonal cutters.<br />
WIRING HARNESSES<br />
WIRE<br />
STRANDED VS. SOLID<br />
Never use solid wire for any aircraft<br />
application, it is too prone to breakage after<br />
bending. The more strands the better for a<br />
given wire gauge.<br />
WIRE GAUGE<br />
– Micro servo wire – 32 Awg<br />
– Standard servo wire – 26 Awg<br />
– Heavy duty servo wire – 22 Awg<br />
INSULATION<br />
– PVC VS Teflon PVC tends to shrink back<br />
under higher heat. Teflon will not do this.<br />
Small and large soldering iron tips. Both of<br />
these examples have chisel-shaped ends.<br />
February <strong>2007</strong>
A<br />
TECHNIQUES FOR WIRE SPLICING<br />
(A) Strip and twist wire ends<br />
(B) Tin wire ends and trim tips<br />
(C) Don’t forget the heatshrink!<br />
(D) Side-by-side soldering technique<br />
(E) Ready for shrinking<br />
B<br />
HOW TO MAKE TWISTED CABLES<br />
- Separate the three wires in standard servo<br />
wire by cutting between insulation with<br />
cutters and pulling apart slowly<br />
- secure wires in a vise<br />
- secure other end in cordless drill<br />
- lightly pull tight and run drill at slow speed<br />
- add a small piece of heatshrink every six<br />
inches to hold the twists in place<br />
C D E<br />
<br />
R/C Soaring Digest
CONNECTORS<br />
These include the sub-miniature DB-9/15,<br />
Micro D, Multiplex– 6 Pin, Molex KK Series<br />
0.156" Type, and the Dean Ultra Connector<br />
DB-9<br />
The DB-9 is the most popular connector.<br />
- Use a very small soldering iron tip, about<br />
1/16" = 0.063"<br />
- Tin servo wire<br />
- Cut tinned wires to a length that fits just to<br />
the bottom of the DB connector solder cup<br />
plus a fraction<br />
- Slip heat shrink over each tinned wire<br />
about 0.5" long, slip back as far from tinned<br />
end as possible to avoid shrinking during<br />
soldering<br />
- Mount DB connector in vise with cups<br />
pointed to the ceiling<br />
- Heat and fill each solder cup with solder, be<br />
sure to get good flow and fill the cup to just<br />
below the surface<br />
- Start on one end of connector and<br />
alternate between the two contact rows, for<br />
thee right-handed, start on left side<br />
- Clean solder iron tip, tin with a small<br />
amount of solder then while holding the<br />
tinned wire in one hand heat the solder<br />
in the cup to receive the wire. When the<br />
solder flows in the cup insert the tinned wire<br />
and hold until cool<br />
- After installation of all wires slip heat<br />
shrink down over each connection. Heat<br />
shrink is critical since even with this<br />
procedure some of the wire insulation will<br />
no doubt have melted back exposing bare<br />
lead which can be a source of a short.<br />
Some notes on using the DB-9 connector in<br />
sailplanes:<br />
In electronics, the DB connector will have<br />
a strain relief backshell to prevent wire<br />
breakage. In sailplanes this is not possible.<br />
After testing all electrical connections of the<br />
connector use some epoxy and thickener<br />
on the back of the connector for a strain<br />
relief. Be sure to use the thickener so that<br />
the epoxy does not run out to the sides - the<br />
opening for the DB connector is very tight.<br />
For the DB-9 connector you have 12 servo<br />
wires and only nine contacts. Standard<br />
convention is to use the female connector<br />
for the side of the circuit delivering power.<br />
Use the female connector for the fuselage<br />
and the male for the wing.<br />
This lack of a contact for each servo wire<br />
makes the DB-9 not the ideal connector<br />
for a full house wing but is very prevalent in<br />
sailplane models and easily acquired.<br />
I like to assign contacts 1,2,6,7 to one<br />
side of the wing, and 4,5,8,9 to the other<br />
(contact 3 is unused). Never try and install<br />
two wires into a single DB solder cup.<br />
Instead, solder a single wire to the cup<br />
about 1” long then solder the two power<br />
or ground leads to this wire and cover with<br />
heat shrink.<br />
DB-9 pin layout<br />
Micro D connector<br />
One possible DB-9 pin arrangement:<br />
CONTACT SIGNAL<br />
1 Left wing power<br />
6 Left wing ground<br />
<br />
Left wing flap<br />
7 Left wing aileron<br />
5 Right wing power<br />
9 Right wing ground<br />
4 Right wing flap<br />
8 Right wing aileron<br />
3 Unused<br />
February <strong>2007</strong>
A<br />
DEAN ULTRA CONNECTOR<br />
(A) Apply wires on this side of blade<br />
(B) Pre-tin Contacts<br />
(C) Strip wires, apply required heat shrink,<br />
and add heatshrink to end of one wire to<br />
avoid shorting<br />
(D) Pre-tin wire<br />
(E) Flatten pre-tinned wire to get better<br />
contact with connector blade<br />
(F) Solder one wire<br />
(G) Apply heatshrink and repeat with<br />
second wire<br />
E<br />
B<br />
C<br />
D<br />
F<br />
G<br />
10 R/C Soaring Digest
CONTROL LINKAGES<br />
The soldered control linkage is one of the<br />
most strongest, most slop-free and reliable<br />
linkages possible. On the internet there is<br />
much debate on the soldered linkage versus<br />
the carbon rod/glued linkage. Investigate<br />
and make up your own mind on the subject.<br />
Personally, I prefer the soldered linkage,<br />
but I am <strong>com</strong>fortable with the soldering<br />
process.<br />
What is Music Wire? Music wire is a high<br />
grade, uniform steel wire originally intended<br />
for strings in musical instruments. It is<br />
currently used in the manufacture of spiral<br />
springs and mandrels. AISI 1085 spring wire<br />
has excellent fatigue properties and will<br />
endure high stress.<br />
Solder linkage consists of using a metal<br />
clevis and music wire. Preparation, acid flux,<br />
and a higher wattage iron are the keys to<br />
success.<br />
Work in a well ventilated area preferably<br />
with a small fan running to get a modest<br />
amount of air flowing past the work area<br />
but not so much as to be cooling the area<br />
where the soldering will occur. Fumes from<br />
soldering are not healthy especially with the<br />
use of acid fluxes.<br />
Use 2-56 threaded Sullivan clevises. These<br />
are always stocked locally instead of the<br />
solder version.<br />
Drill out the threads with a 5/64" drill.<br />
Buy 0.077" music wire (at least that is what<br />
my caliper says, actual value may be +/- a<br />
few 0.001), 2-56 threaded rod is 0.080"<br />
This diameter music wire will just fit into the<br />
clevis with quite a bit of friction. This allows<br />
for holding the rod precisely when you are<br />
doing soldering or just doing trial fits.<br />
Setup all the linkages using 2-56 threaded<br />
rod. Measure distance between clevises<br />
with calipers and cut 0.077" wire to the<br />
appropriate length. Measure and the cut<br />
music wire so that about 0.1"-0.2" extends<br />
beyond inside of the clevis.<br />
Use a diamond file and rough the end of the<br />
music wire over the area that will receive the<br />
solder.<br />
Rough the inside of the clevis with a small<br />
round file.<br />
Degrease the wire and clevis using solvent<br />
(e.g. isopropyl alcohol or acetone).<br />
Apply acid flux to the music wire and clevis.<br />
Hold the clevis in a vise, but use some small<br />
pieces of wood between the vise jaws and<br />
clevis. This helps to prevent the vise from<br />
acting like a large heat sink.<br />
Insert the music wire into the clevis to the<br />
proper distance.<br />
Use a 75 watt or greater soldering iron. Heat<br />
the iron to maximum temperature. Starting<br />
at the front of clevis apply the tip of the iron<br />
to the joint of the wire and clevis and hold.<br />
Heat both parts for about 30-45 seconds<br />
until the acid flux melts.<br />
February <strong>2007</strong> 11
Feed solder into the iron tip and clevis. If<br />
you got the parts hot enough the solder will<br />
flow around the area smoothly. If the solder<br />
only partially melts or too quickly cools then<br />
you probably need a hotter iron.<br />
Repeat the step above at the base of the<br />
wire and clevis. Do this immediately after<br />
the above step as the parts will be already<br />
heated and should require only a small<br />
amount of heating before applying the<br />
solder.<br />
Allow the soldered parts to cool <strong>com</strong>pletely<br />
then inspect to be sure you got good<br />
soldering flow around the clevis in both<br />
areas. Rub the area with some baking soda<br />
to neutralize the acid flux and rinse in water.<br />
After soldering one side, push on the other<br />
clevis to the exact distance.<br />
Be sure to check that the clevises open<br />
to the correct side for the particular<br />
installation. Set against a flat surface to align<br />
the clevises.<br />
Solder the second clevis to the music wire.<br />
FINAL THOUGHTS<br />
Buy the best tools you can afford, it really<br />
makes the difference.<br />
Take your time, soldering is just like any<br />
other activity in modeling.<br />
Practice first on a spare wire, connector, or<br />
linkage.<br />
If your joint is not shiny and smooth, do it<br />
again.<br />
FAI has ratified the following Class F (Model Aircraft) records :<br />
Claim number : 13908<br />
Sub-class F5 Open (Aeroplane, Electric motor S (rechargeable<br />
F5: Radio Controlled Flight Category<br />
Type of record : N°174: Distance to goal and return<br />
Course/location : Wakita, OK (USA)<br />
Performance : 144.42 km<br />
Pilot : Thomas HAYS (USA), Crew : Dan BIERLY (USA)<br />
Date <strong>02</strong>.06.2006<br />
Previous record : 142.8 km (27.05.2006 - Raymond J.V. COOPER, Australia)<br />
Claim number : 14000<br />
Sub-class F5 Open (Aeroplane, Electric motor S (rechargeable<br />
F5: Radio Controlled Flight Category<br />
Type of record : N°171: Duration<br />
Course/location : Stillwater, OK (USA)<br />
Performance : 12h 21min 40sec<br />
Pilot : Thomas HAYS (USA), Crew : Dan BIERLY (USA)<br />
Date 24.06.2006<br />
Previous record : 10h 38mn 30s (21.06.1998 - Emil HILBER, Switzerland)<br />
Claim number : 14045<br />
Sub-class F5 Open (Aeroplane, Electric motor COMB (all sources of<br />
F5: Radio Controlled Flight Category<br />
Type of record : N°195: Distance to goal and return<br />
Course/location : Stephenson County, IL (USA) - Winnebago County, IL<br />
Performance : 67.32 km<br />
Pilot : David FRATELLO (USA), Crew : FRATELLO Armond<br />
Date 16.08.2006<br />
Previous record : 80.43 km (24.09.2006 - Jüri LAIDNA,(Estonia)<br />
12 R/C Soaring Digest
60th<br />
Model Aeroplane Association of Australia<br />
Nationals<br />
Theo Arvanitakis gives Jim Houdalakis one of his trademark uber launches, Dave Pratley looks on in awe.<br />
February <strong>2007</strong> 13
Steve Keep campaigned the Dave Hobby<br />
Pike Superior to good effect.<br />
The 60th MAAA (Model Aeroplane<br />
Association of Australia) Nationals<br />
were held December 28th 2006 through<br />
January 4th <strong>2007</strong>. Albury-Wodonga hosted<br />
the Australian Nationals over the course<br />
of a week. All aspects of aeromodelling<br />
were addressed, but for the glider pilots<br />
HLG, F3J and F3B reports follow. Thanks to<br />
Gerry Carter (CD) and John Skinner for the<br />
reporting.<br />
— Chris Adams<br />
Graham Norman campaigned a Mibo Modeli Shadow to great effect; both pilot and<br />
glider coped well with the conditions. The Mibo Modeli Vision is one to watch.<br />
F3J Thermal (with winch launch)<br />
This event was run over two long days with<br />
13 rounds flown in all. Run to the FAI F3J<br />
rules, this event was tougher in a number of<br />
ways to the usual Australian Open Thermal<br />
Rules. In particular, under the FAI F3J rules,<br />
there is no such thing as a “perfect” score.<br />
The task is to achieve the longest flight<br />
possible within a 10 minute window. Flight<br />
time is measured from the time the model<br />
leaves the launch line to the time the model<br />
touches the ground. There is also a precision<br />
landing bonus. The model must touch<br />
the ground before the 10 minute window<br />
expires.<br />
The flight line was arranged with teams 15<br />
metres apart so that all pilots could launch<br />
at exactly the start of the working time.<br />
It was quite a sight to see up to five high<br />
14 R/C Soaring Digest
John Skinner looking well pleased. His F3B speed run stopped<br />
the clock at 14.11 secs. His weapon of choice; Caracho 3000.<br />
performance gliders, all with wing spans of<br />
over 3 metres, launching simultaneously.<br />
When all pilots achieved their flight times,<br />
the landings were also all happening at the<br />
same time. Thermal conditions over the<br />
two days varied widely with some heats<br />
won with times that were much less than<br />
the theoretical 10 minutes maximum. This<br />
made the whole event very challenging in<br />
terms of testing the pilots thermalling skills.<br />
The outstanding pilot was Carl Strautins<br />
who seemed to have no trouble finding<br />
thermals and whose landings were deadly<br />
in both timing and accuracy. At times there<br />
was massive lift, and at other times massive<br />
sink.<br />
Competitors were very appreciative of the<br />
effort put in by the VMAA, the TCMAC, and<br />
the facilities and catering provided for the<br />
pilots.<br />
Throughout the <strong>com</strong>petition the pilots also<br />
became quite familiar with the property<br />
owner Andy and his wife and family, and<br />
they showed a great deal of interest in our<br />
activities. Andy is a bit of a character, a lovely<br />
man and was good fun to have around.<br />
Brad Wilman launches for Marcus Stent. The glider is in development<br />
and is the brainchild of Bruce Nye, Marcus & Stephen Boag.<br />
The final result for F3J:<br />
1st Carl Strautins - Icon (Maple Leaf Design<br />
)<br />
2nd Max Kroger - Pike Superior (Samba<br />
Model )<br />
3rd Daniel Haskell - Espada RXL (Jaro<br />
Muller )<br />
February <strong>2007</strong> 15
John Skinner unleashing Mike Taylor’s Caracho 3000.<br />
F3B Glider Multi-Task<br />
This event was run at the same field as the<br />
F3J Thermal over the following two days and<br />
six rounds were flown.<br />
The three tasks are;<br />
Task A (Thermal) 10 minute flight and<br />
precision landing in 12 minutes working<br />
time.<br />
Task B (Distance) The most times up and<br />
down a 150 metre course in four minutes<br />
wins. The four minutes is within a seven<br />
minute working time.<br />
Task C (Speed) The quickest time for four<br />
laps up and down a 150 metre course wins.<br />
The working time is four minutes.<br />
We were fortunate and extremely grateful<br />
for the help of a group of Air Cadets who<br />
volunteered their time to help with the<br />
running of the distance task. This task<br />
requires a person at each end of the course<br />
for each pilot so that, if three pilots are<br />
flying, you need six helpers.<br />
Radical F3B Brad Launch<br />
Without this help there is no way that the<br />
event could have gone to six rounds. They<br />
did a great job. We were also fortunate<br />
to have two pilots (who weren’t able to<br />
continue to fly) to man the pylons for the<br />
speed rounds. This enabled this part of the<br />
<strong>com</strong>petition to run much more quickly than<br />
would otherwise have been the case.<br />
Conditions were similar to those for F3J<br />
except that the wind direction for launch<br />
was at best 90 degrees to the direction<br />
of launch and more often than not, even<br />
more than this. However all pilots handled<br />
the situation well by steering their gliders<br />
around to the side (and beyond) so that the<br />
release of the glider from the line was into<br />
wind.<br />
16 R/C Soaring Digest
Plane? Check. Chair? Check. Eski? Check. Sombrero? Check.<br />
All the essentials for tackling the event. Mike Taylor prostrate.<br />
Highlights of the <strong>com</strong>petition were a<br />
number of scores for the distance task of 30<br />
laps (of 150 metres) achieved by Steve Keep<br />
and Max Kroger. That’s 4.5Km in 4 minutes<br />
with a lot of turns as well.<br />
Speed demons stepped up next, and John<br />
Skinner peeled off a seemingly-innocuous<br />
run that yielded 14.11 seconds! That’s an<br />
average of 153 Km/Hr assuming that the<br />
bare minimum of 600 metres was flown.<br />
This is perhaps the fastest <strong>com</strong>petition<br />
speed flight ever achieved by any pilot in<br />
Australia.<br />
Once again everybody was very appreciative<br />
of the effort put in by the VMAA, the<br />
TCMAC, and the facilities provided for<br />
the pilots and the property owner Andy<br />
continued to be very interested in our<br />
activities.<br />
In the end, consistently high performance<br />
over all tasks wins F3B events and on this<br />
occasion those honours went to following;<br />
The final result for F3B:<br />
1st Steve Keep (Caracho 3000 )<br />
2nd John Skinner (Caracho 3000<br />
)<br />
3rd Gerry Carter (Estrella<br />
)<br />
February <strong>2007</strong> 17
The Shadow of Graham Norman, Steve Keep launching.<br />
HLG (Hand Launched Glider)<br />
The entries for this event were very low,<br />
but the standard of flying was very high,<br />
particularly in the case of the winner.<br />
Marcus Stent dominated the event with his<br />
thoroughly researched and practised discus<br />
launch technique and his flying skills.<br />
Unfortunately one pilot was taken out of<br />
the event by a willi willi (small localized<br />
whirlwind) that picked up the model from<br />
the ground and broke it. Another was taken<br />
out when Marcus launched it using his<br />
advanced technique and folded the wing;<br />
Marcus’ launching technique is approaching<br />
martial arts status.<br />
Three rounds were flown with the winner<br />
being Marcus and second was Theo<br />
Arvanitakis.<br />
18 R/C Soaring Digest
Competitors for F3J at the Australian NATS in Albury, NSW.<br />
Summary<br />
Overall the MAAA NATS glider events<br />
were a terrific challenge for <strong>com</strong>petitors. It<br />
proved once again that Australia is a great<br />
breeding-ground for producing world-class<br />
pilots.<br />
< http://www.lsfaustralia.org.au ><br />
Competitors for F3B. All look surprisingly well after<br />
a rigorous four days in 37ºC/98.6ºF heat.<br />
February <strong>2007</strong> 19
Have Sailplane - Will Travel<br />
The Easy Rider<br />
Tom Nagel, tomnagel@iwaynet.net<br />
have been writing periodic “Have Sailplane<br />
I - Will Travel” columns for a number of<br />
years now. One of the key points is that<br />
when I write about my own travels, I am not<br />
writing about trips I take to go soaring. I<br />
write about trips that I go on with my family<br />
or for business, and then manage to squeeze<br />
a sailplane into the luggage and sneak off to<br />
go flying for a few minutes.<br />
In order to get away with this, the sailplane<br />
has to be of modest size, and stowable, and<br />
durable enough to survive handling in the<br />
back of the family van. Most of the time that<br />
means I take a slope wing with me, early on<br />
a Zagi LE, and more recently a Boomerang.<br />
On one trip I took Rick Powers’ all EPP U-2<br />
spy plane, which packed well, but needed<br />
more wind and more space than I could<br />
always find.<br />
I think I may have a new traveling<br />
<strong>com</strong>panion, the 70" Multiplex Easy Rider.<br />
Actually, the box said “Multiplex Easy<br />
Glider,” but that was so close to Easy Rider<br />
20 R/C Soaring Digest
that I downloaded some Captain America and Peter Fonda decals off<br />
the internet in order to have custom decorations.<br />
The all Elapor Easy Rider <strong>com</strong>es in two versions: pure sailplane, and<br />
electric. I went for the electric version, which for $89 includes the<br />
airframe, pre-installed control surfaces, a bag of mechanical doodads,<br />
a speed 400 motor and a folding prop. The electric version with a<br />
1200 MAH lipo weighs 30 ounces ready to fly. The kit builds fast and<br />
easy. The fuselage and wings only have about 8 foam parts.<br />
Just follow the directions, which in the English version at least are<br />
clear and accurate. It feels strange to build a foamy using thick<br />
cyanoacrylate glue and spray-on accelerator, but it works just fine.<br />
The kit even includes a DVD demonstrating the construction and<br />
assembly.<br />
A <strong>com</strong>ment on construction: The wimpy little plastic canopy holddown<br />
latches are altogether too easy to break. Tape messes up the<br />
paint job on the canopy so I am using some small niobium magnets<br />
from Radio Shack to hold down the back end of the canopy.<br />
The kit parts <strong>com</strong>e wrapped in a large sheet of bubble wrap which you<br />
can tape the into a nice wing bag for the two wing halves, and you can<br />
carry the <strong>com</strong>pleted model in the box the kit came in. The fuse won’t<br />
go back in <strong>com</strong>pletely because of the tail surfaces, but you can nestle<br />
the fuse on top of the wings when traveling. The original box is sturdy<br />
and can hold the wings, fuse, batteries, charger, wing rod, transmitter<br />
and odds and ends. You also need to keep a little wire hook in the box<br />
to help you thread the aileron leads through the fuse.<br />
In addition to the Peter Fonda decals and canopy hold-downs, I made<br />
one other mod to Easy Rider. Following a tip from the internet, I<br />
bought a three foot section of round 5/16th steel rod at Lowe’s for a<br />
few bucks. It slides perfectly inside the carbon fiber wing rod, right at<br />
the CG, and adds about 12.5 oz of ballast for sloping. Fit a small piece<br />
of wood dowel at each end of the carbon fiber wing rod to make up<br />
the 1 meter length. The steel rod and the larger 2200 milliamp lipo<br />
bring the total weight up to 45 ounces. The plane still flies well even<br />
50 % heavier than stock. (If you are a 200 pound guy, imagine how<br />
well you would get around at 300 pounds.) The extra weight helps<br />
February <strong>2007</strong> 21
with penetration and speed on the slope.<br />
Easy Rider can handle 15 mph winds unballasted,<br />
but is faster and smoother with<br />
the ballast rod on board<br />
I use the spoileron set up suggested in the<br />
instructions, and find that it helps with<br />
landings both on the slope and on the flat<br />
field.<br />
Easy Rider is not a high performance<br />
electric; its launches are sedate, and its roll<br />
response a little slow. The under-cambered<br />
wing section saps the top end speed. But<br />
in my opinion, you do not want to haul<br />
expensive high performance equipment<br />
along on vacation.<br />
Easy Rider is an easily available, decent<br />
performing, inexpensive sailplane that you<br />
can slope, thermal or power fly, and it fits<br />
mostly back inside its original box, making<br />
it easy to haul along on travels. Also it looks<br />
like a real sailplane, so you can impress the<br />
girls on the beach. (Don’t let my wife see<br />
this part, OK?)<br />
22 R/C Soaring Digest
1/3 scale<br />
Breguet Br-906 “Choucas”<br />
Owned by Rick Briggs, Long Beach California<br />
The model was built by Arnold Hofmann<br />
from Freiburg Germany. Its 1:3 scale,<br />
and the span is 6.3 meter.<br />
The fuselage is all built up, the wings and V-<br />
tail are foam and Obeche with glass lay-up.<br />
Its weighs aproximately 28 pounds, which is<br />
very light for the size.<br />
Arnold is a great model builder, I also have a<br />
40% Condor IV of his. You might have seen<br />
it, it’s yellow.<br />
Arnold built the Choucas from photos, as<br />
no three-views were available. He also built<br />
the single seat Brequt 805 Fauvette in the<br />
same scale and color, and I have photos of it<br />
as well.<br />
Arnold is well known for his model building.<br />
I first saw the Choucas model at the 2000<br />
Elmira aerotow when Frank Oeste from<br />
Germany owned it. I found out he wanted<br />
to sell it, so I contacted him and the rest you<br />
know.<br />
It’s very stable in flight, and one of my<br />
favorites. With the red and white it’s easy to<br />
see at high altitudes. I use a Tommy vario on<br />
board.<br />
The events I go to are mostly the Visalia<br />
Spring and Fall; I’ve been to the JR Event<br />
three times. Peter Goldsmith and Horizon<br />
put on a super event. I also fly with the<br />
Southern California gang on different<br />
weekends. There are about 10 of us.<br />
-- Rick Briggs<br />
http://www.soaringissa.org/<br />
Rick’s Choucas on tow at the 2004 JR Aerotow. Photo by Mark Nankivil<br />
February <strong>2007</strong> 23
24 R/C Soaring Digest
Photos by Mark Nankivil<br />
February <strong>2007</strong> 25
Dave Shaw , s<br />
Astro Jeff<br />
26 R/C Soaring Digest
Say, are you tired of spending $1200 on a<br />
full house mega-ship only to be beat by<br />
someone else flying the $1300 Quasi Moto<br />
14 channel twin <strong>com</strong>puter-controlled ship?<br />
Longing for the good ol’ days when flying<br />
was both fun and relaxing? Is that’s what is<br />
troubling you Bunkie?<br />
Well lift your head up high and gaze at a<br />
beautiful soaring machine from the 70’s.<br />
The Astro Jeff was designed by Jerry Mrlik<br />
for his son to fly in the 1973 SOAR Nats.<br />
Young Jeff, only 12 at the time, smoked the<br />
132 other fliers with a soaring queen that is<br />
both graceful and fun to fly. It even makes<br />
me look good.<br />
So let’s fire up the way-back machine, Mr.<br />
Peabody, and take a trip to the seventies<br />
— the happy days of good old soaring where<br />
it took a real pilot to make his ten minute<br />
flight using several thermals and not a zoom<br />
launch. No hard feelings <strong>com</strong>posite guys,<br />
but here we go.<br />
The Astro Jeff is available through<br />
Skybench Aerotech ,<br />
along with many other NOS legal planes, as<br />
well as all woodcrafter legal birds.<br />
Ray Hayes, who is no stranger to soaring,<br />
has taken the time to bring back nostalgia<br />
and some beautiful kits back to the market.<br />
Having flown with Ray at my local club here<br />
in Michigan, I learned more about soaring<br />
and how to have fun flying in a contest.<br />
But I should tell you a little more history of<br />
this ship. I started flying about 1972 with<br />
a CraftAir Drifter. I started off with a plane<br />
that weighed 1½ pounds, and by the time<br />
I learned how to solo it weighed over five<br />
pounds.<br />
Then I spotted an article in the old<br />
American Aircraft Modeler (old AMA<br />
magazine) about the Jeff. I knew I was not<br />
good enough to scratch build one, but I got<br />
to see Jeff fly it at the ’74 Snow Fly. WOW,<br />
what a sight. This bird covered more air than<br />
any other plane out there. And I vowed to<br />
one day have one, having flown with some<br />
great pilots, like the late John Hoover and<br />
the great Gene Pastori of the “Davison<br />
Hilltoppers.” All the other pilots flew power,<br />
but both John and Gene never let me give<br />
up my dream of soaring.<br />
Jump forward to 2004. I sent my order in to<br />
Ray at Skybench. Within a week the biggest<br />
box I have ever seen was sitting on my front<br />
porch. Like a kid at Christmas, I ripped it<br />
open and found beautifully laser-cut ribs,<br />
enough lumber to build a house, and a<br />
flawless fiberglass fuse.<br />
I cleared the workbench, grabbed some<br />
glue, dumped it out, shook it a few times,<br />
then covered it. Not really, but the plane<br />
goes together extremely fast. All the lasercut<br />
ribs fall right into place, and even the<br />
tail feathers are all laser-cut. Ray bags all the<br />
parts and labels them (he does this on all<br />
his kits), so there is no guesswork as to what<br />
goes where.<br />
I won’t go into a detailed build, as Ray has<br />
that on his website. But a few changes that I<br />
have made are as follows.<br />
• For the rudder post attached to the<br />
fuselage, I used 3/8 balsa block and used<br />
Dubro hinges with a removable wire to ease<br />
transporting of the ship.<br />
• I put the spoiler servos, with cable<br />
extensions, in the wings.<br />
• I ’glassed the poly break and the root<br />
area with two layers of 4oz. cloth. Having<br />
snapped a few wings in the past, I felt it was<br />
a good idea to reinforce these sections. As<br />
a builder, you don’t have to follow the ’glass<br />
part, as it does add a few extra minutes to<br />
the work.<br />
All told, it took me about ten hours of<br />
building before it was ready to sand and<br />
cover.<br />
The plane that is pictured is my number two<br />
ship. The one on the Skybench Aerotech<br />
February <strong>2007</strong> 27
28 R/C Soaring Digest
website was my first one, but I made a big<br />
boo-boo. I was hooked up to a hi-start that<br />
would launch a golf cart several hundred<br />
feet into the sky. Flying Man-on-Man, when<br />
I let go I hit the down stick with my neck<br />
strap. Ten pounds of ’glass and wood took<br />
off nose down into the turf. It held there<br />
for a brief second, then “Splorch!” (Yes,<br />
“Splorch!”), at 100 mph it bounced across<br />
the turf, shedding parts for 300 hundred<br />
feet. What a mess! “Hello, Ray! Send me a<br />
New ’Jeff.”<br />
I still ended up placing quite well, despite<br />
my boo-boo.<br />
Now for the real meat and potatoes.<br />
The very first flight of my ’Jeff was a typical<br />
spring day here in Michigan. Winds North<br />
10 to 20, with temps in the 60’s. Not your<br />
best soaring day. So I stretched out my<br />
heavy duty hi-start and put together three<br />
birds. My old Drifter (found on E-Bay), my<br />
SailAire (aka Pig Drifter), and my Astro Jeff.<br />
Being it was the first and trim flight, I had<br />
to get the nerve up to fly it. So up went the<br />
Drifter, to land after three minutes. Same<br />
with the Pig Drifter. I finally got up the nerve<br />
to try the ’Jeff. Having set the incidence at ½<br />
degree positive on the elevator, I hooked it<br />
up and paced back about 100 paces.<br />
Now we have all read where some author<br />
has taken out a new bird and on the first<br />
flight caught the mother of all thermals and<br />
landed at his feet just as the batteries went<br />
dead. But when we try, we’re lucky to get<br />
three minutes and a short hike to where it<br />
landed. So I was skeptical as to how it would<br />
fly.<br />
After a brief and silent prayer, I lifted up<br />
the nose, pointed it into the wind, made<br />
sure left was left, up and crash (down) was<br />
correct, and let her go.<br />
It towed straight up with out even a click of<br />
trim. Towards the top I fed in a little up to<br />
stretch out the line, and off she went.<br />
An easy left and right turn to see how it<br />
responded, and then crank it over for a<br />
thermal turn. What’s this? It’s going up!<br />
Wow, this plane looks great.<br />
Soon a park employee stopped by and I gave<br />
her the sticks. She never flew before and she<br />
did great.<br />
Well that first flight lasted over 18 minutes.<br />
How I wish all my flights were that good.<br />
“Great Gliding Hoss Flies, Fly Man, the thing<br />
flies!”<br />
Now for landing. This is a big plane with a<br />
wing loading of about 8.4 oz/ft 2 , so take<br />
your time setting up your approach. At 30<br />
seconds out, I try to be about 100 feet off<br />
the ground and right off my shoulder, 20<br />
seconds turn on final with half spoilers, 10<br />
seconds line up and full spoilers and grease<br />
it in.<br />
One of the unusual things that I found with<br />
my Astro Jeff is that by cracking the spoilers,<br />
and they are not that big, it penetrates as if it<br />
has two pounds of lead.<br />
I hope you enjoy building and flying an Astro<br />
Jeff half as much as I do. If you are looking<br />
for a nice relaxing sailplane for contest or<br />
just Sunday flying, get your order in soon.<br />
As for me I am ordering a fourth one. The<br />
third Astro Jeff I ordered went to my best<br />
friend — a very special young man to whom<br />
I was a Big Brother in the 70’s and early<br />
80’s. So if you happen to run across two<br />
guys with planes big enough to threaten the<br />
planet with their shadows (151" wingspan,<br />
1370 square inches wing area), then that<br />
would be team “Fly Long... Fly High,” Steve<br />
and myself.<br />
The Astro Jeff is available through<br />
<br />
The current price is $295.00 plus $19.00<br />
shipping for the full kit, $165.00 plus $8.95<br />
shipping for the semi-kit.<br />
A little more about myself. I’ve been flying<br />
since the 70’s and work in radio as a parttime<br />
host on Sundays at a country music<br />
station. I’m owner/operator of my own<br />
truck, leased to an expediting <strong>com</strong>pany, and<br />
have several NOS and scale ’ships.<br />
— Dave Shaw<br />
February <strong>2007</strong> 29
One Tangent ASH-26 chases another along the hillside near Cuesta Ridge in San Luis Obispo, a site about 10 minutes<br />
from Hwy 101 at the top of the Cuesta Grade. Photo by Dave Copple. FugiFilm FinePix S5000, 1/1000 sec, f8, ISO 200.<br />
30 R/C Soaring Digest
Yeti<br />
a 34 inch CNC sloper<br />
An update by Dave Locke, Sydney, Australia<br />
February <strong>2007</strong> 31
<strong>com</strong>pleted the Yeti and she’s flown successfully! The HS-55’s<br />
I were ditched for JR 371’s. A few ounces of lead were needed<br />
in the nose, as expected. The CG is set about 150mm from the<br />
pointy end.<br />
The maiden flight occured after some cajoling by the local<br />
riffraff. After a few nervous trimming throws, it got up in a<br />
moderate breeze and flew quite well. However, I’m now totally<br />
unsure where the CG should be!<br />
Straight line speed was great, turning too sharply was nerve<br />
racking, as I found out on the first landing approach when too<br />
much elevator was put in. She spun around almost in her own<br />
length. Photographer Klaus likened it to a gumleaf blowing in the<br />
wind.<br />
Otherwise, fast flat turns with enough speed (which was no<br />
problem!) was like it was on rails.<br />
The amount of reflex in the elevons was about 5mm (or ~3/16").<br />
It’s a PW51 airfoil, which has reflex already built in, so this is<br />
surprising.<br />
It’s really stable in straight line with this amount of reflex, with<br />
no hyperstalling or other bad habits. A small amount of lead<br />
was added for the second flight, which I thought made it better<br />
(probably just made it faster), but on landing it tip stalled again<br />
on too much elevator. Total elevator travel was about 3mm up<br />
and down.<br />
In a dive it was almost hands off. I did probably push in a little<br />
down elevator. I didn’t manage to get it inverted as I couldn’t get<br />
it high enough in case a recovery was required.<br />
Overall it was a nerve racking few flights, mainly because the<br />
slope is really rocky in some parts, and one mistake would’ve<br />
meant instant “Yeti spaghetti.”<br />
Feedback seems to be the CG should be moved back slightly and<br />
elevator throws cut back, so more flight testing is in the future.<br />
32 R/C Soaring Digest
PZL Krosno KR-03A “Puchatek”<br />
N289S, sn 03-24<br />
Walk-around by Mark Nankivil, nankivil@covad.net<br />
February <strong>2007</strong> 33
The KR-03A “Puchatek,” also known as the “Krosno,” is a<br />
tandem two-place metal framed sailplane designed as<br />
a basic training glider. It first flew in 1985. It is suitable for<br />
both winch launch and aerotow, and can be used for basic<br />
aerobatics training, thermal and wave flying, hill soaring,<br />
and passenger flights. The instrument panel is located<br />
forward of the front seat only, but it is possible to install an<br />
additional instrument panel in the rear cockpit. After minor<br />
modifications it can be used for blind flying training or<br />
bungee-launching. It has a metal monocoque structure. The<br />
one-piece canopy is starboard hinged. The cantilever wings<br />
are rhomboid in planform with three degrees of forward<br />
sweep. The rear of the wing is fabric covered. The glider has a<br />
T-tail with fabric covered control surfaces. The main wheel is<br />
on a hydraulic shock absorber and has disc brakes. The glider<br />
has both front and rear skids, although some are equipped<br />
with a front tire instead of the front skid and/or a small rear<br />
tire in place of the under-tail skid. The KR-03A has both front<br />
and CG tow hooks. Approach control is by top and bottom<br />
surface Schempp-Hirth type airbrakes.<br />
N289S, sn 03-24 is currently owned by<br />
Illini Glider Club, P.O. Box 143, Monticello IL 61856<br />
Manufacturer: PZL Krosno, Poland<br />
Designer: Jerzy Krawczyk and Eugeniusz Pelczar<br />
Span 16.4m, 53.8 ft Wing chord 1.2m /3.9 ft Wing area 19.44m 2 , 209.25 ft 2<br />
Aspect ratio 13.9 Sweep angle 3º forward Dihedral 4 degrees<br />
Incidence 5.0 degrees Wing airfoil FX S<strong>02</strong>/1-158 Water ballast None<br />
Length 8.63m, 28.3 ft Height 1.65m, 5.4 ft Tailplane span 3.5m, 11.5 ft<br />
Maneuvering +5.3 g, -2.65 g Tailplane airfoil FX 71-L-150/30<br />
Empty weight 350kg, 771 lbs Payload 190kg, 419 lbs Gross weight 540kg, 1190 lbs<br />
Max. wing loading 27.8kg/m 2 , 5.7lbs/ft 2 L/Dmax 27 @ 87 km/h,<br />
54 mph, 47 kts<br />
VNE<br />
Dive brake speed<br />
200km/h, 124 mph<br />
200 km/h, 124 mph<br />
Stall speed<br />
Min. sink<br />
0.78 m/s, 2.38 fps, 1.41 kt @<br />
81.4 km/h, 50.6 mph, 44 kts<br />
57 km/h, 35.4 mph, 30.8 kts @ minimum gross weight<br />
72 km/h, 44.7 mph, 38.9 kts @ maximum gross weight<br />
34 R/C Soaring Digest
February <strong>2007</strong> 35
36 R/C Soaring Digest
February <strong>2007</strong> 37
38 R/C Soaring Digest
Dale King in the front seat<br />
February <strong>2007</strong> 39
40 R/C Soaring Digest
February <strong>2007</strong> 41
42 R/C Soaring Digest
February <strong>2007</strong> 43
44 R/C Soaring Digest
Sled Driver ChronicleS<br />
Jay Decker, sleddriver@monkeytumble.<strong>com</strong><br />
How Did You Get So Much Stuff?<br />
Vacuum Bagging Part 1<br />
Kelly Johnson<br />
Note: This series of articles uses the work<br />
“suck” gratuitously. If you are offended, get<br />
over it. It is just part of the vernacular of the<br />
vacuum bagging <strong>com</strong>munity.<br />
Your spouse, significant other, roommate,<br />
or mother ever walk into your model<br />
area, just look around, and make some<br />
exclamation about how much model<br />
airplane stuff you have? This is in addition<br />
to the exclamations you receive when you<br />
ask or beg to buy more model airplane<br />
stuff when you haven’t used all the model<br />
airplane stuff you have already. I recently<br />
received that exclamation from a fellow<br />
modeler when he saw all the <strong>com</strong>posite<br />
materials, vacuum bagging supplies, and<br />
other building stuff I had. I was incensed!<br />
How could a modeler question having all<br />
this valuable and useful stuff? Actually, he<br />
just wanted to know how or why I had <strong>com</strong>e<br />
to have hundreds of pounds of laminate,<br />
miles of bagging tube and Mylar, dozens of<br />
vacuum bag clips, etc., etc. So I told him the<br />
truth, which is that I had bought out a few<br />
guys who had thought that they wanted to<br />
get into vacuum bagging and molding, but<br />
ended up not sticking with it for whatever<br />
reason.<br />
Even though it is more likely that you have<br />
insomnia and think reading this article is<br />
the cure, I’m going to assume that you are at<br />
least interested in pursuing the <strong>com</strong>posite<br />
construction path outlined last month or<br />
are already somewhere on the path. And,<br />
even though my spouse calls this path the<br />
“Highway to Hell,” it really is a fun journey.<br />
So, let’s start with what you really need to<br />
vacuum bag wings, which might be less and<br />
less expensive than you might think.<br />
You do not need a bunch of expensive<br />
equipment and supplies to start vacuum<br />
bagging skins on to foam cores. In fact,<br />
you might have everything you really need<br />
around your shop and the garage, except a<br />
vacuum pump system. I’m going to share<br />
my thoughts regarding vacuum pump<br />
systems, and next month we’ll talk about<br />
vacuum bags and start you sucking down<br />
vacuum bags for practice.<br />
Basically you have three options for a<br />
vacuum pump system: 1) you can borrow<br />
one, which is what I would suggest that you<br />
do initially, 2) you can buy one, or 3) you can<br />
build one. If you can, I would suggest that<br />
you borrow a vacuum system to experiment<br />
with vacuum bagging, and eventually buy<br />
or build a system if you want to continue<br />
on the <strong>com</strong>posite construction path. If you<br />
are able to borrow a vacuum system, you<br />
February <strong>2007</strong> 45
1 2 3<br />
Photo 1: This is my current vacuum system. The vacuum reservoir is a $17 air tank from the automotive department at Wally World (Wal-<br />
Mart). The nice thing about this tank is that it has a 1/4-inch NPT fitting to connect everything, and it is a pretty shade of blue.<br />
Photo 2: The vacuum pump is a rotary vane pump that was salvaged from a hospital. This pump pulls about 21-inches of vacuum and is an<br />
oiled pump, i.e., I have to put oil in it to keep it lubricated. Paid $40 for it and it works great.<br />
Photo 3: The aquarium check valve in the line between the pump and vacuum reservoir. Purchased from a pet store, it’s cheap, and keeps air<br />
from leaking through the vacuum pump into the reservoir.<br />
will likely be able to borrow vacuum bag<br />
materials also, which I would also encourage<br />
you to do.<br />
If you can’t or don’t want to borrow or build<br />
a vacuum system, you can buy <strong>com</strong>mercially<br />
available units. I’m sure that there are a<br />
multitude of systems available between<br />
the usual suspects, like ACP and CST,<br />
woodworking veneer bagging suppliers,<br />
and homebuilt aircraft suppliers. Here are<br />
my suggested re<strong>com</strong>mendations for a small<br />
home wing bagging vacuum system:<br />
Vacuum Switch Control – A vacuum switch<br />
controls the amount of vacuum by turning<br />
the vacuum pump on and off to control<br />
the amount vacuum. I prefer this type of<br />
control over the type where the pump runs<br />
continuously and a bleed valve is adjusted<br />
to leak air into the system to control the<br />
amount of vacuum.<br />
Vacuum Reservoir – A system that has<br />
a tank which “holds some vacuum” to<br />
minimize vacuum pump motor cycling,<br />
which can be very helpful when you are<br />
trying to find leaks in the system and the<br />
noise of the vacuum pump motor drowns<br />
out the telltale hissing sound of a leak.<br />
“Oil-less” Diaphragm Vacuum Pump<br />
– Vacuum pumps are electromechanical<br />
devices that came out of the “military-<br />
46 R/C Soaring Digest
4 5 6<br />
Photo 4: From top to bottom, the barbed tubing connections, vacuum gauge, vacuum switch, and vacuum reservoir.<br />
Photo 5: Vacuum pump plugged into an electrical outlet, and outlet is wired to a relay and the vacuum switch.<br />
Photo 6: Electrical relay wired to the vacuum switch and the electrical outlet the vacuum pump plugs into.<br />
industrial <strong>com</strong>plex.” There are actually<br />
many types and varieties, including some<br />
that require maintaining an oil level for<br />
lubrication. Fortunately, the little Gast and<br />
Thompson diaphragm vacuum pumps have<br />
be<strong>com</strong>e fairly ubiquitous and are relatively<br />
idiot proof.<br />
Five to 15-inches of Vacuum (minimum<br />
range) – In this country, vacuum is<br />
measured in units of inches of mercury.<br />
In <strong>com</strong>munist units, I mean metric units,<br />
vacuum is measured in torr, which is<br />
millimeters of mercury. An inch of vacuum<br />
inside the vacuum bag results in about a half<br />
pound of force per square inch of surface<br />
area on anything within the vacuum bag.<br />
Foam is relatively weak, so you only need a<br />
limited amount of vacuum before the foam<br />
begins to crush. Five-inches of vacuum is<br />
good for white bead foams, nine-inches<br />
is good for the softer grey, pink, and blue<br />
extruded foams, and up to 15-inches of<br />
vacuum is good for the high <strong>com</strong>pressive<br />
strength extruded foams.<br />
If you don’t have a friend available to<br />
loan you a vacuum system to try out, and<br />
you’d rather build a vacuum system than<br />
purchase one, this section is for you. You<br />
basically need around half a dozen major<br />
<strong>com</strong>ponents, most of which you can salvage<br />
and buy locally or off the internet. Here’s a<br />
list of the major <strong>com</strong>ponents you need for a<br />
good system:<br />
Vacuum Pump – If you can find one or it fits<br />
your budget, get one of those little oil-less<br />
diaphragm vacuum pumps. You need one<br />
February <strong>2007</strong> 47
7<br />
Photo 7: Vacuum manifold with toggle<br />
actuated valves that turn the vacuum on<br />
and off to the plastic hoses coiled on a<br />
hook in the right of photo.<br />
Photo 8: Gast diagraph vacuum pumps, a<br />
single stage pump on the right and a two<br />
stage pump on the left. The single stage<br />
pump pulls around 18-inches of vacuum<br />
and the two stage pumps around 28-<br />
inches.<br />
8<br />
with a 1/6 to 1/4 hp motor and one or two<br />
stages that can produce 15 to 29-inches of<br />
vacuum. Gast and Thompson seem to be<br />
the dominant manufactures of these pumps<br />
in this country.<br />
Other pumps will work just fine, including<br />
the Freon pump in that old fridge in your<br />
front yard. But, you are going to need a<br />
little more apparatus to return oil to the<br />
enclosure and make connections.<br />
One more suggestion, if you think you are<br />
going to want to really get into <strong>com</strong>posite<br />
construction, get a pump capable of pulling<br />
at least 25-inches. Being able to pull near<br />
full vacuum is useful for bagging into molds,<br />
vacuum degassing, and other things you<br />
might want to advance to.<br />
Vacuum Switch – The vacuum switch senses<br />
when the vacuum decreases and turns<br />
the vacuum pump on, and it senses when<br />
the vacuum has increased and turns the<br />
vacuum pump off. The difference in vacuum<br />
between when the pump is turned on and<br />
off is called the “dead band.” Personally,<br />
I like the vacuum switch dead band to be<br />
1-inch or less. The vacuum switch used to<br />
be the toughest part to find, but I found a<br />
bunch of high quality vacuum switches on<br />
eBay for less than $5 a pop. However, the<br />
good ones typically have light duty switch<br />
contacts that can not handle the current of<br />
your vacuum pump motor. So, you might<br />
need a relay circuit, which is an electrical<br />
switch that is controlled by the vacuum<br />
switch. Might sound a little <strong>com</strong>plicated<br />
48 R/C Soaring Digest
9<br />
and scary if you are not electronically inclined, but it isn’t that<br />
hard – a friend who knows a little about electronics or any 12<br />
year-old can help you.<br />
Relay Circuit – A relay is an electrical switch that opens and<br />
closes under control of another electrical circuit. In the case<br />
of your vacuum system, the “another electrical circuit” is<br />
you vacuum switch. I would re<strong>com</strong>mend that you use a relay<br />
that has a 12 volt direct current coil for electrical safety sake.<br />
However, that will mean that you need a 12 volt DC power<br />
supply to run though your vacuum switch and the coil side<br />
of your relay. A wall wart type 9.6 volt NiCad battery charger,<br />
which produces about 12 volts to charge a 9.6 volt battery<br />
pack, will work just fine for a power supply. Again, it might<br />
sound <strong>com</strong>plicated, but your local electronics geek or your<br />
12 year-old should be able to help you right out.<br />
Vacuum Check Valve – Virtually all vacuum pumps leak<br />
air back into the system when the pump is not running.<br />
So you install something called a check valve to stop this<br />
leakage between the vacuum pump and the reservoir. Go to<br />
PetSmart or another aquarium supply shop and buy a couple<br />
aquarium check valves. Install these valves in your vacuum<br />
system in the correct orientation and you are good. These<br />
valves do wear out, but they are pretty cheap, so it good to<br />
have another available as a replacement.<br />
10<br />
Photo 9: The black vacuum switch on the left does not work well below 15-inches of vacuum and has a dead band of 2 to 3-inches of<br />
vacuum. The cylindrical vacuum switches in the photo are very accurate industrial vacuum switches with a 1/4-inch of dead band that work<br />
great and were purchased on eBay about $5, but require the use of a relay circuit.<br />
Photo 10: High current load industrial relay on the right and a 12 Volt power supply on the left that will be used to energize the relay coil.<br />
These <strong>com</strong>ponents will be used with two stage pump and vacuum switches shown above to build a new super-duper vacuum system with<br />
multiple set points.<br />
February <strong>2007</strong> 49
11 12 13<br />
Photo 11: My first vacuum system, which was built around for about $30. The<br />
carrier was cut from a plywood shipping crate.<br />
Photo 12: The vacuum reservoir was a Freon tank liberated from an automotive AC<br />
shop dumpster.<br />
Photo 13: The vacuum pump was liberated from a piece of industrial equipment<br />
for the right price, but the pump had a 220 Volt motor that required the use of<br />
voltage step-up transformer and a relay, which were inexpensively purchase from<br />
an electronics surplus supplier.<br />
Photo 14: Industrial vacuum system can be purchase as <strong>com</strong>plete units, like this<br />
one that was retrofitted with a better vacuum switch and relay circuit. These units<br />
can be affordably purchased from surplus suppliers.<br />
14<br />
50 R/C Soaring Digest
Vacuum Reservoir – There are a multitude<br />
of things you can use for a vacuum reservoir.<br />
I use a steel air tank that has a 1/4-inch pipe<br />
thread fitting to hook up to. I bought it in<br />
the automotive section at Wal-Mart for $17.<br />
Vacuum Gauge – Get one and plumb it into<br />
you system so that you know how much<br />
you suck, I mean, how much vacuum your<br />
system is pulling. Granger has vacuum<br />
gages, I’ve seen them at auto stores and<br />
some hardware stores, and like everything<br />
else, they exist on the internet.<br />
Miscellaneous wiring, piping, and tubing<br />
<strong>com</strong>ponents – You will need wire, an on/<br />
off switch if you want one, tubing, and<br />
pipe fittings to connect your <strong>com</strong>ponents.<br />
You should be able to get this stuff from<br />
hardware stores. I’ve found that DIY stores,<br />
like Home Depot, don’t always have the<br />
tubing and barbed hose fittings that other<br />
hardware stores like True Value Hardware<br />
and some other stores have, so you might<br />
have to make a few stops to get what you<br />
want. Also, you need tubing that will not<br />
collapse under vacuum, so you need to get<br />
some tubing with a wall thickness greater<br />
than what PetSmart sells for aquariums.<br />
The cost of all this stuff just depends on<br />
the availability of surplus industrial parts<br />
in your local area and how much effort you<br />
put into scrounging parts and cobbling<br />
things together yourself. If you get first class<br />
major <strong>com</strong>ponents on eBay and buy the<br />
other <strong>com</strong>ponents new, it will probably set<br />
you back a $150 to $200. If you scrounge<br />
hard and put it some sweat equity, I’ve put<br />
together a vacuum system for less than $30.<br />
While a vacuum system might sound like<br />
a bunch of stuff, after it is all assembled it<br />
will be smaller than your beer chest, which<br />
should be below the threshold where your<br />
spouse, significant other, roommate, or<br />
mother will be able to sense as a discernible<br />
increase in your modeling stuff. See, it<br />
isn’t that hard to get on the <strong>com</strong>posite<br />
construction path.<br />
So, <strong>com</strong>e on in, the water is fine.<br />
FAI has received the following Class F (Model Aircraft) record claim :<br />
Claim number : 14045<br />
Sub-class F5 Open (Aeroplane, Electric motor COMB (all sources of current))<br />
F5: Radio Controlled Flight Category<br />
Type of record : N°195: Distance to goal and return<br />
Course/location : Stephenson County IL - Winnebago County IL<br />
Performance : 67.14 km<br />
Pilot : David Fratello (USA)<br />
Helper : Fratello Armond<br />
Date: 16.08.2006<br />
Current record : 41.14 km (04.09.2004 - Jüri LAIDNA, Estonia)<br />
The details shown above are provisional. When all the evidence required has been received and<br />
checked, the exact figures will be established and the record ratified (if appropriate).<br />
February <strong>2007</strong> 51