VSS3 TDM Manual English - TC Electronic
VSS3 TDM Manual English - TC Electronic
VSS3 TDM Manual English - TC Electronic

Create successful ePaper yourself
Turn your PDF publications into a flip-book with our unique Google optimized e-Paper software.
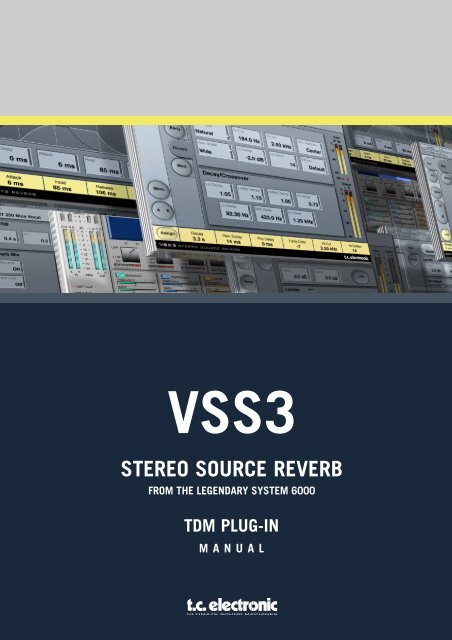
<strong>VSS3</strong><br />
STEREO SOURCE REVERB<br />
FROM THE LEGENDARY SYSTEM 6000<br />
<strong>TDM</strong> PLUG-IN<br />
MANUAL
<strong>TC</strong> Support Interactive<br />
The <strong>TC</strong> Support Interactive website www.tcsupport.tc is designed as an online support<br />
and information center. At the site you can find answers to specific questions regarding<br />
<strong>TC</strong> software and hardware. All known issues are stored in a database searchable by<br />
product, category, keywords, or phrases. Under the section "My Stuff" you can login to<br />
check the status of your questions, download materials such as product manuals, software<br />
updates and new presets.<br />
This site has been specifically designed to meet the needs of our users. We constantly<br />
update the database and you will find the site to be a huge resource of information.<br />
Browse through Q&A's and discover new aspects of your <strong>TC</strong> product.<br />
If you can't find an answer online, you have the option of submitting a question to our<br />
technical support staff who will then reply to you by e-mail. The <strong>TC</strong> Support Team is<br />
on constant alert to help you in any way they can.<br />
Contact Details<br />
Alternatively, you may contact the <strong>TC</strong> <strong>Electronic</strong> distributor in your area, or write to:<br />
<strong>TC</strong> ELECTRONIC A/S<br />
Customer Support<br />
Sindalsvej 34<br />
Risskov DK-8240<br />
Denmark<br />
USA:<br />
<strong>TC</strong> <strong>Electronic</strong>, Inc.<br />
5706 Corsa Avenue, Suite 107<br />
Westlake Village, CA 91362<br />
E N G L I S H<br />
www.tcelectronic.com<br />
© BY <strong>TC</strong> ELECTRONIC A/S 2004. ALL PRODUCT AND COMPANY NAMES ARE<br />
TRADEMARKS OF THEIR RESPECTIVE OWNERS. VST IS A TRADEMARK OF STEIN-<br />
BERG AG, AUDIO UNITS IS A TRADEMARK OF APPLE COMPUTER, INC. ALL SPEC-<br />
IFICATIONS SUBJECT TO CHANGE WITHOUT NOTICE.ALL RIGHTS RESERVED.<br />
<strong>TC</strong> <strong>Electronic</strong> is a <strong>TC</strong> Group company.
TABLE OF CONTENTS<br />
Contact & Support Information . . . . . . . . . . . . . . . . . . . . . . . . . . . . . . . . . . . . . . . . .2<br />
Table Of Contents . . . . . . . . . . . . . . . . . . . . . . . . . . . . . . . . . . . . . . . . . . . . . . . . . . .3<br />
VSS Introduction . . . . . . . . . . . . . . . . . . . . . . . . . . . . . . . . . . . . . . . . . . . . . . . . . . .4<br />
Global Plug-In Controls . . . . . . . . . . . . . . . . . . . . . . . . . . . . . . . . . . . . . . . . . . . . . .7<br />
System Requirements . . . . . . . . . . . . . . . . . . . . . . . . . . . . . . . . . . . . . . . . . . . . . . . .7<br />
The Plug-In Parameters . . . . . . . . . . . . . . . . . . . . . . . . . . . . . . . . . . . . . . . . . . . . . .9<br />
Preset Management . . . . . . . . . . . . . . . . . . . . . . . . . . . . . . . . . . . . . . . . . . . . . . . .18<br />
Converting <strong>VSS3</strong> Presets from System 6000 and Reverb 4000 . . . . . . . . . . . . . . . .19<br />
Compare settings with A/B Mem . . . . . . . . . . . . . . . . . . . . . . . . . . . . . . . . . . . . . . .20<br />
Locking Parameter values using the Parameter Lock . . . . . . . . . . . . . . . . . . . . . . . .21<br />
E N G L I S H<br />
<strong>VSS3</strong> / 3
<strong>VSS3</strong> Stereo Source Reverb<br />
Congratulations with the purchase of your new Virtual Space Simulation plug-in for<br />
Pro Tools|HD.<br />
With this plug-in, you now have one of the best sounding, most versatile and easy-touse<br />
professional reverbs for music and film/post applications available directly within<br />
your Digital Audio Workstation. Combining ultimate control of directivity in the early<br />
reflections with a transparent and harmonically magnificent diffused field, the art of<br />
reverberation is brought to a new and higher level.<br />
The <strong>VSS3</strong> enables you to add the softest and cleanest ambience to your work that<br />
you have ever heard. With the wide range of presets it will give you the exact post production<br />
reverb you are looking for: The <strong>VSS3</strong> Reverb algorithm incorporates dedicated<br />
Early Reflection types for motion picture use, e.g. Car, Bathroom and Conference<br />
Rooms.<br />
The <strong>VSS3</strong> plug-in runs on Pro Tools|HD and Pro Tools|HD Accel hardware, including<br />
the Venue console, at sample rates from 44.1 kHz to 96kHz, with Pro Tools software<br />
6.9 or higher.<br />
Enjoy!<br />
E N G L I S H<br />
4 / <strong>VSS3</strong>
VSS Introduction<br />
Constructing a Reverb Preset with the VSS algorithm<br />
The following few paragraphs are thoughts about the usage of the VSS (Virtual<br />
Space Simulation) algorithm. They should be taken as guidelines rather than fact.<br />
The relationship of Early Reflections and the Reverb tail is very important in this algorithm.<br />
Adjusting the balance between the Early Lev and the Rev Lev parameters is one<br />
of the easier ways to make a HUGE difference in the sound of your reverb!<br />
When you start building your preset you should try this:<br />
First turn the Rev Lev all the way down and also turn the Dry level a little down (or all<br />
the way down if you are in a send/return configuration). In a send/return configuration,<br />
push up the return level. You should now hear Early Reflections, a little of the Dry signal<br />
and no Reverb Tail.<br />
Then begin changing the Early Type and Early Size parameters until you select a room<br />
shape that compliments the program material.<br />
Re-adjust the wet/dry balance until it is pleasing, then bring up the Rev Lev until the<br />
tail of the reverb becomes audible. Add just enough tail to make it work together.<br />
Adjust the Decay time accordingly.<br />
On some presets you may choose to have very little Early Reflections or none at all.<br />
Certain "ambience" style presets might have little or no "tail". That is up to you.<br />
The <strong>VSS3</strong> was designed to have the smoothest Reverb tail ever developed but it is the<br />
Early Reflections that define the "personality" of the room, so try to experiment with<br />
this relationship! By using these parameters correctly you can create a BIG sound<br />
without having a mix swimming in reverb wash.<br />
Note: When using small room sizes and short Decay times on percussive signals, the<br />
Reverb level and Early level must have an approx. level difference of 4dB in order to<br />
prevent a slap effect.<br />
Getting the most out of the Early Reflection Patterns<br />
Early Reflections define the actual feel of the room, where the Reverb tail is the less<br />
defined "bowl" of reflections that follows. The major part of the Early Reflection patterns<br />
of the <strong>VSS3</strong> are simulations of existing rooms and are based on a large number<br />
of reflections (40-100), which have been processed through an advanced algorithm.<br />
There are a number of different types and sizes covering a lot of different acoustic<br />
spaces that you need for music and post production. As the patterns are simulations<br />
of real rooms, the delay times of the first reflections are sonic and spatially "connected"<br />
to the direct signal. Using Pre Delay together with Early Reflections should therefore<br />
be considered very carefully, as the acoustic space created by the pattern tends to<br />
"collapse" if too much Pre Delay is added. If you want the well known slap back reverb<br />
effect, you should use Rev Delay on the Reverb tail instead and reduce the level of<br />
the Early Reflections.<br />
E N G L I S H<br />
<strong>VSS3</strong> / 5
Finding the right Early Type & Size for your track :<br />
• Select Early Type and Early Size on the Early page.<br />
• Turn the Rev Level to -100dB.<br />
• Turn the EarlyLevel to 0dB.<br />
• Select an appropriate size. (Note that some sizes of the different types may overlap,<br />
e.g. Church Small is bigger than Conc Hall medium etc.)<br />
Switch between the different types until it matches the signal and the illusion that<br />
you wish to create.<br />
Generally it is advisable to use small room sizes for drums and perc; medium sizes for<br />
piano, guitar & horns and large sizes for vocals & strings. Large Church and Venue<br />
simulate very big rooms and can therefore be used to create an "echo like" effect if<br />
turned up loud. Many of the patterns can be used as a "Doubling" effect if the Reverb<br />
tail is not added.<br />
Using the Hi Color and Lo Cut parameter on the Early Reflection-page<br />
Once you have selected the desired type and size you can use the Hi Color and the Lo<br />
Cut controls to filter the Early Reflections. The Hi Color parameter is an advanced Hi<br />
Cut function. Please note that in most real rooms the reflections are generally much<br />
softer than the direct signal.<br />
Often it can be advisable to use the Hi Color parameter in the range between -4 to -9<br />
to make the Early Reflections blend properly with the direct signal rather than competing<br />
with it. The Lo Cut filter is very useful if you want to reduce the Early<br />
Reflections in the area between 125-400Hz. Try this if the Early Reflections seem to<br />
make the sound too full.<br />
We hope that you will enjoy working with the <strong>VSS3</strong> !<br />
E N G L I S H<br />
6 / <strong>VSS3</strong>
Global Plug-In Controls<br />
Keyboard Commands<br />
In most host applications, the <strong>VSS3</strong> Stereo Source Reverb supports keyboard commands<br />
for certain functions. The following key commands are available for all plug-in<br />
parameters:<br />
Key Commands in Mac OS X:<br />
Fine Adjust = Apple key + mouse movement<br />
Reset To Default = Option + mouse click<br />
Key Commands in Windows:<br />
Fine Adjust = Ctrl + mouse movement<br />
Reset To Default = Alt + Control + mouse click<br />
Automation<br />
Please be aware that automation of certain parameters, like Reverb Type or<br />
the modulation parameters can cause audible artifacts.<br />
In case you need to automate these parameters, you should take care that<br />
changes only take place in parts where no audio is sent to the plug-in.<br />
This is especially valid for the following parameters: Early Type, Early<br />
Size, Reverb Type, Reverb Width and all parameters on the Modulation page.<br />
SYSTEM REQUIREMENTS<br />
• Mac OS X (10.4 or higher) / Windows XP<br />
• Pro Tools <strong>TDM</strong> 7.2.1 software (or higher)<br />
• Pro Tools HD or HD Accel hardware<br />
• iLok USB key<br />
• iLok.com account and internet access required for product authorization<br />
• System must meet Digidesign’s system requirements for Pro Tools <strong>TDM</strong> systems!<br />
E N G L I S H<br />
<strong>VSS3</strong> / 7
Focus Fields<br />
You can place your own set of parameters in the 6 focus fields at the bottom<br />
of the plug-in.<br />
Making use of the focus fields can give you a better workflow, since you will not have<br />
to switch pages all the time to find the parameters that you work with.<br />
You can assign any parameter to the focus fields, and the focus fields are stored with<br />
the session as well as when you save your presets.<br />
To change the assignment:<br />
• Press the Assign button. The Assign button as well as one of the Focus Fields will<br />
be highlighted.<br />
• Select the Focus Field you wish to link a parameter to, by clicking on that field.<br />
• Click on the parameter you wish to link to the selected Focus Field.<br />
• To get an unassigned (empty) Focus Field, click again on the selected parameter.<br />
• Once you have finished the assignments, click again on the Assign button to leave<br />
the assign mode.<br />
Overload Indication (O/L)<br />
The two LEDs in the metering section, between the input and output meters, will light<br />
up in case internal DSP overloads are detected. You should lower the input level to<br />
avoid these overloads. To reset the indication, click on the O/L LED.<br />
Tool Tips<br />
Each control on the plug-in user interface (UI) will show a small help text when you<br />
move the mouse over it, called “Tool Tip”. In case you do not want to have these Tool<br />
Tips showing up, click on the question mark icon on the “Main” UI page. The Tool Tip<br />
setting is kept globally for this plug-in.<br />
E N G L I S H<br />
8 / <strong>VSS3</strong>
The Plug-In Parameters<br />
The plug-in parameters are spread amongst 4 User Interface pages. They are grouped<br />
into the most important parameters on the Main page, the parameters relevant for the<br />
Early Reflections, the Reverb Tail and finally for Modulation.<br />
Main<br />
On the <strong>VSS3</strong> Main page, we have grouped the most important parameters of the<br />
<strong>VSS3</strong>. Also, on this page you can find the plug-ins preset handling. More about the<br />
preset handling can be found in the section "Preset Handling" later in this manual.<br />
Decay<br />
Range: 0.1 to 20s<br />
The Decay time of the Reverb. Usually associated with the time it takes the Reverb<br />
Tail to decay 60dB. This is the overall Master Decay for the four band Decay parameters<br />
(found in the REVERB section below) which are multiples of this base Reverb<br />
time.<br />
Rev Delay<br />
Range: 0 to 200ms<br />
A delay to the diffuse field part of the Reverb. Adds additional time between the Early<br />
Reflections and the onset of the "diffuse field" of the Reverb.<br />
E N G L I S H<br />
<strong>VSS3</strong> / 9
Pre Delay<br />
Range: 0 to 100ms<br />
A delay placed at the input of the algorithm. This parameter defines how long after<br />
the dry sound the Early Reflections and the diffuse field will begin.<br />
Hi Cut<br />
Range: 20Hz to 20kHz<br />
Rolls off the top end as it enters the Reverb. Used in conjunction with Hi Soften and<br />
Hi Decay to "darken" a room.<br />
Hi Decay<br />
Multiplier Range: 0.01 to 2.5<br />
Sets the Decay time for the High-end frequencies of the Reverb diffuse field.<br />
Levels<br />
Rev Level<br />
Range: Off, -97dB to 0dB<br />
The output level of the diffuse field part of the algorithm. When Rev Level is set to<br />
"Off", the effect will consist entirely of Early Reflections.<br />
Early Level<br />
Range: Off, -97dB to 0dB<br />
The output level of the Early Reflections. When Early Level is set to "Off" the Reverb<br />
effect will consist entirely of Reverb Tail.<br />
Dry Level<br />
Range: Off, -97dB to 0dB<br />
Attenuates the Dry signal level on the output of the plug-in, thus leaving the Reverb<br />
and Early Levels unaffected. "Off" equals a "kill-dry" setting.<br />
The lock in the lower right corner of the control will prevent this parameter from being<br />
updated by preset changes initiated from within the plug-in UI. All other actions (like<br />
preset changes and automation data from the host) will pass and re-open the lock.<br />
In Level<br />
Range: Off, -97dB to 0dB<br />
Sets the Input Level for the algorithm.<br />
Out Level<br />
Range: Off, -97dB to 0dB<br />
The overall Output level of the Reverb. Use this parameter to adjust the output level<br />
to fit for following effects in your host application.<br />
E N G L I S H<br />
10 / <strong>VSS3</strong>
Early<br />
On this page, you can find all the important parameters for the Early Reflections generated<br />
by the <strong>VSS3</strong>.<br />
Early Type<br />
Several types are available - e.g. Airport, Bathroom, Car, Street, etc.<br />
Pick the type that best compliments your material or best represents the effect you<br />
are going for.<br />
Early Color<br />
Range: -40 to +40 (0 = default)<br />
Adjusts the spectral balance in the high end frequencies. This is actually a simple way<br />
of adjusting a complex selection of frequencies.<br />
Early Pos<br />
Here you can select between a Close and a Distant setting. This enables you to<br />
change the distance between the listening position and the source in the same Early<br />
Reflection pattern.<br />
Please note that some of the Early Types only have one position available. The Early<br />
Pos parameter field will be grayed out and show the text "".<br />
E N G L I S H<br />
<strong>VSS3</strong> / 11
Early Size<br />
Range/Type: Small, Medium or Large<br />
Changes the size of the Early Type parameter.<br />
Some of the Early Types have only a fixed size. For these Early Types, the Early Size<br />
parameter field will be grayed out and show the text "".<br />
Early Lo Cut<br />
Range: Off, 25 to 400Hz<br />
Sets the Lo Cut frequency for the Early Reflections.<br />
Early Balance<br />
Range: -100dB R, Center, -100dB L<br />
The left/right balance of the Early Reflections. Allows you to offset the Early<br />
Reflections from the normal center position by attenuating the Early Reflections on<br />
the right or left channel.<br />
E N G L I S H<br />
12 / <strong>VSS3</strong>
Reverb<br />
On this page, you can find all the important parameters for the Reverb Tail generated<br />
by the <strong>VSS3</strong>, including the setup of the crossover frequencies and decay time multipliers<br />
for the individual frequency bands.<br />
Reverb<br />
Rev Type<br />
Range: Smooth, Natural, Alive, Fast, Alive Wide, Fast Wide<br />
Adjust this parameter with the Early Level turned all the way off and the Rev Level all<br />
the way up. Change the type to get a feel of what each one sounds like.<br />
Rev. Width<br />
Range: Mono, Center, Stereo or Wide<br />
With this parameter you can change the width of the diffuse field. The Mono setting is<br />
where the left and right Reverb Tails are completely identical, the Center setting opens<br />
a bit up in the middle, Stereo is the normal stereo image width and Wide covers the<br />
outside of the stereo image.<br />
Note: The Rev Types Fast Wide and Alive Wide only have one width, indicated as<br />
"" (extremely wide).<br />
E N G L I S H<br />
<strong>VSS3</strong> / 13
Lo Cut<br />
Range: 20 to 200Hz<br />
Adjustable filter that allows you to remove low frequencies from the Reverb Tail. The<br />
Lo Cut frequency can be perceived as a Threshold frequency. The cut will be performed<br />
according to the Lo Damp parameter.<br />
Lo Damp<br />
Range: -18dB to 0dB<br />
Sets the amount of cut in dBs. (See Lo Cut description above).<br />
Hi Cut<br />
Range: 20Hz to 20kHz<br />
Rolls off the top end of the signal as it enters the Reverb. Used in conjunction with Hi<br />
Soften and Hi Decay to "darken" a room.<br />
Hi Soften<br />
Range: -50 to +50 (0 = default)<br />
Hi Soften is a special filter used to "soften" the high frequencies of Reverb. This is not<br />
a simple Hi Cut filter but a complex set of filters working together to remove those frequencies<br />
that make a Reverb sound "brittle" or harsh. Hi Soften is scaled/linked to the<br />
Hi Cut and Hi Decay.<br />
Rev Balance<br />
Range: -100dB R, center, -100dB L<br />
The left/right balance of the Reverb. Allows you to offset the diffuse field from the<br />
normal center position by attenuating the Reverb Tail level on the right or left channel.<br />
Diffuse<br />
Range: -50 to +50 (0 = default)<br />
This parameter gives you more or less diffusion than the algorithm designer intended<br />
for the given Decay time. For optimum performance the diffusion is automatically<br />
adjusted behind the scenes whenever you change Decay times. This parameter gives<br />
you the added control to vary the diffusion around this automatic setting.<br />
E N G L I S H<br />
Decay/Crossover<br />
Lo Decay<br />
Multiplier Range: 0.01 to 2.5<br />
Multiplier for the frequencies below the Lo Xover frequency.<br />
Example: If the Main Decay parameter is set to 2.0sec and the Lo Decay parameter is<br />
set to 1.5, frequencies below the Lo Xover will decay for 3.0 sec. (=1.5 x 2.0sec).<br />
Conversely if this parameter is set to 0.5 the Decay time below the Lo Xover point will<br />
be only 1 sec.<br />
Lo Xover<br />
Range: 20Hz to 500Hz<br />
Sets the frequency at which the transition from the low to the low-mid frequencies<br />
takes place.<br />
14 / <strong>VSS3</strong>
Lo Mid Decay<br />
Multiplier Range: 0.01 to 2.5<br />
The Ratio control multiplier for the low-mid frequencies.<br />
Mid Xover<br />
Range: 200Hz to 2kHz<br />
Sets the frequency at which the transition from the low-mid to the mid frequencies<br />
takes place.<br />
Hi Mid Decay<br />
Multiplier Range: 0.01 - 2.5<br />
The Ratio control multiplier for the mid frequencies. This parameter is normally set to<br />
1.0 as it is the main parameter adjusted by the main Decay parameter. This mid-range<br />
decay control would normally be omitted, however, <strong>TC</strong> Engineers felt you could use<br />
this parameter as a fine adjustment tool to "tweak" a preset to sound just right without<br />
having to adjust the master Decay parameter.<br />
Hi Xover<br />
Range: 500Hz to 20kHz<br />
Sets the frequency at which the transition from the mid frequencies to the high frequencies<br />
takes place.<br />
Hi Decay<br />
Range: 0.01 to 2.5<br />
Multiplier for the frequencies above the Hi Xover frequency.<br />
Example: If the main Decay parameter is set to 2.0sec and the Hi Decay parameter is<br />
set to 1.5, frequencies above the Hi-Xover will decay for 3.0 sec. Conversely if this<br />
parameter is set to 0.5 the Decay time above the Hi Xover point will be 1 sec.<br />
E N G L I S H<br />
<strong>VSS3</strong> / 15
Modulation<br />
The <strong>VSS3</strong> offers intense modulation facilities and to control these, the Modulation<br />
page gives you an extensive series of parameters. All these parameters are condensed<br />
into 2 easy to use modulation sections, where you control different assets of the modulation.<br />
The modulation part of the <strong>VSS3</strong> has an in-built set of randomization methods. Every<br />
room in this world sounds different from one second to the next, and with the "random"<br />
feature this is perfectly simulated.<br />
Reverb Modulation<br />
The reverb modulation type is a set of very complex LFO patterns that modulates various<br />
parts of the reverb, and these patterns are developed based on the many years of<br />
experience and knowledge of the <strong>TC</strong> crew.<br />
E N G L I S H<br />
RevMod Type<br />
Off, Smooth 1, Smooth 2, Perc, Wow, Vintage, Wild<br />
Selects the type of modulation.<br />
RevMod Rate<br />
Range: -100, default, +100<br />
Allows you to offset the speed of the LFO from the factory default assigned to each<br />
Type.<br />
16 / <strong>VSS3</strong>
RevMod Width<br />
Range: 0% to 200%<br />
Sets the Width of the modulation.<br />
Space Modulation<br />
The space modulation part imitates the air movement of a room, and this is one of the<br />
things that make the <strong>VSS3</strong> very good at simulating the complex patterns of natural<br />
rooms. You can adjust the modulation type's rate, width and depth.<br />
SpcMod Type<br />
(Off, Normal, Fast, Slow, MidFreq, Sync)<br />
Selects the type of Space Modulation.<br />
SpcMod Rate<br />
Range: -100, default, +100<br />
Allows you to offset the speed of the LFO from the factory default assigned to each<br />
type.<br />
SpcMod Width<br />
Range: 0 to 100%<br />
Sets the width of the modulation.<br />
SpcMod Depth<br />
Range: -50, default, +50<br />
Allows you to offset the amount of space modulation from the factory default.<br />
E N G L I S H<br />
<strong>VSS3</strong> / 17
Preset Management<br />
<strong>TC</strong>'s comprehensive file based preset architecture makes archiving presets a simple<br />
process. This allows you to organize your presets the way you find most comfortable<br />
for your workflow, and to exchange presets with other users, no matter the platform or<br />
application. Presets are saved as discrete files on your hard drive. Once a preset is<br />
saved into the default location, it will automatically appear in the 'File' menu every<br />
time you use the plug-in. The files can then be organized into subfolders, where you<br />
can delete, rearrange or create your own sub-folders to accommodate your needs.<br />
NOTE: A folder will appear in the Preset File Menu if it contains at least one preset.<br />
Next/Previous Presets<br />
From the plug-in's Main page, you can directly jump from one preset to the next (or<br />
previous) by clicking on the up/down arrows right from preset name.<br />
All presets available at the default plug-in preset location will be considered, so you<br />
could in theory reach every preset this way. Direct access to specific presets is done<br />
via the "File" button:<br />
Preset File Menu<br />
Pressing the 'File' button will open the plug-in's File menu. The following options are<br />
available from the File menu.<br />
Loading a Preset<br />
By selecting 'Load', you can navigate to any folder on the system that you have read<br />
access to, including any shared folder. By default, these will be loaded from the<br />
default location for <strong>VSS3</strong> presets. Only presets located in the default file location will<br />
appear in the <strong>VSS3</strong> pop-up preset menu.<br />
Naming a Preset<br />
• Double click on the name field<br />
• Type in the new name<br />
• Press Enter<br />
E N G L I S H<br />
Saving a Preset<br />
By selecting 'Save', you can save your preset to any folder on the system that you have<br />
write access to, including any shared folder. By default, presets are saved to the<br />
default location for the <strong>VSS3</strong> presets.<br />
18 / <strong>VSS3</strong>
Default Preset Locations<br />
The following locations will describe where you can find the <strong>VSS3</strong> presets. The presets<br />
are stored in a folder that is unique to each plug-in:<br />
The plug-in’s own preset handling is storing the presets in the following locations:<br />
Mac OS X: /Users/Shared/<strong>TC</strong> <strong>Electronic</strong>/<strong>VSS3</strong>/Presets/<br />
Windows: (System Drive):\Documents and Settings\All Users\Shared Documents\<strong>TC</strong><br />
<strong>Electronic</strong>\<strong>VSS3</strong>\Presets\<br />
• To delete a file, simply move it to the 'Trash' or 'Recycle bin'.<br />
• To create a new subfolder that appears in the plug-in menu, simply create a new<br />
folder in the plug-in folder that resides in the PRESETS folder of the <strong>VSS3</strong> default<br />
preset location.<br />
NOTE: A folder will not appear in the Preset File Menu unless it has at least one preset<br />
inside.<br />
Converting <strong>VSS3</strong> Presets from System 6000 and<br />
Reverb 4000<br />
In case you are the happy owner of the <strong>VSS3</strong> algorithm for System 6000 or the<br />
Reverb 4000, here is something to get you in an even better mood: The <strong>VSS3</strong> plug-in<br />
is able to read your System 6000/Reverb 4000 presets.<br />
In order to convert presets from System 6000/Reverb 4000 to <strong>VSS3</strong>, you need to<br />
store the System 6000/Reverb 4000 presets in a preset file. The file extension has to<br />
be either ".syx" (for example: MyPresets.syx) or .mid for a MIDI file.<br />
The easiest way to export System 6000/Reverb 4000 presets is to use the "export to<br />
file" function from the Icon Editor for Mac/Windows (requires version 3.5 or higher).<br />
Alternatively, you can save a bank to a floppy disk (System 6000 only) or do a SysEx-<br />
Dump to a MIDI file in your sequencer.<br />
NOTE: For details regarding the export of presets from System 6000 or Reverb 4000,<br />
please refer to your System 6000/Reverb 4000 and Icon Editor documentation.<br />
The generated SysEx/MIDI preset file needs to be placed in the default <strong>VSS3</strong> Preset<br />
folder (at the root level; subfolders are not considered). The file needs to have either<br />
the extension ".syx" (for example: MyPresets.syx) or .mid for a MIDI file.<br />
Note: In case you are running the Icon Editor on the same computer as the <strong>VSS3</strong><br />
plug-in, the <strong>VSS3</strong> will automatically search for preset files in the default locations for<br />
Reverb 4000 and System 6000 files. You do not need to copy the files!<br />
Once your preset file has been placed in the default <strong>VSS3</strong> Preset folder, it will show<br />
up the next time you click the "File" button. At the top of the pop-up list you'll find a<br />
section called "Convert", and the name of your preset file will be listed here.<br />
E N G L I S H<br />
<strong>VSS3</strong> / 19
To convert your preset file to <strong>VSS3</strong> presets, simply select the name of the preset file.<br />
The conversion will only take a few seconds and only needs to be done once.<br />
When the conversion is done, all presets from your preset file will be available in a<br />
subfolder that has the same name as the preset file had. The presets will show up in<br />
the same bank structure as on the System 6000, and presets that are not based on<br />
the <strong>VSS3</strong> algorithm will not be converted.<br />
The preset file will disappear from the Convert section of the file menu.<br />
Compare settings with A/B Mem.<br />
With the A/B compare function you can easily compare different parameter settings<br />
when you work with your music.<br />
You have two buttons: the "Mem" and the "A/B" button.<br />
E N G L I S H<br />
20 / <strong>VSS3</strong>
When you start working with your preset, the A/B button is grayed out. This state indicates<br />
that the settings in both memory locations A and B are identical - so there is<br />
actually nothing to compare.<br />
As soon as you touch one of the parameters, the memory location "A" will get active,<br />
and the "A"-part of the A/B button will light up. All parameter changes will be applied<br />
to memory location "A". If you switch to memory location "B", you get back to your<br />
starting point, and all further changes will now be applied to memory location "B".<br />
Every time you press the A/B button, you will toggle between these two memory locations.<br />
NOTE: The A/B memory locations are temporary settings only! Saving a preset (e.g. via<br />
the File button or with your session) will only save the currently selected memory location.<br />
The setting of the other (hidden) memory location will not be saved!<br />
The "Mem" button will reset the A/B memory locations to the current setting.<br />
Locking Parameter values<br />
- using the Parameter Lock<br />
The parameter lock function allows you to lock the Dry Level, In Level and Out Level,<br />
from changing when you change preset.<br />
By using the parameter lock, you can easily browse through the extensive set of presets<br />
that comes with the <strong>VSS3</strong>, without having to change the Dry Level, In Level or<br />
Out Level all the time.<br />
To lock a parameter, simply click on the small lock in the parameter field. To unlock<br />
it, click again.<br />
The parameter lock only affects parameter changes made with the mouse. The parameter<br />
lock does not affect automation data or preset changes initiated from the host<br />
application. These changes will always pass.<br />
An example:<br />
You have inserted the <strong>VSS3</strong> on a channel.<br />
When you use the <strong>VSS3</strong> as an insert effect, you would probably like the dry part of the<br />
signal to go trough the <strong>VSS3</strong>, and therefore you'd probably turn up the "Dry Level".<br />
E N G L I S H<br />
<strong>VSS3</strong> / 21
Now, if you try to browse through a couple of presets, using the up and down arrows<br />
on the right side of the preset name, you will see that most of the presets have the<br />
Dry Level set to "Off". In other words, the Dry Level goes to "Off" all the time - which<br />
is quite annoying.<br />
And here comes the Parameter Lock. Simply press the small lock in the Dry Level<br />
parameter field, and the Dry Level will stay at the value that you've set it to - no matter<br />
what is saved with the preset you choose.<br />
E N G L I S H<br />
22 / <strong>VSS3</strong>