MITER SAW - Harbor Freight Tools
MITER SAW - Harbor Freight Tools
MITER SAW - Harbor Freight Tools
Create successful ePaper yourself
Turn your PDF publications into a flip-book with our unique Google optimized e-Paper software.
Owner’s Manual & Safety Instructions<br />
Save This Manual Keep this manual for the safety warnings and precautions, assembly, operating,<br />
inspection, maintenance and cleaning procedures. Write the product’s serial number in the back of the manual<br />
near the assembly diagram (or month and year of purchase if product has no number). Keep this manual and<br />
the receipt in a safe and dry place for future reference.<br />
ITEM 69683<br />
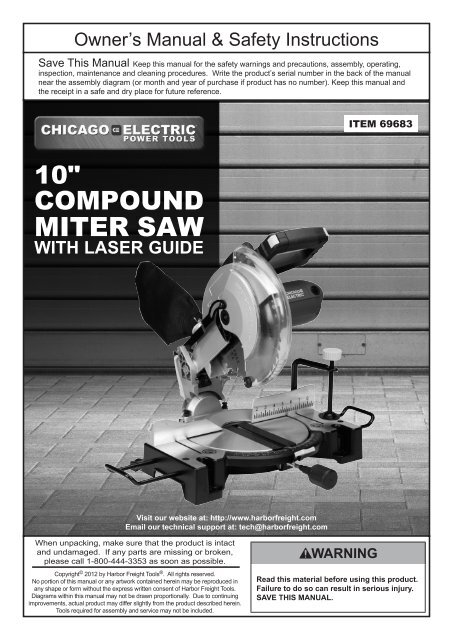
10"<br />
COMPOUND<br />
<strong>MITER</strong> <strong>SAW</strong><br />
WITH LASER GUIDE<br />
Visit our website at: http://www.harborfreight.com<br />
Email our technical support at: tech@harborfreight.com<br />
When unpacking, make sure that the product is intact<br />
and undamaged. If any parts are missing or broken,<br />
please call 1-800-444-3353 as soon as possible.<br />
Copyright © 2012 by <strong>Harbor</strong> <strong>Freight</strong> <strong>Tools</strong> ® . All rights reserved.<br />
No portion of this manual or any artwork contained herein may be reproduced in<br />
any shape or form without the express written consent of <strong>Harbor</strong> <strong>Freight</strong> <strong>Tools</strong>.<br />
Diagrams within this manual may not be drawn proportionally. Due to continuing<br />
improvements, actual product may differ slightly from the product described herein.<br />
<strong>Tools</strong> required for assembly and service may not be included.<br />
Read this material before using this product.<br />
Failure to do so can result in serious injury.<br />
SAVE THIS MANUAL.
Table of Contents<br />
SAFETY SETUP<br />
OPERATION MAINTENANCE<br />
Safety.......................................................... 3<br />
Specifications.............................................. 6<br />
Setup........................................................... 7<br />
Operation.................................................... 10<br />
WARNING SYMBOLS AND DEFINITIONS<br />
Maintenance............................................... 14<br />
Parts List and Diagram............................... 18<br />
Warranty..................................................... 20<br />
This is the safety alert symbol. It is used to alert you to potential personal injury hazards.<br />
Obey all safety messages that follow this symbol to avoid possible injury or death.<br />
Indicates a hazardous situation which, if not avoided,<br />
will result in death or serious injury.<br />
Indicates a hazardous situation which, if not avoided,<br />
could result in death or serious injury.<br />
Indicates a hazardous situation which, if not avoided,<br />
could result in minor or moderate injury.<br />
Addresses practices not related to personal injury.<br />
Page 2 For technical questions, please call 1-800-444-3353. Item 69683
IMPORTANT SAFETY INFORMATION<br />
General Tool Safety Warnings<br />
Read all safety warnings and instructions. Failure to follow the warnings and instructions<br />
may result in electric shock, fire and/or serious injury.<br />
Save all warnings and instructions for future reference.<br />
1. KEEP GUARDS IN PLACE and in working order.<br />
2. REMOVE ADJUSTING KEYS AND WRENCHES.<br />
Form habit of checking to see that keys and adjusting<br />
wrenches are removed from tool before turning it on.<br />
3. KEEP WORK AREA CLEAN.<br />
Cluttered areas and benches invite accidents.<br />
11. ALWAYS USE SAFETY GLASSES. Also use<br />
face or dust mask if cutting operation is dusty.<br />
Everyday eyeglasses only have impact resistant<br />
lenses, they are NOT safety glasses.<br />
12. SECURE WORK. Use clamps or a vise to hold<br />
work when practical. It’s safer than using your<br />
hand and it frees both hands to operate tool.<br />
SAFETY<br />
4. DON’T USE IN DANGEROUS ENVIRONMENT.<br />
Don’t use power tools in damp or wet locations,<br />
or expose them to rain. Keep work area well lighted.<br />
5. KEEP CHILDREN AWAY. All visitors should<br />
be kept safe distance from work area.<br />
6. MAKE WORKSHOP KID PROOF with padlocks,<br />
master switches, or by removing starter keys.<br />
7. DON’T FORCE TOOL. It will do the job better<br />
and safer at the rate for which it was designed.<br />
8. USE RIGHT TOOL. Don’t force tool or attachment<br />
to do a job for which it was not designed.<br />
Table A: RECOMMENDED MINIMUM WIRE GAUGE<br />
FOR EXTENSION CORDS<br />
(120 VOLT)<br />
NAMEPLATE<br />
AMPERES<br />
(at full load)<br />
EXTENSION CORD<br />
LENGTH<br />
25′ 50′ 100′ 150′<br />
0 – 6 18 16 16 14<br />
6.1 – 10 18 16 14 12<br />
10.1 – 12 16 16 14 12<br />
12.1 – 16 14 12 Do not use.<br />
9. USE PROPER EXTENSION CORD. Make sure your<br />
extension cord is in good condition. When using<br />
an extension cord, be sure to use one heavy<br />
enough to carry the current your product will<br />
draw. An undersized cord will cause a drop in line<br />
voltage resulting in loss of power and overheating.<br />
Table A shows the correct size to use depending<br />
on cord length and nameplate ampere rating.<br />
If in doubt, use the next heavier gauge.<br />
The smaller the gauge number, the heavier the cord.<br />
10. WEAR PROPER APPAREL. Do not wear<br />
loose clothing, gloves, neckties, rings, bracelets,<br />
or other jewelry which may get caught in moving<br />
parts. Nonslip footwear is recommended.<br />
Wear protective hair covering to contain long hair.<br />
13. DON’T OVERREACH. Keep proper<br />
footing and balance at all times.<br />
14. MAINTAIN TOOLS WITH CARE. Keep tools sharp<br />
and clean for best and safest performance. Follow<br />
instructions for lubricating and changing accessories.<br />
15. DISCONNECT TOOLS before servicing;<br />
when changing accessories, such as<br />
blades, bits, cutters, and the like.<br />
16. REDUCE THE RISK OF UNINTENTIONAL<br />
STARTING. Make sure switch is in<br />
off position before plugging in.<br />
17. USE RECOMMENDED ACCESSORIES.<br />
Consult the owner’s manual for recommended<br />
accessories. The use of improper accessories<br />
may cause risk of injury to persons.<br />
18. NEVER STAND ON TOOL. Serious injury<br />
could occur if the tool is tipped or if the<br />
cutting tool is unintentionally contacted.<br />
19. CHECK DAMAGED PARTS. Before further use<br />
of the tool, a guard or other part that is damaged<br />
should be carefully checked to determine that<br />
it will operate properly and perform its intended<br />
function – check for alignment of moving parts,<br />
binding of moving parts, breakage of parts,<br />
mounting, and any other conditions that may<br />
affect its operation. A guard or other part that is<br />
damaged should be properly repaired or replaced.<br />
20. DIRECTION OF FEED. Feed work into<br />
a blade or cutter against the direction of<br />
rotation of the blade or cutter only.<br />
21. NEVER LEAVE TOOL RUNNING UNATTENDED.<br />
TURN POWER OFF. Don’t leave tool<br />
until it comes to a complete stop.<br />
MAINTENANCE OPERATION<br />
SETUP<br />
Item 69683<br />
For technical questions, please call 1-800-444-3353.<br />
Page 3
Grounding Instructions<br />
SAFETY SETUP<br />
OPERATION MAINTENANCE<br />
TO PREVENT ELECTRIC SHOCK AND DEATH FROM INCORRECT GROUNDING WIRE CONNECTION<br />
READ AND FOLLOW THESE INSTRUCTIONS:<br />
110-120 V~ Double Insulated <strong>Tools</strong>: <strong>Tools</strong> with Two Prong Plugs<br />
Outlets for 2-Prong Plug<br />
Miter Saw Safety Warnings<br />
For Your Own Safety Read Instruction<br />
Manual Before Operating Miter Saw<br />
1. Wear eye protection.<br />
2. Keep hands out of path of saw blade.<br />
3. Do not operate saw without guards in place.<br />
4. Do not perform any operation freehand.<br />
5. Never reach around saw blade.<br />
6. Turn off tool and wait for saw blade to stop before<br />
moving workpiece or changing settings.<br />
7. Disconnect power before changing blade or servicing.<br />
8. To reduce risk of injury, return carriage to the full<br />
rear position after each crosscut operation.<br />
9. Return all guards to original position if any are<br />
moved during blade replacement. Check all<br />
guards for proper operation after service.<br />
10. The lock down pin is to be used only to lock<br />
the head in place for carrying and storage.<br />
It is not to be used for any cutting operation.<br />
11. DANGER! Coasting Cutting Tool Can Be<br />
Dangerous – Apply brake immediately to stop<br />
cutting tool when the switch is turned off.<br />
12. The torque developed during braking may<br />
loosen the blade-retaining nut/bolt. The blade<br />
retaining nut/bolt should be checked periodically<br />
and tightened if necessary, especially after braking.<br />
1. To reduce the risk of electric shock, double<br />
insulated equipment has a polarized plug<br />
(one blade is wider than the other). This plug will fit in<br />
a polarized outlet only one way. If the plug does not<br />
fit fully in the outlet, reverse the plug. If it still does<br />
not fit, contact a qualified electrician to install the<br />
proper outlet. Do not change the plug in any way.<br />
2. Double insulated tools may be used in either of the<br />
120 volt outlets shown in the preceding illustration.<br />
(See Outlets for 2-Prong Plug.)<br />
13. Always use blades with correct size and shape<br />
(diamond versus round) of arbor holes. Blades that<br />
do not match the mounting hardware of the saw<br />
will run eccentrically, causing loss of control.<br />
14. Never use damaged or incorrect blade washers<br />
or bolt. The blade washers and bolt were<br />
specially designed for your saw, for optimum<br />
performance and safety of operation.<br />
15. Do not use to cut logs, tree limbs, or uneven lumber.<br />
16. Wet lumber, green (unseasoned) lumber, and<br />
pressure treated lumber all have an increased<br />
potential for kickback and should only be cut with a<br />
blade for cutting that lumber type. Wear a NIOSHapproved<br />
respirator and have appropriate ventilation<br />
whenever cutting pressure treated lumber.<br />
17. Do not use blades made from high-speed steel,<br />
abrasive blades, metal-cutting blades or masonrycutting<br />
blades. The guards of this saw are not<br />
designed to protect against the failure of such blades.<br />
18. Blades must be rated to at least the<br />
maximum speed marked on the tool.<br />
19. DO NOT OPERATE WITH ANY GUARD DISABLED,<br />
DAMAGED, OR REMOVED. Moving guards<br />
must move freely and close instantly.<br />
20. The use of accessories or attachments not<br />
recommended by the manufacturer may<br />
result in a risk of injury to persons.<br />
21. When servicing use only identical replacement parts.<br />
Page 4 For technical questions, please call 1-800-444-3353. Item 69683
Miter Saw Safety Warnings (cont.)<br />
22. Do not depress the spindle lock when<br />
starting or during operation.<br />
23. Only use safety equipment that has been approved<br />
by an appropriate standards agency. Unapproved<br />
safety equipment may not provide adequate<br />
protection. Eye protection must be ANSI-approved<br />
and breathing protection must be NIOSH-approved<br />
for the specific hazards in the work area.<br />
24. Stay alert, watch what you are doing and use<br />
common sense when operating a power tool.<br />
Do not use a power tool while you are tired or<br />
under the influence of drugs, alcohol or medication.<br />
A moment of inattention while operating power<br />
tools may result in serious personal injury.<br />
25. Industrial applications must follow OSHA guidelines.<br />
26. Maintain labels and nameplates on the tool.<br />
These carry important safety information.<br />
If unreadable or missing, contact<br />
<strong>Harbor</strong> <strong>Freight</strong> <strong>Tools</strong> for a replacement.<br />
27. Avoid unintentional starting.<br />
Prepare to begin work before turning on the tool.<br />
28. People with pacemakers should consult their<br />
physician(s) before use. Electromagnetic fields in<br />
close proximity to heart pacemaker could cause<br />
pacemaker interference or pacemaker failure.<br />
Vibration Safety<br />
This tool vibrates during use. Repeated or long-term<br />
exposure to vibration may cause temporary or permanent<br />
physical injury, particularly to the hands, arms and<br />
shoulders. To reduce the risk of vibration-related injury:<br />
1. Anyone using vibrating tools regularly or for an<br />
extended period should first be examined by a<br />
doctor and then have regular medical check‐ups<br />
to ensure medical problems are not being caused<br />
or worsened from use. Pregnant women or<br />
people who have impaired blood circulation to<br />
the hand, past hand injuries, nervous system<br />
disorders, diabetes, or Raynaud’s Disease should<br />
not use this tool. If you feel any medical or<br />
physical symptoms related to vibration (such as<br />
tingling, numbness, and white or blue fingers),<br />
seek medical advice as soon as possible.<br />
29. WARNING: Some dust created by power sanding,<br />
sawing, grinding, drilling, and other construction<br />
activities, contains chemicals known [to the State<br />
of California] to cause cancer, birth defects or<br />
other reproductive harm. Some examples of these<br />
chemicals are:<br />
• Lead from lead-based paints<br />
• Crystalline silica from bricks and cement or other<br />
masonry products<br />
• Arsenic and chromium from<br />
chemically treated lumber<br />
Your risk from these exposures varies, depending<br />
on how often you do this type of work. To reduce<br />
your exposure to these chemicals: work in a well<br />
ventilated area, and work with approved safety<br />
equipment, such as those dust masks that are<br />
specially designed to filter out microscopic particles.<br />
(California Health & Safety Code § 25249.5, et seq.)<br />
30. WARNING: Handling the cord on this product will<br />
expose you to lead, a chemical known to the State<br />
of California to cause cancer, and birth defects or<br />
other reproductive harm. Wash hands after handling.<br />
(California Health & Safety Code § 25249.5, et seq.)<br />
31. The warnings, precautions, and instructions<br />
discussed in this instruction manual cannot<br />
cover all possible conditions and situations<br />
that may occur. It must be understood by the<br />
operator that common sense and caution are<br />
factors which cannot be built into this product,<br />
but must be supplied by the operator.<br />
2. Do not smoke during use. Nicotine reduces<br />
the blood supply to the hands and fingers,<br />
increasing the risk of vibration-related injury.<br />
3. Use tools with the lowest vibration when there<br />
is a choice between different processes.<br />
4. Include vibration-free periods each day of work.<br />
5. Grip tool as lightly as possible (while still keeping<br />
safe control of it). Let the tool do the work.<br />
6. To reduce vibration, maintain the tool as<br />
explained in this manual. If any abnormal<br />
vibration occurs, stop use immediately.<br />
SAVE THESE INSTRUCTIONS.<br />
SAFETY<br />
MAINTENANCE OPERATION<br />
SETUP<br />
Item 69683<br />
For technical questions, please call 1-800-444-3353.<br />
Page 5
Specifications<br />
SAFETY SETUP<br />
OPERATION MAINTENANCE<br />
Electrical Rating<br />
Motor No Load Speed<br />
Max. Accessory Diameter 10"<br />
Arbor<br />
Cutting<br />
Capacities<br />
Caution: Use of controls or adjustments or<br />
performance of procedures other than those specified<br />
herein may result in hazardous radiation exposure.<br />
Caution: The use of optical instruments<br />
with this product will increase eye hazard.<br />
120V~ / 60Hz / 15A<br />
4,800 RPM<br />
5/8" Round<br />
90° Straight 2-3/4″ x 5-7/8″<br />
45° Miter 2-3/4″ x 4-1/4″<br />
45° Straight Bevel 1-9/16″ x 5-7/8″<br />
45° Compound 1-9/16″ x 4-1/4″<br />
216045<br />
AVOID EXPOSURE<br />
Laser light is emitted<br />
from this opening.<br />
LASER LIGHT<br />
DO NOT STARE INTO BEAM<br />
Max. Output:
Setup - Before Use:<br />
Read the ENTIRE IMPORTANT SAFETY INFORMATION section at the beginning of this<br />
manual including all text under subheadings therein before set up or use of this product.<br />
TO PREVENT SERIOUS INJURY FROM ACCIDENTAL OPERATION:<br />
Turn the Power Switch of the tool off and unplug the tool from its electrical<br />
outlet before performing any procedure in this section.<br />
SAFETY<br />
Note: For additional information regarding the parts listed in the following pages,<br />
refer to the Assembly Diagram near the end of this manual.<br />
Assembly<br />
1. Insert the ends of the Table Extensions into<br />
the holes in the sides of the Base. Tighten the<br />
Wing Screws to hold the Extensions in place.<br />
The upper edge of the Extensions will be level<br />
with the surface of the saw. This provides a<br />
wider base for the work material to rest on.<br />
Mounting<br />
Use the four bolt holes provided in the Base to mount the Miter Saw to a<br />
stable support before use. Mounting hardware not included.<br />
2. Thread the Miter Knob into the end of the table<br />
above the Miter Lock until securely in place.<br />
3. Slip the Dust Collection Bag over the<br />
Dust Outlet behind the saw.<br />
MAINTENANCE OPERATION<br />
SETUP<br />
Item 69683<br />
For technical questions, please call 1-800-444-3353.<br />
Page 7
Functions<br />
Trigger<br />
Lock<br />
Trigger<br />
Lock<br />
SAFETY SETUP<br />
OPERATION MAINTENANCE<br />
Dust<br />
Collection<br />
Bag<br />
Fence<br />
Table<br />
Extension<br />
Turntable<br />
Miter Scale<br />
Kerf Board<br />
Miter<br />
Knob<br />
Trigger<br />
Lower<br />
Guard<br />
Blade<br />
Clamp<br />
Miter Lock<br />
Page 8 For technical questions, please call 1-800-444-3353. Item 69683
Spindle Lock<br />
SAFETY<br />
Description of Selected Functions<br />
Head Lock-down:<br />
1<br />
2<br />
3<br />
3<br />
Depth<br />
Stop<br />
Bolt<br />
Bevel<br />
Lock<br />
Lever<br />
2<br />
1<br />
Head<br />
Lock‐down<br />
Bevel<br />
Indicator<br />
Guard operation:<br />
When the Handle is lowered, the Lower Guard<br />
raises automatically. When the Handle is raised the<br />
Lower Guard returns to its safety position. Keep hands<br />
clear of the Blade when the Handle is lowered. Do not<br />
interfere with the proper movement of the Lower Guard.<br />
Note: Additional functions are explained<br />
elsewhere in the manual.<br />
MAINTENANCE OPERATION<br />
SETUP<br />
Align pin with<br />
deep groove<br />
to lock cutting head.<br />
Item 69683<br />
Align pin with<br />
shallow groove<br />
to unlock cutting head.<br />
For technical questions, please call 1-800-444-3353.<br />
Page 9
Operating Instructions<br />
Read the ENTIRE IMPORTANT SAFETY INFORMATION section at the beginning of this<br />
manual including all text under subheadings therein before set up or use of this product.<br />
SAFETY SETUP<br />
OPERATION MAINTENANCE<br />
TOOL SET UP<br />
TO PREVENT SERIOUS INJURY FROM ACCIDENTAL OPERATION:<br />
Turn the Power Switch of the tool off and unplug the tool from its electrical<br />
outlet before performing any procedure in this section.<br />
TO PREVENT SERIOUS INJURY: DO NOT OPERATE WITH ANY GUARD DISABLED,<br />
DAMAGED, OR REMOVED. Moving guards must move freely and close instantly.<br />
Replacing the Blade<br />
1. Unplug the tool from its power source.<br />
2. Raise the Lower Guard (56) out<br />
of the way and hold it up.<br />
3. Loosen the Guard Pivot Bolt (63) until it<br />
disengages the Guard Pivot Plate (61).<br />
4. Swing the Guard Pivot Plate up and out of the way.<br />
5. Press in the Spindle Lock (90) on the<br />
back of the saw′s head and hold it in.<br />
Figure A<br />
Spindle Lock<br />
6. Remove the Spindle Bolt* (64) and Flange (65),<br />
see Figure B. *IMPORTANT: The Spindle Bolt has<br />
a left‐handed thread and removes<br />
by turning CLOCKWISE.<br />
Note: Make sure the other Flange (65)<br />
stays in place on the Spindle.<br />
Figure B<br />
7. Remove the Blade (66) and install the new Blade.<br />
Make sure that the Blade's rotation arrow<br />
points in the same direction as the rotation<br />
arrow on the Upper Guard (43).<br />
8. Replace the Flange and Spindle Bolt. Position the<br />
cupped side of the Flange against the blade.<br />
Hold in the Spindle Lock (90) and<br />
wrench tighten the Spindle Bolt by turning it<br />
COUNTERCLOCKWISE. Release the Spindle Lock.<br />
9. Rotate the Guard Pivot Plate (61) back into place,<br />
and secure it with the Guard Pivot Bolt (63).<br />
10. WARNING! Make sure the Lower Guard (56)<br />
operates smoothly and properly protects<br />
from the Blade before using the saw.<br />
Page 10 For technical questions, please call 1-800-444-3353. Item 69683
Using the Workpiece Extension Supports<br />
1. The Table Extensions are inserted into each side of<br />
the Table, and locked in place using the Wing Screws.<br />
2. When properly installed, the upper face of the<br />
Table Extensions are level with the Table, and<br />
provide a wider support surface for the workpiece.<br />
3. Support the workpiece to be level with the table,<br />
and so that after the cut is made the cut off pieces<br />
will not fall. Use sawhorses or other supports<br />
(not included) to support longer workpieces.<br />
4. If the workpiece is not level, you will make<br />
an unintentional bevel cut in the material.<br />
If the workpiece is not supported, it will bind<br />
the blade and may cause the material to<br />
kick back, potentially causing injury.<br />
SAFETY<br />
Adjusting the Miter Angle<br />
A miter cut is one that is at an angle across the horizontal surface of the material. 45º miter cuts to join two pieces<br />
in a right angle corner are common. A 30º cut is often used for a scarf joint or to make a chamfered end.<br />
1. Loosen the Miter Knob by turning it<br />
approximately 1/4 turn counterclockwise.<br />
2. Press down the Miter Lock to unlock the Table.<br />
While holding the Miter Lock down,<br />
move the Table to the desired angle.<br />
Adjusting the Bevel Angle<br />
3. The Miter Angle Indicator will indicate the selected<br />
angle. While the Miter Lock is released, the table will<br />
lock into place at often used miter angles, including<br />
22.5º, 30º, 45º, and 90º on both left and right sides.<br />
4. Tighten the Miter Knob after adjusting the miter angle.<br />
5. With the Table adjusted to the desired angle,<br />
place the workpiece flush against the Fence,<br />
secure it with the Clamp and make the cut.<br />
A bevel cut is one that is at an angle vertically. Bevel cuts can be used to miter relatively wide and<br />
thin material. Bevel cuts can be used in combination with a miter cut to form a compound angle.<br />
Compound angle cuts are often used in crown moldings, picture frames and similar trim materials.<br />
1. Loosen the Bevel Lock Lever at the rear of the saw.<br />
2. Move the blade assembly to the desired angle.<br />
Read the angle on the Bevel Indicator.<br />
3. Lock the blade assembly into position by<br />
rotating the Bevel Lock Lever clockwise.<br />
Tighten firmly but do not over-tighten.<br />
4. Make a sample cut in a piece of scrap to<br />
confirm that the bevel angle is correct.<br />
If it is not, correct the angle before cutting.<br />
Bevel<br />
Lock<br />
Lever<br />
Figure C<br />
Bevel<br />
Indicator<br />
MAINTENANCE OPERATION<br />
SETUP<br />
Item 69683<br />
For technical questions, please call 1-800-444-3353.<br />
Page 11
Using the Depth Stop<br />
If a kerfing or rabbet cut which does not cut through the workpiece is desired,<br />
use the Depth Stop Bolt to control the depth of the cut.<br />
1. Unlock the Head Lock-down, see page 9.<br />
SAFETY SETUP<br />
OPERATION MAINTENANCE<br />
2. Raise the saw head assembly.<br />
3. Pull down on the saw head to<br />
check the current setting.<br />
4. Loosen the Depth Stop Nut on the Depth Stop Bolt.<br />
5. Turn the Depth Stop Bolt clockwise to decrease<br />
depth and counterclockwise to increase depth.<br />
6. Tighten the Depth Stop Nut after adjustment.<br />
Workpiece and Work Area Set Up<br />
1. Designate a work area that is clean and well‐lit.<br />
The work area must not allow access by children<br />
or pets to prevent injury and distraction.<br />
2. Route the power cord along a safe route to reach<br />
the work area without creating a tripping hazard or<br />
exposing the power cord to possible damage. The<br />
power cord must reach the work area with enough<br />
extra length to allow free movement while working.<br />
3. Allow room on both left and right of<br />
saw for extended workpieces.<br />
Figure D<br />
Depth<br />
Stop Nut<br />
Depth<br />
Stop<br />
Bolt<br />
4. Use a saw table, saw stand or other means to<br />
support the workpiece. Mount the Miter Saw<br />
so that the surface is level to the ground, and<br />
additional supports provide a surface on the<br />
same level as the saw table. If the work surface<br />
and any workpiece supports are not level, and<br />
on the same level, unwanted bevel angles will<br />
appear in the cuts resulting in poor joinery.<br />
5. Secure workpieces to the saw table using the Clamp<br />
or other clamping devices (not included). Securing<br />
the workpiece will provide safety by preventing kick<br />
back and by removing the need to hold workpieces<br />
near the blade by hand. Clamping the workpiece<br />
will also improve cutting accuracy by preventing the<br />
workpiece from moving during the cutting operation.<br />
Page 12 For technical questions, please call 1-800-444-3353. Item 69683
General Operating Instructions<br />
DANGER!<br />
<strong>MITER</strong> <strong>SAW</strong>S CAN QUICKLY AMPUTATE FINGERS IF MISUSED.<br />
Keep hands well clear of cutting area.<br />
SAFETY<br />
1. Unlock the Head Lock-down, see page 9.<br />
2. Make sure all adjustment knobs are tight (Miter Knob,<br />
Bevel Lock Lever, Table Extension Knobs).<br />
3. Blow any sawdust or debris away from the Fence.<br />
Place the work material against the Fence.<br />
4. Align the marked location of the cut on<br />
the work material with the saw blade.<br />
Note: To prevent your workpiece from being cut too short,<br />
align the edge of the blade with your measured mark,<br />
keeping the rest of the blade on the waste side of the cut.<br />
5. Hold the work material in place using the Clamp.<br />
Ensure that the work material is level and supported<br />
securely, use saw horses or supports if necessary.<br />
6. Grip the Saw Handle, press one of the Trigger<br />
Locks with your thumb, and squeeze the<br />
Trigger to start the Saw and the laser guide.<br />
Note: If the laser guide line does not line up<br />
with the cut line, release trigger and reposition<br />
workpiece before making the cut.<br />
7. Press down lightly to cut the material.<br />
Do not bear down on the material, use<br />
light downward pressure. If the material<br />
binds the blade, release the trigger.<br />
8. When the cut is completed, raise the blade<br />
assembly, release the trigger, wait for the<br />
Blade to stop turning, release the Clamp and<br />
remove the work material from the saw.<br />
9. To prevent accidents, turn off the tool and<br />
disconnect its power supply after use. Clean, then<br />
store the tool indoors out of children’s reach.<br />
MAINTENANCE OPERATION<br />
SETUP<br />
Item 69683<br />
For technical questions, please call 1-800-444-3353.<br />
Page 13
Maintenance and Servicing<br />
Procedures not specifically explained in this manual must<br />
be performed only by a qualified technician.<br />
SAFETY SETUP<br />
OPERATION MAINTENANCE<br />
TO PREVENT SERIOUS INJURY FROM ACCIDENTAL OPERATION:<br />
Turn the Power Switch of the tool off and unplug the tool from its electrical<br />
outlet before performing any procedure in this section.<br />
TO PREVENT SERIOUS INJURY FROM TOOL FAILURE:<br />
Do not use damaged equipment. If abnormal noise or vibration<br />
occurs, have the problem corrected before further use.<br />
Cleaning, Maintenance, and Lubrication<br />
1. BEFORE EACH USE, inspect the general<br />
condition of the tool. Check for:<br />
• loose hardware,<br />
• misalignment or binding of moving parts,<br />
• cracked or broken parts,<br />
• damaged electrical wiring, and<br />
• any other condition that may<br />
affect its safe operation.<br />
Checking and Calibrating the Fence<br />
The Fence holds the workpiece in a fixed position<br />
while the Table and or the blade assembly<br />
are adjusted in a miter or bevel angle.<br />
To make accurate cuts, the Fence must be<br />
perpendicular (at a 90º angle) to the Saw Blade.<br />
1. Before beginning work, make a test cut on<br />
scrap material with the Table set at 90º.<br />
2. Check the cut with an accurate square.<br />
You can also reverse the two pieces, hold the<br />
cut ends together, and hold a good straight<br />
edge along the side of the pieces.<br />
3. If either test reveals that the cut is not a true 90º<br />
angle, adjust the Fence before beginning work.<br />
2. AFTER USE, wipe external surfaces<br />
of the tool with clean cloth.<br />
3. WARNING! If the supply cord of this<br />
power tool is damaged, it must be replaced<br />
only by a qualified service technician.<br />
If Fence needs adjustment:<br />
1. First unplug the tool.<br />
2. Lower the blade assembly and lock it<br />
in place using the Locking Pin.<br />
3. Lay a carpenter’s square on the table with one<br />
edge along the blade and the other along the<br />
Fence. Any inaccuracy should be visible. NOTE:<br />
The square must contact the surface of the<br />
blade, not the teeth, for an accurate reading.<br />
4. The Fence is held in place with bolts at each end.<br />
Loosen the bolts slightly, and gently tap the<br />
Fence into position using a soft mallet. Retighten<br />
the bolts and make another test cut. Repeat the<br />
process until the Fence is adjusted accurately.<br />
5. Once the Fence is accurately adjusted,<br />
tighten the bolts firmly in place. Recheck<br />
one last time, then proceed to work.<br />
Page 14 For technical questions, please call 1-800-444-3353. Item 69683
Calibrating the Miter Table Indicator<br />
After checking or adjusting the fence to<br />
confirm that it is at 90º to the Blade, check the<br />
accuracy of the Miter Table Angle Indicator.<br />
1. Loosen the screw holding the Angle Indicator in place.<br />
2. Rotate it until the pointer is exactly on 90º.<br />
3. Retighten the screw.<br />
SAFETY<br />
Calibrating the Bevel Angle<br />
For making accurate cuts, the Saw Blade must<br />
be adjusted to be exactly vertical to the Table.<br />
1. To check the angle, have the blade assembly<br />
in its normal upright position. Make a cut on a<br />
piece of flat sided, fairly thick scrap material.<br />
2. Check the cut with an accurate square.<br />
The cut should be at exactly 90º.<br />
3. Angle can also be checked by rotating one cut‐off<br />
piece 180º and holding the cut ends together.<br />
If the cut is not exactly vertical,<br />
the two pieces will form a slight angle.<br />
Adjusting or Replacing the Kerf Board<br />
If the Kerf Board becomes damaged it must be replaced.<br />
1. Remove the four screws holding<br />
the Kerf Board in place.<br />
2. Install a new Kerf Board. Replace the four<br />
screws and tighten them slightly.<br />
4. If necessary, the bevel angle can be corrected<br />
by adjusting the Bevel Adjustment Screw on<br />
the right side under the Bevel Locking Lever.<br />
5. Once the bevel angle is adjusted, adjust the Bevel<br />
Angle Indicator to read 0º when the Saw Blade is<br />
in the vertical position. Loosen the screw holding<br />
the Indicator in place, adjust it to be exactly<br />
over the 0º mark, then retighten the screw.<br />
To adjust the Kerf Board:<br />
1. Lower the Saw Blade and lock it<br />
down with the Locking Pin.<br />
2. Adjust the Kerf Board so the right side of the<br />
Blade slightly clears the edge of the Kerf Board.<br />
3. Loosen the Bevel Lock and set<br />
the Bevel Angle at 45º left.<br />
4. Ensure that the left side of the<br />
Blade clears the Kerf Board.<br />
5. Tighten the four screws holding<br />
the Kerf Board in place.<br />
MAINTENANCE OPERATION<br />
SETUP<br />
Item 69683<br />
For technical questions, please call 1-800-444-3353.<br />
Page 15
Troubleshooting<br />
SAFETY SETUP<br />
OPERATION MAINTENANCE<br />
Problem Possible Causes Likely Solutions<br />
Tool will not start.<br />
Tool operates<br />
sporadically or<br />
at low power.<br />
Wood burns at<br />
ends when cut.<br />
Material frays<br />
or chips out.<br />
Blade binds,<br />
slowing or<br />
stopping saw.<br />
Blade does not<br />
cut completely<br />
through<br />
workpiece.<br />
1. No power at outlet.<br />
2. Cord not connected.<br />
1. Low power supply or<br />
improper extension cords.<br />
2. Worn or cracked<br />
Carbon Brushes.<br />
1. Dirty Blade.<br />
2. Material is binding.<br />
1. Finished side is down.<br />
2. Blade chipped or dull.<br />
3. Blade inappropriate<br />
for material.<br />
4. Material is unsupported.<br />
1. Material is misaligned<br />
on the saw or ends<br />
are not supported.<br />
2. Material is wet, contaminated<br />
or inappropriate blade<br />
is being used.<br />
Depth Stop set too shallow.<br />
1. Check power at outlet.<br />
2. Check that cord is plugged in.<br />
1. Check power supply and power cords.<br />
2. Check Carbon Brushes. Replace if damaged or worn.<br />
1. Clean Blade using blade cleaner or mineral spirits.<br />
2. Check position of work material on Table. Material must<br />
be flat, flush against Fence and supported on ends.<br />
1. Keep finished side of material up or facing operator.<br />
Bottom and back side are prone to chip out.<br />
2. Check for damaged teeth. Sharpen or replace blade.<br />
3. Check blade manufacturer’s recommendations for<br />
material being cut. For cross cutting hard wood and for<br />
precision cuts use a thin kerf blade with 60 or more teeth.<br />
4. Use a thin piece of scrap material, such as 1/4″<br />
plywood, underneath or behind the material to<br />
support the edges of the material as it is being cut.<br />
1. Material must be flat on table, flush against the fence and<br />
supported on both ends.<br />
2. Check condition of material and<br />
check compatibility of blade to material.<br />
Adjust Depth Stop Bolt for desired depth of cut.<br />
Follow all safety precautions whenever diagnosing or servicing the tool.<br />
Disconnect power supply before service.<br />
Page 16 For technical questions, please call 1-800-444-3353. Item 69683
PLEASE READ THE FOLLOWING CAREFULLY<br />
THE MANUFACTURER AND/OR DISTRIBUTOR HAS PROVIDED THE PARTS LIST AND ASSEMBLY DIAGRAM<br />
IN THIS MANUAL AS A REFERENCE TOOL ONLY. NEITHER THE MANUFACTURER OR DISTRIBUTOR<br />
MAKES ANY REPRESENTATION OR WARRANTY OF ANY KIND TO THE BUYER THAT HE OR SHE IS<br />
QUALIFIED TO MAKE ANY REPAIRS TO THE PRODUCT, OR THAT HE OR SHE IS QUALIFIED TO REPLACE<br />
ANY PARTS OF THE PRODUCT. IN FACT, THE MANUFACTURER AND/OR DISTRIBUTOR EXPRESSLY<br />
STATES THAT ALL REPAIRS AND PARTS REPLACEMENTS SHOULD BE UNDERTAKEN BY CERTIFIED AND<br />
LICENSED TECHNICIANS, AND NOT BY THE BUYER. THE BUYER ASSUMES ALL RISK AND LIABILITY<br />
ARISING OUT OF HIS OR HER REPAIRS TO THE ORIGINAL PRODUCT OR REPLACEMENT PARTS<br />
THERETO, OR ARISING OUT OF HIS OR HER INSTALLATION OF REPLACEMENT PARTS THERETO.<br />
SAFETY<br />
Record Product’s Serial Number Here:<br />
Note: If product has no serial number, record month and year of purchase instead.<br />
Note: Some parts are listed and shown for illustration purposes only,<br />
and are not available individually as replacement parts.<br />
MAINTENANCE OPERATION<br />
SETUP<br />
Item 69683<br />
For technical questions, please call 1-800-444-3353.<br />
Page 17
Parts List and Diagram<br />
Parts List<br />
SAFETY SETUP<br />
OPERATION MAINTENANCE<br />
Part Description Qty<br />
1 Base 1<br />
2 M8×30 Bolt 4<br />
3 Table Extension 2<br />
4 Fence 1<br />
5 M6×15 Clamp Knob 1<br />
6 Ø8 Flat Washer 3<br />
7 Ø8 Spring Washer 3<br />
8 Turntable Disc 3<br />
9 Support 1<br />
10 M6×18 Bolt 3<br />
11 M5×12 Bolt 2<br />
12 Ø5 Spring Washer 4<br />
13 Miter Lock 1<br />
14 Miter Lock Cover 1<br />
15 Miter Knob 1<br />
16 Kerf Board 1<br />
17 M4×8 Bolt 4<br />
18 Miter Indicator 1<br />
19 Locating Screw 1<br />
20 Ø8 Fender Washer 1<br />
21 M8 Nut 1<br />
22 M8 Nut 1<br />
23 M8×20 Bolt 2<br />
24 Turntable 1<br />
25 Bevel Pointer 1<br />
26 Ø4 Flat Washer 2<br />
27 Ø4 Spring Washer 3<br />
28 M4×10 Bolt 2<br />
29 M10×50 Stud 1<br />
30 M10×55 Stud 1<br />
31 Support 1<br />
32 Bevel Scale 1<br />
33 Ø2×4 Rivet 2<br />
34 Torsion Spring 1<br />
35 Hinge Pin 1<br />
36 Ø10 Flat Washer 2<br />
37 M10 Nut 1<br />
38 Bevel Lock Lever 1<br />
39 Lock-down Pin 1<br />
40 Lock-down Spring 1<br />
41 Head Lock-down 1<br />
42 Ø3×16 Roll Pin 1<br />
43 Upper Guard 1<br />
44 Guard Label 1<br />
45 Lower Guard Roller 2<br />
46 Ø5 Retaining Ring 2<br />
Part Description Qty<br />
47 Lower Guard Washer 1<br />
48 M6 Nut 1<br />
49 M6×12 Bolt 1<br />
50 Ø6 Fender Washer 3<br />
51<br />
Connecting<br />
Rod Bushing<br />
1<br />
52 Connecting Rod 1<br />
53 M6×10 Bolt 1<br />
54 Lower Guard Plate 1<br />
55 M5×6 Bolt 4<br />
56 Lower Guard 1<br />
57 Lower Guard Spring 1<br />
58<br />
Large Lower<br />
Guard Washer<br />
1<br />
59 Rubber Stop Block 1<br />
60 M6×7 Bolt 1<br />
61 Guard Pivot Plate 1<br />
62 M6×14 Bolt 1<br />
63<br />
M6×10 Guard<br />
Pivot Bolt<br />
1<br />
64<br />
M8×20 Left-handed<br />
Spindle Bolt<br />
1<br />
65 Flange 2<br />
66 Blade 1<br />
67 Spindle 1<br />
68 Woodruff Key 4 1<br />
69 M5×16 Bolt 2<br />
70 Bearing Bracket 1<br />
71 6023 Bearing 1<br />
72 Bearing Housing 1<br />
73 Large Gear 1<br />
74 Ø17 Retaining Ring 1<br />
75<br />
Roller Bearing<br />
Hk121610<br />
1<br />
76 Housing Label 1<br />
77 Brush Holder 2<br />
78 Carbon Brush 2<br />
79 Brush Holder Cap 2<br />
80 M6×35 Bolt 4<br />
81 Ø6 Spring Washer 4<br />
82 Ø6 Flat Washer 4<br />
83 Motor Housing 1<br />
84 Stator 1<br />
85 ST4.8×65 Screw 2<br />
86 6000 Bearing 1<br />
87 Rotor 1<br />
88 Seal 1<br />
Part Description Qty<br />
89 Spindle Lock Spring 1<br />
90 Spindle Lock 1<br />
91 Dust Bag 1<br />
92 M6×8 Set Screw 1<br />
93 Rubber Stop 1<br />
94 6202 Bearing 1<br />
95 Spindle Lock Cover 1<br />
96 Terminal 1<br />
97 Ø4 Toothed Washer 1<br />
98 M4×10 Bolt 1<br />
99 ST6×18 Screw 2<br />
100 Handle 1<br />
101 M5×40 Bolt 2<br />
102 ST3.9×14 Screw 9<br />
103 Upper Handle 1<br />
104 Locking Pin 2<br />
105<br />
Trigger Lock<br />
Connector<br />
1<br />
106 Right Trigger Lock 1<br />
107 Left Trigger Lock 1<br />
108 Switch Spring 1<br />
109 Trigger 1<br />
110 Switch (Fa2-10/1W) 1<br />
111 ST3.9×10 Screw 1<br />
112 Lower Handle 1<br />
113 Cord Clamp 1<br />
114 Cord Protector 1<br />
115 Power Cord 1<br />
116 M6×25 Depth Bolt 1<br />
117 M6 Depth Nut 1<br />
118 Bushing 1<br />
119 M5×8 Bolt 1<br />
120 M5×12 Bolt 1<br />
121 Ø5 Spring Washer 1<br />
122 Ø6 Flat Washer 1<br />
123 Clamp Pressure Plate 1<br />
124 Clamp Bar 1<br />
125 Clamp 1<br />
126 M4×8 Bolt 2<br />
127 M4×4 Set Screw 1<br />
128 Laser Seat 1<br />
129 Laser 1<br />
130 Wire Clamp 2<br />
131 M4×6 Bolt 2<br />
132 Transformer 1<br />
133 ST3.2×6 Screw 2<br />
134 Connector 1<br />
Page 18 For technical questions, please call 1-800-444-3353. Item 69683
Assembly Diagram<br />
SAFETY<br />
19<br />
99<br />
125<br />
124<br />
123<br />
122<br />
121<br />
120<br />
133<br />
132 131<br />
130 129<br />
128 127<br />
126<br />
134<br />
117<br />
116<br />
33<br />
24<br />
95<br />
111<br />
100<br />
107<br />
108<br />
109<br />
103<br />
104<br />
105<br />
106<br />
110<br />
MAINTENANCE OPERATION<br />
SETUP<br />
Item 69683<br />
For technical questions, please call 1-800-444-3353.<br />
Page 19
Limited 90 Day Warranty<br />
<strong>Harbor</strong> <strong>Freight</strong> <strong>Tools</strong> Co. makes every effort to assure that its products meet high quality and durability standards,<br />
and warrants to the original purchaser that this product is free from defects in materials and workmanship for the<br />
period of 90 days from the date of purchase. This warranty does not apply to damage due directly or indirectly,<br />
to misuse, abuse, negligence or accidents, repairs or alterations outside our facilities, criminal activity, improper<br />
installation, normal wear and tear, or to lack of maintenance. We shall in no event be liable for death, injuries<br />
to persons or property, or for incidental, contingent, special or consequential damages arising from the use of<br />
our product. Some states do not allow the exclusion or limitation of incidental or consequential damages, so the<br />
above limitation of exclusion may not apply to you. THIS WARRANTY IS EXPRESSLY IN LIEU OF ALL OTHER<br />
WARRANTIES, EXPRESS OR IMPLIED, INCLUDING THE WARRANTIES OF MERCHANTABILITY AND FITNESS.<br />
To take advantage of this warranty, the product or part must be returned to us with transportation charges<br />
prepaid. Proof of purchase date and an explanation of the complaint must accompany the merchandise.<br />
If our inspection verifies the defect, we will either repair or replace the product at our election or we may<br />
elect to refund the purchase price if we cannot readily and quickly provide you with a replacement. We will<br />
return repaired products at our expense, but if we determine there is no defect, or that the defect resulted<br />
from causes not within the scope of our warranty, then you must bear the cost of returning the product.<br />
This warranty gives you specific legal rights and you may also have other rights which vary from state to state.<br />
3491 Mission Oaks Blvd. • PO Box 6009 • Camarillo, CA 93011 • (800) 444-3353


