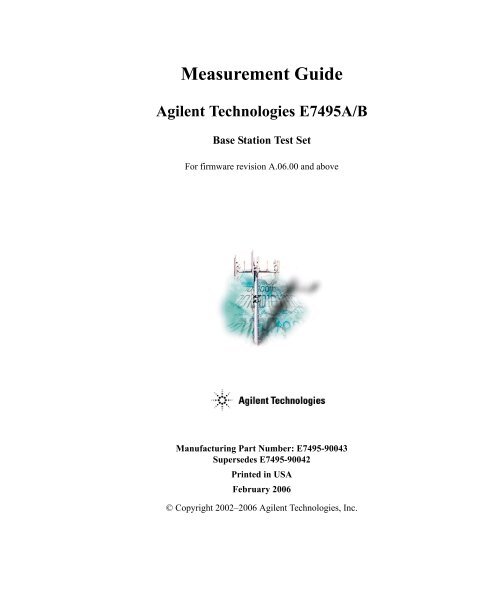
Measurement Guide Agilent Technologies E7495A/B - TRS-RenTelco
Measurement Guide Agilent Technologies E7495A/B - TRS-RenTelco
Measurement Guide Agilent Technologies E7495A/B - TRS-RenTelco

Create successful ePaper yourself
Turn your PDF publications into a flip-book with our unique Google optimized e-Paper software.
<strong>Measurement</strong> <strong>Guide</strong><br />
<strong>Agilent</strong> <strong>Technologies</strong> <strong>E7495A</strong>/B<br />
Base Station Test Set<br />
For firmware revision A.06.00 and above<br />
Manufacturing Part Number: E7495-90043<br />
Supersedes E7495-90042<br />
Printed in USA<br />
February 2006<br />
© Copyright 2002–2006 <strong>Agilent</strong> <strong>Technologies</strong>, Inc.
Notice<br />
The material contained in this document is provided “as is,” and is subject to being<br />
changed, without notice, in future editions. Further, to the maximum extent<br />
permitted by applicable law, <strong>Agilent</strong> disclaims all warranties, either express or<br />
implied with regard to this manual and any information contained herein, including<br />
but not limited to the implied warranties of merchantability and fitness for a<br />
particular purpose. <strong>Agilent</strong> shall not be liable for errors or for incidental or<br />
consequential damages in connection with the furnishing, use, or performance of<br />
this document or any information contained herein. Should <strong>Agilent</strong> and the user<br />
have a separate written agreement with warranty terms covering the material in this<br />
document that conflict with these terms, the warranty terms in the separate<br />
agreement will control.”<br />
Technology Licenses<br />
The hardware and/or software described in this document are furnished under a<br />
license and may be used or copied only in accordance with the terms of such license.<br />
Restricted Rights Legend<br />
If software is for use in the performance of a U.S. Government prime contract or<br />
subcontract, Software is delivered and licensed as “Commercial computer software”<br />
as defined in DFAR 252.227-7014 (June 1995), or as a “commercial item” as<br />
defined in FAR 2.101(a) or as “Restricted computer software” as defined in FAR<br />
52.227-19 (June 1987) or any equivalent agency regulation or contract clause. Use,<br />
duplication or disclosure of Software is subject to <strong>Agilent</strong> <strong>Technologies</strong>’ standard<br />
commercial license terms, and non-DOD Departments and Agencies of the U.S.<br />
Government will receive no greater than Restricted Rights as defined in FAR<br />
52.227-19(c)(1-2) (June 1987). U.S. Government users will receive no greater than<br />
Limited Rights as defined in FAR 52.227-14 (June 1987) or DFAR 252.227-7015<br />
(b)(2) (November 1995), as applicable in any technical data.<br />
2
Where to Find the Latest Information<br />
Documentation is updated periodically. For the latest information about <strong>Agilent</strong><br />
<strong>Technologies</strong> E7495 spectrum analyzers, including firmware upgrades and<br />
application information, please visit the following URL:<br />
http://www.agilent.com/find/<br />
Microsoft® is a U.S. registered trademark of Microsoft Corporation.<br />
3
Contents<br />
1. Getting Started<br />
Introduction. . . . . . . . . . . . . . . . . . . . . . . . . . . . . . . . . . . . . . . . . . . . . . . . . . . . . . . . . . . . . . . . . . . . .20<br />
Unpacking the <strong>E7495A</strong>/B Test Set . . . . . . . . . . . . . . . . . . . . . . . . . . . . . . . . . . . . . . . . . . . . . . . . . . .22<br />
<strong>E7495A</strong>/B Cables, Connectors, and Accessories . . . . . . . . . . . . . . . . . . . . . . . . . . . . . . . . . . . . . .24<br />
Test set options . . . . . . . . . . . . . . . . . . . . . . . . . . . . . . . . . . . . . . . . . . . . . . . . . . . . . . . . . . . . . . . .28<br />
Your First 15 Minutes with the <strong>E7495A</strong>/B . . . . . . . . . . . . . . . . . . . . . . . . . . . . . . . . . . . . . . . . . . . . .33<br />
Get to Know the Layout of the <strong>E7495A</strong>/B . . . . . . . . . . . . . . . . . . . . . . . . . . . . . . . . . . . . . . . . . . .34<br />
Install a Battery . . . . . . . . . . . . . . . . . . . . . . . . . . . . . . . . . . . . . . . . . . . . . . . . . . . . . . . . . . . . . . . .37<br />
Practice Using the Three-way Power Button . . . . . . . . . . . . . . . . . . . . . . . . . . . . . . . . . . . . . . . . .37<br />
Make Your First <strong>Measurement</strong> (Two Port Insertion Loss) . . . . . . . . . . . . . . . . . . . . . . . . . . . . . . .38<br />
Using the Backpack . . . . . . . . . . . . . . . . . . . . . . . . . . . . . . . . . . . . . . . . . . . . . . . . . . . . . . . . . . . . . .41<br />
What Goes Where in the Backpack. . . . . . . . . . . . . . . . . . . . . . . . . . . . . . . . . . . . . . . . . . . . . . . . .42<br />
Contacting <strong>Agilent</strong> <strong>Technologies</strong> . . . . . . . . . . . . . . . . . . . . . . . . . . . . . . . . . . . . . . . . . . . . . . . . . . . .43<br />
More Information from <strong>Agilent</strong> . . . . . . . . . . . . . . . . . . . . . . . . . . . . . . . . . . . . . . . . . . . . . . . . . . .43<br />
<strong>E7495A</strong>/B Base Station Test Set Product Updates . . . . . . . . . . . . . . . . . . . . . . . . . . . . . . . . . . . . .43<br />
Table of Contents<br />
2. One Port Insertion Loss<br />
Measuring One Port Insertion Loss . . . . . . . . . . . . . . . . . . . . . . . . . . . . . . . . . . . . . . . . . . . . . . . . . .46<br />
Calibration - Minimizing your Workload . . . . . . . . . . . . . . . . . . . . . . . . . . . . . . . . . . . . . . . . . . . .46<br />
Performing (and Calibrating) a Basic One Port Insertion Loss measurement . . . . . . . . . . . . . . . .47<br />
Clearing Calibration . . . . . . . . . . . . . . . . . . . . . . . . . . . . . . . . . . . . . . . . . . . . . . . . . . . . . . . . . . . .50<br />
Displaying Location Information Using GPS . . . . . . . . . . . . . . . . . . . . . . . . . . . . . . . . . . . . . . . .51<br />
Setting Average, Sweep, and Restart. . . . . . . . . . . . . . . . . . . . . . . . . . . . . . . . . . . . . . . . . . . . . . . .52<br />
Adding a Marker . . . . . . . . . . . . . . . . . . . . . . . . . . . . . . . . . . . . . . . . . . . . . . . . . . . . . . . . . . . . . . .55<br />
Setting One Port Insertion Loss Interference Rejection . . . . . . . . . . . . . . . . . . . . . . . . . . . . . . . . .56<br />
Setting the Pass/Fail Limits. . . . . . . . . . . . . . . . . . . . . . . . . . . . . . . . . . . . . . . . . . . . . . . . . . . . . . .57<br />
3. 1xEV-DO Analyzer and Over Air Test<br />
Accessing 1xEV-DO Tx and Over Air Test . . . . . . . . . . . . . . . . . . . . . . . . . . . . . . . . . . . . . . . . . . . .61<br />
Making 1xEV-DO Tx <strong>Measurement</strong>s . . . . . . . . . . . . . . . . . . . . . . . . . . . . . . . . . . . . . . . . . . . . . . . . .62<br />
Common 1xEVDO Tx Analyzer <strong>Measurement</strong>s . . . . . . . . . . . . . . . . . . . . . . . . . . . . . . . . . . . . . .62<br />
Performing a Basic 1xEVDO Transmitter <strong>Measurement</strong> . . . . . . . . . . . . . . . . . . . . . . . . . . . . . . . . . .64<br />
Making 1xEV-DO Over Air <strong>Measurement</strong>s . . . . . . . . . . . . . . . . . . . . . . . . . . . . . . . . . . . . . . . . . . . .68<br />
Preparing to Make 1xEV-DO Over Air <strong>Measurement</strong>s . . . . . . . . . . . . . . . . . . . . . . . . . . . . . . . . . . .69<br />
Criteria for Making Valid 1xEV-DO Over Air <strong>Measurement</strong>s . . . . . . . . . . . . . . . . . . . . . . . . . . . . .70<br />
Performing a Basic 1xEV-DO Over Air <strong>Measurement</strong> . . . . . . . . . . . . . . . . . . . . . . . . . . . . . . . . . . .72<br />
5
Contents<br />
Table of Contents<br />
Displaying Location Information Using GPS . . . . . . . . . . . . . . . . . . . . . . . . . . . . . . . . . . . . . . . . . . 75<br />
Interpreting the Display . . . . . . . . . . . . . . . . . . . . . . . . . . . . . . . . . . . . . . . . . . . . . . . . . . . . . . . . . . . 76<br />
Optional 1xEV-DO Tx and Over Air Analyzer <strong>Measurement</strong> Settings . . . . . . . . . . . . . . . . . . . . . . . 78<br />
Setting the Channel or Frequency Step. . . . . . . . . . . . . . . . . . . . . . . . . . . . . . . . . . . . . . . . . . . . . .78<br />
Setting the PN Offset . . . . . . . . . . . . . . . . . . . . . . . . . . . . . . . . . . . . . . . . . . . . . . . . . . . . . . . . . . . 80<br />
Setting the PN Increment . . . . . . . . . . . . . . . . . . . . . . . . . . . . . . . . . . . . . . . . . . . . . . . . . . . . . . . . 80<br />
Setting the Active Channel Threshold Level and Auto Threshold Level. . . . . . . . . . . . . . . . . . . . 81<br />
Setting the Frequency/Time Reference. . . . . . . . . . . . . . . . . . . . . . . . . . . . . . . . . . . . . . . . . . . . . . 82<br />
Setting Units . . . . . . . . . . . . . . . . . . . . . . . . . . . . . . . . . . . . . . . . . . . . . . . . . . . . . . . . . . . . . . . . . . 83<br />
Setting the 1xEV-DO Transmitter Reference Level . . . . . . . . . . . . . . . . . . . . . . . . . . . . . . . . . . . . 83<br />
Setting <strong>Measurement</strong> Time . . . . . . . . . . . . . . . . . . . . . . . . . . . . . . . . . . . . . . . . . . . . . . . . . . . . . . . 84<br />
Setting <strong>Measurement</strong> Offset . . . . . . . . . . . . . . . . . . . . . . . . . . . . . . . . . . . . . . . . . . . . . . . . . . . . . . 85<br />
Setting the Slot Threshold Level . . . . . . . . . . . . . . . . . . . . . . . . . . . . . . . . . . . . . . . . . . . . . . . . . . 86<br />
Setting the CDP Type . . . . . . . . . . . . . . . . . . . . . . . . . . . . . . . . . . . . . . . . . . . . . . . . . . . . . . . . . . . 86<br />
Setting the Pilot Dominance Limit . . . . . . . . . . . . . . . . . . . . . . . . . . . . . . . . . . . . . . . . . . . . . . . . . 87<br />
Setting the Multipath Power Limit . . . . . . . . . . . . . . . . . . . . . . . . . . . . . . . . . . . . . . . . . . . . . . . . . 88<br />
Setting the PN Scanner Sensitivity . . . . . . . . . . . . . . . . . . . . . . . . . . . . . . . . . . . . . . . . . . . . . . . . . 88<br />
Setting Average, Sweep, and Restart . . . . . . . . . . . . . . . . . . . . . . . . . . . . . . . . . . . . . . . . . . . . . . .89<br />
Adding a Marker. . . . . . . . . . . . . . . . . . . . . . . . . . . . . . . . . . . . . . . . . . . . . . . . . . . . . . . . . . . . . . . 91<br />
Setting the Pass/Fail Limits . . . . . . . . . . . . . . . . . . . . . . . . . . . . . . . . . . . . . . . . . . . . . . . . . . . . . . 93<br />
Setting Up the Signal Generator . . . . . . . . . . . . . . . . . . . . . . . . . . . . . . . . . . . . . . . . . . . . . . . . . . 101<br />
Metrics Provided by the 1xEV-DO Tx and Over Air Analyzer <strong>Measurement</strong> . . . . . . . . . . . . . . . . 104<br />
Interpretation of 1xEV-DO Tx and Over Air Analyzer <strong>Measurement</strong> Results . . . . . . . . . . . . . . . . 109<br />
Customizing Your Display . . . . . . . . . . . . . . . . . . . . . . . . . . . . . . . . . . . . . . . . . . . . . . . . . . . . . . . . 114<br />
Sorting by MAC Index or by Walsh Code . . . . . . . . . . . . . . . . . . . . . . . . . . . . . . . . . . . . . . . . . . . . 115<br />
Converting Between MAC Index and Walsh Code . . . . . . . . . . . . . . . . . . . . . . . . . . . . . . . . . . . . . 116<br />
Colors Used on the MAC Code Domain CDP Display . . . . . . . . . . . . . . . . . . . . . . . . . . . . . . . . . . 117<br />
Colors Used on the Pilot Code Domain CDP Display . . . . . . . . . . . . . . . . . . . . . . . . . . . . . . . . . . . 118<br />
Showing or Hiding the OTA PN Scanner. . . . . . . . . . . . . . . . . . . . . . . . . . . . . . . . . . . . . . . . . . . . . 119<br />
Codogram Display . . . . . . . . . . . . . . . . . . . . . . . . . . . . . . . . . . . . . . . . . . . . . . . . . . . . . . . . . . . . . . 120<br />
Performing a Codogram <strong>Measurement</strong> . . . . . . . . . . . . . . . . . . . . . . . . . . . . . . . . . . . . . . . . . . . . . . 121<br />
4. Two Port Insertion Loss<br />
Measuring Two Port Insertion Loss . . . . . . . . . . . . . . . . . . . . . . . . . . . . . . . . . . . . . . . . . . . . . . . . . 124<br />
Normalizing and Performing a Basic Two Port Insertion Loss <strong>Measurement</strong> . . . . . . . . . . . . . . 125<br />
Displaying Location Information Using GPS. . . . . . . . . . . . . . . . . . . . . . . . . . . . . . . . . . . . . . . . 126<br />
6
Contents<br />
Setting Average, Sweep, and Restart. . . . . . . . . . . . . . . . . . . . . . . . . . . . . . . . . . . . . . . . . . . . . . .127<br />
Adding a Marker . . . . . . . . . . . . . . . . . . . . . . . . . . . . . . . . . . . . . . . . . . . . . . . . . . . . . . . . . . . . . .130<br />
Measuring Two Port Insertion Loss for Spectrum Analyzer, Channel Scanner, 1xEV-DO Analyzer,<br />
CDMA Analyzer, and Signal Generator (RF In Loss and RF Out Loss) . . . . . . . . . . . . . . . . . . .131<br />
Measuring Insertion Loss for Power Meter (Option 600 - Power Meter Only) . . . . . . . . . . . . . .134<br />
Determining The Lowest (Worst) Insertion Loss and Its Frequency . . . . . . . . . . . . . . . . . . . . . .135<br />
Determining the Highest (Best) Insertion Loss and Its Frequency . . . . . . . . . . . . . . . . . . . . . . . .136<br />
Using the Delta Marker to Measure a Difference in Insertion Loss or Frequency . . . . . . . . . . .136<br />
Activating Interference Rejection . . . . . . . . . . . . . . . . . . . . . . . . . . . . . . . . . . . . . . . . . . . . . . . . .136<br />
Clearing Normalization . . . . . . . . . . . . . . . . . . . . . . . . . . . . . . . . . . . . . . . . . . . . . . . . . . . . . . . .137<br />
Setting Source Level . . . . . . . . . . . . . . . . . . . . . . . . . . . . . . . . . . . . . . . . . . . . . . . . . . . . . . . . . . .137<br />
Optimizing Dynamic Range . . . . . . . . . . . . . . . . . . . . . . . . . . . . . . . . . . . . . . . . . . . . . . . . . . . . .138<br />
Setting the Pass/Fail Limits. . . . . . . . . . . . . . . . . . . . . . . . . . . . . . . . . . . . . . . . . . . . . . . . . . . . . .139<br />
Table of Contents<br />
5. Adjacent Channel Power<br />
Using the Adjacent Channel Power <strong>Measurement</strong> . . . . . . . . . . . . . . . . . . . . . . . . . . . . . . . . . . . . . .142<br />
Making a Basic Adjacent Channel Power <strong>Measurement</strong> . . . . . . . . . . . . . . . . . . . . . . . . . . . . . . .143<br />
Setting the Adjacent Channel Power Format . . . . . . . . . . . . . . . . . . . . . . . . . . . . . . . . . . . . . . . .145<br />
Setting Average, Sweep, and Restart. . . . . . . . . . . . . . . . . . . . . . . . . . . . . . . . . . . . . . . . . . . . . . .149<br />
Displaying Accurate Peak Power (Recommended for Pulsed Signals) . . . . . . . . . . . . . . . . . . . .151<br />
Setting the Control Units. . . . . . . . . . . . . . . . . . . . . . . . . . . . . . . . . . . . . . . . . . . . . . . . . . . . . . . .151<br />
Setting the Range Control . . . . . . . . . . . . . . . . . . . . . . . . . . . . . . . . . . . . . . . . . . . . . . . . . . . . . . .152<br />
Setting the Analyzer Input Gain . . . . . . . . . . . . . . . . . . . . . . . . . . . . . . . . . . . . . . . . . . . . . . . . . .152<br />
Setting Noise Correction . . . . . . . . . . . . . . . . . . . . . . . . . . . . . . . . . . . . . . . . . . . . . . . . . . . . . . . .153<br />
Setting the Pass/Fail Limits. . . . . . . . . . . . . . . . . . . . . . . . . . . . . . . . . . . . . . . . . . . . . . . . . . . . . .153<br />
Setting Up the Signal Generator . . . . . . . . . . . . . . . . . . . . . . . . . . . . . . . . . . . . . . . . . . . . . . . . . .156<br />
W-CDMA Adjacent Channel Leakage Power Ratio (ACLR) <strong>Measurement</strong>s . . . . . . . . . . . . . . . . .159<br />
6. Working with Batteries<br />
Installing Batteries . . . . . . . . . . . . . . . . . . . . . . . . . . . . . . . . . . . . . . . . . . . . . . . . . . . . . . . . . . . . . .164<br />
Viewing Battery Status . . . . . . . . . . . . . . . . . . . . . . . . . . . . . . . . . . . . . . . . . . . . . . . . . . . . . . . . . . .165<br />
Charging Batteries . . . . . . . . . . . . . . . . . . . . . . . . . . . . . . . . . . . . . . . . . . . . . . . . . . . . . . . . . . . . . .168<br />
Reconditioning Batteries. . . . . . . . . . . . . . . . . . . . . . . . . . . . . . . . . . . . . . . . . . . . . . . . . . . . . . . . . .170<br />
Battery Care . . . . . . . . . . . . . . . . . . . . . . . . . . . . . . . . . . . . . . . . . . . . . . . . . . . . . . . . . . . . . . . . . . .173<br />
Battery Specifications . . . . . . . . . . . . . . . . . . . . . . . . . . . . . . . . . . . . . . . . . . . . . . . . . . . . . . . . . . . .176<br />
7
Contents<br />
Table of Contents<br />
7. CDMA Analyzer<br />
Using the CDMA Analyzer . . . . . . . . . . . . . . . . . . . . . . . . . . . . . . . . . . . . . . . . . . . . . . . . . . . . . . . 180<br />
Common CDMA Tx Analyzer <strong>Measurement</strong>s . . . . . . . . . . . . . . . . . . . . . . . . . . . . . . . . . . . . . . . 180<br />
Performing a Basic CDMA Transmitter <strong>Measurement</strong> . . . . . . . . . . . . . . . . . . . . . . . . . . . . . . . . 181<br />
Codogram Display . . . . . . . . . . . . . . . . . . . . . . . . . . . . . . . . . . . . . . . . . . . . . . . . . . . . . . . . . . . . 186<br />
Performing a Codogram <strong>Measurement</strong>. . . . . . . . . . . . . . . . . . . . . . . . . . . . . . . . . . . . . . . . . . . . . 186<br />
Optional CDMA Tx Analyzer <strong>Measurement</strong> Settings . . . . . . . . . . . . . . . . . . . . . . . . . . . . . . . . . . . 188<br />
Setting the Channel or Frequency Step. . . . . . . . . . . . . . . . . . . . . . . . . . . . . . . . . . . . . . . . . . . . . 188<br />
Setting the PN Offset . . . . . . . . . . . . . . . . . . . . . . . . . . . . . . . . . . . . . . . . . . . . . . . . . . . . . . . . . . 189<br />
Setting the PN Increment . . . . . . . . . . . . . . . . . . . . . . . . . . . . . . . . . . . . . . . . . . . . . . . . . . . . . . . 189<br />
Setting the Frequency/Time Reference. . . . . . . . . . . . . . . . . . . . . . . . . . . . . . . . . . . . . . . . . . . . . 190<br />
Setting Units . . . . . . . . . . . . . . . . . . . . . . . . . . . . . . . . . . . . . . . . . . . . . . . . . . . . . . . . . . . . . . . . . 191<br />
Setting the CDMA Transmitter Reference Level . . . . . . . . . . . . . . . . . . . . . . . . . . . . . . . . . . . . . 191<br />
Setting the Active Channel Threshold Level and Auto Threshold Level. . . . . . . . . . . . . . . . . . . 192<br />
Setting <strong>Measurement</strong> Time . . . . . . . . . . . . . . . . . . . . . . . . . . . . . . . . . . . . . . . . . . . . . . . . . . . . . . 193<br />
Setting Quick Page Channel . . . . . . . . . . . . . . . . . . . . . . . . . . . . . . . . . . . . . . . . . . . . . . . . . . . . . 194<br />
Setting Average, Sweep, and Restart . . . . . . . . . . . . . . . . . . . . . . . . . . . . . . . . . . . . . . . . . . . . . . 195<br />
Adding a Marker. . . . . . . . . . . . . . . . . . . . . . . . . . . . . . . . . . . . . . . . . . . . . . . . . . . . . . . . . . . . . . 196<br />
Setting the Pass/Fail Limits . . . . . . . . . . . . . . . . . . . . . . . . . . . . . . . . . . . . . . . . . . . . . . . . . . . . . 198<br />
Setting Up the Signal Generator . . . . . . . . . . . . . . . . . . . . . . . . . . . . . . . . . . . . . . . . . . . . . . . . . . 206<br />
Metrics Provided by the CDMA Tx Analyzer <strong>Measurement</strong>. . . . . . . . . . . . . . . . . . . . . . . . . . . . . . 209<br />
Interpretation of CDMA Tx Analyzer <strong>Measurement</strong> Results . . . . . . . . . . . . . . . . . . . . . . . . . . . . . 211<br />
8. CDMA Over Air<br />
Using the CDMA Over Air Tool . . . . . . . . . . . . . . . . . . . . . . . . . . . . . . . . . . . . . . . . . . . . . . . . . . . 216<br />
Preparing to Make CDMA Over Air <strong>Measurement</strong>s . . . . . . . . . . . . . . . . . . . . . . . . . . . . . . . . . . 216<br />
Criteria for Making Valid CDMA Over Air <strong>Measurement</strong>s . . . . . . . . . . . . . . . . . . . . . . . . . . . . 217<br />
Performing a Basic CDMA Over Air <strong>Measurement</strong> . . . . . . . . . . . . . . . . . . . . . . . . . . . . . . . . . . 218<br />
Displaying Location Information Using GPS. . . . . . . . . . . . . . . . . . . . . . . . . . . . . . . . . . . . . . . . 220<br />
Codogram Display . . . . . . . . . . . . . . . . . . . . . . . . . . . . . . . . . . . . . . . . . . . . . . . . . . . . . . . . . . . . 222<br />
Performing a Codogram <strong>Measurement</strong>. . . . . . . . . . . . . . . . . . . . . . . . . . . . . . . . . . . . . . . . . . . . . 222<br />
Setting Amplifier Capacity Metrics . . . . . . . . . . . . . . . . . . . . . . . . . . . . . . . . . . . . . . . . . . . . . . .223<br />
Interpreting the Display . . . . . . . . . . . . . . . . . . . . . . . . . . . . . . . . . . . . . . . . . . . . . . . . . . . . . . . . 225<br />
Optional CDMA Over Air <strong>Measurement</strong> Settings . . . . . . . . . . . . . . . . . . . . . . . . . . . . . . . . . . . . . . 227<br />
Setting the Channel or Frequency Step. . . . . . . . . . . . . . . . . . . . . . . . . . . . . . . . . . . . . . . . . . . . . 227<br />
Setting the PN Increment . . . . . . . . . . . . . . . . . . . . . . . . . . . . . . . . . . . . . . . . . . . . . . . . . . . . . . . 228<br />
8
Contents<br />
Setting the Transmitter Reference Level. . . . . . . . . . . . . . . . . . . . . . . . . . . . . . . . . . . . . . . . . . . .228<br />
Setting the Active Channel Threshold Level and Auto Threshold Level . . . . . . . . . . . . . . . . . . .230<br />
Resetting Amplifier Capacity and Traffic Metrics . . . . . . . . . . . . . . . . . . . . . . . . . . . . . . . . . . . .231<br />
Setting <strong>Measurement</strong> Time . . . . . . . . . . . . . . . . . . . . . . . . . . . . . . . . . . . . . . . . . . . . . . . . . . . . . .231<br />
Setting Quick Page Channel . . . . . . . . . . . . . . . . . . . . . . . . . . . . . . . . . . . . . . . . . . . . . . . . . . . . .232<br />
Setting Average, Sweep, and Restart. . . . . . . . . . . . . . . . . . . . . . . . . . . . . . . . . . . . . . . . . . . . . . .234<br />
Adding a Marker . . . . . . . . . . . . . . . . . . . . . . . . . . . . . . . . . . . . . . . . . . . . . . . . . . . . . . . . . . . . . .235<br />
Setting the Pass/Fail Limits. . . . . . . . . . . . . . . . . . . . . . . . . . . . . . . . . . . . . . . . . . . . . . . . . . . . . .237<br />
Setting Up the Signal Generator . . . . . . . . . . . . . . . . . . . . . . . . . . . . . . . . . . . . . . . . . . . . . . . . . .246<br />
Metrics Provided by CDMA Over Air <strong>Measurement</strong>s . . . . . . . . . . . . . . . . . . . . . . . . . . . . . . . . . . .249<br />
Interpretation of CDMA Over Air <strong>Measurement</strong> Results . . . . . . . . . . . . . . . . . . . . . . . . . . . . . . . .253<br />
Table of Contents<br />
9. Channel Scanner<br />
Using the Channel Scanner. . . . . . . . . . . . . . . . . . . . . . . . . . . . . . . . . . . . . . . . . . . . . . . . . . . . . . . .260<br />
Performing a Basic Channel Scanner <strong>Measurement</strong>) . . . . . . . . . . . . . . . . . . . . . . . . . . . . . . . . . .261<br />
Displaying Accurate Peak Power (Recommended for Pulsed Signals) . . . . . . . . . . . . . . . . . . . .264<br />
Setting the Analyzer Input Gain . . . . . . . . . . . . . . . . . . . . . . . . . . . . . . . . . . . . . . . . . . . . . . . . . .265<br />
Setting Noise Correction . . . . . . . . . . . . . . . . . . . . . . . . . . . . . . . . . . . . . . . . . . . . . . . . . . . . . . . .265<br />
Entering the Channels with a List Instead of a Range . . . . . . . . . . . . . . . . . . . . . . . . . . . . . . . . .266<br />
Entering the Channel Power <strong>Measurement</strong> Bandwidth and Time . . . . . . . . . . . . . . . . . . . . . . . .267<br />
Setting Average, Sweep, and Restart. . . . . . . . . . . . . . . . . . . . . . . . . . . . . . . . . . . . . . . . . . . . . . .270<br />
Displaying Frequency or Power . . . . . . . . . . . . . . . . . . . . . . . . . . . . . . . . . . . . . . . . . . . . . . . . . .272<br />
Setting the Pass/Fail Limits. . . . . . . . . . . . . . . . . . . . . . . . . . . . . . . . . . . . . . . . . . . . . . . . . . . . . .272<br />
10. Distance to Fault<br />
Measuring Distance to Fault . . . . . . . . . . . . . . . . . . . . . . . . . . . . . . . . . . . . . . . . . . . . . . . . . . . . . . .276<br />
Measured Distance - the Effects of Frequency and Points . . . . . . . . . . . . . . . . . . . . . . . . . . . . . .276<br />
Resolution - the Effects of Frequency and Points . . . . . . . . . . . . . . . . . . . . . . . . . . . . . . . . . . . . .277<br />
Automatic and Manual Distance to Fault <strong>Measurement</strong>s . . . . . . . . . . . . . . . . . . . . . . . . . . . . . . .277<br />
Calibration - Minimizing your Workload . . . . . . . . . . . . . . . . . . . . . . . . . . . . . . . . . . . . . . . . . . .279<br />
Performing a Basic Distance to Fault <strong>Measurement</strong><br />
(Manual Frequency Range). . . . . . . . . . . . . . . . . . . . . . . . . . . . . . . . . . . . . . . . . . . . . . . . . . . . . .281<br />
Performing a Basic Distance to Fault <strong>Measurement</strong><br />
(Automatic Frequency Range) . . . . . . . . . . . . . . . . . . . . . . . . . . . . . . . . . . . . . . . . . . . . . . . . . . .284<br />
Clearing Calibration . . . . . . . . . . . . . . . . . . . . . . . . . . . . . . . . . . . . . . . . . . . . . . . . . . . . . . . . . . .288<br />
Displaying Location Information Using GPS . . . . . . . . . . . . . . . . . . . . . . . . . . . . . . . . . . . . . . . .289<br />
9
Contents<br />
Table of Contents<br />
Viewing a Single Distance to Fault Sweep. . . . . . . . . . . . . . . . . . . . . . . . . . . . . . . . . . . . . . . . . . 290<br />
Displaying the Top Four Faults. . . . . . . . . . . . . . . . . . . . . . . . . . . . . . . . . . . . . . . . . . . . . . . . . . . 290<br />
Setting Interference Rejection for a Distance to Fault <strong>Measurement</strong>. . . . . . . . . . . . . . . . . . . . . . 291<br />
Setting Average, Sweep, and Restart . . . . . . . . . . . . . . . . . . . . . . . . . . . . . . . . . . . . . . . . . . . . . . 292<br />
Adding a Marker. . . . . . . . . . . . . . . . . . . . . . . . . . . . . . . . . . . . . . . . . . . . . . . . . . . . . . . . . . . . . . 294<br />
Setting the Pass/Fail Limits . . . . . . . . . . . . . . . . . . . . . . . . . . . . . . . . . . . . . . . . . . . . . . . . . . . . . 295<br />
11. E1 Analyzer<br />
Making E1 <strong>Measurement</strong>s . . . . . . . . . . . . . . . . . . . . . . . . . . . . . . . . . . . . . . . . . . . . . . . . . . . . . . . . 298<br />
Steps for Performing a Basic E1 Analyzer <strong>Measurement</strong> . . . . . . . . . . . . . . . . . . . . . . . . . . . . . . 298<br />
Setup Button Selections . . . . . . . . . . . . . . . . . . . . . . . . . . . . . . . . . . . . . . . . . . . . . . . . . . . . . . . . 298<br />
Display/Sound Button Selections . . . . . . . . . . . . . . . . . . . . . . . . . . . . . . . . . . . . . . . . . . . . . . . . .301<br />
Control Button Selections. . . . . . . . . . . . . . . . . . . . . . . . . . . . . . . . . . . . . . . . . . . . . . . . . . . . . . . 301<br />
Sample Hard Loop/End-End Full E1 BERT Test . . . . . . . . . . . . . . . . . . . . . . . . . . . . . . . . . . . . . 303<br />
Sample Monitor Full E1 Test . . . . . . . . . . . . . . . . . . . . . . . . . . . . . . . . . . . . . . . . . . . . . . . . . . . . 306<br />
Setting Up Delay Test Mode. . . . . . . . . . . . . . . . . . . . . . . . . . . . . . . . . . . . . . . . . . . . . . . . . . . . . 310<br />
Turning On Sound. . . . . . . . . . . . . . . . . . . . . . . . . . . . . . . . . . . . . . . . . . . . . . . . . . . . . . . . . . . . . 312<br />
Setting Up E1 Diagnostics . . . . . . . . . . . . . . . . . . . . . . . . . . . . . . . . . . . . . . . . . . . . . . . . . . . . . . 313<br />
Patterns . . . . . . . . . . . . . . . . . . . . . . . . . . . . . . . . . . . . . . . . . . . . . . . . . . . . . . . . . . . . . . . . . . . . . 314<br />
<strong>Measurement</strong> Results . . . . . . . . . . . . . . . . . . . . . . . . . . . . . . . . . . . . . . . . . . . . . . . . . . . . . . . . . . . . 316<br />
Alarm Indicators . . . . . . . . . . . . . . . . . . . . . . . . . . . . . . . . . . . . . . . . . . . . . . . . . . . . . . . . . . . . . . 316<br />
Results Indicators . . . . . . . . . . . . . . . . . . . . . . . . . . . . . . . . . . . . . . . . . . . . . . . . . . . . . . . . . . . . . 316<br />
Status Indicators . . . . . . . . . . . . . . . . . . . . . . . . . . . . . . . . . . . . . . . . . . . . . . . . . . . . . . . . . . . . . . 318<br />
Testing and Fault Mitigation. . . . . . . . . . . . . . . . . . . . . . . . . . . . . . . . . . . . . . . . . . . . . . . . . . . . . 319<br />
More Information About E1 Testing . . . . . . . . . . . . . . . . . . . . . . . . . . . . . . . . . . . . . . . . . . . . . . . .321<br />
Auto Configuration Flow Diagram. . . . . . . . . . . . . . . . . . . . . . . . . . . . . . . . . . . . . . . . . . . . . . . . 321<br />
Terminology . . . . . . . . . . . . . . . . . . . . . . . . . . . . . . . . . . . . . . . . . . . . . . . . . . . . . . . . . . . . . . . . . 323<br />
12. GSM and EDGE Analyzer<br />
Using the GSM Analyzer and the EDGE Analyzer . . . . . . . . . . . . . . . . . . . . . . . . . . . . . . . . . . . . . 327<br />
Performing a Basic GSM or EDGE Transmitter <strong>Measurement</strong> . . . . . . . . . . . . . . . . . . . . . . . . . . 328<br />
Interpreting the Display . . . . . . . . . . . . . . . . . . . . . . . . . . . . . . . . . . . . . . . . . . . . . . . . . . . . . . . . 333<br />
Optional GSM and EDGE Tx Analyzer <strong>Measurement</strong> Settings . . . . . . . . . . . . . . . . . . . . . . . . . . . 337<br />
Setting your Scan Mode . . . . . . . . . . . . . . . . . . . . . . . . . . . . . . . . . . . . . . . . . . . . . . . . . . . . . . . . 338<br />
Adding or Deleting a List Item . . . . . . . . . . . . . . . . . . . . . . . . . . . . . . . . . . . . . . . . . . . . . . . . . . . 340<br />
Setting the Start Frequency/Channel . . . . . . . . . . . . . . . . . . . . . . . . . . . . . . . . . . . . . . . . . . . . . . 341<br />
10
Contents<br />
Setting the Frequency or Channel Step Size . . . . . . . . . . . . . . . . . . . . . . . . . . . . . . . . . . . . . . . . .342<br />
Setting the Stop Frequency/Channel . . . . . . . . . . . . . . . . . . . . . . . . . . . . . . . . . . . . . . . . . . . . . . .343<br />
Setting the Channel Standard . . . . . . . . . . . . . . . . . . . . . . . . . . . . . . . . . . . . . . . . . . . . . . . . . . . .344<br />
Setting the Units of Measure for the Graphical Display . . . . . . . . . . . . . . . . . . . . . . . . . . . . . . . .344<br />
Setting Autoscale. . . . . . . . . . . . . . . . . . . . . . . . . . . . . . . . . . . . . . . . . . . . . . . . . . . . . . . . . . . . . .345<br />
Setting the Reference Level . . . . . . . . . . . . . . . . . . . . . . . . . . . . . . . . . . . . . . . . . . . . . . . . . . . . .346<br />
Setting Scale/Division. . . . . . . . . . . . . . . . . . . . . . . . . . . . . . . . . . . . . . . . . . . . . . . . . . . . . . . . . .346<br />
Using GPS for Frequency Reference and Location Information . . . . . . . . . . . . . . . . . . . . . . . . .346<br />
Setting the Display Position . . . . . . . . . . . . . . . . . . . . . . . . . . . . . . . . . . . . . . . . . . . . . . . . . . . . .347<br />
Setting Auto Order . . . . . . . . . . . . . . . . . . . . . . . . . . . . . . . . . . . . . . . . . . . . . . . . . . . . . . . . . . . .348<br />
Setting Bar Top and Units . . . . . . . . . . . . . . . . . . . . . . . . . . . . . . . . . . . . . . . . . . . . . . . . . . . . . . .348<br />
Setting Mid-Bar. . . . . . . . . . . . . . . . . . . . . . . . . . . . . . . . . . . . . . . . . . . . . . . . . . . . . . . . . . . . . . .349<br />
Setting Zoom. . . . . . . . . . . . . . . . . . . . . . . . . . . . . . . . . . . . . . . . . . . . . . . . . . . . . . . . . . . . . . . . .349<br />
Setting Zoom Offset . . . . . . . . . . . . . . . . . . . . . . . . . . . . . . . . . . . . . . . . . . . . . . . . . . . . . . . . . . .350<br />
Setting Zoom Interval . . . . . . . . . . . . . . . . . . . . . . . . . . . . . . . . . . . . . . . . . . . . . . . . . . . . . . . . . .351<br />
Setting PvT Mask . . . . . . . . . . . . . . . . . . . . . . . . . . . . . . . . . . . . . . . . . . . . . . . . . . . . . . . . . . . . .352<br />
Setting Auto Mode Bar Count. . . . . . . . . . . . . . . . . . . . . . . . . . . . . . . . . . . . . . . . . . . . . . . . . . . .352<br />
Setting Slot Synchronization. . . . . . . . . . . . . . . . . . . . . . . . . . . . . . . . . . . . . . . . . . . . . . . . . . . . .353<br />
Setting TS# (w/ BCCH) . . . . . . . . . . . . . . . . . . . . . . . . . . . . . . . . . . . . . . . . . . . . . . . . . . . . . . . .354<br />
Setting the Pass/Fail Limits. . . . . . . . . . . . . . . . . . . . . . . . . . . . . . . . . . . . . . . . . . . . . . . . . . . . . .355<br />
Adding a Marker . . . . . . . . . . . . . . . . . . . . . . . . . . . . . . . . . . . . . . . . . . . . . . . . . . . . . . . . . . . . . .363<br />
Compensating for the Loss of an External Cable and Attenuator. . . . . . . . . . . . . . . . . . . . . . . . .365<br />
Setting Average, Sweep, and Restart. . . . . . . . . . . . . . . . . . . . . . . . . . . . . . . . . . . . . . . . . . . . . . .366<br />
GSM and EDGE Modulation and Band Information . . . . . . . . . . . . . . . . . . . . . . . . . . . . . . . . . . . .369<br />
Metrics Provided by the GSM and EDGE Analyzer <strong>Measurement</strong> . . . . . . . . . . . . . . . . . . . . . . . . .371<br />
Interpretation of GSM and EDGE Analyzer <strong>Measurement</strong> Results . . . . . . . . . . . . . . . . . . . . . . . . .374<br />
Table of Contents<br />
13. Power Meter<br />
Making an Average Power <strong>Measurement</strong> . . . . . . . . . . . . . . . . . . . . . . . . . . . . . . . . . . . . . . . . . . . . .378<br />
Making a Basic Average Power <strong>Measurement</strong> . . . . . . . . . . . . . . . . . . . . . . . . . . . . . . . . . . . . . . .379<br />
Setting Power Meter Resolution . . . . . . . . . . . . . . . . . . . . . . . . . . . . . . . . . . . . . . . . . . . . . . . . . .382<br />
Setting the Power Meter’s High and Low End-Points . . . . . . . . . . . . . . . . . . . . . . . . . . . . . . . . .383<br />
Setting the Power Meter’s Upper and Lower Limits . . . . . . . . . . . . . . . . . . . . . . . . . . . . . . . . . .384<br />
14. Return Loss<br />
Measuring Return Loss. . . . . . . . . . . . . . . . . . . . . . . . . . . . . . . . . . . . . . . . . . . . . . . . . . . . . . . . . . .388<br />
11
Contents<br />
Table of Contents<br />
Calibration - Minimizing your Workload . . . . . . . . . . . . . . . . . . . . . . . . . . . . . . . . . . . . . . . . . . . 388<br />
Performing (and Calibrating) a Basic Return Loss <strong>Measurement</strong> . . . . . . . . . . . . . . . . . . . . . . . . 389<br />
Clearing Calibration . . . . . . . . . . . . . . . . . . . . . . . . . . . . . . . . . . . . . . . . . . . . . . . . . . . . . . . . . . . 392<br />
Isolating a Return Loss Signal Using a Single Sweep . . . . . . . . . . . . . . . . . . . . . . . . . . . . . . . . . 393<br />
Setting Return Loss Interference Rejection . . . . . . . . . . . . . . . . . . . . . . . . . . . . . . . . . . . . . . . . . 393<br />
Setting Average, Sweep, and Restart . . . . . . . . . . . . . . . . . . . . . . . . . . . . . . . . . . . . . . . . . . . . . . 394<br />
Adding a Marker. . . . . . . . . . . . . . . . . . . . . . . . . . . . . . . . . . . . . . . . . . . . . . . . . . . . . . . . . . . . . . 396<br />
Displaying Location Information Using GPS . . . . . . . . . . . . . . . . . . . . . . . . . . . . . . . . . . . . . . . 397<br />
Setting the Pass/Fail Limits . . . . . . . . . . . . . . . . . . . . . . . . . . . . . . . . . . . . . . . . . . . . . . . . . . . . . 398<br />
15. Signal Generator<br />
Using the Signal Generator . . . . . . . . . . . . . . . . . . . . . . . . . . . . . . . . . . . . . . . . . . . . . . . . . . . . . . . 400<br />
Minimum and Maximum Power levels for Generated Signals. . . . . . . . . . . . . . . . . . . . . . . . . . . 400<br />
Performing a Basic Signal Generator <strong>Measurement</strong>. . . . . . . . . . . . . . . . . . . . . . . . . . . . . . . . . . . 402<br />
Persistent Signal Generator . . . . . . . . . . . . . . . . . . . . . . . . . . . . . . . . . . . . . . . . . . . . . . . . . . . . . 409<br />
16. Spectrum Analyzer<br />
Using the Spectrum Analyzer. . . . . . . . . . . . . . . . . . . . . . . . . . . . . . . . . . . . . . . . . . . . . . . . . . . . . . 412<br />
Performing a Basic Spectrum Analyzer <strong>Measurement</strong>. . . . . . . . . . . . . . . . . . . . . . . . . . . . . . . . . 413<br />
Setting the Range Control. . . . . . . . . . . . . . . . . . . . . . . . . . . . . . . . . . . . . . . . . . . . . . . . . . . . . . . 416<br />
Setting the Analyzer Input Gain . . . . . . . . . . . . . . . . . . . . . . . . . . . . . . . . . . . . . . . . . . . . . . . . . . 417<br />
Setting the Analyzer Detector. . . . . . . . . . . . . . . . . . . . . . . . . . . . . . . . . . . . . . . . . . . . . . . . . . . . 418<br />
Setting Up the Signal Generator . . . . . . . . . . . . . . . . . . . . . . . . . . . . . . . . . . . . . . . . . . . . . . . . . . 419<br />
Setting Average, Sweep, and Restart . . . . . . . . . . . . . . . . . . . . . . . . . . . . . . . . . . . . . . . . . . . . . . 421<br />
Changing the Resolution Bandwidth . . . . . . . . . . . . . . . . . . . . . . . . . . . . . . . . . . . . . . . . . . . . . . 423<br />
Adding or Removing a Marker. . . . . . . . . . . . . . . . . . . . . . . . . . . . . . . . . . . . . . . . . . . . . . . . . . .423<br />
Setting the Pass/Fail Limits . . . . . . . . . . . . . . . . . . . . . . . . . . . . . . . . . . . . . . . . . . . . . . . . . . . . . 426<br />
Spectrogram Display . . . . . . . . . . . . . . . . . . . . . . . . . . . . . . . . . . . . . . . . . . . . . . . . . . . . . . . . . . . . 433<br />
Performing a Spectrogram <strong>Measurement</strong> . . . . . . . . . . . . . . . . . . . . . . . . . . . . . . . . . . . . . . . . . . . 434<br />
Using the Interference ID <strong>Measurement</strong> . . . . . . . . . . . . . . . . . . . . . . . . . . . . . . . . . . . . . . . . . . . . . 437<br />
Performing a Basic Interference ID <strong>Measurement</strong> . . . . . . . . . . . . . . . . . . . . . . . . . . . . . . . . . . . . 437<br />
Using the Occupied BW <strong>Measurement</strong> . . . . . . . . . . . . . . . . . . . . . . . . . . . . . . . . . . . . . . . . . . . . . . 442<br />
Performing a Basic Occupied BW <strong>Measurement</strong> . . . . . . . . . . . . . . . . . . . . . . . . . . . . . . . . . . . . . 443<br />
Using the Spectrum Emission Mask <strong>Measurement</strong> . . . . . . . . . . . . . . . . . . . . . . . . . . . . . . . . . . . . . 448<br />
Channel Standards and Emission Limits . . . . . . . . . . . . . . . . . . . . . . . . . . . . . . . . . . . . . . . . . . . 450<br />
Performing a Basic Spectrum Emissions Mask <strong>Measurement</strong> . . . . . . . . . . . . . . . . . . . . . . . . . . . 451<br />
12
Contents<br />
17. Basic System Operations<br />
System Reference Introduction. . . . . . . . . . . . . . . . . . . . . . . . . . . . . . . . . . . . . . . . . . . . . . . . . . . . .457<br />
Setting System References . . . . . . . . . . . . . . . . . . . . . . . . . . . . . . . . . . . . . . . . . . . . . . . . . . . . . . . .458<br />
Displaying GPS Location Data . . . . . . . . . . . . . . . . . . . . . . . . . . . . . . . . . . . . . . . . . . . . . . . . . . .458<br />
Selecting a Frequency/Timing Reference . . . . . . . . . . . . . . . . . . . . . . . . . . . . . . . . . . . . . . . . . . .458<br />
Setting up the DC Bias Option . . . . . . . . . . . . . . . . . . . . . . . . . . . . . . . . . . . . . . . . . . . . . . . . . . .459<br />
Printing a Screen to a File. . . . . . . . . . . . . . . . . . . . . . . . . . . . . . . . . . . . . . . . . . . . . . . . . . . . . . . . .461<br />
Printing Screens. . . . . . . . . . . . . . . . . . . . . . . . . . . . . . . . . . . . . . . . . . . . . . . . . . . . . . . . . . . . . . .461<br />
Selecting Output Media—PCMCIA Card or Compact Flash Card . . . . . . . . . . . . . . . . . . . . . . .461<br />
File Naming Options . . . . . . . . . . . . . . . . . . . . . . . . . . . . . . . . . . . . . . . . . . . . . . . . . . . . . . . . . . .462<br />
Saving Data. . . . . . . . . . . . . . . . . . . . . . . . . . . . . . . . . . . . . . . . . . . . . . . . . . . . . . . . . . . . . . . . . . . .465<br />
Saving data . . . . . . . . . . . . . . . . . . . . . . . . . . . . . . . . . . . . . . . . . . . . . . . . . . . . . . . . . . . . . . . . . .465<br />
Selecting Output Media—PCMCIA Card or CompactFlash Card . . . . . . . . . . . . . . . . . . . . . . . .465<br />
File Naming Options . . . . . . . . . . . . . . . . . . . . . . . . . . . . . . . . . . . . . . . . . . . . . . . . . . . . . . . . . . .466<br />
Managing Media Types. . . . . . . . . . . . . . . . . . . . . . . . . . . . . . . . . . . . . . . . . . . . . . . . . . . . . . . . . . .469<br />
Configuring for Network Connectivity. . . . . . . . . . . . . . . . . . . . . . . . . . . . . . . . . . . . . . . . . . . . . . .471<br />
Saving, Recalling, and Deleting Instrument States. . . . . . . . . . . . . . . . . . . . . . . . . . . . . . . . . . . . . .474<br />
Saving the State. . . . . . . . . . . . . . . . . . . . . . . . . . . . . . . . . . . . . . . . . . . . . . . . . . . . . . . . . . . . . . .474<br />
Saving the Power-Up State . . . . . . . . . . . . . . . . . . . . . . . . . . . . . . . . . . . . . . . . . . . . . . . . . . . . . .474<br />
Recalling the State. . . . . . . . . . . . . . . . . . . . . . . . . . . . . . . . . . . . . . . . . . . . . . . . . . . . . . . . . . . . .475<br />
Returning the Power-Up State to Factory default . . . . . . . . . . . . . . . . . . . . . . . . . . . . . . . . . . . . .475<br />
Deleting States. . . . . . . . . . . . . . . . . . . . . . . . . . . . . . . . . . . . . . . . . . . . . . . . . . . . . . . . . . . . . . . .476<br />
Viewing System Statistics. . . . . . . . . . . . . . . . . . . . . . . . . . . . . . . . . . . . . . . . . . . . . . . . . . . . . . . . .477<br />
Viewing System Release Versions . . . . . . . . . . . . . . . . . . . . . . . . . . . . . . . . . . . . . . . . . . . . . . . .477<br />
Viewing System Memory . . . . . . . . . . . . . . . . . . . . . . . . . . . . . . . . . . . . . . . . . . . . . . . . . . . . . . .477<br />
Viewing Battery Statistics . . . . . . . . . . . . . . . . . . . . . . . . . . . . . . . . . . . . . . . . . . . . . . . . . . . . . . .478<br />
Using the Option Manager . . . . . . . . . . . . . . . . . . . . . . . . . . . . . . . . . . . . . . . . . . . . . . . . . . . . . . . .479<br />
Viewing Installed Options. . . . . . . . . . . . . . . . . . . . . . . . . . . . . . . . . . . . . . . . . . . . . . . . . . . . . . .479<br />
Viewing Installable Options . . . . . . . . . . . . . . . . . . . . . . . . . . . . . . . . . . . . . . . . . . . . . . . . . . . . .479<br />
Installing an Option. . . . . . . . . . . . . . . . . . . . . . . . . . . . . . . . . . . . . . . . . . . . . . . . . . . . . . . . . . . .480<br />
Viewing Installation Information . . . . . . . . . . . . . . . . . . . . . . . . . . . . . . . . . . . . . . . . . . . . . . . . .480<br />
Testing System Functions . . . . . . . . . . . . . . . . . . . . . . . . . . . . . . . . . . . . . . . . . . . . . . . . . . . . . . . . .481<br />
Table of Contents<br />
18. T1 Analyzer<br />
Making T1 <strong>Measurement</strong>s . . . . . . . . . . . . . . . . . . . . . . . . . . . . . . . . . . . . . . . . . . . . . . . . . . . . . . . .484<br />
Performing a Basic T1 Analyzer <strong>Measurement</strong> . . . . . . . . . . . . . . . . . . . . . . . . . . . . . . . . . . . . . .484<br />
13
Contents<br />
Table of Contents<br />
Setup Button Selections . . . . . . . . . . . . . . . . . . . . . . . . . . . . . . . . . . . . . . . . . . . . . . . . . . . . . . . . 484<br />
Display/Sound Button Selections . . . . . . . . . . . . . . . . . . . . . . . . . . . . . . . . . . . . . . . . . . . . . . . . .487<br />
Control Button Selections. . . . . . . . . . . . . . . . . . . . . . . . . . . . . . . . . . . . . . . . . . . . . . . . . . . . . . . 487<br />
Sample Hard Loop/End-End Full T1 BERT Test . . . . . . . . . . . . . . . . . . . . . . . . . . . . . . . . . . . . . 489<br />
Sample Loopback CSU Full T1 BERT Test . . . . . . . . . . . . . . . . . . . . . . . . . . . . . . . . . . . . . . . . . 494<br />
Sample Monitor Full T1 Test . . . . . . . . . . . . . . . . . . . . . . . . . . . . . . . . . . . . . . . . . . . . . . . . . . . . 499<br />
Sample Emulate CSU/NIU Test . . . . . . . . . . . . . . . . . . . . . . . . . . . . . . . . . . . . . . . . . . . . . . . . . . 503<br />
Sample Delay Test . . . . . . . . . . . . . . . . . . . . . . . . . . . . . . . . . . . . . . . . . . . . . . . . . . . . . . . . . . . . 508<br />
Turning on sound . . . . . . . . . . . . . . . . . . . . . . . . . . . . . . . . . . . . . . . . . . . . . . . . . . . . . . . . . . . . . 510<br />
Setting up T1 diagnostics . . . . . . . . . . . . . . . . . . . . . . . . . . . . . . . . . . . . . . . . . . . . . . . . . . . . . . . 511<br />
Patterns . . . . . . . . . . . . . . . . . . . . . . . . . . . . . . . . . . . . . . . . . . . . . . . . . . . . . . . . . . . . . . . . . . . . . . . 513<br />
<strong>Measurement</strong> Results . . . . . . . . . . . . . . . . . . . . . . . . . . . . . . . . . . . . . . . . . . . . . . . . . . . . . . . . . . . . 514<br />
Alarm indicators . . . . . . . . . . . . . . . . . . . . . . . . . . . . . . . . . . . . . . . . . . . . . . . . . . . . . . . . . . . . . . 514<br />
Results indicators . . . . . . . . . . . . . . . . . . . . . . . . . . . . . . . . . . . . . . . . . . . . . . . . . . . . . . . . . . . . . 514<br />
Status indicators . . . . . . . . . . . . . . . . . . . . . . . . . . . . . . . . . . . . . . . . . . . . . . . . . . . . . . . . . . . . . . 515<br />
<strong>Measurement</strong> results fields . . . . . . . . . . . . . . . . . . . . . . . . . . . . . . . . . . . . . . . . . . . . . . . . . . . . . . 515<br />
Testing and Fault Mitigation. . . . . . . . . . . . . . . . . . . . . . . . . . . . . . . . . . . . . . . . . . . . . . . . . . . . . 518<br />
More Information About T1 Testing . . . . . . . . . . . . . . . . . . . . . . . . . . . . . . . . . . . . . . . . . . . . . . . .523<br />
Detailed Loop Mode and Auto Configuration Descriptions. . . . . . . . . . . . . . . . . . . . . . . . . . . . . 523<br />
Terminology . . . . . . . . . . . . . . . . . . . . . . . . . . . . . . . . . . . . . . . . . . . . . . . . . . . . . . . . . . . . . . . . . 529<br />
19. W-CDMA or W-CDMA (with HSDPA) Analyzer<br />
Using the W-CDMA or W-CDMA (with HSDPA) Analyzer . . . . . . . . . . . . . . . . . . . . . . . . . . . . . 532<br />
Selecting a Reference . . . . . . . . . . . . . . . . . . . . . . . . . . . . . . . . . . . . . . . . . . . . . . . . . . . . . . . . . . 533<br />
RF Connections. . . . . . . . . . . . . . . . . . . . . . . . . . . . . . . . . . . . . . . . . . . . . . . . . . . . . . . . . . . . . . . 534<br />
Preparing to Make W-CDMA or W-CDMA (with HSDPA) Tx Analyzer <strong>Measurement</strong>s. . . . . . 535<br />
Performing a Basic W-CDMA or W-CDMA (with HSDPA) Transmitter <strong>Measurement</strong>. . . . . . . 535<br />
Multiple-View Display . . . . . . . . . . . . . . . . . . . . . . . . . . . . . . . . . . . . . . . . . . . . . . . . . . . . . . . . . 538<br />
Setting the Display Options . . . . . . . . . . . . . . . . . . . . . . . . . . . . . . . . . . . . . . . . . . . . . . . . . . . . . 544<br />
Codogram Display . . . . . . . . . . . . . . . . . . . . . . . . . . . . . . . . . . . . . . . . . . . . . . . . . . . . . . . . . . . . 545<br />
Performing a Codogram <strong>Measurement</strong>. . . . . . . . . . . . . . . . . . . . . . . . . . . . . . . . . . . . . . . . . . . . . 548<br />
Displaying the Active Code Channel Table . . . . . . . . . . . . . . . . . . . . . . . . . . . . . . . . . . . . . . . . . 549<br />
W-CDMA or W-CDMA (with HSDPA) Analyzer <strong>Measurement</strong> Settings . . . . . . . . . . . . . . . . . . . 552<br />
Setting the Channel or Frequency Step. . . . . . . . . . . . . . . . . . . . . . . . . . . . . . . . . . . . . . . . . . . . . 552<br />
Setting the Scrambling Codes. . . . . . . . . . . . . . . . . . . . . . . . . . . . . . . . . . . . . . . . . . . . . . . . . . . . 552<br />
Setting the Display Reference Level . . . . . . . . . . . . . . . . . . . . . . . . . . . . . . . . . . . . . . . . . . . . . . 553<br />
14
Contents<br />
Compensating for the Loss or Gain of External Cables, Attenuators, and Preamps. . . . . . . . . . .554<br />
Setting Average, Sweep, and Restart. . . . . . . . . . . . . . . . . . . . . . . . . . . . . . . . . . . . . . . . . . . . . . .556<br />
Setting the Active Channel Threshold Level and Auto Threshold Level . . . . . . . . . . . . . . . . . . .558<br />
Setting <strong>Measurement</strong> Time . . . . . . . . . . . . . . . . . . . . . . . . . . . . . . . . . . . . . . . . . . . . . . . . . . . . . .559<br />
Enabling PICH and S-CCPCH . . . . . . . . . . . . . . . . . . . . . . . . . . . . . . . . . . . . . . . . . . . . . . . . . . .560<br />
Adding a Marker . . . . . . . . . . . . . . . . . . . . . . . . . . . . . . . . . . . . . . . . . . . . . . . . . . . . . . . . . . . . . .561<br />
Metrics Provided by the W-CDMA or W-CDMA (with HSDPA) Analyzer . . . . . . . . . . . . . . . . . .563<br />
Interpretation of <strong>Measurement</strong> Results. . . . . . . . . . . . . . . . . . . . . . . . . . . . . . . . . . . . . . . . . . . . . . .566<br />
Table of Contents<br />
20. W-CDMA or W-CDMA (with HSDPA) Over Air<br />
Using the W-CDMA or W-CDMA (with HSDPA) Over the Air Tool. . . . . . . . . . . . . . . . . . . . . . .570<br />
Preparing to Make W-CDMA or W-CDMA (with HSDPA) Over the Air <strong>Measurement</strong>s. . . . . .571<br />
Criteria for Making Valid Over the Air <strong>Measurement</strong>s . . . . . . . . . . . . . . . . . . . . . . . . . . . . . . . .571<br />
Performing a Basic Over the Air <strong>Measurement</strong> . . . . . . . . . . . . . . . . . . . . . . . . . . . . . . . . . . . . . .573<br />
Displaying Location Information Using GPS . . . . . . . . . . . . . . . . . . . . . . . . . . . . . . . . . . . . . . . .575<br />
Setting Amplifier Capacity Metrics . . . . . . . . . . . . . . . . . . . . . . . . . . . . . . . . . . . . . . . . . . . . . . .576<br />
Multiple-View Display . . . . . . . . . . . . . . . . . . . . . . . . . . . . . . . . . . . . . . . . . . . . . . . . . . . . . . . . .577<br />
Setting the Display Options. . . . . . . . . . . . . . . . . . . . . . . . . . . . . . . . . . . . . . . . . . . . . . . . . . . . . .581<br />
Codogram Display . . . . . . . . . . . . . . . . . . . . . . . . . . . . . . . . . . . . . . . . . . . . . . . . . . . . . . . . . . . .582<br />
Performing a Codogram <strong>Measurement</strong> . . . . . . . . . . . . . . . . . . . . . . . . . . . . . . . . . . . . . . . . . . . . .585<br />
Optional W-CDMA or W-CDMA (with HSDPA) Over the Air <strong>Measurement</strong> Settings . . . . . . . . .587<br />
Displaying the Active Code Channel Table . . . . . . . . . . . . . . . . . . . . . . . . . . . . . . . . . . . . . . . . .587<br />
Setting the Channel or Frequency Step . . . . . . . . . . . . . . . . . . . . . . . . . . . . . . . . . . . . . . . . . . . . .589<br />
Setting the Scrambling Codes . . . . . . . . . . . . . . . . . . . . . . . . . . . . . . . . . . . . . . . . . . . . . . . . . . . .590<br />
Setting the Transmitter Reference. . . . . . . . . . . . . . . . . . . . . . . . . . . . . . . . . . . . . . . . . . . . . . . . .590<br />
Setting Average, Sweep, and Restart. . . . . . . . . . . . . . . . . . . . . . . . . . . . . . . . . . . . . . . . . . . . . . .592<br />
Setting the Active Channel Threshold Level and Auto Threshold Level . . . . . . . . . . . . . . . . . . .594<br />
Setting <strong>Measurement</strong> Time . . . . . . . . . . . . . . . . . . . . . . . . . . . . . . . . . . . . . . . . . . . . . . . . . . . . . .595<br />
Resetting Amplifier Capacity and Traffic Metrics . . . . . . . . . . . . . . . . . . . . . . . . . . . . . . . . . . . .596<br />
Setting Valid <strong>Measurement</strong> Limits . . . . . . . . . . . . . . . . . . . . . . . . . . . . . . . . . . . . . . . . . . . . . . . .597<br />
Setting the S-CCPCH Parameters . . . . . . . . . . . . . . . . . . . . . . . . . . . . . . . . . . . . . . . . . . . . . . . . .597<br />
Setting the PICH Parameters . . . . . . . . . . . . . . . . . . . . . . . . . . . . . . . . . . . . . . . . . . . . . . . . . . . .598<br />
Adding a Marker . . . . . . . . . . . . . . . . . . . . . . . . . . . . . . . . . . . . . . . . . . . . . . . . . . . . . . . . . . . . . .599<br />
Metrics Provided by the W-CDMA or W-CDMA (with HSDPA) Over Air <strong>Measurement</strong> . . . . . . .601<br />
Interpretation of Over the Air <strong>Measurement</strong> Results . . . . . . . . . . . . . . . . . . . . . . . . . . . . . . . . . . . .605<br />
15
Contents<br />
Table of Contents<br />
21. Safety and Regulatory Information and Specifications<br />
Safety considerations . . . . . . . . . . . . . . . . . . . . . . . . . . . . . . . . . . . . . . . . . . . . . . . . . . . . . . . . . . . . 610<br />
Safety Symbols . . . . . . . . . . . . . . . . . . . . . . . . . . . . . . . . . . . . . . . . . . . . . . . . . . . . . . . . . . . . . . . 610<br />
Safety Considerations For This Test Set. . . . . . . . . . . . . . . . . . . . . . . . . . . . . . . . . . . . . . . . . . . . 611<br />
Lifting and Handling. . . . . . . . . . . . . . . . . . . . . . . . . . . . . . . . . . . . . . . . . . . . . . . . . . . . . . . . . . . 612<br />
Electrostatic Discharge (ESD) Precautions . . . . . . . . . . . . . . . . . . . . . . . . . . . . . . . . . . . . . . . . . 613<br />
Product Markings . . . . . . . . . . . . . . . . . . . . . . . . . . . . . . . . . . . . . . . . . . . . . . . . . . . . . . . . . . . . . 614<br />
Batteries: Safe Handling and Disposal . . . . . . . . . . . . . . . . . . . . . . . . . . . . . . . . . . . . . . . . . . . . . 615<br />
Certification and Compliance Statements . . . . . . . . . . . . . . . . . . . . . . . . . . . . . . . . . . . . . . . . . . . . 621<br />
Certification . . . . . . . . . . . . . . . . . . . . . . . . . . . . . . . . . . . . . . . . . . . . . . . . . . . . . . . . . . . . . . . . . 621<br />
Manufacturer’s Declaration . . . . . . . . . . . . . . . . . . . . . . . . . . . . . . . . . . . . . . . . . . . . . . . . . . . . . 621<br />
Declaration of Conformity for <strong>Agilent</strong> <strong>E7495A</strong>. . . . . . . . . . . . . . . . . . . . . . . . . . . . . . . . . . . . . . 622<br />
Declaration of Conformity for <strong>Agilent</strong> E7495B . . . . . . . . . . . . . . . . . . . . . . . . . . . . . . . . . . . . . . 623<br />
Compliance with German Noise Requirements . . . . . . . . . . . . . . . . . . . . . . . . . . . . . . . . . . . . . . 624<br />
Compliance with Canadian EMC Requirements . . . . . . . . . . . . . . . . . . . . . . . . . . . . . . . . . . . . . 624<br />
Disposal of Batteries. . . . . . . . . . . . . . . . . . . . . . . . . . . . . . . . . . . . . . . . . . . . . . . . . . . . . . . . . . . 624<br />
<strong>E7495A</strong>/B Base Station Test Set Specifications. . . . . . . . . . . . . . . . . . . . . . . . . . . . . . . . . . . . . . . . 625<br />
Battery Pack Specifications . . . . . . . . . . . . . . . . . . . . . . . . . . . . . . . . . . . . . . . . . . . . . . . . . . . . . 637<br />
22. Connector Care<br />
Using, Inspecting, and Cleaning RF Connectors . . . . . . . . . . . . . . . . . . . . . . . . . . . . . . . . . . . . . . . 640<br />
Repeatability . . . . . . . . . . . . . . . . . . . . . . . . . . . . . . . . . . . . . . . . . . . . . . . . . . . . . . . . . . . . . . . . . 640<br />
RF Cable and Connector Care . . . . . . . . . . . . . . . . . . . . . . . . . . . . . . . . . . . . . . . . . . . . . . . . . . .640<br />
Proper Connector Torque . . . . . . . . . . . . . . . . . . . . . . . . . . . . . . . . . . . . . . . . . . . . . . . . . . . . . . . 641<br />
Connector Wear and Damage . . . . . . . . . . . . . . . . . . . . . . . . . . . . . . . . . . . . . . . . . . . . . . . . . . . .642<br />
Cleaning Procedure. . . . . . . . . . . . . . . . . . . . . . . . . . . . . . . . . . . . . . . . . . . . . . . . . . . . . . . . . . . . 642<br />
23. Returning the Test Set for Service<br />
Adjustment, Maintenance, or Repair of the Base Station Test Set. . . . . . . . . . . . . . . . . . . . . . . . . . 644<br />
Returning your Base Station Test Set for Service . . . . . . . . . . . . . . . . . . . . . . . . . . . . . . . . . . . . . . 645<br />
Warranty . . . . . . . . . . . . . . . . . . . . . . . . . . . . . . . . . . . . . . . . . . . . . . . . . . . . . . . . . . . . . . . . . . . . 645<br />
Preparing the <strong>Agilent</strong> <strong>E7495A</strong>/B for Shipping. . . . . . . . . . . . . . . . . . . . . . . . . . . . . . . . . . . . . . . 645<br />
24. Glossary<br />
Glossary of Abbreviations and Acronyms Used . . . . . . . . . . . . . . . . . . . . . . . . . . . . . . . . . . . . . . . 650<br />
16
Contents<br />
25. Copyright Information<br />
Table of Contents<br />
17
Contents<br />
Table of Contents<br />
18
1 Getting Started<br />
“Introduction” on page 20<br />
“Unpacking the <strong>E7495A</strong>/B Test Set” on page 22<br />
“<strong>E7495A</strong>/B Cables, Connectors, and Accessories” on page 24<br />
“Test set options” on page 28<br />
“Your First 15 Minutes with the <strong>E7495A</strong>/B” on page 33<br />
“Using the Backpack” on page 41<br />
“Contacting <strong>Agilent</strong> <strong>Technologies</strong>” on page 43<br />
Getting Started<br />
19
Getting Started<br />
Introduction<br />
Introduction<br />
The <strong>E7495A</strong>/B Base Station Test Set is designed to simplify the job of installing and<br />
maintaining base stations. By combining all important base station diagnostic tools<br />
in one rugged instrument, the <strong>E7495A</strong>/B lets you get your work done in the shortest<br />
time at each base station.<br />
Basic test functionality includes:<br />
Getting Started<br />
• Spectrum Analysis<br />
• Two Port Insertion Loss<br />
• One Port Insertion Loss<br />
• Return Loss<br />
• Distance to Fault<br />
You can optionally add these measurements:<br />
• Adjacent Channel Power<br />
• CDMA Over Air<br />
• CDMA Analyzer<br />
• WCDMA Analyzer<br />
• WCDMA Over Air<br />
• HSDPA for WCDMA Analyzer and WCDMA Over Air<br />
• 1xEV-DO Analyzer and 1xEVDO Over Air<br />
• GSM Analyzer<br />
• GSM/EDGE Analyzer<br />
• Channel Scanner<br />
• T1<br />
• E1<br />
• CW/cdmaOne/cdma2000/1xEV-DO Reverse Link Signal Generator<br />
• Power Meter<br />
• Test software and utilities<br />
20 Chapter 1
Getting Started<br />
Introduction<br />
• DC Bias output (internal, available on the E7495B only)<br />
You can store trace data from Return Loss and Distance to Fault measurements on a<br />
Windows XP PC for later analysis. This analysis software is a free download from<br />
the <strong>Agilent</strong> web site at http://www.agilent.com/find/e7495_software.<br />
In Getting Started, you will learn how to set up the <strong>E7495A</strong>/B, and you will learn to<br />
perform one basic measurement to start getting familiar with the range of tools<br />
contained in the test set.<br />
If you are a new user, also recommended is <strong>E7495A</strong> Quick Basics, an HTML-based<br />
tutorial available on the CD that comes with the test set.<br />
After the Getting Started chapter, you will find, in alphabetical order, one chapter on<br />
each <strong>E7495A</strong>/B measurement. General information on batteries, caring for the<br />
<strong>E7495A</strong>/B, and how to return the instrument for service follows.<br />
Getting Started<br />
Chapter 1 21
Getting Started<br />
Unpacking the <strong>E7495A</strong>/B Test Set<br />
Unpacking the <strong>E7495A</strong>/B Test Set<br />
Getting Started<br />
Unpack and inspect the shipping container and its contents thoroughly to ensure that<br />
nothing was damaged during shipment.<br />
If the contents are damaged or defective, contact your nearest <strong>Agilent</strong> <strong>Technologies</strong><br />
sales and service office. Keep the shipping materials for the carrier’s inspection.<br />
Verify that all the parts were included in the shipping container.<br />
The basic test set package for the <strong>E7495A</strong> includes:<br />
• <strong>E7495A</strong> Base Station Test Set<br />
• Shoulder strap<br />
• One battery<br />
• Two 10 dB pads<br />
• AC/DC converter<br />
• Two N-to-N barrels<br />
• Open connector (50 Ω)<br />
• Short connector (50 Ω)<br />
• Load connector (50 Ω)<br />
• GPS antenna<br />
• 64 MB PCMCIA memory card<br />
• CD ROM containing electronic (PDF) version of <strong>Measurement</strong> <strong>Guide</strong>, <strong>E7495A</strong><br />
Quick Basics tutorial, and application notes<br />
• Accessories case<br />
• Two 60-centimeter (2-foot) cables<br />
• One 3-meter (10-foot) cable<br />
• Two N-to-11 millimeter (N-to-7/16 inch) connectors<br />
• Backpack<br />
• High power attenuator<br />
• <strong>Measurement</strong> <strong>Guide</strong> (this manual)<br />
• Backpack loading card<br />
22 Chapter 1
Getting Started<br />
Unpacking the <strong>E7495A</strong>/B Test Set<br />
The standard test set package for the E7495B includes:<br />
• E7495B Base Station Test Set<br />
• Shoulder strap<br />
• One battery<br />
• Two 10 dB pads<br />
• AC/DC converter<br />
• Two N-to-N barrels<br />
• Open connector (50 Ω)<br />
• Short connector (50 Ω)<br />
• Load connector (50 Ω)<br />
• GPS antenna<br />
• 64 MB PCMCIA memory card<br />
• CD ROM containing electronic (PDF) version of <strong>Measurement</strong> <strong>Guide</strong>, <strong>E7495A</strong><br />
Quick Basics tutorial, and application notes<br />
• One 3-meter (10-foot) cable<br />
• Two 60-centimeter (2-foot) cables<br />
• Two N-to-11 millimeter (N-to-7/16 inch) connectors<br />
• Coax Accessories Case<br />
E7495B-800 Base Station Test Set accessories kit contains, in addition to the<br />
standard package:<br />
Getting Started<br />
• Backpack<br />
• High power attenuator<br />
• <strong>Measurement</strong> <strong>Guide</strong> (this manual)<br />
• Backpack loading card<br />
Chapter 1 23
Getting Started<br />
Unpacking the <strong>E7495A</strong>/B Test Set<br />
<strong>E7495A</strong>/B Cables, Connectors, and Accessories<br />
Part Number Picture Description<br />
0950-4404 AC/DC adapter 24 VDC<br />
100W<br />
(Supplied as standard)<br />
Getting Started<br />
0950-4409 PCMCIA 64MB Flash<br />
memory card<br />
(Supplied as standard)<br />
0955-1458<br />
(<strong>E7495A</strong>)<br />
0955-1599<br />
(E7495B)<br />
High power attenuator<br />
(40 dB 100W)<br />
(Supplied as standard with<br />
<strong>E7495A</strong>)<br />
(Supplied as part of Options<br />
800 and 803 with E7495B)<br />
1150-2085 GPS antenna, SMA M<br />
(Supplied as standard)<br />
1250-2908 Adapter, N (Female) to<br />
11 millimeter (7/16 inch)<br />
(Male)<br />
(Supplied as standard)<br />
24 Chapter 1
Getting Started<br />
Unpacking the <strong>E7495A</strong>/B Test Set<br />
Part Number Picture Description<br />
1250-2810 Adapter, N (Female) to<br />
11 millimeter (7/16 inch)<br />
(Female)<br />
(Supplied as standard)<br />
1420-0883 Battery<br />
(Supplied as standard. Also<br />
supplied as Option 820)<br />
8120-8862<br />
Quantity 2<br />
Cable, 60-centimeter (2-ft)<br />
N(m)-N(m)<br />
(Supplied as standard)<br />
Getting Started<br />
8121-1315 Cable, 3-meter (10-ft)<br />
N(m)-N (m)<br />
(Supplied as standard)<br />
E7495-20165 Shoulder strap<br />
(Supplied as standard)<br />
Chapter 1 25
Getting Started<br />
Unpacking the <strong>E7495A</strong>/B Test Set<br />
Part Number Picture Description<br />
E7495-80053 Soft Carry Bag<br />
(Supplied as Option 801)<br />
Getting Started<br />
E7495-80014 Backpack<br />
(Supplied as standard with<br />
<strong>E7495A</strong>)<br />
(Supplied as part of Options<br />
800 and 802 with E7495B)<br />
26 Chapter 1
Getting Started<br />
Unpacking the <strong>E7495A</strong>/B Test Set<br />
Part Number Picture Description<br />
E7495-60059<br />
Picture not shown<br />
Coax Accessories<br />
Case, plastic and foam<br />
(5000-0911)<br />
Open, 50 ohm, N-type male<br />
(1250-3421)<br />
Short, 50 ohm, N-type male<br />
(1250-3424)<br />
Getting Started<br />
Load, 50 ohm, N-type male<br />
(1250-3423)<br />
Attenuator, fixed 6 GHz<br />
max 10 dB N type<br />
(0955-1534)<br />
Quantity - 2<br />
Adapter, 50 ohm,<br />
N-type F-F<br />
(1250-3422)<br />
Quantity - 2<br />
Chapter 1 27
Getting Started<br />
Unpacking the <strong>E7495A</strong>/B Test Set<br />
Test set options<br />
Option<br />
Number<br />
Description (as printed<br />
on the analyzer rear<br />
panel)<br />
Detailed Description<br />
Getting Started<br />
Option 200 cdmaOne / CDMA 2000<br />
Analyzer<br />
Option 205<br />
1xEV-DO Analyzer &<br />
Over Air Test<br />
Option 210 cdmaOne / CDMA 2000<br />
Over Air Test<br />
Option 220 Channel Scanner Channel Scanner<br />
Option 230 GSM Analyzer GSM Analyzer<br />
cdmaOne / CDMA 2000 Analyzer, includes:<br />
• CA-ASSY RF 50 ohm, BNC, male to male<br />
cable 3-meter (10-ft) (pn 8121-1230)<br />
1xEV-DO Analyzer & Over Air Test<br />
(Source requires Option 510 CW & Complex<br />
Modulation Signal Generator), includes:<br />
• CA-ASSY RF 50 ohm, BNC, male to male<br />
cable 3-meter (10-ft) (pn 8121-1230)<br />
cdmaOne/CDMA2000 over-the-air (OTA) test<br />
(Requires Option 200 cdmaOne / CDMA 2000<br />
Analyzer; Options 810, 811, or 812 are<br />
recommended)<br />
Option 235 EDGE Analyzer Adds EDGE analysis to GSM Analyzer<br />
(Requires Option 230 - GSM Analyzer)<br />
Option 240 W-CDMA Analyzer W-CDMA Analyzer<br />
Option 245<br />
HSDPA Analyzer &<br />
HSDPA Over Air Test<br />
Adds HSDPA Analysis and Over Air test<br />
functionality to W-CDMA Analyzer and<br />
W-CDMA Over Air Test<br />
(Requires Option 240 - W-CDMA Analyzer for<br />
analyzer functionality;)<br />
(Requires Options 240 - W-CDMA Analyzer and<br />
250 - W-CDMA OTA for over-the-air<br />
functionality)<br />
28 Chapter 1
Getting Started<br />
Unpacking the <strong>E7495A</strong>/B Test Set<br />
Option<br />
Number<br />
Description (as printed<br />
on the analyzer rear<br />
panel)<br />
Detailed Description<br />
Option 250 W-CDMA Over Air Test W-CDMA Over Air Test Analyzer<br />
(Requires Option 240 - W-CDMA Analyzer)<br />
(Option 813 European W-CDMA antenna and<br />
pre-selector filter is recommended)<br />
Option 270 Interference Analyzer Interference Analyzer<br />
Option 300 DC Bias DC Bias<br />
(Available on the E7495B Analyzer only)<br />
Option 330 Nortel CDMA Software Nortel CDMA Base Station Test Software<br />
(Requires Option 200 cdmaOne/CDMA2000<br />
OTA, Option 510 CW & complex modulation<br />
source, and Option 600 Power Meter)<br />
Option 500 CW Signal Generator CW Signal Generator<br />
Option 510<br />
Option 51B<br />
Option 50C<br />
CW & Complex<br />
Modulation Signal<br />
Generator<br />
CW/cdmaOne/CDMA2000 reverse link signal<br />
generator<br />
Return to <strong>Agilent</strong> for repair<br />
Return to <strong>Agilent</strong> for calibration<br />
Option 600 Power Meter Power Meter<br />
(Requires 8482A/8481A power sensor), includes:<br />
Getting Started<br />
• One 3-meter (10 ft) power sensor cable<br />
(pn E9288-60002)<br />
Option 700 T1 Analyzer T1 Analyzer, includes:<br />
• Y-bantams to alligator, 3-meter (10-foot)<br />
cable (pn 8121-1026)<br />
• Y-bantams to RJ-45, 3-meter (10-foot) cable<br />
(pn 8121-1025)<br />
• Y-bantams to Y-bantams, 3-meter (10-foot)<br />
cable (pn 8121-1024)<br />
Chapter 1 29
Getting Started<br />
Unpacking the <strong>E7495A</strong>/B Test Set<br />
Option<br />
Number<br />
Description (as printed<br />
on the analyzer rear<br />
panel)<br />
Detailed Description<br />
Option 710 E1 Analyzer E1 Analyzer, includes:<br />
• Balun, 75 - 120 ohm adapter (0950-4551)<br />
• 75 ohm BNC, four connectors, 3-meter<br />
(10-foot) cable (quantity 2) (8121-1228)<br />
Getting Started<br />
Option 800<br />
Option 801<br />
Option 802<br />
Option 803<br />
Option 805<br />
Option 810<br />
Accessory Package - includes backpack, high<br />
power attenuator, and paper manual<br />
Soft Carry Bag<br />
Backpack<br />
40 dB Attenuator<br />
<strong>Measurement</strong> <strong>Guide</strong> for the <strong>Agilent</strong> <strong>E7495A</strong>/B<br />
Base Station Test Set (this manual)<br />
Cellular antenna and pre-selector filter, includes:<br />
Option 811<br />
Option 812<br />
• Cellular antenna (pn 1150-2061)<br />
• preselector filter (pn 0955-1527<br />
• RF TNC to N connector (pn 1200-1897) for<br />
Option 210 - cdmaOne / CDMA 2000 Over<br />
Air Test<br />
PCS Antenna and pre-selector filter, includes:<br />
• PCS antenna (pn 1150-5059)<br />
• preselector filter (pn 0955-1526)<br />
• RF TNC to N connector (pn 1200-1897) for<br />
Option 210 - cdmaOne / CDMA 2000 Over<br />
Air Test<br />
Korean PCS Antenna and pre-selector filter,<br />
includes:<br />
• Korean PCS antenna (pn 1150-5059)<br />
• preselector filter (pn 0955-1590)<br />
• RF TNC to N connector (pn 1200-1897) for<br />
Option 210 - cdmaOne / CDMA 2000 Over<br />
Air Test<br />
30 Chapter 1
Getting Started<br />
Unpacking the <strong>E7495A</strong>/B Test Set<br />
Option<br />
Number<br />
Option 813<br />
Description (as printed<br />
on the analyzer rear<br />
panel)<br />
Detailed Description<br />
W-CDMA antenna and pre-selector filter,<br />
includes:<br />
Option 820<br />
Option<br />
8482A<br />
Option 840<br />
Option 900<br />
Option 901<br />
Option 902<br />
Option 903<br />
Option 906<br />
Option 912<br />
Option 917<br />
Option 918<br />
• W-CDMA antenna 2.1-2.17 GHz<br />
(pn E6455-80003)<br />
• preselector filter (pn 0955-1667)<br />
• RF TNC to N connector (pn 1200-1897) for<br />
Option 210 - cdmaOne / CDMA 2000 Over<br />
Air Test<br />
External charger/battery pack/DC adapter,<br />
includes:<br />
• Battery 10.8V 6A-HR LI-ION<br />
(pn 1420-0883)<br />
• External power supply AC/DC adapter<br />
24 VDC 100 W (pn 0950-4404)<br />
• DC car adapter DC to DC adaptor output<br />
19 VDC 70 W (pn 0950-4412)<br />
• dual battery charger, 12 V AT 1 A<br />
(pn 0950-4276)<br />
Power Sensor, 100 kHz to 4.2 GHz:<br />
Hard transit case (pn E7495-80016)<br />
UK power cord<br />
AUS/NZ/CH power cord<br />
Euro power cord<br />
US power cord<br />
Swiss power cord<br />
Denmark power cord<br />
So Af/India power cord<br />
Japan power cord<br />
Getting Started<br />
Chapter 1 31
Getting Started<br />
Unpacking the <strong>E7495A</strong>/B Test Set<br />
Option<br />
Number<br />
Description (as printed<br />
on the analyzer rear<br />
panel)<br />
Detailed Description<br />
Getting Started<br />
Option 919<br />
Option 920<br />
Option 921<br />
Option 922<br />
Option 927<br />
Israel power cord<br />
Argentinean power cord<br />
Chilean power cord<br />
China power cord<br />
Thailand power cord<br />
For instructions on how to upgrade your analyzer, please see “Installing an Option”<br />
on page 480.<br />
32 Chapter 1
Getting Started<br />
Your First 15 Minutes with the <strong>E7495A</strong>/B<br />
Your First 15 Minutes with the <strong>E7495A</strong>/B<br />
Spend 15 minutes getting acquainted with the test set:<br />
• “Get to Know the Layout of the <strong>E7495A</strong>/B” on page 34<br />
• “Install a Battery” on page 37<br />
• “Practice Using the Three-way Power Button” on page 37<br />
• “Make Your First <strong>Measurement</strong> (Two Port Insertion Loss)” on page 38<br />
Your <strong>E7495A</strong>/B analyzer is fitted with a transflective screen, which is viewable<br />
under all lighting conditions. If you are using your <strong>E7495A</strong>/B analyzer in bright<br />
lighting conditions, for example, in direct sunlight, avoid the temptation to shield<br />
the display from the sunlight. In bright lighting conditions, the display is brighter<br />
and easier to read when you allow the light to fall directly on the screen.<br />
Getting Started<br />
CAUTION<br />
The maximum power for the RF In port and the RF Out/SWR port of the test set is<br />
+20 dBm (100 mW). When directly coupled to a base station, the test set can be<br />
damaged by excessive power applied to any of these ports.<br />
To prevent damage in most situations when you directly couple the test set to a base<br />
station, use the high power attenuator between the test set and the BTS.<br />
Chapter 1 33
Getting Started<br />
Your First 15 Minutes with the <strong>E7495A</strong>/B<br />
Get to Know the Layout of the <strong>E7495A</strong>/B<br />
6<br />
Getting Started<br />
5<br />
1<br />
2<br />
3<br />
4<br />
34 Chapter 1
Getting Started<br />
Your First 15 Minutes with the <strong>E7495A</strong>/B<br />
Number<br />
Description<br />
1 Power button. Powers the test set on and off, and puts it into standby<br />
mode.<br />
• To power on, press the power button. When the test set is on, the<br />
right LED is lit.<br />
• To put into standby mode while the power is on, press the button<br />
for about 1 second. In standby mode—which conserves the battery<br />
and provides quicker startup—the left LED is lit. For more<br />
information about the power button states, refer to “Practice Using<br />
the Three-way Power Button” on page 37.<br />
• To power off, press the button and hold down until you see both<br />
LEDs go out. This takes approximately 5 seconds.<br />
2 • Preset. Recalls the power-up state, applying <strong>Agilent</strong> defaults or the<br />
defaults you define using the Save State button.<br />
• Brightness.Changes the brightness of the display in four<br />
increments. To increase or decrease the brightness, press the button<br />
repeatedly.<br />
• Help. Displays online help.<br />
• ESC/Lcl. Stops the active function and clears the active function<br />
text from the display. Pressing ESC/Lcl after the test set has been<br />
placed in remote mode switches to local mode and enables<br />
front-panel control.<br />
• Mode. Displays a menu of measurement modes.<br />
• Save Data. Saves the non-trace measurement data to either a<br />
PCMCIA or CompactFlash card.<br />
• Save State. Saves the state of all measurement parameters to<br />
non-volatile memory in the test set. You can save multiple states,<br />
each with its own name.<br />
• System. Displays menu of non-measurement operations including<br />
configuration, system status updates, data manipulation, and basic<br />
system functions testing.<br />
• Print Screen. Prints the current screen image to either a PCMCIA<br />
or CompactFlash card.<br />
• Recall State. Recalls the state of all measurement parameters you<br />
saved in non-volatile memory using the Save State button.<br />
3 Numeric keypad. Used for entry of values for many test parameters.<br />
Getting Started<br />
Chapter 1 35
Getting Started<br />
Your First 15 Minutes with the <strong>E7495A</strong>/B<br />
Number<br />
Description<br />
Getting Started<br />
4 • Rotary knob. Allows incremental changes to values for such<br />
things as carrier frequency, reference level, and marker positions.<br />
Rotate clockwise to increase values, counterclockwise to decrease<br />
values. The speed at which you turn the knob affects the rate at<br />
which the values are changed.<br />
• Down Arrow. Decreases the active function value. The increment<br />
size depends upon the current measurement. Each press results in a<br />
single increment change. For those parameters with fixed values,<br />
the next value in a sequence is selected each time you press the<br />
button.<br />
• Up Arrow. Increases the active function value.<br />
5 Battery LEDs. Show remaining charge capacity and charging status of<br />
batteries. For details, see “Viewing Battery Status” on page 165.<br />
6 menu keys. Allow you to select measurement modes and other settings<br />
for configuring and performing measurements, and for other<br />
<strong>E7495A</strong>/B functions.<br />
36 Chapter 1
Getting Started<br />
Your First 15 Minutes with the <strong>E7495A</strong>/B<br />
Install a Battery<br />
Getting Started<br />
Step<br />
Notes<br />
1 Open the battery door. Turn the latch counterclockwise several<br />
times until loose. Then pull the battery door<br />
open.<br />
2 Insert the battery. Insert one or two batteries.<br />
3 Close the battery door. Turn the latch clockwise until tight to<br />
secure the battery door.<br />
For more information about the batteries, including battery installation and removal,<br />
refer to Chapter 6 , “Working with Batteries.”<br />
Practice Using the Three-way Power Button<br />
The <strong>E7495A</strong>/B Test Set power button is designed to provide additional convenience<br />
when you want to pause between measurements, then quickly start again. Besides<br />
Chapter 1 37
Getting Started<br />
Your First 15 Minutes with the <strong>E7495A</strong>/B<br />
working like a standard on-off button, the <strong>E7495A</strong>/B power button also lets you put<br />
the test set into standby mode, which conserves battery usage and provides a quick<br />
startup when you are ready to resume measurements.<br />
Step<br />
Notes<br />
Getting Started<br />
To power on the test set, press<br />
the button.<br />
To put the test set into standby<br />
mode while the power is on,<br />
press the button briefly for about<br />
a second.<br />
To power off the test set, press<br />
the button and hold until both<br />
LEDs above the button go off.<br />
This usually takes about 5<br />
seconds.<br />
As soon as you press the power button, the<br />
right LED goes on. The full power-up<br />
sequence can take up to 2 minutes.<br />
When in standby mode, the left LED is lit.<br />
When you power on the test set again, the<br />
startup takes only about 30 seconds.<br />
When you hold down the button, at first<br />
both LEDs are lit. After about 5 seconds,<br />
both go out.<br />
Make Your First <strong>Measurement</strong> (Two Port Insertion Loss)<br />
The two port insertion loss measurement is perhaps the most fundamental test set<br />
measurement. It quantifies exactly how much loss is incurred as a signal travels<br />
through a cable or other device. You must account for the signal loss of a connecting<br />
cable in order to produce accurate results for a variety of other measurements.<br />
You can perform this measurement using any of the following devices:<br />
Needed for normalization:<br />
• 60-centimeter (2-foot) normalization jumper cable<br />
• Two 10 dB pads<br />
Devices whose insertion loss you measure:<br />
• 60-centimeter (2-foot) test cable<br />
• 3-meter (10-foot) test cable<br />
• High power attenuator<br />
• N-N barrel<br />
38 Chapter 1
Getting Started<br />
Your First 15 Minutes with the <strong>E7495A</strong>/B<br />
Step<br />
Notes<br />
1 Select two port insertion loss.<br />
a. Mode<br />
b. [Antenna/Cable]<br />
c. [Two Port Insertion Loss]<br />
2 Enter the start frequency.<br />
a. Press [Start Freq] if the menu key is not<br />
already highlighted.<br />
b. Enter the frequency using the numeric<br />
keypad.<br />
c. Press [Hz], [kHz], [MHz], or [GHz].<br />
3 Enter the stop frequency.<br />
In this and other procedures,<br />
front-panel buttons are<br />
indicated with bold text, menu<br />
keys with brackets.<br />
Getting Started<br />
a. Press [Stop Freq].<br />
b. Enter the frequency using the numeric<br />
keypad.<br />
c. Press [Hz], [kHz], [MHz], or [GHz].<br />
4 Normalize the test set.<br />
a. [Normalize]<br />
b. Follow the Normalize Wizard.<br />
5 Attach the device whose insertion loss you<br />
want to measure between the two 10 dB pads.<br />
The Normalize Wizard, which<br />
is built into the test set,<br />
displays instructions to guide<br />
you through normalization.<br />
Chapter 1 39
Getting Started<br />
Your First 15 Minutes with the <strong>E7495A</strong>/B<br />
Step<br />
Notes<br />
Getting Started<br />
Insertion loss measurement of high power attenuator and cable.<br />
For more information on making insertion lose measurements, see “Two Port<br />
Insertion Loss” on page 123.<br />
40 Chapter 1
Getting Started<br />
Using the Backpack<br />
Using the Backpack<br />
The <strong>E7495A</strong>/B backpack (Option 802, and included as part of Option 800) is<br />
ergonomically designed to hold the test set as well as its cables and accessories. The<br />
backpack allows you to carry all your gear up to a base station while keeping your<br />
hands free.<br />
Getting Started<br />
WARNING<br />
To avoid overheating, always disconnect the test set from the AC adapter<br />
before storing the test set in the backpack.<br />
If you prefer to leave the test set connected to the AC adapter while inside the<br />
backpack, you can disconnect the AC adapter from its power source to prevent<br />
overheating.<br />
Chapter 1 41
Getting Started<br />
Using the Backpack<br />
What Goes Where in the Backpack<br />
Getting Started<br />
42 Chapter 1
Getting Started<br />
Contacting <strong>Agilent</strong> <strong>Technologies</strong><br />
Contacting <strong>Agilent</strong> <strong>Technologies</strong><br />
For help with product selection and configuration, technical and application<br />
assistance, consulting and integration services, rental and leasing options,<br />
refurbished equipment, product purchases, repair, calibration, education and training<br />
please go to http://www.agilent.com/find/assist<br />
If you do not have access to the Internet, call the appropriate number shown in<br />
below or contact your local <strong>Agilent</strong> <strong>Technologies</strong> Sales and Service Office.<br />
Americas +1-800-829-4444<br />
Australia +1-800-629-485<br />
Europe, Africa, Middle East +32 (0)2 404-9340<br />
Singapore +1-800-375-8100<br />
Getting Started<br />
More Information from <strong>Agilent</strong><br />
For more information about <strong>Agilent</strong>'s <strong>E7495A</strong>/B Base Station Test Set, go to<br />
http://www.agilent.com/find/e7495b<br />
For more information about <strong>Agilent</strong>'s solutions for the communications industry,<br />
visit our web site at http://www.agilent.com/comms/industry<br />
<strong>E7495A</strong>/B Base Station Test Set Product Updates<br />
For information about <strong>E7495A</strong>/B Base Station Test Set updates, go to<br />
http://www.agilent.com/find/e7495b<br />
Chapter 1 43
Getting Started<br />
Contacting <strong>Agilent</strong> <strong>Technologies</strong><br />
Getting Started<br />
44 Chapter 1
2 One Port Insertion Loss<br />
“Measuring One Port Insertion Loss” on page 46<br />
“Calibration - Minimizing your Workload” on page 46<br />
“Performing (and Calibrating) a Basic One Port Insertion Loss measurement” on<br />
page 47<br />
“Clearing Calibration” on page 50<br />
“Displaying Location Information Using GPS” on page 51<br />
“Setting Average, Sweep, and Restart” on page 52<br />
“Adding a Marker” on page 55<br />
“Setting One Port Insertion Loss Interference Rejection” on page 56<br />
“Setting the Pass/Fail Limits” on page 57<br />
One Port Insertion Loss<br />
45
One Port Insertion Loss<br />
Measuring One Port Insertion Loss<br />
Measuring One Port Insertion Loss<br />
The one port insertion loss measurement allows you to quantify signal loss in a<br />
cable or other device without connecting both ends of the cable or device to the test<br />
set. This measurement can be especially useful in measuring the loss of a feedline<br />
connected to the antenna on a tower.<br />
This measurement, however, is less accurate than Two Port Insertion Loss.<br />
Therefore, when it’s practical to connect both ends of a device to the test set—for<br />
example, when measuring your cables or a high power attenuator—it is better to use<br />
Two Port Insertion Loss.<br />
NOTE<br />
The test signal emitted from the SWR port is a sine wave, swept from the starting<br />
frequency to the stop frequency. When testing cables that are attached to antennas,<br />
test signals are radiated, and these test signals can cause interference. Verify that the<br />
signal used for the test cannot cause interference to another antenna.<br />
Calibration - Minimizing your Workload<br />
One Port Insertion Loss<br />
The One-Port Insertion Loss calibration is the same calibration as performed for<br />
the Return Loss and Distance to Fault (when it is performed with Frequency<br />
Range set to manual) measurements. If you have already calibrated for any of these<br />
three measurements, the calibration will apply to the other two measurements and<br />
“Calibrated” (together with the frequency range over which the calibration was<br />
performed) will be displayed on top left of the screen for all three.<br />
The Distance to Fault calibration (when it is performed with Frequency Range set<br />
to Auto) is only valid for other Distance to Fault measurements that are also<br />
performed with Frequency Range set to Auto, and then only if the calibrated<br />
frequency range falls within the previously calibrated frequency range.<br />
If you have not previously performed a calibration, the word “Uncalibrated” appears<br />
at the top left of the measurement screen.<br />
It is important that you keep the calibration frequency range as close as possible to<br />
the actual sweep frequencies you intend using for the measurement or<br />
measurements. Calibrating over a large frequency range (for example, 1 GHz) when<br />
you only intend measuring over a much smaller range (a few kHz, for example) will<br />
induce inaccuracies into your results.<br />
If you plan to perform a combination of One-Port Insertion Loss measurement,<br />
Return Loss measurement, and Distance to Fault measurements using a frequency<br />
46 Chapter 2
One Port Insertion Loss<br />
Measuring One Port Insertion Loss<br />
range that you will set manually, you can perform one calibration for all three<br />
measurements as long as you calibrate over a frequency range that incorporates all<br />
three of your measurements, and as long as your cables do not change. For this<br />
reason, if you are doing Distance to Fault measurements (using a frequency range<br />
that you have set manually) as well as any type of Insertion Loss measurement,<br />
<strong>Agilent</strong> recommends that you select your cable type before performing calibrations.<br />
Press [Mode], [Antenna/Cable], [Distance to Fault], [Cable Type] to set the cable<br />
type.<br />
The calibration remains valid until you do any one of the following:<br />
• set the Distance to Fault frequency range to Auto. Note that the calibration will<br />
become valid again as soon as you switch from Auto back to Manual Frequency<br />
Range.<br />
• power off the test set<br />
• change the start frequency to a new value that lies below the start frequency of<br />
your previous calibration<br />
• change the stop frequency to a new value that lies above the stop frequency of<br />
your previous calibration<br />
• change any of the jumper leads that you used for the calibration<br />
• change any of the attenuators that you used for the calibration<br />
• change the type of cable specified under the [Cable Type] menu key.<br />
Performing (and Calibrating) a Basic One Port Insertion Loss<br />
measurement<br />
Select the desired frequency range and calibrate the test set for a One Port Insertion<br />
Loss measurement. To calibrate your test set, you will need the following pieces of<br />
equipment:<br />
One Port Insertion Loss<br />
• Cable, N (male) to N (male), part number 8120-8862 or 8121-1315<br />
• Calibrated 50 ohm Open connector, part number 1250-3421<br />
• Calibrated 50 ohm Short connector, part number 1250-3424<br />
• Calibrated 50 ohm Load connector, part number 1250-3423<br />
NOTE<br />
All four of these required accessories are supplied as standard with your <strong>Agilent</strong><br />
<strong>E7495A</strong>/B test set.<br />
Chapter 2 47
One Port Insertion Loss<br />
Measuring One Port Insertion Loss<br />
Step<br />
Notes<br />
1 Mode<br />
2 [Antenna/Cable]<br />
3 [One Port Insertion Loss] The one port insertion loss<br />
measurement takes a few seconds to<br />
load.<br />
4 [Start Freq]<br />
5 Enter the start frequency using the<br />
numeric keypad.<br />
6 [Hz], [kHz], [MHz], or [GHz]<br />
7 [Stop Freq]<br />
8 Enter the stop frequency using the<br />
keypad.<br />
9 [Hz], [kHz], [MHz], or [GHz]<br />
The stop frequency should be larger<br />
than the start frequency.<br />
One Port Insertion Loss<br />
48 Chapter 2
One Port Insertion Loss<br />
Measuring One Port Insertion Loss<br />
Step<br />
Notes<br />
10 Check whether your analyzer has<br />
already been calibrated over the<br />
frequency range that you wish to<br />
measure. If it is already calibrated<br />
over the correct frequency range, you<br />
can omit the next step (Step 11) and<br />
go straight to Step 12.<br />
11 If your analyzer is uncalibrated, or<br />
has been calibrated over an<br />
unsuitable frequency, press<br />
[Calibrate]<br />
12 Connect the antenna feedline and<br />
antenna.<br />
The analyzer displays its calibration<br />
status on the top left of the<br />
measurement screen. You only need<br />
to re calibrate if you:<br />
• power off the test set<br />
• change the start frequency to a<br />
new value that lies below the start<br />
frequency of your previous<br />
calibration<br />
• change the stop frequency to a<br />
new value that lies above the stop<br />
frequency of your previous<br />
calibration<br />
• change any of the jumper leads<br />
that you used for the calibration<br />
• change any of the attenuators that<br />
you used for the calibration<br />
• change the type of cable specified<br />
under the [Cable Type] menu key<br />
in the Distance to Fault<br />
measurement.<br />
For more information, see<br />
“Calibration - Minimizing your<br />
Workload” on page 46.<br />
Follow the instructions of the<br />
Calibration Wizard. The test set will<br />
calibrate over the desired frequency<br />
range.<br />
Connect the antenna feedline cable to<br />
the RFout/SWR port.<br />
One Port Insertion Loss<br />
Chapter 2 49
One Port Insertion Loss<br />
Measuring One Port Insertion Loss<br />
Step<br />
Notes<br />
13 Disconnect the feedline at the top of<br />
the tower, and connect a short<br />
connector to the feedline.<br />
This step is necessary to get a good<br />
mismatch for the measurement.<br />
One Port Insertion Loss<br />
14 [Level] Below the trace on the screen is a<br />
table displaying the average insertion<br />
loss.<br />
If the trace is not visible, you can<br />
change the reference level or use<br />
Autoscale to have the test set select a<br />
reference level for you.<br />
• To choose Autoscale, press<br />
[Autoscale].<br />
• To set the level manually, press<br />
[Ref Level], enter a value using<br />
the numeric keypad, then press<br />
[dB].<br />
Clearing Calibration<br />
Clear Calibration deletes the current calibration data, enabling you to re-calibrate<br />
the instrument for the same frequency range.<br />
50 Chapter 2
One Port Insertion Loss<br />
Measuring One Port Insertion Loss<br />
To Clear the <strong>Measurement</strong> Calibration Data:<br />
Step<br />
Notes<br />
1 [Setup]<br />
2 [Clear Calibration] This will clear the calibration for all three one-port<br />
cable measurements.<br />
Displaying Location Information Using GPS<br />
If you are making a One Port Insertion Loss measurement, you can use GPS<br />
Location data to verify your location. For additional information on the GPS Data<br />
function, refer to “Displaying GPS Location Data” on page 458.<br />
To Display GPS Location Information:<br />
Step<br />
Notes<br />
1 [Level/Location]<br />
2 On [Show GPS<br />
Location] select On.<br />
Displays GPS satellite location information. Uses the<br />
internal GPS to capture the location at which a<br />
measurement is made. The GPS information can be<br />
used to return to the same location. The Time Ref<br />
(Freq/Chan/Time Ref mode) button must be set to<br />
Internal GPS for this function to be active.<br />
Information logged includes longitude, latitude,<br />
altitude (feet/meters), and the number of satellites<br />
tracked.<br />
Each time you press this softkey, the selected option<br />
changes.<br />
3 Highlight [On] Toggle to [On] to display GPS satellite location<br />
information. Toggle to [Off] to remove the location<br />
information<br />
One Port Insertion Loss<br />
NOTE<br />
If you prefer to have an electronic copy of the location information, see “Saving<br />
Data” on page 465.<br />
Chapter 2 51
One Port Insertion Loss<br />
Measuring One Port Insertion Loss<br />
Setting Average, Sweep, and Restart<br />
Setting the Sweep<br />
You can select either continuous or single sweep. Continuous sweep provides<br />
repeated, ongoing measurements. Single sweep performs a single measurement that<br />
is repeated only when you push the Single button.<br />
To set sweep:<br />
Step<br />
Notes<br />
1 [Average/Sweep]<br />
2 [Continuous] or [Single] Each time you press this softkey, the<br />
selected option changes.<br />
Setting Averaging<br />
One Port Insertion Loss<br />
You can choose to have averaging On or Off and set the number of averages you<br />
want to take. Averaging only applies to the data, not to the trace. You can select from<br />
the following types of averaging:<br />
• Off: Disables averaging.<br />
• Running: Computes the new result as the weighted sum of the last result and the<br />
new measurement. The last result is weighted by (n – 1)/n. The new result is<br />
weighted by 1/n. Each new measurement produces a new result.<br />
• Max Hold: Is not an average, but on a point by point basis, displays the<br />
maximum amplitude for the given frequency or channel since Max Hold was<br />
turned on. It is updated when a new maximum occurs.<br />
• Group Average: Makes the requested number of measurements, averages the<br />
measurement data, and displays the average as a single result trace.<br />
<strong>Measurement</strong> time will vary based on the requested number of averages and can<br />
take minutes for very large number of averages.<br />
• Group Max Average: Makes the requested number of measurements before<br />
returning a single trace result. This trace is the maximum value seen at each<br />
trace point over the requested number of averages (measurements).<br />
52 Chapter 2
One Port Insertion Loss<br />
Measuring One Port Insertion Loss<br />
To set averaging:<br />
Step<br />
Notes<br />
1 Set the number of averages.<br />
a. [Average]<br />
b. Enter the number of averages<br />
using the numeric keypad.<br />
c. [Enter]<br />
2 Select the type of averaging you<br />
want to apply.<br />
NOTE<br />
a. [Average/Sweep]<br />
b. [Averaging]<br />
c. [Off], [Running Average],<br />
[Max Hold], [Group<br />
Average], or [Group Max<br />
Average]<br />
These two steps can be performed in any order. However, if you turn averaging on<br />
and a large number of averages has previously been set, there may be a delay before<br />
you can change the number of averages.<br />
Setting Restart<br />
When you have averaging turned On and you are in Continuous Sweep mode, you<br />
can restart the averaging by pressing the Restart menu key. The Restart key has no<br />
effect if you are in Single sweep mode.<br />
To restart averaging:<br />
One Port Insertion Loss<br />
Step<br />
Notes<br />
1 [Average/Sweep]<br />
Chapter 2 53
One Port Insertion Loss<br />
Measuring One Port Insertion Loss<br />
Step<br />
Notes<br />
2 [Restart] This key is unavailable or has no effect when<br />
Sweep is set to Single. To restart a Single<br />
Sweep measurement, press [Single].<br />
One Port Insertion Loss<br />
54 Chapter 2
One Port Insertion Loss<br />
Measuring One Port Insertion Loss<br />
Adding a Marker<br />
Markers can be used on traces to help you visually track up to four signals. Each<br />
marker has the following settings:<br />
• Type: Provides three options, including:<br />
• Off<br />
• Normal: Places a diamond-shaped, colored marker, along with a number,<br />
1-4, on the trace.<br />
• Delta: Associated with a normal marker. Therefore, a normal marker must<br />
exist prior to creating the delta marker. The delta marker displays the<br />
difference between the normal marker position and the delta marker<br />
position. Only one delta marker can be associated with a given normal<br />
marker. The normal marker must be active when Delta is selected.<br />
• Marker to Peak: Places the active marker on the current greatest value of the<br />
trace.<br />
• Marker to Next Peak: Places the active marker on the current second greatest<br />
value of the trace.<br />
• Marker to Min: Places the active marker on the current lowest value of the trace.<br />
• Marker to Next Min: Places the active marker on the current second lowest value<br />
of the trace.<br />
To add a marker to a trace<br />
Step<br />
1 [Marker]<br />
2 [Marker]<br />
3 [1], [2], [3], or [4]<br />
4 [Type]<br />
5 [Off], [Normal], or [Delta]<br />
6 Locate the marker relative to the trace:<br />
[Marker to Peak], [Marker to Next Peak],<br />
[Marker to Min], or [Marker to Next Min]<br />
Notes<br />
One Port Insertion Loss<br />
Chapter 2 55
One Port Insertion Loss<br />
Measuring One Port Insertion Loss<br />
Setting One Port Insertion Loss Interference Rejection<br />
Other signals can interfere with One Port Insertion Loss measurements. When<br />
making a one port insertion loss measurement in the presence of known or suspected<br />
interference, you can minimize the effect of the interference on the measurement by<br />
activating interference rejection in the test set.<br />
NOTE<br />
Use of interference rejection will increase the measurement time. Interference<br />
rejection should be used if a known interfering signal exists or if the one port<br />
insertion loss measurement displays suspicious characteristics such as a spike or<br />
rapid movements in the noise floor.<br />
To activate interference rejection:<br />
Step<br />
Notes<br />
1 [Setup]<br />
2 On [Interference<br />
Rejection] select On.<br />
Each time you press this softkey, the selected option<br />
changes.<br />
One Port Insertion Loss<br />
56 Chapter 2
One Port Insertion Loss<br />
Measuring One Port Insertion Loss<br />
Setting the Pass/Fail Limits<br />
The measurement limits setting enables you to alter the value of the maximum and<br />
minimum test limits for the Average Insertion Loss measurement. Limits are set in<br />
dB. These settings affect the metrics color display: red represents fail, green<br />
represents pass. Next to the displayed measurement value, a (P) indicating Pass, or<br />
(F) indicating Fail, will be shown to further indicate whether the value is within or<br />
outside the set limits.<br />
To Set the <strong>Measurement</strong> Maximum and Minimum Limits:<br />
Step<br />
Notes<br />
1 [Setup]<br />
2 [Limits]<br />
3 On [Limits] select On or<br />
Off.<br />
Enables you to toggle the measurement limits<br />
function On (active) and Off (inactive).<br />
• If set to On, Any measured value that exceeds<br />
the upper maximum or is less than the<br />
minimum limit will result in a failure<br />
indication for that value.<br />
4 Set the upper limit.<br />
a. [Maximum Limit]<br />
b. Enter the number on<br />
the numeric keypad.<br />
c. [dB]<br />
5 Set the lower limit.<br />
• If set to Off, pass fail indicators seen in the<br />
metrics display portion of the display will not<br />
be displayed.<br />
Maximum limit can be set from –100 to 100 dBm.<br />
Maximum limit can be set from –100 to 100 dBm.<br />
One Port Insertion Loss<br />
a. [Minimum Limit]<br />
b. Enter the number on<br />
the numeric keypad.<br />
c. [dB]<br />
Chapter 2 57
One Port Insertion Loss<br />
Measuring One Port Insertion Loss<br />
One Port Insertion Loss<br />
58 Chapter 2
3 1xEV-DO Analyzer and Over Air Test<br />
“Accessing 1xEV-DO Tx and Over Air Test” on page 61<br />
“Making 1xEV-DO Tx <strong>Measurement</strong>s” on page 62<br />
“Making 1xEV-DO Over Air <strong>Measurement</strong>s” on page 68<br />
“Displaying Location Information Using GPS” on page 75<br />
“Interpreting the Display” on page 76<br />
“Setting the Channel or Frequency Step” on page 78<br />
“Setting the PN Offset” on page 80<br />
“Setting the PN Increment” on page 80<br />
“Setting the Active Channel Threshold Level and Auto Threshold Level” on<br />
page 81<br />
“Setting the Frequency/Time Reference” on page 82<br />
“Setting Units” on page 83<br />
“Setting the 1xEV-DO Transmitter Reference Level” on page 83<br />
“Setting <strong>Measurement</strong> Time” on page 84<br />
“Setting <strong>Measurement</strong> Offset” on page 85<br />
“Setting the Slot Threshold Level” on page 86<br />
“Setting the CDP Type” on page 86<br />
“Setting the Pilot Dominance Limit” on page 87<br />
“Setting the Multipath Power Limit” on page 88<br />
“Setting the PN Scanner Sensitivity” on page 88<br />
“Setting Average, Sweep, and Restart” on page 89<br />
“Adding a Marker” on page 91<br />
“Setting the Pass/Fail Limits” on page 93<br />
“Setting Up the Signal Generator” on page 101<br />
“Metrics Provided by the 1xEV-DO Tx and Over Air Analyzer <strong>Measurement</strong>”<br />
on page 104<br />
“Interpretation of 1xEV-DO Tx and Over Air Analyzer <strong>Measurement</strong> Results”<br />
on page 109<br />
59<br />
1xEV-DO Analyzer and Over Air<br />
Test
1xEV-DO Analyzer and Over Air Test<br />
“Customizing Your Display” on page 114<br />
“Sorting by MAC Index or by Walsh Code” on page 115<br />
“Converting Between MAC Index and Walsh Code” on page 116<br />
“Colors Used on the MAC Code Domain CDP Display” on page 117<br />
“Colors Used on the Pilot Code Domain CDP Display” on page 118<br />
“Showing or Hiding the OTA PN Scanner” on page 119<br />
“Codogram Display” on page 120<br />
“Performing a Codogram <strong>Measurement</strong>” on page 121<br />
1xEV-DO Analyzer and Over Air<br />
Test<br />
60 Chapter 3
1xEV-DO Analyzer and Over Air Test<br />
Accessing 1xEV-DO Tx and Over Air Test<br />
Accessing 1xEV-DO Tx and Over Air Test<br />
The 1xEV-DO Analyzer & Over Air Test (Option 205) can, as its name suggests, be<br />
used to perform both Tx Analyzer and over-the-air tests.<br />
You can access both the 1xEV-DO Analyzer and the 1xEV-DO Over Air Test either<br />
by pressing [Tx Analyzer], then [1xEV-DO Analyzer] or by pressing [Over Air],<br />
then [1xEV-DO Over Air]. It is worth noting, however, that you are using the same<br />
measurement software in either case.<br />
If you access the measurement through the Tx Analyzer submenu, the Over the Air<br />
features will be turned Off. If you access the measurement through the Over Air<br />
submenu, the Over the Air features will be turned On. Any of these Over the Air<br />
settings can be changed at any time. This means you can easily perform Over the Air<br />
measurements after selecting [Tx Analyzer], [1xEV-DO Analyzer], and equally, you<br />
can perform Tx Analyzer measurements after selecting [Over Air], [1xEV-DO Over<br />
Air]. This will often be faster and more convenient method of switching between the<br />
TX Analyzer and the Over the Air Analyzer.<br />
Chapter 3 61<br />
1xEV-DO Analyzer and Over Air<br />
Test
1xEV-DO Analyzer and Over Air Test<br />
Making 1xEV-DO Tx <strong>Measurement</strong>s<br />
Making 1xEV-DO Tx <strong>Measurement</strong>s<br />
• “Common 1xEVDO Tx Analyzer <strong>Measurement</strong>s” on page 62<br />
• “Preparing to Make 1xEVDO Tx Analyzer <strong>Measurement</strong>s” on page 62<br />
• “Performing a Basic 1xEVDO Transmitter <strong>Measurement</strong>” on page 64<br />
1xEV-DO transmitter measurements verify proper transmitter performance and are<br />
typically made with the access network (AN) still in service. The Access Network<br />
only needs to be taken out of service when you are setting or measuring the Tx<br />
Power Out level, and this is typically only performed during Installation,<br />
Optimization, and Preventative Maintenance.<br />
Important metrics for both Tx and Over the Air measurements include:<br />
• Frequency Error<br />
• PN and Time Offsets<br />
• Non Idle Power<br />
• Idle On/Off Ratio<br />
• Pilot + MAC power<br />
• Pilot Rho (estimated)<br />
• MAC Rho (estimated)<br />
CAUTION<br />
The maximum power for the RF In port and the RF Out/SWR port of the test set is<br />
+20 dBm (100 mW). The maximum power for the Power Sensor port is +24 dBm<br />
(300 mW). When directly coupled to a base station, the test set can be damaged by<br />
excessive power applied to any of these three ports.<br />
To prevent damage in most situations when you directly couple the test set to a base<br />
station, use the high power attenuator between the test set and the BTS.<br />
1xEV-DO Analyzer and Over Air<br />
Test<br />
Common 1xEVDO Tx Analyzer <strong>Measurement</strong>s<br />
Preparing to Make 1xEVDO Tx Analyzer <strong>Measurement</strong>s<br />
When measuring 1xEVDO transmitter performance, there is no need to take the<br />
access network out of service. The Access Network only needs to be taken out of<br />
service when you are setting or measuring the Tx Power Out level, and this is<br />
typically only performed during Preventative Maintenance.<br />
The first step is to choose the type of time reference available. The measurement<br />
62 Chapter 3
1xEV-DO Analyzer and Over Air Test<br />
Making 1xEV-DO Tx <strong>Measurement</strong>s<br />
configuration depends upon the type of time reference you choose to use. Optimally,<br />
a GPS time reference is desired. GPS provides an independent time reference that<br />
can help determine if the access network under test is synchronized with the rest of<br />
the network. Access networks not synchronized with the rest of the network are<br />
referred to as “island cells”.<br />
NOTE<br />
If a GPS time reference is available, you will be able to see all the metrics, and you<br />
will be able to verify that the access network has correctly locked onto the GPS<br />
signal.<br />
If you connect to the access network’s Even Second Clock, you will still get all the<br />
metrics, but you will not have an independent check that the access network has<br />
locked onto the GPS signal.<br />
You need a timing reference (either GPS or ESC) to see PN Offset and Time Offset<br />
results. When using another non-time based reference (for example, Internal<br />
Reference), results for PN Offset or for Time Offset will be unavailable.<br />
You must also know the channel or frequency of the 1xEVDO signal to be analyzed.<br />
Each access network sector is assigned a unique PN [pseudo-noise] Offset. If you<br />
are using a GPS signal or the Even Second Clock, the PN Offset will be detected for<br />
you. If you are making measurements without the aid of either a GPS signal or the<br />
Even Second Clock, you will need to know the PN Offset of the Access Network<br />
that is producing the signal to be analyzed. For more information on PN Offsets<br />
refer to “Adding a Marker” on page 91.<br />
Chapter 3 63<br />
1xEV-DO Analyzer and Over Air<br />
Test
1xEV-DO Analyzer and Over Air Test<br />
Performing a Basic 1xEVDO Transmitter <strong>Measurement</strong><br />
Performing a Basic 1xEVDO Transmitter <strong>Measurement</strong><br />
Once you have taken the access network out of service (this is necessary, for<br />
example, when you are setting the Tx Power Out level) and you have made the<br />
proper connections, you can perform 1xEVDO transmitter measurements.<br />
Step<br />
Notes<br />
1. Mode If your test analyzer is already performing a<br />
1xEV-DO Over the Air measurement, you can<br />
switch quickly to 1xEV-DO Transmitter<br />
measurements by pressing [Display] and then<br />
switching OTA PN Scanner Off. If you do this,<br />
you can omit steps 2 and 3, and skip straight to<br />
Step 4.<br />
2. [Tx Analyzer] See above.<br />
3. [1xEV-DO Anl] See above.<br />
4. [Chan Std]<br />
5. Highlight the channel<br />
standard you want using the<br />
up and down arrow buttons.<br />
6. [Select]<br />
1xEV-DO Analyzer and Over Air<br />
Test<br />
7. On [Units] select Chan or<br />
Freq.<br />
8. Enter the channel or<br />
frequency using the numeric<br />
keypad.<br />
Each time you press this softkey, the selected<br />
option changes.<br />
9. [Fwd] Selects the forward 1xEV-DO channel.<br />
10. [Fr/Time Ref]<br />
11. [GPS] or [External Even Sec] If the sky (and hence the satellites) is not<br />
visible from the position of your analyzer, use<br />
External Even Sec as the time reference.<br />
64 Chapter 3
1xEV-DO Analyzer and Over Air Test<br />
Performing a Basic 1xEVDO Transmitter <strong>Measurement</strong><br />
Step<br />
12. On [PN Offset] select Auto<br />
or Manual.<br />
13. Connect to the access<br />
network.<br />
Notes<br />
The test set defaults to Auto mode. The other<br />
choice is Manual.<br />
• In Auto mode the test set finds the PN<br />
Offset and displays the value in the metrics<br />
display at the bottom of the screen. The<br />
Time Offset is derived from the PN Offset<br />
that has been found.<br />
• In Manual mode you must enter the PN<br />
Offset, which appears in the metrics<br />
display. The Time Offset is derived from<br />
the entered PN Offset.<br />
Connections for out of service 1xEVDO measurements with GPS receiver as<br />
timing reference. This setup is typically used when setting or measuring Tx<br />
Power Out Levels.<br />
Chapter 3 65<br />
1xEV-DO Analyzer and Over Air<br />
Test
1xEV-DO Analyzer and Over Air Test<br />
Performing a Basic 1xEVDO Transmitter <strong>Measurement</strong><br />
Step<br />
Notes<br />
Connections for out of service 1xEVDO measurements with access network<br />
even second as timing reference. This setup is typically used when setting or<br />
measuring Tx Power Out Levels<br />
1xEV-DO Analyzer and Over Air<br />
Test<br />
Connections for in service 1xEVDO measurements with GPS receiver as<br />
timing reference.<br />
66 Chapter 3
1xEV-DO Analyzer and Over Air Test<br />
Performing a Basic 1xEVDO Transmitter <strong>Measurement</strong><br />
Step<br />
Notes<br />
Connections for in service 1xEVDO measurements with access network even<br />
second as timing reference<br />
NOTE<br />
Using GPS Time Reference signals: During a 1xEVDO Analyzer measurement, a<br />
yellow triangle symbol may temporarily appear beside “GPS” in the lower right.<br />
The yellow triangle indicates that the test set is re-synching with the GPS even<br />
second pulse. Once the test set is synchronized, a green dot appears in place of the<br />
triangle. If the GPS is unavailable, a red X appears. If this happens, you must choose<br />
another reference.<br />
A red X will also appear beside “GPS” at the bottom right if you are using the Even<br />
Second Clock timing reference but have not set the instrument to use the Even<br />
Second Clock. If this is happening, press Fr/Time Ref and select External Even<br />
Second as your timing reference.<br />
Chapter 3 67<br />
1xEV-DO Analyzer and Over Air<br />
Test
1xEV-DO Analyzer and Over Air Test<br />
Making 1xEV-DO Over Air <strong>Measurement</strong>s<br />
Making 1xEV-DO Over Air <strong>Measurement</strong>s<br />
• “Preparing to Make 1xEV-DO Over Air <strong>Measurement</strong>s” on page 69<br />
• “Criteria for Making Valid 1xEV-DO Over Air <strong>Measurement</strong>s” on page 70<br />
• “Performing a Basic 1xEV-DO Over Air <strong>Measurement</strong>” on page 72<br />
1xEV-DO over air measurements provide a quick method of verifying 1xEV-DO<br />
transmitter performance. These transmitter measurements can be made on a base<br />
station from the convenience of your vehicle without taking the base station out of<br />
service. Over air measurements are especially useful in maintaining hard-to-access<br />
cell sites such as pole-top base stations.<br />
The 1xEV-DO Analyzer and Over Air option may also be used to measure signals at<br />
a coupled port on the transmitter.<br />
Important metrics for both Tx and Over the Air measurements include:<br />
• Frequency Error<br />
• PN and Time Offsets<br />
• Non Idle Power<br />
• Idle On/Off Ratio<br />
• Pilot + MAC power<br />
• Pilot Rho (estimated)<br />
• MAC Rho (estimated)<br />
NOTE<br />
To achieve valid over-the-air measurements, the test set must be stationary (not<br />
moving).<br />
1xEV-DO Analyzer and Over Air<br />
Test<br />
68 Chapter 3
1xEV-DO Analyzer and Over Air Test<br />
Preparing to Make 1xEV-DO Over Air <strong>Measurement</strong>s<br />
Preparing to Make 1xEV-DO Over Air <strong>Measurement</strong>s<br />
An important consideration when making 1xEV-DO over air measurements is your<br />
location relative to the base station. There must be no obstructions between your<br />
location and the base station antennas.<br />
You must select the type of time reference to be GPS. The GPS antenna must be able<br />
to “see” the satellites to obtain lock, and you must have a GPS lock to perform<br />
measurements.<br />
GPS provides an independent time reference that can help determine if the access<br />
network under test is synchronized with the rest of the network. Access networks<br />
not synchronized with the rest of the network are referred to as “island cells”.<br />
NOTE<br />
Once your test instrument successfully locks onto the GPS time reference, you will<br />
be able to see all the metrics, and you will be able to verify that the access network<br />
has correctly locked onto the GPS signal.<br />
You need to know, and to enter on the test analyzer, the channel or frequency of the<br />
1xEV-DO signal to be analyzed.<br />
Each access network sector has a unique PN offset. If you know this, you can enter<br />
it manually. If you do not know the PN Offset, you can set PN Offset to Auto, and<br />
let the analyzer find the PN offset of the strongest pilot signal for you. You can also<br />
use the PN Scanner to identify all active PNs in the area. For more information on<br />
PN offsets refer to the “Metrics Provided by the 1xEV-DO Tx and Over Air<br />
Analyzer <strong>Measurement</strong>” on page 104.<br />
Once you have connected the proper antenna to the test set, chosen a stationary<br />
location, and verified that you have a clear view of the base station antennas, you<br />
can perform 1xEV-DO over air measurements.<br />
If this is the first 1xEV-DO over air measurement for this base station, you must find<br />
a location that meets the criteria for making a valid measurement. Your location<br />
must have a dominant pilot and very low multipath power. If you have made<br />
1xEV-DO over air measurements at this location before and know it provides valid<br />
measurements, skip to “Performing a Basic 1xEV-DO Over Air <strong>Measurement</strong>” on<br />
page 72.<br />
Chapter 3 69<br />
1xEV-DO Analyzer and Over Air<br />
Test
1xEV-DO Analyzer and Over Air Test<br />
Criteria for Making Valid 1xEV-DO Over Air <strong>Measurement</strong>s<br />
Criteria for Making Valid 1xEV-DO Over Air<br />
<strong>Measurement</strong>s<br />
The first step in making valid 1xEV-DO over air measurements is to identify a target<br />
base station to measure. Then, for your measurements to be valid, you must find a<br />
location near the target base station with a sufficiently strong 1xEV-DO signal.<br />
1xEV-DO over air measurements will experience interference from other 1xEV-DO<br />
signals on the same RF channel and from multipath echoes. The code domain power<br />
view measures two key parameters to indicate these effects:<br />
• Pilot dominance—The difference between the useful energy of the strongest<br />
pilot channel and the combined energy of the lower energy active pilot channels<br />
(expressed in dB). Ideally, this value should be very large (> 16 dB).<br />
The <strong>E7495A</strong>/B test set includes up to nine lower energy active pilots in the pilot<br />
dominance calculation. In live testing of 1xEV-DO networks, however, it is<br />
unlikely that you will have as many as nine interfering pilots.<br />
NOTE<br />
It is important to remember that the pilot dominance is always measured against the<br />
strongest signal. If you have specified your channel of interest manually, this<br />
channel might not necessarily be the strongest.<br />
1xEV-DO Analyzer and Over Air<br />
Test<br />
• Multipath power—The amount of power, of the dominant pilot signal, that is<br />
dispersed outside the main correlation peak due to multipath echoes (expressed<br />
in dB). Ideally, this value should be very small (< 0.1 dB). Multipath power is<br />
the result of portions of the original broadcast signal arriving at the receiving<br />
antenna out of phase with the main power of the original signal. This can be<br />
caused by the signal being reflected off objects, such as buildings, or being<br />
refracted through the atmosphere differently from the main signal. These out of<br />
phase signals can cancel power from the main signal or appear as noise<br />
interference at the receiver.<br />
The table below shows the quality of the over air code domain measurements with<br />
respect to pilot dominance and multipath power.<br />
Table 3-1<br />
Over Air Code Domain <strong>Measurement</strong> Quality<br />
<strong>Measurement</strong> Quality Pilot Dominance Multipath Power<br />
Very good > 16 dB < 0.1 dB<br />
70 Chapter 3
1xEV-DO Analyzer and Over Air Test<br />
Criteria for Making Valid 1xEV-DO Over Air <strong>Measurement</strong>s<br />
Table 3-1<br />
Over Air Code Domain <strong>Measurement</strong> Quality<br />
<strong>Measurement</strong> Quality Pilot Dominance Multipath Power<br />
Fair > 10 dB < 0.4 dB<br />
Marginal > 8dB < 0.7dB<br />
The default measurement limits for pilot dominance and multipath power are set to<br />
give “fair” measurement quality. If these limits are met, the pilot dominance and<br />
multipath power values will be displayed in green. When the pilot dominance and<br />
multipath power parameters are outside the acceptable limits, the parameters will<br />
turn red. If this occurs, you must move to a different location that meets the “fair”<br />
criteria defined above.<br />
In general, you should always use a preselector filter for the band of interest to<br />
prevent strong signals from swamping out the signal of interest. <strong>Agilent</strong> offers these<br />
preselectors and antennas:<br />
• Option 810—Cellular downlink band preselector and antenna<br />
• Option 811—PCS downlink band preselector and antenna<br />
• Option 812—Korean PCS downlink band preselector and antenna<br />
Chapter 3 71<br />
1xEV-DO Analyzer and Over Air<br />
Test
1xEV-DO Analyzer and Over Air Test<br />
Performing a Basic 1xEV-DO Over Air <strong>Measurement</strong><br />
Performing a Basic 1xEV-DO Over Air <strong>Measurement</strong><br />
Step<br />
Notes<br />
1 Mode If your test analyzer is already performing a<br />
1xEV-DO Transmitter measurement, you can<br />
switch quickly to 1xEV-DO Over the Air<br />
measurements by pressing [Display] and then<br />
switching OTA PN Scanner On. If you do this,<br />
you can omit steps 2 and 3, and skip straight to<br />
Step 4.<br />
2 [Over Air] See above.<br />
3 [1xEV-DO Over Air] See above.<br />
4 [Chan Std]<br />
5 Select the channel standard<br />
you want using the up and<br />
down arrow buttons.<br />
6 [Select]<br />
1xEV-DO Analyzer and Over Air<br />
Test<br />
7 On [Units] select Chan or<br />
Freq.<br />
Each time you press this softkey, the selected<br />
option changes.<br />
8 [Channel] or [Frequency] • If you selected Chan in the previous step,<br />
select [Channel].<br />
• If you selected Freq, select [Frequency].<br />
9 Enter the channel or<br />
frequency using the<br />
numeric keypad.<br />
10 [Fwd] Selects the forward 1xEV-DO channel.<br />
11 Verify that on [Fr/Time<br />
Ref] GPS is selected. If<br />
not, press [Fr/Time Ref],<br />
then press [GPS].<br />
72 Chapter 3
1xEV-DO Analyzer and Over Air Test<br />
Performing a Basic 1xEV-DO Over Air <strong>Measurement</strong><br />
Step<br />
12 On [PN Offset] select Auto<br />
or Manual.<br />
13 [Level/Location]<br />
14 [RF IN Loss]<br />
15 Set the RF IN Loss to 0 dB<br />
using the numeric keypad.<br />
16 [dB]<br />
17 Connect to the antenna.<br />
Notes<br />
The test set defaults to Auto mode.<br />
• In Auto mode the test set finds the PN offset<br />
of the strongest pilot signal and displays the<br />
value in the metrics display. The delay is<br />
derived from the found PN offset.<br />
• In Manual mode you must enter the PN<br />
offset using the numeric keypad. The delay<br />
is derived from the entered PN offset.<br />
Connections for in service 1xEVDO measurements with GPS receiver as<br />
timing reference.<br />
Chapter 3 73<br />
1xEV-DO Analyzer and Over Air<br />
Test
1xEV-DO Analyzer and Over Air Test<br />
Performing a Basic 1xEV-DO Over Air <strong>Measurement</strong><br />
NOTE<br />
The test set does not record data for post-processing. It provides a snapshot of<br />
1xEV-DO base station transmit parameters at that location.<br />
NOTE<br />
During a 1xEV-DO over air measurement, a yellow triangle symbol may<br />
temporarily appear beside “GPS” in the lower right. The yellow triangle indicates<br />
that the test set is re-synching with the GPS even second pulse. Once the test set is<br />
syncronized, a green dot appears in place of the triangle. If the GPS is unavailable, a<br />
red X appears. If this happens, you must move to a different location.<br />
1xEV-DO Analyzer and Over Air<br />
Test<br />
74 Chapter 3
1xEV-DO Analyzer and Over Air Test<br />
Displaying Location Information Using GPS<br />
Displaying Location Information Using GPS<br />
If you are making 1xEV-DO over air measurements at a location you previously<br />
established as valid, <strong>Agilent</strong> recommends using GPS to verify that you are at the<br />
location from which you previously measured.<br />
If you are making 1xEV-DO over air measurements from a new location, once you<br />
validate that the location provides a dominant pilot and low multipath power,<br />
<strong>Agilent</strong> recommends that you record the latitude and longitude coordinates of this<br />
location using GPS. Later measurements should be made from this precise location<br />
to provide performance trends.<br />
For additional information on the GPS Data function, refer to “Displaying GPS<br />
Location Data” on page 458.<br />
To Display GPS Location Information:<br />
Step<br />
Notes<br />
NOTE<br />
1 [Level/Location]<br />
2 On [Show GPS<br />
Location] select On.<br />
Displays GPS satellite location information. Uses the<br />
internal GPS to capture the location of a<br />
measurement. The GPS information can be used to<br />
return to the same location. The Time Ref<br />
(Freq/Chan/Time Ref mode) button must be set to<br />
internal GPS for this function to be active.<br />
Information logged includes longitude, latitude,<br />
altitude (feet/meters), and the number of satellites<br />
tracked.<br />
Every time you press [Show GPS Location], the GPS<br />
location display alternates between On and Off.<br />
If you prefer to have an electronic copy of the location information, see “Saving<br />
Data” on page 465.<br />
Chapter 3 75<br />
1xEV-DO Analyzer and Over Air<br />
Test
1xEV-DO Analyzer and Over Air Test<br />
Interpreting the Display<br />
Interpreting the Display<br />
The 1xEV-DO Tx screen is divided into two sections, and the 1xEV-DO Over Air<br />
screen is divided into three sections. The extra, third section in the 1xEV-DO Over<br />
Air screen shows the OTA PN Scanner results, and appears at the top of the display.<br />
You can switch the OTA PN Scanner On or Off independently in either a 1xEV-DO<br />
Tx Analyzer measurement or in a 1xEV-DO Over Air measurement. The presence<br />
or absence of the OTA PN Scanner is the main difference between the 1xEV-DO Tx<br />
Analyzer screen and the 1xEV-DO Over Air screen.<br />
If you have the OTA PN Scanner display switched On, it appears at the top of the<br />
screen. The code domain trace display in the center. The pilot dominance and<br />
multipath power parameters are shown to the left of the screen. When you are<br />
making Over the Air measurements, awareness of these two parameter values helps<br />
you be sure that you are making valid measurements on the sector of interest.<br />
The code domain trace display contains 128 Walsh codes when CDP Type is<br />
MAC 128, or 64 Walsh codes when CDP Type is MAC 64. These are shown in a<br />
bit-reversed order to represent the combined code channels for the varying data rate<br />
traffic channels. The Y-axis labels display the relative power (dB) or absolute power<br />
(dBm), threshold level, and dB/division. The X-axis labels display active channel<br />
Walsh Code numbers. Active code channels shown on the display include:<br />
1xEV-DO Analyzer and Over Air<br />
Test<br />
• Active MAC (Medium Access Control) RPC (Reverse Power Control) channels<br />
(shown in orange)<br />
• RA (Reverse Activity) MAC channel (shown in light blue)<br />
• Noise (shown in light gray)<br />
• Unknown (MAC indexes 0 to 3 only) (typically these are displayed in gray, that<br />
is, as noise. If they are found to be active, they are shown in light brown)<br />
• Pilot (shown as a red bar, and only when CDP Type is Pilot)<br />
The metrics display shows 14 measurement parameters displayed below the CDP<br />
display in three columns and five rows—each with a value and units. For more<br />
information about the parameters in the metric display, refer to “Metrics Provided<br />
by the 1xEV-DO Tx and Over Air Analyzer <strong>Measurement</strong>” on page 104.<br />
The time reference indicator is at the bottom right. For each indicator the text<br />
indicates which time reference you have chosen. A green LED indicates a locked<br />
condition, a red “X” indicates an unlocked condition. You must have a valid time<br />
references (either from the GPS system, or from an Even Second Clock) to make<br />
76 Chapter 3
1xEV-DO Analyzer and Over Air Test<br />
Interpreting the Display<br />
valid measurements.<br />
Chapter 3 77<br />
1xEV-DO Analyzer and Over Air<br />
Test
1xEV-DO Analyzer and Over Air Test<br />
Optional 1xEV-DO Tx and Over Air Analyzer <strong>Measurement</strong> Settings<br />
Optional 1xEV-DO Tx and Over Air Analyzer<br />
<strong>Measurement</strong> Settings<br />
You can change several optional measurement parameters in the 1xEV-DO Tx and<br />
Over Air Analyzer:<br />
• “Setting the Channel or Frequency Step” on page 78<br />
• “Setting the PN Offset” on page 80<br />
• “Setting the PN Increment” on page 80<br />
• “Setting the Active Channel Threshold Level and Auto Threshold Level” on<br />
page 81<br />
• “Setting the Frequency/Time Reference” on page 82<br />
• “Setting Units” on page 83<br />
• “Setting the 1xEV-DO Transmitter Reference Level” on page 83<br />
• “Setting <strong>Measurement</strong> Time” on page 84<br />
• “Setting <strong>Measurement</strong> Offset” on page 85<br />
• “Setting the Slot Threshold Level” on page 86<br />
• “Setting the CDP Type” on page 86<br />
• “Setting Average, Sweep, and Restart” on page 89<br />
• “Adding a Marker” on page 91<br />
• “Setting the Pass/Fail Limits” on page 93<br />
Setting the Channel or Frequency Step<br />
1xEV-DO Analyzer and Over Air<br />
Test<br />
You can set the channel or frequency step so you can quickly increment to the next<br />
channel or frequency using the up and down arrow buttons.<br />
Step<br />
1 [Freq/Chan/Time Ref]<br />
Notes<br />
2 [Chan Step] or [Freq Step] This choice depends on the [Units] mode you<br />
are using.<br />
78 Chapter 3
1xEV-DO Analyzer and Over Air Test<br />
Optional 1xEV-DO Tx and Over Air Analyzer <strong>Measurement</strong> Settings<br />
Step<br />
Notes<br />
3 Enter the desired channel or<br />
frequency step using the<br />
numeric keypad.<br />
4 [Enter] Notice (and verify) the number you entered<br />
below the Chan Step or Freq Step text on the<br />
corresponding button.<br />
Chapter 3 79<br />
1xEV-DO Analyzer and Over Air<br />
Test
1xEV-DO Analyzer and Over Air Test<br />
Optional 1xEV-DO Tx and Over Air Analyzer <strong>Measurement</strong> Settings<br />
Setting the PN Offset<br />
The PN Offset is a “short code” sequence that provides a unique identifier for each<br />
sector of each cell site. The PN Offsets are applied to the I and Q signals before<br />
modulation. PN Offsets are offset in time by 52.08 µs and they repeat every 26.666<br />
ms. This yields 512 unique short code sequences (0-511). The access terminal needs<br />
the PN Offset to decode information in the Pilot and MAC channels, which are<br />
transmitted by the access network.<br />
If you have selected Auto PN Offset, the displayed PN Offset result corresponds to<br />
the PN Offset of the Pilot sequence with the highest power. If you have selected<br />
Manual PN Offset, the result displayed corresponds to your chosen PN Offset.<br />
The number of slots over which the acquistion is made is determined by the<br />
<strong>Measurement</strong> Interval, which itself is determined by the <strong>Measurement</strong> Time. For<br />
more information, refer to “Setting <strong>Measurement</strong> Time” on page 84.<br />
Step<br />
Notes<br />
1. [Freq/Chan/Time]<br />
2. [PN Offset] Each time you press this softkey, the selected<br />
option changes.<br />
Setting the PN Increment<br />
1xEV-DO Analyzer and Over Air<br />
Test<br />
The PN Increment allows you to choose the increment step for the PN Offset search<br />
when PN Offset is set to Auto. Typically the PN Increment is set to 1 when<br />
measuring 1xEV-DO transmitter performance while connected to the access<br />
network via RF cable.<br />
The PN Increment field enables you to search based on a step size of your choice. If<br />
PN Increment = 1 (default), the search will step through PN values by one PN at a<br />
time. If PN Increment = 5, it will step through PN values 0, 5, 10, and so on. The<br />
Measured PN displayed will be a multiple of 5, even if the actual PN is not a<br />
multiple of 5. If you know that all access networks in the area have fixed<br />
increments, then set the PN Increment field to that increment value. If you don’t<br />
know, then use the default value of 1.<br />
80 Chapter 3
1xEV-DO Analyzer and Over Air Test<br />
Optional 1xEV-DO Tx and Over Air Analyzer <strong>Measurement</strong> Settings<br />
Step<br />
Notes<br />
1. [PN Inc]<br />
2. Enter the PN Increment using<br />
the numeric keypad.<br />
The maximum value you can enter is 15.<br />
3. [Enter] Notice (and verify) that the number you<br />
entered for your chosen PN Increment<br />
number appears below the PN Inc text on the<br />
corresponding button.<br />
Setting the Active Channel Threshold Level and Auto Threshold<br />
Level<br />
The active channel threshold level is an advanced setting that can be set to indicate<br />
which code channels are considered active. Any code channels below this power<br />
level are considered inactive (or noise), and any code channels exceeding this power<br />
level are considered to be potentially active traffic channels. Any potentially active<br />
traffic channels, that is, any channels exceeding the Active Channel Threshold<br />
Level, must also have a low power variance over time to be considered truly active<br />
channels. A horizontal red line on the screen represents the threshold level. The test<br />
set can set this level automatically, or you can manually enter a value.<br />
In Auto mode the threshold level moves as the noise fluctuates. The threshold level<br />
is set by the test set at an optimal offset above the average noise floor. If you choose<br />
Auto mode, you can alter the auto threshold offset. The recommended and default<br />
setting is 0 dB. A negative value moves the threshold lower (closer to the noise<br />
floor) and is a more aggressive setting that increases the likelihood of interpreting an<br />
inactive channel as active. A positive value moves the threshold higher (away from<br />
the noise floor) and is a more conservative setting that increases the likelihood of<br />
interpreting an active channel as inactive.<br />
In Manual mode the threshold level is fixed and does not move as the noise<br />
fluctuates.<br />
To Set the Active Channel Threshold Level:<br />
Step<br />
1 [Setup]<br />
Notes<br />
Chapter 3 81<br />
1xEV-DO Analyzer and Over Air<br />
Test
1xEV-DO Analyzer and Over Air Test<br />
Optional 1xEV-DO Tx and Over Air Analyzer <strong>Measurement</strong> Settings<br />
Step<br />
Notes<br />
2 On [Thresh Lvl] select<br />
Auto or Manual.<br />
Each time you press this softkey, the selected<br />
option changes. If you choose Manual, you must<br />
enter the threshold you want using the numeric<br />
keypad, then press [dB].<br />
3 [Auto Thres Offset] The default value is 0 dB. Optionally, you can enter<br />
a negative (more aggressive) or positive (more<br />
conservative) value, then press [dB].<br />
Setting the Frequency/Time Reference<br />
This key is used to specify the source of your frequency reference, or your<br />
frequency and time reference. The analyzer needs an accurate reference signal in<br />
order to make accurate measurements, and this is where you specify the source of<br />
this reference signal.<br />
Step<br />
Notes<br />
1. [Fr/Time Ref] The frequency/time reference form is<br />
dispayed<br />
1xEV-DO Analyzer and Over Air<br />
Test<br />
82 Chapter 3
1xEV-DO Analyzer and Over Air Test<br />
Optional 1xEV-DO Tx and Over Air Analyzer <strong>Measurement</strong> Settings<br />
Step<br />
2. Select the frequency and time<br />
reference from the list using<br />
the up and down arrow<br />
buttons.<br />
Notes<br />
If the sky (and hence the satellites) is visible<br />
from the position of your analyzer, you can<br />
select GPS to get frequency and timing<br />
references from the GPS signal. The GPS<br />
antenna will need to be attached to the<br />
analyzer.<br />
If you connect to the access network’s Even<br />
Second Clock, you will still get all the<br />
metrics, but you will not have an independent<br />
check that the access network has locked onto<br />
the GPS signal.<br />
Other options available are Internal<br />
Reference, External 10 MHz, and External<br />
19.6608 MHz. These last three options only<br />
provide a frequency reference. They do not<br />
provide a time reference. If you use a pure<br />
frequency reference, you will not be able to<br />
see results for PN Offset or for Time Offset..<br />
3. [Select]<br />
Setting Units<br />
This key is used to toggle between Frequency and Channel for your measurements.<br />
That is, you can decide whether to specify (and measure) the frequency in Hertz, or<br />
to specify the Channel Number.<br />
Step<br />
Notes<br />
1. [Units] Each time you press this key, you toggle<br />
between Freq (measurements in Hertz) and<br />
Chan (measurements by Channel Number).<br />
Setting the 1xEV-DO Transmitter Reference Level<br />
You can set the 1xEV-DO transmitter reference level to display either relative power<br />
Chapter 3 83<br />
1xEV-DO Analyzer and Over Air<br />
Test
1xEV-DO Analyzer and Over Air Test<br />
Optional 1xEV-DO Tx and Over Air Analyzer <strong>Measurement</strong> Settings<br />
(dB) or absolute power (dBm). The test set defaults to relative. The top graticule<br />
(horizontal line) represents the total power in the 1xEV-DO channel. The scale per<br />
division is set to 5 dB per division by default, but you can change it if you wish.<br />
If the reference level is set to relative, the reference level represents the total power<br />
in the 1xEV-DO channel, and is displayed as 0.0 dB. If the reference level is set to<br />
absolute, the reference level displays the actual power (in dBm) for the particular<br />
time domain section relevant to the selected CDP type. For example, in pilot CDP<br />
mode, the absolute power level is measured only over the pilot burst region of the<br />
signal.<br />
To Set the 1xEV-DO Transmitter Reference Level:<br />
Step<br />
Notes<br />
1. [Level]<br />
2. On [Reference] select Abs or<br />
Rel.<br />
3. [RF IN Loss]<br />
4. Enter the RF In Loss using<br />
the numeric keypad.<br />
5. [dB]<br />
Each time you press this softkey, the selected<br />
option changes.<br />
If you are using a cable and attenuator<br />
connected to the access network power<br />
amplifier, enter the combined cable and<br />
attenuator loss here. The RF In Loss can be<br />
obtained by measuring the Insertion Loss. See<br />
“Two Port Insertion Loss” on page 123.<br />
Note: If data had been previously entered in<br />
[RF IN Loss], that data will be lost and<br />
replaced by the value you enter here.<br />
1xEV-DO Analyzer and Over Air<br />
Test<br />
NOTE<br />
The insertion loss of the test cable and high power attenuator must be accounted for<br />
to obtain accurate 1xEV-DO power measurements such as Pilot+MAC power. The<br />
insertion loss of the test cable/attenuator combination is accounted for as the RF In<br />
Loss, which is an offset applied by the test set to the power measurements.<br />
Setting <strong>Measurement</strong> Time<br />
The measurement time setting allows you to alter the speed at which measurements<br />
84 Chapter 3
1xEV-DO Analyzer and Over Air Test<br />
Optional 1xEV-DO Tx and Over Air Analyzer <strong>Measurement</strong> Settings<br />
are made. Three choices exist: Slow, Medium, and Fast. The test set defaults to<br />
Medium. Slow measurement time provides a more repeatable measurement at the<br />
expense of time, and is done by increasing the number of slots that are measured.<br />
Fast measurement time provides a quicker measurement at the expense of<br />
repeatablity, and is done by decreasing the number of slots that are measured.<br />
Medium measurement time strikes a balance between measurement speed and<br />
repeatability.<br />
Meas Time<br />
Setting<br />
CDP & Rho<br />
<strong>Measurement</strong><br />
Interval<br />
Data Channel<br />
Modulation<br />
<strong>Measurement</strong><br />
Interval<br />
RF Metric<br />
<strong>Measurement</strong><br />
Interval<br />
Fast 3 full slots 3 full slots 16 full slots<br />
Med 6 full slots 6 full slots 32 full slots<br />
Slow 9 full slots 9 full slots 48 full slots<br />
To Set the <strong>Measurement</strong> Time:<br />
Step<br />
Notes<br />
1. [Setup]<br />
2. On [Meas Time] select<br />
Slow, Med, or Fast.<br />
Each time you press this softkey, the selected<br />
option changes.<br />
Setting <strong>Measurement</strong> Offset<br />
The <strong>Measurement</strong> Offset setting determines the start of the measurement interval<br />
relative to the start of the pilot sequence frame, that is, relative to the start of PN 0.<br />
You can use the <strong>Measurement</strong> Offset parameter in conjunction with the Meas Time<br />
parameter to view a specific part of the frame.<br />
To Set the <strong>Measurement</strong> Offset:<br />
Step<br />
1. [Setup]<br />
Notes<br />
Chapter 3 85<br />
1xEV-DO Analyzer and Over Air<br />
Test
1xEV-DO Analyzer and Over Air Test<br />
Optional 1xEV-DO Tx and Over Air Analyzer <strong>Measurement</strong> Settings<br />
Step<br />
2. Enter the <strong>Measurement</strong><br />
Offset using the numeric<br />
keypad.<br />
Notes<br />
The maximum value you can enter is 15.<br />
Setting the Slot Threshold Level<br />
The Slot Threshold is a level, measured relative to the idle power, that determines<br />
whether a slot is idle or non-idle. When the power in a slot is greater than the Slot<br />
Threshold, that slot is determined to be non-idle. When the power in the slot is less<br />
than, or equal to, the Slot Threshold level, the slot is determined to be idle.<br />
To Set the Slot Threshold Level:<br />
Step<br />
Notes<br />
1. [Setup]<br />
2. Press [Slot Thresh] and<br />
enter the threshold value<br />
using the numeric<br />
keypad, the rotary knob,<br />
or the up and down<br />
arrows.<br />
Specify the Slot Threshold level in dB. The<br />
minimum setting is –100 dB, and the maximum<br />
setting is 0 dB.<br />
3. [dB]<br />
Setting the CDP Type<br />
The CDP Type parameter is used to specify whether you are despreading Pilot,<br />
MAC 64, or MAC 128 codes when you are performing your measurement.<br />
1xEV-DO Analyzer and Over Air<br />
Test<br />
NOTE Rev 0 of the 3GPP2 (Third Generation Partnership Project 2) standards requires 64<br />
MAC codes to be despread; Rev A requires that 128 MAC codes are despread.<br />
To Set the CDP Type:<br />
Step<br />
1. [Setup]<br />
Notes<br />
86 Chapter 3
1xEV-DO Analyzer and Over Air Test<br />
Optional 1xEV-DO Tx and Over Air Analyzer <strong>Measurement</strong> Settings<br />
Step<br />
Notes<br />
2. Press [CDP Type].<br />
3. Press the correct CDP<br />
Type key.<br />
There are three CDP Type options available to<br />
you. These are Pilot, MAC 64, and MAC 128<br />
Setting the Pilot Dominance Limit<br />
Pilot Dominance is only relevant to Over the Air measurements. It does not apply to<br />
Transmitter measurements.<br />
Pilot Dominance is the difference between the useful energy of the strongest pilot<br />
channel and the combined energy of the lower energy active pilot channels<br />
(expressed in dB). Ideally, this value should be very large (> 16 dB).<br />
The <strong>E7495A</strong>/B test set includes up to nine lower energy active pilots in the pilot<br />
dominance calculation. In live testing of 1xEV-DO networks, however, it is unlikely<br />
that you will have as many as nine interfering pilots.<br />
If the measured Pilot Dominance meets the limit you have set, the numeric result<br />
displayed in the OTA PN Scanner section of the screen is displayed in green. If the<br />
measured Pilot Dominance fails to meet the limit you have set, the result is<br />
displayed in red font, and all metrics displayed in the metrics portion of the screen<br />
will be displayed in gray. This is to indicate to you that the metrics you are seeing<br />
are unreliable because the Pilot Dominance limit has not been met.<br />
NOTE<br />
It is important to remember that the pilot dominance is always measured against the<br />
strongest signal. If you have specified your channel of interest manually, this<br />
channel might not necessarily be the strongest.<br />
To Set the Pilot Dominance Limit:<br />
Step<br />
Notes<br />
1. [Setup]<br />
2. Press [Plt Dom] Specify the Pilot Dominance Limit level in dB.<br />
The minimum setting is 0.0 dB, and the maximum<br />
setting is 20 dB<br />
3. [dB]<br />
Chapter 3 87<br />
1xEV-DO Analyzer and Over Air<br />
Test
1xEV-DO Analyzer and Over Air Test<br />
Optional 1xEV-DO Tx and Over Air Analyzer <strong>Measurement</strong> Settings<br />
Setting the Multipath Power Limit<br />
Multipath Power is only relevant to Over the Air measurements. It does not apply to<br />
Transmitter measurements.<br />
Multipath power is the amount of power, of the dominant pilot signal, that is<br />
dispersed outside the main correlation peak due to multipath echoes (expressed in<br />
dB). Ideally, this value should be very small (< 0.1 dB). Multipath power is the<br />
result of portions of the original broadcast signal arriving at the receiving antenna<br />
out of phase with the main power of the original signal. This can be caused by the<br />
signal being reflected off objects, such as buildings, or being refracted through the<br />
atmosphere differently from the main signal. These out of phase signals can cancel<br />
power from the main signal or appear as noise interference at the receiver.<br />
If the measured Multipath Power meets the limit you have set, the numeric result<br />
displayed in the OTA PN Scanner section of the screen is displayed in green. If the<br />
measured Multipath Power fails to meet the limit you have set, the result is<br />
displayed in red font, and all metrics displayed in the metrics portion of the screen<br />
will be displayed in gray. This is to indicate to you that the metrics you are seeing<br />
are unreliable because the Multipath Power limit has not been met.<br />
To Set the Multipath Power Limit:<br />
Step<br />
Notes<br />
1. [Setup]<br />
2. Press [Mp Pwr]. Specify the Multipath Power Limit level in dB.<br />
The minimum setting is 0.0 dB, and the maximum<br />
setting is 2.0 dB<br />
3. [dB]<br />
Setting the PN Scanner Sensitivity<br />
1xEV-DO Analyzer and Over Air<br />
Test<br />
PN Scanner Sensitivity determines the noise floor for the OTA PN Scanner. You can<br />
select from three sensitivity levels—Low, Medium, or High. Setting the sensitivity<br />
to High will result in a lower noise floor but will descrease the measurement speed.<br />
Setting the sensitivity to Low will result in a higher noise floor and decreased<br />
measurement speed.<br />
PN Scanner Sensitivity is coupled to the OTA PN Scanner. If the OTA PN Scanner<br />
is Off, the PN Scanner Sensitivity is disabled; if OTA PN Scanner is On, PN<br />
Scanner Sensitivity is automatically enabled.<br />
88 Chapter 3
1xEV-DO Analyzer and Over Air Test<br />
Optional 1xEV-DO Tx and Over Air Analyzer <strong>Measurement</strong> Settings<br />
To Set the PN Scanner Sensitivity:<br />
Step<br />
Notes<br />
1. [Setup]<br />
2. Press [PN Scanner<br />
Sensitivity].<br />
Each time you press this softkey, the selected<br />
option changes. Select High, Medium, or Low.<br />
Setting Average, Sweep, and Restart<br />
Setting the Sweep<br />
You can select either continuous or single sweep. Continuous sweep provides<br />
repeated, ongoing measurements. Single sweep performs a single measurement that<br />
is repeated only when you push the Single button.<br />
To set sweep:<br />
Step<br />
Notes<br />
1 [Average/Sweep]<br />
2 [Continuous] or [Single] Each time you press one of these<br />
softkeys, the other softkey is<br />
automatically inactivated.<br />
Setting Averaging<br />
You can choose to have averaging On or Off, and to set the number of averages you<br />
want to take. When initialized, the <strong>Agilent</strong> <strong>E7495A</strong>/B defaults to running average:<br />
• A running average computes the new result as the weighted sum of the last result<br />
and the new measurement. The last result is weighted by (n – 1)/n. The new<br />
result is weighted by 1/n. Each new measurement produces a new result.<br />
The reported averages for the following measurements will only be updated when<br />
idle slots are identified within the update interval. If no idle slots are identified, the<br />
average values reported will be from the previous update interval:<br />
• Idle Power<br />
• On/Off Ratio<br />
• Noise Floor<br />
Chapter 3 89<br />
1xEV-DO Analyzer and Over Air<br />
Test
1xEV-DO Analyzer and Over Air Test<br />
Optional 1xEV-DO Tx and Over Air Analyzer <strong>Measurement</strong> Settings<br />
The reported averages for the following measurements will only be updated when<br />
non-idle slots are identified within the update interval. If no non-idle slots are<br />
identified, the average values reported will be from the previous update interval:<br />
• Non-idle Power<br />
NOTE<br />
The Idle Slots metric itself is always averaged even if averaging is switched Off. It<br />
represents the average of all the captures since the measurement was started. You<br />
can reset the Idle Slots metric by changing a parameter, or by using the Restart key.<br />
When you switch averaging On, it is averaged in the same way as the other metrics.<br />
To set averaging:<br />
Step<br />
Notes<br />
1 Set the number of averages.<br />
a. [Average]<br />
b. Enter the number of averages<br />
using the numeric keypad.<br />
c. [Enter]<br />
2 Set averaging On or Off.<br />
a. [Average/Sweep]<br />
b. [Averaging]<br />
c. [Off] or [On]<br />
1xEV-DO Analyzer and Over Air<br />
Test<br />
NOTE<br />
These two steps can be performed in any order. However, if you turn averaging on<br />
and a large number of averages has previously been set, there may be a delay before<br />
you can change number of averages.<br />
Using Restart<br />
When you have averaging turned on, you can restart the averaging by pressing the<br />
Restart menu key. This restarts the averaging for running average in either<br />
Continuous or Single sweep mode.<br />
90 Chapter 3
1xEV-DO Analyzer and Over Air Test<br />
Optional 1xEV-DO Tx and Over Air Analyzer <strong>Measurement</strong> Settings<br />
To restart averaging:<br />
Step<br />
Notes<br />
1 [Average/Sweep]<br />
2 [Restart] This key is unavailable or has no effect when<br />
Sweep is set to Single. To restart a Single<br />
Sweep measurement, press [Single].<br />
It is worth noting that there are some other<br />
events that automatically cause a restart.<br />
These events are:<br />
• If the analyzer identifies a change in PN<br />
Offset.<br />
• If you enter a new PN Offset value.<br />
• If the PN Offset State is changed to Auto<br />
or to Manual.<br />
• If you change the X-scale from MAC to<br />
Walsh Code, or from Walsh Code to<br />
MAC.<br />
• If you change the <strong>Measurement</strong> Time.<br />
• If you change the CDP Type.<br />
Adding a Marker<br />
Markers can be used on the CDP display to help you visually track up to four<br />
signals. Each marker has the following settings:<br />
• Type: Provides three options, including:<br />
• Off<br />
• Normal, which places a diamond-shaped, colored marker, along with a<br />
number, 1-4, on the CDP display.<br />
• Delta, is associated with a normal marker. Therefore, a normal marker must<br />
exist prior to creating the delta marker. The delta marker displays the<br />
difference between the normal marker position and the delta marker<br />
position. Only one delta marker can be associated with a given normal<br />
marker. The normal marker must be active when Delta is selected.<br />
Chapter 3 91<br />
1xEV-DO Analyzer and Over Air<br />
Test
1xEV-DO Analyzer and Over Air Test<br />
Optional 1xEV-DO Tx and Over Air Analyzer <strong>Measurement</strong> Settings<br />
• Marker to Peak: Places the active marker on the current greatest value of the<br />
CDP display.<br />
• Marker to Next Peak: Places the active marker on the current second greatest<br />
value of the CDP display.<br />
Step<br />
Notes<br />
1. [M a r ke r ]<br />
2. [Marker]<br />
3. [1], [2], [3], or [4]<br />
4. [Ty pe ]<br />
5. [Off], [Normal], or [Delta]<br />
6. Locate the marker relative to the code<br />
domain plots:<br />
• [Marker to Peak] or<br />
• [Marker to Next Peak]<br />
1xEV-DO Analyzer and Over Air<br />
Test<br />
92 Chapter 3
1xEV-DO Analyzer and Over Air Test<br />
Optional 1xEV-DO Tx and Over Air Analyzer <strong>Measurement</strong> Settings<br />
Setting the Pass/Fail Limits<br />
You can use the Limits settings to set pass and fail limits for several measurements.<br />
With the Limits setting for a measurement set to Off, the measurement result is<br />
displayed in black in the Metrics portion of the screen.<br />
Setting the limits On for your selected measurement can affect the way the result is<br />
displayed. If the measurement result falls within the bounds set by your limits<br />
settings, the numeric result is displayed in green, and “(P)” is displayed beside the<br />
result If the measurement result falls outside the bounds set by your limits settings,<br />
the numeric result is displayed in red, and “(F)” is displayed beside the result.<br />
In addition, the words “ALL PASS” (in green) or “FAILURE” (in red) are displayed<br />
in the bar at the bottom of the screen. This message refers to all limits which have<br />
been turned on. In other words, if one or more of the results for which limits have<br />
been set to On has failed, then the “FAILED” message is displayed; the “All PASS”<br />
message is displayed only if all measurements have passed their limits tests.<br />
NOTE<br />
No summary “All PASS” or “FAIL” messages are displayed if either of the Pilot<br />
Dominance or the Multipath Power limits are not being met.<br />
If the OTA PN Scanner is turned On, and either the Pilot Dominance Limit is not<br />
being met, or the Multipath Power Limit is not being met, all metrics will be<br />
displayed in gray text. This indicates that because either one, or both, of Pilot<br />
Dominance and Multipath Power have not met their specified limits, all the results<br />
being displayed are inaccurate to an unknown degree, and are therefore unreliable.<br />
Ensure that your signal meets the Pilot Dominance Limit and the Multipath Power<br />
Limit to ensure you collect accurate results.<br />
Regardless of your limits settings, no indication of a pass or a fail for individual<br />
measurements is given if CDP and Metrics are turned Off (see “Metrics Provided<br />
by the 1xEV-DO Tx and Over Air Analyzer <strong>Measurement</strong>” on page 104).<br />
Similarly, the “ALL PASS” or “FAILURE” messages are not displayed if CDP and<br />
Metrics are switched Off. The single exception to this rule is the Time Offset<br />
Limits (see below). If you have Time Offset Limits On, the “ALL PASS” or<br />
“FAILURE” messages are still displayed, even if CDP and Metrics are switched<br />
Off.<br />
To reduce display clutter with all the available limit settings, no limit lines are<br />
displayed on this screen.<br />
• Frequency Error Limits: Sets the high and low Frequency Error limits for the<br />
channel. Any measured frequency error that is outside of the set limits will result<br />
in a failure indiction. The High limit is set by entering a positive number, and the<br />
Chapter 3 93<br />
1xEV-DO Analyzer and Over Air<br />
Test
1xEV-DO Analyzer and Over Air Test<br />
Optional 1xEV-DO Tx and Over Air Analyzer <strong>Measurement</strong> Settings<br />
Low limit is set by entering a negative number.<br />
• Time Offset Limits: Sets the high and low time offset limits for the channel.<br />
Limits are set in microseconds. Any measured time offset value that is outside of<br />
the set limits will result in a failure indication.<br />
NOTE<br />
If you have Time Offset Limits On, the “ALL PASS” or “FAILURE” messages are<br />
still displayed, even if CDP and Metrics are switched Off.<br />
1xEV-DO Analyzer and Over Air<br />
Test<br />
• On/Off Ratio Limits: This refers to the Idle On/Off Power Ratio, which is ratio<br />
of the Pilot + MAC Power to the Idle Data Power. The result is blanked out<br />
when none of the acquisition slots are idle, that is, when Idle Slots shows 0%.<br />
The number of slots over which the acquisition is made is determined by the<br />
Update Interval, which itself is determined by the Meas Time setting.<br />
• Estimated Pilot Rho Limits: Sets the lower limit for Pilot Rho (the upper limit<br />
is always 1.0, representing a perfect signal), and switches the Estimated Pilot<br />
Rho Limits On or Off. Any measured, estimated rho value that falls below the<br />
lower limit will result in a failure indication.<br />
Pilot Rho is the measure of the modulation quality for a 1xEV-DO transmitter. A<br />
Rho value of 1.0 represents a perfect signal, indicating that all the power is being<br />
transmitted correctly. Estimated Pilot Rho is only measured over the 96 pilot<br />
chips contained within every half-slot.<br />
• Estimated MAC Rho Limits: Sets the lower limit for MAC Rho (the upper<br />
limit is always 1.0, representing a perfect signal), and switches the Estimated<br />
Pilot Rho Limits On or Off. Any measured, estimated rho value that falls below<br />
the lower limit will result in a failure indication.<br />
MAC Rho is the measure of the modulation quality for a 1xEV-DO transmitter.<br />
A Rho value of 1.0 represents a perfect signal, indicating that all the power is<br />
being transmitted correctly. Estimated MAC Rho is only measured over the 128<br />
MAC chips contained within every half-slot.<br />
• Max Inactive Ch Limits: This sets the high inactive channel power limits for<br />
MAC channels when you are testing CDP Type MAC 64 or CDP Type<br />
MAC 128, and for the Pilot channel when you are testing CDP Type Pilot.<br />
If you have set Max Inactive Ch Limits to be Off, the maximum inactive channel<br />
power is reported on the front panel with no indication of whether this is a good<br />
or a bad result. If you have set Max Inactive Ch Limits to be On, the measured<br />
inactive channel power level is tested against the High MAC Limit or the High<br />
Pilot Limit (depending on your specified CDP Type), and either “F” (for a fail),<br />
or “P” (for a pass) is also displayed against the measurement.<br />
94 Chapter 3
1xEV-DO Analyzer and Over Air Test<br />
Optional 1xEV-DO Tx and Over Air Analyzer <strong>Measurement</strong> Settings<br />
To Set the <strong>Measurement</strong> Frequency Error Limits:<br />
Step<br />
Notes<br />
1 [Setup]<br />
2 [Limits]<br />
3 On [Freq Error Limits]<br />
select On or Off.<br />
Enables you to toggle the measurement limits<br />
function On (active) and Off (inactive).<br />
• If set to On, the Frequency Error will change<br />
from black to red (fail), or to green (pass), and<br />
will indicate either “P” (pass) or “F” (fail). If<br />
the measured value exceeds either the upper<br />
limit or the lower limit, the words ‘ALL PASS’<br />
in the bar at the bottom of the screen will<br />
change to ‘FAILURE’.<br />
• If set to Off, the channel freq/number value will<br />
be displayed in blue. The bar at the bottom of<br />
the screen will indicate measurement in<br />
progress.<br />
4 Set the upper limit.<br />
a. [High Limit]<br />
b. Enter the number on<br />
the numeric keypad.<br />
c. [GHz], [MHz],<br />
[kHz], or [Hz]<br />
5 Set the lower limit.<br />
a. [Low Limit]<br />
b. Enter the number on<br />
the numeric keypad.<br />
c. [GHz], [MHz],<br />
[kHz], or [Hz]<br />
Chapter 3 95<br />
1xEV-DO Analyzer and Over Air<br />
Test
1xEV-DO Analyzer and Over Air Test<br />
Optional 1xEV-DO Tx and Over Air Analyzer <strong>Measurement</strong> Settings<br />
To Set the <strong>Measurement</strong> Time Offset Limits:<br />
Step<br />
1 On [Time Offset Limits]<br />
select On or Off.<br />
Notes<br />
Enables you to toggle the measurement limits<br />
function On (active) and Off (inactive).<br />
• If set to On, the displayed time offset metrics<br />
will change from blue to red (fail), or to green<br />
(pass), and will indicate either “P” (pass) or “F”<br />
(fail). If the measured values exceed the upper<br />
limit or falls below the the lower limit, the<br />
words ‘ALL PASS’ in the bar at the bottom of<br />
the screen will change to ‘FAILURE’.<br />
• If set to Off, the time offset value will be<br />
displayed in blue. The bar at the bottom of the<br />
screen will indicate measurement in progress.<br />
2 Set the upper limit.<br />
a. [High Limit]<br />
b. Enter the number on<br />
the numeric keypad.<br />
c. [µsec]<br />
3 Set the lower limit.<br />
a. [Low Limit]<br />
b. Enter the number on<br />
the numeric keypad.<br />
c. [µsec]<br />
1xEV-DO Analyzer and Over Air<br />
Test<br />
96 Chapter 3
1xEV-DO Analyzer and Over Air Test<br />
Optional 1xEV-DO Tx and Over Air Analyzer <strong>Measurement</strong> Settings<br />
To Set the Idle On/Off Ratio Limits:<br />
Step<br />
1 Press [On/Off Ratio<br />
Limits].<br />
Notes<br />
.<br />
2 Press [Limits]. Enables you to toggle the Idle On/Off Ratio Limits<br />
function On (active) and Off (inactive).<br />
• If set to On, the displayed On/Off Ratio metric<br />
will change from blue to red (fail), or to green<br />
(pass), and will indicate either “P” (pass) or “F”<br />
(fail). If the measured value exceeds the lower<br />
limit, the words ‘ALL PASS’ in the bar at the<br />
bottom of the screen will change to<br />
‘FAILURE’.<br />
• If set to Off, the Idle Power and Non Idle Power<br />
values will be displayed in blue. The bar at the<br />
bottom of the screen will indicate measurement<br />
in progress.<br />
3 Set the lower limit.<br />
Lower Limit range: –200 to 200 dB<br />
a. [Low Limit]<br />
b. Enter the number on<br />
the numeric keypad.<br />
c. [Enter]<br />
Chapter 3 97<br />
1xEV-DO Analyzer and Over Air<br />
Test
1xEV-DO Analyzer and Over Air Test<br />
Optional 1xEV-DO Tx and Over Air Analyzer <strong>Measurement</strong> Settings<br />
To Set the Estimated Pilot Rho Lower Limit:<br />
Step<br />
Notes<br />
1 Press [Pilot Rho Limit]. .<br />
2 Press [Limits]. Enables you to toggle the Estimated Pilot Rho<br />
measurement’s lower limit function On (active) and<br />
Off (inactive).<br />
• If set to On, the displayed Estimated Pilot Rho<br />
metrics will change from blue to red (fail), or to<br />
green (pass), and will indicate either “P” (pass)<br />
or “F” (fail). If the measured value falls below<br />
the lower limit, the words ‘ALL PASS’ in the<br />
bar at the bottom of the screen will change to<br />
‘FAILURE’.<br />
• If set to Off, the Estimated Pilot Rho value will<br />
be displayed in blue. The bar at the bottom of<br />
the screen will indicate measurement in<br />
progress.<br />
3 Set the lower limit.<br />
Lower Limit range: 0 to 1<br />
a. [Low Limit]<br />
b. Enter the number on<br />
the numeric keypad.<br />
c. [Enter]<br />
1xEV-DO Analyzer and Over Air<br />
Test<br />
98 Chapter 3
1xEV-DO Analyzer and Over Air Test<br />
Optional 1xEV-DO Tx and Over Air Analyzer <strong>Measurement</strong> Settings<br />
To Set the Estimated MAC Rho Lower Limit:<br />
Step<br />
1 Press [Est MAC Rho<br />
Limit].<br />
Notes<br />
.<br />
2 Press [Limits]. Enables you to toggle the Estimated MAC Rho<br />
measurement’s lower limit function On (active) and<br />
Off (inactive).<br />
• If set to On, the displayed Estimated MAC Rho<br />
metrics will change from blue to red (fail), or to<br />
green (pass), and will indicate either “P” (pass)<br />
or “F” (fail). If the measured value falls below<br />
the lower limit, the words ‘ALL PASS’ in the<br />
bar at the bottom of the screen will change to<br />
‘FAILURE’.<br />
• If set to Off, the Estimated MAC Rho value will<br />
be displayed in blue. The bar at the bottom of<br />
the screen will indicate measurement in<br />
progress.<br />
3 Set the lower limit.<br />
Lower Limit range: 0 to 1<br />
a. [Low Limit]<br />
b. Enter the number on<br />
the numeric keypad.<br />
c. [Enter]<br />
Chapter 3 99<br />
1xEV-DO Analyzer and Over Air<br />
Test
1xEV-DO Analyzer and Over Air Test<br />
Optional 1xEV-DO Tx and Over Air Analyzer <strong>Measurement</strong> Settings<br />
To Set the Maximum Inactive Channel High Limit:<br />
Step<br />
1 Press [Max Inactive Ch<br />
Limit].<br />
Notes<br />
.<br />
2 Press [Limits]. Enables you to toggle the Maximum Inactive<br />
Channel measurement’s high limit function On<br />
(active) and Off (inactive).<br />
• If set to On, the displayed Maximum Inactive<br />
Channel metrics will change from blue to red<br />
(fail), or to green (pass), and will indicate either<br />
“P” (pass) or “F” (fail). If the measured value<br />
falls above the high limit, the words<br />
‘ALL PASS’ in the bar at the bottom of the<br />
screen will change to ‘FAILURE’.<br />
• If set to Off, the Maximum Inactive Channel<br />
power value will be displayed in blue. The bar<br />
at the bottom of the screen will indicate<br />
measurement in progress.<br />
3 Set the high MAC limit.<br />
a. [High MAC Limit]<br />
b. Enter the number on<br />
the numeric keypad.<br />
c. [Enter]<br />
4 Set the high Pilot limit.<br />
High Limit range: –200 to 200 dB<br />
High Limit range: –200 to 200 dB<br />
1xEV-DO Analyzer and Over Air<br />
Test<br />
a. [High Pilot Limit]<br />
b. Enter the number on<br />
the numeric keypad.<br />
c. [Enter]<br />
100 Chapter 3
1xEV-DO Analyzer and Over Air Test<br />
Optional 1xEV-DO Tx and Over Air Analyzer <strong>Measurement</strong> Settings<br />
Setting Up the Signal Generator<br />
You can set up the signal generator while in the Spectrum Analyzer mode from the<br />
Setup menu. For more detailed information on the signal generator setup and<br />
operation, refer to“Using the Signal Generator” on page 400.<br />
CAUTION<br />
The maximum power for the RF In port and the RF Out/SWR port of the test set is<br />
+20 dBm (100 mW). The maximum power for the Power Sensor port is +24 dBm<br />
(300 mW). When directly coupled to a base station, the test set can be damaged by<br />
excessive power applied to any of these three ports.<br />
To prevent damage in most situations when you directly couple the test set to a base<br />
station, use the high power attenuator between the test set and the BTS.<br />
NOTE<br />
The lowest level the signal generator can go to is -95 dBm. In order to get a lower<br />
level, you must use an external attenuator. You can compensate for the attenuator in<br />
the RF Out Loss.<br />
Step<br />
Notes<br />
1 [Setup]<br />
2 [Sig Gen]<br />
3 [Freq/Chan]<br />
4 Enter the channel or<br />
frequency using the numeric<br />
keypad.<br />
5 • For channel select [Rev]<br />
or [Fwd]<br />
• For frequency select<br />
[GHz], [MHz], [kHz], or<br />
[Hz],<br />
6 [Mod Format]<br />
Chapter 3 101<br />
1xEV-DO Analyzer and Over Air<br />
Test
1xEV-DO Analyzer and Over Air Test<br />
Optional 1xEV-DO Tx and Over Air Analyzer <strong>Measurement</strong> Settings<br />
Step<br />
Notes<br />
7 Select the channel standard<br />
from the list using the up and<br />
down arrow buttons.<br />
8 [Select]<br />
9 Set the RF output amplitude<br />
a. [Amplitude]<br />
b. Enter the amplitude value<br />
using the numeric keypad.<br />
c. [dBm].<br />
10 If you have previously stored<br />
RF Out Loss from an<br />
insertion loss measurement,<br />
go to the next step.<br />
Or<br />
You may also enter a new value for<br />
amplitude by turning the rotary knob until the<br />
desired value is displayed or using the up and<br />
down arrow keys.<br />
For information on the effects of the RF Out<br />
Loss function on the amplitude, refer to<br />
“Using the RF OUT Loss field‚’ below.<br />
Each time you press this softkey, the selected<br />
option changes.<br />
Press [RF OUT Loss] to<br />
select On and enter the RF<br />
Out Loss value.<br />
11 Connect to the access<br />
network.<br />
12 On [Enable Sig Gen] select<br />
On.<br />
Each time you press this softkey, the selected<br />
option changes.<br />
1xEV-DO Analyzer and Over Air<br />
Test<br />
NOTE<br />
The characteristics of any 1xEV-DO signal generated are:<br />
• RRI Active: RRI Bits: 1<br />
• DRC Channel Relative Gain: +3 dB<br />
• ACK Channel relative Gain: 0 dB<br />
• Data Channel Relative Gain: +3.75 dB<br />
• Data Channel: Active<br />
102 Chapter 3
1xEV-DO Analyzer and Over Air Test<br />
Optional 1xEV-DO Tx and Over Air Analyzer <strong>Measurement</strong> Settings<br />
• Data Channel Data Rate: 9.6 kbps<br />
• Data Channel bit stream: PN15<br />
• I Mask: 3FF80000000<br />
• Q Mask: 3FF00000001<br />
• Filter Type: IS 95 Std<br />
Using the RF OUT Loss field<br />
The RF OUT Loss field is used when it is necessary to test the receiver sensitivity of<br />
a typical access network. The test set’s source will typically go down to –95 dBm. In<br />
order to reach –113 dBm for sensitivity testing, you must use an external attenuator.<br />
The measured value of the attenuator and connecting cables are entered into this<br />
field. This value is then used when this field is set to On. When this field is set to<br />
On, the test set will set the RF generator level to the correct level offset by the<br />
external attenuator/cabling. When you set the RF Generator to –113 dBm (with the<br />
RF OUT Loss field turned On and the external attenuator/cabling loss value entered)<br />
the output at the end of the RF test cabling is –113 dBm.<br />
Example: If you want to set the signal generator to –113 dBm, the attenuator and RF<br />
cabling measures 42.51 dB (measured with the 2 port insertion loss measurement<br />
screen prior to this test), the RF OUT Loss field is turned On (with the 42.51 dB loss<br />
value entered). The actual RF output of the signal generator is –70.49 dBm, the<br />
attenuator and RF cabling attenuated the signal to the desired level; so the RF signal<br />
at the end of the test cable/attenuator is –113 dBm. This also points out the<br />
importance of accurately measuring the loss of the attenuator and connecting cables.<br />
Chapter 3 103<br />
1xEV-DO Analyzer and Over Air<br />
Test
1xEV-DO Analyzer and Over Air Test<br />
Metrics Provided by the 1xEV-DO Tx and Over Air Analyzer<br />
<strong>Measurement</strong><br />
Metrics Provided by the 1xEV-DO Tx and Over Air<br />
Analyzer <strong>Measurement</strong><br />
This section contains descriptions of the individual 1xEV-DO parameters in the<br />
metric display of the screen. For information on expected result values and possible<br />
causes of error if the expected results are not met, see “Interpreting the Display” on<br />
page 76.<br />
You can switch the display of the metric results Off by pressing [Display], and then<br />
setting [CDP and Metrics] to Off. Only the Freq, the PN Offset, and the Time Offset<br />
metrics will be displayed. All other metrics will appear as dashes.<br />
If the OTA PN Scanner is turned On, and either the measured Pilot Dominance is<br />
not within its limits, or the measured Multipath Power is not within its limits, all<br />
metrics will be displayed in gray text. This indicates that because either one, or both,<br />
of Pilot Dominance and Multipath Power have not met their specified limits, all the<br />
results being displayed are inaccurate to an unknown degree, and may therefore be<br />
unreliable. Ensure that your signal meets the Pilot Dominance Limit and the<br />
Multipath Power Limit to ensure you collect accurate results.<br />
Frequency<br />
Frequency is the center frequency you entered.<br />
Frequency Error<br />
Frequency error is the frequency difference between your access network’s actual<br />
center frequency and the frequency (or channel) you entered. With a valid time<br />
reference (GPS or ESC) this will have a range of ± 25KHz about the selected centre<br />
frequency. For a pure frequency reference it is limited to ± 500Hz.<br />
1xEV-DO Analyzer and Over Air<br />
Test<br />
PN Offset<br />
The PN Offset is a “short code” sequence that provides a unique identifier for each<br />
sector of each cell site. The PN Offsets are applied to the I and Q signals before<br />
modulation. PN Offsets are offset in time by 52.08 µs and they repeat every 26.666<br />
ms. This yields 512 unique short code sequences (0-511). The access terminal needs<br />
the PN Offset to decode information in the Pilot channel and the MAC channel, both<br />
of which are transmitted by the access network.<br />
Time Offset<br />
104 Chapter 3
1xEV-DO Analyzer and Over Air Test<br />
Metrics Provided by the 1xEV-DO Tx and Over Air Analyzer<br />
<strong>Measurement</strong><br />
The Time Offset compares the PN Offset timing with the overall system time. This<br />
measurement checks the start of the PN offset in comparison to the GPS signal, or to<br />
the Even Second Clock signal. For example, PN Offset 0 should repeat exactly on<br />
the rising edge of the Timing Reference. PN Offset 1 should repeat 52.08 µs after<br />
the rising edge of the Timing Reference, and so forth. Any deviation in time from<br />
that event is reported as a Time Offset.<br />
Non Idle Power<br />
The Non Idle Power is a measurement of the average power during an entire slot<br />
when the acquired slot is non-idle. When all of the acquired slots are idle (that is,<br />
when Idle Slots shows 100%), the measurement result is blanked out. The number<br />
of slots over which the acquisition is made is determined by the Update Interval,<br />
which itself is determined by the Meas Time setting.<br />
Pilot + MAC Power<br />
The Pilot + MAC Power is a measurement of the average power during the Pilot and<br />
MAC periods. When all of the acquired slots are idle (that is, when Idle Slots shows<br />
100%), the measurement result is blanked out. The number of slots over which the<br />
acquisition is made is determined by the Update Interval, which itself is determined<br />
by the Meas Time setting.<br />
On/Off Ratio<br />
This refers to the Idle On/Off Power Ratio, which is ratio of the Pilot + MAC Power<br />
to the Idle Data Power. The result is blanked out when none of the acquisition slots<br />
are idle, that is, when Idle Slots shows 0%. The number of slots over which the<br />
acquisition is made is determined by the Update Interval, which itself is determined<br />
by the Meas Time setting.<br />
Idle Data Power<br />
The Idle Data Power is a measurement of the average power during the data period<br />
of an idle slot. When none of the acquired slots are idle (that is, when Idle Slots<br />
shows 0%), the measurement result is blanked out. The number of slots over which<br />
the acquisition is made is determined by the Update Interval, which itself is<br />
determined by the Meas Time setting.<br />
Idle Slots<br />
The Idle Slots measurement shows as a percentage, the number of idle slots out of<br />
the total number of slots. Exactly how this percentage figure is worked out depends<br />
on the Averaging State you have selected.<br />
Chapter 3 105<br />
1xEV-DO Analyzer and Over Air<br />
Test
1xEV-DO Analyzer and Over Air Test<br />
Metrics Provided by the 1xEV-DO Tx and Over Air Analyzer<br />
<strong>Measurement</strong><br />
If averaging is Off, the precentage of idle slots since the last restart is<br />
reported.<br />
If averaging is Off and your analyzer is in Single mode, the precentage of<br />
slots within the update interval is reported.<br />
If averaging is On, the result displayed is the percentage of idle slots<br />
within ‘n’ capture intervals, where ‘n’ is the current average number. Once<br />
your desired number of averages has been reached, the result reported is<br />
the percentage of idle slots within the last ‘n’ measurement capture<br />
intervals.<br />
Est Pilot Rho<br />
Pilot Rho is the measure of the modulation quality for a 1xEV-DO<br />
transmitter. This measurement is analogous to measuring FM accuracy<br />
and distortion in an AMPS network or EVM in a TDMA system. A Rho<br />
value of 1.0 represents a perfect signal, indicating that all of the power is<br />
being transmitted correctly. Pilot Rho is only measured over the 96 pilot<br />
chips contained within every half-slot. The measurement result is blanked<br />
out when the code domain measurement does not synchronize to the<br />
received input signal. The number of slots over which the acquisition is<br />
made is determined by the Capture Interval, which itself is determined by<br />
the Meas Time setting.<br />
Est MAC Rho<br />
1xEV-DO Analyzer and Over Air<br />
Test<br />
106 Chapter 3
NOTE<br />
1xEV-DO Analyzer and Over Air Test<br />
Metrics Provided by the 1xEV-DO Tx and Over Air Analyzer<br />
<strong>Measurement</strong><br />
MAC Rho is the measure of the modulation quality for a 1xEV-DO transmitter. This<br />
measurement is analogous to measuring FM accuracy and distortion in an AMPS<br />
network or EVM in a TDMA system. A Rho value of 1.0 represents a perfect signal,<br />
indicating that all of the power is being transmitted correctly. MAC Rho is only<br />
measured over the 128 MAC chips contained within every half-slot. The<br />
measurement result is blanked out when the code domain measurement does not<br />
synchronize to the received input signal. The number of slots over which the<br />
acquisition is made is determined by the Capture Interval, which itself is determined<br />
by the Meas Time setting.<br />
Max Inactive Ch<br />
This is a measure of the Maximum Inactive Channel Power. The reported result is<br />
the maximum power in the separate I and Q channels when the MAC Channel<br />
Walsh Codes are inactive, relative to the total power in both the active and the<br />
inactive channels. The number of slots over which the acquisition is made is<br />
determined by the Update Interval, which itself is determined by the Meas Time<br />
setting.<br />
The result reported is for the currently selected CDP type, for example, if the<br />
selected CDP type is Pilot, this will report the highest power level detected across<br />
the inactive channels within the 32 pilot codes.<br />
Noise Floor<br />
The Noise Floor is the average inactive Walsh code power level detected in the<br />
combined I and Q channels, relative to the total power in both the active and the<br />
inactive channels. The number of slots over which the acquisition is made is<br />
determined by the Update Interval, which itself is determined by the Meas Time<br />
setting.<br />
The result reported is for the currently selected CDP type, for example, if the<br />
selected CDP type is Pilot, this will report the average power level detected across<br />
the inactive channels within the 32 pilot codes.<br />
Take care that you do not confuse Noise Floor with Idle Data Power. Idle Data<br />
Power is the power present in the data region of the Idle slots. Noise Floor is the<br />
average power present in the inactive Walsh Code channels.<br />
Data Modulation Type<br />
The Data Channel Modulation measurement returns the highest modulation detected<br />
within the measurement interval. There are three types of modulation, and hence<br />
four possible measurement results: QPSK, 8PSK, and 16QAM, and blank when no<br />
Chapter 3 107<br />
1xEV-DO Analyzer and Over Air<br />
Test
1xEV-DO Analyzer and Over Air Test<br />
Metrics Provided by the 1xEV-DO Tx and Over Air Analyzer<br />
<strong>Measurement</strong><br />
modulation is detected. QPSK is the lowest type of modulation, 8PSK is the next<br />
higher, and the highest modulation type is 16QAM. Only if all the slots within the<br />
measurement interval are idle will the result be blanked out. The number of slots<br />
over which the acquisition is made is determined by the capture interval, which<br />
itself is determined by the Meas Time setting.<br />
1xEV-DO Analyzer and Over Air<br />
Test<br />
108 Chapter 3
1xEV-DO Analyzer and Over Air Test<br />
Interpretation of 1xEV-DO Tx and Over Air Analyzer <strong>Measurement</strong><br />
Results<br />
Interpretation of 1xEV-DO Tx and Over Air Analyzer<br />
<strong>Measurement</strong> Results<br />
This section contains expected result values and possible causes of error if the<br />
expected results are not met.<br />
Frequency Error<br />
The standards specify very tight Frequency Error performance. In the PCS bands,<br />
the 0.05 parts-per-million specification translates to only 99 Hz at a carrier<br />
frequency of 1980 MHz or 40 Hz at 850 MHz cellular frequencies. Frequency Error<br />
shows up as uncorrelated power that adds to the noise floor or shows up in other<br />
Walsh codes.<br />
If a particular site loses its reference to GPS time, its reference signals will begin to<br />
drift over time. Access Terminals already using the site can remain on the air<br />
because they derive their timing from the signals transmitted by the access network.<br />
However, access terminals using other sites/sectors may be prevented from using<br />
the site because they are confused by the error in frequency. This creates what is<br />
known as the “island cell effect”. By itself, the cell is still functional. To the rest of<br />
the system, it's inaccessible.<br />
This island cell effect can be caused by a failure in the site's GPS receiver and<br />
timebase distribution network. Using the test set's Internal GPS receiver provides an<br />
independent time reference that will allow you to determine if this cell site is out of<br />
sync with the rest of the network.<br />
PN Offset<br />
Verify that the PN Offset is correct. If you are in Manual mode, the PN Offset will<br />
display the value you entered. Make sure the Time Offset is small (less than 3 µs). If<br />
the Time Offset is greater than expected, see the section on Time Offset below. If<br />
you are in Auto mode, the test set will tune to the PN Offset with the smallest<br />
amount of Time Offset. If an incorrect PN Offset is displayed, the Time Offset will<br />
likely be very small.<br />
Time Offset<br />
Time Offset is a measure of the time of the arrival of the pilot signal from the access<br />
network with respect to GPS time. It is expressed in microseconds.<br />
The 1xEV-DO standards specify a maximum time offset of 10 µs. Generally 5 µs is<br />
a recommended maximum, although many access network manufacturers specify<br />
Chapter 3 109<br />
1xEV-DO Analyzer and Over Air<br />
Test
1xEV-DO Analyzer and Over Air Test<br />
Interpretation of 1xEV-DO Tx and Over Air Analyzer <strong>Measurement</strong><br />
Results<br />
that timing must be within 3 µs. If the Time Offset is large enough, an “island cell”<br />
can occur. The “island cell” effect was mentioned already when discussing<br />
Frequency Error.<br />
An access terminal moving outward toward the limit of its cell will need to acquire<br />
the adjacent cell in order to hand off. If the time offset of the target cell is too far<br />
from that of the current site, the handoff may not happen.<br />
The dependence of the access terminal on correct system time limits the physical<br />
distance to a target cell's antenna. Each PN Offset is 52.08 µs; if the propagation<br />
delay is too long, the received PN Offset may be different from the value designated<br />
on the Sync channel. This difference can confuse the access terminal, causing the<br />
handoff to fail.<br />
Another cause of timing error is a bad GPS receiver or timing distribution network<br />
within the access network. To test your access network's GPS and timing<br />
distribution system, you can use the internal GPS receiver to generate an accurate<br />
timing reference for the test set to use while performing access network tests.<br />
Non Idle Power<br />
When making channel power measurements, make sure you have accounted for the<br />
loss of the test cable and high power attenuator you are using. If you do not know<br />
the loss of your test cable and high power attenuator configuration, perform an<br />
insertion loss measurement and enter the insertion loss as the RF In Loss value. For<br />
more information see “Two Port Insertion Loss” on page 123.<br />
If the channel power is lower than expected, verify you have a good connection to<br />
the RF output of the access network. Also, verify the cable you are using to connect<br />
to the access network is not faulty. A low channel power may also indicate a bad<br />
power amplifier.<br />
Inaccurate channel power (high or low) may indicate an incorrect power setting at<br />
the access network.<br />
1xEV-DO Analyzer and Over Air<br />
Test<br />
Pilot + MAC Power<br />
The Pilot + MAC Power is a measurement of the average power during the Pilot and<br />
MAC periods. This is when the transmitter is only sending overhead messages in a<br />
burst mode and is not transmitting any data to users. When the Idle slot activity goes<br />
to zero (no idle slots), the Pilot + MAC and a couple of the other measurements<br />
blank (as they have no meaning when all slots are active).<br />
On/Off Ratio<br />
The On/Off Ratio is a ratio of the Pilot + MAC Power to the Idle Data Power. The<br />
110 Chapter 3
1xEV-DO Analyzer and Over Air Test<br />
Interpretation of 1xEV-DO Tx and Over Air Analyzer <strong>Measurement</strong><br />
Results<br />
recommended minimum On/Off Ratio for idle slots was set to 7dB in the standard to<br />
allow Access Network manufacturers to protect the power amplifiers from large<br />
output power swings between On portions of the signal during bursts and Off<br />
portions of the signal in idle slots. Each manufacture may set this value to different<br />
levels. This parameter is loaded into the radios from the Switch.<br />
When the Idle slot activity goes to zero (no idle slots), the On/Off Ratio and a couple<br />
of the other measurements blank (as they have no meaning when all slots are active).<br />
Idle Data Pwr<br />
This is the average power level in the data portion, averaged across all idle slots in<br />
the acquired capture, and can contribute to the overall Noise Floor in the system. A<br />
high reading here combined with a high reading in the CDP Noise Floor can indicate<br />
a problem with the I/Q Modulator or indicates the amplifier is being overdriven.<br />
When the Idle slot activity goes to zero (no idle slots), the Idle Data Power and a<br />
couple of the other measurements blank (as they have no meaning when all slots are<br />
active).<br />
Idle Slots<br />
This reading is a measure of the number of idle slots, measured as a percentage of<br />
the total number of slots available. This reading can be used as a flag to add more<br />
capacity at the site as the reading approaches 0%.<br />
Est Pilot Rho<br />
The 1xEV-DO access network standard specifies that Rho must be greater than<br />
0.912. Typical values for a healthy access network are greater than 0.94.<br />
Rho failures can indicate problems in:<br />
• Compression in linear amplifiers<br />
• Magnitude and phase errors in the IQ modulator<br />
• Phase non-linearity (group delay)<br />
• Spurious signals in the transmission path<br />
• Carrier feedthrough<br />
Because the uncorrelated power appears as interference to the access terminals, poor<br />
Rho performance will affect the sector's capacity. The added interference can<br />
require that the signal on traffic channels be raised to overcome the interference.<br />
This may, in turn, be seen as further interference. At some point, the site will have to<br />
shed calls in order to supply the remaining calls with enough signal versus the<br />
interference in the system.<br />
Chapter 3 111<br />
1xEV-DO Analyzer and Over Air<br />
Test
1xEV-DO Analyzer and Over Air Test<br />
Interpretation of 1xEV-DO Tx and Over Air Analyzer <strong>Measurement</strong><br />
Results<br />
Est MAC Rho<br />
The 1xEV-DO access network standard specifies that Rho must be greater than<br />
0.912. Typical values for a healthy access network are greater than 0.94.<br />
Rho failures can indicate problems in:<br />
• Compression in linear amplifiers<br />
• Magnitude and phase errors in the IQ modulator<br />
• Phase non-linearity (group delay)<br />
• Spurious signals in the transmission path<br />
• Carrier feedthrough<br />
Because the uncorrelated power appears as interference to the access terminals, poor<br />
Rho performance will affect the sector's capacity. The added interference can<br />
require that the signal on traffic channels be raised to overcome the interference.<br />
This may, in turn, be seen as further interference. At some point, the site will have to<br />
shed calls in order to supply the remaining calls with enough signal versus the<br />
interference in the system.<br />
Max Inactive Ch<br />
According to the 1xEV-DO standard, the CDP in all inactive channels must be at<br />
least 27 dB below the total MAC power.<br />
If this value exceeds 27 dBc, compression may be occurring in the base station<br />
power amplifier or there may be errors in the base station IQ modulator.<br />
1xEV-DO Analyzer and Over Air<br />
Test<br />
Noise Floor<br />
The light gray bars on the CDP trace display are noise. While they appear to be<br />
channels on the trace and are referred to as noise channels, they are not real<br />
1xEVDO channels. They represent the noise energy in the inactive displayed code<br />
channel. The average level of the top of these noise bars represents the CDP Trace<br />
noise floor, and is the figure reported here.<br />
The noise floor level can be influenced by many conditions one of which can be the<br />
existence of high power from another CDMA base station or such things as loose<br />
RF connections. It is desirable to reduce the noise floor as much as possible before<br />
making measurements. If you have a strong signal on the metrics display but still<br />
show a high noise floor, then a problem may exist in the base station.<br />
Data Modulation Type<br />
The Data Modulation Type measurement returns the highest modulation detected<br />
112 Chapter 3
1xEV-DO Analyzer and Over Air Test<br />
Interpretation of 1xEV-DO Tx and Over Air Analyzer <strong>Measurement</strong><br />
Results<br />
within the measurement interval. There are three types of modulation, and hence<br />
four possible measurement results: QPSK, 8PSK, and 16QAM, and blank when no<br />
modulation is detected. QPSK is the lowest type of modulation, 8PSK is the next<br />
higher, and the highest modulation type is 16QAM. Only if all the slots within the<br />
measurement interval are idle will the result be blanked out. The number of slots<br />
over which the acquisition is made is determined by the Update Interval, which<br />
itself is determined by the Meas Time setting.<br />
A reading of 16QAM indicates high throughput for the access network. If only<br />
QPSK is shown over time, then there may be a problem in the transmit path of the<br />
acess network.<br />
Chapter 3 113<br />
1xEV-DO Analyzer and Over Air<br />
Test
1xEV-DO Analyzer and Over Air Test<br />
Customizing Your Display<br />
Customizing Your Display<br />
You can change the way your measurement results are displayed on your analyzer.<br />
The MAC Code Domain Plot in the graphical area of the display can be switched<br />
between displaying MAC Code Power sorted by MAC index, and displaying MAC<br />
Code Power sorted by Walsh Code.<br />
The same information, sorted either by MAC index or by Walsh Code, can itself be<br />
displayed in two different ways. The CDP plot (the default display) can be switched<br />
to show a Codogram, which adds the third dimension of time to the display. That is,<br />
you can view code domain power (sorted by either MAC Index or be Walsh Code)<br />
over time.<br />
1xEV-DO Analyzer and Over Air<br />
Test<br />
114 Chapter 3
1xEV-DO Analyzer and Over Air Test<br />
Sorting by MAC Index or by Walsh Code<br />
Sorting by MAC Index or by Walsh Code<br />
The default view of a CDP plot is sorted by MAC Index. This can be changed to a<br />
view sorted by Walsh Code. The order used for Walsh Code display is Hadamard.<br />
Step<br />
Notes<br />
1 Press [Display]<br />
2 Press [MAC CDP X Axis] Each time you press this softkey, the selected<br />
option changes. Select either MAC or Walsh<br />
as your preferred display option.<br />
Chapter 3 115<br />
1xEV-DO Analyzer and Over Air<br />
Test
1xEV-DO Analyzer and Over Air Test<br />
Converting Between MAC Index and Walsh Code<br />
Converting Between MAC Index and Walsh Code<br />
Converting From<br />
Converting To<br />
Even numbered MAC Indexes Walsh Code = MAC Index / 2<br />
Odd numbered MAC Indexes Walsh Code = ((MAC Index – 1) / 2) + 32<br />
Walsh Codes 0 – 31 MAC Index = Walsh Code * 2<br />
Walsh Codes 32 – 64 MAC Index = ((Walsh Code – 32)* 2) + 1<br />
1xEV-DO Analyzer and Over Air<br />
Test<br />
116 Chapter 3
1xEV-DO Analyzer and Over Air Test<br />
Colors Used on the MAC Code Domain CDP Display<br />
Colors Used on the MAC Code Domain CDP Display<br />
MAC<br />
Index<br />
Walsh Code Color Notes<br />
0 0 Gray if inactive<br />
Light brown if active<br />
1 32 Gray if inactive<br />
Light brown if active<br />
2 1 Gray if inactive<br />
Light brown if active<br />
3 33 Gray if inactive<br />
Light brown if active<br />
Reserved channel/code, and<br />
should always be inactive. If<br />
these are light brown, then<br />
channel type is “Unknown”.<br />
Reserved channel/code, and<br />
should always be inactive. If<br />
these are light brown, then<br />
channel type is “Unknown”.<br />
Reserved channel/code, and<br />
should always be inactive. If<br />
these are light brown, then<br />
channel type is “Unknown”.<br />
Reserved channel/code, and<br />
should always be inactive. If<br />
these are light brown, then<br />
channel type is “Unknown”.<br />
4 2 Light blue Reverse activity. Should always<br />
be active.<br />
>4 3 – 31 and<br />
34 – 63 for<br />
CDP Type<br />
MAC 64.<br />
3 – 31 and<br />
34 – 127 for<br />
CDP Type<br />
MAC 128.<br />
Gray if inactive (or<br />
“noise”)<br />
Orange if active<br />
Orange indicates active MAC<br />
RPC channels. Active channels<br />
display the Walsh Code/MAC<br />
Index below the graticule in<br />
yellow text.<br />
Chapter 3 117<br />
1xEV-DO Analyzer and Over Air<br />
Test
1xEV-DO Analyzer and Over Air Test<br />
Colors Used on the Pilot Code Domain CDP Display<br />
Colors Used on the Pilot Code Domain CDP Display<br />
Walsh<br />
Code<br />
Color<br />
Notes<br />
0 Always red Pilot<br />
1 – 31 Always gray<br />
(inactive)<br />
Noise<br />
1xEV-DO Analyzer and Over Air<br />
Test<br />
118 Chapter 3
1xEV-DO Analyzer and Over Air Test<br />
Showing or Hiding the OTA PN Scanner<br />
Showing or Hiding the OTA PN Scanner<br />
The presence of the OTA PN Scanner at the top of your screen is the main<br />
distinguishing feature of an Over the Air measurement. If, from the main (Mode)<br />
screen, you selected [Tx Analyzer], then [1xEV-DO Analyzer], the OTA PN<br />
Scanner will usually be switched Off; if, from the main (Mode) screen, you selected<br />
[Over Air], then [1xEV-DO Over Air], the OTA PN Scanner will usually be<br />
switched On.<br />
Step<br />
Notes<br />
1 Press [Display]<br />
2 Press [OTA PN Scanner] Each time you press this key, the codogram<br />
state switches between On and Off.<br />
When the OTA PN Scanner is turned Off, there is more space on the screen to<br />
display the Code Domain Plot, so the finer details of the Code Domain Plot are<br />
easier to see.<br />
When you have the OTA PN Scanner display On, you also have the option of<br />
turning the CDP and Metrics Off. This leaves more space on the screen to display<br />
the OTA PN Scanner, so the finer details of the OTA PN Scanner measurement are<br />
easier to see. At the same time, most of the metrics are turned off so they appear as<br />
dashes on the metrics portion of the screen. Only the Frequency, the PN Offset, and<br />
the Time Offset are still computed and displayed on the screen. As the test<br />
instrument no longer has to compute the metrics results or the CDP plot, the update<br />
rate of the OTA PN Scanner is improved.<br />
Chapter 3 119<br />
1xEV-DO Analyzer and Over Air<br />
Test
1xEV-DO Analyzer and Over Air Test<br />
Codogram Display<br />
Codogram Display<br />
Switching to the Codogram view adds the third dimension of time to the display.<br />
That is, you can view code domain power (sorted by either MAC Index or be Walsh<br />
Code) over time. MAC Indexes or Walsh Codes are displayed against the horizontal<br />
X-axis, time is represented on the vertical Y-axis, and signal strength is indicated by<br />
the color - low power signals are represented by the cooler, blue end of the<br />
spectrum, and high power signals by the warmer, red end of the spectrum.<br />
The codogram plot rises over time until it fills the graphical section of the display.<br />
Your most recent data appears at the bottom of the display, and your oldest data<br />
(several minutes ago to several hours ago, depending on your settings) appears at the<br />
top of the display. In this way, you can clearly see the changes in power that occur<br />
over a period of time.<br />
The Update Interval is the interval, measured in whole seconds, between successive<br />
records displayed on the codogram. In other words, if you set the update interval to<br />
5 seconds, the codogram display will not update until the after the first complete<br />
measurement following a gap of five seconds. Alternatively, you can set the update<br />
interval to provide the maximum data collection speed by pressing [Max Speed], or<br />
by setting the update interval to 0 (zero) seconds.<br />
NOTE<br />
It is not always possible for the analyzer to match the update interval you specify. It<br />
is possible, for example, to set your update interval to zero seconds (the maximum<br />
speed), and then to find that the analyzer can not update any faster than once every<br />
two seconds.<br />
You can clear your screen and start a fresh codogram display by pressing the Reset<br />
Codogram key. Changing the units of the X-axis (for example, by changing CDP<br />
Type, or by switching from MAC to Walsh Code) also clears and resets the<br />
codogram.<br />
1xEV-DO Analyzer and Over Air<br />
Test<br />
120 Chapter 3
1xEV-DO Analyzer and Over Air Test<br />
Performing a Codogram <strong>Measurement</strong><br />
Performing a Codogram <strong>Measurement</strong><br />
Step<br />
Notes<br />
1 [Display]<br />
2 [Codogram] This displays the menu that controls the<br />
appearance and behavior of the<br />
codogram display.<br />
3 On [Codogram] select On or Off. Each time you press this key, the<br />
codogram state switches between On and<br />
Off.<br />
When you set [Codogram] to On,<br />
[Reset Codogram], [Update Interval] and<br />
[Palette] become active.<br />
4 [Reset Codogram] This restarts the data capture for the<br />
Codogram. You may see the screen<br />
freeze for a few seconds before the<br />
display starts plotting data again.<br />
5 If desired set the update interval:<br />
a. [Update Interval]<br />
b. Enter the interval number of<br />
seconds using the numeric<br />
keypad.<br />
c. Select [sec] or [Max Speed].<br />
6 If desired set the display color:<br />
a. [Palette]<br />
b. Select [Full Color] or<br />
[Grayscale].<br />
Allows you to set the update interval to 0,<br />
1, or more seconds. Alternatively, you<br />
may set it to automatically determine the<br />
update interval that provides the<br />
maximum data collection speed.<br />
If you need to return to the automatically<br />
determined maximum capture speed, you<br />
must press [Update Interval] followed by<br />
a numeric keypad key to access [Max<br />
Speed].<br />
The color/grayscale top and bottom<br />
mappings are determined by the Ref<br />
Level and Scale/Div settings. To change<br />
the mapping, go to [Level/Location] and<br />
change [Ref Level] and [Scale/Div].<br />
Chapter 3 121<br />
1xEV-DO Analyzer and Over Air<br />
Test
1xEV-DO Analyzer and Over Air Test<br />
Performing a Codogram <strong>Measurement</strong><br />
NOTE<br />
The key labelled “Update Interval” was labelled “Capture Interval” in earlier<br />
versions of the software (A.04.00 or earlier). The way the key works has not<br />
changed. Only the key label has changed to clarify what the key does.<br />
1xEV-DO Analyzer and Over Air<br />
Test<br />
122 Chapter 3
4 Two Port Insertion Loss<br />
“Measuring Two Port Insertion Loss” on page 124<br />
“Performing a Basic Two Port Insertion Loss <strong>Measurement</strong> (Normalize)” on<br />
page 125<br />
“Displaying Location Information Using GPS” on page 126<br />
“Setting Average, Sweep, and Restart” on page 127<br />
“Adding a Marker” on page 130<br />
“Measuring Two Port Insertion Loss for Spectrum Analyzer, Channel Scanner,<br />
1xEV-DO Analyzer, CDMA Analyzer, and Signal Generator (RF In Loss and<br />
RF Out Loss)” on page 131<br />
“Measuring Insertion Loss for Power Meter (Option 600 - Power Meter Only)”<br />
on page 134<br />
“Determining The Lowest (Worst) Insertion Loss and Its Frequency” on<br />
page 135<br />
“Determining the Highest (Best) Insertion Loss and Its Frequency” on page 136<br />
“Using the Delta Marker to Measure a Difference in Insertion Loss or<br />
Frequency” on page 136<br />
“Activating Interference Rejection” on page 136<br />
“Clearing Normalization” on page 137<br />
“Setting Source Level” on page 137<br />
“Optimizing Dynamic Range” on page 138<br />
“Setting the Pass/Fail Limits” on page 139<br />
Two Port Insertion Loss<br />
123
Two Port Insertion Loss<br />
Two Port Insertion Loss<br />
Measuring Two Port Insertion Loss<br />
Measuring Two Port Insertion Loss<br />
This test measures the loss of a cable or other device over a specified frequency<br />
range.<br />
Insertion loss measurements are important in accurately quantifying the amount of<br />
loss a signal will incur as it passes through a cable, attenuator, or any other device.<br />
In S-parameter terms, insertion loss is referred to as an S 21 measurement. “S” stands<br />
for scattering.<br />
NOTE<br />
Any cable added to your measurement configuration will add some loss that must be<br />
accounted for. For example, a jumper cable placed between the test set and the<br />
antenna feedline (or other device) you are connecting will add some loss to the<br />
measurement.<br />
If you add a jumper cable to your measurement configuration, you must normalize<br />
out the loss associated with the cable at your current measurement frequency.<br />
Otherwise, your measurement results will be inaccurate, and you will probably<br />
adjust transmit parameters in error.<br />
Insertion loss measurements have a variety of uses. However, the example<br />
procedures focus on two kinds of two-port insertion loss measurements that you<br />
need as preparation for other test set measurements:<br />
• Measuring the 3 meter (10 ft) test cable, 60 cm (2 ft) normalization cable, and<br />
high power attenuator provides values you can store as RF In Loss and RF Out<br />
Loss.<br />
— RF In Loss is used with the Spectrum Analyzer, Channel Scanner,<br />
cdma Analyzer, cdma2000 analyzer, 1x-EVDO Analyzer, and the<br />
GSM Analyzer.<br />
— RF Out Loss is used with the Signal Generator.<br />
— RF Out Loss is the measured loss of cables and other devices between the<br />
<strong>E7495A</strong>/B RF Out (Port 1) and the receiver under test.<br />
• Measuring the high power attenuator and 60 cm (2 ft) normalization cable<br />
provides stored Power Meter Loss (PM loss), which is needed for using the<br />
Power Meter.<br />
— PM loss is the measured loss of cables and other devices between the signal<br />
source and the power sensor.<br />
124 Chapter 4
Two Port Insertion Loss<br />
Measuring Two Port Insertion Loss<br />
Normalizing and Performing a Basic Two Port Insertion Loss <strong>Measurement</strong><br />
Before you perform a two port insertion loss measurement, you must first normalize<br />
the measured values for insertion loss by compensating for the loss associated with<br />
the devices (adapters, cables) that connect the <strong>E7495A</strong>/B Base Station Test Set to<br />
the device or assembly being tested. Otherwise, the loss introduced by these<br />
connecting devices is added to the loss of the device under test.<br />
Two Port Insertion Loss<br />
Performing a Basic Two Port Insertion Loss <strong>Measurement</strong> (Normalize)<br />
Step<br />
Notes<br />
1 Mode<br />
2 [Antenna/Cable]<br />
3 [Two Port Insertion Loss] The insertion loss<br />
measurement takes a few<br />
seconds to load.<br />
4 [Start Freq]<br />
5 Enter the start frequency of interest using the<br />
numeric keypad.<br />
6 [Hz], [kHz], [MHz], or [GHz]<br />
7 [Stop Freq]<br />
8 Enter the stop frequency of interest using the<br />
numeric keypad.<br />
The stop frequency should be<br />
larger than the start frequency.<br />
9 [Hz], [kHz], [MHz], or [GHz]<br />
10 [Normalize] Follow the instructions of the<br />
Normalize Wizard.<br />
11 Connect the device whose insertion loss you<br />
want to measure.<br />
Chapter 4 125
Two Port Insertion Loss<br />
Figure 4-1<br />
Two Port Insertion Loss<br />
Measuring Two Port Insertion Loss<br />
Two Port Insertion Loss <strong>Measurement</strong> Results, After Normalization.<br />
Displaying Location Information Using GPS<br />
If you are making a Two Port Insertion Loss measurement, you may use GPS<br />
Location data to verify your location. For additional information on the GPS Data<br />
function, refer to “Displaying GPS Location Data” on page 458.<br />
To Display GPS Location Information:<br />
Step<br />
Notes<br />
1 [Level/Location]<br />
126 Chapter 4
Step<br />
2 On [Show GPS<br />
Location] select On.<br />
Notes<br />
Two Port Insertion Loss<br />
Measuring Two Port Insertion Loss<br />
Displays GPS satellite location information. Uses the<br />
internal GPS to capture the location of a<br />
measurement. The GPS information can be used to<br />
return to the same location. The Time Ref<br />
(Freq/Chan/Time Ref mode) button must be set to<br />
Internal GPS for this function to be active.<br />
Information logged includes latitude, altitude<br />
(feet/meters), and the number of satellites tracked.<br />
Each time you press this softkey, the selected option<br />
changes.<br />
3 Highlight [On] Toggle to [On] to display GPS satellite location<br />
information. Toggle to [Off] to remove the location<br />
information<br />
Two Port Insertion Loss<br />
NOTE<br />
If you prefer to have an electronic copy of the location information, see “Saving<br />
Data” on page 465.<br />
Setting Average, Sweep, and Restart<br />
Setting the Sweep<br />
You can select either continuous or single sweep. Continuous sweep provides<br />
repeated, ongoing measurements. Single sweep performs a single measurement that<br />
is repeated only when you push the Single button.<br />
To Set Sweep:<br />
Step<br />
Notes<br />
1 [Average/Sweep]<br />
2 [Continuous] or [Single] Each time you press this softkey, the<br />
selected option changes.<br />
Setting Averaging<br />
You can choose to have Averaging On or Off, and to set the number of averages you<br />
Chapter 4 127
Two Port Insertion Loss<br />
Two Port Insertion Loss<br />
Measuring Two Port Insertion Loss<br />
want to take if Averaging is On. Averaging only applies to the data, not to the trace.<br />
You can select from the following types of averaging:<br />
• Off: Disables averaging.<br />
• Running: Computes the new result as the weighted sum of the last result and the<br />
new measurement. The last result is weighted by (n – 1)/n. The new result is<br />
weighted by 1/n. Each new measurement produces a new result.<br />
• Max Hold: Is not an average, but on a point by point basis, displays the<br />
maximum amplitude for the given frequency since Max Hold was turned on. It is<br />
updated when a new maximum occurs.<br />
• Group Average: Makes the requested number of measurements, averages the<br />
measurement data, and displays the average as a single result trace.<br />
<strong>Measurement</strong> time will vary based on the requested number of averages, and can<br />
take several minutes for very large number of averages.<br />
• Group Max Average: Makes the requested number of measurements before<br />
returning a single trace result. This trace is the maximum value seen at each<br />
trace point over the requested number of averages (measurements).<br />
To Set Averaging:<br />
Step<br />
Notes<br />
1 Set the number of averages.<br />
a. [Average]<br />
b. Enter the number of averages<br />
using the numeric keypad.<br />
c. [Enter]<br />
2 Select the type of averaging you<br />
want to apply.<br />
a. [Average/Sweep]<br />
b. [Averaging]<br />
c. [Off], [Running Average],<br />
[Max Hold], [Group<br />
Average], or [Group Max<br />
Average]<br />
128 Chapter 4
NOTE<br />
NOTE<br />
Two Port Insertion Loss<br />
Measuring Two Port Insertion Loss<br />
These two steps can be performed in any order. However, if you turn averaging on<br />
and a large number of averages has previously been set, there may be a delay before<br />
you can change number of averages.<br />
Setting Restart<br />
When you have averaging turned On and you are in Continuous Sweep mode, you<br />
can restart the averaging by pressing the Restart menu key. The Restart key has no<br />
effect if you are in Single sweep mode.<br />
Pressing the Restart key has no effect on the average count when performing Group<br />
Average or Group Max.<br />
To restart averaging:<br />
Two Port Insertion Loss<br />
Step<br />
Notes<br />
1 [Average/Sweep]<br />
2 [Restart] This key is unavailable or has no effect when<br />
Sweep is set to Single. To restart a Single<br />
Sweep measurement, press [Single].<br />
Chapter 4 129
Two Port Insertion Loss<br />
Two Port Insertion Loss<br />
Measuring Two Port Insertion Loss<br />
Adding a Marker<br />
Markers can be used on traces to help you visually track up to four signals. Each<br />
marker has the following settings:<br />
• Type: Provides three options, including:<br />
• Off<br />
• Normal: Places a diamond-shaped, colored marker, along with a number,<br />
1-4, on the trace.<br />
• Delta: This is associated with a normal marker. Therefore, a normal marker<br />
must exist prior to creating the delta marker. The delta marker displays the<br />
difference between the normal marker position and the delta marker<br />
position. Only one delta marker can be associated with a given normal<br />
marker. The normal marker must be active when Delta is selected.<br />
• Marker to Peak: Places the active marker on the current greatest value of the<br />
trace.<br />
• Marker to Next Peak: Places the active marker on the current second greatest<br />
value of the trace.<br />
• Marker to Min: Places the active marker on the current lowest value of the trace.<br />
• Marker to Next Min: Places the active marker on the current second lowest value<br />
of the trace.<br />
To Add a Marker to a Trace:<br />
Step<br />
Notes<br />
1 [Marker]<br />
2 [Marker]<br />
3 [1], [2], [3], or [4]<br />
4 [Type]<br />
5 [Off], [Normal], or [Delta]<br />
6 Locate the marker relative to the trace:<br />
[Marker to Peak], [Marker to Next Peak],<br />
[Marker to Min], or [Marker to Next Min]<br />
130 Chapter 4
Two Port Insertion Loss<br />
Measuring Two Port Insertion Loss<br />
Measuring Two Port Insertion Loss for Spectrum Analyzer,<br />
Channel Scanner, 1xEV-DO Analyzer, CDMA Analyzer, and<br />
Signal Generator (RF In Loss and RF Out Loss)<br />
To prepare to perform spectrum analysis, Tx analysis (CDMA, W-CDMA,<br />
1xEV-DO, and so forth), and signal generator measurements, you must store RF In<br />
Loss and RF Out Loss values.<br />
Two Port Insertion Loss<br />
Step<br />
Notes<br />
1 Connect the cable or device. Connect the 3 meter (10 ft) cable, high power<br />
attenuator, and other 60 cm (2 ft) cable (not<br />
used for normalization) between the two 10 dB<br />
pads that were used for normalization.<br />
Chapter 4 131
Two Port Insertion Loss<br />
Two Port Insertion Loss<br />
Measuring Two Port Insertion Loss<br />
Step<br />
Notes<br />
2 [Level] If the insertion loss trace is not visible, you can<br />
change the reference level or use Autoscale to<br />
have the test set select a reference level for<br />
you.<br />
3 [Store As]<br />
• Press [Autoscale] to display the trace so<br />
that it fills the screen from top to bottom.<br />
• Press [Ref Level] and then enter the<br />
appropriate value and press [dB] to<br />
manually select a level for the trace.<br />
• Press [Scale/Div] and then enter the<br />
appropriate value and press [dB] to<br />
manually select the number of dBs per line<br />
on the graticule.<br />
4 [Store As RF IN Loss] Saves the RF In Loss value for use in later<br />
measurements.<br />
5 [Store As RF OUT Loss] Saves the RF Out Loss value for use in later<br />
measurements.<br />
132 Chapter 4
Figure 4-2<br />
Two Port Insertion Loss<br />
Measuring Two Port Insertion Loss<br />
Two Port Insertion Loss <strong>Measurement</strong> Results, Including Effects of 60 cm (2 ft)<br />
Cable, 3 meter (10 ft) Cable, and High Power Attenuator.<br />
Two Port Insertion Loss<br />
Chapter 4 133
Two Port Insertion Loss<br />
NOTE<br />
Two Port Insertion Loss<br />
Measuring Two Port Insertion Loss<br />
Measuring Insertion Loss for Power Meter (Option 600 - Power<br />
Meter Only)<br />
This measurement is only available if you have Option 600 - Power Meter, and<br />
requires an 8482A/8481A power sensor.<br />
Before making a power measurement, you need to store a PM Loss value that will<br />
compensate for the loss of the devices you use to connect to the transmitter.<br />
Step<br />
1 Connect the cable or<br />
device.<br />
Notes<br />
Connect the high power attenuator and remaining<br />
60 cm (2 ft) cable (not the cable used for<br />
normalization) between the two 10 dB pads that<br />
were used for normalization.<br />
134 Chapter 4
Step<br />
Notes<br />
Two Port Insertion Loss<br />
Measuring Two Port Insertion Loss<br />
2 [Level/Location] If the insertion loss trace is not visible, you can<br />
change the reference level or use Autoscale to have<br />
the test set select a reference level for you.<br />
Two Port Insertion Loss<br />
3 [Store As]<br />
• Press [Autoscale] to display the trace so that it<br />
fills the screen from top to bottom.<br />
• Press [Ref Level] and then enter the<br />
appropriate value and press [dB] to manually<br />
select a level for the trace.<br />
• Press [Scale/Div] and then enter the<br />
appropriate value and press [dB] to manually<br />
select the number of dBs per line on the<br />
graticule.<br />
4 [Store As PM Loss] Saves the loss for use with the power<br />
measurement. This PM Loss figure only remains<br />
valid for as long as you continue to use the same<br />
“characterized assembly”, that is, the same cables<br />
and pads.<br />
If Option 600 - Power Meter is not installed, [Store<br />
as PM Loss] and [PM Loss] are unavailable.<br />
Determining The Lowest (Worst) Insertion Loss and Its<br />
Frequency<br />
Step<br />
Notes<br />
1 [Marker]<br />
2 On [Type] select<br />
Normal.<br />
Each time you press this softkey, the selected option<br />
changes.<br />
3 [Marker to Peak] Places a marker on the highest peak. The marker<br />
value is displayed in the upper right.<br />
Chapter 4 135
Two Port Insertion Loss<br />
Two Port Insertion Loss<br />
Measuring Two Port Insertion Loss<br />
Determining the Highest (Best) Insertion Loss and Its Frequency<br />
Step<br />
Notes<br />
1 [Marker]<br />
2 On [Type] select<br />
Normal.<br />
Each time you press this softkey, the selected option<br />
changes.<br />
3 [Marker to Min] Places a marker on the lowest peak. The marker<br />
value is displayed in the upper right.<br />
Using the Delta Marker to Measure a Difference in Insertion Loss<br />
or Frequency<br />
Step<br />
Notes<br />
1 [Marker]<br />
2 On [Type] select<br />
Normal.<br />
3 [Marker to Peak]<br />
Each time you press this softkey, the selected<br />
option changes.<br />
4 On [Type] select Delta. Each time you press this softkey, the selected<br />
option changes.<br />
5 [Marker to Min] Two markers, for Normal and Delta, are displayed.<br />
The marker values are displayed in the upper right.<br />
Activating Interference Rejection<br />
Other signals sometimes interfere with insertion loss measurements when<br />
measuring the isolation between antennas. When measuring isolation between<br />
antennas in the presence of known or suspected interference, you can minimize the<br />
effect of the interference by activating Interference Rejection in the test set.<br />
NOTE<br />
Use of interference rejection will increase the measurement time. Interference<br />
rejection should be used if a known interfering signal exists or if the insertion loss<br />
136 Chapter 4
Two Port Insertion Loss<br />
Measuring Two Port Insertion Loss<br />
measurement displays suspicious characteristics such as a spike or rapid movements<br />
in the noise floor.<br />
To Activate Interference Rejection:<br />
Step<br />
Notes<br />
Two Port Insertion Loss<br />
1 [Setup]<br />
2 On [Interference<br />
Rejection] select On.<br />
Each time you press this softkey, the selected<br />
option changes.<br />
Clearing Normalization<br />
Clear Normalization deletes the current normalization data, enabling you to<br />
re-normalize the instrument for the same frequency range.<br />
To Clear the <strong>Measurement</strong> Normalization Values:<br />
Step<br />
Notes<br />
1 [Setup]<br />
2 [Clear Normalization]<br />
Setting Source Level<br />
Source level enables you to set the output level of the internal source at the RF<br />
Out/SWR connector. You may enter a value from –100 dBm to +10 dBm.<br />
To Set the Source Level:<br />
Step<br />
Notes<br />
1 [Setup]<br />
2 On [Source Lev] select<br />
Manual.<br />
3 Enter the start frequency<br />
of interest using the<br />
numeric keypad.<br />
4 [dB]<br />
Each time you press this softkey, the selected<br />
option changes.<br />
Chapter 4 137
Two Port Insertion Loss<br />
Two Port Insertion Loss<br />
Measuring Two Port Insertion Loss<br />
Optimizing Dynamic Range<br />
When using the default settings, the test set optimizes measurement accuracy at the<br />
expense of dynamic range. There may be times, however, when you prefer to gain<br />
dynamic range and lose some accuracy. For example, when measuring sector<br />
isolation on adjacent antennas, you may want to see a relatively large dynamic<br />
range, and your results will not be impaired significantly by 1 to 2 dB less accuracy.<br />
Optimizing for dynamic range gains you approximately 30 dB of dynamic range.<br />
Step<br />
Notes<br />
1 [Setup]<br />
2 On [Optimize] select<br />
Range.<br />
Each time you press this softkey, the selected<br />
option changes.<br />
138 Chapter 4
Setting the Pass/Fail Limits<br />
Two Port Insertion Loss<br />
Measuring Two Port Insertion Loss<br />
The measurement limits setting enables you to alter the value of the maximum and<br />
minimum test limits for the Average Insertion Loss measurement. Limits are set in<br />
dB. These settings affect the metrics color display: red represents fail, green<br />
represents pass. Next to the displayed measurement value, a (P) indicating Pass, or<br />
(F) indicating Fail, will be shown to further indicate whether the value is within or<br />
outside the set limits.<br />
To Set the <strong>Measurement</strong> Maximum and Minimum Limits:<br />
Two Port Insertion Loss<br />
Step<br />
Notes<br />
1 [Setup]<br />
2 [Limits]<br />
3 On [Limits] select On or<br />
Off.<br />
Enables you to toggle the measurement limits<br />
function On (active) and Off (inactive).<br />
• If set to On, Any measured value that exceeds<br />
the upper maximum or is less than the<br />
minimum limit will result in a failure<br />
indication for that value.<br />
• If set to Off, pass fail indicators seen in the<br />
metrics display portion of the display will not<br />
be displayed.<br />
4 Set the upper limit.<br />
a. [Maximum Limit]<br />
b. Enter the number on<br />
the numeric keypad.<br />
c. [dB]<br />
5 Set the lower limit.<br />
a. [Minimum Limit]<br />
b. Enter the number on<br />
the numeric keypad.<br />
c. [dB]<br />
Maximum limit can be set from –100 dBm to<br />
+10 dBm.<br />
Minimum limit can be set from –100 dBm to<br />
+10 dBm.<br />
Chapter 4 139
Two Port Insertion Loss<br />
Two Port Insertion Loss<br />
Measuring Two Port Insertion Loss<br />
140 Chapter 4
5 Adjacent Channel Power<br />
“Using the Adjacent Channel Power <strong>Measurement</strong>” on page 142<br />
“Making a Basic Adjacent Channel Power <strong>Measurement</strong>” on page 143<br />
“Setting the Adjacent Channel Power Format” on page 145<br />
“Setting Average, Sweep, and Restart” on page 149<br />
“Displaying Accurate Peak Power (Recommended for Pulsed Signals)” on<br />
page 151<br />
“Setting the Control Units” on page 151<br />
“Setting the Range Control” on page 152<br />
“Setting the Analyzer Input Gain” on page 152<br />
“Setting Noise Correction” on page 153<br />
“Setting the Pass/Fail Limits” on page 153<br />
“Setting Up the Signal Generator” on page 156<br />
“W-CDMA Adjacent Channel Leakage Power Ratio (ACLR) <strong>Measurement</strong>s”<br />
on page 159<br />
Adjacent Channel Power<br />
141
Adjacent Channel Power<br />
Using the Adjacent Channel Power <strong>Measurement</strong><br />
Using the Adjacent Channel Power <strong>Measurement</strong><br />
Adjacent Channel Power<br />
CAUTION<br />
CAUTION<br />
Adjacent Channel Power measures the power of the carrier and the power of the<br />
noise in its adjacent channels. The measurement results can help you determine<br />
whether the power is set correctly and whether the transmitter filter is working<br />
properly. Once you have set the limits, you can easily see whether a test falls within<br />
those limits using the mask feature and the color-coded metrics. You can measure<br />
the adjacent channel power on one to three adjacent channels on each side of your<br />
center channel in the CDMA, W-CDMA, TDMA, GSM Edge and GPRS, AMPS,<br />
NMT-450, Tetra, and iDEN channel bands.<br />
When measuring multiple adjacent channels, the combined channel power must not<br />
exceed +20 dBm at the RF In port.<br />
The maximum power for the RF In port and the RF Out/SWR port of the test set is<br />
+20 dBm (100 mW). The maximum power for the Power Sensor port is +24 dBm<br />
(300 mW). When directly coupled to a base station, the test set can be damaged by<br />
excessive power applied to any of these three ports.<br />
To prevent damage in most situations when you directly couple the test set to a base<br />
station, use the high power attenuator between the test set and the BTS.<br />
NOTE<br />
For complex modulation such as CDMA, W-CDMA, 1xEV-DO and GSM, the<br />
frequency error measurement is not accurate (see respective analyzers for detailed<br />
frequency error results).<br />
NOTE<br />
The RF in loss can be added manually or automatically by performing an insertion<br />
loss measurement. For measurement instructions refer to “Performing (and<br />
Calibrating) a Basic One Port Insertion Loss measurement” on page 47 or<br />
“Normalizing and Performing a Basic Two Port Insertion Loss <strong>Measurement</strong>” on<br />
page 125.<br />
142 Chapter 5
Adjacent Channel Power<br />
Using the Adjacent Channel Power <strong>Measurement</strong><br />
Making a Basic Adjacent Channel Power <strong>Measurement</strong><br />
Step<br />
Notes<br />
1. Select Adjacent Channel Power.<br />
a. Mode<br />
b. [Spectrum Analyzer/Tools]<br />
c. [Adjacent Channel Power]<br />
2 Select the channel standard.<br />
a. [Chan Std]<br />
b. Select the standard using the up<br />
and down arrow buttons.<br />
c. [Select]<br />
3 On [Units] select Chan. Each time you press this softkey, the<br />
selected option changes. (The<br />
instructions in this manual show<br />
selections for Channel.)<br />
4 Setup the frequency/channel you<br />
want to view.<br />
Adjacent Channel Power<br />
a. [Freq/Chan]<br />
b. [Channel]<br />
c. Enter the number on the<br />
numeric keypad.<br />
d. [Fwd] or [Rev]<br />
5 Connect to the base station.<br />
6 Set the level/location.<br />
a. [Level/Location]<br />
b. [Autoscale]<br />
c. [Select]<br />
If the adjacent channel power trace is not<br />
visible, you can change the reference<br />
level or use Autoscale to have the test set<br />
select a reference level for you.<br />
Chapter 5 143
Adjacent Channel Power<br />
Using the Adjacent Channel Power <strong>Measurement</strong><br />
Step<br />
Notes<br />
Adjacent Channel Power<br />
Out-of-service connection<br />
In-service connection (valid for center channel; adjacent channel<br />
measurements may not be valid because there may be active adjacent<br />
channels.)<br />
144 Chapter 5
Adjacent Channel Power<br />
Using the Adjacent Channel Power <strong>Measurement</strong><br />
Setting the Adjacent Channel Power Format<br />
When performing an adjacent channel power measurement, several measurement<br />
settings must be specified. The measurement settings include bandwidth and<br />
measurement time for the center channel. In addition, the measurement settings for<br />
the adjacent channels are:<br />
• number of adjacent channels<br />
• offset of the first adjacent channel from the center channel<br />
• offset of the adjacent channels from each other<br />
• measurement bandwidth and measurement time for each adjacent channel<br />
These settings determine how the DSP measures the center channel and its adjacent<br />
channels. Depending on the modulation type of the signal you are trying to measure<br />
(CDMA, GSM, and so forth), different measurement bandwidths, times, and offsets<br />
are required.<br />
Default adjacent channel power measurement settings, called ACP formats, are<br />
provided in the <strong>E7495A</strong>/B base station test sets. Generally, the ACP format is<br />
determined by the channel standard you select. However, to accommodate your<br />
particular situation, you can decouple the default formats from the channel standard,<br />
or you can change each measurement setting independently. The three methods of<br />
selecting your measurement settings are:<br />
Adjacent Channel Power<br />
• Channel: Each channel standard has an associated ACP format. With this<br />
method, the optimum measurement bandwidth and measurement time for the<br />
modulation type are automatically selected when you set the channel standard.<br />
For example, when you select GSM-950 as the channel standard, with this<br />
method the test set selects the bandwidth and time and adjacent channel offsets<br />
for the GSM format.<br />
• List: Select the ACP format from a list of values that are set<br />
automatically—independent of the channel standard.<br />
• Custom: Manually set all parameters: the measurement bandwidth and<br />
measurement time for the center and adjacent channel(s), the offset from the<br />
center channel for the first adjacent channel, and the offset between adjacent<br />
channels.<br />
Chapter 5 145
Adjacent Channel Power<br />
Using the Adjacent Channel Power <strong>Measurement</strong><br />
To Select the Channel Format Type:<br />
Step<br />
Notes<br />
1. [ACP Format]<br />
Adjacent Channel Power<br />
2. [Format Type] Each time you press this softkey, the<br />
selected option changes. The option you<br />
select determines which buttons on the<br />
right are active.<br />
3. [C ha n ]<br />
4. Select the standard you want.<br />
a. [Chan Std]<br />
b. Select the standard using the up<br />
and down arrow buttons.<br />
c. [Select]<br />
Channel BW/Time is available, but all<br />
buttons are grayed out, enabling you<br />
only to view the settings. To change any<br />
of the settings, choose Cust.<br />
To Select the List Format Type:<br />
Step<br />
1. [ACP Format]<br />
Notes<br />
2. [Format Type] Each time you press this softkey, the<br />
selected option changes. The option you<br />
select determines which buttons on the<br />
right are active.<br />
3. [List]<br />
4. Select the format you want.<br />
a. [Format List]<br />
b. Select the standard using the up<br />
and down arrow buttons.<br />
c. [Select]<br />
Channel BW/Time is available, but all<br />
buttons are grayed out, enabling you<br />
only to view the settings. To change any<br />
of the settings, choose Cust.<br />
146 Chapter 5
Adjacent Channel Power<br />
Using the Adjacent Channel Power <strong>Measurement</strong><br />
To Select the Custom Format Type:<br />
Step<br />
1 [ACP Format]<br />
Notes<br />
2 [Format Type] Each time you press this softkey,<br />
the selected option changes. The<br />
option you select determines<br />
which buttons on the right are<br />
active.<br />
3 [Cust]<br />
4 Set the carrier and adjacent channel<br />
bandwidth.<br />
a. [Channel BW/Time]<br />
b. [Center Chan Meas BW]<br />
c. Enter the center channel bandwidth on<br />
the numeric keypad.<br />
d. [GHz] or [MHz] or [kHz] or [Hz]<br />
e. [Center Chan Meas Time]<br />
f. Enter the center channel measurement<br />
time on the numeric keypad.<br />
g. [ms]<br />
h. [Adj Chan Meas BW]<br />
i. Enter the adjacent channel bandwidth<br />
on the keypad.<br />
j. [GHz] or [MHz] or [kHz] or [Hz]<br />
k. [Adj Chan Meas Time]<br />
l. Enter the adjacent channel measurement<br />
time on the keypad.<br />
m. [ms]<br />
Adjacent Channel Power<br />
Chapter 5 147
Adjacent Channel Power<br />
Using the Adjacent Channel Power <strong>Measurement</strong><br />
Adjacent Channel Power<br />
5 Enable the frequency error function from<br />
the BW/Time menu.<br />
a. On [Freq Err] select On. Each time you<br />
press this softkey, the Frequency Error<br />
state (On or Off) changes.<br />
b. [Back]<br />
6 Set the offset from the carrier to the first<br />
adjacent channel.<br />
a. [Ctr to Adj Step Size]<br />
b. Enter the offset on the numeric keypad.<br />
c. [GHz] or [MHz] or [kHz] or [Hz]<br />
7 Set the offset between adjacent channels.<br />
a. [Adj to Adj Step Size]<br />
b. Enter the offset on the numeric keypad.<br />
c. [GHz] or [MHz] or [kHz] or [Hz]<br />
8 Set the number of adjacent channels (from<br />
0-3).<br />
When Frequency Error is<br />
switched On, the Frequency<br />
Error result is added to the<br />
metrics display at the bottom of<br />
the screen.<br />
a. Enter the number on the numeric<br />
keypad.<br />
b. [Enter]<br />
148 Chapter 5
Adjacent Channel Power<br />
Using the Adjacent Channel Power <strong>Measurement</strong><br />
Setting Average, Sweep, and Restart<br />
Setting the Sweep<br />
You can select either continuous or single sweep. Continuous sweep provides<br />
repeated, ongoing measurements. Single sweep performs a single measurement that<br />
is repeated only when you push the Single button.<br />
To set sweep:<br />
Step<br />
1 [Average/Sweep]<br />
Notes<br />
2 [Continuous] or [Single] Each time you press this softkey, the<br />
selected option changes.<br />
Adjacent Channel Power<br />
Setting Averaging<br />
You can choose to have averaging on or off and set the number of averages you want<br />
to take. Averaging only applies to the data, not the trace. You can select from the<br />
following types of averaging:<br />
• Off: Disables averaging.<br />
• Running: Computes the new result as the weighted sum of the last result and the<br />
new measurement. The last result is weighted by (n – 1)/n. The new result is<br />
weighted by 1/n. Each new measurement produces a new result.<br />
• Max Hold: Is not an average, but on a point by point basis, displays the<br />
maximum amplitude for the given frequency or channel since Max Hold was<br />
turned on. It is updated when a new maximum occurs.<br />
• Group Average: Makes the requested number of measurements, averages the<br />
measurement data, and displays the average as a single result trace.<br />
<strong>Measurement</strong> time will vary based on the requested number of averages and can<br />
take minutes for very large number of averages.<br />
• Group Max Average: Makes the requested number of measurements before<br />
returning a single trace result. This trace is the maximum value seen at each<br />
trace point over the requested number of averages (measurements).<br />
Chapter 5 149
Adjacent Channel Power<br />
Using the Adjacent Channel Power <strong>Measurement</strong><br />
To set averaging:<br />
Step<br />
Notes<br />
1 Set the number of averages.<br />
Adjacent Channel Power<br />
a. [Average]<br />
b. Enter the number of averages<br />
using the numeric keypad.<br />
c. [Enter]<br />
2 Select the type of averaging you<br />
want to apply.<br />
a. [Average/Sweep]<br />
b. [Averaging]<br />
c. [Off], [Running Average],<br />
[Max Hold], [Group<br />
Average], or [Group Max<br />
Average]<br />
NOTE<br />
These two steps can be performed in any order. However, if you turn averaging on<br />
and a large number of averages has previously been set, there may be a delay before<br />
you can change number of averages.<br />
Setting Restart<br />
When you have averaging turned On and you are in Continuous Sweep mode, you<br />
can restart the averaging by pressing the Restart menu key. The Restart key has no<br />
effect if you are in Single sweep mode.<br />
To restart averaging:<br />
Step<br />
Notes<br />
1 [Average/Sweep]<br />
2 [Restart] This key is unavailable or has no effect when<br />
Sweep is set to Single. To restart a Single<br />
Sweep measurement, press [Single].<br />
150 Chapter 5
Adjacent Channel Power<br />
Using the Adjacent Channel Power <strong>Measurement</strong><br />
Displaying Accurate Peak Power (Recommended for Pulsed<br />
Signals)<br />
For pulsed signals, you can get a more accurate measurement of the signal’s peak or<br />
average power by using the Peak Power Detector setting (see below) in the test set.<br />
The test set measures average power of signals by default. For<br />
non-constant-duty-cycle signals such as GSM, an average power reading fails to<br />
accurately show amplitude when the signal is On if other timeslots in the frame are<br />
powered Off.<br />
If the [Power Detector] menu key is grayed out, the test set needs to be upgraded in<br />
order to measure pulsed signals. Contact the <strong>Agilent</strong> Service Center for upgrade<br />
information.<br />
If it is not a peak signal, it is probably better to select Average for a more accurate<br />
result.<br />
To Display Peak Power:<br />
Step<br />
Notes<br />
Adjacent Channel Power<br />
1. [S e tu p]<br />
2. On [Power Detector] select Pk. Each time you press this softkey, the<br />
selected option changes.<br />
Setting the Control Units<br />
In some instances you may be provided specifications by engineering in either dBm<br />
or watts. You can switch between the two units in order to make it easier to interpret<br />
measurement results.<br />
To Change Units on the Y-Axis:<br />
Step<br />
Notes<br />
1. [Level/Location]<br />
2. [Units] Each time you press this softkey, the<br />
selected option changes.<br />
Chapter 5 151
Adjacent Channel Power<br />
Using the Adjacent Channel Power <strong>Measurement</strong><br />
Step<br />
Notes<br />
3. [dBm] or [Watts] There is no change made to the Y-axis.<br />
The change is to the units for entry. The<br />
reference level changes on the graph,<br />
but not the axis labels.<br />
Adjacent Channel Power<br />
Setting the Range Control<br />
The autoranging feature, which is built into the test set, helps ensure accurate<br />
measurements by changing front-end amplifier gain as needed, for example, when a<br />
strong signal threatens to overload the test set. When this occurs, the noise floor<br />
rises (as gain is decreased), then falls again when the strong signal stops. To select<br />
this feature:<br />
• On [Range Ctrl] select Auto to enable the <strong>E7495A</strong>/B to continuously adjust the<br />
noise floor to the optimum setting.<br />
If you prefer a fixed noise floor, you can disable autoranging in two ways using the<br />
Setup function within Spectrum Analyzer:<br />
• On [Range Ctrl] select Hold to fix the noise floor at the current level. A<br />
subsequent strong signal—even outside the measurement range—may cause an<br />
inaccurate reading due to overloading the front-end of the test set.<br />
• On [Range Ctrl] select Max to fix the noise floor at the current level until a<br />
strong signal comes in. In that case, the floor will rise to maintain accuracy, but<br />
will not return to its lower level after the strong signal stops.<br />
Step<br />
Notes<br />
1. [Setup]<br />
2. [Range Ctrl]<br />
3. [Auto] [Hold] or [Max]<br />
Setting the Analyzer Input Gain<br />
Normally the <strong>E7495A</strong>/B is set to add the most gain in the receive path to boost<br />
152 Chapter 5
Adjacent Channel Power<br />
Using the Adjacent Channel Power <strong>Measurement</strong><br />
low-level signals. If the signal is high, there is no reason to add gain. When you’re<br />
measuring a strong signal, select Low sensitivity to reduce the gain in the receive<br />
path and lower the noise floor. For a low level signal, select High.<br />
Step<br />
Notes<br />
1. [Setup]<br />
NOTE<br />
2. [Sensitivity]<br />
3. Low or High<br />
The Sensitivity setting is coupled to the Noise Correction setting. Changing the<br />
Sensitivity setting from Low to High will cause the Noise Correction setting to<br />
change from On to Off. Conversely, if the Noise Correction setting is changed from<br />
Off to On, the Sensitivity setting is changed from High to Low.<br />
Adjacent Channel Power<br />
Setting Noise Correction<br />
You can turn the Noise Correction function on or off. When set to On, noise<br />
correction will be activated and the test set will correct for the noise generated<br />
internally by the analyzer. It allows the you to make accurate measurements on<br />
signals close to the noise floor.<br />
To Set the <strong>Measurement</strong> Noise Correction:<br />
Step<br />
Notes<br />
1 [Setup]<br />
2 On [Noise Correction]<br />
select On or Off.<br />
Each time you press this softkey, the selected<br />
option changes.<br />
Setting the Pass/Fail Limits<br />
The <strong>E7495A</strong>/B uses generic defaults, rather than standard defaults. You can change<br />
those to accommodate your base station settings.<br />
• Power Limits: Sets the high and low limits of the center channel, as well as the<br />
Chapter 5 153
Adjacent Channel Power<br />
Using the Adjacent Channel Power <strong>Measurement</strong><br />
Adjacent Channel Power<br />
high limit of the adjacent channels. Center channel limits are set in dBm and are<br />
absolute. Adjacent channel limits are set in dB and are relative to the center<br />
channel power. The settings you choose define the shape of the mask displayed<br />
on the screen. To measure only the outer frequencies, turn off the mask. These<br />
settings affect the metrics color display: red represents fail, green represents<br />
pass.<br />
• Frequency Limits: Sets the high and low frequency limits for the center<br />
channel only. These settings affect the metrics color display: red represents fail,<br />
green represents pass.<br />
To Change Power Limits:<br />
Step<br />
1. [Setup]<br />
2. [Limits]<br />
Notes<br />
3. [Power Limits]<br />
4. [On] or [Off]<br />
5. Set the center channel upper limit.<br />
a. [Center Chan High Limit]<br />
b. Enter the number on the<br />
numeric keypad.<br />
c. [dBm]<br />
6 Set the center channel lower limit.<br />
a. [Center Chan Low Limit]<br />
b. Enter the number on the<br />
numeric keypad.<br />
c. [dBm]<br />
154 Chapter 5
Adjacent Channel Power<br />
Using the Adjacent Channel Power <strong>Measurement</strong><br />
Step<br />
Notes<br />
7 Set the adjacent channel 1 upper<br />
limit.<br />
a. [Adj Chan 1 High Limit]<br />
b. Enter the number on the<br />
numeric keypad.<br />
c. [dB]<br />
8 Set the adjacent channel 2 upper<br />
limit.<br />
a. [Adj Chan 2 High Limit]<br />
b. Enter the number on the<br />
numeric keypad.<br />
c. [dB]<br />
9 [Back]<br />
Adjacent Channel Power<br />
Chapter 5 155
Adjacent Channel Power<br />
Using the Adjacent Channel Power <strong>Measurement</strong><br />
To Change Frequency Limits:<br />
Step<br />
Notes<br />
1. [Setup]<br />
2. [Frequency Limits]<br />
Adjacent Channel Power<br />
3. [On] or [Off]<br />
4. Set the upper limit.<br />
a. [Frequency High Limit]<br />
b. Enter the number on the numeric<br />
keypad.<br />
c. [GHz] or [MHz] or [kHz] or<br />
[Hz]<br />
5 Set the lower limit.<br />
a. [Frequency Low Limit]<br />
b. Enter the number on the numeric<br />
keypad.<br />
c. [GHz] or [MHz] or [kHz] or<br />
[Hz]<br />
Setting Up the Signal Generator<br />
You can set up the signal generator while in the Spectrum Analyzer mode from the<br />
Setup menu. For more detailed information on the signal generator setup and<br />
operation, refer to “Using the Signal Generator” on page 400.<br />
CAUTION<br />
The maximum power for the RF In port and the RF Out/SWR port of the test set is<br />
+20 dBm (100 mW). The maximum power for the Power Sensor port is +24 dBm<br />
(300 mW). When directly coupled to a base station, the test set can be damaged by<br />
excessive power applied to any of these three ports.<br />
To prevent damage in most situations when you directly couple the test set to a base<br />
156 Chapter 5
Adjacent Channel Power<br />
Using the Adjacent Channel Power <strong>Measurement</strong><br />
station, use the high power attenuator between the test set and the BTS.<br />
NOTE<br />
The lowest level the signal generator can go to is -90 dBm. In order to get a lower<br />
level, you must use an external attenuator. You can compensate for the attenuator<br />
using RF Out Loss.<br />
Step<br />
1 [Setup]<br />
2 [Sig Gen]<br />
3 [Freq/Chan]<br />
4 Enter the channel or<br />
frequency using the numeric<br />
keypad.<br />
5 • For channel select [Rev]<br />
or [Fwd]<br />
• For frequency select<br />
[GHz], [MHz], [kHz], or<br />
[Hz],<br />
6 [Mod Format]<br />
7 Select the channel standard<br />
from the list using the up and<br />
down arrow buttons.<br />
8 [Select]<br />
9 Set the RF output amplitude<br />
a. [Amplitude]<br />
b. Enter the amplitude value<br />
using the numeric keypad.<br />
c. [dBm].<br />
Notes<br />
You may also enter a new value for<br />
amplitude by turning the rotary knob until the<br />
desired value is displayed or using the up and<br />
down arrow keys.<br />
Adjacent Channel Power<br />
Chapter 5 157
Adjacent Channel Power<br />
Using the Adjacent Channel Power <strong>Measurement</strong><br />
Step<br />
10 If you have previously stored<br />
RF Out Loss from an<br />
insertion loss measurement,<br />
go to the next step.<br />
Or<br />
Notes<br />
For information on the effects of the RF Out<br />
Loss function on the amplitude, refer to<br />
“Using the RF OUT Loss field”, below.<br />
Each time you press this softkey, the selected<br />
option changes.<br />
Adjacent Channel Power<br />
Press [RF OUT Loss] to<br />
select On and enter the RF<br />
Out Loss value.<br />
11 Connect to the base station.<br />
12 On [Enable Sig Gen] select<br />
On.<br />
Each time you press this softkey, the selected<br />
option changes.<br />
Using the RF OUT Loss field<br />
The RF OUT Loss field is used when it is necessary to test the receiver sensitivity of<br />
a typical base station. The test set’s source will typically go down to –90 dBm, in<br />
order to reach –113 dBm for sensitivity testing, you must use an external attenuator.<br />
The measured value of the attenuator and connecting cables are entered into this<br />
field. This value is then used when this field is set to On. When this field is set to<br />
On, the test set will set the RF generator level to the correct level offset by the<br />
external attenuator/cabling. When you set the RF Generator to –113 dBm (with the<br />
RF OUT Loss field turned On and the external attenuator/cabling loss value entered)<br />
the output at the end of the RF test cabling is –113 dBm.<br />
Example: If you want to set the signal generator to –113 dBm, the attenuator and RF<br />
cabling measures 42.51 dB (measured with the 2 port insertion loss measurement<br />
screen prior to this test), the RF OUT Loss field is turned On (with the 42.51 dB loss<br />
value entered). The actual RF output of the signal generator is –70.49 dBm, the<br />
attenuator and RF cabling attenuated the signal to the desired level; so the RF signal<br />
at the end of the test cable/attenuator is –113 dBm. This also points out the<br />
importance of accurately measuring the loss of the attenuator and connecting cables.<br />
158 Chapter 5
Adjacent Channel Power<br />
W-CDMA Adjacent Channel Leakage Power Ratio (ACLR)<br />
<strong>Measurement</strong>s<br />
W-CDMA Adjacent Channel Leakage Power Ratio<br />
(ACLR) <strong>Measurement</strong>s<br />
One of the most important measurements on RF signals for digital communication<br />
systems is the leakage power into the adjacent channels. A quantitative figure of<br />
merit is adjacent channel power ratio (ACPR) or adjacent channel leakage ratio<br />
(ACLR). The ACLR measurement determines how much of the transmitted power<br />
is allowed to leak into the first and second neighboring carriers (high side and low<br />
side). Leakage of RF power into adjacent channels or bands can cause major<br />
interference to occur on another carrier’s network.<br />
The measurement of ACLR is defined as the ratio of the average power in the<br />
adjacent frequency channel to the average power in the transmitted frequency<br />
channel. It is reported in dBc (dB relative to the main carrier).<br />
Test models are used to have pre-defined test conditions for base station<br />
conformance test of ACLR. Under 3GPP TS 25.141, five types of test models are<br />
defined. Each test model consists of PCCPCH (Primary Common Control Physical<br />
Channel), PICH (Paging Indication Channel), CPICH (Common Pilot Channel),<br />
SCH (Synchronization Channel) and some DPCHs (Dedicated Physical Channels).<br />
Adjacent Channel Power<br />
Chapter 5 159
Adjacent Channel Power<br />
W-CDMA Adjacent Channel Leakage Power Ratio (ACLR)<br />
<strong>Measurement</strong>s<br />
Figure 5-1<br />
Sample <strong>Measurement</strong> of ACLR on a Valid 3GPP W-CDMA Signal<br />
Adjacent Channel Power<br />
Figure 5-1 is an example of the measurement results as a bar graph of the power<br />
levels at different offsets. This gives you a quick reading of respective powers. The<br />
bar graph is green with 'P' on the bar graph, indicating the ACLR measurement<br />
passes at the 5 MHz and 10 MHz offsets.<br />
NOTE<br />
The 3GPP TS 25.141 standard for W-CDMA requires the adjacent channel power<br />
leakage ratio to be better than –44.2 dBc at 5 MHz offset and –49.2 dBc at 10 MHz<br />
offset. The minimum requirements for the adjacent channel power leakage ratios are<br />
–45 dBc and –50 dBc respectively, but the conformance test requirements add<br />
0.8 dB tolerance to these figures. The conformance limits are consequently<br />
–44.2 dBc at 5 MHz offset and –49.2 dBc at 10 MHz offset.<br />
160 Chapter 5
Adjacent Channel Power<br />
W-CDMA Adjacent Channel Leakage Power Ratio (ACLR)<br />
<strong>Measurement</strong>s<br />
Adjacent Channel Power<br />
Chapter 5 161
Adjacent Channel Power<br />
W-CDMA Adjacent Channel Leakage Power Ratio (ACLR)<br />
<strong>Measurement</strong>s<br />
Adjacent Channel Power<br />
162 Chapter 5
6 Working with Batteries<br />
“Installing Batteries” on page 164<br />
“Viewing Battery Status” on page 165<br />
“Charging Batteries” on page 168<br />
“Reconditioning Batteries” on page 170<br />
“Battery Care” on page 173<br />
“Battery Specifications” on page 176<br />
Working with Batteries<br />
163
Working with Batteries<br />
Installing Batteries<br />
Installing Batteries<br />
Working with Batteries<br />
Step<br />
Notes<br />
1 Open the battery door. Turn the latch counterclockwise several times until<br />
loose. Then pull the battery door open.<br />
2 Insert the battery. Insert one or two batteries.<br />
3 Close the battery<br />
door.<br />
Turn the latch clockwise until tight to secure the<br />
battery door.<br />
164 Chapter 6
Working with Batteries<br />
Viewing Battery Status<br />
Viewing Battery Status<br />
You can view information about battery status in four ways:<br />
• Two battery LEDs embedded in the <strong>E7495A</strong>/B enclosure<br />
• Icons in the lower right of the front panel screen<br />
• System Statistics—Battery screen, available from the System menu<br />
• LCD gauge built into each battery<br />
Battery LEDs<br />
LED<br />
Charge remaining<br />
NOTE<br />
Green<br />
Blinking green<br />
Green and red (may<br />
appear yellow or orange)<br />
Red<br />
Greater than or equal to 25% charge capacity<br />
remaining<br />
Battery charging<br />
Greater than or equal to 10% and less than 25%<br />
charge capacity remaining<br />
Less than 10% charge capacity remaining<br />
The battery status LEDs will function only when the test set is on, in standby mode,<br />
or connected to external power.<br />
Working with Batteries<br />
Front Panel Icons<br />
Icon<br />
Status<br />
Plug icon<br />
2 solid batteries 2 batteries installed<br />
1 solid battery 1 battery installed<br />
Connected to external power through AC adapter<br />
converter or car adapter<br />
Chapter 6 165
Working with Batteries<br />
Viewing Battery Status<br />
Icon<br />
% displayed beneath<br />
battery<br />
Status<br />
Amount of charge capacity remaining for battery<br />
System Statistics—Battery Screen<br />
Step<br />
Notes<br />
1 System<br />
2 [More 1 of 2]<br />
3 [Battery]<br />
The Battery screen displays several kinds of information:<br />
Working with Batteries<br />
• Temperature—the internal temperature of each battery as measured by a sensor<br />
embedded in each battery<br />
• Voltage—for each battery cell stack as measured by each battery’s sensor<br />
• Run Time to Empty—while using external power, External DC Power is<br />
displayed; while using battery power, the predicted remaining battery run time is<br />
displayed in minutes at the present rate of discharge. If two batteries are<br />
installed, the second battery will have Not in Use displayed. The instrument<br />
mode you select affects the discharge rate, which determines the run time to<br />
empty. Antenna/Cable, Spectrum Analyzer, CDMA Tx Analyzer, and CDMA<br />
Over Air modes use the most power. Backhaul and Power Meter modes use the<br />
least power.<br />
• Fuel Gauge Error—the present accuracy of each battery’s fuel gauge or<br />
remaining charge capacity. If the error exceeds 10%, you should condition the<br />
battery.<br />
• Percent Charged—the predicted charge capacity of each battery in percent.<br />
• Battery Status—For Battery 1 and Battery 2, Present or Missing tells you<br />
whether a battery is installed.<br />
Built-In Battery Gauge<br />
Each Lithium Ion battery has a five-segment LCD gauge that displays its charge<br />
166 Chapter 6
Working with Batteries<br />
Viewing Battery Status<br />
status. Each segment represents 20% of the charge capacity. The gauge is active<br />
unless the battery is in shutdown mode. You can view the gauge with the door open.<br />
Gauge<br />
Charge Remaining<br />
5 segments 81-100%<br />
4 segments 61-80%<br />
3 segments 41-60%<br />
2 segment 21-40%<br />
1 segment 1-20%<br />
0 segment Less than 1%<br />
Working with Batteries<br />
Chapter 6 167
Working with Batteries<br />
Charging Batteries<br />
Charging Batteries<br />
You can charge batteries internally or using the external battery charger (Option<br />
#820). The external charger provides much faster charging time.<br />
CAUTION<br />
Charge batteries internally or with the appropriate charger, a SMBus charger of level<br />
II or higher.<br />
Never use a non-SMBus charger because the battery issues commands over the<br />
SMBus to the charger to control the charge rate and voltage.<br />
Never use a modified or damaged charger.<br />
Working with Batteries<br />
Internal Charging<br />
You can use the <strong>E7495A</strong>/B to recharge while the test set is operating or shut down.<br />
For a fully depleted battery, charging time is approximately 4 hours if the test set is<br />
shut down, 8 hours if the test set is operating.<br />
If two batteries are installed, the test set fully charges Battery 1 before charging<br />
Battery 2. During internal charging, the charge indicator blinks to indicate which<br />
battery is being charged.<br />
To charge a battery internally, simply attach the car adapter or AC adapter and turn<br />
on external power.<br />
External Charging<br />
The external battery charger (available as part of Option 820) lets you charge two<br />
batteries simultaneously. Each fully depleted battery takes up to 4 hours to recharge.<br />
You have the option of charging batteries before they become fully depleted. Doing<br />
this does not shorten battery life, but repeatedly charging a battery before it is fully<br />
discharged will impair the accuracy of its internal charge-remaining indicator. When<br />
the fuel gauge error is greater than 10%, the battery should be reconditioned.<br />
External Battery Charger LED<br />
Green on<br />
Green flashing<br />
Charging Status<br />
Fully charged<br />
Fast charging<br />
168 Chapter 6
Working with Batteries<br />
Charging Batteries<br />
External Battery Charger LED<br />
Yellow flashing<br />
Yellow/green<br />
Red flashing<br />
Yellow on<br />
Charging Status<br />
Reconditioning—the accuracy of the<br />
battery’s internal LCD charge gauge is<br />
being renewed. See “Reconditioning<br />
Batteries.”<br />
Battery is reconditioned<br />
Error<br />
Standby<br />
Working with Batteries<br />
Chapter 6 169
Working with Batteries<br />
Reconditioning Batteries<br />
Reconditioning Batteries<br />
Each battery contains a microchip that monitors battery usage and tracks how much<br />
capacity is available. This function can become less accurate because of temperature<br />
fluctuations, aging, self-discharge, repeated partial charging, and other factors. This<br />
inaccuracy is displayed on the System Statistics—Battery screen as Fuel Gauge<br />
Error.<br />
To ensure the accuracy of the battery’s internal capacity tracking system,<br />
occasionally you need to recalibrate the battery. Reconditioning—also known as<br />
recalibrating—is done by fully charging the battery, fully discharging it, recharging<br />
it again, and then verifying that the error has been corrected.<br />
You can recondition a battery internally or with the external charger. The charger<br />
makes the process simpler.<br />
Determining if a Battery Needs Reconditioning<br />
Step<br />
Notes<br />
Working with Batteries<br />
NOTE<br />
1 System<br />
2 [More 1 of 2]<br />
3 [Battery] On the Battery screen, if the error percentage for<br />
the battery is greater than 10%, the battery needs<br />
to be reconditioned.<br />
After reconditioning, if the battery is not fully charged or still shows more than a<br />
10% Fuel Gauge Error reading, repeat the reconditioning procedure. If the second<br />
reconditioning does not restore a full charge and give an error reading of 10% or<br />
less, the battery needs replacement. This error will affect all of the displayed battery<br />
charge indicators.<br />
Internal Reconditioning<br />
If you don’t have the external battery charger, you can use the test set to recondition<br />
170 Chapter 6
Working with Batteries<br />
Reconditioning Batteries<br />
a battery. The process takes longer and requires shutting down the test set.<br />
Step<br />
1 Fully charge the battery.<br />
a. Power off the test set.<br />
b. Install the battery needing<br />
reconditioning into the test set. If you<br />
have a second battery installed, remove<br />
the second battery.<br />
c. Connect the car adapter or AC adapter<br />
to the test set, and plug the other end of<br />
the adapter in the appropriate power<br />
source.<br />
2 Fully discharge the battery.<br />
Notes<br />
To fully charge the battery, leave<br />
the test set power off for<br />
approximately 4 hours.<br />
a. Disconnect the external power adapter,<br />
then power on the test set.<br />
b. Confirm that the battery now has 100%<br />
of its charge by checking the Battery 1<br />
or Battery 2 status icon in the lower<br />
right of the display or the System<br />
Statistics—Battery screen.<br />
c. Run the test set without external power<br />
until you fully deplete the battery<br />
(approximately 1.5 hours).<br />
3 Charge the battery and verify a full charge.<br />
a. Power off the test set again.<br />
b. Reconnect the external power adapter<br />
and charge the battery again for<br />
approximately 4 hours.<br />
c. Power on the test set.<br />
d. Confirm that the battery is fully<br />
charged and reconditioned by checking<br />
the System Statistics—Battery screen.<br />
On the System Statistics—Battery<br />
screen, the battery should show<br />
100% charge rate and less than a<br />
10% Fuel Gauge Error.<br />
Working with Batteries<br />
Chapter 6 171
Working with Batteries<br />
Reconditioning Batteries<br />
Reconditioning with the External Battery Charger<br />
Step<br />
Notes<br />
1 Insert a battery into the left bay of the<br />
external battery charger.<br />
2 Press the blue button labeled Push to<br />
Recalibrate Left Battery Bay.<br />
3 Install the battery into the test set.<br />
4 On the System Statistics—Battery<br />
screen, verify that the battery is fully<br />
charged and reconditioned.<br />
The charger will charge the battery<br />
fully, discharge it completely, then<br />
recharge it fully again. The entire<br />
process can take up to 10 hours.<br />
WARNING<br />
If you are charging the batteries internally, even while the test set is powered<br />
off, the test set may become warm. Take care to provide proper ventilation.<br />
Working with Batteries<br />
172 Chapter 6
Working with Batteries<br />
Battery Care<br />
Battery Care<br />
WARNING<br />
Lithium Ion and lithium polymer cells and battery packs may get hot, explode,<br />
or ignite and cause serious injury if exposed to abuse conditions. Be sure to<br />
follow these safety warnings:<br />
• Do not install the battery backward, so the polarity is reversed.<br />
• Do not connect the positive terminal and negative terminal of the battery to<br />
each other with any metal object (such as wire).<br />
• Do not carry or store the battery with necklaces, hairpins, or other metal<br />
objects.<br />
• Do not pierce the battery with nails, strike the battery with a hammer, step<br />
on the battery, or otherwise subject it to strong impacts or shocks.<br />
• Do not solder directly onto the battery.<br />
• Do not expose the battery to water or salt water, or allow the battery to get<br />
wet.<br />
• Do not disassemble or modify the battery. The battery contains safety and<br />
protection devices, which, if damaged, may cause the battery to generate<br />
heat, explode, or ignite.<br />
• Do not place the battery in or near fire, on stoves, or in other high<br />
temperature locations. Do not place the battery in direct sunlight, or use or<br />
store the battery inside cars in hot weather. Doing so may cause the battery<br />
to generate heat, explode, or ignite. Using the battery in this manner may<br />
also result in a loss of performance and a shortened life expectancy.<br />
• Danger of explosion if battery is incorrectly replaced. Replace only with the<br />
same or equivalent type recommended. Discard used batteries according to<br />
manufacturer’s instructions.<br />
Working with Batteries<br />
Chapter 6 173
Working with Batteries<br />
Battery Care<br />
WARNING<br />
Do not discharge the battery using any device except the specified device. When<br />
the battery is used in devices other than the specified device, it may damage the<br />
battery or reduce its life expectancy. If the device causes an abnormal current<br />
to flow, it may cause the battery to become hot, explode, or ignite and cause<br />
serious injury.<br />
Maximizing Battery Life<br />
The Lithium Ion battery used in the <strong>E7495A</strong>/B has a life span of approximately 300<br />
charge cycles at room temperature, with normal charge and discharge rates. You can<br />
maximize the number of charge cycles with reasonable battery care:<br />
Working with Batteries<br />
• Clean the battery contacts occasionally, using a pencil eraser or alcohol and a<br />
cotton swab. Make sure no residue from the eraser or cotton swab is left on the<br />
contact points.<br />
• Cycle each battery through a full charge and full discharge on a regular basis,<br />
preferably monthly. Even if you use external power most of the time, you will<br />
lengthen battery life by occasionally cycling through a full discharge/recharge<br />
cycle.<br />
• Do not leave a battery unused for an extended period. Batteries that remain idle<br />
eventually lose their ability to hold a charge.<br />
• Unplug the external battery charger (Option #820) when you’re not using the<br />
test set.<br />
• Store batteries in a cool, dry location, away from metal objects and corrosive<br />
gases. Extended exposure to high humidity or temperatures above 45 degrees<br />
Celsius (113 degrees Fahrenheit) can impair battery performance and shorten<br />
battery life. Storage limits are –20 °C to 60 °C 80% RH.<br />
• Allow a battery to warm to room temperature before charging it. Temperature<br />
shock can damage the battery chemistry and in some cases cause a short circuit.<br />
• Always charge batteries at temperatures between 0 and 45 degrees Celsius (32 to<br />
113 degrees Fahrenheit).<br />
• Operate the test set on battery power between the temperatures of -10 and +50<br />
degrees Celsius (–14 to +122 degrees Fahrenheit). Using the batteries at lower<br />
or higher temperatures can damage the batteries and reduce operating life. Cold<br />
temperatures affect battery chemistry, reducing charge capacity, especially<br />
below 0 degrees Celsius (32 degrees Fahrenheit).<br />
• Batteries are shipped with a minimum of 20% charge capacity to provide at least<br />
174 Chapter 6
Working with Batteries<br />
Battery Care<br />
a 6-month shelf life at room temperature, before the battery electronics go into<br />
shutdown mode. When a battery has discharged down to a 7.1 volts, it goes into<br />
shutdown mode. When this occurs, the battery electronics self-disconnect,<br />
removing their electronic load from the cells. This provides approximately 1<br />
year of room temperature storage before the cells self-discharge to the point<br />
beyond which they should not be recharged. Once a battery has reached<br />
shutdown mode the battery will undergo a self-test immediately upon being put<br />
into charge. The charger will then attempt to pre-charge the battery at a very low<br />
initial charge rate. If the voltage does not recover, the battery pack has been<br />
allowed to discharge beyond the point of safe recovery. The charge cycle will be<br />
terminated, and the battery pack needs to be replaced.<br />
If the battery does recover from a shutdown mode, the fuel gauge accuracy will<br />
be reduced. Complete a battery recalibration as soon as possible to calibrate the<br />
fuel gauge.<br />
Initial Charge Cycle<br />
New batteries must be rapid-charged (typically to 80%), then trickle-charged<br />
(slowly charged to 100%) for 24 hours, before their first use and for the first two or<br />
three uses.<br />
Because the batteries you receive with the <strong>E7495A</strong>/B are new, they have a minimal<br />
charge when you receive them. All batteries require a “break-in” period, so don't be<br />
alarmed if a battery doesn't hold a full charge right away. A new battery commonly<br />
will show a false full charge (voltage) as indicated on the test set or charger, and<br />
may not power up the test set upon first use. Before using a new battery, leave it<br />
charging for 24 hours.<br />
Lithium Ion Battery Disposal<br />
When you notice a large decrease in charge capacity after proper recharging, it’s<br />
probably time to replace the battery.<br />
Li-Ion batteries need to be disposed of properly. Contact your local waste<br />
management facility for information regarding environmentally sound collection,<br />
recycling, and disposal of the batteries. Regulations vary for different countries.<br />
Dispose of in accordance with local regulations.<br />
Working with Batteries<br />
Chapter 6 175
Working with Batteries<br />
Battery Specifications<br />
Battery Specifications<br />
The <strong>E7495A</strong>/B Base Station test set uses the Inspired Energy NI2040AG Smart<br />
Battery, which produces 10.8 volts DC at approximately 6000 mA. The NI2040AG<br />
is a Lithium Ion battery pack, which uses the System Management Bus (SMBus)<br />
interface to communicate with the test set and charger. To charge the batteries, use<br />
only the <strong>Agilent</strong> approved SMBus charger of Level II or higher or the <strong>E7495A</strong>/B.<br />
External charging voltage is 18 V to 24 VDC.<br />
The battery is designed for approximately 300 full charge/discharge cycles at room<br />
temperature and under normal rates of discharge.<br />
The NI2040AG uses electronically programmable read-only memory (EPROM) to<br />
store key data regarding the battery cells and charge capacity.<br />
Working with Batteries<br />
Protection Electronics<br />
The NI2040AG SMBus battery uses several protection devices to prevent damage to<br />
the battery and test set. The battery is internally protected against excessive current<br />
draws and reduced loads (shorts), excessive voltage and temperatures.<br />
During charging and discharging, the battery will monitor and report its voltage,<br />
current, and temperature. If any of these monitored conditions exceeded their safety<br />
limits, the battery will terminate any further charge or discharge until the error<br />
condition is corrected.<br />
Test Set Operation: Battery Current Drain in the Off or Standby Mode<br />
The <strong>E7495A</strong>/B provides two “powered down” modes: off and standby.<br />
When the test set is operating from battery power, it continues to draw current in<br />
both off and standby modes. When in standby mode the test set draws 70 mA, or<br />
28% of a full battery charge in a 24-hour period. When in off mode, the test set<br />
draws 45 mA, or 18% of a full battery charge in a 24-hour period. <strong>Agilent</strong><br />
recommends that if the test set is not going to be used for an extended period of<br />
time, you periodically check and maintain the batteries’ charge, or remove the<br />
batteries from your test set. This will ensure you have sufficient battery capacity if<br />
you intend to operate the test set from battery power.<br />
Battery Drain when in Off and Standby Modes<br />
• Single battery off mode: 18.46% or 1.08 amps per 24 hrs.<br />
• Single battery standby mode: 28.72% or 1.68 amps per 24 hrs.<br />
176 Chapter 6
Working with Batteries<br />
Battery Specifications<br />
Battery and Charger Part Numbers<br />
Standard Supplied Accessories<br />
Description<br />
Part Number<br />
AC/DC Converter 0950-4404<br />
NI2040AG Battery 1420-0883*<br />
Optional Accessories provided in <strong>E7495A</strong>/B Option 820<br />
Description<br />
Part Number<br />
Charger 12 V at 1 A 0950-4276<br />
AC/DC Converter 0950-4404<br />
Auto Adapter F1455A 0950-4412<br />
NOTE<br />
NI2040AG Battery<br />
<strong>E7495A</strong><br />
E7495B<br />
1420-0883<br />
1420-0883<br />
* Replace only with NI2040AG or equivalent, <strong>Agilent</strong>-approved battery.<br />
Additional batteries are also available directly from Inspired Energy, Inc. To<br />
purchase additional or replacement batteries, visit www.inspired-energy.com, or call<br />
toll free USA 1-888-5-INSPIRE (546-7747).<br />
Working with Batteries<br />
Chapter 6 177
Working with Batteries<br />
Battery Specifications<br />
NOTE<br />
Regarding the battery charger and conditioner:<br />
• Install the instrument so that the ON / OFF switch is readily identifiable and is<br />
easily reached by the operator. The ON / OFF switch and the detachable power<br />
cord are the instrument disconnecting devices. They disconnect the mains<br />
circuits from the mains supply before other parts of the instrument.<br />
Alternatively, an externally installed switch or circuit breaker (which is readily<br />
identifiable and is easily reached by the operator) may be used as a<br />
disconnecting device.<br />
• Install the instrument so that the detachable power cord is readily identifiable<br />
and is easily reached by the operator. The detachable power cord is the<br />
instrument disconnecting device. It disconnects the mains circuits from the<br />
mains supply before other parts of the instrument. The front panel switch is only<br />
a standby switch and is not a LINE switch. Alternatively, an externally installed<br />
switch or circuit breaker (which is readily identifiable and is easily reached by<br />
the operator) may be used as a disconnecting device.<br />
Working with Batteries<br />
Battery Current Drain<br />
When in the Off mode the test set draws ~45 mA of current when the batteries) are<br />
left installed, and ~70 mA when in Standby mode.<br />
The test set with a single battery loses ~18% of its battery charge per day in Off<br />
mode and ~28% per day in Standby mode. The following table shows how long a<br />
test set can be in Standby or Off modes until the battery is providing enough current<br />
to operate the test set.<br />
Number of Batteries<br />
Battery Capacity in<br />
Standby Mode<br />
Battery Capacity in Off<br />
Mode<br />
1 3.5 days 5.4 days<br />
2 6.9 days 10.8 days<br />
178 Chapter 6
7 CDMA Analyzer<br />
“Using the CDMA Analyzer” on page 180<br />
“Common CDMA Tx Analyzer <strong>Measurement</strong>s” on page 180<br />
“Preparing to Make CDMA Tx Analyzer <strong>Measurement</strong>s” on page 180<br />
“Performing a Basic CDMA Transmitter <strong>Measurement</strong>” on page 181<br />
“Codogram Display” on page 186<br />
“Performing a Codogram <strong>Measurement</strong>” on page 186<br />
“Interpreting the Display” on page 184<br />
“Setting the Channel or Frequency Step” on page 188<br />
“Setting the PN Offset” on page 189<br />
“Setting the PN Increment” on page 189<br />
“Setting the Frequency/Time Reference” on page 190<br />
“Setting Units” on page 191<br />
“Setting the CDMA Transmitter Reference Level” on page 191<br />
“Setting the Active Channel Threshold Level and Auto Threshold Level” on<br />
page 192<br />
“Setting <strong>Measurement</strong> Time” on page 193<br />
“Setting Quick Page Channel” on page 194<br />
“Setting Average, Sweep, and Restart” on page 195<br />
“Adding a Marker” on page 196<br />
“Setting the Pass/Fail Limits” on page 198<br />
“Setting Up the Signal Generator” on page 206<br />
“Metrics Provided by the CDMA Tx Analyzer <strong>Measurement</strong>” on page 209<br />
“Interpretation of CDMA Tx Analyzer <strong>Measurement</strong> Results” on page 211<br />
CDMA Analyzer<br />
179
CDMA Analyzer<br />
Using the CDMA Analyzer<br />
Using the CDMA Analyzer<br />
CDMA transmitter measurements verify proper transmitter performance and are<br />
typically made with the base station out of service. Important metrics are:<br />
• frequency error<br />
• PN and time offsets<br />
• channel power<br />
• waveform quality (estimated Rho)<br />
• carrier feedthrough<br />
• noise floor<br />
• pilot channel power<br />
• page channel delta power from pilot<br />
• sync channel delta power from pilot<br />
• quick changing channel delta power from pilot<br />
• For information about CDMA over air measurements, refer to “CDMA Over<br />
Air” on page 215.<br />
CAUTION<br />
The maximum power for the RF In port and the RF Out/SWR port of the test set is<br />
+20 dBm (100 mW). The maximum power for the Power Sensor port is +24 dBm<br />
(300 mW). When directly coupled to a base station, the test set can be damaged by<br />
excessive power applied to any of these three ports.<br />
To prevent damage in most situations when you directly couple the test set to a base<br />
station, use the high power attenuator between the test set and the BTS.<br />
Common CDMA Tx Analyzer <strong>Measurement</strong>s<br />
Preparing to Make CDMA Tx Analyzer <strong>Measurement</strong>s<br />
CDMA Analyzer<br />
NOTE<br />
The first step in measuring CDMA transmitter performance is to take the base<br />
station out of service. The next step is to choose the type of time reference available.<br />
The measurement configuration depends upon the type of time reference you choose<br />
to use. Optimally, a GPS time reference is desired. GPS provides an independent<br />
time reference that can help determine if the base station under test is synchronized<br />
with the rest of the network. Base stations not synchronized with the rest of the<br />
network are referred to as “island cells”.<br />
If a GPS time reference is unavailable, you must connect to the even second pulse<br />
180 Chapter 7
CDMA Analyzer<br />
Using the CDMA Analyzer<br />
from the base station.<br />
You must also know the channel or frequency and the PN (pseudo noise) Offset of<br />
the CDMA signal to be analyzed. Each base station sector has a unique PN Offset.<br />
For more information on PN Offsets refer to “Adding a Marker” on page 196.<br />
Performing a Basic CDMA Transmitter <strong>Measurement</strong><br />
Once you have taken the base station out of service and made the proper<br />
connections, you can perform CDMA transmitter measurements.<br />
Step<br />
Notes<br />
1. Mode<br />
2. [Tx Analyzer]<br />
3. [CDMA Analyzer]<br />
4. [Chan Std]<br />
5. Highlight the channel<br />
standard you want using the<br />
up and down arrow buttons.<br />
6. [Select]<br />
7. On [Units] select Chan or<br />
Freq.<br />
8. Enter the channel or<br />
frequency using the numeric<br />
keypad.<br />
Each time you press this softkey, the selected<br />
option changes.<br />
• If you selected Chan in the previous step,<br />
select [Channel].<br />
• If you selected Freq, select [Frequency].<br />
9. [Fwd] Selects the forward CDMA channel.<br />
10. [Fr/Time Ref]<br />
11. [GPS] or [External Even Sec] GPS is the preferred time reference. If the sky<br />
(and hence the satellites) is not visible from<br />
the position of your analyzer, use External<br />
Even Sec as the time reference. When using<br />
the Even Second reference, the base station<br />
timing is relative to itself.<br />
CDMA Analyzer<br />
Chapter 7 181
CDMA Analyzer<br />
Using the CDMA Analyzer<br />
Step<br />
12. On [PN Offset] select Auto<br />
or Manual.<br />
13. Connect to the base station.<br />
Notes<br />
The test set defaults to Auto mode. The other<br />
choice is Manual.<br />
• In Auto mode the test set finds the PN<br />
Offset and displays the value in the metrics<br />
display at the bottom of the screen. The<br />
Time Offset is derived from the PN Offset<br />
that has been found.<br />
• In Manual mode you must enter the PN<br />
Offset, which appears in the metrics<br />
display. The Time Offset is derived from<br />
the entered PN Offset.<br />
CDMA Analyzer<br />
Connections for out of service CDMA measurements with GPS receiver as<br />
timing reference<br />
182 Chapter 7
CDMA Analyzer<br />
Using the CDMA Analyzer<br />
Step<br />
Notes<br />
Connections for out of service CDMA measurements with base station even<br />
second as timing reference<br />
Connections for in service CDMA measurements with GPS receiver as timing<br />
reference<br />
CDMA Analyzer<br />
Chapter 7 183
CDMA Analyzer<br />
Using the CDMA Analyzer<br />
Step<br />
Notes<br />
Connections for in service CDMA measurements with base station even<br />
second as timing reference<br />
NOTE<br />
During a CDMA Analyzer measurement, a yellow triangle symbol may temporarily<br />
appear beside “GPS” in the lower right. The yellow triangle indicates that the test set<br />
is re-synching with the GPS even second pulse. Once the test set is synchronized, a<br />
green dot appears in place of the triangle. If the GPS is unavailable, a red X appears.<br />
If this happens, you must choose another reference.<br />
Interpreting the Display<br />
The CDMA Tx Analyzer screen is divided into two sections:<br />
CDMA Analyzer<br />
• The trace display - that is, the graphic bar chart taking up most of the screen<br />
• The metrics display - that is, a table of values at the bottom of the screen<br />
The trace display contains a code domain power display. In this display 128 Walsh<br />
codes are shown in bit-reversed order to represent the combined code channels for<br />
the varying data rate traffic channels. The Y-axis labels display the relative power<br />
(dB) or absolute power (dBm), threshold level, and dB/division. The X-axis labels<br />
display active channel numbers. Active channel Walsh code numbers shown on the<br />
display include:<br />
184 Chapter 7
CDMA Analyzer<br />
Using the CDMA Analyzer<br />
• Pilot (red)<br />
• Page (green)<br />
• Sync (blue)<br />
• Quick page (light blue)<br />
• IS-95 traffic (yellow)<br />
• cdma2000 traffic (orange)<br />
• Unknown traffic (tan)<br />
• Noise (light gray)<br />
The metrics display shows 12 measurement parameters displayed below the trace<br />
display in three columns and four rows—each with a value and units. For more<br />
information about the parameters in the metric display, refer to “Metrics Provided<br />
by the CDMA Tx Analyzer <strong>Measurement</strong>” on page 209.<br />
The frequency indicator is at the bottom right, the time reference indicator at the<br />
bottom left. For each indicator the text indicates which reference you have chosen.<br />
A green LED indicates a locked condition, a red “X,” an unlocked condition.<br />
CDMA Analyzer<br />
Chapter 7 185
CDMA Analyzer<br />
Using the CDMA Analyzer<br />
Codogram Display<br />
This view provides a history of the code power. The codogram plot rises over time<br />
until it fills the graphical section of the display. Your most recent data appears at the<br />
bottom of the display, and your oldest data (several minutes ago to several hours<br />
ago, depending on your settings) appears at the top of the display. In this way, you<br />
can clearly see the changes in power that occur over a period of time. You can use it<br />
to:<br />
• see traffic channels as they initiate and terminate,<br />
• track traffic channel call levels over time.<br />
The Update Interval is the interval, measured in whole seconds, between successive<br />
records displayed on the codogram. In other words, if you set the update interval to<br />
5 seconds, the codogram display will not update until the after the first complete<br />
measurement following a gap of five seconds. Alternatively, you can set the update<br />
interval to provide the maximum data collection speed by pressing [Max Speed], or<br />
by setting the update interval to 0 (zero) seconds.<br />
NOTE<br />
It is not always possible for the analyzer to match the update interval you specify. It<br />
is possible, for example, to set your update interval to zero seconds (the maximum<br />
speed), and then to find that the analyzer can not update any faster than once every<br />
two seconds.<br />
Performing a Codogram <strong>Measurement</strong><br />
Step<br />
Notes<br />
1 [Display]<br />
CDMA Analyzer<br />
2 [Codogram] This displays the menu that controls the<br />
appearance and behavior of the<br />
codogram display.<br />
186 Chapter 7
CDMA Analyzer<br />
Using the CDMA Analyzer<br />
Step<br />
Notes<br />
3 On [Codogram] select On or Off. Each time you press this key, the<br />
codogram state switches between On and<br />
Off.<br />
When you set [Codogram] to On,<br />
[Reset Codogram], [Update Interval] and<br />
[Palette] become active.<br />
4 [Reset Codogram] This restarts the data capture for the<br />
Codogram. You may see the screen<br />
freeze for a few seconds before the<br />
display starts plotting data again.<br />
5 If desired set the update interval:<br />
a. [Update Interval]<br />
b. Enter the interval number of<br />
seconds using the numeric<br />
keypad.<br />
c. Select [sec] or [Max Speed].<br />
6 If desired set the display color:<br />
a. [Palette]<br />
b. Select [Full Color] or<br />
[Grayscale].<br />
Allows you to set the update interval to 0,<br />
1, or more seconds. Alternatively, you<br />
may set it to automatically determine the<br />
update interval that provides the<br />
maximum data collection speed.<br />
If you need to return to the automatically<br />
determined maximum capture speed, you<br />
must press [Update Interval] followed by<br />
a numeric keypad key to access [Max<br />
Speed].<br />
The color/grayscale top and bottom<br />
mappings are determined by the Ref<br />
Level and Scale/Div settings. To change<br />
the mapping, go to [Level/Location] and<br />
change [Ref Level] and [Scale/Div].<br />
NOTE<br />
The key labelled “Update Interval” was labelled “Capture Interval” in earlier<br />
versions of the software (v.04.00 or earlier). The way the key works has not<br />
changed. Only the key label has changed to clarify what the key does.<br />
CDMA Analyzer<br />
Chapter 7 187
CDMA Analyzer<br />
Optional CDMA Tx Analyzer <strong>Measurement</strong> Settings<br />
Optional CDMA Tx Analyzer <strong>Measurement</strong> Settings<br />
You can change several optional measurement parameters in the CDMA Tx<br />
Analyzer:<br />
• “Setting the Channel or Frequency Step” on page 188<br />
• “Setting the PN Increment” on page 189<br />
• “Setting the CDMA Transmitter Reference Level” on page 191<br />
• “Setting the Active Channel Threshold Level and Auto Threshold Level” on<br />
page 192<br />
• “Setting <strong>Measurement</strong> Time” on page 193<br />
• “Setting Quick Page Channel” on page 194<br />
• “Setting Average, Sweep, and Restart” on page 195<br />
• “Adding a Marker” on page 196<br />
• “Setting the Pass/Fail Limits” on page 198<br />
Setting the Channel or Frequency Step<br />
You can set the channel or frequency step so you can quickly increment to the next<br />
channel or frequency using the up and down arrow buttons.<br />
Step<br />
Notes<br />
CDMA Analyzer<br />
1. [Chan Step] or [Freq<br />
Step]<br />
2. Enter the desired<br />
channel or frequency<br />
step using the numeric<br />
keypad.<br />
This choice depends on the [Units] mode you are<br />
using.<br />
3. [Enter] Notice (and verify) that the number you entered<br />
(the channel step number or the frequency step<br />
number) appears below the Chan Step or Freq Step<br />
text on the corresponding button.<br />
188 Chapter 7
CDMA Analyzer<br />
Optional CDMA Tx Analyzer <strong>Measurement</strong> Settings<br />
Setting the PN Offset<br />
The PN Offset (Pseudo-Noise Offset) key allows you to set the analyzer to find the<br />
PN Offset automatically, or to set it to manually to a known value.<br />
The PN Offset is a short code sequence that provides a unique identifier for each<br />
sector of each cell site. There are 512 unique offsets 0 - 511), which the access<br />
terminals use to decode the information broadcast by the access network.<br />
Step<br />
Notes<br />
1. [PN Offset] Each time you press this key, the setting<br />
toggles between Auto and Manual.<br />
2. If you are setting the PN Offset<br />
manually, enter the PN Offset<br />
number using the numeric<br />
keypad.<br />
3. If you are setting the PN Offset<br />
manually, press [Enter]<br />
Any value from 0 to 511 is valid.<br />
Notice (and verify) that the number you<br />
entered for your chosen PN Offset number<br />
appears below the PN Offset text on the<br />
corresponding button. Note that no number is<br />
displayed if the setting is Auto.<br />
Setting the PN Increment<br />
The PN Increment allows you to choose the increment step for the PN Offset.<br />
Typically the PN Increment is set to 1 when measuring CDMA transmitter<br />
performance while connected to the base station via RF cable.<br />
The PN Increment field enables you to search based on a step size of your choice. If<br />
PN Increment = 1 (default), the search will step through PN values by one PN at a<br />
time. If PN Increment = 5, it will step through PN values 0, 5, 10, and so on. The<br />
Measured PN displayed will be a multiple of 5, even if the actual PN is not a<br />
multiple of 5. If you know that all base stations in the area have fixed increments,<br />
then set the PN Increment field to that increment value. If you don’t know, then use<br />
the default value of 1.<br />
CDMA Analyzer<br />
Chapter 7 189
CDMA Analyzer<br />
Optional CDMA Tx Analyzer <strong>Measurement</strong> Settings<br />
Step<br />
Notes<br />
1. [PN Inc]<br />
2. Enter the PN Increment using<br />
the numeric keypad.<br />
The maximum value you can enter is 15.<br />
3. [Enter] Notice (and verify) that the number you<br />
entered for your chosen PN Increment<br />
number appears below the PN Inc text on the<br />
corresponding button.<br />
Setting the Frequency/Time Reference<br />
This key is used to specify the source of your frequency reference, or your<br />
frequency and time reference. The analyzer needs an accurate reference signal in<br />
order to make accurate measurements, and this is where you specify the source of<br />
this reference signal.<br />
Step<br />
Notes<br />
1. [Fr/Time Ref] The frequency/time reference form is<br />
displayed<br />
CDMA Analyzer<br />
190 Chapter 7
CDMA Analyzer<br />
Optional CDMA Tx Analyzer <strong>Measurement</strong> Settings<br />
Step<br />
2. Select the frequency and time<br />
reference from the list using<br />
the up and down arrow<br />
buttons.<br />
Notes<br />
If the sky (and hence the satellites) is visible<br />
from the position of your analyzer, you can<br />
select GPS to get frequency and timing<br />
references from the GPS signal. The GPS<br />
antenna will need to be attached to the<br />
analyzer.<br />
If you connect to the access network’s Even<br />
Second Clock, you will still get all the<br />
metrics, but you will not have an independent<br />
check that the access network has locked onto<br />
the GPS signal.<br />
Other options available are Internal<br />
Reference, External 10 MHz, and External<br />
19.6608 MHz. These last three options only<br />
provide a frequency reference. They do not<br />
provide a time reference...<br />
3. [Select]<br />
Setting Units<br />
This key is used to toggle between Frequency and Channel for your measurements.<br />
That is, you can decide whether to specify (and measure) the frequency in Hertz, to<br />
specify the Channel Number.<br />
Step<br />
Notes<br />
1. [Units] Each time you press this key, you toggle<br />
between Freq (measurements in Hertz) and<br />
Chan (measurements by Channel Number).<br />
Setting the CDMA Transmitter Reference Level<br />
You can set the CDMA transmitter reference level to display either relative power<br />
(dB) or absolute power (dBm). The test set defaults to relative. The top graticule<br />
(horizontal line) represents the total power in the CDMA channel. The scale per<br />
CDMA Analyzer<br />
Chapter 7 191
CDMA Analyzer<br />
Optional CDMA Tx Analyzer <strong>Measurement</strong> Settings<br />
division is set to 5 dB per division by default, but you can change it if you wish.<br />
If the reference level is set to relative, the reference level is relative to the total<br />
power (in dB) in the CDMA channel. If the reference level is set to absolute, the<br />
reference level displays the actual power (in dBm) in the CDMA channel.<br />
To Set the CDMA Transmitter Reference Level:<br />
Step<br />
Notes<br />
1. [Level/Location]<br />
2. On [Reference] select Abs or<br />
Rel.<br />
3. [RF IN Loss]<br />
4. Enter the RF In Loss using<br />
the numeric keypad.<br />
5. [dB]<br />
Each time you press this softkey, the selected<br />
option changes.<br />
If you are using a cable and attenuator<br />
connected to the base station power amplifier,<br />
enter the combined cable and attenuator RF In<br />
Loss here. The RF In Loss can be obtained by<br />
measuring the Insertion loss. See “Two Port<br />
Insertion Loss” on page 123.<br />
Note: If data had been previously entered in<br />
[RF IN Loss], that data will be lost and<br />
replaced by the value you enter here.<br />
NOTE<br />
The insertion loss of the test cable and high power attenuator must be accounted for<br />
to obtain accurate CDMA power measurements such as channel power and pilot<br />
power. The insertion loss of the test cable/attenuator combination are accounted for<br />
as the RF In Loss, which is an offset applied to the power measurements by the test<br />
set.<br />
CDMA Analyzer<br />
Setting the Active Channel Threshold Level and Auto Threshold<br />
Level<br />
The active channel threshold level is an advanced setting that can be set to indicate<br />
which code channels are considered active. Any code channels exceeding this power<br />
level are considered active traffic channels and any code channels below this power<br />
level are considered inactive (or noise). A horizontal red line on the screen<br />
192 Chapter 7
CDMA Analyzer<br />
Optional CDMA Tx Analyzer <strong>Measurement</strong> Settings<br />
represents the threshold. The test set can set this level automatically, or you can<br />
manually enter a value.<br />
In Auto mode the threshold level moves as the noise fluctuates. The threshold level<br />
is set by the test set at an optimal offset above the average noise floor. In Auto mode,<br />
you can alter the Auto Threshold Offset. The recommended and default setting is<br />
0 dB. A negative value moves the threshold lower (closer to the noise floor) and is a<br />
more aggressive setting that increases the likelihood of interpreting an inactive<br />
channel as active. A positive value moves the threshold higher (away from the noise<br />
floor) and is a more conservative setting that increases the likelihood of interpreting<br />
an active channel as inactive.<br />
In Manual mode the threshold level is fixed and does not move as the noise<br />
fluctuates.<br />
To Set the Active Channel Threshold Level:<br />
Step<br />
Notes<br />
1. [Setup]<br />
2. On [Thresh Lvl] select<br />
Auto or Manual.<br />
Each time you press this softkey, the selected<br />
option changes. If you choose Manual, you must<br />
enter the threshold you want using the numeric<br />
keypad, then press [dB].<br />
3. [Auto Thres Offset] The default value is 0 dB. Optionally, you can<br />
enter a negative (more aggressive) or positive<br />
(more conservative) value, then press [dB].<br />
Setting <strong>Measurement</strong> Time<br />
The measurement time setting allows you to alter the speed at which measurements<br />
are made. Three choices exist: Slow, Average, and Fast. The test set defaults to<br />
Average.<br />
Slow measurement time provides a more accurate measurement at the expense of<br />
time.<br />
Fast measurement time provides a quicker measurement at the expense of accuracy.<br />
Average measurement time strikes a balance between measurement speed and<br />
accuracy.<br />
CDMA Analyzer<br />
Chapter 7 193
CDMA Analyzer<br />
Optional CDMA Tx Analyzer <strong>Measurement</strong> Settings<br />
To Set the <strong>Measurement</strong> Time:<br />
Step<br />
Notes<br />
1. [Setup]<br />
2. On [Meas Time] select<br />
Slow, Avg, or Fast.<br />
Each time you press this softkey, the selected<br />
option changes.<br />
Setting Quick Page Channel<br />
With the advent of cdma2000, a new control channel called the quick page channel<br />
(QPCH) has been added. The QPCH is used to improve standby time in the phone<br />
and may or may not be enabled. The QPCH is generally channel number 80. Note<br />
that the QPCH is a bursted channel. In other words, it is not on all the time. You may<br />
have to wait to see the QPCH show up on the trace. The Delta QPCH Power<br />
parameter on the metric display can help you determine the level of the QPCH. The<br />
QPCH is also a single-wide channel: it only occupies one of the 128 channels. The<br />
pilot, paging, and sync control channels are double-wide channels and occupy two<br />
of the 128 channels on the display.<br />
To Set the QPCH:<br />
Step<br />
Notes<br />
1. [Setup]<br />
2. On [Quick Page<br />
Channel] select Off or<br />
Ch 80.<br />
Each time you press this softkey, the selected<br />
option changes.<br />
CDMA Analyzer<br />
194 Chapter 7
CDMA Analyzer<br />
Optional CDMA Tx Analyzer <strong>Measurement</strong> Settings<br />
Setting Average, Sweep, and Restart<br />
Setting the Sweep<br />
You can select either continuous or single sweep. Continuous sweep provides<br />
repeated, ongoing measurements. Single sweep performs a single measurement that<br />
is repeated only when you push the Single button.<br />
To set sweep:<br />
Step<br />
Notes<br />
1 [Average/Sweep]<br />
2 [Continuous] or [Single] Each time you press one of these<br />
softkeys, the other softkey is<br />
automatically inactivated.<br />
Setting Averaging<br />
You can choose to have averaging On or Off and set the number of averages you<br />
want to take. Averaging only applies to the data, not the trace. When initialized, the<br />
<strong>Agilent</strong> <strong>E7495A</strong>/B defaults to running average:<br />
• A running average computes the new result as the weighted sum of the last result<br />
and the new measurement. The last result is weighted by (n – 1)/n. The new<br />
result is weighted by 1/n. Each new measurement produces a new result.<br />
To set averaging:<br />
Step<br />
Notes<br />
1 Set the number of averages.<br />
a. [Average/Sweep]<br />
b. [Average]<br />
c. Enter the number of averages<br />
using the numeric keypad.<br />
d. [Enter]<br />
CDMA Analyzer<br />
Chapter 7 195
CDMA Analyzer<br />
Optional CDMA Tx Analyzer <strong>Measurement</strong> Settings<br />
Step<br />
Notes<br />
2 Set averaging On or Off.<br />
a. [Average/Sweep]<br />
b. [Averaging]<br />
c. [Off] or [On]<br />
NOTE<br />
These two steps can be performed in any order. However, if you turn averaging on<br />
and a large number of averages has previously been set, there may be a delay before<br />
you can change number of averages.<br />
Setting Restart<br />
When you have averaging turned On and you are in Continuous Sweep mode, you<br />
can restart the averaging by pressing the Restart menu key. The Restart key has no<br />
effect if you are in Single sweep mode.<br />
To restart averaging:<br />
Step<br />
Notes<br />
1 [Average/Sweep]<br />
2 [Restart] This key is unavailable or has no effect when<br />
Sweep is set to Single. To restart a Single<br />
Sweep measurement, press [Single].<br />
Adding a Marker<br />
Markers can be used on traces to help you visually track up to four signals. Each<br />
marker has the following settings:<br />
• Type: Provides three options, including:<br />
CDMA Analyzer<br />
• Off<br />
• Normal, which places a diamond-shaped, colored marker, along with a<br />
number, 1-4, on the trace.<br />
• Delta, is associated with a normal marker. Therefore, a normal marker must<br />
exist prior to creating the delta marker. The delta marker displays the<br />
196 Chapter 7
CDMA Analyzer<br />
Optional CDMA Tx Analyzer <strong>Measurement</strong> Settings<br />
difference between the normal marker position and the delta marker<br />
position. Only one delta marker can be associated with a given normal<br />
marker. The normal marker must be active when Delta is selected.<br />
• Marker to Peak: Places the active marker on the current greatest value of the<br />
trace.<br />
• Marker to Next Peak: Places the active marker on the current second greatest<br />
value of the trace.<br />
Step<br />
Notes<br />
1. [Marker]<br />
2. [Marker]<br />
3. [1], [2], [3], or [4]<br />
4. [Type]<br />
5. [Off], [Normal], or [Delta]<br />
6. Locate the marker relative to the trace:<br />
• [Marker to Peak] or<br />
• [Marker to Next Peak]<br />
CDMA Analyzer<br />
Chapter 7 197
CDMA Analyzer<br />
Optional CDMA Tx Analyzer <strong>Measurement</strong> Settings<br />
Setting the Pass/Fail Limits<br />
The measurement limits settings enable you to alter the values of the test limits for<br />
the important measurements on the CDMA Tx Analyzer Screen. These settings<br />
affect the metrics color display: red represents fail, green represents pass. Next to<br />
the displayed measurement value, a (P) for Pass, or (F) for Fail, will be shown to<br />
further indicate whether the value is within or outside the set limits. In addition, the<br />
words “ALL PASS” or “FAILURE” are displayed in the bar at the bottom of the<br />
screen for all limits which have been turned on.<br />
CDMA Analyzer<br />
• Frequency Error Limits: Sets the high and low Frequency Error limits for the<br />
channel. Any measured frequency error that is outside of the set limits will result<br />
in a failure indiction. The High limit is set by entering a positive number, and the<br />
Low limit is set by entering a negative number.<br />
• Time Offset Limits: Sets the high and low time offset limits for the channel.<br />
Limits are set in microseconds. Any measured time offset value that is outside of<br />
the set limits will result in a failure indication.<br />
• Est. Rho Limit: Sets the lower Estimated Rho limit for the channel. Any<br />
measured value of estimate Rho this is below the set limit will result in a failure<br />
indication.<br />
• Carrier Feedthrough Limit: Sets the upper carrier feedthrough limit for the<br />
channel. The upper limit is set in dBc and is relative to channel power. Any<br />
measured carrier feedthrough value that is above the set limit will result in a<br />
failure indication.<br />
• Noise Floor Limit: Sets the upper noise floor limits for the channel. The limit is<br />
set in dB. Any measured noise floor value above the set limit will result in a<br />
failure indication.<br />
• Pilot Power Limit: Sets the upper and lower limits of the pilot power. These<br />
limits are set in dBm. Any measured pilot power value that is above or below the<br />
set limits will result in a failure indication.<br />
• Delta Page Power Limits: Sets the upper and lower limits of the delta page<br />
power. The limits are set in dB and are relative to the pilot power. Any measured<br />
delta page power value that is above or below the set limit will result in a failure<br />
indication.<br />
• Delta Sync Power Limits: Sets the upper and lower limit of the delta sync<br />
power. The limit is set in dB and is relative to the pilot power. Any measured<br />
Delta Sync Power value above or below the set limit will result in a failure<br />
indication.<br />
198 Chapter 7
CDMA Analyzer<br />
Optional CDMA Tx Analyzer <strong>Measurement</strong> Settings<br />
To Set the <strong>Measurement</strong> Frequency Error Limits:<br />
Step<br />
Notes<br />
1 [Setup]<br />
2 [Limits]<br />
3 On [Freq Error Limits]<br />
select On or Off.<br />
Enables you to toggle the measurement limits<br />
function On (active) and Off (inactive).<br />
• If set to On, the Frequency Error will change<br />
from black to red (fail) or green (pass) and<br />
indicate either a “P” (pass) or “F” (fail). If the<br />
measured value exceeds either the upper or<br />
lower limit, the words ALL PASS in the bar at<br />
the bottom of the screen, will change to<br />
FAILURE.<br />
• If set to Off, the channel freq/number value will<br />
be displayed in blue. The area at the bottom of<br />
the screen that is used to indicate Pass or Fail<br />
will be over-written. The bar at the bottom of<br />
the screen, will indicate measurement in<br />
progress.<br />
4 Set the upper limit.<br />
a. [High Limit]<br />
b. Enter the number on<br />
the numeric keypad.<br />
c. [GHz], [MHz],<br />
[kHz], or [Hz]<br />
5 Set the lower limit.<br />
a. [Low Limit]<br />
b. Enter the number on<br />
the numeric keypad.<br />
c. [GHz], [MHz],<br />
[kHz], or [Hz]<br />
CDMA Analyzer<br />
Chapter 7 199
CDMA Analyzer<br />
Optional CDMA Tx Analyzer <strong>Measurement</strong> Settings<br />
To Set the <strong>Measurement</strong> Time Offset Limits:<br />
Step<br />
1 On [Time Offset Limits]<br />
select On or Off.<br />
Notes<br />
Enables you to toggle the measurement limits<br />
function On (active) and Off (inactive).<br />
• If set to On, the displayed time offset metrics<br />
will change from blue to red (fail) or green<br />
(pass) and indicate either a “P” (pass) or “F”<br />
(fail). If the measured values exceed the upper<br />
or lower limit, the words ‘ALL PASS’, in the<br />
bar at the bottom of the screen, will change to<br />
‘FAILURE’.<br />
• If set to Off, the time offset value will be<br />
displayed in blue. The bar at the bottom of the<br />
screen will indicate measurement in progress.<br />
2 Set the upper limit.<br />
a. [High Limit]<br />
b. Enter the number on<br />
the numeric keypad.<br />
c. [µsec]<br />
3 Set the lower limit.<br />
a. [Low Limit]<br />
b. Enter the number on<br />
the numeric keypad.<br />
c. [µsec]<br />
CDMA Analyzer<br />
200 Chapter 7
CDMA Analyzer<br />
Optional CDMA Tx Analyzer <strong>Measurement</strong> Settings<br />
To Set the <strong>Measurement</strong> Estimated Rho Lower Limit:<br />
Step<br />
1 On [Est. Rho Limit]<br />
select On or Off.<br />
Notes<br />
Enables you to toggle the measurements lower limit<br />
function On (active) and Off (inactive).<br />
• If set to On, the displayed estimated Rho<br />
metrics will change from blue to red (fail) or<br />
green (pass) and indicate either a “P” (pass) or<br />
“F” (fail). If the measured values exceed lower<br />
limit, the words ‘ALL PASS’, in the bar at the<br />
bottom of the screen, will change to<br />
‘FAILURE’.<br />
• If set to Off, the time estimated Rho value will<br />
be displayed in blue. The bar at the bottom of<br />
the screen will indicate measurement in<br />
progress.<br />
2 Set the lower limit.<br />
Lower Limit range: 0 to 1<br />
a. [Low Limit]<br />
b. Enter the number on<br />
the numeric keypad.<br />
c. [Enter]<br />
CDMA Analyzer<br />
Chapter 7 201
CDMA Analyzer<br />
Optional CDMA Tx Analyzer <strong>Measurement</strong> Settings<br />
To Set the <strong>Measurement</strong> Carrier Feedthrough Upper Limit:<br />
Step<br />
1 On [Carr Feedthru<br />
Limit] select On or<br />
Off.<br />
2 Set the upper limit.<br />
Notes<br />
Enables you to toggle the measurement limits<br />
function On (active) and Off (inactive).<br />
• If set to On, the displayed carrier feedthrough<br />
metric will change from blue to red (fail) or<br />
green (pass) and indicate either a “P” (pass) or<br />
“F” (fail). If the measured value exceeds the<br />
upper limit, ALL PASS, in the bar at the bottom<br />
of the screen, will change to FAILURE.<br />
• If set to Off, the time carrier feedthrough value<br />
will be displayed in blue. The bar at the bottom<br />
of the screen will indicate measurement in<br />
progress.<br />
Upper Limit range: +100 dBc to –150 dBc<br />
a. [High Limit]<br />
b. Enter the number on<br />
the numeric keypad.<br />
c. [dBc]<br />
To Set the <strong>Measurement</strong> Noise Floor Upper Limit:<br />
Step<br />
1 On [Noise Floor Limits]<br />
select On or Off.<br />
Notes<br />
Enables you to toggle the measurement limit<br />
function On (active) and Off (inactive).<br />
CDMA Analyzer<br />
• If set to On, the displayed noise floor metrics<br />
will change from blue to red (fail) or green<br />
(pass) and indicate either a “P” (pass) or “F”<br />
(fail). If the measured value exceeds the upper<br />
limit, ALL PASS, in the bar at the bottom of the<br />
screen, will change to FAILURE.<br />
• If set to Off, the time noise floor value will be<br />
displayed in blue. The bar at the bottom of the<br />
screen will indicate measurement in progress.<br />
202 Chapter 7
CDMA Analyzer<br />
Optional CDMA Tx Analyzer <strong>Measurement</strong> Settings<br />
Step<br />
2 Set the upper limit.<br />
Notes<br />
Upper Limit range: +100 dBc to –150 dBc<br />
a. [High Limit]<br />
b. Enter the number on<br />
the numeric keypad.<br />
c. [dB]<br />
To Set the <strong>Measurement</strong> Pilot Power Limits:<br />
Step<br />
1 On [Pilot Power Limits]<br />
select On or Off.<br />
Notes<br />
Enables you to toggle the measurement limits<br />
function On (active) and Off (inactive).<br />
• If set to On, the delta pilot power metrics will<br />
change from blue to red (fail) or green (pass)<br />
and indicate either a “P” (pass) or “F” (fail). If<br />
the measured value exceeds the upper limit or<br />
lower limit, ALL PASS, in the bar at the bottom<br />
of the screen, will change to FAILURE.<br />
• If set to Off, the time pilot power value will be<br />
displayed in blue. If NO limits are set to On, the<br />
pass/fail bar will not be displayed at the bottom<br />
of the screen.<br />
2 Set the upper limit.<br />
Delta Limit range: –150 to 100 dBm<br />
a. [High Limit]<br />
b. Enter the number on<br />
the numeric keypad.<br />
c. [dBm]<br />
3 Set the lower limit.<br />
a. [Low Limit]<br />
b. Enter the number on<br />
the numeric keypad.<br />
c. [dBm]<br />
Delta Limit range: –150 to 100 dBm<br />
CDMA Analyzer<br />
Chapter 7 203
CDMA Analyzer<br />
Optional CDMA Tx Analyzer <strong>Measurement</strong> Settings<br />
To Set the <strong>Measurement</strong> Delta Page Power Limits:<br />
Step<br />
1 On [∆ Page Pwr Limits]<br />
select On or Off.<br />
Notes<br />
Enables you to toggle the measurement limits<br />
function On (active) and Off (inactive).<br />
• If set to On, the delta page power metrics will<br />
change from blue to red (fail) or green (pass)<br />
and indicate either a “P” (pass) or “F” (fail). If<br />
the measured value exceeds the upper limit or<br />
lower limit, ALL PASS, in the bar at the bottom<br />
of the screen, will change to FAILURE.<br />
• If set to Off, the time delta page power value<br />
will be displayed in blue. If NO limits are set to<br />
On, the pass/fail bar will not be displayed at the<br />
bottom of the screen.<br />
2 Set the upper delta limit.<br />
a. [High Limit]<br />
b. Enter the number on<br />
the numeric keypad.<br />
c. [dB]<br />
3 Set the lower delta limit.<br />
Delta Limit range: –150 to 100 dB<br />
Delta Limit range: –150 to 100 dB<br />
a. [Low Limit]<br />
b. Enter the number on<br />
the numeric keypad.<br />
c. [dB]<br />
CDMA Analyzer<br />
204 Chapter 7
CDMA Analyzer<br />
Optional CDMA Tx Analyzer <strong>Measurement</strong> Settings<br />
To Set the <strong>Measurement</strong> Delta Sync Power Limits:<br />
Step<br />
1 On [∆ Sync Pwr Limits]<br />
select On or Off.<br />
Notes<br />
Enables you to toggle the measurement limits<br />
function On (active) and Off (inactive).<br />
• If set to On, the delta sync. power metrics will<br />
change from blue to red (fail) or green (pass)<br />
and indicate either a “P” (pass) or “F” (fail). If<br />
the measured value exceeds the upper limit or<br />
lower limit, the words ‘ALL PASS’, in the bar<br />
at the bottom of the screen, will change to<br />
‘FAILURE’.<br />
• If set to Off, the time delta sync. power value<br />
will be displayed in blue. If NO limits are set to<br />
On, the pass/fail bar will not be displayed at the<br />
bottom of the screen.<br />
2 Set the upper delta limit.<br />
a. [High Limit]<br />
b. Enter the number on<br />
the numeric keypad.<br />
c. [dB]<br />
2 Set the lower delta limit.<br />
Delta Limit range: –150 to 100 dB<br />
Delta Limit range: –150 to 100 dB<br />
a. [Low Limit]<br />
b. Enter the number on<br />
the numeric keypad.<br />
c. [dB]<br />
CDMA Analyzer<br />
Chapter 7 205
CDMA Analyzer<br />
Optional CDMA Tx Analyzer <strong>Measurement</strong> Settings<br />
Setting Up the Signal Generator<br />
You can set up the signal generator while in the Spectrum Analyzer mode from the<br />
Setup menu. For more detailed information on the signal generator setup and<br />
operation, refer to “Using the Signal Generator” on page 400.<br />
CAUTION<br />
The maximum power for the RF In port and the RF Out/SWR port of the test set is<br />
+20 dBm (100 mW). The maximum power for the Power Sensor port is +24 dBm<br />
(300 mW). When directly coupled to a base station, the test set can be damaged by<br />
excessive power applied to any of these three ports.<br />
To prevent damage in most situations when you directly couple the test set to a base<br />
station, use the high power attenuator between the test set and the BTS.<br />
NOTE<br />
The lowest level the signal generator can go to is -90 dBm. In order to achieve a<br />
lower level, you must use an external attenuator. You can compensate for the<br />
attenuator in the RF Out Loss.<br />
Step<br />
Notes<br />
1 [Setup]<br />
2 [Sig Gen]<br />
3 [Freq/Chan]<br />
4 [Frequency] or [Channel]<br />
5 Enter the channel or<br />
frequency using the numeric<br />
keypad.<br />
CDMA Analyzer<br />
6 • For channel select [Rev]<br />
or [Fwd]<br />
• For frequency select<br />
[GHz], [MHz], [kHz], or<br />
[Hz],<br />
7 [Mod Format]<br />
206 Chapter 7
CDMA Analyzer<br />
Optional CDMA Tx Analyzer <strong>Measurement</strong> Settings<br />
Step<br />
Notes<br />
8 Select the channel standard<br />
from the list using the up and<br />
down arrow buttons.<br />
9 [Select]<br />
10 Set the RF output amplitude<br />
a. [Amplitude]<br />
b. Enter the amplitude value<br />
using the numeric keypad.<br />
c. [dBm].<br />
11 If you have previously stored<br />
RF Out Loss from an<br />
insertion loss measurement,<br />
go to the next step.<br />
Or<br />
You may also enter a new value for<br />
amplitude by turning the rotary knob until the<br />
desired value is displayed or using the up and<br />
down arrow keys.<br />
For information on the effects of the RF Out<br />
Loss function on the amplitude, refer to<br />
“Using the RF OUT Loss field‚’ below.<br />
Each time you press this softkey, the selected<br />
option changes.<br />
Press [RF OUT Loss] to<br />
select On and enter the RF<br />
Out Loss value.<br />
12 Connect to the base station.<br />
13 On [Enable Sig Gen] select<br />
On.<br />
Each time you press this softkey, the selected<br />
option changes.<br />
14 On [RF] select On. Each time you press this softkey, the selected<br />
option changes.<br />
Using the RF OUT Loss field<br />
The RF OUT Loss field is used when it is necessary to test the receiver sensitivity of<br />
a typical base station. The test set’s source will typically go down to –95 dBm. In<br />
order to reach –113 dBm for sensitivity testing, you must use an external attenuator.<br />
The measured value of the attenuator and connecting cables are entered into this<br />
field. This value is then used when this field is set to On. When this field is set to<br />
On, the test set will set the RF generator level to the correct level offset by the<br />
external attenuator/cabling. When you set the RF Generator to –113 dBm (with the<br />
CDMA Analyzer<br />
Chapter 7 207
CDMA Analyzer<br />
Optional CDMA Tx Analyzer <strong>Measurement</strong> Settings<br />
RF OUT Loss field turned On and the external attenuator/cabling loss value entered)<br />
the output at the end of the RF test cabling is –113 dBm.<br />
Example: If you want to set the signal generator to –113 dBm, the attenuator and RF<br />
cabling measures 42.51 dB (measured with the 2 port insertion loss measurement<br />
screen prior to this test), the RF OUT Loss field is turned On (with the 42.51 dB loss<br />
value entered). The actual RF output of the signal generator is –70.49 dBm, the<br />
attenuator and RF cabling attenuated the signal to the desired level; so the RF signal<br />
at the end of the test cable/attenuator is –113 dBm. This also points out the<br />
importance of accurately measuring the loss of the attenuator and connecting cables.<br />
CDMA Analyzer<br />
208 Chapter 7
CDMA Analyzer<br />
Metrics Provided by the CDMA Tx Analyzer <strong>Measurement</strong><br />
Metrics Provided by the CDMA Tx Analyzer<br />
<strong>Measurement</strong><br />
This section contains descriptions of the individual CDMA transmit parameters in<br />
the metric display of the screen. The “Interpretation of CDMA Tx Analyzer<br />
<strong>Measurement</strong> Results” section contains expected result values and possible causes<br />
of error if the expected results are not met.<br />
Frequency Error<br />
Frequency error is the frequency difference between your transmitter's actual center<br />
frequency and the frequency (or channel) you entered.<br />
PN Offset<br />
The PN Offset is a “short code” sequence that provides a unique identifier for each<br />
sector of each cell site. The PN Offsets are applied to the I and Q signals before<br />
modulation. PN Offsets are offset in time by 52.08 µs and they repeat every 26.666<br />
ms. This yields 512 unique short code sequences (0-511). The mobile phone needs<br />
the PN Offset to decode information in the Sync and Paging channels, which are<br />
transmitted by the base station.<br />
Time Offset<br />
The Time Offset compares the PN Offset timing with the overall system time. This<br />
measurement checks the start of the PN offset in comparison to either the GPS<br />
signal or the Even Second clock signal. For example, PN Offset 0 should repeat<br />
exactly on the rising edge of the Even Second clock. PN Offset 1 should repeat<br />
52.08 µs after the rising edge of the Even Second clock, and so forth. Any error in<br />
time from that event is reported as a Time Offset.<br />
Channel Power<br />
Channel Power is the integrated power within a defined bandwidth. For CDMA the<br />
channel bandwidth is defined to be 1.25 MHz. Channel Power measures the power<br />
the base station is transmitting across the entire 1.25 MHz CDMA channel.<br />
Estimated Rho<br />
Estimated Rho is the measure of the modulation quality for a CDMA transmitter.<br />
This measurement is analogous to measuring FM accuracy and distortion in an<br />
AMPS network or EVM in a TDMA system. A Rho value of 1.0 is perfect,<br />
CDMA Analyzer<br />
Chapter 7 209
CDMA Analyzer<br />
Metrics Provided by the CDMA Tx Analyzer <strong>Measurement</strong><br />
indicating that all of the power is being transmitted correctly.<br />
Carrier Feedthrough<br />
Carrier Feedthrough is a result of the RF carrier signal feeding through the I/Q<br />
modulator and riding on the output circuitry without being modulated. Carrier<br />
Feedthrough is a common cause of bad Rho measurements.<br />
Noise Floor<br />
Noise Floor is the average power of all the inactive channels.<br />
Pilot Power<br />
Pilot Power is the total power in the Pilot code channel, expressed in dBm. The<br />
transmit power of the Pilot Channel signal for a given base station is normally<br />
constant.<br />
Delta Page Power<br />
Delta Page Power is the amplitude difference between the Paging Channel and Pilot<br />
Channel, expressed in dB. The transmit power of the Paging Channel is constant and<br />
can be set at a value relative to the Pilot Power. A common value is -4 dB relative to<br />
the Pilot.<br />
Delta Sync Power<br />
Delta Sync Power is the amplitude difference between the Sync Channel and Pilot<br />
Channel, expressed in dB. The transmit power of the Sync Channel is constant and<br />
may be set at a value relative to the Pilot Power. A common value is -10 dB relative<br />
to the Pilot.<br />
CDMA Analyzer<br />
Delta Quick Page Channel Power<br />
Delta Quick Page Channel (QPCH) Power is the amplitude difference between the<br />
Quick Page Channel and Pilot Channel, expressed in dB. The QPCH is a bursted<br />
channel and is not on all the time. In order to capture the level of the QPCH, the<br />
statistic measures and holds the peak level of the QPCH. Until a QPCH has been<br />
measured, the value will be dashes. When “on”, the level of the QPCH is constant<br />
and is set at a value relative to the Pilot Power. The QPCH digital gain level can be<br />
set to 2, 1, 0, -1, -2, -3, -4, and -5 dB relative to the Pilot.<br />
210 Chapter 7
CDMA Analyzer<br />
Interpretation of CDMA Tx Analyzer <strong>Measurement</strong> Results<br />
Interpretation of CDMA Tx Analyzer <strong>Measurement</strong><br />
Results<br />
This section contains expected result values and possible causes of error if the<br />
expected results are not met.<br />
Frequency Error<br />
The standards specify very tight Frequency Error performance. In the PCS bands,<br />
the 0.05 parts-per-million specification translates to only 99 Hz at a carrier<br />
frequency of 1980 MHz or 40 Hz at 850 MHz cellular frequencies. Frequency Error<br />
shows up as uncorrelated power that adds to the noise floor or shows up in other<br />
Walsh codes.<br />
If a particular site loses its reference to GPS time, its reference signals will begin to<br />
drift over time. Phones already using the site can remain on the air because they<br />
derive their timing from the signals transmitted by the base station. However,<br />
phones using other sites/sectors may be prevented from using the site because they<br />
are confused by the error in frequency. This creates what is known as the “island cell<br />
effect”. By itself, the cell is still functional. To the rest of the system, it's<br />
inaccessible.<br />
This island cell effect can be caused by a failure in the site's GPS receiver and<br />
timebase distribution network. Using the test set's Internal GPS receiver provides an<br />
independent time reference that will allow you to determine if this cell site is out of<br />
sync with the rest of the network (“island cell effect”).<br />
PN Offset<br />
Verify that the PN Offset is correct. If you are in Manual mode, the PN Offset will<br />
display the value you entered. Make sure the Time Offset is small (less than 3 µs). If<br />
the Time Offset is greater than expected, see the section on Time Offset below. If<br />
you are in Auto mode, the test set will tune to the PN Offset with the smallest Time<br />
Offset. If an incorrect PN Offset is displayed, the Time Offset will likely be very<br />
large.<br />
Time Offset<br />
The CDMA standards specify a maximum offset of 10 µs; generally 5 µs is a<br />
recommended maximum. If the Time Offset is large enough, an “island cell” can<br />
occur. The “island cell effect” was mentioned already when discussing Frequency<br />
Error.<br />
CDMA Analyzer<br />
Chapter 7 211
CDMA Analyzer<br />
Interpretation of CDMA Tx Analyzer <strong>Measurement</strong> Results<br />
A phone moving outward toward the limit of its cell will need to acquire the<br />
adjacent cell in order to hand off. If the time offset of the target cell is too far from<br />
that of the current site, the handoff may not happen.<br />
The dependence of the phone on correct system time limits the physical distance to a<br />
target cell's antenna. Each PN Offset is 52.08 µs; if the propagation delay is too<br />
long, the received PN Offset may be different from the value designated on the Sync<br />
channel. This difference can confuse the phone, causing the handoff to fail.<br />
Another cause of timing error is a bad GPS receiver or timing distribution network<br />
within the base station. To test your base station's GPS and timing distribution<br />
system, you can use the internal GPS receiver to generate an accurate timing<br />
reference for the test set to use while performing base station tests.<br />
Channel Power<br />
When making channel power measurements, make sure you have accounted for the<br />
loss of the test cable and high power attenuator you are using. If you do not know<br />
the loss of your test cable and high power attenuator configuration, perform an<br />
insertion loss measurement and enter the insertion loss as the RF In Loss value. For<br />
more information see “Two Port Insertion Loss” on page 123.<br />
If the channel power is lower than expected, verify you have a good connection to<br />
the RF output of the base station. Also, verify the cable you are using to connect to<br />
the base station is not faulty. A low channel power may also indicate a bad power<br />
amplifier.<br />
Inaccurate channel power (high or low) may indicate an incorrect power setting at<br />
the base station.<br />
Estimated Rho<br />
The CDMA base station standard specifies that Rho must be greater than 0.912.<br />
Typical values for a healthy base station are greater than 0.94.<br />
Rho failures can indicate problems in:<br />
CDMA Analyzer<br />
• Compression in linear amplifiers<br />
• Magnitude and phase errors in the IQ modulator<br />
• Phase non-linearity (group delay)<br />
• Spurious signals in the transmission path<br />
• Carrier feedthrough<br />
Because the uncorrelated power appears as interference to the phones, poor Rho<br />
performance will affect the sector's capacity. The added interference can require that<br />
212 Chapter 7
CDMA Analyzer<br />
Interpretation of CDMA Tx Analyzer <strong>Measurement</strong> Results<br />
the signal on traffic channels be raised to overcome the interference. This may, in<br />
turn, be seen as further interference. At some point, the site will have to shed calls in<br />
order to supply the remaining calls with enough signal versus the interference in the<br />
system.<br />
Carrier Feedthrough<br />
A good carrier feedthrough level is less than -25 dB. The IS-97 standard does not<br />
specify carrier feedthrough; however, this measurement provides an additional tool<br />
to troubleshoot the base station's transmitter.<br />
In the frequency domain, carrier feedthrough can show up as an uncorrelated energy<br />
spike that can be seen on the spectrum analyzer by closely spanning into the top of<br />
the CDMA signal. The effects of carrier feedthrough can also show up as higher<br />
noise levels on the Code Domain Power screen. The inactive Walsh codes will be<br />
pushing the -27 dB specification for noise. Carrier feedthrough can be caused by the<br />
lack of isolation across the mixer and cavity of the transmitter's I/Q modulator.<br />
Shielding can help reduce carrier feedthrough.<br />
Noise Floor<br />
A good noise floor value is between -40 dB and -45 dB for modern base stations. If<br />
the noise floor is above these values (for example, -20 dB), the modulator may be<br />
the source of the added noise. Another possibility is a problem with the base<br />
station's channel card. The channel card generates the individual Walsh codes.<br />
Pilot Power<br />
If the measured value of pilot power is more than +/-0.5 dB different from the<br />
intended setting, it may indicate the following:<br />
• There has been a change made to the digital gain setting of the pilot channel.<br />
• The base station power amplifier has a problem.<br />
Delta Page Power<br />
If the measured value of Delta Page Power is more than +/-0.5 dB different from the<br />
intended setting, it may indicate that the digital gain setting for the Paging Channel<br />
has been changed.<br />
Delta Sync Power<br />
If the measured value of Delta Sync Power is more than +/- 0.5 dB different from<br />
the intended setting, it may indicate that the digital gain setting for the sync channel<br />
has been changed.<br />
CDMA Analyzer<br />
Chapter 7 213
CDMA Analyzer<br />
Interpretation of CDMA Tx Analyzer <strong>Measurement</strong> Results<br />
Delta Quick Page Channel Power<br />
If the measured value of Delta QPCH Power is more than +/-0.5 dB different from<br />
the intended setting, it may indicate that the digital gain setting for the QPCH has<br />
been changed.<br />
CDMA Analyzer<br />
214 Chapter 7
8 CDMA Over Air<br />
“Using the CDMA Over Air Tool” on page 216<br />
“Preparing to Make CDMA Over Air <strong>Measurement</strong>s” on page 216<br />
“Criteria for Making Valid CDMA Over Air <strong>Measurement</strong>s” on page 217<br />
“Performing a Basic CDMA Over Air <strong>Measurement</strong>” on page 218<br />
“Displaying Location Information Using GPS” on page 220<br />
“Codogram Display” on page 222<br />
“Performing a Codogram <strong>Measurement</strong>” on page 222<br />
“Setting Amplifier Capacity Metrics” on page 223<br />
“Interpreting the Display” on page 225<br />
“Optional CDMA Over Air <strong>Measurement</strong> Settings” on page 227<br />
“Setting the Channel or Frequency Step” on page 227<br />
“Setting the PN Increment” on page 228<br />
“Setting the Transmitter Reference Level” on page 228<br />
“Setting the Active Channel Threshold Level and Auto Threshold Level” on<br />
page 230<br />
“Resetting Amplifier Capacity and Traffic Metrics” on page 231<br />
“Setting <strong>Measurement</strong> Time” on page 231<br />
“Setting Quick Page Channel” on page 232<br />
“Setting Average, Sweep, and Restart” on page 234<br />
“Adding a Marker” on page 235<br />
“Setting the Pass/Fail Limits” on page 237<br />
“Setting Up the Signal Generator” on page 246<br />
“Metrics Provided by CDMA Over Air <strong>Measurement</strong>s” on page 249<br />
“Interpretation of CDMA Over Air <strong>Measurement</strong> Results” on page 253<br />
CDMA Over Air<br />
215
CDMA Over Air<br />
CDMA Over Air<br />
Using the CDMA Over Air Tool<br />
Using the CDMA Over Air Tool<br />
CDMA over air measurements provide a quick method of verifying CDMA<br />
transmitter performance. These transmitter measurements can be made on a base<br />
station from the convenience of your vehicle without taking the base station out of<br />
service. Over air measurements are especially useful in maintaining hard-to-access<br />
cell sites such as pole top base stations. Option 210 - cdmaOne/CDMA2000 OTA<br />
may also be used to measure signals at a coupled port on the transmitter.<br />
For out-of-service CDMA transmitter measurements, Option 2000 - cdmaOne /<br />
CDMA 2000 Analyzer is recommended. For more information refer to “CDMA<br />
Analyzer” on page 179.<br />
CAUTION<br />
To achieve valid over-the-air measurements, the test set must be stationary (not<br />
moving). An alternative is to make these measurements from a coupled port at the<br />
base station.<br />
Preparing to Make CDMA Over Air <strong>Measurement</strong>s<br />
An important consideration when making CDMA over air measurements is your<br />
location relative to the base station. There must be no obstructions between your<br />
location and the base station antennas. Also, the GPS antenna must be able to “see”<br />
the satellites to obtain lock. Using internal GPS for the time reference has the same<br />
advantages mentioned for CDMA Tx Analyzer measurements (“island cell”<br />
detection).<br />
You must know the channel or frequency and the PN offset of the CDMA signal to<br />
be analyzed. Each base station sector has a unique PN offset. For more information<br />
on PN offsets refer to the “Metrics Provided by CDMA Over Air <strong>Measurement</strong>s” on<br />
page 249.<br />
Once you have connected the proper antenna to the test set, chosen a stationary<br />
location, and verified that you have a clear view of the base station antennas, you<br />
can perform CDMA over air measurements.<br />
If this is the first CDMA over air measurement for this base station, you must find a<br />
location that meets the criteria for making a valid measurement. Your location must<br />
have a dominant pilot and very low multipath power. If you have made CDMA over<br />
air measurements at this location before and know it provides valid measurements,<br />
skip to “Performing a Basic CDMA Over Air <strong>Measurement</strong>” on page 218.<br />
216 Chapter 8
CDMA Over Air<br />
Using the CDMA Over Air Tool<br />
Criteria for Making Valid CDMA Over Air <strong>Measurement</strong>s<br />
The first step in making valid CDMA over air measurements is to identify a target<br />
base station to measure. Then, for your measurements to be valid, you must find a<br />
location near the target base station with a sufficiently strong CDMA signal. CDMA<br />
over air measurements will experience interference from other CDMA signals on<br />
the same RF channel and from multipath echoes. The code domain power view<br />
measures two key parameters to indicate these effects:<br />
CDMA Over Air<br />
• Pilot dominance—The difference between the energy of the strongest pilot<br />
channel and the combined energy in the second and third strongest pilot<br />
channels (expressed in dB). Ideally, this value should be very large (> 16 dB)<br />
• Multipath power—The amount of power, of the dominant pilot signal, that is<br />
dispersed outside the main correlation peak due to multipath echoes (expressed<br />
in dB). Ideally, this value should be very small (< 0.1 dB). Multipath power is<br />
the result of portions of the original broadcast signal arriving at the receiving<br />
antenna out of phase with the main power of the original signal. This can be<br />
caused by the signal being reflected off objects, such as buildings, or being<br />
refracted through the atmosphere differently from the main signal. These out of<br />
phase signals can cancel power from the main signal or appear as noise<br />
interference at the receiver.<br />
The table below shows the quality of the over air code domain measurements with<br />
respect to pilot dominance and multipath power.<br />
Table 8-1<br />
Over Air Code Domain <strong>Measurement</strong> Quality<br />
<strong>Measurement</strong> Quality Pilot Dominance Multipath Power<br />
Very good > 16 dB < 0.1 dB<br />
Fair > 10 dB < 0.4 dB<br />
Marginal > 8dB < 0.7dB<br />
The default measurement limits for pilot dominance and multipath power are set to<br />
give “fair” measurement quality. If these limits are met, the pilot dominance and<br />
multipath power values will be displayed in green. When the pilot dominance and<br />
multipath power parameters are outside the acceptable limits, the parameters will<br />
turn red. If this occurs, you must move to a different location that meets the “fair”<br />
criteria defined above.<br />
Chapter 8 217
CDMA Over Air<br />
CDMA Over Air<br />
Using the CDMA Over Air Tool<br />
In general, you should always use a preselector filter for the band of interest to<br />
prevent strong signals from swamping out the signal of interest. <strong>Agilent</strong> offers these<br />
preselectors and antennas:<br />
• Option 810—Cellular downlink band preselector and antenna<br />
• Option 811—PCS downlink band preselector and antenna<br />
• Option 812—Korean PCS downlink band preselector and antenna<br />
Performing a Basic CDMA Over Air <strong>Measurement</strong><br />
Step<br />
Notes<br />
1 Mode<br />
2 [Over Air]<br />
3 [CDMA Over Air]<br />
4 [Chan Std]<br />
5 Select the channel standard<br />
you want using the up and<br />
down arrow buttons.<br />
6 [Select]<br />
7 On [Units] select Chan or<br />
Freq.<br />
Each time you press this softkey, the selected<br />
option changes.<br />
8 [Channel] or [Frequency] • If you selected Chan in the previous step,<br />
select [Channel].<br />
• If you selected Freq, select [Frequency].<br />
9 Enter the channel or<br />
frequency using the<br />
numeric keypad.<br />
10 [Fwd] Selects the forward CDMA channel.<br />
218 Chapter 8
Step<br />
11 Verify that on [Fr/Time<br />
Ref] GPS is selected. If<br />
not, press [Fr/Time Ref],<br />
then press [GPS].<br />
12 On [PN Offset] select Auto<br />
or Manual.<br />
13 [Level/Location]<br />
14 [RF IN Loss]<br />
15 Set the RF IN Loss to 0 dB<br />
using the numeric keypad.<br />
16 [dB]<br />
17 Connect to the antenna.<br />
Notes<br />
CDMA Over Air<br />
Using the CDMA Over Air Tool<br />
The test set defaults to Auto mode.<br />
• In Auto mode the test set finds the PN offset<br />
of the strongest pilot signal and displays the<br />
value in the metrics display. The delay is<br />
derived from the found PN offset.<br />
• In Manual mode you must enter the PN<br />
offset using the numeric keypad. The delay<br />
is derived from the entered PN offset.<br />
CDMA Over Air<br />
Chapter 8 219
CDMA Over Air<br />
NOTE<br />
CDMA Over Air<br />
Using the CDMA Over Air Tool<br />
The test set does not record data for post-processing. It provides a snapshot of<br />
CDMA base station transmit parameters at that location.<br />
NOTE<br />
During a CDMA over air measurement, a yellow triangle symbol may temporarily<br />
appear beside “GPS” in the lower right. The yellow triangle indicates that the test set<br />
is re-synching with the GPS even second pulse. Once the test set is synchronized, a<br />
green dot appears in place of the triangle. If the GPS is unavailable, a red X appears.<br />
If this happens, you must choose another reference.<br />
Displaying Location Information Using GPS<br />
If you are making CDMA over air measurements at a location you previously<br />
established as valid, <strong>Agilent</strong> recommends using GPS to verify that you are at the<br />
location from which you previously measured.<br />
If you are making CDMA over air measurements from a new location, once you<br />
validate that the location provides a dominant pilot and low multipath power,<br />
<strong>Agilent</strong> recommends that you record the latitude and longitude coordinates of this<br />
location using GPS. Later measurements should be made from this precise location<br />
to provide performance trends.<br />
For additional information on the GPS Data function, refer to “Displaying GPS<br />
Location Data” on page 458.<br />
To Display GPS Location Information:<br />
Step<br />
Notes<br />
1 [Level/Location]<br />
220 Chapter 8
Step<br />
2 On [Show GPS<br />
Location] select On.<br />
Notes<br />
CDMA Over Air<br />
Using the CDMA Over Air Tool<br />
Displays GPS satellite location information. Uses the<br />
internal GPS to capture the location of a<br />
measurement. The GPS information can be used to<br />
return to the same location. The Time Ref<br />
(Freq/Chan/Time Ref mode) button must be set to<br />
internal GPS for this function to be active.<br />
Information logged includes longitude, latitude,<br />
altitude (feet/meters), and the number of satellites<br />
tracked.<br />
Every time you press [Show GPS Location], the GPS<br />
location display alternates between On and Off.<br />
CDMA Over Air<br />
NOTE<br />
If you prefer to have an electronic copy of the location information, see “Saving<br />
Data” on page 465.<br />
Chapter 8 221
CDMA Over Air<br />
CDMA Over Air<br />
Using the CDMA Over Air Tool<br />
Codogram Display<br />
This view provides a history of the spectrum. The codogram plot rises over time<br />
until it fills the graphical section of the display. Your most recent data appears at the<br />
bottom of the display, and your oldest data (several minutes ago to several hours<br />
ago, depending on your settings) appears at the top of the display. In this way, you<br />
can clearly see the changes in power that occur over a period of time. You can use it<br />
to:<br />
• see traffic channels as they initiate and terminate,<br />
• track traffic channel call levels over time.<br />
The Update Interval is the interval, measured in whole seconds, between successive<br />
records displayed on the codogram. In other words, if you set the update interval to<br />
5 seconds, the codogram display will not update until after the first complete<br />
measurement following a gap of five seconds. Alternatively, you can set the update<br />
interval to provide the maximum data collection speed by pressing [Max Speed], or<br />
by setting the update interval to 0 (zero) seconds.<br />
NOTE<br />
It is not always possible for the analyzer to match the update interval you specify. It<br />
is possible, for example, to set your update interval to zero seconds (the maximum<br />
speed), and then to find that the analyzer can not update any faster than once every<br />
two seconds.<br />
Performing a Codogram <strong>Measurement</strong><br />
Step<br />
Notes<br />
1 [Display]<br />
2 [Codogram] This displays the menu that controls the<br />
appearance and behavior of the<br />
codogram display.<br />
222 Chapter 8
Step<br />
CDMA Over Air<br />
Using the CDMA Over Air Tool<br />
3 On [Codogram] select On or Off. Each time you press this key, the<br />
codogram state switches between On and<br />
Off.<br />
When you set [Codogram] to On,<br />
[Reset Codogram], [Update Interval] and<br />
[Palette] become active.<br />
4 [Reset Codogram] This restarts the data capture for the<br />
Codogram. You may see the screen<br />
freeze for a few seconds before the<br />
display starts plotting data again.<br />
5 If desired set the update interval:<br />
a. [Update Interval]<br />
b. Enter the interval number of<br />
seconds using the numeric<br />
keypad.<br />
c. Select [sec] or [Max Speed].<br />
6 If desired set the display color:<br />
a. [Palette]<br />
b. Select [Full Color] or<br />
[Grayscale].<br />
Notes<br />
Allows you to set the update interval to 0,<br />
1, or more seconds. Alternatively, you<br />
may set it to automatically determine the<br />
update interval that provides the<br />
maximum data collection speed.<br />
If you need to return to the automatically<br />
determined maximum capture speed, you<br />
must press [Update Interval] followed by<br />
a numeric keypad key to access [Max<br />
Speed].<br />
The color/grayscale top and bottom<br />
mappings are determined by the Ref<br />
Level and Scale/Div settings. To change<br />
the mapping, go to [Level/Location] and<br />
change [Ref Level] and [Scale/Div].<br />
CDMA Over Air<br />
NOTE<br />
The key labelled “Update Interval” was labelled “Capture Interval” in earlier<br />
versions of the software (v.04.00 or earlier). The way the key works has not<br />
changed. Only the key label has changed to clarify what the key does.<br />
Setting Amplifier Capacity Metrics<br />
The Amplifier Capacity measurement is an estimate of the amount of power<br />
amplifier capacity that is being used, expressed in percent of maximum. Amplifier<br />
capacity properties must be properly set to make valid amplifier capacity<br />
Chapter 8 223
CDMA Over Air<br />
CDMA Over Air<br />
Using the CDMA Over Air Tool<br />
measurements. Amplifier capacity metrics are amplifier capacity, peak amplifier<br />
capacity, and average amplifier capacity.<br />
A CDMA base station is typically set up with a specified amount of power allocated<br />
to the pilot channel, and specified power settings of the paging and sync channels<br />
are defined relative to the pilot channel. Occasionally, the paging and sync channels<br />
power settings will also be specified in absolute power units (watts or dBm). Given<br />
the pilot, paging, and sync power setup values and the maximum power output of<br />
the amplifier, the percentage amplifier capacity setup parameters can be determined.<br />
To Set Amplifier Capacity Properties:<br />
Step<br />
Notes<br />
1 [Reset/Display/Amp Cap]<br />
2 On [Amp Cap] select On.<br />
3 [Pilot Pwr]<br />
4 Enter the pilot power in<br />
watts, using the numeric<br />
keypad.<br />
5 [dBm] or [W]<br />
6 [Max PA Pwr]<br />
7 Enter the maximum power<br />
of the power amplifier in<br />
watts, using the numeric<br />
keypad.<br />
8 [dBm] or [W]<br />
9 [Delta Page Pwr]<br />
10 Enter the Delta Page Pwr in<br />
dB, using the numeric<br />
keypad.<br />
11 [dB]<br />
12 [Delta Sync Pwr]<br />
The pilot power is the total power in the<br />
dominant pilot signal, expressed in dBm or in<br />
watts.<br />
A base station power amplifier is specified to<br />
have a maximum power limit.<br />
The delta paging power is the power level of<br />
the paging channel expressed as a dB value<br />
relative to the pilot channel power level.<br />
224 Chapter 8
Step<br />
13 Enter the Delta Sync Pwr in<br />
dB, using the numeric<br />
keypad.<br />
14 [dB]<br />
Notes<br />
CDMA Over Air<br />
Using the CDMA Over Air Tool<br />
The delta sync power is the power level of the<br />
the sync channel expressed as a dB value<br />
relative to the pilot channel power level.<br />
CDMA Over Air<br />
Interpreting the Display<br />
The CDMA Over Air screen is divided into three sections: the code domain trace<br />
display, strongest pilot trace display, and metrics display.<br />
The code domain trace display contains 128 Walsh codes, which are shown in a<br />
bit-reversed order to represent the combined code channels for the varying data rate<br />
traffic channels. The Y-axis labels display the relative power (dB) or absolute power<br />
(dBm), threshold level, and dB/division. The X-axis labels display active channel<br />
Walsh Code numbers. Active code channels shown on the display include:<br />
• Pilot (red)<br />
• Page (green)<br />
• Sync (blue)<br />
• Quick page (light blue)<br />
• IS-95 traffic (yellow)<br />
• cdma2000 traffic (orange)<br />
• Unknown traffic (tan)<br />
• Noise (light gray)<br />
The strongest pilot trace display contains the pilot dominance and multipath power<br />
parameters. Awareness of these two parameter values helps you be sure that you are<br />
making valid measurements on the sector of interest.<br />
The metrics display shows 18 measurement parameters displayed below the trace<br />
display in three columns and six rows—each with a value and units. For more<br />
information about the metric display, refer to “Metrics Provided by CDMA Over Air<br />
<strong>Measurement</strong>s” on page 249.<br />
The frequency indicator is at the bottom right corner of the screen, the time<br />
reference indicator at the bottom left. For each indicator the text indicates which<br />
reference you have chosen. A green LED indicates a locked condition. A red “X”<br />
Chapter 8 225
CDMA Over Air<br />
CDMA Over Air<br />
Using the CDMA Over Air Tool<br />
indicates an unlocked condition.<br />
226 Chapter 8
CDMA Over Air<br />
Optional CDMA Over Air <strong>Measurement</strong> Settings<br />
Optional CDMA Over Air <strong>Measurement</strong> Settings<br />
You can alter several optional measurement parameters in CDMA Over Air:<br />
CDMA Over Air<br />
“Setting the Channel or Frequency Step” on page 227<br />
“Setting the PN Increment” on page 228<br />
“Setting the Transmitter Reference Level” on page 228<br />
“Setting the Active Channel Threshold Level and Auto Threshold Level” on<br />
page 230<br />
“Resetting Amplifier Capacity and Traffic Metrics” on page 231<br />
“Setting <strong>Measurement</strong> Time” on page 231<br />
“Setting Quick Page Channel” on page 232<br />
“Setting Average, Sweep, and Restart” on page 234<br />
“Adding a Marker” on page 235<br />
“Setting the Pass/Fail Limits” on page 237<br />
“Metrics Provided by CDMA Over Air <strong>Measurement</strong>s” on page 249<br />
“Interpretation of CDMA Over Air <strong>Measurement</strong> Results” on page 253<br />
Setting the Channel or Frequency Step<br />
You can set the channel or frequency step so you can quickly increment to the next<br />
channel or frequency using the Up Arrow and Down Arrow buttons.<br />
Step<br />
Notes<br />
1 [Chan Step] or [Freq Step] This choice depends on the [Units] mode you<br />
are using.<br />
2 Enter the desired channel or<br />
frequency step using the<br />
numeric keypad.<br />
3 [Enter] Notice (and verify) the number you entered<br />
below the Chan Step or Freq Step text on the<br />
corresponding button.<br />
Chapter 8 227
CDMA Over Air<br />
CDMA Over Air<br />
Optional CDMA Over Air <strong>Measurement</strong> Settings<br />
Setting the PN Increment<br />
The PN Increment allows you to choose the increment step for the PN Offset.<br />
Typically the PN Increment is set to 1 when measuring CDMA transmitter<br />
performance while connected to the base station via RF cable.<br />
The PN Increment field enables you to search based on a step size of your choice. If<br />
PN Increment = 1 (default), the search will step through PN values by one PN at a<br />
time. If PN Increment = 5, it will step through PN values 0, 5, 10, and so on. The<br />
Measured PN displayed will be a multiple of 5, even if the actual PN is not a<br />
multiple of 5. If you know that all base stations in the area have fixed increments,<br />
then set the PN Increment field to that increment value. If you don’t know, then use<br />
the default value of 1.<br />
Step<br />
Notes<br />
1. [PN Inc]<br />
2. Enter the PN Increment using<br />
the numeric keypad.<br />
The maximum value you can enter is 15.<br />
3. [Enter] Notice (and verify) that the number you<br />
entered for your chosen PN Increment<br />
number appears below the PN Inc text on the<br />
corresponding button.<br />
Setting the Transmitter Reference Level<br />
You can set the CDMA transmitter reference level to display either relative power<br />
(dB) or absolute power (dBm). The test set defaults to relative. The top graticule<br />
(horizontal line) represents the total power in the CDMA channel. The scale per<br />
division is set to 5 dB per division.<br />
If the reference level is set to relative, the reference level is relative to the total<br />
power (in dB) in the CDMA channel. If the reference level is set to absolute, the<br />
reference level displays the actual power (in dBm) in the CDMA channel.<br />
Step<br />
Notes<br />
1 [Level/Location]<br />
228 Chapter 8
Step<br />
2 On [Reference] select Abs or<br />
Rel.<br />
CDMA Over Air<br />
Optional CDMA Over Air <strong>Measurement</strong> Settings<br />
Notes<br />
Each time you press this softkey, the<br />
selected option changes.<br />
CDMA Over Air<br />
Chapter 8 229
CDMA Over Air<br />
CDMA Over Air<br />
Optional CDMA Over Air <strong>Measurement</strong> Settings<br />
Setting the Active Channel Threshold Level and Auto Threshold<br />
Level<br />
The active channel threshold level is an advanced setting that can be set to indicate<br />
which code channels are considered active. Any code channels exceeding this power<br />
level are considered active traffic channels and any code channels below this power<br />
level are considered inactive (or noise). A horizontal red line on the screen<br />
represents the threshold level. The test set can set this level automatically, or you<br />
can manually enter a value.<br />
In Auto mode the threshold level moves as the noise fluctuates. The threshold level<br />
is set by the test set at an optimal offset above the average noise floor. If you choose<br />
Auto mode, you can alter the auto threshold offset. The recommended and default<br />
setting is 0 dB. A negative value moves the threshold lower (closer to the noise<br />
floor) and is a more aggressive setting that increases the likelihood of interpreting an<br />
inactive channel as active. A positive value moves the threshold higher (away from<br />
the noise floor) and is a more conservative setting that increases the likelihood of<br />
interpreting an active channel as inactive.<br />
In Manual mode the threshold level is fixed and does not move as the noise<br />
fluctuates.<br />
To Set the Active Channel Threshold Level:<br />
Step<br />
Notes<br />
1 [Setup]<br />
2 On [Thresh Lvl] select<br />
Auto or Manual.<br />
Each time you press this softkey, the selected<br />
option changes. If you choose Manual, you must<br />
enter the threshold you want using the numeric<br />
keypad, then press [dB].<br />
3 [Auto Thres Offset] The default value is 0 dB. Optionally, you can enter<br />
a negative (more aggressive) or positive (more<br />
conservative) value, then press [dB].<br />
230 Chapter 8
CDMA Over Air<br />
Optional CDMA Over Air <strong>Measurement</strong> Settings<br />
Resetting Amplifier Capacity and Traffic Metrics<br />
the amplifier capacity metrics such as the peak and average amplifier capacity and<br />
peak and average utilization can be reset. If you prefer to reset these parameters<br />
manually, you may do so using the [Reset Metrics] menu key. The test set may<br />
automatically reset these parameters for you if you are using the PN Offset Auto<br />
mode.<br />
In PN Offset Auto mode, if the test set finds a new dominant pilot (from a stronger<br />
base station signal), the peak and average amplifier capacity values will be reset.<br />
The test set will decode the signal containing the new dominant pilot and gather new<br />
amplifier capacity data for this signal. In PN Offset Manual mode if the test set finds<br />
a new dominant pilot, the signal will not be decoded and the test set will display<br />
noise in the code domain power display. The amplifier capacity metrics will be<br />
unaffected and the test set will not gather data until the desired signal becomes<br />
dominant again.<br />
To Manually Reset the Amplifier Capacity Metrics:<br />
CDMA Over Air<br />
Step<br />
Notes<br />
1 [Reset/Display/Amp<br />
Cap]<br />
2 [Reset Metrics]<br />
Setting <strong>Measurement</strong> Time<br />
The <strong>Measurement</strong> Time setting allows you to alter the speed at which measurements<br />
are being made. Three choices exist: Slow, Average, and Fast. The test set defaults<br />
to Average. Slow measurement time provides a more accurate measurement at the<br />
expense of time. Fast measurement time provides a quicker measurement at the<br />
expense of accuracy. Average measurement time strikes a balance between<br />
measurement speed and measurement accuracy.<br />
Step<br />
Notes<br />
1 [Setup]<br />
2 On [Meas Time] select<br />
Slow, Avg, or Fast.<br />
Each time you press this softkey, the selected<br />
option changes.<br />
Chapter 8 231
CDMA Over Air<br />
CDMA Over Air<br />
Optional CDMA Over Air <strong>Measurement</strong> Settings<br />
Setting Quick Page Channel<br />
With the advent of cdma2000, a new control channel called the quick page channel<br />
(QPCH) has been added. The QPCH is used to improve standby time in the phone<br />
and may or may not be enabled. The QPCH is generally channel number 80. Note<br />
that the QPCH is a bursted channel. In other words, it is not on all the time. You may<br />
have to wait to see the QPCH show up on the trace. The Delta QPCH Power<br />
parameter on the metric display can help you determine the level of the QPCH. The<br />
QPCH is also a single-wide channel: it only occupies one of the 128 channels. The<br />
pilot, paging, and sync control channels are double-wide channels and occupy two<br />
of the 128 channels on the display.<br />
232 Chapter 8
To Set the QPCH:<br />
Step<br />
1 [Setup]<br />
2 On [Quick Page<br />
Channel] select Off or<br />
Ch 80.<br />
CDMA Over Air<br />
Optional CDMA Over Air <strong>Measurement</strong> Settings<br />
Notes<br />
Each time you press this softkey, the selected<br />
option changes.<br />
CDMA Over Air<br />
Chapter 8 233
CDMA Over Air<br />
CDMA Over Air<br />
Optional CDMA Over Air <strong>Measurement</strong> Settings<br />
Setting Average, Sweep, and Restart<br />
Setting the Sweep<br />
You can select either continuous or single sweep. Continuous sweep provides<br />
repeated, ongoing measurements. Single sweep performs a single measurement that<br />
is repeated only when you push the Single button.<br />
To set sweep:<br />
Step<br />
Notes<br />
1 [Average/Sweep]<br />
2 [Continuous] or [Single] Each time you press this softkey, the<br />
selected option changes.<br />
Setting Averaging<br />
You can choose to have averaging on or off and set the number of averages you want<br />
to take. Averaging only applies to the data, not the trace. You can select from the<br />
following types of averaging: When initialized, the <strong>Agilent</strong> <strong>E7495A</strong>/B defaults to<br />
running average:<br />
• A running average computes the new result as the weighted sum of the last result<br />
and the new measurement. The last result is weighted by (n – 1)/n. The new<br />
result is weighted by 1/n. Each new measurement produces a new result.<br />
To set averaging:<br />
Step<br />
Notes<br />
1 Set the number of averages.<br />
a. [Average/Sweep]<br />
b. [Average]<br />
c. Enter the number of averages<br />
using the numeric keypad.<br />
d. [Enter]<br />
234 Chapter 8
Step<br />
2 Set averaging On or Off.<br />
CDMA Over Air<br />
Optional CDMA Over Air <strong>Measurement</strong> Settings<br />
Notes<br />
CDMA Over Air<br />
a. [Average/Sweep]<br />
b. [Averaging]<br />
c. [Off] or [On]<br />
NOTE<br />
These two steps can be performed in any order. However, if you turn averaging on<br />
and a large number of averages has previously been set, there may be a delay before<br />
you can change number of averages.<br />
Setting Restart<br />
When you have averaging turned On and you are in Continuous Sweep mode, you<br />
can restart the averaging by pressing the Restart menu key. The Restart key has no<br />
effect if you are in Single sweep mode.<br />
To restart averaging:<br />
Step<br />
Notes<br />
1 [Average/Sweep]<br />
2 [Restart] This key is unavailable or has no effect when<br />
Sweep is set to Single. To restart a Single<br />
Sweep measurement, press [Single].<br />
Adding a Marker<br />
Markers can be used on traces to help you visually track up to four signals. Each<br />
marker has the following settings:<br />
• Type: Provides three options, including:<br />
• Off<br />
• Normal, which places a diamond-shaped, colored marker, along with a<br />
number, 1-4, on the trace.<br />
• Delta, is associated with a normal marker. Therefore, a normal marker must<br />
exist prior to creating the delta marker. The delta marker displays the<br />
Chapter 8 235
CDMA Over Air<br />
CDMA Over Air<br />
Optional CDMA Over Air <strong>Measurement</strong> Settings<br />
difference between the normal marker position and the delta marker<br />
position. Only one delta marker can be associated with a given normal<br />
marker. The normal marker must be active when Delta is selected.<br />
• Marker to Peak: Places the active marker on the current greatest value of the<br />
trace.<br />
• Marker to Next Peak: Places the active marker on the current second greatest<br />
value of the trace.<br />
Step<br />
Notes<br />
1 [Marker]<br />
2 [Marker]<br />
3 [1], [2], [3], or [4]<br />
4 [Type]<br />
5 [Off], [Normal], or [Delta]<br />
6 Locate the marker relative to the trace:<br />
• [Marker to Peak] or<br />
• [Marker to Next Peak]<br />
236 Chapter 8
Setting the Pass/Fail Limits<br />
CDMA Over Air<br />
Optional CDMA Over Air <strong>Measurement</strong> Settings<br />
The measurement limits settings enable you to alter the values of the test limits for<br />
the important measurements on the CDMA Over the Air Analyzer Screen. These<br />
settings affect the metrics color display: red represents fail, green represents pass.<br />
Next to the displayed measurement value, a (P) for Pass, or (F) for Fail, will be<br />
shown to further indicate whether the value is within or outside the set limits. In<br />
addition, the words “ALL PASS” or “FAILURE” are displayed in the bar at the<br />
bottom of the screen for all limits which have been turned on.<br />
CDMA Over Air<br />
• Frequency Limits: Sets the high and low Frequency Error limits for the<br />
channel. Any measured frequency error that is outside of the set limits will result<br />
in a failure indiction. The High limit is set by entering a positive number, and the<br />
Low limit is set by entering a negative number.<br />
• Time Offset Limits: Sets the high and low time offset limits for the channel.<br />
Limits are set in microseconds. Any measured time offset value that is outside of<br />
the set limits will result in a failure indication.<br />
• Est. Rho Limit: Sets the lower Estimated Rho limit for the channel. Any<br />
measured value of estimate Rho this is below the set limit will result in a failure<br />
indication.<br />
• Carrier Feedthrough Limit: Sets the upper carrier feedthrough limit for the<br />
channel. The upper limit is set in dBc and is relative to channel power. Any<br />
measured carrier feedthrough value that is above the set limit will result in a<br />
failure indication.<br />
• Noise Floor Limit: Sets the upper noise floor limits for the channel. The limit is<br />
set in dB and is absolute. Any measured noise floor value above the set limit will<br />
result in a failure indication.<br />
• Pilot Power Limit: Sets the upper and lower limit of the delta page power. This<br />
limit is set in dBm. Any measured value that is above or below the set limit will<br />
result in a failure indication.<br />
• Delta Page Power Limits: Sets the upper and lower limit of the delta page<br />
power. The limit is set in dB and is relative to the pilot power. The Delta Page<br />
Power Limit calculates a value relative to Carrier Power. If the calculated delta<br />
value exceeds the maximum or minimum set value, a failure is indicated.<br />
• Delta Sync Power Limits: Sets the upper and lower limit of the delta sync<br />
power. The limit is set in dB and is relative to the pilot power. Any measured<br />
Delta Sync Power value above or below the set limit will result in a failure<br />
indication.<br />
Chapter 8 237
CDMA Over Air<br />
CDMA Over Air<br />
Optional CDMA Over Air <strong>Measurement</strong> Settings<br />
To Set the <strong>Measurement</strong> Frequency Error Limits:<br />
Step<br />
1 [Setup]<br />
2 [Limits]<br />
3 On [Freq Error Limits]<br />
select On or Off.<br />
Notes<br />
Enables you to toggle the measurement limits<br />
function On (active) and Off (inactive).<br />
• If set to On, the Frequency Error will change<br />
from blue to red (fail) or green (pass) and<br />
indicate either a “P” (pass) or “F” (fail). If the<br />
measured value exceed either the upper or<br />
lower limit, ALL PASS, in the bar at the bottom<br />
of the screen, will change to FAILURE.<br />
• If set to Off, the channel freq/number value will<br />
be displayed in blue. The area at the bottom of<br />
the screen that is used to indicate Pass or Fail<br />
will be over-written. The bar at the bottom of<br />
the screen, will indicate measurement in<br />
progress.<br />
4 Set the upper limit.<br />
a. [High Limit]<br />
b. Enter the number on<br />
the numeric keypad.<br />
c. [GHz], [MHz],<br />
[kHz], or [Hz]<br />
5 Set the lower limit.<br />
a. [Low Limit]<br />
b. Enter the number on<br />
the numeric keypad.<br />
c. [GHz], [MHz],<br />
[kHz], or [Hz]<br />
238 Chapter 8
To Set the <strong>Measurement</strong> Time Offset Limits:<br />
Step<br />
1 On [Time Offset Limits]<br />
select On or Off.<br />
CDMA Over Air<br />
Optional CDMA Over Air <strong>Measurement</strong> Settings<br />
Notes<br />
Enables you to toggle the measurement limits<br />
function On (active) and Off (inactive).<br />
CDMA Over Air<br />
• If set to On, the displayed time offset metrics<br />
will change from blue to red (fail) or green<br />
(pass) and indicate either a “P” (pass) or “F”<br />
(fail). If the measured values exceed the upper<br />
or lower limit, ALL PASS, in the bar at the<br />
bottom of the screen, will change to FAILURE.<br />
• If set to Off, the time offset value will be<br />
displayed in blue. The bar at the bottom of the<br />
screen will indicate measurement in progress.<br />
2 Set the upper limit.<br />
a. [High Limit]<br />
b. Enter the number on<br />
the numeric keypad.<br />
c. [µsec]<br />
3 Set the lower limit.<br />
a. [Low Limit]<br />
b. Enter the number on<br />
the numeric keypad.<br />
c. [µsec]<br />
Chapter 8 239
CDMA Over Air<br />
CDMA Over Air<br />
Optional CDMA Over Air <strong>Measurement</strong> Settings<br />
To Set the <strong>Measurement</strong> Estimated Rho Lower Limit:<br />
Step<br />
1 On [Est. Rho Limit]<br />
select On or Off.<br />
Notes<br />
Enables you to toggle the measurements lower limit<br />
function On (active) and Off (inactive).<br />
• If set to On, the displayed estimated Rho<br />
metrics will change from blue to red (fail) or<br />
green (pass) and indicate either a “P” (pass) or<br />
“F” (fail). If the measured values exceed lower<br />
limit, ALL PASS, in the bar at the bottom of the<br />
screen, will change to FAILURE.<br />
• If set to Off, the time estimated Rho value will<br />
be displayed in blue. The bar at the bottom of<br />
the screen will indicate measurement in<br />
progress.<br />
2 Set the lower limit.<br />
Lower Limit range: 0 to 1<br />
a. [Low Limit]<br />
b. Enter the number on<br />
the numeric keypad.<br />
c. [Enter]<br />
240 Chapter 8
CDMA Over Air<br />
Optional CDMA Over Air <strong>Measurement</strong> Settings<br />
To Set the <strong>Measurement</strong> Carrier Feedthrough Upper Limit:<br />
Step<br />
1 On [Carr Feedthru<br />
Limit] select On or<br />
Off.<br />
2 Set the upper limit.<br />
Notes<br />
Enables you to toggle the measurement limits<br />
function On (active) and Off (inactive).<br />
• If set to On, the displayed carrier feedthrough<br />
metric will change from blue to red (fail) or<br />
green (pass) and indicate either a “P” (pass) or<br />
“F” (fail). If the measured value exceeds the<br />
upper limit, the words ‘ALL PASS’, in the bar<br />
at the bottom of the screen, will change to<br />
‘FAILURE’.<br />
• If set to Off, the time carrier feedthrough value<br />
will be displayed in blue. The bar at the bottom<br />
of the screen will indicate measurement in<br />
progress.<br />
Upper Limit range: 60 to –150 dBc<br />
CDMA Over Air<br />
a. [High Limit]<br />
b. Enter the number on<br />
the numeric keypad.<br />
c. [dBc]<br />
Chapter 8 241
CDMA Over Air<br />
CDMA Over Air<br />
Optional CDMA Over Air <strong>Measurement</strong> Settings<br />
To Set the <strong>Measurement</strong> Noise Floor Upper Limit:<br />
Step<br />
1 On [Noise Floor Limits]<br />
select On or Off.<br />
Notes<br />
Enables you to toggle the measurement limit<br />
function On (active) and Off (inactive).<br />
• If set to On, the displayed noise floor metrics<br />
will change from blue to red (fail) or green<br />
(pass) and indicate either a “P” (pass) or “F”<br />
(fail). If the measured value exceeds the upper<br />
limit, the words ‘ALL PASS’, in the bar at the<br />
bottom of the screen, will change to<br />
‘FAILURE’.<br />
• If set to Off, the time noise floor value will be<br />
displayed in blue. The bar at the bottom of the<br />
screen will indicate measurement in progress.<br />
2 Set the upper limit.<br />
Upper Limit range: 60 to –150 dBc<br />
a. [High Limit]<br />
b. Enter the number on<br />
the numeric keypad.<br />
c. [dB]<br />
242 Chapter 8
To Set the <strong>Measurement</strong> Pilot Power Limits:<br />
Step<br />
1 On [Pilot Power Limits]<br />
select On or Off.<br />
CDMA Over Air<br />
Optional CDMA Over Air <strong>Measurement</strong> Settings<br />
Notes<br />
Enables you to toggle the measurement limits<br />
function On (active) and Off (inactive).<br />
CDMA Over Air<br />
• If set to On, the delta pilot power metrics will<br />
change from blue to red (fail) or green (pass)<br />
and indicate either a “P” (pass) or “F” (fail). If<br />
the measured value exceeds the upper limit or<br />
lower limit, the words ‘ALL PASS’, in the bar<br />
at the bottom of the screen, will change to<br />
‘FAILURE’.<br />
• If set to Off, the time pilot power value will be<br />
displayed in blue. If NO limits are set to On, the<br />
pass/fail bar will not be displayed at the bottom<br />
of the screen.<br />
2 Set the upper limit.<br />
a. [High Limit]<br />
b. Enter the number on<br />
the numeric keypad.<br />
c. [dBm]<br />
3 Set the lower limit.<br />
Delta Limit range: –150 to 100 dBm<br />
Delta Limit range: –150 to 100 dBm<br />
a. [Low Limit]<br />
b. Enter the number on<br />
the numeric keypad.<br />
c. [dBm]<br />
Chapter 8 243
CDMA Over Air<br />
CDMA Over Air<br />
Optional CDMA Over Air <strong>Measurement</strong> Settings<br />
To Set the <strong>Measurement</strong> Delta Page Power Limits:<br />
Step<br />
1 On [∆ Page Pwr Limits]<br />
select On or Off.<br />
Notes<br />
Enables you to toggle the measurement limits<br />
function On (active) and Off (inactive).<br />
• If set to On, the delta page power metrics will<br />
change from blue to red (fail) or green (pass)<br />
and indicate either a “P” (pass) or “F” (fail). If<br />
the measured value exceeds the upper limit or<br />
lower limit, the words ‘ALL PASS’, in the bar<br />
at the bottom of the screen, will change to<br />
‘FAILURE’.<br />
• If set to Off, the time delta page power value<br />
will be displayed in blue. If NO limits are set to<br />
On, the pass/fail bar will not be displayed at the<br />
bottom of the screen.<br />
2 Set the upper delta limit.<br />
a. [High Limit]<br />
b. Enter the number on<br />
the numeric keypad.<br />
c. [dB]<br />
3 Set the lower delta limit.<br />
Delta Limit range: –150 to 100 dB<br />
Delta Limit range: –150 to 100 dB<br />
a. [Low Limit]<br />
b. Enter the number on<br />
the numeric keypad.<br />
c. [dB]<br />
244 Chapter 8
To Set the <strong>Measurement</strong> Delta Sync Power Limits:<br />
Step<br />
1 On [∆ Sync Pwr Limits]<br />
select On or Off.<br />
CDMA Over Air<br />
Optional CDMA Over Air <strong>Measurement</strong> Settings<br />
Notes<br />
Enables you to toggle the measurement limits<br />
function On (active) and Off (inactive).<br />
CDMA Over Air<br />
• If set to On, the delta sync. power metrics will<br />
change from blue to red (fail) or green (pass)<br />
and indicate either a “P” (pass) or “F” (fail). If<br />
the measured value exceeds the upper limit or<br />
lower limit, the words ‘ALL PASS’, in the bar<br />
at the bottom of the screen, will change to<br />
‘FAILURE’.<br />
• If set to Off, the time delta sync. power value<br />
will be displayed in blue. If NO limits are set to<br />
On, the pass/fail bar will not be displayed at the<br />
bottom of the screen.<br />
2 Set the upper delta limit.<br />
a. [High Limit]<br />
b. Enter the number on<br />
the numeric keypad.<br />
c. [dB]<br />
2 Set the lower delta limit.<br />
Delta Limit range: –150 to 100 dB<br />
Delta Limit range: –150 to 100 dB<br />
a. [Low Limit]<br />
b. Enter the number on<br />
the numeric keypad.<br />
c. [dB]<br />
Chapter 8 245
CDMA Over Air<br />
CDMA Over Air<br />
Optional CDMA Over Air <strong>Measurement</strong> Settings<br />
Setting Up the Signal Generator<br />
You can set up the signal generator while in the Spectrum Analyzer mode from the<br />
Setup menu. For more detailed information on the signal generator setup and<br />
operation, refer to “Using the Signal Generator” on page 400.<br />
CAUTION<br />
The maximum power for the RF In port and the RF Out/SWR port of the test set is<br />
+20 dBm (100 mW). The maximum power for the Power Sensor port is +24 dBm<br />
(300 mW). When directly coupled to a base station, the test set can be damaged by<br />
excessive power applied to any of these three ports.<br />
To prevent damage in most situations when you directly couple the test set to a base<br />
station, use the high power attenuator between the test set and the BTS.<br />
NOTE<br />
The lowest level the signal generator can go to is -90 dBm. In order to get a lower<br />
level, you must use an external attenuator. You can compensate for the attenuator in<br />
the RF Out Loss.<br />
Step<br />
Notes<br />
1 [Setup]<br />
2 [Sig Gen]<br />
3 [Freq/Chan]<br />
4 [Frequency] or [Channel]<br />
5 Enter the channel or<br />
frequency using the numeric<br />
keypad.<br />
6 • For channel select [Rev]<br />
or [Fwd]<br />
• For frequency select<br />
[GHz], [MHz], [kHz], or<br />
[Hz],<br />
7 [Mod Format]<br />
246 Chapter 8
Step<br />
8 Select the channel standard<br />
from the list using the up and<br />
down arrow buttons.<br />
9 [Select]<br />
10 Set the RF output amplitude<br />
a. [Amplitude]<br />
b. Enter the amplitude value<br />
using the numeric keypad.<br />
c. [dBm].<br />
11 If you have previously stored<br />
RF Out Loss from an<br />
insertion loss measurement,<br />
go to the next step.<br />
Or<br />
CDMA Over Air<br />
Optional CDMA Over Air <strong>Measurement</strong> Settings<br />
Notes<br />
You may also enter a new value for<br />
amplitude by turning the rotary knob until the<br />
desired value is displayed or using the up and<br />
down arrow keys.<br />
For information on the effects of the RF Out<br />
Loss function on the amplitude, refer to refer<br />
to “Using the RF OUT Loss field” below.<br />
Each time you press this softkey, the selected<br />
option changes.<br />
CDMA Over Air<br />
Press [RF OUT Loss] to<br />
select On and enter the RF<br />
Out Loss value.<br />
12 Connect to the base station.<br />
13 Set [Enable Sig Gen] to Yes. Each time you press this softkey, the selected<br />
option changes.<br />
14 Set [RF] to On.<br />
Using the RF OUT Loss field<br />
The RF OUT Loss field is used when it is necessary to test the receiver sensitivity of<br />
a typical base station. The test set’s source will typically go down to –95 dBm, in<br />
order to reach –113 dBm for sensitivity testing, you must use an external attenuator.<br />
The measured value of the attenuator and connecting cables are entered into this<br />
field. This value is then used when this field is set to On. When this field is set to<br />
On, the test set will set the RF generator level to the correct level offset by the<br />
external attenuator/cabling. When you set the RF Generator to –113 dBm (with the<br />
RF OUT Loss field turned On and the external attenuator/cabling loss value entered)<br />
Chapter 8 247
CDMA Over Air<br />
CDMA Over Air<br />
Optional CDMA Over Air <strong>Measurement</strong> Settings<br />
the output at the end of the RF test cabling is –113 dBm.<br />
Example: If you want to set the signal generator to –113 dBm, the attenuator and RF<br />
cabling measures 42.51 dB (measured with the 2 port insertion loss measurement<br />
screen prior to this test), the RF OUT Loss field is turned On (with the 42.51 dB loss<br />
value entered). The actual RF output of the signal generator is –70.49 dBm, the<br />
attenuator and RF cabling attenuated the signal to the desired level; so the RF signal<br />
at the end of the test cable/attenuator is –113 dBm. This also points out the<br />
importance of accurately measuring the loss of the attenuator and connecting cables.<br />
248 Chapter 8
CDMA Over Air<br />
Metrics Provided by CDMA Over Air <strong>Measurement</strong>s<br />
Metrics Provided by CDMA Over Air <strong>Measurement</strong>s<br />
This section contains descriptions of the individual CDMA transmit parameters in<br />
the metric display of the screen. For expected result values and possible causes of<br />
error if the expected results are not met, see “Interpretation of CDMA Over Air<br />
<strong>Measurement</strong> Results” on page 253.<br />
CDMA Over Air<br />
Frequency Error<br />
Frequency error is the frequency difference between your transmitter's actual center<br />
frequency and the frequency (or channel) you entered.<br />
PN Offset<br />
The PN Offset is a “short code” sequence that provides a unique identifier for each<br />
sector of each cell site. The PN Offsets are applied to the I and Q signals before<br />
modulation. PN Offsets are offset in time by 52.08 µs and they repeat every 26.666<br />
ms. This yields 512 unique short code sequences (0-511). The mobile phone needs<br />
the PN Offset to decode information in the Sync and Paging channels, which are<br />
transmitted by the base station.<br />
Time Offset<br />
The Time Offset compares the PN Offset timing with the overall system time. This<br />
measurement checks the start of the PN offset in comparison to either the GPS<br />
signal or the Even Second clock signal. For example, PN Offset 0 should repeat<br />
exactly on the rising edge of the Even Second clock. PN Offset 1 should repeat<br />
52.08 µs after the rising edge of the Even Second clock, and so forth. Any error in<br />
time from that event is reported as a Time Offset.<br />
IS-95 specifies that the base station timing must be within +/-10 µs of its assigned<br />
value. Many base station manufactures specify that the timing must be within +/-3<br />
µs. For example, if you are parked near the transmit antenna, the propagation delay<br />
is less than 1 µs. The measured value of delay should be within the recommended<br />
limit, which is greater than -10 µs and less than +10 µs. As you move away from the<br />
transmit antenna, propagation delay needs to be considered—about 1 µs for every<br />
300 meters (1000 feet). So, if you are parked 800 meters (½ mile) from the transmit<br />
antenna, the additional propagation delay would be approximately 2.5 µs. The<br />
measured value of delay should be greater than -7.5 µs and less than +12.5 µs.<br />
Chapter 8 249
CDMA Over Air<br />
CDMA Over Air<br />
Metrics Provided by CDMA Over Air <strong>Measurement</strong>s<br />
Below is a table showing various delays vs. distance.<br />
Distance<br />
Delay<br />
161 meters (0.1 mile) 0.56 µs<br />
402 meters (0.25 mile) 1.36 µs<br />
805 meters (0.5 mile) 2.72 µs<br />
1609 meters (1 mile) 5.28 µs<br />
8047 meters (5 miles) 26.4 µs<br />
Estimated Rho<br />
Estimated Rho is the measure of the modulation quality for a CDMA transmitter.<br />
This measurement is analogous to measuring FM accuracy and distortion in an<br />
AMPS network or EVM in a TDMA system. A Rho value of 1.0 is perfect,<br />
indicating that all of the power is being transmitted correctly.<br />
Carrier Feedthrough<br />
Carrier Feedthrough is a result of the RF carrier signal feeding through the I/Q<br />
modulator and appearing at the transmitter port. Carrier Feedthrough is a common<br />
cause of bad Rho measurements.<br />
Noise Floor<br />
Noise Floor is the average power of all the inactive channels.<br />
Channel Power<br />
Channel Power is the total power within a defined bandwidth. For CDMA the<br />
channel bandwidth is defined to be 1.25 MHz. Channel Power measures the power<br />
the base station is transmitting across the entire 1.25 MHz CDMA channel.<br />
Pilot Power<br />
Pilot Power is the total power in the Pilot code channel, expressed in dBm. The<br />
transmit power of the Pilot Channel signal for a given base station is constant.<br />
Pilot Ec/Io<br />
The Pilot Ec/Io is the ratio of the pilot power to all the other power in the channel,<br />
expressed in dB. Since Ec and Io are measured individually, the system can detect<br />
250 Chapter 8
CDMA Over Air<br />
Metrics Provided by CDMA Over Air <strong>Measurement</strong>s<br />
poor signal quality and tell you if it is caused by low Ec or high Io. This helps you<br />
quickly resolve coverage versus interference issues.<br />
Delta Page Power<br />
Delta Page Power is the amplitude difference between the Paging Channel and Pilot<br />
Channel, expressed in dB. The transmit power of the Paging Channel is constant and<br />
can be set at a value relative to the Pilot Power. A common value is -4 dB relative to<br />
the Pilot. It is important to know what the intended settings are for each carrier and<br />
sector of your base station.<br />
CDMA Over Air<br />
Delta Sync Power<br />
Delta Sync Power is the amplitude difference between the Sync Channel and Pilot<br />
Channel, expressed in dB. The transmit power of the Sync Channel is constant and<br />
may be set at a value relative to the Pilot Power. A common value is -10 dB relative<br />
to the Pilot. It is important to know what the intended settings are for each carrier<br />
and sector of your base station.<br />
Delta Quick Page Channel Power<br />
Delta Quick Page Channel (QPCH) Power is the amplitude difference between the<br />
Quick Page Channel and Pilot Channel, expressed in dB. The QPCH is a bursted<br />
channel and is not on all the time. In order to capture the level of the QPCH, the<br />
statistic measures and holds the peak level of the QPCH. Until a QPCH has been<br />
measured, the value will be dashes. When “on”, the level of the QPCH is constant<br />
and is set at a value relative to the Pilot Power. The QPCH digital gain level can be<br />
set to 2, 1, 0, -1, -2, -3, -4, and -5 dB relative to the Pilot. It is important to know<br />
what the intended settings are for each carrier and sector of your base station.<br />
Amplifier Capacity<br />
Assuming the Amplifier Capacity parameters are set properly, the Amplifier<br />
Capacity measurement is an estimate of the amount of power amplifier capacity that<br />
is being used, expressed in percent of maximum. When an amplifier is transmitting<br />
at maximum output power, it is said to be at 100% of its capacity. For example, an<br />
amplifier with a maximum output power of 12 watts would be at 50% of capacity<br />
when transmitting 6 watts and at 100% of capacity when transmitting at 12 watts.<br />
The percentage of amplifier capacity increases as the number or level of the traffic<br />
channels increase.<br />
Peak Amplifier Capacity<br />
Peak Amplifier Capacity is the peak level of all the valid Amplifier Capacity<br />
Chapter 8 251
CDMA Over Air<br />
CDMA Over Air<br />
Metrics Provided by CDMA Over Air <strong>Measurement</strong>s<br />
measurements while on the same PN offset. In PN Offset Auto mode this<br />
measurement is reset if the PN offset changes or the Reset Metrics button is used. In<br />
PN Offset Manual mode this measurement is reset only if the Reset Metrics button<br />
is used.<br />
Average Amplifier Capacity<br />
Average Amplifier Capacity is the average level of all the valid Amplifier Capacity<br />
measurements while on the same PN offset. In PN Offset Auto mode this<br />
measurement is reset if the PN offset changes or the Reset Metrics button is used. In<br />
PN Offset Manual mode this measurement is reset only if the Reset Metrics button<br />
is used.<br />
Utilization<br />
Utilization is a ratio of the active Walsh codes to the total 128 Walsh codes,<br />
expressed in percent. Even though active control channels such as the pilot are<br />
included in the utilization measurement, utilization is an indication of the traffic that<br />
is being carried by the base station.<br />
For example, a CDMA signal with a pilot, paging, and sync channel, two IS-95<br />
traffic channels, and one eight-wide cdma2000 data channel, would use 18 Walsh<br />
codes. Each control channel would use two Walsh codes, each IS-95 channel would<br />
use two Walsh codes, and the cdma2000 channel would use 8 Walsh codes for a<br />
total or 18 Walsh codes. Eighteen Walsh codes in use out of the 128 total Walsh<br />
codes would result in a utilization of 14%.<br />
Peak Utilization<br />
Peak Utilization is the peak level of all the valid Utilization measurements while on<br />
the same PN offset. In PN Offset Auto mode this measurement is reset if the PN<br />
offset changes or the Reset Metrics button is used. In PN Offset Manual mode this<br />
measurement is reset only if the Reset Metrics button is used.<br />
Average Utilization<br />
Average Utilization is the average level of all the valid Utilization measurements<br />
while on the same PN offset. In PN Offset Auto mode this measurement is reset if<br />
the PN offset changes or the Reset Metrics button is used. In PN Offset Manual<br />
mode this measurement is reset only if the Reset Metrics button is used.<br />
252 Chapter 8
CDMA Over Air<br />
Interpretation of CDMA Over Air <strong>Measurement</strong> Results<br />
Interpretation of CDMA Over Air <strong>Measurement</strong> Results<br />
This section contains expected result values and possible causes of error if the<br />
expected results are not met.<br />
CDMA Over Air<br />
Frequency Error<br />
The standards specify very tight Frequency Error performance. In the PCS bands,<br />
the 0.05 parts-per-million specification translates to only 99 Hz at a carrier<br />
frequency of 1980 MHz or 40 Hz at 850 MHz cellular frequencies. Frequency Error<br />
shows up as uncorrelated power that adds to the noise floor or shows up in other<br />
Walsh codes.<br />
If a particular site loses its reference to GPS time, its reference signals will begin to<br />
drift over time. Mobiles already using the site can remain on the air because they<br />
derive their timing from the signals transmitted by the base station. However,<br />
mobiles using other sites/sectors may be prevented from using the site because they<br />
are confused by the error in frequency. This creates what is known as the “island cell<br />
effect”. By itself, the cell is still functional. To the rest of the system, it's<br />
inaccessible.<br />
This island cell effect can be caused by a failure in the site's GPS receiver and<br />
timebase distribution network. Using the test set's Internal GPS receiver provides an<br />
independent time reference that will allow you to determine if this cell site is out of<br />
sync with the rest of the network (“island cell effect”).<br />
PN Offset<br />
Verify the PN Offset is correct. If you are in Manual mode, the PN Offset will<br />
display the value you entered. Make sure the Time Offset is small (less than 3 µs). If<br />
the Time Offset is greater than expected, see the section on Time Offset below. If<br />
you are in Auto mode, the test set will tune to the PN Offset with the least amount of<br />
Time Offset. If an incorrect PN Offset is displayed, the Time Offset will likely be<br />
very large.<br />
Time Offset<br />
The CDMA standards specify a maximum offset of 10 µs; generally 5 µs is a<br />
recommended maximum. If the Time Offset is large enough, an “island cell” can<br />
occur. The “island cell effect” was mentioned already when discussing Frequency<br />
Error.<br />
A phone moving outward toward the limit of its cell will need to acquire the<br />
Chapter 8 253
CDMA Over Air<br />
CDMA Over Air<br />
Interpretation of CDMA Over Air <strong>Measurement</strong> Results<br />
adjacent cell in order to hand off. If the time offset of the target cell is too far from<br />
that of the current site, the handoff may not happen.<br />
The dependence of the phone on correct system time limits the physical distance to a<br />
target cell's antenna. Each PN Offset is 52.08 µs; if the propagation delay is too<br />
long, the received PN Offset may be different from the value designated on the Sync<br />
channel. This difference can confuse the phone, causing the handoff to fail.<br />
Another cause of timing error is a bad GPS receiver or timing distribution network<br />
within the base station. To test your base station's GPS and timing distribution<br />
system, you can use the internal GPS receiver to generate an accurate timing<br />
reference for the test set to use while performing base station tests.<br />
The Time Offset should be within the following limits:<br />
• Less than +/- 10 µs if the receiving antenna is next to the base station, or<br />
• Less than +/- 10 µs, plus 1 µs for every 300 meters (1000 feet) you are away<br />
from the base station.<br />
If the measured value of the Delay falls outside of the expected range, consider the<br />
following problems:<br />
• The GPS receiver is not working correctly, and the base station timing is<br />
incorrect.<br />
• The base station main oscillator is not working correctly, and the base station<br />
timing is incorrect.<br />
• The GPS receiver is not locked to the GPS satellites.<br />
Estimated Rho<br />
The CDMA base station standard specifies that Rho must be greater than 0.912.<br />
Typical values for a healthy base station are greater than 0.94. When measuring Rho<br />
over-the-air, these values can only be achieved under very good conditions for<br />
multipath power and pilot dominance. For example, a Multipath Power of < 0.1 dB<br />
and a Pilot Dominance of > 15 dB is required to measure Rho of 0.912. For more on<br />
the affects of pilot dominance and multipath power on Estimated Rho see “Criteria<br />
for Making Valid CDMA Over Air <strong>Measurement</strong>s” on page 217.<br />
Verify that the Estimated Rho meets the following criteria:<br />
• Greater than 0.8 if the Multipath Power and Pilot Dominance properties remain<br />
at the defaults of 0.4 dB and 10 dB, respectively, or<br />
• Greater than 0.912 if you have set the Multipath Power and Pilot Dominance<br />
properties to 0.1 dB and 15 dB, respectively.<br />
254 Chapter 8
CDMA Over Air<br />
Interpretation of CDMA Over Air <strong>Measurement</strong> Results<br />
Poor Rho performance affects the base station capacity because the uncorrelated<br />
power appears as interference to the mobiles. The added interference will require an<br />
increase in the traffic channel level to overcome the interference. This may, in turn,<br />
be seen as further interference. At some point, the site will have to shed calls in<br />
order to supply the remaining calls with enough signal versus the interference in the<br />
system.<br />
If Estimated Rho is lower than expected, check the following:<br />
CDMA Over Air<br />
• External interference may be degrading the CDMA signal. Use the spectrum<br />
analyzer to verify that no spurious signals are present in the band of the<br />
transmitter.<br />
• Compression may be occurring in the base station power amplifier.<br />
• There may be errors in the base station IQ modulator.<br />
Carrier Feedthrough<br />
A good Carrier Feedthrough level is less than -25 dB. The IS-97 standard does not<br />
specify Carrier Feedthrough; however, this measurement provides an additional tool<br />
to troubleshoot the base station's transmitter.<br />
In the frequency domain, Carrier Feedthrough can show up as an uncorrelated<br />
energy spike that can be seen on the spectrum analyzer by closely spanning into the<br />
top of the CDMA signal. The effects of Carrier Feedthrough can also show up as<br />
higher noise levels on the Code Domain Power screen. The inactive Walsh codes<br />
will be pushing the -27 dB specification for noise. Carrier Feedthrough can be<br />
caused by the lack of isolation across the mixer and cavity of the transmitter's I/Q<br />
modulator.<br />
Noise Floor<br />
A good Noise Floor value is between -20 dB and -30 dB and depends on the quality<br />
of the signal. If the Noise Floor is above these values (for example, -20 dB), the<br />
modulator may be the source of the added noise. Another possibility is a problem<br />
with the base station's channel card. The channel card generates the individual<br />
Walsh codes.<br />
Channel Power<br />
If the Channel Power is lower than expected, verify you are in a location that meets<br />
the criteria to provide valid measurements.<br />
Inaccurate Channel Power (high or low) may indicate an incorrect power setting at<br />
the base station.<br />
Chapter 8 255
CDMA Over Air<br />
CDMA Over Air<br />
Interpretation of CDMA Over Air <strong>Measurement</strong> Results<br />
Pilot Power<br />
If the Pilot Power has varied significantly from previous readings at the same<br />
location, it may indicate the following:<br />
• There has been a change made to the digital gain setting of the Pilot Channel.<br />
• The base station power amplifier has a problem.<br />
• The transmit antenna system has been changed or damaged.<br />
Pilot Ec/Io<br />
A high value of Ec/Io means there is less interference from other base stations and<br />
noise and is an indicator of base station performance. When Ec/Io is mapped, it can<br />
be used to determine coverage quality.<br />
Delta Page Power<br />
If the measured value of Delta Page Power is more than +/-0.5 dB different from<br />
previous measurements at the same location, it may indicate that the digital gain<br />
setting for the Paging Channel has been changed from the intended setting.<br />
Delta Sync Power<br />
If the measured value of Delta Sync Power is more than +/- 0.5 dB different from<br />
previous measurements at the same location, it may indicate that the digital gain<br />
setting for the Sync Channel has been changed from the intended setting.<br />
Delta Quick Page Channel Power<br />
If the measured value of Delta QPCH Power is more than +/-0.5 dB different from<br />
previous measurements at the same location, it may indicate that the digital gain<br />
setting for the QPCH has been changed from the intended setting.<br />
Amplifier Capacity<br />
The Amplifier Capacity metric provides an instantaneous reading of how much of<br />
the amplifier's capacity is currently being used. More meaningful information is<br />
provided by the Peak and Average Amplifier Capacity metrics gathered over a 10 to<br />
15 minute interval.<br />
Peak Amplifier Capacity<br />
If the Peak Amplifier Capacity is greater than 100%, the traffic at this base station<br />
has caused the base station amplifier to exceed its maximum power rating. This is<br />
not desirable as this problem can result in system degradation or damage to the<br />
256 Chapter 8
CDMA Over Air<br />
Interpretation of CDMA Over Air <strong>Measurement</strong> Results<br />
amplifier.<br />
You can get an indication of how often the amplifier capacity is being exceeded by<br />
watching the Amplifier Capacity measurement. This is an instantaneous<br />
measurement of the amplifier capacity.<br />
CDMA Over Air<br />
Average Amplifier Capacity<br />
If the Average Amplifier Capacity is greater than 85%, the base station power<br />
amplifier is close to its maximum power limit. Further increase in traffic on this base<br />
station could cause system performance problems or damage to the power amplifier.<br />
You should notify your RF Engineering Department as soon as possible.<br />
Utilization<br />
The Utilization metric provides an instantaneous reading of the percentage of the<br />
traffic channels currently being used. More meaningful information is provided by<br />
the Peak and Average Utilization metrics gathered over a 10 to 15 minute interval.<br />
Peak Utilization<br />
If the Peak Utilization of this base station is greater than 65%, this is a warning that<br />
peak traffic rates at this base station are getting very high. It is possible that calls<br />
could be getting blocked or dropped.<br />
Average Utilization<br />
If the Average Utilization of this base station is greater than 45%, the base station is<br />
carrying a great deal of traffic. It may be time to consider adding another carrier or<br />
another base station.<br />
Chapter 8 257
CDMA Over Air<br />
CDMA Over Air<br />
Interpretation of CDMA Over Air <strong>Measurement</strong> Results<br />
258 Chapter 8
9 Channel Scanner<br />
“Using the Channel Scanner” on page 260<br />
“Performing a Basic Channel Scanner <strong>Measurement</strong>)” on page 261<br />
“Displaying Accurate Peak Power (Recommended for Pulsed Signals)” on<br />
page 264<br />
“Setting the Analyzer Input Gain” on page 265<br />
“Setting Noise Correction” on page 265<br />
“Entering the Channels with a List Instead of a Range” on page 266<br />
“Entering the Channel Power <strong>Measurement</strong> Bandwidth and Time” on page 267<br />
“Setting Average, Sweep, and Restart” on page 270<br />
“Displaying Frequency or Power” on page 272<br />
“Setting the Pass/Fail Limits” on page 272<br />
Channel Scanner<br />
259
Channel Scanner<br />
Using the Channel Scanner<br />
Using the Channel Scanner<br />
The Channel Scanner measures the power of multiple transmitted signals. It is most<br />
useful for measuring channel power in TDMA, GSM, AMPS, and iDEN channel<br />
bands. Channel power may be measured on a single channel or across multiple<br />
channels or frequencies. The Channel Scanner can be used to measure TDMA,<br />
AMPS, GSM and iDEN adjacent channel power.<br />
Channel Scanner<br />
CAUTION<br />
CAUTION<br />
When measuring multiple channels, the combined channel power must not exceed<br />
+20 dBm at the RF In port.<br />
The maximum power for the RF In port and the RF Out/SWR port of the test set is<br />
+20 dBm (100 mW). The maximum power for the Power Sensor port is +24 dBm<br />
(300 mW). When directly coupled to a base station, the test set can be damaged by<br />
excessive power applied to any of these three ports.<br />
To prevent damage in most situations when you directly couple the test set to a base<br />
station, use the high power attenuator between the test set and the BTS.<br />
NOTE<br />
For complex modulation such as CDMA, W-CDMA, 1xEV-DO and GSM, the<br />
frequency error measurement is not accurate (see respective analyzers for detailed<br />
frequency error results).<br />
NOTE<br />
The RF In Loss can be added manually or automatically by performing an insertion<br />
loss measurement. For measurement instructions refer to “Performing (and<br />
Calibrating) a Basic One Port Insertion Loss measurement” on page 47 or<br />
“Normalizing and Performing a Basic Two Port Insertion Loss <strong>Measurement</strong>” on<br />
page 125.<br />
260 Chapter 9
Channel Scanner<br />
Using the Channel Scanner<br />
Performing a Basic Channel Scanner <strong>Measurement</strong>)<br />
Step<br />
Notes<br />
1 Select Channel Scanner.<br />
a. Mode<br />
b. [Spectrum Analyzer/Tools]<br />
c. [Channel Scanner]<br />
2 Select the channel standard.<br />
a. [CS Chan Std]<br />
b. Select the standard using the up<br />
and down arrow buttons.<br />
c. [Select]<br />
3 On [CS Units] select Chan. Each time you press this softkey, the<br />
selected option changes.<br />
Channel Scanner<br />
4 On [Scan Mode] select Range. Each time you press this softkey, the<br />
selected option changes.<br />
5 Select the start channel.<br />
a. [Start Chan]<br />
b. Enter the start channel using<br />
the numeric keypad.<br />
c. [Fwd] or [Rev]<br />
6 Enter the CS step size.<br />
a. [CS Step Size]<br />
b. Enter the step size using the<br />
numeric keypad.<br />
c. [Enter]<br />
Chapter 9 261
Channel Scanner<br />
Using the Channel Scanner<br />
Step<br />
Notes<br />
Channel Scanner<br />
7 Enter the number of channels.<br />
a. [Num Chans]<br />
b. Enter the number using the<br />
numeric keypad.<br />
c. [Enter]<br />
8 Connect to the base station.<br />
If you want to use the Channel Scanner<br />
to measure adjacent channel power, set<br />
the number of channels to 3, and make<br />
the start channel (Step 5) one lower than<br />
the channel of interest.<br />
Out of service connection<br />
262 Chapter 9
Channel Scanner<br />
Using the Channel Scanner<br />
Step<br />
Notes<br />
Channel Scanner<br />
In service connection<br />
Over the air measurement connection<br />
Chapter 9 263
Channel Scanner<br />
Using the Channel Scanner<br />
NOTE<br />
The autoranging feature under [Setup], [Range Control] that is built into the test set<br />
helps ensure accurate measurements by changing front-end amplifier gain as<br />
needed. This might be, for example, when a strong signal threatens to overload the<br />
test set. When this occurs, the noise floor rises (as gain is decreased), then falls again<br />
when the strong signal stops.<br />
If you prefer a fixed noise floor, you can disable autoranging in two ways using the<br />
Setup function within Channel Scanner:<br />
Channel Scanner<br />
• On [Range Ctrl] select Hold to fix the noise floor at the current level. A<br />
subsequent strong signal—even outside the measurement range—may cause an<br />
inaccurate reading due to overloading the front-end of the test set.<br />
• On [Range Ctrl] select Max to fix the noise floor at the current level until a<br />
strong signal comes in. In that case, the floor will rise to maintain accuracy, but<br />
will not return to its lower level after the strong signal stops.<br />
Displaying Accurate Peak Power (Recommended for Pulsed<br />
Signals)<br />
For pulsed signals, you can get a more accurate measurement of the signal’s peak or<br />
average power by using the Peak Power Detector setting.<br />
The test set measures average power of signals by default. But for<br />
non-constant-duty-cycle signals such as GSM, an average power reading fails to<br />
accurately show amplitude when the signal is on if other timeslots in the frame are<br />
powered off.<br />
If the [Power Detector] menu key is grayed out, the test set needs to be upgraded in<br />
order to measure pulsed signals. Contact the <strong>Agilent</strong> Service Center for upgrade<br />
information.<br />
Step<br />
Notes<br />
1 [Setup]<br />
2 On [Power Detector] select Pk. Each time you press this softkey, the<br />
selected option changes.<br />
264 Chapter 9
Channel Scanner<br />
Using the Channel Scanner<br />
Setting the Analyzer Input Gain<br />
Normally the <strong>E7495A</strong>/B is set to add the most gain in the receive path to boost<br />
low-level signals. If the signal is high, there is no reason to add gain. When you’re<br />
measuring a strong signal, select low sensitivity to reduce the gain in the receive<br />
path and lower the noise floor. For a low level signal, select high.<br />
Step<br />
Notes<br />
1. [Setup]<br />
2. [Sensitivity]<br />
3. Low or High<br />
Channel Scanner<br />
NOTE<br />
The Sensitivity setting is coupled to the Noise Correction setting. Changing the<br />
Sensitivity setting from Low to High will cause the Noise Correction setting to<br />
change from On to Off. Conversely, if the Noise Correction setting is changed from<br />
Off to On, the Sensitivity setting is changed from High to Low.<br />
Setting Noise Correction<br />
You can turn the Noise Correction function On or Off. When set to On, noise<br />
correction will be activated and correct for the noise generated internally by the<br />
analyzer. It allows the you to make accurate measurements on signals close to the<br />
noise floor.<br />
To Set the <strong>Measurement</strong> Noise Correction:<br />
Step<br />
Notes<br />
1 [Setup]<br />
2 On [Noise Correction]<br />
select On or Off.<br />
Each time you press this softkey, the selected<br />
option changes.<br />
Chapter 9 265
Channel Scanner<br />
Using the Channel Scanner<br />
Entering the Channels with a List Instead of a Range<br />
Step<br />
Notes<br />
1 Select Channel Scanner.<br />
Channel Scanner<br />
a. Mode<br />
b. [Spectrum Analyzer/Tools]<br />
c. [Channel Scanner]<br />
2 Select the channel standard.<br />
a. [CS Chan Std]<br />
b. Select the standard using the up and<br />
down arrow buttons.<br />
c. [Select]<br />
3 On [CS Units] select Chan. Each time you press this softkey, the<br />
selected option changes.<br />
4 On [Scan Mode] select List. Each time you press this softkey, the<br />
selected option changes.<br />
5 View or modify your list of channels.<br />
a. [List]<br />
b. [Ok]<br />
View (and modify if necessary) your<br />
list of channels.<br />
266 Chapter 9
Channel Scanner<br />
Using the Channel Scanner<br />
Step<br />
Notes<br />
6 Enter channels into the list.<br />
a. Use [Insert Row] to add a channel,<br />
then enter its number using the<br />
numeric keypad and [Fwd] or [Rev]<br />
to complete each entry.<br />
b. Use [Delete Row] to remove<br />
channels you do not want displayed.<br />
Select a channel you want to<br />
remove using the up and down<br />
arrow buttons. Then press [Delete<br />
Row] to remove the selected<br />
channel.<br />
c. [Ok]<br />
Channel Scanner<br />
Entering the Channel Power <strong>Measurement</strong> Bandwidth and Time<br />
When performing a channel power measurement, you must specify a measurement<br />
bandwidth and measurement time. These parameters determine how the analyzer<br />
measures each channel on the Channel Scanner. Depending on the modulation<br />
format of signal you are trying to measure (CDMA, GSM, and so forth), different<br />
measurement bandwidths and times are required. You have three ways of selecting<br />
these parameters:<br />
• Press [Format/BW], then on [Format Type] select List, and then select the<br />
format from a list—independently of the channel standard.<br />
• Select [Format/BW], then on [Format Type] select Cust. Then select the<br />
measurement bandwidth and measurement time for each channel.<br />
To Select the Channel Format Type:<br />
Step<br />
Notes<br />
1. [Format/BW]<br />
Chapter 9 267
Channel Scanner<br />
Using the Channel Scanner<br />
Step<br />
Notes<br />
Channel Scanner<br />
2. On [Format Type] select Chan. Each time you press this softkey, the<br />
selected option changes. The option you<br />
select determines which buttons on the<br />
right are active.<br />
Each channel standard has an associated<br />
modulation format. With this method,<br />
the optimum measurement bandwidth<br />
and measurement time for the<br />
modulation format are automatically<br />
selected when you set the channel<br />
standard. For example, when you select<br />
GSM-950 as the channel standard, with<br />
this method the test set selects the<br />
bandwidth and time for the GSM<br />
format.<br />
3. Select the standard you want.<br />
a. [CS Chan Std]<br />
b. Select the standard using the up<br />
and down arrow buttons.<br />
c. [Select]<br />
To Select the List Format Type:<br />
Step<br />
1. [Format/BW]<br />
Notes<br />
2. On [Format Type] select List. Each time you press this softkey, the<br />
selected option changes. The option you<br />
select determines which buttons on the<br />
right are active.<br />
268 Chapter 9
Channel Scanner<br />
Using the Channel Scanner<br />
3. Select the format you want.<br />
a. [Format List]<br />
b. Select the standard using the up<br />
and down arrow buttons.<br />
c. [Select]<br />
This selection is independently of the<br />
channel standard selected under<br />
[Freq/Chan], [CS Chan Std].<br />
To Select the Custom Format Type:<br />
Step<br />
1 [Format/BW]<br />
Notes<br />
2 On [Format Type] select Cust. Each time you press this softkey,<br />
the selected option changes.<br />
Each channel standard has an<br />
associated modulation format.<br />
With this method, the optimum<br />
measurement bandwidth and<br />
measurement time for the<br />
modulation format are<br />
automatically selected when you<br />
set the channel standard. For<br />
example, when you select<br />
GSM-950 as the channel<br />
standard, with this method the<br />
test set selects the bandwidth<br />
and time for the GSM format.<br />
4 Set the channel power measurement<br />
bandwidth and measurement time.<br />
Channel Scanner<br />
a. [Meas BW]<br />
b. Enter the bandwidth on the numeric<br />
keypad.<br />
c. [GHz] or [MHz] or [kHz] or [Hz]<br />
d. [Meas Time]<br />
e. Enter the time on the numeric keypad.<br />
f. [ms]<br />
Chapter 9 269
Channel Scanner<br />
Using the Channel Scanner<br />
Setting Average, Sweep, and Restart<br />
Setting the Sweep<br />
You can select either continuous or single sweep. Continuous sweep provides<br />
repeated, ongoing measurements. Single sweep performs a single measurement that<br />
is repeated only when you push the Single button.<br />
To set sweep:<br />
Channel Scanner<br />
Step<br />
1 [Average/Sweep]<br />
Setting Averaging<br />
Notes<br />
2 [Continuous] or [Single] Each time you press this softkey, the<br />
selected option changes.<br />
You can choose to have averaging On or Off and set the number of averages you<br />
want to take. Averaging only applies to the data, not the trace. You can select from<br />
the following types of averaging:<br />
• Off: Disables averaging.<br />
• Running: Computes the new result as the weighted sum of the last result and the<br />
new measurement. The last result is weighted by (n – 1)/n. The new result is<br />
weighted by 1/n. Each new measurement produces a new result.<br />
• Max Hold: Is not an average, but on a point by point basis, displays the<br />
maximum amplitude for the given frequency or channel since Max Hold was<br />
turned on. It is updated when a new maximum occurs.<br />
• Group Average: Makes the requested number of measurements, averages the<br />
measurement data, and displays the average as a single result trace.<br />
<strong>Measurement</strong> time will vary based on the requested number of averages and can<br />
take minutes for very large number of averages.<br />
• Group Max Average: Makes the requested number of measurements before<br />
returning a single trace result. This trace is the maximum value seen at each<br />
trace point over the requested number of averages (measurements).<br />
270 Chapter 9
Channel Scanner<br />
Using the Channel Scanner<br />
To set averaging:<br />
Step<br />
Notes<br />
1 Set the number of averages.<br />
a. [Average]<br />
b. Enter the number of averages<br />
using the numeric keypad.<br />
c. [Enter]<br />
2 Select the type of averaging you<br />
want to apply.<br />
a. [Average/Sweep]<br />
b. [Averaging]<br />
c. [Off], [Running Average],<br />
[Max Hold], [Group<br />
Average], or [Group Max<br />
Average]<br />
Channel Scanner<br />
NOTE<br />
These two steps can be performed in any order. However, if you turn averaging On<br />
and a large number of averages has previously been set, there may be a delay before<br />
you can change number of averages.<br />
Setting Restart<br />
When you have averaging turned On and you are in Continuous Sweep mode, you<br />
can restart the averaging by pressing the Restart menu key. The Restart key has no<br />
effect if you are in Single sweep mode.<br />
To restart averaging:<br />
Step<br />
Notes<br />
1 [Average/Sweep]<br />
2 [Restart] This key is unavailable or has no effect when<br />
Sweep is set to Single. To restart a Single<br />
Sweep measurement, press [Single].<br />
Chapter 9 271
Channel Scanner<br />
Using the Channel Scanner<br />
Displaying Frequency or Power<br />
You can display frequency or power values above the bars in the trace display. The<br />
displayed frequency is the average instantaneous frequency when the signal is<br />
active.<br />
For CDMA type signals, the frequency option is not recommended; accurate<br />
frequencies for CDMA are not displayed.<br />
Step<br />
Notes<br />
Channel Scanner<br />
1 [Setup]<br />
2 On [Display Value] select Off,<br />
Freq, or Pwr.<br />
Setting the Pass/Fail Limits<br />
Each time you press this softkey, the<br />
selected option changes. Choosing Off<br />
displays no values above the bars.<br />
The measurement limits setting enables you to alter the value of the upper and lower<br />
test limits. The settings you choose define the location of the limit lines displayed on<br />
the screen. These settings affect the color of the bar graph display and the measured<br />
value: red represents fail, green represents pass, and blue indicates that the limits are<br />
turned off.<br />
• Power Limits: Sets the high and low limits of the channel power. Limits are set<br />
in dB and are relative. Any channel value that is outside of the set limits will<br />
result in a failure indication.<br />
• Frequency Limits: Sets the high and low frequency limits for each channel.<br />
Limits are set in Hz. These settings affect the display color as indicated above,<br />
but there are no limit lines shown on the display.<br />
To Set the <strong>Measurement</strong> Upper and Lower Limits:<br />
Step<br />
Notes<br />
1 [Setup]<br />
2 [Limits]<br />
3 [Power Limits]<br />
272 Chapter 9
Channel Scanner<br />
Using the Channel Scanner<br />
Step<br />
3 On [Power Limits] select<br />
On or Off.<br />
Notes<br />
Enables you to toggle the measurement limits<br />
function On (active) and Off (inactive).<br />
• If set to On, upper and lower limit lines are<br />
displayed on the screen. Any measured channel<br />
value that exceeds the upper limit or is less<br />
than the lower limit will result in a failure<br />
indication for that value.<br />
4 Set the upper limit.<br />
• If set to Off, the channel power value will be<br />
displayed in blue. The bar graph will be blue if<br />
neither Power or Frequency Error Limit has<br />
been set to On.<br />
Note: the screen will only display values and<br />
pass/fail indications for one set of limits at a time.<br />
If you have Frequency limits turned on then choose<br />
to turn on Power limits, the Frequency limits will<br />
turn off.<br />
Maximum Upper limit: top of display<br />
Channel Scanner<br />
a. [Power High Limit]<br />
b. Enter the number on<br />
the numeric keypad.<br />
c. [dB]<br />
5 Set the lower limit.<br />
a. [Power Low Limit]<br />
b. Enter the number on<br />
the numeric keypad.<br />
c. [dB]<br />
Maximum Lower Limit: bottom of display<br />
Chapter 9 273
Channel Scanner<br />
Using the Channel Scanner<br />
Step<br />
6 On [Freq Error Limits]<br />
select On or Off.<br />
Notes<br />
Enables you to toggle the measurement limits<br />
function On (active) and Off (inactive).<br />
Channel Scanner<br />
4 Set the upper limit.<br />
a. [Frequency High<br />
Limit]<br />
b. Enter the number on<br />
the numeric keypad.<br />
c. [GHz], [MHz],<br />
[kHz], or [Hz]<br />
5 Set the lower limit.<br />
a. [Frequency Low<br />
Limit]<br />
b. Enter the number on<br />
the numeric keypad.<br />
c. [GHz], [MHz],<br />
[kHz], or [Hz]<br />
• If set to On, the displayed channel frequency<br />
and the bar graph will change from blue to red<br />
(fail) or green (pass). Any measured value that<br />
exceeds the upper limit or is less than the lower<br />
limit will result in a failure indication for that<br />
value.<br />
• If set to Off, the channel freq/number value will<br />
be displayed in blue. The bar graph will be blue<br />
if neither Power or Frequency Error Limit has<br />
been set to On<br />
Note: the screen will only display values and<br />
pass/fail indications for one set of limits at a time.<br />
If you have Power limits turned on then choose to<br />
turn on Frequency limits, the Power limits will turn<br />
off.<br />
Maximum Upper limit: 1 GHz<br />
Minimum Upper limit: 0.0 GHz<br />
Maximum Lower limit: 0.0 Hz<br />
Minimum Lower limit: –1 GHz<br />
274 Chapter 9
10 Distance to Fault<br />
“Measuring Distance to Fault” on page 276<br />
“Measured Distance - the Effects of Frequency and Points” on page 276<br />
“Resolution - the Effects of Frequency and Points” on page 277<br />
“Automatic and Manual Distance to Fault <strong>Measurement</strong>s” on page 277<br />
“Performing a Basic Distance to Fault <strong>Measurement</strong> (Manual Frequency<br />
Range)” on page 281<br />
“Performing a Basic Distance to Fault <strong>Measurement</strong> (Automatic Frequency<br />
Range)” on page 284<br />
“Clearing Calibration” on page 288<br />
“Displaying Location Information Using GPS” on page 289<br />
“Viewing a Single Distance to Fault Sweep” on page 290<br />
“Displaying the Top Four Faults” on page 290<br />
“Setting Interference Rejection for a Distance to Fault <strong>Measurement</strong>” on<br />
page 291<br />
“Setting Average, Sweep, and Restart” on page 292<br />
“Adding a Marker” on page 294<br />
“Setting the Pass/Fail Limits” on page 295<br />
Distance to Fault<br />
275
Distance to Fault<br />
Measuring Distance to Fault<br />
Measuring Distance to Fault<br />
A signal is transmitted from the RF Out/SWR port of the test set to the<br />
cable-under-test. The signals reflected from faults in the cable are received by the<br />
test set.<br />
In performing this measurement, the test set uses frequency domain reflectometry.<br />
The changing interference of the transmitted and reflected signals contains<br />
information about the distance to one or more faults. This information can be used to<br />
find the physical distance to the faults. The distance displayed on the test set is the<br />
physical distance to the probable faults, corrected for the cable loss and velocity<br />
propagation factor of the cable.<br />
Measured Distance - the Effects of Frequency and Points<br />
It is not always obvious how frequency range affects measured distance and<br />
resolution, and it often appears to be counter-intuitive. If you are new to making<br />
Distance to Fault measurements, this section will help clarify what is happening.<br />
In the following equations<br />
Distance to Fault<br />
• The Speed of Light (‘c’) is a constant value of 3 * 10 to the power 8 meters per<br />
second.<br />
• Your test cable’s transmission speed (relative to light) is V Rel<br />
The Measured Distance (in meters) of the DTF measurement is determined by the<br />
following equation:<br />
1<br />
-- × Number of Points × c × V<br />
Measured Distance (in meters)<br />
4<br />
Rel<br />
= -----------------------------------------------------------------------------<br />
Frequency Span<br />
You can see from this equation that:<br />
• To increase the measured distance:<br />
— you can increase the number of points, or<br />
— you can reduce the frequency span.<br />
• To reduce the measured distance:<br />
— you can reduce the number of points, or<br />
— you can increase the frequency span.<br />
276 Chapter 10
Distance to Fault<br />
Measuring Distance to Fault<br />
Resolution - the Effects of Frequency and Points<br />
It is not always obvious how frequency range affects measured distance and<br />
resolution, and it often appears to be counter-intuitive. If you are new to making<br />
Distance to Fault measurements, this section will help clarify what is happening.<br />
Resolution Distance (in meters) of the DTF measurement, that is, the shortest<br />
distance between two faults that can still be resolved by the analyzer, is determined<br />
by the following equation:<br />
Measured Distance (in meters)<br />
Resolution Distance (in meters) = -------------------------------------------------------------------------<br />
1<br />
-- × Number of Points<br />
2<br />
NOTE<br />
Please be careful how you interpret this equation. Note that to increase the<br />
resolution, you need to reduce the Resolution Distance; to reduce the resolution, you<br />
need to increase the Resolution Distance.<br />
NOTE<br />
You can see from this equation that:<br />
• To increase the resolution, that is, to reduce the Resolution Distance:<br />
— you can increase the number of points, or<br />
— you can reduce the measured distance.<br />
• To reduce the resolution, that is, to increase the Resolution Distance:<br />
— you can reduce the number of points, or<br />
— you can increase the measured distance.<br />
Distance to Fault<br />
NOTE<br />
Although you can set your number of points to 256, 512, or 1024, you will only ever<br />
be able to save 256 data points when you save trace data. This is because only 256<br />
points are ever used to display the trace, regardless of how many points you have<br />
used to actually make the measurement. You will not, however, be losing any<br />
resolution, or reducing the quality of your data. The results will still reflect the true<br />
number of data points that you specified.<br />
Automatic and Manual Distance to Fault <strong>Measurement</strong>s<br />
The test set provides two ways of measuring distance to fault:<br />
Chapter 10 277
Distance to Fault<br />
Measuring Distance to Fault<br />
• Automatic Frequency Range. You select the measurement distance and the test<br />
set automatically selects the Start Frequency and the Stop Frequency. The<br />
measurement distance is set using the [Start Distance] and the [Stop Distance]<br />
menu keys on the [Freq/Dist/Calibrate] menu. In this mode, the displayed and<br />
measured distances are the same. There are always 256 measurement points<br />
across the distance you set, so adjusting the distance settings allows you to<br />
display the maximum resolution for the portion of the cable you are testing. The<br />
disadvantage is that the start and stop frequencies are automatically set and may<br />
limit the test set's ability to sweep through filters or lightning protectors. This<br />
mode is best used for checking a cable that has no frequency limiting devices.<br />
Example 1: If you set [Start Distance] to 0 m (0 ft) and the [Stop Distance] to<br />
60 m (197 ft), and you specify 256 Data Points, the instrument automatically<br />
selects a [Start Freq] of 375 MHz and a [Stop Freq] of 659.8 MHz.<br />
Example 2: If you again set [Start Distance] to 0 m (0 ft) and the [Stop Distance]<br />
to 60 m (197 ft), and but this time you specify 1024 Data Points to give you<br />
greater resolution, the instrument automatically selects a [Start Freq] of<br />
375 MHz and a [Stop Freq] of 1.5142 GHz.<br />
Distance to Fault<br />
NOTE<br />
• Manual Frequency Range. When set to Manual, you must specify the Start<br />
Frequency and the Stop Frequency, and the measured distance is worked out<br />
from these frequencies. Generally, the typical start and stop frequencies you use<br />
will result in a measured distance that will be larger than the distance over which<br />
you want to look for faults.<br />
The Measured Distance and the Displayed Distance can be different. The distance<br />
over which the instrument has made its measurements, and which has been derived<br />
from the frequencies you specified, is called the Measured Distance. This is<br />
displayed at the top right corner of the measurement screen.<br />
The Displayed Distance refers to that part of the entire Measured Distance that<br />
you choose to display on your measurement screen. You set the Displayed Distance<br />
manually by pressing the [Start Distance] and the [Stop Distance] menu keys on the<br />
[Freq/Dist/Calibrate] menu.<br />
To help isolate faults over the length of interest, you can set a displayed distance<br />
less than the measured distance. The displayed distance is set using the [Start<br />
Distance] and the [Stop Distance] menu keys on the [Freq/Dist/Calibrate] menu.<br />
Keep in mind that there are 256, 512, or 1024 measurement points across the<br />
measured distance. The exact number of measurement points is set using the<br />
[Data Points] key on the [Setup] menu. Therefore, the measurement points<br />
across the chosen displayed distance will be a ratio of displayed distance to<br />
measured distance times the number of points you have specified. The higher the<br />
278 Chapter 10
Distance to Fault<br />
Measuring Distance to Fault<br />
number of data points, the greater the measurement resolution.<br />
In most cases, the default resolution using 256 data points will be adequate to<br />
locate the faults, but if more resolution is needed you can increase the span<br />
between the start and stop frequencies (which will decrease the measured<br />
distance) or use the other approach, automatic frequency range. If the<br />
measurement distance is not long enough for the cable you are testing, reduce<br />
the span between the start and stop frequencies (which will increase the<br />
measurement distance) or use automatic frequency range.<br />
NOTE<br />
When testing cables attached to antennas, test signals are radiated from the test<br />
antenna Verify that the signal used for the test, and therefore being radiated from the<br />
test antenna, cannot interfere with other radiated signals from other antennas.<br />
Calibration - Minimizing your Workload<br />
The Distance to Fault calibration (when it is performed with Frequency Range set<br />
to manual) is the same calibration as performed for the Return Loss and One-Port<br />
Insertion Loss measurements. If you have already calibrated for any of these three<br />
measurements, the calibration will apply to the other two measurements and<br />
“Calibrated” (together with the frequency range over which the calibration was<br />
performed) will be displayed on top left of the screen for all three if the Start and<br />
Stop frequencies are set within the calibrated frequency range.<br />
The Distance to Fault calibration (when it is performed with Frequency Range set<br />
to Auto) is only valid for other Distance to Fault measurements that are also<br />
performed with Frequency Range set to Auto, and then only if the Start and Stop<br />
frequencies fall within the previously calibrated frequency range.<br />
If you have not previously performed a calibration, the word “Uncalibrated” appears<br />
at the top left of the measurement screen.<br />
It is important that you keep the calibration frequency range as close as possible to<br />
the actual sweep frequencies you intend using for the measurement or<br />
measurements. Calibrating over a large frequency range (for example, 1 GHz) when<br />
you only intend measuring over a much smaller range (a few kHz, for example) will<br />
reduce your measurement accuracy.<br />
If you plan to perform a combination of One-Port Insertion Loss measurement,<br />
Return Loss measurement, and Distance to Fault measurements using a frequency<br />
range that you will set manually, you can perform one calibration for all three<br />
measurements as long as you calibrate over a frequency range that incorporates all<br />
three of your measurements, and as long as your cables do not change. For this<br />
reason, if you are doing Distance to Fault measurements (using a frequency range<br />
Distance to Fault<br />
Chapter 10 279
Distance to Fault<br />
Measuring Distance to Fault<br />
that you have set manually) as well as any type of Insertion Loss measurement,<br />
<strong>Agilent</strong> recommends that you select your cable type before performing calibrations.<br />
Press [Mode], [Antenna/Cable], [Distance to Fault], [Cable Type] to set the cable<br />
type.<br />
The calibration remains valid until you do any one of the following:<br />
• set the Distance to Fault frequency range to Auto. Note that the calibration will<br />
become valid again as soon as you switch from Auto back to Manual Frequency<br />
Range.<br />
• power off the test set<br />
• change the start frequency to a new value that lies below the start frequency of<br />
your previous calibration<br />
• change the stop frequency to a new value that lies above the stop frequency of<br />
your previous calibration<br />
• change any of the jumper leads that you used for the calibration<br />
• change any of the attenuators that you used for the calibration<br />
• change the type of cable specified under the [Cable Type] menu key.<br />
Distance to Fault<br />
NOTE<br />
None of the following calibrations are valid for Distance to Fault calibrations with<br />
Frequency Range set to Auto:<br />
• Distance to Fault calibrations performed with the Frequency Range set to<br />
Manual<br />
• One Port Insertion Loss calibrations<br />
• Two Port Insertion Loss calibrations<br />
• Return Loss calibrations<br />
Note also that Distance to Fault calibrations performed with the Frequency Range<br />
set to Auto are not valid for any other measurement, including Distance to Fault<br />
with the Frequency Range set to Manual.<br />
280 Chapter 10
Distance to Fault<br />
Measuring Distance to Fault<br />
Performing a Basic Distance to Fault <strong>Measurement</strong><br />
(Manual Frequency Range)<br />
Step<br />
Notes<br />
1 Mode<br />
2 [Antenna/Cable]<br />
3 [Distance to Fault] The distance to fault measurement takes a few<br />
seconds to load.<br />
4 On [Freq Range] select<br />
Manual.<br />
5 [Start Freq]<br />
6 Enter the start<br />
frequency using the<br />
numeric keypad.<br />
7 [Hz], [kHz], [MHz], or<br />
[GHz]<br />
8 [Stop Freq]<br />
9 Enter the stop<br />
frequency using the<br />
numeric keypad.<br />
10 [Hz], [kHz], [MHz], or<br />
[GHz]<br />
11 On [Units] select<br />
Meters or Feet.<br />
12 [Start Distance]<br />
Each time you press this softkey, the selected<br />
option changes.<br />
Each time you press this softkey, the selected<br />
option changes.<br />
Distance to Fault<br />
Chapter 10 281
Distance to Fault<br />
Measuring Distance to Fault<br />
Step<br />
Notes<br />
Distance to Fault<br />
13 Enter the start distance<br />
using the numeric<br />
keypad.<br />
14 [Stop Distance]<br />
15 Enter the stop distance<br />
using the numeric<br />
keypad.<br />
16 [Cable Type]<br />
17 On [Cable Type] on the<br />
right, select RG, BTS,<br />
or Cust.<br />
18 Press [Select Cable] to<br />
display a predefined list<br />
of RG and BTS cables.<br />
The start distance you can enter cannot be greater<br />
than the distance displayed in the Measured<br />
Distance window at the top right. If you need a<br />
larger distance, reduce the start and stop frequency<br />
span.<br />
If your Start Distance is 0 m (0 ft), you will see a<br />
peak corresponding to 0 m (0 ft). This is caused by<br />
reflection from the junction between your analyzer<br />
and the cable under test. This does not necessarily<br />
indicate a problem, but be sure that this connection<br />
is tight and clean.<br />
The stop distance you can enter cannot be greater<br />
than the distance displayed in the Measured<br />
Distance window at the top right, but must be<br />
greater than the start distance previously entered. If<br />
you need a larger distance, reduce the start and stop<br />
frequency span.<br />
Each time you press this softkey, the selected<br />
option changes. If you select RG or BTS, you will<br />
be asked to select from a list of common cable<br />
types, the specific type of cable you are measuring<br />
[Select Cable].<br />
If the type of cable you are measuring is not listed,<br />
you need to select Cust (Custom Cable). Proceed to<br />
Step 20 for custom cable selection.<br />
Use the knob, or the up and down arrow keys, to<br />
scroll through the list and to highlight your chosen<br />
cable.<br />
19 [Select] The type of cable you selected will be displayed at<br />
the upper left of the screen. Now proceed to Step<br />
21.<br />
282 Chapter 10
Distance to Fault<br />
Measuring Distance to Fault<br />
Step<br />
Notes<br />
20 For Custom Cables<br />
only (Cable<br />
Type = Cust), you must<br />
specify the<br />
characteristics of your<br />
cable. Use [Cable<br />
Atten] and [Prop Vel] to<br />
do this.<br />
21 Check whether your<br />
analyzer has already<br />
been calibrated over the<br />
frequency range and<br />
with the correct cable<br />
type that you wish to<br />
measure. If it is already<br />
calibrated over the<br />
correct frequency range<br />
and cable type, you can<br />
omit the next steps<br />
(Step 22 and Step 23)<br />
and go straight to Step<br />
24.<br />
Specify your custom cable’s attenuation [Cable<br />
Atten.] in dB per 100 m (or in dB per 100 ft.)<br />
Specify also your custom cable’s propagation<br />
velocity [Prop Vel], measured as a percentage of<br />
the speed of light in a vacuum.<br />
The values you enter here will be used for the<br />
measurement, and will be displayed at the upper<br />
left of the display.<br />
Most cable manufacturers provide a table showing<br />
attenuation versus frequency for each type of cable.<br />
Remember that attenuation varies with frequency,<br />
so select an attenuation value that corresponds as<br />
closely as possible to the center of the frequency<br />
range you are using.<br />
The analyzer displays its calibration status on the<br />
top left of the measurement screen. You only need<br />
to re calibrate if you:<br />
• power off the test set<br />
• change the start frequency to a new value that<br />
lies below the start frequency of your previous<br />
calibration<br />
• change the stop frequency to a new value that<br />
lies above the stop frequency of your previous<br />
calibration<br />
• change any of the jumper leads that you used<br />
for the calibration<br />
• change any of the attenuators that you used for<br />
the calibration<br />
• change the type of cable specified under the<br />
[Cable Type] menu key.<br />
For more information, see “Calibration -<br />
Minimizing your Workload” on page 279.<br />
Distance to Fault<br />
Chapter 10 283
Distance to Fault<br />
Measuring Distance to Fault<br />
Step<br />
Notes<br />
22 If your analyzer is<br />
uncalibrated, or has<br />
been calibrated over an<br />
unsuitable frequency or<br />
with the incorrect cable<br />
type, press [Freq/Dist/<br />
Calibrate]<br />
23 [Calibrate] Follow the Calibration Wizard.<br />
24 Connect the antenna<br />
feedline and antenna.<br />
Connect the antenna feedline to the RF Out/SWR<br />
port.<br />
Distance to Fault<br />
25 (Recommended)<br />
[Level] [Autoscale]<br />
If you prefer to set the reference level manually,<br />
after pressing [Level], press [Ref Level]. Then<br />
enter the value you want using the numeric keypad<br />
and press [dB].<br />
Performing a Basic Distance to Fault <strong>Measurement</strong><br />
(Automatic Frequency Range)<br />
Step<br />
Notes<br />
1 Mode<br />
284 Chapter 10
Distance to Fault<br />
Measuring Distance to Fault<br />
Step<br />
Notes<br />
2 [Antenna/Cable]<br />
3 [Distance to Fault] The distance to fault measurement takes a few<br />
seconds to load.<br />
4 On [Freq Range] select<br />
Auto.<br />
5 On [Units] select<br />
Meters or Feet.<br />
Each time you press this softkey, the selected<br />
option changes.<br />
Each time you press this softkey, the selected<br />
option changes.<br />
6 [Start Distance] For greater ease of use, you do not need to display<br />
the measurement results for the entire cable length<br />
that you are measuring. If you want to zoom in on a<br />
small section of the cable, enter here the distance<br />
from the start of the cable. If you want to look at<br />
the whole cable, leave this at the default setting of<br />
0 m (0 ft).<br />
If your Start Distance is 0 m (0 ft), you will see a<br />
peak corresponding to 0 m (0 ft). This is caused by<br />
reflection from the junction between your analyzer<br />
and the cable under test. This does not necessarily<br />
indicate a problem, but be sure that this connection<br />
is tight and clean.<br />
7 Using the numeric<br />
keypad, enter the start<br />
distance for the part of<br />
the cable that you wish<br />
to zoom in on.<br />
After entering the Start Distance value, press [m]<br />
for meters, or [ft] for feet, to use the new value.<br />
8 [Stop Distance] After entering the Stop Distance value, press [m]<br />
for meters, or [ft] for feet, to use the new value.<br />
Distance to Fault<br />
Chapter 10 285
Distance to Fault<br />
Measuring Distance to Fault<br />
Step<br />
Notes<br />
Distance to Fault<br />
9 Using the numeric<br />
keypad, enter the stop<br />
distance for the part of<br />
the cable that you wish<br />
to zoom in on.<br />
10 [Cable Type]<br />
11 On [Cable Type] on the<br />
right, select RG, BTS,<br />
or Cust.<br />
12 Press [Select Cable] to<br />
display a predefined list<br />
of RG and BTS cables.<br />
The greatest accuracy is obtained when you enter a<br />
cable length slightly greater than the cable length<br />
being tested. If you are not sure of the cable length,<br />
enter a value 1.25 times the estimated length, and<br />
enter a start distance value of 0 m (0 ft) as<br />
described in Step 6. Depending on the return loss of<br />
the antenna or device at the end of the cable, you<br />
may see a high relative mismatch displayed at the<br />
actual length of the cable<br />
Each time you press this softkey, the selected<br />
option changes. If you select RG or BTS, you will<br />
be asked to select from a list of common cable<br />
types, the specific type of cable you are measuring<br />
[Select Cable].<br />
If the type of cable you are measuring is not listed,<br />
you need to select Cust (Custom Cable). Proceed<br />
to Step 14 for custom cable selection.<br />
Use the knob, or the up and down arrow keys, to<br />
scroll through the list and to highlight your chosen<br />
cable.<br />
13 [Select] The type of cable you selected will be displayed at<br />
the upper left of the screen. Now proceed to Step<br />
15.<br />
286 Chapter 10
Distance to Fault<br />
Measuring Distance to Fault<br />
Step<br />
Notes<br />
14 For Custom Cables only<br />
(Cable Type = Cust),<br />
you must specify the<br />
characteristics of your<br />
cable. Use [Cable<br />
Atten] and [Prop Vel] to<br />
do this.<br />
15 [Freq/Dist/ Calibrate]<br />
Specify your custom cable’s attenuation [Cable<br />
Atten.] in dB per 100 m (or in dB per 100 ft.)<br />
Specify also your custom cable’s propagation<br />
velocity [Prop Vel], measured as a percentage of<br />
the speed of light in a vacuum.<br />
The values you enter here will be used for the<br />
measurement, and will be displayed at the upper<br />
left of the display.<br />
Most cable manufacturers provide a table showing<br />
attenuation versus frequency for each type of cable.<br />
Remember that attenuation varies with frequency,<br />
so select an attenuation value that corresponds as<br />
closely as possible to the center of the frequency<br />
range you are using.<br />
16 [Calibrate] Follow the Calibration Wizard. If you have<br />
previously calibrated using a Frequency Range of<br />
Auto, and your frequency range lies within the<br />
previously calibrated frequency range, your<br />
analyzer will already be calibrated and you will not<br />
need to recalibrate.<br />
17 Connect the antenna<br />
feedline and antenna.<br />
Connect the antenna feedline to the RF Out/SWR<br />
port.<br />
Distance to Fault<br />
Chapter 10 287
Distance to Fault<br />
Measuring Distance to Fault<br />
Step<br />
Notes<br />
18 (Recommended)<br />
[Level] [Autoscale]<br />
If you prefer to set the reference level manually,<br />
after pressing [Level], press [Ref Level]. Then<br />
enter the value you want using the numeric keypad<br />
and press [dB].<br />
Distance to Fault<br />
Clearing Calibration<br />
Clear Calibration deletes the current calibration data, enabling you to re-calibrate<br />
the instrument for the same frequency range, or for a new frequency range.<br />
To Clear the <strong>Measurement</strong> Calibration Data:<br />
Step<br />
Notes<br />
1 [Setup]<br />
288 Chapter 10
Distance to Fault<br />
Measuring Distance to Fault<br />
Step<br />
Notes<br />
2 [Clear Calibration] If you previously selected Manual Frequency<br />
Range, [Clear Calibration] only clears the<br />
calibration for the Manual mode. Auto mode<br />
calibration data is not cleared. Note also that if you<br />
clear a Manual calibration, you will also clear the<br />
calibration data for the Return Loss and the One<br />
Port Insertion Loss measurements as these<br />
measurements all share the same calibration data.<br />
If you previously selected Auto Frequency Range,<br />
[Clear Calibration] only clears the calibration for<br />
the Auto mode. Manual mode calibration data is<br />
not cleared.<br />
Displaying Location Information Using GPS<br />
If you are making a Distance to Fault measurement, you may use GPS Location data<br />
to verify your location. For additional information on the GPS Data function, refer<br />
to “Displaying GPS Location Data” on page 458.<br />
To Display GPS Location Information:<br />
Step<br />
1 [Level/Location]<br />
2 On [Show GPS<br />
Location] select On.<br />
Notes<br />
Displays GPS satellite location information. Uses the<br />
internal GPS to capture the location of a<br />
measurement. The GPS information can be used to<br />
return to the same location. The Time Ref<br />
(Freq/Chan/Time Ref mode) button must be set to<br />
Internal GPS for this function to be active.<br />
Information logged includes longitude, latitude,<br />
altitude (feet/meters), and the number of satellites<br />
tracked.<br />
Each time you press this softkey, the selected option<br />
changes.<br />
Distance to Fault<br />
Chapter 10 289
Distance to Fault<br />
Measuring Distance to Fault<br />
Step<br />
Notes<br />
3 Highlight [On] Toggle to [On] to display GPS satellite location<br />
information. Toggle to [Off] to remove the location<br />
information<br />
NOTE<br />
If you prefer to have an electronic copy of the location information, see “Saving<br />
Data” on page 465.<br />
Viewing a Single Distance to Fault Sweep<br />
Step<br />
Notes<br />
1 [Average/Sweep]<br />
2 [Single] Activates the single sweep. Press [Continuous] if<br />
you want to start multiple sweeps.<br />
Distance to Fault<br />
NOTE<br />
Every time you wish to perform another single sweep, you need to press the [Single]<br />
key. Pressing the [Restart] key does not start another single sweep—[Restart] only<br />
restarts the averaging.<br />
Displaying the Top Four Faults<br />
When measuring distance to fault, you can display the top four faults with markers<br />
on the trace. Even if the Fault Indicators are not set to On, the position and the<br />
severity of the top four cable faults are still listed in the Metrics Display section at<br />
the bottom of the screen.<br />
If your Start Distance is 0 m (0 ft), you will see a peak corresponding to 0 m (0 ft).<br />
This is caused by reflection from the junction between your analyzer and the cable<br />
under test. This DC component, sometimes referred to as the “dead zone", does not<br />
290 Chapter 10
Distance to Fault<br />
Measuring Distance to Fault<br />
necessarily indicate a problem, but be sure that the connection is tight and clean.<br />
Step<br />
Notes<br />
1 [Setup]<br />
2 On [Fault Indicators] select<br />
On.<br />
Each time you press this softkey, the selected<br />
option changes. When set to On, the positions of<br />
the top four faults are indicated on the trace with<br />
four numbered yellow triangles. If you have<br />
Pass/Fail Limits set to On, the yellow triangles<br />
will be colored red for any faults that exceed<br />
your pre-defined limit. For more information on<br />
setting Pass/Fail limits, see “Setting the Pass/Fail<br />
Limits” on page 295.<br />
Setting Interference Rejection for a Distance to Fault<br />
<strong>Measurement</strong><br />
NOTE<br />
Other signals can interfere with distance to fault measurements. When making a<br />
distance to fault measurement in the presence of known or suspected interference,<br />
you can minimize the effect of the interference on the measurement by activating<br />
interference rejection in the test set.<br />
Use of interference rejection will increase the measurement time. Interference<br />
rejection should be used if a known interfering signal exists or if the distance to fault<br />
measurement displays suspicious characteristics such as a spike or rapid movements<br />
in the noise floor.<br />
To Activate Interference Rejection:<br />
Distance to Fault<br />
Step<br />
Notes<br />
1 [Setup]<br />
2 On [Interference<br />
Rejection] select On.<br />
Each time you press this softkey, the selected<br />
option changes.<br />
Chapter 10 291
Distance to Fault<br />
Measuring Distance to Fault<br />
Setting Average, Sweep, and Restart<br />
Setting the Sweep<br />
You can select either continuous or single sweep. Continuous sweep provides<br />
repeated, ongoing measurements. Single sweep performs a single measurement that<br />
is repeated only when you push the Single button.<br />
To set sweep:<br />
Step<br />
Notes<br />
1 [Average/Sweep]<br />
2 [Continuous] or [Single] Each time you press this softkey, the<br />
selected option changes.<br />
Setting Averaging<br />
You can choose to have averaging On or Off and set the number of averages you<br />
want to take. Averaging only applies to the data, not the trace. You can select from<br />
the following types of averaging:<br />
Distance to Fault<br />
• Off: Disables averaging.<br />
• Running Average: Computes the new result as the weighted sum of the last<br />
result and the new measurement. The last result is weighted by (n – 1)/n. The<br />
new result is weighted by 1/n. Each new measurement produces a new result.<br />
• Max Hold: Is not an average, but on a point by point basis, displays the<br />
maximum amplitude for the given frequency or channel since Max Hold was<br />
turned on. It is updated when a new maximum occurs.<br />
• Group Average: Makes the requested number of measurements, averages the<br />
measurement data, and displays the average as a single result trace.<br />
<strong>Measurement</strong> time will vary based on the requested number of averages and can<br />
take minutes for very large number of averages.<br />
• Group Max Average: Makes the requested number of measurements before<br />
returning a single trace result. This trace is the maximum value seen at each<br />
trace point over the requested number of averages (measurements).<br />
292 Chapter 10
Distance to Fault<br />
Measuring Distance to Fault<br />
To set averaging:<br />
Step<br />
Notes<br />
1 Set the number of averages.<br />
a. [Average]<br />
b. Enter the number of averages<br />
using the numeric keypad.<br />
c. [Enter]<br />
2 Select the type of averaging you<br />
want to apply.<br />
a. [Average/Sweep]<br />
b. [Averaging]<br />
c. [Off], [Running Average],<br />
[Max Hold], [Group<br />
Average], or [Group Max<br />
Average]<br />
NOTE<br />
These two steps can be performed in any order. However, if you turn averaging on<br />
and a large number of averages has previously been set, there may be a delay before<br />
you can change number of averages.<br />
Setting Restart<br />
When you have averaging turned On and you are in Continuous Sweep mode, you<br />
can restart the averaging by pressing the Restart menu key. The Restart key has no<br />
effect if you are in Single sweep mode.<br />
To restart averaging:<br />
Distance to Fault<br />
Step<br />
Notes<br />
1 [Average/Sweep]<br />
2 [Restart] This key is unavailable or has no effect when<br />
Sweep is set to Single. To restart a Single<br />
Sweep measurement, press [Single].<br />
Chapter 10 293
Distance to Fault<br />
Measuring Distance to Fault<br />
Adding a Marker<br />
Markers can be used on traces to help you visually track up to four signals. Each<br />
marker has the following settings:<br />
• Type: Provides three options, including:<br />
Distance to Fault<br />
• Off<br />
• Normal, which places a diamond-shaped, colored marker, along with a<br />
number, 1-4, on the trace.<br />
• Delta, is associated with a normal marker. Therefore, a normal marker must<br />
exist prior to creating the delta marker. The delta marker displays the<br />
difference between the normal marker position and the delta marker<br />
position. Only one delta marker can be associated with a given normal<br />
marker. The normal marker must be active when Delta is selected.<br />
• Marker to Peak: Places the active marker on the current greatest value of the<br />
trace.<br />
• Marker to Next Peak: Places the active marker on the current second greatest<br />
value of the trace.<br />
• Marker to Min: Places the active marker on the current lowest value of the<br />
trace.<br />
• Marker to Next Min: Places the active marker on the current second lowest<br />
value of the trace.<br />
Step<br />
1 [Marker]<br />
Notes<br />
2 [Marker] Each time you press the<br />
[Marker] key, you will step to<br />
the next marker in the sequence<br />
1 - 2 - 3 - 4 - 1 - 2, and so on.<br />
3 [1], [2], [3], or [4]<br />
4 [Type]<br />
5 [Off], [Normal], or [Delta]<br />
294 Chapter 10
Distance to Fault<br />
Measuring Distance to Fault<br />
Step<br />
6 Locate the marker relative to the trace:<br />
[Marker to Peak] or [Marker to Next Peak]<br />
or [Marker to Min] or [Marker to Next<br />
Min]<br />
Notes<br />
This feature is available for both<br />
normal markers and for delta<br />
markers.<br />
Setting the Pass/Fail Limits<br />
The measurement limits setting enables you to alter the value of the upper limit.<br />
Limits are set in dB and are relative. The setting you choose defines the location of<br />
the limit line displayed on the screen. The setting affect the metrics color display:<br />
red represents fail, green represents pass.<br />
To Set the <strong>Measurement</strong> Upper and Lower Limits:<br />
Step<br />
Notes<br />
1 [Setup]<br />
2 [Limits]<br />
3 On [Limits] select On or<br />
Off.<br />
Enables you to toggle the measurement limits<br />
function On (active) and Off (inactive).<br />
• If set to On, a limit line is displayed on the<br />
screen. Any measured value that exceeds the<br />
limit will result in a failure indication for that<br />
value.<br />
• If set to Off, neither a limit line nor a limit<br />
indicator are displayed. Also, the pass fail<br />
indicator is not shown in the metrics display<br />
portion of the display.<br />
Distance to Fault<br />
Chapter 10 295
Distance to Fault<br />
Measuring Distance to Fault<br />
Step<br />
4 Set the upper limit.<br />
a. [Upper Limit]<br />
b. Enter the number on<br />
the numeric keypad.<br />
c. [dB]<br />
Notes<br />
Maximum Upper limit: Ref Level (top of display)<br />
Minimum Upper limit: bottom of display<br />
Distance to Fault<br />
296 Chapter 10
11 E1 Analyzer<br />
“Making E1 <strong>Measurement</strong>s” on page 298<br />
“Steps for Performing a Basic E1 Analyzer <strong>Measurement</strong>” on page 298<br />
“Setup Button Selections” on page 298<br />
“Display/Sound Button Selections” on page 301<br />
“Control Button Selections” on page 301<br />
“Sample Hard Loop/End-End Full E1 BERT Test” on page 303<br />
“Sample Monitor Full E1 Test” on page 306<br />
“Setting Up Delay Test Mode” on page 310<br />
“Turning On Sound” on page 312<br />
“Setting Up E1 Diagnostics” on page 313<br />
“Patterns” on page 314<br />
“Alarm Indicators” on page 316<br />
“Results Indicators” on page 316<br />
“Status Indicators” on page 318<br />
“Testing and Fault Mitigation” on page 319<br />
“Auto Configuration Flow Diagram” on page 321<br />
“Terminology” on page 323<br />
E1 Analyzer<br />
297
E1 Analyzer<br />
Making E1 <strong>Measurement</strong>s<br />
Making E1 <strong>Measurement</strong>s<br />
The <strong>Agilent</strong> <strong>E7495A</strong>/B provide a simple solution for all your E1 testing needs, from<br />
basic transmission testing to BERT testing. For more information about E1 testing,<br />
refer to “<strong>Measurement</strong> Results” on page 316.<br />
Steps for Performing a Basic E1 Analyzer <strong>Measurement</strong><br />
Step<br />
Notes<br />
1 [Mode]<br />
2 [Backhaul]<br />
3 [E1 Analyzer]<br />
4 [Get Started/ Test<br />
Mode]<br />
The tests are listed on the buttons on the right.<br />
Pressing a test mode button will provide you with<br />
information about the test and the test options<br />
available.<br />
5 [Setup] Configure the E1 analyzer for the measurement.<br />
6 [Display/Sound] Setup your view of the measurement results.<br />
7 [Control] Modify the measurement setup and inject errors as<br />
you perform the measurement.<br />
Setup Button Selections<br />
• Rx Input: The Primary and Secondary inputs are both affected by this setting.<br />
E1 Analyzer<br />
— Terminate - sets the input impedance to 75 Ohms. Can be performed only<br />
when the E1 circuit is interrupted (connected into a jack that interrupts the<br />
circuit).<br />
— Monitor - sets the input impedance to 75 Ohms, inserts 20 dB gain, and<br />
should be selected when connected to a 'Monitor' jack.<br />
— Bridge - sets the input impedance >1000 Ohms and should be selected when<br />
bridging on to an E1 circuit.<br />
298 Chapter 11
E1 Analyzer<br />
Making E1 <strong>Measurement</strong>s<br />
• Line Code: Configures the test set to transmit and expect to receive a line code<br />
that is compatible with the network’s design. There are two types of line coding<br />
used in E1 networks:<br />
— AMI - Alternate Mark Inversion is a traditional line code.<br />
— HDB3 - High Density Bipolar 3 replaces runs of 4 zeroes with a special code<br />
that is not compatible with AMI. It allows greater flexibility of data patterns<br />
by enhancing repeater synchronization by increasing pulse density, thereby<br />
providing greater throughput.<br />
• Framing: Configures the test set to transmit and expect to receive a particular<br />
framing pattern that is compatible with the network’s design. It enables the test<br />
set to receive the E1 signal and to then synchronize, identify, and extract the<br />
individual channels.<br />
— Unframed - Causes the test set to simulate a loss of frame condition.<br />
— PCM30 - A framing format consisting of 30 traffic channels, 1 slot reserved<br />
for the frame alignment signal (FAS) and 1 slot reserved for common<br />
channel signaling.<br />
— PCM30 + CRC4 - A framing format consisting of 30 traffic channels, 1 slot<br />
reserved for the frame alignment signal (FAS) with CRC and 1 slot reserved<br />
for common channel signaling.<br />
— PCM31 - A framing format consisting of 30 traffic channels, 1 slot reserved<br />
for the frame alignment signal (FAS)<br />
— PCM31 +CRC4 - A framing format consisting of 30 traffic channels, 1 slot<br />
reserved for the frame alignment signal (FAS) with CRC<br />
• Pattern: Configures the test set to expect a particular test pattern. Many test<br />
patterns are available to 'stress' the circuit in a particular manner or to gain<br />
maximum insight into a particular problem.<br />
• Tx Pattern: Allows you to select either Normal or Inverted patterns.<br />
• Tx Clock: Configures the test set to use one of the following methods to derive<br />
the transmit clock frequency.<br />
— Internal - The transmit clock is derived within the test set and is<br />
independent of the incoming signal. This is useful when the device or line<br />
under test is configured to synchronize on the incoming signal. In this case<br />
the return clock frequency of the return signal should match the transmit<br />
clock frequency of the test set.<br />
— Primary Rx - The transmit clock frequency is derived from the signal<br />
E1 Analyzer<br />
Chapter 11 299
E1 Analyzer<br />
Making E1 <strong>Measurement</strong>s<br />
received at the Primary Rx jack on the test set.<br />
— Secondary Rx - The transmit clock frequency is derived from the signal<br />
received at the Secondary Rx jack on the test set.<br />
• Timeslot: Applicable only in the Channel BERT mode. Sets the active channel<br />
to be tested for BERT.<br />
• Fill Data: When performing Channel BERT testing this configures the source of<br />
data transmitted in the unused slots. For drop-and-insert testing this field is<br />
typically set to Secondary Rx.<br />
— All 1's - Set this mode to maintain a sufficient 1's density on the unused<br />
channels during testing. All 1's are typically transmitted on unused channels<br />
in live E1 circuits.<br />
— Idle - Set this mode to accommodate specific troubleshooting such as to<br />
exercise a circuit designed for HDB3.<br />
— Primary Rx - Fills the unused slots with Primary Rx data.<br />
— Secondary Rx - Fills the unused slots with Secondary Rx data.<br />
• Slip Reference: Selects the reference for the frame slip measurement.<br />
— None - This selection disables the frame slip measurement.<br />
— Internal - In this mode the test set compares the framing of the incoming<br />
signal with the test set's internal clock. Three conditions are necessary when<br />
using this mode:<br />
1. The far end must be receiving a signal from this test set.<br />
2. The transmit clock on the far end must be configured to synchronize on<br />
the incoming signal.<br />
3. The Tx Clock on this test set must be set to internal.<br />
— Second Rx - In this mode the test set compares the frame clock timing of the<br />
received signal on the Primary Rx jack with the frame clock timing of the<br />
received signal on the Secondary Rx jack.<br />
E1 Analyzer<br />
300 Chapter 11
E1 Analyzer<br />
Making E1 <strong>Measurement</strong>s<br />
• Second Tx: Selects the source of data of the signal available at the Secondary<br />
Tx jack.<br />
— AIS - The signal at the Secondary Rx jack is an unframed all ones, and id<br />
often referred to as AIS.<br />
— Second Rx - The Secondary Rx signal is buffered and looped back to the<br />
Secondary Tx jack.<br />
— Primary Rx - The signal at the Primary Rx jack is buffered and internally<br />
routed to the Secondary Tx jack.<br />
Display/Sound Button Selections<br />
Configure the following for the measurement you’re doing:<br />
• Status: Allows you to select which status panel is active.<br />
• Alarms: Displays those errors occurring on either the primary or secondary<br />
channel, depending on your selection. Displays in the bottom-right of the screen.<br />
• Results: Can choose an error and select results you want to drill down to. This<br />
shows more metrics on the error you select. Displays in bottom-right of screen.<br />
• Sound: Enables you to turn sound on and off. Use sound mostly to listen for<br />
drop outs or changes in the signal.<br />
• Volume: Enables you to set the volume of speaker output.<br />
Control Button Selections<br />
On the Control button, the available buttons are unique to the test mode you select.<br />
Once you set up your display, you can change settings such as patterns, alarm<br />
injections, and so forth, while you make the measurement.<br />
• Pattern: Configures the test set to send and expect to receive a particular test<br />
pattern. Many test patterns are available to 'stress' the circuit in a particular<br />
manner or to gain maximum insight into a particular problem.<br />
• Alarm/Error: Enables a list of available alarms and conditions that can be<br />
transmitted on the Primary Tx channel. The alarm or condition is invoked by<br />
pressing the Inject button.<br />
To troubleshoot your E1 line, you can monitor for errors or alarms. You can<br />
inject errors to see how the system responds.<br />
— Loss of Signal Alarm - The test ceases to send a signal.<br />
E1 Analyzer<br />
Chapter 11 301
E1 Analyzer<br />
Making E1 <strong>Measurement</strong>s<br />
— Loss of Frame Alarm - Disables the frame pattern.<br />
— FAS Distant Alarm - Sets the Remote Alarm Indicator bit in timeslot 0 of<br />
the odd frames to simulate an FAS distant alarm.<br />
— RAI Remote Alarm Indicator - See FAS Distant Alarm (above).<br />
— MFAS Distant Alarm - Sets every sixth bit of each timeslot 16 in the zero<br />
frame to simulate an MFAS distant alarm.<br />
— AIS Alarm - Alarm Indication Signal (AIS) sends an unframed, all 1s<br />
pattern.<br />
— TS-16 AIS Alarm - Sets all bits in timeslot 16.<br />
— BPV Error - The test set forces a single bipolar violation error with each<br />
press of the Inject button.<br />
— FAS Error - Causes an error in the frame alignment signal.<br />
— MFAS Error - Causes an error in the multi-frame alignment signal.<br />
— CRC-4 Error - Causes the test set to generate a CRC error. Note that this is<br />
possible only when CRC-4 frame modes are selected.<br />
— FEB (E-Bit) Error - Causes the test set to set the E bit on odd frames.<br />
— Pattern Error - The test set forces an error in the transmitted pattern with<br />
each press of the Inject button.<br />
• Timeslot: Applicable only in the Channel BERT mode. Sets the active channel<br />
to be tested for BERT.<br />
• Fill Data: When performing Channel BERT testing this configures the source of<br />
data transmitted in the unused slots. For drop-and-insert testing, this field is<br />
typically set to Secondary Rx.<br />
E1 Analyzer<br />
— All 1's - Set this mode to maintain a sufficient 1's density on the unused<br />
channels during testing. All 1's are typically transmitted on unused channels<br />
in live E1 circuits.<br />
— Idle - Set this mode to accommodate specific troubleshooting such as to<br />
exercise a circuit designed for HDB3.<br />
— Primary Rx - Fills the unused slots with Primary Rx data.<br />
— Secondary Rx - Fills the unused slots with Secondary Rx data.<br />
• Inject: Causes the error or condition that is currently displayed on the button to<br />
occur. Some selections cause a single event to occur, while others maintain a<br />
constant state. The text on the button changes to reflect the appropriate action.<br />
302 Chapter 11
E1 Analyzer<br />
Making E1 <strong>Measurement</strong>s<br />
Sample Hard Loop/End-End Full E1 BERT Test<br />
You can use this test mode to perform measurements such as BERT on an E1 circuit.<br />
This example explains how to setup a hard-loop/ene-end full E1 BERT test. A hard<br />
loop test requires one test set at one end, and a hard loop at the other. An end-end<br />
test requires a test set at each end, but enables the troubleshooter to identify the<br />
direction of the trouble. The E1 circuit is not available for service when using this<br />
test mode.<br />
During the commissioning or startup phase of an E1 circuit, a several day<br />
end-to-end or hard loop test is often performed. This type of test provides the most<br />
comprehensive level of information, but does require that the circuit be taken out of<br />
service for the duration of the test. The test results provide more granular resolution<br />
on root cause problems than does a monitor test.<br />
Figure 11-1<br />
Sample End to End Connection Using a Terminate Connection with a Dsx<br />
Service Panel<br />
Primary<br />
Rx Tx<br />
From<br />
Channel<br />
Service<br />
Unit<br />
OUT<br />
IN<br />
OUT<br />
IN<br />
To Base<br />
Station<br />
DSX Service panel<br />
Test Set<br />
Sample Hard Loop/End-End Full E1 Test:<br />
Step<br />
1 [Mode]<br />
2 [Backhaul]<br />
Notes<br />
E1 Analyzer<br />
Chapter 11 303
E1 Analyzer<br />
Making E1 <strong>Measurement</strong>s<br />
Step<br />
Notes<br />
3 [E1 Analyzer]<br />
4 [Get Started/ Test<br />
Mode]<br />
5 [Hard Loop/End-End] Use this test mode to perform measurements such<br />
as BERT on an E1 circuit. The far end signal must<br />
be derived from either a hard loop or from a<br />
second test set. The E1 circuit is not available for<br />
service when using this test mode.<br />
6 [Full E1 BERT] Select this to perform a BERT test on a full E1<br />
Circuit.<br />
7 [Auto Config] Enables the Auto Configuration buttons.<br />
E1 Analyzer<br />
8 [Start Primary Auto<br />
Config]<br />
9 [Back]<br />
10 [Setup]<br />
11 Setup Rx input.<br />
a. [Rx Input]<br />
b. [Terminate]<br />
12 Setup line code.<br />
a. [Line Code]<br />
b. [HDB3]<br />
13 Setup framing.<br />
a. [Framing]<br />
b. [PCM31 + CRC4]<br />
14 Setup pattern.<br />
a. [Pattern]<br />
b. [QRSS]<br />
Causes the test set to analyze the incoming E1<br />
signal and align the setup choices to the properties<br />
of that signal.<br />
The test set must be connected to a jack that<br />
interrupts the E1 circuit.<br />
This assumes the circuit is designed for HDB3<br />
(High Density Bipolar 3). An E1-line code in<br />
which bipolar violations are deliberately inserted<br />
if user data contains a string of 4 or more<br />
consecutive zeros.<br />
This assumes that the circuit has been designed for<br />
PCM31 + CRC4.<br />
304 Chapter 11
E1 Analyzer<br />
Making E1 <strong>Measurement</strong>s<br />
Step<br />
Notes<br />
15 Setup Tx pattern.<br />
a. [Tx Pattern]<br />
b. [Normal]<br />
16 Setup Tx clock.<br />
a. [Tx Clock]<br />
b. [Internal]<br />
17 Setup slip reference.<br />
a. [Slip Ref]<br />
b. [None]<br />
18 Setup second Tx.<br />
This is the default selection after test set Preset and<br />
covers the situation when a hard loop is configured<br />
at the far end. If a separate test set is used at each<br />
end, then the test set on one end should have the<br />
Tx Clock set to Primary Rx (assuming the<br />
incoming signal is connected to this jack). Another<br />
alternative is to use a second E1 circuit connected<br />
to the Secondary Rx jack to establish proper<br />
timing.<br />
Disables the frame slip measurement.<br />
Use the default condition.<br />
a. [Second Rx]<br />
b. [AIS]<br />
19 [Display/Sound] Enables the display and sound options on the<br />
buttons on the right.<br />
20 Setup the status.<br />
a. [Status]<br />
b. [Pri]<br />
21 Setup alarms.<br />
a. [Alarms]<br />
b. [Pri]<br />
Activates only the Primary Status pane. The<br />
inactive channel should be deactivated to cease the<br />
display of invalid measurements.<br />
This selection causes the Alarm pane to toggle<br />
between Primary and Secondary. Use [Pri] to<br />
observe the Primary Results in the Alarm Panel.<br />
Each time you press this softkey, the selected<br />
option changes.<br />
E1 Analyzer<br />
Chapter 11 305
E1 Analyzer<br />
Making E1 <strong>Measurement</strong>s<br />
Step<br />
22 Setup results display.<br />
a. [Results]<br />
b. Use up and down<br />
buttons to select.<br />
c. [Select]<br />
23 Setup to inject an error.<br />
a. [Control]<br />
b. [Alarm/Error]<br />
c. Use the Up and<br />
Down arrow<br />
buttons to select.<br />
d. [Select]<br />
e. [Inject]<br />
Notes<br />
Displays a list of results information that can be<br />
displayed in the Results pane. Make a selection<br />
based on the need of the application. [Control]<br />
enables several soft keys on the right that control<br />
choices specific to each test mode.<br />
Allows you to select and then inject the alarm or<br />
error you want to test. Causes the error or<br />
condition that is currently displayed on the Inject<br />
button to occur. Note that some selections cause a<br />
single event to occur while others maintain a<br />
constant state. The text on the button changes to<br />
reflect the appropriate action.<br />
Press the [Inject] softkey to toggle between On<br />
and Off. Selecting On will inject the error selected<br />
with the [Alarm/Error] softkey during Step 23(b).<br />
Sample Monitor Full E1 Test<br />
This example shows how to monitor an E1 circuit without disrupting service.<br />
During this test the source of signal from the far end can be either live data or<br />
pattern data from a second test set. This mode is very similar to End-to-End Hard<br />
Loop mode, with the exception that the signal present on the Primary Tx jack is a<br />
buffered replica of the signal present on the Primary Rx jack. When monitor jacks<br />
are not available, this feature allows the technician to break into a live E1 and pass<br />
that signal through the test set, thereby keeping the circuit in-service. This is useful<br />
for monitoring long-term statistics of an E1 circuit.<br />
E1 Analyzer<br />
306 Chapter 11
E1 Analyzer<br />
Making E1 <strong>Measurement</strong>s<br />
Figure 11-2<br />
Sample Monitor Mode with a Monitor Port Connection<br />
MON<br />
MON<br />
Primary<br />
Rx Tx<br />
From<br />
Channel<br />
Service<br />
Unit<br />
OUT<br />
IN<br />
OUT<br />
IN<br />
To Base<br />
Station<br />
DSX Service panel<br />
Test Set<br />
When using the above sample connection for monitoring an E1 circuit with a<br />
monitor port, you should set Rx Input to monitor.<br />
Figure 11-3<br />
Sample Monitor Mode without a Monitor Port<br />
Primary<br />
Rx Tx<br />
From<br />
Channel<br />
Service<br />
Unit<br />
OUT<br />
IN<br />
OUT<br />
IN<br />
To Base<br />
Station<br />
DSX Service panel<br />
Test Set<br />
When using the above sample connection for terminating an E1 circuit, you should<br />
set Rx Input to terminate.<br />
E1 Analyzer<br />
Chapter 11 307
E1 Analyzer<br />
Making E1 <strong>Measurement</strong>s<br />
To Preform a Sample Monitoring Procedure<br />
Step<br />
Notes<br />
1 [Mode]<br />
2 [Backhaul]<br />
3 [E1 Analyzer]<br />
4 [Get Started/ Test Mode]<br />
E1 Analyzer<br />
5 Setup monitoring.<br />
a. [Monitor]<br />
b. [Monitor Full E1]<br />
6 Setup auto configuration.<br />
a. [Auto Config]<br />
b. [Start Primary Auto Config]<br />
Use this test mode to monitor live data<br />
on the E1 line without affecting service.<br />
The simplest hookup for monitoring<br />
does not require the test Set Tx outputs<br />
to be connected. In some cases, you may<br />
connect the Tx outputs to the E1 circuit.<br />
For those cases, the Tx primary and<br />
secondary transmitted signals are<br />
regenerated from the received signal on<br />
the corresponding line.<br />
Choose [Monitor Full E1] to monitor<br />
performance of a full E1 Circuit.<br />
Causes the test set to analyze the<br />
incoming E1 signal and to align the<br />
setup choices to that signal.<br />
7 [Back] Shifts focus back to the main mode<br />
selection buttons.<br />
8 Setup the Rx Input.<br />
a. [Setup]<br />
b. [Rx Input]<br />
c. [Terminate]<br />
9 Setup line code.<br />
a. [Line Code]<br />
b. [HDB3]<br />
This assumes the test set is connected<br />
into a jack that interrupts the E1 circuit.<br />
Note: If you are connected to a monitor<br />
port, select [Monitor] instead of<br />
[Terminate].<br />
This assumes the circuit is designed for<br />
HDB3.<br />
308 Chapter 11
E1 Analyzer<br />
Making E1 <strong>Measurement</strong>s<br />
Step<br />
10 Setup framing.<br />
a. [Framing]<br />
b. [PCM31 + CRC4]<br />
11 Setup pattern.<br />
Notes<br />
This assumes that the circuit has been<br />
designed for PCM31 + CRC4.<br />
Set to the pattern sent by the far end.<br />
a. [Pattern]<br />
b. [QRSS]<br />
12 Setup Tx Pattern.<br />
a. [Tx Pattern]<br />
b. [Normal]<br />
13 Setup Tx clock.<br />
a. [Tx Clock]<br />
b. [Internal]<br />
This selection is not applicable in<br />
Monitor mode because the Primary Tx<br />
signal is a buffered replica of the signal<br />
applied to the Primary Rx jack and is not<br />
affected by this setting.<br />
Internal is the default selection after test<br />
set Preset.<br />
14 [More 1 of 2] Displays further options. Choose [More<br />
2 of 2] to return to the previous list of<br />
options.<br />
15 Setup the slip reference.<br />
Disables the frame slip measurement.<br />
a. [Slip Ref]<br />
b. [None]<br />
16 Setup the second Tx.<br />
Use the default condition.<br />
a. [Second Tx]<br />
b. [AIS]<br />
17 [Display/Sound] Enables the [Display] options on the<br />
buttons on the right.<br />
E1 Analyzer<br />
Chapter 11 309
E1 Analyzer<br />
Making E1 <strong>Measurement</strong>s<br />
Step<br />
18 Setup the status display.<br />
a. [Status]<br />
b. [Pri]<br />
19 Setup alarms.<br />
a. [Alarms]<br />
b. [Pri]<br />
20 Setup the results display.<br />
a. [Results]<br />
b. Use the up and down buttons<br />
to move to the desired choice.<br />
c. [Select]<br />
Notes<br />
Activates only the Primary Status pane.<br />
The inactive channel should be<br />
deactivated to cease the display of<br />
invalid measurements.<br />
This selection causes the Alarm pane to<br />
toggle between Primary and Secondary.<br />
Use the Pri selection to observe the<br />
Primary Results in the Alarm Panel.<br />
Enables a list of results information that<br />
can be displayed in the Results pane.<br />
Make a selection based on the need of<br />
the application.<br />
Setting Up Delay Test Mode<br />
Use this test mode to have the test set measure the round trip delay of an E1 circuit.<br />
It is necessary to have a loop condition at the far end during this test. The best<br />
accuracy is obtained when a hard loop exists at the far end. Be aware that devices<br />
placed in loopback may add additional delay. During this mode, a pattern consisting<br />
of a zero inserted into a string of ones is transmitted and analyzed to determine the<br />
delay in the path. The selected test pattern is sent as filler during the calculation<br />
interval.<br />
E1 Analyzer<br />
310 Chapter 11
E1 Analyzer<br />
Making E1 <strong>Measurement</strong>s<br />
Figure 11-4<br />
Delay Connection Diagram<br />
Primary<br />
Rx Tx<br />
From<br />
Channel<br />
Service<br />
Unit<br />
OUT<br />
IN<br />
OUT<br />
IN<br />
To Base<br />
Station<br />
DSX Service panel<br />
Test Set<br />
To Preform a Sample Delay Mode Test Procedure<br />
Step<br />
Notes<br />
1 [Mode]<br />
2 [Backhaul]<br />
3 [E1 Analyzer]<br />
4 [Get Started/ Test Mode]<br />
5 Perform Delay test.<br />
a. [Delay]<br />
b. [Full E1]<br />
Use this test mode to measure the delay<br />
between the Primary Tx and Rx ports.<br />
Use this measured delay to determine the<br />
approximate distance between near end<br />
and far end. The far end of the line must<br />
be manually looped during this test.<br />
Since a signal is being sent on the E1<br />
line, service on the E1 will be affected.<br />
Delay measurements require full E1<br />
bandwidth.<br />
6 [Setup] Select this to display a list of setup<br />
choices that pertain to this test mode.<br />
E1 Analyzer<br />
Chapter 11 311
E1 Analyzer<br />
Making E1 <strong>Measurement</strong>s<br />
Step<br />
7 Setup Rx Input.<br />
a. [Rx Input]<br />
b. [Terminate]<br />
8 Setup Line Code.<br />
a. [Line Code]<br />
b. [AMI] or [HDB3]<br />
9 Setup Framing.<br />
a. [Framing]<br />
b. [Unframed] or [PCM30] or<br />
[PCM30 + CRC4] or<br />
[PCM31] or<br />
[PCM31 + CRC4]<br />
10 Setup the Pattern.<br />
Notes<br />
This assumes the test set is connected<br />
into a jack that interrupts the circuit.<br />
This assumes that the circuit is designed<br />
for AMI or HDB3.<br />
This assumes that the circuit has been<br />
designed for the option you select.<br />
a. [Pattern]<br />
b. Use the up and down arrow<br />
buttons to move to a pattern.<br />
c. [Select]<br />
11 Setup the Tx Pattern.<br />
a. [Tx Pattern]<br />
b. [Normal] or [Invert]<br />
12 Setup the Tx Clock.<br />
a. [Tx Clock]<br />
b. [Internal] or [Primary Rx]<br />
None of the options available on [More 1<br />
of 2] are available in Delay mode.<br />
E1 Analyzer<br />
Turning On Sound<br />
You can listen to a single channel at a time in channel test modes. Sound is disabled<br />
when you are in full E1 test modes.<br />
312 Chapter 11
E1 Analyzer<br />
Making E1 <strong>Measurement</strong>s<br />
To Turn On the Sound<br />
Step<br />
Notes<br />
1 [Mode]<br />
2 [Backhaul]<br />
3 [E1 Analyzer]<br />
4 [Get Started/ Test Mode]<br />
5 [Hard Loop/End-End], [Channel<br />
BERT] or [Monitor], [Monitor<br />
Channel]<br />
6 Select Channel mode.<br />
7 [Display/Sound]<br />
8 [Sound]<br />
9 [On] or [Off] Each time you press this softkey, the<br />
selected option changes.<br />
10 Set the volume.<br />
a. [Volume]<br />
b. Enter the volume level from 1 to<br />
10.<br />
c. [Enter]<br />
Setting Up E1 Diagnostics<br />
The diagnostic tests available for E1 include:<br />
• RAM - During the RAM test, the memory on the E1 measurement module is<br />
tested. Memory hardware failures are detected.<br />
• ROM - The ROM test verifies the integrity of the code by performing a<br />
checksum measurement.<br />
• Loop Back - The loop back test is a functional test of the transmitting and<br />
receiving hardware. It attempts to send various signal patterns and levels and<br />
then to verify the measured values. It is important that this test be done using<br />
short 75 BNC cables (preferably 100-millimeter (4-inch) cables) because long<br />
E1 Analyzer<br />
Chapter 11 313
E1 Analyzer<br />
Making E1 <strong>Measurement</strong>s<br />
cables can reduce the signal levels during the diagnostic tests, and this could<br />
case a false failure.<br />
If any of the three tests listed above fail, contact your service center.<br />
To Set Up E1 Diagnostics<br />
Step<br />
Notes<br />
1 [Mode]<br />
2 [Backhaul]<br />
3 [E1 Analyzer]<br />
4 [Tests]<br />
5 [Verification] The E1 Loop Cable connection<br />
diagram shown on the instrument<br />
display, and the accompanying<br />
explanation, contain the information<br />
you need to set up the test.<br />
6 [Continue] The test is performed and results are<br />
reported on the screen.<br />
Patterns<br />
Many test patterns are available to 'stress' the circuit in a unique way or to gain<br />
maximum insight into a particular problem. Much has been written to guide the<br />
troubleshooter to select the proper pattern. Below is a list of the patterns available in<br />
the test set.<br />
E1 Analyzer<br />
• 2E6-1<br />
• 2E9-1<br />
• 2E11-1<br />
• 2E15-1<br />
• 2E20-1<br />
• QRSS- A pseudorandom pattern that simulates live traffic on a circuit. It is a<br />
very common test pattern<br />
• 2E23-1<br />
• All 0’s - A pattern that is often selected to verify HDB3 provisioning.<br />
314 Chapter 11
E1 Analyzer<br />
Making E1 <strong>Measurement</strong>s<br />
• 1:7 - An eight-bit pattern that contains a single 1. Used to test clock recovery.<br />
• 1:3 - A 4-bit pattern with a single 1.<br />
• 1:1 - A 2-bit pattern with a single 1.<br />
• All 1's - A pattern that causes line drivers to consume the maximum amount of<br />
current. If framing is set to 'Unframed' the resulting pattern is equivalent to an<br />
Alarm Indication Signal (AIS).<br />
E1 Analyzer<br />
Chapter 11 315
E1 Analyzer<br />
<strong>Measurement</strong> Results<br />
<strong>Measurement</strong> Results<br />
Alarm Indicators<br />
• Signal Loss - The test set encountered the absence of data on the E1 signal. A<br />
frame pulse may or may not be present.<br />
• Frame Loss - The test set encountered an unexpected frame pattern. The frame<br />
pattern did not match the one selected in 'Setup.'<br />
• AIS Alarm - The test set encountered an unframed all-ones signal.<br />
• TS 16 AIS Alarm - The test set encountered all ones in every timeslot sixteen.<br />
• FAS Distant Alarm - The test set detected a FAS alarm being sent from the far<br />
end. This alarm indicator is also known as RAI (Remote Alarm Indication)<br />
• MFAS Distant Alarm - The test set detected an MFAS alarm being sent from<br />
the far end.<br />
• Pattern Inv - The pattern of the signal applied to the test set is inverted.<br />
Results Indicators<br />
E1 Analyzer<br />
• (Code) BPV - A momentary indicator that responds when a bipolar violation<br />
occurs on the incoming signal applied to the Receive jack. HDB3 codes are not<br />
considered a BPV and will not activate this indicator when the test set is set to<br />
AMI mode.<br />
• FAS - A momentary indicator that responds to a disruption in the frame<br />
alignment signal.<br />
• MFAS - A momentary indicator that responds to a disruption in the multi-frame<br />
alignment signal. This indicator is applicable in only PCM-30 framing modes.<br />
• CRC-4 - A momentary indicator that responds to a disruption of the incoming<br />
CRC. This indicator is applicable in only CRC-4 framing modes.<br />
• E-Bit - A momentary indicator that responds to the E-bit.<br />
• Pattern - A momentary indicator that responds to a disruption of the incoming<br />
pattern.<br />
• Frame Slip - A momentary indicator that responds when the test set<br />
encountered a disruption of the incoming frame pattern.<br />
316 Chapter 11
E1 Analyzer<br />
<strong>Measurement</strong> Results<br />
• Recv Level - The voltage level of the signal measured at the Rx jack.<br />
• Frequency - The frequency of the signal measured at the Rx jack. The E1 Pulses<br />
indicator must be active for this measurement to be displayed.<br />
• Elapsed Time - Indicates the amount of elapsed time since the last measurement<br />
reset.<br />
• BPV Errors - A tally of the number of BPV errors since the last measurement<br />
reset.<br />
• BPV Error Rate - The percent ratio of BPV errors to total bits transmitted since<br />
the last measurement reset.<br />
• BPV Errd Secs - The number of one second intervals since the last<br />
measurement reset that contained BPV errors.<br />
• Frame Errors - A tally of the number of Frame errors since the last<br />
measurement reset.<br />
• Frame Error Rate - The percent ratio of frame errors to total bits transmitted<br />
since the last measurement reset.<br />
• Frame Errd Secs - A tally of the number of one-second intervals since the last<br />
measurement reset that contained frame errors.<br />
• Signal Loss - A tally of the number of one-second intervals since the last<br />
measurement reset that contained signal errors.<br />
• Frame Sync Loss - A tally of the number of one-second intervals since the last<br />
measurement reset that contained frame sync loss.<br />
• Excess Zeros - A tally of the number of one-second intervals since the last<br />
measurement reset that contained excess zeros.<br />
• All 1's - A tally of the number of one-second intervals since the last<br />
measurement reset that contained the AIS pattern.<br />
• Error Free Seconds - A tally of the number of one-second intervals that were<br />
error free since the last measurement reset.<br />
• Errored Seconds - A tally of the number of one-second intervals since the last<br />
measurement reset that contained errors such as BPVs and frame errors.<br />
• Severe Errored Seconds - A tally of the number of one-second intervals since<br />
the last measurement reset that were severely errored.<br />
• Available Seconds - A tally of the number of one-second intervals since the last<br />
measurement reset that were available for service.<br />
• Unavailable Seconds - A tally of the number of one-second intervals since the<br />
E1 Analyzer<br />
Chapter 11 317
E1 Analyzer<br />
<strong>Measurement</strong> Results<br />
last measurement reset that were unavailable for service.<br />
• Degraded Minutes - A tally of the number of one-second intervals since the last<br />
measurement reset that were degraded.<br />
• Slip Rate - The percent ratio of frames cycle slips of the incoming signal<br />
relative to the slip reference choice on the setup menu - since the last<br />
measurement reset.<br />
• Peak + Wander - The peak amount of positive wander, measured in bit<br />
intervals, since the last measurement reset.<br />
• Peak - Wander - The peak amount of negative wander, measured in bit<br />
intervals, since the last measurement reset.<br />
• +Frame Slips - A tally of the number of positive frame slips that occurred since<br />
the last measurement reset.<br />
• –Frame Slips - A tally of the number of positive frame slips that occurred since<br />
the last measurement reset.<br />
• Bit Errors - A tally of the number of bit errors that occurred since the last<br />
measurement reset.<br />
• Bit Error Rate - The percent ratio of bit errors to total bits transmitted since the<br />
last measurement reset.<br />
• Pattern Sync Loss - A tally of the number of times the pattern detector lost<br />
synchronization since the last measurement reset.<br />
• Test Data Rate - The measured data rate of the bit stream.<br />
Status Indicators<br />
E1 Analyzer<br />
• E1 Pulses - The test set is receiving pulses at the receive jack. Frame pulses<br />
alone are not sufficient to activate this indicator. There must be pulses present in<br />
the payload field.<br />
• HDB3 - A HDB3 pulse pattern was detected on the incoming signal at the<br />
receive jack. Note that only certain patterns transmit HDB3 pulse patterns. The<br />
pattern must contain at least 4 consecutive zeroes before a HDB3 pattern is sent.<br />
The QRSS pattern will generate HDB3 while an idle E1 circuit transmitting all<br />
1's will not.<br />
• Frame Sync - A frame sync pattern matches the one specified in the setup<br />
screen on the test set.<br />
• Pattern Sync - The received pattern matches the one specified in the setup<br />
318 Chapter 11
E1 Analyzer<br />
<strong>Measurement</strong> Results<br />
screen on the test set.<br />
Testing and Fault Mitigation<br />
The complexity of E1 testing certainly parallels or possibly exceeds that of RF tests<br />
at a cell site. Shadowing efforts and customer expression have shown that most cell<br />
site technicians reduce the complexities of backhaul E1 testing down into a series of<br />
well-defined steps. These tests are often not comprehensive but are often sufficient<br />
to determine the continuity of an E1 circuit with a high degree of confidence. Often<br />
times the test sequence is developed by an experienced technician and is determined<br />
by finding the shortest path to an adequate measurement on a particular piece of<br />
readily available equipment. E1 testing often involves one technician on each end of<br />
a circuit. In the case of wireless, the technician at the switch end, very experienced<br />
at backhaul testing, is often working with a field technician that has a broader-based<br />
set of knowledge and is often less experienced in backhaul testing. The switch<br />
technician quickly develops a test procedure that involves the least amount of verbal<br />
instructions with the field technician.<br />
E1 Facility Summary<br />
This next section describes the elements in a typical E1 backhaul facility. Based on<br />
this information, typical fault conditions and what procedures are typically followed<br />
to restore service to the E1 span.<br />
With almost no exception all circuits leased from the TELCO are routed through at<br />
least one central office facility. If this were not the case, planning and managing the<br />
repeaters needed for E1 transmission would be an onerous task.<br />
Isolating Faults Using Test Equipment<br />
Test equipment can be used to generate and monitor alarms and errors. Test<br />
equipment is connected to the E1 facility in a variety of ways. BNC jacks are often<br />
available on the equipment. When the plug is inserted into the jack the circuit is<br />
interrupted. Sometimes a monitor jack is available. When a plug is inserted into the<br />
monitor jack the circuit is not interrupted and a -20 dB signal is available at the jack.<br />
When none of these is available the signal may be monitored at a connection block,<br />
sometimes referred to as a “punch-down block”. The table below, “E1 Facility<br />
Access Methods,” describes the three typical access methods.<br />
E1 Facility Access Methods<br />
E1 Analyzer<br />
Chapter 11 319
E1 Analyzer<br />
<strong>Measurement</strong> Results<br />
Access method<br />
Test set<br />
configuration<br />
Notes<br />
Test Jacks Terminated Circuit is broken when plug is inserted into<br />
jack. The test equipment is normally set to<br />
“Terminate” and provides 75 Ohm<br />
termination.<br />
Monitor Jacks Monitor The circuit is not interrupted when the plug<br />
is inserted into the jack. The test set, when<br />
set to “Monitor”, provides a 75 Ohm<br />
connection, and expects the signal to be<br />
20 dB lower than the original signal.<br />
Direct<br />
Connection to<br />
“Punch Down<br />
Block”.<br />
Bridged<br />
The circuit is not interrupted in this mode.<br />
The test set impedance is greater than 1000<br />
Ohms so that the circuit is minimally<br />
affected. Test set is set to “Bridged.”<br />
WARNING<br />
It is important to remember that 90 volts DC may exist between the transmit<br />
and receive pair. This voltage can be lethal!<br />
E1 Analyzer<br />
320 Chapter 11
E1 Analyzer<br />
More Information About E1 Testing<br />
More Information About E1 Testing<br />
Auto Configuration Flow Diagram<br />
Selecting Auto Config causes the test set to analyze the incoming E1 signal and<br />
align the setup choices to that signal. If the incoming data pattern is not recognized,<br />
then 'NA Live Data' is displayed, and the pattern selected on the setup screen will<br />
remain unchanged. If HDB3 codes are detected, then this condition will be indicated<br />
and the line code parameter will be set accordingly. If setup was configured for<br />
HDB3 prior to selecting Auto Config and the pattern detected does not have<br />
sufficient zeros density to warrant HDB3, then 'NA' will be displayed, and the line<br />
code choice in the setup screen will remain unchanged. Finally, the framing format<br />
is detected, displayed and selection changed accordingly on the setup screen.<br />
E1 Analyzer<br />
Chapter 11 321
E1 Analyzer<br />
More Information About E1 Testing<br />
Figure 11-5<br />
Flow Diagram for Auto Configuration<br />
Auto Configuration<br />
Selected<br />
E1 Pulses Detected<br />
No<br />
Display "No<br />
Signal Present"<br />
Yes<br />
Determine the Fame Format and Set<br />
the Hardware Accordingly<br />
Report Current<br />
Framing<br />
Format<br />
Report Pattern<br />
Yes<br />
Pattern Detected<br />
No<br />
Changes Hardware<br />
to 64 x 1<br />
No<br />
Pattern Detected<br />
Yes<br />
Changes Hardware<br />
to Full E1<br />
Yes<br />
64 x 1 Selected<br />
Pattern<br />
Detected on<br />
Current<br />
Channel<br />
No<br />
Yes<br />
Report Pattern<br />
Yes<br />
No<br />
Pattern Detected<br />
No<br />
Sets Pattern to<br />
2 23 - 1<br />
Report Pattern<br />
as "Live"<br />
Report Channel<br />
Format (Future<br />
Enhancement)<br />
Report Line<br />
Code<br />
E1 Analyzer<br />
322 Chapter 11
E1 Analyzer<br />
More Information About E1 Testing<br />
Terminology<br />
CRC<br />
To an observer, the data on a live E1 Circuit appears to be random. Fortunately there<br />
is a way to perform limited testing when the circuit is designed for Cyclic<br />
Redundancy Checksum (CRC) format. A portion of the frame bits is reserved for a<br />
CRC sequence that can be monitored for performance. Simply stated, the CRC bits<br />
are calculated on the transmit end and inserted as a pattern on the frame bit. The<br />
CRC pattern depends on the pattern of other bits transmitted by the E1 Circuit. The<br />
receiving end also computes this pattern and compares it with the CRC that was<br />
computed and sent by the transmitting end. Since both ends use the same rules for<br />
computing the pattern, the CRC bits will be identical when all the bits involved in<br />
the computation agree. The CRC check provides good insight into the end-to-end<br />
integrity of the E1 Circuit and should be used in conjunction with other tests that can<br />
help determine what the cause of the CRC failure might be.<br />
BPV<br />
The electrical signals on a properly functioning E1 circuit conform to the<br />
specification set forth in the standards. The standards specify that the presence of a<br />
voltage indicates a data '1' and the absence of a voltage represents a data '0'. Each<br />
occurrence of a data one produces a voltage for half a bit interval that is the opposite<br />
polarity of the previous bit, hence the name Alternate Mark Inversion (AMI). The<br />
alternating nature of the signal ensures that the average DC voltage is zero, allowing<br />
it be transformer coupled. Transformer coupling ensures a high degree of common<br />
mode rejection to the equipment that processes E1 signals.<br />
High Density Bipolar 3 (HDB3) is an exception to AMI that replaces runs of 4<br />
consecutive zeroes with a special code that violates the AMI rules. It allows greater<br />
flexibility of data pattern by enhancing repeater synchronization by increasing pulse<br />
density thereby providing greater throughput.<br />
When the electrical signal does not adhere to the alternating nature of the waveform<br />
specification a BiPolar Violation (BPV) has occurred. This can happen for a number<br />
of reasons, many of which are outside the control of the wireless technician. One<br />
cause may be from electrical noise radiating from florescent lamps, motors, or spark<br />
plug ignition circuits coupling into the copper lines that carry E1 signals. Shielded<br />
cable is often chosen for E1 circuits to minimize electrical interference. This shield<br />
must be grounded to be effective. When the cable is spliced or terminated, the shield<br />
on both cables should be connected together. Often the transmit and receive signals<br />
are routed in separate cable bundles.<br />
The receive signal is often much weaker that the transmit signal. Cross talk in the<br />
E1 Analyzer<br />
Chapter 11 323
E1 Analyzer<br />
More Information About E1 Testing<br />
cable pairs can cause the transmit signal to appear on the receive pair and interfere<br />
with the low-level receive signal.<br />
Frame<br />
Pulses streaming in an E1 circuit would be meaningless if there were no way to<br />
organize the pulses into a meaningful structure.<br />
E1 Analyzer<br />
324 Chapter 11
12 GSM and EDGE Analyzer<br />
“Using the GSM Analyzer and the EDGE Analyzer” on page 327<br />
“Performing a Basic GSM or EDGE Transmitter <strong>Measurement</strong>” on page 328<br />
“Interpreting the Display” on page 333<br />
“Optional GSM and EDGE Tx Analyzer <strong>Measurement</strong> Settings” on page 337<br />
“Setting your Scan Mode” on page 338<br />
“Setting the Start Frequency/Channel” on page 341<br />
“Setting the Frequency or Channel Step Size” on page 342<br />
“Setting the Stop Frequency/Channel” on page 343<br />
“Setting the Channel Standard” on page 344<br />
“Setting the Units of Measure for the Graphical Display” on page 344<br />
“Setting Autoscale” on page 345<br />
“Setting the Reference Level” on page 346<br />
“Setting Scale/Division” on page 346<br />
“Using GPS for Frequency Reference and Location Information” on page 346<br />
“Setting the Display Position” on page 347<br />
“Setting Auto Order” on page 348<br />
“Setting Bar Top and Units” on page 348<br />
“Setting Mid-Bar” on page 349<br />
“Setting Zoom” on page 349<br />
“Setting Zoom Offset” on page 350<br />
“Setting Zoom Interval” on page 351<br />
“Setting PvT Mask” on page 352<br />
“Setting Auto Mode Bar Count” on page 352<br />
“Setting Slot Synchronization” on page 353<br />
“Setting TS# (w/ BCCH)” on page 354<br />
“Setting the Pass/Fail Limits” on page 355<br />
“Adding a Marker” on page 363<br />
GSM and EDGE Analyzer<br />
325
GSM and EDGE Analyzer<br />
GSM and EDGE Analyzer<br />
“Compensating for the Loss of an External Cable and Attenuator” on page 365<br />
“Setting Average, Sweep, and Restart” on page 366<br />
“GSM and EDGE Modulation and Band Information” on page 369<br />
“Metrics Provided by the GSM and EDGE Analyzer <strong>Measurement</strong>” on page 371<br />
“Interpretation of GSM and EDGE Analyzer <strong>Measurement</strong> Results” on<br />
page 374<br />
326 Chapter 12
GSM and EDGE Analyzer<br />
Using the GSM Analyzer and the EDGE Analyzer<br />
Using the GSM Analyzer and the EDGE Analyzer<br />
Option 230 - GSM Analyzer enables measurements of GSM signals. Similarly,<br />
Option 235 - EDGE Analyzer enables measurements of EDGE signals.<br />
This chapter explains how to make standard GSM measurements using Option 230 -<br />
GSM Analyzer. It also explains how to make the more advanced EDGE<br />
measurements for which you will require Option 235 - EDGE Analyzer.<br />
GSM and EDGE transmitter measurements verify proper transmitter performance<br />
and can be made with the base station in service or out of service. Important metrics<br />
include:<br />
GSM and EDGE Analyzer<br />
• Frequency Error<br />
• BSIC (Base Station Identification Code)<br />
• TSC (Training Sequence Code)<br />
• Modulation Type<br />
• TS Pwr (Timeslot Power) in dBm<br />
• TS Pwr in W<br />
• Occupied Bandwidth<br />
• I/Q Offset<br />
• RMS Phase Error<br />
• Peak Phase Error<br />
• RMS EVM (Error Vector Magnitude)<br />
• Peak EVM<br />
• 95%tile EVM (95th Percentile EVM)<br />
NOTE<br />
RMS EVM, Peak EVM, and 95%tile EVM measurements are only available if<br />
Option 235 - EDGE Analyzer is installed<br />
Chapter 12 327
GSM and EDGE Analyzer<br />
GSM and EDGE Analyzer<br />
Using the GSM Analyzer and the EDGE Analyzer<br />
Three different graphical views of your measurements are available. You can view:<br />
• Channel Scanner<br />
• Power versus Time<br />
• Spectrum<br />
The measurements conform to the following GSM standards:<br />
• GSM 450<br />
• GSM 480<br />
• GSM 850<br />
• GSM 900<br />
• DCS 1800<br />
• PCS 1900<br />
CAUTION<br />
The maximum power for the RF In port and the RF Out/SWR port of the test set is<br />
+20 dBm (100 mW). The maximum power for the Power Sensor port is +24 dBm<br />
(300 mW). When directly coupled to a base station, the test set can be damaged by<br />
excessive power applied to any of these three ports.<br />
To prevent damage in most situations when you directly couple the test set to a base<br />
station, use the high power attenuator between the test set and the BTS.<br />
NOTE<br />
To prevent unusual display information from being shown, ensure that you have<br />
selected a valid GSM Standard. It is possible for you to set a Chan Std that allows<br />
you to enter a lower Stop channel number than the current Start channel number<br />
resulting in unexpected information in the display. This is because some of the<br />
channel standards have discontinuities and reversals in channel numbers.<br />
Performing a Basic GSM or EDGE Transmitter <strong>Measurement</strong><br />
The first step in measuring GSM or EDGE transmitter performance is to take the<br />
base station out of service or, for an in-service measurement, connect the test set to<br />
the coupled port. You must also know the channel or frequency of the EDGE signal<br />
to be analyzed.<br />
328 Chapter 12
GSM and EDGE Analyzer<br />
Using the GSM Analyzer and the EDGE Analyzer<br />
To Make a GSM or EDGE Tx Analyzer <strong>Measurement</strong>:<br />
Step<br />
1 Mode<br />
Notes<br />
2 [Tx Analyzer] or [Over Air] Regardless of whether you select<br />
[Tx Analyzer] or [Over Air] at this stage, you<br />
will access the same measurement software in<br />
the analyzer. This means you can select<br />
[Tx Analyzer] and proceed to make an Over<br />
the Air measurement, and you can select [Over<br />
Air] and proceed to make a Tx <strong>Measurement</strong>.<br />
The two options here are presented for your<br />
convenience only, and have no further effect.<br />
3 [GSM Analyzer] or [GSM<br />
(w/ EDGE) Analyzer],<br />
or<br />
[GSM Over Air] or [GSM<br />
(w/ EDGE) Over Air]<br />
4 [Chan Std]<br />
5 Highlight the channel<br />
standard you want using the<br />
up and down arrow buttons.<br />
6 [Select]<br />
7 On [Scan Mode] select<br />
Range, Auto, or List.<br />
The wording on the key label is dependent on<br />
whether or not you have Option 235 - EDGE<br />
Analyzer installed, and also whether you<br />
selected [Tx Analyzer] or [Over Air] at Step 2.<br />
Select a valid GSM standard such as<br />
GSM-850 or EGSM-900. Notice that some<br />
valid standards may not be visible to you until<br />
you scroll down the screen.<br />
Each time you press this menu key, the<br />
selected option changes.<br />
GSM and EDGE Analyzer<br />
a. If you selected Range or<br />
Auto, go to step 8.<br />
b. If you selected List, go to<br />
step 9.<br />
Chapter 12 329
GSM and EDGE Analyzer<br />
GSM and EDGE Analyzer<br />
Using the GSM Analyzer and the EDGE Analyzer<br />
Step<br />
8 If you selected Range or<br />
Auto, you may set Start and<br />
Stop frequency/channel and<br />
the Step Size of the display<br />
range.<br />
Notes<br />
a. On [Start Chan] enter the<br />
channel or frequency<br />
using the numeric<br />
keypad.<br />
b. On [Stop Chan] enter the<br />
channel or frequency<br />
using the numeric keypad<br />
c. On [Step Size] enter the<br />
channel or frequency step<br />
using the numeric keypad<br />
9 If you selected List, you may<br />
select and change any or all<br />
of the available Freqs/Chans<br />
on the List screen.<br />
Menu keys label will read “Chan” or “Freq”<br />
depending on the Units you have selected.<br />
In addition, you may add Freqs/Chans to the<br />
list or delete Freqs/Chans from the list. Refer<br />
to “Adding or Deleting a List Item” on<br />
page 340.<br />
a. [List]<br />
b. Highlight the list item<br />
you want using the up<br />
and down arrow buttons.<br />
c. Enter a new Freq./Chan.<br />
d. Repeat steps b and c as<br />
necessary.<br />
e. [OK]<br />
10 Press [Display].<br />
330 Chapter 12
Step<br />
11 On [Position], specify the<br />
frequency or the channel<br />
(depending on your units of<br />
measurement - see Step 8) at<br />
which you wish to make your<br />
measurement.<br />
12 Press [View].<br />
13 Select the measurement view<br />
you want shown by pressing<br />
one of the three buttons listed<br />
below:<br />
a. [Channel Scanner]<br />
b. [Power vs. Time]<br />
c. [Spectrum]<br />
14 Connect to the base station or<br />
to your antenna.<br />
GSM and EDGE Analyzer<br />
Using the GSM Analyzer and the EDGE Analyzer<br />
Notes<br />
The position you specify (specified either by<br />
frequency or by channel number) is the<br />
position at which your measurement will be<br />
made. The numeric results that are displayed<br />
refer to this frequency or channel only.<br />
This position is indicated graphically on the<br />
Channel Scanner view (see Step 13) by a<br />
vertical yellow line.<br />
You can select any one of the three graphical<br />
views. The numeric results shown in the lower<br />
portion of the screen are independent of the<br />
graphical view you select. Changing your<br />
graphical view does not change which<br />
numeric results are displayed.<br />
The numeric results are always taken from the<br />
Position (frequency or channel) that you<br />
specified at Step 11, and from the first slot at<br />
that Position, that is, from Slot 0. This applies<br />
even when you are not actually displaying<br />
Slot 0 on the screen.<br />
If you are making a transmitter measurement,<br />
connect your analyzer to the base station. If<br />
you are making an Over the Air measurement,<br />
connect your analyzer to its antenna.<br />
GSM and EDGE Analyzer<br />
Chapter 12 331
GSM and EDGE Analyzer<br />
GSM and EDGE Analyzer<br />
Using the GSM Analyzer and the EDGE Analyzer<br />
Step<br />
Notes<br />
Out of service connection for a Transmitter <strong>Measurement</strong><br />
In service connection for a Transmitter <strong>Measurement</strong><br />
332 Chapter 12
Step<br />
GSM and EDGE Analyzer<br />
Using the GSM Analyzer and the EDGE Analyzer<br />
Notes<br />
GSM and EDGE Analyzer<br />
In service connection for an Over the Air <strong>Measurement</strong><br />
15 [Level/Location]<br />
16 [Autoscale]<br />
Interpreting the Display<br />
The GSM/EDGE Tx Analyzer screen is divided into two sections in the Channel<br />
Scanner and the Spectrum views, and into three sections in the Power versus Time<br />
view:<br />
• The graphics display, that is, the graphic chart taking up most of the upper part<br />
of the screen<br />
• The metrics display, that is, the table of values at the bottom of the screen<br />
• In the Power versus Time view only, the third section displayed is of slot<br />
information. This is the row of power values at the top of the screen<br />
NOTE<br />
The results metrics that are displayed will not correlate precisely with the plot that<br />
you see. This is because the analyzer performs two or more separate data<br />
acquisitions - at least one to gather the data for the graphical plot, and a separate<br />
acquisition to display data for the metrics. Any small variances between the two<br />
Chapter 12 333
GSM and EDGE Analyzer<br />
GSM and EDGE Analyzer<br />
Using the GSM Analyzer and the EDGE Analyzer<br />
displayed results are due to variances in the signal over time.<br />
The Graphics Display contains the graphical view of your measurement. You can<br />
change this view by pressing [Display] and [View], and then selecting one of the<br />
three view options available to you. The three views are:<br />
• Channel Scanner: The graphics display shows channel power. In this display,<br />
the power of each selected channel is shown. The Y-axis labels display the<br />
absolute power (dBm), and dB/division. The X-axis labels display the frequency<br />
or channel number. Channel Scanner in GSM Tx Analyzer and in EDGE Tx<br />
Analyzer both use the ‘Peak Detector’ and therefore the displayed bar height is<br />
the 'Peak power in the acquisition'.<br />
• Power vs. Time with Zoom set to “Slots”: The graphics display shows power<br />
versus time for the channel selected using [Display], then [Position]. In this<br />
display, the power of the channel (or of part of the channel) you selected is<br />
shown against time. The Y-axis labels display the absolute power (dBm), and<br />
dB/division. The X-axis represents time, and shows from 60 µs before the first<br />
of your specified timeslots, up to 60 µs after the last of your specified timeslots.<br />
You can display one or more of the eight slots in the channel of interest. The<br />
number of slots displayed is determined by your Zoom Interval setting. For more<br />
details, see “Setting Zoom Interval” on page 351.<br />
The left-most slot displayed is determined by your Zoom Offset setting. For<br />
more details, see “Setting Zoom Offset” on page 350.<br />
NOTE It is worth noting that regardless of which slot you have displayed in the graphics<br />
portion of the screen, the displayed metrics always refer to the first slot, that is, to<br />
Slot 0.<br />
If the Power versus Time mask is set to On, you will also see a mask indicating<br />
the lower and the upper limits for the channels you are displaying. The lower<br />
limit mask is displayed in yellow, and the upper limit mask in magenta (pink).<br />
The green signal trace must lie between these limits for it to pass the Mask Test.<br />
For more details on the PvT mask, see “Setting PvT Mask” on page 352.<br />
The power in each slot is displayed at the top of the screen, together with the<br />
results of the mask test for each slot. A ‘P’ in a green circle represents a Pass,<br />
and an ‘F’ in a red triangle represents a Fail. Each red triangle has an arrow<br />
beside it that indicates whether it is the upper limit, the lower limit, or both<br />
limits that have failed. A double-ended arrow indicates both upper and lower<br />
limits failed, an arrow pointing up indicates an upper limit failure, and an arrow<br />
pointing down indicates a lower limit failure. These pass and fail indicators are<br />
334 Chapter 12
GSM and EDGE Analyzer<br />
Using the GSM Analyzer and the EDGE Analyzer<br />
shown below. The entire channel’s Pass or Fail status is also displayed.<br />
GSM and EDGE Analyzer<br />
• Power vs. Time with Zoom set to “Rise/Fall”: The graphics display shows<br />
power versus time for part of the selected slot ([Zoom Offset]) in the selected<br />
channel ([Display], then [Position]). The power of the slot you selected is shown<br />
against time.<br />
The Y-axis labels display the absolute power (dBm), and dB/division. The<br />
X-axis represents time. The portion of the X-axis to the left of the gray bar<br />
represents from 60 µs before the start, to 60 µs after the start, of the slot of<br />
interest.<br />
The gray bar in the center of the display represents the central portion of the slot<br />
for which no data is displayed.<br />
The portion of the X-axis to the right of the gray bar represents from 60 µs<br />
before the end, to 60 µs after the end, of the slot of interest. The power values<br />
(“TS Pwr”) at the top of the screen represent the maximum TS Power for each of<br />
the eight slots in the frame.<br />
The slot whose trace is displayed is determined by your Zoom Offset setting. For<br />
more details, see “Setting Zoom Offset” on page 350.<br />
NOTE It is worth noting that regardless of which slot you have displayed in the graphics<br />
portion of the screen, the displayed metrics always refer to the first slot, that is, to<br />
Slot 0.<br />
If the Power versus Time mask is set to On, you will also see a mask indicating<br />
the lower and the upper limits for the channels you are displaying. The lower<br />
limit mask is displayed in yellow, and the upper limit mask in magenta (pink).<br />
The green signal trace must lie between these limits for it to pass the Mask Test.<br />
For more details on the PvT mask, see “Setting PvT Mask” on page 352.<br />
The power in each slot is displayed at the top of the screen, together with the<br />
results of the mask test for each slot. A green ‘P’ represents a Pass, and a red ‘F’<br />
Chapter 12 335
GSM and EDGE Analyzer<br />
GSM and EDGE Analyzer<br />
Using the GSM Analyzer and the EDGE Analyzer<br />
represents a Fail. The entire channel’s Pass or Fail status is also displayed.<br />
• Spectrum: The graphics display shows spectral power for the selected slot<br />
([Slot Sync]) in the selected channel ([Display], then [Position]) measured in a<br />
500 kHz acquisition bandwidth. The Y-axis labels display the absolute power<br />
(dBm), and dB/division. The X-axis represents frequency, and shows the<br />
frequency across the Channel selected with your [Position] setting.<br />
The metrics display shows measurement parameters displayed below the trace<br />
display in three columns and five rows—each with a value and units (the exceptions<br />
are BSIC, TSC, and Mod Type, which have no units.) For more information about<br />
the parameters in the metric display, refer to “Metrics Provided by the GSM and<br />
EDGE Analyzer <strong>Measurement</strong>” on page 371.<br />
The frequency reference indicator is at the bottom right, and the time reference<br />
indicator at the bottom left. For each indicator the text indicates which reference you<br />
have chosen. A green LED indicates a locked condition, a red “X,” an unlocked<br />
condition.<br />
336 Chapter 12
GSM and EDGE Analyzer<br />
Optional GSM and EDGE Tx Analyzer <strong>Measurement</strong> Settings<br />
Optional GSM and EDGE Tx Analyzer <strong>Measurement</strong><br />
Settings<br />
You can change several optional measurement parameters in the GSM/EDGE Tx<br />
Analyzer:<br />
GSM and EDGE Analyzer<br />
• “Setting your Scan Mode” on page 338<br />
• “Adding or Deleting a List Item” on page 340<br />
• “Setting the Start Frequency/Channel” on page 341<br />
• “Setting the Frequency or Channel Step Size” on page 342<br />
• “Setting the Stop Frequency/Channel” on page 343<br />
• “Setting the Channel Standard” on page 344<br />
• “Setting the Units of Measure for the Graphical Display” on page 344<br />
• “Setting Autoscale” on page 345<br />
• “Setting the Reference Level” on page 346<br />
• “Setting Scale/Division” on page 346<br />
• “Using GPS for Frequency Reference and Location Information” on page 346<br />
• “Setting the Display Position” on page 347<br />
• “Setting Auto Order” on page 348<br />
• “Setting Bar Top and Units” on page 348<br />
• “Setting Mid-Bar” on page 349<br />
• “Setting Zoom” on page 349<br />
• “Setting Zoom Offset” on page 350<br />
• “Setting Zoom Interval” on page 351<br />
• “Setting PvT Mask” on page 352<br />
• “Setting Auto Mode Bar Count” on page 352<br />
• “Setting Slot Synchronization” on page 353<br />
• “Setting TS# (w/ BCCH)” on page 354<br />
• “Setting the Pass/Fail Limits” on page 355<br />
Chapter 12 337
GSM and EDGE Analyzer<br />
GSM and EDGE Analyzer<br />
Optional GSM and EDGE Tx Analyzer <strong>Measurement</strong> Settings<br />
• “Adding a Marker” on page 363<br />
• “Compensating for the Loss of an External Cable and Attenuator” on page 365<br />
• “Setting Average, Sweep, and Restart” on page 366<br />
Setting your Scan Mode<br />
The selected Scan Mode provides three different methods of specifying the channels<br />
you wish to look at. These are Range Mode, Auto Mode, and List Mode:<br />
• Range Mode: All channels between the Start and Stop Freq/Channel are<br />
displayed. The channels are separated by the Freq/Channel Step value. Metrics<br />
are only computed for the single channel indicated by the vertical yellow line,<br />
which can be adjusted by using the [Display], [Position] softkeys. For further<br />
details, see “Setting the Display Position” on page 347.<br />
If the channel you specified using the [Position] softkey can not be demodulated,<br />
you will see the message “No valid Slot Sync found” displayed on the graphic<br />
portion of the screen for all three views, and the numeric metrics at the bottom<br />
of the screen will be dashed out. In the Power versus Time view, the PvT Mask<br />
will not be shown even if you have switched it on.<br />
To Set the Scan Mode to Range:<br />
Step<br />
Notes<br />
1 [Freq/Chan]<br />
2 [Scan Mode] Each time you press this key, the selected<br />
option changes. Set Scan Mode to Range.<br />
3 [Start Freq] Enter the start frequency or the start channel<br />
for your desired scan, and terminate it with<br />
the appropriate Units key.<br />
4 [Stop Freq] Enter the stop frequency or the stop channel<br />
for your desired scan, and terminate it with<br />
the appropriate Units key.<br />
3 [Step Size] Enter the step size for your desired scan, and<br />
terminate it with the appropriate Units key.<br />
For further details on Step Size, see “Setting<br />
the Start Frequency/Channel” on page 341.<br />
338 Chapter 12
GSM and EDGE Analyzer<br />
Optional GSM and EDGE Tx Analyzer <strong>Measurement</strong> Settings<br />
• Auto Mode: All channels between the Start and Stop Freq/Channel are<br />
examined, but only the channels with the highest power are measured. Metrics<br />
are computed for all of the displayed channels, but are only displayed for the<br />
single channel indicated by the vertical yellow line, which can be adjusted by<br />
using the [Display], [Position] softkeys. For further details, see “Setting the<br />
Display Position” on page 347.<br />
The maximum number of displayed channels is 20.<br />
If the channel you specified using the [Position] softkey can not be demodulated,<br />
you will see the message “No valid Slot Sync found” displayed on the graphic<br />
portion of the screen for all three views, and the numeric metrics at the bottom<br />
of the screen will be dashed out.<br />
If the channel determined by your Position setting is not found within the high<br />
power channels found by this Auto Mode, you will see the message “Display<br />
Position not found within Auto Mode Bar Count”.<br />
To Set the Scan Mode to Auto:<br />
GSM and EDGE Analyzer<br />
Step<br />
Notes<br />
1 [Freq/Chan]<br />
2 [Scan Mode] Each time you press this key, the selected<br />
option changes. Set Scan Mode to Auto.<br />
3 [Start Freq] Enter the start frequency or the start channel<br />
for your desired scan, and terminate it with<br />
the appropriate Units key.<br />
4 [Stop Freq] Enter the stop frequency or the stop channel<br />
for your desired scan, and terminate it with<br />
the appropriate Units key.<br />
5 [Step Size] Enter the step size for your desired scan, and<br />
terminate it with the appropriate Units key.<br />
For further details on Step Size, see “Setting<br />
the Start Frequency/Channel” on page 341.<br />
6 [Setup], [Auto Mode Bar<br />
Count]<br />
Enter the number of channels you wish to<br />
display on the screen. The maximum number<br />
is 20. Terminate your choice by pressing the<br />
[Enter] key.<br />
• List Mode: All channels in the list are measured. Metrics are computed for all of<br />
Chapter 12 339
GSM and EDGE Analyzer<br />
GSM and EDGE Analyzer<br />
Optional GSM and EDGE Tx Analyzer <strong>Measurement</strong> Settings<br />
the displayed channels, but are only displayed for the single channel indicated<br />
by the vertical yellow line, which can be adjusted by using the [Display],<br />
[Position] softkeys. The maximum number of list items is 40. For further details,<br />
see “Setting the Display Position” on page 347.<br />
To Set the Scan Mode to List:<br />
Step<br />
Notes<br />
1 [Freq/Chan]<br />
2 [Scan Mode] Each time you press this key, the selected<br />
option changes. Set Scan Mode to List. For<br />
further details on how to add or remove items<br />
from your Scan List, see below.<br />
Adding or Deleting a List Item<br />
You may add and delete list items from the Scan Mode List for the specific<br />
channel/frequencies you want to measure.<br />
NOTE<br />
If you duplicate a channel entry in your list, you might notice that the graphical<br />
results for the duplicated channel vary. This is because the analyzer takes a separate<br />
acquisition of data for each of the channel plots. The variance you see in the<br />
displayed plots are due to the signal’s variance over time from one acquisition to the<br />
next.<br />
340 Chapter 12
GSM and EDGE Analyzer<br />
Optional GSM and EDGE Tx Analyzer <strong>Measurement</strong> Settings<br />
To Add or Delete a List Item:<br />
Step<br />
1 Enter channels into the list.<br />
a. Use [Insert Row] to add a<br />
channel. First highlight a<br />
row, then use [Insert Row]<br />
to insert a row below the<br />
highlighted row. Then<br />
enter its number using the<br />
numeric keypad and [Up]<br />
or [Dn] to complete each<br />
entry.<br />
b. Use [Delete Row] to<br />
remove channels you do<br />
not want displayed. Select<br />
a channel you want to<br />
remove using the up and<br />
down arrow buttons. Then<br />
press [Delete Row] to<br />
remove the selected<br />
channel.<br />
c. [Ok]<br />
Notes<br />
The maximum number of list items is 40. If<br />
the number of channels displayed is 20 or<br />
fewer, a single bar graph is used to display<br />
them.<br />
If the number of channels displayed is greater<br />
than 20, two bar graphs are used to display<br />
them. Half of your selected channels are<br />
shown in a horizontal bar graph displayed in<br />
the upper portion of the screen, and the<br />
remaining channels are shown similarly in<br />
the lower portion of the screen.<br />
GSM and EDGE Analyzer<br />
Setting the Start Frequency/Channel<br />
The Start Frequency or Start Channel sets the frequency (or channel) from which<br />
any scan will start. You can specify either a Start Frequency or a Start Channel,<br />
depending on your Units setting. This is described in “Setting the Units of Measure<br />
for the Graphical Display” on page 344.<br />
If your Start Channel mode is set to Chan, you can only view one channel at a time.<br />
The Stop Channel key will be disabled, and set to the same value as your Start<br />
Channel.<br />
Start Channel and Start Band are independent of each other, so if you switch from<br />
Start Channel to Start Band, your previous Start Band and Stop Band settings will be<br />
restored.<br />
If the channel you specified using the [Position] softkey can not be demodulated,<br />
Chapter 12 341
GSM and EDGE Analyzer<br />
GSM and EDGE Analyzer<br />
Optional GSM and EDGE Tx Analyzer <strong>Measurement</strong> Settings<br />
you will see the message “No valid Slot Sync found” displayed on the graphic<br />
portion of the screen for all three views, and the numeric metrics at the bottom of the<br />
screen will be dashed out. In the Power versus Time view, the PvT Mask will not be<br />
shown even if you have switched it on.<br />
To Set the Start Frequency or Start Channel:<br />
Step<br />
1 [Start Freq] or [Start<br />
Chan]<br />
2 Enter the desired<br />
channel or frequency<br />
step using the numeric<br />
keypad.<br />
3 [Up] or [Dn]<br />
OR<br />
[Hz], [kHz], [MHz], or<br />
[GHz]<br />
Notes<br />
This choice depends on the [Units] mode you are<br />
using.<br />
This choice depends on the [Units] mode you are<br />
using. When specifying channel numbers,<br />
terminate your selection with [Up] or [Dn] to<br />
specify either an Uplink channel or Downlink<br />
channel.<br />
When specifying a frequency, terminate your<br />
selection with one of the frequency units of<br />
measure.<br />
Notice (and verify) that the number you entered<br />
appears below the Start Freq or Start Chan text on<br />
the corresponding button.<br />
Setting the Frequency or Channel Step Size<br />
The Channel or Frequency Step sets the distance between the measured channels.<br />
The GSM standard has a channel spacing of 200 kHz, but the signal is actually<br />
somewhat wider than that. Therefore service providers often space their channels<br />
400 kHz apart. The entered step value must be a multiple of 200 kHz.<br />
You can specify your Step Size as a frequency band or as a number of channels,<br />
depending on your Units setting. This is described in “Setting the Units of Measure<br />
for the Graphical Display” on page 344.<br />
342 Chapter 12
GSM and EDGE Analyzer<br />
Optional GSM and EDGE Tx Analyzer <strong>Measurement</strong> Settings<br />
To Set the Frequency or Channel Step Size:<br />
Step<br />
Notes<br />
1 [Step Size] This choice depends on the [Units] mode you are<br />
using.<br />
2 Enter the desired<br />
channel or frequency<br />
step using the numeric<br />
keypad.<br />
3 [Up] or [Dn]<br />
or<br />
[Hz], [kHz], [MHz], or<br />
[GHz]<br />
This choice depends on the [Units] mode you are<br />
using.<br />
When specifying a frequency, terminate your<br />
selection with one of the frequency units of<br />
measure.<br />
Notice (and verify) that the number you entered<br />
appears below the Chan Step or Freq Step text on<br />
the corresponding button.<br />
GSM and EDGE Analyzer<br />
Setting the Stop Frequency/Channel<br />
• The Stop Frequency or Stop Channel sets the end frequency (or channel) to<br />
which the analyzer will scan. You can specify either a Stop Frequency or a Stop<br />
Channel, depending on your Units setting. This is described in “Setting the Units<br />
of Measure for the Graphical Display” on page 344.<br />
To Set the Stop Frequency or the Stop Channel:<br />
Step<br />
1 [Stop Freq] or [Stop<br />
Chan]<br />
2 Enter the desired<br />
channel or frequency<br />
step using the numeric<br />
keypad.<br />
Notes<br />
This choice depends on the [Units] mode you are<br />
using.<br />
Chapter 12 343
GSM and EDGE Analyzer<br />
GSM and EDGE Analyzer<br />
Optional GSM and EDGE Tx Analyzer <strong>Measurement</strong> Settings<br />
Step<br />
3 [Enter]<br />
OR<br />
[Hz], [kHz], [MHz], or<br />
[GHz]<br />
Notes<br />
This choice depends on the [Units] mode you are<br />
using. When specifying channel numbers,<br />
terminate your selection with [Up] or [Dn] to<br />
specify either an Uplink Channel or Downlink<br />
Channel.<br />
When specifying a frequency, terminate your<br />
selection with one of the frequency units of<br />
measure.<br />
Notice (and verify) that the number you entered<br />
appears below the Stop Freq or Stop Chan text on<br />
the corresponding button.<br />
Setting the Channel Standard<br />
You can specify one of the recognized GSM or EDGE standards for your<br />
measurements.<br />
When you select your Channel Standard, the Start and Stop channels are<br />
automatically set to valid channels within the selected band only if your Units are<br />
set to Chan. If your Units are set to Freq, the Start and Stop Frequencies will not<br />
change from your current settings. For details on setting Units, see “Setting the<br />
Units of Measure for the Graphical Display” on page 344.<br />
To Set the Channel Standard:<br />
Step<br />
Notes<br />
1 [Chan Std] This displays a list of the pre-loaded channel<br />
standards.<br />
2 Highlight the Channel<br />
Standard you want.<br />
3 [Select]<br />
Use the Up and the Down arrows, or the knob, to<br />
navigate to the standard you want. Note that some<br />
standards might be off the top or the bottom of the<br />
screen.<br />
Setting the Units of Measure for the Graphical Display<br />
You can set your analyzer to display the graphical measurement results in either<br />
344 Chapter 12
GSM and EDGE Analyzer<br />
Optional GSM and EDGE Tx Analyzer <strong>Measurement</strong> Settings<br />
absolute frequency or in channel numbers. This setting also determines whether<br />
frequency or channel number is displayed on the following keys:<br />
• Start Freq<br />
• Step Size<br />
• Stop Freq or Stop Chan<br />
To Set the Units:<br />
GSM and EDGE Analyzer<br />
Step<br />
Notes<br />
1 [Freq/Chan]<br />
2 [Units] Each time you press this menu key, the selected<br />
option changes.<br />
Note and verify that the correct unit of measure<br />
(either frequency or channel number) is displayed<br />
on the X-axis beneath the graphics on the screen<br />
(Channel Scanner view only), and on the keys<br />
listed above.<br />
NOTE<br />
If the relevant frequencies on your display do not correspond to a valid channel<br />
number in the channel plan of the GSM or EDGE standard you have selected, both<br />
the graphics display and the key labels will show a “?”. For more details on setting<br />
channel standards, see “Setting the Channel Standard” on page 344.<br />
Setting Autoscale<br />
When [Autoscale] is selected, [Ref Level] and [Scale/Div] are automatically<br />
calculated and any manually entered values will be reset. [Ref Level] and<br />
[Scale/Div] are only reset once when you press [Autoscale]. That is, they will not be<br />
repeatedly reset as your measurement results change.<br />
To Set the Reference Level and Scale/Div Automatically:<br />
Step<br />
Notes<br />
1 [Level/Location]<br />
2 [Autoscale]<br />
Chapter 12 345
GSM and EDGE Analyzer<br />
GSM and EDGE Analyzer<br />
Optional GSM and EDGE Tx Analyzer <strong>Measurement</strong> Settings<br />
Setting the Reference Level<br />
You can adjust the absolute amplitude represented by the top graticule line on the<br />
display (the reference level). Also, you can set the units per vertical graticule<br />
division on the display. When [Autoscale] is selected, [Ref Level] and [Scale/Div]<br />
are automatically calculated and any manually entered values will be reset.<br />
To Set the Reference Level:<br />
Step<br />
Notes<br />
1 [Level/Location]<br />
2 Enter the reference level<br />
using the numeric keypad,<br />
the up and down arrows, or<br />
the knob.<br />
3 [dBm] or [W]<br />
Setting Scale/Division<br />
You can use [Scale/Div] to determine the spacing of the graticule lines on your<br />
display.<br />
To Set the Scale/Division:<br />
Step<br />
Notes<br />
1 [Level/Location]<br />
2 [Scale/Div]<br />
3 Enter the graticule spacing<br />
value using the numeric<br />
keypad<br />
4 [dB]<br />
Using GPS for Frequency Reference and Location Information<br />
You can use GPS Location data to verify your location and to provide an accurate<br />
frequency reference.<br />
To Display GPS Location Information:<br />
346 Chapter 12
Step<br />
1 [Level/Location]<br />
2 On [Show GPS<br />
Location] select On.<br />
GSM and EDGE Analyzer<br />
Optional GSM and EDGE Tx Analyzer <strong>Measurement</strong> Settings<br />
Notes<br />
Displays GPS satellite location information. Uses the<br />
internal GPS to capture the location at which a<br />
measurement is made. The GPS information can be<br />
used to return to the same location. The Time Ref<br />
(Freq/Chan/Time Ref mode) button must be set to<br />
Internal GPS for this function to be active.<br />
Information logged includes longitude, latitude,<br />
altitude (feet/meters), and the number of satellites<br />
tracked.<br />
Each time you press this menu key, the selected<br />
option changes.<br />
3 Highlight [On] Toggle to [On] to display GPS satellite location<br />
information. Toggle to [Off] to remove the location<br />
information.<br />
GSM and EDGE Analyzer<br />
Setting the Display Position<br />
You can set the location or position of the channel of interest. This determines the<br />
channel used to calculate the measurement metrics displayed in the metrics portion<br />
of the display. It also determines the center frequency in Spectrum View, and the<br />
channel from where slot information is displayed in the Power versus Time view.<br />
In the Channel Scanner view only, the channel of interest is indicated by vertical<br />
yellow line.<br />
To Set the Display Position:<br />
Step<br />
Notes<br />
1 [Display]<br />
2 [Position]<br />
Chapter 12 347
GSM and EDGE Analyzer<br />
GSM and EDGE Analyzer<br />
Optional GSM and EDGE Tx Analyzer <strong>Measurement</strong> Settings<br />
Step<br />
3 Enter the desired channel<br />
number or frequency using<br />
the numeric keypad, the up<br />
and down arrows, or the<br />
knob.<br />
4 If Frequency/Channel Units<br />
have been set to Chan, select<br />
[Up] or [Dn]<br />
If Frequency/Channel Units<br />
have been set to Freq, select<br />
[Hz], [kHz], [MHz], or<br />
[GHz]<br />
Notes<br />
If you use the up and down arrows or knob to<br />
change the channel number/frequency, the<br />
terminator units keys will not be displayed.<br />
However, the display will update to the<br />
entered number of bars after a few seconds.<br />
Setting Auto Order<br />
You can select the order that the channel bars are displayed. You can set them to be<br />
arranged in order of the relative power level or in order of the channel frequency. If<br />
you select Pwr, the bars are arranged in order of descending power. If you select<br />
Freq, the bars are arranged in order of ascending frequency.<br />
This setting is only available when View is set to Channel Scanner, and Scan Mode<br />
is set to Auto.<br />
To Set Auto Order:<br />
Step<br />
Notes<br />
1 [Display]<br />
2 On [Auto Order] select Pwr<br />
or Freq.<br />
Each time you press this menu key, the<br />
selected option changes.<br />
Setting Bar Top and Units<br />
You can set the channel power to be displayed (in dBm or watts) at the top of the<br />
channel bars. This only affects the power displayed on the top of the bars. The<br />
vertical scale of the graph does not change.<br />
This setting is only available when View is set to Channel Scanner.<br />
348 Chapter 12
To Set Bar Top:<br />
Step<br />
1 [Display]<br />
GSM and EDGE Analyzer<br />
Optional GSM and EDGE Tx Analyzer <strong>Measurement</strong> Settings<br />
2 On [Bar Top] select Off or<br />
Pwr.<br />
2 On [Units] select dBm or<br />
Watts.<br />
Notes<br />
Each time you press this menu key, the<br />
selected option changes.<br />
Each time you press this menu key, the<br />
selected option changes.<br />
GSM and EDGE Analyzer<br />
Setting Mid-Bar<br />
You can set BSIC to be displayed at the middle of the channel bars.<br />
This setting is only available when View is set to Channel Scanner, and when Scan<br />
Mode is set to Auto or to List.<br />
To Set Mid-Bar:<br />
Step<br />
Notes<br />
1 [Display]<br />
2 On [Mid-Bar] select Off or<br />
BSIC.<br />
Each time you press this menu key, the<br />
selected option changes.<br />
Setting Zoom<br />
You can zoom into one or more of the eight slots in a channel, or you can zoom in<br />
further to look at just the rising and falling edges of a single slot. You use this Zoom<br />
setting to determine whether the analyzer displays the complete slot(s), or only the<br />
rising and falling edges.<br />
If you select Zoom Rise/Fall to look at the rising and falling edges of a single slot,<br />
and your Zoom Interval is set to greater than one slot, the slot whose rising and<br />
falling edges are displayed is the slot corresponding to your Zoom Offset setting.<br />
This setting is only available when View is set to Power versus Time.<br />
For details on setting the Zoom Interval, see “Setting Zoom Interval” on page 351.<br />
For details on setting the Zoom Offset, see “Setting Zoom Offset” on page 350.<br />
Chapter 12 349
GSM and EDGE Analyzer<br />
GSM and EDGE Analyzer<br />
Optional GSM and EDGE Tx Analyzer <strong>Measurement</strong> Settings<br />
To Set Zoom:<br />
Step<br />
1 [Display]<br />
2 On [Zoom] select Slots or<br />
Rise/Fall.<br />
Notes<br />
Each time you press this menu key, the<br />
selected option changes.<br />
Setting Zoom Offset<br />
You can zoom into one or more of the eight slots in a channel using a combination of<br />
this Zoom Offset and the Zoom Interval. If you decide to zoom in on a portion of the<br />
channel, that is, you zoom in on fewer than the eight slots available, you can use the<br />
Zoom Offset setting to determine which of the slots is displayed first on the left side<br />
of the screen.<br />
Your Zoom Offset setting also determines which slot is displayed when Zoom is set<br />
to Rise/Fall, that is, you choose to display only the rising and falling edges of a<br />
single slot.<br />
The possible values you can set for Zoom Offset depend on your Zoom setting. If<br />
Zoom is set to Slots, that is, you want to display one or more slots or partial slots,<br />
you can set Zoom Offset to any value between 0.25 and 7.75 using 0.25 increments.<br />
If your Zoom setting is Rise/Fall, you can only set Zoom Offset to a whole integer<br />
value between 0 and 7.<br />
Your Zoom Offset setting is also limited by your Zoom Interval setting. With eight<br />
slots in any one channel, your Zoom Offset and your Zoom Interval settings can not<br />
total any more than eight slots. As an example, if your Zoom Interval is already set<br />
to five, you can not set this Zoom Offset any higher than three. Using the same<br />
example, if you want to set your Zoom Offset higher than three, you must first lower<br />
your Zoom Interval setting.<br />
NOTE<br />
It is this Zoom Offset setting here that is limited by your Zoom Interval setting. Be<br />
aware that this Zoom Offset setting can be reduced by a later setting of a high Zoom<br />
Interval.<br />
NOTE<br />
The first of the eight slots in a channel is always referred to as Slot 0, and the final<br />
slot in the channel is Slot 7.<br />
This setting is only available when View is set to Power versus Time.<br />
350 Chapter 12
GSM and EDGE Analyzer<br />
Optional GSM and EDGE Tx Analyzer <strong>Measurement</strong> Settings<br />
For details on setting the Zoom Interval, see “Setting Zoom Interval” on page 351.<br />
For details on setting Zoom, see “Setting Zoom” on page 349.<br />
To Set Zoom Offset:<br />
Step<br />
Notes<br />
GSM and EDGE Analyzer<br />
1 [Display]<br />
2 [Zoom Offset] Enter the slot number using the numeric<br />
keypad, and terminate your selection using the<br />
[Slots] softkey. You can also use the knob or<br />
the up and down arrow keys to set the Zoom<br />
Offset.<br />
Setting Zoom Interval<br />
You can zoom into one or more of the eight slots in a channel using a combination of<br />
this Zoom Interval and the Zoom Offset. If you decide to zoom in on a portion of the<br />
channel, that is, you zoom in on fewer than the eight slots available, you use this<br />
Zoom Interval setting to determine how many of the eight slots are displayed.<br />
The possible values you can set for Zoom Interval depend on your Zoom setting. If<br />
Zoom is set to Slots, that is, you want to display one or more slots or partial slots,<br />
you can set Zoom Interval to any value between 0.25 and 8.0 using 0.25 increments.<br />
If your Zoom setting is Rise/Fall, this key is not available because the Rise/Fall<br />
display is focussed on one particular slot only.<br />
Your Zoom Offset is limited by this Zoom Interval setting. With eight slots in any<br />
one channel, your Zoom Offset and your Zoom Interval settings can not total any<br />
more than eight slots. If you enter a Zoom Interval figure here that, when added to<br />
the Zoom Offset setting, totals more than eight, your Zoom Offset setting will be<br />
reduced so that Zoom Offset + Zoom Interval = 8.<br />
This Zoom Interval setting is only available if View is set to Power versus Time and<br />
if Zoom is set to Slots.<br />
NOTE<br />
It is this Zoom Interval setting here that can have an effect on your Zoom Offset<br />
setting. Your Zoom Offset setting is limited by your setting of Zoom Interval here.<br />
NOTE<br />
The first of the eight slots in a channel is always referred to as Slot 0, and the final<br />
slot in the channel is Slot 7.<br />
Chapter 12 351
GSM and EDGE Analyzer<br />
GSM and EDGE Analyzer<br />
Optional GSM and EDGE Tx Analyzer <strong>Measurement</strong> Settings<br />
For details on setting the Zoom Offset, see “Setting Zoom Offset” on page 350.<br />
For details on setting Zoom, see “Setting Zoom” on page 349.<br />
To Set Zoom Interval:<br />
Step<br />
Notes<br />
1 [Display]<br />
2 [Zoom Interval] Enter the number of slots using the numeric<br />
keypad, and terminate your selection using the<br />
[Slots] softkey. You can also use the knob or<br />
the up and down arrow keys to set the Zoom<br />
Interval.<br />
Setting PvT Mask<br />
You can choose to display or to hide the Power versus Time Mask using the PvT<br />
Mask softkey.<br />
The EDGE specifications set minimum and maximum limits to the slot power when<br />
measured over time. The PvT mask displays these limits on the screen. The Lower<br />
Limit Mask is shown in yellow, and the Upper Limit Mask is shown in magenta<br />
(pink).<br />
This setting is only available when View is set to Power versus Time.<br />
To Set the PvT Mask:<br />
Step<br />
Notes<br />
1 [Display]<br />
2 On [PvT Mask], select On or<br />
Off.<br />
Each time you press this menu key, the<br />
selected option changes.<br />
Setting Auto Mode Bar Count<br />
The <strong>Measurement</strong> Bar Count setting allows you to alter the number of channel data<br />
bars displayed when you set the [Scan Mode] to Auto. The channels that have the<br />
highest power will be displayed, up to the number of channels you have set.<br />
If you set you Start Freq mode to Chan, your E7495 test set displays only one<br />
channel, so your Auto Mode Bar Count is automatically set to 1. If you later set your<br />
352 Chapter 12
GSM and EDGE Analyzer<br />
Optional GSM and EDGE Tx Analyzer <strong>Measurement</strong> Settings<br />
Start Freq mode to Freq so you can display several channels, your Auto Mode Bar<br />
Count setting will stay at 1. You will need to change Auto Mode Bar Count<br />
manually if you want to display more than one channel, or set your Scan Mode to<br />
Range or to List.<br />
To Set the <strong>Measurement</strong> Auto Mode Bar Count:<br />
GSM and EDGE Analyzer<br />
Step<br />
Notes<br />
1 [Setup]<br />
2 [Auto Mode Bar Count]<br />
3 Enter the number of bars<br />
to display using the<br />
numeric keypad, the up<br />
and down arrows, or the<br />
knob.<br />
The maximum number of bars that can be<br />
displayed is 20.<br />
4 [Enter] If you use the up and down arrows or the knob to<br />
change the bar count number, the Enter key will<br />
not be displayed. However, the display will update<br />
to the entered number of bars after a few seconds.<br />
Setting Slot Synchronization<br />
The Slot Sync setting allows you to specify which slot is used for demodulation.<br />
The default is Auto.<br />
If Option 235 - EDGE Analyzer is installed, both GMSK and 8PSK signals can be<br />
demodulated. If Option 235 - EDGE Analyzer is not installed, only GMSK signals<br />
can be demodulated.<br />
The different slot synchronization settings available to you are:<br />
• Highest Pwr: The slot that is demodulated is the active slot with the highest<br />
power<br />
• Auto: The analyzer demodulates a randomly selected active slot.<br />
• GMSK: The analyzer demodulates a randomly selected active GMSK slot. This<br />
option is grayed out if Option 235 - EDGE Analyzer is not installed.<br />
• 8PSK: The analyzer demodulates the randomly selected active 8PSK slot. This<br />
option is grayed out if Option 235 - EDGE Analyzer is not installed.<br />
• Specified TS# (w/ BCCH): The analyzer demodulates the specified TS#<br />
Chapter 12 353
GSM and EDGE Analyzer<br />
GSM and EDGE Analyzer<br />
Optional GSM and EDGE Tx Analyzer <strong>Measurement</strong> Settings<br />
(Training Sequence number) if a BCCH (Broadcasting Control Channel) is<br />
detected. If Option 235 - EDGE Analyzer is not installed, only GMSK signals<br />
can be demodulated. For more details on TS#, refer to “Setting TS# (w/ BCCH)”<br />
on page 354.<br />
If no BCCH is detected, Auto is used even though Specified TS# (w/ BCCH) is<br />
still selected.<br />
If you have Slot Sync set to Specified TS# (w/ BCCH), and no BCCH channel is<br />
found, the message “BCCH not found - using Auto Slot Sync” will be displayed.<br />
To Set the Slot Synchronization:<br />
Step<br />
Notes<br />
1 [Setup]<br />
2 [Slot Sync]<br />
3 [Highest Pwr], [Auto],<br />
[GMSK], [8PSK], or<br />
[Specified TS#<br />
(w/ BCCH)]<br />
[GMSK] and [8PSK] are only available if you have<br />
Option 235 - EDGE Analyzer installed.<br />
Setting TS# (w/ BCCH)<br />
The TS# (w/ BCCH) setting allows you to specify which Training Sequence is used<br />
for slot synchronization. This parameter is disabled unless Slot Sync is set to<br />
Specified TS# (w/ BCCH). For more details on setting Slot Sync, refer to “Setting<br />
Slot Synchronization” on page 353.<br />
To Set the Training Sequence Number:<br />
Step<br />
Notes<br />
1 [Setup]<br />
2 [Specified TS#<br />
(w/ BCCH)]<br />
3 Enter the TS# using the<br />
numeric keypad.<br />
4 [Enter]<br />
This key is disabled unless Slot Sync is set to<br />
Specified TS# (w/ BCCH)<br />
You must enter a number between 0 and 7.<br />
354 Chapter 12
GSM and EDGE Analyzer<br />
Optional GSM and EDGE Tx Analyzer <strong>Measurement</strong> Settings<br />
Setting the Pass/Fail Limits<br />
The measurement limits settings allow you to alter the values of a range of upper<br />
and lower test limits. All of these settings, with the exception of Channel Scanner<br />
Power, affect the metrics color display: red represents fail, green represents pass.<br />
You can switch each measurement limit On or Off independently of all other limits.<br />
If one or more measurement limits is turned On, and they all pass, the summary text<br />
“ALL PASS” is displayed below the numerical results of the screen. If any limit test<br />
fails, the summary text “FAILURE” is displayed in the same area.<br />
GSM and EDGE Analyzer<br />
NOTE<br />
A pass or fail of the Channel Scanner Power Limit does not affect the summary<br />
status.<br />
“Setting Channel Scanner Power Limits” on page 355<br />
“Setting Frequency Error Limits” on page 356<br />
“Setting TS Power Limits” on page 357<br />
“Setting the I/Q Offset Limit” on page 358<br />
“Setting the RMS Phase Error Limit” on page 359<br />
“Setting the Peak Phase Error Limit” on page 360<br />
“Setting the RMS EVM Limit” on page 360<br />
“Setting the Peak EVM Limit” on page 361<br />
“Setting the 95th Percentile EVM Limit” on page 362<br />
Setting Channel Scanner Power Limits<br />
You can set upper and lower Channel Scan Power Limits to determine which of the<br />
channels scanned are valid. Channels whose power falls within your specified limits<br />
are displayed in green on your graphics display, and are further indicated with a “P”<br />
for “Pass”. Channels whose power either falls below the lower limit, or exceeds the<br />
upper limit, are displayed in red on your graphics display, and are indicated with an<br />
“F” for “Fail”. A pass or fail of this Channel Scanner Power Limit does not affect<br />
the summary status message. If Channel Power Limits are set to Off, the channels<br />
are displayed in blue on the screen, and no Pass/Fail indicator is shown.<br />
If Chan Scan Pwr Limits are set to On, the limits you specified are represented on<br />
the graphics display with two yellow lines. The High Limit line is indicated with<br />
“H>”, and the Low Limit line with “
GSM and EDGE Analyzer<br />
GSM and EDGE Analyzer<br />
Optional GSM and EDGE Tx Analyzer <strong>Measurement</strong> Settings<br />
To Set the Channel Scan Upper and Lower Limits:<br />
Step<br />
1 [Setup]<br />
2 [Chan Scan Pwr Limits]<br />
3 [Limits]<br />
4 [On] or [Off]<br />
5 Set the upper limit.<br />
Notes<br />
The limit is specified in dBm.<br />
a. [High Limit]<br />
b. Enter the number on<br />
the numeric keypad.<br />
c. [dBm]<br />
6 Set the lower limit.<br />
The limit is specified in dBm.<br />
a. [Low Limit]<br />
b. Enter the number on<br />
the numeric keypad.<br />
c. [dBm]<br />
Setting Frequency Error Limits<br />
You can set upper and lower Frequency Error Limits for your Frequency Error<br />
<strong>Measurement</strong> results.<br />
If Freq Error Limits are turned On, and your measured frequency error is within the<br />
limits you have specified, the numeric result reported in the metrics portion of the<br />
screen will be displayed in green, and the Limit Pass will be indicated by “(P)” after<br />
the result. If your measured frequency error is outside your specified limits, the<br />
numeric result reported in the metrics portion of the screen will be displayed in red,<br />
and the Limit Failure will be indicated by “(F)” after the result.<br />
To Set the Frequency Error Upper and Lower Limits:<br />
Step<br />
Notes<br />
1 [Setup]<br />
356 Chapter 12
Step<br />
2 [Freq Error Limits]<br />
3 [Limits]<br />
4 [On] or [Off]<br />
5 Set the upper limit.<br />
GSM and EDGE Analyzer<br />
Optional GSM and EDGE Tx Analyzer <strong>Measurement</strong> Settings<br />
Notes<br />
GSM and EDGE Analyzer<br />
a. [High Limit]<br />
b. Enter the number on<br />
the numeric keypad.<br />
c. [ppm]<br />
6 Set the lower limit.<br />
a. [Low Limit]<br />
b. Select Auto or<br />
Manual<br />
c. If you have selected<br />
Manual in Step 6b,<br />
enter the number on<br />
the numeric keypad.<br />
d. If you have selected<br />
Manual in Step 6b,<br />
press [ppm].<br />
If you select Auto, the Low Limit is automatically<br />
set to negative (High Limit). For example, if High<br />
Limit is set to 0.05 ppm, then the Auto Low Limit<br />
is set to –0.05 ppm.<br />
If you select Manual, you must specify the limit in<br />
ppm.<br />
If you switch from Manual to Auto, and then back<br />
to Manual, the previous Manual setting is not<br />
restored.<br />
NOTE<br />
The disabled gray keys showing your High Limit and your Low Limit in Hz are for<br />
information only. They display the calculated frequency error limits in Hz. The<br />
displayed values (in Hertz) are calculated from your current frequency and your<br />
specified limits in ppm.<br />
Setting TS Power Limits<br />
You can set upper and lower Timeslot Power Limits for your TS Power<br />
<strong>Measurement</strong> results.<br />
If TS Power Limits are turned On, and your measured TS power is within the limits<br />
you have specified, the numeric results reported in the metrics portion of the screen<br />
will be displayed in green, and the Limit Pass will be indicated by “(P)” after the<br />
Chapter 12 357
GSM and EDGE Analyzer<br />
GSM and EDGE Analyzer<br />
Optional GSM and EDGE Tx Analyzer <strong>Measurement</strong> Settings<br />
results. If your measured TS Power is outside your specified limits, the numeric<br />
results reported in the metrics portion of the screen will be displayed in red, and the<br />
Limit Failure will be indicated by “(F)” after the results.<br />
To Set the TS Power Limits:<br />
Step<br />
Notes<br />
1 [Setup]<br />
2 [TS Pwr Limits]<br />
3 [Limits]<br />
4 [On] or [Off]<br />
5 Set the upper limit.<br />
a. [High Limit]<br />
b. Enter the number on<br />
the numeric keypad.<br />
c. [dBm]<br />
6 Set the lower limit.<br />
a. [Low Limit]<br />
b. Enter the number on<br />
the numeric keypad.<br />
c. [dBm]<br />
Setting the I/Q Offset Limit<br />
You can set an upper I/Q Offset Limit for your <strong>Measurement</strong> results.<br />
If I/Q Offset Limit is turned On, and your measured I/Q Offset is below the limit<br />
you have specified, the numeric results reported in the metrics portion of the screen<br />
will be displayed in green, and the Limit Pass will be indicated by “(P)” after the<br />
result. If your measured I/Q Offset is above your specified limit, the numeric result<br />
reported in the metrics portion of the screen will be displayed in red, and the Limit<br />
Failure will be indicated by “(F)” after the results.<br />
358 Chapter 12
GSM and EDGE Analyzer<br />
Optional GSM and EDGE Tx Analyzer <strong>Measurement</strong> Settings<br />
To Set the I/Q Offset Limit:<br />
Step<br />
1 [Setup]<br />
2 [I/Q Offset Limits]<br />
3 [Limits]<br />
4 [On] or [Off]<br />
5 Set the high limit.<br />
Notes<br />
GSM and EDGE Analyzer<br />
a. [High Limit]<br />
b. Enter the number on<br />
the numeric keypad.<br />
c. [dB]<br />
Setting the RMS Phase Error Limit<br />
You can set an upper RMS Phase Error Limit for your <strong>Measurement</strong> results.<br />
If RMS Ph Err Limit is turned On, and your measured RMS Phase Error is below<br />
the limit you have specified, the numeric results reported in the metrics portion of<br />
the screen will be displayed in green, and the Limit Pass will be indicated by “(P)”<br />
after the result. If your measured RMS Phase Error is above your specified limit, the<br />
numeric result reported in the metrics portion of the screen will be displayed in red,<br />
and the Limit Failure will be indicated by “(F)” after the results.<br />
To Set the RMS Phase Error Limit:<br />
Step<br />
Notes<br />
1 [Setup]<br />
2 [RMS Ph Err Limits]<br />
3 [Limits]<br />
4 [On] or [Off]<br />
Chapter 12 359
GSM and EDGE Analyzer<br />
GSM and EDGE Analyzer<br />
Optional GSM and EDGE Tx Analyzer <strong>Measurement</strong> Settings<br />
Step<br />
5 Set the high limit.<br />
a. [High Limit]<br />
b. Enter the number on<br />
the numeric keypad.<br />
c. [deg]<br />
Notes<br />
Setting the Peak Phase Error Limit<br />
You can set an upper Peak Phase Error Limit for your <strong>Measurement</strong> results.<br />
If Peak Ph Err Limit is turned On, and your measured Peak Phase Error is below the<br />
limit you have specified, the numeric results reported in the metrics portion of the<br />
screen will be displayed in green, and the Limit Pass will be indicated by “(P)” after<br />
the result. If your measured Peak Phase Error is above your specified limit, the<br />
numeric result reported in the metrics portion of the screen will be displayed in red,<br />
and the Limit Failure will be indicated by “(F)” after the results.<br />
To Set the Peak Phase Error Limit:<br />
Step<br />
Notes<br />
1 [Setup]<br />
2 [Peak Ph Err Limits]<br />
3 [Limits]<br />
4 [On] or [Off]<br />
5 Set the high limit.<br />
a. [High Limit]<br />
b. Enter the number on<br />
the numeric keypad.<br />
c. [deg]<br />
Setting the RMS EVM Limit<br />
You can set an upper RMS Error Vector Magnitude Limit for your <strong>Measurement</strong><br />
360 Chapter 12
GSM and EDGE Analyzer<br />
Optional GSM and EDGE Tx Analyzer <strong>Measurement</strong> Settings<br />
results.<br />
If RMS EVM Limit is turned On, and your measured RMS EVM is below the limit<br />
you have specified, the numeric results reported in the metrics portion of the screen<br />
will be displayed in green, and the Limit Pass will be indicated by “(P)” after the<br />
result. If your measured RMS EVM is above your specified limit, the numeric result<br />
reported in the metrics portion of the screen will be displayed in red, and the Limit<br />
Failure will be indicated by “(F)” after the results.<br />
To Set the RMS EVM Limit:<br />
GSM and EDGE Analyzer<br />
Step<br />
Notes<br />
1 [Setup]<br />
2 [RMS EVM Limits]<br />
3 [Limits]<br />
4 [On] or [Off]<br />
5 Set the high limit.<br />
a. [High Limit]<br />
b. Enter the number on<br />
the numeric keypad.<br />
c. [%]<br />
Setting the Peak EVM Limit<br />
You can set an upper Peak Error Vector Magnitude Limit for your <strong>Measurement</strong><br />
results.<br />
If Peak EVM Limit is turned On, and your measured Peak EVM is below the limit<br />
you have specified, the numeric results reported in the metrics portion of the screen<br />
will be displayed in green, and the Limit Pass will be indicated by “(P)” after the<br />
result. If your measured Peak EVM is above your specified limit, the numeric result<br />
reported in the metrics portion of the screen will be displayed in red, and the Limit<br />
Failure will be indicated by “(F)” after the results.<br />
To Set the Peak Phase Error Limit:<br />
Step<br />
Notes<br />
1 [Setup]<br />
Chapter 12 361
GSM and EDGE Analyzer<br />
GSM and EDGE Analyzer<br />
Optional GSM and EDGE Tx Analyzer <strong>Measurement</strong> Settings<br />
Step<br />
2 [Peak EVM Limits]<br />
3 [Limits]<br />
4 [On] or [Off]<br />
5 Set the high limit.<br />
Notes<br />
a. [High Limit]<br />
b. Enter the number on<br />
the numeric keypad.<br />
c. [%]<br />
Setting the 95th Percentile EVM Limit<br />
You can set an upper 95th Percentile Error Vector Magnitude Limit for your<br />
<strong>Measurement</strong> results.<br />
If 95%tile EVM Limit is turned On, and your measured 95th Percentile EVM is<br />
below the limit you have specified, the numeric results reported in the metrics<br />
portion of the screen will be displayed in green, and the Limit Pass will be indicated<br />
by “(P)” after the result. If your measured 95th Percentile EVM is above your<br />
specified limit, the numeric result reported in the metrics portion of the screen will<br />
be displayed in red, and the Limit Failure will be indicated by “(F)” after the results.<br />
To Set the Peak Phase Error Limit:<br />
Step<br />
Notes<br />
1 [Setup]<br />
2 [95%tile EVM Limits]<br />
3 [Limits]<br />
4 [On] or [Off]<br />
362 Chapter 12
Step<br />
5 Set the high limit.<br />
GSM and EDGE Analyzer<br />
Optional GSM and EDGE Tx Analyzer <strong>Measurement</strong> Settings<br />
a. [High Limit]<br />
b. Enter the number on<br />
the numeric keypad.<br />
c. [%]<br />
Notes<br />
GSM and EDGE Analyzer<br />
Adding a Marker<br />
Markers can only be used when your View is either Power versus Time, or<br />
Spectrum. The Marker keys are disabled when your View is Channel Scanner. If you<br />
activate a marker in one view, and then change to another view, the marker(s) will<br />
not be transferred to the new View. Markers in each view are independent of each<br />
other. If, however, you then return to your original view with the markers, your<br />
previous marker settings will be restored.<br />
Markers can be used on traces and masks to help you visually track up to four<br />
points. Each marker has the following settings:<br />
• Type: Provides three options, including:<br />
• Off<br />
• Normal: Places a diamond-shaped, colored marker, along with a number,<br />
1-4, on the trace.<br />
• Delta: Associated with a normal marker. Therefore, a normal marker must<br />
exist prior to creating the delta marker. The delta marker displays the<br />
difference between the normal marker position and the delta marker<br />
position. Only one delta marker can be associated with a given normal<br />
marker. The normal marker must be active when Delta is selected.<br />
• Trace: Provides three options in the Power versus Time view, and two options in<br />
the Spectrum view. The Trace options are:<br />
• RF Envelope (PvT only): Places the currently selected marker on the RF<br />
Envelope trace.<br />
• Upper Mask (PvT only): Places the currently selected marker on the Upper<br />
Mask.<br />
• Lower Mask (PvT only): Places the currently selected marker on the Lower<br />
Chapter 12 363
GSM and EDGE Analyzer<br />
GSM and EDGE Analyzer<br />
Optional GSM and EDGE Tx Analyzer <strong>Measurement</strong> Settings<br />
Mask.<br />
• Normal (Spectrum view only): Places the currently selected marker on the<br />
Normal trace, that is, on an unaveraged trace.<br />
• Averaged (Spectrum view only: Places the currently selected marker on the<br />
Averaged trace. This Trace option is only available if Averaging is turned<br />
On, and then only in the Spectrum view.<br />
• Marker to Peak: Places the active marker on the current greatest value of the<br />
specified trace. When you press this softkey, you will see 1/32 at the bottom of<br />
the key, indicating that the marker is currently placed on the highest (the “1” in<br />
1/32) of the 32 highest trace positions. This display will change every time you<br />
press Marker to Next Peak (see below).<br />
• Marker to Next Peak: Moves the active marker left or right to the next greatest<br />
value on the trace. Every time you press this softkey, the label at the bottom of<br />
the Marker to Peak softkey will cycle from 1/32 to 2/32, then to 3/32, and so<br />
forth until it reaches 32/32 At this point, when the Marker to Peak softkey is<br />
displaying 32/32, this Marker to Next Peak softkey will be deactivated, and will<br />
no longer be available to you. Your marker is then positioned on the 32nd (and<br />
last) of the 32 highest peak positions. You will need to press the Marker to Peak<br />
softkey to reactivate this Marker to Next Peak softkey.<br />
The fractional number, that is, 1/32, 2/32, and so forth, that is displayed on the<br />
Marker to Peak softkey label indicates that the marker is currently positioned on<br />
the first (1/32) of the 32 highest peak positions available, the second (2/32) of<br />
the highest peak positions, and so forth.<br />
To add a marker to a trace<br />
Step<br />
Notes<br />
1 [Marker]<br />
2 [Marker] Every time you press this<br />
softkey, the selected marker<br />
number changes by 1.<br />
3 [Type]<br />
4 [Off], [Normal], or [Delta]<br />
5 [Trace] In the Spectrum view, the Trace<br />
key will be disabled if you have<br />
Averaging switched Off.<br />
364 Chapter 12
Step<br />
GSM and EDGE Analyzer<br />
Optional GSM and EDGE Tx Analyzer <strong>Measurement</strong> Settings<br />
6 In PvT view, select [RF Envelope], [Upper<br />
Mask], or [Lower Mask].<br />
In Spectrum view, select [Normal] or<br />
[Averaged].<br />
7 Locate the marker relative to the trace:<br />
[Marker to Peak] or [Marker to Next Peak]<br />
Notes<br />
The Trace options you see<br />
depend on which view (PvT or<br />
Spectrum) you are using.<br />
GSM and EDGE Analyzer<br />
Compensating for the Loss of an External Cable and Attenuator<br />
The insertion loss of the test cable and high power attenuator must be compensated<br />
for to obtain accurate GSM power measurements. This process is called<br />
“normalization” and is described in “Measuring Two Port Insertion Loss” on<br />
page 124.<br />
The insertion loss of the combination of test cable and attenuator is accounted for as<br />
the RF In Loss, which is an offset applied to the power measurements by the test set.<br />
Step<br />
1 [Level/Location]<br />
2 [RF IN Loss]<br />
3 Enter the RF In loss using the<br />
numeric keypad.<br />
Notes<br />
If you are using a cable and additional<br />
devices connected to the antenna, enter the<br />
combined cable and device RF In loss here.<br />
The RF In loss can be obtained by<br />
measuring the Insertion loss. See “Two Port<br />
Insertion Loss” on page 123.<br />
Note: If data had been previously entered in<br />
[RF In Loss], that data will be lost and<br />
replaced by the value you enter here.<br />
4 [dB]<br />
Chapter 12 365
GSM and EDGE Analyzer<br />
GSM and EDGE Analyzer<br />
Optional GSM and EDGE Tx Analyzer <strong>Measurement</strong> Settings<br />
Setting Average, Sweep, and Restart<br />
Setting the Sweep<br />
You can select either continuous or single sweep. Continuous sweep provides<br />
repeated, ongoing measurements. Single sweep performs a single measurement that<br />
is repeated only when you push the Single button.<br />
If you have set Sweep to Single, and you are in the Power versus Time view or the<br />
Spectrum view, you will see the message “No Graph Data. Re-acquire using current<br />
Display Position” if you change your Position setting. To remove this message,<br />
either change your Position back to its original setting, or restart your measurement<br />
by pressing [Single] again. For more details on setting the Display Position, see<br />
“Setting the Display Position” on page 347.<br />
To set sweep:<br />
Step<br />
Notes<br />
1 [Average/Sweep]<br />
2 [Continuous] or [Single] Each time you press this menu key,<br />
the selected option changes.<br />
NOTE<br />
A very useful facility if you have completed a single sweep is being able to look at<br />
that sweep’s data in a variety of different ways without taking a new measurement.<br />
You can change any of the View settings (Channel Scanner, Power versus Time, or<br />
Spectrum), you can change any of the Zoom settings (Zoom, Zoom Offset, or Zoom<br />
Interval), and you can even change the Position setting. This enables you to look<br />
very closely at every aspect of one particular sweep measurement, knowing all the<br />
time that you are looking at the same measurement data every time.<br />
Setting Averaging<br />
You can choose to have averaging On or Off and set the number of averages you<br />
want to take. Averaging only applies to measuring of the channel power. You can<br />
select from the following types of averaging:<br />
• Off: Disables averaging.<br />
• Running Average: Computes the new result as the weighted sum of the last<br />
366 Chapter 12
GSM and EDGE Analyzer<br />
Optional GSM and EDGE Tx Analyzer <strong>Measurement</strong> Settings<br />
result and the new measurement. The last result is weighted by (n – 1)/n. The<br />
new result is weighted by 1/n. Each new measurement produces a new result.<br />
If you are measuring an intermittent signal and no valid demodulated signal is<br />
acquired, the numeric results will display the last valid, Running Average results<br />
until a fresh, valid signal is acquired. This enables you inspect the averaged<br />
results for poor quality, intermittent signals that might otherwise be lost.<br />
• Max Hold: Is not an average, but on a point by point basis, displays the<br />
maximum amplitude for the given frequency or channel since Max Hold was<br />
turned on. It is updated when a new maximum occurs.<br />
If you are measuring an intermittent signal and no valid demodulated signal is<br />
acquired, the numeric results will display the last valid, averaged Max Hold<br />
results until a fresh, valid signal is acquired.<br />
• Group Average: Makes the requested number of measurements, averages the<br />
measurement data, and displays the average as a single result-trace.<br />
<strong>Measurement</strong> time will vary based on the requested number of averages and can<br />
take minutes for very large number of averages.<br />
• Group Max Average: Makes the requested number of measurements before<br />
returning a single result-trace. This trace is the maximum value seen at each<br />
trace point over the requested number of averages (measurements).<br />
To set averaging:<br />
GSM and EDGE Analyzer<br />
Step<br />
Notes<br />
1 Set the number of averages.<br />
a. [Average/Sweep]<br />
b. [Average]<br />
c. Enter the number of averages<br />
using the numeric keypad.<br />
d. [Enter]<br />
Chapter 12 367
GSM and EDGE Analyzer<br />
GSM and EDGE Analyzer<br />
Optional GSM and EDGE Tx Analyzer <strong>Measurement</strong> Settings<br />
Step<br />
2 Select the type of averaging you<br />
want to apply.<br />
e. [Averaging]<br />
f. [Off], [Running Average],<br />
[Max Hold], [Group<br />
Average], or [Group Max<br />
Average]<br />
Notes<br />
NOTE<br />
These two steps can be performed in any order. However, if you turn averaging on<br />
and a large number of averages has previously been set, there may be a delay before<br />
you can change number of averages.<br />
Setting Restart<br />
When you have averaging turned On and you are in Continuous Sweep mode, you<br />
can restart the averaging by pressing the Restart menu key. The Restart key has no<br />
effect if you are in Single sweep mode.<br />
To restart averaging:<br />
Step<br />
Notes<br />
1 [Average/Sweep]<br />
2 [Restart] This key is unavailable or has no effect when<br />
Sweep is set to Single. To restart a Single<br />
Sweep measurement, press [Single].<br />
368 Chapter 12
GSM and EDGE Analyzer<br />
GSM and EDGE Modulation and Band Information<br />
GSM and EDGE Modulation and Band Information<br />
The standard includes multiple traffic channels, a control channel, and a cell<br />
broadcast channel. Although the GSM specification defines a channel spacing of<br />
200 kHz, it is worth noting that service providers often space their channels 400 kHz<br />
apart.<br />
GSM 450, GSM 480, GSM 900, GSM 850, DCS 1800, and PCS 1900 are<br />
GSM-defined frequency bands. The term GSM 900 is used for any GSM system<br />
operating in the 900 MHz band, which includes P-GSM, E-GSM, and R-GSM.<br />
Primary (or standard) GSM 900 band (P-GSM) is the original GSM band. Extended<br />
GSM 900 band (E-GSM) includes all the P-GSM band plus an additional 50<br />
channels. Railway GSM 900 band (R-GSM) includes all the E-GSM band plus<br />
additional channels.<br />
DCS 1800 is an adaptation of GSM 900, created to allow for smaller cell sizes for<br />
higher system capacity. PCS 1900 is intended to be identical to DCS 1800 except for<br />
frequency allocation and power levels. The term GSM 1800 is sometimes used for<br />
DCS 1800, and the term GSM 1900 is sometimes used for PCS 1900. For specifics<br />
on the bands, refer to “GSM and EDGE Modulation and Band Data” table below.<br />
The framing structure for GSM measurements is based on a hierarchical system<br />
consisting of timeslots, TDMA frames, multiframes, superframes, and hyperframes.<br />
One timeslot consists of 156.25 (157) symbol periods including tail, training<br />
sequence, encryption, guard time, and data bits. Eight of these timeslots make up<br />
one TDMA frame. Either 26 or 51 TDMA frames make up one multiframe. Frames<br />
13 and 26 in the 26 frame multiframe are dedicated to control channel signaling.<br />
EDGE (Enhanced Data for Global Evolution) is an enhanced version of GSM that<br />
uses 8PSK (8-Phase Shift Keying) as opposed to the GMSK (Gaussian Minimum<br />
Shift Keying) of GSM. EDGE can therefore transmit three times as many bits per<br />
symbol as GSM while using the same framing structure.<br />
GSM and EDGE Analyzer<br />
Chapter 12 369
GSM and EDGE Analyzer<br />
Table 12-1<br />
GSM and EDGE Analyzer<br />
GSM and EDGE Modulation and Band Information<br />
GSM and EDGE Modulation and Band Data<br />
GSM 450 GSM 480 GSM 850 P-GSM<br />
(GSM 900)<br />
E-GSM<br />
(GSM 900)<br />
R-GSM<br />
(GSM 900)<br />
DCS 1800<br />
(GSM<br />
1800)<br />
PCS 1900<br />
(GSM<br />
1900)<br />
Uplink<br />
(MS Transmit)<br />
450.4 to<br />
457.6 MHz<br />
478.8 to<br />
486.0 MHz<br />
824 to<br />
849 MHz<br />
890 to<br />
915 MHz<br />
880 to<br />
915 MHz<br />
876 to<br />
915 MHz<br />
1710 to<br />
1785 MHz<br />
1850 to<br />
1910 MHz<br />
Downlink<br />
(BTS Transmit)<br />
460.4 to<br />
467.6 MHz<br />
488.8 to<br />
496.0 MHz<br />
869 to<br />
894 MHz<br />
935 to<br />
960 MHz<br />
925 to<br />
960 MHz<br />
921 to<br />
960 MHz<br />
1805 to<br />
1880 MHz<br />
1930 to<br />
1990 MHz<br />
Range<br />
(ARFCN)<br />
259 to 293 306 to 340 128 to 251 1 to 124 0 to 124 and<br />
975 to 1023<br />
1 to 124 and<br />
955 to 1023<br />
512 to 885 512 to 810<br />
TX/RX Spacing<br />
(Freq.)<br />
TX/RX Spacing<br />
(Time)<br />
45 MHz 45 MHz 45 MHz 45 MHz 45 MHz 45 MHz 95 MHz 80 MHz<br />
3 timeslots 3 timeslots 3 timeslots 3 timeslots 3 timeslots 3 timeslots 3 timeslots 3 timeslots<br />
Modulation<br />
Data Rate<br />
GMSK (kbits/s):<br />
8PSK (kbits/s)<br />
270.833<br />
810<br />
270.833<br />
810<br />
270.833<br />
810<br />
270.833<br />
810<br />
270.833<br />
810<br />
270.833<br />
810<br />
270.833<br />
810<br />
270.833<br />
810<br />
Frame Period 4.615 ms 4.615 ms 4.615 ms 4.615 ms 4.615 ms 4.615 ms 4.615 ms 4.615 ms<br />
Timeslot Period 576.9 µs 576.9 µs 576.9 µs 576.9 µs 576.9 µs 576.9 µs 576.9 µs 576.9 µs<br />
GSM Bit and Symbol<br />
Period<br />
EDGE Bit and<br />
Symbol Period<br />
3.692 µs 3.692 µs 3.692 µs 3.692 µs 3.692 µs 3.692 µs 3.692 µs 3.692 µs<br />
1.235 µs 1.235 µs 1.235 µs 1.235 µs 1.235 µs 1.235 µs 1.235 µs 1.235 µs<br />
Modulation - GSM 0.3 GMSK 0.3 GMSK 0.3 GMSK 0.3 GMSK 0.3 GMSK 0.3 GMSK 0.3 GMSK 0.3 GMSK<br />
Modulation - EDGE 3π/8 8PSK 3π/8 8PSK 3π/8 8PSK 3π/8 8PSK 3π/8 8PSK 3π/8 8PSK 3π/8 8PSK 3π/8 8PSK<br />
Channel Spacing 200 kHz 200 kHz 200 kHz 200 kHz 200 kHz 200 kHz 200 kHz 200 kHz<br />
TDMA Mux 8 8 8 8 8 8 8 8<br />
Voice Coder<br />
Bit Rate<br />
13 kbits/s 13 kbits/s 13 kbits/s 13 kbits/s 13 kbits/s,<br />
5.6 kbits/s<br />
13 kbits/s 13 kbits/s 13 kbits/s<br />
370 Chapter 12
GSM and EDGE Analyzer<br />
Metrics Provided by the GSM and EDGE Analyzer <strong>Measurement</strong><br />
Metrics Provided by the GSM and EDGE Analyzer<br />
<strong>Measurement</strong><br />
This section contains descriptions of the individual GSM transmit parameters in the<br />
metrics display of the screen. The “Interpretation of GSM Tx Analyzer<br />
<strong>Measurement</strong> Results” section contains expected result values and possible causes<br />
of error if the expected results are not met.<br />
GSM and EDGE Analyzer<br />
Frequency<br />
Frequency of the channel indicated by the vertical yellow line on the Channel<br />
Scanner display. The position of this yellow line can be adjusted by using the<br />
[Display], [Position] softkeys. For further details, see “Setting the Display Position”<br />
on page 347.<br />
Frequency Error<br />
Frequency error is the frequency difference between your transmitter's actual center<br />
frequency and the frequency (or channel) you entered.<br />
BSIC (Base Station Identification Code)<br />
A two digit number that identifies the base station for the indicated channel. It<br />
consists of the PLMN color code with a range from 0 to 7, and the S color code with<br />
a range from 0 to 7. The BSIC is shown in Decimal format (8 * NCC) + BCC. For<br />
example, if the NCC is 4, BCC is 3, the BSIC will be 35 (4*8+3 = 35). BSIC is<br />
transmitted on a synchronization channel and is used to identify a cell and to<br />
indicate the timing sequence being used.<br />
• BCC = Base station Color Code<br />
• BSIC = Base Station Identity Code<br />
• NCC = Network Color Code<br />
• PLMN = Public Land Mobile Network<br />
TSC<br />
TSC (Training Sequence Code) is a single digit integer from 0 to 7, “n/a (Sync)” if<br />
the demodulated slot is a GMSK Sync burst. The training Sequence is in the center<br />
of every burst, and is used to determine the start and stop of the useful part of the<br />
burst.<br />
Chapter 12 371
GSM and EDGE Analyzer<br />
GSM and EDGE Analyzer<br />
Metrics Provided by the GSM and EDGE Analyzer <strong>Measurement</strong><br />
Mod Type<br />
Modulation Type can be either GMSK or 8PSK. GSM signals use GMSK<br />
modulation, and EDGE signals use 8PSK modulation.<br />
TS Pwr (Timeslot Power)<br />
The average power of the highest power timeslot in the acquired frame. This is the<br />
absolute power level and displayed in both dBm and microWatts.<br />
OBW (Occupied Bandwidth)<br />
This is the 99% power bandwidth of the centered 500 kHz span at the channel<br />
frequency. In other words, the total power of 500 kHz span centered at the channel<br />
frequency is computed, then the bandwidth that contains 99% of the total power is<br />
returned as the occupied bandwidth.<br />
I/Q Offset<br />
I/Q origin offset is a value in dB of the I and Q error (magnitude squared) offset<br />
from the origin. It indicates the magnitude of the carrier feedthrough signal. When<br />
there is no carrier feedthrough, I/Q Offset is zero.<br />
RMS and Peak Phase Error<br />
Phase error is the fundamental measure of modulation quality in GSM and EDGE<br />
systems. Since GSM and EDGE systems use relative phase to transmit information,<br />
the phase accuracy of the GSM or EDGE transmission is critical to the system’s<br />
performance, and ultimately to its effective range.<br />
The Phase Error metrics are only reported for GSM signals with their GMSK<br />
modulation. Phase Error is not reported for EDGE signals, with their 8PSK<br />
modulation, since this measurement of signal quality is reported as part of the Error<br />
Vector Magnitude metric. For more details on Error Vector Magnitude<br />
measurements with EDGE signals, see “RMS, Pk, and 95%tile Error Vector<br />
Magnitude” on page 373.<br />
The phase error is computed by measuring the test signal and computing the<br />
difference between the phase of the transmitted signal and the phase of a<br />
theoretically perfect signal.<br />
RMS Phase Error: This is the RMS of the phase error (in degrees) between the<br />
measured phase and the ideal phase of a TCH timeslot. The GSM standard specifies<br />
the RMS phase error not to exceed 5 degrees during the useful part of the GSM<br />
burst.<br />
Pk Phase Error: Peak phase error is the maximum phase error (in degrees) between<br />
372 Chapter 12
GSM and EDGE Analyzer<br />
Metrics Provided by the GSM and EDGE Analyzer <strong>Measurement</strong><br />
the measured phase and the ideal phase of a TCH timeslot, at a single instant. The<br />
GSM standard specifies the peak phase error not to exceed 20 degrees during the<br />
useful part of the GSM burst.<br />
RMS, Pk, and 95%tile Error Vector Magnitude<br />
Error Vector Magnitude (EVM) is used as a measure of the quality of a signal, and<br />
represents the difference, in both phase and magnitude, between a theoretically<br />
perfect signal and the actual signal received.<br />
Another measure of quality similar to EVM is Modulation Error ratio (MER),<br />
which is sometimes referred to as Carrier to Interference Ratio (C/I). For further<br />
details on MER and C/I, see “Modulation Error Ratio (MER) and Carrier to<br />
Interference Ratio (C/I)” on page 376.<br />
GSM and EDGE Analyzer<br />
NOTE<br />
RMS EVM, Peak EVM, and 95%tile EVM measurements are only available if<br />
Option 235 - EDGE Analyzer is installed<br />
RMS EVM: This is the RMS of the EVM (Error Vector Magnitude), and is only<br />
reported for 8PSK modulated signals, that is, for EDGE signals only and not for<br />
GSM signals. EVM is measured and calculated over the useful part of the burst, and<br />
is shown as a percentage.<br />
The EVM metrics are only reported for EDGE signals with their 8PSK modulation.<br />
EVM is not reported for GSM signals, with their GMSK modulation, since this<br />
measurement of signal quality is reported as the Phase Error metric. For more details<br />
on Phase Error measurements with GSM signals, see “RMS and Peak Phase Error”<br />
on page 372.<br />
Pk EVM: This is the Peak of the EVM (Error Vector Magnitude), and is only<br />
reported for 8PSK modulated signals, that is, for EDGE signals only and not for<br />
GSM signals. EVM is measured and calculated over the useful part of the burst, and<br />
is shown as a percentage.<br />
95%tile EVM: This is the 95th Percentile of the EVM (Error Vector Magnitude),<br />
and is only reported for 8PSK modulated signals, that is, for EDGE signals only and<br />
not for GSM signals. In other words, it is the EVM value below which 95% of all<br />
measurements fall. EVM is measured and calculated over the useful part of the<br />
burst, and is shown as a percentage.<br />
Chapter 12 373
GSM and EDGE Analyzer<br />
GSM and EDGE Analyzer<br />
Interpretation of GSM and EDGE Analyzer <strong>Measurement</strong> Results<br />
Interpretation of GSM and EDGE Analyzer<br />
<strong>Measurement</strong> Results<br />
This section contains expected result values and possible causes of error if the<br />
expected results are not met.<br />
Frequency Error<br />
The GSM standard specifies very tight frequency error performance. In the GSM<br />
900 band, the 0.05 ppm (parts-per-million) specification translates to only 45 Hz<br />
error.<br />
Frequency error measurements indicate synthesizer/phase lock loop performance.<br />
This is especially important in a BTS with frequency hopping active. Poor<br />
frequency error measurements can show, for example, that a synthesizer is failing to<br />
settle quickly enough as it shifts frequency between transmissions. Poor frequency<br />
error can cause a multitude of problems, for example, the target receiver may be<br />
unable to gain lock, and the transmitter may cause interference with other users.<br />
You will need to use an external reference or GPS (if available) in order to achieve<br />
an accurate frequency error reading.<br />
BSIC (Base Station Identity Code)<br />
If the BSIC can not be decoded, dashes will be displayed. If it is not as expected,<br />
check the base station settings against the plan.<br />
TS Pwr (Timeslot Power)<br />
Maximum Timeslot Power is the measure of in-channel power for GSM Systems.<br />
The purpose of the Maximum Timeslot Power measurement is to determine the<br />
power delivered to the antenna system in the radio frequency/channel under test.<br />
The Maximum Timeslot Power measurement verifies the accuracy of the<br />
transmitted RF carrier power.<br />
If the maximum timeslot power is lower than expected, verify you have a good<br />
connection to the RF output of the base station. Also, verify the cable you are using<br />
to connect to the base station is not faulty. A low power may also indicate an issue<br />
with the power amplifier.<br />
Inaccurate channel power (high or low) may indicate an incorrect power setting at<br />
the base station.<br />
374 Chapter 12
GSM and EDGE Analyzer<br />
Interpretation of GSM and EDGE Analyzer <strong>Measurement</strong> Results<br />
Phase Error and I/Q offset<br />
Phase error (not EVM) is the fundamental measure of modulation quality in GSM<br />
systems. Since GSM systems use relative phase to transmit information, the phase<br />
accuracy of the GSM transmission is critical to the system’s performance, and<br />
ultimately to its effective range. EVM is not the primary metric for GSM signals<br />
because GMSK modulation uses constant amplitude.<br />
The phase error is computed by measuring the test signal and computing the<br />
difference between the phase of the transmitted signal and the phase of a<br />
theoretically perfect signal.<br />
Poor phase error or I/Q offset could indicate a problem with the I/Q baseband<br />
generator, filters, or modulator in the transmitter circuitry. The output amplifier in<br />
the transmitter can also create distortion that causes unacceptably high phase error.<br />
Poor phase error will reduce the ability of a receiver to correctly demodulate signals,<br />
especially in marginal signal conditions. This ultimately affects range.<br />
The Phase Error metrics are only reported for GSM signals with their GMSK<br />
modulation. Phase Error is not reported for EDGE signals, with their 8PSK<br />
modulation, since this measurement of signal quality is reported as part of the Error<br />
Vector Magnitude metric. For more details on Error Vector Magnitude<br />
measurements with EDGE signals, see below.<br />
Another measure of quality similar to EVM is Modulation Error ratio (MER),<br />
which is sometimes referred to as Carrier to Interference Ratio (C/I). For further<br />
details on MER and C/I, see “Modulation Error Ratio (MER) and Carrier to<br />
Interference Ratio (C/I)” on page 376.<br />
RMS EVM: This is the RMS of the EVM (Error Vector Magnitude). EVM is<br />
measured and calculated over the useful part of the burst, and is shown as a<br />
percentage. The EVM figure represents the difference, in both phase and magnitude,<br />
between a theoretically perfect signal and the actual signal received. The EDGE<br />
standard specifies the RMS EVM not to exceed 7.0% during the useful part of the<br />
EDGE burst, when under normal operating conditions, and excluding the effect of<br />
passive combining equipment. RMS EVM may go as high as 8% under extreme<br />
operating conditions, again excluding the effect of passive combining equipment.<br />
The EVM metrics are only reported for EDGE signals with their 8PSK modulation.<br />
EVM is not reported for GSM signals, with their GMSK modulation, since this<br />
measurement of signal quality is reported as the Phase Error metric.<br />
Pk EVM: This is the RMS of the EVM (Error Vector Magnitude). EVM is<br />
measured and calculated over the useful part of the burst, and is shown as a<br />
percentage. The EVM figure represents the difference, in both phase and magnitude,<br />
between a theoretically perfect signal and the actual signal received. The EDGE<br />
GSM and EDGE Analyzer<br />
Chapter 12 375
GSM and EDGE Analyzer<br />
GSM and EDGE Analyzer<br />
Interpretation of GSM and EDGE Analyzer <strong>Measurement</strong> Results<br />
standard specifies the Peak EVM not to exceed 11.0% during the useful part of the<br />
EDGE burst, under all operating conditions, and excluding the effect of passive<br />
combining equipment.<br />
The EVM metrics are only reported for EDGE signals with their 8PSK modulation.<br />
EVM is not reported for GSM signals, with their GMSK modulation, since this<br />
measurement of signal quality is reported as the Phase Error metric.<br />
95%tile EVM: This is the 95th Percentile of the EVM (Error Vector Magnitude). In<br />
other words, it is the EVM value below which 95% of all measurements fall. EVM<br />
is measured and calculated over the useful part of the burst, and is shown as a<br />
percentage. The EVM figure represents the difference, in both phase and magnitude,<br />
between a theoretically perfect signal and the actual signal received. The EDGE<br />
standard specifies the 95th Percentile EVM not to exceed 11.0% during the useful<br />
part of the EDGE burst, under all operating conditions, and excluding the effect of<br />
passive combining equipment.<br />
The EVM metrics are only reported for EDGE signals with their 8PSK modulation.<br />
EVM is not reported for GSM signals, with their GMSK modulation, since this<br />
measurement of signal quality is reported as the Phase Error metric.<br />
Modulation Error Ratio (MER) and Carrier to Interference Ratio (C/I)<br />
Modulation Error Ratio (also referred to as Carrier to Interference Ratio) is a<br />
measure of signal quality that is similar to EVM. A measured signal can be modeled<br />
as the sum of an ideal signal and an error signal. MER represents the ratio of the<br />
ideal signal’s power and amplitude to the error signal’s power and amplitude. The<br />
result is usually expressed in dB.<br />
Although the <strong>Agilent</strong> <strong>E7495A</strong>/B base station test sets do not display the MER (or<br />
Carrier to Interference Ratio) results, they can be calculated from the EVM result<br />
using the following equation:<br />
Modulation Error Ratio or Carrier to Interference Ratio = –20 * log(EVM/100) dB<br />
Example: If you measure a signal and find its EVM to be 2.56%, the calculation to<br />
find the MER or C/I is as follows:<br />
MER (or C/I) = –20 * log(EVM/100) dB<br />
= –20 * log(2.56/100) dB<br />
= –20 * log 0.0256 dB<br />
= –20 * –1.59176 dB<br />
so EVM of 2.56% is equivalent to MER (or C/I) = 31.84 dB<br />
376 Chapter 12
13 Power Meter<br />
“Making an Average Power <strong>Measurement</strong>” on page 378<br />
“Making a Basic Average Power <strong>Measurement</strong>” on page 379<br />
“Setting Power Meter Resolution” on page 382<br />
“Setting the Power Meter’s High and Low End-Points” on page 383<br />
“Setting the Power Meter’s Upper and Lower Limits” on page 384<br />
Power Meter<br />
377
Power Meter<br />
Making an Average Power <strong>Measurement</strong><br />
Making an Average Power <strong>Measurement</strong><br />
Power Meter<br />
NOTE<br />
Average power measurements provide a key metric in transmitter performance.<br />
Transmit power must be set accurately to achieve optimal coverage in wireless<br />
networks. If transmit power is set too high due to inaccurate power measurements,<br />
undesired interference can occur. If transmit power is set too low, coverage gaps or<br />
holes may occur. Either case affects system capacity and translates into decreased<br />
revenue for service providers.<br />
Average power can be measured while the base station is active for the channel of<br />
interest. All other channels should be inactive. Average power is a broadband<br />
measurement, so if there are other signals present it will also measure their power<br />
contributions.<br />
The test set supports the <strong>Agilent</strong> 8482A and 8481A power sensors.<br />
CAUTION<br />
The maximum power for the RF In port and the RF Out/SWR port of the test set is<br />
+20 dBm (100 mW). The maximum power for the Power Sensor port is +24 dBm<br />
(300 mW). When directly coupled to a base station, the test set can be damaged by<br />
excessive power applied to any of these three ports.<br />
To prevent damage in most situations when you directly couple the test set to a base<br />
station, use the high power attenuator between the test set and the BTS.<br />
NOTE<br />
If you suspect other signals may be present, it is recommended that you turn off all<br />
the other channels and measure average power on the signal of interest alone.<br />
Another option is to measure channel power (which is inherently less accurate), but<br />
filters out all other channels (signals). You can measure channel power for CDMA<br />
using the CDMA Analyzer or CDMA Over Air tool. For other modulation formats,<br />
use their respective analyzers (that is, GSM, 1xEV-DO, or W-CDMA) or measure<br />
channel power using either the spectrum analyzer or the Channel Scanner tool.<br />
NOTE<br />
If you have not done so, measure the loss of the high power attenuator by using the<br />
Insertion Loss measurement. Refer to “Two Port Insertion Loss” on page 123.<br />
NOTE<br />
Connect the Power Meter as close as possible to the power amplifier/duplexer<br />
output. Do not use a coupled port. The levels of the sensors do not function well at<br />
378 Chapter 13
Power Meter<br />
Making an Average Power <strong>Measurement</strong><br />
the levels provided by a coupled port.<br />
Making a Basic Average Power <strong>Measurement</strong><br />
To make an average power measurement, you connect the power sensor and cable,<br />
zero and calibrate the meter, and then take a reading.<br />
When should you zero the Power Meter?<br />
• Every time you use the Power Meter.<br />
• When a 5 degree C. change in temperature occurs.<br />
• Whenever you change the power sensor.<br />
• Every 24 hours.<br />
• Before measuring low level signals—for example, 10 dB above the lowest<br />
specified power for your power sensor.<br />
When should you calibrate the Power Meter? Every time you cycle the power on<br />
and off.<br />
To Make a Basic Average Power <strong>Measurement</strong>:<br />
Power Meter<br />
Step<br />
Notes<br />
1 Mode<br />
2 [Power Meter]<br />
3 [Zero] Follow the Zeroing Wizard, which displays<br />
instructions on the screen.<br />
4 [Continue]<br />
5 [Ref CF]<br />
6 Enter the reference cal<br />
factor using the<br />
numeric keypad.<br />
The reference cal factor is printed on the label of the<br />
power sensor head.<br />
7 [%]<br />
8 [Calibrate]<br />
Chapter 13 379
Power Meter<br />
Making an Average Power <strong>Measurement</strong><br />
Step<br />
9 Connect the power<br />
sensor to the Power Ref<br />
50 MHz port.<br />
Notes<br />
The test set supports the <strong>Agilent</strong> 8482A and 8481A<br />
power sensors.<br />
10 [Continue]<br />
11 [Cal Factor]<br />
Power Meter<br />
12 Enter the cal factor<br />
using the numeric<br />
keypad.<br />
A list of cal factors is printed on the label of the<br />
power sensor head. Select one that’s within the<br />
operating frequency of the base station.<br />
For an example of a power sensor calibration table,<br />
see below.<br />
Using the example power sensor calibration table, if<br />
you were interested in 800 MHz, then:<br />
800 MHz has a Cal Factor percentage of ~98.2<br />
13 [%]<br />
14 Connect the external<br />
attenuator.<br />
Note: Interpolate the Cal Factor from the frequency<br />
range provided on the power sensor. The example<br />
sensor calibration table shows that 800 MHz is<br />
between 300 to 1000 MHz. Since 300 MHz is listed<br />
at 98.5 and 1000 MHz (1 GHz) is at 98.1, 800 MHz<br />
would be ~98.2.<br />
380 Chapter 13
Power Meter<br />
Making an Average Power <strong>Measurement</strong><br />
Step<br />
15 If you have previously<br />
stored PM loss from an<br />
insertion loss<br />
measurement, go to the<br />
next step.<br />
Notes<br />
For information on the effects of the PM Loss<br />
function on the measurement, refer to “Using the<br />
Power Meter Loss field, below.<br />
Or<br />
Press [PM Loss] and<br />
enter the PM loss value.<br />
16 Connect to the base<br />
station.<br />
Connect the power sensor to the signal to be<br />
measured. The connection is typically after the<br />
output of the power amplifier or duplexer. The<br />
connection requires, in addition to the power sensor<br />
and attenuator, a 2 ft. cable and two Type-N barrel<br />
connectors.<br />
Power Meter<br />
Using the Power Meter Loss Field<br />
Typical base stations exceed the maximum input to most power sensor heads.<br />
Therefore an attenuator (typically a 40 dB 100 W attenuator) is required. The<br />
measured value of the attenuator and connecting cables is entered into this field.<br />
This value is then used when this field is set to On. When this field is set to On, the<br />
test set will add this loss value to the true measured value indicating the displayed<br />
measured value.<br />
Example: The base station transmits 40 dBm (10 W), the attenuator and RF cabling<br />
Chapter 13 381
Power Meter<br />
Making an Average Power <strong>Measurement</strong><br />
measures 42.51 dB (measured with the 2 port insertion loss measurement prior to<br />
this test), and the PM loss is turned On (with the 42.51 dB loss value entered). The<br />
true measured level (using an 8481A sensor) is –2.51 dBm (the attenuator and RF<br />
cabling attenuated the signal to within the proper range for the sensor), but the<br />
displayed measured value is 40 dBm (10 W), which is correct. This also points out<br />
the importance of accurately measuring the loss of the attenuator and connecting<br />
cables.<br />
Power Meter<br />
Using the Power Ref Button to Verify the Sensor Is Working Properly<br />
With the sensor head connected to the Power Ref 50 MHz RF Port and selecting<br />
Power Ref to On, you can verify that the sensor is working correctly. In this<br />
configuration, the power meter should indicate approximately 0 dBm (1 mW) as it<br />
reads the 50 MHz, 0 dBm RF signal.<br />
Example of a Sensor Calibration Table (<strong>Agilent</strong> 8482A)<br />
MHz<br />
CF%<br />
.1000 97.3<br />
.3000 99.0<br />
1.0 99.0<br />
3.0 99.0<br />
10.0 99.5<br />
30.0 99.1<br />
100 98.8<br />
300 98.5<br />
1000 98.1<br />
2000 97.4<br />
3000 98.1<br />
4000 90.5<br />
Setting Power Meter Resolution<br />
You can choose from four levels of Power Meter resolution. Higher resolutions<br />
provide more accuracy but slow the measurement speed.<br />
382 Chapter 13
Power Meter<br />
Making an Average Power <strong>Measurement</strong><br />
Step<br />
Notes<br />
1 [Mode]<br />
2 [Power Meter]<br />
3 [Setup]<br />
4 On [Resolution] select<br />
1, 2, 3, or 4.<br />
Each time you press this softkey, the selected<br />
option changes.<br />
• [1] = 1<br />
• [2] = 0.1<br />
• [3] = 0.01<br />
• [4] = 0.001<br />
Power Meter<br />
Setting the Power Meter’s High and Low End-Points<br />
Changing the high and low end points changes the scale resolution, making it easier<br />
to view small changes in power. This does not change the range of the sensor.<br />
Step<br />
Notes<br />
1 [Mode]<br />
2 [Power Meter]<br />
3 [Setup]<br />
4 [Low End]<br />
5 Enter the minimum value you want<br />
using the numeric keypad.<br />
6 [dBm]<br />
7 [Hi End]<br />
8 Enter the maximum scale value<br />
you want using the numeric<br />
keypad.<br />
Chapter 13 383
Power Meter<br />
Making an Average Power <strong>Measurement</strong><br />
Step<br />
Notes<br />
9 [dBm]<br />
Setting the Power Meter’s Upper and Lower Limits<br />
You can configure the Power Meter to detect when a measurement has failed<br />
predefined upper and lower limits.<br />
Power Meter<br />
Step<br />
Notes<br />
1 [Mode]<br />
2 [Power Meter]<br />
3 [Setup]<br />
4 On [Limit] select On. Each time you press this softkey, the selected<br />
option changes.<br />
5 [Low Limit]<br />
6 Enter the low limit<br />
using the numeric<br />
keypad.<br />
384 Chapter 13
Power Meter<br />
Making an Average Power <strong>Measurement</strong><br />
Step<br />
Notes<br />
7 [dBm]<br />
8 [Hi Limit]<br />
9 Enter the high limit<br />
using the numeric<br />
keypad.<br />
10 [dBm]<br />
Power Meter<br />
Chapter 13 385
Power Meter<br />
Making an Average Power <strong>Measurement</strong><br />
Power Meter<br />
386 Chapter 13
14 Return Loss<br />
“Measuring Return Loss” on page 388<br />
“Calibration - Minimizing your Workload” on page 388<br />
“Performing (and Calibrating) a Basic Return Loss <strong>Measurement</strong>” on page 389<br />
“Clearing Calibration” on page 392<br />
“Isolating a Return Loss Signal Using a Single Sweep” on page 393<br />
“Setting Return Loss Interference Rejection” on page 393<br />
“Setting Average, Sweep, and Restart” on page 394<br />
“Adding a Marker” on page 396<br />
“Displaying Location Information Using GPS” on page 397<br />
“Setting the Pass/Fail Limits” on page 398<br />
Return Loss<br />
387
Return Loss<br />
Measuring Return Loss<br />
Measuring Return Loss<br />
Return loss is a measure of reflection characteristics. One way you can use the<br />
return loss measurement is to detect problems in the antenna feedline system and the<br />
antenna itself. A portion of the incident power will be reflected back to the source<br />
from each transmission line fault as well as the antenna. The ratio of the reflected<br />
voltages to the incident voltage is called the reflection coefficient. The reflection<br />
coefficient is a complex number, meaning it has both magnitude and phase<br />
information. In S-parameter terms, Return Loss is referred to as an S 11<br />
measurement.<br />
NOTE<br />
Test signals can cause interference. When testing cables attached to antennas, test<br />
signals are radiated. Verify that the signal used for the test cannot cause interference<br />
to another antenna.<br />
Calibration - Minimizing your Workload<br />
Return Loss<br />
The Return Loss calibration is the same calibration as performed for the One Port<br />
Insertion Loss and Distance to Fault (when it is performed with Frequency Range<br />
set to manual) measurements. If you have already calibrated for any of these three<br />
measurements, the calibration will apply to the other two measurements and<br />
“Calibrated” (together with the frequency range over which the calibration was<br />
performed) will be displayed on top left of the screen for all three if the Start and the<br />
Stop frequencies are set within the calibrated frequency range.<br />
The Distance to Fault calibration (when it is performed with Frequency Range set<br />
to Auto) is only valid for other Distance to Fault measurements that are also<br />
performed with Frequency Range set to Auto, and then only if the Start and the Stop<br />
Frequencies fall within the previously calibrated frequency range.<br />
If you have not previously performed a calibration, the word “Uncalibrated” appears<br />
at the top left of the measurement screen.<br />
It is important that you keep the calibration frequency range as close as possible to<br />
the actual sweep frequencies you intend using for the measurement or<br />
measurements. Calibrating over a large frequency range (for example, 1 GHz) when<br />
you only intend measuring over a much smaller range (a few kHz, for example) will<br />
reduce your measurement accuracy.<br />
If you plan to perform a combination of One-Port Insertion Loss measurement,<br />
Return Loss measurement, and Distance to Fault measurements using a frequency<br />
388 Chapter 14
Return Loss<br />
Measuring Return Loss<br />
range that you will set manually, you can perform one calibration for all three<br />
measurements as long as you calibrate over a frequency range that incorporates all<br />
three of your measurements, and as long as your cables do not change. For this<br />
reason, if you are doing Distance to Fault measurements (using a frequency range<br />
that you have set manually) as well as any type of Insertion Loss measurement,<br />
<strong>Agilent</strong> recommends that you select your cable type before performing calibrations.<br />
Press [Mode], [Antenna/Cable], [Distance to Fault], [Cable Type] to set the cable<br />
type.<br />
The calibration remains valid until you do any one of the following:<br />
• set the Distance to Fault frequency range to Auto. Note that the calibration will<br />
become valid again as soon as you switch from Auto back to Manual Frequency<br />
Range.<br />
• power off the test set<br />
• change the start frequency to a new value that lies below the start frequency of<br />
your previous calibration<br />
• change the stop frequency to a new value that lies above the stop frequency of<br />
your previous calibration<br />
• change any of the jumper leads that you used for the calibration<br />
• change any of the attenuators that you used for the calibration<br />
• change the type of cable specified under the [Cable Type] menu key.<br />
Performing (and Calibrating) a Basic Return Loss <strong>Measurement</strong><br />
Select the desired frequency range and calibrate the test set (using calibrated Open,<br />
Short, and Load connectors) for a return loss measurement.<br />
Return Loss<br />
Step<br />
Notes<br />
1 Mode<br />
2 [Antenna/Cable]<br />
3 [Return Loss] The return loss measurement takes a few seconds<br />
to load.<br />
4 [Start Freq]<br />
Chapter 14 389
Return Loss<br />
Measuring Return Loss<br />
Step<br />
Notes<br />
5 Enter the start<br />
frequency using the<br />
numeric keypad.<br />
6 [Hz], [kHz], [MHz], or<br />
[GHz]<br />
7 [Stop Freq]<br />
8 Enter the stop<br />
frequency using the<br />
keypad.<br />
The stop frequency should be larger than the start<br />
frequency.<br />
9 [Hz], [kHz], [MHz], or<br />
[GHz]<br />
Return Loss<br />
10 Check whether your<br />
analyzer has already<br />
been calibrated over the<br />
frequency range that<br />
you wish to measure. If<br />
it is already calibrated<br />
over the correct<br />
frequency range, you<br />
can omit the next step<br />
(Step 11) and go<br />
straight to Step 12.<br />
The analyzer displays its calibration status on the<br />
top left of the measurement screen. You only need<br />
to re calibrate if you:<br />
• power off the test set<br />
• change the start frequency to a new value that<br />
lies below the start frequency of your previous<br />
calibration<br />
• change the stop frequency to a new value that<br />
lies above the stop frequency of your previous<br />
calibration<br />
• change any of the jumper leads that you used<br />
for the calibration<br />
• change any of the attenuators that you used for<br />
the calibration<br />
• change the type of cable specified under the<br />
[Cable Type] menu key in the Distance to Fault<br />
measurement.<br />
For more information, see “Calibration -<br />
Minimizing your Workload” on page 388.<br />
390 Chapter 14
Return Loss<br />
Measuring Return Loss<br />
Step<br />
11 If your analyzer is<br />
uncalibrated, or has<br />
been calibrated over an<br />
unsuitable frequency,<br />
press [Calibrate]<br />
12 Connect the antenna<br />
feedline and antenna.<br />
Notes<br />
Follow the instructions of the Calibration Wizard.<br />
The test set will calibrate over the desired<br />
frequency range.<br />
Connect the antenna feedline cable to the<br />
RFout/SWR port.<br />
Return Loss<br />
Chapter 14 391
Return Loss<br />
Measuring Return Loss<br />
Step<br />
Notes<br />
13 [Level] Below the Return Loss display is a table displaying<br />
the Frequency, the Return Loss, and the Standing<br />
Wave Ratio (SWR) of the best and worst return<br />
losses. These values may be changing rapidly. To<br />
isolate a signal, use a single sweep, or apply<br />
averaging to the trace data.<br />
If the Return Loss trace is not visible, you can<br />
change the reference level, or use Autoscale to<br />
have the test set select a reference level for you.<br />
• To choose Autoscale, press [Autoscale].<br />
• To set the reference level manually, press [Ref<br />
Level], enter a value using the numeric keypad,<br />
then press [dB].<br />
Return Loss<br />
NOTE<br />
If the Return Loss measurement looks suspect (less than 5 dB), you may want to<br />
perform a Distance to Fault measurement to determine if a noticeable fault exists<br />
and where it may be located. For more information see “Distance to Fault” on<br />
page 275.<br />
Clearing Calibration<br />
Clear Calibration deletes the current calibration data, enabling you to re-calibrate<br />
the instrument for the same frequency range, or for a new frequency range.<br />
To Clear the <strong>Measurement</strong> Calibration Data:<br />
Step<br />
Notes<br />
1 [Setup]<br />
2 [Clear Calibration] When you clear the calibration, you will also clear<br />
the calibration for both the One-Port Insertion Loss<br />
measurement and for the Distance to Fault Manual<br />
Range measurement as all three measurements<br />
share the same calibration data.<br />
392 Chapter 14
Return Loss<br />
Measuring Return Loss<br />
Isolating a Return Loss Signal Using a Single Sweep<br />
Step<br />
Notes<br />
1 [Average/Sweep]<br />
2 [Single] Activate the single sweep. Press [Continuous] if you<br />
want to start multiple sweeps.<br />
Setting Return Loss Interference Rejection<br />
Other signals can interfere with return loss measurements. When making a return<br />
loss measurement in the presence of known or suspected interference, you can<br />
minimize the effect of the interference on the measurement by activating<br />
interference rejection in the test set.<br />
NOTE<br />
Use of interference rejection will increase the measurement time. Interference<br />
rejection should be used if a known interfering signal exists or if the Return Loss<br />
measurement displays suspicious characteristics such as a spike or rapid movements<br />
in the noise floor.<br />
Step<br />
1 [Setup]<br />
2 On [Interference<br />
Rejection] select On.<br />
Notes<br />
Each time you press this softkey, the selected<br />
option changes.<br />
Return Loss<br />
Chapter 14 393
Return Loss<br />
Measuring Return Loss<br />
Setting Average, Sweep, and Restart<br />
Setting the Sweep<br />
You can select either continuous or single sweep. Continuous sweep provides<br />
repeated, ongoing measurements. Single sweep performs a single measurement that<br />
is repeated only when you push the Single button.<br />
To set sweep:<br />
Step<br />
Notes<br />
1 [Average/Sweep]<br />
2 [Continuous] or [Single] Press the softkey to select the sweep<br />
mode you require.<br />
Setting Averaging<br />
You can choose to have averaging on or off and set the number of averages you want<br />
to take. Averaging only applies to the data, not the trace. You can select from the<br />
following types of averaging:<br />
Return Loss<br />
• Off: Disables averaging.<br />
• Running Average: Computes the new result as the weighted sum of the last<br />
result and the new measurement. The last result is weighted by (n – 1)/n. The<br />
new result is weighted by 1/n. Each new measurement produces a new result.<br />
• Max Hold: Is not an average, but on a point by point basis, displays the<br />
maximum amplitude for the given frequency or channel since Max Hold was<br />
turned on. It is updated when a new maximum occurs.<br />
• Group Average: Makes the requested number of measurements, averages the<br />
measurement data, and displays the average as a single result trace.<br />
<strong>Measurement</strong> time will vary based on the requested number of averages and can<br />
take minutes for very large number of averages.<br />
• Group Max Average: Makes the requested number of measurements before<br />
returning a single trace result. This trace is the maximum value seen at each<br />
trace point over the requested number of averages (measurements).<br />
394 Chapter 14
Return Loss<br />
Measuring Return Loss<br />
To set averaging:<br />
Step<br />
Notes<br />
1 Set the number of averages.<br />
a. [Average]<br />
b. Enter the number of averages<br />
using the numeric keypad.<br />
c. [Enter]<br />
2 Select the type of averaging you<br />
want to apply.<br />
a. [Average/Sweep]<br />
b. [Averaging]<br />
c. [Off], [Running Average],<br />
[Max Hold], [Group<br />
Average], or [Group Max<br />
Average]<br />
NOTE<br />
These two steps can be performed in any order. However, if you turn averaging on<br />
and a large number of averages has previously been set, there may be a delay before<br />
you can change number of averages.<br />
Setting Restart<br />
When you have averaging turned On and you are in Continuous Sweep mode, you<br />
can restart the averaging by pressing the Restart menu key. The Restart key has no<br />
effect if you are in Single sweep mode.<br />
To restart averaging:<br />
Return Loss<br />
Step<br />
Notes<br />
1 [Average/Sweep]<br />
2 [Restart] This key is unavailable or has no effect when<br />
Sweep is set to Single. To restart a Single<br />
Sweep measurement, press [Single].<br />
Chapter 14 395
Return Loss<br />
Measuring Return Loss<br />
Adding a Marker<br />
Markers can be used on traces to help you visually track up to four signals. Each<br />
marker has the following settings:<br />
• Type: Provides three options, including:<br />
Return Loss<br />
• Off<br />
• Normal, which places a diamond-shaped, colored marker, along with a<br />
number, 1-4, on the trace.<br />
• Delta, is associated with a normal marker. Therefore, a normal marker must<br />
exist prior to creating the delta marker. The delta marker displays the<br />
difference between the normal marker position and the delta marker<br />
position. Only one delta marker can be associated with a given normal<br />
marker. The normal marker must be active when Delta is selected.<br />
• Marker to Peak: Places the active marker on the current greatest value of the<br />
trace.<br />
• Marker to Next Peak: Places the active marker on the current second greatest<br />
value of the trace.<br />
• Center Freq to Marker: Scrolls to locate the current marker in the center of the<br />
trace.<br />
• Ref Level to Marker: Scrolls the trace to place the marker at the top of the<br />
screen. To reset the reference level, choose [Level/Location] [Autoscale].<br />
To Add a Marker to a Trace:<br />
Step<br />
Notes<br />
1 [Marker]<br />
2 [Marker] Each time you press the<br />
[Marker] key, you will step to<br />
the next marker in the<br />
sequence 1 - 2 - 3 - 4 - 1 - 2,<br />
and so on.<br />
3 [1], [2], [3], or [4]<br />
4 [Type]<br />
5 [Off], [Normal], or [Delta]<br />
396 Chapter 14
Return Loss<br />
Measuring Return Loss<br />
Step<br />
6 Locate the marker relative to the trace:<br />
• [Marker to Peak]<br />
• [Marker to Next Peak]<br />
[Marker to Next Min]<br />
Notes<br />
This feature is available for<br />
both normal markers and for<br />
delta markers.<br />
Displaying Location Information Using GPS<br />
If you are making a Return Loss measurement, you may use GPS Location data to<br />
verify your location. For additional information on the GPS Data function, refer to<br />
“Displaying GPS Location Data” on page 458.<br />
To Display GPS Location Information:<br />
Step<br />
Notes<br />
1 [Level/Location]<br />
2 On [Show GPS<br />
Location] select On.<br />
Displays GPS satellite location information. Uses the<br />
internal GPS to capture the location of a<br />
measurement. The GPS information can be used to<br />
return to the same location. The Time Ref<br />
(Freq/Chan/Time Ref mode) button must be set to<br />
Internal GPS for this function to be active.<br />
Information logged includes longitude, latitude,<br />
altitude (feet/meters), and the number of satellites<br />
tracked.<br />
Each time you press this softkey, the selected option<br />
changes.<br />
3 Highlight [On] Toggle to [On] to display GPS satellite location<br />
information. Toggle to [Off] to remove the location<br />
information<br />
Return Loss<br />
NOTE<br />
If you prefer to have an electronic copy of the location information, see “Saving<br />
Data” on page 465.<br />
Chapter 14 397
Return Loss<br />
Measuring Return Loss<br />
Setting the Pass/Fail Limits<br />
The measurement limits setting enables you to alter the value of the upper limit.<br />
Limits are set in dB and are relative. The setting you choose defines the location of<br />
the limit line displayed on the screen. The setting affect the metrics color display:<br />
red represents fail, green represents pass.<br />
To Set the <strong>Measurement</strong> Limit:<br />
Step<br />
Notes<br />
1 [Setup]<br />
2 [Limits]<br />
3 On [Limits] select On or<br />
Off.<br />
Enables you to toggle the measurement limits<br />
function On (active) and Off (inactive).<br />
Return Loss<br />
4 Set the limit.<br />
a. [RTN Loss Limit]<br />
b. Enter the number on<br />
the numeric keypad.<br />
c. [dB]<br />
• If set to On, a limit line is displayed on the<br />
screen. The “Best” Return Loss value must<br />
equal or exceed the limit line to generate a Pass<br />
Indication (P). If the “Best” Return Loss value<br />
does exceed the limit line, a Fail indication (F)<br />
will be displayed.<br />
• If set to Off, neither a limit line is displayed nor<br />
is a pass fail indicator seen in the metrics<br />
display portion of the display.<br />
Maximum limit: Ref Level (top of display)<br />
Minimum limit: bottom of display<br />
398 Chapter 14
15 Signal Generator<br />
“Using the Signal Generator” on page 400<br />
“Performing a Basic Signal Generator <strong>Measurement</strong>” on page 402<br />
“Minimum and Maximum Power levels for Generated Signals” on page 400<br />
“Persistent Signal Generator” on page 409<br />
NOTE<br />
The information here applies to the use of the signal generator when accessed from<br />
the Spectrum Analyzer/Tools menu. For information on the use of the [Sig Gen]<br />
menu under a measurement [Setup] key menu, refer to the specific measurement<br />
chapter or measurement help topic.<br />
Signal Generator<br />
399
Signal Generator<br />
Using the Signal Generator<br />
Using the Signal Generator<br />
The Signal Generator is used to check the performance of base station receivers. It<br />
supports both Received Signal Strength Indicator (RSSI) and CDMA Frame Error<br />
Rate (FER) measurements. The Signal Generator provides multiple forward and<br />
reverse-link modulation types. For a complete list of supported modulation types,<br />
press the [Modulation] menu key after you begin the measurement.<br />
CAUTION<br />
The maximum power for the RF In (Port 1) and RF Out/SWR (Port 2) ports is<br />
+20 dBm (100 mW). The maximum power for the Power Sensor port is +24 dBm<br />
(300 mW). When directly coupled to a base station (BTS) or Access Network (AN),<br />
the test set can be damaged by excessive power applied to any of these three ports.<br />
To prevent damage in most situations when you directly couple the test set to a base<br />
station, use the high power attenuator between the test set and the BTS.<br />
NOTE<br />
The lowest power level the signal generator can reach is –90 dBm for CW signals,<br />
and –95 dBm for complex modulated signals. In order to get a lower level, you must<br />
use an external attenuator. You can compensate for the attenuator using RF Out<br />
Loss.<br />
NOTE<br />
It usually takes around 5 to 10 seconds for your chosen signal to start being<br />
generated. A 1xEV-DO signal can take up to 30 seconds to start being generated.<br />
Minimum and Maximum Power levels for Generated Signals<br />
<strong>E7495A</strong><br />
E7495B<br />
Signal Generator<br />
Signal<br />
Max.<br />
Power<br />
Min. Power<br />
Max.<br />
Power<br />
Min.<br />
Power<br />
CW –23 dBm –90 dBm –23 dBm –90 dBm<br />
CDMA Forward Link<br />
Pilot Only No Filter<br />
–47 dBm –95 dBm –28 dBm –95 dBm<br />
400 Chapter 15
Signal Generator<br />
Using the Signal Generator<br />
<strong>E7495A</strong><br />
E7495B<br />
Signal<br />
Max.<br />
Power<br />
Min. Power<br />
Max.<br />
Power<br />
Min.<br />
Power<br />
CDMA Forward Link<br />
Pilot Only Filtered<br />
CDMA IS-95 Rev Link<br />
RC1 9.6 Kbps Zero Data<br />
Traffic<br />
CDMA IS-95 Rev Link<br />
Zero Data Access<br />
CDMA IS-95 Rev Link<br />
RC1 9.6Kbps Random<br />
Data Traffic<br />
CDMA IS-95 Rev Link<br />
RC2 14.4Kbps Zero Data<br />
Traffic Channel<br />
R-FCH RC3 Zero Data<br />
Fundamental<br />
R-FCH RC3 Random<br />
Data Fundamental<br />
1xEV-DO Rev Link 9.6Kb<br />
15PN Data (ARB)<br />
–47 dBm –95 dBm –28 dBm –95 dBm<br />
–47 dBm –95 dBm –28 dBm –95 dBm<br />
–47 dBm –95 dBm –28 dBm –95 dBm<br />
–47 dBm –95 dBm –28 dBm –95 dBm<br />
–47 dBm –95 dBm –28 dBm –95 dBm<br />
–47 dBm –95 dBm –28 dBm –95 dBm<br />
–47 dBm –95 dBm –28 dBm –95 dBm<br />
–48.5 dBm –96.5 dBm –29.5 dBm –96.5 dBm<br />
<strong>E7495A</strong><br />
E7495B<br />
Signal<br />
Max.<br />
Power<br />
Min. Power<br />
Max.<br />
Power<br />
Min.<br />
Power<br />
CW –23 dBm –90 dBm –23 dBm –90 dBm<br />
CDMA Forward Link<br />
Pilot Only No Filter<br />
–47 dBm –95 dBm –28 dBm –95 dBm<br />
Signal Generator<br />
Chapter 15 401
Signal Generator<br />
Using the Signal Generator<br />
<strong>E7495A</strong><br />
E7495B<br />
Signal<br />
Max.<br />
Power<br />
Min. Power<br />
Max.<br />
Power<br />
Min.<br />
Power<br />
CDMA Forward Link<br />
Pilot Only Filtered<br />
CDMA IS-95 Rev Link<br />
RC1 9.6Kbps Zero Data<br />
Traffic<br />
CDMA IS-95 Rev Link<br />
Zero Data Access<br />
CDMA IS-95 Rev Link<br />
RC1 9.6 Kbps Random<br />
Data Traffic<br />
CDMA IS-95 Rev Link<br />
RC2 14.4Kbps Zero Data<br />
Traffic<br />
R-FCH RC3 Zero Data<br />
Fundamental<br />
R-FCH RC3 Random<br />
Data Fundamental<br />
1xEV-DO Rev Link 9.6Kb<br />
15PN Data (ARB)<br />
–47 dBm –95 dBm –28 dBm –95 dBm<br />
–47 dBm –95 dBm –28 dBm –95 dBm<br />
–47 dBm –95 dBm –28 dBm –95 dBm<br />
–47 dBm –95 dBm –28 dBm –95 dBm<br />
–47 dBm –95 dBm –28 dBm –95 dBm<br />
–47 dBm –95 dBm –28 dBm –95 dBm<br />
–47 dBm –95 dBm –28 dBm –95 dBm<br />
–48.5 dBm –96.5 dBm –29.5 dBm –96.5 dBm<br />
Performing a Basic Signal Generator <strong>Measurement</strong><br />
Step<br />
Notes<br />
Signal Generator<br />
1 Mode<br />
2 [Spectrum Analyzer/Tools]<br />
3 [Signal Generator]<br />
4 [Chan Std]<br />
402 Chapter 15
Signal Generator<br />
Using the Signal Generator<br />
Step<br />
Notes<br />
5 Select the channel standard<br />
from the list using the up and<br />
down arrow buttons.<br />
6 [Select]<br />
7 On [Units] select Chan. Each time you press this softkey, the analyzer<br />
switches between Channel (Chan) and<br />
Frequency (Freq). The Units settings are<br />
coupled across multiple tools.<br />
8 [Fr/Time Ref] Complex signals such as cdma and 1xEV-DO<br />
require accurate time and frequency<br />
references before they can be reliably<br />
generated or demodulated.<br />
9 [GPS] or [External Even Sec] Only GPS and External Even Second<br />
provide the timing information necessary to<br />
generate an accurately modulated signal.<br />
Select GPS if you are receiving GPS location<br />
information (System, [Fr/Time Ref<br />
Location], [Show GPS Location] set to On).<br />
Otherwise, select External Even Second, and<br />
connect your external even second reference<br />
signal to the Even Second Sync In port on<br />
your test set. It is worth noting that the signal<br />
may disappear momentarily when you switch<br />
between different time references because<br />
the signal needs to be realigned with the<br />
system time.<br />
If you are not needing a time aligned signal<br />
(for example, you are simply generating a<br />
carrier wave), you do not need to use either<br />
GPS or External Even Second Clock as your<br />
time reference.<br />
If you are using a frequency only reference,<br />
the signal will be modulated with the same<br />
accuracy as when using a time reference. The<br />
difference is that it will not be time aligned to<br />
the system time during playback<br />
Signal Generator<br />
Chapter 15 403
Signal Generator<br />
Using the Signal Generator<br />
Step<br />
Notes<br />
10 [Select]<br />
11 [Channel]<br />
12 Enter the channel number<br />
using the numeric keypad.<br />
When the channel is set, it is set across all the<br />
test set tools, so as you switch between tools,<br />
the channel is preset.<br />
13 [Rev] or [Up] Always choose the reverse or the uplink<br />
channel when performing a receiver<br />
sensitivity test measurement.The terms<br />
“Reverse link” and “Uplink” have the same<br />
meaning. GSM standards use the term “Up”<br />
whereas cdma standards use the term<br />
“Reverse”.<br />
14 [Modulation]<br />
If the key is grayed out, go to<br />
the step 16.<br />
Or<br />
If the key is active, go to the<br />
next step.<br />
If the [Modulation] menu key is grayed out,<br />
your test set does not include the Option<br />
510 - CW & Complex Modulation Signal<br />
Generator. You have only CW source.<br />
Signal Generator<br />
404 Chapter 15
Signal Generator<br />
Using the Signal Generator<br />
Step<br />
Notes<br />
15 [Format] You will now see a list of all the available<br />
signal formats:<br />
• CW (No modulation) - an unmodulated<br />
carrier wave<br />
• CDMA Forward Link (Pilot only)<br />
without Equalization Filter<br />
• CDMA Forward Link (Pilot only) with<br />
Equalization Filter<br />
• CDMA IS-95 Reverse Link - RC1<br />
9.6Kbps Zero Data Traffic Channel<br />
• CDMA IS-95 Reverse Link - Zero Data<br />
Access Channel<br />
• CDMA IS-95 Reverse Link - RC1<br />
9.6Kbps Random Data Traffic Channel<br />
• CDMA IS-95 Reverse Link - RC2<br />
14.4Kbps Zero Data Traffic Channel<br />
• R-FCH RC3 Zero Data Fundamental<br />
Channel<br />
• R-FCH RC3 Random Data Fundamental<br />
Channel<br />
• 1xEV-DO Reverse Link 9.6Kb 15PN<br />
data (ARB) - parameters such as<br />
PN Offset are fixed in this file and cannot<br />
be altered. Be aware that it can take up to<br />
30 seconds for a 1xEV-Do signal to start<br />
being generated. a<br />
Signal Generator<br />
Chapter 15 405
Signal Generator<br />
Using the Signal Generator<br />
Step<br />
Notes<br />
Signal Generator<br />
16 Select the signal format from<br />
the list using the up and down<br />
arrow keys.<br />
a. If you have selected a<br />
CDMA Forward Link<br />
modulation type, select<br />
PN Offset. For other<br />
modulation types, you do<br />
not need to select<br />
PN Offset.<br />
b. If you have selected<br />
cdma2000 modulation<br />
with fundamental<br />
channels, you also need to<br />
press [R-FCH Pwr].<br />
17 Enable the RF output, set the<br />
RF output amplitude, and set<br />
the step key increments.<br />
a. [Amplitude]<br />
b. [RF] Select On.<br />
c. [Amplitude]<br />
d. Enter the amplitude value<br />
using the numeric keypad.<br />
e. [dBm]<br />
f. [Ampl Step]<br />
g. Enter the step value using<br />
the numeric keypad.<br />
h. [dB]<br />
The PN Offset is a “short code” sequence<br />
that provides a unique identifier for each<br />
sector of each cell site. The PN Offsets are<br />
applied to the I and Q signals before<br />
modulation. PN Offsets are offset in time by<br />
52.08 µs and they repeat every 26.666 ms.<br />
This yields 512 unique short code sequences<br />
(0-511). The mobile phone needs the PN<br />
Offset to decode information in the Sync and<br />
Paging channels, which are transmitted by<br />
the base station.<br />
R-FCH Pwr specifies the Reverse<br />
Fundamental Channel Power, and applies<br />
only to cdma-2000 RC3 channels. It does not<br />
apply to cdma IS-95 RC1 and cdma IS-95<br />
RC2 reverse link channels.<br />
You may also enter a new value for<br />
amplitude by turning the rotary knob until the<br />
desired value is displayed or by using the up<br />
and down arrow keys.<br />
406 Chapter 15
Signal Generator<br />
Using the Signal Generator<br />
Step<br />
18 If you have previously stored<br />
RF Out Loss from an<br />
insertion loss measurement,<br />
go to the next step.<br />
Or<br />
Notes<br />
For information on the effects of the RF Out<br />
Loss function on the amplitude, refer to<br />
“Using the RF Out Loss field” below.<br />
Each time you press this softkey, the selected<br />
option changes.<br />
Press [RF OUT Loss] to<br />
select On and enter the RF<br />
Out Loss value.<br />
19 Connect to the base station.<br />
Low level non duplex connection<br />
Signal Generator<br />
Chapter 15 407
Signal Generator<br />
Using the Signal Generator<br />
Step<br />
Notes<br />
High level non duplex connection<br />
20 On [RF] select On. Each time you press this softkey, the selected<br />
option changes.<br />
a. The characteristics of any 1xEV-DO signal generated are:<br />
RRI Active: RRI Bits: 1<br />
DRC Channel Relative Gain: +3 dB<br />
ACK Channel relative Gain: 0 dB<br />
Data Channel Relative Gain: +3.75 dB<br />
Data Channel: Active<br />
Data Channel Data Rate: 9.6 kbps<br />
Data Channel bit stream: PN15<br />
I Mask: 3FF80000000<br />
Q Mask: 3FF00000001<br />
Filter Type: IS 95 Std<br />
Signal Generator<br />
Using the RF OUT Loss field<br />
The RF OUT Loss field is used when it is necessary to test the receiver sensitivity of<br />
a typical base station. The test set’s source will typically go down to –90 dBm. In<br />
order to reach –113 dBm for sensitivity testing, you must use an external attenuator.<br />
The measured value of the attenuator and connecting cables are entered into this<br />
field. This value is then used when this field is set to On. When this field is set to<br />
On, the test set will set the RF generator level to the correct level offset by the<br />
external attenuator/cabling. When you set the RF Generator to –113 dBm (with the<br />
RF OUT Loss field turned On and the external attenuator/cabling loss value entered)<br />
408 Chapter 15
Signal Generator<br />
Using the Signal Generator<br />
the output at the end of the RF test cabling is –113 dBm.<br />
Example: If you want to set the signal generator to –113 dBm, the attenuator and RF<br />
cabling measures 42.51 dB (measured with the 2 port insertion loss measurement<br />
screen prior to this test), the RF OUT Loss field is turned On (with the 42.51 dB loss<br />
value entered). The actual RF output of the signal generator is –70.49 dBm, the<br />
attenuator and RF cabling attenuated the signal to the desired level; so the RF signal<br />
at the end of the test cable/attenuator is –113 dBm. This also points out the<br />
importance of accurately measuring the loss of the attenuator and connecting cables.<br />
Persistent Signal Generator<br />
The signal generator function can be used simultaneously with other measurement<br />
functions of the test set. This allows you to use the test set as both the source and the<br />
measurement device when making your measurements. To do this, setup the signal<br />
generator as described in “Performing a Basic Signal Generator <strong>Measurement</strong>” on<br />
page 402.<br />
Then proceed as described below.<br />
Step<br />
Notes<br />
1 Mode<br />
2 [Spectrum Analyzer/Tools]<br />
3 [Signal Generator]<br />
4 [Freq/Chan/Time Ref]<br />
5 On [Persist Sig Gen] select<br />
Yes.<br />
Each time you press this softkey, the selected<br />
option changes.<br />
Yes turns the persistent signal generator<br />
function On and No turns the function Off.<br />
When the persistent signal generator is<br />
turned On, an icon ( ) appears in the<br />
lower-right corner of the display.<br />
6 Mode<br />
7 Select the desired<br />
measurement mode and<br />
proceed with your<br />
measurements<br />
Signal Generator<br />
Chapter 15 409
Signal Generator<br />
Using the Signal Generator<br />
Step<br />
Notes<br />
17 [Amplitude] Changes the RF output power. Amplitude<br />
becomes the active function and the current<br />
value is shown in the active entry area of the<br />
display. To enter a new value for amplitude,<br />
turn the rotary knob until the desired value is<br />
displayed, use the up and down arrow keys,<br />
or enter the value using the numeric keypad.<br />
Then press [dBm].<br />
Signal Generator<br />
410 Chapter 15
16 Spectrum Analyzer<br />
“Using the Spectrum Analyzer” on page 412<br />
“Performing a Basic Spectrum Analyzer <strong>Measurement</strong>” on page 413<br />
“Setting the Range Control” on page 416<br />
“Setting the Analyzer Input Gain” on page 417<br />
“Setting the Analyzer Detector” on page 418<br />
“Setting Up the Signal Generator” on page 419<br />
“Setting Average, Sweep, and Restart” on page 421<br />
“Changing the Resolution Bandwidth” on page 423<br />
“Adding or Removing a Marker” on page 423<br />
“Setting the Pass/Fail Limits” on page 426<br />
“Spectrogram Display” on page 433<br />
“Performing a Spectrogram <strong>Measurement</strong>” on page 434<br />
“Using the Interference ID <strong>Measurement</strong>” on page 437<br />
“Performing a Basic Interference ID <strong>Measurement</strong>” on page 437<br />
“Using the Occupied BW <strong>Measurement</strong>” on page 442<br />
Spectrum Analyzer<br />
“Performing a Basic Occupied BW <strong>Measurement</strong>” on page 443<br />
“Using the Spectrum Emission Mask <strong>Measurement</strong>” on page 448<br />
“Channel Standards and Emission Limits” on page 450<br />
“Performing a Basic Spectrum Emissions Mask <strong>Measurement</strong>” on page 451<br />
411
Spectrum Analyzer<br />
Spectrum Analyzer<br />
Using the Spectrum Analyzer<br />
Using the Spectrum Analyzer<br />
Use the Spectrum Analyzer in direct connect mode to:<br />
• Verify that your transmitted signal does not interfere (produce spurs and<br />
harmonics) with other signals.<br />
• Verify spectral integrity—look at a signal to see if it meets expectations, look for<br />
unwanted signals.<br />
Use the Spectrum Analyzer in Over Air mode to:<br />
• Look for interference generated by other transmitters that can interfere with your<br />
transmit band.<br />
CAUTION<br />
The maximum power for the RF In port and the RF Out/SWR port of the test set is<br />
+20 dBm (100 mW). The maximum power for the Power Sensor port is +24 dBm<br />
(300 mW). When directly coupled to a base station, the test set can be damaged by<br />
excessive power applied to any of these three ports.<br />
To prevent damage in most situations when you directly couple the test set to a base<br />
station, use the high power attenuator between the test set and the BTS.<br />
NOTE<br />
The RF In loss can be added manually, or automatically by performing an insertion<br />
loss measurement. For measurement instructions refer to “Performing (and<br />
Calibrating) a Basic One Port Insertion Loss measurement” on page 47 or<br />
“Normalizing and Performing a Basic Two Port Insertion Loss <strong>Measurement</strong>” on<br />
page 125.<br />
412 Chapter 16
Spectrum Analyzer<br />
Using the Spectrum Analyzer<br />
Performing a Basic Spectrum Analyzer <strong>Measurement</strong><br />
Spectrum Analyzer<br />
Step<br />
Notes<br />
1 Select Spectrum Analyzer.<br />
a. Mode<br />
b. [Spectrum Analyzer/Tools]<br />
c. [Spectrum Analyzer]<br />
2 Enter the channel standard.<br />
a. [Freq/Chan]<br />
b. [Chan Std]<br />
c. Select the standard using the up and<br />
down arrow buttons.<br />
d. [Select]<br />
e. On [Units] select Chan.<br />
3 Enter the channel number.<br />
Each time you press the [Units]<br />
menu key, the selected option<br />
changes between Freq. (frequency)<br />
and Chan. (channel number).<br />
a. [Channel]<br />
b. Enter the channel number using the<br />
numeric keypad.<br />
c. Select [Fwd] or [Rev].<br />
4 Set the span.<br />
a. [Span]<br />
b. Enter the frequency using the<br />
numeric keypad.<br />
c. [Hz], [kHz], [MHz], or [GHz]<br />
5 Connect to the base station.<br />
Chapter 16 413
Spectrum Analyzer<br />
6<br />
Step<br />
Spectrum Analyzer<br />
Using the Spectrum Analyzer<br />
Notes<br />
Out of service connection<br />
In service connection<br />
414 Chapter 16
7 For an over the air measurement,<br />
connect an antenna and an external<br />
filter to the RF input.<br />
8<br />
Step<br />
Notes<br />
Spectrum Analyzer<br />
Using the Spectrum Analyzer<br />
The external filter is necessary to<br />
eliminate out-of-band signals that<br />
would otherwise reduce the dynamic<br />
range of measurements in the band<br />
of interest. The effect of the<br />
out-of-band signals is to raise the<br />
noise floor, possibly hiding some or<br />
all of the signal of interest.<br />
Spectrum Analyzer<br />
Over the air measurement connection<br />
9 Set the level to Autoscale.<br />
a. [Level]<br />
b. [Autoscale]<br />
Chapter 16 415
Spectrum Analyzer<br />
Step<br />
Spectrum Analyzer<br />
Using the Spectrum Analyzer<br />
10 (Recommended) Display a marker and<br />
set it to peak.<br />
a. [Marker]<br />
b. [Marker]<br />
c. On [Type] select Normal.<br />
d. [Marker to Peak]<br />
Notes<br />
The marker value appears in the<br />
upper right.<br />
Pressing [Marker] on the left menu<br />
displays the Marker menu on the<br />
right. Pressing Marker on the right<br />
menu selects your marker number.<br />
Marker numbers cycle from 1 to 2 to<br />
3 to 4, and back again, each time you<br />
press this key.<br />
Setting the Range Control<br />
The autoranging feature, which is built into the test set, helps ensure accurate<br />
measurements by changing front-end amplifier gain as needed when a strong signal<br />
threatens to overload the test set. When this occurs, the noise floor rises (as gain is<br />
decreased), then falls again when the strong signal stops. You should leave the range<br />
control in autorange for general use to ensure the accuracy of the measurement<br />
results.<br />
If you prefer to use a fixed noise floor, you can disable autoranging in two ways<br />
using the [Setup], [Range Ctrl] function within Spectrum Analyzer:<br />
• On [Range Ctrl] select Hold to fix the front-end amplifier gain at the current<br />
level. You may use [Range Up] or [Range Down] to change the noise floor. A<br />
word of caution: when you use the Hold setting, a subsequent strong<br />
signal—even outside the measurement range—may cause an inaccurate reading<br />
due to overloading the front-end of the test set. While in Hold, you can adjust the<br />
gain of the front-end amplifier with the Range Up and Range Down menu keys.<br />
The Hold setting cannot be saved. Leaving the measurement or going into the<br />
sleep mode will reset the Range Ctrl to Auto.<br />
• On [Range Ctrl] select Max to fix the front-end amplifier gain at the current level<br />
until a strong signal comes in. When a strong signal is received, the front-end<br />
amplifier gain will be reduced to maintain accuracy, but it will not return to its<br />
lower level after the strong signal stops.<br />
If the noise floor is too high to measure the signal of interest, reducing the resolution<br />
bandwidth will reduce the noise floor, at the expense of the measurement update<br />
416 Chapter 16
ate.<br />
Using the Range Control Function:<br />
Spectrum Analyzer<br />
Using the Spectrum Analyzer<br />
Spectrum Analyzer<br />
Step<br />
Notes<br />
1 Set the Range Ctrl to<br />
Hold.<br />
a. [Setup]<br />
b. [Range Ctrl]<br />
c. On [Range Ctrl]<br />
select [Hold]<br />
d. Select [Range Up]<br />
or [Range Down]<br />
2 Set the Range Ctrl to<br />
Max.<br />
Each time you press this softkey, the selected<br />
option changes.<br />
Use the Range Up or Range Down menu keys<br />
to adjust the gain to ensure the accuracy of the<br />
measurement results.<br />
For more information on the autoranging feature,<br />
refer to the note above.<br />
a. [Setup]<br />
b. [Range Ctrl]<br />
c. On [Range Ctrl]<br />
select [Max]<br />
Setting the Analyzer Input Gain<br />
Normally the <strong>E7495A</strong>/B is set to add the most gain in the receive path to boost<br />
low-level signals. If the signal is high, there is no reason to add gain. When you’re<br />
measuring a strong signal, select low sensitivity to reduce the gain in the receive<br />
path and lower the noise floor. For a low level signal, select high.<br />
Step<br />
Notes<br />
1. [Setup]<br />
Chapter 16 417
Spectrum Analyzer<br />
Spectrum Analyzer<br />
Using the Spectrum Analyzer<br />
Step<br />
2. [Sensitivity]<br />
3. Low or High<br />
Notes<br />
NOTE<br />
The Sensitivity setting is coupled to the Noise Correction setting. Changing the<br />
Sensitivity setting from Low to High will cause the Noise Correction setting to<br />
change from On to Off. Conversely, if the Noise Correction setting is changed from<br />
Off to On, the Sensitivity setting is changed from High to Low.<br />
Setting the Analyzer Detector<br />
You can set a detector mode for spectrum measurements.<br />
Positive peak detection displays the highest sample level measured during each<br />
sampling period.<br />
Sample detection displays the peak of CW-like signals and maximums and<br />
minimums of noise-like signals.<br />
Negative peak detection displays the lowest sample level measured during each<br />
sampling period.<br />
Average detection displays the average power in each frequency measured<br />
across the spectrum.<br />
Step<br />
Notes<br />
1. [Setup]<br />
2. [Detector]<br />
3. [Peak], [Sample], [Negative Peak],<br />
or [Average]<br />
418 Chapter 16
Setting Up the Signal Generator<br />
Spectrum Analyzer<br />
Using the Spectrum Analyzer<br />
You can set up the signal generator while in the Spectrum Analyzer mode from the<br />
Setup menu. For more detailed information on the signal generator setup and<br />
operation, refer to “Using the Signal Generator” on page 400.<br />
Spectrum Analyzer<br />
CAUTION<br />
The maximum power for the RF In port and the RF Out/SWR port of the test set is<br />
+20 dBm (100 mW). The maximum power for the Power Sensor port is +24 dBm<br />
(300 mW). When directly coupled to a base station, the test set can be damaged by<br />
excessive power applied to any of these three ports.<br />
To prevent damage in most situations when you directly couple the test set to a base<br />
station, use the high power attenuator between the test set and the BTS.<br />
NOTE<br />
The lowest level the signal generator can go to is -90 dBm. In order to get a lower<br />
level, you must use an external attenuator. You can compensate for the attenuator in<br />
the RF Out Loss.<br />
Step<br />
Notes<br />
1 [Setup]<br />
2 [Sig Gen]<br />
3 [Freq/Chan]<br />
4 Enter the channel number or<br />
the frequency using the<br />
numeric keypad.<br />
5 • For channel select [Rev]<br />
or [Fwd]<br />
• For frequency select<br />
[GHz], [MHz], [kHz], or<br />
[Hz],<br />
6 [Mod Format]<br />
7 Select the channel standard<br />
from the list using the up and<br />
down arrow buttons.<br />
.<br />
.<br />
Chapter 16 419
Spectrum Analyzer<br />
Spectrum Analyzer<br />
Using the Spectrum Analyzer<br />
Step<br />
8 [Select]<br />
9 Set the RF output amplitude<br />
a. [Amplitude]<br />
b. Enter the amplitude value<br />
using the numeric keypad.<br />
c. [dBm].<br />
10 If you have previously stored<br />
RF Out Loss from an<br />
insertion loss measurement,<br />
go to the next step.<br />
Or<br />
Notes<br />
You may also enter a new value for<br />
amplitude by turning the rotary knob until the<br />
desired value is displayed or using the up and<br />
down arrow keys.<br />
For information on the effects of the RF Out<br />
Loss function on the amplitude, refer to<br />
“Using the RF Out Loss field” below.<br />
Each time you press this softkey, the selected<br />
option changes.<br />
Press [RF OUT Loss] to<br />
select On and enter the RF<br />
Out Loss value.<br />
11 Connect to the base station.<br />
12 On [Enable Sig Gen] select<br />
On.<br />
Each time you press this softkey, the selected<br />
option changes.<br />
Using the RF OUT Loss field<br />
The RF OUT Loss field is used when you need to test the receiver sensitivity of a<br />
typical base station. The test set’s source will typically go down to –95 dBm, so in<br />
order to reach –113 dBm for sensitivity testing, you must use an external attenuator.<br />
The measured value of the attenuator and connecting cables are entered into this<br />
field. This value is then used when this field is set to On. When this field is set to<br />
On, the test set will set the RF generator level to the correct level offset by the<br />
external attenuator/cabling. When you set the RF Generator to –113 dBm (with the<br />
RF OUT Loss field turned On and the external attenuator/cabling loss value entered)<br />
the output at the end of the RF test cabling is –113 dBm.<br />
Example: If you want to set the signal generator to –113 dBm, the attenuator and RF<br />
cabling measures 42.51 dB (measured with the 2 port insertion loss measurement<br />
screen prior to this test), the RF OUT Loss field is turned On (with the 42.51 dB loss<br />
value entered). The actual RF output of the signal generator is –70.49 dBm, the<br />
420 Chapter 16
Spectrum Analyzer<br />
Using the Spectrum Analyzer<br />
attenuator and RF cabling attenuated the signal to the desired level; so the RF signal<br />
at the end of the test cable/attenuator is –113 dBm. This also points out the<br />
importance of accurately measuring the loss of the attenuator and connecting cables.<br />
Setting Average, Sweep, and Restart<br />
Spectrum Analyzer<br />
Setting the Sweep<br />
You can select either continuous or single sweep. Continuous sweep provides<br />
repeated, ongoing measurements. Single sweep performs a single measurement that<br />
is repeated only when you push the Single button.<br />
To set sweep:<br />
Step<br />
Notes<br />
1 [Average/Sweep]<br />
2 [Continuous] or [Single] Each time you press one of these<br />
softkeys, the selected option changes.<br />
Setting Averaging<br />
You can choose to have averaging on or off and set the number of averages you want<br />
to take. You can select from the following types of averaging:<br />
• Off: Disables averaging.<br />
• Running: Computes the new result as the weighted sum of the last result and the<br />
new measurement. The last result is weighted by (n – 1)/n. The new result is<br />
weighted by 1/n. Each new measurement produces a new result.<br />
• Max Hold: Is not an average, but on a point by point basis, displays the<br />
maximum amplitude for the given frequency or channel since Max Hold was<br />
turned on. It is updated when a new maximum occurs.<br />
• Group Average: Makes the requested number of measurements, averages the<br />
measurement data, and displays the average as a single result trace.<br />
<strong>Measurement</strong> time will vary based on the requested number of averages and can<br />
take minutes for very large number of averages.<br />
• Group Max Average: Makes the requested number of measurements before<br />
returning a single trace result. This trace is the maximum value seen at each<br />
trace point over the requested number of averages (measurements).<br />
Chapter 16 421
Spectrum Analyzer<br />
Spectrum Analyzer<br />
Using the Spectrum Analyzer<br />
To set averaging:<br />
Step<br />
1 Set the number of averages.<br />
a. [Average]<br />
b. Enter the number of averages<br />
using the numeric keypad.<br />
c. [Enter]<br />
2 Select the type of averaging you<br />
want to apply.<br />
a. [Average/Sweep]<br />
b. [Averaging]<br />
c. [Off], [Running Average],<br />
[Max Hold], [Group<br />
Average], or [Group Max<br />
Average]<br />
Notes<br />
NOTE<br />
These two steps can be performed in any order. However, if you turn averaging on<br />
and a large number of averages has previously been set, there may be a delay before<br />
you can change number of averages.<br />
Setting Restart<br />
When you have averaging turned On and you are in Continuous Sweep mode, you<br />
can restart the averaging by pressing the Restart menu key. The Restart key has no<br />
effect if you are in Single sweep mode.<br />
To restart averaging:<br />
Step<br />
Notes<br />
1 [Average/Sweep]<br />
2 [Restart] This key is unavailable or has no effect when<br />
Sweep is set to Single. To restart a Single<br />
Sweep measurement, press [Single].<br />
422 Chapter 16
Changing the Resolution Bandwidth<br />
Spectrum Analyzer<br />
Using the Spectrum Analyzer<br />
The default resolution bandwidth is 0.1% of the span in Auto mode. By selecting<br />
Manual, you can define a narrower bandwidth and thereby see spurious signals that<br />
you might miss in Auto mode. However, the measurement will be slower.<br />
Spectrum Analyzer<br />
NOTE<br />
The auto mode is appropriate for most measurements. When you set the Res BW to<br />
Manual, you must remember to change the Res BW whenever you change the span.<br />
Otherwise, the measurement may take longer then expected or will not have the<br />
expected accuracy and or resolution.<br />
Furthermore, if you set the span greater than 1 MHz, the maximum resolution<br />
bandwidth allowed is 1% of the span. For example, if you set the span to 20 MHz,<br />
the maximum resolution bandwidth will be 200 kHz.<br />
Step<br />
Notes<br />
1 [Setup]<br />
2 On [Res BW] select Manual. Each time you press this softkey, the selected<br />
option changes. In Auto mode, the resolution<br />
bandwidth is coupled to the span setting,<br />
Manual mode decouples the resolution<br />
bandwidth from the span.<br />
3 Enter the bandwidth using the<br />
numeric keypad.<br />
4 [Hz] or [kHz]<br />
Adding or Removing a Marker<br />
Markers can be used on traces to help you visually track up to four signals. Each<br />
marker has the following settings:<br />
• Type: Provides three options, including:<br />
• Off<br />
• Normal, which places a diamond-shaped, colored marker, along with a<br />
number, 1-4, on the trace.<br />
• Delta, is associated with a normal marker. Therefore, a normal marker must<br />
Chapter 16 423
Spectrum Analyzer<br />
Spectrum Analyzer<br />
Using the Spectrum Analyzer<br />
exist prior to creating the delta marker. The delta marker displays the<br />
difference between the normal marker position and the delta marker<br />
position. Only one delta marker can be associated with a given normal<br />
marker. The normal marker must be active when Delta is selected.<br />
• Marker to Peak: Places the active marker on the current greatest value of the<br />
trace. This key is only enabled when your currently selected marker is of type<br />
Normal or Delta.<br />
• Marker to Next Peak: Places the active marker on the current next greatest<br />
value of the trace. This key is only enabled after you have performed a Marker to<br />
Peak search, and when the currently selected marker is of type Normal or Delta.<br />
• Center Freq to Marker: Changes the center frequency to locate the current<br />
marker in the center of the trace.<br />
• Ref Level to Marker: Scrolls the trace to place the marker at the top of the<br />
screen. To reset the reference level, choose [Level/Location] [Autoscale].<br />
To Add a Marker to a Trace:<br />
Step<br />
Notes<br />
1 [Marker]<br />
2 [Marker] Press [Marker] repeatedly to select<br />
Marker 1, 2, 3, or 4.<br />
4 [Type]<br />
5 [Normal] or [Delta]<br />
6 Locate the marker relative to the trace:<br />
• [Marker to Peak]<br />
• [Marker to Next Peak]<br />
7 Locate the trace relative to the marker:<br />
• [Center Freq to Marker]<br />
• [Ref Level to Marker]<br />
424 Chapter 16
To Remove a Marker from a Trace:<br />
Step<br />
1 [Marker]<br />
Spectrum Analyzer<br />
Using the Spectrum Analyzer<br />
Notes<br />
2 [Marker] Press [Marker] repeatedly to select<br />
Marker 1, 2, 3, or 4.<br />
4 [Type]<br />
5 [Off]<br />
Spectrum Analyzer<br />
Chapter 16 425
Spectrum Analyzer<br />
Spectrum Analyzer<br />
Using the Spectrum Analyzer<br />
Setting the Pass/Fail Limits<br />
The measurement limits setting allows you to alter the value of the upper and lower<br />
test limits. Center segment limits are set in dBm and are absolute limit values. The<br />
first and second segment limit values are set in dB and are limit values relative to the<br />
center segment. The settings you choose define the location of the limit lines<br />
displayed on the screen. These settings will result in a pass/fail flag being displayed<br />
on the screen above the limit line: a red triangle with a “F” is a fail, a green circle<br />
with a “P” is a pass.<br />
You can set a variety of limit configurations to suit your needs: a single upper or<br />
lower limit, an upper and lower limit pair (see Figure 16-2), a segmented upper or<br />
lower limit, or an upper and lower segmented limit mask (see Figure 16-1). You can<br />
specify a maximum of one centre segment, two lower segments, and two upper<br />
segments.<br />
Figure 16-1<br />
Segmented Limit Mask<br />
426 Chapter 16
Figure 16-2<br />
Limit Lines Upper & Lower<br />
Spectrum Analyzer<br />
Using the Spectrum Analyzer<br />
Spectrum Analyzer<br />
Chapter 16 427
Spectrum Analyzer<br />
Spectrum Analyzer<br />
Using the Spectrum Analyzer<br />
To Set the <strong>Measurement</strong> Upper and Lower Limits:<br />
Step<br />
1 [Setup]<br />
2 [Limits]<br />
3 Set the upper limit.<br />
Notes<br />
a. On [Limits] select<br />
Upper<br />
4 Set the center segment<br />
limit.<br />
a. On [Segments] select<br />
Center<br />
5 On [Center Segment]<br />
select On or Off.<br />
Enables you to toggle the measurement limit line<br />
segment function On (active) and Off (inactive).<br />
• If set to On, an upper limit line with a pass or<br />
fail icon above the line is displayed on the<br />
screen. This enables you to set the center<br />
segment limit value and the width of the center<br />
segment. (Center segment width (Center Span)<br />
is unavailable unless the first segment is turned<br />
on.) Any measured value that exceeds the<br />
upper limit will result in a failure indication.<br />
• If set to Off, neither limit lines nor pass fail<br />
indicators are displayed.<br />
6 Set the center segment<br />
limit value.<br />
a. [Center Level]<br />
b. Enter the number on<br />
the numeric keypad.<br />
c. [dBm]<br />
Maximum Upper limit: 50 dBm to –150 dBm (if a<br />
lower limit is set, the upper limit should be set<br />
higher than the lower limit)<br />
428 Chapter 16
Step<br />
7 • If you only need an<br />
upper limit line, stop<br />
here.<br />
• If you need a lower<br />
limit line:<br />
Notes<br />
Spectrum Analyzer<br />
Using the Spectrum Analyzer<br />
Spectrum Analyzer<br />
a. On [Limits]<br />
select Lower<br />
b. Repeat steps 4, 5,<br />
and 6.<br />
• For a segmented<br />
limit line, proceed<br />
with step 8.<br />
8 Set the first segment<br />
limit.<br />
a. On [Segments] select<br />
1st<br />
9 On [1 st Segment] select<br />
On or Off.<br />
Enables you to toggle the measurement limit line<br />
segment function On (active) and Off (inactive).<br />
• If set to On, a left and right upper limit line<br />
segment with a pass or fail icon above each<br />
segment is displayed on the screen. This<br />
enables you to set the first segment left and<br />
right limit values and the width of the left and<br />
right first segment. (The first segment width<br />
(Span) is unavailable unless the second<br />
segment is turned on.) Any measured value that<br />
exceeds the upper limit will result in a failure<br />
indication.<br />
• If set to Off, neither limit lines nor pass fail<br />
indicators are displayed. Nor are second<br />
segment functions available.<br />
Chapter 16 429
Spectrum Analyzer<br />
Spectrum Analyzer<br />
Using the Spectrum Analyzer<br />
Step<br />
10 Set the first segment left<br />
and right limit values.<br />
a. On [1 st Segment]<br />
select Left.<br />
b. [Level]<br />
c. Enter the number on<br />
the numeric keypad.<br />
d. [dB]<br />
Notes<br />
Maximum Upper limit: 50 dBm to –150 dBm (if a<br />
lower limit is set, the upper limit should be set<br />
higher than the lower limit)<br />
e. On [1 st Segment]<br />
select Right.<br />
f. Repeat steps b, c, and<br />
d.<br />
11 Set the center segment<br />
width value.<br />
a. On [Segments] select<br />
Center<br />
b. [Center Span]<br />
c. Enter the number on<br />
the numeric keypad.<br />
d. [GHz], [MHz],<br />
[kHz], or [Hz]<br />
12 • If you only need a<br />
two segment limit<br />
line, stop here.<br />
• For a three segment<br />
limit line, proceed<br />
with step 13.<br />
13 On [Segments] select<br />
2nd<br />
430 Chapter 16
Step<br />
14 On [2 nd Segment] select<br />
On or Off.<br />
15 Set the second segment<br />
left and right limit<br />
values.<br />
a. On [2 nd Segment]<br />
select Left.<br />
b. [Level]<br />
c. Enter the number on<br />
the numeric keypad.<br />
d. [dB]<br />
e. On [2 nd Segment]<br />
select Right.<br />
f. Repeat steps b, c, and<br />
d.<br />
Notes<br />
Spectrum Analyzer<br />
Using the Spectrum Analyzer<br />
Enables you to toggle the measurement limit line<br />
segment function On (active) and Off (inactive).<br />
• If set to On, a left and right upper limit line<br />
segment with a pass or fail icon above each<br />
segment is displayed on the screen. This<br />
enables you to set the second segment left and<br />
right limit values. Any measured value that<br />
exceeds the upper limit will result in a failure<br />
indication.<br />
• If set to Off, neither limit lines nor pass fail<br />
indicators are displayed.<br />
Maximum Upper limit: 50 dBm to –150 dBm. If a<br />
Lower Limit is set, the Upper Limit should be set<br />
higher than the Lower Limit)<br />
Spectrum Analyzer<br />
Chapter 16 431
Spectrum Analyzer<br />
Spectrum Analyzer<br />
Using the Spectrum Analyzer<br />
Step<br />
16 Set the first segment<br />
width value.<br />
Notes<br />
a. On [Segments] select<br />
1st<br />
b. [Span]<br />
c. Enter the number on<br />
the numeric keypad.<br />
d. [GHz], [MHz],<br />
[kHz], or [Hz],<br />
17 Set the lower limit.<br />
a. On [Limits] select<br />
Lower<br />
b. Repeat steps 4<br />
through 16 as<br />
appropriate for the<br />
number of segments<br />
you need.<br />
Maximum Lower Limit: dBm to –150 dBm. If an<br />
Upper Limit is set, the Lower Limit should be set<br />
lower than the Upper Limit)<br />
432 Chapter 16
Spectrogram Display<br />
Spectrum Analyzer<br />
Spectrogram Display<br />
The Spectrogram view can be used with the Interference ID or the Occupied BW<br />
measurements and standard spectrum. Troubleshooting a transmitter system is often<br />
aided by examining the time evolution of the power distribution.<br />
This view provides a history of the spectrum. You can use it to:<br />
Spectrum Analyzer<br />
• locate intermittent signals.<br />
• track signal levels over time.<br />
You may set the following parameters for this view:<br />
• The Update Interval is the interval, measured in whole seconds, between<br />
successive records displayed on the spectrogram. In other words, if you set the<br />
update interval to 5 seconds, the spectrogram display will not update until the<br />
after the first complete measurement following a gap of five seconds.<br />
Alternatively, you can set the update interval to provide the maximum data<br />
collection speed by pressing [Max Speed], or by setting the update interval to 0<br />
(zero) seconds.<br />
NOTE<br />
It is not always possible for the analyzer to match the update interval you specify. It<br />
is possible, for example, to set your update interval to zero seconds (the maximum<br />
speed), and then to find that the analyzer can not update any faster than once every<br />
two seconds.<br />
A data sample is taken every n seconds for display on the spectrogram.<br />
Increasing the update time allows data capturing over a longer period of time in<br />
the spectrogram. However, it is a sampling technique that allows intermittent<br />
events, which may occur between samplings, to be lost. Therefore, if you are<br />
searching for intermittent signals, consider using Group Max average type in<br />
conjunction with increasing the capture time (see “Setting Average, Sweep, and<br />
Restart” on page 421).<br />
Approximate Times Taken to Display the Spectrogram<br />
Update Interval<br />
Max. Speed<br />
Time for a Full Screen Display<br />
34 seconds<br />
1 second 3 minutes<br />
Chapter 16 433
Spectrum Analyzer<br />
Spectrum Analyzer<br />
Spectrogram Display<br />
Update Interval<br />
2 seconds 6 minutes<br />
4 seconds 12 minutes<br />
Time for a Full Screen Display<br />
30 seconds 90 minutes (1.5 hours)<br />
60 seconds 180 minutes (3.0 hours)<br />
300 seconds (1 minute) 900 minutes (15.0 hours)<br />
600 seconds (10 minutes) 1800 minutes (30.0 hours)<br />
The frequency indicator is at the bottom right corner of the screen, the time<br />
reference indicator at the bottom left. For each indicator the text indicates which<br />
reference you have chosen. A green LED indicates a locked condition. A red<br />
“X” indicates an unlocked condition.<br />
• Frame Skip: Allows you to set the number of frames you would like to skip<br />
when capturing data. You may set this value from skip 0 to 2147,483,647<br />
frames. Increasing the frame skip value causes the display to redraw the<br />
spectrum every n th trace and a block of lines is shown at once instead of a single<br />
line at a time. Higher frame skip values are for use with fast measurements.<br />
• Palette: Allows you to set the display to full color or grayscale.<br />
Performing a Spectrogram <strong>Measurement</strong><br />
Step<br />
Notes<br />
1 [Spectrum Analyzer]<br />
2 [<strong>Measurement</strong>s]<br />
3 [Spectrogram]<br />
434 Chapter 16
Step<br />
Spectrum Analyzer<br />
Spectrogram Display<br />
4 On [Spectrogram] select On. Each time you press this key,<br />
the spectrogram state switches<br />
between On and Off.<br />
5 If you need to restart the data capture press<br />
[Reset Spectrogram]<br />
6 If desired set the update interval:<br />
a. [Update Interval]<br />
b. Enter the interval number using the<br />
numeric keypad.<br />
c. Select [sec] or [Max Speed].<br />
7 If desired set the number of frames you want<br />
to skip:<br />
Notes<br />
When you set [Spectrogram]<br />
to On, [Reset Spectrogram],<br />
[Update Interval], [Frame<br />
Skip], and [Palette] become<br />
active.<br />
This restarts the data capture<br />
for the Codogram. You may<br />
see the screen freeze for a few<br />
seconds before the display<br />
starts plotting data again.<br />
Allows you to set the update<br />
interval to 0, 1, or more<br />
seconds. Alternatively, you<br />
may set it to automatically<br />
determine the update interval<br />
that provides the maximum<br />
data collection speed.<br />
If you need to return to the<br />
automatically determined<br />
maximum capture speed, you<br />
must press [Update Interval]<br />
followed by a numeric keypad<br />
key to access [Max Speed].<br />
Spectrum Analyzer<br />
a. [Frame Skip]<br />
b. Enter the interval number using the<br />
numeric keypad.<br />
c. Select [frames].<br />
Chapter 16 435
Spectrum Analyzer<br />
Spectrum Analyzer<br />
Spectrogram Display<br />
Step<br />
8 If desired set the display color:<br />
a. [Palette]<br />
b. Select [Full Color] or [Grayscale].<br />
Notes<br />
The color/grayscale top and<br />
bottom mappings are<br />
determined by the Ref Level<br />
and Scale/Div settings. To<br />
change the mapping, go to<br />
[Level/Location] and change<br />
[Ref Level] and [Scale/Div].<br />
Figure 16-3<br />
Spectrogram View of a 1xEV-DO Signal<br />
436 Chapter 16
Using the Interference ID <strong>Measurement</strong><br />
Spectrum Analyzer<br />
Using the Interference ID <strong>Measurement</strong><br />
Use the Interference ID measurement to find and identify interference signals over a<br />
designated spectrum. This measurement requires that Option 270 - Interference<br />
Analyzer be installed on your instrument. Interference ID provides you with a list of<br />
possible signal types for a designated signal. For example, a selected interference<br />
signal might be indicated as a possible CW or a CDMA signal. This measurement<br />
does not demodulate the signals. Therefore the list is not definitive. The list retains<br />
some history to help identify intermittent signals. The history can be reset with the<br />
[Average] [Restart] menu keys.<br />
Spectrum Analyzer<br />
Performing a Basic Interference ID <strong>Measurement</strong><br />
Step<br />
Notes<br />
1 Select Spectrum Analyzer.<br />
a. Mode<br />
b. [Spectrum Analyzer/Tools]<br />
c. [Spectrum Analyzer]<br />
2 Enter the channel standard.<br />
a. [Chan Std]<br />
b. Select the standard using the up and<br />
down arrow buttons.<br />
c. [Select]<br />
d. On [Units] select Chan.<br />
3 Enter the channel number.<br />
Each time you press the [Units]<br />
menu key, the selected option<br />
changes.<br />
a. [Channel]<br />
b. Enter the channel number using the<br />
numeric keypad.<br />
c. Select [Fwd] or [Rev].<br />
Chapter 16 437
Spectrum Analyzer<br />
Spectrum Analyzer<br />
Using the Interference ID <strong>Measurement</strong><br />
Step<br />
4 Set the span.<br />
a. [Span]<br />
b. Enter the frequency using the<br />
numeric keypad.<br />
c. [Hz], [kHz], [MHz], or [GHz]<br />
5 Connect to the base station.<br />
Notes<br />
Connect to the Antenna<br />
438 Chapter 16
Step<br />
6 For an Over The Air measurement,<br />
connect an antenna and an external<br />
filter to the RF input.<br />
Spectrum Analyzer<br />
Using the Interference ID <strong>Measurement</strong><br />
Notes<br />
The external filter is necessary to<br />
eliminate out-of-band signals that<br />
would otherwise reduce the<br />
dynamic range of measurements in<br />
the band of interest. The effect of<br />
the out-of-band signals is to raise<br />
the noise floor, possibly hiding<br />
some or all of the signal of interest.<br />
However, the external filter is<br />
optional in this set up:<br />
Spectrum Analyzer<br />
• If you want to limit your search<br />
to a specific band of interest,<br />
then you should use the<br />
external filter.<br />
• If you want to search beyond a<br />
specific band, then you can<br />
leave the filter off.<br />
Over the air measurement connection<br />
Chapter 16 439
Spectrum Analyzer<br />
Spectrum Analyzer<br />
Using the Interference ID <strong>Measurement</strong><br />
Step<br />
7 Set the level to Autoscale.<br />
a. [Level]<br />
b. [Autoscale]<br />
8 Select the Interference ID<br />
<strong>Measurement</strong>.<br />
a. [<strong>Measurement</strong>s]<br />
b. [Interference ID]<br />
c. On [Interference ID] select On.<br />
9 You can set marker to a signal peak by:<br />
a. [Signal Pointer]<br />
b. Enter the frequency using the<br />
numeric keypad.<br />
c. Select [GHz], [MHz], [kHz], or<br />
[Hz].<br />
OR by:<br />
a. [Pointer to Peak]<br />
b. Enter the frequency using the<br />
numeric keypad.<br />
c. Select [Pointer To Next Peak] to<br />
mark successively lower peaks.<br />
Notes<br />
A marker will appear on the trace<br />
at the left of the display. The<br />
Frequency and power level at the<br />
marker (Signal Pointer) is<br />
displayed in the data window<br />
below the trace display window.<br />
The type of signal that is causing<br />
the interference is also indicated.<br />
The number displayed at the<br />
bottom of the Pointer to Peak<br />
button indicates the number of the<br />
marked peak and the total number<br />
of peaks. For example, 1/22<br />
indicates the peak with the highest<br />
power on the display and a total of<br />
22 peaks displayed. 2/22 would<br />
indicate the second highest peak,<br />
3/22 the third highest, and so forth.<br />
Pointer to Peak always returns the<br />
marker to the highest peak.<br />
440 Chapter 16
Step<br />
10 You can set the threshold level to<br />
automatically set value or manual select<br />
a value by:<br />
a. On [Threshold] select Auto<br />
Or<br />
a. On [Threshold] select Manual<br />
b. Enter the threshold value using the<br />
numeric keypad.<br />
c. Select [dBm].<br />
11 You can set center frequency of the<br />
display to the marker frequency by:<br />
a. [Zoom to Signal]<br />
b. [Zoom In]<br />
12 Under [Zoom to Signal] you may also<br />
select [Zoom Out]<br />
Spectrum Analyzer<br />
Using the Interference ID <strong>Measurement</strong><br />
Notes<br />
The threshold limit line is<br />
displayed on the graticule at the<br />
desired level. Ensure that the<br />
threshold value you enter is within<br />
the graticule range or the threshold<br />
limit line will be off the display.<br />
The threshold is used to determine<br />
the “edges” of the signal. Manual<br />
adjustment may be required to<br />
correctly identify some signals,<br />
especially in crowded spectrums.<br />
The marker will track with the new<br />
center frequency at the center of<br />
the display. The Span will be<br />
decreased to enhance viewing of<br />
the designated interference signal.<br />
[Zoom Out] will back out the<br />
[Zoom In] series. If you Manually<br />
set the Frequency/Channel or<br />
Span, it will clear the [Zoom Out]<br />
history.<br />
Spectrum Analyzer<br />
Chapter 16 441
Spectrum Analyzer<br />
Spectrum Analyzer<br />
Using the Occupied BW <strong>Measurement</strong><br />
Using the Occupied BW <strong>Measurement</strong><br />
Occupied Bandwidth integrates the power of the displayed spectrum and puts<br />
markers at the frequencies between which a selected percentage of the power is<br />
contained. The measurement defaults to 99% of the occupied bandwidth power. The<br />
power-bandwidth routine first computes the combined power of all signal responses<br />
contained in the trace. For 99% occupied power bandwidth, markers are placed at<br />
the frequencies on either side of 99% of the power. This would leave 1% of the<br />
power evenly distributed outside the markers. The difference between the marker<br />
frequencies is the 99% power bandwidth and is the value displayed.<br />
The Occupied BW result will correspond to the span between the two markers and<br />
will be a multiple of the span between two points. So, for a 10 MHz span, the OBW<br />
will come in multiples of 39.216 kHz (10 MHz divided by 255). Values will be 0,<br />
39.216 kHz, 78.431 kHz, 117.647 kHz, and so forth. For narrow signals (TDMA,<br />
PDC, and so forth) you will need to zoom in on the signal to get a reasonably<br />
accurate Occupied BW result. For a 100 kHz span the Occupied BW resolution will<br />
be 392 Hz (100 kHz divided by 255).<br />
The occupied bandwidth measurement can be made in single or continuous sweep<br />
mode. The center frequency and reference level may be set by you.<br />
442 Chapter 16
NOTE<br />
Spectrum Analyzer<br />
Using the Occupied BW <strong>Measurement</strong><br />
Performing a Basic Occupied BW <strong>Measurement</strong><br />
The <strong>E7495A</strong>/B defaults to Average (RMS) detection to measure the occupied<br />
bandwidth power. Average (RMS) detection gives the most accurate results, so the<br />
default detector setting should therefore be maintained for OBW measurements.<br />
Sample detection will give similar results to the Average (RMS) detection, although<br />
the results will be less repeatable. Peak and Negative Peak detection will give higher<br />
and lower results, respectively, from the actual power.<br />
To reproduce repeatable power readings, use the default Average (RMS) detector. In<br />
addition, you should use Running Average or Group Average with 50 or more<br />
averages. For more details on averaging, see “Setting Average, Sweep, and Restart”<br />
on page 421.<br />
Spectrum Analyzer<br />
Step<br />
Notes<br />
1 Select Spectrum Analyzer.<br />
a. Mode<br />
b. [Spectrum Analyzer/Tools]<br />
c. [Spectrum Analyzer]<br />
2 Enter the channel standard.<br />
a. [Chan Std]<br />
b. Select the standard using the up and<br />
down arrow buttons.<br />
c. [Select]<br />
d. On [Units] select Chan.<br />
3 Enter the channel number.<br />
Each time you press the [Units]<br />
menu key, the selected option<br />
changes.<br />
a. [Channel]<br />
b. Enter the channel number using the<br />
numeric keypad.<br />
c. Select [Fwd] or [Rev].<br />
Chapter 16 443
Spectrum Analyzer<br />
Spectrum Analyzer<br />
Using the Occupied BW <strong>Measurement</strong><br />
Step<br />
4 Set the span.<br />
a. [Span]<br />
b. Enter the frequency using the<br />
numeric keypad.<br />
c. [Hz], [kHz], [MHz], or [GHz]<br />
5 Turn on Averaging.<br />
a. [Span]<br />
b. Enter the frequency using the<br />
numeric keypad.<br />
c. [Hz], [kHz], [MHz], or [GHz]<br />
6 Connect to the base station.<br />
Notes<br />
Refer to the note above.<br />
Use [Setup] [Res BW] to ensure the<br />
RBW is set between Span/255 &<br />
Span/127.<br />
Use [Average/Sweep] to set<br />
Averaging ON, set to Running<br />
Average or Group Average, and set<br />
Average number to 50 or greater.<br />
Out of service connection<br />
444 Chapter 16
Step<br />
Spectrum Analyzer<br />
Using the Occupied BW <strong>Measurement</strong><br />
Notes<br />
Spectrum Analyzer<br />
In service connection<br />
7 For an over the air measurement,<br />
connect an antenna and an external<br />
filter to the RF input.<br />
The external filter is necessary to<br />
eliminate out-of-band signals that<br />
would otherwise reduce the<br />
dynamic range of measurements in<br />
the band of interest. The effect of<br />
the out-of-band signals is to raise<br />
the noise floor, possibly hiding<br />
some or all of the signal of interest.<br />
However, the external filter is<br />
optional in this set up:<br />
• If you want to limit your search<br />
to a specific band of interest you<br />
should use it<br />
• If you want to search beyond a<br />
specific band then can leave the<br />
filter off.<br />
Chapter 16 445
Spectrum Analyzer<br />
Spectrum Analyzer<br />
Using the Occupied BW <strong>Measurement</strong><br />
Step<br />
Notes<br />
Over the air measurement connection<br />
8 Set the level to Autoscale.<br />
a. [Level]<br />
b. [Autoscale]<br />
9 Select the Occupied BW <strong>Measurement</strong>.<br />
a. [<strong>Measurement</strong>s]<br />
b. [Occupied BW]<br />
c. On [Occupied BW] select On.<br />
10 Set the percentage of power for<br />
calculating the Occupied BW.<br />
A marker pair will appear on the<br />
trace and the occupied bandwidth<br />
value and the integrated power in<br />
the Occupied BW are displayed in<br />
the data window below the trace<br />
graticule.<br />
The default percentage is 99%.<br />
a. [Power]<br />
b. Enter the percentage number using<br />
the numeric keypad.<br />
c. Select [%].<br />
446 Chapter 16
Step<br />
11 If you are measuring a narrow signal<br />
such as TDMA or PDC, zoom in on the<br />
signal for a more accurate Occupied<br />
BW results.<br />
Spectrum Analyzer<br />
Using the Occupied BW <strong>Measurement</strong><br />
Notes<br />
Spectrum Analyzer<br />
a. [Freq/Chan/Span]<br />
b. [Span]<br />
c. Enter the frequency using the<br />
numeric keypad.<br />
d. [Hz], [kHz], [MHz], or [GHz]<br />
Chapter 16 447
Spectrum Analyzer<br />
Spectrum Analyzer<br />
Using the Spectrum Emission Mask <strong>Measurement</strong><br />
Using the Spectrum Emission Mask <strong>Measurement</strong><br />
Use the Spectrum Emission Mask (SEM) measurement (also sometimes referred to<br />
as Conducted Spurious Emissions measurement) to identify and determine the<br />
power levels of spurious emissions outside the assigned CDMA channel. The<br />
measurement is made at the access network output port or at the repeater RF output<br />
port.<br />
The SEM measurement only supports the cdma2000 and the 1xEV-DO channel<br />
standards, covering band classes 0,1,3,4,5,6, and 10. If you enable the SEM<br />
measurement using an unsupported channel standard, the limit mask will not be<br />
turned on and a message will be displayed telling you that SEM <strong>Measurement</strong>s do<br />
not support your selected channel standard. The table below summarizes supported<br />
and unsupported channel standards:<br />
Band<br />
Class<br />
Band Name<br />
Channel Standard<br />
Name<br />
SEM<br />
<strong>Measurement</strong>s<br />
Supported?<br />
0 800 MHz Band. North American Cellular<br />
CDMA (commonly<br />
referred to as, ‘Cellular<br />
Band”)<br />
1 1900 MHz Band North American PCS<br />
CDMA (commonly<br />
referred to as, “PCS”).<br />
Yes<br />
Yes<br />
2 TACS Band TACS CDMA SEM Not<br />
Supported<br />
3 JTACS Band Japan CDMA Yes<br />
4 Korean PCS Band. Korean PCS CDMA Yes<br />
5 450 MHz Band NMT-450 Yes<br />
6 2 GHz Band IMT-2000 cdma2000 Yes<br />
7 700 MHz Band: North American 700<br />
MHz Cellular CDMA<br />
SEM Not<br />
Supported<br />
8 1800 MHz Band 1800 MHz CDMA SEM Not<br />
Supported<br />
448 Chapter 16
Band<br />
Class<br />
Band Name<br />
Spectrum Analyzer<br />
Using the Spectrum Emission Mask <strong>Measurement</strong><br />
9 900 MHz Band 900 MHz CDMA SEM Not<br />
Supported<br />
10 Secondary 800 MHz<br />
Band<br />
11 400 MHz European<br />
PAMR Band<br />
Channel Standard<br />
Name<br />
Secondary 800 CDMA<br />
400 MHz European<br />
PAMR<br />
SEM<br />
<strong>Measurement</strong>s<br />
Supported?<br />
Yes<br />
SEM Not<br />
Supported<br />
12 800 MHz PAMR Band 800 MHz PAMR SEM Not<br />
Supported<br />
Spectrum Analyzer<br />
NOTE<br />
SEM measurements are made under two conditions. These are:<br />
• Continuous Data mode, that is, with no idle slots.<br />
• Idle mode, that is, with all slots idle except the control channel<br />
Your <strong>E7495A</strong> or E7495B test instrument can only make SEM measurements for the<br />
first condition, that is, in Continuous Data mode<br />
To make an SEM measurement, the power level limits at different frequency offsets<br />
need to be specified. These power limits vary between different channel standards,<br />
but have all been predefined for you. These limits are listed in the table below.<br />
For all possible channel standards for which you can make an SEM measurement<br />
(see the table above), the power limits have been predefined and will be displayed<br />
on the screen as a stepped yellow line. This line is known as the ‘mask’. If you<br />
attempt to make an SEM measurement for a channel standard that does not support<br />
SEM measurements, no mask will be displayed, and the message, “SEM<br />
<strong>Measurement</strong> does not support the selected Channel Standard” will be displayed on<br />
the bottom of the test instrument’s screen.<br />
Chapter 16 449
Spectrum Analyzer<br />
Spectrum Analyzer<br />
Using the Spectrum Emission Mask <strong>Measurement</strong><br />
Channel Standards and Emission Limits<br />
Band<br />
Class<br />
Band Name Frequency Variance Emission Limit /<br />
RBW<br />
0 800 MHz Band. 750 kHz to 1.98 MHz<br />
1.98 MHz to 4.00 MHz<br />
1 1900 MHz Band 885 kHz to 1.98 MHz<br />
1.98 MHz to 2.25 MHz<br />
2 TACS Band SEM Not Supported<br />
3 JTACS Band 750 kHz to 1.98 MHz<br />
1.98 MHz to 4.00 MHz<br />
4 Korean PCS Band. 885 kHz to 1.98 MHz<br />
1.98 MHz to 2.25 MHz<br />
5 450 MHz Band 750 kHz to 1.98 MHz<br />
1.98 MHz to 4.00 MHz<br />
6 2 GHz Band 885 kHz to 1.98 MHz<br />
1.98 MHz to 2.25 MHz<br />
7 700 MHz Band: SEM Not Supported<br />
8 1800 MHz Band SEM Not Supported<br />
9 900 MHz Band SEM Not Supported<br />
10 Secondary 800 MHz<br />
Band<br />
11 400 MHz European<br />
PAMR Band<br />
750 kHz to 1.98 MHz<br />
1.98 MHz to 4.00 MHz<br />
SEM Not Supported<br />
12 800 MHz PAMR Band SEM Not Supported<br />
–45 dBc / 30 kHz<br />
–60 dBc / 30 kHz<br />
–45 dBc / 30 kHz<br />
–55 dBc / 30 kHz<br />
–45 dBc / 30 kHz<br />
–60 dBc / 30 kHz<br />
–45 dBc / 30 kHz<br />
–55 dBc / 30 kHz<br />
–45 dBc / 30 kHz<br />
–60 dBc / 30 kHz<br />
–45 dBc / 30 kHz<br />
–55 dBc / 30 kHz<br />
–45 dBc / 30 kHz<br />
–60 dBc / 30 kHz<br />
450 Chapter 16
Spectrum Analyzer<br />
Using the Spectrum Emission Mask <strong>Measurement</strong><br />
Performing a Basic Spectrum Emissions Mask <strong>Measurement</strong><br />
Step<br />
Notes<br />
Spectrum Analyzer<br />
1 Select Spectrum Analyzer.<br />
a. Mode<br />
b. [Spectrum Analyzer/Tools]<br />
c. [Spectrum Analyzer]<br />
2 Enter the channel standard.<br />
a. [Chan Std]<br />
b. Select the standard using the up and<br />
down arrow buttons.<br />
c. [Select]<br />
d. On [Units] select Chan.<br />
3 Enter the channel number.<br />
Each time you press the [Units]<br />
menu key, the selected option<br />
changes.<br />
a. [Channel]<br />
b. Enter the channel number using the<br />
numeric keypad.<br />
c. Select [Fwd] or [Rev].<br />
4 Select the SEM measurement.<br />
a. [<strong>Measurement</strong>s]<br />
b. [SEM]<br />
Chapter 16 451
Spectrum Analyzer<br />
Spectrum Analyzer<br />
Using the Spectrum Emission Mask <strong>Measurement</strong><br />
Step<br />
5 Switch the SEM measurement On.<br />
a. [SEM]<br />
Notes<br />
Each time you press the [SEM]<br />
menu key, the selected option<br />
changes.<br />
As soon as you switch the SEM<br />
measurement On, the SEM mask<br />
(a stepped yellow line) will appear<br />
on the screen. If no SEM mask<br />
appears, check that SEM<br />
measurements are supported for<br />
your selected channel standard.<br />
Each individual mask line segment<br />
will be annotated with either a<br />
green circle with ‘P’ inside it<br />
(indicating that the limit line<br />
segment has not been exceeded) or<br />
with a red triangle with an ‘F’<br />
(indicating the limit has been<br />
exceeded and the test has failed).<br />
When the SEM <strong>Measurement</strong> is turned On, the states of the following parameters<br />
are stored for restoration when the SEM <strong>Measurement</strong> is turned Off:<br />
• Resolution bandwidth mode<br />
• Frequency span<br />
• Averaging mode<br />
• Number of averages<br />
• Upper limits<br />
• Lower limits<br />
The following parameters are then set to perform the measurement. Each time the<br />
SEM measurement is turned On, these parameters are set to the values as detailed<br />
below. In addition the upper limits are reset to appropriate default values when the<br />
SEM measurement is On and the selected channel standard is changed.<br />
• Occupied bandwidth measurement turned Off<br />
• Interference analysis measurement turned Off<br />
452 Chapter 16
• Resolution bandwidth mode set to Manual<br />
• Resolution bandwidth set to 30 kHz<br />
Spectrum Analyzer<br />
Using the Spectrum Emission Mask <strong>Measurement</strong><br />
• Lower limit center, segment 1 and segment 2 set to Off<br />
• Number of averages set to 10<br />
Spectrum Analyzer<br />
• Averaging mode set to Running<br />
• If currently selected channel standard is Band class 0, 2, 3, 5, 7, 9 or 10 (see<br />
table above)<br />
— Span set to 8MHz<br />
• If currently selected channel standard is Band class 1, 4, 6 or 8<br />
— Span set to 5MHz<br />
• Upper limits are set to the levels specified in the table above.<br />
The SEM <strong>Measurement</strong> is turned Off when either the Occupied Bandwidth or<br />
Interference Analysis measurements are turned On.<br />
Figure 16-4<br />
Spectrum Emissions Mask (SEM) <strong>Measurement</strong>l<br />
Chapter 16 453
Spectrum Analyzer<br />
Spectrum Analyzer<br />
Using the Spectrum Emission Mask <strong>Measurement</strong><br />
454 Chapter 16
17 Basic System Operations<br />
“System Reference Introduction” on page 457<br />
“Setting System References” on page 458<br />
“Displaying GPS Location Data” on page 458<br />
“Selecting a Frequency/Timing Reference” on page 458<br />
“Setting up the DC Bias Option” on page 459<br />
“Printing a Screen to a File” on page 461<br />
“Printing Screens” on page 461<br />
“Selecting Output Media—PCMCIA Card or Compact Flash Card” on<br />
page 461<br />
“File Naming Options” on page 462<br />
“Saving Data” on page 465<br />
“Saving data” on page 465<br />
“Selecting Output Media—PCMCIA Card or CompactFlash Card” on<br />
page 465<br />
“File Naming Options” on page 466<br />
“Managing Media Types” on page 469<br />
Basic System Operations<br />
“Formatting a PCMCIA or CompactFlash Card” on page 469<br />
“Test Software Operation” on page 469<br />
“Configuring for Network Connectivity” on page 471<br />
“Saving, Recalling, and Deleting Instrument States” on page 474<br />
“Saving the State” on page 474<br />
“Saving the Power-Up State” on page 474<br />
“Recalling the State” on page 475<br />
“Returning the Power-Up State to Factory default” on page 475<br />
“Deleting States” on page 476<br />
“Viewing System Statistics” on page 477<br />
“Viewing System Release Versions” on page 477<br />
455
Basic System Operations<br />
“Viewing System Memory” on page 477<br />
“Viewing Battery Statistics” on page 478<br />
“Using the Option Manager” on page 479<br />
Basic System Operations<br />
“Viewing Installed Options” on page 479<br />
“Viewing Installable Options” on page 479<br />
“Installing an Option” on page 480<br />
“Viewing Installation Information” on page 480<br />
“Testing System Functions” on page 481<br />
456 Chapter 17
Basic System Operations<br />
System Reference Introduction<br />
System Reference Introduction<br />
The <strong>Agilent</strong> <strong>E7495A</strong>/B Base Station Test Sets provide a system utility that allows<br />
you to perform non-measurement activities and to configure the test set for:<br />
• General operations<br />
• System status updates<br />
• Data manipulation<br />
• Basic system functions testing<br />
Basic System Operations<br />
Chapter 17 457
Basic System Operations<br />
Setting System References<br />
Setting System References<br />
The <strong>Agilent</strong> <strong>E7495A</strong>/B provide a utility to preconfigure the global settings for the<br />
box.<br />
Displaying GPS Location Data<br />
Basic System Operations<br />
Perform this procedure to have the current GPS location data visible on the screen at<br />
all times.<br />
Step<br />
1 [System]<br />
2 [Fr/Time Ref<br />
Location]<br />
3 On [Show GPS<br />
Location] select On.<br />
Notes<br />
Each time you press this softkey, the selected option<br />
changes.<br />
NOTE<br />
A GPS locked or unlocked indicator is located in the bottom-left of the screen. It<br />
indicates whether or not the GPS signal is being captured.<br />
Selecting a Frequency/Timing Reference<br />
Perform this procedure to select a common frequency or timing reference to be used<br />
for all measurement tools (when applicable).<br />
Step<br />
Notes<br />
1 [System]<br />
2 [Fr/Time Ref Location]<br />
458 Chapter 17
Basic System Operations<br />
Setting System References<br />
Step<br />
Notes<br />
3 [Fr/Time Ref] Displays additional menu buttons. With Internal<br />
GPS and External Even Sec, both frequency and<br />
time references are active. This is used when<br />
measuring CDMA signals to get valid PN<br />
offsets.<br />
NOTE<br />
4 Select the frequency/timing<br />
reference you want.<br />
With the other five options, you get only<br />
frequency.<br />
A frequency/time reference indicator in the lower-right of the screen shows both the<br />
selected reference and its status.<br />
Basic System Operations<br />
Reference indicators include: “GPS,” “Int Ref,” “Even Sec,” “Ext 10 MHz,” “Ext<br />
13 MHz,” or “Ext 19.66 MHz.”<br />
Status indicators include:<br />
• Green dot to indicate that the reference is locked<br />
• Yellow triangle to indicate that the reference is acquiring lock<br />
• Red X to indicate that the reference is not locked<br />
Setting up the DC Bias Option<br />
The DC Bias Tee, Option 300 - DC Bias, provides power from the <strong>Agilent</strong> E7495B<br />
to the amplifier at the top of a base station tower, or the end of the cable run. The DC<br />
voltage (12 volts) is output on the center conductor of Port 1, RF Out. The option<br />
enables you to test with the amplifier powered on. DC bias defaults to off when you<br />
select a new measurement type which does not depend on either Port 1 or Port 2,<br />
and it must be turned on each time you want to use it. It stays on as long as you’re<br />
using measurements that use RF In or Out. DC Bias cannot be saved in the On<br />
position as a state and is turned off when the power is cycled, including when going<br />
into the sleep state. If you do not have the option, it is grayed out on the screen.<br />
NOTE<br />
The maximum current draw is 800 milliamps.<br />
Chapter 17 459
Basic System Operations<br />
Setting System References<br />
Step<br />
Notes<br />
1 System<br />
2 [Fr/Time Ref Location]<br />
3 [DC Out] [On] Each time you press this softkey, the selected option<br />
changes.<br />
Basic System Operations<br />
WARNING<br />
If you have tripped the RPP or are over the current limit for the DC bias, a<br />
warning screen appears. However, if you have shorted the output, the short<br />
may not be detected, and the test set will shut off current to the DC Bias port.<br />
460 Chapter 17
Basic System Operations<br />
Printing a Screen to a File<br />
Printing a Screen to a File<br />
The <strong>E7495A</strong>/B lets you save screen images to PNG files. You can save the image<br />
files to a PCMCIA card or to a CompactFlash card.<br />
Printing Screens<br />
Step<br />
1 Display data on a measurement<br />
screen.<br />
2 Insert the PCMCIA or CompactFlash<br />
card.<br />
3 Select the card you want to use by<br />
selecting the output media (see<br />
“Selecting Output Media—PCMCIA<br />
Card or CompactFlash Card” on<br />
page 465).<br />
4 Select how you want to name the<br />
data file you’re saving (see “File<br />
Naming Options” on page 462).<br />
5 [Print Screen]<br />
6 Enter a name for the file (or it is done<br />
automatically, depending on the file<br />
naming method you selected).<br />
Notes<br />
This step need only be performed the<br />
first time you insert a new card type.<br />
This step need only be performed prior<br />
to the first time you save a file, or if<br />
you want to change the method you<br />
use.<br />
The name you provide is displayed on<br />
the top of the screen image that is<br />
stored in your.PNG file.<br />
Basic System Operations<br />
Selecting Output Media—PCMCIA Card or Compact Flash Card<br />
Step<br />
Notes<br />
1 [System]<br />
Chapter 17 461
Basic System Operations<br />
Printing a Screen to a File<br />
Step<br />
Notes<br />
2 [Print Screen Setup]<br />
3 On [File Location]<br />
select PCMCIA or CF.<br />
Each time you press this softkey, the selected option<br />
changes.<br />
Basic System Operations<br />
File Naming Options<br />
You have three options for naming image files. You can<br />
• Name each file automatically using this format:<br />
saveData_YYYYMMDD_HHMMSS.png<br />
• Name each file individually, and enter the name you want. This is called User<br />
file naming.<br />
• Have the test set ask you how you want to name each file for each file you save.<br />
Setting Up Automatic File Naming<br />
Step<br />
Notes<br />
1 [System]<br />
2 [Print Screen Setup]<br />
3 On [Filename] select<br />
Auto.<br />
Each time you press this softkey, the selected option<br />
changes.<br />
Setting Up User File Naming<br />
Step<br />
Notes<br />
1 [System]<br />
2 [Print Screen Setup]<br />
3 On [Filename] select User. Each time you press this softkey, the<br />
selected option changes.<br />
462 Chapter 17
Basic System Operations<br />
Printing a Screen to a File<br />
Step<br />
Notes<br />
4 Setup file naming.<br />
a. [User Filename]<br />
b. If the filename does not exist, use<br />
the rotary knob or up and down<br />
arrow buttons to select a letter and<br />
the buttons on the left to change<br />
cursor position<br />
c. For each character entered, press<br />
[Enter]. If the filename does exist,<br />
select [Choose File...] on the right<br />
to display a list of the current files<br />
on the selected media.<br />
d. Use the rotary knob to select the<br />
file and press Select.<br />
e. [Ok]<br />
5 [If File Exists]<br />
6 [Overwrite], [Prompt], [Auto Incr], or<br />
[Timestamp]<br />
• Overwrite—overwrites existing<br />
file data with new file data.<br />
• Prompt—prompts you to input a<br />
new file name.<br />
• Auto Incr—automatically<br />
increments the filename and<br />
retains the existing filename.<br />
• Timestamp—attaches a<br />
timestamp to the filename to<br />
distinguish it from the existing<br />
file.<br />
Basic System Operations<br />
Setting Up Asking For Filename<br />
You can choose to have the test set ask you at the time you print a screen how you<br />
want to name the file. For every file you save, you can choose to specify automatic<br />
naming or to enter the filename you want.<br />
Chapter 17 463
Basic System Operations<br />
Printing a Screen to a File<br />
Step<br />
Notes<br />
1 [System]<br />
2 [Print Screen Setup]<br />
Basic System Operations<br />
3 On [Filename] select<br />
Ask.<br />
Each time you press this softkey, the selected option<br />
changes.<br />
464 Chapter 17
Basic System Operations<br />
Saving Data<br />
Saving Data<br />
Saving data<br />
Step<br />
1 Display data on a measurement<br />
view.<br />
2 Insert the PCMCIA or<br />
CompactFlash card.<br />
3 Select the card you want to use by<br />
selecting the output media (see<br />
“Selecting Output<br />
Media—PCMCIA Card or<br />
CompactFlash Card” on page 465).<br />
4 Select how you want to name the<br />
data file you’re saving (see “File<br />
Naming Options” on page 462).<br />
5 [Save Data]<br />
6 Enter a name for the file (or it is<br />
done automatically, depending on<br />
the file naming method you<br />
selected).<br />
Notes<br />
This step must only be performed the<br />
first time you insert a new card type.<br />
This step must only be performed prior<br />
to the first time you save a file, or if<br />
you want to change the method you<br />
use.<br />
Basic System Operations<br />
Selecting Output Media—PCMCIA Card or CompactFlash Card<br />
Step<br />
Notes<br />
1 [System]<br />
2 [Save Data Setup]<br />
Chapter 17 465
Basic System Operations<br />
Saving Data<br />
Step<br />
3 On [File Location]<br />
select PCMCIA or CF.<br />
Notes<br />
Each time you press this softkey, the selected option<br />
changes.<br />
File Naming Options<br />
Basic System Operations<br />
You have three options for naming data files. You can:<br />
• Name each file automatically using this format:<br />
saveData_YYYYMMDD_HHMMSS.xls<br />
• Name each file individually, and enter the name you want. This is called User<br />
file naming.<br />
• Have the test set ask you how you want to name each file at the time you save<br />
the data.<br />
Setting Up Automatic File Naming<br />
Step<br />
Notes<br />
1 [System]<br />
2 [Save Data Setup]<br />
3 On [Filename] select<br />
Auto.<br />
Each time you press this softkey, the selected option<br />
changes.<br />
Setting Up User File Naming<br />
Step<br />
Notes<br />
1 [System]<br />
2 [Save Data Setup]<br />
3 On [Filename] select User. Each time you press this softkey, the<br />
selected option changes.<br />
466 Chapter 17
Basic System Operations<br />
Saving Data<br />
Step<br />
4 Setup file naming.<br />
Notes<br />
.<br />
a. [User Filename]<br />
b. If the filename does not exist, use<br />
the rotary knob or up and down<br />
arrow buttons to select a letter and<br />
the buttons on the left to change<br />
cursor position<br />
c. For each character entered, press<br />
[Enter]. If the filename does exist,<br />
select [Choose File...] on the right<br />
to display a list of the current files<br />
on the selected media.<br />
d. Use the rotary knob to select the<br />
file and press Select.<br />
e. [Ok]<br />
5 [If File Exists]<br />
6 [Overwrite], [Prompt], [Auto Incr], or<br />
[Timestamp]<br />
• Overwrite—overwrites existing<br />
file data with new file data.<br />
• Prompt—prompts you to input a<br />
new file name.<br />
• Auto Incr—automatically<br />
increments the filename and<br />
retains the existing file name.<br />
• Timestamp—attaches a<br />
timestamp to the filename to<br />
distinguish it from the existing<br />
file.<br />
Basic System Operations<br />
Setting Up Asking For Filename<br />
You can choose to have the test set ask you at the time you save a data file how you<br />
want to name the file. This option means that for every file you save, you will be<br />
able to specify automatic naming or enter the filename you want.<br />
Chapter 17 467
Basic System Operations<br />
Saving Data<br />
Step<br />
Notes<br />
1 [System]<br />
2 [Save Data Setup]<br />
Basic System Operations<br />
3 On [Filename] select<br />
Ask.<br />
Each time you press this softkey, the selected option<br />
changes.<br />
468 Chapter 17
Basic System Operations<br />
Managing Media Types<br />
Managing Media Types<br />
The <strong>E7495A</strong>/B is compatible with two media types for storing and retrieving data:<br />
PCMCIA card and CompactFlash card. The media type buttons are not active until a<br />
media card is inserted and recognized by the <strong>E7495A</strong>/B. Upon proper recognition,<br />
the test set allows you to perform basic media tasks with each media type.<br />
Formatting a PCMCIA or CompactFlash Card<br />
You need to perform this procedure to prepare a new or existing PCMCIA or<br />
CompactFlash storage card for data storage.<br />
Step<br />
1 Make sure the card you will<br />
format is inserted in its slot.<br />
2 [System]<br />
3 [Media Manager]<br />
4 [Format PCMCIA] or<br />
[Format CF]<br />
Notes<br />
Prepares a PCMCIA of CompactFlash card for<br />
storage. Erases existing data on the card.<br />
Basic System Operations<br />
Test Software Operation<br />
Your <strong>E7495A</strong>/B can be optioned for various software options. Refer to the<br />
appropriate software manual for the usage of the Test Software key and Software<br />
Utilities key.<br />
Importing or Exporting Configuration Files from a compact flash or<br />
PCMCIA flash memory card.<br />
You can perform this procedure to import or export Test Software configuration files<br />
to or from a PCMCIA or a CompactFlash storage card.<br />
Chapter 17 469
Basic System Operations<br />
Managing Media Types<br />
Step<br />
Notes<br />
1 Make sure the card with the<br />
software configuration files<br />
or a card with adequate free<br />
space to receive the files is<br />
inserted in its slot.<br />
Basic System Operations<br />
2 [System]<br />
3 [Media Manager]<br />
4 To import configuration files<br />
from a memory card<br />
[Import Config Files]<br />
a. [from PCMCIA] or<br />
[from CF]; depending on<br />
which memory card you<br />
are using.<br />
b. Follow the on screen<br />
instructions.<br />
5 To export configuration files<br />
to a memory card<br />
[Export Config Files]<br />
a. [to PCMCIA] or [to CF];<br />
depending on which<br />
memory card you are<br />
using.<br />
b. Follow the on screen<br />
instructions.<br />
470 Chapter 17
Basic System Operations<br />
Configuring for Network Connectivity<br />
Configuring for Network Connectivity<br />
The <strong>E7495A</strong>/B can operate as a device on any compatible network. In order to be<br />
accessible on the network, certain information must be entered so the test set can<br />
communicate with other devices. Configuring the test set for network activity is<br />
performed by using the IP administrator located in the system utilities.<br />
IP Administration Using DHCP<br />
Perform this procedure to allow your test set to be integrated into an existing<br />
network that uses DHCP to dynamically assign an IP address. This procedure<br />
requires that you have the System Name (available from your network<br />
administrator).<br />
Step<br />
1 [System]<br />
2 [Controls]<br />
3 [IP Admin]<br />
4 [Sys Name]<br />
5 Enter the name of the<br />
test set.<br />
6 [Ok]<br />
7 On [DHCP] select<br />
On.<br />
8 [Save]<br />
Notes<br />
This is automatically assigned by the network<br />
administrator.<br />
An IP address and other network information will<br />
automatically be assigned if the Sys Name is<br />
recognized by the network.<br />
9 [Ok] Saves the current configuration and restarts the test<br />
set. DHCP will dynamically assign an IP address.<br />
Basic System Operations<br />
IP Administration Without DHCP<br />
Perform this procedure to allow your test set to be integrated into an existing<br />
network that uses a technique other than DHCP for its IP address assignments. One<br />
Chapter 17 471
Basic System Operations<br />
Configuring for Network Connectivity<br />
example of an alternative technique used for IP address assignments is DNS. This<br />
procedure requires the following specific data from the network administrator:<br />
• System name<br />
• IP address<br />
• Net mask<br />
• Gateway<br />
Basic System Operations<br />
Step<br />
1 [System]<br />
2 [Controls]<br />
3 [IP Admin]<br />
4 [Sys Name]<br />
5 Enter the name of the<br />
test set.<br />
6 [Ok]<br />
7 On [DHCP] select<br />
Off.<br />
Notes<br />
This name is usually assigned by the network<br />
administrator.<br />
Each time you press this softkey, the selected option<br />
changes.<br />
8 [IP Address]<br />
Now you must specify relevant network information<br />
for the test set to be recognized. Contact your<br />
network administrator if you do not have this<br />
information.<br />
9 Enter the IP address. Use the rotary knob and menu keys on the left.<br />
10 [Ok]<br />
11 [Net Mask]<br />
12 Enter the Net Mask. Use the rotary knob and menu keys on the left.<br />
13 [Ok]<br />
14 [Gateway]<br />
15 Enter the Gateway. Use the rotary knob and menu keys on the left.<br />
472 Chapter 17
Basic System Operations<br />
Configuring for Network Connectivity<br />
Step<br />
Notes<br />
16 [Ok]<br />
17 [Save]<br />
18 [Ok] Saves the current network configuration and restarts<br />
the test set.<br />
Basic System Operations<br />
Chapter 17 473
Basic System Operations<br />
Saving, Recalling, and Deleting Instrument States<br />
Saving, Recalling, and Deleting Instrument States<br />
You can save the current configuration of buttons and settings for recall at a later<br />
time. You can also save a customized power-up state, which the test set will use the<br />
each subsequent time it is powered on. This enables you to configure common usage<br />
and power-on states to speed up base station testing.<br />
Basic System Operations<br />
Saving the State<br />
Step<br />
1 Configure all<br />
measurement settings<br />
you want to save.<br />
2 [Save State]<br />
3 Enter the state name<br />
you want to use, for<br />
example, “Remote<br />
base station.<br />
4 [Ok]<br />
Notes<br />
Make sure you’re viewing the screen you want to<br />
recall later.<br />
Each time you press this softkey, the selected option<br />
changes.<br />
Saving the Power-Up State<br />
Step<br />
1 Configure all<br />
measurement settings<br />
you want to save.<br />
Notes<br />
Make sure you’re viewing the screen you want to<br />
display at power up.<br />
2 [Save State]<br />
474 Chapter 17
Basic System Operations<br />
Saving, Recalling, and Deleting Instrument States<br />
Step<br />
3 Enter the state name,<br />
“Power up” (the test<br />
set is case-sensitive,<br />
so be sure to<br />
capitalize the “P”).<br />
Notes<br />
This is the name the test set uses to identify the<br />
power-up state.<br />
4 [Ok]<br />
Recalling the State<br />
Step<br />
1 [Recall State]<br />
2 Select from the list<br />
the state you want to<br />
recall.<br />
Notes<br />
Use the rotary knob or the up and down arrow<br />
buttons to select the state you want to delete.<br />
All states, in addition to two supplied in the test set,<br />
are displayed:<br />
Basic System Operations<br />
3 [Select]<br />
• Powerup - The default power-up state shipped<br />
with the test set, or the power-up state last saved<br />
with the test set.<br />
• Factory Defaults - The default power-up state<br />
shipped with the test set. You can always revert to<br />
it by selecting it in this procedure.<br />
Returning the Power-Up State to Factory default<br />
Step<br />
Notes<br />
1 [Recall State]<br />
2 Select Factory Defaults<br />
from the list.<br />
Use the rotary knob or the up and down arrow<br />
buttons to select the state you want to delete.<br />
Chapter 17 475
Basic System Operations<br />
Saving, Recalling, and Deleting Instrument States<br />
Step<br />
Notes<br />
3 [Select]<br />
4 [Save State<br />
Basic System Operations<br />
5 Enter the filename,<br />
“Powerup” (the test set<br />
is case-sensitive, so be<br />
sure to capitalize the<br />
“P”).<br />
6 [Ok]<br />
Deleting States<br />
If you have saved a state you will no longer use, you can delete it.<br />
Step<br />
Notes<br />
1 [System]<br />
2 [Save/Recall]<br />
3 [Delete States]<br />
4 Select the state you want<br />
to delete or [All] to<br />
delete all saved states.<br />
Use the rotary knob or up and down arrow buttons<br />
to select the state you want to delete.<br />
5 [Select]<br />
NOTE<br />
Selecting [All] does not delete the Powerup or Factory Defaults states.<br />
476 Chapter 17
Basic System Operations<br />
Viewing System Statistics<br />
Viewing System Statistics<br />
The <strong>E7495A</strong>/B provides a utility that allows you to:<br />
• Check test set status<br />
• Verify operational readiness<br />
• Perform system configuration<br />
• Check the system software version<br />
Viewing System Release Versions<br />
Perform this procedure to view the current version of software and firmware for<br />
enabled features.<br />
Step<br />
Notes<br />
Basic System Operations<br />
1 [System]<br />
2 [More 1 of 2]<br />
3 [System Stats]<br />
4 [Rev Info] View version information for system firmware.<br />
5 [Page Up]<br />
or<br />
[Page Down]<br />
Use these buttons to scroll to the next screen.<br />
Viewing System Memory<br />
Perform this procedure to view current allocation and usage statistics of the memory<br />
available.<br />
Step<br />
Notes<br />
1 [System]<br />
2 [More 1 of 2]<br />
3 [System Stats]<br />
Chapter 17 477
Basic System Operations<br />
Viewing System Statistics<br />
Step<br />
Notes<br />
4 [Memory] View status of total, used, and available memory.<br />
Viewing Battery Statistics<br />
Perform this procedure to view current status and battery usage.<br />
Basic System Operations<br />
Step<br />
1 [System]<br />
2 [More 1 of 2]<br />
3 [System Stats]<br />
Notes<br />
4 [Battery] View the status of battery conditions. For details, see<br />
“System Statistics—Battery Screen” on page 166.<br />
5 As needed, [Page Up]<br />
or [Page Down]<br />
Use these menu keys if you need to scroll up or down<br />
to see all the information.<br />
478 Chapter 17
Basic System Operations<br />
Using the Option Manager<br />
Using the Option Manager<br />
The <strong>E7495A</strong>/B provides a utility that allows you to:<br />
• View installed options<br />
• View installable options (by user and by factory)<br />
• View installation information<br />
• Install an option<br />
Viewing Installed Options<br />
Step<br />
Notes<br />
1 [System]<br />
2 [More 1 of 2]<br />
3 [Option Manager]<br />
4 [Installed Options] Provides a list of all installed options.<br />
5 [Page Up]<br />
or<br />
[Page Down]<br />
Use as necessary to scroll to the next screen.<br />
Basic System Operations<br />
Viewing Installable Options<br />
Perform this procedure to view a list of all options that you can install for the test<br />
set. Two lists are displayed: options you can install yourself and options that must be<br />
installed at the factory.<br />
Step<br />
Notes<br />
1 [System]<br />
2 [More 1 of 2]<br />
3 [Option Manager]<br />
Chapter 17 479
Basic System Operations<br />
Using the Option Manager<br />
Step<br />
Notes<br />
4 [Installable Options] Provides a list of options that can be installed.<br />
5 [Page Up]<br />
or<br />
[Page Down]<br />
Use as necessary to scroll to the next screen<br />
Basic System Operations<br />
Installing an Option<br />
Step<br />
Notes<br />
1 [System]<br />
2 [More 1 of 2]<br />
3 [Option Manager]<br />
4 [Installing an Option] Follow the on-screen instructions.<br />
Viewing Installation Information<br />
Perform this procedure to view current manufacturing information about your test<br />
set that must be provided to <strong>Agilent</strong> to install a user-installable option.<br />
Step<br />
Notes<br />
1 [System]<br />
2 [More 1 of 2]<br />
3 [Option Manager]<br />
4 [Install Info] When you call your <strong>Agilent</strong> sales representative to<br />
order an option, you will need to provide the<br />
information you see on this screen:<br />
• Model number<br />
• Serial number<br />
• Host ID<br />
480 Chapter 17
Basic System Operations<br />
Testing System Functions<br />
Testing System Functions<br />
The <strong>E7495A</strong>/B provides two simple tests you can perform to test the basic system<br />
functionality: a display test and a keyboard test.<br />
Testing Your Display<br />
Perform this procedure to verify the correct operation of your display device.<br />
Step<br />
Notes<br />
1 [System]<br />
2 [More 1 of 2]<br />
3 [Service]<br />
4 [Verification]<br />
5 [Display Test] Follow directions on screen.<br />
Basic System Operations<br />
Testing Your Keyboard<br />
Perform this procedure to verify the correct operation of your keyboard device.<br />
Step<br />
Notes<br />
1 [System]<br />
2 [More 1 of 2]<br />
3 [Service]<br />
4 [Verification]<br />
5 [Keyboard Test] Press the available buttons and view the results on the<br />
screen.<br />
Chapter 17 481
Basic System Operations<br />
Testing System Functions<br />
Basic System Operations<br />
482 Chapter 17
18 T1 Analyzer<br />
“Making T1 <strong>Measurement</strong>s” on page 484<br />
“Performing a Basic T1 Analyzer <strong>Measurement</strong>” on page 484<br />
“Setup Button Selections” on page 484<br />
“Display/Sound Button Selections” on page 487<br />
“Control Button Selections” on page 487<br />
“Sample Hard Loop/End-End Full T1 BERT Test” on page 489<br />
“Sample Loopback CSU Full T1 BERT Test” on page 494<br />
“Sample Monitor Full T1 Test” on page 499<br />
“Sample Emulate CSU/NIU Test” on page 503<br />
“Sample Delay Test” on page 508<br />
“Turning on sound” on page 510<br />
“Setting up T1 diagnostics” on page 511<br />
“Patterns” on page 513<br />
“<strong>Measurement</strong> Results” on page 514<br />
“Alarm indicators” on page 514<br />
“Results indicators” on page 514<br />
“Status indicators” on page 515<br />
“<strong>Measurement</strong> results fields” on page 515<br />
“Testing and Fault Mitigation” on page 518<br />
“Detailed Loop Mode and Auto Configuration Descriptions” on page 523<br />
T1 Analyzer<br />
— “Remote CSU/NIU Loop Mode” on page 523<br />
— “Auto Configuration Flow Diagram” on page 527<br />
“Terminology” on page 529<br />
483
T1 Analyzer<br />
Making T1 <strong>Measurement</strong>s<br />
Making T1 <strong>Measurement</strong>s<br />
The <strong>Agilent</strong> <strong>E7495A</strong>/B provide a simple solution for all your T1 testing needs, from<br />
basic transmission testing to BERT testing. For more information about T1 testing,<br />
refer to “<strong>Measurement</strong> Results” on page 514.<br />
Performing a Basic T1 Analyzer <strong>Measurement</strong><br />
Step<br />
Notes<br />
1. [Mode]<br />
2. [Backhaul]<br />
3. [T1 Analyzer]<br />
4. [Get Started/ Test Mode] The tests are listed on the buttons on the right.<br />
Pressing a test mode button will provide you<br />
with information about the test and the test<br />
options available.<br />
5. [Setup] Configure the T1 analyzer for the measurement.<br />
T1 Analyzer<br />
6. [Display] Setup your view of the measurement results.<br />
7. [Control] Modify the measurement setup and inject errors<br />
as you perform the measurement.<br />
Setup Button Selections<br />
• Rx Input: The Primary and Secondary inputs are both affected by this setting.<br />
— Terminate - Sets the input impedance to 100 Ohms. Can be performed only<br />
when the T1 circuit is interrupted (connected into a jack that interrupts the<br />
circuit).<br />
— Monitor - Sets the input impedance to 100 Ohms, inserts 20 dB gain, and<br />
should be selected when connected to a 'Monitor' jack.<br />
— Bridge - Sets the input impedance >1000 Ohms and should be selected when<br />
bridging on to a T1 circuit.<br />
484 Chapter 18
T1 Analyzer<br />
Making T1 <strong>Measurement</strong>s<br />
• Line Code: Configures the test set to transmit and expect to receive a line code<br />
that is compatible with the network’s design. There are two types of line coding<br />
used in T1 networks:<br />
— AMI - Alternate Mark Inversion is a traditional line code.<br />
— B8ZS - Bipolar 8 Zero Substitution replaces runs of 8 zeroes with a special<br />
code that is not compatible with AMI. It allows greater flexibility of data<br />
patterns by enhancing repeater synchronization by increasing pulse density,<br />
thereby providing greater throughput.<br />
• Framing: Configures the test set to transmit and expect to receive a particular<br />
framing pattern that is compatible with the network’s design. It enables the test<br />
set to receive the T1 signal and to then synchronize, identify, and extract the<br />
individual channels.<br />
— Unframed - The 193rd (framing) bit is set to 0 or 1, depending on the<br />
pattern.<br />
— D3/D4 - A 12 frame structure accomplished by sending a unique pattern on<br />
the 193rd (framing) bit.<br />
— ESF - A 24 frame structure accomplished by sending a unique pattern on the<br />
193rd (framing) bit. In this mode the frame bits are used to transmit a CRC<br />
and carry information to accommodate alarms and control<br />
• Pattern: Configures the test set to expect a particular test pattern. Many test<br />
patterns are available to 'stress' the circuit in a particular manner or to gain<br />
maximum insight into a particular problem.<br />
• Tx Pattern: Allows you to select either Normal or Inverted patterns.<br />
• Tx Clock: Configures the test set to use one of the following methods to derive<br />
the transmit clock frequency:<br />
T1 Analyzer<br />
— Internal - The transmit clock is derived within the test set and is<br />
independent of the incoming signal. This is useful when the device or line<br />
under test is configured to synchronize on the incoming signal. In this case<br />
the return clock frequency of the return signal should match the transmit<br />
clock frequency of the test set.<br />
— Primary Rx - The transmit clock frequency is derived from the signal<br />
received at the Primary Rx jack on the test set.<br />
— Secondary Rx - The transmit clock frequency is derived from the signal<br />
received at the Secondary Rx jack on the test set.<br />
• Channel: Applicable only in the Channel BERT mode. Sets the active channel<br />
Chapter 18 485
T1 Analyzer<br />
Making T1 <strong>Measurement</strong>s<br />
to be tested for BERT.<br />
• Fill Data: When performing Channel BERT testing this configures the source of<br />
data transmitted in the unused slots. For drop-and-insert testing this field is<br />
typically set to Secondary Rx.<br />
— All 1’s - Set this mode to maintain a sufficient 1s density on the unused<br />
channels during testing. All 1s are typically transmitted on unused channels<br />
in live T1 circuits.<br />
— Idle - Set this mode to accommodate specific troubleshooting such as to<br />
exercise a circuit designed for B8ZS.<br />
— Primary Rx - Fills the unused slots with Primary Rx data.<br />
— Secondary Rx - Fills the unused slots with Secondary Rx data.<br />
• Loop Code: Selects the format of the transmitted code when a loop-up or<br />
loop-down is requested.<br />
T1 Analyzer<br />
— ESF Datalink - Loopback state change requests are sent to the far end in the<br />
framing pattern in the ESF datalink channel. Note that this mode is possible<br />
when only ESF is selected for the framing pattern.<br />
— In-band - Loopback state change requests are sent to the far end by<br />
replacing the normal channel data with the loop code. Note that in this mode<br />
the code must persist for 5 seconds for the far end to respond<br />
• Slip Reference: Selects the reference for the frame slip measurement.<br />
— None - This selection disables the frame slip measurement.<br />
— Internal - In this mode the test set compares the framing of the incoming<br />
signal with the test set's internal clock. Three conditions are necessary when<br />
using this mode: the far end must be receiving a signal from this test set, the<br />
transmit clock on the far end must be configured to synchronize on the<br />
incoming signal, and the Tx Clock on this test set must be set to Internal.<br />
Internal is the default selection after test set preset and covers the situation<br />
when a hard loop is configured at the far end. If a separate test set is used at<br />
each end, then the test set on one end should have the Tx Clock set to<br />
Primary Rx (Assuming the incoming signal is connected to this jack.)<br />
Another alternative is to use a second T1 circuit connected to the Secondary<br />
Rx jack to establish proper timing.<br />
— Second Rx - In this mode the test set compares the frame clock timing of the<br />
received signal on the Primary Rx jack with the frame clock timing of the<br />
received signal on the Secondary Rx jack.<br />
486 Chapter 18
T1 Analyzer<br />
Making T1 <strong>Measurement</strong>s<br />
• Tx Line Build Out [Tx LBO]: Sets the Tx level and pulse shape to simulate the<br />
signal conditions that would be encountered at the end of a distant transmission<br />
cable. This is useful for testing equipment suspected of having trouble receiving<br />
the signals found in typical applications.<br />
— 0 dB LBO = 0 dBdsx = 6 Vpp<br />
— -7.5 dB LBO = -7.5 dBdsx = 2.53 Vpp<br />
— -15 dB LBO = -15 dBdsx = 1.07 Vpp<br />
• Second Tx: Selects the source of data of the signal available at the Secondary<br />
Tx jack.<br />
— AIS - The signal at the Secondary Rx jack is an unframed all ones aka AIS.<br />
— Second Rx - The Secondary Rx signal is buffered and looped back to the<br />
Secondary Tx jack.<br />
— Primary Rx - The signal at the Primary Rx jack is buffered and internally<br />
routed to the Secondary Tx jack.<br />
Display/Sound Button Selections<br />
Configure the following for the measurement you’re doing:<br />
• Status: Allows you to select which status panel is active.<br />
• Alarms: Displays those errors occurring on either the primary or secondary<br />
channel, depending on your selection. Displays in the bottom-right of the screen.<br />
• Results: You can choose an error and select results you want to drill down to;<br />
shows more metrics on error you select. Displays in bottom-right of screen.<br />
• Sound: Works on single channels only and enables you to turn sound on and off.<br />
Use sound mostly to listen for drop outs or changes in the signal.<br />
• Volume: Enables you to set the volume of speaker output.<br />
T1 Analyzer<br />
Control Button Selections<br />
On the Control button, the available buttons are unique to the test mode you select.<br />
Once you set up your display, you can change settings such as patterns, alarm<br />
injections, and so forth, while you make the measurement.<br />
• Pattern: Configures the test set to expect a particular test pattern. Many test<br />
patterns are available to 'stress' the circuit in a particular manner or to gain<br />
maximum insight into a particular problem.<br />
Chapter 18 487
T1 Analyzer<br />
Making T1 <strong>Measurement</strong>s<br />
• Alarm/Error: Enables a list of available alarms and conditions that can be<br />
transmitted on the Primary Tx channel. The alarm or condition is invoked by<br />
pressing the Inject button.<br />
To troubleshoot your T1 line, you can monitor for errors or alarms. Inject errors<br />
to see how the system responds.<br />
T1 Analyzer<br />
— Loss of Signal Alarm - The test set ceases to send a signal.<br />
— Loss of Frame Alarm - Forces the framing bit to always be set to 1.<br />
— Yellow Alarm - The test set sends a Yellow Alarm. In D3/D4 mode, the test<br />
set sets bit #2 of each timeslot to 0. In ESF mode, the datalink bits are<br />
configured to send a repetitive pattern of 8 ones, followed by 8 zeros.<br />
— AIS Alarm - The test set sends an AIS, or ‘Blue Alarm’, by sending an<br />
unframed, all 1s pattern (a constant contiguous stream of 1s).<br />
— Idle Alarm - The test set sends a framed, all zero pattern. Note that the far<br />
end will interpret this as a Yellow Alarm.<br />
— BPV Error - The test set forces a single, bipolar violation error with each<br />
press of the Inject button.<br />
— Frame Error - The test set forces a single frame error with each press of the<br />
Inject button.<br />
— The test set forces a CRC error with each press of the Inject button only<br />
when ESF mode is selected.<br />
— The test set forces an error in the transmitted pattern with each press of the<br />
Inject button.<br />
• Fill Data: When performing Channel BERT testing, this configures the source<br />
of data transmitted in the unused slots. For drop-and-insert testing, this field is<br />
typically set to Secondary Rx.<br />
— All 1's - Set this mode to maintain a sufficient 1s density on the unused<br />
channels during testing. All 1s are typically transmitted on unused channels<br />
in live T1 circuits.<br />
— Idle - Set this mode to accommodate specific troubleshooting such as to<br />
exercise a circuit designed for B8ZS.<br />
— Primary Rx - Fills the unused slots with Primary Rx data.<br />
— Secondary Rx - Fills the unused slots with Secondary Rx data.<br />
• Inject: Causes the error or condition that is currently displayed on the button to<br />
occur. Some selections cause a single event to occur, while others maintain a<br />
488 Chapter 18
T1 Analyzer<br />
Making T1 <strong>Measurement</strong>s<br />
constant state. The text on the button changes to reflect the appropriate action.<br />
• Loop Up/Loop Down: Available in emulate mode, these buttons enable you to<br />
manually put the test set into either loop up or loop down mode.<br />
• Send Loop Up/Send Loop Down: Available in emulate mode, the Send Loop<br />
Up button sends a loop up command to the far end. Send Loop Down sends a<br />
loop down command to the far end.<br />
Sample Hard Loop/End-End Full T1 BERT Test<br />
Use this test mode to perform measurements, such as BERT, on a known test pattern<br />
being sent from the far end. The far end signal can be generated by looping back the<br />
transmitted signal from this test set or by a second test set. To use this test, have<br />
someone at the far end manually loop-up the equipment or generate a known pattern<br />
with a far end test set. Since a pattern is being sent on the T1 line, service on the T1<br />
will be affected.<br />
This example explains how to setup a hard-loop/end-end full T1 BERT test. A hard<br />
loop test requires one test set at one end and a hard loop at the other. An end-end test<br />
requires a test set at each end but enables the troubleshooter to identify the direction<br />
of the trouble. The T1 circuit is not available for service when using this test mode.<br />
During the commissioning or startup phase of a T1 circuit, a several day end-end or<br />
hard loop test is often performed. This type of test provides the most comprehensive<br />
level of information but does require the circuit to be taken out-of-service for the<br />
duration of the test. The test results provide more granular resolution on root cause<br />
problems than a monitor test.<br />
T1 Analyzer<br />
Chapter 18 489
T1 Analyzer<br />
Making T1 <strong>Measurement</strong>s<br />
Figure 18-1<br />
Sample End to End Connection Diagram<br />
To Preform a Hard Loop/End-End Full T1 BERT Test<br />
Step<br />
Notes<br />
T1 Analyzer<br />
1 Connect the BSTS to the<br />
DSX panel<br />
2 [Mode]<br />
3 [Backhaul]<br />
4 [T1 Analyzer]<br />
5 Select a test mode.<br />
a. [Get Started/ Test Mode]<br />
b. [Hard Loop/End-End]<br />
c. [Full T1 BERT]<br />
Refer to Figure 18-1<br />
Use this test mode to perform measurements<br />
such as BERT on a T1 circuit. The far end<br />
signal must be derived from either a hard loop<br />
or from a second test set. The T1 circuit is not<br />
available for service when using this test mode.<br />
Select this to perform a BERT test on a full T1<br />
Circuit.<br />
490 Chapter 18
T1 Analyzer<br />
Making T1 <strong>Measurement</strong>s<br />
Step<br />
Notes<br />
6 Setup auto configuration.<br />
a. [Auto Config]<br />
b. [Start Primary Auto<br />
Config]<br />
Enables the Auto Configuration buttons and<br />
causes the test set to analyze the incoming T1<br />
signal and align the setup choices to the<br />
properties of that signal.<br />
7 [Back] Shifts focus back to the main mode selection<br />
buttons.<br />
8 [Setup] Select this to display a list of setup choices that<br />
pertain to this test mode.<br />
9 Setup the Rx input.<br />
a. [Rx Input]<br />
b. [Terminate]<br />
10 Setup the line code.<br />
a. [Line Code]<br />
b. [B8ZS]<br />
11 Setup the framing.<br />
a. [Framing]<br />
b. [ESF]<br />
12 Setup the pattern.<br />
This assumes the test set is connected into a<br />
jack that interrupts the T1 circuit.<br />
This assumes the circuit is designed for B8ZS<br />
(Bipolar 8 Zero Substitution). A T-carrier line<br />
code in which bipolar violations are<br />
deliberately inserted if user data contains a<br />
string of 8 or more consecutive zeros.<br />
This assumes that the circuit has been designed<br />
for ESF. Extended Superframe Format utilizes<br />
the framing bit capacity for additional<br />
purposes. The number of frames per<br />
multiframe is expanded to 24 frames.<br />
T1 Analyzer<br />
a. [Pattern]<br />
b. Use up and down<br />
buttons to select.<br />
c. [QRSS]<br />
d. [Select]<br />
Chapter 18 491
T1 Analyzer<br />
Making T1 <strong>Measurement</strong>s<br />
Step<br />
13 Setup the Tx clock.<br />
a. [Tx Clock]<br />
b. [Internal]<br />
14 Setup the Tx LBO.<br />
a. [Tx LBO]<br />
b. [0 dB]<br />
15 Setup the slip reference.<br />
a. [Slip Ref]<br />
b. [None]<br />
16 Setup the second Tx.<br />
Notes<br />
Internal is the default selection after test set<br />
preset and covers the situation when a hard<br />
loop is configured at the far end. If a separate<br />
test set is used at each end, then the test set on<br />
one end should have the TX Clock set to<br />
Primary Rx (assuming the incoming signal is<br />
connected to this jack). Another alternative is<br />
to use a second T1 circuit connected to the<br />
Secondary Rx jack to establish proper timing.<br />
This is a typical level found at the customer<br />
demarcation point.<br />
Disables the frame slip measurement.<br />
Use the default condition.<br />
T1 Analyzer<br />
a. [Second Tx]<br />
b. [AIS]<br />
17 Setup the display.<br />
a. [Display]<br />
b. [Status]<br />
c. [Pri]<br />
18 Setup alarms.<br />
a. [Alarms]<br />
b. [Pri]<br />
Enables the [Display] options on the buttons on<br />
the right.<br />
Activates only the Primary Status pane. The<br />
inactive channel should be deactivated to cease<br />
the display of invalid measurements.<br />
Use this selection to observe the Primary<br />
Results in the Alarm Panel.<br />
492 Chapter 18
T1 Analyzer<br />
Making T1 <strong>Measurement</strong>s<br />
Step<br />
19 Setup the results display.<br />
a. [Results]<br />
b. Use up and down<br />
buttons to select.<br />
c. [Select]<br />
20 Setup the results display.<br />
a. [Results]<br />
b. Use the up and down<br />
arrows to select.<br />
c. Make a selection.<br />
d. [Select]<br />
21 Setup the controls and select<br />
a pattern.<br />
Notes<br />
Enables a list of results information that can be<br />
displayed in the Results pane. Make a<br />
selection based on the need of the application.<br />
Enables a list of results information that can be<br />
displayed in the Results pane. Make a<br />
selection based on the need of the application.<br />
a. [Control]<br />
b. [Pattern]<br />
c. Use the up and down<br />
buttons to select.<br />
d. QRSS<br />
e. [Select]<br />
22 Select the alarm.<br />
T1 Analyzer<br />
a. [Alarm/Error]<br />
b. Use the up and down<br />
buttons to select.<br />
c. Loss of Signal<br />
d. [Select]<br />
Chapter 18 493
T1 Analyzer<br />
Making T1 <strong>Measurement</strong>s<br />
Step<br />
23 Inject an error.<br />
a. [Inject]<br />
b. [On]<br />
Notes<br />
Causes the error or condition that is currently<br />
displayed on the button to occur.<br />
Sample Loopback CSU Full T1 BERT Test<br />
T1 Analyzer<br />
Use this test mode to perform a measurement, such as BERT, on a known test<br />
pattern being sent from the far end. The far end signal will be generated by looping<br />
back the transmitted signal from this test set. You will use this test set to send a code<br />
to automatically loop-up either a CSU or NIU at the far end. Since a pattern is being<br />
sent on the T1 line, service on the T1 will be affected.<br />
Once you have selected this test mode, you can send the loop-up or loop-down code<br />
using the buttons on the Control menu. If you are you are using ESF, configure the<br />
appropriate ESF Loop Code on the Setup menu.<br />
The T1 circuit is not available for service when using this test mode. End-to-end<br />
loopback tests are normally limited to the CSU since NIU loop codes are normally<br />
suppressed at the central office.<br />
When the far end of a T1 circuit is in a remote location and trouble is suspected, it is<br />
possible to place the equipment at the far end into loopback by sending a special<br />
code designated for this purpose. If the T1 circuit is leased, then the wireless<br />
technician is often limited to looping only the CSU, as NIU loop codes are usually<br />
blocked at the central office. The loop code can be sent either in-band or on the ESF<br />
datalink channel by the test set to the far end equipment. The first method, in-band,<br />
replaces the bits in the T1 traffic channels with the unique loop code. The remote<br />
equipment must see this code for 5 seconds before it will respond in order to<br />
minimize the potential that patterns in live data will falsify this request. The<br />
downside of this technique is that all devices in the transmit path see this code and<br />
any may respond. This could lead to a confusing situation if a T1 route consists of<br />
multiple hops, each with its own CSU pair. If the far end has a hard loop then the<br />
loop code could come back to the near end and inadvertently place that CSU into<br />
loopback. The test set does monitor for a pre-existing loop and will notify you when<br />
remote loopback is attempted using an in-band loop code.<br />
Another method is available if the circuit is designed for Extended Super Frame<br />
(ESF). This method, ESF datalink, sends the loop code on the ESF data link bits.<br />
This method is not prone to false information and, therefore, responds very rapidly.<br />
This is the default mode of the test set. For more information, see the section<br />
494 Chapter 18
T1 Analyzer<br />
Making T1 <strong>Measurement</strong>s<br />
detailing loopback operation.<br />
Figure 18-2<br />
CSU Full T1 BERT Loopback Connection Diagram<br />
To Preform a Loopback CSU Full T1 BERT Test<br />
Step<br />
1 Connect the BSTS to the<br />
DSX panel<br />
2 [Mode]<br />
3 [Backhaul]<br />
4 [T1 Analyzer]<br />
Notes<br />
Refer to Figure 18-2<br />
T1 Analyzer<br />
Chapter 18 495
T1 Analyzer<br />
Making T1 <strong>Measurement</strong>s<br />
Step<br />
Notes<br />
5 Select a test mode.<br />
a. [Get Started/ Test Mode]<br />
b. [Loopback CSU/NIU]<br />
c. [CSU Full T1 BERT]<br />
Use this test mode to perform measurements<br />
such as BERT on a T1 circuit by placing the far<br />
end CSU or NIU into a loopback state. The T1<br />
circuit is not available for service when using<br />
this test mode. End-to-end loopback tests are<br />
normally limited to the CSU since NIU loop<br />
codes are normally suppressed at the central<br />
office.<br />
Select this to perform a BERT test on a full T1<br />
Circuit.<br />
6 [Setup] Select this to display a list of setup choices that<br />
pertain to this test mode.<br />
7 Setup Rx input.<br />
a. [Rx Input]<br />
b. [Terminate]<br />
8 Setup line code.<br />
This assumes the test set is connected into a<br />
jack that interrupts the T1 circuit.<br />
This assumes the circuit is designed for B8ZS.<br />
T1 Analyzer<br />
a. [Line Code]<br />
b. [B8ZS]<br />
9 Setup framing.<br />
a. [Framing]<br />
b. [ESF]<br />
10 Select a pattern.<br />
This assumes that the circuit has been designed<br />
for ESF.<br />
a. [Pattern]<br />
b. Use the up and down<br />
buttons to select.<br />
c. QRSS<br />
d. [Select]<br />
496 Chapter 18
T1 Analyzer<br />
Making T1 <strong>Measurement</strong>s<br />
Step<br />
11 Setup Tx clock.<br />
a. [Tx Clock]<br />
b. [Internal]<br />
12 Setup the Tx LBO.<br />
a. [Tx LBO]<br />
b. [0 dB]<br />
13 Setup the loop code.<br />
a. [Loop Code]<br />
b. [In-band]<br />
14 Setup the slip reference.<br />
Notes<br />
This is the default selection after test set preset<br />
and covers the situation when a hard loop is<br />
configured at the far end. If a separate test set<br />
is used at each end then the test set on one end<br />
should have the Tx Clock set to Primary Rx<br />
(assuming the incoming signal is connected to<br />
this jack.) Another alternative is to use a<br />
second T1 circuit connected to the Secondary<br />
Rx jack to establish proper timing.<br />
This is a typical level found at the customer<br />
demarcation point.<br />
Your choice depends on the far end CSU<br />
configuration.<br />
Disables the frame slip measurement.<br />
a. [Slip Ref]<br />
b. [None]<br />
15 Setup the second Tx.<br />
a. [Second Tx]<br />
b. [AIS]<br />
16 Setup the display.<br />
a. [Display]<br />
b. [Status]<br />
c. [Pri]<br />
17 Setup the alarms.<br />
a. [Alarms]<br />
b. [Pri]<br />
Use the default condition.<br />
Enables the [Display] options on the buttons on<br />
the right. Activates only the Primary Status<br />
pane. The inactive channel should be<br />
deactivated to cease the display of invalid<br />
measurements.<br />
This selection causes the Alarm pane to toggle<br />
between Primary and Secondary. Use this<br />
selection to observe the Primary Results in the<br />
Alarm Panel.<br />
T1 Analyzer<br />
Chapter 18 497
T1 Analyzer<br />
Making T1 <strong>Measurement</strong>s<br />
Step<br />
18 Setup the results display.<br />
a. [Results]<br />
b. Use the up and down<br />
arrows to select.<br />
c. Make a selection.<br />
d. [Select]<br />
19 Setup the controls and select<br />
a pattern.<br />
Notes<br />
Enables a list of results information that can be<br />
displayed in the Results pane. Make a<br />
selection based on the need of the application.<br />
a. [Control]<br />
b. [Pattern]<br />
c. Use the up and down<br />
buttons to select.<br />
d. QRSS<br />
e. [Select]<br />
20 Select the alarm.<br />
T1 Analyzer<br />
a. [Alarm/Error]<br />
b. Use the up and down<br />
buttons to select.<br />
c. Loss of Signal<br />
d. [Select]<br />
21 [Send Loop Up] Sends a loop up command to the far end and<br />
reports the loop state on the status line. If a<br />
pre-existing loop is detected at the far end then<br />
“Pre-existing loop” is displayed on the status<br />
line. This is only possible in In-band mode.<br />
22 [Send Loop Down] Sends a loop down command to the far end and<br />
reports the loop state on the status line.<br />
498 Chapter 18
T1 Analyzer<br />
Making T1 <strong>Measurement</strong>s<br />
Step<br />
23 Inject an error.<br />
a. [Inject]<br />
b. [On]<br />
Notes<br />
Causes the error or condition that is currently<br />
displayed on the button to occur.<br />
Sample Monitor Full T1 Test<br />
Use this test mode to monitor live data on the T1 line without affecting service. The<br />
simplest hookup for monitoring does not require the test set Tx outputs to be<br />
connected. In some cases, you may connect the Tx outputs to the T1 circuit. For<br />
those cases, the Tx primary and secondary transmitted signals are regenerated from<br />
the received signal on the corresponding line.<br />
In this example, you use the monitor test mode to test performance without<br />
disrupting service on a T1 circuit. During this test, the source of the signal from far<br />
end can be either live data or pattern data from a second test set. This mode is very<br />
similar to End-to-End Hard Loop mode, with the exception that the signal present on<br />
the Primary Tx jack is a buffered replica of the signal present on the Primary Rx<br />
jack. When monitor jacks are not available, this feature allows the technician to<br />
break into a live T1 and pass that signal through the test set, thereby keeping the<br />
circuit in-service. This is useful for monitoring long-term statistics of a T1 circuit.<br />
Figure 18-3<br />
Sample Monitor Mode With Monitor Port Connection.<br />
T1 Analyzer<br />
Chapter 18 499
T1 Analyzer<br />
Making T1 <strong>Measurement</strong>s<br />
When using the above sample connection for monitoring a T1 circuit with a monitor<br />
port, you should set Rx Input to monitor.<br />
Figure 18-4<br />
Sample Monitor Mode Without a Monitor Port Connection<br />
When using the above sample connection for terminating an T1 circuit, set Rx Input<br />
to terminate.<br />
To Preform a Monitor Full T1 BERT Test<br />
T1 Analyzer<br />
Step<br />
1 Connect the BSTS to<br />
the DSX panel<br />
2 [Mode]<br />
3 [Backhaul]<br />
4 [T1 Analyzer]<br />
5 [Get Started/ Test<br />
Mode]<br />
Notes<br />
For a DSX with a monitor port connection, refer to<br />
Figure 18-3<br />
For a DSX without a monitor port connection,<br />
refer to Figure 18-4<br />
500 Chapter 18
T1 Analyzer<br />
Making T1 <strong>Measurement</strong>s<br />
Step<br />
6 Setup monitoring.<br />
a. [Monitor]<br />
b. [Monitor Full T1]<br />
7 Setup auto<br />
configuration.<br />
Notes<br />
Choose this to monitor performance of a full T1<br />
Circuit.<br />
Causes the test set to analyze the incoming T1<br />
signal and align the setup choices to that signal.<br />
a. [Auto Config]<br />
b. [Primary Auto<br />
Config]<br />
8 [Back] Shifts focus back to the main mode selection<br />
buttons.<br />
9 [Setup] Select this to display a list of setup choices that<br />
pertain to this test mode.<br />
10 Setup the Rx Input.<br />
a. [Setup]<br />
b. [Rx Input]<br />
c. [Terminate]<br />
11 Setup line code.<br />
a. [Line Code]<br />
b. [B8ZS]<br />
12 Setup framing.<br />
a. [Framing]<br />
b. [ESF]<br />
This assumes the test set is connected into a jack<br />
that interrupts the T1 circuit.<br />
Note: If you are connected to a monitor port, select<br />
[Monitor] instead of [Terminate].<br />
This assumes the circuit is designed for B8ZS.<br />
This assumes that the circuit has been designed for<br />
ESF.<br />
T1 Analyzer<br />
Chapter 18 501
T1 Analyzer<br />
Making T1 <strong>Measurement</strong>s<br />
Step<br />
13 Select a pattern.<br />
Notes<br />
Set to the pattern sent by the far end.<br />
T1 Analyzer<br />
a. [Pattern]<br />
b. Use the up and<br />
down buttons to<br />
select.<br />
c. QRSS<br />
d. [Select]<br />
14 Setup Tx clock.<br />
a. [Tx Clock]<br />
b. [Internal]<br />
15 Setup the Tx LBO.<br />
a. [Tx LBO]<br />
b. [0 dB]<br />
16 Setup the slip<br />
reference.<br />
a. [Slip Ref]<br />
b. [None]<br />
17 Setup the second Tx.<br />
This selection is not applicable in Monitor mode<br />
because the Primary Tx signal is a buffered replica<br />
of the signal applied to the Primary Rx jack and is<br />
not affected by this setting. This is the default<br />
selection after test set preset.<br />
This is a typical level found at the customer<br />
demarcation point.<br />
Disables the frame slip measurement.<br />
Use the default condition.<br />
a. [Second Tx]<br />
b. [AIS]<br />
18 [Display] Enables the [Display] options on the buttons on the<br />
right.<br />
19 Setup the display.<br />
a. [Display]<br />
b. [Status]<br />
c. [Pri]<br />
Enables the [Display] options on the buttons on the<br />
right. Activates only the Primary Status pane. The<br />
inactive channel should be deactivated to stop the<br />
display of invalid measurements.<br />
502 Chapter 18
T1 Analyzer<br />
Making T1 <strong>Measurement</strong>s<br />
Step<br />
20 Setup the alarms.<br />
a. [Alarms]<br />
b. [Pri]<br />
21 Setup the results<br />
display.<br />
Notes<br />
This selection causes the Alarm pane to toggle<br />
between Primary and Secondary. Use this selection<br />
to observe the Primary Results in the Alarm Panel.<br />
Make a selection based on the need of the<br />
application.<br />
a. [Results]<br />
b. Use the up and<br />
down arrows to<br />
select.<br />
c. Make a selection.<br />
d. [Select]<br />
22 [Control] The selection enables several soft keys on the right<br />
that control choices specific to each test mode.<br />
23 Select a pattern.<br />
Select a pattern.<br />
a. [Pattern]<br />
b. Use the up and<br />
down buttons to<br />
select.<br />
c. QRSS<br />
d. [Select]<br />
T1 Analyzer<br />
Sample Emulate CSU/NIU Test<br />
The purpose of this test mode is to emulate a CSU or NIU. The test set will<br />
terminate the T1 line, and a loop-up code sent from the far end will cause this test<br />
set to enter a loopback state. Conversely, a loop-down code sent from the far end<br />
will cause this test set to exit the loopback state.<br />
If you are using ESF, configure the appropriate ESF Loop Code on the Setup menu.<br />
In this example, you use the emulate CSU/NSU test mode to have the test set<br />
emulate a CSU or NIU at the near end. In this mode it is possible for the far end to<br />
place this test set into loopback mode. The T1 circuit is not available for service<br />
Chapter 18 503
T1 Analyzer<br />
Making T1 <strong>Measurement</strong>s<br />
during loopback. Loopback tests are normally limited to the CSU since NIU loop<br />
codes are normally suppressed at the central office. When the test set is in a<br />
loopback state, AIS is present at the Secondary Tx jack. When not in loopback state,<br />
the Primary Rx signal is routed to the Secondary Tx jack and the Secondary Rx<br />
signal is routed to the Primary Tx jack.<br />
NOTE<br />
Avoid having a hard loop in the Secondary channel as it will cause a constant loop<br />
condition to exist.<br />
You may want to emulate the functionality of a CSU/NIU if trouble is suspected in<br />
that equipment. The wireless technician will often be interested in only the CSU<br />
mode. The functionality of a CSU is emulated in this mode and the test set will<br />
respond to loop codes received at the Primary Rx input.<br />
The test set has the capability to emulate the functionality of a CSU/NIU.<br />
The test set will respond only to the type of loop code selected on the setup screen.<br />
Be aware that when the test set is not in loopback mode, the source of data on the<br />
Primary Tx jack is the Secondary Rx jack, and the source of data on the Secondary<br />
Tx jack is the Primary Rx jack. If B8ZS is selected on the test set, then the signal (or<br />
no signal - which is decoded as all zeros) will be translated to B8ZS format.<br />
Figure 18-5<br />
Sample Emulate CSU/NIU Test Setup<br />
T1 Analyzer<br />
The following table provides the data source for primary Tx and secondary Tx<br />
504 Chapter 18
T1 Analyzer<br />
Making T1 <strong>Measurement</strong>s<br />
during loop-up and loop-down states in emulate mode.<br />
Data Source in Emulate Mode<br />
Jack Loop Up Loop Down<br />
Primary Tx Primary Rx • AIS when no signal present at Secondary Rx<br />
• Secondary Rx<br />
Secondary Tx Secondary Rx • AIS<br />
T1 Analyzer<br />
Chapter 18 505
T1 Analyzer<br />
Making T1 <strong>Measurement</strong>s<br />
Sample Emulated CSU/NIU Test:<br />
Step<br />
1 Connect the BSTS to the DSX<br />
panel<br />
Notes<br />
Refer to Figure 18-5<br />
2 [Mode]<br />
3 [Backhaul]<br />
4 [T1 Analyzer]<br />
5 Select a test mode.<br />
Choose this to emulate a CSU.<br />
T1 Analyzer<br />
a. [Get Started/ Test Mode]<br />
b. [Emulate CSU/NIU]<br />
c. [Emulate CSU]<br />
6 [Setup] Select this to display a list of setup choices<br />
that apply to this test mode.<br />
7 Setup Rx input.<br />
a. [Rx Input]<br />
b. [Terminate]<br />
8 Setup line code.<br />
a. [Line Code]<br />
b. [B8ZS]<br />
9 Setup framing.<br />
a. [Framing]<br />
b. [ESF]<br />
This assumes the test set is connected into a<br />
jack that interrupts the circuit.<br />
This assumes the circuit is designed for<br />
B8ZS.<br />
This assumes that the circuit has been<br />
designed for ESF.<br />
506 Chapter 18
T1 Analyzer<br />
Making T1 <strong>Measurement</strong>s<br />
Step<br />
Notes<br />
10 Select a pattern.<br />
a. [Pattern]<br />
b. Use the up and down<br />
buttons to select.<br />
c. QRSS<br />
d. [Select]<br />
11 Setup Tx LBO.<br />
a. [Tx LBO]<br />
b. [0 dB]<br />
This is a typical level found at the customer<br />
demarcation point.<br />
12 [More 1 of 2]] Displays the rest of the Setup options.<br />
13 Setup the loop code.<br />
a. [Loop Code]<br />
b. [ESF Data Link]<br />
Configures what type of loop code this test<br />
set will respond to. Requires a Datalink loop<br />
code for this test set to enter loopback mode.<br />
14 [Display] Enables the Display options on the buttons<br />
on the right.<br />
15 Setup the results display.<br />
a. [Results]<br />
b. Use the up and down<br />
arrows to select.<br />
c. Make a selection.<br />
d. [Select]<br />
Enables a list of results information that can<br />
be displayed in the Results pane. Make a<br />
selection based on the need of the<br />
application.<br />
16 [Control] The selection enables several soft keys on the<br />
right that control choices specific to each test<br />
mode.<br />
17 [Pattern] Select a pattern.<br />
18 [Self Loop Up] Forces the test set to enter loop-up state.<br />
19 [Self Loop Down] Forces the test set to enter loop-down state.<br />
T1 Analyzer<br />
Chapter 18 507
T1 Analyzer<br />
Making T1 <strong>Measurement</strong>s<br />
Sample Delay Test<br />
Use this test mode to measure the delay between the primary Tx and Rx ports. This<br />
measured delay can be used to determine the approximate distance between near<br />
end and the far end. The far end of the line must be manually looped during this test.<br />
Since a signal is being sent on the T1 line, service on the T1 will be affected.<br />
In this example, you can use this test mode to have the test set measure the round<br />
trip delay of a T1 circuit. It is necessary to have a loop condition at the far end<br />
during this test. The best accuracy is obtained when a hard loop exists at the far end.<br />
The far end CSU can be remotely looped up using the CSU/NIU Loopback mode,<br />
however, be aware that the loopback method in the remote device could add<br />
additional delay. During this mode a pattern consisting of a zero inserted into a<br />
string of ones is transmitted and analyzed to determine the delay in the path. The<br />
selected test pattern is sent as filler during the calculation interval.<br />
Figure 18-6<br />
Delay Connection Diagram<br />
T1 Analyzer<br />
508 Chapter 18
T1 Analyzer<br />
Making T1 <strong>Measurement</strong>s<br />
Sample Delay Test<br />
Step<br />
1 Connect the BSTS to the<br />
DSX panel<br />
Notes<br />
Refer to Figure 18-6<br />
2 [Mode]<br />
3 [Backhaul]<br />
4 [T1 Analyzer]<br />
5 Select a test mode.<br />
a. [Get Started/ Test Mode]<br />
b. [Delay]<br />
c. [Full T1]<br />
Choose this to perform a Delay test on a full<br />
T1 Circuit. Delay measurements require full<br />
T1 bandwidth.<br />
6 [Setup] Select this to display a list of setup choices<br />
that pertain to this test mode.<br />
7 Setup Rx input.<br />
a. [Rx Input]<br />
b. [Terminate]<br />
8 Setup line code.<br />
a. [Line Code]<br />
b. [B8ZS]<br />
9 Setup framing.<br />
a. [Framing]<br />
b. [ESF]<br />
This assumes the test set is connected into a<br />
jack that interrupts the circuit.<br />
This assumes the circuit is designed for<br />
B8ZS.<br />
This assumes that the circuit has been<br />
designed for ESF.<br />
T1 Analyzer<br />
Chapter 18 509
T1 Analyzer<br />
Making T1 <strong>Measurement</strong>s<br />
Step<br />
Notes<br />
10 Select a pattern.<br />
a. [Pattern]<br />
b. Use the up and down<br />
buttons to select.<br />
c. QRSS<br />
d. [Select]<br />
11 Setup Tx LBO.<br />
a. [Tx LBO]<br />
b. [0 dB]<br />
This is a typical level found at the customer<br />
demarcation point.<br />
Turning on sound<br />
You can listen to a single channel at a time in channel test mode. Sound is disabled<br />
when you are in full T1 test mode.<br />
To Turn On the Sound<br />
T1 Analyzer<br />
Step<br />
1. [Mode]<br />
2. [Backhaul]<br />
3. [T1 Analyzer]<br />
4. [Get Started/Test Mode]<br />
5. Select a measurement.<br />
6. Select Channel mode.<br />
7. [Display/Sound]<br />
8. [Sound]<br />
Notes<br />
9. [On] or [Off] Each time you press this softkey, the<br />
selected option changes.<br />
510 Chapter 18
T1 Analyzer<br />
Making T1 <strong>Measurement</strong>s<br />
Step<br />
Notes<br />
10. Set the volume.<br />
a. [Volume]<br />
b. Enter the volume level from 1 - 10.<br />
c. [Enter]<br />
Setting up T1 diagnostics<br />
The diagnostic tests available for T1 include:<br />
• RAM - During the RAM test, the memory on the T1 measurement module is<br />
tested. Any memory hardware failures are detected.<br />
• ROM - The ROM test verifies the integrity of the code by performing a<br />
checksum measurement.<br />
• Loop Back - The loop back test is a functional test of the transmitting and<br />
receiving hardware. It attempts to send various signal patterns and levels and<br />
then to verify the measured values. It is important that this test be done using<br />
short bantam jumpers (plugs) as even a 1.2 – 2.0 meter (4 – 6 foot) cable can<br />
reduce the signal levels during the diagnostic tests, and this can cause a false<br />
failure.<br />
If any of the above tests fail, contact your service center.<br />
To Set Up T1 Diagnostics<br />
Step<br />
Notes<br />
T1 Analyzer<br />
1. [Mode]<br />
2. [Backhaul]<br />
3. [T1 Analyzer]<br />
4. [Tests]<br />
5. [Verification] The “Connect the T1 Patch Plugs” diagram<br />
and explanation in the instrument contain<br />
the information you need to set up the test.<br />
.<br />
Chapter 18 511
T1 Analyzer<br />
Making T1 <strong>Measurement</strong>s<br />
Step<br />
Notes<br />
6. [Continue] The test is performed and results are<br />
reported on the screen.<br />
T1 Analyzer<br />
512 Chapter 18
T1 Analyzer<br />
Patterns<br />
Patterns<br />
Many test patterns are available to 'stress' the circuit in a unique way or to gain<br />
maximum insight into a particular problem. Much has been written to guide the<br />
troubleshooter to select the proper pattern. Below is a summary of the qualities of<br />
the patterns available in the test set.<br />
• 1:7 - An eight-bit pattern that contains a single one. Used to test clock recovery.<br />
• 2 in 8 - An eight bit pattern with two ones and a maximum of four consecutive<br />
zeroes. B8ZS is never sent.<br />
• 3 in 24 - A twenty-four bit-pattern containing 3 ones with the longest length of<br />
consecutive zeroes constrained to fifteen. It has a ones density of 12.5% and is<br />
used to check clock recovery.<br />
• All 1's - A pattern that causes line drivers to consume the maximum amount of<br />
current. If framing is set to 'Unframed' the resulting pattern is equivalent to a<br />
'Blue Alarm' or 'Alarm Indication Signal' or AIS.<br />
• All 0's - A pattern that is often selected to verify B8ZS provisioning.<br />
• QRSS - A pseudorandom pattern that simulates live traffic on a circuit. It is a<br />
very common test pattern<br />
• T1-DALY - A pattern that changes rapidly between high and low density. This<br />
pattern is used to stress ALBO, equalizer and timing recovery circuits.<br />
• 55 Octet - Similar to the T1-DALY pattern except that it contains runs of fifteen<br />
consecutive zeroes that violate ones density requirements if sent unframed.<br />
• 2E15-1 - A pseudorandom pattern based on a 15 bit shift register.<br />
• 2E20-1 - A pseudorandom pattern based on a 20 bit shift register.<br />
• 2E23-1 - A pseudorandom pattern based on a 23 bit shift register.<br />
• Alternating Ones and Zeroes - A pattern that alternates between ones and<br />
zeroes.<br />
T1 Analyzer<br />
Chapter 18 513
T1 Analyzer<br />
<strong>Measurement</strong> Results<br />
<strong>Measurement</strong> Results<br />
Alarm indicators<br />
T1 Analyzer<br />
• Signal Loss - The test set encountered the absence of 192 or more consecutive<br />
pulses. A frame pulse may or may not be present<br />
• Frame Loss - The test set encountered an unexpected frame pattern. The frame<br />
pattern did not match that selected in 'Setup'<br />
• Excess Zeros - The test set encountered the absence at least 16 consecutive<br />
pulses in AMI mode, or the absence of at least 8 consecutive pulses in B8ZS<br />
mode.<br />
• All Ones - The test set encountered an unframed, all 1s pattern (a constant<br />
contiguous stream of 1s). This pattern is also known as an Alarm Indication<br />
Signal (AIS), ‘Keep-Alive Signal’, or ‘Blue Alarm’. Blue alarms are generated<br />
by faulty transmission equipment such a T3 to T1 multiplexers.<br />
• Yellow Alarm - A Remote Alarm Indication (RAI) signal pattern was received.<br />
This is normally sent by the far end interface equipment (CSU) in response to<br />
receiving a blue alarm on its network side. In D4 framing mode, a yellow alarm<br />
is created at the far end by setting bit 2 to 0 for 255 consecutive frames. In ESF,<br />
a pattern of eight 0s and eight 1s is repeated 16 times to indicate a yellow alarm.<br />
• Idle (CDI) - A Customer Disconnect Indication signal was received from the far<br />
end interface unit indicating that the customer is no longer supplying a signal. A<br />
CDI signal is an in-band pattern 0001 0100. Eight ones followed by eight zeros<br />
interrupted each second for 100 ms with LAPD Idle code (01111110) will be<br />
sent in the ESF Facility Data Link (ESF FDL).<br />
Results indicators<br />
• BPV - A momentary indicator that responds when a bipolar violation occurs on<br />
the incoming signal applied to the Receive jack. B8ZS codes are not considered<br />
a BPV and will not activate this indicator when the test set is set to AMI mode.<br />
• Frame - A momentary indicator that responds when the test set encountered a<br />
disruption of the incoming frame pattern.<br />
• Pattern - A momentary indicator that responds to a disruption of the incoming<br />
pattern.<br />
514 Chapter 18
T1 Analyzer<br />
<strong>Measurement</strong> Results<br />
• CRC - A momentary indicator that respond to a disruption of the incoming<br />
CRC. This indicator is applicable in only ESF mode.<br />
Status indicators<br />
• T1 Pulses - The test set is receiving pulses at the receive jack. Frame pulses<br />
alone are not sufficient to activate this indicator. There must be pulses present in<br />
the payload field.<br />
• B8ZS - A B8ZS pulse pattern was detected on the incoming signal at the receive<br />
jack. Note that only certain patterns transmit B8ZS pulse patterns. The pattern<br />
must contain at least 8 consecutive zeroes before a B8ZS pattern is sent. The<br />
QRSS pattern will generate B8ZS while an idle T1 circuit transmitting all 1's<br />
will not.<br />
• Frame Sync - A frame sync pattern matches that specified in the setup screen on<br />
the test set.<br />
• Pattern Sync - The received pattern matches that specified in the setup screen<br />
on the test set<br />
<strong>Measurement</strong> results fields<br />
Recv Level<br />
The voltage level of the signal measured at the Rx jack. (0 dBdsx = 6 Vpp)<br />
Frequency<br />
The frequency of the signal measured at the Rx jack. The T1 Pulses indicator must<br />
be active for this measurement to be displayed.<br />
T1 Analyzer<br />
Elapsed Time<br />
Indicates the amount of elapsed time since the last measurement reset.<br />
BPV Errors<br />
A tally of the number of BPV errors since the last measurement reset.<br />
BPV Error Rate<br />
The percent ratio of BPV errors to total bits transmitted since the last measurement<br />
reset.<br />
Chapter 18 515
T1 Analyzer<br />
<strong>Measurement</strong> Results<br />
BPV Errd Secs<br />
The number of one second intervals since the last measurement reset that contained<br />
BPV errors.<br />
Frame Errors<br />
A tally of the number of Frame errors since the last measurement reset.<br />
Frame Error Rate<br />
The percent ratio of frame errors to total bits transmitted since the last measurement<br />
reset.<br />
Frame Errd Secs<br />
A tally of the number of one-second intervals since the last measurement reset that<br />
contained frame errors.<br />
Signal Loss<br />
A tally of the number of one-second intervals since the last measurement reset that<br />
contained signal errors.<br />
Frame Sync Loss<br />
T1 Analyzer<br />
A tally of the number of one-second intervals since the last measurement reset that<br />
contained frame sync loss.<br />
Excess Zeros<br />
A tally of the number of one-second intervals since the last measurement reset that<br />
contained excess zeros.<br />
All 1's<br />
A tally of the number of one-second intervals since the last measurement reset that<br />
contained the AIS pattern.<br />
Yellow Alarm<br />
A tally of the number of one-second intervals since the last measurement reset that<br />
contained the yellow alarm pattern.<br />
516 Chapter 18
T1 Analyzer<br />
<strong>Measurement</strong> Results<br />
Error Free Seconds<br />
A tally of the number of one-second intervals that were error free since the last<br />
measurement reset.<br />
Errored Seconds<br />
A tally of the number of one-second intervals since the last measurement reset that<br />
contained errors such as BPVs and frame errors.<br />
Severe Errored Seconds<br />
A tally of the number of one-second intervals since the last measurement reset that<br />
were severely errored.<br />
Available Seconds<br />
A tally of the number of one-second intervals since the last measurement reset that<br />
were available for service.<br />
Unavailable Seconds<br />
A tally of the number of one-second intervals since the last measurement reset that<br />
were unavailable for service.<br />
Degraded Minutes<br />
A tally of the number of one-second intervals since the last measurement reset that<br />
were degraded.<br />
Slip Rate<br />
The percent ratio of frames cycle slips of the incoming signal, relative to the slip<br />
reference choice on the setup menu, since the last measurement reset.<br />
T1 Analyzer<br />
Peak +Wander<br />
The peak amount of positive wander, measured in bit intervals, since the last<br />
measurement reset. Each peak wander interval of 193 qualifies as a frame slip.<br />
Peak -Wander<br />
The peak amount of negative wander, measured in bit intervals, since the last<br />
measurement reset. Each peak wander interval of 193 qualifies as a frame slip.<br />
Chapter 18 517
T1 Analyzer<br />
<strong>Measurement</strong> Results<br />
+Frame Slips<br />
A tally of the number of positive frame slips that occurred since the last<br />
measurement reset.<br />
-Frame Slips<br />
A tally of the number of positive frame slips that occurred since the last<br />
measurement reset.<br />
Bit Errors<br />
A tally of the number of bit errors that occurred since the last measurement reset.<br />
Bit Error Rate<br />
The percent ratio of bit errors to total bits transmitted since the last measurement<br />
reset.<br />
Pattern Sync Loss<br />
A tally of the number of times the pattern detector lost synchronization since the last<br />
measurement reset.<br />
Test Data Rate<br />
T1 Analyzer<br />
The measured data rate of the bit stream.<br />
Testing and Fault Mitigation<br />
The complexity of T1 testing certainly parallels or possibly exceeds that of RF tests<br />
at a cell site. Shadowing efforts and customer expression have shown that most cell<br />
site technicians reduce the complexities of backhaul T1 testing down into a series of<br />
well-defined steps. These tests are often not comprehensive, but are often sufficient<br />
to determine the continuity of a T1 circuit with a high degree of confidence. The test<br />
sequence is often developed by an experienced technician and is determined by<br />
finding the shortest path to an adequate measurement on a particular piece of readily<br />
available equipment. T1 testing often involves one technician on each end of a<br />
circuit. In the case of wireless, the technician at the switch end, very experienced at<br />
backhaul testing, is often working with a field technician who has a broader-based<br />
set of knowledge and is often less experienced in backhaul testing. The switch<br />
technician quickly develops a test procedure that involves the smallest number of<br />
verbal instructions to the field technician.<br />
518 Chapter 18
T1 Analyzer<br />
<strong>Measurement</strong> Results<br />
T1 Facility Summary<br />
This next section describes the elements in a typical T1 backhaul facility. Based on<br />
this information, the next section shows typical fault conditions and what<br />
procedures are typically followed to restore service to the T1 span.<br />
With almost no exception all circuits leased from the TELCO are routed through at<br />
least one central office facility. If this were not the case, planning and managing the<br />
repeaters needed for T1 transmission would be an onerous task. Repeater facilities<br />
are need to be spaced at a distance of 6000 feet (about 1.8 km) and generally contain<br />
slots for multiple repeater units. Figure 18-7 shows a typical circuit layout.<br />
Figure 18-7<br />
Typical T1 Circuit Layout<br />
The following definitions apply:<br />
Central Office: This is usually located at the geographic center of a particular<br />
service area. It is normally a building that contains the switching equipment and<br />
cable cross-connect facilities. Although this diagram shows a single central office,<br />
each end is often served by a separate central office. Facilities exist at the central<br />
office to accommodate remote testing and monitoring of T1 facilities.<br />
Field Repeater: Repeaters are necessary when the customer is located beyond 6000<br />
feet (about 1.8 km) from the central office. Multiple repeaters are necessary when<br />
the span exceeds 12000 feet. Most commercial customers are located within 12000<br />
feet (about 3.6 km) of the central office. The repeaters are powered from the central<br />
office. Typically 90 volts is provided between the center-taps of the transmit and<br />
receive transformers. A particular repeater can be looped back by applying a<br />
specific loop-back tone. Often a label affixed to the cabinet denotes the loop-back<br />
tone. This may look like “FLTR A” or “FLTR B”.<br />
NIU: A device provided by the TELCO that contains the necessary equipment to<br />
provide the expected electrical levels to the customer. This device may be active and<br />
the serves as the customer demarcation (demark) point. When this device is active it<br />
can be looped back by applying the proper loop-back code. The customer is<br />
T1 Analyzer<br />
Chapter 18 519
T1 Analyzer<br />
<strong>Measurement</strong> Results<br />
responsible for equipment beyond this point.<br />
CSU: A customer provided unit that is required by the TELCO as part of the tariffed<br />
service agreement. This device may be looped back applying a specific loop-back<br />
code.<br />
Isolating Faults with Alarm and Errors:<br />
Elements in a T1 facility are subject to failure. The most common failure is due to<br />
inadvertent cable dig-ups. Fault conditions cause errors and errors cause alarms. The<br />
alarms are often remotely monitored and can be observed by test equipment<br />
attached to the circuit. The most common alarm is the Alarm Indication Signal<br />
(AIS), also known as a ‘Blue Alarm’. This alarm can be generated by a network<br />
element that not functioning or is receiving no signal. A CSU that is not receiving a<br />
signal (from the end-equipment) might generate an AIS depending on its<br />
configuration. When the CSU at the distant end sees AIS from the network it<br />
responds by sending a ‘Yellow Alarm’ back to the network. Figure 18-8 shows a<br />
typical circuit layout.<br />
Figure 18-8<br />
(Blue) and Yellow Alarm Diagram<br />
T1 Analyzer<br />
The CSU is a customer-supplied device. The Network Interface Unit (NIU) is<br />
provided by the network supplier. It may be a simple passive device with terminals<br />
or an advanced electronic package such as an optical to copper interface. Some NIU<br />
devices sense the presence or absence of the CSU and, if absent, send a Customer<br />
Disconnect Indication (CDI) toward the network.<br />
520 Chapter 18
T1 Analyzer<br />
<strong>Measurement</strong> Results<br />
Isolating Faults Using Test Equipment:<br />
Test equipment can be used to generate and monitor alarms and errors. Test<br />
equipment is connected to the T1 facility in a variety of ways. Bantam jacks are<br />
often available on the equipment. When the plug is inserted into the jack the circuit<br />
is interrupted. Sometimes a monitor jack is available. When a plug is inserted into<br />
the monitor jack the circuit is not interrupted and a –20 dB signal is available at the<br />
jack. When none of these is available, the signal may be monitored at a connection<br />
block, sometimes referred to as a “punch-down block”. The “T1 Facility Access<br />
Methods” table below describes the three typical access methods.<br />
T1 Facility Access Methods<br />
Access method Test set configuration Notes<br />
Test Jacks Terminated Circuit is broken when plug is inserted<br />
into jack. The test equipment is normally<br />
set to “Terminate” and provides 100 Ohm<br />
termination.<br />
Monitor Jacks Monitor The circuit is not interrupted when the<br />
plug is inserted into the jack. The actual<br />
signal is available at a level 20 dB lower<br />
than the original. The test set normally set<br />
to “Monitor” provides a 100 Ohm<br />
termination and expects the signal to be<br />
20 dB down from what is usually<br />
expected.<br />
Direct Connection to “Punch<br />
Down Block”.<br />
Bridged<br />
The circuit is not interrupted in this mode.<br />
The test set impedance is greater than<br />
1000 Ohms so that the circuit is minimally<br />
affected. Test set is set to “Bridged”<br />
T1 Analyzer<br />
WARNING<br />
The following table describes the typical levels encountered in a T1 circuit. It is<br />
important to remember that 90 volts DC may exist between the transmit and<br />
receive pair. This voltage can be lethal!<br />
Typical Levels Encountered in a T1 Circuit<br />
0 dBdsx 6 Volts peak to peak<br />
-7.5 dBdsx 2.53 Volts peak to peak<br />
Chapter 18 521
T1 Analyzer<br />
<strong>Measurement</strong> Results<br />
-15 dBdsx 1.07 Volts peak to peak<br />
T1 Analyzer<br />
522 Chapter 18
T1 Analyzer<br />
More Information About T1 Testing<br />
More Information About T1 Testing<br />
Detailed Loop Mode and Auto Configuration Descriptions<br />
Remote CSU/NIU Loop Mode<br />
At each end of a T1 facility there is a Channel Service Unit (CSU) and possibly a<br />
Network Interface Unit (NIU). Both of these units have the ability to be remotely<br />
“looped up” by sending the proper loopback code. This can be done either by<br />
sending the expected loopback code in-band or out-of-band. When sent in-band, a<br />
particular pattern is transmitted on every slot for 5 seconds. When the code is sent<br />
out-of-band, the pattern is sent as part of the framing bit stream and is referred to as<br />
‘data-link’. It is important to note that once a CSU or NIU is remotely placed into<br />
loopback, it remains in that state. When a CSU or NIU is in a loopback state, that<br />
unit will loop the in-band loop code back to the near end. If the near end CSU sees<br />
the in-band loopback code repeated from the far end CSU then both CSU units can<br />
become locked in a loopback state. The test set is designed to minimize this<br />
possibility. However, you should take precautions to prevent this from happening<br />
and be aware of this potential situation. Some CSU/NIU units do not respond to<br />
in-band loop codes when they are configured for ESF. In general, NIU loop codes<br />
will be blocked at the central office.<br />
T1 Analyzer<br />
Chapter 18 523
T1 Analyzer<br />
More Information About T1 Testing<br />
Figure 18-9<br />
Flow Diagram of In-band Loop-up Code Originating from the Test Set<br />
Test Set Sends Loop-Up Code to Far End<br />
Test Set Attempts to Decode Loop-Up Code from Far End for 1 Second<br />
Display<br />
"Preexisting<br />
Loop"<br />
Yes<br />
Loop-Up Code<br />
Detected From Far<br />
End<br />
No<br />
Display<br />
"Operation<br />
Complete"<br />
Yes<br />
Loop-Up Code<br />
Detected From Far<br />
End<br />
No<br />
T1 Analyzer<br />
Test Set Stops Sending Loop Code<br />
and Starts Sendig Test Pattern<br />
Display<br />
"Timeout"<br />
Timeout<br />
524 Chapter 18
T1 Analyzer<br />
More Information About T1 Testing<br />
Figure 18-10<br />
Flow Diagram of In-band Loop-down Code Originating from the Test Set<br />
Test Set Sends Loop-Down Code to Far End<br />
Display<br />
"Operation<br />
Complete"<br />
No<br />
Loop-Down Code<br />
Detected From Far<br />
End<br />
Yes<br />
Timeout<br />
Test Set Stops Sending Loop Code<br />
and Starts Sendig Test Pattern<br />
Display<br />
"Timeout"<br />
The flow of events differs when the out-of-band method of loopback is selected. In<br />
this case, loopback can occur within 16 ms, and therefore it is not possible to<br />
determine if a pre-existing loop exists.<br />
T1 Analyzer<br />
Chapter 18 525
T1 Analyzer<br />
More Information About T1 Testing<br />
Figure 18-11<br />
Flow Diagram of Out-of-band Loop-up Code Originating from the Test Set<br />
Test Set Sends Loop-Up Code ESF Data<br />
Link and 2 15 - 1 Pattern In-Band<br />
Test Set Waits for 100 ms<br />
Test Set Stops Sends Loop-Up Code on ESF<br />
Test Set Waits for 900 ms<br />
Display<br />
"Timeout"<br />
Timeout<br />
215 - 1 Pattern<br />
Detected<br />
No<br />
Yes<br />
T1 Analyzer<br />
Display<br />
"Operation<br />
Complete"<br />
Test Set Reverts to Sending<br />
User Selected Pattern<br />
Please note that 2 15 -1 (2047) pattern is used because it is normally used for<br />
fractional T1 testing and has a low probability of being present on the full T1.<br />
526 Chapter 18
T1 Analyzer<br />
More Information About T1 Testing<br />
Figure 18-12<br />
Flow Diagram of Out-of-band Loop-down Code Originating from the Test Set<br />
Test Set Sends Loop-Down Code ESF Data<br />
Link and 2 15 - 1 Pattern In-Band<br />
Test Set Waits for 100 ms<br />
Test Set Stops Sends Loop-Down Code on<br />
ESF<br />
Test Set Waits for 900 ms<br />
Display<br />
"Timeout"<br />
Timeout<br />
2 15 - 1 Pattern<br />
Detected<br />
No<br />
Yes<br />
Display<br />
"Operation<br />
Complete"<br />
Test Set Reverts to Sending<br />
User Selected Pattern<br />
T1 Analyzer<br />
Please note that 2 15 -1 (2047) pattern is used because it is normally used for<br />
fractional T1 testing and has a low probability of being present on the full T1.<br />
Auto Configuration Flow Diagram<br />
Selecting Auto Config causes the test set to analyze the incoming T1 signal and<br />
align the setup choices to that signal. If the incoming data pattern is not recognized<br />
then “NA Live Data” is displayed and the pattern selected on the setup screen will<br />
remain unchanged. If B8ZS codes are detected then this condition will be indicated<br />
and the line code parameter will be set accordingly. If setup was configured for<br />
B8ZS prior to selecting Auto Config and the pattern detected does not have<br />
sufficient zeros density to warrant B8ZS then “NA” will be displayed and the line<br />
Chapter 18 527
T1 Analyzer<br />
More Information About T1 Testing<br />
code choice in the setup screen will remain unchanged. Finally, the framing format<br />
is detected, displayed and selection changed accordingly on the setup screen.<br />
• Flow Diagram for Auto Configuration<br />
Auto Configuration<br />
Selected<br />
T1 Pulses Detected<br />
No<br />
Display "No<br />
Signal Present"<br />
Yes<br />
Determine the Fame Format and Set<br />
the Hardware Accordingly<br />
Report Current<br />
Framing<br />
Format<br />
Report Pattern<br />
Yes<br />
Pattern Detected<br />
No<br />
Changes Hardware<br />
to 64 x 1<br />
No<br />
Pattern Detected<br />
Yes<br />
Changes Hardware<br />
to Full T1<br />
Yes<br />
64 x 1 Selected<br />
T1 Analyzer<br />
Pattern<br />
Detected on<br />
Current<br />
Channel<br />
No<br />
Yes<br />
Report Pattern<br />
Yes<br />
No<br />
Pattern Detected<br />
No<br />
Sets Pattern to<br />
2 23 - 1<br />
Report Pattern<br />
as "Live"<br />
Report Channel<br />
Format (Future<br />
Enhancement)<br />
Report Line<br />
Code<br />
528 Chapter 18
T1 Analyzer<br />
More Information About T1 Testing<br />
Terminology<br />
CRC:<br />
To an observer, the data on a live T1 Circuit appear to be random. Fortunately there<br />
is a way to perform limited testing when the circuit is designed for Extended Super<br />
Frame (ESF) format. A portion of the frame bits are reserved for a Cyclic<br />
Redundancy Checksum (CRC) sequence that can be monitored for performance.<br />
Simply stated, the CRC bits are calculated on the transmit end and inserted as a<br />
pattern on the frame bit. The CRC pattern depends on the pattern of other bits<br />
transmitted by the T1 Circuit. The receiving end also computes this pattern and<br />
compares it with the CRC that was computed and sent by the transmitting end. Since<br />
both ends use the same rules for computing the pattern, the CRC bits will be<br />
identical when all the bits involved in the computation agree. The CRC check<br />
provides good insight into the end-to-end integrity of the T1 Circuit and should be<br />
used in conjunction with other tests that can help determine what the cause of the<br />
CRC failure might be.<br />
BPV:<br />
The electrical signals on a properly functioning T1 circuit conform to the<br />
specification set forth in the standards. The standards specify that the presence of a<br />
voltage indicates a data '1' and the absence of a voltage represents a data '0'. Each<br />
occurrence of a data one produces a voltage for half a bit interval that is the opposite<br />
polarity of the previous bit, hence the name Alternate Mark Inversion (AMI). The<br />
alternating nature of the signal ensures that the average DC voltage is zero, allowing<br />
it be transformer coupled. Transformer coupling ensures a high degree of common<br />
mode rejection to the equipment that processes T1 signals.<br />
Bipolar 8 Zero Substitution (B8ZS) is an exception to AMI that replaces runs of 8<br />
consecutive zeroes with a special code that violates the AMI rules. It allows greater<br />
flexibility of data patterns by enhancing repeater synchronization by increasing<br />
pulse density thereby providing greater throughput.<br />
When the electrical signal does not adhere to the alternating nature of the waveform<br />
specification a BiPolar Violation (BPV) has occurred. This can happen for a number<br />
of reasons, many of which are outside the control of the wireless technician. One<br />
cause may be from electrical noise radiating from florescent lamps, motors, or spark<br />
plug ignition circuits coupling into the copper lines that carry T1 signals. Shielded<br />
cable is often chosen for T1 circuits to minimize electrical interference. This shield<br />
must be grounded to be effective. When the cable is spliced or terminated the shield<br />
on both cables should be connected together. Often the transmit and receive signals<br />
are routed in separate cable bundles.<br />
T1 Analyzer<br />
Chapter 18 529
T1 Analyzer<br />
More Information About T1 Testing<br />
The receive signal is often much weaker that the transmit signal. Cross talk in the<br />
cable pairs can cause the transmit signal to appear on the receive pair and interfere<br />
with the low-level receive signal.<br />
Frame:<br />
Pulses streaming in a T1 circuit would be meaningless if there was no way to<br />
organize them in a meaningful structure. In T1, bits are organized into 192 bit<br />
frames with an associated single frame bit for a total of 193 bits. The frame bit<br />
pattern has unique characteristics that allow the receiving end to recognize it and to<br />
synchronize to it. D3/D4 framing patterns have the ability to identify a super frame<br />
of 12 sub-frames. Extended Super Fame (ESF) has the ability to identify a super<br />
frame of 24 sub-frames and include a data link channel and Cyclic Redundancy<br />
Checksum (CRC) check bits.<br />
T1 Analyzer<br />
530 Chapter 18
19 W-CDMA or W-CDMA (with HSDPA)<br />
Analyzer<br />
“Using the W-CDMA or W-CDMA (with HSDPA) Analyzer” on page 532<br />
“Selecting a Reference” on page 533<br />
“RF Connections” on page 534<br />
“Preparing to Make W-CDMA or W-CDMA (with HSDPA) Tx Analyzer<br />
<strong>Measurement</strong>s” on page 535<br />
“Performing a Basic W-CDMA or W-CDMA (with HSDPA) Transmitter<br />
<strong>Measurement</strong>” on page 535<br />
“Multiple-View Display” on page 538<br />
“Setting the Display Options” on page 544<br />
“Codogram Display” on page 545<br />
“Performing a Codogram <strong>Measurement</strong>” on page 548<br />
“Displaying the Active Code Channel Table” on page 549<br />
“Setting the Channel or Frequency Step” on page 552<br />
“Setting the Scrambling Codes” on page 552<br />
“Setting the Display Reference Level” on page 553<br />
“Compensating for the Loss or Gain of External Cables, Attenuators, and<br />
Preamps” on page 554<br />
“Setting Average, Sweep, and Restart” on page 556<br />
“Setting the Active Channel Threshold Level and Auto Threshold Level” on<br />
page 558<br />
“Enabling PICH and S-CCPCH” on page 560<br />
“Adding a Marker” on page 561<br />
“Metrics Provided by the W-CDMA or W-CDMA (with HSDPA) Analyzer” on<br />
page 563<br />
“Interpretation of <strong>Measurement</strong> Results” on page 566<br />
531<br />
W-CDMA or W-CDMA (with HSDPA)<br />
Analyzer
W-CDMA or W-CDMA (with HSDPA) Analyzer<br />
Using the W-CDMA or W-CDMA (with HSDPA) Analyzer<br />
Using the W-CDMA or W-CDMA (with HSDPA)<br />
Analyzer<br />
W-CDMA and W-CDMA (with HSDPA) transmitter measurements verify proper<br />
transmitter performance of a Base Station (commonly referred to as a Node B) and<br />
are typically made with the base station out-of-service in test mode. Non-intrusive<br />
measurements can also be made on a live network if a monitor or test port is present.<br />
This is usually a coupled port, with power levels that are –20 or –30 dB down from<br />
the main Tx output power RF path. The power levels on the main Tx output power<br />
path can exceed 10 Watts. Important metrics include:<br />
W-CDMA or W-CDMA (with HSDPA)<br />
Analyzer<br />
• Frequency Error<br />
• Error Vector Magnitude (EVM)<br />
• Peak Code Domain Error (PCDE)<br />
• Channel Power<br />
• Carrier Feedthrough<br />
• Code Domain Noise Floor<br />
• CPICH Power<br />
• Delta Powers between CPICH (Common Pilot Channel) and P-CCPCH<br />
(Primary Common Control Physical Channel), S-CCPCH (Secondary Common<br />
Control Physical Channel), PICH (Paging Indicator Channel), P-SCH (Primary<br />
Synchronization Channel) and S-SCH (Secondary Synchronization Channel).<br />
These latter measurements are all performed in the “Code Domain” and are<br />
sometimes referred to as Code Domain Power (CDP) measurements.<br />
One of the defining elements of a 3G system is high-speed data transmission. The<br />
3GPP standard allows for multiple data rates depending on the application. This<br />
flexibility requires complex processing in both the transmitter and receiver to retain<br />
information quality and still transfer a variety of user information in the noisy<br />
spread spectrum environment. The CDP measurements allow you to quickly verify<br />
the operation of a 3GPP transmitter. In addition, it can give a high-level evaluation<br />
of modulation quality, channel power, and signal-to-noise in the code domain.<br />
High Speed Downlink Packet Access (HSDPA) was added in Release 5 of the 3GPP<br />
specifications. HSDPA was added in an attempt to make the W-CDMA systems<br />
more efficient for packet data applications by increasing peak data rates and<br />
reducing packet latency. You will need Option 245 - HSDPA Analyzer & HSDPA<br />
532 Chapter 19
W-CDMA or W-CDMA (with HSDPA) Analyzer<br />
Using the W-CDMA or W-CDMA (with HSDPA) Analyzer<br />
Over Air Test to make HSDPA-specific measurements, although other W-CDMA<br />
measurements can still be made without this option installed on your test set.<br />
This chapter covers Option 240 - W-CDMA Analyzer installed on its own, and<br />
Option 240 - W-CDMA Analyzer installed together with Option 245 - HSDPA<br />
Analyzer & HSDPA Over Air Test.<br />
Where differences exist between using Option 240 - W-CDMA Analyzer installed on<br />
its own, and using it in conjunction with Option 245 - HSDPA Analyzer & HSDPA<br />
Over Air Test, these differences are usually called out in this document. Where the<br />
differences are small, however, they are not called out.<br />
Example of a difference that is not called out: a title on a menu can be either<br />
W-CDMA Anl. or HSDPA Anl. depending on whether or not Option 245 - HSDPA<br />
Analyzer & HSDPA Over Air Test has been installed. The keys under that menu do<br />
not change, and only the title of the menu changes. Such differences are not called<br />
out here.<br />
Selecting a Reference<br />
The <strong>E7495A</strong>/B supports three different types of frequency reference input for<br />
making frequency measurements. These are listed in the table below.<br />
<strong>E7495A</strong>/B Reference Inputs<br />
Reference Type of reference provided Notes<br />
GPS Ref Time and Frequency Strongly recommended – provides<br />
accurate and network-independent<br />
measurements<br />
Ext Ref<br />
Int Ref<br />
Frequency Only:<br />
2.048 MHz, 10 MHz or<br />
13 MHz<br />
Frequency Only:<br />
Uses the test set’s internal<br />
oscillator<br />
Recommended if no GPS signal is<br />
obtainable. Will only measure<br />
frequency and frequency error relative<br />
to BTS reference<br />
Only recommended if no other<br />
reference signal is available. You must<br />
typically be within 750 Hz of the base<br />
station operating frequency when<br />
entering frequency or channel<br />
information in order for the test set to be<br />
able to lock to the Tx signal.<br />
Chapter 19 533<br />
W-CDMA or W-CDMA (with HSDPA)<br />
Analyzer
W-CDMA or W-CDMA (with HSDPA) Analyzer<br />
Using the W-CDMA or W-CDMA (with HSDPA) Analyzer<br />
It is strongly recommended that you use the Global Positioning System (GPS) signal<br />
as the frequency reference for the W-CDMA and the W-CDMA (with HSDPA) Tx<br />
measurements because it provides an independent reference for measuring the<br />
operating frequency of the base station. A GPS antenna must be connected to the<br />
GPS input of the test set, and the antenna must have a clear view of the sky in order<br />
for the GPS to lock. If a GPS signal cannot be obtained, you can use the frequency<br />
reference provided by the base station to perform the measurement.<br />
The <strong>E7495A</strong>/B test set supports all of the following frequency references and time<br />
references:<br />
• Frequency and Time - GPS (External antenna supplied)<br />
• Frequency and Time - External Even Second Pulse<br />
• Frequency only - Internal Reference<br />
• Frequency only - External 1.000 MHz (E7945B only)<br />
• Frequency only - External 2.048 MHz (E7945B only)<br />
• Frequency only - External 4.950 MHz (E7945B only)<br />
• Frequency only - External 10.000 MHz<br />
• Frequency only - External 13.000 MHz (E7945B only)<br />
• Frequency only - External 15.000 MHz (E7945B only)<br />
• Frequency only - External 19.6608 MHz<br />
If you use the frequency reference provided by the base station, keep in mind that<br />
the frequency error metric will only be measuring the error relative to the base<br />
station reference signal, and not relative to absolute frequency and time. You will<br />
not be able to determine if the base station frequency is aligned with the other base<br />
stations in the network. Since the GPS provides an independent reference, the<br />
frequency error metric can be used to determine if the base station frequency is<br />
offset from the rest of the network.<br />
W-CDMA or W-CDMA (with HSDPA)<br />
Analyzer<br />
RF Connections<br />
For the RF connection, you can connect the <strong>E7495A</strong>/B RF Input Port either directly<br />
to the Tx RF output of the base station, or to the coupled output port on the base<br />
station when you are making W-CDMA or HSDPA transmitter measurements. In<br />
this way, the base station can remain on-air (in-service) while Tx measurements are<br />
being made. If the RF Input port of the instrument is connected directly to the Tx RF<br />
output, then the base station (or at least that sector) must be taken out of service.<br />
534 Chapter 19
W-CDMA or W-CDMA (with HSDPA) Analyzer<br />
Using the W-CDMA or W-CDMA (with HSDPA) Analyzer<br />
CAUTION The maximum power for the RF Out/SWR port (Port 1) and the RF In port (Port 2)<br />
of the test set is +20 dBm (100 mW). The maximum power for the Power Sensor<br />
port is +24 dBm (300 mW). When directly coupled to a base station, the test set can<br />
be damaged by excessive power applied to any of these three ports.<br />
To prevent damage in most situations when you directly couple the test set to a base<br />
station, use the high power attenuator between the test set and the BTS.<br />
NOTE<br />
Most base stations also provide a coupled output, which is a port used for testing.<br />
This output port is usually in the form of a small RF connector on the front of the<br />
base station rack, located on or near the high power amplifier module, and is usually<br />
labeled “Test Out,” “Monitor Out,” or “Tx MON” or “TEST.” Be sure to check the<br />
specifications provided by the base station's manufacturer prior to connecting the<br />
<strong>E7495A</strong>/B test set. This enables you to determine the output power range of this test<br />
port, and therefore avoid the possibility of damaging the test set.<br />
Preparing to Make W-CDMA or W-CDMA (with HSDPA) Tx<br />
Analyzer <strong>Measurement</strong>s<br />
The first step in measuring W-CDMA transmitter performance (with or without<br />
HSDPA) is to take the base station out of service. In-service measurements are also<br />
possible, as long as you either use an external coupler, or you use a test port as<br />
described in the note above. The next step is to choose the type of time reference<br />
available. The measurement configuration depends upon the type of time reference<br />
you choose. If you use GPS as your time reference, you can also use it to verify the<br />
frequency independently.<br />
You must know the channel or carrier frequency of the transmitter to be analyzed.<br />
Additionally, each base station sector has a unique scrambling code that is<br />
transmitted to mobiles in that sector. These scrambling codes can be detected<br />
automatically by the test set, or can be entered manually if desired.<br />
Performing a Basic W-CDMA or W-CDMA (with HSDPA)<br />
Transmitter <strong>Measurement</strong><br />
Step<br />
1 Mode<br />
Notes<br />
Chapter 19 535<br />
W-CDMA or W-CDMA (with HSDPA)<br />
Analyzer
W-CDMA or W-CDMA (with HSDPA) Analyzer<br />
Using the W-CDMA or W-CDMA (with HSDPA) Analyzer<br />
Step<br />
Notes<br />
2 [Tx Analyzer]<br />
3 [W-CDMA Analyzer] or<br />
[W-CDMA (w/ HSDPA) Analyzer]<br />
4 Setup the channel standard.<br />
a. [Chan Std]<br />
b. Highlight the channel standard<br />
you want using the up and down<br />
arrow buttons.<br />
c. [Select]<br />
5 Use the [Units] softkey to select Freq<br />
or Chan. Select Chan for this<br />
example.<br />
6 Setup the channel.<br />
The softkey label changes to include<br />
“(w/ HSDPA)” if you have Option<br />
245 - HSDPA Analyzer & HSDPA<br />
Over Air Test installed on your test<br />
set.<br />
Each time you press this softkey, the<br />
selected option changes.<br />
W-CDMA or W-CDMA (with HSDPA)<br />
Analyzer<br />
a. [Channel]<br />
b. Enter the channel using the<br />
numeric keypad.<br />
c. [Fwd] or [Rev]<br />
7 Setup the scrambling codes.<br />
a. [Scramble C...]<br />
b. [Auto] or [Manual]<br />
Each time you press this softkey, the<br />
selected option changes.<br />
Auto takes the strongest code.<br />
Manual lets you specify the<br />
scrambling code.<br />
536 Chapter 19
W-CDMA or W-CDMA (with HSDPA) Analyzer<br />
Using the W-CDMA or W-CDMA (with HSDPA) Analyzer<br />
Step<br />
8 Setup the frequency/time reference.<br />
a. [Fr/Time Ref]<br />
b. [GPS] or [External Even Second]<br />
for frequency and time reference.<br />
[Internal Reference] or any other<br />
[External...] for frequency<br />
reference only<br />
9 Connect to the base station.<br />
Notes<br />
GPS is the preferred frequency<br />
reference.<br />
Connections for out of service W-CDMA or W-CDMA (w/ HSDPA)<br />
measurements with GPS receiver as timing reference<br />
Chapter 19 537<br />
W-CDMA or W-CDMA (with HSDPA)<br />
Analyzer
W-CDMA or W-CDMA (with HSDPA) Analyzer<br />
Using the W-CDMA or W-CDMA (with HSDPA) Analyzer<br />
Step<br />
Notes<br />
Connections for in service W-CDMA or W-CDMA (w/ HSDPA)<br />
measurements with GPS receiver as timing reference<br />
NOTE<br />
During a W-CDMA or W-CDMA (with HSDPA) Analyzer measurement, a yellow<br />
triangle symbol may temporarily appear beside “GPS” in the lower right. The<br />
yellow triangle indicates that the test set is re-synchronizing with the GPS pulses.<br />
Once the test set is synchronized, a green dot appears in place of the triangle. If the<br />
GPS is unavailable, a red X appears. If this happens, you must choose another<br />
reference.<br />
Multiple-View Display<br />
W-CDMA or W-CDMA (with HSDPA)<br />
Analyzer<br />
The W-CDMA and W-CDMA (w/ HSDPA) Tx analyzer multiple-view screens are<br />
divided into two sections in both the Zoom View (default–Figure 19-1 on page 541<br />
and Figure 19-2 on page 542) and in the Full View (Figure 19-3 on page 543 and<br />
Figure 19-4 on page 544). The upper portion contains three graphical views of your<br />
data, and the lower portion contains the measurement metrics.<br />
The upper, graphical portion shows the following three views:<br />
• In Full View, the top-left graph shows the power in the lower 256 of the 512<br />
channels (OVSFs or spread codes). The remaining 256 channels are shown in<br />
the lower left graph.<br />
In Zoom View, the top-left graph shows all 512 channels (OVSFs or spread<br />
538 Chapter 19
W-CDMA or W-CDMA (with HSDPA) Analyzer<br />
Using the W-CDMA or W-CDMA (with HSDPA) Analyzer<br />
codes). A light blue section link is the bottom bar of the upper graph to the<br />
whole of the lower graph (described below). The red line across the graph<br />
represents the active channel threshold. The traffic channel displays in orange<br />
color, the rest are in the color shown in the control view.<br />
• In Full View, the lower-left graph shows the upper 256 of the 512 channels<br />
(OVSFs or spread codes).<br />
In Zoom View, the lower-left graph shows the power in the section highlighted<br />
in light blue in the top-left graph. This is a selection of either 32, 64, or 128<br />
codes.<br />
• The top-right graph (Control View) shows the power in the control channels (see<br />
Table below). The PICH and the S-CCPCH channels are only displayed if you<br />
have enabled them using the Setup menu. For further details, see “Enabling<br />
PICH and S-CCPCH” on page 560.<br />
The bottom portion (Metrics View) displays the current measurement metrics.<br />
NOTE<br />
In W-CDMA or W-CDMA (with HSDPA), the P-SCH and S-SCH are not assigned<br />
spread codes and therefore do not appear in the code domain power display (Full<br />
View). The <strong>E7495A</strong>/B features a control channel graph view (Control View) for<br />
these two Sync channels to measure power only, since there is no spread code<br />
associated with these channels. They have special non-orthogonal scrambling codes<br />
and are only actually On 10% of the time<br />
Acronym Full Name Viewable in Which Display<br />
Area?<br />
Option 245 - HSDPA<br />
Analyzer & HSDPA<br />
Over Air Test<br />
Required?<br />
CPICH Common Pilot Channel Visible in all views (red bar) Not required<br />
DPCH<br />
Dedicated Physical<br />
Channel/Dedicated Pilot<br />
Channel<br />
Visible ONLY in the Full<br />
View and in the Zoom View<br />
(orange bars). Not Visible in<br />
the Control View<br />
Required. You will not<br />
be able to see this<br />
channel unless you<br />
have Option 245 -<br />
HSDPA Analyzer &<br />
HSDPA Over Air Test<br />
installed.<br />
Chapter 19 539<br />
W-CDMA or W-CDMA (with HSDPA)<br />
Analyzer
W-CDMA or W-CDMA (with HSDPA) Analyzer<br />
Using the W-CDMA or W-CDMA (with HSDPA) Analyzer<br />
Acronym Full Name Viewable in Which Display<br />
Area?<br />
HS-PDSCH<br />
(HSDPA<br />
signals<br />
only)<br />
P-CCPCH<br />
High Speed Physical<br />
Downlink Shared Channel<br />
NOTE: You can have QPSK<br />
and QAM versions of<br />
HS-PDSCH<br />
Primary Common Control<br />
Physical Channel<br />
Visible ONLY in the Full<br />
View and in the Zoom View<br />
(Pale yellow bars). Not<br />
Visible in the Control View<br />
Visible in all views (yellow<br />
bar)<br />
PICH Paging Indicator Channel Visible in all views (light blue<br />
bar), but only if activated (for<br />
further details, see “Enabling<br />
PICH and S-CCPCH” on<br />
page 560)<br />
P-SCH<br />
S-CCPCH<br />
S-SCH<br />
Primary Synchronization<br />
Channel<br />
Secondary Common Control<br />
Physical Channel<br />
Secondary Synchronization<br />
Channel<br />
Visible ONLY in the Control<br />
View (blue bar)<br />
Visible in all views (green<br />
bar), but only if activated (for<br />
further details, see “Enabling<br />
PICH and S-CCPCH” on<br />
page 560)<br />
Visible ONLY in the Control<br />
View (purple bar)<br />
Option 245 - HSDPA<br />
Analyzer & HSDPA<br />
Over Air Test<br />
Required?<br />
Required. You will not<br />
be able to see this<br />
channel unless you<br />
have Option 245 -<br />
HSDPA Analyzer &<br />
HSDPA Over Air Test<br />
installed.<br />
Not required<br />
Not required<br />
Not required<br />
Not required<br />
Not required<br />
W-CDMA or W-CDMA (with HSDPA)<br />
Analyzer<br />
540 Chapter 19
W-CDMA or W-CDMA (with HSDPA) Analyzer<br />
Using the W-CDMA or W-CDMA (with HSDPA) Analyzer<br />
Figure 19-1<br />
The Multiple-View Zoom Display Without an HSDPA Signal or Without<br />
Option 245 - HSDPA Analyzer & HSDPA Over Air Test Installed<br />
NOTE<br />
The Multiple-View Zoom Display (above) is virtually identical for both of the<br />
following situations:<br />
• Option 245 - HSDPA Analyzer & HSDPA Over Air Test has not been installed<br />
• Option 245 - HSDPA Analyzer & HSDPA Over Air Test has been installed, but<br />
there is no HSDPA signal to display<br />
The only differences you might notice are cosmetic only. There is a change to the<br />
description above the left menu, and there is a change to the measurement<br />
description at the bottom of the screen.<br />
Chapter 19 541<br />
W-CDMA or W-CDMA (with HSDPA)<br />
Analyzer
W-CDMA or W-CDMA (with HSDPA) Analyzer<br />
Using the W-CDMA or W-CDMA (with HSDPA) Analyzer<br />
Figure 19-2<br />
The Multiple-View Zoom Display With Option 245 - HSDPA Analyzer &<br />
HSDPA Over Air Test and HSDPA Signal Present<br />
W-CDMA or W-CDMA (with HSDPA)<br />
Analyzer<br />
542 Chapter 19
W-CDMA or W-CDMA (with HSDPA) Analyzer<br />
Using the W-CDMA or W-CDMA (with HSDPA) Analyzer<br />
Figure 19-3<br />
The Multiple-View Full Display Without an HSDPA Signal, or Without Option<br />
245 - HSDPA Analyzer & HSDPA Over Air Test Installed<br />
NOTE<br />
The Multiple-View Full Display (above) is virtually identical for both of the<br />
following situations:<br />
• Option 245 - HSDPA Analyzer & HSDPA Over Air Test has not been installed<br />
• Option 245 - HSDPA Analyzer & HSDPA Over Air Test has been installed, but<br />
there is no HSDPA signal to display<br />
The only differences you might notice are cosmetic only. There is a change to the<br />
description above the left menu, and there is a change to the measurement<br />
description at the bottom of the screen.<br />
Chapter 19 543<br />
W-CDMA or W-CDMA (with HSDPA)<br />
Analyzer
W-CDMA or W-CDMA (with HSDPA) Analyzer<br />
Using the W-CDMA or W-CDMA (with HSDPA) Analyzer<br />
Figure 19-4<br />
The Multiple-View Full Display With Option 245 - HSDPA Analyzer & HSDPA<br />
Over Air Test and HSDPA Signal Present<br />
Setting the Display Options<br />
The display options enable you to zoom in on portions of the graph, or to see the<br />
entire trace at once.<br />
W-CDMA or W-CDMA (with HSDPA)<br />
Analyzer<br />
Step<br />
Notes<br />
1 [Display]<br />
544 Chapter 19
W-CDMA or W-CDMA (with HSDPA) Analyzer<br />
Using the W-CDMA or W-CDMA (with HSDPA) Analyzer<br />
Step<br />
Notes<br />
2 On [View] select [Zoom] or [Full]. If you are displaying Zoom view and<br />
select Full view, the display changes the<br />
top-left and bottom-left graphs to show<br />
the first 256 codes in the top graph, and<br />
the second 256 codes in the bottom<br />
graph. If you select Zoom, the two keys,<br />
Position and Width (see Steps 3 and 6<br />
below), become available.<br />
3 [Position] When you are in Zoom view, this option<br />
changes the starting point (spread code)<br />
of the section of the full view (upper<br />
graph) that the Zoom view (lower graph)<br />
will expand for more detailed analysis.<br />
4 Enter the position using the<br />
numeric keypad.<br />
5 [Enter]<br />
6 On [Width] select [32], [64],<br />
[128], or [256].<br />
In Zoom view, smaller numbers selected<br />
with this option correspond to narrower<br />
zoom windows on the full view. If you<br />
select 32 for example, you will have the<br />
minimum window and maximum zoom.<br />
You will also see channel information<br />
displayed below each active channel. The<br />
data displayed is the spreading factor<br />
used by that channel and its spread code<br />
or OVSF number.<br />
Codogram Display<br />
This view provides a history of the spectrum. The codogram plot rises over time<br />
until it fills the graphical section of the display. Your most recent data appears at the<br />
bottom of the display, and your oldest data (several minutes ago to several hours<br />
ago, depending on your settings) appears at the top of the display. In this way, you<br />
can clearly see the changes in power that occur over a period of time. You can use it<br />
to:<br />
• see traffic channels as they initiate and terminate,<br />
Chapter 19 545<br />
W-CDMA or W-CDMA (with HSDPA)<br />
Analyzer
W-CDMA or W-CDMA (with HSDPA) Analyzer<br />
Using the W-CDMA or W-CDMA (with HSDPA) Analyzer<br />
W-CDMA or W-CDMA (with HSDPA)<br />
Analyzer<br />
NOTE<br />
• track traffic channel call levels over time.<br />
The W-CDMA or W-CDMA (with HSDPA) Tx analyzer Codogram screen is<br />
divided into 3 sections in the Zoom view (default–Figure 19-5 on page 547) and 4<br />
sections in the Full view (Figure 19-6 on page 548) as follows:<br />
• Zoom and Full views: The lower-right graph (Code Domain Trace view)<br />
shows the power in all 512 OVSF (Orthogonal Variable rate Spread Factor)<br />
Code Channels. For display details, refer to.“Multiple-View Display” on<br />
page 538.<br />
• Zoom view: The left graph (Codogram view) provides a display of data<br />
captured over time. The OVSF codes are shown on the x-axis and correspond to<br />
the light blue highlight on the Code Domain Trace view. The OVSF codes<br />
selected for your Zoom View are determined by the Position setting, which sets<br />
the lowest (or left) OVSF code, and by the Width setting, which sets the number<br />
of OVSF codes displayed. For example, with Position set to 400, and Width set<br />
to 32, your Zoom View will show codes 400 to 431, that is, from Position 400<br />
for a Width of 32 codes.<br />
You can change the time interval to allow longer spectrum history. The color<br />
corresponds to the OVSF channel strength.<br />
• Full view: The top-left graph (Codogram view) shows the power in the first half<br />
of the OVSF channels (SF512 channels 0 - 255). The lower-left graph shows the<br />
power in the other half of the channels (SF512 channels 256-511). Both graphs<br />
provide a display of data captured over time.<br />
You can change the time interval to allow longer spectrum history. The color<br />
corresponds to the OVSF channel strength.<br />
• Zoom and Full views: The top-right graph (Color Legend) provides a color vs.<br />
power legend to help you interpret the power level in the Codogram.<br />
The Update Interval is the interval, measured in whole seconds, between successive<br />
records displayed on the codogram. In other words, if you set the update interval to<br />
5 seconds, the codogram display will not update until the after the first complete<br />
measurement following a gap of five seconds. Alternatively, you can set the update<br />
interval to provide the maximum data collection speed by pressing [Max Speed], or<br />
by setting the update interval to 0 (zero) seconds.<br />
It is not always possible for the analyzer to match the update interval you specify. It<br />
is possible, for example, to set your update interval to zero seconds (the maximum<br />
speed), and then to find that the analyzer can not update any faster than once every<br />
two seconds.<br />
546 Chapter 19
W-CDMA or W-CDMA (with HSDPA) Analyzer<br />
Using the W-CDMA or W-CDMA (with HSDPA) Analyzer<br />
The frequency indicator is at the bottom right corner of the screen, the time<br />
reference indicator at the bottom left. For each indicator the text indicates which<br />
reference you have chosen. A green LED indicates a locked condition. A red “X”<br />
indicates an unlocked condition.<br />
Figure 19-5<br />
The Codogram Zoom Display<br />
Chapter 19 547<br />
W-CDMA or W-CDMA (with HSDPA)<br />
Analyzer
W-CDMA or W-CDMA (with HSDPA) Analyzer<br />
Using the W-CDMA or W-CDMA (with HSDPA) Analyzer<br />
Figure 19-6<br />
The Codogram Full Display<br />
Performing a Codogram <strong>Measurement</strong><br />
Step<br />
Notes<br />
1 [Display]<br />
W-CDMA or W-CDMA (with HSDPA)<br />
Analyzer<br />
2 [Codogram] This displays the menu that controls the<br />
appearance and behavior of the<br />
codogram display.<br />
3 On [Codogram] select On or Off. Each time you press this key, the<br />
codogram state switches between On and<br />
Off.<br />
When you set [Codogram] to On,<br />
[Reset Codogram], [Update Interval] and<br />
[Palette] become active.<br />
548 Chapter 19
W-CDMA or W-CDMA (with HSDPA) Analyzer<br />
Using the W-CDMA or W-CDMA (with HSDPA) Analyzer<br />
Step<br />
Notes<br />
4 [Reset Codogram] This restarts the data capture for the<br />
Codogram. You may see the screen<br />
freeze for a few seconds before the<br />
display starts plotting data again.<br />
5 If desired set the update interval:<br />
a. [Update Interval]<br />
b. Enter the interval number of<br />
seconds using the numeric<br />
keypad.<br />
c. Select [sec] or [Max Speed].<br />
6 If desired set the display color:<br />
a. [Palette]<br />
b. Select [Full Color] or<br />
[Grayscale].<br />
Allows you to set the update interval to 0,<br />
1, or more seconds. Alternatively, you<br />
may set it to automatically determine the<br />
update interval that provides the<br />
maximum data collection speed.<br />
If you need to return to the automatically<br />
determined maximum display update<br />
rate, you must press [Update Interval]<br />
followed by a numeric keypad key to<br />
access [Max Speed].<br />
The color/grayscale top and bottom<br />
mappings are determined by the Ref<br />
Level and Scale/Div settings. To change<br />
the mapping, go to [Level/Location] and<br />
change [Ref Level] and [Scale/Div].<br />
NOTE<br />
The key labelled “Update Interval” was labelled “Capture Interval” in earlier<br />
versions of the software (A.04.00 or earlier). The way the key works has not<br />
changed. Only the key label has changed to clarify its function.<br />
Displaying the Active Code Channel Table<br />
This display option enables you to look at a numeric and textual description of all<br />
the active code channels in your signal. The table of active channels is displayed on<br />
the left of the graphic area of the screen. The control channel chart, and a small<br />
graphic display of all 512 channels, are both displayed to the right of the table.<br />
Step<br />
1 [Display]<br />
Notes<br />
Chapter 19 549<br />
W-CDMA or W-CDMA (with HSDPA)<br />
Analyzer
W-CDMA or W-CDMA (with HSDPA) Analyzer<br />
Using the W-CDMA or W-CDMA (with HSDPA) Analyzer<br />
Step<br />
Notes<br />
2 [Active Code Ch Table] When you press the Active Code Ch<br />
Table key, a fresh menu is displayed.<br />
3 Press [Active Code Ch Table] Each time you press this key, the selected<br />
option changes. Switching Active Code<br />
Channel Table On displays a table of all<br />
the active channels.<br />
For each active code you will see in the<br />
first column the channel’s channel<br />
number, and its spreading factor (in<br />
parentheses).<br />
In the second column is a textual<br />
description of that channel.<br />
In the third column is its code domain<br />
power (CDP) in dBc. The CDP figure is<br />
accurate to one decimal place.<br />
The menu keys to navigate up and down<br />
the table also become active when the<br />
Active Channel Code Table is switched<br />
On.<br />
If you have previously positioned a<br />
marker on one of the active channels, this<br />
channel’s entry in the table is highlighted<br />
with a yellow background (see<br />
Figure 19-7 on page 551 for an example).<br />
W-CDMA or W-CDMA (with HSDPA)<br />
Analyzer<br />
550 Chapter 19
W-CDMA or W-CDMA (with HSDPA) Analyzer<br />
Using the W-CDMA or W-CDMA (with HSDPA) Analyzer<br />
Figure 19-7<br />
The Active Code Channel Table Display (with Option 245 - HSDPA Analyzer &<br />
HSDPA Over Air Test Installed)<br />
Chapter 19 551<br />
W-CDMA or W-CDMA (with HSDPA)<br />
Analyzer
W-CDMA or W-CDMA (with HSDPA) Analyzer<br />
W-CDMA or W-CDMA (with HSDPA) Analyzer <strong>Measurement</strong> Settings<br />
W-CDMA or W-CDMA (with HSDPA) Analyzer<br />
<strong>Measurement</strong> Settings<br />
Setting the Channel or Frequency Step<br />
You can set the channel or frequency step so you can quickly increment to the next<br />
channel or frequency using the up and down arrow buttons.<br />
Step<br />
Notes<br />
1 [Chan Step] or [Freq Step] This choice depends on the [Units]<br />
mode you are using.<br />
2 Enter the desired channel or<br />
frequency step using the numeric<br />
keypad.<br />
3 [Enter] Notice (and verify) the number you<br />
entered below the Chan Step or Freq<br />
Step text on the corresponding button.<br />
Setting the Scrambling Codes<br />
The <strong>E7495A</strong>/B has two ways to identify the scrambling code being used by the<br />
transmitter under analysis: an automatic detection mode, Auto, and a<br />
manually-specified mode, Manual.<br />
• In Auto mode, the test set automatically detects the scrambling code present in<br />
the signal.<br />
W-CDMA or W-CDMA (with HSDPA)<br />
Analyzer<br />
• In Manual mode, the scrambling code can be entered by you instead of being<br />
auto-detected by the instrument.<br />
If the scrambling code is known, its value can be entered and the test set can decode<br />
and display the code domain power of the signal, even if no P-SCH and S-SCH are<br />
present (a CPICH must be present, however). In normal operating conditions, these<br />
synchronization channels are available, so the P-SCH and S-SCH are used by the<br />
<strong>E7495A</strong>/B (and W-CDMA or W-CDMA (with HSDPA) mobiles) to determine the<br />
552 Chapter 19
W-CDMA or W-CDMA (with HSDPA) Analyzer<br />
W-CDMA or W-CDMA (with HSDPA) Analyzer <strong>Measurement</strong> Settings<br />
correct sequence of scrambling codes required to demodulate the DPCH channels.<br />
Step<br />
Notes<br />
1 [Freq/Chan/Time Ref]<br />
2 [Scramble C...]<br />
3 [Auto] or [Manual] Each time you press this softkey, the<br />
selected option changes.<br />
In Manual mode, you can enter a number<br />
using the keypad.<br />
Setting the Display Reference Level<br />
You can set the W-CDMA or W-CDMA (with HSDPA) Tx analysis display to show<br />
the power in each channel as either relative power (dB) or absolute power (dBm).<br />
The test set's default display mode is relative. In relative mode, the top horizontal<br />
line (top-most graticule) of the display represents the total power (channel power) in<br />
the 3.84 MHz bandwidth of that W-CDMA or W-CDMA (with HSDPA) signal<br />
being broadcast by the transmitter. It is always 0 dB in this mode since it is a relative<br />
measurement. The power in each channel is shown as a vertical bar, with its height<br />
expressed in dB relative to the total channel power.<br />
If you set the reference level mode to absolute, then the top graticule in the display<br />
still corresponds to total channel power in the 5 MHz bandwidth. However, the<br />
reference level and all the power values of the vertical bars showing the power in<br />
each channel are now indicated with absolute power in dBm.<br />
To set the W-CDMA or W-CDMA (with HSDPA) transmitter reference level (while<br />
in W-CDMA or W-CDMA (with HSDPA) Analyzer mode):<br />
Step<br />
Notes<br />
1 [Level/Location]<br />
2 On [Reference] select Abs or<br />
Rel.<br />
Each time you press this softkey, the<br />
selected option changes.<br />
Chapter 19 553<br />
W-CDMA or W-CDMA (with HSDPA)<br />
Analyzer
W-CDMA or W-CDMA (with HSDPA) Analyzer<br />
W-CDMA or W-CDMA (with HSDPA) Analyzer <strong>Measurement</strong> Settings<br />
Compensating for the Loss or Gain of External Cables,<br />
Attenuators, and Preamps<br />
The insertion loss of the test cable and high power attenuator must be compensated<br />
for to obtain accurate W-CDMA or W-CDMA (with HSDPA) power measurements,<br />
such as channel power. This process is called normalization and is described in<br />
“Measuring Two Port Insertion Loss” on page 124.<br />
The insertion loss of the test cable/attenuator combination is accounted for as the RF<br />
In Loss, which is an offset applied to the power measurements by the test set.<br />
Similarly, the insertion gain of an external preamp must be compensated for to<br />
obtain accurate W-CDMA or W-CDMA (with HSDPA) measurements.Although an<br />
external preamp produces a gain rather than a loss, this is also compensated for<br />
using RF In Loss. To enter a gain figure for a preamp, you must enter a negative loss<br />
figure. For example, to enter a gain of 20 dB, you must enter “–20 dB” here.<br />
W-CDMA or W-CDMA (with HSDPA)<br />
Analyzer<br />
554 Chapter 19
W-CDMA or W-CDMA (with HSDPA) Analyzer<br />
W-CDMA or W-CDMA (with HSDPA) Analyzer <strong>Measurement</strong> Settings<br />
Step<br />
1 [RF IN Loss]<br />
2 Enter the RF In loss using the<br />
numeric keypad. Enter a<br />
negative number to indicate a<br />
gain.<br />
Notes<br />
If you are using a cable and attenuator<br />
connected to the base station power<br />
amplifier, enter the combined cable and<br />
attenuator RF In loss here. The RF In loss<br />
can be obtained by measuring the Insertion<br />
loss. See “Two Port Insertion Loss” on<br />
page 123.<br />
If you are using an external preamp and<br />
need to make an allowance for the preamp’s<br />
gain, enter the gain by using a negative<br />
number.<br />
Example of a loss: if you have to account for<br />
an external attenuation of 20 dB, enter<br />
“20 dB” here.<br />
Example of a gain: if your preamp has a<br />
gain of 12 dB, enter the negative figure<br />
“–12 dB” here.<br />
Note: If data had been previously entered in<br />
[RF IN Loss], that data will be lost and<br />
replaced by the value you enter here.<br />
3 [dB]<br />
Chapter 19 555<br />
W-CDMA or W-CDMA (with HSDPA)<br />
Analyzer
W-CDMA or W-CDMA (with HSDPA) Analyzer<br />
W-CDMA or W-CDMA (with HSDPA) Analyzer <strong>Measurement</strong> Settings<br />
Setting Average, Sweep, and Restart<br />
Setting the Sweep<br />
You can select either continuous or single sweep. Continuous sweep provides<br />
repeated, ongoing measurements. Single sweep performs a single measurement that<br />
is repeated only when you push the Single button.<br />
To set sweep:<br />
Step<br />
Notes<br />
1 [Average/Sweep]<br />
2 [Continuous] or [Single] Each time you press this softkey, the<br />
selected option changes.<br />
Setting Averaging<br />
You can choose to have averaging On or Off and to set the number of averages you<br />
want to take. Averaging only applies to the data, not the trace. When initialized, the<br />
<strong>Agilent</strong> <strong>E7495A</strong>/B defaults to running average:<br />
• A running average computes the new result as the weighted sum of the last result<br />
and the new measurement. The last result is weighted by (n – 1)/n. The new<br />
result is weighted by 1/n. Each new measurement produces a new result.<br />
Averaging applies to the following measurement metrics and the control channel<br />
view only:<br />
W-CDMA or W-CDMA (with HSDPA)<br />
Analyzer<br />
• Freq Error<br />
• Noise Floor<br />
• EVM<br />
• PCDE<br />
• Carrier Feedthrough<br />
• Chan Pwr<br />
• CPICH power<br />
• all the delta powers<br />
556 Chapter 19
W-CDMA or W-CDMA (with HSDPA) Analyzer<br />
W-CDMA or W-CDMA (with HSDPA) Analyzer <strong>Measurement</strong> Settings<br />
• Control Channel Graph<br />
The following measurements are never averaged:<br />
• CDP Trace<br />
• Threshold<br />
To set averaging:<br />
Step<br />
Notes<br />
1 Set the number of averages.<br />
a. [Average]<br />
b. Enter the number of averages<br />
using the numeric keypad.<br />
c. [Enter]<br />
2 Set averaging On or Off.<br />
a. [Average/Sweep]<br />
b. [Averaging]<br />
c. [Off] or [On]<br />
NOTE<br />
These two steps can be performed in any order. However, if you turn averaging on<br />
and a large number of averages has previously been set, there may be a delay before<br />
you can change number of averages.<br />
Setting Restart<br />
When you have averaging turned On and you are in Continuous Sweep mode, you<br />
can restart the averaging by pressing the Restart menu key. The Restart key has no<br />
effect if you are in Single sweep mode.<br />
To restart averaging:<br />
Step<br />
1 [Average/Sweep]<br />
Notes<br />
Chapter 19 557<br />
W-CDMA or W-CDMA (with HSDPA)<br />
Analyzer
W-CDMA or W-CDMA (with HSDPA) Analyzer<br />
W-CDMA or W-CDMA (with HSDPA) Analyzer <strong>Measurement</strong> Settings<br />
Step<br />
Notes<br />
2 [Restart] This key is unavailable or has no effect when<br />
Sweep is set to Single. To restart a Single<br />
Sweep measurement, press [Single].<br />
Setting the Active Channel Threshold Level and Auto Threshold<br />
Level<br />
The active channel threshold level is an advanced setting that can be set to indicate<br />
which code channels are considered active. Any code channels exceeding this power<br />
level are considered active traffic channels and any code channels below this power<br />
level are considered inactive (or noise). Those channels that are considered active,<br />
that is, channels that meet or exceed the threshold level, are indicated by the<br />
presence of their OVSF Code below the bar in the display. Inactive channels do not<br />
have their OVSF Codes displayed.<br />
A horizontal red line on the screen represents the threshold. The test set can set this<br />
level automatically, or you can manually enter a value.<br />
In Auto mode the threshold level moves as the noise fluctuates. The threshold level<br />
is set by the test set at an optimal offset above the average noise floor. In Auto mode,<br />
you can alter the Auto Threshold Offset. The recommended and default setting is<br />
0 dB. A negative value moves the threshold lower (closer to the noise floor) and is a<br />
more aggressive setting that increases the likelihood of interpreting an inactive<br />
channel as active. A positive value moves the threshold higher (away from the noise<br />
floor) and is a more conservative setting that increases the likelihood of interpreting<br />
an active channel as inactive.<br />
In Manual mode the threshold level is fixed and does not move as the noise<br />
fluctuates.<br />
To set the active channel threshold level:<br />
W-CDMA or W-CDMA (with HSDPA)<br />
Analyzer<br />
Step<br />
1 [Setup]<br />
2 On [Threshold] select<br />
Auto or Manual.<br />
Notes<br />
Each time you press this softkey, the selected option<br />
changes. If you choose Manual, you must enter the<br />
threshold you want using the numeric keypad, then<br />
press [dB].<br />
558 Chapter 19
W-CDMA or W-CDMA (with HSDPA) Analyzer<br />
W-CDMA or W-CDMA (with HSDPA) Analyzer <strong>Measurement</strong> Settings<br />
Step<br />
Notes<br />
3 [Auto Thres Offset] The default value is 0 dB. Optionally, you can enter a<br />
negative (more aggressive) or positive (more<br />
conservative) value, then press [dB].<br />
NOTE<br />
Knowing which inactive code channels are contributing the most noise to the overall<br />
W-CDMA or W-CDMA (with HSDPA) channel may provide clues to the source of<br />
noise, such as a bad channel card in the base station.<br />
Setting <strong>Measurement</strong> Time<br />
The <strong>Measurement</strong> Time setting allows you to alter the speed at which measurements<br />
are being made. Three choices exist: Slow, Medium, and Fast. The test set defaults<br />
to Medium. Slow measurement time provides a more accurate measurement at the<br />
expense of time. Fast measurement time provides a quicker measurement at the<br />
expense of accuracy. Medium measurement time strikes a balance between<br />
measurement speed and measurement accuracy.<br />
Changes in measurement time, or measurement speed, are achieved by varying the<br />
amount of data used to plot the CDP trace, and by varying the type of frame<br />
alignment used. Table on page 560 shows this.<br />
Chapter 19 559<br />
W-CDMA or W-CDMA (with HSDPA)<br />
Analyzer
W-CDMA or W-CDMA (with HSDPA) Analyzer<br />
W-CDMA or W-CDMA (with HSDPA) Analyzer <strong>Measurement</strong> Settings<br />
Table 19-1<br />
Speeds Slots and Frame Alignment at Different <strong>Measurement</strong><br />
Meas Time<br />
Number<br />
of Slots<br />
W-CDMA (HSDPA Off)<br />
W-CDMA (HSDPA On)<br />
Slow 2 Aligned to Scramble Sequence Frame (CPICH = 0)<br />
Medium 2 Random Slot Aligned to the start of the<br />
next sub-frame boundary<br />
Fast 2 Random Slot Random Slot<br />
NOTE<br />
CDP measurements will only meet <strong>Agilent</strong>’s published specifications when you are<br />
using either Medium or Slow measurement speeds.<br />
Step<br />
Notes<br />
1 [Setup]<br />
2 On [Meas Time] select<br />
Slow, Medium, or Fast.<br />
Each time you press this softkey, the selected<br />
option changes.<br />
Enabling PICH and S-CCPCH<br />
W-CDMA or W-CDMA (with HSDPA)<br />
Analyzer<br />
In 3GPP W-CDMA or W-CDMA (with HSDPA), two optional control channels are<br />
provided: S-CCPCH and PICH. These can have different spreading codes and<br />
spreading factors. For this reason, the <strong>E7495A</strong>/B only identifies them as PICH and<br />
S-CCPCH channels when enabled by you. The test set defaults to the disabled (off)<br />
state. In the default mode, the test set still shows the energy by assuming a spread<br />
factor of 512 in the Full view and Zoom view graphs. Either the actual spreading<br />
factor or spreading code must be entered manually before the test set will display the<br />
PICH or S-CCPCH parameters with their correct spread factors and OVSF codes.<br />
To enable the PICH and S-CCPCH<br />
Step<br />
Notes<br />
1 [Setup] The same procedure is used for both settings.<br />
S-CCPCH is used in this example.<br />
2 [S-CCPCH] Each time you press this softkey, the selected option<br />
changes.<br />
560 Chapter 19
W-CDMA or W-CDMA (with HSDPA) Analyzer<br />
W-CDMA or W-CDMA (with HSDPA) Analyzer <strong>Measurement</strong> Settings<br />
Step<br />
Notes<br />
3 On [S-CCPCH<br />
Enable], select [Off]<br />
or [On]<br />
4 [Spread Factor] If you choose spread factor, you must press enter the<br />
spreading factor you want using the numeric keypad,<br />
then press [Enter].<br />
5 [Channel] If you choose channel, you must press enter the<br />
channel you want using the numeric keypad, then<br />
press [Enter].<br />
Adding a Marker<br />
Markers can be used on traces to help you visually track up to four signals. Each<br />
marker has the following settings:<br />
• Type: Provides three options, including:<br />
— Off<br />
— Normal which places a diamond-shaped, colored marker, and a number<br />
from 1-4, on the trace.<br />
— ∆ (Delta) is associated with a normal marker. Therefore, a normal marker<br />
must exist prior to creating the ∆ (delta) marker. The ∆ (delta) marker<br />
displays the difference between the normal marker position and the ∆ (delta)<br />
marker position. Only one ∆ (delta) marker can be associated with a given<br />
normal marker. The normal marker must be active when ∆ (Delta) is<br />
selected.<br />
• Marker to Peak: Places the active marker on the plot of the code with the<br />
highest power level.<br />
• Marker to Next Peak: Places the active marker on the next highest peak as<br />
measured from your current marker’s position.<br />
• Marker to Next Active Ch Left: Places the active marker on the next active<br />
channel to the left of your current marker.<br />
• Marker to Next Active Ch Right: Places the active marker on the next active<br />
channel to the right of your current marker.<br />
Chapter 19 561<br />
W-CDMA or W-CDMA (with HSDPA)<br />
Analyzer
W-CDMA or W-CDMA (with HSDPA) Analyzer<br />
W-CDMA or W-CDMA (with HSDPA) Analyzer <strong>Measurement</strong> Settings<br />
To add a marker to a trace<br />
Step<br />
Notes<br />
1 [Marker]<br />
2 [Marker]<br />
3 [1], [2], [3], or [4]<br />
4 [Type]<br />
5 [Off], [Normal], or [∆ (Delta)]<br />
6 Locate the marker relative to the trace:<br />
• [Marker to Peak]<br />
• [Marker to Next Peak]<br />
• [Marker to Next Active Channel<br />
Left]<br />
or<br />
• [Marker to Next Active Channel<br />
Right]<br />
W-CDMA or W-CDMA (with HSDPA)<br />
Analyzer<br />
562 Chapter 19
W-CDMA or W-CDMA (with HSDPA) Analyzer<br />
Metrics Provided by the W-CDMA or W-CDMA (with HSDPA) Analyzer<br />
Metrics Provided by the W-CDMA or W-CDMA (with<br />
HSDPA) Analyzer<br />
This section contains descriptions of the individual W-CDMA or W-CDMA (with<br />
HSDPA) transmitter metrics in the Metrics view of the screen. For information on<br />
expected result values and possible causes of error if the expected results are not<br />
met, see “Interpretation of <strong>Measurement</strong> Results” on page 566.<br />
Frequency<br />
Frequency is the selected transmitter operating frequency entered by you (or<br />
calculated from the channel number entered by you).<br />
Freq Error (Frequency Error)<br />
Frequency error, as set up in Controls, is the frequency difference between your<br />
transmitter's actual center frequency and the frequency (or channel) you entered.<br />
Scramble Code<br />
The Scrambling Code being measured (manual or auto). In W-CDMA or W-CDMA<br />
(with HSDPA), each Access Network (or BTS) output signal is scrambled by<br />
multiplying each of its data channels by a unique pseudo-noise (PN) code. In the<br />
W-CDMA specifications, this is referred to as a Scrambling Code.<br />
Noise Floor<br />
Noise Floor is the average power level of all the inactive channels.<br />
Threshold<br />
Threshold is the active channel threshold level and is an advanced setting that can be<br />
set to indicate which code channels are considered active. (For more information,<br />
see “Setting the Active Channel Threshold Level and Auto Threshold Level” on<br />
page 558.)<br />
EVM (Error Vector Magnitude)<br />
EVM is the measure of signal quality specified as a percent of noise to pure signal.<br />
It is the difference between the measured waveform and the theoretical modulated<br />
waveform (the error vector). EVM metrics are used to measure the modulation<br />
quality of a transmitter. The 3GPP standard requires the EVM not to exceed 17.5%<br />
for normal W-CDMA (defined as Test Models 1 and 4), and not to exceed 12.5% in<br />
Chapter 19 563<br />
W-CDMA or W-CDMA (with HSDPA)<br />
Analyzer
W-CDMA or W-CDMA (with HSDPA) Analyzer<br />
Metrics Provided by the W-CDMA or W-CDMA (with HSDPA) Analyzer<br />
W-CDMA or W-CDMA (with HSDPA)<br />
Analyzer<br />
NOTE<br />
the case of 16QAM HSDPA (defined as Test Model 5).<br />
PCDE (Peak Code Domain Error)<br />
PCDE takes the noise and projects the maximum impact it will have on all OVSF<br />
codes. PCDE is the maximum value for the code domain error for all codes (both<br />
active and inactive).<br />
In W-CDMA or W-CDMA (with HSDPA), specifically to address the possibility of<br />
uneven error power distribution, the EVM measurement has been supplemented<br />
with PCDE. The 3GPP standard requires the PCDE not to exceed –33 dB at a<br />
spreading factor of 256, but the Conformance Test adds in a Test Tolerance of 1dB.<br />
This gives a Conformance Limit for Peak Code Domain Error of –32dB at a<br />
spreading factor of 256.<br />
Carr Feedthru or Carr FT (Carrier Feedthrough)<br />
Carrier Feedthrough is a result of the RF carrier signal feeding through the I/Q<br />
modulator and riding on the output circuitry without being modulated.<br />
Chan Pwr (Channel Power)<br />
Channel Power is the integrated power within a defined bandwidth. For W-CDMA<br />
or W-CDMA (with HSDPA) the channel bandwidth is 3.84 MHz. Channel Power<br />
measures the power the base station is transmitting across the entire 3.84 MHz<br />
W-CDMA or W-CDMA (with HSDPA) channel.<br />
CPICH (Common Pilot Channel)<br />
Common Pilot Channel (CPICH) is the channel that carries the scrambling code.<br />
The CPICH metric reports the power in this channel in dBc. By default, the CPICH<br />
Limits are set to Off. If you set CPICH Limits On, the default upper limit value is<br />
0 dBc, and the lower limit value is –20 dBc.<br />
The CPICH default limits are set at a level suitable for catching only gross errors<br />
when field testing live signals. To perform conformance testing, you will need to set<br />
the limits to your own specifications. Conformance testing for Test Model 2 (TM2),<br />
for example, requires that the CPICH limits are set to ±2.9 dB, that is, to –7.1 dB<br />
and –12.9 dB with a –10 dBc signal.<br />
Control Channel Delta (∆) Powers<br />
The last column on the far right of the Metrics view shows the relative powers of the<br />
five control channels relative to the Common Pilot Channel. For example,<br />
P-CCPCH is the amplitude difference between the CPICH and the P-CCPCH. In<br />
564 Chapter 19
W-CDMA or W-CDMA (with HSDPA) Analyzer<br />
Metrics Provided by the W-CDMA or W-CDMA (with HSDPA) Analyzer<br />
W-CDMA or W-CDMA (with HSDPA) systems, the transmit power of all the<br />
control channels can be set at different values relative to the CPICH. the five control<br />
channel ∆ power metrics are:<br />
• ∆P-CCPCH - primary common control physical channel<br />
• ∆S-CCPCH - secondary common control physical channel<br />
• ∆PICH - paging indicator channel<br />
• ∆P-SCH - primary sync channel<br />
• ∆S-SCH - secondary sync channel<br />
Chapter 19 565<br />
W-CDMA or W-CDMA (with HSDPA)<br />
Analyzer
W-CDMA or W-CDMA (with HSDPA) Analyzer<br />
Interpretation of <strong>Measurement</strong> Results<br />
Interpretation of <strong>Measurement</strong> Results<br />
This section contains expected result values and possible causes of error if the<br />
expected results are not met.<br />
Freq (Frequency)<br />
If you are in the channel mode, verify that the correct channelization and channel<br />
number are set.<br />
Freq Error (Frequency Error)<br />
The frequency error of the analyzer should be
W-CDMA or W-CDMA (with HSDPA) Analyzer<br />
Interpretation of <strong>Measurement</strong> Results<br />
Check the Threshold settings to make sure they are correct. (See “Setting the Active<br />
Channel Threshold Level and Auto Threshold Level” on page 558 for more<br />
information.).<br />
• If the Threshold setting is Auto with no offset, it is an indication that there is a<br />
poor signal to noise ratio.<br />
• Check the Channel Power to ensure the level is as expected.<br />
• If the power level is good, look for EVM and PCDE problems.<br />
EVM (Error Vector Magnitude)<br />
An unexpectedly high EVM could be due to interfering signals, carrier feedthrough,<br />
transmitter I/Q modulator, or signal path.<br />
PCDE (Peak Code Domain Error)<br />
An unexpectedly high PCDE could be due to interfering signals, carrier<br />
feedthrough, transmitter I/Q modulator, or signal path.<br />
Carr Feedthru (Carrier Feedthrough)<br />
A good Carrier Feedthrough level is less than -25 dB. The 3GPP standard does not<br />
specify Carrier Feedthrough; however, this measurement provides an additional tool<br />
to troubleshoot the base station's transmitter.<br />
In the frequency domain, Carrier Feedthrough can show up as an energy spike that<br />
can be seen on the spectrum analyzer by closely spanning into the top of the<br />
W-CDMA or W-CDMA (with HSDPA) signal. The effects of Carrier Feedthrough<br />
can also show up as higher noise levels on the Code Domain Power screen. Carrier<br />
Feedthrough can be caused by the lack of isolation across the mixer and cavity of<br />
the transmitter's I/Q modulator.<br />
Chan Pwr (Channel Power)<br />
If the Channel Power level is not as expected, check pilot dominance and the<br />
number of Scrambling codes visible. All visible sectors will contribute to channel<br />
power. Also, check Amplifier Capacity and Utilization as they could have exceeded<br />
the maximum capacity. A high power data call could be indicated by a very wide<br />
and tall bar.<br />
CPICH (Common Pilot Channel)<br />
CPICH will vary with distance from the base station and clear line of sight to the<br />
antenna. If the CPICH is not as expected, check pilot dominance and base station<br />
settings (ratio to other control channels should be good).<br />
Chapter 19 567<br />
W-CDMA or W-CDMA (with HSDPA)<br />
Analyzer
W-CDMA or W-CDMA (with HSDPA) Analyzer<br />
Interpretation of <strong>Measurement</strong> Results<br />
Control Channel Delta (∆) Powers<br />
The Delta results should match the Base Station settings. If not, ensure the Base<br />
Station settings are as expected.<br />
W-CDMA or W-CDMA (with HSDPA)<br />
Analyzer<br />
568 Chapter 19
20 W-CDMA or W-CDMA (with HSDPA)<br />
Over Air<br />
“Using the W-CDMA or W-CDMA (with HSDPA) Over the Air Tool” on<br />
page 570<br />
“Preparing to Make W-CDMA or W-CDMA (with HSDPA) Over the Air<br />
<strong>Measurement</strong>s” on page 571<br />
“Criteria for Making Valid Over the Air <strong>Measurement</strong>s” on page 571<br />
“Performing a Basic Over the Air <strong>Measurement</strong>” on page 573<br />
“Displaying Location Information Using GPS” on page 575<br />
“Setting Amplifier Capacity Metrics” on page 576<br />
“Multiple-View Display” on page 577<br />
“Setting the Display Options” on page 581<br />
“Codogram Display” on page 582<br />
“Performing a Codogram <strong>Measurement</strong>” on page 585<br />
“Displaying the Active Code Channel Table” on page 587<br />
“Setting the Channel or Frequency Step” on page 589<br />
“Setting the Scrambling Codes” on page 590<br />
“Setting the Transmitter Reference” on page 590<br />
“Setting Average, Sweep, and Restart” on page 592<br />
“Setting the Active Channel Threshold Level and Auto Threshold Level” on<br />
page 594<br />
“Resetting Amplifier Capacity and Traffic Metrics” on page 596<br />
“Setting <strong>Measurement</strong> Time” on page 595<br />
“Setting Valid <strong>Measurement</strong> Limits” on page 597<br />
“Setting the S-CCPCH Parameters” on page 597<br />
“Setting the PICH Parameters” on page 598<br />
“Adding a Marker” on page 599<br />
“Metrics Provided by the W-CDMA or W-CDMA (with HSDPA) Over Air<br />
<strong>Measurement</strong>” on page 601<br />
“Interpretation of Over the Air <strong>Measurement</strong> Results” on page 605<br />
W-CDMA or W-CDMA (with HSDPA)<br />
Over Air<br />
569
W-CDMA or W-CDMA (with HSDPA)<br />
Over Air<br />
W-CDMA or W-CDMA (with HSDPA) Over Air<br />
Using the W-CDMA or W-CDMA (with HSDPA) Over the Air Tool<br />
Using the W-CDMA or W-CDMA (with HSDPA) Over<br />
the Air Tool<br />
W-CDMA and W-CDMA (with HSDPA) over the air measurements provide a quick<br />
method of verifying W-CDMA or W-CDMA (with HSDPA) transmitter<br />
performance. These transmitter measurements can be made on a base station<br />
(commonly referred to as a Node B) from the convenience of your vehicle without<br />
taking the base station out of service. Over the air measurements are especially<br />
useful in maintaining hard-to-access cell sites such as pole top base stations. The<br />
W-CDMA Over the Air and W-CDMA (with HSDPA) options (Option<br />
250 - W-CDMA Over Air Test, and Option 245 - HSDPA Analyzer & HSDPA Over<br />
Air Test) may also be used to measure signals at a coupled port on the transmitter.<br />
High Speed Downlink Packet Access (HSDPA) was added in Release 5 of the 3GPP<br />
specifications. HSDPA was added in an attempt to make the W-CDMA systems<br />
more efficient for packet data applications by increasing peak data rates and<br />
reducing packet latency. You will need Option 245 - HSDPA Analyzer & HSDPA<br />
Over Air Test to make HSDPA-specific measurements, although other W-CDMA<br />
measurements can still be made without this option installed on your test set.<br />
This chapter covers Option 250 - W-CDMA Over Air Test installed on its own, and<br />
Option 250 - W-CDMA Over Air Test installed together with Option 245 - HSDPA<br />
Analyzer & HSDPA Over Air Test.<br />
Where differences exist between using Option 250 - W-CDMA Over Air Test<br />
installed on its own, and using it in conjunction with Option 245 - HSDPA Analyzer<br />
& HSDPA Over Air Test, these differences are usually called out in this document.<br />
Where the differences are small, however, they are not called out.<br />
Example of a difference that is not called out: a title on a menu can be either<br />
W-CDMA Ovr Air or HSDPA Over Air depending on whether or not Option<br />
245 - HSDPA Over Air Test & HSDPA Over Air Test has been installed. The keys<br />
under that menu do not change, and only the title of the menu changes. Such<br />
differences are not called out here.<br />
For out-of-service W-CDMA (without HSDPA) transmitter measurements, the<br />
W-CDMA Tx Analyzer option (Option 240 - W-CDMA Analyzer) is recommended.<br />
For all HSDPA measurements, including out-of-service HSDPA transmitter<br />
measurements, the HSDPA option (Option 245 - HSDPA Analyzer & HSDPA Over<br />
Air Test) is recommended. For more information refer to “W-CDMA or W-CDMA<br />
(with HSDPA) Analyzer” on page 531.<br />
570 Chapter 20
CAUTION<br />
W-CDMA or W-CDMA (with HSDPA) Over Air<br />
Using the W-CDMA or W-CDMA (with HSDPA) Over the Air Tool<br />
To achieve valid over-the-air measurements, the test set must be stationary (not<br />
moving). An alternative is to make these measurements from a coupled port at the<br />
base station.<br />
Preparing to Make W-CDMA or W-CDMA (with HSDPA) Over<br />
the Air <strong>Measurement</strong>s<br />
An important consideration when making W-CDMA or W-CDMA (with HSDPA)<br />
over the air measurements is your location relative to the base station. There must be<br />
no obstructions between your location and the base station antennas. Also, the GPS<br />
antenna must be able to “see” the satellites to obtain lock. You must know the<br />
channel or frequency and the Channel Standard of the W-CDMA or W-CDMA<br />
(with HSDPA) signal to be analyzed.<br />
Once you have connected the proper antenna and filter to the test set, chosen a<br />
stationary location, and verified that you have a clear view of the base station<br />
antennas, you can perform W-CDMA or W-CDMA (with HSDPA) over the air<br />
measurements.<br />
If this is the first W-CDMA or W-CDMA (with HSDPA) over the air measurement<br />
for this base station, you must find a location that meets the criteria for making a<br />
valid measurement. Your location must have a dominant pilot and very low<br />
multipath power. If you have made W-CDMA or W-CDMA (with HSDPA) over the<br />
air measurements at this location before and know it provides valid measurements,<br />
skip to “Performing a Basic Over the Air <strong>Measurement</strong>” on page 573.<br />
Criteria for Making Valid Over the Air <strong>Measurement</strong>s<br />
The first step in making valid W-CDMA (with or without HSDPA) over the air<br />
measurements is to identify a target base station to measure. Then, for your<br />
measurements to be valid, you must find a location near the target base station with<br />
an unobstructed view of the base station antenna and a sufficiently strong W-CDMA<br />
or W-CDMA (with HSDPA) signal. W-CDMA or W-CDMA (with HSDPA) over<br />
the air measurements will experience interference from other W-CDMA or<br />
W-CDMA (with HSDPA) signals on the same RF channel and from multipath<br />
echoes. The code domain power view measures two key parameters to indicate these<br />
effects:<br />
• Pilot dominance—The difference between the useful energy of the strongest<br />
pilot channel and the combined energy of the lower energy active pilot channels<br />
(expressed in dB). Ideally, this value should be very large (> 18 dB).<br />
W-CDMA or W-CDMA (with HSDPA)<br />
Over Air<br />
Chapter 20 571
W-CDMA or W-CDMA (with HSDPA)<br />
Over Air<br />
NOTE<br />
W-CDMA or W-CDMA (with HSDPA) Over Air<br />
Using the W-CDMA or W-CDMA (with HSDPA) Over the Air Tool<br />
The <strong>E7495A</strong>/B test set includes up to six lower energy active pilots in the pilot<br />
dominance calculation.<br />
It is important to remember that the pilot dominance is always measured against the<br />
strongest signal. If you have specified your channel of interest manually, this<br />
channel might not necessarily be the strongest.<br />
• Multipath power—The amount of power from the dominant pilot signal that is<br />
dispersed outside the main correlation peak, due to multipath echoes (expressed<br />
in dB). Ideally, this value should be very small (< 0.1 dB). Multipath power is<br />
the result of portions of the original broadcast signal arriving at the receiving<br />
antenna out of phase with the main power of the original signal. This can be<br />
caused by the signal being reflected off objects, such as buildings, or being<br />
refracted through the atmosphere differently from the main signal. These out of<br />
phase signals can cancel power from the main signal, or can appear as noise<br />
interference at the receiver.<br />
The table below gives guidelines to the quality of the over the air code domain<br />
measurements with respect to pilot dominance and multipath power.<br />
<strong>Measurement</strong> Quality Pilot Dominance Multipath Power<br />
Very good >= 10 dB < 0.1 dB<br />
Fair > 8dB < 0.4dB<br />
Marginal > 5dB < 0.7dB<br />
The default measurement limits for pilot dominance and multipath power are set to<br />
give “fair” measurement quality. If these limits are met, the pilot dominance and<br />
multipath power values will be displayed in green. When the pilot dominance and<br />
multipath power parameters are outside the acceptable limits, the parameters will<br />
turn red. If this occurs, you must move to a different location that meets the “fair”<br />
criteria defined above.<br />
In general, you should always use a preselector filter for the band of interest to<br />
prevent strong signals from overwhelming the signal of interest. <strong>Agilent</strong> offers the<br />
following preselector and antenna:<br />
• Option 813—W-CDMA preselector filter and antenna for W-CDMA.<br />
572 Chapter 20
W-CDMA or W-CDMA (with HSDPA) Over Air<br />
Using the W-CDMA or W-CDMA (with HSDPA) Over the Air Tool<br />
Performing a Basic Over the Air <strong>Measurement</strong><br />
Step<br />
1 Mode<br />
2 [Over Air]<br />
3 [W-CDMA Over Air] or<br />
[W-CDMA (w/ HSDPA)<br />
Over Air]<br />
4 [Chan Std]<br />
5 Select the channel standard<br />
you want using the up and<br />
down arrow buttons.<br />
6 [Select]<br />
7 On [Units] select Chan or<br />
Freq.<br />
Notes<br />
The softkey label changes to include<br />
“(w/ HSDPA)” if you have Option 245 - HSDPA<br />
Analyzer & HSDPA Over Air Test installed on<br />
your test set.<br />
Each time you press this softkey, the selected<br />
option changes.<br />
8 [Channel] or [Frequency] • If you selected Chan in the previous step,<br />
select [Channel].<br />
• If you selected Freq, select [Frequency].<br />
9 Enter the channel or<br />
frequency using the<br />
numeric keypad.<br />
• If you selected Channel in the previous step,<br />
terminate your selection with either [Fwd] or<br />
[Rev].<br />
• If you selected Frequency in the previous<br />
step, terminate your selection with the<br />
appropriate unit of measure.<br />
10 [Fwd] Selects the forward W-CDMA or W-CDMA<br />
(with HSDPA) channel.<br />
11 Verify that on<br />
[Fr/Time Ref] GPS is<br />
selected. If not, press<br />
[Fr/Time Ref], then press<br />
[GPS].<br />
This step is not required but it can improve the<br />
accuracy of the test set frequency reference.<br />
W-CDMA or W-CDMA (with HSDPA)<br />
Over Air<br />
Chapter 20 573
W-CDMA or W-CDMA (with HSDPA)<br />
Over Air<br />
W-CDMA or W-CDMA (with HSDPA) Over Air<br />
Using the W-CDMA or W-CDMA (with HSDPA) Over the Air Tool<br />
Step<br />
12 On [Scramble C...] select<br />
Auto or Manual.<br />
13 [Level/Location]<br />
14 On [Ref Level] select Abs<br />
or Rel.<br />
Notes<br />
The test set defaults to Auto mode.<br />
• In Auto mode the test set finds the Scramble<br />
code of the strongest pilot signal and<br />
displays the value in the metrics display.<br />
• In Manual mode you must enter the<br />
Scramble code using the numeric keypad.<br />
Enables you to toggle the measurement<br />
reference value between Abs (absolute) and Rel<br />
(relative).<br />
• If set to Abs, the measurement is made in<br />
reference to absolute power and the results<br />
in the CDP chart are displayed in dBm.<br />
• If set to Rel, the measurement is made<br />
relative to the Channel Power and the results<br />
are displayed in dB.<br />
15 [RF IN Loss]<br />
16 Enter the RF In Loss using<br />
the numeric keypad.<br />
17 [dB]<br />
18 Connect to the antenna.<br />
If you are using a cable and additional devices<br />
connected to the antenna, enter the combined<br />
cable and device RF In Loss here. The RF In<br />
Loss can be obtained by measuring the Insertion<br />
loss. See “Two Port Insertion Loss” on<br />
page 123.<br />
Note: If data has been previously entered in [RF<br />
IN Loss], that data will be lost and replaced by<br />
the new value you enter here.<br />
574 Chapter 20
Step<br />
W-CDMA or W-CDMA (with HSDPA) Over Air<br />
Using the W-CDMA or W-CDMA (with HSDPA) Over the Air Tool<br />
Notes<br />
W-CDMA or W-CDMA (with HSDPA)<br />
Over Air<br />
NOTE<br />
The test set itself does not record data for post-processing. It provides a snapshot of<br />
W-CDMA or W-CDMA (with HSDPA) base station transmit parameters at that<br />
location.<br />
NOTE<br />
During a W-CDMA or W-CDMA (with HSDPA) over the air measurement, a<br />
yellow triangle symbol may temporarily appear beside “GPS” in the lower right.<br />
The yellow triangle indicates that the test set is re-synching with the GPS pulse per<br />
second signal. Once the test set is synchronized, a green dot appears in place of the<br />
triangle. If the GPS is unavailable, a red X appears. If this happens, you must choose<br />
another reference.<br />
Displaying Location Information Using GPS<br />
If you are making W-CDMA or W-CDMA (with HSDPA) over the air<br />
measurements at a location you previously established as valid, <strong>Agilent</strong><br />
recommends using GPS to verify that you are at the location from which you<br />
previously measured.<br />
If you are making W-CDMA or W-CDMA (with HSDPA) over the air<br />
Chapter 20 575
W-CDMA or W-CDMA (with HSDPA)<br />
Over Air<br />
W-CDMA or W-CDMA (with HSDPA) Over Air<br />
Using the W-CDMA or W-CDMA (with HSDPA) Over the Air Tool<br />
measurements from a new location, once you validate that the location provides a<br />
dominant pilot and low multipath power, <strong>Agilent</strong> recommends that you record the<br />
latitude and longitude coordinates of this location using GPS. Later measurements<br />
should be made from this precise location to provide performance trends.<br />
To Display GPS Location Information:<br />
Step<br />
Notes<br />
1 [Level/Location]<br />
2 On [Show GPS<br />
Location] select On.<br />
Displays GPS satellite location information. Uses the<br />
internal GPS to capture the location of a<br />
measurement. These coordinates can be used to<br />
return to the same location to compare and contrast<br />
reference measurements to future measurements.<br />
The Time Ref (Freq/Chan/Time Ref mode) button<br />
must be set to GPS for this function to be active.<br />
Information logged includes longitude, latitude,<br />
altitude (feet/meters), and the number of satellites<br />
tracked.<br />
Each time you press this softkey, the selected option<br />
changes.<br />
3 Highlight On Toggle to On to display GPS satellite location<br />
information. Toggle to Off to remove the location<br />
information<br />
NOTE<br />
If you prefer to have an electronic copy of the location information, see “Saving<br />
Data” on page 465.<br />
Setting Amplifier Capacity Metrics<br />
The Amplifier Capacity measurement is an estimate of the amount of power<br />
amplifier capacity that is being used, expressed in percent of maximum. Amplifier<br />
capacity properties must be properly set to make valid amplifier capacity<br />
measurements. Amplifier capacity metrics are amplifier capacity, peak amplifier<br />
capacity, and average amplifier capacity.<br />
A W-CDMA or W-CDMA (with HSDPA) base station is typically set up with a<br />
576 Chapter 20
W-CDMA or W-CDMA (with HSDPA) Over Air<br />
Using the W-CDMA or W-CDMA (with HSDPA) Over the Air Tool<br />
specified amount of power allocated to the CPICH (Common Pilot Channel). The<br />
specified power settings of the PCCPCH (Primary Common Control Physical<br />
Channel) are defined relative to the CPICH. Occasionally, the PCCPCH power<br />
setting will also be specified in absolute power units (watts or dBm). Given the<br />
CPICH and PCCPCH setup values and the maximum power output of the amplifier,<br />
the percentage amplifier capacity setup parameters can be determined.<br />
To Set Amplifier Capacity Properties:<br />
W-CDMA or W-CDMA (with HSDPA)<br />
Over Air<br />
Step<br />
Notes<br />
1 [Setup]<br />
2 [Amp Cap Settings]<br />
3 On [Amp Cap] select On.<br />
4 [Max PA Pwr]<br />
5 [W]<br />
6 Enter the maximum power<br />
amplifier power in watts,<br />
using the numeric keypad.<br />
A base station power amplifier is specified to<br />
have a maximum power limit.<br />
7 [CPICH Pwr] CPICH refers to Common Pilot Channel.<br />
8 Enter the CPICH power in<br />
watts, using the numeric<br />
keypad.<br />
The CPICH power is the total power in the<br />
dominant pilot signal, expressed in watts.<br />
9 [W]<br />
10 [∆ (Delta) PCCPCH...] PCCPCH refers to Primary Common Control<br />
Physical Channel.<br />
11 Enter the ∆ (Delta)<br />
PCCPCH Pwr in dB, using<br />
the numeric keypad.<br />
12 [dB]<br />
The ∆ (Delta) PCCPCH is the expected<br />
amplitude difference between the PCCPCH<br />
channel and CPICH channel, expressed in dB.<br />
Multiple-View Display<br />
The W-CDMA or W-CDMA (with HSDPA) Over the Air analyzer multiple-view<br />
Chapter 20 577
W-CDMA or W-CDMA (with HSDPA)<br />
Over Air<br />
W-CDMA or W-CDMA (with HSDPA) Over Air<br />
Using the W-CDMA or W-CDMA (with HSDPA) Over the Air Tool<br />
screens are divided into two sections in the Zoom view (default–Figure 20-1 on<br />
page 580) and five sections in the Full view (Figure 20-2 on page 581) as follows:<br />
• Zoom view: The top-left graph (Code Domain Trace View) shows the power in<br />
all 512 OVSF (Orthogonal Variable rate Spread Factor) Code Channels. Code<br />
channels have variable width depending on the Spread Factor for the channel.<br />
SF512 has 512 code channels with each channel 1 unit in width. SF256 has 256<br />
channels with each channel 2 units in width. The width continues to double for<br />
SF128, SF64, and so forth. The Y-axis labels display the relative power (dB) or<br />
absolute power (dBm), threshold level, and dB/division. The X-axis labels<br />
display active channel numbers.<br />
The light blue section on the bottom bar corresponds with the section displayed<br />
in zoom view (described below). The red line across the graph represents the<br />
active channel threshold. The control channels are in the color indicated in<br />
“Channel Descriptions and Acronyms”.<br />
Active code channels shown on the display include:<br />
• Red - Common Pilot Channel (CPICH)<br />
• Yellow - Primary common control channel (P-CCPCH)<br />
• Green - Secondary common control channel (S-CCPCH); if enabled under<br />
the Setup menu<br />
• Light blue - Paging Indication Channel (PICH) if enabled under the Setup<br />
menu; also P-SCH<br />
• Purple - S-SCH<br />
• Orange - Active DPCH traffic channels<br />
• Light yellow - Active HS-PDSCH (QPSK and 16QAM) traffic channels<br />
• Noise (light gray)<br />
• Full view: The top-left graph (Code Domain Trace View) shows the power in the<br />
first half of the OVSF channels (SF512 channels 0 - 255). The lower-left graph<br />
shows the power in the other half of the channels (SF512 channels 256-511).<br />
The code channel appearance and colors are the same as described above.<br />
• Zoom view: The lower-left graph (Zoom View) shows the power in the section<br />
of the graph highlighted in light blue in the top-left graph, a section of 32, 64,<br />
128, or 256 codes.<br />
• Zoom and Full views: The top-right graph (Strongest Pilot View) contains the<br />
pilot dominance and multipath power parameters. This shows the strongest<br />
Scrambling Codes seen by the test set. Active codes, that is, codes that reach or<br />
578 Chapter 20
W-CDMA or W-CDMA (with HSDPA) Over Air<br />
Using the W-CDMA or W-CDMA (with HSDPA) Over the Air Tool<br />
exceed the Threshold Level, are indicated by having their Scrambling Code<br />
displayed on the X-axis. Codes that do not reach the Threshold Level are<br />
considered inactive, and do not have their Scrambling Code displayed.<br />
The Scrambling Code of interest should clearly dominate. The display is useful<br />
when positioning the test set to see what other base stations or sectors need to be<br />
avoided. Awareness of these two parameter values helps you be sure that you are<br />
making valid measurements on the sector of interest.<br />
• Full view: The lower-right graph (Control View) shows the power in the control<br />
channels (see “Channel Descriptions and Acronyms”).<br />
The ∆ (delta) power (relative to CPICH) is shown in the middle of the control<br />
bars.<br />
• Zoom and Full views: The bottom portion (Metrics View) displays 15<br />
measurement parameters for the current measurement, displayed in three<br />
columns and five rows—each with a value and units. For more information<br />
about the metric display, refer to “Metrics Provided by the W-CDMA or<br />
W-CDMA (with HSDPA) Over Air <strong>Measurement</strong>” on page 601.<br />
The frequency reference indicator is at the bottom right corner of the screen, the<br />
time reference indicator at the bottom left. For each indicator the text indicates<br />
which reference you have chosen. A green LED indicates a locked condition. A red<br />
“X” indicates an unlocked condition.<br />
W-CDMA or W-CDMA (with HSDPA)<br />
Over Air<br />
NOTE<br />
In W-CDMA or W-CDMA (with HSDPA), the P-SCH and S-SCH are not assigned<br />
OVSF codes and therefore do not appear in the code domain trace view. The<br />
<strong>E7495A</strong>/B features a control channel graph view (Control View) for these two Sync<br />
channels to measure power only, since there are no OVSF codes associated with<br />
these channels. They have special non-orthogonal codes and are only On 10% of the<br />
time<br />
Table 20-1<br />
Channel Descriptions and Acronyms<br />
Acronym Full Name Viewable in Which Display Area<br />
CPICH Common Pilot Channel Visible in all views (red bar)<br />
PCCPCH<br />
SCCPCH<br />
Primary Common Control Physical<br />
Channel<br />
Secondary Common Control Physical<br />
Channel<br />
Visible in all views (yellow bar)<br />
Visible in all views (green bar)<br />
Chapter 20 579
W-CDMA or W-CDMA (with HSDPA)<br />
Over Air<br />
Table 20-1<br />
W-CDMA or W-CDMA (with HSDPA) Over Air<br />
Using the W-CDMA or W-CDMA (with HSDPA) Over the Air Tool<br />
Channel Descriptions and Acronyms<br />
Acronym Full Name Viewable in Which Display Area<br />
PICH Paging Indicator Channel Visible in all views (light blue bar)<br />
P-SCH Primary Sync Channel Visible ONLY in the Control View (blue bar)<br />
S-SCH Secondary Sync Channel Visible ONLY in the Control View (purple<br />
bar)<br />
Figure 20-1<br />
The Multiple-View Zoom Display<br />
580 Chapter 20
Figure 20-2<br />
W-CDMA or W-CDMA (with HSDPA) Over Air<br />
Using the W-CDMA or W-CDMA (with HSDPA) Over the Air Tool<br />
The Multiple-View Full Display<br />
W-CDMA or W-CDMA (with HSDPA)<br />
Over Air<br />
Setting the Display Options<br />
The display options enable you to zoom in on portions of the graph, or to see the<br />
entire trace at once.<br />
Step<br />
Notes<br />
1 [Display]<br />
2 On [View] select [Zoom] or [Full]. If you are displaying Zoom view and<br />
select Full view, the display changes the<br />
top-left and bottom-left graphs to show<br />
the first 256 codes in the top graph, and<br />
the second 256 codes in the bottom<br />
graph. If you select Zoom, the two keys,<br />
Position and Width (see Steps 3 and 6<br />
below), become available.<br />
Chapter 20 581
W-CDMA or W-CDMA (with HSDPA)<br />
Over Air<br />
W-CDMA or W-CDMA (with HSDPA) Over Air<br />
Using the W-CDMA or W-CDMA (with HSDPA) Over the Air Tool<br />
Step<br />
3 [Position] When you are in Zoom view, this option<br />
changes the starting point (spread code)<br />
of the section of the full view (upper<br />
graph) that the Zoom view (lower graph)<br />
will expand for more detailed analysis.<br />
4 Enter the position using the<br />
numeric keypad.<br />
5 [Enter]<br />
6 On [Width] select [32], [64], [128]<br />
or [256].<br />
Notes<br />
In Zoom view, smaller numbers selected<br />
with this option correspond to narrower<br />
zoom windows on the full view. If you<br />
select 32 for example, you will have the<br />
minimum window and maximum zoom.<br />
You will also see channel information<br />
displayed below each active channel.<br />
This information is the spreading factor<br />
used by that channel and its spread code<br />
or OVSF number.<br />
Codogram Display<br />
This view provides a history of the code domain power. The codogram plot rises<br />
over time until it fills the graphical section of the display. Your most recent data<br />
appears at the bottom of the display, and your oldest data (several minutes ago to<br />
several hours ago, depending on your settings) appears at the top of the display. In<br />
this way, you can clearly see the changes in power that occur over a period of time.<br />
You can use it to:<br />
• see traffic channels as they initiate and terminate,<br />
• track traffic channel call levels over time.<br />
The W-CDMA or W-CDMA (with HSDPA) Over the Air Codogram screen is<br />
divided into 3 sections in the Zoom view (default–Figure 20-3 on page 584) and 4<br />
sections in the Full view (Figure 20-4 on page 585) as follows:<br />
• Zoom and Full views: The lower-right graph (Code Domain Trace view)<br />
shows the power in all 512 OVSF (Orthogonal Variable rate Spread Factor)<br />
Code Channels. For display details, refer to “Multiple-View Display” on<br />
582 Chapter 20
W-CDMA or W-CDMA (with HSDPA) Over Air<br />
Using the W-CDMA or W-CDMA (with HSDPA) Over the Air Tool<br />
page 577.<br />
• Zoom view: The left graph (Codogram view) provides a display of data<br />
captured over time. The OVSF codes are shown on the X-axis and correspond to<br />
the light blue highlight on the Code Domain Trace view. The OVSF codes<br />
selected for your Zoom View are determined by the Position setting, which sets<br />
the lowest (or left) OVSF code, and by the Width setting, which sets the number<br />
of OVSF codes displayed. For example, with Position set to 400, and Width set<br />
to 32, your Zoom View will show codes 400 to 431, that is, from Position 400<br />
for a Width of 32 codes.<br />
You can change the time interval to allow longer spectrum history. The color<br />
corresponds to the OVSF channel strength.<br />
• Full view: The top-left graph (Codogram view) shows the power in the first half<br />
of the OVSF channels (SF512 channels 0 - 255). The lower-left graph shows the<br />
power in the other half of the channels (SF512 channels 256-511). Both graphs<br />
provide a display of data captured over time.<br />
You can change the time interval to allow longer spectrum history. The color<br />
corresponds to the OVSF channel strength.<br />
• Zoom and Full views: The top-right graph (Color Legend) provides a color vs.<br />
power legend to help you interpret the power level in the Codogram.<br />
The Update Interval is the interval, measured in whole seconds, between successive<br />
records displayed on the codogram. In other words, if you set the update interval to<br />
5 seconds, the codogram display will not update until the after the first complete<br />
measurement following a gap of five seconds. Alternatively, you can set the update<br />
interval to provide the maximum data collection speed by pressing [Max Speed], or<br />
by setting the update interval to 0 (zero) seconds.<br />
W-CDMA or W-CDMA (with HSDPA)<br />
Over Air<br />
NOTE<br />
It is not always possible for the analyzer to match the update interval you specify. It<br />
is possible, for example, to set your update interval to zero seconds (the maximum<br />
speed), and then to find that the analyzer can not update any faster than once every<br />
two seconds.<br />
The frequency indicator is at the bottom right corner of the screen, the time<br />
reference indicator at the bottom left. For each indicator the text indicates which<br />
reference you have chosen. A green LED indicates a locked condition. A red “X”<br />
indicates an unlocked condition.<br />
Chapter 20 583
W-CDMA or W-CDMA (with HSDPA)<br />
Over Air<br />
Figure 20-3<br />
W-CDMA or W-CDMA (with HSDPA) Over Air<br />
Using the W-CDMA or W-CDMA (with HSDPA) Over the Air Tool<br />
The Codogram Zoom Display<br />
584 Chapter 20
Figure 20-4<br />
W-CDMA or W-CDMA (with HSDPA) Over Air<br />
Using the W-CDMA or W-CDMA (with HSDPA) Over the Air Tool<br />
The Codogram Full Display<br />
W-CDMA or W-CDMA (with HSDPA)<br />
Over Air<br />
Performing a Codogram <strong>Measurement</strong><br />
Step<br />
Notes<br />
1 [Display]<br />
2 [Codogram] This displays the menu that controls the<br />
appearance and behavior of the<br />
codogram display.<br />
Chapter 20 585
W-CDMA or W-CDMA (with HSDPA)<br />
Over Air<br />
W-CDMA or W-CDMA (with HSDPA) Over Air<br />
Using the W-CDMA or W-CDMA (with HSDPA) Over the Air Tool<br />
Step<br />
3 On [Codogram] select On or Off. Each time you press this key, the<br />
codogram state switches between On and<br />
Off.<br />
When you set [Codogram] to On,<br />
[Reset Codogram], [Update Interval] and<br />
[Palette] become active.<br />
4 [Reset Codogram] This restarts the data capture for the<br />
Codogram. You may see the screen<br />
freeze for a few seconds before the<br />
display starts plotting data again.<br />
5 If desired set the update interval:<br />
a. [Update Interval]<br />
b. Enter the interval number of<br />
seconds using the numeric<br />
keypad.<br />
c. Select [sec] or [Max Speed].<br />
6 If desired set the display color:<br />
a. [Palette]<br />
b. Select [Full Color] or<br />
[Grayscale].<br />
Notes<br />
Allows you to set the update interval to 0,<br />
1, or more seconds. Alternatively, you<br />
may set it to automatically determine the<br />
update interval that provides the<br />
maximum data collection speed.<br />
If you need to return to the automatically<br />
determined maximum display update<br />
rate, you must press [Update Interval]<br />
followed by a numeric keypad key to<br />
access [Max Speed].<br />
The color/grayscale top and bottom<br />
mappings are determined by the Ref<br />
Level and Scale/Div settings. To change<br />
the mapping, go to [Level/Location] and<br />
change [Ref Level] and [Scale/Div].<br />
NOTE<br />
The key labelled “Update Interval” was labelled “Capture Interval” in earlier<br />
versions of the software (A.04.00 or earlier). The way the key works has not<br />
changed. Only the key label has changed to clarify its function.<br />
586 Chapter 20
W-CDMA or W-CDMA (with HSDPA) Over Air<br />
Optional W-CDMA or W-CDMA (with HSDPA) Over the Air <strong>Measurement</strong><br />
Settings<br />
Optional W-CDMA or W-CDMA (with HSDPA) Over<br />
the Air <strong>Measurement</strong> Settings<br />
You can alter several optional measurement parameters in W-CDMA or W-CDMA<br />
(with HSDPA) Over the Air:<br />
W-CDMA or W-CDMA (with HSDPA)<br />
Over Air<br />
• “Setting the Channel or Frequency Step” on page 589<br />
• “Setting the Scrambling Codes” on page 590<br />
• “Setting the Transmitter Reference” on page 590<br />
• “Setting Average, Sweep, and Restart” on page 592<br />
• “Setting the Active Channel Threshold Level and Auto Threshold Level” on<br />
page 594<br />
• “Setting <strong>Measurement</strong> Time” on page 595<br />
• “Resetting Amplifier Capacity and Traffic Metrics” on page 596<br />
• “Setting Valid <strong>Measurement</strong> Limits” on page 597<br />
• “Setting the S-CCPCH Parameters” on page 597<br />
• “Setting the PICH Parameters” on page 598<br />
• “Adding a Marker” on page 599<br />
Displaying the Active Code Channel Table<br />
This display option enables you to look at a numeric and textual description of all<br />
the active code channels in your signal. The table of active channels is displayed on<br />
the left of the graphic area of the screen. The full graphic display of all 512 channels<br />
is reduced in size and displayed to the right of the table.<br />
Step<br />
Notes<br />
1 [Display]<br />
2 [Active Code Ch Table] When you press the Active Code Ch<br />
Table key, a fresh menu is displayed.<br />
Chapter 20 587
W-CDMA or W-CDMA (with HSDPA)<br />
Over Air<br />
W-CDMA or W-CDMA (with HSDPA) Over Air<br />
Optional W-CDMA or W-CDMA (with HSDPA) Over the Air <strong>Measurement</strong><br />
Settings<br />
Step<br />
Notes<br />
3 Press [Active Code Ch Table] Each time you press this key, the selected<br />
option changes. Switching Active Code<br />
Channel Table On displays a table of all<br />
the active channels.<br />
For each active code you will see in the<br />
first column the channel’s spreading<br />
factor, and its OVSF code number (in<br />
parentheses).<br />
In the second column is a textual<br />
description of that channel.<br />
In the third column is its code domain<br />
power (CDP) in dBc. The CDP figure is<br />
accurate to one decimal place.<br />
The menu keys to navigate up and down<br />
the table also become active when the<br />
Active Channel Code Table is switched<br />
On.<br />
If you have previously positioned a<br />
marker on one of the active channels, this<br />
channel’s entry in the table is highlighted<br />
with a yellow background (see<br />
Figure 20-5 on page 589 for an example).<br />
588 Chapter 20
Figure 20-5<br />
W-CDMA or W-CDMA (with HSDPA) Over Air<br />
Optional W-CDMA or W-CDMA (with HSDPA) Over the Air <strong>Measurement</strong><br />
Settings<br />
The Active Code Channel Table Display (with Option 245 Installed)<br />
W-CDMA or W-CDMA (with HSDPA)<br />
Over Air<br />
Setting the Channel or Frequency Step<br />
You can set the channel or frequency step so you can quickly increment to the next<br />
channel or frequency using the Up Arrow and Down Arrow buttons.<br />
Step<br />
Notes<br />
1 [Freq/Chan/Time Ref]<br />
2 [Chan Step] or [Freq Step] This choice depends on the [Units] mode you<br />
are using.<br />
3 Enter the desired channel or<br />
frequency step using the<br />
numeric keypad.<br />
4 [Enter] Notice (and verify) that the number you<br />
entered is displayed below the Chan Step or<br />
Freq Step text on the corresponding button.<br />
Chapter 20 589
W-CDMA or W-CDMA (with HSDPA)<br />
Over Air<br />
W-CDMA or W-CDMA (with HSDPA) Over Air<br />
Optional W-CDMA or W-CDMA (with HSDPA) Over the Air <strong>Measurement</strong><br />
Settings<br />
Setting the Scrambling Codes<br />
The <strong>E7495A</strong>/B has two ways to identify the scrambling code being used by the<br />
transmitter under analysis: an automatic detection mode, Auto, and a<br />
manually-specified mode, Manual.<br />
• In Auto mode, the test set automatically detects the scrambling code present in<br />
the signal.<br />
• In Manual mode, you enter the scrambling code instead of it being auto-detected<br />
by the instrument.<br />
If the scrambling code is known, its value can be entered and the test set can decode<br />
and display the code domain power of the signal, even if no P-SCH and S-SCH are<br />
present (a CPICH must be present, however). In normal operating conditions, these<br />
sync channels are available, so the P-SCH and S-SCH are used by the <strong>E7495A</strong>/B<br />
(and W-CDMA or W-CDMA (with HSDPA) mobiles) to determine the correct<br />
sequence of scrambling codes required to demodulate the DPCH channels.<br />
Step<br />
Notes<br />
1 [Freq/Chan/Time Ref]<br />
2 [Scramble C...]<br />
3 [Auto] or [Manual] Each time you press this softkey, the<br />
selected option changes.<br />
In Manual mode, you can enter a number<br />
using the keypad.<br />
Setting the Transmitter Reference<br />
You can set the W-CDMA or W-CDMA (with HSDPA) Over the Air display to<br />
show the power in each channel as either relative power (dB) or absolute power<br />
(dBm). The test set's default display mode is relative. In relative mode, the top<br />
horizontal line (top-most graticule) of the display represents the total power<br />
(channel power) in the 3.84 MHz bandwidth of that W-CDMA or W-CDMA (with<br />
HSDPA) signal being broadcast by the transmitter. It is always 0 dB in this mode<br />
since it is a relative measurement. The power in each channel is shown as a vertical<br />
bar, with its height expressed in dB relative to the total channel power.<br />
If you set the reference level mode to absolute, then the top graticule in the display<br />
still corresponds to total channel power in the 3.84 MHz bandwidth. However, the<br />
reference level and all the power values of the vertical bars showing the power in<br />
590 Chapter 20
NOTE<br />
W-CDMA or W-CDMA (with HSDPA) Over Air<br />
Optional W-CDMA or W-CDMA (with HSDPA) Over the Air <strong>Measurement</strong><br />
Settings<br />
each channel are now indicated with absolute power in dBm.<br />
This setting only affects the CDP display, the Control Channel display, and the<br />
Codogram display. The Metrics display and the Pilot View are not affected.<br />
To set the W-CDMA or W-CDMA (with HSDPA) Transmitter Display<br />
Reference level:<br />
W-CDMA or W-CDMA (with HSDPA)<br />
Over Air<br />
Step<br />
Notes<br />
1 [Level/Location]<br />
2 On [Reference] select Abs or<br />
Rel.<br />
Each time you press this softkey, the<br />
selected option changes.<br />
Chapter 20 591
W-CDMA or W-CDMA (with HSDPA)<br />
Over Air<br />
W-CDMA or W-CDMA (with HSDPA) Over Air<br />
Optional W-CDMA or W-CDMA (with HSDPA) Over the Air <strong>Measurement</strong><br />
Settings<br />
Setting Average, Sweep, and Restart<br />
Setting the Sweep<br />
You can select either continuous or single sweep. Continuous sweep provides<br />
repeated, ongoing measurements. Single sweep performs a single measurement that<br />
is repeated only when you push the Single button.<br />
To set sweep:<br />
Step<br />
Notes<br />
1 [Average/Sweep]<br />
2 [Continuous] or [Single] Each time you press this softkey, the<br />
selected option changes.<br />
Setting Averaging<br />
You can choose to have averaging On or Off and to set the number of averages you<br />
want to take. Averaging only applies to the data, not the trace. When initialized, the<br />
<strong>Agilent</strong> <strong>E7495A</strong>/B defaults to running average:<br />
• A running average computes the new result as the weighted sum of the last result<br />
and the new measurement. The last result is weighted by (n – 1)/n. The new<br />
result is weighted by 1/n. Each new measurement produces a new result.<br />
Averaging applies to the following measurement metrics and the control channel<br />
view only:<br />
• Frequency Error<br />
• Noise Floor<br />
• EVM<br />
• PCDE<br />
• Carrier Feedthrough<br />
• Channel Power<br />
• CPICH power<br />
• all the delta powers<br />
592 Chapter 20
W-CDMA or W-CDMA (with HSDPA) Over Air<br />
Optional W-CDMA or W-CDMA (with HSDPA) Over the Air <strong>Measurement</strong><br />
Settings<br />
• Control Channel Graph<br />
The following measurements are unaffected by setting Averaging On or Off. They<br />
are always averaged up to a maximum count of 32768:<br />
• Utilization<br />
• Peak Utilization<br />
• Average Utilization<br />
• Amplifier Capacity<br />
• Peak Amplifier Capacity<br />
• Average Amplifier Capacity<br />
The following measurements are never averaged:<br />
W-CDMA or W-CDMA (with HSDPA)<br />
Over Air<br />
• CDP Trace<br />
• Scramble Code Scanner Trace<br />
• Threshold<br />
To set averaging:<br />
Step<br />
Notes<br />
1 Set the number of averages.<br />
a. [Average]<br />
b. Enter the number of averages<br />
using the numeric keypad.<br />
c. [Enter]<br />
2 Set averaging On or Off.<br />
a. [Average/Sweep]<br />
b. [Averaging]<br />
c. [Off] or [On]<br />
NOTE<br />
These two steps can be performed in any order. However, if you turn averaging on<br />
and a large number of averages has previously been set, there may be a delay before<br />
you can change number of averages.<br />
Chapter 20 593
W-CDMA or W-CDMA (with HSDPA)<br />
Over Air<br />
W-CDMA or W-CDMA (with HSDPA) Over Air<br />
Optional W-CDMA or W-CDMA (with HSDPA) Over the Air <strong>Measurement</strong><br />
Settings<br />
Setting Restart<br />
When you have averaging turned On and you are in Continuous Sweep mode, you<br />
can restart the averaging by pressing the Restart menu key. It also resets the<br />
Amplifier Capacity and Traffic metrics. The Restart key has no effect if you are in<br />
Single sweep mode.<br />
To restart averaging:<br />
Step<br />
Notes<br />
1 [Average/Sweep]<br />
2 [Restart] This key is unavailable or has no effect when<br />
Sweep is set to Single. To restart a Single<br />
Sweep measurement, press [Single].<br />
Setting the Active Channel Threshold Level and Auto Threshold<br />
Level<br />
The active channel threshold level is an advanced setting that can be set to indicate<br />
which code channels are considered active. Any code channels exceeding this power<br />
level are considered active traffic channels and any code channels below this power<br />
level are considered inactive (or noise). Those channels that are considered active,<br />
that is, channels that meet or exceed the threshold level, are indicated by the<br />
presence of their OVSF Code below the bar in the display. Inactive channels do not<br />
have their OVSF Codes displayed.<br />
A horizontal red line on the screen represents the threshold. The test set can set this<br />
level automatically, or you can manually enter a value.<br />
In Auto mode the threshold level moves as the noise fluctuates. The threshold level<br />
is set by the test set at an optimal offset above the average noise floor. In Auto mode,<br />
you can alter the Auto Threshold Offset. The recommended and default setting is<br />
0 dB. A negative value moves the threshold lower (closer to the noise floor) and is a<br />
more aggressive setting that increases the likelihood of interpreting an inactive<br />
channel as active. A positive value moves the threshold higher (away from the noise<br />
floor) and is a more conservative setting that increases the likelihood of interpreting<br />
an active channel as inactive.<br />
In Manual mode the threshold level is fixed and does not move as the noise<br />
fluctuates.<br />
594 Chapter 20
W-CDMA or W-CDMA (with HSDPA) Over Air<br />
Optional W-CDMA or W-CDMA (with HSDPA) Over the Air <strong>Measurement</strong><br />
Settings<br />
To set the active channel threshold level:<br />
Step<br />
1 [Setup]<br />
2 On [Threshold] select<br />
Auto or Manual.<br />
Notes<br />
Each time you press this softkey, the selected option<br />
changes. If you choose Manual, you must enter the<br />
threshold you want using the numeric keypad, then<br />
press [dB].<br />
3 [Auto Thres Offset] The default value is 0 dB. Optionally, you can enter a<br />
negative (more aggressive) or positive (more<br />
conservative) value, then press [dB].<br />
W-CDMA or W-CDMA (with HSDPA)<br />
Over Air<br />
NOTE<br />
Knowing which inactive code channels are contributing the most noise to the overall<br />
W-CDMA or W-CDMA (with HSDPA) channel may provide clues to the source of<br />
noise, such as a bad channel card in the base station.<br />
Setting <strong>Measurement</strong> Time<br />
The <strong>Measurement</strong> Time setting allows you to alter the speed at which measurements<br />
are being made. Three choices exist: Slow, Medium, and Fast. The test set defaults<br />
to Medium. Slow measurement time provides a more accurate measurement at the<br />
expense of time. Fast measurement time provides a quicker measurement at the<br />
expense of accuracy. Medium measurement time strikes a balance between<br />
measurement speed and measurement accuracy.<br />
Changes in measurement time, or measurement speed, are achieved by varying the<br />
amount of data used to plot the CDP trace, and by varying the type of frame<br />
alignment used.<br />
Chapter 20 595
W-CDMA or W-CDMA (with HSDPA)<br />
Over Air<br />
W-CDMA or W-CDMA (with HSDPA) Over Air<br />
Optional W-CDMA or W-CDMA (with HSDPA) Over the Air <strong>Measurement</strong><br />
Settings<br />
Slots and Frame Alignment at Different <strong>Measurement</strong> Speeds<br />
Meas Time<br />
Number<br />
of Slots<br />
W-CDMA (HSDPA Off)<br />
W-CDMA (HSDPA On)<br />
Slow 2 Aligned to Scramble Sequence Frame (CPICH = 0)<br />
Medium 2 Random Slot Aligned to the start of the<br />
next sub-frame boundary<br />
Fast 2 Random Slot Random Slot<br />
To set the <strong>Measurement</strong> Speed:<br />
Step<br />
Notes<br />
1 [Setup]<br />
2 On [Meas Time] select<br />
Slow, Medium, or Fast.<br />
Each time you press this softkey, the selected<br />
option changes.<br />
NOTE<br />
CDP measurements will only meet <strong>Agilent</strong>’s published specifications when you are<br />
using either Medium or Slow measurement speeds.<br />
Resetting Amplifier Capacity and Traffic Metrics<br />
The amplifier capacity metrics such as the peak and average amplifier capacity and<br />
peak and average utilization can be reset. If you prefer to reset these parameters<br />
manually, you may do so using the [Reset Metrics] menu key.<br />
NOTE<br />
Pressing [Reset Metrics] also causes a restart of your analyzer.<br />
To Manually Reset the Amplifier Capacity Metrics:<br />
Step<br />
Notes<br />
1 [Display/Reset]<br />
2 [Reset Metrics] This will also cause a restart of your analyzer.<br />
596 Chapter 20
W-CDMA or W-CDMA (with HSDPA) Over Air<br />
Optional W-CDMA or W-CDMA (with HSDPA) Over the Air <strong>Measurement</strong><br />
Settings<br />
Setting Valid <strong>Measurement</strong> Limits<br />
The Valid <strong>Measurement</strong> Setting allows you to set the Multipath Power and Pilot<br />
Dominance limits. These settings control will help the test set to determine if valid<br />
over the air measurements are being made.<br />
Step<br />
Notes<br />
W-CDMA or W-CDMA (with HSDPA)<br />
Over Air<br />
1 [Setup]<br />
2 [Valid Meas Settings]<br />
3 Set Multipath Power<br />
limit.<br />
a. [Mp Pwr ]<br />
b. Enter the power<br />
level using the<br />
numeric keypad.<br />
c. [dB]<br />
Setting the S-CCPCH Parameters<br />
The S-CCPCH (Secondary Common Control Physical Channel) Setting allows you<br />
enable S-CCPCH, set the spread factor, and designate the channel number. The<br />
S-CCPCH settings help the test set determine which channel is the S-CCPCH<br />
channel. Once the test set has identified this channel, it can perform the delta power<br />
measurements for this channel and display them to the you.<br />
Step<br />
Notes<br />
1 [Setup]<br />
Chapter 20 597
W-CDMA or W-CDMA (with HSDPA)<br />
Over Air<br />
W-CDMA or W-CDMA (with HSDPA) Over Air<br />
Optional W-CDMA or W-CDMA (with HSDPA) Over the Air <strong>Measurement</strong><br />
Settings<br />
Step<br />
2 [S-CCPCH] This key displays the current Spread Factor,<br />
selected channel, and Enable /Disable status.<br />
3 On [S-CCPCH Enable]<br />
select On or Off.<br />
4 Set the Spread Factor.<br />
Notes<br />
Each time you press this softkey, the selected<br />
option changes.<br />
a. [Spread Factor]<br />
b. [4], [8], [16], [32],<br />
[64], [128], or [256].<br />
5 Set the channel.<br />
a. [Channel]<br />
b. Enter the channel<br />
number using the<br />
numeric keypad.<br />
c. [Enter]<br />
Always enter the channel number even if you have<br />
set Units to Freq.<br />
Setting the PICH Parameters<br />
The PICH (Paging Indicator Channel) Setting allows you enable PICH and<br />
designate the channel number. The PICH settings help the test set to determine<br />
which channel is the PICH channel. Once the test set has identified this channel, it<br />
can perform the delta power measurements for this channel and display them to you.<br />
Step<br />
Notes<br />
1 [Setup]<br />
2 [PICH] This key displays the current Spread Factor,<br />
selected channel (in parenthesis), and Enable<br />
/Disable status.<br />
3 On [PICH Enable]<br />
select On or Off.<br />
Each time you press this softkey, the selected<br />
option changes.<br />
[Spread Factor] is grayed out and unavailable<br />
because the spread factor is fixed at 256.<br />
598 Chapter 20
W-CDMA or W-CDMA (with HSDPA) Over Air<br />
Optional W-CDMA or W-CDMA (with HSDPA) Over the Air <strong>Measurement</strong><br />
Settings<br />
Step<br />
4 Set the channel.<br />
a. [Channel]<br />
b. Enter the channel<br />
number using the<br />
numeric keypad.<br />
c. [Enter]<br />
Notes<br />
Always enter the channel number even if you have<br />
set Units to Freq.<br />
W-CDMA or W-CDMA (with HSDPA)<br />
Over Air<br />
Adding a Marker<br />
Markers can be used on traces to help you visually track up to four signals. Each<br />
marker has the following settings:<br />
• Type: Provides three options, including:<br />
• Off<br />
• Normal, which places a diamond-shaped, colored marker, along with a<br />
number, 1-4, on the trace.<br />
• ∆ (Delta), is associated with a normal marker. Therefore, a normal marker<br />
must exist prior to creating the ∆ (delta) marker. The ∆ (delta) marker<br />
displays the difference between the normal marker position and the ∆ (delta)<br />
marker position. Only one ∆ (delta) marker can be associated with a given<br />
normal marker. The normal marker must be active when ∆ (Delta) is<br />
selected.<br />
• Marker to Peak: Places the active marker on the current greatest value of the<br />
trace.<br />
• Marker to Next Peak: Places the active marker on the next highest peak as<br />
measured from your current marker’s position.<br />
• Marker to Next Active Ch Left: Places the active marker on the next active<br />
channel to the left of your current marker.<br />
• Marker to Next Active Ch Right: Places the active marker on the next active<br />
channel to the right of your current marker.<br />
Step<br />
Notes<br />
1 [Marker]<br />
Chapter 20 599
W-CDMA or W-CDMA (with HSDPA)<br />
Over Air<br />
W-CDMA or W-CDMA (with HSDPA) Over Air<br />
Optional W-CDMA or W-CDMA (with HSDPA) Over the Air <strong>Measurement</strong><br />
Settings<br />
Step<br />
2 [Marker]<br />
3 [1], [2], [3], or [4]<br />
4 [Type]<br />
5 [Off], [Normal], or [∆ (Delta)]<br />
6 Locate the marker relative to the trace:<br />
Notes<br />
• [Marker to Peak]<br />
• [Marker to Next Peak]<br />
• [Marker to Next Active Channel Left]<br />
or<br />
• [Marker to Next Active Channel Right]<br />
600 Chapter 20
W-CDMA or W-CDMA (with HSDPA) Over Air<br />
Metrics Provided by the W-CDMA or W-CDMA (with HSDPA) Over Air<br />
<strong>Measurement</strong><br />
Metrics Provided by the W-CDMA or W-CDMA (with<br />
HSDPA) Over Air <strong>Measurement</strong><br />
This section contains descriptions of the individual W-CDMA or W-CDMA (with<br />
HSDPA) transmitter metrics in the Metrics view of the screen. For expected result<br />
values and possible causes of error if the expected results are not met, see<br />
“Interpretation of Over the Air <strong>Measurement</strong> Results” on page 605.<br />
W-CDMA or W-CDMA (with HSDPA)<br />
Over Air<br />
Freq (Frequency)<br />
Frequency is the selected transmitter operating frequency you have entered (or<br />
calculated from the channel number you have entered).<br />
Freq Error (Frequency Error)<br />
Frequency error is the frequency difference between your transmitter's actual center<br />
frequency and the frequency (or channel) you entered.<br />
Scramble Code<br />
The Scrambling Code being measured (manual or auto). In W-CDMA or W-CDMA<br />
(with HSDPA), each Access Network (or BTS) output signal is scrambled by<br />
multiplying each of its data channels by a unique pseudo-noise (PN) code. In the<br />
W-CDMA specifications, this is referred to as a Scrambling Code.<br />
Noise Floor<br />
Noise Floor is the average power level of all the inactive channels.<br />
Carr Feedthru or Carr FT (Carrier Feedthrough)<br />
Carrier Feedthrough is a result of the RF carrier signal feeding through the I/Q<br />
modulator and riding on the output circuitry without being modulated.<br />
EVM (Error Vector Magnitude)<br />
EVM is the measure of signal quality specified as a percent of noise to pure signal.<br />
It is the difference between the measured waveform and the theoretical modulated<br />
waveform (the error vector). EVM metrics are used to measure the modulation<br />
quality of a transmitter. The 3GPP standard requires the EVM not to exceed 17.5%<br />
for normal W-CDMA (defined as Test Models 1 and 4), and not to exceed 12.5% in<br />
the case of 16QAM HSDPA (defined as Test Model 5).<br />
Chapter 20 601
W-CDMA or W-CDMA (with HSDPA)<br />
Over Air<br />
W-CDMA or W-CDMA (with HSDPA) Over Air<br />
Metrics Provided by the W-CDMA or W-CDMA (with HSDPA) Over Air<br />
<strong>Measurement</strong><br />
PCDE (Peak Code Domain Error)<br />
PCDE takes the noise and projects the maximum impact it will have on all OVSF<br />
codes. PCDE is the maximum value for the code domain error for all codes (both<br />
active and inactive).<br />
In W-CDMA or W-CDMA (with HSDPA), specifically to address the possibility of<br />
uneven error power distribution, the EVM measurement has been supplemented<br />
with PCDE. The 3GPP standard requires the PCDE not to exceed –33 dB at a<br />
spreading factor of 256, but the Conformance Test adds in a Test Tolerance of 1dB.<br />
This gives a Conformance Limit for Peak Code Domain Error of –32dB at a<br />
spreading factor of 256.<br />
Utilization<br />
Utilization is a ratio of the active OVSF codes to the total SF512 codes, expressed as<br />
a percentage. Even though active control channels such as the pilot are included in<br />
the utilization measurement, utilization is an indication of the traffic that is being<br />
carried by the base station.<br />
For example, W-CDMA or W-CDMA (with HSDPA) signal with CPICH,<br />
PCCPCH, SCCPCH using SF256, and PICH, would use 8 of 512 SF512 codes,<br />
giving a utilization of 1.6%.<br />
Pk Util (Peak Utilization)<br />
Peak Utilization is the peak level of all the valid Utilization measurements while on<br />
the same Scrambling code. In Scrambling code Auto mode this measurement is reset<br />
if the Scrambling code changes or the Reset Metrics button is used. In Scrambling<br />
code Manual mode this measurement is reset only if the Reset Metrics button is<br />
used.<br />
NOTE<br />
Pressing [Reset Metrics] also causes a restart of your analyzer.<br />
Avg Util (Average Utilization)<br />
Average Utilization is the average level of all the valid Utilization measurements<br />
while on the same Scrambling code. In Scrambling code Auto mode this<br />
measurement is reset if the Scrambling code changes or the Reset Metrics button is<br />
used. In Scrambling code Manual mode this measurement is reset only if the Reset<br />
Metrics button is used.<br />
NOTE<br />
Pressing [Reset Metrics] also causes a restart of your analyzer.<br />
602 Chapter 20
W-CDMA or W-CDMA (with HSDPA) Over Air<br />
Metrics Provided by the W-CDMA or W-CDMA (with HSDPA) Over Air<br />
<strong>Measurement</strong><br />
Chan Pwr (Channel Power)<br />
Channel Power is the integrated power within a defined bandwidth. For W-CDMA<br />
or W-CDMA (with HSDPA) the channel bandwidth is 3.84 MHz. Channel Power<br />
measures the power the base station is transmitting across the entire 3.84 MHz<br />
W-CDMA or W-CDMA (with HSDPA) channel.<br />
CPICH (Common Pilot Channel)<br />
Common Pilot Channel (CPICH) is the channel that carries the scrambling code.<br />
The CPICH metric reports the power in this channel in dBc. By default, the CPICH<br />
Limits are set to Off. If you set CPICH Limits On, the default upper limit value is<br />
0 dBc, and the lower limit value is –20 dBc.<br />
W-CDMA or W-CDMA (with HSDPA)<br />
Over Air<br />
NOTE<br />
The CPICH default limits are set at a level suitable for catching only gross errors<br />
when field testing live signals. To perform conformance testing, you will need to set<br />
the limits to your own specifications. Conformance testing for Test Model 2 (TM2),<br />
for example, requires that the CPICH limits are set to ±2.9 dB, that is, to –7.1 dB<br />
and –12.9 dB with a –10 dBc signal.<br />
Amp Cap (Amplifier Capacity)<br />
Assuming the Amplifier Capacity parameters are set properly, the Amplifier<br />
Capacity measurement is an estimate of the amount of power amplifier capacity that<br />
is being used, expressed in percent of maximum. When an amplifier is transmitting<br />
at maximum output power, it is said to be at 100% of its capacity. For example, an<br />
amplifier with a maximum output power of 12 watts would be at 50% of capacity<br />
when transmitting 6 watts and at 100% of capacity when transmitting at 12 watts.<br />
The percentage of amplifier capacity generally increases as the number or level of<br />
the traffic channels increase.<br />
Pk Amp Cap (Peak Amplifier Capacity)<br />
Peak Amplifier Capacity is the peak level of all the valid Amplifier Capacity<br />
measurements while on the same Scrambling code. In Scrambling code Auto mode<br />
this measurement is reset if the Scrambling code changes or the Reset Metrics<br />
button is used. In Scrambling code Manual mode this measurement is reset only if<br />
the Reset Metrics button is used.<br />
NOTE<br />
Pressing [Reset Metrics] also causes a restart of your analyzer.<br />
Avg Amp Cap (Average Amplifier Capacity)<br />
Chapter 20 603
W-CDMA or W-CDMA (with HSDPA)<br />
Over Air<br />
NOTE<br />
W-CDMA or W-CDMA (with HSDPA) Over Air<br />
Metrics Provided by the W-CDMA or W-CDMA (with HSDPA) Over Air<br />
<strong>Measurement</strong><br />
Average Amplifier Capacity is the average level of all the valid Amplifier Capacity<br />
measurements while on the same Scrambling code. In Scrambling code Auto mode<br />
this measurement is reset if the Scrambling code changes or the Reset Metrics<br />
button is used. In Scrambling code Manual mode this measurement is reset only if<br />
the Reset Metrics button is used.<br />
Pressing [Reset Metrics] also causes a restart of your analyzer.<br />
604 Chapter 20
W-CDMA or W-CDMA (with HSDPA) Over Air<br />
Interpretation of Over the Air <strong>Measurement</strong> Results<br />
Interpretation of Over the Air <strong>Measurement</strong> Results<br />
This section contains expected result values and possible causes of error if the<br />
expected results are not met.<br />
Freq (Frequency)<br />
If you are in the channel mode, verify that the correct channelization and channel<br />
number are set.<br />
W-CDMA or W-CDMA (with HSDPA)<br />
Over Air<br />
Freq Error (Frequency Error)<br />
The frequency error of the analyzer should be
W-CDMA or W-CDMA (with HSDPA)<br />
Over Air<br />
W-CDMA or W-CDMA (with HSDPA) Over Air<br />
Interpretation of Over the Air <strong>Measurement</strong> Results<br />
to position the test set. If the correct Scrambling code cannot be located, check the<br />
base station settings.<br />
Noise Floor<br />
An unexpectedly high noise floor could be due to interfering signals.<br />
Carr Feedthru (Carrier Feedthrough)<br />
A good Carrier Feedthrough level is less than -25 dBc. The 3GPP standard does not<br />
specify Carrier Feedthrough; however, this measurement provides an additional tool<br />
to troubleshoot the base station's transmitter.<br />
In the frequency domain, Carrier Feedthrough can show up as an energy spike that<br />
can be seen on the spectrum analyzer by closely spanning into the top of the<br />
W-CDMA or W-CDMA (with HSDPA) signal. The effects of Carrier Feedthrough<br />
can also show up as higher noise levels on the Code Domain Power screen. Carrier<br />
Feedthrough can be caused by the lack of isolation across the mixer and cavity of<br />
the transmitter's I/Q modulator.<br />
EVM (Error Vector Magnitude)<br />
An unexpectedly high EVM could be due to interfering signals, carrier feedthrough,<br />
pilot dominance, or multipath power. If these are all correct, check for transmitter<br />
I/Q modulator or signal path problems.<br />
PCDE (Peak Code Domain Error)<br />
An unexpectedly high PCDE could be due to interfering signals, carrier<br />
feedthrough, pilot dominance, or multipath power. If these are all correct, check for<br />
transmitter I/Q modulator or signal path problems.<br />
Utilization<br />
The Utilization metric provides an instantaneous reading of the percentage of the<br />
traffic channels currently being used. More meaningful information is provided by<br />
the Peak and Average Utilization metrics gathered over a 10 to 15 minute interval.<br />
Pk Util (Peak Utilization)<br />
If the Peak Utilization of this base station is greater than 65%, this is a warning that<br />
peak traffic rates at this base station are getting very high. It is possible that calls<br />
could be getting blocked or dropped.<br />
606 Chapter 20
W-CDMA or W-CDMA (with HSDPA) Over Air<br />
Interpretation of Over the Air <strong>Measurement</strong> Results<br />
Avg Util (Average Utilization)<br />
If the Average Utilization of this base station is greater than 45%, the base station is<br />
carrying a great deal of traffic. Service providers may want to consider expanding<br />
their network infrastructure to support higher system (call) demands.<br />
Chan Pwr (Channel Power)<br />
If the Channel Power level is not as expected, check pilot dominance and the<br />
number of Scramble codes visible. All visible sectors will contribute to channel<br />
power. Also, check Amplifier Capacity and Utilization as they could have exceeded<br />
the maximum capacity. A high power data call could be indicated by a very wide<br />
and tall bar.<br />
W-CDMA or W-CDMA (with HSDPA)<br />
Over Air<br />
CPICH (Common Pilot Channel)<br />
CPICH will vary with distance from the base station and clear line of sight to the<br />
antenna. If the CPICH is not as expected, check pilot dominance and base station<br />
settings (ratio to other control channels should be good).<br />
Amp Cap (Amplifier Capacity)<br />
The Amplifier Capacity metric provides an instantaneous reading of how much of<br />
the amplifier's capacity is currently being used. More meaningful information is<br />
provided by the Peak and Average Amplifier Capacity metrics gathered over a 10 to<br />
15 minute interval.<br />
Pk Amp Cap (Peak Amplifier Capacity)<br />
If the Peak Amplifier Capacity is greater than 100%, the traffic at this base station<br />
has caused the base station amplifier to exceed its maximum power rating. This is<br />
not desirable as this problem can result in system degradation or damage to the<br />
amplifier.<br />
You can get an indication of how often the amplifier capacity is being exceeded by<br />
watching the Amplifier Capacity measurement. This is an instantaneous<br />
measurement of the amplifier capacity.<br />
Avg Amp Cap (Average Amplifier Capacity)<br />
If the Average Amplifier Capacity is greater than 85%, the base station power<br />
amplifier is close to its maximum power limit. Further increase in traffic on this base<br />
station could cause system performance problems or damage to the power amplifier.<br />
You should notify your RF Engineering Department as soon as possible.<br />
Chapter 20 607
W-CDMA or W-CDMA (with HSDPA)<br />
Over Air<br />
W-CDMA or W-CDMA (with HSDPA) Over Air<br />
Interpretation of Over the Air <strong>Measurement</strong> Results<br />
608 Chapter 20
Safety and Regulatory Information and Specifications<br />
21 Safety and Regulatory Information and<br />
Specifications<br />
“Safety considerations” on page 610<br />
“Safety Symbols” on page 610<br />
“Safety Considerations For This Test Set” on page 611<br />
“Lifting and Handling” on page 612<br />
“Electrostatic Discharge (ESD) Precautions” on page 613<br />
“Product Markings” on page 614<br />
“Batteries: Safe Handling and Disposal” on page 615<br />
“Certification and Compliance Statements” on page 621<br />
“Certification” on page 621<br />
“Manufacturer’s Declaration” on page 621<br />
“Declaration of Conformity for <strong>Agilent</strong> <strong>E7495A</strong>” on page 622<br />
“Declaration of Conformity for <strong>Agilent</strong> E7495B” on page 623<br />
“Compliance with German Noise Requirements” on page 624<br />
“Compliance with Canadian EMC Requirements” on page 624<br />
“<strong>E7495A</strong>/B Base Station Test Set Specifications” on page 625<br />
Safety and Regulatory Information<br />
and Specifications<br />
“Battery Pack Specifications” on page 637<br />
Chapter 21 609
Safety and Regulatory Information and Specifications<br />
Safety considerations<br />
Safety considerations<br />
Safety and Regulatory Information<br />
and Specifications<br />
General<br />
This product and related documentation must be reviewed for familiarization with<br />
safety markings and instructions before operation.<br />
This product has been designed and tested in accordance with IEC Publication<br />
61010-1+A1+A2:1992 Safety Requirements for Electrical Equipment for<br />
<strong>Measurement</strong>, Control and Laboratory Use and has been supplied in a safe<br />
condition. This instruction documentation contains information and warnings which<br />
must be followed by the user to ensure safe operation and to maintain the product in<br />
a safe condition.<br />
Safety Earth Ground<br />
A uninterruptible safety earth ground must be provided from the main power source<br />
to the product input wiring terminals, power cord, or supplied power cord set.<br />
Chassis Ground Terminal<br />
To prevent a potential shock hazard, always connect the rear-panel chassis ground<br />
terminal to earth ground when operating this test set from a dc power source.<br />
Safety Symbols<br />
!<br />
Indicates test set damage can occur if indicated operating limits are<br />
exceeded. Refer to the instructions in this guide.<br />
Indicates hazardous voltages.<br />
Indicates earth (ground) terminal<br />
WARNING<br />
A WARNING note denotes a hazard. It calls attention to a procedure, practice,<br />
or the like, which, if not correctly performed or adhered to, could result in<br />
personal injury. Do not proceed beyond a WARNING sign until the indicated<br />
610 Chapter 21
Safety and Regulatory Information and Specifications<br />
Safety considerations<br />
conditions are fully understood and met.<br />
CAUTION<br />
A CAUTION note denotes a hazard. It calls attention to an operation procedure,<br />
practice, or the like, which, if not correctly performed or adhered to, could result in<br />
damage to or destruction of part or all of the product. Do not proceed beyond an<br />
CAUTION note until the indicated conditions are fully understood and met.<br />
WARNING<br />
Safety Considerations For This Test Set<br />
Whenever it is likely that the protection has been impaired, the test set must be<br />
made inoperative and be secured against any unintended operation.<br />
If this test set is to be energized via an autotransformer (for voltage reduction),<br />
make sure the common terminal is connected to the earth terminal of the<br />
power source.<br />
If this product is not used as specified, the protection provided by the<br />
equipment could be impaired. This product must be used in a normal condition<br />
(in which all means for protection are intact) only.<br />
No operator serviceable parts in this product. Refer servicing to qualified<br />
personnel. To prevent electrical shock, do not remove covers.<br />
Servicing instructions are for use by qualified personnel only. To avoid<br />
electrical shock, do not perform any servicing unless you are qualified to do so.<br />
The opening of covers or removal of parts is likely to expose dangerous<br />
voltages. Disconnect the product from all voltage sources while it is being<br />
opened.<br />
Adjustments described in the manual are performed with power supplied to<br />
the test set while protective covers are removed. Energy available at many<br />
points may, if contacted, result in personal injury.<br />
For Continued protection against fire hazard, replace the line fuse(s) with T<br />
250 V 5.0 A fuse(s) or the same current rating and type. Do not use repaired<br />
fuses or short circuited fuseholders.<br />
Safety and Regulatory Information<br />
and Specifications<br />
WARNING<br />
This product is a Safety Class I test set (provided with a protective earthing<br />
ground incorporated in the power cord). The mains plug shall only be inserted<br />
in a socket outlet provided with a protective earth contact. Any interruption of<br />
the protective conductor inside or outside of the product is likely to make the<br />
product dangerous. Intentional interruption is prohibited.<br />
Chapter 21 611
Safety and Regulatory Information and Specifications<br />
Safety considerations<br />
Safety and Regulatory Information<br />
and Specifications<br />
WARNING<br />
Always use the three-prong ac power cord supplied with this product. Failure<br />
to ensure adequate earth grounding by not using this cord may cause personal<br />
injury and/or product damage.<br />
This product is designed for use in Installation Category II and Pollution<br />
Degree 3 per IEC 61010 and IEC 60664 respectively.<br />
This product has autoranging line voltage input, be sure the supply voltage is<br />
within the specified range.<br />
To prevent electrical shock, disconnect test set from mains (line) before<br />
cleaning. Use a dry cloth or one slightly dampened with water to clean the<br />
external case parts. Do not attempt to clean internally.<br />
Ventilation Requirements: When installing the product in a cabinet, the<br />
convection into and out of the product must not be restricted. The ambient<br />
temperature (outside the cabinet) must be less than the maximum operating<br />
temperature of the product by 4 ° C for every 100 watts dissipated in the<br />
cabinet. If the total power dissipated in the cabinet is greater than 800 watts,<br />
then forced convection must be used.<br />
WARNING<br />
If you are charging the batteries internally—even while the test set is powered<br />
off—the test set may become warm. Take care to provide proper ventilation.<br />
WARNING<br />
Danger of explosion if battery is incorrectly replaced. Replace only with the<br />
same or equivalent type recommended. Discard used batteries according to<br />
manufacturer’s instructions.<br />
WARNING<br />
To avoid overheating, always disconnect the test set from the AC adapter<br />
before storing the test set in the soft carrying case.<br />
If you prefer to leave the test set connected to the AC adapter while inside the<br />
soft carrying case, you can disconnect the AC adapter from its power source to<br />
prevent overheating.<br />
Lifting and Handling<br />
When lifting and handling the <strong>Agilent</strong> <strong>E7495A</strong>/B Base Station Test Set use<br />
ergonomically correct procedures. Lift and carry the test set by the carrying strap.<br />
612 Chapter 21
Safety and Regulatory Information and Specifications<br />
Safety considerations<br />
Electrostatic Discharge (ESD) Precautions<br />
This test set was constructed in an ESD (electrostatic discharge) protected<br />
environment. This is because most of the semiconductor devices used in this test set<br />
are susceptible to damage by static discharge.<br />
Depending on the magnitude of the charge, device substrates can be punctured or<br />
destroyed by contact or mere proximity of a static charge. The result can cause<br />
degradation of device performance, early failure, or immediate destruction.<br />
These charges are generated in numerous ways such as simple contact, separation of<br />
materials, and normal motions of persons working with static sensitive devices.<br />
When handling or servicing equipment containing static sensitive devices, adequate<br />
precautions must be taken to prevent device damage or destruction.<br />
Only those who are thoroughly familiar with industry accepted techniques for<br />
handling static sensitive devices should attempt to service circuitry with these<br />
devices.<br />
Safety and Regulatory Information<br />
and Specifications<br />
Chapter 21 613
Safety and Regulatory Information and Specifications<br />
Safety considerations<br />
Product Markings<br />
The CE mark shows that the product complies with all relevant<br />
European legal Directives (if accompanied by a year, it<br />
signifies when the design was proven).<br />
Safety and Regulatory Information<br />
and Specifications<br />
The CSA mark is a registered trademark of the Canadian<br />
Standards Association.<br />
The off symbol is used to mark a position of the instrument<br />
power line switch.<br />
The on symbol is used to mark a position of the instrument<br />
power line switch.<br />
The standby symbol is used to mark a position of the<br />
instrument power line switch.<br />
The C-Tick mark is a registered trademark of the Australian<br />
Spectrum Management Agency.<br />
614 Chapter 21
Safety and Regulatory Information and Specifications<br />
Safety considerations<br />
Batteries: Safe Handling and Disposal<br />
Safety and Regulatory Information<br />
and Specifications<br />
Chapter 21 615
Safety and Regulatory Information and Specifications<br />
Safety considerations<br />
Safety and Regulatory Information<br />
and Specifications<br />
616 Chapter 21
Safety and Regulatory Information and Specifications<br />
Safety considerations<br />
Safety and Regulatory Information<br />
and Specifications<br />
Chapter 21 617
Safety and Regulatory Information and Specifications<br />
Safety considerations<br />
Safety and Regulatory Information<br />
and Specifications<br />
618 Chapter 21
Safety and Regulatory Information and Specifications<br />
Safety considerations<br />
Safety and Regulatory Information<br />
and Specifications<br />
Chapter 21 619
Safety and Regulatory Information and Specifications<br />
Safety considerations<br />
Safety and Regulatory Information<br />
and Specifications<br />
620 Chapter 21
Safety and Regulatory Information and Specifications<br />
Certification and Compliance Statements<br />
Certification and Compliance Statements<br />
Certification<br />
<strong>Agilent</strong> <strong>Technologies</strong> certifies that this product met its published specifications at<br />
the time of shipment from the factory. <strong>Agilent</strong> further certifies that its calibration<br />
measurements are traceable to the United States National Institute of Standards and<br />
Technology, to the extent allowed by the Institute’s calibration facility, and to the<br />
calibration facilities of other International Standards Organization members.<br />
Manufacturer’s Declaration<br />
This product has been designed and tested in accordance with the standards listed on<br />
the Manufacturer's Declaration of Conformity, and has been supplied in a safe<br />
condition. The documentation contains information and warnings that must be<br />
followed by the user to ensure safe operation and to maintain the product in a safe<br />
condition.<br />
Safety and Regulatory Information<br />
and Specifications<br />
Chapter 21 621
Safety and Regulatory Information and Specifications<br />
Certification and Compliance Statements<br />
Declaration of Conformity for <strong>Agilent</strong> <strong>E7495A</strong><br />
Safety and Regulatory Information<br />
and Specifications<br />
622 Chapter 21
Safety and Regulatory Information and Specifications<br />
Certification and Compliance Statements<br />
Declaration of Conformity for <strong>Agilent</strong> E7495B<br />
Safety and Regulatory Information<br />
and Specifications<br />
Chapter 21 623
Safety and Regulatory Information and Specifications<br />
Certification and Compliance Statements<br />
Compliance with German Noise Requirements<br />
This is to declare that this test set is in conformance with the German Regulation on<br />
Noise Declaration for Machines (Laermangabe nach der<br />
Maschinenlaermrerordnung –3 GSGV Deutschland).<br />
Safety and Regulatory Information<br />
and Specifications<br />
Acoustic Noise Emission/Geraeuschemission<br />
LpA
Safety and Regulatory Information and Specifications<br />
<strong>E7495A</strong>/B Base Station Test Set Specifications<br />
<strong>E7495A</strong>/B Base Station Test Set Specifications<br />
Specifications describe the test set's warranted performance and are valid over the<br />
entire operating/environmental range unless otherwise noted.<br />
The <strong>E7495A</strong>/B Base Station Test Set has been tested to the specifications of IEC<br />
529 “Degrees of Protection Provided by Enclosures (IP Code).” Using this standard,<br />
the <strong>E7495A</strong>/B is rated IPX4.<br />
Supplemental Characteristics are intended to provide additional information useful<br />
in applying the test set by giving typical, but non-warranted performance<br />
parameters.<br />
Characteristics and specifications are shown as follows:<br />
• Bold type indicates a warranted, hard specification.<br />
• Normal type indicates a nominal value. Nominal values are design center values<br />
and not normally tested during manufacturing.<br />
Supplemental characteristics are intended to provide additional information useful<br />
in applying the instrument by giving typical, but non-warranted, performance<br />
parameters. These characteristics are shown in italics or labeled as “typical,” or<br />
“usable to”.<br />
Safety and Regulatory Information<br />
and Specifications<br />
Table 21-1<br />
<strong>E7495A</strong>/B Base Station Test Set General Specifications<br />
Unless otherwise noted, the following specifications apply to all measurements/tools using Port 2.<br />
Frequency accuracy:<br />
Using internal time base:<br />
Internal frequency aging<br />
With GPS lock for > 15 minutes:<br />
≤ ± 1 ppm<br />
± 1 ppm aging/year<br />
≤ ± 0.03 ppm<br />
Input frequency range:<br />
Maximum input level:<br />
500 kHz to 2700 MHz<br />
(Refer to individual measurement tools below for applicable<br />
frequency ranges.)<br />
+ 20 dBm (.1 W), + 50 dBm with supplied attenuator<br />
Chapter 21 625
Safety and Regulatory Information and Specifications<br />
<strong>E7495A</strong>/B Base Station Test Set Specifications<br />
Table 21-1<br />
<strong>E7495A</strong>/B Base Station Test Set General Specifications<br />
Maximum input power without damaging<br />
instrument:<br />
Frequency and time reference:<br />
100 W (without external attenuator)<br />
Safety and Regulatory Information<br />
and Specifications<br />
Can use internal timebase or external<br />
signal:<br />
Display:<br />
GPS (external antenna supplied)<br />
Even second; pulse<br />
1.000 MHz:<br />
2.048 MHz:<br />
4.950 MHz:<br />
10.000 MHz:<br />
13.000 MHz:<br />
15.000 MHz:<br />
19.6608 MHz:<br />
≥ 0 dBm (E7495B only)<br />
≥ 0 dBm (E7495B only)<br />
≥ 0 dBm (E7495B only)<br />
≥ 0 dBm<br />
≥ 0 dBm (E7495B only)<br />
≥ 0 dBm (E7495B only)<br />
≥ 0 dBm<br />
Scale:<br />
Number of points:<br />
Number of divisions:<br />
40 dB Attenuator:<br />
Frequency range:<br />
Attenuation accuracy:<br />
Max power:<br />
1 to 20 dB / div. Settable in 1 dB increments.<br />
256<br />
10<br />
10 to 2500 MHz<br />
±0.5 dB<br />
50 dBm (100 W)<br />
Spectrum Analyzer / Tools<br />
Input frequency range:<br />
Reference level range:<br />
Dynamic range:<br />
Input attenuation:<br />
10 mHz to 2700 MHz (usable to 500 kHz)<br />
–150 to +100 dBm<br />
+50 dBm to –150 dBm<br />
(with supplied external 40 dB attenuator) (30 Hz RBW)<br />
0 to 30 dB automatically selected.<br />
10 dB controllable manually.<br />
626 Chapter 21
Safety and Regulatory Information and Specifications<br />
<strong>E7495A</strong>/B Base Station Test Set Specifications<br />
Table 21-1<br />
<strong>E7495A</strong>/B Base Station Test Set General Specifications<br />
Amplitude accuracy:<br />
Resolution bandwidth:<br />
Span:<br />
Trace update:<br />
Span:<br />
Simultaneous dynamic range:<br />
SSB phase noise:<br />
Spurious responses:<br />
Range control set to auto, high<br />
sensitivity mode internally generated.<br />
50 ohm load on input:<br />
Crossing spurs:<br />
±1 dB (100 MHz – 2500 MHz at 25 °C)<br />
10 Hz to 1 MHz, settable to 1 Hz precision<br />
1 kHz to 2.6995 GHz<br />
2.6995 GHz (autocouple) = 5.1 seconds<br />
60 MHz (autocouple) = 400 ms<br />
1 MHz (100 Hz RBW) = 1.2 seconds<br />
> 90 dB (CW signals at 300 kHz separation, span 500 kHz,<br />
30 Hz RBW<br />
≤ –85 dBc (30 kHz offset)<br />
< 115 dBm<br />
≤ 50 dBc<br />
Safety and Regulatory Information<br />
and Specifications<br />
Displayed average noise level:<br />
Port 2 VSWR: < 2:1<br />
–150 dBm (30 Hz RBW, 375 MHz to 1.5 GHz)<br />
Antenna/Cable Tester<br />
For each of the following measurements, a short self-calibration procedure must be run prior to making the<br />
measurement.<br />
Frequency range:<br />
Frequency resolution:<br />
Immunity to interfering signals:<br />
<strong>Measurement</strong> speed:<br />
Full span:<br />
60 MHz span:<br />
375 to 2500 MHz<br />
< 500 Hz<br />
+20 dBm (with interference rejection turned on)<br />
< 17 ms/point<br />
< 7 ms/point<br />
Chapter 21 627
Safety and Regulatory Information and Specifications<br />
<strong>E7495A</strong>/B Base Station Test Set Specifications<br />
Table 21-1<br />
<strong>E7495A</strong>/B Base Station Test Set General Specifications<br />
Return loss (Port 1):<br />
With ≥ 4 averages and 375 MHz to<br />
2200 MHz<br />
Safety and Regulatory Information<br />
and Specifications<br />
Range:<br />
VSWR:<br />
Resolution:<br />
Display range:<br />
SWR range:<br />
Distance to Fault (Port 1):<br />
Range (m):<br />
Resolution:<br />
VSWR:<br />
Insertion loss (Port 1 to Port 2):<br />
Ε7495Β > 40 dB, Ε7495ΒΑ> 30 dB<br />
Ε7495Β < 1.02, Ε7495Α < 1.07<br />
0.1 dB<br />
–5 to +150 dB<br />
1 to 500<br />
1 m to 300 m<br />
(1.5 x 10 8 ) (Vf)/(f2 - f1) Hz where Vf is relative<br />
propagating velocity of the cable. Typically 1% of<br />
measurement distance<br />
1 to 500<br />
<strong>Measurement</strong> uses supplied 10 dB pads.<br />
Usable range:<br />
Accuracy:<br />
Readout resolution:<br />
Average insertion loss (readout)<br />
accuracy: ± 0.1 dB for<br />
> 100 dB wide range mode<br />
± 1 dB (over 0 to 60 dB, ≥ 16 averages)<br />
± 0.1 dB<br />
± 0.1 dB; for Range – 0 to 40 dB, Frequency (mobile<br />
phone bands) – 824 to 960 MHz, 1710 to 2170 MHz<br />
Table 21-2<br />
<strong>E7495A</strong>/B Base Station Test Set Option Specifications<br />
cdmaOne / cdma2000 Tx Analyzer Option 200<br />
Waveform quality accuracy (rho): ± 0.005 for 0.9 < p < 1.0<br />
(min. power at RF input > –85 dBm<br />
Pilot time alignment (tau):<br />
Code domain power accuracy:<br />
Pilot power:<br />
± 500 nSec<br />
± 1.5 dBm absolute, ± 0.5 dB relative (> –20 dB)<br />
± 1.5 dB<br />
628 Chapter 21
Safety and Regulatory Information and Specifications<br />
<strong>E7495A</strong>/B Base Station Test Set Specifications<br />
Table 21-2<br />
<strong>E7495A</strong>/B Base Station Test Set Option Specifications<br />
RF Channel Scanner Option 220 (includes adjacent channel power)<br />
<strong>Measurement</strong> range<br />
Frequency readout accuracy:<br />
Frequency range:<br />
+20 dBm to –125 dBm > 375 MHz, 10 kHz RBW<br />
(up to +50 dBm with external attenuator)<br />
Timebase accuracy +3 Hz + 1 / (measurement time X duty<br />
cycle)<br />
10 MHz to 2700 MHz<br />
RF channel power: ± 1 dB (100 to 2500 MHz)<br />
Adjacent channel power accuracy: ± 0.75 dBc<br />
GSM Analyzer Option 230<br />
Frequency range:<br />
100 MHz to 2500 MHz (usable to 10 MHz)<br />
RF channel power: ± 1 dB (0 to –70 dBm)<br />
Phase error floor: < 2.5 degrees RMS<br />
Phase error accuracy: < 1 degree RMS, 2 degrees ≤ Phase Error ≤ 15 degrees<br />
Frequency error accuracy: ± 40 Hz with external reference<br />
Safety and Regulatory Information<br />
and Specifications<br />
NOTE<br />
Please see the product overview for the latest specifications. This can be found by<br />
visiting the <strong>Agilent</strong> website at www.agilent.com/find/E7495B, and clicking on the<br />
“E7495B Base Station Test Tool Product Overview” link.<br />
W-CDMA (UMTS) Option 240<br />
Error Vector Magnitude (EVM):<br />
Conditions:<br />
Resolution 0.1%; residual error –65 dBm,<br />
3GPP test model 4<br />
Code Domain Power Accuracy: ±0.5 dB (for code channel power > –25 dB relative to<br />
total power, using test model 1 (with 16 DPCH, 32 DPCH,<br />
and 64 DPCH), test model 2 and test model 3 (with<br />
16 DPCH and 32 DPCH))<br />
Scrambling Code Determination<br />
1 second (in auto mode)<br />
Chapter 21 629
Safety and Regulatory Information and Specifications<br />
<strong>E7495A</strong>/B Base Station Test Set Specifications<br />
Table 21-2<br />
<strong>E7495A</strong>/B Base Station Test Set Option Specifications<br />
DC Bias Option 300 (Port 1) E7495B only<br />
Safety and Regulatory Information<br />
and Specifications<br />
DC Voltage:<br />
+12.7 VDC maximum<br />
DC Current:<br />
800 mA maximum<br />
Volt-Amps:<br />
9.84 VA maximum<br />
Signal Generator (CW) Option 500 (Port 1)<br />
Frequency range:<br />
375 to 2500 MHz<br />
Output level:<br />
–23 to –95 dBm<br />
Level accuracy:<br />
± 1 dB between –25 to –85 dBm<br />
Phase error:<br />
At 30 KHz offset –90 dBc/Hz<br />
cdmaOne / cdma2000 Reverse Link Signal Generator Option 510 (port 1)<br />
Frequency range:<br />
Output level (<strong>E7495A</strong>):<br />
Output level (E7495B):<br />
Level accuracy:<br />
375 to 2500 MHz<br />
–50 to –95 dBm<br />
–28 to –95 dBm<br />
± 1.5 dB (–50 dBm to –90 dBm)<br />
± 2 dB (> –50 dBm)<br />
Power Meter Option 600<br />
Display<br />
Range:<br />
Limits:<br />
Resolution:<br />
–100 dBm to +100 dBm<br />
± –100 dBm<br />
Settable 1.0, 0.1, 0.01, 0.001 in logarithmic mode or<br />
1, 2, 3, or 4 significant digits in learner mode.<br />
630 Chapter 21
Safety and Regulatory Information and Specifications<br />
<strong>E7495A</strong>/B Base Station Test Set Specifications<br />
Table 21-2<br />
<strong>E7495A</strong>/B Base Station Test Set Option Specifications<br />
Instrumentation Accuracy:<br />
Absolute:<br />
Relative:<br />
Zero set accuracy:<br />
Power reference accuracy:<br />
Power output:<br />
Accuracy:<br />
VSWR:<br />
External attenuator:<br />
Max power:<br />
Attenuation:<br />
± 0.02 dB (log) or ± 0.5% (linear) Add the<br />
corresponding power sensor linearity percentage.<br />
± 0.04 dB (log) or ± 1.0% (linear) Add the<br />
corresponding power sensor linearity percentage.<br />
Zero set is the digital zero with an 8482A sensor<br />
±50nW<br />
1.00 mW (0.0 dBm) traceable to the U.S. National<br />
Institute of Standards and Technology (NIST).<br />
± 1.2% worst case (± 0.9% rss) for one year<br />
< 1.08<br />
100 watts<br />
40 dB ± 0.5 dB<br />
Safety and Regulatory Information<br />
and Specifications<br />
Power meter Option 600 with <strong>Agilent</strong> 8482A power sensor<br />
(also supports <strong>Agilent</strong> 8481A power sensor)<br />
Frequency Range:<br />
VSWR<br />
100 kHz to 4.2 GHz<br />
100kHz to 1MHz:<br />
0.3MHz to 1MHz:<br />
1MHz to 2GHz:<br />
2GHz to 4.2GHz:<br />
< 1.60<br />
< 1.20<br />
< 1.10<br />
< 1.3<br />
Power linearity: + 10 dBm to +20 dBm; ± 3%<br />
Maximum power:<br />
<strong>Measurement</strong> noise:<br />
Average filtering:<br />
Zero drift:<br />
300 mW average. 1 W peak, 30 W - µsec per pulse<br />
< 93.5 nW (0.85 + 110 nW)<br />
Fixed at 32 in normal mode<br />
< ± 10 nW<br />
Chapter 21 631
Safety and Regulatory Information and Specifications<br />
<strong>E7495A</strong>/B Base Station Test Set Specifications<br />
Table 21-2<br />
<strong>E7495A</strong>/B Base Station Test Set Option Specifications<br />
T1 Analyzer Option 700<br />
Safety and Regulatory Information<br />
and Specifications<br />
Receive level (line 1 and line 2):<br />
Electrical interface:<br />
Connectors, Rx, Tx:<br />
Output:<br />
Line build out<br />
Input:<br />
+6 dB DSC to –36 dB DSX or 100 mv peak-to-peak to<br />
12 V peak-to-peak<br />
Receive frequency (line 1 and line 2) display receive<br />
frequency (5 ppm) “Loopback” control send CSU or NIU<br />
loop codes CSU/NIU emulation respond to CSU or NIU<br />
loop codes<br />
Primary and secondary ports<br />
Conforms to TR-TSY-000499, CCITT Rec.G.703<br />
AT&T Pubs CB113, CB119, CB132, CB143<br />
PUB62508 and PUB62411 pulse shape specifications<br />
when terminated in 100 ohms and 0 dB line build-out<br />
is selected<br />
0 dB, –7.5, –15 dB<br />
Terminate:<br />
Monitor:<br />
Bridge<br />
Clock:<br />
Internal:<br />
External:<br />
Recovered:<br />
Transmitter and receiver:<br />
Framing: Unframed:<br />
Channel formats:<br />
Test patterns:<br />
Error injection type:<br />
Error rate:<br />
Alarm inject type:<br />
DSX +6 dB to DSX –36 dB, 100 ohms<br />
DSX –14 dB to DSX –40 dB, 100 ohms<br />
DSX + 6 dB to DSX –36 dB, > 1000 ohms<br />
1.544 MHz<br />
± 5 ppm<br />
± 300 ppm<br />
± 300 ppm<br />
D3 / D4 and ESF<br />
Full T1, 64 X 1<br />
QRSS, all Os, 1:7, 2 in 8, 3 in 24, all 1s, T-1-Daly, 55<br />
OCTET<br />
BPV, frame, CRC, pattern (logic)<br />
Single<br />
LOS, LOF, yellow, AIS, idle (CDI)<br />
632 Chapter 21
Safety and Regulatory Information and Specifications<br />
<strong>E7495A</strong>/B Base Station Test Set Specifications<br />
Table 21-2<br />
<strong>E7495A</strong>/B Base Station Test Set Option Specifications<br />
E1 Analyzer Option 710<br />
Error detect:<br />
Error rate calculation:<br />
Alarm detect:<br />
Clock and frame slips:<br />
Auto configuration:<br />
Receive level (line 1 and line 2):<br />
Receive frequency (line 1):<br />
Channel access:<br />
Delay measurement:<br />
Electrical Interface:<br />
Connectors, Rx, Tx:<br />
Code (BPV), FAS, MFAS,CRC-4, Far End Block (FEBE),<br />
Pattern, Fame Slip<br />
Bit-Error-Rate, Error Free Seconds, Errored seconds<br />
AIS, TS-16 AIS, FAST DISTANT, MFAS DISTANT<br />
Clock Slips, Frame slips, Peak Wander, Clock slip rate<br />
Automatically detect line code, framing and test pattern<br />
+6 dB DSX to –36 dB DSX or 100 mv p-to-p to<br />
12 v p-to-p<br />
Display receive frequency (± 5 ppm)<br />
Output audio to system<br />
Measure delay in unit intervals for “looped-back” signal<br />
Primary and secondary ports<br />
Safety and Regulatory Information<br />
and Specifications<br />
Output:<br />
Line code:<br />
Impedance:<br />
Input:<br />
Bridge:<br />
Clock:<br />
Internal:<br />
External:<br />
Recovered:<br />
Transmitter and receiver<br />
Framing:<br />
Channel Formats:<br />
Conforms to ITU-T Rec.G.703<br />
AMI, HDB3<br />
Terminate: 75 ohms ± 5% Bridge: > 1000 ohms<br />
Terminate: DSX +6 dB to DSX –36 dB<br />
DSX +6 dB to DSX –36 dB<br />
2.048 MHz<br />
± 5 ppm<br />
± 300 ppm<br />
± 300 ppm<br />
Unframed, PCM-30, PCM-30 with CRC, PCM-31,<br />
PCM-31 with CRC<br />
Full E1, 64x1<br />
Chapter 21 633
Safety and Regulatory Information and Specifications<br />
<strong>E7495A</strong>/B Base Station Test Set Specifications<br />
Table 21-2<br />
Test Patterns:<br />
<strong>E7495A</strong>/B Base Station Test Set Option Specifications<br />
(True or Inverse, ITU Rec) 2 6 –1 (Q6&Q5), 2 9 –1 (V.52),<br />
2 11 –1 (0.152), 2 15 –1 (0.151) 2 20 –1 (V.57), QRSS,<br />
2 23 –1(0.151), All 0's, 1:7, 1:3, 1:1, All 1's<br />
Error injection<br />
Safety and Regulatory Information<br />
and Specifications<br />
Type:<br />
Error rate:<br />
Table 21-3<br />
Display:<br />
Dimensions<br />
Height:<br />
Width:<br />
Depth:<br />
Weight (without batteries):<br />
Code (BPV), FAS, MFAS, CRC-4, Far End Block<br />
(FEBE), Pattern<br />
Single<br />
Alarm generation AIS, TS-16 AIS, FAS DISTANT,<br />
MFAS DISTANT, Loss of signal, Loss of Frame<br />
<strong>E7495A</strong>/B Base Station Test Set General Specifications<br />
Transflective VGA and color LCD<br />
11.6”, 295 mm<br />
14.5”, 368 mm<br />
5.3”, 135 mm<br />
20 lbs, 9.1 kg<br />
Power supply:<br />
Internal:<br />
External:<br />
Battery life:<br />
Lithium Ion battery: 10.8 volts, 6.0 Ah (1 NI2040AG<br />
shipped standard, will accept 2 batteries)<br />
DC Input +9 V to +25 V dc (55 Watts)<br />
Approximately 1.5 hour per battery (time varies<br />
depending upon instrument mode)<br />
634 Chapter 21
Safety and Regulatory Information and Specifications<br />
<strong>E7495A</strong>/B Base Station Test Set Specifications<br />
Table 21-3<br />
<strong>E7495A</strong>/B Base Station Test Set General Specifications<br />
Interface Ports:<br />
Inputs<br />
Port 2 RF in:<br />
External DC input:<br />
Frequency reference:<br />
Two RS 232 (DB-9) (reserved for future use)<br />
Two USB 1.1 (reserved for future use)<br />
One LAN Port 10 Base T<br />
Built-in speaker<br />
PCMCIA Card slot<br />
CompactFlash memory (type 1 & 2)<br />
Stereo headphone jack<br />
General purpose input/output - TTL level (reserved for<br />
future use)<br />
50 ohm type N<br />
+9 V to + 25 V DC (55 Watts)<br />
Safety and Regulatory Information<br />
and Specifications<br />
Input power:<br />
Connector:<br />
Even second:<br />
Connector:<br />
Level:<br />
GPS antenna:<br />
Connector:<br />
Output:<br />
Outputs:<br />
Port 1 RF Out/SWR Connector:<br />
Power reference:<br />
–10 to + 10 dBm<br />
50 ohm BNC<br />
High impedance BNC<br />
TTL compatible<br />
SMA<br />
5V at 50mA<br />
50 ohm type N<br />
50 ohm type N; SWR < 1.06<br />
Chapter 21 635
Safety and Regulatory Information and Specifications<br />
<strong>E7495A</strong>/B Base Station Test Set Specifications<br />
Table 21-3<br />
<strong>E7495A</strong>/B Base Station Test Set General Specifications<br />
Optional Connectors:<br />
Option 600 power meter:<br />
Safety and Regulatory Information<br />
and Specifications<br />
Outputs:<br />
Inputs:<br />
Option 700 T1 analyzer:<br />
Out puts:<br />
Inputs:<br />
Option 710 E1 analyzer:<br />
Outputs:<br />
Inputs:<br />
50 ohm type N power reference<br />
Sensor input for 8480 series sensors<br />
Operating temperature specified range: –10 ° to 50 °C; 14 ° to 122 °F<br />
(2) Bantum outputs; Tx primary and secondary<br />
(2) Bantum inputs; Rx primary and secondary<br />
Storage temperature: –40 ° to 70 °C; –40 ° to 158 °F<br />
Calibration Cycle: 1 year<br />
Warranty Duration:<br />
1 year<br />
(2) 75 ohm BNC outputs; Tx primary and secondary<br />
(2) 75 ohm BNC inputs; Rx primary and secondary<br />
636 Chapter 21
Safety and Regulatory Information and Specifications<br />
<strong>E7495A</strong>/B Base Station Test Set Specifications<br />
Battery Pack Specifications<br />
Product Safety Data Sheet<br />
PRODUCT NAME: Inspired Energy Rechargeable Battery Pack Model: NI2040AG Rev2<br />
ALTERNATE NAME: 1420-0883<br />
TRADE NAME: NI2040AG Rev 2 / NI2040AG2 Volts: 10.8<br />
CHEMICAL SYSTEM: Lithium Ion<br />
Approximate Weight: 484 g<br />
Date Prepared: November 13th th 2002 Updated April 7 th 2003<br />
SECTION I – MANUFACTURER INFORMATION<br />
Inspired Energy, Inc.<br />
12705 N US Hwy 441<br />
Alachua, FL 32615<br />
Telephone: (888) 5-INSPIRE (888-546-7747)<br />
SECTION II – HAZARDOUS INGREDIENTS<br />
Safety and Regulatory Information<br />
and Specifications<br />
Important Note:<br />
The battery should not be opened or burned. Exposure to the ingredients contained within or their combustion<br />
products could be harmful<br />
Please refer to the attached cell Material Safety Data Sheet Filename: MSDS Moli 18650 up to 2400mAh.pdf<br />
SECTION III – OPERATING PARAMETERS<br />
Maximum Charge Voltage:<br />
Minimum Charge Voltage:<br />
Maximum Charge Current:<br />
Maximum Discharge Current:<br />
12.6 V<br />
7.5 V<br />
3.0 A<br />
6.0 A<br />
Recommended Charging Method: Use an <strong>Agilent</strong> approved charger to provide a 3.0 A current limited<br />
constant voltage of 12.6 V. The charging cycle will terminate when the average current falls below 150mA.<br />
The information contained within is provided for your information only. This battery is an article pursuant to 29 CFR<br />
1910.1200 and, as such, is not subject to the OSHA Hazard Communication standard requirement for preparation<br />
of a material safety data sheet. The information and recommendations set forth herein are made in good faith and<br />
are believed to be accurate as of the date of preparation. However, INSPIRED ENERGY, INC. MAKES NO<br />
WARRANTY, EITHER EXPRESSED OR IMPLIED, WITH RESPECT TO THIS INFORMATION AND DISCLAIMS<br />
ALL LIABILITY FROM RELIANCE ON IT.<br />
Inspired Energy, Inc. 12705 US Hwy 441 N, Alachua, FL 32615<br />
US toll free: 1-888-5-INSPIRE (1-888-546-7747) Tel: 386 462 3676 Fax: 386 462 6765<br />
www.inspired-energy.com<br />
Chapter 21 637
Safety and Regulatory Information and Specifications<br />
<strong>E7495A</strong>/B Base Station Test Set Specifications<br />
Safety and Regulatory Information<br />
and Specifications<br />
638 Chapter 21
22 Connector Care<br />
“Using, Inspecting, and Cleaning RF Connectors” on page 640<br />
“Repeatability” on page 640<br />
“RF Cable and Connector Care” on page 640<br />
“Proper Connector Torque” on page 641<br />
“Connector Wear and Damage” on page 642<br />
“Cleaning Procedure” on page 642<br />
Connector Care<br />
639
Connector Care<br />
Using, Inspecting, and Cleaning RF Connectors<br />
Using, Inspecting, and Cleaning RF Connectors<br />
Taking proper care of cables and connectors will protect your test set’s ability to<br />
make accurate measurements. Inaccurate measurements often result from<br />
improperly made connections or dirty or damaged connectors.<br />
Worn, out-of-tolerance, or dirty connectors degrade the accuracy and repeatability<br />
of measurements. For more information on connector care, refer to the<br />
documentation that came with your calibration kit.<br />
Repeatability<br />
If you make two identical measurements with your test set, the differences should be<br />
so small that they do not affect the value of the measurement. Repeatability (the<br />
amount of similarity from one measurement to another of the same type) can be<br />
affected by:<br />
• Dirty or damaged connectors<br />
• Connections that have been made without using proper torque techniques (this<br />
applies primarily when connectors in the test set have been disconnected, then<br />
reconnected)<br />
Connector Care<br />
CAUTION<br />
This test set contains test sets and devices that are static-sensitive. Always take<br />
proper electrostatic precautions before touching the center conductor of any<br />
connector, or the center conductor of any cable that is connected to the test set.<br />
RF Cable and Connector Care<br />
Connectors are the most critical link in a precision measurement. These devices are<br />
manufactured to extremely precise tolerances and must be used and maintained with<br />
care to protect the measurement accuracy and repeatability of your test set.<br />
To Extend the Life of Your Cables or Connectors:<br />
• Avoid repeated bending of cables—a single sharp bend can ruin a cable<br />
instantly.<br />
• Avoid repeated connection and disconnection of cable connectors.<br />
• Inspect the connectors before connection; look for dirt, nicks, and other signs of<br />
damage or wear. A bad connector can ruin the good connector instantly.<br />
640 Chapter 22
Connector Care<br />
Using, Inspecting, and Cleaning RF Connectors<br />
• Clean dirty connectors. Dirt and foreign matter can cause poor electrical<br />
connections and may damage the connector.<br />
• Minimize the number of times you bend cables.<br />
• Never bend a cable at a sharp angle.<br />
• Do not bend cables near the connectors.<br />
• If any of the cables will be flexed repeatedly, buy a back-up cable. This will<br />
allow immediate replacement and will minimize your test set’s down time.<br />
Before Connecting the Cables to Any Device:<br />
• Check all connectors for wear or dirt.<br />
• When making the connection, torque the connector to the proper value.<br />
Proper Connector Torque<br />
CAUTION<br />
• Provides more accurate measurements<br />
• Keeps moisture out the connectors<br />
• Eliminates radio frequency interference (RFI) from affecting your<br />
measurements<br />
The torque required depends on the type of connector. Refer to Table 22-1. Do not<br />
overtighten the connector.<br />
Never exceed the recommended torque when attaching cables.<br />
Table 22-1<br />
Proper Connector Torque<br />
Connector Care<br />
Connector<br />
Torque<br />
cm-kg<br />
Torque<br />
N-cm<br />
Torque<br />
in-lbs<br />
Wrench part<br />
number<br />
Type-N 52 508 45 8710-1935<br />
3.5 mm 9.2 90 8 8710-1765<br />
SMA 5.7 56 5 8710-1582<br />
Chapter 22 641
Connector Care<br />
Using, Inspecting, and Cleaning RF Connectors<br />
Connector Wear and Damage<br />
Look for metal particles from the connector threads and other signs of wear (such as<br />
discoloration or roughness). Visible wear can affect measurement accuracy and<br />
repeatability. Discard or repair any device with a damaged connector. A bad<br />
connector can ruin a good connector on the first mating. A magnifying glass or<br />
jeweler’s loupe is useful during inspection.<br />
Cleaning Procedure<br />
1. Blow particulate matter from connectors using an environmentally-safe aerosol<br />
such as Ultrajet. This product is recommended by the United States<br />
Environmental Protection Agency and contains chlorodifluoromethane.<br />
2. Use an alcohol wipe to wipe connector surfaces. Wet a small swab with alcohol<br />
(from the alcohol wipe) and clean the connector with the swab.<br />
3. Allow the alcohol to evaporate off the connector before making connections<br />
Connector Care<br />
CAUTION<br />
Do not allow excessive alcohol to run into the connector. Excessive alcohol entering<br />
the connector collects in pockets in the connector’s internal parts. The liquid will<br />
cause random changes in the connector’s electrical performance. If excessive<br />
alcohol gets into a connector, lay it aside to allow the alcohol to evaporate. This may<br />
take up to three days. If you attach that connector to another device it can take much<br />
longer for trapped alcohol to evaporate.<br />
642 Chapter 22
23 Returning the Test Set for Service<br />
“Adjustment, Maintenance, or Repair of the Base Station Test Set” on page 644<br />
“Returning your Base Station Test Set for Service” on page 645<br />
“Preparing the <strong>Agilent</strong> <strong>E7495A</strong>/B for Shipping” on page 645<br />
643<br />
Returning the Test Set for Service
Returning the Test Set for Service<br />
Adjustment, Maintenance, or Repair of the Base Station Test Set<br />
Adjustment, Maintenance, or Repair of the Base Station<br />
Test Set<br />
Any adjustment, maintenance, or repair of the <strong>E7495A</strong>/B Base Station Test Set must<br />
be performed by qualified personnel. Contact your customer engineer through your<br />
local <strong>Agilent</strong> <strong>Technologies</strong> Service Center. You may contact <strong>Agilent</strong> through the<br />
Internet or by telephone. For contact information refer to “Contacting <strong>Agilent</strong><br />
<strong>Technologies</strong>” on page 43.<br />
NOTE<br />
For specific test set packing instructions, refer to “Returning your Base Station Test<br />
Set for Service” on page 645.<br />
Returning the Test Set for Service<br />
644 Chapter 23
Returning the Test Set for Service<br />
Returning your Base Station Test Set for Service<br />
Returning your Base Station Test Set for Service<br />
The instructions in this section explain how to properly package the system for<br />
return to <strong>Agilent</strong> <strong>Technologies</strong>.<br />
NOTE<br />
Please notify <strong>Agilent</strong> <strong>Technologies</strong> before returning your system for service. Any<br />
special arrangements for the system can be discussed at this time. This will help<br />
<strong>Agilent</strong> <strong>Technologies</strong> repair and return your system as quickly as possible.<br />
Warranty<br />
If the system is still under warranty or is covered by an <strong>Agilent</strong> <strong>Technologies</strong><br />
maintenance contract, it will be repaired under the terms of the warranty or contract.<br />
If the system is no longer under warranty or is not covered by an <strong>Agilent</strong><br />
<strong>Technologies</strong> maintenance plan, <strong>Agilent</strong> <strong>Technologies</strong> will notify you of the cost of<br />
the repair after examining the unit.<br />
When a system is returned to <strong>Agilent</strong> <strong>Technologies</strong> for servicing, it must be<br />
adequately packaged (see “Preparing the <strong>Agilent</strong> <strong>E7495A</strong>/B for Shipping” on<br />
page 645) and have a complete description of the failure symptoms attached.<br />
When describing the failure, please be as specific as possible about the nature of the<br />
problem. Include copies of additional failure information (such as receiver or<br />
computer failure settings, data related to system failure, and error messages) along<br />
with the system being returned.<br />
Preparing the <strong>Agilent</strong> <strong>E7495A</strong>/B for Shipping<br />
CAUTION<br />
Cover electrical connectors to protect sensitive components from electrostatic<br />
damage. Test set damage can result from using packaging materials other than the<br />
original materials. Never use styrene pellets as packaging material. They do not<br />
adequately cushion the system or prevent it from shifting in the carton. They may<br />
also cause system damage by generating static electricity.<br />
Chapter 23 645<br />
Returning the Test Set for Service
Returning the Test Set for Service<br />
Returning your Base Station Test Set for Service<br />
Step<br />
1 Write a complete description<br />
of the failure and attach it to<br />
the system.<br />
Notes<br />
Include any specific performance details<br />
related to the problem. The following<br />
information should be returned with the<br />
system:<br />
• Type of service required<br />
• Date system was returned for repair<br />
• Description of the problem:<br />
• Whether problem is constant or<br />
intermittent<br />
• Whether system is<br />
temperature-sensitive<br />
• Whether system is vibration<br />
sensitive<br />
• System settings required to<br />
reproduce the problem<br />
• Error Code<br />
• Performance data<br />
• Company Name and return address<br />
• Name and phone number of technical<br />
contact person<br />
• Model number of returned system<br />
• Full serial number of returned system<br />
• List of any accessories returned with<br />
the system<br />
Returning the Test Set for Service<br />
2 Caution: Cover all front and<br />
rear panel connectors that were<br />
originally covered when you<br />
first received the system.<br />
3 Pack the system in the original<br />
shipping containers. Original<br />
materials are available through<br />
<strong>Agilent</strong> <strong>Technologies</strong> office.<br />
See step 4 for more<br />
information.<br />
646 Chapter 23
Returning the Test Set for Service<br />
Returning your Base Station Test Set for Service<br />
Step<br />
4 Wrap the system in anti-static<br />
plastic to reduce the possibility<br />
of damage caused by<br />
electrostatic discharge.<br />
Notes<br />
For systems weighing less than 54 kg (120<br />
lbs.), use a double-walled, corrugated<br />
cardboard carton of 159 kg (350 lbs.) test<br />
strength.<br />
The carton must be large enough to allow 3<br />
to 4 inches on all sides of the system for<br />
packing material, and strong enough to<br />
accommodate the weight of the system.<br />
Surround the equipment with 3 to 4 inches<br />
of packing material, to protect the system<br />
and prevent it from moving in the carton. If<br />
packing foam is not available, the best<br />
alternative is S.D-240 Air Cap from<br />
Sealed Air Corporation (Commerce,<br />
California 90001). Air Cap looks like a<br />
plastic sheet filled with air bubbles. Use<br />
the pink (anti-static) Air Cap to reduce<br />
static electrical damage. Wrapping the<br />
system several times in this material will<br />
protect the system and prevent it from<br />
moving in the carton.<br />
5 Seal the carton with strong<br />
nylon adhesive tape and mark<br />
it “FRAGILE, HANDLE<br />
WITH CARE”.<br />
6 Retain copies of all shipping<br />
papers.<br />
Chapter 23 647<br />
Returning the Test Set for Service
Returning the Test Set for Service<br />
Returning your Base Station Test Set for Service<br />
Returning the Test Set for Service<br />
648 Chapter 23
24 Glossary<br />
Here you will find a list of the more common abbreviations and<br />
acronyms used in the rest of this manual.<br />
Glossary<br />
649
Glossary<br />
Glossary of Abbreviations and Acronyms Used<br />
Glossary<br />
Glossary of Abbreviations and Acronyms Used<br />
Table 24-1<br />
Access Network<br />
(AN)<br />
Access Terminal<br />
(AT)<br />
BS or BTS<br />
CDMA<br />
CPICH<br />
DPCH<br />
DSP<br />
DTF<br />
EVM<br />
FDR<br />
FFT<br />
The network equipment providing data connectivity<br />
between a packet switched data network (typically the<br />
Internet) and the access terminals. Connectivity is<br />
typically provided at the Link Layer (PPP). Equivalent<br />
terminology to BTS.<br />
A device providing data connectivity to a user. An access<br />
terminal may be connected to a computing device such as<br />
a laptop personal computer or may be self contained data<br />
device such as a personal digital assistant. Equivalent<br />
terminology to MS.<br />
Base Station<br />
Code Division Multiple Access.<br />
Common Pilot Channel<br />
Dedicated Physical Channel/Dedicated Pilot Channel<br />
Digital Signal Processing<br />
Distance to Fault<br />
Error Vector Magnitude.<br />
Frequency Domain Reflectometry<br />
Fast Fourier Transform<br />
FIR Filter<br />
GPS<br />
Global Positioning System. Global Positioning System<br />
comprises of multiple satellites all of which orbit the<br />
earth twice a day. Users with a GPS receiver use timing<br />
information from the satellites in order to triangulate<br />
their position on the earth surface.<br />
650 Chapter 24
Glossary<br />
Glossary of Abbreviations and Acronyms Used<br />
Table 24-1<br />
Glossary<br />
GUI<br />
HS-DSCH<br />
HS-PDSCH<br />
HS-SCCH<br />
HSDPA<br />
MAC Channel<br />
MS<br />
OTA<br />
P-CCPCH<br />
P-SCH<br />
PCDE<br />
PICH<br />
PSA<br />
Graphical User Interface<br />
High Speed Downlink Channel<br />
High Speed Physical Downlink Shared Channel<br />
High Speed Shared Control Channel<br />
High Speed Data Packet Access<br />
Medium Access Control Channel.<br />
Mobile Station<br />
Over The Air<br />
Primary Common Control Physical Channel<br />
Primary Synchronization Channel<br />
Peak Code Domain Error<br />
Paging Indication Channel/Pilot Channel<br />
<strong>Agilent</strong> <strong>Technologies</strong> Performance Spectrum Analyzer<br />
(Model Numbers E4440A, E4443A, E4445A, E4448A).<br />
PN Offset<br />
PN Sequence<br />
QPSK<br />
Pseudo noise sequence. A periodic binary sequence.<br />
Quadrature Phase Shift Keying. QPSK is a digital<br />
frequency modulation technique used for sending data<br />
over coaxial cable networks. Since it's both easy to<br />
implement and fairly resistant to noise, QPSK is used<br />
primarily for sending data from the cable subscriber<br />
upstream to the Internet.<br />
Reverse Activity<br />
(RA)<br />
Reverse Power<br />
Control (RPC)<br />
Chapter 24 651
Glossary<br />
Glossary of Abbreviations and Acronyms Used<br />
Glossary<br />
Table 24-1<br />
RF<br />
S-CCPCH<br />
S-SCH<br />
SCH<br />
SEM<br />
TDR<br />
TSTD<br />
VSA<br />
VSWR<br />
W-CDMA<br />
8PSK<br />
Radio Frequency. Any frequency within the<br />
electromagnetic spectrum normally associated with radio<br />
wave propagation.<br />
Secondary Common Control Physical Channel<br />
Secondary Synchronization Channel<br />
Synchronization Channel<br />
Spectrum Emission Mask.<br />
Time Domain Reflectometry.<br />
Time Switched Transmit Diversity<br />
<strong>Agilent</strong> <strong>Technologies</strong> Vector Signal Analyzer.<br />
Voltage Standing Wave Ratio. A standing wave may be<br />
formed when a wave is transmitted into one end of a<br />
transmission line and is reflected from the other end by<br />
an impedance mismatch. VSWR is the ratio of maximum<br />
to minimum voltage in a standing wave pattern.<br />
Wideband Code Division Multiple Access<br />
8 Phase Shift Keying. This is a modulation technique in<br />
which the carrier can exist in one of eight different states.<br />
As such, each state can represent three bits - 000 through<br />
to 111. This modulation technique is used in EDGE<br />
(Enhanced Data rates for Global Evolution).<br />
16QAM<br />
652 Chapter 24
25 Copyright Information<br />
“Where to Find Additional Copyright Information” on page 654<br />
“© Copyright 1999 The Apache Software Foundation. All rights reserved.<br />
The Apache Software License, Version 1.1” on page 654<br />
“© Copyright 1994-2004 Sun Microsystems, Inc. All Rights Reserved.” on<br />
page 655<br />
“© Copyright 1989, 1991 Free Software Foundation, Inc. GNU General Public<br />
License Version 2, June 1991.” on page 655<br />
“© Copyright 1991, 1999 Free Software Foundation, Inc. GNU Lesser General<br />
Public License Version 2.1, February 1999.” on page 660<br />
“© Copyright 1998-2004, CEE-J, Skelmir, LLC. All rights reserved.” on<br />
page 668<br />
Copyright Information<br />
653
Copyright Information<br />
Where to Find Additional Copyright Information<br />
Additional Copyright information is available on the Documentation CD-ROM and<br />
in the front matter of this manual.<br />
Copyright Information<br />
© Copyright 1999 The Apache Software Foundation. All rights<br />
reserved. The Apache Software License, Version 1.1<br />
Redistribution and use in source and binary forms, with or without modification, are<br />
permitted provided that the following conditions are met:<br />
1. Redistributions of source code must retain the above copyright notice, this list<br />
of conditions and the following disclaimer.<br />
2. Redistributions in binary form must reproduce the above copyright notice, this<br />
list of conditions and the following disclaimer in the documentation and/or<br />
other materials provided with the distribution.<br />
3. The end-user documentation included with the redistribution, if any, must<br />
include the following acknowledgment: “This product includes software<br />
developed by the Apache Software Foundation (http://www.apache.org).”<br />
Alternately, this acknowledgment may appear in the software itself, if and<br />
wherever such third-party acknowledgments normally appear.<br />
4. The names “Xerces” and “Apache Software Foundation” must not be used to<br />
endorse or promote products derived from this software without prior written<br />
permission. For written permission, please contact apache@apache.org.<br />
5. Products derived from this software may not be called “Apache”, nor may<br />
“Apache” appear in their name, without prior written permission of the Apache<br />
Software Foundation.<br />
THIS SOFTWARE IS PROVIDED ``AS IS'' AND ANY EXPRESSED OR<br />
IMPLIED WARRANTIES, INCLUDING, BUT NOT LIMITED TO, THE<br />
IMPLIED WARRANTIES OF MERCHANTABILITY AND FITNESS FOR A<br />
PARTICULAR PURPOSE ARE DISCLAIMED. IN NO EVENT SHALL THE<br />
APACHE SOFTWARE FOUNDATION OR ITS CONTRIBUTORS BE LIABLE<br />
FOR ANY DIRECT, INDIRECT, INCIDENTAL, SPECIAL, EXEMPLARY, OR<br />
CONSEQUENTIAL DAMAGES (INCLUDING, BUT NOT LIMITED TO,<br />
PROCUREMENT OF SUBSTITUTE GOODS OR SERVICES; LOSS OF USE,<br />
DATA, OR PROFITS; OR BUSINESS INTERRUPTION) HOWEVER CAUSED<br />
AND ON ANY THEORY OF LIABILITY, WHETHER IN CONTRACT, STRICT<br />
LIABILITY, OR TORT (INCLUDING NEGLIGENCE OR OTHERWISE)<br />
ARISING IN ANY WAY OUT OF THE USE OF THIS SOFTWARE, EVEN IF<br />
ADVISED OF THE POSSIBILITY OF SUCH DAMAGE.<br />
654 Chapter 25
Copyright Information<br />
=====================================================<br />
This software consists of voluntary contributions made by many individuals on<br />
behalf of the Apache Software Foundation and was originally based on software<br />
copyright © 1999, International Business Machines, Inc., http://www.ibm.com. For<br />
more information on the Apache Software Foundation, please see<br />
http://www.apache.org.<br />
© Copyright 1994-2004 Sun Microsystems, Inc. All Rights Reserved.<br />
Redistribution and use in source and binary forms, with or without modification, are<br />
permitted provided that the following conditions are met:<br />
• Redistribution of source code must retain the above copyright notice, this list of<br />
conditions and the following disclaimer.<br />
• Redistribution in binary form must reproduce the above copyright notice, this<br />
list of conditions and the following disclaimer in the documentation and/or other<br />
materials provided with the distribution.<br />
Neither the name of Sun Microsystems, Inc. or the names of contributors may be<br />
used to endorse or promote products derived from this software without specific<br />
prior written permission.<br />
This software is provided “AS IS,” without a warranty of any kind. ALL EXPRESS<br />
OR IMPLIED CONDITIONS, REPRESENTATIONS AND WARRANTIES,<br />
INCLUDING ANY IMPLIED WARRANTY OF MERCHANTABILITY,<br />
FITNESS FOR A PARTICULAR PURPOSE OR NON-INFRINGEMENT, ARE<br />
HEREBY EXCLUDED. SUN MICROSYSTEMS, INC. (“SUN”) AND ITS<br />
LICENSORS SHALL NOT BE LIABLE FOR ANY DAMAGES SUFFERED BY<br />
LICENSEE AS A RESULT OF USING, MODIFYING OR DISTRIBUTING THIS<br />
SOFTWARE OR ITS DERIVATIVES. IN NO EVENT WILL SUN OR ITS<br />
LICENSORS BE LIABLE FOR ANY LOST REVENUE, PROFIT OR DATA, OR<br />
FOR DIRECT, INDIRECT, SPECIAL, CONSEQUENTIAL, INCIDENTAL OR<br />
PUNITIVE DAMAGES, HOWEVER CAUSED AND REGARDLESS OF THE<br />
THEORY OF LIABILITY, ARISING OUT OF THE USE OF OR INABILITY TO<br />
USE THIS SOFTWARE, EVEN IF SUN HAS BEEN ADVISED OF THE<br />
POSSIBILITY OF SUCH DAMAGES.<br />
You acknowledge that this software is not designed, licensed or intended for use in<br />
the design, construction, operation or maintenance of any nuclear facility.<br />
Copyright Information<br />
© Copyright 1989, 1991 Free Software Foundation, Inc.<br />
GNU General Public License Version 2, June 1991.<br />
Free Software Foundation, Inc. 59 Temple Place, Suite 330, Boston, MA<br />
Chapter 25 655
Copyright Information<br />
Copyright Information<br />
02111-1307 USA<br />
Everyone is permitted to copy and distribute verbatim copies of this license<br />
document, but changing it is not allowed.<br />
GNU GENERAL PUBLIC LICENSE TERMS AND CONDITIONS FOR<br />
COPYING, DISTRIBUTION AND MODIFICATION<br />
0. This License applies to any program or other work which contains a notice placed<br />
by the copyright holder saying it may be distributed under the terms of this General<br />
Public License. The “Program”, below, refers to any such program or work, and a<br />
“work based on the Program” means either the Program or any derivative work<br />
under copyright law: that is to say, a work containing the Program or a portion of it,<br />
either verbatim or with modifications and/or translated into another language.<br />
(Hereinafter, translation is included without limitation in the term “modification”.)<br />
Each licensee is addressed as “you”.<br />
Activities other than copying, distribution and modification are not covered by this<br />
License; they are outside its scope. The act of running the Program is not restricted,<br />
and the output from the Program is covered only if its contents constitute a work<br />
based on the Program (independent of having been made by running the Program).<br />
Whether that is true depends on what the Program does.<br />
1. You may copy and distribute verbatim copies of the Program's source code as you<br />
receive it, in any medium, provided that you conspicuously and appropriately<br />
publish on each copy an appropriate copyright notice and disclaimer of warranty;<br />
keep intact all the notices that refer to this License and to the absence of any<br />
warranty; and give any other recipients of the Program a copy of this License along<br />
with the Program.<br />
You may charge a fee for the physical act of transferring a copy, and you may at<br />
your option offer warranty protection in exchange for a fee.<br />
2. You may modify your copy or copies of the Program or any portion of it, thus<br />
forming a work based on the Program, and copy and distribute such modifications or<br />
work under the terms of Section 1 above, provided that you also meet all of these<br />
conditions:<br />
a) You must cause the modified files to carry prominent notices stating that you<br />
changed the files and the date of any change.<br />
b) You must cause any work that you distribute or publish, that in whole or in part<br />
contains or is derived from the Program or any part thereof, to be licensed as a<br />
whole at no charge to all third parties under the terms of this License.<br />
c) If the modified program normally reads commands interactively when run, you<br />
must cause it, when started running for such interactive use in the most ordinary<br />
656 Chapter 25
Copyright Information<br />
way, to print or display an announcement including an appropriate copyright notice<br />
and a notice that there is no warranty (or else, saying that you provide a warranty)<br />
and that users may redistribute the program under these conditions, and telling the<br />
user how to view a copy of this License. (Exception: if the Program itself is<br />
interactive but does not normally print such an announcement, your work based on<br />
the Program is not required to print an announcement.)<br />
These requirements apply to the modified work as a whole. If identifiable sections<br />
of that work are not derived from the Program, and can be reasonably considered<br />
independent and separate works in themselves, then this License, and its terms, do<br />
not apply to those sections when you distribute them as separate works. But when<br />
you distribute the same sections as part of a whole which is a work based on the<br />
Program, the distribution of the whole must be on the terms of this License, whose<br />
permissions for other licensees extend to the entire whole, and thus to each and<br />
every part regardless of who wrote it.<br />
Thus, it is not the intent of this section to claim rights or contest your rights to work<br />
written entirely by you; rather, the intent is to exercise the right to control the<br />
distribution of derivative or collective works based on the Program.<br />
In addition, mere aggregation of another work not based on the Program with the<br />
Program (or with a work based on the Program) on a volume of a storage or<br />
distribution medium does not bring the other work under the scope of this License.<br />
3. You may copy and distribute the Program (or a work based on it, under Section 2)<br />
in object code or executable form under the terms of Sections 1 and 2 above<br />
provided that you also do one of the following:<br />
a) Accompany it with the complete corresponding machine-readable source code,<br />
which must be distributed under the terms of Sections 1 and 2 above on a medium<br />
customarily used for software interchange; or,<br />
b) Accompany it with a written offer, valid for at least three years, to give any third<br />
party, for a charge no more than your cost of physically performing source<br />
distribution, a complete machine-readable copy of the corresponding source code, to<br />
be distributed under the terms of Sections 1 and 2 above on a medium customarily<br />
used for software interchange; or,<br />
c) Accompany it with the information you received as to the offer to distribute<br />
corresponding source code. (This alternative is allowed only for noncommercial<br />
distribution and only if you received the program in object code or executable form<br />
with such an offer, in accord with Subsection b above.)<br />
The source code for a work means the preferred form of the work for making<br />
modifications to it. For an executable work, complete source code means all the<br />
source code for all modules it contains, plus any associated interface definition files,<br />
Copyright Information<br />
Chapter 25 657
Copyright Information<br />
Copyright Information<br />
plus the scripts used to control compilation and installation of the executable.<br />
However, as a special exception, the source code distributed need not include<br />
anything that is normally distributed (in either source or binary form) with the major<br />
components (compiler, kernel, and so on) of the operating system on which the<br />
executable runs, unless that component itself accompanies the executable.<br />
If distribution of executable or object code is made by offering access to copy from<br />
a designated place, then offering equivalent access to copy the source code from the<br />
same place counts as distribution of the source code, even though third parties are<br />
not compelled to copy the source along with the object code.<br />
4. You may not copy, modify, sublicense, or distribute the Program except as<br />
expressly provided under this License. Any attempt otherwise to copy, modify,<br />
sublicense or distribute the Program is void, and will automatically terminate your<br />
rights under this License. However, parties who have received copies, or rights,<br />
from you under this License will not have their licenses terminated so long as such<br />
parties remain in full compliance.<br />
5. You are not required to accept this License, since you have not signed it.<br />
However, nothing else grants you permission to modify or distribute the Program or<br />
its derivative works. These actions are prohibited by law if you do not accept this<br />
License. Therefore, by modifying or distributing the Program (or any work based on<br />
the Program), you indicate your acceptance of this License to do so, and all its terms<br />
and conditions for copying, distributing or modifying the Program or works based<br />
on it.<br />
6. Each time you redistribute the Program (or any work based on the Program), the<br />
recipient automatically receives a license from the original licensor to copy,<br />
distribute or modify the Program subject to these terms and conditions. You may not<br />
impose any further restrictions on the recipients' exercise of the rights granted<br />
herein. You are not responsible for enforcing compliance by third parties to this<br />
License.<br />
7. If, as a consequence of a court judgment or allegation of patent infringement or<br />
for any other reason (not limited to patent issues), conditions are imposed on you<br />
(whether by court order, agreement or otherwise) that contradict the conditions of<br />
this License, they do not excuse you from the conditions of this License. If you<br />
cannot distribute so as to satisfy simultaneously your obligations under this License<br />
and any other pertinent obligations, then as a consequence you may not distribute<br />
the Program at all. For example, if a patent license would not permit royalty-free<br />
redistribution of the Program by all those who receive copies directly or indirectly<br />
through you, then the only way you could satisfy both it and this License would be<br />
to refrain entirely from distribution of the Program.<br />
If any portion of this section is held invalid or unenforceable under any particular<br />
658 Chapter 25
Copyright Information<br />
circumstance, the balance of the section is intended to apply and the section as a<br />
whole is intended to apply in other circumstances.<br />
It is not the purpose of this section to induce you to infringe any patents or other<br />
property right claims or to contest validity of any such claims; this section has the<br />
sole purpose of protecting the integrity of the free software distribution system,<br />
which is implemented by public license practices. Many people have made generous<br />
contributions to the wide range of software distributed through that system in<br />
reliance on consistent application of that system; it is up to the author/donor to<br />
decide if he or she is willing to distribute software through any other system and a<br />
licensee cannot impose that choice.<br />
This section is intended to make thoroughly clear what is believed to be a<br />
consequence of the rest of this License.<br />
8. If the distribution and/or use of the Program is restricted in certain countries either<br />
by patents or by copyrighted interfaces, the original copyright holder who places the<br />
Program under this License may add an explicit geographical distribution limitation<br />
excluding those countries, so that distribution is permitted only in or among<br />
countries not thus excluded. In such case, this License incorporates the limitation as<br />
if written in the body of this License.<br />
9. The Free Software Foundation may publish revised and/or new versions of the<br />
General Public License from time to time. Such new versions will be similar in<br />
spirit to the present version, but may differ in detail to address new problems or<br />
concerns.<br />
Each version is given a distinguishing version number. If the Program specifies a<br />
version number of this License which applies to it and “any later version”, you have<br />
the option of following the terms and conditions either of that version or of any later<br />
version published by the Free Software Foundation. If the Program does not specify<br />
a version number of this License, you may choose any version ever published by the<br />
Free Software Foundation.<br />
10. If you wish to incorporate parts of the Program into other free programs whose<br />
distribution conditions are different, write to the author to ask for permission. For<br />
software which is copyrighted by the Free Software Foundation, write to the Free<br />
Software Foundation; we sometimes make exceptions for this. Our decision will be<br />
guided by the two goals of preserving the free status of all derivatives of our free<br />
software and of promoting the sharing and reuse of software generally.<br />
NO WARRANTY<br />
11. BECAUSE THE PROGRAM IS LICENSED FREE OF CHARGE, THERE IS<br />
NO WARRANTY FOR THE PROGRAM, TO THE EXTENT PERMITTED BY<br />
APPLICABLE LAW. EXCEPT WHEN OTHERWISE STATED IN WRITING<br />
Copyright Information<br />
Chapter 25 659
Copyright Information<br />
Copyright Information<br />
THE COPYRIGHT HOLDERS AND/OR OTHER PARTIES PROVIDE THE<br />
PROGRAM “AS IS” WITHOUT WARRANTY OF ANY KIND, EITHER<br />
EXPRESSED OR IMPLIED, INCLUDING, BUT NOT LIMITED TO, THE<br />
IMPLIED WARRANTIES OF MERCHANTABILITY AND FITNESS FOR A<br />
PARTICULAR PURPOSE. THE ENTIRE RISK AS TO THE QUALITY AND<br />
PERFORMANCE OF THE PROGRAM IS WITH YOU. SHOULD THE<br />
PROGRAM PROVE DEFECTIVE, YOU ASSUME THE COST OF ALL<br />
NECESSARY SERVICING, REPAIR OR CORRECTION.<br />
12. IN NO EVENT UNLESS REQUIRED BY APPLICABLE LAW OR AGREED<br />
TO IN WRITING WILL ANY COPYRIGHT HOLDER, OR ANY OTHER<br />
PARTY WHO MAY MODIFY AND/OR REDISTRIBUTE THE PROGRAM AS<br />
PERMITTED ABOVE, BE LIABLE TO YOU FOR DAMAGES, INCLUDING<br />
ANY GENERAL, SPECIAL, INCIDENTAL OR CONSEQUENTIAL DAMAGES<br />
ARISING OUT OF THE USE OR INABILITY TO USE THE PROGRAM<br />
(INCLUDING BUT NOT LIMITED TO LOSS OF DATA OR DATA BEING<br />
RENDERED INACCURATE OR LOSSES SUSTAINED BY YOU OR THIRD<br />
PARTIES OR A FAILURE OF THE PROGRAM TO OPERATE WITH ANY<br />
OTHER PROGRAMS), EVEN IF SUCH HOLDER OR OTHER PARTY HAS<br />
BEEN ADVISED OF THE POSSIBILITY OF SUCH DAMAGES.<br />
© Copyright 1991, 1999 Free Software Foundation, Inc.<br />
GNU Lesser General Public License Version 2.1, February 1999.<br />
Free Software Foundation, Inc. 59 Temple Place, Suite 330, Boston, MA<br />
02111-1307 USA<br />
Everyone is permitted to copy and distribute verbatim copies of this license<br />
document, but changing it is not allowed. [This is the first released version of the<br />
Lesser GPL. It also counts as the successor of the GNU Library Public License,<br />
version 2, hence the version number 2.1.]<br />
GNU LESSER GENERAL PUBLIC LICENSE TERMS AND CONDITIONS<br />
FOR COPYING, DISTRIBUTION AND MODIFICATION<br />
0. This License Agreement applies to any software library or other program which<br />
contains a notice placed by the copyright holder or other authorized party saying it<br />
may be distributed under the terms of this Lesser General Public License (also<br />
called “this License”). Each licensee is addressed as “you”.<br />
A “library” means a collection of software functions and/or data prepared so as to be<br />
conveniently linked with application programs (which use some of those functions<br />
and data) to form executables.<br />
The “Library”, below, refers to any such software library or work which has been<br />
distributed under these terms. A “work based on the Library” means either the<br />
660 Chapter 25
Copyright Information<br />
Library or any derivative work under copyright law: that is to say, a work containing<br />
the Library or a portion of it, either verbatim or with modifications and/or translated<br />
straightforwardly into another language. (Hereinafter, translation is included<br />
without limitation in the term “modification”.)<br />
“Source code” for a work means the preferred form of the work for making<br />
modifications to it. For a library, complete source code means all the source code for<br />
all modules it contains, plus any associated interface definition files, plus the scripts<br />
used to control compilation and installation of the library.<br />
Activities other than copying, distribution and modification are not covered by this<br />
License; they are outside its scope. The act of running a program using the Library<br />
is not restricted, and output from such a program is covered only if its contents<br />
constitute a work based on the Library (independent of the use of the Library in a<br />
tool for writing it). Whether that is true depends on what the Library does and what<br />
the program that uses the Library does.<br />
1. You may copy and distribute verbatim copies of the Library's complete source<br />
code as you receive it, in any medium, provided that you conspicuously and<br />
appropriately publish on each copy an appropriate copyright notice and disclaimer<br />
of warranty; keep intact all the notices that refer to this License and to the absence of<br />
any warranty; and distribute a copy of this License along with the Library.<br />
You may charge a fee for the physical act of transferring a copy, and you may at<br />
your option offer warranty protection in exchange for a fee.<br />
2. You may modify your copy or copies of the Library or any portion of it, thus<br />
forming a work based on the Library, and copy and distribute such modifications or<br />
work under the terms of Section 1 above, provided that you also meet all of these<br />
conditions:<br />
a) The modified work must itself be a software library.<br />
b) You must cause the files modified to carry prominent notices stating that you<br />
changed the files and the date of any change.<br />
c) You must cause the whole of the work to be licensed at no charge to all third<br />
parties under the terms of this License.<br />
d) If a facility in the modified Library refers to a function or a table of data to be<br />
supplied by an application program that uses the facility, other than as an argument<br />
passed when the facility is invoked, then you must make a good faith effort to ensure<br />
that, in the event an application does not supply such function or table, the facility<br />
still operates, and performs whatever part of its purpose remains meaningful. (For<br />
example, a function in a library to compute square roots has a purpose that is<br />
entirely well-defined independent of the application. Therefore, Subsection 2d<br />
requires that any application-supplied function or table used by this function must<br />
Copyright Information<br />
Chapter 25 661
Copyright Information<br />
Copyright Information<br />
be optional: if the application does not supply it, the square root function must still<br />
compute square roots.)<br />
These requirements apply to the modified work as a whole. If identifiable sections<br />
of that work are not derived from the Library, and can be reasonably considered<br />
independent and separate works in themselves, then this License, and its terms, do<br />
not apply to those sections when you distribute them as separate works. But when<br />
you distribute the same sections as part of a whole which is a work based on the<br />
Library, the distribution of the whole must be on the terms of this License, whose<br />
permissions for other licensees extend to the entire whole, and thus to each and<br />
every part regardless of who wrote it.<br />
Thus, it is not the intent of this section to claim rights or contest your rights to work<br />
written entirely by you; rather, the intent is to exercise the right to control the<br />
distribution of derivative or collective works based on the Library.<br />
In addition, mere aggregation of another work not based on the Library with the<br />
Library (or with a work based on the Library) on a volume of a storage or<br />
distribution medium does not bring the other work under the scope of this License.<br />
3. You may opt to apply the terms of the ordinary GNU General Public License<br />
instead of this License to a given copy of the Library. To do this, you must alter all<br />
the notices that refer to this License, so that they refer to the ordinary GNU General<br />
Public License, version 2, instead of to this License. (If a newer version than version<br />
2 of the ordinary GNU General Public License has appeared, then you can specify<br />
that version instead if you wish.) Do not make any other change in these notices.<br />
Once this change is made in a given copy, it is irreversible for that copy, so the<br />
ordinary GNU General Public License applies to all subsequent copies and<br />
derivative works made from that copy.<br />
This option is useful when you wish to copy part of the code of the Library into a<br />
program that is not a library.<br />
4. You may copy and distribute the Library (or a portion or derivative of it, under<br />
Section 2) in object code or executable form under the terms of Sections 1 and 2<br />
above provided that you accompany it with the complete corresponding<br />
machine-readable source code, which must be distributed under the terms of<br />
Sections 1 and 2 above on a medium customarily used for software interchange.<br />
If distribution of object code is made by offering access to copy from a designated<br />
place, then offering equivalent access to copy the source code from the same place<br />
satisfies the requirement to distribute the source code, even though third parties are<br />
not compelled to copy the source along with the object code.<br />
5. A program that contains no derivative of any portion of the Library, but is<br />
designed to work with the Library by being compiled or linked with it, is called a<br />
662 Chapter 25
Copyright Information<br />
“work that uses the Library”. Such a work, in isolation, is not a derivative work of<br />
the Library, and therefore falls outside the scope of this License.<br />
However, linking a “work that uses the Library” with the Library creates an<br />
executable that is a derivative of the Library (because it contains portions of the<br />
Library), rather than a “work that uses the library”. The executable is therefore<br />
covered by this License. Section 6 states terms for distribution of such executables.<br />
When a “work that uses the Library” uses material from a header file that is part of<br />
the Library, the object code for the work may be a derivative work of the Library<br />
even though the source code is not. Whether this is true is especially significant if<br />
the work can be linked without the Library, or if the work is itself a library. The<br />
threshold for this to be true is not precisely defined by law.<br />
If such an object file uses only numerical parameters, data structure layouts and<br />
accessories, and small macros and small inline functions (ten lines or less in length),<br />
then the use of the object file is unrestricted, regardless of whether it is legally a<br />
derivative work. (Executables containing this object code plus portions of the<br />
Library will still fall under Section 6.)<br />
Otherwise, if the work is a derivative of the Library, you may distribute the object<br />
code for the work under the terms of Section 6. Any executables containing that<br />
work also fall under Section 6, whether or not they are linked directly with the<br />
Library itself.<br />
6. As an exception to the Sections above, you may also combine or link a “work that<br />
uses the Library” with the Library to produce a work containing portions of the<br />
Library, and distribute that work under terms of your choice, provided that the terms<br />
permit modification of the work for the customer's own use and reverse engineering<br />
for debugging such modifications.<br />
You must give prominent notice with each copy of the work that the Library is used<br />
in it and that the Library and its use are covered by this License. You must supply a<br />
copy of this License. If the work during execution displays copyright notices, you<br />
must include the copyright notice for the Library among them, as well as a reference<br />
directing the user to the copy of this License. Also, you must do one of these things:<br />
a) Accompany the work with the complete corresponding machine-readable source<br />
code for the Library including whatever changes were used in the work (which must<br />
be distributed under Sections 1 and 2 above); and, if the work is an executable<br />
linked with the Library, with the complete machine-readable “work that uses the<br />
Library”, as object code and/or source code, so that the user can modify the Library<br />
and then relink to produce a modified executable containing the modified Library.<br />
(It is understood that the user who changes the contents of definitions files in the<br />
Library will not necessarily be able to recompile the application to use the modified<br />
definitions.)<br />
Copyright Information<br />
Chapter 25 663
Copyright Information<br />
Copyright Information<br />
b) Use a suitable shared library mechanism for linking with the Library. A suitable<br />
mechanism is one that (1) uses at run time a copy of the library already present on<br />
the user's computer system, rather than copying library functions into the<br />
executable, and (2) will operate properly with a modified version of the library, if<br />
the user installs one, as long as the modified version is interface-compatible with the<br />
version that the work was made with.<br />
c) Accompany the work with a written offer, valid for at least three years, to give the<br />
same user the materials specified in Subsection 6a, above, for a charge no more than<br />
the cost of performing this distribution.<br />
d) If distribution of the work is made by offering access to copy from a designated<br />
place, offer equivalent access to copy the above specified materials from the same<br />
place.<br />
e) Verify that the user has already received a copy of these materials or that you have<br />
already sent this user a copy.<br />
For an executable, the required form of the “work that uses the Library” must<br />
include any data and utility programs needed for reproducing the executable from it.<br />
However, as a special exception, the materials to be distributed need not include<br />
anything that is normally distributed (in either source or binary form) with the major<br />
components (compiler, kernel, and so on) of the operating system on which the<br />
executable runs, unless that component itself accompanies the executable.<br />
It may happen that this requirement contradicts the license restrictions of other<br />
proprietary libraries that do not normally accompany the operating system. Such a<br />
contradiction means you cannot use both them and the Library together in an<br />
executable that you distribute.<br />
7. You may place library facilities that are a work based on the Library side-by-side<br />
in a single library together with other library facilities not covered by this License,<br />
and distribute such a combined library, provided that the separate distribution of the<br />
work based on the Library and of the other library facilities is otherwise permitted,<br />
and provided that you do these two things:<br />
a) Accompany the combined library with a copy of the same work based on the<br />
Library, uncombined with any other library facilities. This must be distributed under<br />
the terms of the Sections above.<br />
b) Give prominent notice with the combined library of the fact that part of it is a<br />
work based on the Library, and explaining where to find the accompanying<br />
uncombined form of the same work.<br />
8. You may not copy, modify, sublicense, link with, or distribute the Library except<br />
as expressly provided under this License. Any attempt otherwise to copy, modify,<br />
sublicense, link with, or distribute the Library is void, and will automatically<br />
664 Chapter 25
Copyright Information<br />
terminate your rights under this License. However, parties who have received<br />
copies, or rights, from you under this License will not have their licenses terminated<br />
so long as such parties remain in full compliance.<br />
9. You are not required to accept this License, since you have not signed it.<br />
However, nothing else grants you permission to modify or distribute the Library or<br />
its derivative works. These actions are prohibited by law if you do not accept this<br />
License. Therefore, by modifying or distributing the Library (or any work based on<br />
the Library), you indicate your acceptance of this License to do so, and all its terms<br />
and conditions for copying, distributing or modifying the Library or works based on<br />
it.<br />
10. Each time you redistribute the Library (or any work based on the Library), the<br />
recipient automatically receives a license from the original licensor to copy,<br />
distribute, link with or modify the Library subject to these terms and conditions. You<br />
may not impose any further restrictions on the recipients' exercise of the rights<br />
granted herein. You are not responsible for enforcing compliance by third parties<br />
with this License. _<br />
11. If, as a consequence of a court judgment or allegation of patent infringement or<br />
for any other reason (not limited to patent issues), conditions are imposed on you<br />
(whether by court order, agreement or otherwise) that contradict the conditions of<br />
this License, they do not excuse you from the conditions of this License. If you<br />
cannot distribute so as to satisfy simultaneously your obligations under this License<br />
and any other pertinent obligations, then as a consequence you may not distribute<br />
the Library at all. For example, if a patent license would not permit royalty-free<br />
redistribution of the Library by all those who receive copies directly or indirectly<br />
through you, then the only way you could satisfy both it and this License would be<br />
to refrain entirely from distribution of the Library.<br />
If any portion of this section is held invalid or unenforceable under any particular<br />
circumstance, the balance of the section is intended to apply, and the section as a<br />
whole is intended to apply in other circumstances.<br />
It is not the purpose of this section to induce you to infringe any patents or other<br />
property right claims or to contest validity of any such claims; this section has the<br />
sole purpose of protecting the integrity of the free software distribution system<br />
which is implemented by public license practices. Many people have made generous<br />
contributions to the wide range of software distributed through that system in<br />
reliance on consistent application of that system; it is up to the author/donor to<br />
decide if he or she is willing to distribute software through any other system and a<br />
licensee cannot impose that choice.<br />
This section is intended to make thoroughly clear what is believed to be a<br />
consequence of the rest of this License.<br />
Copyright Information<br />
Chapter 25 665
Copyright Information<br />
Copyright Information<br />
12. If the distribution and/or use of the Library is restricted in certain countries<br />
either by patents or by copyrighted interfaces, the original copyright holder who<br />
places the Library under this License may add an explicit geographical distribution<br />
limitation excluding those countries, so that distribution is permitted only in or<br />
among countries not thus excluded. In such case, this License incorporates the<br />
limitation as if written in the body of this License.<br />
13. The Free Software Foundation may publish revised and/or new versions of the<br />
Lesser General Public License from time to time. Such new versions will be similar<br />
in spirit to the present version, but may differ in detail to address new problems or<br />
concerns.<br />
Each version is given a distinguishing version number. If the Library specifies a<br />
version number of this License which applies to it and “any later version”, you have<br />
the option of following the terms and conditions either of that version or of any later<br />
version published by the Free Software Foundation. If the Library does not specify a<br />
license version number, you may choose any version ever published by the Free<br />
Software Foundation.<br />
14. If you wish to incorporate parts of the Library into other free programs whose<br />
distribution conditions are incompatible with these, write to the author to ask for<br />
permission. For software which is copyrighted by the Free Software Foundation,<br />
write to the Free Software Foundation; we sometimes make exceptions for this. Our<br />
decision will be guided by the two goals of preserving the free status of all<br />
derivatives of our free software and of promoting the sharing and reuse of software<br />
generally.<br />
NO WARRANTY<br />
15. BECAUSE THE LIBRARY IS LICENSED FREE OF CHARGE, THERE IS<br />
NO WARRANTY FOR THE LIBRARY, TO THE EXTENT PERMITTED BY<br />
APPLICABLE LAW. EXCEPT WHEN OTHERWISE STATED IN WRITING<br />
THE COPYRIGHT HOLDERS AND/OR OTHER PARTIES PROVIDE THE<br />
LIBRARY “AS IS” WITHOUT WARRANTY OF ANY KIND, EITHER<br />
EXPRESSED OR IMPLIED, INCLUDING, BUT NOT LIMITED TO, THE<br />
IMPLIED WARRANTIES OF MERCHANTABILITY AND FITNESS FOR A<br />
PARTICULAR PURPOSE. THE ENTIRE RISK AS TO THE QUALITY AND<br />
PERFORMANCE OF THE LIBRARY IS WITH YOU. SHOULD THE LIBRARY<br />
PROVE DEFECTIVE, YOU ASSUME THE COST OF ALL NECESSARY<br />
SERVICING, REPAIR OR CORRECTION.<br />
16. IN NO EVENT UNLESS REQUIRED BY APPLICABLE LAW OR AGREED<br />
TO IN WRITING WILL ANY COPYRIGHT HOLDER, OR ANY OTHER<br />
PARTY WHO MAY MODIFY AND/OR REDISTRIBUTE THE LIBRARY AS<br />
PERMITTED ABOVE, BE LIABLE TO YOU FOR DAMAGES, INCLUDING<br />
666 Chapter 25
Copyright Information<br />
ANY GENERAL, SPECIAL, INCIDENTAL OR CONSEQUENTIAL DAMAGES<br />
ARISING OUT OF THE USE OR INABILITY TO USE THE LIBRARY<br />
(INCLUDING BUT NOT LIMITED TO LOSS OF DATA OR DATA BEING<br />
RENDERED INACCURATE OR LOSSES SUSTAINED BY YOU OR THIRD<br />
PARTIES OR A FAILURE OF THE LIBRARY TO OPERATE WITH ANY<br />
OTHER SOFTWARE), EVEN IF SUCH HOLDER OR OTHER PARTY HAS<br />
BEEN ADVISED OF THE POSSIBILITY OF SUCH DAMAGES.<br />
Copyright Information<br />
Chapter 25 667
Copyright Information<br />
© Copyright 1998-2004, CEE-J, Skelmir, LLC. All rights reserved.<br />
Copyright Information<br />
668 Chapter 25
Index<br />
Numerics<br />
1xEV-DO analyzer<br />
adding a marker, 91<br />
basic measurement, 64<br />
common measurements, 62<br />
data channel modulation, 107, 112<br />
estimated MAC Rho, 106, 112<br />
estimated pilot Rho, 106, 111<br />
frequency, 104<br />
frequency error, 104, 109<br />
idle data power, 111<br />
idle slots, 111<br />
interpretation of measurement<br />
results, 109<br />
interpreting the display, 76<br />
max inactive channel, 107, 112<br />
noise floor, 112<br />
non-idle power, 110<br />
optional measurement settings, 78<br />
pass/fail limits, 93<br />
pilot + MAC power, 110<br />
PN offset, 104, 109<br />
setting 1xEV-DO transmitter<br />
reference level, 83<br />
setting CDP type, 86<br />
setting channel or frequency step,<br />
78<br />
setting frequency/time reference,<br />
82<br />
setting measurement offset, 85<br />
setting measurement time, 84<br />
setting PN increment, 80<br />
setting slot threshold level, 86<br />
setting units, 83<br />
signal generator, 101<br />
time offset, 109<br />
uses, 62<br />
1xEV-DO over air<br />
adding a marker, 91<br />
basic measurement, 72<br />
criteria for making valid<br />
measurements, 70<br />
data channel modulation, 107, 112<br />
displaying location information<br />
using GPS, 75<br />
estimated MAC Rho, 106, 112<br />
estimated pilot Rho, 106, 111<br />
frequency, 104<br />
frequency error, 104, 109<br />
idle data power, 111<br />
idle slots, 111<br />
interpretation of measurement<br />
results, 109<br />
interpreting the display, 76<br />
max inactive channel, 107, 112<br />
noise floor, 112<br />
non-idle power, 110<br />
optional measurement settings, 78<br />
pass/fail limits, 93<br />
pilot + MAC power, 110<br />
PN offset, 104, 109<br />
setting active channel threshold and<br />
auto threshold levels, 81<br />
setting CDP type, 86<br />
setting channel or frequency step,<br />
78<br />
setting frequency/time reference,<br />
82<br />
setting measurement offset, 85<br />
setting measurement time, 84<br />
setting multipath power limit, 88<br />
setting pilot dominance, 87<br />
setting PN offset, 80<br />
setting slot threshold level, 86<br />
setting units, 83<br />
time offset, 109<br />
A<br />
abbreviations used, 650<br />
acp<br />
analyzer input gain, 152, 417<br />
sensitivity, 152, 417<br />
acronyms, 650<br />
active channel threshold level, 558,<br />
594<br />
active code channel table<br />
HSDPA, 549, 587<br />
W-CDMA, 549<br />
adjacent channel power, 142<br />
autoranging, 152<br />
basic measurement, 143<br />
format, 145<br />
measurement settings, 145<br />
pass/fail limits, 153<br />
peak power, 151<br />
range control, 152<br />
adjustment, maintenance, or repair of<br />
test set, 644<br />
<strong>Agilent</strong><br />
customer assistance, 43<br />
sales offices, 43<br />
analyzer input gain<br />
acp, 152, 417<br />
channel scanner, 265<br />
auto scan mode bar count, 352<br />
average & averaging, 52, 89, 127,<br />
149, 195, 234, 270, 292, 366,<br />
394, 421, 556, 592<br />
averaging restart, 53, 90, 129, 150,<br />
196, 235, 271, 293, 368, 395,<br />
422, 557, 594<br />
B<br />
batteries<br />
built-in battery gauge, 166<br />
caring for, 173<br />
charger part numbers, 177<br />
charging, 168<br />
current drain, 178<br />
disposal, 175<br />
front panel icons, 165<br />
installing, 37, 164<br />
LEDs, 165<br />
maximizing battery life, 174<br />
part numbers, 177<br />
precautions, 173<br />
reconditioning/recalibrating, 170<br />
Index<br />
Index 669
Index<br />
Index<br />
specifications, 176<br />
statistics, 478<br />
status, 165<br />
System Statistics - Battery Screen,<br />
166<br />
buttons on front panel, 34<br />
C<br />
C/I ratio, 376<br />
cable and connector care, 640<br />
cables, connectors, and accessories,<br />
24<br />
calibration<br />
distance to fault, 288<br />
one port insertion loss, 46, 47, 50<br />
return Loss, 392<br />
Canadian EMC requirements, 621<br />
capture interval<br />
see "update interval"<br />
update interval (differences<br />
between...), 122, 187, 223,<br />
549, 586<br />
carrier to interference ratio, 376<br />
carrying case<br />
using, 41<br />
what goes where, 42<br />
CDMA analyzer<br />
basic measurement, 181<br />
carrier feedthrough, 210, 213<br />
channel power, 209, 212<br />
common measurements, 180<br />
delta page power, 210, 213<br />
delta quick page channel power,<br />
210, 214<br />
delta sync power, 210, 213<br />
estimated Rho, 209, 212<br />
frequency error, 209, 211<br />
interpretation of measurement<br />
results, 211<br />
interpreting the display, 184<br />
metrics, 196<br />
noise floor, 210, 213<br />
optional measurement settings, 188<br />
pilot power, 210, 213<br />
PN offset, 209, 211, 406<br />
setting active channel threshold and<br />
auto threshold levels, 192<br />
setting CDMA transmitter reference<br />
level, 191<br />
setting channel or frequency step,<br />
188<br />
setting frequency/time reference,<br />
190<br />
setting measurement time, 193<br />
setting PN increment, 189<br />
setting PN offset, 189<br />
setting quick page channel, 194<br />
setting units, 191<br />
time offset, 211<br />
uses, 180<br />
CDMA over air<br />
amplifier capacity, 251, 256<br />
average amplifier capacity, 252,<br />
257<br />
average utilization, 252, 257<br />
basic measurement, 218<br />
carrier feedthrough, 250, 255<br />
channel power, 250, 255<br />
criteria for making valid<br />
measurements, 217<br />
delta page power, 251, 256<br />
delta quick page channel power,<br />
251, 256<br />
delta sync power, 251, 256<br />
displaying location information<br />
using GPS, 220<br />
estimated Rho, 250, 254<br />
frequency error, 253<br />
interpretation of measurement<br />
results, 253<br />
metrics, 249<br />
noise floor, 250, 255<br />
optional measurement settings, 227<br />
pass/fail limits, 237<br />
peak amplifier capacity, 251, 256<br />
pilot Ec/Io, 250, 256<br />
pilot power, 250, 256<br />
PN offset, 249, 253<br />
resetting amplifier capacity and<br />
traffic metrics, 231<br />
setting active channel threshold and<br />
auto threshold levels, 230<br />
setting amplifier capacity metrics,<br />
223<br />
setting channel or frequency step,<br />
227<br />
setting measurement time, 231<br />
setting PN increment, 228<br />
setting quick page channel, 232<br />
setting transmitter reference level,<br />
228<br />
signal generator, 246<br />
time offset, 253<br />
utilization, 252<br />
CDMA Tx Analyzer<br />
pass/fail limits, 198<br />
certification, 621<br />
channel scanner<br />
analyzer input gain, 265<br />
autoranging, 264<br />
basic measurement, 261<br />
displaying accurate peak power for<br />
pulsed signals, 264<br />
displaying frequency or power, 272<br />
entering channels with list instead<br />
of range, 266<br />
entering measurement bandwidth<br />
and time, 267<br />
pass/fail limits, 272<br />
sensitivity, 153, 265<br />
charging batteries, 168<br />
cleaning supplies, connector, 642<br />
clear calibration<br />
distance to fault, 288<br />
one port insertion loss, 50<br />
return Loss, 392<br />
clear normalization<br />
one port insertion loss, 137<br />
670 Index
Index<br />
CompactFlash cards, 469<br />
compliance statements, 621<br />
configuring for network connectivity,<br />
471<br />
connectors<br />
care, 640<br />
cleaning, 642<br />
cleaning RF, 640<br />
inspecting for wear, 642<br />
inspecting RF, 640<br />
ordering cleaning supplies, 642<br />
torque specifications, 641<br />
copyrights, 653<br />
D<br />
data<br />
saving, 465<br />
declaration of conformity, 622<br />
detector mode<br />
spectrum analyzer, 418<br />
DHCP, 471<br />
display<br />
testing, 481<br />
distance to fault<br />
basic measurement (automatic<br />
frequency range), 284<br />
basic measurement (manual<br />
frequency range), 281<br />
clear calibration, 288<br />
displaying location information<br />
using GPS, 289<br />
interference rejection, 291<br />
manual vs. automatic frequency<br />
range, 276<br />
pass/fail limits, 295<br />
viewing a single sweep, 290<br />
viewing trace data on a PC, 21<br />
dynamic range optimization<br />
two port insertion loss, 138<br />
E<br />
E1<br />
(code) BPV, 316<br />
alarm indicators, 316<br />
all 1’s, 317<br />
available seconds, 317<br />
bit error rate, 318<br />
bit errors, 318<br />
BPV, 323<br />
BPV errd secs, 317<br />
BPV error rate, 317<br />
BPV errors, 317<br />
BVP, 316<br />
CRC, 323<br />
CRC-4, 316<br />
degraded minutes, 318<br />
E-bit, 316<br />
elapsed time, 317<br />
error free seconds, 317<br />
errored seconds, 317<br />
excess zeros, 317<br />
facility summary, 319<br />
FAST, 316<br />
frame errd secs, 317<br />
frame error rate, 317<br />
frame errors, 317<br />
frame slip, 316<br />
frame slip, -, 318<br />
frame slips, +, 318<br />
frame sync loss, 317<br />
frequency, 317<br />
isolating faults using test<br />
equipment, 319<br />
isolating faults with alarm and<br />
errors, 319<br />
making E1 measurements, 298<br />
measurement results, 316<br />
MFAST, 316<br />
pattern, 316<br />
pattern sync loss, 318<br />
patterns, 314<br />
peak - wander, 318<br />
peak +wander, 318<br />
recv level, 317<br />
results indicators, 316<br />
selecting hard loop/end-end full E1,<br />
303<br />
severe errored seconds, 317<br />
signal loss, 317<br />
slip rate, 318<br />
terminology, 323<br />
test data rate, 318<br />
testing and fault mitigation, 319<br />
unavailable seconds, 317<br />
E1 analyzer<br />
alarm indicators, 316<br />
control screen, 301<br />
delay, 310<br />
diagnostics, 313<br />
display/sound screen, 301<br />
hard loop/end-end full E1, 303<br />
Isolating faults using test<br />
equipment, 319<br />
measurement results, 316<br />
monitor test mode, 306<br />
patterns, 314<br />
performing basic measurement, 298<br />
results indicators, 316<br />
setup screen, 298<br />
slip reference, 300<br />
status indicators, 318<br />
testing and fault mitigation, 319<br />
E1 facility summary, 319<br />
<strong>E7495A</strong>/B options, 28<br />
<strong>E7495A</strong>/B specifications, 625<br />
EDGE<br />
definition, 369<br />
modulation, 369<br />
pass/fail limits, 355<br />
EDGE analyzer<br />
adding or deleting list items, 340<br />
base station identity code, 371, 374<br />
basic measurement, 328<br />
BSIC, 371, 374<br />
C/I, 376<br />
carrier to interference ratio, 376<br />
Ch Obw, 372<br />
Index<br />
Index 671
Index<br />
Index<br />
channel occupied bandwidth power,<br />
372<br />
error vector magnitude, 95%tile,<br />
373<br />
error vector magnitude, peak, 373<br />
error vector magnitude, RMS, 373<br />
EVM, 375<br />
evm, 95%tile, 373<br />
evm, peak, 373<br />
evm, RMS, 373<br />
external cable and attenuator loss,<br />
365<br />
frequency, 371<br />
frequency error, 371, 374<br />
interpretation of measurement<br />
results, 374<br />
interpreting the display, 333<br />
IQ offset, 372, 375<br />
max TS power, 374<br />
maximum timeslot power, 372, 374<br />
MER, 376<br />
modulation error ratio, 376<br />
modulation type, 372<br />
OBW, 372<br />
occupied bandwidth power, 372<br />
optional measurement settings, 337<br />
phase error, 375<br />
phase error and IQ offset, 375<br />
phase error, peak, 372<br />
phase error, RMS, 372<br />
setting auto mode bar count, 352<br />
setting auto order, 348<br />
setting autoscale, 345<br />
setting bar top, 348<br />
setting channel or frequency step,<br />
342<br />
setting channel standard, 344<br />
setting display position, 347<br />
setting mid-bar, 349<br />
setting PvT mask, 352<br />
setting reference level, 346<br />
setting scale/division, 346<br />
setting scan mode, 338<br />
setting slot synchronization, 353<br />
setting start channel or start<br />
frequency, 341<br />
setting stop channel or stop<br />
frequency, 343<br />
setting TS# (w/ BCCH), 354<br />
setting units of measure, 344<br />
setting zoom, 349<br />
setting zoom interval, 351<br />
setting zoom offset, 350<br />
training sequence code, 371<br />
TSC, 371<br />
uses, 327<br />
EDGE max TS power, 372<br />
EDGE modulation type, 372<br />
EDGE standards<br />
DCS 1800, 369<br />
E-GSM, 369<br />
GSM 1900, 369<br />
GSM 450, 369<br />
GSM 480, 369<br />
GSM 850, 369<br />
GSM 900, 369<br />
PCS 1900, 369<br />
P-GSM, 369<br />
R-GSM, 369<br />
electrostatic discharge (ESD)<br />
precautions, 613<br />
EVM<br />
EDGE Analyzer, 375<br />
RMS, 375<br />
F<br />
file naming<br />
asking for, 463<br />
automatic, 462<br />
options, 462<br />
user, 462<br />
formatting a PCMCIA or<br />
CompactFlash card, 469<br />
frequency reference<br />
1xEVDO analyzer, 82<br />
1xEVDO over air, 82<br />
CDMA analyzer, 190<br />
frequency/timing reference, 458<br />
front panel layout, 34<br />
functionality in the test set, 20<br />
G<br />
German noise compliance, 621<br />
glossary, 650<br />
GPS location data, 458<br />
1xEV-DO over air, 75<br />
CDMA over air, 220<br />
distance to fault, 289<br />
two port insertion loss, 126<br />
GSM<br />
modulation, 369<br />
pass/fail limits, 355<br />
GSM analyzer<br />
adding or deleting list items, 340<br />
base station identity code, 371, 374<br />
basic measurement, 328<br />
BSIC, 371, 374<br />
Ch Obw, 372<br />
channel occupied bandwidth power,<br />
372<br />
external cable and attenuator loss,<br />
365<br />
frequency, 371<br />
frequency error, 371, 374<br />
interpretation of measurement<br />
results, 374<br />
interpreting the display, 333<br />
IQ offset, 372, 375<br />
max TS power, 374<br />
maximum timeslot power, 372, 374<br />
modulation type, 372<br />
OBW, 372<br />
occupied bandwidth power, 372<br />
optional measurement settings, 337<br />
phase error, 375<br />
phase error and IQ offset, 375<br />
phase error, peak, 372<br />
672 Index
Index<br />
phase error, RMS, 372<br />
setting auto mode bar count, 352<br />
setting auto order, 348<br />
setting autoscale, 345<br />
setting bar top, 348<br />
setting channel or frequency step,<br />
342<br />
setting channel standard, 344<br />
setting display position, 347<br />
setting mid-bar, 349<br />
setting PvT mask, 352<br />
setting reference level, 346<br />
setting scale/division, 346<br />
setting scan mode, 338<br />
setting slot synchronization, 353<br />
setting start channel or start<br />
frequency, 341<br />
setting stop channel or stop<br />
frequency, 343<br />
setting TS# (w/ BCCH), 354<br />
setting units of measure, 344<br />
setting zoom, 349<br />
setting zoom interval, 351<br />
setting zoom offset, 350<br />
training sequence code, 371<br />
TSC, 371<br />
uses, 327<br />
GSM max TS power, 372<br />
GSM modulation type, 372<br />
GSM standards<br />
DCS 1800, 369<br />
E-GSM, 369<br />
GSM 1900, 369<br />
GSM 450, 369<br />
GSM 480, 369<br />
GSM 850, 369<br />
GSM 900, 369<br />
PCS 1900, 369<br />
P-GSM, 369<br />
R-GSM, 369<br />
H<br />
Hard Loop/End-End Full E1, 303<br />
highest (best) insertion loss, 136<br />
HSDPA analyzer, 532, 570<br />
active code channels, 549, 587<br />
basic transmitter measurement, 535<br />
carrier feedthrough, 564<br />
chan pwr, 564, 567<br />
channel or frequency step, 552<br />
channel power, 564, 567<br />
control channel delta power, 564,<br />
568<br />
CPICH, 564, 567, 603<br />
display options, 544<br />
EVM, 563, 567<br />
external amplifier gain, 554<br />
external cable and attenuator loss,<br />
554<br />
freq error, 563, 566<br />
frequency, 563, 566<br />
frequency error, 563, 566<br />
markers, 561<br />
metrics, 561<br />
noise floor, 563, 566<br />
PCDE, 564, 567<br />
S-CCPCH, 560<br />
scramble code, 552, 563, 566, 601<br />
scrambling code, 563, 566, 601<br />
scrambling codes, 552<br />
setting active channel threshold and<br />
auto threshold levels, 558, 594<br />
setting HSDPA transmitter<br />
reference level, 553<br />
setting PN increment, 552<br />
sweep (continuous or single), 561<br />
threshold, 563, 566<br />
threshold level, 558, 594<br />
transmitter reference level, 553<br />
uses, 532<br />
HSDPA over air, 570<br />
amplifier capacity, 603, 607<br />
average amplifier capacity, 603,<br />
607<br />
average utilization, 602, 607<br />
basic measurement, 573<br />
carr ft, 567, 601, 606<br />
carrier feedthrough, 567, 601, 606<br />
chan pwr, 603, 607<br />
channel power, 603, 607<br />
common pilot channel, 607<br />
CPICH, 607<br />
criteria for making valid<br />
measurements, 571<br />
display options, 581<br />
displaying location information<br />
using GPS, 575<br />
error vector magnitude, 601, 602,<br />
606<br />
EVM, 601, 602<br />
freq, 605<br />
freq error, 605<br />
frequency, 601, 605<br />
frequency error, 601, 605<br />
interpretation of measurement<br />
results, 566, 605<br />
noise floor, 601, 606<br />
optional measurement settings, 587<br />
pcde, 606<br />
peak amplifier capacity, 603, 607<br />
peak code domain error, 606<br />
peak utilization, 606<br />
pk amp cap, 607<br />
pk util, 606<br />
resetting amplifier capacity and<br />
traffic metrics, 596<br />
scramble code, 590, 605<br />
scrambling code, 590, 605<br />
setting amplifier capacity metrics,<br />
576<br />
setting channel or frequency step,<br />
589<br />
setting measurement limits, 597<br />
setting measurement time, 559, 595<br />
setting PICH parameters, 598<br />
setting PN increment, 590<br />
setting S-CCPCH parameters, 597<br />
Index<br />
Index 673
Index<br />
Index<br />
setting transmitter reference level,<br />
590<br />
utilization, 602, 606<br />
I<br />
installation information, 480<br />
installing a battery, 37, 164<br />
interference ID measurement, 437,<br />
451<br />
interference rejection<br />
one port insertion loss, 56<br />
interpretation of measurement results<br />
EDGE, 374<br />
GSM, 374<br />
introduction to the test set, 20<br />
IP administration<br />
using DHCP, 471<br />
without DHCP, 471<br />
K<br />
keyboard<br />
testing, 481<br />
L<br />
layout of front panel, 34<br />
leveling source<br />
two port insertion loss, 137<br />
lifting and handling the test set, 612<br />
lowest (worst) insertion loss, 135<br />
M<br />
managing media types, 469<br />
manufacturer’s declaration, 622<br />
marker, adding, 55, 363<br />
measurements, optional, 20<br />
MER, 376<br />
modulation<br />
8PSK, 369<br />
EDGE, 369<br />
GMSK, 369<br />
GSM, 369<br />
modulation error ratio, 376<br />
N<br />
network connectivity, 471<br />
noise compliance, German, 621<br />
normalization<br />
one port insertion loss, 137<br />
O<br />
occupied BW measurement, 443<br />
one port insertion loss<br />
basic measurement, 47<br />
calibration, 46, 47<br />
clear calibration, 50<br />
interference rejection, 56<br />
measuring, 46<br />
pass/fail limits, 57<br />
option manager, 479<br />
optional measurements, 20<br />
options<br />
installing, 480<br />
viewing installable, 479<br />
viewing installed, 479<br />
options for test set, 28<br />
over air<br />
HSDPA, 570<br />
W-CDMA, 570<br />
P<br />
pass/fail limits<br />
1xEV-DO analyzer, 93<br />
1xEV-DO over air, 93<br />
CDMA over air analyzer, 237<br />
CDMA Tx Analyzer, 198<br />
channel scanner, 272<br />
distance to fault, 295<br />
one port insertion loss, 57<br />
return loss, 398<br />
spectrum analyzer, 426<br />
two port insertion loss, 139<br />
PC software, 21<br />
PCMCIA cards, 469<br />
persistent signal generator, 409<br />
post processor software, 21<br />
power button, 35, 37<br />
power meter<br />
basic average power measurement,<br />
379<br />
making an average power<br />
measurement, 378<br />
setting high and low end-points,<br />
383<br />
setting resolution, 382<br />
setting upper and lower limits, 384<br />
printing screens, 461<br />
product markings, 614<br />
R<br />
reconditioning/recalibrating batteries,<br />
170<br />
release versions, 477<br />
restart, 52, 89, 127, 149, 195, 234,<br />
270, 292, 366, 394, 421, 556,<br />
592<br />
restart averaging, 53, 90, 129, 150,<br />
196, 235, 271, 293, 368, 395,<br />
422, 557, 594<br />
return loss, 387<br />
basic measurement, 389<br />
clear calibration, 392<br />
interference rejection, 393<br />
isolating a return loss signal using a<br />
single sweep, 393<br />
isolating using a single sweep, 393<br />
pass/fail limits, 398<br />
viewing trace data on a PC, 21<br />
returning the test set for service, 645<br />
RF cable and connector care, 640<br />
RF connectors, 640<br />
S<br />
safety considerations, 610<br />
safety symbols, 610<br />
sales and service offices, 43<br />
674 Index
Index<br />
saving data, 465<br />
scan mode, auto bar count, 352<br />
scramble code<br />
HSDPA, 563, 605<br />
HSDPA over air, 590<br />
W-CDMA, 563, 605<br />
W-CDMA over air, 590<br />
scramble codes<br />
HSDPA, 552<br />
W-CDMA, 552<br />
sensitivity<br />
acp, 152, 417<br />
channel scanner, 153, 265<br />
service<br />
returning the test set, 645<br />
shipping the test set, 645<br />
service offices, 43<br />
shipping the test set, 645<br />
signal generator<br />
1xEV-DO analyzer, 101<br />
basic measurement, 402<br />
CDMA over air, 246<br />
persistent signal generator, 409<br />
selecting a channel, time and<br />
frequency reference, 402<br />
spectrum analyzer, 156, 206, 419<br />
uses, 400<br />
software for PCs, 21<br />
specifications for test set, 625<br />
spectrogram measurement, 434<br />
spectrogram view<br />
spectrum analyzer, 433<br />
spectrum analyzer<br />
basic measurement, 413<br />
detector mode, 418<br />
interference ID measurement, 437,<br />
451<br />
occupied BW measurement, 443<br />
pass/fail limits, 426<br />
signal generator, 156, 206, 419<br />
spectrogram measurement, 434<br />
spectrogram view, 433<br />
uses, 412, 437, 442, 448<br />
state<br />
deleting, 476<br />
power-up, 474<br />
recalling, 475<br />
returning power-up to factory<br />
defaults, 475<br />
saving, 474<br />
statistics<br />
system, 477<br />
viewing, 477<br />
sweep, 52, 89, 127, 149, 195, 234,<br />
270, 292, 366, 394, 421, 556,<br />
592<br />
sweep (continuous or single), 52, 89,<br />
127, 149, 195, 234, 270, 292,<br />
366, 394, 421, 556, 592<br />
system<br />
memory, 477<br />
release versions, 477<br />
statistics, 477<br />
system operations<br />
configuring for network<br />
connectivity, 471<br />
displaying GPS location data, 458<br />
formatting a PCMCIA or<br />
CompactFlash card, 469<br />
IP administration using DHCP, 471<br />
IP administration without DHCP,<br />
471<br />
managing media types, 469<br />
printing screens, 461<br />
saving data, 465<br />
selecting a timing reference, 458<br />
setting system references, 458<br />
using the option manager, 479<br />
viewing battery statistics, 478<br />
viewing system memory, 477<br />
viewing system release versions,<br />
477<br />
viewing system statistics, 477<br />
T<br />
T1<br />
alarm indicators, 514<br />
all 1’s, 516<br />
available seconds, 517<br />
bit error rate, 518<br />
bit errors, 518<br />
BPV, 529<br />
BPV errd secs, 516<br />
BPV error rate, 515<br />
BPV errors, 515<br />
control screen, 487<br />
CRC, 529<br />
degraded minutes, 517<br />
detailed loop mode and auto<br />
configuration descriptions,<br />
523<br />
display/sound screen, 487<br />
error free seconds, 517<br />
errored seconds, 517<br />
excess zeros, 516<br />
facility summary, 519<br />
frame errd secs, 516<br />
frame error rate, 516<br />
frame errors, 516<br />
frame slips, 518<br />
frame sync loss, 516<br />
isolating faults using test<br />
equipment, 521<br />
isolating faults with alarm and<br />
errors, 520<br />
making T1 measurements, 484<br />
measurement results, 514<br />
measurement results fields, 515<br />
monitor test mode, 499<br />
pattern sync loss, 518<br />
patterns, 510<br />
peak - wander, 517<br />
peak +wander, 517<br />
performing basic measurement, 484<br />
remote CSU/NIU loop mode, 523<br />
results indicators, 514<br />
selecting delay, 508<br />
Index<br />
Index 675
Index<br />
Index<br />
selecting emulate CSU/NIU, 503<br />
selecting hard loop/end-end full T1,<br />
489<br />
selecting loopback CSU full T1<br />
BERT, 494<br />
setup button, 484<br />
severe errored seconds, 517<br />
signal loss, 516<br />
slip rate, 517<br />
slip reference, 486<br />
status indicators, 515<br />
terminology, 529<br />
test data rate, 518<br />
testing and fault mitigation, 518<br />
unavailable seconds, 517<br />
test patterns<br />
E1, 314<br />
test set functionality, 20<br />
test set options, 28<br />
test set specifications, 625<br />
time reference<br />
1xEVDO analyzer, 82<br />
1xEVDO over air, 82<br />
CDMA analyzer, 190<br />
torque, 641<br />
two port insertion loss<br />
as your first measurement, 38<br />
basic measurement, 125<br />
clear normalization, 137<br />
determining the highest insertion<br />
loss and its frequency, 136<br />
determining the lowest insertion<br />
loss and its frequency, 135<br />
displaying location information<br />
using GPS, 126<br />
dynamic range optimization, 138<br />
for power meter, 134<br />
for spectrum analyzer, channel<br />
scanner, 1xEVDO, CDMA<br />
analyzer, and signal generator,<br />
131<br />
interference rejection, 136<br />
measuring, 124<br />
pass/fail limits, 139<br />
performing a basic measurement,<br />
125<br />
source leveling, 137<br />
uses, 124<br />
U<br />
unpacking the test set, 22<br />
update interval, 121, 122, 187, 223,<br />
435, 548, 549, 586<br />
uses of<br />
EDGE analyzer, 327<br />
GSM analyzer, 327<br />
signal generator, 400<br />
spectrum analyzer, 412, 437, 442,<br />
448<br />
two port insertion loss, 124<br />
using connectors, 640<br />
using the occupied BW measurement,<br />
442<br />
using the spectrum analyzer, 412,<br />
437, 448<br />
V<br />
viewing battery statistics, 478<br />
viewing trace data on a PC<br />
distance to fault, 21<br />
return loss, 21<br />
W<br />
warranty, 645<br />
W-CDMA analyzer, 532, 570<br />
active code channels, 549, 587<br />
basic transmitter measurement, 535<br />
carrier feedthrough, 564<br />
chan pwr, 564, 567<br />
channel or frequency step, 552<br />
channel power, 564, 567<br />
control channel delta power, 564,<br />
568<br />
CPICH, 564, 567, 603<br />
display option, 544<br />
EVM, 563, 567<br />
external amplifier gain, 554<br />
external cable and attenuator loss,<br />
554<br />
freq error, 563, 566<br />
frequency, 563, 566<br />
frequency error, 563, 566<br />
markers, 561<br />
metrics, 561<br />
noise floor, 563, 566<br />
PCDE, 564, 567<br />
S-CCPCH, 560<br />
scramble code, 552, 563, 566, 601<br />
scrambling code, 563, 566, 601<br />
scrambling codes, 552<br />
setting active channel threshold and<br />
auto threshold levels, 558, 594<br />
setting PN increment, 552<br />
setting W-CDMA transmitter<br />
reference level, 553<br />
sweep (continuous or single), 561<br />
threshold, 563, 566<br />
threshold level, 558, 594<br />
transmitter reference level, 553<br />
uses, 532<br />
W-CDMA over air, 570<br />
amplifier capacity, 603, 607<br />
average amplifier capacity, 603,<br />
607<br />
average utilization, 602, 607<br />
basic measurement, 573<br />
carr ft, 567, 601, 606<br />
carrier feedthrough, 567, 601, 606<br />
chan pwr, 603, 607<br />
channel power, 603, 607<br />
common pilot channel, 607<br />
CPICH, 607<br />
criteria for making valid<br />
measurements, 571<br />
display options, 581<br />
displaying location information<br />
using GPS, 575<br />
error vector magnitude, 601<br />
676 Index
Index<br />
EVM, 601<br />
evm, 606<br />
freq, 605<br />
freq error, 605<br />
frequency, 601, 605<br />
frequency error, 601, 605<br />
interpretation of measurement<br />
results, 566, 605<br />
noise floor, 601, 606<br />
optional measurement settings, 587<br />
PCDE, 602<br />
pcde, 606<br />
peak amplifier capacity, 603, 607<br />
peak code domain error, 602, 606<br />
peak utilization, 606<br />
pk amp cap, 607<br />
pk util, 606<br />
resetting amplifier capacity and<br />
traffic metrics, 596<br />
scramble code, 590, 605<br />
scrambling code, 590, 605<br />
setting amplifier capacity metrics,<br />
576<br />
setting channel or frequency step,<br />
589<br />
setting measurement limits, 597<br />
setting measurement time, 559, 595<br />
setting PICH parameters, 598<br />
setting PN increment, 590<br />
setting S-CCPCH parameters, 597<br />
setting transmitter reference level,<br />
590<br />
utilization, 602, 606<br />
Working with Batteries, 163, 649<br />
Index<br />
Index 677
Index<br />
Index<br />
678 Index