DUO BTC BEVERAGE MACHINE - Vending Machines
DUO BTC BEVERAGE MACHINE - Vending Machines
DUO BTC BEVERAGE MACHINE - Vending Machines

Create successful ePaper yourself
Turn your PDF publications into a flip-book with our unique Google optimized e-Paper software.
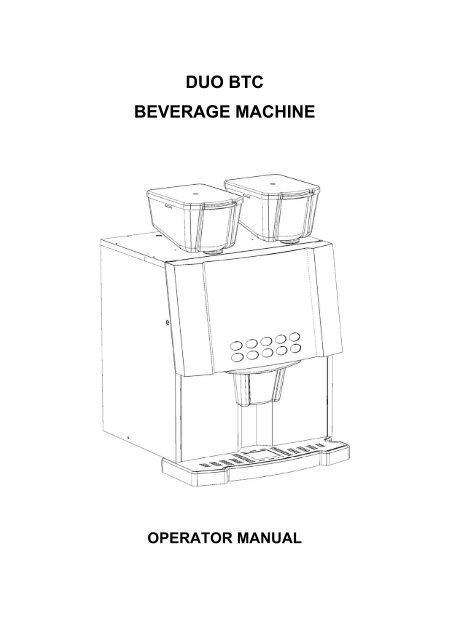
<strong>DUO</strong> <strong>BTC</strong><br />
<strong>BEVERAGE</strong> <strong>MACHINE</strong><br />
OPERATOR MANUAL
COFFEtek LTD<br />
<strong>DUO</strong> <strong>BTC</strong> <strong>BEVERAGE</strong> <strong>MACHINE</strong><br />
CONTENTS<br />
PAGE<br />
FOREWORD........................................................................................................... 5<br />
SPECIFICATIONS .................................................................................................. 6<br />
SERVICES REQUIRED .......................................................................................... 6<br />
Electrical Supply.................................................................................................. 6<br />
Water Supply....................................................................................................... 6<br />
PROGRAMMING .................................................................................................... 7<br />
Internal Keypad ................................................................................................... 7<br />
Keypad Functions ............................................................................................... 7<br />
OPERATOR PROGRAM......................................................................................... 9<br />
Accessing the Operators Mode ........................................................................... 9<br />
Display Counter................................................................................................. 10<br />
Total Vends ....................................................................................................................10<br />
View Ingredient Counters...............................................................................................10<br />
Reset Counters ..............................................................................................................10<br />
Reset Grout Counter (Clear Grout Bucket Full Condition)............................................10<br />
SAFETY WARNINGS ........................................................................................... 11<br />
FROST WARNING................................................................................................ 12<br />
INSTALLATION..................................................................................................... 13<br />
Location............................................................................................................. 13<br />
Levelling ............................................................................................................ 13<br />
Connecting the Water Services......................................................................... 13<br />
Connecting the Electrical Services.................................................................... 14<br />
HYGIENE.............................................................................................................. 15<br />
DAILY HYGIENE............................................................................................... 17<br />
Cleaning ............................................................................................................ 17<br />
Coffee Brewer ................................................................................................................17<br />
Tea Brewer.....................................................................................................................20<br />
Filling................................................................................................................. 23<br />
Instant Products & Leaf Tea...........................................................................................23<br />
Bean Hopper ..................................................................................................................23<br />
Flushing............................................................................................................. 23<br />
WEEKLY HYGIENE .......................................................................................... 24<br />
Cleaning ............................................................................................................ 24<br />
Milk / Chocolate mixing system removal........................................................................25<br />
Coffee mixing system removal.......................................................................................25<br />
FAULT FINDING GUIDE....................................................................................... 27<br />
<strong>DUO</strong> <strong>BTC</strong> OPERATOR MANUAL 3
COFFEtek LTD<br />
4 OPERATOR MANUAL <strong>DUO</strong> <strong>BTC</strong>
COFFEtek LTD<br />
FOREWORD<br />
The information contained in this technical manual is applicable to the Duo<br />
<strong>BTC</strong> Beverage Machine. Due to customer requirements some units may vary<br />
from the one described in the manual.<br />
Only personnel who have undergone relevant equipment training must<br />
undertake maintenance of the dispensing machine.<br />
The Manufacturer reserves the right to make changes, without notice, to the<br />
design of the dispensing machine, which may affect the information, contained<br />
in this manual.<br />
The Duo <strong>BTC</strong> Beverage Machine is designed for indoor use, in an<br />
environment with an ambient temperature range of between 0°C and 40°C.<br />
<strong>DUO</strong> <strong>BTC</strong> <strong>BEVERAGE</strong> <strong>MACHINE</strong><br />
<strong>DUO</strong> <strong>BTC</strong> OPERATOR MANUAL 5
COFFEtek LTD<br />
SPECIFICATIONS<br />
Weight:<br />
Height:<br />
Width:<br />
Depth:<br />
45kg TBC<br />
62.5cm<br />
57.5cm<br />
53cm<br />
Temp. Range: 0ºC to 55ºC (ambient)<br />
SERVICES REQUIRED<br />
Electrical Supply<br />
Supply voltage:<br />
Current rating:<br />
230V, 50Hz, single phase fused supply<br />
13A<br />
The fused electrical supply must be terminated at a safety isolator switch,<br />
which provides a contact separation of at least 3mm. The isolator should be<br />
located within 1m of the beverage machine.<br />
Water Supply<br />
15mm dia. water mains supply, terminating at a convenient stop tap located<br />
within 1m of the beverage machine.<br />
Water Pressure<br />
Minimum:<br />
Maximum:<br />
1 bar<br />
8 bar<br />
A 15mm double back check valve, with inspection port, should be fitted prior to<br />
the flexible hose.<br />
6 OPERATOR MANUAL <strong>DUO</strong> <strong>BTC</strong>
COFFEtek LTD<br />
PROGRAMMING<br />
Internal Keypad<br />
FLUSH<br />
PROG<br />
ESC<br />
ENTER<br />
Keypad Functions<br />
The internal keypad provides the means to initiate self clean cycles, clear the<br />
grout bucket full condition and access the operator menu.<br />
Initiating a FLUSH cycle<br />
A self clean cycle is initiated by pressing the FLUSH key. Note: A suitable<br />
receptacle should be placed under the dispense nozzles to avoid filling the drip<br />
tray, before initiating the flush cycle. The precise amount of liquid will vary<br />
according to machine configuration however a 1 liter container is usually<br />
sufficient. A flush cycle will only start if the tank is correctly up to temperature.<br />
Clearing the Grout Bucket Full Counter<br />
The grout bucket full condition can be cleared by pressing and holding the<br />
ENTER key pressed for 3 seconds. To use this method the machine must be<br />
in its normal operating mode, i.e. not in the operator program, see below.<br />
Alternatively the grout bucket full condition may be cleared via a menu within<br />
the operators program. The machine will beep twice and briefly display the<br />
message COUNTER RESET to confirm the action has occurred.<br />
<strong>DUO</strong> <strong>BTC</strong> OPERATOR MANUAL 7
COFFEtek LTD<br />
Note: The grout bucket full condition occurs when a predefined number<br />
of brewer dispense cycles have taken place since the condition was last<br />
cleared. The state of the bucket is not sensed directly. If the bucket full<br />
condition is cleared without emptying the bucket it may subsequently<br />
overflow necessitating a complete strip and clean of the carriage<br />
assemblies. It is strongly recommended that the practice of emptying<br />
the bucket before clearing the condition be adopted as standard<br />
operating procedure.<br />
8 OPERATOR MANUAL <strong>DUO</strong> <strong>BTC</strong>
COFFEtek LTD<br />
OPERATOR PROGRAM<br />
The Operator’s Program provides access to the machines audit facilities,<br />
allows the operator to set the machine in or out of service and access an<br />
alternative method of clearing the grout bucket full condition.<br />
Keypad functions when used in the operator’s programming mode, are as<br />
follows:-<br />
• Key (ENTER) used to access a function.<br />
• Key (ESC) used to escape from the operator’s mode.<br />
• Key (PROG) used to access the operator’s program, then used to<br />
change menu functions.<br />
• ARROWS UP (), DOWN (), LEFT (), RIGHT (‣) are used for<br />
adjustments when in program mode.<br />
WARNING: Some keys on the internal keypad share functions with the<br />
external keys. Pressing the STAR key when the machine is in standby<br />
mode will lead to a selection being dispensed.<br />
Accessing the Operators Mode<br />
Access to the operator program is achieved by pressing the PROG key on the<br />
internal keyboard. The display will show:<br />
PRESS DRINK TO DISPLAY COUNTER<br />
Repeatedly pressing the ENTER button will cause each of the operators<br />
program functions to be displayed in turn. To exit from the operators program<br />
press the ESC button.<br />
The functions available in the Operators program are as follows:<br />
Display Counters<br />
Total Vend<br />
View Ingredient Counters<br />
Reset Counters<br />
Reset Grout Counter<br />
(Clear Grout Bin Full condition)<br />
<strong>DUO</strong> <strong>BTC</strong> OPERATOR MANUAL 9
COFFEtek LTD<br />
Display Counter<br />
The DISPLAY COUNTER option is accessed on entering the Operator’s<br />
Program. The resettable vend counts may be viewed by pressing each of the<br />
external selection buttons in turn. To access other options, press PROG on<br />
the internal keypad. The other options are as follows:<br />
TOTAL VENDS<br />
Total Vend<br />
View Ingredient Counters<br />
Reset Counters<br />
Reset Grout Counter<br />
(Clear Grout Bin Full condition)<br />
Access the Total Vends Count option using PROG key, the display will show<br />
total vend count.<br />
VIEW INGREDIENT COUNTERS<br />
Access the View Ingredient Counters option by using PROG key. Press<br />
ENTER to display the first counter, then press the UP arrow to scroll<br />
through the others.<br />
RESET COUNTERS<br />
Access Reset Counters by using PROG key, to clear drink counters press<br />
ENTER. The display will show:<br />
ARE YOU SURE<br />
ENTER (Y) ESC (N)<br />
Press ENTER to confirm that you wish to clear the counter or ESC to abort the<br />
operation.<br />
RESET GROUT COUNTER<br />
(CLEAR GROUT BUCKET FULL CONDITION)<br />
Pressing ENTER when the Reset Grout Counter is displayed will clear the<br />
grout bin full condition and allow dispensing to recommence. The message<br />
COUNTER RESET is displayed briefly to confirm the operation has occurred.<br />
10 OPERATOR MANUAL <strong>DUO</strong> <strong>BTC</strong>
COFFEtek LTD<br />
SAFETY WARNINGS<br />
1. Maintenance of the Duo <strong>BTC</strong> Beverage Machine is only to be<br />
undertaken by trained personnel who are fully aware of the dangers<br />
involved and who have taken adequate precautions.<br />
2. Lethal voltages are exposed when the mains electrical supply to the<br />
dispensing machine is available and any of the following items are<br />
removed:<br />
• Lid and cover assembly<br />
• Motor shelf<br />
• Side panels<br />
Maintenance personnel must ensure that the machine is isolated from<br />
the mains electrical supply before removing any of these items.<br />
3. Replacement of the Type Y mains cable requires special tools. Should<br />
the cable become damaged, a trained person from an approved service<br />
agent must only carry out replacement.<br />
4. THIS APPLIANCE MUST BE EARTHED.<br />
5. Ensure that the connection to the water system is compliant with the<br />
pertinent national and local legislation. In the UK the Model Water<br />
Bylaws 1986 Statutory Instrument (SI) No.1147 are applicable.<br />
6. Ensure that the unit is positioned such that the plug connecting the unit<br />
to the mains supply is accessible.<br />
7. The Duo <strong>BTC</strong> Beverage Machine is designed for indoor use, in an<br />
environment with an ambient temperature range of between 0°C and<br />
40°C. The machine should be located close to the appropriate electrical<br />
and water services with a minimum of 100mm (4in) clearance between<br />
the rear of the cabinet and the wall to allow adequate ventilation, and, if<br />
in a corner location, not closer to the right hand wall than 400mm (16in)<br />
to accommodate opening of the door.<br />
The unit should not be situated in an area where a water jet could be<br />
used.<br />
8. The Duo <strong>BTC</strong> Beverage Machine is a heavy item. A minimum of two<br />
people are required to lift it.<br />
9. The water in the boiler, and the boiler itself, are hot enough to scald or<br />
burn, even some time after the machine has been switched off. The<br />
boiler must be drained, filled with cold water and drained again before<br />
any attempt is made to handle it or any of its associated parts.<br />
<strong>DUO</strong> <strong>BTC</strong> OPERATOR MANUAL 11
COFFEtek LTD<br />
10. Young children, the aged and the infirm should not be allowed to operate<br />
the dispensing machine unsupervised, in order to protect them from the<br />
risk of being scalded by hot beverages.<br />
FROST WARNING<br />
Care must be taken to protect the dispensing machine from frost. Do not attempt<br />
to operate the machine if it becomes frozen. Contact the nearest service agent<br />
immediately. Do not restore the machine to operational use until it has been<br />
checked and approved for use by the service agent.<br />
12 OPERATOR MANUAL <strong>DUO</strong> <strong>BTC</strong>
COFFEtek LTD<br />
INSTALLATION<br />
WARNINGS<br />
(1) THE <strong>BEVERAGE</strong> <strong>MACHINE</strong> IS A HEAVY ITEM. CARE MUST BE<br />
TAKEN WHEN LIFTING IT. A MINIMUM OF TWO PEOPLE ARE<br />
REQUIRED TO LIFT IT.<br />
(2) THE <strong>BEVERAGE</strong> <strong>MACHINE</strong> MAY TOPPLE IF THE MOUNT IS<br />
WEAK OR INSECURE. ENSURE THAT THE MOUNT IS SECURE<br />
AND THAT IT CAN SUPPORT THE WEIGHT OF THE <strong>MACHINE</strong>.<br />
(3) ENSURE THAT THE MAINS ELECTRICAL SUPPLY IS ISOLATED<br />
BEFORE CONNECTING THE SUPPLY CABLE TO THE <strong>MACHINE</strong>.<br />
Location<br />
The beverage machine is designed for indoor use, in an environment with an<br />
ambient temperature range of between 0°C and 40°C. The machine should<br />
be located close to the appropriate electrical and water services with a<br />
minimum of 100mm (4in) clearance between the rear of the cabinet and the<br />
wall to allow adequate ventilation, and, if in a corner location, not closer to the<br />
right hand wall than 400mm (16in) to accommodate opening of the door.<br />
The unit should not be situated in an area where a water jet could be<br />
used.<br />
Levelling<br />
The machine should be levelled both fore and aft and side-to-side by<br />
adjustment of the four leveling feet, using a spirit level on the cabinet floor to<br />
check for level.<br />
The unit must be mounted within 10º of the vertical for safe operation.<br />
Connecting the Water Services<br />
Refer to the current requirements of The Model Water<br />
Bylaws 1986 Statutory Instrument (SI) No.1147.<br />
The water supply should be taken from a 15mm rising main at a pressure of<br />
between 1 to 8 bar and should be fitted with a stopcock to isolate the supply<br />
<strong>DUO</strong> <strong>BTC</strong> OPERATOR MANUAL 13
COFFEtek LTD<br />
during servicing. A 15mm double backcheck valve, with inspection port, should<br />
be fitted to the flexible hose.<br />
The outlet should be fitted with BSP connections and must be positioned<br />
within 1.5m of the machine to ensure correct fitting of the hose. If possible, the<br />
outlet should be located behind the machine to prevent misuse.<br />
Before connecting the machine hose to the mains outlet, flush the system, via<br />
the stopcock, to remove any impurities that may have accumulated in the<br />
mains supply pipe.<br />
Connect the machine hose to the mains outlet using the seals supplied and<br />
ensure that all fittings are tight. Turn on the water supply at the stopcock and<br />
check for leaks, both behind and inside the machine.<br />
Connecting the Electrical Services<br />
WARNINGS<br />
(1) THE <strong>MACHINE</strong> MAINS CABLE MUST BE CONNECTED TO THE<br />
SUPPLY VIA A SAFETY ISOLATOR SWITCH WHICH PROVIDES<br />
A CONTACT SEPARATION OF AT LEAST 3mm.<br />
(2) REPLACEMENT OF THE Y TYPE MAINS CABLE REQUIRES<br />
SPECIAL TOOLS. SHOULD THE CABLE BECOME DAMAGED,<br />
REPLACEMENT MUST ONLY BE CARRIED OUT BY A TRAINED<br />
PERSON FROM AN APPROVED SERVICE AGENT.<br />
(3) ENSURE THAT THE SUPPLY TO THE ISOLATOR SWITCH IS<br />
ISOLATED BEFORE MAKING ANY CONNECTIONS TO IT.<br />
(4) ENSURE THAT THE SUPPLY TO THE <strong>MACHINE</strong> IS ISOLATED<br />
BEFORE MAKING ANY CONNECTIONS TO THE TERMINAL<br />
BLOCK AT THE REAR OF THE <strong>MACHINE</strong>.<br />
(5) THE DISPENSING <strong>MACHINE</strong> MUST BE EARTHED.<br />
Connect the beverage machine, via a safety isolator switch with a contact<br />
separation of at least 3mm, to a 230V, 50Hz, 13A supply. Note that<br />
replacement of the Y Type mains cable requires special tools. Should the<br />
cable become damaged, replacement must only be carried out by a trained<br />
person from an approved service agent.<br />
Preferably, the isolator switch should be located behind the machine to<br />
prevent accidental damage or misuse.<br />
14 OPERATOR MANUAL <strong>DUO</strong> <strong>BTC</strong>
COFFEtek LTD<br />
HYGIENE<br />
WARNINGS<br />
(1) THE COFFEE GRINDER HAS SHARP BLADES THAT MAY CAUSE<br />
SEVERE INJURY TO ANY BODY PARTS THAT COME INTO<br />
CONTACT WITH THEM WHILST THEY ARE ROTATING. A STEEL<br />
ISOLATOR TUBE MAKES THE BLADES IN ACCESSIBLE IN NORMAL<br />
OPERATION. THEY ARE PREVENTED FROM OPERATING WHEN<br />
THE ISOLATOR TUBE IS REMOVED BY AN ELECTRICAL<br />
INTERLOCK. ONLY SUITABLY TRAINED ENGINEERS SHOULD<br />
REMOVE THE ISOLATOR TUBE.<br />
(2) NO ATTEMPT SHOULD BE MADE TO DEFEAT THE INTERLOCK<br />
SWITCH.<br />
(3) IN THE EVENT THAT THE GRINDER BECOMES JAMMED IT MAY BE<br />
TEMPTING TO TRY TO REMOVE THE ITEM CAUSING THE JAM<br />
USING A LONG IMPLEMENT. IF SUCCESSFUL THIS MAY LEAD TO<br />
THE FREED BLADES STARTING TO ROTATE UNEXPECTEDLY.<br />
DAMAGE TO THE IMPLEMENT AND BLADES MAY RESULT. IN THE<br />
EVENT THAT THE GRINDER BECOMES JAMMED CONTACT AN<br />
APPROVED SERVICE AGENT.<br />
(4) THE COFFEE BREWER HAS MOVING PARTS THAT MAY TRAP OR<br />
PINCH. ENSURE THAT THE INTERNAL SWITCH IS IN THE<br />
DISABLED POSITION BEFORE ATTEMPTING ANY ACTIVITY<br />
ASSOCIATED WITH THE BREWER UNIT. TO AVOID INJURY DO<br />
NOT PLACE FINGERS BETWEEN THE BREWER CHAMBER AND<br />
CARRIAGE AT ANY TIME.<br />
(5) AFTER ENABLING THE <strong>MACHINE</strong> USING THE INTERNAL SWITCH<br />
THE BREWER UNIT WILL START WITHOUT WARNING AND WILL<br />
ROTATE TO LOCATE ITS HOME POSITION. KEEP HANDS CLEAR<br />
OF THE BREWER UNIT UNLESS THE <strong>MACHINE</strong> IS SWITCHED OFF<br />
(6) THE UNIT MUST NOT BE CLEANED USING A WATER JET OR<br />
SPRAY. THE ENCLOSURE IS NOT WATERPROOF AND DAMAGE<br />
MAY OCCUR IF EXCESSIVE VOLUMES OF WATER ARE USED IN<br />
THE CLEANING PROCESS.<br />
(7) THE TEA BREWER HAS MOVING PARTS THAT MAY TRAP OR<br />
PINCH. ENSURE THAT THE INTERNAL SWITCH IS IN THE<br />
DISABLED POSITION BEFORE ATTEMPTING ANY ACTIVITY<br />
ASSOCIATED WITH THE BREWER UNIT. TO AVOID INJURY DO<br />
NOT PLACE FINGERS BETWEEN THE BREWER CHAMBER AND<br />
<strong>DUO</strong> <strong>BTC</strong> OPERATOR MANUAL 15
COFFEtek LTD<br />
CARRIAGE AT ANY TIME.<br />
16 OPERATOR MANUAL <strong>DUO</strong> <strong>BTC</strong>
COFFEtek LTD<br />
DAILY HYGIENE<br />
Cleaning<br />
(1) Set the On/Off switch on the machine to OFF and isolate the mains<br />
electrical supply from the machine. Unlock and open the cabinet<br />
door.<br />
(2) Remove the ingredient canisters. Wipe clean the exterior surfaces of<br />
the canister assembly. Wipe dry.<br />
(3) Remove the waste tray and grille. Empty the contents of the tray<br />
and wash and dry the tray and grille.<br />
(4) Remove the coffee grouts bucket. Empty the contents of the bucket<br />
and wash and dry it.<br />
(5) Disconnect the pipes from the mixing bowls and dispense head.<br />
Remove the mixing bowls, tubes and dispense nozzles, and also the<br />
whipper paddle and whipper base. Wash and dry these items<br />
COFFEE BREWER<br />
(6) Disconnect the tube connecting the coffee brewer to the mixing bowl<br />
by pulling the black right-angled fitting (A) away from the brewer<br />
itself. Remove the coffee brewer safety cover and lift the lower<br />
carriage locking lever (B) to the vertical, (unlocked position).<br />
Remove the carriage assembly by pulling it gently towards the front<br />
of the machine.<br />
<strong>DUO</strong> <strong>BTC</strong> OPERATOR MANUAL 17
COFFEtek LTD<br />
(7) Disconnect the ball and socket coupling visible inside the coffee<br />
brewer extract chamber. This is accomplished by pulling the lower<br />
vertical rod towards the front of the machine.<br />
(8) Move the upper locking lever (C) to the vertical, (unlocked position)<br />
and remove the brew chamber assembly (D) by pulling it gently<br />
towards the front of the machine.<br />
(9) Wash and dry the carriage and brew chamber assembly.<br />
18 OPERATOR MANUAL <strong>DUO</strong> <strong>BTC</strong>
COFFEtek LTD<br />
(10) Inspect the filter belt and if necessary remove and clean or replace<br />
it. Anticipated belt life is between 1000 and 3000 operations<br />
depending on the coffee grind, water hardness and frequency of<br />
washing. Belts may be washed in clean warm water or a de-tanning<br />
agent to prolong their life. However replacement will become<br />
necessary to avoid the brewer becoming blocked. Belt removal can<br />
only be done with the carriage removed. The procedure is to<br />
compress the tension roller between left hand forefingers and thumb<br />
(A). Then push in and rotate the red lever approximately an 1/8 th<br />
turn clockwise (B). Having rotated the lever allow it to return in<br />
direction (C) to lock the tension rollers in the compressed position.<br />
The belt should be free to rotate and can be removed by sliding it<br />
back and forth whilst pulling it in direction (D). Periodically the<br />
brewer drain channel should be cleaned to prevent blocking. The<br />
method is similar to that for the tea brewer. See section 15.<br />
(11) To replace the belt follow the first part of the above procedure to<br />
compress the tension roller. Then refit the new / cleaned belt.<br />
Release the tension roller by pressing the red lever in. (B). It is not<br />
necessary to rotate the lever. It is spring tensioned.<br />
<strong>DUO</strong> <strong>BTC</strong> OPERATOR MANUAL 19
COFFEtek LTD<br />
TEA BREWER<br />
(12) Disconnect the tube connecting the tea brewer to the dispense head<br />
by pulling the black right-angled fitting (A) away from the brewer<br />
itself. Then lift the carriage locking lever (B) to the vertical,<br />
(unlocked position). Remove the carriage assembly by pulling it<br />
gently towards you.<br />
(13) With the carriage removed tilt the brew pot slightly and remove it by<br />
pulling it gently towards you. The tea mixing bowl can then be<br />
removed.<br />
20 OPERATOR MANUAL <strong>DUO</strong> <strong>BTC</strong>
COFFEtek LTD<br />
(14) Wash and clean the carriage brewer pot and mixing chamber.<br />
(15) Once per week the filter belt should be removed and inspected.<br />
Removal procedure is as for the coffee brewer carriage – see<br />
section 10 & 11. The belt may be cleaned using a de-tanning<br />
solution but should be replaced after approximately 5000 vends. If<br />
action is not taken to prevent it tannin will build up and block the<br />
brewer drain channel. With the belt removed the brewer carriage<br />
drain channel can be cleaned using a small brush see below. .<br />
Suitable part is 22052. After ensuring larger tannin deposits are<br />
removed, the carriage assembly may be soaked in a dilute solution<br />
of de-stainer to remove smaller deposits.<br />
(16) Refit the filter belt using the reverse of the process described in<br />
section 11.<br />
(17) Clean and dry the dispense wash area.<br />
(18) Wipe clean all accessible inner and outer surfaces of the machine.<br />
Wipe dry.<br />
(19) Refit the whipper bases, paddles, mixing bowls, tubes and dispense<br />
nozzles and brewer parts. The assembly procedure for the brewers<br />
is the reverse of the disassembly procedure. Ensure that both<br />
brewer-locking levers on the coffee brewer and the carriage locking<br />
lever on the tea brewer are in the locked, (horizontal position) before<br />
proceeding to the next section.<br />
(20) Replace the grouts collection bucket and refit the front cover,<br />
ingredient canister<br />
<strong>DUO</strong> <strong>BTC</strong> OPERATOR MANUAL 21
COFFEtek LTD<br />
(21) Turn on the power. Note the brewers will cycle to reach their home<br />
positions.<br />
(22) Carry out a FLUSH operation, see below. Check that there are no<br />
leaks and that the brewer indexes properly. A container with a<br />
capacity of at least 1 liter should be placed beneath the dispense<br />
point to catch the liquid dispensed during the flush operation.<br />
22 OPERATOR MANUAL <strong>DUO</strong> <strong>BTC</strong>
COFFEtek LTD<br />
Filling<br />
INSTANT PRODUCTS & LEAF TEA<br />
(1) Turn the ingredient dispense chutes to face upwards to prevent<br />
ingredient spillage. Remove the instant product ingredient canisters<br />
from the machine. Remove the lid from each one in turn and fill it<br />
with the correct ingredient refitting the lid afterwards.<br />
(2) Place the canisters back in the machine ensuring that each one is in<br />
the correct position. Return the ingredient chutes to the correct<br />
dispense positions.<br />
(3) Restore the mains electrical supply to the machine and set the<br />
On/Off switch on the machine to ON.<br />
BEAN HOPPER<br />
Unlock the bean hopper lid and remove it. Fill the hopper with sufficient<br />
beans for the days anticipated use. Refit and lock the hopper lid. Note any<br />
foreign objects that fall into the hopper should be retrieved before the machine<br />
is used further or damage to the grinder may result.<br />
Note: The tea in the hopper is not used to actually make beverages. It is<br />
purely for display purposes and should be filled with the same ingredient as in<br />
the leaf tea canister.<br />
Flushing<br />
A flush operation is initiated by pressing the FLUSH key on the in keypad<br />
located on the inside of the machines door. Once started the machine will<br />
cycle the brewers putting only hot water through them. It will then rinse each<br />
mixing system in turn. Pressing any key will terminate the self-clean cycle<br />
however once in progress the brewer flush cycles cannot be halted. A<br />
container with a capacity of at least 1 liter is needed to contain the liquid<br />
dispensed during a flush cycle. . A flush cycle will only start if the tank is<br />
correctly up to temperature.<br />
<strong>DUO</strong> <strong>BTC</strong> OPERATOR MANUAL 23
COFFEtek LTD<br />
WEEKLY HYGIENE<br />
Cleaning<br />
On a weekly basis an identical procedure to that described under DAILY<br />
HYGIENE should be carried out with the following additional activities.<br />
(1) The ingredients should be removed from the canisters and the<br />
canisters washed and allowed to thoroughly dry, before being<br />
refilled with ingredients and restored to the machine. It is<br />
recommended that the canisters be left to dry overnight.<br />
(2) The brewer filter belt should be removed and cleaned by soaking it<br />
in a suitable de-staining solution.<br />
(3) A full disassembly and cleaning of the instant mixing systems should<br />
be carried out as follows:<br />
WHIPPER AND MIXING BOWL ASSEMBLIES<br />
(4) Set the on/off switch on the machine to off and isolate the mains<br />
electrical supply from the machine. Unlock and open the cabinet<br />
door.<br />
(5) Rotate the canister nozzles then remove the ingredient canisters.<br />
Wipe clean the exterior surfaces of the canister assembly and dry<br />
thoroughly.<br />
24 OPERATOR MANUAL <strong>DUO</strong> <strong>BTC</strong>
COFFEtek LTD<br />
(6) Disconnect the pipes from the mixing bowls and remove the<br />
dispense nozzles from the dispense head. Wash and dry these<br />
items.<br />
MILK / CHOCOLATE MIXING SYSTEM REMOVAL<br />
• Rotate and remove the steam trap .<br />
• Remove the mixing bowl .<br />
• Remove the whipper housing by turning to the right and then<br />
pulling towards you.<br />
• Remove the whipper impellor by pulling toward you.<br />
• Finally turn the whipper base to the right and pull off.<br />
COFFEE MIXING SYSTEM REMOVAL<br />
• Lift off steam trap .<br />
• Remove mixer chamber by pulling the top towards you.<br />
• Remove the impellor and seal .<br />
(7) Clean all the whipper parts in hot water using the recommended<br />
sterilising agent and dry them thoroughly.<br />
(8) Remove the extract chamber from the canister shelf. Wash and dry<br />
the cover.<br />
(9) Clean all accessible inner and outer surfaces of the machine using a<br />
damp cloth and wipe dry.<br />
(10) Replace the cleaned parts.<br />
(11) Replace the ingredient canister after filling with product and rotate<br />
the canister nozzle downwards.<br />
(12) Switch on the machine and set on/off switch to on.<br />
(13) Flush the machine by pressing FLUSH button on internal keypad<br />
ensure there are no leaks and everything is working correctly.<br />
(14) Remove the grouts bucket empty and wash it out.<br />
<strong>DUO</strong> <strong>BTC</strong> OPERATOR MANUAL 25
COFFEtek LTD<br />
(15) Remove waste tray and grille and empty contents.<br />
(16) Clean waste tray and grille and replace.<br />
26 OPERATOR MANUAL <strong>DUO</strong> <strong>BTC</strong>
COFFEtek LTD<br />
FAULT FINDING GUIDE<br />
FAULT POSSIBLE CAUSE ACTION<br />
Drinks Cold Thermal cut-out tripped Reset trip<br />
Machine Inoperable;<br />
No Display<br />
Power Supply failure<br />
Reset machine by switching<br />
off and on<br />
Bearding of Ingredient<br />
Steam hoods missing from<br />
mixing bowls or incorrectly<br />
positioned<br />
Fit steam hoods to mixing<br />
bowls and position correctly<br />
Machine Floods Dispense pipes incorrectly<br />
fitted to dispense head<br />
Mixing bowls incorrectly fitted<br />
Whipper seals missing<br />
Reposition pipes<br />
Reposition mixing bowls<br />
Check seals<br />
Water System Fault Water turned off Reset machine by switching<br />
off and on<br />
Temperature Low<br />
Reset over temperature trip<br />
<strong>DUO</strong> <strong>BTC</strong> OPERATOR MANUAL 27