Wildfire Prevention Conducting School Programs Guide - National ...
Wildfire Prevention Conducting School Programs Guide - National ...
Wildfire Prevention Conducting School Programs Guide - National ...
You also want an ePaper? Increase the reach of your titles
YUMPU automatically turns print PDFs into web optimized ePapers that Google loves.
A Publication of the<br />
<strong>National</strong> <strong>Wildfire</strong><br />
Coordinating Group<br />
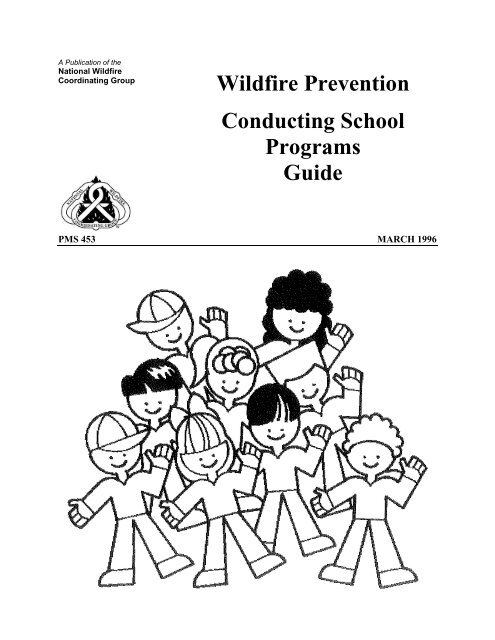
<strong>Wildfire</strong> <strong>Prevention</strong><br />
<strong>Conducting</strong> <strong>School</strong><br />
<strong>Programs</strong><br />
<strong>Guide</strong><br />
PMS 453 MARCH 1996
<strong>Wildfire</strong> <strong>Prevention</strong><br />
<strong>Conducting</strong> <strong>School</strong><br />
<strong>Programs</strong><br />
<strong>Guide</strong><br />
This publication is available online at http://www.nwcg.gov<br />
CONDUCTING SCHOOL PROGRAMS - GUIDE
NOTES<br />
Notes<br />
CONDUCTING SCHOOL PROGRAMS - GUIDE
PREFACE<br />
This <strong>Wildfire</strong> <strong>Prevention</strong> <strong>Guide</strong> is a project of the <strong>National</strong> <strong>Wildfire</strong><br />
Coordinating Group. This is one in a series designed to provide<br />
information and guidance for personnel who have interests and/or<br />
responsibilities in fire prevention.<br />
Each guide in the series addresses an individual component of a fire<br />
prevention program. In addition to providing insight and useful<br />
information, each guide suggests implementation strategies and<br />
examples for utilizing this information.<br />
Each <strong>Wildfire</strong> <strong>Prevention</strong> <strong>Guide</strong> has been developed by Fire<br />
<strong>Prevention</strong> Specialists and subject-matter experts in the appropriate<br />
area. The goal of this series is to improve and enhance wildfire<br />
prevention programs and to facilitate the achievement of NWCG<br />
program goals.<br />
The development group is made up of the following representatives:<br />
Pat Durland, Project Leader, USDI, BLM/NIFC, Fire <strong>Prevention</strong><br />
Bill Clark, USDI, <strong>National</strong> Park Service, NIFC, Fire <strong>Prevention</strong><br />
Danny Jones, USDA, Forest Service, Sierra <strong>National</strong> Forest<br />
Tara Johannsen, USDI, BLM, Prineville, Oregon<br />
Steve Eckert, Assistant State FMO, Wyoming State Office, BLM<br />
Dana Dierkes, <strong>National</strong> Park Service, Washington D. C.<br />
Kathryn Hooper. Fire <strong>Prevention</strong> Officer, Las Vegas District, BLM<br />
Gene Ottonello, FCO, Battle Mountain District, BLM<br />
Pat Kidder, California State FMO, California State Office, BLM<br />
Bruce Turbeville, California Department of Forestry and Fire<br />
Protection<br />
CONDUCTING SCHOOL PROGRAMS – GUIDE<br />
Preface – i
NOTES<br />
ii - Notes<br />
CONDUCTING SCHOOL PROGRAMS - GUIDE
CONTENTS<br />
1.1 INTRODUCTION ....................................................................................... 3<br />
1.2 UNDERSTANDING THE EDUCATIONAL SETTING ........................... 3<br />
1.3 THE TEACHERS INPUT ........................................................................... 4<br />
1.4 GUIDELINES FOR KNOWING THE TARGET AUDIENCE<br />
AND TAILORING THE PRESENTATION .............................................. 5<br />
Preschool .............................................................................................. 6<br />
Primary grades ..................................................................................... 8<br />
Intermediate grades (Third through sixth grade) ............................... 10<br />
Junior high school .............................................................................. 12<br />
High school program ......................................................................... 14<br />
1.5 HANDLING PROBLEMS AND PROBLEM STUDENTS ..................... 15<br />
1.6 DEVELOPING PRESENTATION SKILLS:<br />
GUIDELINES AND TECHNIQUES ....................................................... 17<br />
Preparation ......................................................................................... 18<br />
Practice .............................................................................................. 19<br />
Presentation ........................................................................................ 20<br />
1.7 AUDIOVISUAL AIDS .............................................................................. 22<br />
Slide presentations ............................................................................. 24<br />
Using charts ....................................................................................... 27<br />
Using a chalkboard ............................................................................ 29<br />
1.8 HANDLING UNSOLICITED AND UNPLANNED REQUESTS ........... 31<br />
CONDUCTING SCHOOL PROGRAMS – GUIDE<br />
Contents – iii
PART 2<br />
2.1 SAMPLE LESSON PLAN GOOD FIRE, BAD FIRE .............................. 35<br />
2.2 SAMPLE LESSON PLAN FOR GOOD FIRE IS HELPFUL .................. 37<br />
2.3 SUGGESTIONS FOR A FIRE PREVENTION PROGRAM<br />
SCRIPT AND PROPS .............................................................................. 39<br />
2.4 EDUCATIONAL PROPS & TEACHING AIDS ...................................... 45<br />
2.5 EVALUATING YOUR WILDFIRE PREVENTION PROGRAM .......... 47<br />
Sample Evaluation Form ................................................................... 49<br />
iv – Contents<br />
CONDUCTING SCHOOL PROGRAMS –GUIDE
1.1 INTRODUCTION<br />
This <strong>Guide</strong> is one in a series of <strong>Wildfire</strong> <strong>Prevention</strong> <strong>Guide</strong>s that are<br />
designed to be used as a tool to enhance the delivery of basic<br />
wildfire prevention and safety programs.<br />
The information here provides guidance in presenting wildfire<br />
prevention and safety messages to audiences at the following<br />
educational levels: 1) Preschool; 2) Primary Grades (Kindergarten<br />
through Second Grade); 3) Intermediate Grades (Third through Sixth<br />
Grade); and 4) a basic introduction to presenting wildfire prevention<br />
messages to older students at the junior and senior high school levels.<br />
This guide was developed by a group of subject matter experts<br />
experts who contributed their time, energy and knowledge to the task<br />
of providing this information for fire prevention personnel.<br />
CONDUCTING SCHOOL PROGRAMS – GUIDE<br />
Contents – iii
NOTES<br />
2 - Notes CONDUCTING SCHOOL PROGRAMS –GUIDE
1.2 UNDERSTANDING THE EDUCATIONAL<br />
SETTING<br />
The first step in reaching out to students and presenting a fire<br />
prevention message is to know and understand the local school system<br />
and the educational setting .<br />
Personal contact with school officials by agency personnel is an<br />
important part of any wildfire prevention program. To be effective,<br />
each contact must be planned carefully in advance and delivered<br />
formally or informally with enthusiasm. This is the chance to "sell"<br />
the wildfire prevention goals. Initial steps to take include the<br />
following:<br />
• Contact school administrators.<br />
• Seek approval from school officials to contact school<br />
administrators; use proper local policies.<br />
• Be prepared to present an outline and supportive materials to<br />
school officials when applying for approval of the <strong>Wildfire</strong><br />
<strong>Prevention</strong> Pro gram presentation.<br />
• Make personal contacts with teachers.<br />
• Make contacts through other means (e.g., Parent-Teacher<br />
Association)<br />
CONDUCTING SCHOOL PROGRAMS – GUIDE Educational Setting - 3
1.3 THE TEACHERS INPUT<br />
The presentation of a wildfire prevention program will be enhanced if<br />
input is obtained from the teacher during the planning process. This<br />
will show interest and professionalism as well as provide helpful<br />
information to improve the effectiveness of the presentation.<br />
The following actions should be taken to maximize program<br />
effectiveness in the classroom:<br />
• Speak with the teacher and try to get a feel for current<br />
understanding of fire and wildfire prevention by the students.<br />
• Ask what fire safety issues have been presented in the past.<br />
• Ask what objectives the presentation must meet for the class/<br />
teacher/school.<br />
• Learn what the teacher's time constraints are and tailor the<br />
presentation to meet those constraints.<br />
• Visit the school in advance to ensure the facilities and<br />
classroom layout are adequate for the presentation. If a visit is<br />
not possible in advance, ask for detailed information by phone<br />
or mail.<br />
• Ask for the number of students and if there are any students<br />
with special needs (deaf, physically impaired, non-English<br />
speaking students, etc.)<br />
• If audiovisual aids are to be used, BE SURE to ask about<br />
special needs such as room setup, power supply, screens,<br />
window shades, etc.<br />
• A good rule of thumb for supervision is to have one adult for<br />
every 10 children. It is also a good idea to send information,<br />
guidelines and rules to the teacher or program leader in advance<br />
of the presentation.<br />
4 – The Teacher’s Input CONDUCTING SCHOOL PROGRAMS –GUIDE
1.4 GUIDELINES FOR KNOWING THE TARGET<br />
AUDIENCE AND TAILORING THE<br />
PRESENTATION<br />
The information on the following pages provides a basic look at<br />
student development and will help to understand the learning<br />
capabilities of each grade level that will be contacted.<br />
Additionally, this section suggests some presentation methods and<br />
techniques to assist the instructor in tailoring the presentation to the<br />
ability and skill of the students at each level.<br />
CONDUCTING SCHOOL PROGRAMS – GUIDE Target Audience - 5
Preschool<br />
What you should know<br />
Studies have shown that reaching children of preschool age with a fire<br />
prevention message is essential in our effort to reduce wildland fires.<br />
Effective wildfire prevention and fire safety education geared toward<br />
preschool children can substantially reduce the number of wildland<br />
fires.<br />
Preschool children are just beginning to be more aware of what goes<br />
on around them and may have some mistaken concepts. Preschoolers<br />
test their concepts in many ways. Dramatic play and talk are ways of<br />
testing what they have seen and heard. Discussing their ideas with<br />
adults is one of the most effective ways in which preschoolers clarify<br />
their concepts. Firsthand experience is helpful and should be included<br />
when talking to preschoolers.<br />
Methods of instruction<br />
You can help these children develop correct concepts of fire<br />
prevention by using the following methods:<br />
• Give simple information. Simple fire prevention materials<br />
should be used and thoroughly explained to the children.<br />
Complicated materials are not understood and should never be<br />
used.<br />
• Let them touch and see. To increase the children's<br />
understanding of the message, include items that allow the<br />
children to use all of their senses.<br />
• Present information a little at a time. Too much information<br />
at once is usually overwhelming and is not absorbed by a<br />
preschool child.<br />
• Answer all questions to the children's satisfaction. If you're<br />
not sure you have done so, ask them. Some children will use<br />
this opportunity to tell a story and it is up to you to steer the<br />
presentation back to answering questions.<br />
6 – Preschool CONDUCTING SCHOOL PROGRAMS –GUIDE
Presentation techniques<br />
There are special techniques that can be used with preschool children.<br />
The instructor can become a part of the class and let the children feel<br />
at ease. The following tips can aid in the presentation and help the<br />
students become more receptive to the message:<br />
• Sit on the floor with them or be at the same eye level.<br />
• During the presentation, pass around items being talked about.<br />
This helps the children become actively involved, gives them<br />
something for a reference, and enhances their understanding of<br />
the message.<br />
• Use visual aids wherever possible (use large, simple images).<br />
• Move slowly; do not use rapid movements.<br />
• Speak slowly in a quiet and calm voice.<br />
• Introduce a few ideas as a time; be sure the children understand<br />
them.<br />
• Remember that a workable-size group of preschoolers is<br />
between five and 20 students -- the fewer the better. Verify the<br />
number of students beforehand in order to better plan the<br />
program.<br />
• Relate the information in the message to something within the<br />
children's experience (barbeque, fireplace, gas or wood stove,<br />
birthday candles, etc.)<br />
CONDUCTING SCHOOL PROGRAMS – GUIDE Preschool - 7
Primary grades<br />
(Kindergarten through second grade)<br />
What you should know<br />
Children in the primary grades (kindergarten through second grade)<br />
are usually active 5- to 7 -year-olds. They are alert, keen observers<br />
with vivid imaginations. They learn best by participating and being<br />
involved in activities with their hands, feet, and body.<br />
The primary-grade child is a pretender and imitator who is easily<br />
influenced by the behavior of adults. The image that is portrayed can<br />
make a lasting impression on him or her.<br />
Attention spans among age groups vary considerably. Plan the<br />
program length, class size and course content accordingly. Do not try<br />
to present too many ideas at one time. Use one or two simple themes.<br />
Kindergarten and first-grade children require short, easy lessons no<br />
longer than 10 to 15 minutes in length. Second graders may accept an<br />
interesting, well-illustrated program of no longer than 25 minutes.<br />
Indoor programs should never go beyond one school period for any<br />
primary class.<br />
The ideal group size is 20 to 30 children. This should be the rule for<br />
kindergarten and first grade. Sometimes, to accommodate tight school<br />
schedules, it may be necessary to combine classes. However, avoid<br />
mixing grade levels if possible.<br />
The language used must be appropriate to the age level being taught.<br />
A 7-year-old second grader can grasp the meaning of some words that<br />
are foreign to the 5-year-old kindergarten student.<br />
Observe the children when speaking. If they do not understand a<br />
concept, try using different words or relate an example in another<br />
way.<br />
8 – Primary Grades CONDUCTING SCHOOL PROGRAMS –GUIDE
Presentation techniques<br />
The techniques to use in reaching primary-grade students differ from<br />
those used with younger children. The following are some suggested<br />
techniques to use when presenting a program to students at this<br />
educational level:<br />
• Identify with the group. For instance, put yourself in the<br />
place of the child and it can be observed that by hovering<br />
over them, you appear to be a large, overwhelming person.<br />
Get down to their level by sitting on the floor or a small<br />
chair. Meet them eye-to-eye.<br />
• These are impressionable children who may hold on to every<br />
word and action, so be careful what is said or done.<br />
• Use slow, deliberate movements.<br />
• Speak clearly and distinctly.<br />
• Repeat often, emphasizing and explaining important words.<br />
• Look them in the eyes as you glance around the group.<br />
• Answer each question completely and be sure the children<br />
understand the answer. Have the class help in answering.<br />
After the presentation<br />
After concluding the presentation to the class, provide materials to the<br />
teacher( s) to continue teaching the subject matter during the school<br />
year. Write a thank-you letter to the teacher as soon as possible, using<br />
the following suggestions:<br />
• Word it so the teacher can read it to the class.<br />
• Design it so that it serves as a review of the presentation.<br />
CONDUCTING SCHOOL PROGRAMS – GUIDE Primary Grades - 9
Intermediate grades (Third through sixth grade)<br />
What you should know<br />
Intermediate-grade children have perhaps the greatest range in mental<br />
and physical growth than any other age group.<br />
• Some third-grade and most fourth-grade students have<br />
begun the systematic study of grammar. They are learning to<br />
use telephones, write letters, and use dictionaries. Their<br />
vocabularies are increasing, and they have begun to<br />
calculate fractions and geometry.<br />
• Ten-year-old fifth graders can be eager, receptive, happy<br />
scholars who are willing to accept any doctrine and who will<br />
be influenced by it in the future.<br />
• Fifth graders are gaining control of their limbs, so they are<br />
less awkward. Their vocabulary is steadily increasing. They<br />
are starting to use graphs, decimals, geometric figures, and<br />
they solve problems in many ways. Their enthusiasm makes<br />
them uninhibited singers with generally good rhythm.<br />
• Fifth-grade students have progressed rapidly in their<br />
scientific knowledge and development. They have expanded<br />
their understanding of the world far beyond their own area<br />
to regional and ethnic groups in the United States who<br />
contributed to the culture and wealth of our nation. They are<br />
learning the part individuals and government play in<br />
conserving natural resources.<br />
• Fifth graders are beginning to comprehend science and can<br />
assimilate the fundamentals of ecology, land management<br />
and combustion. They now can relate watershed fires to loss<br />
of water and distinguish between renewable and<br />
nonrenewable resources.<br />
• Eleven-year -old sixth graders are applying the basic skills<br />
developed in grades four and five. They are being<br />
introduced to global geography; relationships that exist<br />
among peoples of the world; and the basic facts of the<br />
physical world: land, water, air and the interdependence of<br />
natural resources.<br />
10 – Intermediate Grades CONDUCTING SCHOOL PROGRAMS –GUIDE
Presentation techniques<br />
Through the cooperation of principals and teachers, we can take<br />
advantage of the fifth-grade basic course of study to incorporate fire<br />
prevention and conservation into spelling, vocabulary, mathematics,<br />
science, social studies, and physical education.<br />
Fifth-grade fire prevention programs can range from a simple display<br />
card to a presentation as formal as a locally sponsored Junior Fire<br />
Fighter Program. Or, if money, personnel and time allow, fire<br />
prevention programs can become as comprehensive as you want.<br />
The sixth-grade program can be patterned almost entirely after the<br />
fifth grade, but it should be more detailed, taking advantage of<br />
increased maturity.<br />
At each of these levels, students understand cause-and-effect<br />
relationships. Emphasize these relationships when presenting a<br />
message about fire prevention and the use, sharing and appreciation of<br />
public lands.<br />
CONDUCTING SCHOOL PROGRAMS – GUIDE Intermediate Grades - 11
Junior high school<br />
What you should know<br />
The typical junior high school student is experiencing an awkward<br />
stage of adjustment and development. These youngsters are<br />
undergoing the mental and physical challenges of adolescence.<br />
This age group is not only impressionable and creative but also<br />
inconsistent. Anyone teaching this age group must be alert and<br />
flexible to cope with its challenging behavior patterns. These<br />
youngsters are inclined to react spontaneously and somewhat<br />
unpredictably to changes in classroom situations. In spite of all this,<br />
these children are probably the most rewarding of all to instruct.<br />
Seventh through ninth graders are interested in the things that affect<br />
them. Therefore, it is critical that natural resource and fire prevention<br />
education relate directly to the audience or to some other interest that<br />
is important to them. Responsibility and dollars do not get their<br />
attention.<br />
Presentation techniques<br />
Show how wildland resource losses from fires affect them. Make the<br />
presentation relate to their world and teenage interests. Describe fire<br />
prevention step-by-step with unfolding drama on their terms. Explain<br />
what fires can do to them and their future. Cite examples of recent<br />
local or regional fires they may have seen or heard about.<br />
Increase the presentation effectiveness by meeting the students' needs.<br />
Ideally, any effort to extend fire prevention programs into junior high<br />
schools should be approached from a curriculum standpoint. In other<br />
words,relate the presentation to the specific class.<br />
12 – Junior High <strong>School</strong> CONDUCTING SCHOOL PROGRAMS –GUIDE
For example, if a teacher requests a program for a general science<br />
class, realize that these classes normally explain the principles of<br />
combustion but do not show how carelessness is at fault in many fires.<br />
The presentation should consist mostly of demonstrations about<br />
combustion principles; the fire triangle; Type A, B and C fires; or fire<br />
causes. Fire prevention messages can be introduced while the focus<br />
remains on the curriculum subject.<br />
In a general science class, for example, the talk might be about the<br />
combustion that occurs when a cigarette is tossed into dry fuel and<br />
explain the factors leading to fire spread, the effects of topography,<br />
and so on. In a biology class, attention can be drawn to the lifescience<br />
aspects of the forest or rangeland. For instance, relate the<br />
effects of fire to the balance of nature. In an English class, slogans or<br />
essay contests would be appropriate. For art classes, students can<br />
concentrate on signs, posters, paintings or models.<br />
Junior high school groups are impressionable. Although they tend to<br />
resist authority and question traditional values, they readily accept the<br />
teaching of nonacademic professionals who make guest appearances<br />
in their classes.<br />
The best teaching approach for junior high school students is to orient<br />
the presentation to the subject matter they are studying in that<br />
particular class. Involve the students by using material that is relevant<br />
to their experience level. The choice of technique (lecture,<br />
demonstration, movies, slides, student workshop or field trip) may<br />
vary, but the method selected must fit both the teaching situation and<br />
any classroom limitations.<br />
CONDUCTING SCHOOL PROGRAMS – GUIDE Junior High <strong>School</strong> - 13
High school program<br />
What you should know<br />
High schools offer an opportunity to reach young, active citizens with<br />
fire prevention messages. There is potential for both immediate and<br />
long range results. Most students are fairly serious and generally wellinformed<br />
about the world around them. Even average or belowaverage<br />
students probably have been exposed to advanced teaching<br />
techniques and to a wider range of subjects than some adults.<br />
Whenever possible, programs should be given to classes where<br />
students' interest and knowledge in a subject are similar. For example,<br />
a science class may be limited to pupils who have completed<br />
prescribed courses and have shown an interest in the subject matter. In<br />
such cases, a program could be designed to fit both the interest and<br />
knowledge of the students. Scientific aspects of fire prevention and<br />
fire-safe communities should be of interest and could be easily<br />
understood. <strong>Programs</strong> given to a student assembly where interests and<br />
abilities vary greatly would need to be much more general.<br />
As with all presentations, the preparation should include learning<br />
about the audience beforehand. Talk to the teacher( s) or principal.<br />
They have an interest in the presentation being a positive learning<br />
experience, so they are glad to help by talking about the students'<br />
interests, educational level, etc.<br />
Agency personnel have a definite advantage over regular teachers and<br />
most other guest instructors. Uniforms are admired and respected by<br />
most high school students. Caution must be exercised, however, to<br />
ensure technical accuracy. Alert high school students quickly detect<br />
errors, so instructors must be careful that they present correct<br />
information.<br />
Most high school students have one thing in common: they are testing<br />
their sophistication. If they have any interest in a subject, they want to<br />
know "why?"<br />
14 –High <strong>School</strong> CONDUCTING SCHOOL PROGRAMS –GUIDE
Any well-prepared and well-presented fire prevention program is<br />
acceptable for high school presentations, but programs combining<br />
visual aids with lectures have more impact than lectures without aids.<br />
Adequate results can be achieved with a straight lecture, but this<br />
technique should be used only when visual materials are not available<br />
or are not feasible.<br />
1.5 HANDLING PROBLEMS AND PROBLEM<br />
STUDENTS<br />
Preschool through second grade<br />
Sometimes there may be little problems that plague you, but if you are<br />
well-prepared and make the presentation interesting, you can<br />
overcome the small difficulties and avoid major ones. Sometimes, no<br />
matter how much is done, a disruptive child may interrupt the<br />
presentation. Do not lose your composure or let things get out of hand.<br />
Make the problem child your helper. Let the child hand out materials,<br />
sit next to you, hold up displays, or draw on the blackboards. If<br />
necessary, seek the teacher's assistance in dealing with or removing a<br />
problem student.<br />
Intermediate grades through high school<br />
How do you appeal to the youngster who may be a problem? What do<br />
you do and say? How do you win over such a student? There is no set<br />
pattern because these students are individuals who do not always<br />
understand themselves. Approach them as young adults. Interject<br />
humor, and use demonstrations to keep them interested in you and the<br />
presentation.<br />
Stimulate students' intellects with facts and concepts that are special<br />
or unique to our profession. Do not try to deceive students. They are<br />
perceptive and alert and can see through your efforts.<br />
CONDUCTING SCHOOL PROGRAMS – GUIDE Problem Students - 15
NOTES<br />
16 – Notes CONDUCTING SCHOOL PROGRAMS –GUIDE
1.6 DEVELOPING PRESENTATION SKILLS:<br />
GUIDELINES AND TECHNIQUES<br />
This section provides information that lays the groundwork for<br />
improving instructor presentation skills. These guidelines are designed<br />
to help give professional and effective fire prevention presentations in<br />
school settings.<br />
Thoroughly developed, effective presentations can increase student<br />
participation, understanding and support. Therefore, they need to be<br />
an integral part of fire prevention programs. Increasing knowledge<br />
and experience as a presenter leads to increased confidence and<br />
ability, which in tum leads to more informed, adaptable and effective<br />
presentations.<br />
As a minimum, the following should be considered:<br />
• Become familiar with the material, program and props well in<br />
advance of the presentation.<br />
• Wear an agency uniform, when appropriate.<br />
• Adjust the presentation to meet the educational and skill level<br />
of the audience.<br />
• Practice presenting a professional agency image.<br />
CONDUCTING SCHOOL PROGRAMS – GUIDE Presentation Skills - 17
Preparation<br />
Determine in advance what the talk is about and the type of<br />
presentation that is planned. Is the goal to inform, persuade, sell an<br />
idea or project, incite to action, entertain, or to present an award?<br />
After selecting the subject and the type of presentation, outline the<br />
points to cover.<br />
• Find an interesting starting point or attention-grabber. In the<br />
opening, try to establish rapport with the audience. The more<br />
that is known about the audience beforehand, the easier this will<br />
be.<br />
• Fill in the body of the talk with the points to cover, keeping in<br />
mind the background, interests and concerns of the audience.<br />
• Select a good concluding point. Without a definite conclusion,<br />
the instructor might flounder helplessly and cause<br />
embarrassment.<br />
• It is helpful to partially memorize the beginning and ending of<br />
your talk. Never memorize the body of your talk.<br />
• Prepare psychologically. Much of the success of the talk<br />
depends on the instructor's frame of mind. Think positively<br />
about it and the talk will be easier to give. Look forward to the<br />
opportunity to present issues of prime concern to the audience.<br />
18 – Presentation Skills CONDUCTING SCHOOL PROGRAMS –GUIDE
Practice<br />
Rehearse the talk. Carefully work out the elements of sequence,<br />
timing and continuity. Remember that more practice time is needed to<br />
develop a formal talk that sounds natural and is interesting and<br />
personal.<br />
Have someone else listen to the practice talk to help smooth out rough<br />
areas. If visual aids are used, determine where to stand so the audience<br />
can see without obstructions. Slides, movies, and other visuals need to<br />
be run through for timing, sequence and appropriateness. If possible,<br />
rehearse in the actual presentation setting with the projectors,<br />
recorders, etc., that will be used during the actual presentation.<br />
Experiencing nervousness and stage fright is normal for most people.<br />
Apprehension about the audience reaction is often a positive element,<br />
because, the very nature of this feeling can make the instructor more<br />
alert. While there is no single method to remove the nervousness and<br />
fears, thorough preparation and practice are likely the most effective<br />
tools to help deal with these feelings. The more prepared the<br />
instructors are, the more comfortable they will be before, during and<br />
after the presentation.<br />
CONDUCTING SCHOOL PROGRAMS – GUIDE Presentation Skills - 19
Presentation<br />
When the time comes to perform, try to relax. If you are nervous,<br />
experts on public speaking suggest that you take a deep breath and<br />
exhale slowly. Before you are introduced, be sure your uniform is in<br />
order and then leave your attire alone. When you are introduced, rise,<br />
face the person who introduced you, pause a few seconds to let things<br />
settle down, and then make your opening statement.<br />
Personality is one of the most important ingredients of your talk. You<br />
have the ability and prestige, or the group (or your supervisor) would<br />
not have asked you to speak. You arrived at your present position<br />
because of your talents and effort, coupled with knowledge and years<br />
of personal experience.<br />
All of these together help make up your personality, which is the most<br />
effective tool you possess. A little humility and a smile will put your<br />
audience at ease and gain their support.<br />
• Good posture before an audience is a must. Stand upright.<br />
Let your hands rest naturally at your sides or rest them on the<br />
lectern. Do not hold eyeglasses, pens or pencils, books,<br />
magazines, other objects, or jingle change in your pocket.<br />
Handling these objects is a nervous habit that tends to distract<br />
your audience from what you are saying.<br />
• Maintain good eye contact with your audience. Visually scan<br />
the audience. Do not settle on one individual, the wall, ceiling,<br />
floor, or podium. If reading something, look up frequently to let<br />
your audience know you have not forgotten them.<br />
• Use gestures. They add interest. Do not flail your arms, but use<br />
gestures pertinent to your remarks. Let your gestures be natural,<br />
not artificial.<br />
20 – Presentation Skills CONDUCTING SCHOOL PROGRAMS –GUIDE
• Involve the audience with props whenever possible. For<br />
example, simple, colorful and creative items that encompass the<br />
use of many senses are suggested, especially for young<br />
audiences.<br />
If you sit down after speaking and realize that you left out parts of<br />
your talk that were very important, don't dwell on it or worry about it.<br />
Use it as a learning experience and decide that you will do better next<br />
time.<br />
Most of the principles described here are accepted Toastmasters'<br />
practices and techniques. If you hold a job that involves frequent talks<br />
before groups, you should consider joining a speaker's club or<br />
enrolling in an adult education class in your community. You should<br />
practice public speaking whenever possible. You can learn something<br />
from each presentation, a each speech makes you more confident for<br />
the next one.<br />
CONDUCTING SCHOOL PROGRAMS – GUIDE Presentation Skills - 21
1.7 AUDIOVISUAL AIDS<br />
Too often, people think that motion pictures and slides represent the<br />
entire scope of visual aids. This is not so. Charts, graphs, pictures,<br />
models, and sketches are classified as visual aids. Visual aids have<br />
unlimited possibilities; their use is limited only by the resourcefulness<br />
of the people who use them.<br />
Use audiovisual aids whenever possible because they convey<br />
information, knowledge, and ideas in the shortest possible time. Such<br />
aids, however, must be appropriate for the age and educational level<br />
of the audience. While audiovisual tools are an important element in<br />
presentations to young audiences, the audiovisual aids discussed on<br />
the following pages are targeted primarily for older students and adult<br />
audiences.<br />
Verbal explanations supplemented by visual aids attract attention and<br />
create interest more rapidly than verbal explanations alone. Use a<br />
combination of visual aids if the situation permits. The major part of<br />
what people hear is forgotten in a relatively short time. On the other<br />
hand, things people see and hear make a more lasting impression and<br />
increase retention.<br />
Many things cannot be taught, explained or sold without the aid of<br />
demonstrations, models, charts, diagrams or pictures. Visual aids can<br />
be the difference between confusion and understanding.<br />
When deciding what type of visual aids to use in the presentation,<br />
consider the following:<br />
• The objective. What is expected of the audience as the result of<br />
the program? Only after this has been decided can the objective<br />
be prepared to consider the best method of visualization to use.<br />
22 – Audiovisual Aids CONDUCTING SCHOOL PROGRAMS –GUIDE
• The audience. What age and educational level is the audience?<br />
What type and complexity of audiovisual aids will get and keep<br />
their attention? What audiovisual aids will best impart the<br />
message and increase retention of what the audience learns?<br />
• The size of the audience. This determines the size of charts<br />
and lettering. A small group sitting in front of the instructor<br />
does not require large charts and lettering. However, everything<br />
must be large enough for the entire audience to see.<br />
• Location of the audience. If the program is presented in<br />
various locations, films, video tapes or slides are best because<br />
they can be shown in either close quarters or large auditoriums.<br />
They also are relatively easy to transport and handle.<br />
• Size of the budget. This question must be answered before<br />
determining the types of visual aids to use.<br />
• Keep it simple. A cardinal principle, simplicity, underlies the<br />
preparation of good visual aids. Each aid should deal with one<br />
central idea. The material should be rigorously edited to ensure<br />
that all nonessentials have been omitted. The remaining<br />
material should not be overcrowded. It is better to have two<br />
simple illustrations than one that is "busy" or complex.<br />
When the material is presented, consider the following points:<br />
• Do not let the audience see the visual aids until they are<br />
discussed, then cover or remove them when finished.<br />
• Never read graphic displays to the audience. Any viewer can do<br />
this. Point out the significance of the material.<br />
After the presentation, evaluate the success of the material from<br />
the points of view of both the speaker and audience. If<br />
necessary, modify the material before it is used again.<br />
CONDUCTING SCHOOL PROGRAMS – GUIDE Audiovisual Aids - 23
Slide presentations<br />
Automatic cameras with electric light meters, projectors with remote<br />
control features, lapse dissolve units and other electronic devices can<br />
improve the speaker's delivery and the audience's interest.<br />
An effective slide presentation cannot be done without proper<br />
preparation. Using visuals requires more practice and finesse than the<br />
average speech by itself.<br />
Each slide should be selected for its ability to make a point, attract<br />
attention, or imply a conclusion. Each slide should be the best<br />
available in composition and exposure. A perfect photograph with no<br />
apparent point, however, is of less value than a poorer shot with a<br />
definite message. In most cases, no photograph at all is better than a<br />
poor one.<br />
How many slides should be used?<br />
This is difficult to determine, especially for the beginner. There is no<br />
general rule of thumb. Each presentation must be considered<br />
separately. In a 30-minute presentation, as few as 12 or as many as 80<br />
slides can be used successfully, depending on how they are used and<br />
what needs to be to shown. Generally, the fewer slides used, the more<br />
important it is for each one to be clear and convey the information you<br />
want to share.<br />
Slides occasionally can be used in a series and projected very quickly<br />
for emphasis. There is no end to the possible uses if proper and<br />
conscientious thought is given to preparation.<br />
Use note cards.<br />
Note or index cards are very useful for preparing the written portion<br />
of the talk. They should be numbered to correspond with the slides as<br />
they are shown. Any changes or substitutions can be numbered and<br />
slipped into correct order without disturbing or retyping several pages<br />
of written material.<br />
24 – Slide Presentations CONDUCTING SCHOOL PROGRAMS –GUIDE
If standard 8" x 11" paper is used as a script, a good method is to<br />
divide the sheet in half vertically, mark one half audio, and the other<br />
half video, and then write the written presentation across from the<br />
visual that will be shown during that portion of the talk. Remember to<br />
leave plenty of space for easier reading.<br />
Keep slides clean.<br />
Most slides collect dust or fingerprints after being handled.<br />
Fingerprints can be removed by using a commercial liquid<br />
preparation. A camel-hair brush works well on dust.<br />
Label and number slides.<br />
Each slide should be labeled and numbered in case you drop or<br />
scramble them accidently. It does happen!!<br />
Use good equipment.<br />
A slide program is worthless without proper equipment.<br />
• The projector should be checked before each use. Make sure<br />
that you have a spare bulb, a three-to-two prong adapter, at least<br />
one 15-foot or longer extension cord and a remote control<br />
extension.<br />
The lens should be clean, so have a static brush. Have a stand<br />
for the projector, in case it is needed. If a cartridge projector is<br />
used, correctly place and check each slide before arriving for<br />
the performance.<br />
• Consider screen size and the focal length required for the lens.<br />
The screen should be filled by the picture, if possible. If you<br />
use both horizontal and vertical slides are used, have a square<br />
screen. If the screen is rectangular, either the vertical or<br />
horizontal slides are too large.<br />
CONDUCTING SCHOOL PROGRAMS – GUIDE Slide Presentations - 25
A few "don'ts" for speakers using slides:<br />
• Don't apologize for any equipment or slides. If they are that<br />
poor, do not use them.<br />
• Don't refer to a slide as a slide or picture. For example: "This<br />
slide shows ..." or "This is ..." or "This picture was taken ..."<br />
The audience knows that it is a picture and that they are<br />
watching the screen. Put your message across without these<br />
references.<br />
• Don't wait until the last minute to arrive and assemble your<br />
equipment. It should be done before the crowd arrives. This<br />
gives the impression of organization, interest, professionalism<br />
and efficiency.<br />
• Don't use slides showing information that is not in the script.<br />
• Don't use slides that are irrelevant to the talk or that are poor<br />
examples of the point being discussed.<br />
• Don't use slides containing poor photography caused by<br />
overexposure or poor composition.<br />
• Don't use slides that lack continuity. This results when there is<br />
neither a connection between slides nor a smooth sequence of<br />
thought from one slide to the next.<br />
DO let the audience know if you want them to ask questions during<br />
the performance or if there will be a question period after the<br />
presentation.<br />
26 – Slide Presentations CONDUCTING SCHOOL PROGRAMS –GUIDE
Using charts<br />
Charts are inexpensive, easy to make and use, and easily changed or<br />
replaced. They can be very effective and flexible.<br />
Charts help to win and hold the attention and interest of the audience.<br />
They can clarity ideas that would be difficult to express in words<br />
alone. An average speaker can excel in getting points across by using<br />
a well- organized set of charts.<br />
The American Standards Association has set the following specific<br />
minimum criteria and size standards applicable to all types of displays<br />
and wall charts.<br />
• Minimum size of the smallest lettering should be about 1/50 of<br />
the height of the sign.<br />
• The standard shape of the chart or display is a height-to-width<br />
ratio of 3:4.<br />
• A general rule also can be applied to determine the needed size<br />
of direct display charts. The minimum desired width must be 11<br />
6 of the maximum viewing distance. For example, if a student<br />
at the rear of a classroom is 24 feet away from the front<br />
blackboard where a poster is displayed, the width of the poster<br />
must be at least four feet (1/6 of 24). Then the standard vertical<br />
height would be three feet (3:4 ratio).<br />
The American Standards Association has also defined specific criteria<br />
for the size of lines and lettering used on charts. Refer to these<br />
criteria, if available. A good rule of thumb, however, is to make lines<br />
and letters large enough to be seen and read by all members of the<br />
audience, including those seated at the rear of the room.<br />
CONDUCTING SCHOOL PROGRAMS – GUIDE Using Charts - 27
Several factors must be considered when making charts. Review the<br />
material to be presented and become familiar with its major points and<br />
implications. The organization of the chart may vary according to the<br />
particular purposes.<br />
• If the chart contains an overview given early in a presentation,<br />
it may show several different points briefly.<br />
• If the chart contains a summary, the information should be quite<br />
specific.<br />
• If more than one chart is needed to cover the topic, prepare<br />
separate charts and select a good sequence. Two chart forms are<br />
used to present data in sequence: the strip chart and the flip<br />
chart.<br />
Types of charts<br />
The strip chart is a single chart that contains various steps covered<br />
with strips of paper. Important points may be exposed individually by<br />
removing each paper strip as desired. Strips can be attached to the<br />
chart with masking or cellophane tape.<br />
The flip chart is a series of charts prepared in sequence that are bound<br />
together at the top. As the instructor completes the discussion, each<br />
chart is pulled up over the easel to expose the next chart. Flip charts<br />
can be bought ready made or prepared from several sheets of<br />
newsprint or large drawing paper. Fasten the sheets together at the top<br />
with thin metal or wood strips on the front and back. Mount the<br />
supporting strip at the top of an easel.<br />
Good charts often use a mixture of pictures, drawings, cartoons,<br />
graphs, diagrams, and words.<br />
28 – Using Charts CONDUCTING SCHOOL PROGRAMS –GUIDE
Using a chalkboard<br />
The chalkboard is probably the most familiar teaching device. A<br />
chalkboard is generally available, and it is one of the most widely<br />
used visual tools in any programmed talk. In spite of its availability,<br />
however, it is rarely used for graphic or pictorial presentations.<br />
Sketching before a group holds the attention of the audience. For<br />
example, when a speaker turns to the board, selects a piece of chalk,<br />
and begins to draw, the movement attracts attention. During a<br />
"sleepy" period, if the speaker takes a piece of chalk and starts to<br />
sketch, the attention of each member of the audience is drawn to the<br />
board.<br />
A carefully prepared chalkboard drawing made beforehand does not<br />
have the same vitalizing effect as a strong spontaneous sketch which<br />
emphasizes action or a key point made at the right moment during a<br />
program. The following are some points to follow when using a<br />
chalkboard:<br />
• Do not hide the writing by standing directly in front of it. Write<br />
legibly and make sure everyone can see and read your writing.<br />
• Do not write too much at one time. Speak to the group, then<br />
write a little, then stand aside and talk. Continue this procedure.<br />
• Speak directly to the group; do not talk to the board.<br />
These principles of using a chalkboard also apply to the use of easels<br />
and paper pads and the porcelain-surface boards.<br />
CONDUCTING SCHOOL PROGRAMS – GUIDE Using a Chalkboard - 29
Porcelain-surface boards<br />
One of the latest developments in chalkboards is the porcelain-surface<br />
board. Because of its steel base, magnets adhere to its face and papers<br />
can be displayed without tacking, taping or defacing the board<br />
surface.<br />
Instructional materials equipped with magnetic holders are available<br />
in many colors. Magnetic frame sticks can hold charts to the steel<br />
surface, or magnetic pointers or arrows can be used to highlight the<br />
item being discussed.<br />
The magnetic board is particularly useful when displayed items are<br />
moved as problems change or solutions are developed.<br />
Easels and paper pads<br />
Another "chalkboard" is a portable easel that holds king-sized paper<br />
sheets. The big advantage of this device over the conventional<br />
blackboard is that conference notes, sketches or ideas can be saved for<br />
future reference.<br />
The lines on paper pads are usually light blue and barely visible from<br />
a short distance. Pads can be purchased unlined or in 1/2-inch or l-<br />
inch squares. The lines can help in making your the charts or draw<br />
diagrams before groups.(also see flip charts on page 28)<br />
30 – Boards/Pads CONDUCTING SCHOOL PROGRAMS –GUIDE
1.8 HANDLING UNSOLICITED AND UNPLANNED<br />
REQUESTS<br />
Occasionally unexpected requests will be received to present a fire<br />
prevention program. These requests may put the instructor in the<br />
awkward position of wanting to add the presentation to the schedule<br />
but being short on time, materials and promotional items.<br />
While it is difficult to always avoid such predicaments, you can<br />
significantly reduce their impact by doing the following:<br />
• Carefully consider the request to see if it meets the fire<br />
prevention program goals.<br />
• Determine if it is worth the time it will require to gather extra<br />
materials and promotional items and organize a presentation.<br />
• If the schedule won't allow you to meet the request, try to<br />
provide a Teachers' <strong>Guide</strong>, if available, including lesson plans<br />
so the teacher can present the material. Include names arid<br />
phone numbers as a reference in case the teacher has any<br />
questions.<br />
• Try to utilize existing programs to meet the needs of the<br />
unplanned requests.<br />
• Consider asking other presenters from within the agency or<br />
cooperative agency to fulfill the request.<br />
• On an annual basis, budget for and order additional items to<br />
help cover unplanned requests. Also, know how to obtain more<br />
materials when necessary.<br />
CONDUCTING SCHOOL PROGRAMS – GUIDE Unplanned Requests - 31
NOTES<br />
32 – Notes CONDUCTING SCHOOL PROGRAMS –GUIDE
PART 2<br />
<strong>Wildfire</strong> <strong>Prevention</strong> Program<br />
Sample Lesson Plan - Good Fire, Bad Fire<br />
Sample Lesson Plan- Good Fire is Helpful<br />
Suggestions for a Fire <strong>Prevention</strong> Program<br />
Script Narrative and Props<br />
Educational Props and Teaching Aids<br />
Evaluating Your <strong>Wildfire</strong> <strong>Prevention</strong> Program<br />
CONDUCTING SCHOOL PROGRAMS – GUIDE Part 2 - 33
NOTES<br />
34 – Notes CONDUCTING SCHOOL PROGRAMS –GUIDE
2.1 SAMPLE LESSON PLAN<br />
GOOD FIRE, BAD FIRE<br />
Title:<br />
Grade Level:<br />
Time<br />
Required:<br />
Skills:<br />
Learning<br />
Objectives:<br />
Materials:<br />
Good Fires and Bad Fires<br />
Preschool to Second Grade<br />
20 Minutes<br />
The student, by participating in this activity, will<br />
be able to distinguish between good and bad fires.<br />
The students will be able to correctly identify good<br />
fires and bad fires. In addition, the children will be<br />
able to complete an activity sheet by connecting<br />
the Good Fire or Bad Fire examples with a Happy<br />
Flame or Angry Flame character. The activity<br />
sheets will be available in the teacher packets.<br />
Good Fire - Bad Fire activity sheets.<br />
Note: This activity asks the student to draw a line<br />
from the Happy Flame to the Good Fires and to<br />
draw a line from the Angry Flame to the Bad Fires.<br />
Good Fire - Bad Fire Flash Cards:<br />
#1 Meet the <strong>Wildfire</strong> <strong>Prevention</strong> Team<br />
#2 Meet the Good Fire and Bad Fire characters<br />
#3 Barbeque<br />
CONDUCTING SCHOOL PROGRAMS – GUIDE Sample Lesson Plan - 35
#4 Child with clothes burning<br />
#5 <strong>Wildfire</strong><br />
#6 Campfire<br />
#7 Fireplace<br />
#8 Kids playing with matches<br />
#9 Birthday candles<br />
#10 House fire<br />
Procedures:<br />
You will be telling the children that we will be<br />
discussing fire safety and learning how they can be<br />
safe from fire. We will ask the children what fire<br />
is. The desired response is that it is hot and that it<br />
burns. If they do not respond this way, then we<br />
will lead them to this conclusion. We will<br />
emphasize to them that fire is dangerous and<br />
something that adults must use and supervise.<br />
We will then let the children discuss whether or<br />
not all fire is bad. We will tell them that there are<br />
good fires and bad fires. It is important to remind<br />
them that fire is dangerous, it CAN hurt them and<br />
they should NEVER play with fire.<br />
Not all fire is bad. We will ask them to give an<br />
example of a Good Fire. We will also give them a<br />
few examples to introduce the concept of Good<br />
Fire; i.e., fireplace, birthday candles or campfire.<br />
Similarly, we will give them some examples of<br />
Bad Fire and discuss the differences with them,<br />
letting them make the distinction between good<br />
and bad fire. It will be stressed that whether a fire<br />
is good or bad, it is dangerous and must be used<br />
only by adults.<br />
36 – Sample Lesson Plan CONDUCTING SCHOOL PROGRAMS –GUIDE
2.2 SAMPLE LESSON PLAN FOR GOOD FIRE IS<br />
HELPFUL<br />
Title:<br />
Grade Level:<br />
Good Fire is Helpful<br />
Kindergarten through 5th Grade<br />
Time Required: 20 minutes (or more if discussion and time allow)<br />
Skill:<br />
Learning<br />
Objectives:<br />
Materials:<br />
Students will use their knowledge of helpful and<br />
harmful fires to solve problems related to keeping<br />
fires helpful and not allowing them to become outof-control<br />
wildfires.<br />
Students will understand the concepts of useful<br />
and helpful fires as well as harmful fires. Students<br />
will also understand aspects of fire safety.<br />
• Narrative script (on the following pages).<br />
• Props (or slides, if available) to emphasize the<br />
appropriate topic.<br />
Procedures:<br />
We will be telling the children that we will be<br />
discussing fire safety and learning how they can be<br />
safe from fire. We will ask the children what fire<br />
is. The desired response is that it is hot and that it<br />
burns. If they do not respond this way, then we<br />
will lead them to this conclusion.<br />
CONDUCTING SCHOOL PROGRAMS – GUIDE Sample Lesson Plan - 37
We will emphasize to them that fire is<br />
DANGEROUS and something that adults must use<br />
and supervise.<br />
We will then let the children discuss whether or<br />
not all fire is bad. We will tell them that there are<br />
Good Fires and Bad Fires. It is important to remind<br />
them that fire is dangerous, it CAN hurt them and<br />
they should NEVER play with fire.<br />
Not all fire is bad. We will ask them to give an<br />
example of a Good Fire. We will also give them a<br />
few examples to introduce the concept of good<br />
fire, e.g. fireplace, birthday candles or campfire.<br />
Similarly, we will give them some examples of<br />
Bad Fire and discuss the differences with them,<br />
letting them make the distinction between good<br />
and bad fire. Fire safety will be stressed as will the<br />
concept that whether a fire is good or bad, ALL<br />
fire is dangerous and must only be used or<br />
supervised by adults.<br />
38 – Sample Lesson Plan CONDUCTING SCHOOL PROGRAMS –GUIDE
2.3 SUGGESTIONS FOR A FIRE PREVENTION<br />
PROGRAM SCRIPT AND PROPS<br />
The following script and prop suggestions provide a framework which can be<br />
adapted, built upon, expanded and tailored to specific geographic areas, audiences<br />
and fire prevention program needs. Props may be slides, pictures or other visual<br />
depictions.<br />
1. Prop or slide showing parent burning leaves or a ditchbank<br />
Question:<br />
Answer:<br />
What does parent need to know about and have on hand when<br />
using fire?<br />
Burning Permit if required by local law.<br />
Weather. Strong winds may cause fire to spread and grow.<br />
Shovel. Always have a shovel nearby in case fire starts to burn<br />
beyond planned boundaries.<br />
Garden Hose. Always have water near to help cool fire if it starts<br />
to spread.<br />
Never burn near buildings such as garages, sheds or other<br />
structures that could catch on fire.<br />
CONDUCTING SCHOOL PROGRAMS – GUIDE Narrative & Props - 39
Question:<br />
Answer:<br />
What are good and bad aspects of these fires?<br />
Good - gets rid of dead leaves and weeds. Also the ashes can be<br />
used to help gardens and flowers grow.<br />
Bad - none, as long as fire doesn't get big, out of control or the<br />
smoke bothers others.<br />
2. Prop showing campfire near tents in a camping area<br />
Question:<br />
Answer:<br />
What precautions should be or have been taken to safely use the<br />
campfire?<br />
The campfire area should be cleared of grass, twigs and branches.<br />
Keep it small. Fires should be contained in a pit about two feet by<br />
two feet in size and the pit should be lined with rocks and bare dirt<br />
(or concrete in some developed campsites).<br />
Keep it away from tents. Fires should never be built near tents or<br />
other things that can catch on fire. Remember, sparks may fly out<br />
of the fire and travel several feet.<br />
Have a shovel and water handy. Always keep some water and a<br />
shovel nearby so that if the fire does start to escape from the fire<br />
pit, you can put it out.<br />
40 – Narrative & Props CONDUCTING SCHOOL PROGRAMS –GUIDE
Question:<br />
Answer:<br />
Never leave a campfire unattended. If someone isn't there to watch<br />
the fire, it could escape its limits. If you are going to bed or you<br />
are going off to fish, hike or play, always be sure the fire is dead<br />
out.<br />
Even when there are just coals in the fire, put water on it and stir it<br />
up with the shovel before leaving.<br />
Don 't build a fire on a windy day. Strong wind gusts can blow<br />
sparks and fire outside of the fire pit.<br />
What are the good and bad aspects of a campfire?<br />
Good - They keep us warm in the outdoors.<br />
They can dry both wet clothes and us.<br />
They are fun for roasting marshmallows and hotdogs and other<br />
cooking.<br />
Bad - none... as long as it is kept small and under control.<br />
3. Prop showing vegetation close to a house or structure<br />
Tell students that in case of a wild or uncontrolled fire, this house<br />
or structure would be threatened and may burn.<br />
CONDUCTING SCHOOL PROGRAMS – GUIDE Narrative & Props - 41
Question:<br />
Answer:<br />
What could this homeowner or property owner do to protect the<br />
house or structure? What could students do if this was their house?<br />
Make sure all weeds and flammable bushes are cleared away from<br />
the house or structure, ideally for at least 30 feet.<br />
Plant only fire-resistant plants and shrubs near houses or other<br />
structures.<br />
Don't stack firewood next to a house, garage or other structure.<br />
<strong>Wildfire</strong> can ignite the wood and then the house or other structure.<br />
Trim tree branches so they don't hang over or next to the house or<br />
structure.<br />
Don't put cedar (wooden) shakes on your house near wildlands<br />
unless the shakes are fire-resistant. If the house already has a wood<br />
roof, spray it with a fire-resistant solution.<br />
Point out to students that it may be nice to live next to range or<br />
forest lands but it's very important to protect your home from fire.<br />
4. Prop(s) showing fireworks going off, such as a Roman candle or sparkler<br />
and large overhead fireworks. (You may want to bring some actual illegal<br />
fireworks that have been confiscated by law enforcement officials. Contact<br />
local police or fire departments or agency law enforcement personnel).<br />
42 – Narrative & Props CONDUCTING SCHOOL PROGRAMS –GUIDE
Tell students that fireworks are fun and exciting but they must be used carefully<br />
so they don't start a wildfire.<br />
Question:<br />
Answer:<br />
What can we do to be sure fireworks don't start fires?<br />
Always have an adult present. Fireworks are dangerous and should<br />
only be lit by an adult. Fireworks can burn you.<br />
Don't use fireworks near grass land or forests. Fireworks can get<br />
out of control and ignite a fire very easily in dry grass or brush. In<br />
the forest they can start fires in pine needles on the ground and<br />
burn tall trees.<br />
Always have some water and a shovel nearby when you use<br />
fireworks, just in case one misfires or starts a fire.<br />
Stress that fireworks of any type are not allowed on public lands!<br />
5. Prop(s) showing people outdoors (hunters, bikers, or people having a<br />
picnic) doing foolish things (littering, throwing a burning cigarette, etc.).<br />
Ask the students if they see these people doing anything they shouldn't be<br />
doing and have them tell you why. Help them with some of the following<br />
ideas:<br />
Carelessly tossed cigarettes can ignite a wildfire. Always be sure adults<br />
use the ashtray. If they smoke outdoors, make sure they do so only in an<br />
area cleared to bare dirt and that they crush out the cigarettes cold when<br />
they are finished.<br />
Littering ruins a pretty view for others and it's a fire hazard because papers<br />
can ignite easily. Broken glass can work like a magnifying glass in the sun<br />
and ignite a fire.<br />
CONDUCTING SCHOOL PROGRAMS – GUIDE Narrative & Props - 43
Point out to the students that it's fun to enjoy the outdoors but we need to take<br />
care of it and leave it clean. Always clean up after yourself. It's always good<br />
to pick up litter even if it isn't yours.<br />
6. Slide(s) showing motorcycle riders and off-road-vehicle drivers in areas<br />
of grass and brush or in the forest.<br />
Tell students that some people's recreation includes riding motorcycles or offroad<br />
vehicles in the wildlands but they need to be careful so they don't start a<br />
fire. Ask the students if they know why/how people in the slide are risking<br />
starting a fire.<br />
You may need to prompt the students with this one and explain that sparks<br />
from mufflers can ignite a fire in grass or pine needles.<br />
Question:<br />
Answer:<br />
How can these people be safe about riding in these areas?<br />
Be sure they have spark arresters in their mufflers.<br />
Always stay on designated trails and don't wander off into the<br />
grass and brush or off the trails in the forest. (You can also<br />
incorporate an erosion message here.)<br />
Note: Posters, photographs or other pictures may be obtained from<br />
a motorcycle or off-road-vehicle dealer in your area.<br />
These are just a few suggestions for props and prevention messages. You may<br />
want to adapt them to your geographical area and specific audiences and<br />
incorporate them into your own prevention program.<br />
44 – Narrative & Props CONDUCTING SCHOOL PROGRAMS –GUIDE
2.4 EDUCATIONAL PROPS & TEACHING AIDS<br />
ITEM GRADES: P K 1 2 3 4 5 6<br />
SUPPORT MATERIALS:<br />
CLIP ART X X X X X X X X<br />
STENCILS X X X X<br />
CALENDARS X X X X<br />
CLASS DECORATIONS X X X X X X X X<br />
BANNERS X X X X X X X X<br />
CREATIVE BOOKS X X X X<br />
CERTIFICATES/AWARDS X X X X X X X X<br />
RUBBER STAMPS X X X X X X<br />
PENNANTS X X X X<br />
BULLETIN BOARD AIDS X X X X X X X X<br />
STICKERS X X X X X X<br />
NAMEPLATES/TAGS X X X X X<br />
MAGNETS X X X X X<br />
BOOKMARKS X X X X<br />
BOOKCOVERS X X X X<br />
POSTERS X X X X X X X X<br />
NOTEPADS PENCILS X X X X<br />
CRAYONS X X X X X X X X<br />
CHARACTER REPLICAS X X X X X<br />
CHARACTER CUTOUTS X X X X X<br />
BUTTONS X X X X X<br />
TRADING CARDS X X X X X X<br />
ACTIVITIES:<br />
PUZZLE-TABLE X X X X X<br />
PUZZLE-FLOOR X X X X X<br />
SCHOOL PLAYS X X X X X X X X<br />
SKITS X X X X X X X X<br />
CONDUCTING SCHOOL PROGRAMS – GUIDE Props & Aids - 45
ITEM GRADES: P K 1 2 3 4 5 6<br />
GAMES:<br />
BOARD X X X X X X X X<br />
BINGO X X X X X X X<br />
MEMORY MATCH X X X X X X X<br />
ZIP CARD GAME X X X X<br />
WORD GAMES X X X X X X X<br />
TWENTY QUESTIONS X X X X<br />
JEOPARDY TYPE X X X X<br />
FLASHCARDS X X X X X X X X<br />
LEARNING SHEETS X X X X X X X X<br />
COSTUMES X X X X X<br />
TELL-A-STORY X X X X<br />
DELIVERY TECHNIQUES:<br />
OVERHEAD<br />
TRANSPARENCY X X X X<br />
SLIDE PROGRAMS X X X X X X X X<br />
VIDEOTAPES X X X X X X X X<br />
AUDIOTAPES X X X X X X X X<br />
THEMATIC TEACHING X X X X X X X<br />
BIG BOOKS X X X X X<br />
STORY CARDS X X X X X<br />
PUPPETS X X X X X<br />
PUPPET SHOWS X X X X X<br />
MITT BOARD X X X X X<br />
INTERNET X X X X X X<br />
COMPUTER GAMES X X X X X X X<br />
46 – Props & Aids CONDUCTING SCHOOL PROGRAMS –GUIDE
2.5 EVALUATING YOUR WILDFIRE PREVENTION<br />
PROGRAM<br />
As with all presentations, the school programs for wildfire prevention education<br />
are dynamic and always have room for change and improvement. A written<br />
evaluation provided by your audience is a valuable tool for measuring the<br />
effectiveness of your program and identifying strengths and weaknesses.<br />
The <strong>Wildfire</strong> <strong>Prevention</strong> Program Evaluation form on the following page is one<br />
example of a written evaluation. It can be used as is, adapted to a specific<br />
audience, and requested from the teacher or students or both. The feedback you<br />
receive through this form can be referred to and used as you further develop and<br />
Improve your program.<br />
Because of busy schedules and time constraints, some teachers may prefer to<br />
complete the evaluation and return it to you before you leave the classroom.<br />
Others may want to take more time or have a follow-up discussion with their<br />
students before responding. however, if the evaluation form is to be returned at a<br />
later date, ask that it be sent within a specified time, such as five days. This helps<br />
ensure that the information is fresh and the form won't be delayed indefinitely.<br />
Also, if you ask that the form be mailed back to you, attach a self-addressed,<br />
stamped envelope.<br />
CONDUCTING SCHOOL PROGRAMS – GUIDE Evaluation - 47
NOTES<br />
48 – Notes CONDUCTING SCHOOL PROGRAMS –GUIDE
WILDFIRE PREVENTION<br />
PROGRAM EVALUATION<br />
We would appreciate it if you would take a few moments to fill out this evaluation<br />
sheet and return it within five days to: {Name, Agency and Address} Thank You.<br />
Question Response Comments<br />
1. What is the age and grade level of<br />
your students?<br />
Age<br />
Grade<br />
2. Is the lesson appropriate and/or<br />
effective for this age and grade level? Yes No<br />
3. How many students are in your group?<br />
4. Do you feel that your students<br />
understand the concepts that were<br />
presented? Yes No<br />
5. Was the lesson plan delivered in a<br />
manner that was easy for your students<br />
to understand? Yes No<br />
6. What was YOUR response to the<br />
program? Please score using a scale of<br />
1 to 5 where 1 = poor and 5 =<br />
excellent.<br />
7. What was your students' response to<br />
the program?<br />
Score<br />
Score<br />
8. Would you be interested in having our<br />
agency visit your school again? Yes No<br />
Continued Next Page<br />
CONDUCTING SCHOOL PROGRAMS – GUIDE Evaluation - 49
9. Name of your preschool or school:<br />
10. Address of your school: Street:<br />
City<br />
Zip<br />
11. Your name:<br />
12. <strong>School</strong> phone number: ( )<br />
We are looking forward to the response about our program from you and your students. We<br />
value your opinion, and your comments will help us to continue improving our wildfire<br />
prevention program. Please return this form within the next five days.<br />
Thank you for participating in this evaluation. We appreciate it!<br />
Your comments on the overall program will be appreciated.<br />
(Use additional sheets of paper if needed)<br />
50 – Evaluation CONDUCTING SCHOOL PROGRAMS –GUIDE


