FrontRow Symbio User Guide - Centrum Sound
FrontRow Symbio User Guide - Centrum Sound
FrontRow Symbio User Guide - Centrum Sound

You also want an ePaper? Increase the reach of your titles
YUMPU automatically turns print PDFs into web optimized ePapers that Google loves.
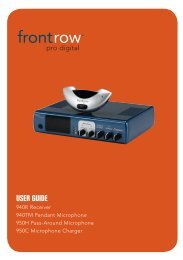
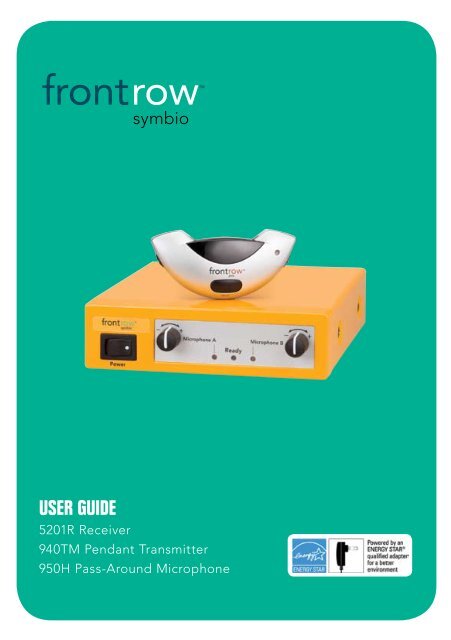
symbio<br />
user guide<br />
5201R Receiver<br />
940TM Pendant Transmitter<br />
950H Pass-Around Microphone
Contents<br />
Important Safety Instructions . . . . . . . . . . . . . . . . . . . . . . . . . . . . . . . . . . . . . . . . . . . . . . . 1<br />
Electrical Warnings . . . . . . . . . . . . . . . . . . . . . . . . . . . . . . . . . . . . . . . . . . . . . . . . . . . . . . . . 2<br />
Introduction . . . . . . . . . . . . . . . . . . . . . . . . . . . . . . . . . . . . . . . . . . . . . . . . . . . . . . . . . . . . . . 3<br />
Basic System <strong>Guide</strong>lines. . . . . . . . . . . . . . . . . . . . . . . . . . . . . . . . . . . . . . . . . . . . . . . . . . . . 4<br />
Chapter 1 Receiver Components . . . . . . . . . . . . . . . . . . . . . . . . . . . . . . . . . . . . . . . . . . . 5<br />
Chapter 2 Microphone Components. . . . . . . . . . . . . . . . . . . . . . . . . . . . . . . . . . . . . . . . 6<br />
940TM Pendant Microphone<br />
Chapter 3 Features. . . . . . . . . . . . . . . . . . . . . . . . . . . . . . . . . . . . . . . . . . . . . . . . . . . . . . . 7<br />
Chapter 4 Installing Batteries and Charging . . . . . . . . . . . . . . . . . . . . . . . . . . . . . 8 - 10<br />
Chapter 5 Using . . . . . . . . . . . . . . . . . . . . . . . . . . . . . . . . . . . . . . . . . . . . . . . . . . . . . . . . 11<br />
950H Pass-Around Microphone<br />
Chapter 6 Features. . . . . . . . . . . . . . . . . . . . . . . . . . . . . . . . . . . . . . . . . . . . . . . . . . . . . . 12<br />
Chapter 7 Setting gain, channel, installing battery, and charging . . . . . . . . . . 13 - 14<br />
Chapter 8 Using . . . . . . . . . . . . . . . . . . . . . . . . . . . . . . . . . . . . . . . . . . . . . . . . . . . . 15 - 16<br />
Chapter 9 Using a Second Microphone . . . . . . . . . . . . . . . . . . . . . . . . . . . . . . . . . . . . 17<br />
950C Microphone Charger<br />
Chapter 10 Features. . . . . . . . . . . . . . . . . . . . . . . . . . . . . . . . . . . . . . . . . . . . . . . . . . . . . . 18<br />
Chapter 11 950C Charger Setup . . . . . . . . . . . . . . . . . . . . . . . . . . . . . . . . . . . . . . . . . . . 19<br />
5201R <strong>Symbio</strong> Receiver<br />
Chapter 12 Features . . . . . . . . . . . . . . . . . . . . . . . . . . . . . . . . . . . . . . . . . . . . . . . . . . . . . . . . . 20<br />
Chapter 13 Activate Receiver and Transmitter . . . . . . . . . . . . . . . . . . . . . . . . . . . . . . . . . . 21<br />
Chapter 14 Product Specifications. . . . . . . . . . . . . . . . . . . . . . . . . . . . . . . . . . . . . . . . . .22<br />
Chapter 15 Troubleshooting . . . . . . . . . . . . . . . . . . . . . . . . . . . . . . . . . . . . . . . . . . . . . . .23<br />
Chapter 16 Regulatory . . . . . . . . . . . . . . . . . . . . . . . . . . . . . . . . . . . . . . . . . . . . . . . . . . . . 24
IMPORTANT SAFETY<br />
INSTRUCTIONS<br />
1. The apparatus shall not be exposed to<br />
dripping or splashing and no objects<br />
filled with liquids, such as vases, shall be<br />
placed on the apparatus.<br />
2. Read these instructions.<br />
3. Keep these instructions.<br />
4. Heed all warnings.<br />
5. Follow all instructions.<br />
6. Do not use this apparatus near water.<br />
7. Clean only with dry cloth.<br />
8. Do not block any ventilation openings.<br />
Install in accordance with the manufacturer’s<br />
instructions.<br />
9. Do not install near any heat sources<br />
such as radiators, heat registers,<br />
stoves, or other apparatus (including<br />
amplifiers) that produce heat.<br />
10. Do not defeat the safety purpose of<br />
the polarized or grounding-type plug.<br />
A polarized plug has two blades with<br />
one wider than the other. A grounding<br />
type plug has two blades and a third<br />
grounding prong. The wide blade or<br />
the third prong are provided for your<br />
safety. If the provided plug does not fit<br />
into your outlet, consult an electrician<br />
for replacement of the obsolete outlet.<br />
11. Protect the power cord from being<br />
walked on or pinched particularly at<br />
plugs, convenience receptacles, and the<br />
point where they exit from the apparatus.<br />
12. Only use attachments/accessories<br />
specified by the manufacturer.<br />
13. Use only with the cart, stand, tripod,<br />
bracket, or table specified by the manufacturer,<br />
or sold with the<br />
apparatus. When a cart is<br />
used, use caution when<br />
moving the cart/apparatus<br />
combination to avoid<br />
injury from tip-over.<br />
14. Unplug this apparatus during lightning<br />
storms or when unused for long periods<br />
of time.<br />
15. Refer all servicing to qualified service<br />
personnel. Servicing is required when<br />
the apparatus has been damaged in<br />
any way, such as power-supply cord<br />
or plug is damaged, liquid has been<br />
spilled or objects have fallen into the<br />
apparatus, the apparatus has been<br />
exposed to rain or moisture, does<br />
not operate normally, or has been<br />
dropped.<br />
WARNING<br />
To reduce the risk of fire or electric shock,<br />
do not expose this apparatus to rain or<br />
moisture.<br />
WARNING<br />
To prevent injury, this apparatus must be<br />
securely attached to the floor/wall in<br />
accordance with the installation instructions.<br />
WARNING<br />
Batteries (battery pack or batteries<br />
installed) shall not be exposed to excessive<br />
heat such as sunshine, fire or the like. Do<br />
not use noticeably damaged batteries.<br />
CAUTION<br />
To reduce the risk of fire or electric shock,<br />
do not perform any servicing other than<br />
that contained in the operating instructions<br />
unless you are qualified to do so.<br />
1
ELECTRICAL WARNINGS<br />
1. Avoid Abuse to the Power Supply<br />
To reduce risk of electric shock, unplug<br />
the power supply from outlet before<br />
attempting any maintenance or cleaning.<br />
Turn off controls will not reduce this risk.<br />
To reduce the risk of fire or electric<br />
shock, do not expose this apparatus to<br />
rain or moisture.<br />
DO NOT disassemble the power supply.<br />
Return the apparatus to Phonic<br />
Ear <strong>FrontRow</strong> for qualified service and<br />
repair if service or repair is required.<br />
Incorrect reassembly may result in a risk<br />
of electric shock or fire.<br />
DO NOT expose the power supply to<br />
rain, snow, water, gas, oil, etc.<br />
DO NOT operate the power supply<br />
if it has received a sharp blow, been<br />
dropped, or otherwise damaged in any<br />
way; return the apparatus to Phonic Ear<br />
<strong>FrontRow</strong> for qualified service and repair.<br />
DO NOT block or cover the apparatus<br />
and impede ventilation.<br />
DO NOT expose batteries (battery<br />
pack or batteries installed) to excessive<br />
heat such as sunshine, fire, or the like.<br />
2. Proper Use of the Power Supply<br />
and Wiring<br />
An extension cord should not be used<br />
unless absolutely necessary. Use of<br />
improper extension cord could result<br />
in a risk of fire and electric shock. The<br />
cord MUST be plugged into a grounded<br />
outlet. Make sure it is properly wired, in<br />
good electrical condition, and wire size<br />
is large enough for AC ampere rating of<br />
the power supply or charger as specified<br />
below. AWG = American Wire Gauge.<br />
To reduce risk of damage to plug and<br />
cord when disconnecting the power<br />
supply or charger, ALWAYS pull on plug<br />
- NEVER on cord.<br />
!<br />
Locate cord so that it will not be<br />
stepped on, tripped over, or otherwise<br />
subject to damage or stress. DO NOT<br />
lay extension cord on charger.<br />
DO NOT operate the power supply<br />
with damaged cord or plug - replace<br />
them immediately.<br />
ELECTRICAL SAFETY<br />
INFORMATION:<br />
PRECAUTIONS & SAFETY<br />
RECOMMENDATIONS<br />
Follow Manufacturers' Recommendations<br />
Before using the receiver and power supply,<br />
read all instructions for, and caution markings<br />
on the receiver and power supply and in<br />
this user guide.<br />
2
Introduction<br />
Congratuations on the purchase of your new <strong>FrontRow</strong> system!<br />
<strong>FrontRow</strong> systems engage students, improve attentiveness to the teacher, build learning success,<br />
reduce the achievement gap, foster control and orderliness, improve test scores, and reduce<br />
vocal strain and fatigue for teachers. Numerous studies show that classrooms using teacher voice<br />
amplification enjoy better student comprehension, increased student participation, better grades<br />
and fewer behavioral referrals.<br />
Read this manual carefully to become familiar with your system and to get the most out of its<br />
many features and options.<br />
Understanding Voice Amplification and its Benefits<br />
without voice amplification<br />
with voice amplification<br />
?<br />
?<br />
cough!<br />
• reduced comprehension<br />
• reduced attention<br />
• teacher fatigue<br />
• improved comprehension<br />
• improved attention<br />
• greater teacher energy<br />
Installation Notice<br />
Your <strong>FrontRow</strong> <strong>Symbio</strong> system is a precision wireless audio instrument designed to improve<br />
students' ability to perceive the teacher's voice.<br />
We strongly recommend having your system set up by a professional installer who is familar<br />
with <strong>FrontRow</strong> systems (contact your representative for referrals to installers in your area).<br />
If you choose to install your <strong>FrontRow</strong> <strong>Symbio</strong> system yourself, take great care to follow<br />
the instructions in the <strong>Symbio</strong> Installation <strong>Guide</strong> found at www.gofrontrow.com/support/<br />
product-guides. Achieving the best performance from your system is only possible<br />
by properly selecting and positioning sensors. Improper installation can result in<br />
poor performance.<br />
3
Basic System <strong>Guide</strong>lines<br />
To help ensure that you get the most from this system, follow these basic guidelines:<br />
Microphones:<br />
Proper pendant microphone placement will allow you to comfortably wear your microphone<br />
all day and ensure the best sound quality.<br />
Speak at a normal level when using your pendant microphone; the system is projecting your<br />
voice for you.<br />
Use a student microphone (sold separately) to create a more dynamic learning environment<br />
by amplifying a student's voice when they are reading or presenting.<br />
Do not use two microphones on the same channel. Your <strong>FrontRow</strong> <strong>Symbio</strong> receiver is designed to<br />
accept audio from two microphones simultaneously, but they must be on separate channels.<br />
Batteries:<br />
Install batteries in your equipment now, then charge overnight before initial use.<br />
Charge microphone batteries every night. Our Nickel Metal Hydride (NiMH) batteries last the<br />
entire school day between charges, but should be charged every night so they are ready to go in<br />
the morning.<br />
Replace microphone rechargeable batteries after 12 months of use to avoid poor performance<br />
and possible equipment damage. Only use special "silver sleeve", auto-sensing batteries supplied<br />
by <strong>FrontRow</strong>.<br />
Avoid battery corrosion. Charge then remove batteries if your transmitter will not be used for<br />
several weeks.<br />
Alkaline batteries may be used if you forgot to charge your transmitter the night before. NEVER<br />
attempt to recharge alkaline batteries. To ensure proper charging, always be sure that only "silver<br />
sleeve", auto-sensing batteries are installed.<br />
For installation instructions go to: http://www.gofrontrow.com/support/product-guides<br />
4
1 Receiver Components<br />
1<br />
2<br />
Receiver<br />
1. Receiver<br />
2. Infrared ceiling sensor*<br />
3. Receiver power supply<br />
4. Receiver mounting tray (optional)<br />
3<br />
4<br />
*Not necessary if <strong>FrontRow</strong> IR speakers are already installed<br />
5
2 Microphone Components<br />
1<br />
2<br />
3<br />
Transmitter<br />
1. 940TM pendant microphone<br />
2. Adjustable neck strap<br />
3. (1) AA (LR6) NiMH rechargeable battery<br />
("silver sleeve", auto-sensing)<br />
4. Aux-in audio adaptor cord<br />
(3.5mm to 3.5mm)<br />
5 . Two unit charger<br />
6. 950C charger<br />
(optional)<br />
7. Pass-around microphone<br />
(optional)<br />
4<br />
5<br />
(optional items)<br />
6<br />
7<br />
6
3 940TM Pendant Microphone<br />
Features<br />
1<br />
front<br />
2<br />
4<br />
bottom<br />
5 6 7 8 9 6 10<br />
back<br />
3<br />
1. Neck strap<br />
2. Infrared emitter diodes<br />
(Do not block)<br />
3. Indicator light<br />
4. Mute button<br />
(Push to mute)<br />
5. Channel selector<br />
(Select Channel A or Channel B. Do not<br />
have two microphones on the same<br />
channel in the same room)<br />
6. Dual microphone ports<br />
(Do not block)<br />
7. Aux-in audio jack<br />
(Use aux-in audio adaptor cord to send<br />
audio from a secondary audio source<br />
such as an MP3 player, portable radio/<br />
CD/tape player to the receiver)<br />
8. External microphone jack (optional)<br />
(to connect a boom microphone)<br />
9. Charge jack<br />
10. On/off switch<br />
11. Battery compartment<br />
Accepts 1 AA (LR6) battery<br />
NiMH rechargeable recommended<br />
("silver sleeve", auto-sensing)<br />
6 6 11<br />
7
4 940TM Pendant Microphone<br />
Installing Batteries and Charging<br />
1<br />
Your microphone is equipped<br />
with SmartCharge technology to<br />
protect against charging incompatible<br />
batteries. The microphone<br />
will only charge the "silver-sleeve",<br />
auto-sensing battery that comes with your<br />
microphone. If an incompatible battery is<br />
detected, the microphone will not let you<br />
charge the battery.<br />
Install Battery<br />
1. Push down on tab to open battery compartment<br />
2. Insert battery into compartment. Note<br />
polarity indicators<br />
3. Replace battery door<br />
4. Charge battery overnight before initial use<br />
2<br />
important! To ensure best performance,<br />
and avoid equipment damage, <strong>FrontRow</strong><br />
recommends replacing rechargeable batteries<br />
at the beginning of each school year.<br />
8
940TM Pendant Microphone<br />
Installing Batteries and Charging (cont.)<br />
1<br />
Charge Battery Nightly<br />
1. Microphone indicator light will blink red<br />
when battery is low<br />
2. Plug the two-microphone charge cord<br />
into the wall<br />
3. Turn microphone off<br />
4. Insert any one of the two charge cord<br />
plugs into the charge jack<br />
5. The microphone indicator light should<br />
be red when charging. If it is OFF, check<br />
microphone battery and ensure charge<br />
cord is properly connected to microphone<br />
and plugged in<br />
5<br />
Note: If you forget to charge your<br />
microphone at night, you may use a<br />
standard AA (LR6) alkaline battery instead.<br />
Remember to remove the alkaline battery<br />
and replace it with a "silver-sleeve", autosensing<br />
battery before charging the unit.<br />
4<br />
spare<br />
3<br />
Important! In order to prevent damage<br />
to your microphone, the SmartCharge feature<br />
is intended to prevent charging of any<br />
battery other than the "silver sleeve" autosensing<br />
battery supplied by <strong>FrontRow</strong>. Do<br />
not attempt to charge alkaline batteries.<br />
To ensure proper charging, always be sure<br />
that only "silver sleeve" auto-sensing batteries<br />
are installed.<br />
9
940TM Pendant Microphone<br />
Charging with the 950C charger (optional)<br />
3/4<br />
2<br />
1<br />
1. Turn microphone off<br />
2. Place microphone face up into the<br />
charge pocket. Ensure it is fully seated.<br />
3. The charger indicator light should be<br />
solid red when charging. If it is blinking<br />
red, you are attempting to charge an<br />
alkaline battery or the battery is damaged<br />
or worn out. Replace this battery with a<br />
<strong>FrontRow</strong> "silver sleeve" NiMH cell. If the<br />
light is off, ensure charger is properly connected<br />
to power supply and that you are<br />
charging a 940TM microphone (930TM<br />
microphones cannot be charged in this<br />
charger). Re-check the seating.<br />
4. The charger indicator light will turn green<br />
when charging is complete.<br />
Note: If the charger is blinking red and the<br />
cell is the proper type, make sure the charger<br />
contacts are free of contaminants. If they<br />
appear dirty, then clean with rubbing alcohol,<br />
using a cotton swab.<br />
10
5 940TM Pendant Microphone<br />
3<br />
Using<br />
2<br />
5in/13cm<br />
6<br />
5 6 4<br />
1<br />
1. Place microphone around neck and<br />
connect clasp<br />
2. Adjust neck straps to position microphone<br />
as close to mouth as possible<br />
(approximately 5in/13cm)<br />
3. Set channel to A or B (whichever is not<br />
already in use)<br />
4. Turn microphone on. Indicator light<br />
should be green<br />
5. Press mute switch as needed for private<br />
conversations. Indicator light will blink green<br />
6. Optional: if desired, plug in external<br />
boom microphone<br />
Light Legend<br />
Green . . . . . . . . . . . . On<br />
Blinking Green . . . . . . Muted<br />
Blinking Red . . . . . . . . Low Battery<br />
When Charging:<br />
Off . . . . . . . . . . . . . . Alkaline Battery<br />
Detected, or<br />
microphone power<br />
is still on<br />
Red . . . . . . . . . . . . . . Charging<br />
940TM (bottom)<br />
11<br />
9<br />
The 940TM Pendant Microphone can be<br />
used to transmit audio from a secondary<br />
audio source (MP3 player, computer, portable<br />
radio/CD/tape player) to the receiver.<br />
7<br />
8<br />
10<br />
7. Plug one end of the audio adaptor cord<br />
(included) in the Audio Out/headphone<br />
jack of the secondary audio source. Plug<br />
the other end of the adaptor cord to<br />
the Aux-In jack on the 940TM Pendant<br />
Microphone<br />
8. Turn the secondary audio source on<br />
9. Turn the 940TM Pendant Microphone on<br />
10. Turn the volume on the secondary audio<br />
source all the way up and adjust the microphone<br />
volume on the receiver to obtain<br />
the optimal volume<br />
11. You can "talk over" the secondary audio<br />
by speaking into the microphone or mute<br />
the microphone to ensure the best audio<br />
sound quality<br />
11
6 950H Pass-Around Microphone (optional)<br />
Features<br />
1<br />
2<br />
3<br />
7<br />
Front<br />
8 9<br />
11<br />
5<br />
4<br />
6<br />
Back<br />
1. Emitter diodes<br />
(Do not block)<br />
2. 2-way indicator light<br />
Green = On and transmitting<br />
Blinking red = Low battery<br />
Red = Charging via 3.5mm charge<br />
input jack only<br />
No light = Charging via 950C charger<br />
3. On/off switch<br />
4. Battery compartment<br />
(On back)<br />
5. Gain switch<br />
(Inside battery compartment)<br />
6. Channel switch<br />
(Inside battery compartment)<br />
7. Name plate<br />
8. Charge input jack<br />
(Use with 2-unit charge cord only)<br />
9. Aux input jack, stereo summing<br />
10. Lavaliere clip<br />
11. 950C charger contacts<br />
Bottom<br />
10<br />
9<br />
8<br />
11<br />
12
7 950H Pass-Around Microphone (optional)<br />
Setting gain, channel, installing battery, and charging<br />
1<br />
Set gain and channel, and install battery<br />
1. Unscrew battery door to open<br />
battery compartment<br />
2. Set gain as follows:<br />
High: If majority of users will hold the<br />
microphone far from the mouth<br />
Mid (recommended): For most uses<br />
Low: If majority of users will hold the<br />
microphone close to the mouth<br />
3. Set channel to A or B<br />
(Whichever is not in use)<br />
4. Insert battery into compartment.<br />
Note polarity indicators<br />
5. Replace battery door<br />
6. Charge battery overnight before<br />
initial use<br />
2<br />
3<br />
IMPORTANT! To ensure top performance<br />
and avoid equipment damage, <strong>FrontRow</strong><br />
recommends replacing rechargeable batteries<br />
at the beginning of each school year.<br />
Charge Battery Nightly<br />
Indicator light will blink red when battery is low<br />
Note: If you forget to charge your microphone<br />
at night, you may use a standard AA<br />
(LR6) alkaline battery instead. Remember to<br />
remove the alkaline battery and replace it with<br />
a <strong>FrontRow</strong> "silver-sleeve", auto-sensing battery<br />
before charging the unit.<br />
4<br />
Important! In order to prevent damage<br />
to your microphone, the SmartCharge<br />
feature is intended to prevent charging of<br />
any battery other than the "silver sleeve"<br />
auto-sensing battery supplied by <strong>FrontRow</strong>.<br />
Do not attempt to charge alkaline batteries<br />
separately. To ensure proper charging,<br />
always be sure that only <strong>FrontRow</strong> "silver<br />
sleeve" auto-sensing batteries are installed.<br />
13
950H Pass-Around Microphone (optional)<br />
Charging with the 2-unit charge cord<br />
1<br />
3<br />
2<br />
4<br />
1. Plug the two-microphone charge cord into<br />
the wall<br />
2. Turn microphone off<br />
3. Insert one of the charge cord plugs into<br />
the charge jack<br />
4. The microphone indicator light should be<br />
red when charging. If it is OFF, ensure that<br />
you are not attempting to change an alkaline<br />
battery, and that charge cord is properly<br />
connected to microphone and wall and<br />
950H is OFF.<br />
Charging with the 950C charger<br />
1<br />
2<br />
3/4<br />
1. Turn microphone off<br />
2. Place microphone into the charge pocket.<br />
Ensure it is fully seated.<br />
3. The charger indicator light should be<br />
solid red when charging. If the light is off,<br />
ensure charger is properly connected<br />
to power supply and that you are not<br />
attempting to charge an alkaline battery.<br />
4. The charger indicator light will turn green<br />
when charging is complete and unit will<br />
enter maintenance mode.<br />
14
8 950H Pass-Around Microphone (optional)<br />
Using<br />
3<br />
5<br />
1<br />
5in. (13cm)<br />
2<br />
1. Turn microphone on<br />
2. Note indicator light<br />
Green = On and transmitting<br />
Blinking red = Low battery<br />
3. To allow hands-free use (for example,<br />
when reading aloud and turning pages),<br />
attach the lavaliere clip. Adjust neck strap<br />
to position microphone approximately<br />
4 - 5in (10 - 13cm) from mouth.<br />
4. Keep top of microphone approximately<br />
3 - 4in. (7.5 – 10cm) from mouth<br />
5. Do not block emitter diodes<br />
6. Turn off microphone and place microphone<br />
in charger at the end of the day<br />
Note: The 950H is factory set on Channel B.<br />
If you are using two microphones, they<br />
must be on different channels.<br />
4<br />
caution: The lavaliere clip should easily<br />
slide on and snap into place. Do NOT<br />
snap the clip around the body or install the<br />
microphone backward or damage may result.<br />
3in. (7cm)<br />
6<br />
15
950H Pass-Around Microphone<br />
Using (cont.)<br />
11<br />
9<br />
The 950H Pass-Around Microphone can be<br />
used to transmit audio from a secondary<br />
audio source (MP3 player, computer, portable<br />
radio/CD/tape player) to the receiver.<br />
7<br />
8<br />
10<br />
7. Plug one end of the audio adaptor cord<br />
(included) in the Audio Out/headphone<br />
jack of the secondary audio source.<br />
Plug the other end of the adaptor cord to<br />
the Aux-In jack on the 950H Pass-Around<br />
Microphone<br />
8. Turn the secondary audio source on<br />
9. Turn the 950H Pass-Around Microphone on<br />
10. Turn the volume on the secondary audio<br />
source all the way up and adjust the microphone<br />
volume on the receiver to obtain<br />
the optimal volume<br />
11. When using this feature the microphone<br />
audio is disabled<br />
16
9 Using a Second Microphone<br />
teacher 1<br />
(channel A)<br />
Classroom 1<br />
teacher 2<br />
(channel B)<br />
Your receiver is designed to receive two<br />
microphone signals at once. For example,<br />
two teachers (or a teacher and an aide)<br />
may each use a microphone. Or, one<br />
teacher can use a microphone and students<br />
can use a pass-around microphone.<br />
Microphones must be on different channels<br />
or interference will occur. Do not have<br />
both microphones on the same channel.<br />
Classroom 2<br />
teacher<br />
(channel A)<br />
student<br />
(channel B)<br />
17
10 950C Charger (optional)<br />
Features<br />
1<br />
2<br />
3<br />
4<br />
top<br />
1. Charge pocket for 950H<br />
Pass-Around microphone<br />
2. 2-way indicator light for 950H<br />
Pass-Around microphone<br />
No light = Pocket empty or<br />
improper battery<br />
Red = Charging<br />
Blinking red = Charge error<br />
Green = Charging complete<br />
3. Charge pocket for 940TM Pendant<br />
microphone (will not charge 930TM<br />
pendant microphone)<br />
4. 2-way indicator light for 940TM<br />
Pendant microphone<br />
No light = Pocket empty<br />
Red = Charging<br />
Blinking red = Charge error or<br />
improper battery<br />
Green = Charging complete<br />
5. Power supply input<br />
back<br />
5<br />
18
11 950C Charger Setup<br />
1. Plug power supply into power outlet and<br />
into the back of the charging base<br />
2. Charging multiple microphones<br />
You can charge up to 3 microphones<br />
in any configuration by connecting two<br />
chargers to the power supply. Charging<br />
4 or more microphones will cause the<br />
power supply to shut off.<br />
1 2<br />
OR<br />
OR<br />
1<br />
2<br />
19
12 5201R <strong>Symbio</strong> Receiver<br />
Features<br />
front<br />
1<br />
2 3 4 5 6<br />
back<br />
7 8 9 10 7 7<br />
1. Power/Standby Button<br />
2. Microphone A Volume Control<br />
3. Microphone A Reception Light<br />
4. Power On Ready Indicator Light<br />
5. Microphone B Reception Light<br />
6. Microphone B Volume Control<br />
7. Infrared Sensor Inputs (Wall or Ceiling)<br />
8. Audio Out Jack<br />
9. Audio Out Mic/Line Switch<br />
10. DC Input Jack<br />
20
13 5201R <strong>Symbio</strong> Receiver<br />
Activate Receiver and Transmitter<br />
1 4 2 4<br />
5in/13cm<br />
3<br />
1. Press power button<br />
2. Green..... Power On<br />
3. Put microphone around neck and adjust<br />
strap so it is 5in. (13cm) from your mouth<br />
4. Turn microphone on and check<br />
microphone A or B indicator light<br />
Green..... Receiving Signal<br />
Red........ Microphone Off/Muted<br />
5. Speak in a normal conversational tone<br />
while walking the entire room. Have a<br />
second person adjust the volume to a<br />
comfortable level.<br />
Once the microphone volume is set to<br />
the optimal level, the only thing you need<br />
to remember is to turn the receiver and<br />
microphone on in the morning and turn<br />
them off and charge the microphone in<br />
the evening.<br />
4<br />
21
14 Product Specifications<br />
<strong>Symbio</strong> Receiver: 5201R<br />
Receiver frequency: 2.3MHz & 2.8MHz<br />
(2 simultaneous channels)<br />
Operating range: 18.5m/60ft line-of-sight<br />
(typical)<br />
Frequency Response: 50Hz to 10kHz<br />
THD: < 1% @ 1kHz<br />
Signal to Noise: > 65dB (system)<br />
Power Supply: 15V @ 600mA<br />
Mic level out: 0V to 100mVrms at maximum<br />
volume & maximum deviation, typical<br />
Line level out: 0V to 1Vrms at maximum<br />
volume & maximum deviation, typical<br />
Size (wxhxd): 14 x 3.8 x 18 cm/5.5 x 1.5 x 7 in<br />
Weight: 766g/1.7lbs.<br />
Pendant Mic Transmitter: 940TM<br />
Transmitting frequency: 2.3MHz & 2.8MHz<br />
(switchable)<br />
Transmission type: Infrared<br />
Operating range: 18.5m/60ft line-of-sight<br />
(typical)<br />
Transmission angles: 160˚ horizontally;<br />
40˚ vertically (1/2 power)<br />
Microphones: dual uni-directional cardioid<br />
(directivity index 6.0@500Hz)<br />
Use controls: On/off/mute/channel<br />
Inputs/outputs: 2.5mm mic input; 3.5mm aux<br />
input; 1.3mm DC charge jack<br />
Battery life: minimum 8 hour (single AA,<br />
2500mAH rechargeable NiMH)<br />
Size (wxhxd): 11 x 6 x 2.5 cm/4.5 x 2.5 x 0.9 in<br />
Weight: 85g/3.0oz (with battery)<br />
22
15 Troubleshooting<br />
Receiver won’t turn on (power light<br />
doesn’t turn on)<br />
• Verify that the power supply is plugged into<br />
both the receiver and a working wall outlet<br />
’Dead spots’ or microphone crackling/<br />
noise<br />
• Verify that you are not blocking either the<br />
emitters on the microphone or the sensors<br />
mounted around the room<br />
• If reception is interrupted or noisy when facing<br />
a certain direction, install an additional sensor<br />
in that area of the room (see Installer <strong>Guide</strong>)<br />
• If using more than one microphone, verify<br />
that they are not on the same channel<br />
• Recharge or replace the microphone batteries<br />
No signal reception (channel indicator<br />
light on receiver is red)<br />
• Check that the microphone is on<br />
• Check that the microphone is not muted<br />
(940TM only)<br />
• Verify that you are not blocking either the<br />
emitters on the microphone or the sensors<br />
mounted around the room<br />
• If reception is interrupted when facing a<br />
certain direction, install an additional sensor<br />
in that area of the room (see Installer <strong>Guide</strong>)<br />
• If using more than one microphone, verify<br />
that they are not on the same channel<br />
• Recharge or replace the microphone batteries<br />
Weak or no output from speaker(s)<br />
• Increase the Microphone A or B Volume<br />
control(s) on the receiver, or audio device<br />
• Position the microphone closer to mouth<br />
• Verify that the speakers have been properly<br />
installed<br />
High or low pitched whine or hum<br />
coming through speakers<br />
• There may be a ground loop with the<br />
system. Install a ground loop isolator on the<br />
audio output.<br />
• There may be "noisy" electrical wiring.<br />
Install an AC line filter<br />
Distorted/gurgling/buzzing<br />
• Microphones are on same channel. If you<br />
are using two microphones, set one to<br />
channel A and the other to channel B<br />
Feedback (squealing)<br />
• Lower the Microphone A or B Volume control(s)<br />
on the receiver<br />
• Make sure that speakers are mounted as close<br />
as possible to the ceiling and to the listening<br />
area; avoid mounting speakers in the teacher’s<br />
primary lecture area<br />
• Position the microphone closer to mouth<br />
23
16 Regulatory<br />
receiver: part 15, subpart B<br />
<strong>FrontRow</strong> <strong>Symbio</strong> Receiver<br />
5201R<br />
Tested to comply with<br />
FCC Standards<br />
This product conforms with the<br />
essential requirements of European<br />
Union Directive /EU Directive<br />
2004/108/EC EMC Directive and 2002/95<br />
ROHS Directive. This product can be subject<br />
to interference at our operational frequency<br />
bands of 2.3 and 2.8 MHz.<br />
For home or office use<br />
This equipment has been tested and found<br />
to comply with the limits for a Class B digital<br />
device, pursuant to Part 15 of the FCC Rules.<br />
These limits are designed to provide reasonable<br />
protection against harmful interference<br />
in a residential installation. This equipment<br />
generates, uses and can radiate radio frequency<br />
energy and, if not installed and used<br />
in accordance with the instructions, may<br />
cause harmful interference to radio communications.<br />
However, there is no guarantee<br />
that interference will not occur in a particular<br />
installation.<br />
FCC notes<br />
The <strong>FrontRow</strong> <strong>Symbio</strong> system is approved<br />
by the FCC (Federal Communications<br />
Commission). The use of the system may<br />
be governed by specific FCC rules and FCC<br />
licensing or notifications may be required.<br />
Consult your local FCC office for detailed<br />
information.<br />
Phonic Ear receivers and transmitters, when<br />
required, are approved by the Federal<br />
Communications Commission (FCC) in the<br />
U.S. and Industry Canada. Other government<br />
approvals are available upon request. (Other<br />
international regulations may also apply.)<br />
Any changes or modifications made to any<br />
government-approved element of this instrument,<br />
without the express approval of<br />
Phonic Ear, Inc. in writing, could void the<br />
user's authority to operate those elements<br />
of the system.<br />
Electrical and electronic<br />
equipment (EEE) contains<br />
materials, components and<br />
substances, that could be<br />
dangerous or detrimental to human health<br />
and the environment if waste electrical and<br />
electronic equipment (WEEE) is not disposed<br />
of correctly. Products marked with the<br />
crossed-out dustbin shown here are electrical<br />
and electronic equipment. The crossed-out<br />
dustbin indicates that waste electrical and<br />
electronic equipment may not be disposed<br />
of with unsorted household waste and that it<br />
must be collected separately.<br />
In developing and manufacturing your Phonic<br />
Ear product, we used high-quality materials<br />
and components that can be reused. Thus,<br />
when disposing of your waste electrical<br />
and electronic equipment, you must use a<br />
collection system designated for this purpose,<br />
regardless of whether you dispose of your<br />
waste at your local waste site or it is collected<br />
from your home. Please contact your local<br />
authority for further information.<br />
IC notes<br />
This Class B digital apparatus complies with<br />
Canadian ICES-003.<br />
Cet appareil numérique de la classe B est<br />
conforme à la norme NMB-003 du Canada.<br />
The term "IC:" before the radio certification<br />
number only signifies that Industry of Canada<br />
technical specifications were met.<br />
24
USA<br />
<strong>FrontRow</strong><br />
Corporate Headquarters<br />
2080 Lakeville Highway<br />
Petaluma, CA 94954-6713<br />
toll-free: 800.227.0735<br />
tel: 707.769.1110<br />
fax: 707.769.9624<br />
web: www.gofrontrow.com<br />
Australia<br />
Phonic Ear<br />
512 Wickham Street<br />
Fortitude Valley Qld 4051<br />
toll-free: 1 800 PHONIC<br />
tel: + 617 3250 0385<br />
fax: + 617 3250 0386<br />
web: www.gofrontrow.com<br />
Canada<br />
<strong>FrontRow</strong><br />
6950 Creditview Road, Unit 1<br />
Mississauga, ON L5N 0A6<br />
toll-free: 800.340.9894<br />
tel: 905.461.5300<br />
fax: 905.677.7760<br />
web: www.gofrontrow.com<br />
Europe/Asia<br />
Phonic Ear A/S<br />
Kongebakken 9<br />
2765 Smørum<br />
Denmark<br />
tel: +45 3917 7101<br />
fax: +45 3927 7900<br />
web: www.gofrontrow.com<br />
www.phonicear.com<br />
New Zealand<br />
Oticon New Zealand Ltd.<br />
142 Lambton Quay<br />
P.O. Box 9128<br />
Te Aro. Wellington<br />
toll-free: 800 OTICON<br />
toll-free fax: 00800 FAX<br />
OTICON<br />
web: www.oticon.co.nz<br />
United Kingdom<br />
PC Werth Limited<br />
Audiology House<br />
45 Nightingale Lane<br />
London SW12 8SP<br />
tel: 020 8772 2700<br />
web: www.soundfield.info<br />
© 2009 Phonic Ear Inc. Phonic Ear, <strong>FrontRow</strong> and the names of Phonic Ear and <strong>FrontRow</strong> products are trademarks or registered<br />
trademarks of Phonic Ear, Inc. in the U.S. and other countries. Product specifications and accessories subject to change without<br />
notice.<br />
821-7357-101/Rev. C/5765 1109