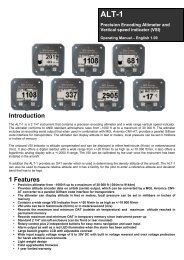
RV-1 - STRATOMASTER Instrumentation MGL Avionics
RV-1 - STRATOMASTER Instrumentation MGL Avionics
RV-1 - STRATOMASTER Instrumentation MGL Avionics

You also want an ePaper? Increase the reach of your titles
YUMPU automatically turns print PDFs into web optimized ePapers that Google loves.
Stratomaster Smart Single<br />
<strong>RV</strong>-1<br />
Universal Engine RPM and Rotor RPM display<br />
The <strong>RV</strong>-1 unit is a 2.25” instrument providing a universal rev counter that can be adapted to a<br />
variety of roles. Typical uses are engine RPM displays or Helicopter / Gyroplane Rotor RPM<br />
displays.<br />
Digital engine RPM / Rotor RPM display with scale selectable analog display<br />
Engine hobbs meter (can be set to current engine time)<br />
Engine running timer (can be used as flight timer), resettable to zero at any time.
The main display<br />
Run timer<br />
Hobbs<br />
meter<br />
Digital RPM<br />
display<br />
Analog RPM<br />
display<br />
About RPM measurements<br />
Generally, there are two different methods of measuring RPM. The <strong>RV</strong>-1 unit can be setup to<br />
perform either method.<br />
The first method involves counting pulses generated by some device in the engine or from a<br />
sensor in case of Rotor RPM.<br />
Pulses are counted over a period of time and the result is then used to calculate RPM. This<br />
method requires a high number of pulses and a short measurement interval. The <strong>RV</strong>-1 counts<br />
pulses for ½ second. This method is suitable for most two stroke engines such as produced by<br />
Rotax.<br />
Engines producing few pulses (perhaps only one pulse per revolution) and run at low revs, as<br />
well as slow turning rotors require a different method. Here the <strong>RV</strong>-1 can use the time it takes to<br />
generate only two pulses as bases for the RPM calculation.<br />
The particular method to be used and the number of pulses per revolution are entered as part of<br />
the <strong>RV</strong>-1 setup as given below.<br />
Setting up the <strong>RV</strong>-1<br />
Press the Menu key to enter the menu. You can move forward and backwards in the menu by<br />
using the + and – keys. To change or select a menu item, move the highlight to the desired item<br />
and then press the Menu key. To end an edit or function, press the Menu key again.<br />
To exit the menu and continue normal operation, select the ***Done*** function and press the<br />
Menu key. Note, all changes you have initiated during your session will only be remembered by<br />
the instrument if you exit the menu using the ***Done*** function.
Zero FT<br />
This function allows you to set the flight timer to zero. The flight timer counts hours and minutes<br />
while the engine is running.<br />
Set Hobbs<br />
This function allows you to set the hobbs meter to your current engine running time.<br />
Use the plus and minus buttons to change the indicated part of the hobbs reading. Use the Menu<br />
button to change from hour hundreds to hours to minutes.<br />
Moving the update cursor below the numbers past the minutes field on the right ends the edit of<br />
the hobbs meter reading and stores any changes.<br />
Scale …<br />
Choose your desired scale for the analog RPM display. You can choose values from 500 to 9500<br />
RPM in steps of 500 RPM. You should select a value that is just higher than the highest RPM you<br />
expect during operation.<br />
Contrast …<br />
This function allows you to change the display contrast to your liking. You can select values from<br />
about 6 to 25.<br />
BL …<br />
This function allows you to switch the display backlight on or off.<br />
Pulse …<br />
Select if you want the <strong>RV</strong>-1 to count pulses from the engine for ½ second period (Fast) or if you<br />
want the <strong>RV</strong>-1 to use the time between pulses to calculate revs (Slow).<br />
Typical setups:<br />
Rotax 503,582 DCDI - Fast (6 pulses per revolution).<br />
Rotax 503 single ignition, Rotax 912/914 – Slow (one pulse per revolution).<br />
Gyro Rotor RPM with gear tooth sensor – Fast (about 100 pulses per revolution).<br />
Gyro Rotor RPM with single hall effect sensor – Slow (one pulse per revolution).<br />
Helicopter Rotor RPM with single hall effect sensor – Slow (one pulse per revolution).
Calib …<br />
Enter the number of pulses per RPM. For engines with an uneven number of cylinders like three<br />
cylinder four stroke engines you can enter values containing fractions (usually 1.5 in this<br />
example).<br />
Most four stroke engines would generate one pulse for every two revolutions per cylinder. A four<br />
cylinder automotive four stroke engine would thus generate 2 pulses per revolution.<br />
A typical Rotax DCDI two stroke engine would generate 6 pulses per revolution. The well known<br />
Rotax 912/914 engines generate one pulse per revolution.<br />
Filter …<br />
The <strong>RV</strong>-1 unit contains a digital filter. This filter is used to achieve a higher resolution of the digital<br />
rev counter than is available in ordinary operation.<br />
In digital rev counters, resolution is largely dependant on the amount of time given to measure<br />
RPM. The more time available, the higher the resolution possible. However, on the downside of<br />
this, the more sluggish the display will react to changes in engine settings.<br />
Resolution with the <strong>RV</strong>-1 is dependant on the number of pulses per rev and the type of<br />
measurement method you have selected (Pulse Fast/Slow).<br />
The update rate for the measurement is a fixed, fast 0.5 seconds.<br />
The digital filter is activated whenever input revs are fairly constant and this results in a very high<br />
resolution of the digital RPM display in a short time span. The filter needs to be setup for the<br />
expected base resolution. This can be between 10 and 30 RPM for most setups. The filter has<br />
the following settings:<br />
Scale -The setting is made dependant on your Scale selection from 500 to 9500 RPM. The filter<br />
factor is fixed as follows:<br />
Scale 500 – 10 RPM<br />
Scale 1000 – 20 RPM<br />
Scale 1500 – 30 RPM<br />
Scale 2000 – 40 RPM<br />
Scale 2500 – 50 RPM<br />
Scale 3000 – 60 RPM<br />
Scale 3500 – 70 RPM<br />
Scale 4000 – 80 RPM<br />
Scale 4500 – 90 RPM<br />
Scale 5000 – 100 RPM<br />
Scale 5500 – 110 RPM<br />
Scale 6000 – 120 RPM<br />
Scale 6500 – 130 RPM<br />
Scale 7000 – 140 RPM
Scale 7500 – 150 RPM<br />
Scale 8000 – 160 RPM<br />
Scale 8500 – 170 RPM<br />
Scale 9000 – 180 RPM<br />
Scale 9500 – 190 RPM<br />
10,20,30,40,50,60,70,80,90,100 – The filter factor can be set to any of these values independent<br />
of your scale selection. Choose a filter setting that results in a smooth, high resolution RPM<br />
display. A filter setting too low for your setup will result in a “jumpy” display. RPM display will<br />
change at your base resolution and no smoothing will happen. Choose the lowest setting that<br />
results on a smooth display for greatest sensitivity of the reading.<br />
OFF – the digital filter is switched off and the display will result in fastest update rates at the<br />
resolution dictated by your setup.
Technical specifications:<br />
Display temperature range (operational): -20 to +80 degrees C<br />
Supply voltage: +8 to +18V. +24/28V with optional pre regulator.<br />
Supply current: 25mA/40mA (backlight off/on)<br />
Rev counter input:<br />
Range: 0-9999 RPM.<br />
Minimum signal for stable display: 2Vpp.<br />
Fully A/C coupled, maximum voltage +/- 40V.<br />
RF noise filter plus Schmidt trigger based input.<br />
Note: It is essential that a single wire be connected from the minus terminal of the<br />
instrument to the engine block. This wire must not be used to share currents with other<br />
electrical users as this can affect accuracy of readings.<br />
Warranty:<br />
<strong>MGL</strong> avionics warrants their products for a period of one year from date of purchase against<br />
faulty workmanship. Warranty is limited to the replacement of faulty components and includes the<br />
cost of labor. Shipping costs are for the account of the purchaser.<br />
Note for operation on supplies with inductive loads:<br />
Any operation of electronic instrumentation on power supplies that are subject to high voltages<br />
caused by operation of inductive loads (starter motors, solenoids, relays) are required to be fitted<br />
with suitable protection.<br />
All Smart Singles are guaranteed to withstand temporary over voltage up to 40V without<br />
additional protection. We recommend that measures are taken to prevent voltage transients in<br />
excess of this limit.<br />
<strong>MGL</strong> <strong>Avionics</strong> recommends the fitment of a fuse in line with a 33V transorb (available from <strong>MGL</strong><br />
<strong>Avionics</strong> at low cost) to protect electronic instruments, radios and intercom systems. Only one<br />
such arrangement is required for a cluster of instruments.<br />
Please note that product warranty excludes damages caused by unprotected, unsuitable or<br />
incorrectly wired electrical supplies.
Installing the <strong>RV</strong>-1<br />
Warning:<br />
"+5V" terminal<br />
is for supply of<br />
pickup sensors<br />
only. Connection<br />
of REV counter<br />
signals to this line<br />
will destroy instrument.<br />
+5V<br />
REV<br />
Breaker<br />
Ignition<br />
coil<br />
<strong>RV</strong>-1<br />
REV<br />
counter<br />
DC<br />
+12V-<br />
Ground<br />
(close to breaker)<br />
Power<br />
switch<br />
Ground<br />
Fuse<br />
33V Transorb<br />
protection device<br />
Positive supply<br />
(+12V from battery)<br />
Negative supply<br />
(airframe ground)<br />
Installation of the <strong>RV</strong>-1 is quite straight forward in most cases. The above drawing shows a<br />
typical connection for a standard “old fashioned” contact breaker system. Most electronic ignition<br />
systems are very similar, the only difference is that the breaker has been replaced with a<br />
semiconductor switching device. Most electronic ignition modules have an output terminal<br />
intended for connection to a rev counter.<br />
The <strong>RV</strong>-1 input is quite universally usable. For example, it is common to connect a hall-effect<br />
sensor using the +5V line to supply the sensor. A small magnet it then mounted on a shaft (for<br />
example rotor shaft of a helicopter) and the hall effect sensor switches every time the magnet<br />
passes the sensor.<br />
The RC-1 needs a typical voltage swing of about 2 to 2.5V minimum to operate and the input is<br />
A/C coupled for easy installation. This means that the voltage signal may have a DC voltage<br />
superimposed without affecting the instrument. For example, if you have a signal that varies in<br />
voltage from 5V to 8V with every pulse, it can be used with the <strong>RV</strong>-1.<br />
For installations such as with the Rotax DCDI two-stroke engines, the rev counter input is simply<br />
connected to the grey rev counter wire from the engine. These engines produce six pulses per<br />
rev (set this up in the relevant menu item).<br />
Most engines produce 0.5, 1 or 2 pulses per revolution. This needs to be setup in the “Calib”<br />
menu item.<br />
Please note: The 5V supply line is unprotected and intended only for the supply of halleffect,<br />
optical or geartooth sensors. Connecting any voltages (such as the 12V supply) to<br />
this line will destroy the instrument.<br />
The 5V line may supply currents of up to 30mA. Should your sensor require greater<br />
currents you must supply it from another source.
Various pickup / sensor installation possibilities<br />
Warning:<br />
"+5V" terminal<br />
is for supply of<br />
pickup sensors<br />
only. Connection<br />
of REV counter<br />
signals to this line<br />
will destroy instrument.<br />
<strong>RV</strong>-1<br />
REV<br />
counter<br />
+5V<br />
REV<br />
Grey rev counter wire<br />
Ballast<br />
resistor<br />
Brown wire<br />
(engine block - ground)<br />
Note: On Rotax<br />
DCDI ignition<br />
systems it may<br />
be required to<br />
install a ballast<br />
resistor as<br />
shown. A<br />
typical value is<br />
220 ohms.<br />
Many<br />
installations<br />
can omit this.<br />
Rotax DCDI setup (Ballast resistor optional)<br />
Warning:<br />
"+5V" terminal<br />
is for supply of<br />
pickup sensors<br />
only. Connection<br />
of REV counter<br />
signals to this line<br />
will destroy instrument.<br />
<strong>RV</strong>-1<br />
REV<br />
counter<br />
+5V<br />
REV<br />
2K2 resistor<br />
Magnet<br />
Hall effect sensor<br />
Typical hall<br />
effect sensor<br />
installation<br />
detects the<br />
passing of a<br />
magnet<br />
suitably fixed<br />
to prop flanges<br />
or shafts.<br />
Magnetic pickup with Hall effect sensor<br />
Warning:<br />
"+5V" terminal<br />
is for supply of<br />
pickup sensors<br />
only. Connection<br />
of REV counter<br />
signals to this line<br />
will destroy instrument.<br />
<strong>RV</strong>-1<br />
REV<br />
counter<br />
+5V<br />
REV<br />
1K resistor<br />
Honeywell gear tooth sensor<br />
The gear tooth<br />
sensor is a<br />
popular pickup<br />
used on the<br />
pre-rotation<br />
gear of a gyro<br />
plane.<br />
(rotor speed<br />
indication)<br />
Magnetic pickup with active gear tooth sensor<br />
Warning:<br />
"+5V" terminal<br />
is for supply of<br />
pickup sensors<br />
only. Connection<br />
of REV counter<br />
signals to this line<br />
will destroy instrument.<br />
<strong>RV</strong>-1<br />
REV<br />
counter<br />
+5V<br />
REV<br />
DC<br />
+12V-<br />
DC<br />
+12V-<br />
DC<br />
+12V-<br />
DC<br />
+12V-<br />
Optical, reflective sensor<br />
220, 330 or 560 ohm resistor<br />
2K2, 3K3 or 4K7 resistor<br />
The optical<br />
reflective<br />
pickup can<br />
provide a<br />
simple means<br />
of contactless<br />
RPM sensing in<br />
difficult<br />
installations.