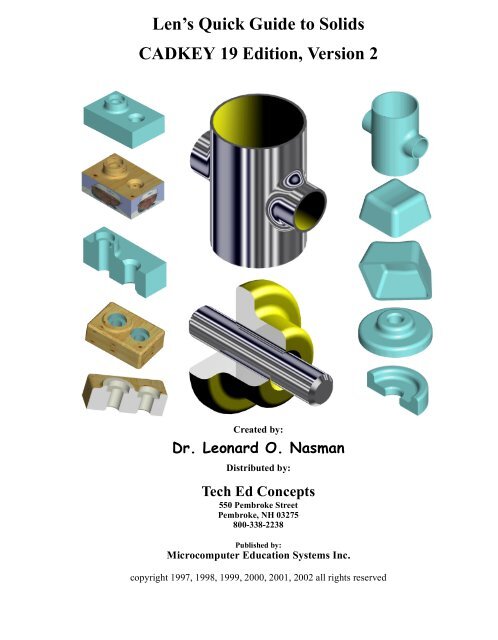
Len's Quick Guide to Solids CADKEY 19 Edition ... - TechEdu.com
Len's Quick Guide to Solids CADKEY 19 Edition ... - TechEdu.com
Len's Quick Guide to Solids CADKEY 19 Edition ... - TechEdu.com

You also want an ePaper? Increase the reach of your titles
YUMPU automatically turns print PDFs into web optimized ePapers that Google loves.
Len’s <strong>Quick</strong> <strong>Guide</strong> <strong>to</strong> <strong>Solids</strong><br />
<strong>CADKEY</strong> <strong>19</strong> <strong>Edition</strong>, Version 2<br />
Created by:<br />
Dr. Leonard O. Nasman<br />
Distributed by:<br />
Tech Ed Concepts<br />
550 Pembroke Street<br />
Pembroke, NH 03275<br />
800-338-2238<br />
Published by:<br />
Micro<strong>com</strong>puter Education Systems Inc.<br />
copyright <strong>19</strong>97, <strong>19</strong>98, <strong>19</strong>99, 2000, 2001, 2002 all rights reserved
Len’s <strong>Quick</strong> <strong>Guide</strong> <strong>to</strong> <strong>Solids</strong>, <strong>CADKEY</strong> <strong>19</strong> <strong>Edition</strong>, Version 2<br />
by Dr. Leonard O. Nasman<br />
Copyright <strong>19</strong>97, <strong>19</strong>98, <strong>19</strong>99, 2000, 2001, 2002<br />
by Micro<strong>com</strong>puter Education Systems Inc.<br />
Distributed by Tech Ed Concepts<br />
550 Pembroke Street<br />
Pembroke, NH 03275<br />
www.tecedu.<strong>com</strong><br />
800-338-2238<br />
All rights reserved. No part of this document may be reproduced or used in any form or by<br />
any means, such as: graphic, electronic, internet, or mechanical including pho<strong>to</strong>copying,<br />
recording, videotaping, or information s<strong>to</strong>rage and retrieval systems without written permission<br />
of the publisher.<br />
<strong>CADKEY</strong> is a registered trademark of Cadkey Corporation., 33 Bos<strong>to</strong>n Post Road West,<br />
Marlborough, MA 01752. (www.cadkey.<strong>com</strong>)<br />
Printed in the United States of America.<br />
10 9 8 7 6 5 4 3 2<br />
This version created Tuesday, February 26, 2002<br />
Nasman, Leonard O.<br />
Len’s <strong>Quick</strong> <strong>Guide</strong> <strong>to</strong> <strong>Solids</strong> / Leonard O. Nasman<br />
1. <strong>CADKEY</strong> (Computer software)<br />
2. Computer Aided Design<br />
3. Mechanical design<br />
4. Computer aided drawing<br />
5. Drafting<br />
6. Solid Modeling
LEN’S QUICK GUIDE TO SOLIDS<br />
Project Goals<br />
When you have <strong>com</strong>pleted this project you will be able <strong>to</strong>:<br />
1. Use the fundamental <strong>Solids</strong> <strong>19</strong> functions and features.<br />
2. Create solid models from primitive shapes.<br />
3. Combine solids using the Boolean Unite and Subtract functions.<br />
4. Modify solids with the Drill Hole, Blend Edges, Chamfer Edges,<br />
and Shelling functions.<br />
5. Use the Extrude Profile and Revolve Profile functions <strong>to</strong> create solids<br />
from 2D Shapes.<br />
6. Trim a solid object using a 2D entity and the Modify, Trim First function.<br />
7. Render a model using textured surfaces.
Len’s <strong>Quick</strong> <strong>Guide</strong> <strong>to</strong> <strong>Solids</strong><br />
Introduction<br />
This project is designed for those who want <strong>to</strong> quickly explore the fundamentals of using<br />
<strong>CADKEY</strong> <strong>Solids</strong> <strong>19</strong> <strong>to</strong> create 3D models. If you spend a couple of hours practicing the<br />
techniques presented here, you should be able <strong>to</strong> “knock the socks off” your friends who<br />
are used <strong>to</strong> seeing only 2D drafting with CAD.<br />
If you are not familiar with the Windows 95/98/Me interface, you may find some of the<br />
procedures described here a little confusing. New <strong>CADKEY</strong> users may want <strong>to</strong> start with<br />
The Cadkey Project Book, 5th <strong>Edition</strong> (Available from Tech Ed Concepts, 800-338-<br />
2238). That book covers everything presented in this project, and a lot more, but is<br />
designed for people with no prior CAD or Windows 95/98/Me experience.<br />
Required Files<br />
To provide the user with a quick introduction <strong>to</strong> solid modeling without the bother of<br />
searching through a bewildering collection of menus and <strong>to</strong>ols, a cus<strong>to</strong>m <strong>to</strong>olbar has been<br />
prepared for this tu<strong>to</strong>rial. The <strong>to</strong>olbar file (CadLab.tbr) may be downloaded free from<br />
the www.tecedu.<strong>com</strong> web page, or it may be obtained from your <strong>CADKEY</strong> dealer.<br />
A blank seed drawing file will make it easier <strong>to</strong> <strong>com</strong>plete the projects in this book. This<br />
file (BLANK3D.prt) may also be downloaded from the www.tecedu.<strong>com</strong> web page.<br />
You may also create your own blank seed drawing by following the instructions found at<br />
the end of this book.<br />
<strong>Solids</strong> Modeling, Page 4
The <strong>CADKEY</strong> User Interface<br />
The <strong>CADKEY</strong> User Interface<br />
Figure 1, The <strong>CADKEY</strong> display and user interface<br />
If you are not familiar with the <strong>CADKEY</strong> user interface, study the display shown in Figure<br />
1. Your display may vary depending on the Windows 95/98/ME display and resolution<br />
settings. The figures in this document were captured with a resolution of 800 by 600.<br />
Installing the Cus<strong>to</strong>m Toolbar<br />
The projects in this book have been designed <strong>to</strong> provide a quick introduction <strong>to</strong> <strong>Solids</strong> <strong>19</strong>.<br />
To avoid searching through a <strong>com</strong>plex collection of menus and <strong>to</strong>ols, a cus<strong>to</strong>m <strong>to</strong>olbar will<br />
be used. The required <strong>to</strong>olbar file can be downloaded from the www.tecedu.<strong>com</strong> web<br />
page or may be obtained from your local <strong>CADKEY</strong> dealer.<br />
Once the <strong>to</strong>olbar file has been obtained, it must be copied in<strong>to</strong> your <strong>CADKEY</strong> direc<strong>to</strong>ry.<br />
<strong>Solids</strong> Modeling, Page 5
Len’s <strong>Quick</strong> <strong>Guide</strong> <strong>to</strong> <strong>Solids</strong><br />
1.__ Use the Windows Explorer <strong>to</strong> copy the CadLab.tbr file <strong>to</strong> the <strong>CADKEY</strong> main<br />
direc<strong>to</strong>ry.<br />
After the CadLab.tbr file is copied in<strong>to</strong> the <strong>CADKEY</strong> main direc<strong>to</strong>ry, it must be loaded<br />
in<strong>to</strong> <strong>CADKEY</strong>.<br />
2.__ From the MENU BAR, select Tools, Toolbar.<br />
3.__ From the Toolbar File dialog box, select the Load but<strong>to</strong>n.<br />
4.__ Find the CadLab.tbr file, and click on it <strong>to</strong> move it in<strong>to</strong> the File name text box.<br />
Then click on the Open but<strong>to</strong>n.<br />
5.__ From the Toolbar File dialog box, select the Close but<strong>to</strong>n.<br />
Your <strong>to</strong>olbar should now look like the <strong>to</strong>olbar shown below.<br />
There are three additional <strong>to</strong>olbar pages as shown below. You can cycle through these<br />
pages by selecting the arrows on the left end of the <strong>to</strong>olbar.<br />
•• NOTE: If you want <strong>to</strong> use this <strong>to</strong>olbar each time you start <strong>CADKEY</strong>, do the following.<br />
From the MENU BAR, select Tools, Options. In the Default Options<br />
dialog box, use the Toolbar Browse but<strong>to</strong>n <strong>to</strong> make CadLab.tbr the Default<br />
File.<br />
Once the cus<strong>to</strong>m <strong>to</strong>olbar is loaded, you are ready <strong>to</strong> explore <strong>Solids</strong> <strong>19</strong>.<br />
Opening the Seed Drawing<br />
•• NOTE: The following steps require that the BLANK3D.prt file is available. You<br />
can either download it from the www.tecedu.<strong>com</strong> web page, or obtain it from<br />
your local <strong>CADKEY</strong> dealer.<br />
• If you are using the free demo version of <strong>CADKEY</strong>, you will not be able <strong>to</strong> save<br />
files. If this is the case, ignore all steps that use the Save, Rename Part File<br />
<strong>to</strong>ol.<br />
<strong>Solids</strong> Modeling, Page 6
Opening the Seed Drawing<br />
<strong>CADKEY</strong> allows for more than one part file <strong>to</strong> be open at a time. To minimize confusion,<br />
and <strong>to</strong> keep the system memory from be<strong>com</strong>ing filled, the projects in this book will be<br />
started by first closing all open part files.<br />
1.__ From the TOOLBAR, select the Close All Files <strong>to</strong>ol.<br />
Your display should look similar <strong>to</strong> Figure 2.<br />
Figure 2, Using the <strong>to</strong>olbar.<br />
2.__ From the TOOLBAR, select the Open Part File <strong>to</strong>ol. Set the Look in<br />
folder as required, and Open the BLANK3D.prt file.<br />
To prevent accidently adding unwanted entities <strong>to</strong> the seed drawing file, it is a good idea <strong>to</strong><br />
get in<strong>to</strong> the habit of immediately creating a new part file as soon as the seed drawing has<br />
been loaded.<br />
<strong>Solids</strong> Modeling, Page 7
Len’s <strong>Quick</strong> <strong>Guide</strong> <strong>to</strong> <strong>Solids</strong><br />
3.__ From the TOOLBAR, select the Save, Rename Part File <strong>to</strong>ol.<br />
4.__ In the Save As dialog box, enter BLOCK1 in the File name text box and<br />
then select the Save but<strong>to</strong>n. Enter Practice block as the Part Description<br />
and click OK.<br />
Now you are ready <strong>to</strong> start creating a solid model.<br />
Creating Blocks<br />
1.__ From the TOOLBAR, select the Create a Block <strong>to</strong>ol.<br />
Your display should look similar <strong>to</strong> Figure 3.<br />
Figure 3, Creating a block<br />
The Create Block dialog box is shown in Figure 3. The upper section of the dialog box<br />
provides value boxes for entering the size of the block. The lower section of the dialog box<br />
has an area for selecting the desired Create By option, and the Axis method. In this<br />
example the Key In and Cplane Z axis options will be used.<br />
<strong>Solids</strong> Modeling, Page 8
Creating Blocks<br />
• A dialog box option is selected when there is a dot in the circle <strong>to</strong> the left of the<br />
option. An option can be selected by clicking on either the text or the circle for<br />
that option.<br />
2.__ In the Create By section of the Create Block dialog box, select the Key In option.<br />
3.__ In the Axis section of the Create Block dialog box, select the Cplane Z axis<br />
option.<br />
• The Width, Length, and Height dimensions in the dialog box are relative <strong>to</strong><br />
current view (not world) coordinates.<br />
•• NOTE: Press the TAB (not the Enter key) <strong>to</strong> make the cursor jump <strong>to</strong> the next text<br />
entry box.<br />
4.__ Enter a Width of 6.0, a Length of 4.0, and a Height of 2.0 in the Create Block<br />
dialog box. Then select the OK but<strong>to</strong>n.<br />
5.__ From the CONVERSATION BAR, select the Key In option.<br />
<strong>Solids</strong> Modeling, Page 9