
You also want an ePaper? Increase the reach of your titles
YUMPU automatically turns print PDFs into web optimized ePapers that Google loves.
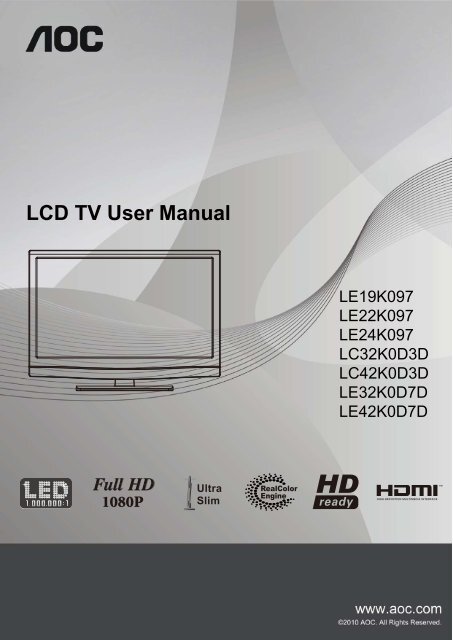
<strong>LCD</strong> <strong>TV</strong> <strong>User</strong> <strong>Manual</strong><br />
1<br />
LE19K097<br />
LE22K097<br />
LE24K097<br />
LC32K0D3D<br />
LC42K0D3D<br />
LE32K0D7D<br />
LE42K0D7D
This manual provides as an operational guide to user. All statements, technical information, and<br />
recommendations in this manual and in any guides or related documents are believed reliable, but the<br />
accuracy and completeness thereof are not guaranteed or warranted, and they are not intended to be,<br />
nor should they be understood to be, representations or warranties concerning the products described.<br />
Table of Contents<br />
IMPORTANT INFORMATION ..............................................................................................................................................3<br />
WARNING ..............................................................................................................................................................................................................................................3<br />
CAUTION ...............................................................................................................................................................................................................................................3<br />
NOTIFICATION ......................................................................................................................................................................................................................................3<br />
IMPORTANT SAFETY INFORMATION ...............................................................................................................................3<br />
USAGE INSTRUCTIONS .....................................................................................................................................................4<br />
Installation ...............................................................................................................................................................................................................................................4<br />
AC Power Cable ......................................................................................................................................................................................................................................5<br />
<strong>LCD</strong> Screen .............................................................................................................................................................................................................................................5<br />
Wiring .....................................................................................................................................................................................................................................................5<br />
Electric Shock .........................................................................................................................................................................................................................................5<br />
Lightning Storms .....................................................................................................................................................................................................................................6<br />
When Not in Use ....................................................................................................................................................................................................................................6<br />
Overloading ............................................................................................................................................................................................................................................6<br />
Optional Equipment ................................................................................................................................................................................................................................6<br />
Small Accessories ..................................................................................................................................................................................................................................6<br />
Antennas .................................................................................................................................................................................................................................................6<br />
Batteries ..................................................................................................................................................................................................................................................6<br />
Cleaning ..................................................................................................................................................................................................................................................6<br />
Magnetic Influence ..................................................................................................................................................................................................................................7<br />
Sound .....................................................................................................................................................................................................................................................7<br />
Carrying the <strong>TV</strong> .......................................................................................................................................................................................................................................7<br />
Ventilation ................................................................................................................................................................................................................................................7<br />
Moisture ...................................................................................................................................................................................................................................................8<br />
Volume Adjustment .................................................................................................................................................................................................................................8<br />
Servicing ..................................................................................................................................................................................................................................................8<br />
CONTENTS IN THE BOX ...................................................................................................................................................9<br />
CONTROLS & CONNECTIONS: .........................................................................................................................................9<br />
SET-UP ............................................................................................................................................................................ 11<br />
Inserting Batteries into the Remote control ..............................................................................................................................................................................................11<br />
Attaching the Base ....................................................................................................................................................................................................................................11<br />
Wall-Mounting ...........................................................................................................................................................................................................................................11<br />
PC INPUT SIGNAL REFERENCE CHART ..................................................................................................................... 12<br />
VIDEO INPUT SIGNAL REFERENCE CHART ............................................................................................................... 12<br />
USING AOC <strong>TV</strong> ................................................................................................................................................................. 13<br />
Turning the <strong>TV</strong> On and Off ........................................................................................................................................................................................................................14<br />
Initial Setting ..............................................................................................................................................................................................................................................14<br />
Switching Input Source ..............................................................................................................................................................................................................................16<br />
Adjust Picture Setting ................................................................................................................................................................................................................................16<br />
Adjust Sound Setting ................................................................................................................................................................................................................................17<br />
OSD <strong>Manual</strong> Setting .................................................................................................................................................................................................................................18<br />
Feature Setup ............................................................................................................................................................................................................................................19<br />
TROUBLESHOOTING ..................................................................................................................................................... 20<br />
DIMENSIONS & SPECIFICATIONS ................................................................................................................................ 21<br />
2
Important Information<br />
WARNING<br />
CAUTION<br />
RISK OF ELECTRIC SHOCK<br />
DO NOT OPEN<br />
ATTENTION<br />
RISQUE DE CHOC ELECTRIQUE,<br />
NE PAS OUVRIR<br />
PRECAUCION<br />
RIESGO DE CHOQUE ELECTRICO<br />
NO ABRIR<br />
This symbol is intended to alert the user to the<br />
presence of insinuated “dangerous voltage”<br />
within the <strong>TV</strong>’s enclosure that may be of sufficient<br />
magnitude to constitute a risk of electric shock to<br />
persons.<br />
This symbol is intended to alert the user to the<br />
presence of important operating and maintenance<br />
(servicing) instructions in the literature accompanying<br />
the <strong>TV</strong>.<br />
To reduce the risk of fire or electric shock, do not expose this <strong>TV</strong> to<br />
rain or moisture, the <strong>TV</strong> shall not be exposed to dripping or splashing<br />
and no objects filled with liquids, such as vases, shall be placed on<br />
the <strong>TV</strong>.<br />
CAUTION<br />
To prevent electric shock, do not use this polarized AC plug with an<br />
extension cord, receptacle or other outlet unless the blades can be<br />
fully inserted to prevent blade exposure.<br />
Use the Wall-Mount bracket or <strong>TV</strong> stand which was recommended by<br />
AOC, and please consult your dealer for detailed information.<br />
Use with other Wall-Mount Bracket or <strong>TV</strong> stand may cause instability<br />
and possibly result in injury.<br />
These servicing instructions are for use by qualified service<br />
personnel only. To reduce the risks of electric shock do not perform<br />
any servicing other than that contained in the operating instructions<br />
unless you are qualified to do so.<br />
Disposal of Waste Equipment by <strong>User</strong>s in Private<br />
Household in the European Union<br />
This symbol on the product or on its packaging indicates that this<br />
product must not be disposed of with your other household waste.<br />
Instead, it is your responsibility to dispose of your waste equipment<br />
by handing it over to a designated collection point for the recycling<br />
of waste electrical and electronic equipment. The separate collection<br />
and recycling of your waste equipment at the time of disposal will<br />
help to conserve natural resources and ensure that it is recycled in a<br />
manner that protects human health and the environment. For more<br />
information about where you can drop off your waste equipment for<br />
recycling, please contact your local city office, your household waste<br />
disposal service or the shop where you purchased the product.<br />
CE marking<br />
The shipped version of this device complies with the requirements<br />
of EEC directives 2004/108/EC “Electromagnetic compatibility” and<br />
2006/95/EC “Low voltage directive”.<br />
3<br />
Declaration of RoHS Compliance<br />
This product has been designed and manufactured in compliance<br />
with Directive 2002/95/EC of the European Parliament and the<br />
Council on restriction of the use of certain hazardous substances in<br />
electrical and electronic equipment (RoHS Directive) and is deemed<br />
to comply with the maximum concentration values issued by the<br />
European Technical Adaptation Committee (TAC) as shown below:<br />
Substance<br />
Proposed Maximum<br />
Concentration<br />
Actual<br />
Concentration<br />
Lead (Pb) 0.1% < 0.1%<br />
Mercury (Hg) 0.1% < 0.1%<br />
Cadmium (Cd) 0.01% < 0.01%<br />
Hexavalent<br />
Chromium (Cr6+)<br />
0.1% < 0.1%<br />
Polybrominated<br />
biphenyls(PBB)<br />
Polybrominated<br />
0.1% < 0.1%<br />
biphenyl ethers<br />
(PBDE)<br />
0.1% < 0.1%<br />
Certain components of products as stated above are exempted under<br />
the Annex of the RoHS Directives as noted below:<br />
Examples of exempted components are:<br />
1. Mercury in compact fluorescent lamps not exceeding 5 mg per<br />
lamp and in other lamps not<br />
specifically mentioned in the Annex of RoHS Directive.<br />
2. Lead in glass of cathode ray tubes, electronic components,<br />
fluorescent tubes, and electronic ceramic parts (e.g. piezoelectronic<br />
devices).<br />
3. Lead in high temperature type solders (i.e. lead-based alloys<br />
containing 85% by weight or more lead).<br />
4. Lead as an allotting element in steel containing up to 0.35% lead<br />
by weight, aluminium containing up to 0.4% lead by weight and as a<br />
cooper alloy containing up to 4% lead by weight.<br />
NOTIFICATION<br />
Radio Frequency Interference Statement<br />
Warning:<br />
These limits are designed to provide reasonable protection against<br />
harmful interference in a residential installation. This equipment<br />
generates uses and can radiate radio frequency energy and, if not<br />
installed and used in accordance with the instructions, may cause<br />
harmful interference to radio communications.<br />
However, there is no guarantee that interference will not occur<br />
in a particular installation. If this equipment does cause harmful<br />
interference to radio or television reception, which can be determined<br />
by turning the equipment off and on, the user is encouraged to try to<br />
correct the interference by one or more of the following measures:<br />
��Reorient or relocate the receiving antenna.<br />
��Increase the separation between the equipment and receiver.<br />
��Connect the equipment into an outlet on a circuit different from<br />
that to which the receiver is connected.<br />
��Consult the dealer or an experienced radio/ <strong>TV</strong> technician for<br />
help.<br />
For details concerning safety precautions, see “Important Safety<br />
Instructions” and “Important Usage Instructions” below.<br />
Important Safety Information<br />
1) Read these instructions.<br />
2) Keep these instructions.<br />
3) Heed all warnings.<br />
4) Follow all instructions.<br />
5) Do not use this apparatus near water.<br />
6) Clean only with a dry cloth.<br />
7) Do not block any of the ventilation openings. Install in<br />
accordance with the manufacturers instructions.<br />
8 ) Do not install near any heat sources such as radiators, heat<br />
registers, stoves, or other apparatus (including amplifiers) that<br />
produce heat.<br />
9 ) Do not defeat the safety purpose of the polarized or grounding<br />
type plug. A polarized plug has two blades with one wider<br />
than the other. A grounding type plug has two blades and third<br />
grounding prong. The wide blade or third prong is provided for<br />
your safety. When the provided plug does not fit into your outlet,
10) 8 ) Protect the power cord from being walked on or pinched<br />
particularly at plugs, convenience receptacles, and the point<br />
where they exit from the apparatus.<br />
9 11) ) Only use attachments/accessories specified by the<br />
manufacturer.<br />
12) 10 ) Use only with a cart, stand, tripod, bracket, or table specified<br />
by the manufacturer, or sold with the apparatus. When a cart is<br />
used, use caution when moving the cart/apparatus combination<br />
to avoid injury from tip-over.<br />
13) 11 ) Unplug this apparatus during lightning storms or when unused<br />
for long periods of time.<br />
14) 12 ) Refer all servicing to qualified service personnel. Servicing is<br />
required when the apparatus has been damaged in any way,<br />
such as power-supply cord or plug is damaged, liquid has been<br />
spilled or objects have fallen into apparatus, the apparatus has<br />
been exposed to rain or moisture, does not operate normally, or<br />
has been dropped.<br />
13 15) ) If any liquid or solid object should fall inside the cabinet, unplug<br />
the <strong>TV</strong> immediately and have it checked by qualified service<br />
personnel before operating it further.<br />
14 16) ) Avoid operating the <strong>TV</strong> at temperatures below 32°F (0°C).<br />
17) 15 ) If the <strong>TV</strong> is transported directly from a cold to a warm location,<br />
or if the room temperature changes suddenly, the picture may<br />
be blurred or show poor color due to moisture condensation. In<br />
this case, please wait a few hours to let the moisture evaporate<br />
before turning on the <strong>TV</strong>.<br />
16 18) ) The apparatus must be connected to a mains socket outlet with<br />
a protected earthed connection.<br />
17 19) ) The mains plug or appliance coupler is used as the disconnect<br />
device, the disconnect device shall remain readily operable.<br />
18 20) ) When purchased or used in different countries,use an<br />
appropriate power cable which is compliant with local laws and<br />
regulations.<br />
19 21) ) No naked flame sources, such as lighted candles, should be<br />
placed on the apparatus.<br />
20 22) ) The device is not intended for use at visual display work places<br />
acc. BildscharbV.<br />
is a trademark of SRS Labs, Inc.<br />
TruSurround HD technology is incorporated under license from SRS<br />
Labs, Inc.<br />
SRS TruSurround HD creates an immersive, feature-rich surround<br />
sound experience from two speakers, complete with rich bass, high<br />
frequency detail and clear dialog.<br />
4<br />
Usage Instructions<br />
Installation<br />
Placement<br />
It is recommended to watch the <strong>TV</strong> at a distance of 3 -7 times which<br />
of the screen height, and in moderate brightness. Watching the <strong>TV</strong><br />
for too long or in a dark room may cause eye fatigue. To obtain a<br />
clear picture, do not expose the screen to direct illumination or direct<br />
sunlight. It is recommended to use spot lighting directed down from<br />
the ceiling or to cover the windows that face the screen with opaque<br />
drapery. It is desirable to install the <strong>TV</strong> in a room where the floor and<br />
walls are not of a reflective material.<br />
h<br />
3h~7h<br />
To prevent the <strong>TV</strong> from toppling over and causing injury, take<br />
measurement to secure the <strong>TV</strong> to a wall or stand.<br />
The <strong>TV</strong> should be installed near an easily accessible AC power<br />
outlet.<br />
Observe the following in placing the <strong>TV</strong>. Otherwise the <strong>TV</strong> may fall<br />
from the stand or Wall-Mount, causing damage or serious injury.<br />
��Place the <strong>TV</strong> on a stable, level surface.<br />
��Do not hang anything on the <strong>TV</strong>. Do not allow children to climb on<br />
the <strong>TV</strong>.<br />
��Do not install the <strong>TV</strong> in places subject to extreme temperatures,<br />
such as in direct sunlight, near a radiator, or near a heating vent<br />
or exposed to direct air conditioning.<br />
��Never place the <strong>TV</strong> in hot, oily, humidor excessively dusty places.<br />
��Do not install the <strong>TV</strong> where insects may enter.<br />
��Do not install the <strong>TV</strong> where it may be exposed to mechanical<br />
vibration.<br />
��Do not install the <strong>TV</strong> in a location where it may protrude, such as<br />
on or behind a pillar, or where you might bump your head on it.<br />
Otherwise, it may result in injury.<br />
Outdoor Use<br />
Do not install this <strong>TV</strong> outdoors. If the <strong>TV</strong> is exposed to rain, it may<br />
result in a fire or an electric shock. Do not expose the <strong>TV</strong> to direct<br />
sunlight, it may heat up and become damaged.<br />
Wall-Mount<br />
Wall-Mount installation requires the use of a Wall-Mount Bracket.<br />
When installing or removing the <strong>TV</strong>, using a Wall-Mount Bracket,<br />
be sure to use qualified contractors. If not properly secured during<br />
installation or removal from the Wall-Mount Bracket, the <strong>TV</strong> may fall<br />
and cause serious injury.<br />
For use only with UL Listed Wall Mount Bracket with suitable weight/<br />
load.<br />
Observe the following when installing the <strong>TV</strong> using a Wall-Mount<br />
bracket.<br />
1 2 3 4
��Be sure to follow the operating instructions supplied with the Wall-<br />
Mount bracket when installing the <strong>TV</strong>.<br />
��Be sure to attach the brackets supplied with the Wall-Mount<br />
bracket.<br />
��Don’t hang the <strong>TV</strong> from the ceiling. It may fall and cause serious<br />
injury.<br />
AC Power Cable<br />
��Use the AC power cord specified by AOC and suitable for the<br />
voltage where you use it.<br />
��The plug is designed, for safety purposes, to fit into the wall outlet<br />
only one way. If you are unable to insert the plug fully into the<br />
outlet, contact your dealer.<br />
��If you will not be using the <strong>TV</strong> for several days, disconnect the<br />
power by pulling the plug itself. Never pull on the cord.<br />
��When disconnecting AC power cord, the power cord should be<br />
easily accessible for disconnection.<br />
<strong>TV</strong> should be installed near an easily accessible power outlet. Do<br />
not use a poor fitting outlet. Insert the plug fully into the outlet. If it is<br />
loose, it may cause arcing and result in a fire. Contact your electrician<br />
to have the outlet changed.<br />
Observe the followings to prevent the AC power cord from being<br />
damaged. If the AC power cord is damaged, it may result in a fire or<br />
an electric shock. Stop using it and ask your dealer or AOC service<br />
center to exchange it.<br />
��Do not place the <strong>TV</strong> where the power cord is subject to wear or<br />
abuse.<br />
��Do not pinch, bend, or twist the cord excessively. The core lines<br />
may be bared and cut, causing a short-circuit, and resulting in a<br />
fire or an electric shock.<br />
��Do not convert or damage the power cord.<br />
��Do not allow anything to rest on or roll over the power cord.<br />
��Do not move the <strong>TV</strong> with the power cord plugged in.<br />
��Keep the power cord away from heat sources.<br />
��To unplug power cord, disconnect it from the wall outlet first.<br />
��Be sure to grasp the plug when disconnecting the power cord.<br />
��Do not pull the power cord.<br />
��Do not use the supplied AC power cord on any other equipment.<br />
��Use only an original AOC AC power cord, not other brands.<br />
<strong>LCD</strong> Screen<br />
��Although the <strong>LCD</strong> screen is made with high-precision technology<br />
and has effective pixels of 99.99% or more, black dots or bright<br />
points of light (red, blue, or green) may appear constantly on the<br />
<strong>LCD</strong> screen. This is a structural property of the <strong>LCD</strong> panel and is<br />
not a malfunction.<br />
��The <strong>LCD</strong> screen is made with high-precision technology and to<br />
achieve a high level of performance and picture quality, this <strong>TV</strong>’s<br />
backlight setting is set to maximize the brightness of the <strong>TV</strong>.<br />
However, uneven brightness may be observed when the <strong>LCD</strong> <strong>TV</strong><br />
is viewed in a dark ambient without an input source or a blank<br />
screen. This condition is normal and not a malfunction of the <strong>TV</strong>.<br />
Changing the Picture mode, Backlight setting, enabling the Light<br />
Sensor, or turning on the Power management will improve this<br />
condition. In order to ensure long performance of your set and<br />
reduce the risk of screen burning, please observe the following<br />
precautions: 1)Does not display still image (still computer and<br />
video game images, logos. pictures, text and imagesdisplayed<br />
in 4:3) for extended periods of time; 2) Use a screen saver when<br />
using a computer.<br />
5<br />
��Do not expose the <strong>LCD</strong> screen surface to direct sunlight. Doing so<br />
may damage the <strong>LCD</strong> panel.<br />
��Do not push or scratch the <strong>LCD</strong> screen, or place objects on top<br />
of the <strong>TV</strong>. The image may be uneven or the <strong>LCD</strong> panel may be<br />
damaged.<br />
��If the <strong>TV</strong> is used in a cold place, a smear may occur in the picture<br />
or the picture may become dark. This does not indicate a failure.<br />
These phenomena improve as the temperature rises.<br />
��Ghosting may occur when still pictures are displayed continuously.<br />
It should disappear after a few moments.<br />
��The screen and cabinet get warm when the <strong>TV</strong> is in use. This is<br />
not a malfunction.<br />
��Avoid spraying insect repellent with volatile material on the<br />
screen.<br />
��Avoid prolonged contact with rubber or plastic material.<br />
Broken Pieces<br />
Do not throw anything at the <strong>TV</strong>. The screen glass may break by the<br />
impact and cause serious injury.<br />
If the surface of the <strong>TV</strong> cracks, do not touch it until you have<br />
unplugged the AC power cord. Otherwise electric shock may result.<br />
Handling of broken glass and liquid crystal leakage<br />
If the <strong>LCD</strong> panel gets damaged, crystalline liquid leakage may occur,<br />
or scattered broken glass may result. Do not touch broken glass or<br />
crystalline liquid which is toxic, with bare hands as cuts, poisoning or<br />
skin irritation may occur. Also, do not let glass fragments or leaked<br />
crystalline liquid get into your eyes or mouth. Should either contact<br />
your eyes or mouth, rinse the contacted area thoroughly with water<br />
and consult your doctor.<br />
Wiring<br />
When connecting cables, be sure to unplug the AC power cord for<br />
your safety. Take care not to catch your feet on the cables. It may<br />
damage the <strong>TV</strong> set.<br />
Electric Shock<br />
Do not touch the AC power cord or the <strong>TV</strong> with a wet hand. If you<br />
plug/unplug the AC power cord from the <strong>TV</strong> with a wet hand, it may<br />
cause electric shock.
Lightning Storms<br />
For added protection for this <strong>TV</strong> during a lightning storm, or when it<br />
is left unattended and unused for long periods of time, unplug it from<br />
the wall outlet and disconnect the antenna. This will prevent damage<br />
to the <strong>TV</strong> due to lightning and power line surges.<br />
When Not in Use<br />
If you will not be using the <strong>TV</strong> set for several days, the <strong>TV</strong> set should<br />
be disconnected from the AC power outlet for environmental and<br />
safety reasons. The <strong>TV</strong> set is not disconnected from the AC power<br />
source when the <strong>TV</strong> set is switched off. To disconnect the <strong>TV</strong> set<br />
completely, pull the plug from the AC power outlet.<br />
Overloading<br />
This <strong>TV</strong> set is designed to operate on a 220~240 V AC supply only.<br />
Take care not to connect too many appliances to the same AC power<br />
outlet as this could result in a fire or an electric shock.<br />
Optional Equipment<br />
Do not install optional equipment too close to the <strong>TV</strong> set. Keep<br />
optional equipment at least 11.875 inches (30 cm) away from the <strong>TV</strong><br />
set. If a VCR is installed in front of the <strong>TV</strong> set or beside the <strong>TV</strong> set,<br />
the picture may become distorted. Picture distortion and/or noisy<br />
sound may occur if the <strong>TV</strong> set is positioned in close proximity to any<br />
equipment emitting electromagnetic radiation.<br />
Small Accessories<br />
Keep small accessories out of children’s reach.<br />
6<br />
Antennas<br />
Outdoor antenna grounding<br />
If you want to connect an outdoor antenna, please assure that it is<br />
grounded to avoid bolt damages. Please notice the regulation EN<br />
50083-1 !!<br />
Please avoid water drops or spray water, also don’t put liquid filled<br />
cases (e.g. vases) next to the unit.<br />
A permanent high volume for headphones or earphones may causes<br />
ear and eardrum damages. Please avoid turning up the volume too<br />
loud. The adjustment of the equalizer to the maximum also increases<br />
the volume.<br />
Don’t put things with open fire/flames, like e.g. candles, next to the<br />
unit.<br />
Antenna lead-in wire<br />
Ground clamps<br />
Electric service<br />
equipment<br />
Ground clamps<br />
Batteries<br />
Antenna lead-in wire<br />
Antenna discharge unit<br />
Grounding conductors<br />
Power service grounding<br />
electrode system<br />
��Do not dispose of batteries in a fire.<br />
��Do not short circuit, disassemble or overheat the batteries.<br />
��Danger of explosion if battery is incorrectly replaced. Replace only<br />
with the same or equivalent type.<br />
��The batteries (batteries installed) shall not be exposed to<br />
excessive heat such as sunshine, fire or the like.<br />
Disposal of used batteries<br />
To preserve our environment, dispose of used batteries according to<br />
your local laws or regulations.<br />
Cleaning<br />
Cleaning the AC power plug<br />
Unplug the AC power plug and clean it regularly. If the plug is<br />
covered with dust and it picks up moisture, its insulation may<br />
deteriorate and result in a fire.<br />
Cleaning the screen surface/ cabinet of the <strong>TV</strong> set<br />
��Unplug the AC power cord to avoid electric shock when cleaning.<br />
��Clean the cabinet of the <strong>TV</strong> with a dry soft cloth. To remove dust<br />
from the screen, wipe it gently with a soft cloth. Stubborn stains
��may be removed with a cloth slightly dampened with a solution<br />
of mild soap and warm water. Never use strong solvents such as<br />
thinner or benzine for cleaning.<br />
��If using a chemically pretreated cloth, please follow the instruction<br />
provided on the package.<br />
��The ventilation holes can accumulate dust over time. To ensure<br />
proper ventilation, we recommend removing the dust periodically<br />
(once a month) using a vacuum cleaner.<br />
Magnetic Influence<br />
This <strong>TV</strong> contains a strong magnet in the speaker unit that generates<br />
a magnetic field. Keep any items susceptible to magnetic fields away<br />
from the speaker.<br />
7<br />
Sound<br />
If a snapping or popping sound from the <strong>TV</strong> is continuous or frequent<br />
while the <strong>TV</strong> is operating, unplug the <strong>TV</strong> and consult your dealer or<br />
service technician. It is normal for some <strong>TV</strong>’s to make occasional<br />
snapping or popping sounds, particu larly when being turned on or off.<br />
?<br />
ding~<br />
Pong~<br />
Carrying the <strong>TV</strong><br />
Carry the <strong>TV</strong> in the specified manner<br />
To avoid dropping the <strong>TV</strong> and causing serious injury, be sure to<br />
follow these guidelines:<br />
��Before carrying the <strong>TV</strong>, disconnect all cables.<br />
��Carrying the large size <strong>TV</strong> requires two or more people.<br />
��When you carry the <strong>TV</strong>, place your hand as illustrated and hold it<br />
securely. Do not put stress on the <strong>LCD</strong> panel.<br />
��When lifting or moving the <strong>TV</strong>, hold it firmly from the bottom. Place<br />
your palm directly under the panel.<br />
��When carrying, do not subject the <strong>TV</strong> to shocks or vibration, or<br />
excessive force.<br />
Ventilation<br />
The slots and openings in the <strong>TV</strong> are provided for necessary<br />
ventilation. To ensure reliable operation of the <strong>TV</strong> and to protect it<br />
from overheating, these slots and openings must never be blocked or<br />
covered.<br />
Unless proper ventilation is provided, the <strong>TV</strong> may gather dust and get<br />
dirty. For proper ventilation, observe the following:<br />
��Do not install the <strong>TV</strong> face up, down or sideways.<br />
��Do not install the <strong>TV</strong> turned over or upside down.<br />
��Never cover the slots and openings with a cloth or other materials.<br />
��Never block the slots and openings by placing the <strong>TV</strong> on a bed,<br />
sofa, rug or other similar surface.<br />
��Never place the <strong>TV</strong> in a confined space, such as a bookcase or<br />
built-in cabinet, unless proper ventilation is provided.<br />
Leave some space around the <strong>TV</strong> set as shown below. Otherwise,<br />
air-circulation may be inadequate and will cause overheating, which<br />
may cause a fire or damage to the <strong>TV</strong> set.<br />
Install on the wall
4 inches<br />
10 cm<br />
Installed with stand<br />
4 inches<br />
10 cm<br />
4 inches<br />
10 cm<br />
11 7/8 inches<br />
30 cm<br />
4 inches<br />
10 cm<br />
11 7/8 inches<br />
30 cm<br />
4 inches<br />
10 cm<br />
Leave at least this space<br />
around the set.<br />
4 inches<br />
10 cm<br />
Leave at least this space<br />
around the set.<br />
Never install the <strong>TV</strong> set where Air circulation is blocked.<br />
Objects and ventilation holes<br />
Never push objects of any kind into the <strong>TV</strong> through the cabinet slots<br />
as they may touch dangerous voltage points or short out parts that<br />
could result in a fire or an electric shock. Do not place any objects on<br />
the <strong>TV</strong>.<br />
Moisture<br />
Moisture and flammable objects<br />
��The <strong>TV</strong> must not be exposed to dripping or splashing. Do not<br />
place objects filled with liquids, such as vases, on the <strong>TV</strong>.<br />
��Do not use power-line operated <strong>TV</strong> sets near water— for<br />
example, near a bathtub, washbowl, kitchen sink, or laundry tub,<br />
in a wet basement, or near a swimming pool, etc. It may result in a<br />
fire or an electric shock.<br />
��Do not let this <strong>TV</strong> get wet. Never spill liquid of any kind on the <strong>TV</strong>.<br />
If any liquid or solid object does fall through, do not operate the<br />
<strong>TV</strong>. It may result in electric shock or damage to the <strong>TV</strong>. Have it<br />
checked immediately by qualified personnel.<br />
��To prevent fire, keep flammable objects or open flame (e.g.<br />
candles) away from the <strong>TV</strong>.<br />
8<br />
Volume Adjustment<br />
Adjust the volume so as not to trouble your neighbors. Sound<br />
carries very easily at night. Therefore, closing the windows or using<br />
headphones is suggested.<br />
When using headphones, adjust the volume so as to avoid excessive<br />
levels, as hearing damage may result.<br />
Servicing<br />
Do not attempt to service the <strong>TV</strong> by yourself since opening the<br />
cabinet may expose you to dangerous voltage or other hazards.<br />
Refer all servicing to qualified service personnel.<br />
Replacement Parts<br />
When replacement parts are required, be sure the service technician<br />
certifies in writing that he/she has used replacement parts specified<br />
by the manufacturer that have the same characteristics as the<br />
original parts.<br />
Unauthorized substitutions may result in a fire, an electric shock or<br />
other hazards.<br />
Safety Check<br />
Upon completion of any service or repairs to the <strong>TV</strong>, ask the service<br />
technician to perform routine safety checks (as specified by the<br />
manufacturer) to determine that the <strong>TV</strong> is in safe operating condition,<br />
and to so certify. Ask a qualified service technician to dispose of the<br />
<strong>TV</strong>.<br />
Thank you for purchasing this AOC high-definition television. The<br />
quality of the image you see on your AOC <strong>TV</strong> is only as good as the<br />
quality of the signal it receives.<br />
Mobile telephone warning<br />
To avoid disturbances in picture and sound, malfunctioning of your<br />
<strong>TV</strong> or even damage to the <strong>TV</strong>, keep away your mobile telephone<br />
from the <strong>TV</strong>.<br />
End of life directive<br />
We are paying a lot of attention to produce environmental friendly in<br />
green focal areas.<br />
Your new receiver contains materials, which can be recycled and<br />
reused.<br />
At the end of its life, specialized companies can dismantle the<br />
discarded receiver to concentrate the reusable materials and to<br />
minimize the amount of materials to be disposed of.<br />
Please ensure you dispose of your old receiver according to local<br />
regulations.
Contents in the Box<br />
After unpack the <strong>TV</strong> box, please check the <strong>TV</strong> and all accessories are well presented and undamaged.<br />
AOC <strong>TV</strong> Set<br />
Remote Control<br />
QSG<br />
Quick Start Guide<br />
Controls & Connections:<br />
Speaker<br />
Speaker<br />
Power Indicator<br />
IR Receiver<br />
Base<br />
Remote Control Battery<br />
Warranty<br />
Card<br />
Warranty Card<br />
Volume +<br />
Volume -<br />
Channel<br />
Channel<br />
Menu<br />
Input<br />
Power<br />
9<br />
Base Screw<br />
<strong>User</strong><br />
<strong>Manual</strong><br />
<strong>User</strong> <strong>Manual</strong><br />
Slim Gender Cabel for<br />
LE32K0D7D<br />
LE42K0D7D<br />
1. VOL + Press to increase the sound volume level.<br />
2. VOL - Press to decrease the sound volume level.<br />
3. ���� Press to select the next higher program number.<br />
4. ���� Press to select the next lower program number.<br />
5. MENU<br />
Press to open or exit the OSD (on-screen display)<br />
menu.<br />
6. INPUT Press to select the input source.<br />
7. Power<br />
Press to turn on / off (standby) the <strong>TV</strong> set. (Press<br />
to turn on <strong>TV</strong> after the power on status, LED had<br />
changed to Blue.)
��LE19K097/LE22K097/LE24K097 ��LE32K0D7D/LE42K0D7D<br />
7<br />
PC IN<br />
SERVICE<br />
7<br />
6<br />
6<br />
L - AUDIO - R SPDIF OUT<br />
VIDEO<br />
5<br />
AV OUT<br />
5<br />
L - AUDIO - R<br />
6 5 7<br />
4<br />
3 4<br />
4<br />
SCART<br />
��LC32K0D3D/LC42K0D3D<br />
3 5 7<br />
3<br />
4 6<br />
Item Description<br />
Headphone Jack<br />
SPDIF *<br />
(Coaxial Digital Audio Out)<br />
AV IN 1(AV/S-VIDEO)/L-<br />
AUDIO-R<br />
3<br />
2<br />
2<br />
2<br />
2<br />
1<br />
1<br />
1<br />
1<br />
3<br />
Connects to your headphones. If your headphones do not match the jack, use a suitable plug adapter (not<br />
supplied). While headphones are connected, the <strong>TV</strong> speakers are muted.<br />
Connect an external sound system with optical cable to the SPDIF out jack on the back of your <strong>TV</strong> to the SPDIF<br />
IN jack and to the amplifier or receiver.<br />
Connects to the COMPOSITE VIDEO output or S-Video output jack from your video equipment that has<br />
COMPOSITE or S-Video VIDEO, and audio (L/R) jacks can connect audio source to your <strong>TV</strong>. When connected,<br />
S-Video will take priority over Composite video (Yellow jack).<br />
USB/Service Insert USB storage device to the USB port to view photos or listen to music.<br />
HDMI IN 1/ 2<br />
PC IN (RGB/AUDIO)<br />
Component IN 1/<br />
(1080p/1080i/<br />
720p/480p/480i)/<br />
L-AUDIO-R<br />
VHF/UHF/Cable Input<br />
HDMI (High-Definition Multimedia Interface) provides an uncompressed, all-digital audio/video interface between<br />
this <strong>TV</strong> and any HDMI-equipped audio/video equipment, such as a set-top box, DVD player, Blu-ray Disc player,<br />
A/V receiver as well as PC. HDMI supports enhanced, or high-definition video, plus digital audio.<br />
If the equipment has a DVI jack and not an HDMI jack, connect the DVI jack to the HDMI IN (with DVI-to-HDMI<br />
cable or adapter) jack, and connect the audio jack to the PC AUDIO IN jacks of HDMI IN.<br />
DVI-to-HDMI cable DVI-to-HDMI adapter<br />
HDMI connection is necessary to view 480i, 480p, 720p, 1080i and 1080p formats.<br />
Be sure to use only an HDMI cable that bears the HDMI logo. (We do not supply DVI-HDMI cable and DVI-HDMI<br />
adapter and HD15-HD15 cable.)<br />
Connects to a personal computer’s video output connector using HD15-HD15 cable (analog RGB). Can also be<br />
connected to other analog RGB equipment. See “PC Input Signal Reference Chart” on page 15 for the signals that<br />
can be displayed.<br />
For some Apple Macintosh computers, it may be necessary to use an adapter (not supplied). If this is the case,<br />
connect the adapter to the computer before connecting the HD15-HD15 cable.<br />
If the picture is noisy, flickering or not clear, adjust Phase and Pitch of Screen settings.<br />
Connects to your <strong>TV</strong>’s component video (YPbPr ) and audio (L/R) jacks. Component video provides better picture<br />
quality than the S-VIDEO or the composite video connections. Component video (YPbPr) connection is necessary<br />
to view 480i, 480p, 720p, 1080i and 1080p formats.<br />
RF (Radio Frequency or modulated signal design used as the carrier for television broadcasts.) input that<br />
connects to your Cable or VHF/UHF antenna.<br />
* SPDIF<br />
Sony/Philips Digital Interconnect Format. S/PDIF is mostly used to transmit compressed multichannel audio from a media player to an amplifier/receiver.<br />
10<br />
EXT<br />
COMPONENT SPDIF OUT HDMI<br />
(RGB/AV)<br />
Y Pb Pr L R<br />
3<br />
4<br />
3<br />
4<br />
2<br />
2<br />
2 1<br />
1<br />
1<br />
Common Interface<br />
<strong>TV</strong> Antenna<br />
USB<br />
VGA AUDIO IN<br />
HDMI 3
Set-Up<br />
Inserting Batteries into the Remote control<br />
Insert two size AAA batteries (supplied) to the diagram inside the battery compartment of the remote control.�<br />
Attaching the Base<br />
IMPORTANT: The Base of the AOC <strong>LCD</strong> <strong>TV</strong> must be assembled prior to usage.<br />
1. Place the <strong>TV</strong> set facing down on a soft and flat surface (blanket, foam, cloth, etc.) to prevent any<br />
damage to <strong>TV</strong> set.<br />
2. Carefully align and insert the Base to the stand<br />
3. Insert the screws to the bottom of the base and use them to tighten the base to the stand.<br />
4. Please refer to the “Important Usage instructions” in the above.<br />
Wall-Mounting<br />
Please install on a wall by using a Wall-Mount Bracket (sold separately). Before mounting the <strong>TV</strong> on a wall, the Table-Top Stand must be<br />
removed from the <strong>TV</strong>. Follow the simple steps below to remove the Table-Top Stand:<br />
1. Disconnect all the cables from the <strong>TV</strong>.<br />
2. Gently lay the <strong>TV</strong>, face down, onto a level and stable surface covered with a thick and soft cloth. Make sure the Table-Top Stand is hanging<br />
over the edge.<br />
3. Remove the screws as shown in the illustration for your model and pull the Table-Top Stand out.<br />
4. Do not remove any other screws from the <strong>TV</strong>.<br />
5. Do not remove the Table-Top Stand for any reason other than to Wall-Mount the <strong>TV</strong>.<br />
6. Be sure to store the removed screws and Table-Top Stand in a safe place until you are ready to reattach the Table-Top Stand. Keep the<br />
screws away from small children.<br />
7. For bracket installation, refer to the instruction guide provided by the Wall-Mount Bracket model for your <strong>TV</strong>. Sufficient expertise is required in<br />
installing this <strong>TV</strong>, especially to determine the strength of the wall for withstanding the <strong>TV</strong>’s weight.<br />
8. For product protection and safety reasons, AOC strongly recommends that you use the Wall-Mount Bracket model designed for your <strong>TV</strong> and<br />
the Wall-Mounting of your <strong>TV</strong> should be performed by AOC dealer or licensed contractor.<br />
1 2 3 4<br />
Note: 200 mm x 200 mm wall mount bracket & M4 screws are not included. Please contact your local distributor.<br />
11
PC Input Signal Reference Chart<br />
After connecting the PC to the <strong>TV</strong>, set the output signal from the PC according to the chart below.<br />
Presetting PC Mode<br />
Standard Resolution Refresh Rate (Hz)<br />
VESA 640 x 480 60<br />
VESA 800 x 600 60<br />
VESA 1024 x 768 60<br />
VESA 1360 x 768 60<br />
VESA 1920 x 1080(FHD Model) 60<br />
Video Input Signal Reference Chart<br />
After connecting the video input to the <strong>TV</strong>, set the output signal from the video input according to the chart below.<br />
Presetting Video Mode<br />
Standard Resolution Refresh Rate (Hz)<br />
SD 480i 60<br />
SD 480P 60<br />
SD 576i 50<br />
SD 576P 50<br />
HD 720P 50<br />
HD 720P 60<br />
HD 1080i 50<br />
HD 1080i 60<br />
FHD 1080p 50<br />
FHD 1080p 60<br />
Standard Definition Interface<br />
You can also enjoy traditional program by using a DVD player or VCR Player. Connect this equipment to your <strong>TV</strong> via the Composite Input or<br />
S-Video Input on the back of your <strong>TV</strong>.<br />
Refer to the Quick Setup Guide (supplied) when connecting other equipment to your <strong>TV</strong>.<br />
12
USING AOC <strong>TV</strong><br />
Buttons located at the right side of the <strong>TV</strong> will operate the same as these buttons on the remote control.<br />
T t<br />
PR<br />
�� ���� ��� ���<br />
Button Description<br />
POWER Press to turn on and off the <strong>TV</strong>.<br />
Back<br />
Press to go back to the previous <strong>TV</strong> channel or exit from the OSD when<br />
displaying menu items and settings.<br />
0-9 Press 0-9 to select a channel; the channel changes after two seconds.<br />
EPG Press this key to display electronic program guide in <strong>TV</strong> mode..<br />
VOL +/- Press to adjust the volume.<br />
Source<br />
Press to display the list of External Inputs. Press repeatedly to toggle<br />
through the inputs.<br />
Mute Press to mute the sound. Press again or press VOL+ to restore the sound.<br />
CH +/-<br />
/ / �� �� / �� ��<br />
MENU<br />
Dis ZOOM<br />
Press to scan through channels. To scan quickly through channels, press<br />
and hold down either + or -.<br />
Move left, up, down or right to select the available option or adjust the<br />
setting in OSD menu.<br />
Press to confirm the selected item or setting.<br />
Press to display or close a list of convenient functions and menu<br />
shortcuts. The OSD (On Screen Display) menu items vary based on input<br />
and content.<br />
Press repeatedly to step through the Wide Mode settings: Wide Zoom,<br />
Normal, Full, Zoom. The Wide Mode settings can be also accessed in the<br />
Screen settings.<br />
INFO Press to add channel to Favorite List.<br />
Picture<br />
Audio<br />
Sleep<br />
Press repeatedly to cycle through the available picture modes: Vivid,<br />
Standard, Mild. The picture modes can also be accessed in the Picture<br />
settings. For details, see Picture settings on section Using <strong>TV</strong> Features..<br />
Press repeatedly to cycle through the available sound modes: POP,<br />
Standard, Dance, Live, and Club. The sound modes can also be accessed<br />
in the Sound settings. For details, see page 24..<br />
Press repeatedly to cycle through the available sleep timer, 0~120<br />
minutes. The Sleep Timer can also be set in the OSD settings. For details,<br />
see OSD settings on section Using <strong>TV</strong> Features.<br />
To use the four colored buttons, you can access Teletext in the<br />
corresponding item or page color instructions.<br />
Teletext Press to turn On / off Teletext.<br />
Mix Press to mixed display <strong>TV</strong> content and television content..<br />
Size<br />
Press this button to change the font size: Full screen, Top half and Bottom<br />
half.<br />
Subpage Press to Open the sub-page of teletext<br />
Index Press to back to the index page of teletext.<br />
Subtitle<br />
Sleep<br />
You can set a time period for which the <strong>TV</strong> will be turned off automatically.<br />
��� ���<br />
In <strong>TV</strong> mode: Press to turn the subtitle on or off In Text mode: Press it<br />
to select the next page marked as a subtitle page and request it as the<br />
display page.<br />
Hold Press to freeze the current page of teletext.<br />
Reveal Press to show additional information of teletext.<br />
13
Turning the <strong>TV</strong> On and Off<br />
You can turn on the <strong>TV</strong> by using power switch button on the <strong>TV</strong> set or on the remote controller.<br />
Initial Setting<br />
When you first start up this AOC <strong>LCD</strong> <strong>TV</strong> set, please follow the Initial Wizard to your AOC <strong>LCD</strong> <strong>TV</strong>.<br />
1. Selecting Language.<br />
Select your language: English, Deutsch,Français,Italiano,Español,Português,Nederlands.<br />
�� ���� ��� ���<br />
2. Selecting your country.<br />
�� ���� ��� ���<br />
������������������������������������������OK.<br />
���������������������������������<br />
14
3. Selecting your mode.<br />
�� ���� ��� ���<br />
�������������������������������������������������������OK.<br />
4. Selecting your scan mode.<br />
�� ���� ��� ���<br />
5. Initial Setup Completed<br />
�������������������������������������������������������������<br />
15
Adjust Sound Setting<br />
1 Press MENUto call out MENU.<br />
2<br />
3<br />
4<br />
�� ���� ��� ���<br />
�� ���� ��� ���<br />
�� ���� ��� ���<br />
��������������������������” , and press OK.<br />
�����������������������������������Sound mode, Bass, Treble, Balance, Audio Source, Audio language, SPDIF,<br />
Speaker, AVL, Preset, and press OK to enter.<br />
��������������������<br />
5 Press MENU again to exit.<br />
Audio Setting Items Description<br />
Music: Enhances treble and bass.<br />
Sound Mode<br />
Speech: Enhances treble and keep bass in middle.<br />
Personal: Adjust sound mode as personal favorite.<br />
Sound Mode can also be accessed by pressing Audio on the remote control.<br />
Bass Increases or decreases lower-pitched sounds.<br />
Treble Increases or decreases higher-pitched sounds.<br />
Balance Emphasizes left or right speaker balance.<br />
Audio Source Select the audio source from Mono, Stereo, or Dual 1 & Dual 2. (This function works in A<strong>TV</strong> only.)<br />
SPDIF<br />
Digital audio output format. Select from RAW and PCM. The difference between SPDIF PCM or RAW:<br />
SPDIF PCM: It will only output as a PCM 44.1Khz digital no matter what the recording is in the media.<br />
SPDIF RAW: It will output the stream as it is digitally recorded, i.e. DTS recording as a DTS or a Dolby as a Dolby, or a<br />
native 48 or 96Khz.<br />
Speaker<br />
Choose to turn on / off the <strong>TV</strong> internal speaker. The digital audio output signals and earphone output signals will not be<br />
turned off even though the <strong>TV</strong> speaker is off. The default setting is On.<br />
AVL Enable or disable Automatic Volume Level.<br />
Preset Restore the default audio settings.<br />
17
OSD <strong>Manual</strong> Setting<br />
Channel Search<br />
1 Press MENU to call out MENU.<br />
2<br />
3<br />
�� ���� ��� ���<br />
�� ���� ��� ���<br />
�����������������������” , and press OK.<br />
�����������������������������”, and then press OK.<br />
Menu Description<br />
Country<br />
To select the relevant country. This is the country you are in, or the country whose channels you want to receive if you<br />
live near its borders.<br />
Channels<br />
Enter the channels submenu, and choose from Channel Scan, Update Scan, Single RF Scan, Analog <strong>Manual</strong> Scan,<br />
Channel Skip, Channel Sort, Channel Edit, Decoder, and Analog CH Fine Tune.<br />
Channel scan<br />
Channel Scan will re-tune the television automatically. It is recommended to run the Channel Scan periodically to<br />
ensure that all new services are added.<br />
Update scan<br />
Search the new channels automatically that are not in the channel list.<br />
Single RF Scan (Digital Only)<br />
Enter the Single RF Scan in the Channels submenu to scan digital channels.<br />
Analog <strong>Manual</strong> Scan<br />
The television can be tuned-in manually using Analog <strong>Manual</strong> Scan. Use the number keys to enter the Start<br />
Frequency to scan up or scan down.<br />
Channel skip<br />
To prevent certain programs from being viewed by pressing CH + / - buttons on the remote control, the program<br />
position can be skipped.<br />
Tip: The skipped program may not be found by pressing CH + / - buttons but can be access by pressing number<br />
buttons directly.<br />
Channel sort<br />
Change the order of the Channel List.<br />
Channel Edit<br />
Enter the Channel Edit in the channels submenu to edit the channel number and channel name by using the number<br />
buttons 0~9.<br />
Decoder (Analog only)<br />
Channel Decode support the Canal+ (paid television channel); however, the channel also broadcast some unencrypted<br />
programs. These programs without encryption can be viewed free of charge.<br />
Analog CH Fine Tune<br />
Select Analog CH Fine Tune in the Channels submenu to adjust the frequency.<br />
18
Features Setup<br />
1 Press MENU/EXIT to call out MENU.<br />
2<br />
3<br />
4<br />
�� ���� ��� ���<br />
�� ���� ��� ���<br />
�� ���� ��� ���<br />
����������������������������” , and press OK.<br />
������������������������������������������������, Time, Sleep timer, Transparency, Password Setting,<br />
Parental control, Closed Captions, Analog Caption, etc. and press OK to enter.<br />
��������������������<br />
5 Press MENU/EXIT again to exit.<br />
Menu Description<br />
Menu Language To select the on-screen display menu language.<br />
Picture Format To select the available display format from Auto, Normal, Wide, Zoom 1, or Zoom2.<br />
Time Zone<br />
To select the time zone you are in.<br />
Time<br />
To set the time and date or select auto synchronization.<br />
Time<br />
Tip: Before you want to set the time and date by your own, please make sure<br />
Auto synchronization is Off.<br />
Sleep Timer<br />
To set the <strong>TV</strong> to turn itself off within a certain time.<br />
Analog Subtitle<br />
To display the transmitted subtitle on the screen. Either this text can be permanently displayed (assuming that the<br />
Subtitle<br />
service is available in the broadcast) or only when mute is active.<br />
Subtitle Type<br />
To choose the subtitle type from normal or hearing impaired.<br />
Digital Teletext Language<br />
To select the teletext language.<br />
Teletext Language<br />
Decode Page Language<br />
To set the teletext language to the regional location.<br />
Common Interface This menu appears with your CI supplier information.<br />
HDMI Scan Info<br />
(HDMI only)<br />
Automatic<br />
Set to underscan or overscan automatically when the video signal is detected.<br />
Underscan<br />
When the video signal is detected, all active pixels and lines are displayed with or without border.<br />
Overscan<br />
When the video signal is detected, some active pixels and lines at the edges are not displayed.<br />
Reset Default To reset all <strong>TV</strong> settings to the original factory values.<br />
19
Troubleshooting<br />
Condition Explanation / Solution<br />
No picture<br />
No picture Check the Power Saving settings.<br />
Make sure the power cord is connected securely. Turn on the power of the <strong>TV</strong>.<br />
Cannot receive any channels<br />
Check antenna/cable connections. Make sure the Cable setting is correct for your <strong>TV</strong> signal source.<br />
<strong>TV</strong> is locked to one channel Perform Auto Program to add receivable channels that are not present in the <strong>TV</strong>’s memory.<br />
Perform Auto Program to add receivable channels that are not present in the channels <strong>TV</strong>’s memory.<br />
Cannot receive or select<br />
To receive or select cable channels, make sure that Cable in the Channel settings is set to On. To<br />
receive or select UHF channels over an antenna, make sure Cable is set to Off.<br />
Check if Sleep Timer is activated, or confirm the Duration setting of Timer automatically.<br />
The <strong>TV</strong> turns off<br />
Check PC Power Management in General Settings.<br />
Check the connection between the optional video equipment and the <strong>TV</strong> Sources.<br />
No picture from some video Press INPUT on the remote control.<br />
Select your desired input from the External Inputs list.<br />
Poor picture<br />
The quality of the images is not<br />
as good as what I saw at the<br />
store<br />
Double images or ghosts<br />
Only snow and noise appear on<br />
the screen<br />
Dotted lines or stripes<br />
No color/Dark picture/Color is not<br />
correct/The picture is too bright<br />
Noisy picture<br />
No sound/Noisy sound<br />
Picture quality depends on the signal content. See Quick Setup Guide (supplied) to display the best<br />
possible picture for that signal.<br />
Check antenna/cable connections.<br />
Check the antenna location and direction.<br />
Check if the antenna is broken or bent; Check if the antenna has reached the end of its serviceable life.<br />
(3-5 years in normal use, 1-2 years at the seaside.)<br />
Keep the <strong>TV</strong> away from noise sources such as cars, motorcycles, or hair-dryers.<br />
If using 300 ohm twin lead, move the excess lead away from the <strong>TV</strong> or try using 75 ohm coaxial cable<br />
instead.<br />
Press PICTURE to select the desired Picture Mode; Adjust the Picture Mode options in the Picture<br />
settings.<br />
Make sure that the antenna is connected using a 75-ohm coaxial cable.<br />
Keep the antenna cable away from other connecting cords.<br />
To avoid <strong>TV</strong> interference, make sure to use an undamaged antenna cable.<br />
Check the volume control. Press MUTE or VOL + so that �disappears from the screen.<br />
Good picture, no sound<br />
Disconnect your headphones.<br />
For HDMI equipment, confirm that the audio output setting of the connected equipment is set to PCM.<br />
This <strong>TV</strong>'s HDMI inputs support PCM 32, 44.1 and 48 kHz, 16, 20 and 24bits.<br />
Make sure that the antenna is connected using a 75-ohm coaxial cable.<br />
Audio noise<br />
Keep the antenna cable away from other connecting cords.<br />
To avoid <strong>TV</strong> interference, make sure to use an undamaged antenna cable.<br />
PC Input<br />
Confirm the PC is correctly connected to the <strong>TV</strong> with either the PC IN (with an HD15 cable) or with the HDMI IN.<br />
Ensure the output signal from the PC is one of the formats listed on page 18.<br />
No Picture / No Signal<br />
Turn the PC off. Confirm the PC connection and restart the PC. Plug and play will auto-detect the <strong>TV</strong><br />
and correctly set up PC timing.<br />
Verify PC Power Management is activated.<br />
Poor Picture Adjust the resolution. Adjust Pitch and Phase.<br />
Wide Mode changes<br />
automatically<br />
Suddenly the picture gets smaller<br />
“Black box” on screen<br />
Black bands appear at the edges<br />
of the screen<br />
Condition Explanation / Solution<br />
PC Input<br />
Certain programs on DVD or<br />
other digital sources display a<br />
loss of detail, especially during<br />
fast-motion or dark scenes<br />
Remote control does not operate<br />
The current Wide Mode setting is automatically replaced with the 4:3<br />
Default setting when you change the channel or video input, if 4:3 Default in the Screen settings is set<br />
to other than Off. If you want to lock in Wide Mode selected with WIDE on the remote control, set 4:3<br />
Default to Off in the Screen settings.<br />
Check the Auto Wide option in the Screen settings.<br />
The picture gets smaller during the commercials, this is due to the method the provider broadcasts their<br />
contents. When HD content channels switch to SD definition content (commercials), the picture may be<br />
small with a black border.<br />
You have selected a text option and no text is available. To turn off this feature, set the CC Display<br />
option to Off. If you were trying to select closed captioning, select CC1 instead of Text1-4.<br />
Some wide screen programs are filmed in aspect ratios that are greater than 16:9 (this is especially<br />
common with theatrical releases). Your <strong>TV</strong> will show these programs with black bands at the top and<br />
bottom of the screen. For more details, check the documentation that came with your DVD (or contact<br />
your program provider). Programs in 4:3 aspect ratio will have bands on left and right sides of the<br />
screen.<br />
This is due to the digital compression of the source content used by certain digital broadcasts and<br />
DVDs which may cause your <strong>TV</strong>’s screen to display less detail than usual, or cause artifacts (small<br />
blocks or dots, pixilation) to appear on your screen. These signal compressions are more visible and are<br />
dependent on the clarity and resolution of the television.<br />
Check the polarity of the batteries or replace the batteries.<br />
Point the remote control at the remote control sensor located at the front of the <strong>TV</strong>.<br />
Fluorescent lamps can interfere with your remote control operation; try turning off the fluorescent lamps.<br />
Keep the remote control sensor area clear from obstacles.<br />
20
Dimensions & Specifications<br />
Model LE19K097 LE22K097 LE24K097<br />
Screen Size 18.5” diagonal 21.5” diagonal 23.6” diagonal<br />
Resolution 1366 x 768 1920 x 1080 1920 x 1080<br />
Bulgarian, Croatian, Czech, Danish, Dutch, English, Finnish, French,<br />
Gaeilge, German, Greek, Hungarian, Italian, Norwegian, Polish,<br />
OSD Language<br />
Portuguese, Rumanian, Russian, Serbian, Slovakian, Slovenian, Spanish,<br />
Swedish, Turkish, Latvian, Estonian, Lithuanian, Ukrainian<br />
View Angle 160°(H)/150°(V)<br />
Brightness 250 cd/m 2<br />
21<br />
250 cd/m 2<br />
Video System PAL/SECAM/DVBT<br />
300 cd/m 2<br />
Audio System B/G, D/K, I, LL’ B/G, D/K, I, LL’ B/G, D/K, I, LL’<br />
Speaker Output 3W x 2 3W x 2 3W x 2<br />
Rear Connectors<br />
Tuner Input<br />
PC IN: D-SUB & PC Audio<br />
Component Video & L/R Audio Input<br />
SCART<br />
SPDIF Output<br />
HDMI<br />
COMMON INTERFACE<br />
AV In<br />
Side Connectors<br />
Earphone Output<br />
HDMI<br />
USB<br />
Input Voltage 220-240V, 50/60Hz<br />
Power consumption ���� ���� ����<br />
Standby Power<br />
Consumption<br />
Set Dimension(W x H x D�����<br />
(with base and stand)(mm)<br />
459 x 356 x 150<br />
�����<br />
527 x 395 x 150 571 x 420 x 160<br />
Set Dimension(W x H x D)<br />
(w/o base and stand)(mm)<br />
459 x 323 x 38 527 x 361 x 39 571 x 406 x 40<br />
Net Weight (Kg) 4 4 5.5<br />
Mounting Hole Space 100 x 100mm<br />
Operation Temperature 0ºC~35ºC<br />
USB Photo/Music/Video<br />
Supported Formats<br />
Picture JPEG<br />
Baseline<br />
Progressive<br />
Audio MP3 MPEG1 Layer 3<br />
Video<br />
MPEG1 VOB, MPG<br />
MPEG4 AVI, MP4<br />
Realmedia RM
Model LE32K0D7D LE42K0D7D LC32K0D3D LC42K0D3D<br />
Screen Size 32” diagonal 42” diagonal 32” diagonal 42” diagonal<br />
Resolution 1920 x 1080<br />
Bulgarian, Croatian, Czech, Danish, Dutch, English, Finnish, French, Gaeilge,<br />
German, Greek, Hungarian, Italian, Norwegian, Polish, Portuguese, Rumanian,<br />
OSD Language<br />
Russian, Serbian, Slovakian, Slovenian, Spanish, Swedish, Turkish, Latvian,<br />
Estonian, Lithuanian, Ukrainian<br />
View Angle 178°(H)/178°(V)<br />
Brightness 450 cd/m 2<br />
450 cd/m 2<br />
450 cd/m 2<br />
Video System PAL/SECAM/DVBT/DVBC<br />
500 cd/m 2<br />
Audio System B/G, D/K, I, LL’ B/G, D/K, I, LL’ B/G, D/K, I, LL’ B/G, D/K, I, LL’<br />
Speaker Output 10W x 2<br />
Tuner Input<br />
Speaker: 8W x 2<br />
Woofer: 10W<br />
Rear Connectors<br />
PC IN: D-SUB & PC Audio<br />
Component Video & L/R Audio Input<br />
SCART<br />
SPDIF Output<br />
HDMI<br />
COMMON INTERFACE<br />
AV In<br />
Side Connectors<br />
Earphone Output<br />
HDMI<br />
USB<br />
Input Voltage 220-240V, 50/60Hz<br />
10W x 2 10W x 2<br />
Power consumption ���� ����� ����� �����<br />
Standby Power<br />
Consumption<br />
Set Dimension�W x H x D�����<br />
(with base and stand)(mm)<br />
Set Dimension�W x H x<br />
775 x 563 x 210<br />
�����<br />
1005 x 693 x 230 779 x 553 x 251 1011 x 698 x 278<br />
D�<br />
(w/o base and stand)(mm)<br />
775 x 521 x 46 1005 x 651 x 46 779 x 553 x 98 1011 x 650 x 108<br />
Net Weight (Kg) 10.5 19 12<br />
20<br />
Wall Mount Size 200 x 100mm 200 x 200mm 200 x 200mm 400 x 200mm<br />
Operation Temperature 0ºC~35ºC<br />
USB Photo/Music/Video<br />
Supported Formats<br />
Picture JPEG<br />
Baseline<br />
Progressive<br />
Audio MP3 MPEG1 Layer 3<br />
Video<br />
8~48 KHz<br />
8~576 Kbps Mono/<br />
Stereo<br />
MPEG1 VOB, MPG MPEG-1 Video<br />
MPEG4 AVI, MP4 XVID/MPEG-4<br />
Realmedia RM RealVideo 8/9/10<br />
Caution:<br />
AOC is not responsible if the USB storage device is not supported, nor is it responsible for damage or loss of<br />
data from the device.<br />
Tips:<br />
1. If can’t detect the connected device, it would be caused by the connected device driver not by <strong>TV</strong> failure.<br />
2. The reading speed will be variable due to the different connected devices and different storage capacities.<br />
3. Sometimes it can’t detect the device because the connected device can’t meet with the standard USB spec<br />
requirement (5V /500 mA).<br />
�����������������������������������������������������������������������������������������������������������������<br />
5. USB port could be also used as software upgrade.<br />
22