Operating Instructions Non-Contact Safety Switch CET.-AR-...-CH ...
Operating Instructions Non-Contact Safety Switch CET.-AR-...-CH ...
Operating Instructions Non-Contact Safety Switch CET.-AR-...-CH ...

Create successful ePaper yourself
Turn your PDF publications into a flip-book with our unique Google optimized e-Paper software.
More than safety.<br />
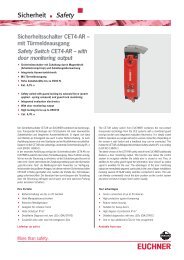
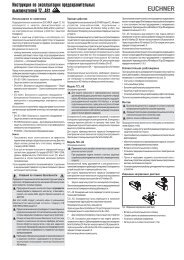
<strong>Operating</strong> <strong>Instructions</strong><br />
<strong>Non</strong>-<strong>Contact</strong> <strong>Safety</strong> <strong>Switch</strong><br />
<strong>CET</strong>.-<strong>AR</strong>-...-<strong>CH</strong>-... (Multicode)
<strong>Operating</strong> <strong>Instructions</strong> <strong>Safety</strong> <strong>Switch</strong> <strong>CET</strong>.-<strong>AR</strong>-...-<strong>CH</strong>-...<br />
Contents<br />
Scope 3<br />
Correct use 3<br />
Possible combinations for CES components 4<br />
Exclusion of liability and warranty 4<br />
General safety instructions 5<br />
Function 6<br />
Function of the electronics 6<br />
Function of the guard locking 8<br />
Start button and feedback loop (optional) 9<br />
Mechanical release and mechanical key release (can be retrofitted) 9<br />
Emergency unlocking (can be retrofitted) 10<br />
Escape release (optional) 11<br />
Wire front release (optional) 12<br />
Lockout mechanism (optional) 13<br />
Changing the approach direction 14<br />
Mounting 15<br />
Electrical connection 17<br />
<strong>Safety</strong> in case of faults 18<br />
Fuse protection for power supply 18<br />
Requirements for connection cables 19<br />
Maximum cable lengths 20<br />
Connector assignment safety switch <strong>CET</strong>-<strong>AR</strong> with plug connectors 2 x M12 22<br />
Connector assignment safety switch <strong>CET</strong>-<strong>AR</strong> with plug connector RC18 23<br />
Connector assignment Y-distributor 24<br />
Connection of a single <strong>CET</strong>-<strong>AR</strong> 25<br />
Connection of several <strong>CET</strong>-<strong>AR</strong> in a switch chain 28<br />
Setup 35<br />
LED indicators 35<br />
Initial setup 35<br />
Functional check 36<br />
System status table 37<br />
Technical data 38<br />
Technical data for safety switch <strong>CET</strong>.-<strong>AR</strong>-C..-<strong>CH</strong>-... 38<br />
Dimension drawing safety switch <strong>CET</strong>-<strong>AR</strong>-... 40<br />
Technical data for actuator <strong>CET</strong>-A-BWK-50X 42<br />
Ordering Information and Accessories 43<br />
Versions with plug connectors 2 x M12 43<br />
Connection cables M12 and accessories for series connection 44<br />
Versions with plug connector RC18 45<br />
Connection cables RC18 46<br />
Accessories 46<br />
Inspection and service 47<br />
Service 47<br />
Declaration of conformity 48<br />
2
<strong>Operating</strong> <strong>Instructions</strong> <strong>Safety</strong> <strong>Switch</strong> <strong>CET</strong>.-<strong>AR</strong>-...-<strong>CH</strong>-...<br />
Scope<br />
Correct use<br />
These operating instructions are valid for all <strong>CET</strong>.-<strong>AR</strong>-...-<strong>CH</strong>-... versions. These<br />
operating instructions and the enclosed data sheet form the complete user information<br />
for your device.<br />
The safety switch <strong>CET</strong>-<strong>AR</strong> is an electromagnetic interlock device with guard locking.<br />
The safety switch <strong>CET</strong>-<strong>AR</strong> can be integrated into an <strong>AR</strong> switch chain or operated<br />
as a separate system.<br />
In combination with a safety guard and the machine control, this safety component<br />
prevents the safety guard from being opened while a dangerous machine movement<br />
is being performed.<br />
For the control system, this means that<br />
ÌÌstarting commands which cause hazardous situations must become active<br />
only when the safety guard is in protective position and the guard locking is<br />
in locked position. The locked position of the guard locking must be released<br />
only when the hazardous situation is no longer present.<br />
Before safety components are used, a risk assessment must be performed on the<br />
machine in accordance with<br />
ÌÌEN ISO 13849-1, <strong>Safety</strong> of machinery. <strong>Safety</strong> related parts of control systems.<br />
General principles for design, Annex B<br />
ÌÌEN ISO 12100, <strong>Safety</strong> of machinery – General principles for design – Risk assessment<br />
and risk reduction.<br />
ÌÌIEC 62061, <strong>Safety</strong> of machinery - Functional safety of safety-related electrical,<br />
electronic and programmable electronic control systems<br />
Correct use includes compliance with the relevant requirements for installation<br />
and operation, in particular<br />
ÌÌEN ISO 13849-1, <strong>Safety</strong> of machinery. <strong>Safety</strong> related parts of control systems.<br />
General principles for design<br />
ÌÌEN 1088, <strong>Safety</strong> of machinery. Interlocking devices associated with guards.<br />
Principles for design and selection<br />
ÌÌEN 60204-1, Electrical equipment of machines<br />
The safety switch is only allowed to be operated in conjunction with the intended<br />
EU<strong>CH</strong>NER <strong>CET</strong> actuators and the related connection components from EU<strong>CH</strong>NER.<br />
On the use of different actuators or other connection components, EU<strong>CH</strong>NER<br />
provides no warranty for safe function.<br />
Connection of several devices in an <strong>AR</strong> switch chain is permitted only using devices<br />
intended for series connection in an <strong>AR</strong> switch chain. Check this in the instructions<br />
of the device in question.<br />
A maximum of 20 safety switches are allowed to be operated in a switch chain.<br />
3
<strong>Operating</strong> <strong>Instructions</strong> <strong>Safety</strong> <strong>Switch</strong> <strong>CET</strong>.-<strong>AR</strong>-...-<strong>CH</strong>-...<br />
Important:<br />
ÌÌThe user is responsible for the integration of the device into a safe overall<br />
system. For this purpose, the overall system must be validated, e.g. in accordance<br />
with EN ISO 13849-2.<br />
ÌÌCorrect use requires observing the permissible operating parameters (see<br />
Technical data).<br />
ÌÌIf a product data sheet is included with the product, the information on the<br />
data sheet applies in case of discrepancies with the operating instructions.<br />
ÌÌIn the estimation of the PL for the overall system, a maximum value of<br />
100 years can be assumed for the MTTF d<br />
according to the limit value in<br />
EN ISO 13849-1:2008, section 4.5.2. This corresponds to a minimum<br />
value for the PFH d<br />
of 2.47 x 10 -8 /h. When up to 11 devices are connected<br />
in series, these limit values can be assumed for the entire switch chain as a<br />
subsystem. As a subsystem, this switch chain achieves PL e. If more than<br />
11 devices are connected in series, the PFHd can be calculated using one of<br />
the methods stated in EN ISO 13849-1:2008, Section 4.5.1.<br />
ÌÌIf the simplified method according to Section 6.3 of EN ISO 13849:2008-12<br />
is used for validation, the Performance Level (PL) might be reduced when<br />
more than 11 devices are connected in series.<br />
ÌÌIt is only allowed to use components that are permissible in accordance with<br />
the table below.<br />
Possible combinations for CES components<br />
Actuator<br />
<strong>Safety</strong> switch<br />
<strong>CET</strong>-A-BWK-50X<br />
096327<br />
<strong>CET</strong>.-<strong>AR</strong>-...-<strong>CH</strong>-...<br />
Key to symbols<br />
Combination possible<br />
Note:<br />
For information about combination with an <strong>AR</strong> evaluation unit, please refer to the<br />
section Information on operation on an <strong>AR</strong> evaluation unit on page 32.<br />
Exclusion of liability and warranty<br />
In case of failure to comply with the conditions for correct use stated above, or<br />
if the safety instructions are not followed, or if any servicing is not performed as<br />
required, liability will be excluded and the warranty void.<br />
4
<strong>Operating</strong> <strong>Instructions</strong> <strong>Safety</strong> <strong>Switch</strong> <strong>CET</strong>.-<strong>AR</strong>-...-<strong>CH</strong>-...<br />
General safety instructions<br />
Warning!<br />
Important:<br />
As the unique actuator codes are not evaluated, the <strong>CET</strong>.-<strong>AR</strong>-...-<strong>CH</strong>-... version<br />
can only be used for applications in which a hazard cannot result from possible<br />
tampering with the system.<br />
<strong>Safety</strong> switches fulfill personal protection functions. Incorrect installation or tampering<br />
can lead to fatal injuries to personnel.<br />
Check the safe function of the safety guard particularly<br />
ÌÌafter any setup work<br />
ÌÌafter the replacement of a <strong>CET</strong> component<br />
ÌÌafter an extended period without use<br />
ÌÌafter every fault<br />
Independent of these checks, the safe function of the safety guard should be<br />
checked at suitable intervals as part of the maintenance schedule.<br />
Danger of fatal injury in the event of incorrect connection or incorrect use.<br />
ÌÌ<strong>Safety</strong> switches must not be bypassed (bridging of contacts), turned away,<br />
removed or otherwise rendered ineffective. On this topic pay attention in<br />
particular to the measures for reducing the possibility of bypassing from<br />
EN 1088:1995+A2:2008, Section 5.7.<br />
The device is only allowed to be installed and placed in operation by authorized<br />
personnel<br />
ÌÌwho are familiar with the correct handling of safety components<br />
ÌÌwho are familiar with the applicable EMC regulations<br />
ÌÌwho are familiar with the applicable regulations on health and safety and accident<br />
prevention<br />
ÌÌwho have read and understood the operating instructions.<br />
Prior to use, read the operating instructions and keep these in a safe place.<br />
Ensure that the operating instructions are always available during mounting,<br />
setup and servicing work. EU<strong>CH</strong>NER cannot provide any warranty in relation to<br />
the readability of the CD for the storage period required. For this reason you<br />
should archive a printed copy of the operating instructions. You can download<br />
the operating instructions from www.EU<strong>CH</strong>NER.de.<br />
5
<strong>Operating</strong> <strong>Instructions</strong> <strong>Safety</strong> <strong>Switch</strong> <strong>CET</strong>.-<strong>AR</strong>-...-<strong>CH</strong>-...<br />
Function<br />
Function of the electronics<br />
Recess<br />
Springmounted<br />
guard<br />
locking<br />
pin<br />
Lift tappet<br />
Slide<br />
Transponder<br />
<strong>Safety</strong> switches series <strong>CET</strong>-<strong>AR</strong> permit locking of movable safety guards. They meet<br />
the following safety requirements:<br />
ÌÌCategory 3, PLe according to EN ISO 13849-1 (head mounted upward)<br />
ÌÌCategory 4, PLe according to EN ISO 13849-1 (head mounted downward or<br />
horizontal)<br />
ÌÌRedundant design of the circuit in the unit with self-monitoring<br />
ÌÌThe safety system still functions even if an internal component fails<br />
ÌÌThe switch state of the semiconductor outputs is continuously monitored internally<br />
ÌÌShort circuit detection at the safety outputs by pulse signals<br />
The following switch-on condition applies to safety outputs OA and OB (see also<br />
System status table and the section Typical system times):<br />
ÌÌ<strong>Safety</strong> guard closed<br />
ÌÌGuard locking active (actuator completely inserted into recess)<br />
ÌÌBoth safety outputs (IA and IB) must be on<br />
ÌÌFeedback loop closed (only for version with feedback loop/start button)<br />
The system consists of the following components: coded actuator (transponder)<br />
and switch.<br />
Each actuator has a unique electronic coding and is therefore a unique element.<br />
The code in an actuator cannot be reprogrammed.<br />
Unlike systems with unique code detection, on multicode devices a specific code<br />
is not requested but instead it is only checked whether the actuator is of a type<br />
that can be detected by the system (multicode detection). There is no exact comparison<br />
of the actuator code with the code defined in the safety switch (unique<br />
code detection).<br />
The safety switch with integrated evaluation unit and read head is fastened to the<br />
fixed part of the safety guard.<br />
The actuator attached to the movable part of the safety guard is moved towards<br />
the read head fitted in the safety switch by closing the door. When the switch-on<br />
distance is reached, power is supplied to the actuator by the inductive read head<br />
and data can be transferred.<br />
If a permissible code is detected, the safety outputs are released.<br />
Due to the combination of dynamic polling of the actuator and the redundant,<br />
diverse design of the safety electronics with the two feedback safety outputs, the<br />
safety switch will enter the safe state with every detectable fault.<br />
When the safety guard is opened, the safety outputs switch off the safety circuit<br />
and the monitoring output OUT is switched off. The state of the safety outputs is<br />
monitored internally by two microprocessors.<br />
In the event of a fault in the safety switch, the safety circuit is switched off and<br />
the DIA LED illuminates red.<br />
The safety switch has a redundant circuit design with self-monitoring. This means<br />
that the safety system is still effective even if a component fails.<br />
6
<strong>Operating</strong> <strong>Instructions</strong> <strong>Safety</strong> <strong>Switch</strong> <strong>CET</strong>.-<strong>AR</strong>-...-<strong>CH</strong>-...<br />
The system is designed so that failures will not result in the loss of the safety function.<br />
The occurrence of failures is detected by cyclic self-monitoring at the latest<br />
on the next demand to close the safety contacts (e.g. on starting).<br />
7
<strong>Operating</strong> <strong>Instructions</strong> <strong>Safety</strong> <strong>Switch</strong> <strong>CET</strong>.-<strong>AR</strong>-...-<strong>CH</strong>-...<br />
Function of the guard locking<br />
Version <strong>CET</strong>1-<strong>AR</strong>, guard locking by spring force<br />
The lift tappet is pressed into the locked position by the force of the spring for the<br />
guard locking pin in the actuator and unlocked electromagnetically by the safety<br />
switch. The guard locking functions in accordance with the closed-circuit current<br />
principle. The locked safety guard cannot be opened immediately in the event of<br />
interruption of the power supply to the solenoid.<br />
The guard locking pin of the actuator cannot be moved out of the recess and the<br />
door is locked in the closed position as long as the lift tappet is pressed down by<br />
the actuator.<br />
When the operating voltage is present at the locking solenoid, the lift tappet is<br />
extended and lifts the actuator's guard locking pin above the edge of the recess.<br />
The safety door can then be opened.<br />
Important:<br />
Version <strong>CET</strong>2-<strong>AR</strong>, guard locking by solenoid force<br />
The safety guard can be opened immediately in the event of interruption of the<br />
solenoid power supply! Usage only in special cases in accordance with strict<br />
evaluation of the accident risk (see DIN EN 1088 (1995), section 5.5)!<br />
Example: If the risk of accidental locking inside a safety guard during a power<br />
failure is higher than the risk of ineffective guard locking.<br />
The lift tappet is held in locked position by electromagnetic force and released<br />
by spring force. The guard locking operates in accordance with the open-circuit<br />
current principle.<br />
The safety door can be opened as long as the lift tappet is held in the extended<br />
position.<br />
The lift tappet is released when operating voltage is present at the guard locking<br />
solenoid. The actuator's guard locking pin can now press the lift tappet down.<br />
The safety door is locked as soon as the guard locking pin is fully inserted into<br />
the recess.<br />
Version <strong>CET</strong>3-<strong>AR</strong>, guard locking by spring force with door monitoring<br />
output<br />
Function as for <strong>CET</strong>1-<strong>AR</strong>, however here the door position is also monitored. The<br />
door monitoring output OUT D is switched on as soon as the actuator protrudes<br />
beyond the extended lift tappet (state: door closed, guard locking not active). The<br />
output OUT D also remains switched on when guard locking is active.<br />
Version <strong>CET</strong>4-<strong>AR</strong>, guard locking by solenoid force with door monitoring<br />
output<br />
Function as for <strong>CET</strong>2-<strong>AR</strong>, however here the door position is also monitored. The<br />
door monitoring output OUT D is switched on as soon as the actuator protrudes<br />
beyond the extended lift tappet (state: door closed, guard locking not active). The<br />
output OUT D also remains switched on when guard locking is active.<br />
8
<strong>Operating</strong> <strong>Instructions</strong> <strong>Safety</strong> <strong>Switch</strong> <strong>CET</strong>.-<strong>AR</strong>-...-<strong>CH</strong>-...<br />
Start button and feedback loop (optional)<br />
Important:<br />
A start button and a feedback loop can be connected (for monitoring downstream<br />
relays and contactors).<br />
Faults on the start button are not detected. This can lead to unintentional automatic<br />
starting.<br />
On devices with start button and feedback loop, safety outputs OA and OB are<br />
switched on only when the start button is pressed and the feedback loop is closed.<br />
Start button and feedback loop must be closed for at least 500 ms.<br />
Monitoring output OUT is switched on as soon as guard locking is active. The status<br />
of the feedback loop has no influence on this (see section System status table).<br />
Important:<br />
Mechanical release and mechanical key release<br />
(can be retrofitted)<br />
ÌÌThe mechanical release is not a safety function.<br />
ÌÌThe machine manufacturer must select and use a suitable release (escape<br />
release, emergency unlocking, etc.) for a specific application. A risk assessment<br />
appraisal is required for this purpose. It may be necessary to take<br />
specifications from a product standard into account.<br />
ÌÌThe mechanical key release must not be used to lock the switch during maintenance<br />
work to prevent activation of guard locking, for example.<br />
ÌÌThe correct function 5,8 must be checked at regular intervals.<br />
ÌÌLoss of the release function due to mounting errors or damage during<br />
mounting.<br />
ÌÌCheck the release function every time after mounting.<br />
ÌÌLoss of the release function due to tension on the actuator. The door must<br />
not be under tension during release.<br />
ÌÌPlease observe the notes 16,7 on any enclosed data sheets.<br />
30<br />
35,5<br />
20<br />
Ø<br />
The mechanical release can be used to unlock guard locking, irrespective of the<br />
state of the solenoid.<br />
Using mechanical release<br />
1. Unscrew locking screw<br />
2. Using a screwdriver, turn the mechanical release by around 180° in the direction<br />
of the arrow<br />
¨¨<br />
The safety device can be opened<br />
The mechanical release must be returned to its original position and sealed after<br />
use (for example with sealing lacquer).<br />
9
<strong>Operating</strong> <strong>Instructions</strong> <strong>Safety</strong> <strong>Switch</strong> <strong>CET</strong>.-<strong>AR</strong>-...-<strong>CH</strong>-...<br />
Using mechanical key release<br />
On devices with mechanical key release (can be retrofitted), simply turn the key to<br />
unlock. For mounting, see the mechanical key release supplement.<br />
The monitoring output OUT is switched off; OUT D can assume an undefined state.<br />
Open the safety door and close it again after resetting the mechanical release.<br />
The device will then operate normally again.<br />
Important:<br />
Emergency unlocking (can be retrofitted)<br />
ÌÌEmergency unlocking is not a safety function.<br />
ÌÌThe machine manufacturer must select and use a suitable release (escape<br />
release, emergency unlocking, etc.) for a specific application. A risk assessment<br />
appraisal is required for this purpose. It may be necessary to take<br />
specifications from a product standard into account.<br />
ÌÌThe correct function must be checked at regular intervals.<br />
ÌÌLoss of the release function due to mounting errors or damage during<br />
mounting.<br />
ÌÌCheck the release function every time after mounting.<br />
ÌÌLoss of the release function due to tension on the actuator. The door must<br />
not be under tension during release.<br />
ÌÌPlease observe the notes on any enclosed data sheets.<br />
Emergency unlocking can be used to unlock guard locking, irrespective of the state<br />
of the solenoid. For mounting, see the mounting supplement.<br />
Important:<br />
Using emergency unlocking<br />
The door must not be under tension when emergency unlocking is actuated.<br />
Detent bolt<br />
ÌÌTurn emergency unlocking clockwise until it clicks into place.<br />
¨¨<br />
The safety device can be opened<br />
To reset, press the detent bolt inward using a small screwdriver or similar tool and<br />
turn the emergency unlocking back.<br />
The monitoring output OUT is switched off; OUT D can assume an undefined state.<br />
Open the safety door and close it again after resetting emergency unlocking. The<br />
device will then operate normally again.<br />
71<br />
10
<strong>Operating</strong> <strong>Instructions</strong> <strong>Safety</strong> <strong>Switch</strong> <strong>CET</strong>.-<strong>AR</strong>-...-<strong>CH</strong>-...<br />
Important:<br />
Escape release (optional)<br />
ÌÌThe escape release is not a safety function.<br />
ÌÌThe machine manufacturer must select and use a suitable release (escape<br />
release, emergency unlocking, etc.) for a specific application. A risk assessment<br />
appraisal is required for this purpose. It may be necessary to take<br />
specifications from a product standard into account.<br />
ÌÌThe correct function must be checked at regular intervals.<br />
ÌÌLoss of the release function due to tension on the actuator. The door must<br />
not be under tension during release.<br />
ÌÌPlease observe the notes on any enclosed data sheets.<br />
The escape release is used to open a locked safety guard from the inside (see<br />
dimension drawing in the section Technical data).<br />
Fit escape release such that operation, inspection and maintenance are possible.<br />
Using the escape release<br />
ÌÌPress the red release knob to the stop<br />
¨¨<br />
The safety device can be opened<br />
Pull the knob out again to reset.<br />
The monitoring output OUT is switched off; OUT D can assume an undefined state.<br />
Open the safety door and close it again after resetting the escape release. The<br />
device will then operate normally again.<br />
11
<strong>Operating</strong> <strong>Instructions</strong> <strong>Safety</strong> <strong>Switch</strong> <strong>CET</strong>.-<strong>AR</strong>-...-<strong>CH</strong>-...<br />
Important:<br />
Wire front release (optional)<br />
ÌÌThe wire front release is not a safety function.<br />
ÌÌThe wire front release is non-latching and therefore must not be used as an<br />
escape release unless the machine manufacturer itself provides a detent<br />
mechanism. The machine manufacturer must select and use a suitable release<br />
(escape release, emergency unlocking, etc.) for a specific application.<br />
A risk assessment appraisal is required for this purpose. It may be necessary<br />
to take specifications from a product standard into account.<br />
ÌÌLoss of the release function due to tension on the actuator. The door must<br />
not be under tension during release.<br />
ÌÌThe correct function must be checked at regular intervals.<br />
The wire front release permits remote release of the guard locking via a pull rope.<br />
Flexible routing of the pull rope permits release of the guard locking in inaccessible<br />
installation situations.<br />
Important:<br />
Mounting the wire front release<br />
ÌÌLoss of the release function due to mounting errors, damage or wear.<br />
ÌÌCheck the release function every time after mounting.<br />
ÌÌWhen routing the wire front release, ensure that it operates smoothly.<br />
ÌÌObserve the min. bending radius (100 mm) and minimize the number of<br />
bends.<br />
ÌÌThe switch is not allowed to be opened.<br />
ÌÌObserve the notes on the enclosed data sheets.<br />
12
<strong>Operating</strong> <strong>Instructions</strong> <strong>Safety</strong> <strong>Switch</strong> <strong>CET</strong>.-<strong>AR</strong>-...-<strong>CH</strong>-...<br />
Important:<br />
Lockout mechanism (optional)<br />
ÌÌThe lockout mechanism is not a safety function.<br />
ÌÌThe correct function must be checked at regular intervals.<br />
The lockout mechanism can be used to prevent maintenance personnel from being<br />
unintentionally locked in the danger area, for example.<br />
In locked position, the lockout mechanism prevents activation of guard locking.<br />
The lockout mechanism can be secured in locking position with up to three locks.<br />
The mechanical release can still be used.<br />
Important:<br />
Using the lockout mechanism<br />
Deactivate guard locking and open the safety door before using the lockout<br />
mechanism.<br />
Before entering the danger area:<br />
1. Open the door<br />
2. Press button, move lockout mechanism to locking position (Figures A and B)<br />
and secure with lock (Figure C)<br />
¨¨<br />
Guard locking cannot be activated, and it must not be possible to start the<br />
machine. Important: Test this before entering the danger area.<br />
Resetting the lockout mechanism:<br />
1. Open the safety door if necessary<br />
2. Remove the lock<br />
3. Move lockout mechanism to basic position (Figure A)<br />
Locking function not active Locking function active Locking function active and<br />
secured<br />
Pushbutton<br />
Push button and align lever<br />
Fit lock<br />
Figure A Figure B Figure C<br />
13
<strong>Operating</strong> <strong>Instructions</strong> <strong>Safety</strong> <strong>Switch</strong> <strong>CET</strong>.-<strong>AR</strong>-...-<strong>CH</strong>-...<br />
(1)<br />
(2)<br />
Using mechanical release<br />
1. Unscrew locking screw<br />
2. Operate the mechanical release through the threaded bore of the locking<br />
screw (e.g. with a metal rod ∅ 3 mm)<br />
¨¨<br />
The safety device can be opened<br />
The locking screw must be screwed back in and sealed after use (for example<br />
with sealing lacquer).<br />
The monitoring output OUT is switched off; OUT D can assume an undefined state.<br />
Open the safety door and close it again after resetting the mechanical release.<br />
The device will then operate normally again.<br />
Changing the approach direction<br />
1. Remove the screws from the safety switch<br />
2. Set the required direction<br />
3. Tighten the screws with a torque of 1.5 Nm.<br />
Fig. 1: Changing the approach direction<br />
14
<strong>Operating</strong> <strong>Instructions</strong> <strong>Safety</strong> <strong>Switch</strong> <strong>CET</strong>.-<strong>AR</strong>-...-<strong>CH</strong>-...<br />
Mounting<br />
Caution!<br />
Caution!<br />
<strong>Safety</strong> switches must not be bypassed (bridging of contacts), turned away,<br />
removed or otherwise rendered ineffective.<br />
ÌÌOn this topic pay attention in particular to the measures for reducing the possibility<br />
of bypassing according to EN 1088:1995.A2:2008, sec. 5.7.<br />
ÌÌThe max. achievable category according to EN 13849-1 depends on the<br />
installation position (see technical data).<br />
Risk of damage to equipment and malfunctions as a result of incorrect installation.<br />
ÌÌ<strong>Safety</strong> switches must not be used as a mechanical end stop. Fit an additional<br />
end stop for the movable part of the safety guard.<br />
ÌÌObserve the min. door radii (see figure below).<br />
ÌÌEnsure that the actuator contacts the slide in the designated area (see figure<br />
below). Marks on the slide specify the prescribed approach zone.<br />
ÌÌThe prerequisite for trouble-free long-term operation is protection of the<br />
switch head and the actuator against penetrating foreign objects such as<br />
swarf, sand, and blasting shot, etc. The switch should be installed with the<br />
actuating head down for this purpose.<br />
ÌÌCover the switch and the actuator during painting work.<br />
min R800<br />
min R300<br />
74,5 ± 4 mm<br />
Anfahrbereich/<br />
Approach Zone<br />
Fig. 2: Door radii and approach zone<br />
15
<strong>Operating</strong> <strong>Instructions</strong> <strong>Safety</strong> <strong>Switch</strong> <strong>CET</strong>.-<strong>AR</strong>-...-<strong>CH</strong>-...<br />
!<br />
= 90°<br />
Note the following points:<br />
ÌÌActuator and safety switch must be easily accessible for inspection and replacement.<br />
ÌÌThe switching operation must only be triggered by the specific actuator designated<br />
for this purpose.<br />
ÌÌActuator and safety switch must be fitted so that<br />
ÌÌthe actuator is positively mounted on the safety guard, e.g. by using the<br />
safety screws included.<br />
ÌÌthey cannot be removed or tampered with using simple means.<br />
ÌÌthe active faces of the actuator and the safety switch are parallel to each<br />
other (see figure on the left).<br />
ÌÌthe actuator is fully inserted into the switch recess when the safety guard is<br />
closed (see figure on the left).<br />
ÌÌno dirt can accumulate in the recess.<br />
!<br />
16
<strong>Operating</strong> <strong>Instructions</strong> <strong>Safety</strong> <strong>Switch</strong> <strong>CET</strong>.-<strong>AR</strong>-...-<strong>CH</strong>-...<br />
Electrical connection<br />
Warning!<br />
The following connection options are available:<br />
ÌÌSeparate operation<br />
ÌÌSeries connection with Y-distributors from EU<strong>CH</strong>NER (only with M12 plug connector)<br />
ÌÌSeries connection, e.g. with wiring in the control cabinet.<br />
ÌÌOperation on an <strong>AR</strong> evaluation unit<br />
In case of an error, loss of the safety function through incorrect connection.<br />
ÌÌTo ensure safety, both safety outputs (OA and OB) must always be evaluated.<br />
ÌÌThe monitoring output OUT and the door monitoring output OUT D are not<br />
allowed to be used as safety outputs.<br />
ÌÌLay the connection cables with protection to prevent the risk of short circuits.<br />
Caution!<br />
Risk of damage to equipment or malfunctions as a result of incorrect connection.<br />
ÌÌThe power supply for the evaluation electronics is electrically isolated from<br />
the power supply for the guard locking solenoid.<br />
ÌÌThe teach-in input and feedback loop, as well as LED 1 and LED 2, have the<br />
same ground potential as the guard locking solenoid.<br />
ÌÌDo not use a control system with pulsing or switch off the pulsing function in<br />
your control system. The device generates its own clock signal on the output<br />
lines OA/OB. A downstream control system must tolerate these pulses,<br />
which may have a length of up to 1 ms.<br />
The pulses are also output when the safety outputs are switched off.<br />
Depending on the inertia of the connected device (control system, relay,<br />
etc.), this can lead to short switching processes.<br />
ÌÌThe inputs on an evaluation unit connected must be positive-switching, as the<br />
two outputs on the safety switch deliver a level of +24 V in the switched-on<br />
state.<br />
ÌÌAll the electrical connections must either be isolated from the mains supply by<br />
a safety transformer according to IEC 61558-2-6 with limited output voltage in<br />
the event of a fault, or by other equivalent isolation measures (PELV).<br />
ÌÌFor use and operation as per the requirements*, a power supply with<br />
the feature “for use in class 2 circuits” must be used. The same requirement<br />
applies to the safety outputs.<br />
Alternative solutions must comply with the following requirements:<br />
a) Electrically isolated power supply unit with a max. open-circuit voltage of 30<br />
V/DC and a limited current of max. 8 A.<br />
b) Electrically isolated power supply unit in combination with fuse as per UL248.<br />
This fuse should be designed for max. 3.3 A and should be integrated into<br />
the 30 V DC voltage section.<br />
ÌÌFor use and applications as per the requirements*, a connection cable<br />
listed under UL category code CYJV/7 must be used and the following requirements<br />
met: min. 30 V DC, 2 A, 85 °C. The EU<strong>CH</strong>NER connection cables<br />
in the section Ordering information and accessories meet these requirements.<br />
* Note on the scope of the UL approval: The devices are tested according to the requirements of UL508 and CSA/ C22.2 no. 14 (protection against electric shock and fire).<br />
17
<strong>Operating</strong> <strong>Instructions</strong> <strong>Safety</strong> <strong>Switch</strong> <strong>CET</strong>.-<strong>AR</strong>-...-<strong>CH</strong>-...<br />
Caution!<br />
Important:<br />
ÌÌAll electrical outputs must have an adequate protective circuit for inductive<br />
loads. The outputs must be protected with a free-wheeling diode for this purpose.<br />
RC interference suppression units must not be used.<br />
ÌÌPower devices which are a powerful source of interference must be installed<br />
in a separate location away from the input and output circuits for signal processing.<br />
The cable routing for safety circuits should be as far away as possible<br />
from the cables of the power circuits.<br />
ÌÌIn order to avoid EMC interference, the physical environmental and operating<br />
conditions at the installation site of the device must comply with the requirements<br />
according to the standard EN 60204-1:2006, section 4.4.2 (EMC).<br />
ÌÌPlease pay attention to any interference fields in case of devices such as<br />
frequency converters or induction heating systems. Observe the EMC instructions<br />
in the manuals from the respective manufacturer.<br />
If the device does not appear to function when operating voltage is applied (e.g.<br />
green STATE LED does not flash), the safety switch must be returned unopened<br />
to the manufacturer.<br />
<strong>Safety</strong> in case of faults<br />
ÌÌThe operating voltage U B<br />
and the solenoid voltage UCM are reverse polarity<br />
protected.<br />
ÌÌThe contacts IA/IB and OA/OB are short-circuit-proof<br />
ÌÌA short circuit between OA and OB is detected by the switch.<br />
ÌÌA short circuit in the cable can be excluded by laying the cable with protection.<br />
Fuse protection for power supply<br />
The power supply must be provided with fuse protection depending on the number<br />
of switches and current required for the outputs. The following rules apply:<br />
Max. current consumption of an individual switch I max<br />
I max<br />
= I UB<br />
+ I OUT<br />
+ I OA+OB<br />
(+ I OUT D<br />
*)<br />
I UB<br />
= <strong>Switch</strong> operating current (80 mA)<br />
I OUT<br />
= Load current of monitoring outputs (max. 50 mA per monitoring output)<br />
I OA+OB<br />
= Load current of safety outputs OA + OB (2 x max. 200 mA)<br />
* only for version with door monitoring output<br />
Max. current consumption of a switch chain Σ I max<br />
Σ I max<br />
= I OA+OB<br />
+ n x (I UB<br />
+ I OUT<br />
(+ I OUT D<br />
*))<br />
n = Number of connected switches<br />
* only for version with door monitoring output<br />
18
<strong>Operating</strong> <strong>Instructions</strong> <strong>Safety</strong> <strong>Switch</strong> <strong>CET</strong>.-<strong>AR</strong>-...-<strong>CH</strong>-...<br />
Caution!<br />
Requirements for connection cables<br />
Risk of damage to equipment or malfunctions as a result of incorrect connection<br />
cables.<br />
ÌÌUse connection components and connection cables from EU<strong>CH</strong>NER<br />
ÌÌOn the usage of other connection components, the requirements in the following<br />
table apply. EU<strong>CH</strong>NER provides no warranty for safe function in case<br />
of failure to comply with these requirements.<br />
Observe the following requirements with respect to the connection cables:<br />
For safety switch <strong>CET</strong>-<strong>AR</strong> with plug connectors 2 x M12<br />
Parameter Value Unit<br />
Wire cross-section min. 0.34 mm²<br />
R max. 60 W/km<br />
C max. 120 nF/km<br />
L max. 0.65 mH/km<br />
Recommended cable type<br />
LIYY 8x or 5x 0.34 mm²<br />
For safety switches <strong>CET</strong>-<strong>AR</strong> with plug connector RC18<br />
Parameter Value Unit<br />
Wire cross-section min. 0.34 mm²<br />
R max. 60 W/km<br />
C max. 120 nF/km<br />
L max. 0.65 mH/km<br />
Recommended cable type<br />
LIFY11Y min. 19-cores<br />
19
l n<br />
u min<br />
= 24 V -10%<br />
<strong>Operating</strong> <strong>Instructions</strong> <strong>Safety</strong> <strong>Switch</strong> <strong>CET</strong>.-<strong>AR</strong>-...-<strong>CH</strong>-...<br />
Maximum cable lengths<br />
<strong>Switch</strong> chains are permitted up to a maximum overall cable length of 200 m taking<br />
into account the voltage drop as a result of the cable resistance (see table below<br />
with example data and case example).<br />
l max<br />
=200 m<br />
l 2<br />
l 1<br />
u n<br />
= 24 V -20%<br />
i out<br />
SPS<br />
PLC<br />
CES-<strong>AR</strong> # 1<br />
CES-<strong>AR</strong> # n-1<br />
5 x 0,34 mm 2<br />
<strong>CET</strong>-<strong>AR</strong> # n<br />
n<br />
I OA/OB<br />
(mA)<br />
l 1<br />
(m)<br />
Max. number of<br />
switches<br />
5<br />
6<br />
10<br />
Possible output current per channel<br />
OA/OB<br />
Max. cable length from the last switch<br />
to the control system<br />
10 150<br />
25 100<br />
50 80<br />
100 50<br />
200 25<br />
10 120<br />
25 90<br />
50 70<br />
100 50<br />
200 25<br />
10 70<br />
25 60<br />
50 50<br />
100 40<br />
200 25<br />
20
<strong>Operating</strong> <strong>Instructions</strong> <strong>Safety</strong> <strong>Switch</strong> <strong>CET</strong>.-<strong>AR</strong>-...-<strong>CH</strong>-...<br />
Determining cable lengths using the example table<br />
Example: 6 switches are to be used in series. Cabling with a length of 40 m is<br />
routed from a safety relay in the control cabinet to the last switch (#6). Cables<br />
with a length of 20 m each are connected between the individual CES-<strong>AR</strong>/<strong>CET</strong>-<strong>AR</strong><br />
safety switches.<br />
l max<br />
= 140 m<br />
l 2<br />
= 5 x 20 m<br />
l 1<br />
= 40 m<br />
l n<br />
= 20 m<br />
u n<br />
= min. 19,2 V<br />
i OA/OB<br />
= min. 75 mA<br />
Sicherheitsrelais<br />
<strong>Safety</strong> Relay<br />
CES-<strong>AR</strong> # 1<br />
CES-<strong>AR</strong> # 2<br />
CES-<strong>AR</strong> # 3<br />
CES-<strong>AR</strong> # 5<br />
<strong>CET</strong>-<strong>AR</strong> # 4<br />
<strong>CET</strong>-<strong>AR</strong> # 6<br />
Fig. 3: Circuit example with six CES-<strong>AR</strong>/<strong>CET</strong>-<strong>AR</strong><br />
A safety relay is connected downstream which consumes 75 mA at each of the<br />
two safety inputs. This operates over the whole temperature range with a voltage<br />
of 19.2 V (corresponds to 24 V -20%).<br />
All the relevant values can now be determined using the example table:<br />
1. Select the corresponding section in the column n (max. number of switches).<br />
Here: 6 switches.<br />
2. In column I OA/OB<br />
(possible output current per channel OA/OB), find a current<br />
greater than or equal to 75 mA. Here: 100 mA.<br />
¨¨<br />
It is then possible to determine the maximum cable length from the last switch<br />
(#6) to the control system from column l 1<br />
. Here: a length of 50 m is permitted.<br />
Result: The desired cable length l 1<br />
of 40 m is below the permitted value from the<br />
table. The overall length of the switch chain l max<br />
of 140 m is less than the maximum<br />
value of 200 m.<br />
¨¨<br />
The planned application is therefore functional in this form.<br />
21
<strong>Operating</strong> <strong>Instructions</strong> <strong>Safety</strong> <strong>Switch</strong> <strong>CET</strong>.-<strong>AR</strong>-...-<strong>CH</strong>-...<br />
Connector assignment safety switch <strong>CET</strong>-<strong>AR</strong> with<br />
plug connectors 2 x M12<br />
Version without door monitoring output (<strong>CET</strong>1/2)<br />
wiring diagram A<br />
Plug connectors<br />
(view of connection side)<br />
S1.2<br />
S1.3<br />
S2.2<br />
S2.3<br />
S1.4<br />
2 x M12<br />
S2.5<br />
S1.8<br />
S1.7<br />
S1.6<br />
S1.5<br />
S2.1<br />
S1.1<br />
S2.4<br />
PIN Designation Function<br />
Wire color<br />
Connection cable 1)<br />
S 1.1 IB Enable input for channel 2 WH<br />
S 1.2 U B<br />
<strong>Operating</strong> voltage <strong>AR</strong> electronics, 24 V DC BN<br />
S 1.3 OA <strong>Safety</strong> output, channel 1 GN<br />
S 1.4 OB <strong>Safety</strong> output, channel 2 YE<br />
S 1.5 OUT Door monitoring output GY<br />
S 1.6 IA Enable input for channel 1 PK<br />
S 1.7 0 V U B<br />
<strong>Operating</strong> voltage <strong>AR</strong> electronics 0 V BU<br />
S 1.8 RST Reset input RD<br />
S 2.1 0 V U CM<br />
<strong>Operating</strong> voltage of guard locking solenoid 0 V BN<br />
S 2.2 LED 1 LED 1 red, freely configurable, 24 V DC WH<br />
S 2.3 LED 2 LED 2 green, freely configurable, 24 V DC BU<br />
S 2.4 U CM<br />
<strong>Operating</strong> voltage of guard locking solenoid, 24 V DC BK<br />
S 2.5<br />
1) Only for standard EU<strong>CH</strong>NER connection cable<br />
Y<br />
-<br />
Version with feedback loop:<br />
If the feedback loop is not used, connect to 24 V DC B<br />
Version without feedback loop:<br />
This connection must be connected to 0 V.<br />
wiring diagram B<br />
Plug connectors<br />
(view of connection side)<br />
S1.2<br />
S1.3<br />
S2.2<br />
S2.3<br />
S1.4<br />
2 x M12<br />
S2.5<br />
S1.8<br />
S1.7<br />
S1.6<br />
S1.5<br />
S2.1<br />
S1.1<br />
S2.4<br />
Version with door monitoring output (<strong>CET</strong>3/4)<br />
PIN Designation Function<br />
Wire color<br />
Connection cable 1)<br />
S 1.1 IB Enable input for channel 2 WH<br />
S 1.2 U B<br />
<strong>Operating</strong> voltage <strong>AR</strong> electronics, 24 V DC BN<br />
S 1.3 OA <strong>Safety</strong> output, channel 1 GN<br />
S 1.4 OB <strong>Safety</strong> output, channel 2 YE<br />
S 1.5 OUT Door monitoring output GY<br />
S 1.6 IA Enable input for channel 1 PK<br />
S 1.7 0 V U B<br />
<strong>Operating</strong> voltage <strong>AR</strong> electronics 0 V BU<br />
S 1.8 RST Reset input RD<br />
S 2.1 0 V U CM<br />
<strong>Operating</strong> voltage of guard locking solenoid 0 V BN<br />
S 2.2 OUT D Door monitoring output WH<br />
S 2.3 LED 1 LED 1 red, freely configurable, 24 V DC BU<br />
S 2.4 U CM<br />
<strong>Operating</strong> voltage of guard locking solenoid, 24 V DC BK<br />
S 2.5<br />
1) Only for standard EU<strong>CH</strong>NER connection cable<br />
Y<br />
-<br />
Version with feedback loop:<br />
If the feedback loop is not used, connect to 24 V DC B<br />
Version without feedback loop:<br />
This connection must be connected to 0 V.<br />
22
<strong>Operating</strong> <strong>Instructions</strong> <strong>Safety</strong> <strong>Switch</strong> <strong>CET</strong>.-<strong>AR</strong>-...-<strong>CH</strong>-...<br />
Version with door monitoring output (<strong>CET</strong>3/4), continued<br />
wiring diagram C<br />
Plug connectors<br />
(view of connection side)<br />
S1.2<br />
S1.3<br />
S1.4<br />
2 x M12<br />
S2.5<br />
S1.8<br />
S1.5<br />
S2.1<br />
S1.1<br />
S1.7<br />
S1.6<br />
PIN Designation Function<br />
Wire color<br />
Connection cable 1)<br />
S 1.1 IB Enable input for channel 2 WH<br />
S 1.2 U B<br />
<strong>Operating</strong> voltage <strong>AR</strong> electronics, 24 V DC BN<br />
S 1.3 OA <strong>Safety</strong> output, channel 1 GN<br />
S 1.4 OB <strong>Safety</strong> output, channel 2 YE<br />
S 1.5 OUT Door monitoring output GY<br />
S 1.6 IA Enable input for channel 1 PK<br />
S 1.7 0 V U B<br />
<strong>Operating</strong> voltage <strong>AR</strong> electronics 0 V BU<br />
S 1.8 RST Reset input RD<br />
S2.2<br />
S2.3<br />
S2.4<br />
S 2.1 0 V U CM<br />
<strong>Operating</strong> voltage of guard locking solenoid 0 V BN<br />
S 2.2 OUT D Door monitoring output WH<br />
S 2.3 OUT Door monitoring output BU<br />
S 2.4 U CM<br />
<strong>Operating</strong> voltage of guard locking solenoid, 24 V DC BK<br />
S 2.5 - Not used<br />
1) Only for standard EU<strong>CH</strong>NER connection cable<br />
wiring diagram D<br />
Plug connectors<br />
(view of connection side)<br />
RC18<br />
With screen<br />
bonding clamp<br />
11 12<br />
1<br />
10 18<br />
17 13 2<br />
9 19<br />
16 14<br />
3<br />
15<br />
8<br />
4<br />
7 5<br />
6<br />
13<br />
Connector assignment safety switch <strong>CET</strong>-<strong>AR</strong> with<br />
plug connector RC18<br />
PIN Designation Function<br />
Wire color<br />
Connection cable 1)<br />
1 U CM<br />
<strong>Operating</strong> voltage of guard locking solenoid, 24 V DC VT<br />
2 IA Enable input for channel 1 RD<br />
3 IB Enable input for channel 2 GY<br />
4 OA <strong>Safety</strong> output, channel 1 RD/BU<br />
5 OB <strong>Safety</strong> output, channel 2 GN<br />
6 U B<br />
<strong>Operating</strong> voltage <strong>AR</strong> electronics, 24 V DC BU<br />
7 RST Reset input GY/PK<br />
8 OUT D Door monitoring output (only <strong>CET</strong>3-<strong>AR</strong> and <strong>CET</strong>4-<strong>AR</strong>) GN/WH<br />
9 - n.c. YE/WH<br />
10 OUT Door monitoring output GY/WH<br />
11 - n.c. BK<br />
12 FE Function earth GN/YE<br />
Y<br />
-<br />
Version with feedback loop:<br />
if the feedback loop is not used, connect to 24 V DC<br />
Version without feedback loop:<br />
This connection must be connected to 0 V.<br />
14 - n.c. BN/GY<br />
15 LED 1 LED 1 red, freely configurable, 24 V DC BN/YE<br />
16 LED 2 LED 2 green, freely configurable, 24 V DC BN/GN<br />
17 - n.c. WH<br />
18 0V U CM<br />
<strong>Operating</strong> voltage of guard locking solenoid 0 V YE<br />
19 0V U B<br />
<strong>Operating</strong> voltage <strong>AR</strong> electronics 0 V BN<br />
1) Only for standard EU<strong>CH</strong>NER connection cable<br />
23
<strong>Operating</strong> <strong>Instructions</strong> <strong>Safety</strong> <strong>Switch</strong> <strong>CET</strong>.-<strong>AR</strong>-...-<strong>CH</strong>-...<br />
Connector assignment Y-distributor<br />
(Only for version with plug connectors 2 x M12)<br />
Connector assignment<br />
<strong>Safety</strong> switch <strong>CET</strong>-<strong>AR</strong><br />
(plug S1, 8-pin, plug)<br />
and<br />
Y-distributor (8-pin, socket)<br />
Pin<br />
Function<br />
1 IB<br />
2 U B<br />
3 OA<br />
4 OB<br />
5 OUT<br />
6 IA<br />
7 0 V<br />
8 RST<br />
Y-distributor<br />
with connection cable<br />
111696 or 112395<br />
Y-distributor<br />
097627<br />
Bridging plug 097645<br />
4-pin , plug<br />
(figure similar)<br />
2<br />
1<br />
3<br />
Socket<br />
4<br />
8<br />
5<br />
6<br />
7<br />
15,1<br />
Socket<br />
2 3 1<br />
( 45° )<br />
4 5 8<br />
6<br />
7<br />
M12x1<br />
M12x1<br />
15 15<br />
M12x1<br />
41<br />
45<br />
097627<br />
max. 45<br />
33<br />
Length l<br />
Order No.<br />
Length<br />
l [mm]<br />
111696 200<br />
112395 1000<br />
M12x1<br />
Ø 14,6<br />
M12x1<br />
44<br />
Plug<br />
3 3<br />
5<br />
4<br />
2<br />
2<br />
5<br />
4<br />
1<br />
1<br />
Socket<br />
Ø 14,5<br />
A<br />
B<br />
M12x1<br />
20,5<br />
15<br />
35,1<br />
Plug<br />
2 2<br />
3 3<br />
5<br />
5<br />
Socket<br />
4<br />
1<br />
1<br />
4<br />
Pin<br />
Function<br />
Pin<br />
Function<br />
1 U B<br />
1 U B<br />
Pin<br />
Function<br />
Pin<br />
Function<br />
2 OA<br />
2 IA<br />
1 U B<br />
1 U B<br />
3 0 V<br />
3 0 V<br />
2 OA<br />
2 IA<br />
4 OB<br />
4 IB<br />
3 0 V<br />
3 0 V<br />
5 RST<br />
5 RST<br />
4 OB<br />
4 IB<br />
5 RST<br />
5 RST<br />
24
<strong>Operating</strong> <strong>Instructions</strong> <strong>Safety</strong> <strong>Switch</strong> <strong>CET</strong>.-<strong>AR</strong>-...-<strong>CH</strong>-...<br />
Connection of a single <strong>CET</strong>-<strong>AR</strong><br />
If a single <strong>CET</strong>-<strong>AR</strong> is used, connect the device as shown in Figure 4 to Figure 11.<br />
The monitoring output OUT and, if available, the door monitoring output OUT D<br />
can be connected to a control system.<br />
The switches can be reset via the RST input. To do this, a voltage of 24 V is applied<br />
to the RST input for at least 3 seconds. The RST input must be connected<br />
to 0 V if it is not used.<br />
Warning!<br />
Important:<br />
In case of an error, loss of the safety function through incorrect connection.<br />
ÌÌTo ensure safety, both safety outputs (OA and OB) must always be evaluated.<br />
Single-channel use of the safety outputs leads to a loss of the category in<br />
accordance with EN ISO 13849-1.<br />
The subsystem <strong>CET</strong>-<strong>AR</strong> complies with PL e in accordance with EN 13849-1. To<br />
integrate the subsystem in a category 3 or 4 structure, it is necessary to monitor<br />
the downstream load (the feedback loop must be monitored).<br />
These examples show only an excerpt that is relevant for connection of the <strong>CET</strong><br />
system. The example illustrated here does not show complete system planning.<br />
The user is responsible for safe integration in the overall system.<br />
DC 24 V<br />
-F2<br />
-F1<br />
0V UCM<br />
LED 1<br />
LED 2<br />
UCM<br />
J<br />
IB<br />
UB<br />
OA<br />
OB<br />
OUT<br />
IA<br />
0V UB<br />
RST<br />
Connected<br />
load<br />
1<br />
2<br />
3<br />
4<br />
5<br />
1<br />
2<br />
3<br />
4<br />
5<br />
6<br />
7<br />
8<br />
<strong>Safety</strong><br />
outputs<br />
M12 plug-connector<br />
(5-pin)<br />
<strong>CET</strong>-<strong>AR</strong><br />
M12 plug-connector<br />
(8-pin)<br />
GND<br />
Fig. 4: Connection example for separate operation, version with teach-in input<br />
and plug connectors 2 x M12<br />
25
<strong>Operating</strong> <strong>Instructions</strong> <strong>Safety</strong> <strong>Switch</strong> <strong>CET</strong>.-<strong>AR</strong>-...-<strong>CH</strong>-...<br />
DC 24 V<br />
-F2<br />
-F1<br />
0V UCM<br />
LED 1<br />
LED 2<br />
UCM<br />
J<br />
IB<br />
UB<br />
OA<br />
OB<br />
OUT<br />
IA<br />
0V UB<br />
RST<br />
Connected<br />
load<br />
18<br />
15<br />
16<br />
1<br />
13<br />
3<br />
6<br />
4<br />
5<br />
10<br />
2<br />
19<br />
7<br />
<strong>Safety</strong><br />
outputs<br />
RC 18 plug connector<br />
(19-pin)<br />
<strong>CET</strong>-<strong>AR</strong><br />
GND<br />
Fig. 5: Connection example for separate operation, version with teach-in input<br />
and plug connector RC18<br />
DC 24 V<br />
-F2<br />
-F1<br />
ST<strong>AR</strong>T<br />
0V UCM<br />
LED 1<br />
LED 2<br />
UCM<br />
Y<br />
IB<br />
UB<br />
OA<br />
OB<br />
OUT<br />
IA<br />
0V UB<br />
RST<br />
1<br />
2<br />
3<br />
4<br />
5<br />
1<br />
2<br />
3<br />
4<br />
5<br />
6<br />
7<br />
8<br />
Connected<br />
load<br />
Feedback<br />
loop<br />
<strong>Safety</strong><br />
outputs<br />
M12 plug-connector<br />
(5-pin)<br />
<strong>CET</strong>-<strong>AR</strong><br />
M12 plug-connector<br />
(8-pin)<br />
GND<br />
Fig. 6: Connection example for separate operation, version with start button,<br />
feedback loop and plug connectors 2 x M12<br />
DC 24 V<br />
-F2<br />
-F1<br />
ST<strong>AR</strong>T<br />
18 0V UCM<br />
15 LED 1<br />
16 LED 2<br />
1 UCM<br />
13 Y<br />
3 IB<br />
6 UB<br />
4 OA<br />
5 OB<br />
10 OUT<br />
2 IA<br />
19 0V UB<br />
7 RST<br />
Connected<br />
load<br />
Feedback<br />
loop<br />
<strong>Safety</strong><br />
outputs<br />
RC 18 plug connector<br />
(19-pin)<br />
<strong>CET</strong>-<strong>AR</strong><br />
GND<br />
Fig. 7: Connection example for separate operation, version with start button,<br />
feedback loop and plug connector RC18<br />
26
<strong>Operating</strong> <strong>Instructions</strong> <strong>Safety</strong> <strong>Switch</strong> <strong>CET</strong>.-<strong>AR</strong>-...-<strong>CH</strong>-...<br />
DC 24 V<br />
-F2<br />
-F1<br />
0V UCM<br />
LED 1<br />
LED 2<br />
UCM<br />
IB<br />
UB<br />
OA<br />
OB<br />
OUT<br />
IA<br />
0V UB<br />
RST<br />
Connected<br />
load<br />
1<br />
2<br />
3<br />
4<br />
5<br />
1<br />
2<br />
3<br />
4<br />
5<br />
6<br />
7<br />
8<br />
-<br />
<strong>Safety</strong><br />
outputs<br />
M12 plug-connector<br />
(5-pin)<br />
<strong>CET</strong>-<strong>AR</strong><br />
M12 plug-connector<br />
(8-pin)<br />
GND<br />
Fig. 8: Connection example for separate operation, version without start button<br />
and feedback loop and without teach-in input with plug connectors 2 x M12<br />
DC 24 V<br />
-F2<br />
-F1<br />
0V UCM<br />
LED 1<br />
LED 2<br />
UCM<br />
IB<br />
UB<br />
OA<br />
OB<br />
OUT<br />
IA<br />
0V UB<br />
RST<br />
Connected<br />
load<br />
18<br />
15<br />
16<br />
1<br />
13<br />
3<br />
6<br />
4<br />
5<br />
10<br />
2<br />
19<br />
7<br />
-<br />
<strong>Safety</strong><br />
outputs<br />
RC 18 plug connector<br />
(19-pin)<br />
<strong>CET</strong>-<strong>AR</strong><br />
GND<br />
Fig. 9: Connection example for separate operation, version without start button<br />
and feedback loop and without teach-in input with plug connector RC18<br />
DC 24 V<br />
-F2<br />
-F1<br />
ST<strong>AR</strong>T<br />
0V UCM<br />
OUT D<br />
LED 1<br />
UCM<br />
Y<br />
IB<br />
UB<br />
OA<br />
OB<br />
OUT<br />
IA<br />
0V UB<br />
RST<br />
1<br />
2<br />
3<br />
4<br />
5<br />
1<br />
2<br />
3<br />
4<br />
5<br />
6<br />
7<br />
8<br />
Connected<br />
load<br />
Feedback<br />
loop<br />
<strong>Safety</strong><br />
outputs<br />
M12 plug-connector<br />
(5-pin)<br />
<strong>CET</strong>-<strong>AR</strong><br />
M12 plug-connector<br />
(8-pin)<br />
GND<br />
Fig. 10: Connection example for separate operation, version with door monitoring<br />
output, start button, feedback loop and plug connectors 2 x M12<br />
27
<strong>Operating</strong> <strong>Instructions</strong> <strong>Safety</strong> <strong>Switch</strong> <strong>CET</strong>.-<strong>AR</strong>-...-<strong>CH</strong>-...<br />
DC 24 V<br />
-F2<br />
-F1<br />
ST<strong>AR</strong>T<br />
18 0V UCM<br />
15 LED 1<br />
16 LED 2<br />
1 UCM<br />
13 Y<br />
3 IB<br />
6 UB<br />
4 OA<br />
5 OB<br />
10 OUT<br />
2 IA<br />
19 0V UB<br />
7 RST<br />
8 OUT D<br />
Connected<br />
load<br />
Feedback<br />
loop<br />
<strong>Safety</strong><br />
outputs<br />
RC 18 plug connector<br />
(19-pin)<br />
<strong>CET</strong>-<strong>AR</strong><br />
GND<br />
Fig. 11: Connection example for separate operation, version with door monitoring<br />
output, start button, feedback loop and plug connector RC18<br />
Important:<br />
Connection of several <strong>CET</strong>-<strong>AR</strong> in a switch chain<br />
ÌÌAn <strong>AR</strong> switch chain may contain a maximum of 20 safety switches.<br />
ÌÌIf more than 11 devices are connected in series, the PFHd can be calculated<br />
using one of the methods stated in EN ISO 13849-1:2008, Section 4.5.1.<br />
ÌÌIf the simplified method according to Section 6.3 of EN ISO 13849:2008-12<br />
is used for validation, the Performance Level (PL) might be reduced when<br />
more than 11 devices are connected in series.<br />
Important:<br />
The subsystem <strong>CET</strong>-<strong>AR</strong> complies with PL e in accordance with EN 13849-1. To<br />
integrate the subsystem in a category 3 or 4 structure, it is necessary to monitor<br />
the downstream load (the feedback loop must be monitored).<br />
On the use of the <strong>CET</strong>-<strong>AR</strong> with feedback loop, this switch must be in the last<br />
position in the switch chain (see Figure 12).<br />
These examples show only an excerpt that is relevant for connection of the <strong>CET</strong><br />
system. The example illustrated here does not show complete system planning.<br />
The user is responsible for safe integration in the overall system.<br />
The series connection is shown here based on the example of the version with plug<br />
connectors 2 x M12. The series connection of the version with plug connector RC18<br />
has similar behavior, but is realized using additional terminals in a control cabinet.<br />
The switches in the version with plug connectors 2 x M12 are connected one after<br />
the other with the aid of pre-assembled connection cables and Y-distributors. If<br />
a safety guard is opened or if a fault occurs on one of the switches, the system<br />
shuts down the machine. A higher level control system cannot, however, detect<br />
which safety guard is open or on which switch a fault has occurred with this connection<br />
technology.<br />
The safety outputs are permanently assigned to the respective safety inputs of the<br />
downstream switch. OA must be connected to IA and OB to IB. If the connections<br />
are interchanged (e.g. OA to IB), the unit will switch to fault state.<br />
28
<strong>Operating</strong> <strong>Instructions</strong> <strong>Safety</strong> <strong>Switch</strong> <strong>CET</strong>.-<strong>AR</strong>-...-<strong>CH</strong>-...<br />
Always use input RST in series connections. All switches in a chain can be reset at<br />
the same time with this reset input. To do this, a voltage of 24 V must be applied<br />
to the RST input for at least 3 seconds. If input RST is not used in your application,<br />
it should be connected to 0 V.<br />
Note the following on this aspect:<br />
ÌÌA common signal must be used for all switches in the chain. This can be a<br />
changeover switch or the output of a control system. A button is not suitable<br />
because Reset must always be connected to GND during operation (see switch<br />
S11 in Figure 12).<br />
ÌÌReset must always be performed simultaneously for all switches of the chain.<br />
Information on operation in a mixed <strong>AR</strong> switch chain<br />
The safety switch <strong>CET</strong>-<strong>AR</strong> has a longer risk time than a CES-<strong>AR</strong> switch (see section<br />
Technical data and Typical system times).<br />
29
<strong>Operating</strong> <strong>Instructions</strong> <strong>Safety</strong> <strong>Switch</strong> <strong>CET</strong>.-<strong>AR</strong>-...-<strong>CH</strong>-...<br />
Y-distributor<br />
Y-distributor<br />
Y-distributor Y-distributor<br />
<strong>Safety</strong> Inputs<br />
<strong>Safety</strong> Inputs<br />
<strong>Safety</strong> Output<br />
<strong>Safety</strong> Inputs<br />
<strong>Safety</strong> Output<br />
<strong>Safety</strong> Output<br />
Safe Evaluation<br />
Read Head<br />
Read Head<br />
Terminating plug<br />
Terminating plug<br />
RST<br />
5<br />
5 RST<br />
UB<br />
1<br />
1 UB<br />
0V<br />
3<br />
3<br />
0V<br />
OA<br />
2<br />
2<br />
IA<br />
OB<br />
4<br />
4<br />
IB<br />
1 6 8 2 7 5 3 4<br />
IB IA RST UB 0V OUT OA OB<br />
IB IA RST UB 0V OUT OA OB<br />
IB IA RST UB 0V OUT OA OB<br />
1<br />
6<br />
8<br />
2<br />
7<br />
5<br />
3<br />
4<br />
1<br />
6<br />
8<br />
2<br />
7<br />
5<br />
3<br />
4<br />
1<br />
6<br />
8<br />
2<br />
7<br />
5<br />
3<br />
4<br />
CES<br />
CES<br />
-S11<br />
12<br />
11 14<br />
13<br />
-S10<br />
14<br />
LED1<br />
UCM<br />
0V(UCM)<br />
X2:3 X2:4 X2:5 X2:1<br />
<strong>CET</strong><br />
24V<br />
0V<br />
J<br />
IB<br />
IA<br />
RST<br />
UB<br />
0V<br />
OUT<br />
OA<br />
OB<br />
UB<br />
1<br />
IA<br />
2<br />
IB<br />
4<br />
Fig. 12: Connection example for series connection with reset and changeover switch.<br />
30
<strong>Operating</strong> <strong>Instructions</strong> <strong>Safety</strong> <strong>Switch</strong> <strong>CET</strong>.-<strong>AR</strong>-...-<strong>CH</strong>-...<br />
Y-distributor Y-distributor Y-distributor<br />
<strong>Safety</strong> Inputs<br />
<strong>Safety</strong> Inputs<br />
<strong>Safety</strong> Output<br />
<strong>Safety</strong> Inputs<br />
<strong>Safety</strong> Output<br />
<strong>Safety</strong> Output<br />
Read Head<br />
Read Head<br />
Terminating plug<br />
-S2<br />
-S1 ST<strong>AR</strong>T<br />
IB IA RST UB 0V OUT OA OB<br />
IB IA RST UB 0V OUT OA OB<br />
IB IA RST UB 0V OUT OA OB LED1 UCM<br />
0V(UCM)<br />
6<br />
8<br />
2<br />
7<br />
5<br />
3<br />
4<br />
1<br />
6<br />
8<br />
2<br />
7<br />
5<br />
3<br />
4<br />
1<br />
6<br />
8<br />
2<br />
7<br />
5<br />
3<br />
4<br />
X2:3<br />
X2:4<br />
X2:5<br />
X2:1<br />
1<br />
CES CES<br />
<strong>CET</strong><br />
Feedback<br />
loop<br />
Connected<br />
load<br />
Eval Unit<br />
24V<br />
0V<br />
Y<br />
Fig. 13: Connection example for operation in a CES-<strong>AR</strong> switch chain, version<br />
with start button and feedback loop<br />
31
<strong>Operating</strong> <strong>Instructions</strong> <strong>Safety</strong> <strong>Switch</strong> <strong>CET</strong>.-<strong>AR</strong>-...-<strong>CH</strong>-...<br />
Information on operation on an <strong>AR</strong> evaluation unit<br />
The following devices can be operated on an <strong>AR</strong> evaluation unit.<br />
Device<br />
<strong>CET</strong>1/2<br />
<strong>CET</strong>3/4<br />
Version number<br />
from V1.1.2<br />
from V1.0.0<br />
Important:<br />
ÌÌDevices with start button and feedback loop are not suitable for connection<br />
to an <strong>AR</strong> evaluation unit.<br />
Please refer to the system manual for the relevant <strong>AR</strong> evaluation unit for more<br />
information. Devices that do not have a version number yet are not suitable for this.<br />
Devices without door monitoring output (<strong>CET</strong>1/2) each occupy one monitoring<br />
output on the <strong>AR</strong> evaluation unit (HIGH with active guard locking).<br />
Devices with door monitoring output (<strong>CET</strong>3/4) each occupy two monitoring outputs<br />
on the <strong>AR</strong> evaluation unit. The first monitoring output signals the door position<br />
(HIGH when door is closed). The second monitoring output signals the position of<br />
guard locking (HIGH when guard locking is active).<br />
32
<strong>Operating</strong> <strong>Instructions</strong> <strong>Safety</strong> <strong>Switch</strong> <strong>CET</strong>.-<strong>AR</strong>-...-<strong>CH</strong>-...<br />
Important:<br />
Notes on operation with safe control systems<br />
Devices with start button and feedback loop are not suitable for connection to<br />
safe control systems.<br />
Please observe the following requirements for connection to safe control systems:<br />
ÌÌUse a common power supply for the control system and the connected safety<br />
switches.<br />
ÌÌA clocked power supply must not be used for UB. Tap the supply voltage<br />
directly from the power supply unit. If the supply voltage is connected to a<br />
terminal of a safe control system, this output must provide sufficient electrical<br />
current.<br />
ÌÌAlways connect inputs IA and IB directly to a power supply unit or to outputs<br />
OA and OB of another EU<strong>CH</strong>NER <strong>AR</strong> device (series connection). Clocked signals<br />
must not be present at inputs IA and IB.<br />
ÌÌOutputs OA and OB can be connected to the safe inputs of a control system.<br />
Prerequisite: The input must be suitable for clocked safety signals (OSSD signals,<br />
e.g. from light curtains). The control system must tolerate clock pulses<br />
on the input signals. This normally can be set up by parameter assignment in<br />
the control system. Observe the notes of the control system manufacturer.<br />
For the pulse duration of your safety switch, please refer to the section Typical<br />
system times on page 39.<br />
ÌÌThe following applies for single-channel control of the guard locking:<br />
The guard locking (0V UMC) and the control system must have the same<br />
weight.<br />
ÌÌFor two-channel control of the solenoid voltage by safe outputs of a control<br />
system, the following points must be observed (see also Figure 14):<br />
ÌÌIf possible, switch off the pulsing of the outputs in the control system.<br />
ÌÌFor devices with teach-in input J, the input must remain unswitched in normal<br />
operation.<br />
ÌÌFreely controllable LEDs may only be switched in parallel to the solenoid (i.e.<br />
the LED indicates whether the solenoid is energized).<br />
A detailed example of connecting and setting the parameters of the control<br />
system is available for many devices at www.euchner.de in the download area »<br />
Applikationen » <strong>CET</strong>. The features of the respective device are dealt with there in<br />
greater detail.<br />
33
<strong>Operating</strong> <strong>Instructions</strong> <strong>Safety</strong> <strong>Switch</strong> <strong>CET</strong>.-<strong>AR</strong>-...-<strong>CH</strong>-...<br />
Y-distributor Y-distributor Y-distributor<br />
<strong>Safety</strong> Inputs<br />
<strong>Safety</strong> Inputs<br />
<strong>Safety</strong> Output<br />
<strong>Safety</strong> Inputs<br />
<strong>Safety</strong> Output<br />
<strong>Safety</strong> Output<br />
Read Head<br />
Read Head<br />
Terminating plug<br />
IB IA RST UB 0V OUT OA OB<br />
IB IA RST UB 0V OUT OA OB<br />
IB IA RST UB 0V OUT OA OB LED1 UCM<br />
6<br />
8<br />
2<br />
7<br />
5<br />
3<br />
4<br />
1<br />
6<br />
8<br />
2<br />
7<br />
5<br />
3<br />
4<br />
1<br />
6<br />
8<br />
2<br />
7<br />
5<br />
3<br />
4<br />
X2:3<br />
X2:4<br />
X2:5<br />
0V(UCM)<br />
X2:1<br />
1<br />
CES CES<br />
<strong>CET</strong><br />
DO..M DO..P DO<br />
-X1 -X1<br />
Digital<br />
4 F-DO<br />
Output<br />
ET200<br />
DI4 DI0<br />
4/8 F-DI<br />
DC24V<br />
M<br />
2<br />
3<br />
PWR<br />
Supply of<br />
the control<br />
24V<br />
0V<br />
J<br />
Fig. 14: Connection example for mixed series connection (2 x CES and 1 x <strong>CET</strong>)<br />
on ET200<br />
34
<strong>Operating</strong> <strong>Instructions</strong> <strong>Safety</strong> <strong>Switch</strong> <strong>CET</strong>.-<strong>AR</strong>-...-<strong>CH</strong>-...<br />
Setup<br />
LED indicators<br />
LED Color State Significance<br />
LED2<br />
LED1<br />
STATE<br />
green<br />
illuminated<br />
flashing<br />
Normal operation<br />
Power Up<br />
(further signal functions: see status table)<br />
DIA<br />
red<br />
illuminated<br />
- Internal electronics fault<br />
- Fault at the inputs/outputs<br />
STATE (gn)<br />
DIA (rd)<br />
LED 1 red freely configurable*<br />
LED 2 green freely configurable*<br />
*)<br />
Can vary depending on version. See data sheet.<br />
Initial setup<br />
1. Apply operating voltage to the safety switch.<br />
¨¨<br />
The green LED flashes quickly (approx. 10 Hz).<br />
A self-test is performed during this time (approx. 8 s). After this, the LED<br />
flashes cyclically one time and signals that it is in standby state.<br />
2. Move actuator to the read head (observe distance < S ao<br />
).<br />
¨¨<br />
The green LED illuminates continuously and indicates the detection of the<br />
actuator.<br />
35
<strong>Operating</strong> <strong>Instructions</strong> <strong>Safety</strong> <strong>Switch</strong> <strong>CET</strong>.-<strong>AR</strong>-...-<strong>CH</strong>-...<br />
Warning!<br />
Functional check<br />
Danger of fatal injury as a result of faults in installation and functional check.<br />
ÌÌBefore carrying out the functional check, make sure that there are no persons<br />
in the danger area.<br />
ÌÌObserve the valid accident prevention regulations.<br />
Mechanical function test<br />
The actuator must slide easily into the recess on the actuating head. Close the<br />
safety guard several times to check the function.<br />
Electrical function test<br />
After installation and any fault, the safety function must be fully checked. Proceed<br />
as follows:<br />
1. <strong>Switch</strong> on operating voltage.<br />
¨¨<br />
The machine must not start automatically.<br />
¨¨<br />
The safety switch carries out a self-test. The green LED STATE flashes for 8 s<br />
with 10 Hz. The green LED STATE then flashes at regular intervals.<br />
2. Close all safety guards. Guard locking by solenoid force: Activate guard locking.<br />
¨¨<br />
The machine must not start automatically. It must not be possible to open the<br />
safety guard.<br />
¨¨<br />
The green STATE LED illuminates continuously.<br />
3. Enable operation in the control system.<br />
¨¨<br />
It must not be possible to deactivate the guard locking as long as operation<br />
is enabled.<br />
4. Disable operation in the control system and deactivate guard locking.<br />
¨¨<br />
The safety guard must remain locked until there is no longer any risk of injury.<br />
¨¨<br />
It must not be possible to start the machine as long as the guard locking is<br />
deactivated.<br />
Repeat steps 2-4 for each safety guard.<br />
36
<strong>Operating</strong> <strong>Instructions</strong> <strong>Safety</strong> <strong>Switch</strong> <strong>CET</strong>.-<strong>AR</strong>-...-<strong>CH</strong>-...<br />
System status table<br />
<strong>Operating</strong> mode<br />
Actuator/door position<br />
<strong>Safety</strong> outputs<br />
OA and OB<br />
Monitoring output OUT<br />
Door monitoring output<br />
OUT D<br />
(only <strong>CET</strong>3 and <strong>CET</strong>4)<br />
LED indicator<br />
output<br />
STATE (green)<br />
DIA (red)<br />
State<br />
Self-test X off off off<br />
10 Hz<br />
(8 s)<br />
Self-test after power up<br />
closed on on on Normal operation, door closed and locked<br />
Normal operation<br />
closed off on on<br />
1 x inverse<br />
Normal operation, door closed and locked, safety outputs not switched because:<br />
- Preceding device in the switch chain signals "door open" (only with series<br />
connection)<br />
- Feedback loop not closed<br />
closed off off On 1 x Normal operation, door closed and not locked<br />
open off off off 1 x Normal operation, door open<br />
Fault display<br />
X off off off 2 x<br />
X off off off 4 x<br />
X off off off 5 x<br />
Input fault<br />
(e.g. missing test pulses, illogical switch state from previous switch in the<br />
switch chain)<br />
Output fault<br />
(e.g. short circuit, loss of switching ability)<br />
Internal fault<br />
(e.g. component fault, data error or short circuit at the outputs)<br />
X off off off X X Internal fault<br />
LED not illuminated<br />
LED illuminated<br />
Key to symbols<br />
10 Hz (8 s) LED flashes for 8 seconds at 10 Hz<br />
3 x LED flashes three times<br />
X<br />
Any state<br />
After the cause has been remedied, faults can generally be reset by opening and<br />
closing the door. If the fault is still displayed afterward, use the reset function or<br />
briefly interrupt the power supply. Please contact the manufacturer if the fault could<br />
not be reset after restarting.<br />
Important:<br />
If you do not find the displayed device status in the System status table, this indicates<br />
an internal device fault. In this case, you should contact the manufacturer.<br />
37
<strong>Operating</strong> <strong>Instructions</strong> <strong>Safety</strong> <strong>Switch</strong> <strong>CET</strong>.-<strong>AR</strong>-...-<strong>CH</strong>-...<br />
Technical data<br />
Note:<br />
If a product data sheet is included with the product, the information on the data<br />
sheet applies in case of discrepancies with the operating instructions.<br />
Technical data for safety switch <strong>CET</strong>.-<strong>AR</strong>-C..-<strong>CH</strong>-...<br />
Parameter Value Unit<br />
V DC<br />
min. typ. max.<br />
General<br />
Material, slide<br />
Stainless steel<br />
Material, safety switch housing<br />
Die-cast aluminum<br />
Installation position<br />
Any (recommendation: switch head downward)<br />
Degree of protection with plug connector M12 IP67<br />
with plug connector RC18<br />
IP65<br />
(screwed tight with the related mating connector)<br />
<strong>Safety</strong> class<br />
III<br />
Degree of contamination 3<br />
Mechanical life<br />
1 x 10 6 operating cycles<br />
Ambient temperature at U B<br />
-20 - +55 °C<br />
Actuator approach speed, max. 20 m/min<br />
Locking force Fmax 6500 N<br />
Locking force F Zh<br />
in acc. with GS-ET-19<br />
F Zh<br />
= F max<br />
/1.3 = 5000<br />
N<br />
Weight approx. 1.0 kg<br />
Degrees of freedom (actuator in recess) X, Y, Z X, Y ± 5; Z ± 4 mm<br />
Connection type (depending on version)<br />
2 plug connectors M12, 5 and 8-pin<br />
1 plug connector RC 18, 19-pin (as yet no UL approval)<br />
<strong>Operating</strong> voltage U B<br />
(reverse polarity protected, regulated,<br />
residual ripple < 5%)<br />
24 ± 15% (PELV) V DC<br />
Current consumption I B<br />
80 mA<br />
For the approval according to UL the following applies<br />
Operation only with UL class 2 power supply, or equivalent measures<br />
<strong>Switch</strong>ing load according to UL DC 24 V, class 2<br />
External fuse (operating voltage U B<br />
) 0.25 - 2 A<br />
External fuse (solenoid operating voltage U CM<br />
) 0.5 - 8 A<br />
Rated insulation voltage U i<br />
- - 75 V<br />
Resilience to vibration In acc. with EN 60947-5-2<br />
EMC protection requirements In acc. with EN IEC 60947-5-3<br />
<strong>Safety</strong> outputs OA/OB<br />
Semiconductor outputs, p-switching, short circuit-proof<br />
HIGH U OA<br />
/U OB<br />
U B<br />
- 1.5 - U B<br />
- Output voltage U OA<br />
/U 1) OB<br />
LOW U OA<br />
/U OB<br />
0 - 1<br />
<strong>Switch</strong>ing current per safety output 1 - 200 mA<br />
Utilization category according to EN 60947-5-2<br />
DC-13 24V 200mA<br />
Caution: outputs must be protected with a free-wheeling diode in case of inductive loads<br />
<strong>Switch</strong>ing frequency 0.5 Hz<br />
Repeat accuracy R acc. to EN IEC 60947-5-3 ≤ 10 %<br />
Monitoring outputs OUT and OUT D (optional)<br />
p-switching, short circuit-proof<br />
Output voltage 0.8 x U B<br />
- U B<br />
V DC<br />
Max. load - - 50 mA<br />
Teach-in input J or input feedback loop Y<br />
HIGH 15 - U CM V<br />
LOW 0 - 1<br />
Solenoid<br />
Solenoid operating voltage U CM<br />
(reverse polarity protected,<br />
regulated, residual ripple < 5%)<br />
DC 24 V +10%/-15%<br />
Current consumption solenoid I CM<br />
480 mA<br />
Power consumption 10 W<br />
Duty cycle 100 %<br />
Freely configurable LEDs 2)<br />
LED1 red, LED2 green<br />
<strong>Operating</strong> voltage 20.4 - 26.4 V DC<br />
Reliability values according to EN ISO 13849-1 Head downward or horizontal Head upward<br />
Category 4 3<br />
Performance Level (PL) e e<br />
PFH d<br />
3.1 x 10 -9 / h 4.29 x 10 -8 / h<br />
Mission time 20 20 years<br />
1) Values at a switching current of 50 mA without taking into account the cable lengths.<br />
2) Can vary depending on version. See data sheet.<br />
38
<strong>Operating</strong> <strong>Instructions</strong> <strong>Safety</strong> <strong>Switch</strong> <strong>CET</strong>.-<strong>AR</strong>-...-<strong>CH</strong>-...<br />
Typical system times<br />
The specified times are maximum values for <strong>AR</strong> switch chains with 20 devices.<br />
Individual devices have shorter system times.<br />
Ready delay: After switching on, the unit carries out a self-test for 8 s. The system<br />
is ready for operation only after this time.<br />
<strong>Switch</strong>-on time of safety outputs: The max. reaction time from the moment<br />
when the safety guard is locked to the moment when the safety outputs switch<br />
on T on<br />
is 400 ms.<br />
Simultaneity monitoring, safety inputs IA/IB: If the safety inputs have different<br />
switching states for longer than 150 ms, the safety outputs OA/OB will be switched<br />
off. The devices switches to fault state.<br />
Risk time according to EN 60947-5-3: If an actuator moves outside the operating<br />
distance, the safety outputs OA and OB are deactivated after a maximum<br />
of 500 ms.<br />
Difference time: The safety outputs OA and OB switch with a slight time offset.<br />
They have the same signal state at the latest after a difference time of 10 ms.<br />
Clock pulses at the safety outputs: The device generates its own clock signal<br />
on the output lines OA/OB. A downstream control system must tolerate these<br />
pulses, which may have a length of up to 1 ms.<br />
This can usually be set up in the control systems by parameter assignment. If<br />
parameter assignment is not possible for your control system or if shorter clock<br />
pulses are required, please contact our support organization.<br />
The pulses are also output when the safety outputs are switched off.<br />
39
<strong>Operating</strong> <strong>Instructions</strong> <strong>Safety</strong> <strong>Switch</strong> <strong>CET</strong>.-<strong>AR</strong>-...-<strong>CH</strong>-...<br />
Dimension drawing safety switch <strong>CET</strong>-<strong>AR</strong>-...<br />
Version with plug connectors 2 x M12<br />
42<br />
30<br />
41<br />
M12<br />
With escape release<br />
LED 2 LED 1<br />
13,4<br />
STATE<br />
DIA<br />
Basic position for<br />
escape release<br />
Release by pressing<br />
28<br />
16<br />
166<br />
130<br />
66,7<br />
<strong>CET</strong>.-<strong>AR</strong>...CRA...<br />
90,1<br />
<strong>CET</strong>.-<strong>AR</strong>...CDA...<br />
25<br />
25<br />
20<br />
SW 19<br />
M e c h a n i c a l<br />
release<br />
74,5 ±4 mm<br />
5<br />
17,5<br />
15<br />
43,6<br />
51,7<br />
<br />
11,3<br />
11<br />
∅ 6,5<br />
For M6 screw<br />
DIN 1207 / ISO 4762<br />
75<br />
34<br />
With angle connectors<br />
8<br />
4<br />
Lift tappet<br />
10,5<br />
26,5<br />
Version with plug connector RC 18<br />
Dimensions with plug connector RC18<br />
Cable exit left<br />
Cable exit right<br />
52<br />
26<br />
42<br />
30<br />
23<br />
21<br />
60<br />
21,5<br />
40
<strong>Operating</strong> <strong>Instructions</strong> <strong>Safety</strong> <strong>Switch</strong> <strong>CET</strong>.-<strong>AR</strong>-...-<strong>CH</strong>-...<br />
With mechanical key release<br />
With emergency unlocking<br />
With front wire release<br />
5,8<br />
35,5<br />
25<br />
30,4<br />
Ø<br />
20<br />
30<br />
16,7<br />
71<br />
With lockout mechanism<br />
140<br />
30,5<br />
83<br />
42<br />
85<br />
41
<strong>Operating</strong> <strong>Instructions</strong> <strong>Safety</strong> <strong>Switch</strong> <strong>CET</strong>.-<strong>AR</strong>-...-<strong>CH</strong>-...<br />
Technical data for actuator <strong>CET</strong>-A-BWK-50X<br />
Parameter Value Unit<br />
Housing material<br />
min. typ. max.<br />
Stainless steel<br />
Stroke max. 15 mm<br />
Weight 0.25 kg<br />
Ambient temperature - 20 - + 55 °C<br />
Degree of protection acc. to EN<br />
IEC 60529<br />
Mechanical life<br />
IP 67<br />
1 x 10 6 operating cycles<br />
Locking force, max. 6,500 N<br />
Installation position<br />
Power supply<br />
Active face opposite switch head<br />
Inductive via switch<br />
Dwell time 1) 0.5 - - s<br />
1) The dwell time is the time that the actuator must be inside or outside the operating distance.<br />
Dimension drawing actuator <strong>CET</strong>-A-BWK-50X<br />
6,5<br />
22<br />
8,5<br />
5<br />
34<br />
45<br />
34<br />
15<br />
Active<br />
face<br />
15<br />
6,5<br />
71<br />
5<br />
16<br />
8<br />
15<br />
5<br />
15 16<br />
38<br />
Tip!<br />
<strong>Safety</strong> screws are included with the actuator.<br />
42
<strong>Operating</strong> <strong>Instructions</strong> <strong>Safety</strong> <strong>Switch</strong> <strong>CET</strong>.-<strong>AR</strong>-...-<strong>CH</strong>-...<br />
Ordering Information and Accessories<br />
Versions with plug connectors 2 x M12<br />
Order No./item<br />
Closed-circuit<br />
current principle<br />
Open-circuit<br />
current principle<br />
Door monitoring<br />
output<br />
Unicode<br />
Multicode<br />
Single insertion slide<br />
Double insertion slide<br />
Teach-in input<br />
Feedback loop<br />
Escape release<br />
Wire front release<br />
Lockout mechanism<br />
Wiring diagram<br />
<strong>CET</strong>1<br />
106275<br />
<strong>CET</strong>1-<strong>AR</strong>-CDA-AH-50X-SG-106275 l l l l A<br />
106616<br />
<strong>CET</strong>1-<strong>AR</strong>-CRA-AH-50A-SG-106616 l l l l l<br />
A<br />
75 mm<br />
106159<br />
<strong>CET</strong>1-<strong>AR</strong>-CRA-AH-50F-SG-106159 l l l l l<br />
A<br />
75 mm<br />
111766<br />
<strong>CET</strong>1-<strong>AR</strong>-CRA-AH-50F-SG-C2333-111766 l l l l l<br />
l A<br />
75 mm<br />
105802<br />
<strong>CET</strong>1-<strong>AR</strong>-CRA-AH-50S-SG-105802 l l l l A<br />
103418<br />
<strong>CET</strong>1-<strong>AR</strong>-CRA-AH-50X-SG-103418 l l l l A<br />
112121<br />
<strong>CET</strong>1-<strong>AR</strong>-CRA-AH-50X-SG-C2333-112121 l l l l l A<br />
113320<br />
<strong>CET</strong>1-<strong>AR</strong>-CRA-AH-50S-SG-C2290-113320 l l l l l<br />
A<br />
6 m<br />
110241<br />
<strong>CET</strong>1-<strong>AR</strong>-CRA-<strong>CH</strong>-50F-SG-110241 l l l l<br />
A<br />
75 mm<br />
105764<br />
<strong>CET</strong>1-<strong>AR</strong>-CRA-<strong>CH</strong>-50S-SG-105764 l l l l A<br />
105763<br />
<strong>CET</strong>1-<strong>AR</strong>-CRA-<strong>CH</strong>-50X-SG-105763 l l l A<br />
109231<br />
<strong>CET</strong>1-<strong>AR</strong>-CDA-<strong>CH</strong>-50X-SG-109231 l l l A<br />
113272<br />
<strong>CET</strong>1-<strong>AR</strong>-CRA-<strong>CH</strong>-50F-SG-C2333-113272 l l l l<br />
l A<br />
75 mm<br />
<strong>CET</strong>2<br />
109075<br />
<strong>CET</strong>2-<strong>AR</strong>-CRA-AH-50S-SG-109075 l l l l A<br />
110240<br />
<strong>CET</strong>2-<strong>AR</strong>-CRA-AH-50X-SG-110240 l l l l A<br />
109941<br />
<strong>CET</strong>2-<strong>AR</strong>-CRA-<strong>CH</strong>-50F-SG-C2312-109941 l l l l<br />
A<br />
105 mm<br />
110082<br />
<strong>CET</strong>2-<strong>AR</strong>-CRA-<strong>CH</strong>-50X-SG-110082 l l l A<br />
43
<strong>Operating</strong> <strong>Instructions</strong> <strong>Safety</strong> <strong>Switch</strong> <strong>CET</strong>.-<strong>AR</strong>-...-<strong>CH</strong>-...<br />
Versions with plug connectors 2 x M12 (continued)<br />
Order No./item<br />
Closed-circuit<br />
current principle<br />
Open-circuit<br />
current principle<br />
Door monitoring output<br />
Unicode<br />
Multicode<br />
Single insertion slide<br />
Double insertion slide<br />
Teach-in input<br />
Feedback loop<br />
Escape release<br />
Wire front release<br />
Lockout mechanism<br />
Wiring diagram<br />
<strong>CET</strong>3<br />
109401<br />
<strong>CET</strong>3-<strong>AR</strong>-CRA-AH-50X-SG-109401 l l l l l B<br />
113139<br />
<strong>CET</strong>3-<strong>AR</strong>-CRA-AH-50X-SG-C2290-113139 l l l l l l<br />
4 m<br />
114512<br />
<strong>CET</strong>3-<strong>AR</strong>-CRA-AH-50X-SG-C2333-114512 l l l l l l B<br />
113965<br />
<strong>CET</strong>3-<strong>AR</strong>-CRA-AH-50F-SG-113965 l l l l l l<br />
75 mm<br />
114508<br />
<strong>CET</strong>3-<strong>AR</strong>-CRA-AH-50F-SG-C2357-114508 l l l l l l<br />
l B<br />
75 mm<br />
110114<br />
<strong>CET</strong>3-<strong>AR</strong>-CRA-<strong>CH</strong>-50X-SG-C2290-110114 l l l l l<br />
4 m<br />
110905<br />
<strong>CET</strong>3-<strong>AR</strong>-CRA-<strong>CH</strong>-50F-SG-C2290-110905 l l l l l<br />
75 mm<br />
110906<br />
<strong>CET</strong>3-<strong>AR</strong>-CRA-<strong>CH</strong>-50X-SG-110906 l l l l B<br />
110907<br />
<strong>CET</strong>3-<strong>AR</strong>-CRA-<strong>CH</strong>-50F-SG-110907 l l l l l<br />
75 mm<br />
112921<br />
<strong>CET</strong>3-<strong>AR</strong>-CRA-<strong>CH</strong>-50F-SG-C2333-112921 l l l l l<br />
l B<br />
75 mm<br />
112992<br />
<strong>CET</strong>3-<strong>AR</strong>-CRA-<strong>CH</strong>-50S-SG-112992 l l l l l B<br />
113958<br />
<strong>CET</strong>3-<strong>AR</strong>-CRA-<strong>CH</strong>-50F-SG-C2357-113958 l l l l l<br />
l B<br />
105 mm<br />
114090<br />
<strong>CET</strong>3-<strong>AR</strong>-CDA-<strong>CH</strong>-50F-SG-114090 l l l l B<br />
<strong>CET</strong>4<br />
111683<br />
<strong>CET</strong>4-<strong>AR</strong>-CRA-AH-50X-SG-111683 l l l l l B<br />
111684<br />
<strong>CET</strong>4-<strong>AR</strong>-CRA-<strong>CH</strong>-50X-SG-111684 l l l l B<br />
113767<br />
<strong>CET</strong>4-<strong>AR</strong>-CRA-<strong>CH</strong>-50X-SG-C2333-113767 l l l l l B<br />
114650<br />
<strong>CET</strong>4-<strong>AR</strong>-CRA-<strong>CH</strong>-50F-SG-114650 l l l l l<br />
75 mm<br />
113081<br />
<strong>CET</strong>4-<strong>AR</strong>-CRA-<strong>CH</strong>-50S-SG-113081 l l l l l B<br />
114712<br />
<strong>CET</strong>4-<strong>AR</strong>-CDA-<strong>CH</strong>-50X-SG-114712 l l l l B<br />
113609<br />
<strong>CET</strong>4-<strong>AR</strong>-CRA-<strong>CH</strong>-50X-SG-C2355-113609 l l l l C<br />
l<br />
4 m<br />
B<br />
B<br />
B<br />
B<br />
B<br />
B<br />
Designation Cable length [m]/version Order no./item<br />
Connection cable M12<br />
PVC, flying lead<br />
8-pin<br />
Connection cable M12 for solenoid<br />
PVC, flying lead<br />
5-pin<br />
Bridging plug<br />
Y-distributor M12<br />
Y-distributor M12 with connecting cable<br />
Connection cables M12 and accessories for series<br />
connection<br />
5 100177<br />
10 100178<br />
20 100179<br />
5 100183<br />
10 100184<br />
20 100185<br />
M12 plug connector 4-pin<br />
097645<br />
Bridging plug<br />
M12, 1 x 8-pin, 2 x 5-pin<br />
097627<br />
Y-distributor M12<br />
M12, 1 x 8-pin, 2 x 5-pin<br />
111696<br />
Y-distributor M12 with connecting cable<br />
44
<strong>Operating</strong> <strong>Instructions</strong> <strong>Safety</strong> <strong>Switch</strong> <strong>CET</strong>.-<strong>AR</strong>-...-<strong>CH</strong>-...<br />
Versions with plug connector RC18<br />
Important: Versions with plug connector RC-18 do not yet have UL approval.<br />
Order No./item<br />
Closed-circuit<br />
current principle<br />
Open-circuit<br />
current principle<br />
Door monitoring<br />
output<br />
Unicode<br />
Multicode<br />
Single insertion slide<br />
Double insertion slide<br />
Teach-in input<br />
Feedback loop<br />
Escape release<br />
Wire front release<br />
Lockout mechanism<br />
Wiring diagram<br />
<strong>CET</strong>1<br />
110203<br />
<strong>CET</strong>1-<strong>AR</strong>-CRA-AH-50X-SH-110203 l l l l D<br />
113022<br />
<strong>CET</strong>1-<strong>AR</strong>-CRA-AH-50X-SH-C2290-113022 l l l l l<br />
4 m<br />
113021<br />
<strong>CET</strong>1-<strong>AR</strong>-CRA-AH-50F-SH-C2353-113021 l l l l l<br />
105 mm<br />
110943<br />
<strong>CET</strong>1-<strong>AR</strong>-CRA-AH-50F-SH-C2312-110943 l l l l l<br />
105 mm<br />
110204<br />
<strong>CET</strong>1-<strong>AR</strong>-CRA-<strong>CH</strong>-50X-SH-110204 l l l D<br />
113255<br />
<strong>CET</strong>1-<strong>AR</strong>-CRA-<strong>CH</strong>-50X-SH-113255 l l l D<br />
<strong>CET</strong>2<br />
110205<br />
<strong>CET</strong>2-<strong>AR</strong>-CRA-AH-50X-SH-110205 l l l l D<br />
112466<br />
<strong>CET</strong>2-<strong>AR</strong>-CDA-AH-50X-SH-112466 l l l l D<br />
110206<br />
<strong>CET</strong>2-<strong>AR</strong>-CRA-<strong>CH</strong>-50X-SH-110206 l l l D<br />
<strong>CET</strong>3<br />
110103<br />
<strong>CET</strong>3-<strong>AR</strong>-CRA-AH-50X-SH-110103 l l l l l D<br />
111725<br />
<strong>CET</strong>3-<strong>AR</strong>-CRA-AH-50F-SH-C2312-111725 l l l l l l<br />
105 mm<br />
113024<br />
<strong>CET</strong>3-<strong>AR</strong>-CRA-AH-50X-SH-C2290-113024 l l l l l l<br />
4 m<br />
113023<br />
<strong>CET</strong>3-<strong>AR</strong>-CRA-AH-50F-SH-C2353-113023 l l l l l l<br />
105 mm<br />
113151<br />
<strong>CET</strong>3-<strong>AR</strong>-CRA-AH-50X-SH-C2333-113151 l l l l l l D<br />
114088<br />
<strong>CET</strong>3-<strong>AR</strong>-CRA-AH-50X-SH-C2290-114088 l l l l l l<br />
6 m<br />
114505<br />
<strong>CET</strong>3-<strong>AR</strong>-CRA-AH-50F-SH-C2333-114505 l l l l l l<br />
l D<br />
75 mm<br />
113148<br />
<strong>CET</strong>3-<strong>AR</strong>-CRA-AH-50F-SH-113148 l l l l l l<br />
75 mm<br />
114647<br />
<strong>CET</strong>3-<strong>AR</strong>-CDA-AH-50F-SH-114647 l l l l l l<br />
75 mm<br />
110104<br />
<strong>CET</strong>3-<strong>AR</strong>-CRA-<strong>CH</strong>-50X-SH-110104 l l l l D<br />
<strong>CET</strong>4<br />
110201<br />
<strong>CET</strong>4-<strong>AR</strong>-CRA-AH-50X-SH-110201 l l l l l D<br />
110202<br />
<strong>CET</strong>4-<strong>AR</strong>-CRA-<strong>CH</strong>-50X-SH-110202 l l l l l D<br />
116285<br />
<strong>CET</strong>4-<strong>AR</strong>-CRA-AH-50F-SH-116285 l l l l l<br />
75 mm<br />
l<br />
4 m<br />
l<br />
4 m<br />
D<br />
D<br />
D<br />
D<br />
D<br />
D<br />
D<br />
D<br />
D<br />
D<br />
45
<strong>Operating</strong> <strong>Instructions</strong> <strong>Safety</strong> <strong>Switch</strong> <strong>CET</strong>.-<strong>AR</strong>-...-<strong>CH</strong>-...<br />
Designation Cable length [m] Order no./item<br />
1.5<br />
092761<br />
RC18EF1,5M-C1825<br />
3<br />
092816<br />
RC18EF3M-C1825<br />
6<br />
077014<br />
RC18EF6M-C1825<br />
077015<br />
8<br />
Female plug RC18<br />
RC18EF8M-C1825<br />
with cable PUR<br />
092898<br />
10<br />
for <strong>CET</strong>-<strong>AR</strong><br />
RC18EF10M-C1825<br />
18-pin + PE<br />
077016<br />
15<br />
RC18EF15M-C1825<br />
20<br />
092726<br />
RC18EF20M-C1825<br />
25<br />
092727<br />
RC18EF25M-C1825<br />
30<br />
095993<br />
RC18EF30M-C1825<br />
1.5<br />
092883<br />
RC18EF1,5MF-C1825<br />
3<br />
092884<br />
RC18EF3MF-C1825<br />
6<br />
092885<br />
RC18EF6MF-C1825<br />
Plug connector RC18<br />
with cable halogen-free<br />
for <strong>CET</strong>-<strong>AR</strong><br />
18-pin + PE<br />
Connection cables RC18<br />
8<br />
10<br />
15<br />
20<br />
25<br />
092886<br />
RC18EF8MF-C1825<br />
092887<br />
RC18EF10MF-C1825<br />
092888<br />
RC18EF15MF-C1825<br />
092889<br />
RC18EF20MF-C1825<br />
092890<br />
RC18EF25MF-C1825<br />
Designation Use Version Order No./item<br />
Mechanical key release for safety switch <strong>CET</strong> identical locking, incl. 2 keys<br />
Replacement key<br />
for mechanical key release, identical<br />
locking<br />
2 keys, identical locking<br />
Emergency unlocking for safety switch <strong>CET</strong> latching in both positions<br />
Cover<br />
Mounting plate EMP-L-<strong>CET</strong><br />
Mounting plate EMP-B-<strong>CET</strong><br />
for safety switch <strong>CET</strong><br />
and actuators <strong>CET</strong><br />
for safety switch <strong>CET</strong><br />
for actuator <strong>CET</strong><br />
door hinge right<br />
door hinge left<br />
Actuator for safety switch <strong>CET</strong> incl. safety screws<br />
<strong>Safety</strong> screws (spare)<br />
Accessories<br />
for actuator <strong>CET</strong><br />
4 x M5 x 16<br />
packaging unit: 100 ea.<br />
098850<br />
Mechanical key release<br />
099434<br />
Replacement key<br />
103714<br />
Emergency unlocking <strong>CET</strong><br />
098808<br />
<strong>CET</strong> cover right<br />
098807<br />
<strong>CET</strong> cover left<br />
106695<br />
EMP-L-<strong>CET</strong><br />
106694<br />
EMP-B-<strong>CET</strong><br />
096327<br />
<strong>CET</strong>-A-BWK-50X<br />
073456<br />
M5 x 16<br />
Tip!<br />
The connection cables given above meet the requirements for connection material<br />
according to UL specifications. You will find further connection material, in<br />
particular for series connection, in the current <strong>Non</strong>-<strong>Contact</strong> <strong>Safety</strong> System CES<br />
catalog at www.euchner.de.<br />
46
<strong>Operating</strong> <strong>Instructions</strong> <strong>Safety</strong> <strong>Switch</strong> <strong>CET</strong>.-<strong>AR</strong>-...-<strong>CH</strong>-...<br />
Inspection and service<br />
Warning!<br />
Loss of the safety function because of damage to the system.<br />
In case of damage, the entire device must be replaced.<br />
Only accessories or spare parts that can be ordered from EU<strong>CH</strong>NER may be<br />
replaced.<br />
Note:<br />
Regular inspection of the following is necessary to ensure trouble-free long-term<br />
operation:<br />
ÌÌCheck the switching function (see section Functional check)<br />
ÌÌCheck all additional functions (e.g. escape release, lockout mechanism, etc.)<br />
ÌÌCheck the secure fastening of the devices and the connections<br />
ÌÌCheck for soiling<br />
No servicing is required, repairs to the device are only allowed to be made by the<br />
manufacturer.<br />
The year of manufacture can be seen in the lower right corner of the rating plate.<br />
The current version number in the format (V X.X.X) can also be found on the device.<br />
Service<br />
If service support is required, please contact:<br />
EU<strong>CH</strong>NER GmbH + Co. KG<br />
Kohlhammerstraße 16<br />
D-70771 Leinfelden-Echterdingen<br />
Service telephone:<br />
+49 711 7597-500<br />
E-mail:<br />
info@euchner.de<br />
Internet:<br />
www.euchner.de<br />
47
<strong>Operating</strong> <strong>Instructions</strong> <strong>Safety</strong> <strong>Switch</strong> <strong>CET</strong>.-<strong>AR</strong>-...-<strong>CH</strong>-...<br />
Declaration of conformity<br />
48
<strong>Operating</strong> <strong>Instructions</strong> <strong>Safety</strong> <strong>Switch</strong> <strong>CET</strong>.-<strong>AR</strong>-...-<strong>CH</strong>-...<br />
49
Euchner GmbH + Co. KG<br />
Kohlhammerstraße 16<br />
D-70771 Leinfelden-Echterdingen<br />
info@euchner.de<br />
www.euchner.de<br />
Edition:<br />
110789-07-12/12<br />
Title:<br />
<strong>Operating</strong> <strong>Instructions</strong> <strong>Safety</strong> <strong>Switch</strong> <strong>CET</strong>.-<strong>AR</strong>-...-<strong>CH</strong>-...<br />
(translation of the original operating instructions)<br />
Copyright:<br />
© EU<strong>CH</strong>NER GmbH + Co. KG, 12/2012<br />
Subject to technical modifications,<br />
no responsibility is accepted for the accuracy of this information.<br />
More than safety.