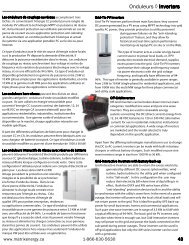
Grid Connections for Aurora Inverters - Matrix Energy
Grid Connections for Aurora Inverters - Matrix Energy
Grid Connections for Aurora Inverters - Matrix Energy

You also want an ePaper? Increase the reach of your titles
YUMPU automatically turns print PDFs into web optimized ePapers that Google loves.
Application Note<br />
Application Note<br />
<strong>Grid</strong> Connection Options and Configuration<br />
<strong>for</strong> <strong>Aurora</strong> String <strong>Inverters</strong><br />
Revision: 001<br />
Revised: 10OCT2010<br />
TABLE OF CONTENTS
Application Note<br />
<strong>Aurora</strong> <strong>Grid</strong> Connection Options<br />
1. Introduction ...................................................................................................................................... 3<br />
1.1. Scope ...................................................................................................................................... 3<br />
2. <strong>Aurora</strong> <strong>Grid</strong> <strong>Connections</strong> .................................................................................................................. 3<br />
2.1. Electrical Wiring <strong>for</strong> Three Phase <strong>Aurora</strong> <strong>Inverters</strong> ............................................................... 3<br />
2.2. Electrical Wiring <strong>for</strong> Single Phase <strong>Aurora</strong> <strong>Inverters</strong> ............................................................... 3<br />
2.3. Making Changes to the Inverter Configuration ..................................................................... 5<br />
2.3.1. Navigating the Inverter Configuration ............................................................................. 5<br />
2.3.2. Setting the <strong>Grid</strong> Type ...................................................................................................... 6<br />
2.3.3. Setting the <strong>Grid</strong> Nominal Voltage ................................................................................... 6<br />
3. North America <strong>Grid</strong> Standards .......................................................................................................... 8<br />
REVISION TABLE<br />
Document<br />
Revision<br />
Author<br />
Date<br />
Approved<br />
by<br />
Description of Modification<br />
001 R. Allen 10OCT2010 Original Release<br />
Page 2 of 9 Issued: 10OCT2010 Revision: 001
Application Note<br />
<strong>Aurora</strong> <strong>Grid</strong> Connection Options<br />
1. Introduction<br />
Power‐One’s <strong>Aurora</strong> String <strong>Inverters</strong> are designed<br />
to feed energy harvested from PV and<br />
wind sources to a local utility distribution system<br />
(aka, the grid). However there are several<br />
available types of grid connections depending<br />
upon the intended usage of the installed electrical<br />
service. <strong>Aurora</strong> <strong>Inverters</strong> are designed to<br />
be connectable with any of the utility low voltage<br />
service connections available in the world,<br />
including single phase, split phase and three<br />
phase systems.<br />
This document provides details of how to wire<br />
the grid interconnection and procedures neede<br />
to adjust the inverter operating system (configuration)<br />
to match the desired grid connections.<br />
The appenix lists various NA grid standards<br />
and connections.<br />
1.1. Scope<br />
This document is applicable to the all <strong>Aurora</strong><br />
PVI Wind and Photovoltaic (PV) series string inverters,<br />
including both trans<strong>for</strong>merless and isolated<br />
versions.<br />
NOTE: If <strong>Aurora</strong> trans<strong>for</strong>merless <strong>Inverters</strong> are used<br />
in parallel or in three‐phase applications and are<br />
fed by a common source such as a single wind turbine,<br />
isolation trans<strong>for</strong>mers will need to be incorporated<br />
in the grid connection. Please refer to <strong>Aurora</strong><br />
application note entitled, <strong>Aurora</strong> TL Wind <strong>Inverters</strong><br />
and Parallel Usage, <strong>for</strong> details.<br />
For all models the appropriate grid wiring connections<br />
are provided on a label affixed to the<br />
unit. The in<strong>for</strong>mation in Figure 2‐3 is an expanded<br />
version of this label and shows all possible grid<br />
wiring options.<br />
The following sections provide descriptions of<br />
how <strong>Aurora</strong> String <strong>Inverters</strong> must be electrical‐<br />
phase.<br />
ly connected, and procedures <strong>for</strong> changing the<br />
inverter configuration to match the various<br />
grid standards. The Appendix includes detailed<br />
in<strong>for</strong>mation on the various NA grid standards.<br />
2. <strong>Aurora</strong> <strong>Grid</strong> <strong>Connections</strong><br />
2.1. Three‐Phase <strong>Aurora</strong> <strong>Inverters</strong><br />
The three phase PVI‐seroes string inverters designed<br />
<strong>for</strong> the NA market <strong>for</strong> either wind or PV<br />
applications have preset grid voltages of either<br />
208V or 480V 3Ø connections and do not need<br />
configuration changes to allow connection to<br />
these grid standards.<br />
2.2. Single‐Phase <strong>Aurora</strong> <strong>Inverters</strong><br />
Connection of a single phase <strong>Aurora</strong> Inverter to<br />
the grid requires connecting either two or<br />
three conductors depending upon the grid<br />
type. The specific location of the 3‐terminal<br />
grid wiring block depends upon whether the<br />
inverter is provisioned with a DC switchbox.<br />
There are no switch wired associated with the<br />
grid‐side wiring; however, addition of the optional<br />
switchbox changes the location of the AC<br />
grid terminal block. See Figure 2‐1 and<br />
Figure 2‐2 <strong>for</strong> differences in these two implementations.<br />
As shown in these figures, the AC grid connection<br />
<strong>for</strong> any single‐phase <strong>Aurora</strong> inverter consists<br />
of a terminal block with three positions.<br />
The number of position used (either two or<br />
three) is dependent upon whether the grid to<br />
be connected grid is single phase or split<br />
Revision: 001 Issued: 10OCT2010 Page 3 of 9
Application Note<br />
<strong>Aurora</strong> <strong>Grid</strong> Connection Options<br />
Figure 2‐1: <strong>Grid</strong> wiring terminal block <strong>for</strong> single‐phase <strong>Aurora</strong> inverters without a DC switchbox<br />
1 2 3<br />
Figure 2‐2: <strong>Grid</strong> wiring terminal block <strong>for</strong> single‐phase <strong>Aurora</strong> inverters with optional switchbox provisioned<br />
Page 4 of 9 Issued: 10OCT2010 Revision: 001
Application Note<br />
<strong>Aurora</strong> <strong>Grid</strong> Connection Options<br />
Inverter<br />
TERMINAL<br />
Wiring<br />
Option A<br />
Wiring<br />
Option B<br />
Wiring<br />
Option C<br />
1 2 3 1 2 3 1 2 3<br />
L1 L2 - L1 L2 N N L1 -<br />
L2 L3 - - - - N L2 -<br />
L3 L1 - - - - N L3 -<br />
Figure 2‐3: <strong>Grid</strong> Wiring In<strong>for</strong>mation <strong>for</strong> all single‐Ø inverters showing all wiring options<br />
2.3. Making Changes to the Inverter Configuration<br />
Based on the grid standard to which inverter<br />
must be connected, the <strong>Aurora</strong> inverter may<br />
need to have changes made to its configuration<br />
data. The correct grid type and nominal grid<br />
voltage must be programmed correctly into the<br />
configuration file to allow proper and safe operation<br />
of the inverter. This is easily accomplished<br />
using the front panel key pad adjacent<br />
to the front panel display.<br />
The default configuration setting <strong>for</strong> all US<br />
models is 240V/120V split‐phase, and if connecting<br />
to this grid configuration, no adjustments<br />
are required. To select a different grid<br />
standard and/or nominal grid voltage different<br />
from this default, refer to the following procedures.<br />
2.3.1. Navigating the Inverter Configuration<br />
Both of the following procedures require the<br />
user to enter multiple digit values (e.g., 4‐digit<br />
passwords, 3‐digit voltages) into the inverter<br />
control system. This is accomplished using the<br />
display and the front panel arrow keys. In the<br />
procedures below, after entering a location<br />
where numerical value entry is required use the<br />
front panel arrow keys to navigate digit positions<br />
on the display and change digit values:<br />
• Use the up/down [↑↓] front panel arrow<br />
keys to change the value of a digit as required.<br />
• Use the right/left [← →] arrow keys to<br />
move the cursor from one digit position to<br />
the next (left or right)<br />
• Repeat this process to enter values in all<br />
digit positions as required<br />
Revision: 001 Issued: 10OCT2010 Page 5 of 9
Application Note<br />
<strong>Aurora</strong> <strong>Grid</strong> Connection Options<br />
2.3.2. Setting the <strong>Grid</strong> Type<br />
The <strong>Grid</strong> Type <strong>for</strong> <strong>Aurora</strong> single‐phase inverters<br />
can be either single phase or split phase. To adjust<br />
the grid type of the inverter:<br />
1. Power‐on the inverter by applying 200VDC<br />
to one set of DC input terminals. This can<br />
be done prior to installation of the unit using<br />
a DC power supply capable of supplying<br />
the required voltage, or it can be completed<br />
once the inverter has been installed<br />
and connected to the PV array, but prior to<br />
connection to the grid. In either case, hazardous<br />
voltages can be accessible so exercise<br />
extreme caution<br />
2. Press the ESC key to access the submenu<br />
directory<br />
3. Using the arrow keys as necessary, move<br />
the cursor to highlight the SETTING menu,<br />
and press the ENTER button<br />
4. At the prompt, type in the basic password<br />
[0000] (using the procedure of Section 0)<br />
to access the SETTING submenu<br />
5. Use the up/down [↑↓] arrow keys move<br />
the display cursor to highlight the SELECT<br />
GRID STANDARD menu item and press the<br />
ENTER button.<br />
6. Use the up/down [↑↓] arrow keys to<br />
move the cursor to the desired choice of<br />
grid type (Single or Split phase)<br />
7. When complete, press the ESC button several<br />
times to return to the main menu, or<br />
alternatively power cycle the unit.<br />
2.3.3. Setting the <strong>Grid</strong> Nominal Voltage<br />
Prior to commencing this procedure, the<br />
second level (service) password <strong>for</strong> the inverter<br />
must be obtained by request from the Power‐<br />
One Technical Center. This password is specific<br />
to each inverter and is based on the unit serial<br />
number.<br />
As access to this menu also allows access to<br />
other controlled parameters, which if modified<br />
without consent and approval by Power‐One<br />
can result in unsafe operation and/or damage<br />
to the inverter. There<strong>for</strong>e, be<strong>for</strong>e the second<br />
level password can be released it is necessary<br />
to ratify the limited liability <strong>for</strong>m found in section<br />
4 of this document. Once this password is<br />
obtained, proceed as follows:<br />
1. Open inverter access cover and apply<br />
200VDC to one set of DC input terminals.<br />
This can be done prior to installation of the<br />
inverter using a DC power supply capable of<br />
supplying the required voltage. Alternatively,<br />
this can be accomplished once the inverter<br />
has been installed and connected to the<br />
PV array; however, it must be completed<br />
prior to connection to the grid. In either<br />
case, use extreme caution as hazardous voltages<br />
can be easily accessible!<br />
2. Once powered, press the ESC key to access<br />
the main system menu<br />
3. Using the up/down [↑↓] arrow keys as necessary,<br />
move the cursor to highlight the<br />
SETTING menu item, and press the ENTER<br />
button<br />
4. At the prompt, enter the first level user<br />
password, always [0000] using the procedure<br />
of Section 0. When complete, press<br />
the ENTER button to access the SETTINGS<br />
submenu.<br />
Page 6 of 9 Issued: 10OCT2010 Revision: 001
Application Note<br />
<strong>Aurora</strong> <strong>Grid</strong> Connection Options<br />
5. From the SETTINGS menu, using the<br />
up/down [↑↓] arrow keys move the cursor<br />
to highlight the SERVICE submenu and press<br />
the ENTER button.<br />
6. At the prompt, enter the second level service<br />
password previously obtained in Step<br />
(1). Use the procedure of Section 0 to enter<br />
the values. When completed, press the EN‐<br />
TER button to enter the SERVICE menu.<br />
7. From the SERVICE menu using the up/down<br />
[↑↓] arrow keys move the cursor to highlight<br />
the V NOM menu item, and press the<br />
ENTER button.<br />
8. Using the arrow keys navigate the cursor<br />
(per the procedure of 0) to enter the desired<br />
3‐digit nominal grid voltage; when<br />
complete, press the ENTER button.<br />
9. When complete, press the ESC button several<br />
times to return to the main menu, or alternatively<br />
power cycle the unit.<br />
Revision: 001 Issued: 10OCT2010 Page 7 of 9
Application Note<br />
<strong>Aurora</strong> <strong>Grid</strong> Connection Options<br />
3. Appendix A: North America <strong>Grid</strong><br />
Standards<br />
Historically, there have been a number of different<br />
NA utility grid standards, which <strong>for</strong> the<br />
most part have evolved into those listed in Table<br />
3‐1, and which are the primary standards in<br />
use today. If the user encounters any connections<br />
different from those listed, contact the<br />
Power‐One Technical Center <strong>for</strong> further instructions.<br />
With regard to line frequency In North America,<br />
all utility AC transmission and distribution operates<br />
at a frequency of 60Hz.<br />
Table 3‐1: Popular NA <strong>Grid</strong> Standards<br />
Voltage 1 N O Phase N O of<br />
Phases Type Conductors<br />
Reference<br />
Application<br />
240/120 1 Split 3 Figure 3‐3 Single phase residential<br />
208/120 3 Wye 4<br />
Figure 3‐1 Three phase ‐Light Commercial (default<br />
standard)<br />
240/120 3 High leg 4<br />
Figure 3‐2 Three‐phase ‐Light Commercial (limited<br />
usage)<br />
480/277 3 Wye 4 Figure 3‐1 Heavy Commercial/industrial<br />
600/347 3 Wye 4 Figure 3‐1 Heavy Commercial/industrial (Canada)<br />
Figure 3‐1: 3Ø‐Y/4W service entrance used to provide<br />
208V/120V/3Ø‐Y or 480V/277V/3Ø‐Y facility<br />
service entrances.<br />
Figure 3‐2: 3Ø‐∆/4W (HIGH LEG) service entrance<br />
used to provide both 240V/3Ø‐∆ and limited<br />
120/1Ø facility service entrance.<br />
Figure 3‐3: 1Ø/3W service entrance used to provide 240V<br />
and 120V/1Ø service <strong>for</strong> residences.<br />
1 V1 / V2 – V1 indicates system phase to phase voltage; V2 indicates system phase to neutral<br />
Page 8 of 9 Issued: 10OCT2010 Revision: 001
Application Note<br />
<strong>Aurora</strong> <strong>Grid</strong> Connection Options<br />
4. CONDITIONAL ACCESS AGREEMENT<br />
Access Agreement to allow access to the restricted “Advanced Menu” of <strong>Aurora</strong><br />
Wind and Photovoltaic <strong>Inverters</strong> via <strong>Aurora</strong> Installer software<br />
In the following Agreement the word “CUSTOMER” is intended to refer to the undersigned party in the CUSTOMER<br />
COMPANY NAME area at the bottom of this document<br />
Power‐One is delivering to the CUSTOMER, a password(s) to allow access to the restricted Advanced<br />
Menu area within the <strong>Aurora</strong> Installer software.<br />
Hereby Power‐One states that the Advanced Menu is a restricted area within the <strong>Aurora</strong> Installer<br />
software that allows access to parameters, which if modified improperly can have an impact on the<br />
product certification and operation.<br />
As such, any changes made without explicit written permission from Power‐One will void any safety<br />
certifications as well as the Power‐One warranty.<br />
In signing this document CUSTOMER accepts the restrictions and acquires full responsibility <strong>for</strong> any<br />
issue(s) that arises as a result of changes made to any parameters within the Advanced Menu, where<br />
not previously agreed upon and documented with Power‐One, Inc.<br />
This document is executed expressly to allow the following changes to Advanced Menu parameters:<br />
1. Modifying the nominal grid voltage setting from the 240V default to match necessary grid level<br />
2. Setting must be within specifed datasheet limits <strong>for</strong> grid voltage<br />
Power‐One, Inc<br />
Renewable <strong>Energy</strong> BU<br />
740 Calle Plano<br />
Camarillo, CA 93012<br />
____________________________________<br />
____________________________________<br />
__________________________________<br />
Customer<br />
Company<br />
Name<br />
Business<br />
unit<br />
Customer<br />
address<br />
Signature<br />
Printed<br />
Name<br />
Date<br />
Signed:<br />
____________________________________<br />
____________________________________<br />
____________________________________<br />
____________________________________<br />
____________________________________<br />
____________________________________<br />
Revision: 001 Issued: 10OCT2010 Page 9 of 9