
You also want an ePaper? Increase the reach of your titles
YUMPU automatically turns print PDFs into web optimized ePapers that Google loves.
Page 6<br />
<strong>Western</strong> <strong>Wood</strong><br />
This gave me wood of the same vintage which would make the best<br />
color match. Most plugs could be installed with carpenter’s glue<br />
but in cases where the holes were elongated or chipped, I used<br />
WEST’s 410 epoxy filler as it will accept the filler stain which tends<br />
to hide the problems associated with using the old planks. A slick,<br />
a chisel and a nice random orbital sander got the topsides down to<br />
“new wood” and then it came time to fair and fair and fair the<br />
topsides. I never dreamed how many high and low spots I could<br />
find in a boat of this size. Final prep of the bottom and some<br />
bottom paint and the boat was ready to be rolled over.<br />
At some time in this boat’s previous life someone had painted the sheer line quarter round with a few coats of<br />
white paint. Nancy used remover, scrapers, brass brushes and ice<br />
picks to get the color out. She was very patient when old “eagle<br />
eye” rejected a piece again and again and sent her back outside to<br />
get rid of another white line or spot. The balance of the old decking<br />
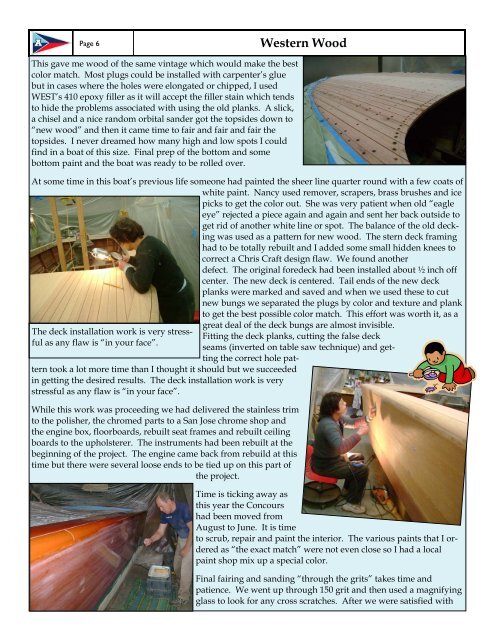
was used as a pattern for new wood. The stern deck framing<br />
had to be totally rebuilt and I added some small hidden knees to<br />
correct a Chris Craft design flaw. We found another<br />
defect. The original foredeck had been installed about ½ inch off<br />
center. The new deck is centered. Tail ends of the new deck<br />
planks were marked and saved and when we used these to cut<br />
new bungs we separated the plugs by color and texture and plank<br />
to get the best possible color match. This effort was worth it, as a<br />
The deck installation work is very stressful<br />
as any flaw is “in your face”.<br />
great deal of the deck bungs are almost invisible.<br />
Fitting the deck planks, cutting the false deck<br />
seams (inverted on table saw technique) and getting<br />
the correct hole pattern<br />
took a lot more time than I thought it should but we succeeded<br />
in getting the desired results. The deck installation work is very<br />
stressful as any flaw is “in your face”.<br />
While this work was proceeding we had delivered the stainless trim<br />
to the polisher, the chromed parts to a San Jose chrome shop and<br />
the engine box, floorboards, rebuilt seat frames and rebuilt ceiling<br />
boards to the upholsterer. The instruments had been rebuilt at the<br />
beginning of the project. The engine came back from rebuild at this<br />
time but there were several loose ends to be tied up on this part of<br />
the project.<br />
Time is ticking away as<br />
this year the Concours<br />
had been moved from<br />
August to June. It is time<br />
to scrub, repair and paint the interior. The various paints that I ordered<br />
as “the exact match” were not even close so I had a local<br />
paint shop mix up a special color.<br />
Final fairing and sanding “through the grits” takes time and<br />
patience. We went up through 150 grit and then used a magnifying<br />
glass to look for any cross scratches. After we were satisfied with