manual - Eagle Access Control Systems, Inc.
manual - Eagle Access Control Systems, Inc.
manual - Eagle Access Control Systems, Inc.

Create successful ePaper yourself
Turn your PDF publications into a flip-book with our unique Google optimized e-Paper software.
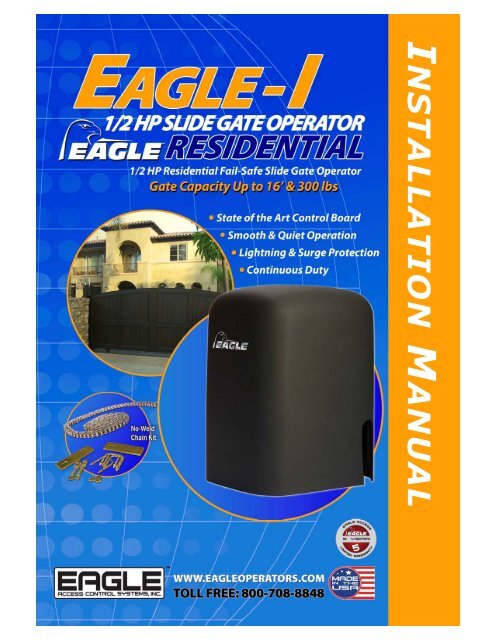
INSTALLATION MANUAL
Table of Contents<br />
Contents<br />
Page<br />
UL Listings Page 3/4<br />
Installing the Warning Sign / Precautions Page 5<br />
Instructions on Gate Posts Page 6<br />
Positive Stops Page 6<br />
Methods of Installation Page 7<br />
Proper Chain Installation Page 7<br />
Mounting Operator(s) to Concrete Pad(s) Page 8<br />
Selecting the Opening Direction of Gate Page 8<br />
Connecting the Power Page 9<br />
Reverse / Exit Loop Installations Page 9<br />
Two Way Adjustable Reverse Sensors / ERD Page 10<br />
The Feature Selector Page 11/12<br />
Master and Slave Operation Page 13<br />
Master <strong>Control</strong> Page 13<br />
Slave <strong>Control</strong> Page 14<br />
Selecting the Delay Functions Page 14<br />
Describing the Output Connections Page 15<br />
MAG Lock Solenoid Page 15<br />
Alarm Page 15<br />
24 VAC Auxiliary Power Page 15<br />
Connecting the <strong>Access</strong>ories Page 16<br />
Description of Inputs Page 17<br />
Receiver Connections Page 18<br />
Gate Travel Distance / Setting the Limit Switches Page 18<br />
Emergency Releases Page 18<br />
© 2002 <strong>Eagle</strong> <strong>Access</strong> <strong>Control</strong> <strong>Systems</strong>, <strong>Inc</strong>.<br />
All rights reserved. No part of this <strong>manual</strong> may be reproduced in any<br />
means: graphics, electronics, or mechanical, including photocopying without<br />
the expressed written permission of the publisher. Materials, components<br />
and specifications are subject to change without notice.<br />
<strong>Eagle</strong> <strong>Access</strong> <strong>Control</strong> <strong>Systems</strong>, <strong>Inc</strong>. / (800) 708-8848- / www.eagleoperators.com<br />
(2)
1) Install the gate operator only when:<br />
The operator is appropriate for the construction and the usage Class of the gate.<br />
All openings of a horizontal slide gate are guarded or screened from the bottom of the<br />
gate to a minimum of 4 feet (1.2 m) above the ground to prevent a 2 ¼ inch (57.15 mm)<br />
diameter sphere from passing through the openings anywhere in the gate, and<br />
in that portion of the adjacent fence that the gate covers in the open position.<br />
All exposed pinch points are eliminated or guarded.<br />
Guarding is supplied for exposed rollers.<br />
UL Listings<br />
Gate Operators Installation Instructions<br />
2) The operator is intended for installation only on gates used for vehicles. Pedestrians must be<br />
supplied with a separate access opening.<br />
3) The gate must be installed in a location so that enough clearance is supplied between the gate<br />
and adjacent structures when opening and closing to reduce the risk of entrapment. Swinging<br />
gates shall not open into public access areas.<br />
4) The gate must be properly installed and work freely in both directions prior to the installation of<br />
the gate operator.<br />
5) <strong>Control</strong>s must be far enough from the gate so that the user is prevented from coming in<br />
contact with the gate while operating the controls. <strong>Control</strong>s intended to be used to reset an<br />
operator after two sequential activations of the entrapment protection device(s) must<br />
be located in the line of sight of the outdoor gate or easily accessible controls shall have a<br />
security feature to prevent unauthorized use.<br />
6) All warning signs and placards must be installed where visible in the area of the gate.<br />
7) For a gate operator utilizing a non-contact sensor such as a photo beam:<br />
See instructions on the placement of non-contact sensor for each type of application.<br />
Care shall be given to reduce the risk of nuisance tripping such as when a vehicle<br />
trips the sensor while the gate is still moving.<br />
One or more non-contact sensors shall be located where the risk of entrapment or<br />
obstruction exists, such as the perimeter reachable by a moving gate or barrier.<br />
8) Gate operators utilizing a contact sensor such as an edge sensor:<br />
One or more contact sensors shall be located at the leading edge, trailing edge, and<br />
post mounted both inside and outside of a vehicular horizontal sliding gate.<br />
One or more contact sensors shall be located at the bottom edge of a vehicular lift<br />
gate.<br />
One or more contact sensors shall be located at the pinch point of a vehicular vertical<br />
pivot gate.<br />
A hard wire contact sensor shall be located and its wiring arranged so that the<br />
communication between the sensor and the gate operator is not subject to<br />
mechanical damage.<br />
A wireless contact sensor such as one that transmits radio frequency (RF) signals<br />
to the gate operator for entrapment protection functions shall be located where the<br />
transmission of the signals are not obstructed or impeded by building structure,<br />
natural landscaping, or similar obstruction. A wireless contact sensor shall function<br />
under the intended end use conditions.<br />
<strong>Eagle</strong> <strong>Access</strong> <strong>Control</strong> <strong>Systems</strong>, <strong>Inc</strong>. / (800) 708-8848 / www.eagleoperators.com<br />
(3)
UL Listings<br />
Essential Safety Procedures<br />
WARNING - TO REDUCE THE RISK OF INJURY OR DEATH - READ AND FOLLOW ALL INSTRUCTIONS:<br />
Never let children operate or play with gate controls. Keep the remote control away from<br />
children.<br />
Always keep people and objects away from gate while the gate is in operation. NO ONE<br />
SHOULD CROSS THE PATH OF A MOVING GATE.<br />
Test the gate operator monthly. The gate must reverse on contact with a rigid object or stop<br />
when an object activates the non-contact sensors. After adjusting the force or the limit of<br />
travel, retest the gate operator. Failure to adjust and retest the gate operator properly can<br />
increase the risk of injury or death.<br />
Use the emergency release only when the gate is not moving. Make sure the power for the<br />
gate operator is off.<br />
KEEP GATES PROPERLY MAINTAINED. Read and follow the <strong>manual</strong>. Have a qualified<br />
service person make repairs to the gate or gate hardware.<br />
The entrance is for vehicles only. Pedestrians must use separate entrance.<br />
BE SURE TO CONTINUE TO KNOW AND PRACTICE THESE INSTRUCTIONS<br />
__________________________________________<br />
UL Listings<br />
Vehicular horizontal slide-gate operator (or<br />
Gate - A moving barrier such as a swinging,<br />
system) - A vehicular gate operator (or system)<br />
sliding, raising, lowering, rolling, or like barrier<br />
that controls a gate which slides in a horizontal<br />
that is a stand-alone passage barrier or is that<br />
direction that is intended for use for vehicular<br />
portion of a wall or fence system that controls<br />
entrance or exit to a drive, parking lot, or the like.<br />
entrance and/or egress by persons or vehicles<br />
and completes the perimeter of a defined area.<br />
__________________________________________<br />
Residential vehicular gate operator - Class I -<br />
A vehicular gate operator (or system) intended<br />
for use in a home of one to four single family<br />
dwellings, or a garage or parking area associated<br />
therewith.<br />
Commercial / General access vehicular gate<br />
operator - Class II - A vehicular gate operator<br />
(or system) intended for use in a commercial<br />
location or building such as a multi-family<br />
housing unit (five or more single family units),<br />
hotel, garages, retail store, or other buildings<br />
servicing the general public.<br />
Commercial / General access vehicular gate<br />
operator - Class III - A vehicular gate operator<br />
(or system) intended for use in an industrial<br />
location, loading dock area, or other location<br />
not intended to service the general public.<br />
Commercial / General access vehicular gate<br />
operator - Class IV - A vehicular gate operator<br />
(or system) intended for use in a guarded<br />
industrial location or buildings such as airport<br />
security area or other restricted access<br />
locations not servicing the general public, in<br />
which unauthorized access is prevented via<br />
supervision by security personnel.<br />
<strong>Eagle</strong> <strong>Access</strong> <strong>Control</strong> <strong>Systems</strong>, <strong>Inc</strong>. / (800) 708-8848 / www.eagleoperators.com<br />
(4)
Slide Gate Operators / <strong>Eagle</strong> I<br />
____________________<br />
Installing the Warning Sign<br />
Install Warning Sign On Both Sides Of Gate<br />
____________________<br />
Precautions<br />
Be sure to mount ALL operating devices clearly out of<br />
! reach of through gate. !<br />
____________________<br />
Regarding Ornamental Grill Styled Gates:<br />
Injuries may be avoided if a mesh or screen is<br />
installed on the gate. Injuries resulting from hands<br />
and feet becoming stuck in gate or children riding<br />
the gate while in movement, can be greatly<br />
reduced if this "screen" or "mesh" is applied<br />
to gate as a safety precaution.<br />
____________________<br />
CAUTION!<br />
!<br />
Be sure to read and follow all the <strong>Eagle</strong> <strong>Access</strong> <strong>Control</strong> <strong>Systems</strong>, <strong>Inc</strong>. and<br />
UL instructions before installing and operating any <strong>Eagle</strong> <strong>Access</strong> <strong>Control</strong><br />
<strong>Systems</strong>, <strong>Inc</strong>. products. <strong>Eagle</strong> <strong>Access</strong> <strong>Control</strong> <strong>Systems</strong>, <strong>Inc</strong>. is not responsible<br />
for any improper installation procedures caused by installer or user failing to<br />
comply with local building codes.<br />
<strong>Eagle</strong> <strong>Access</strong> <strong>Control</strong> <strong>Systems</strong>, <strong>Inc</strong>. / (800) 708-8848 / www.eagleoperators.com<br />
(5)
Slide Gate Operators / <strong>Eagle</strong> I<br />
____________________<br />
Instructions on Gate Posts<br />
Important Notice!<br />
Because the coasting distance may vary due to change in temperature, <strong>Eagle</strong> <strong>Access</strong> <strong>Control</strong>s does NOT<br />
recommend the installation of a stop or catch post in front of the gate path as shown in Example A.<br />
To do so will cause the gate to hit the post in certain instances. <strong>Eagle</strong> <strong>Access</strong> <strong>Control</strong>s only recommends<br />
installation of catch rollers on the side of a post with a minimal distance of 4" (Four inches) between the<br />
rollers as shown in Example B. Also when fully open the end of the sliding gate must stop at least 3"<br />
(three inches) from any wall or other objects as shown in Example C.<br />
A<br />
Top View<br />
<strong>Inc</strong>orrect<br />
EAGLE<br />
B<br />
Correct<br />
EAGLE<br />
Positive stop in fully closed position<br />
3 inches C<br />
Gate in Fully Open Position<br />
EAGLE<br />
!<br />
Positive stop in fully open position<br />
CAUTION! Regarding Positive Stops<br />
For safety reasons, a positive stop must be installed on the gate track prior to installation of the gate.<br />
This will assure that the gate does not exceed movement limit and derail while opening or closing fully.<br />
<strong>Eagle</strong> <strong>Access</strong> <strong>Control</strong> <strong>Systems</strong>, <strong>Inc</strong>. / (800) 708-8848 / www.eagleoperators.com<br />
(6)
Slide Gate Operators / <strong>Eagle</strong> I<br />
____________________<br />
Methods of Installation<br />
CAUTION!<br />
!<br />
It is highly recommended to install "over travel stops" at both ends of the gate rail in any type of installation<br />
in order to prevent derailing.<br />
Front Installation<br />
EAGLE<br />
* *<br />
*<br />
Rear Installation<br />
Recommended Positive Stop Locations<br />
EAGLE<br />
* *<br />
____________________<br />
For Rear Installations, be sure to drop the<br />
Idler Wheel farthest from the gate to the<br />
lower position that is provided on the<br />
Chassis.<br />
EAGLE<br />
Rear Chain Installation<br />
Extra Idler Wheel<br />
____________________<br />
The "No Weld Chain Kit"<br />
comes standard with<br />
all sliding gate units.<br />
EAGLE<br />
EAGLE<br />
CORRECT<br />
Proper Chain Installation<br />
Minimum space between gate and<br />
output sprocket must be 4". After you<br />
position the gate operator, bolt-down<br />
the operator to the concrete bed. Make<br />
certain the concrete bed is solid.<br />
<strong>Eagle</strong> <strong>Access</strong> <strong>Control</strong> <strong>Systems</strong>, <strong>Inc</strong>. / (800) 708-8848 / www.eagleoperators.com<br />
(7)
Slide Gate Operators / <strong>Eagle</strong> I<br />
____________________<br />
Mounting Operator(s) To A Concrete Pad<br />
CAUTION!<br />
!<br />
Be sure that the operator is installed in a level and paralleled position and is properly secured.<br />
Improper installation could result in property damage, severe injury, and/or death.<br />
Note:<br />
The following concrete recommendations<br />
are installation suggestions only.<br />
Please consult local codes for actual<br />
requirements in your area.<br />
R<br />
E<br />
D<br />
H<br />
E<br />
A<br />
D<br />
1/2" x 3-1/2"<br />
F<br />
A<br />
S<br />
T<br />
E<br />
N<br />
E<br />
R<br />
Recommended<br />
Dimensions<br />
5"<br />
18"<br />
(Concrete Pad Diagram N.T.S.)<br />
18"<br />
18"<br />
____________________<br />
Selecting Opening Direction of Gate<br />
EAGLE<br />
To select the opening direction of the gate, use<br />
the Feature Selector (as shown). Select switch #2<br />
to the "open left" position for left opening. Use switch<br />
#2 to the "open right" position for right opening.<br />
FEATURE SELECTOR<br />
EAGLE<br />
<strong>Eagle</strong> <strong>Access</strong> <strong>Control</strong> <strong>Systems</strong>, <strong>Inc</strong>. / (800) 708-8848 / www.eagleoperators.com<br />
(8)
Slide Gate Operators / <strong>Eagle</strong> I<br />
____________________<br />
Connecting The Power<br />
CAUTION!<br />
!<br />
Be sure that the circuit breaker for the line input power is turned off before connecting the input power to the unit.<br />
Connect 120 VAC, 15A, 60HZ, line input power<br />
to the wires provided in the power switch junction<br />
box located near the bottom of the operator.<br />
Warning: <strong>Eagle</strong> <strong>Access</strong> <strong>Control</strong> <strong>Systems</strong>, <strong>Inc</strong><br />
is not responsible for researching and complying<br />
with local building codes. Be sure to check<br />
into these codes before your installation.<br />
!<br />
All units must be properly grounded<br />
The wires are color coded as follows:<br />
Black - 120 VAC / Line Input Power<br />
White - Neutral Input<br />
Green - Ground Input (from an approved grounding method), the unit must be grounded<br />
SINGLE<br />
OPERATOR<br />
DUAL<br />
OPERATORS<br />
12 AWG<br />
400 ft.<br />
12 AWG<br />
200 ft.<br />
10 AWG<br />
650 ft.<br />
10 AWG<br />
325 ft.<br />
8 AWG<br />
1000 ft.<br />
8 AWG<br />
500 ft.<br />
4 AWG<br />
2000 ft.<br />
4 AWG<br />
1000 ft.<br />
____________________<br />
Reverse / Exit Loop Installation<br />
The purpose of a reversing loop is to prevent the gate from closing on a vehicle while it is exiting or stopped<br />
in the middle of the gate area. The purpose of the exit loop is to automatically open the gate when a vehicle<br />
approaches to exit.<br />
Exit Loop Operation<br />
LOOP CUT<br />
TWISTED WIRES<br />
EAGLE<br />
EXIT LOOP<br />
REVERSE LOOP<br />
REVERSE LOOP<br />
Wires must be<br />
wrapped inside<br />
the groove three<br />
times. Once you<br />
have completed<br />
the process, fill<br />
up the grooves<br />
with a proper<br />
seal.<br />
PROPER SEALER<br />
SHOULD BE USED<br />
IN LOOP CUTS<br />
WIRE LAYERS<br />
IN LOOP CUT<br />
<strong>Eagle</strong> <strong>Access</strong> <strong>Control</strong> <strong>Systems</strong>, <strong>Inc</strong>. / (800) 708-8848 / www.eagleoperators.com<br />
(9)
Slide Gate Operators / <strong>Eagle</strong> I<br />
____________________<br />
Connecting the Loop Detector<br />
LOOP<br />
DETECTOR<br />
LOOP HARNESS<br />
Gray<br />
REVERSE LOOP<br />
(A)<br />
Gray<br />
Black<br />
(B)<br />
Gray<br />
Black<br />
Yellow<br />
Blue<br />
Brown<br />
TWISTED<br />
GROUND<br />
WIRES<br />
EXIT LOOP<br />
REVERSE LOOP<br />
See larger Exit Loop<br />
Detail on Page 9<br />
CAUTION!<br />
Do not connect power<br />
to both A and B, connect<br />
only to the appropriate<br />
power source for your<br />
loop detector!<br />
Loop Detector Power<br />
For 110V power connect to the 100 junction power box (A)<br />
For 24V AC power connect<br />
____________________<br />
to terminal on the Diamond Board (B)<br />
Two Way Adjustable Reverse Sensor / ERD<br />
CAUTION!<br />
!<br />
Only a qualified service technician must make all adjustments to the sensor.<br />
There is an LED "OVERLOAD" warning<br />
that will light up when the gate is<br />
heavier than normal for the operator.<br />
During this warning, the operator will<br />
not function properly.<br />
The <strong>Control</strong> Board has two<br />
separate pots for adjusting<br />
sensitivity. One is for opening the<br />
gate, and the other is for closing the<br />
gate.<br />
IMPORTANT<br />
The level of sensitivity<br />
depends on the weight<br />
of the gate and the<br />
conditions of installation.<br />
When Adjusting Sensors Remember...<br />
Too Sensitive = if the gates stops or reverses by itself<br />
Not Sensitive enough = if the gate strikes an object and does not stop or reverse<br />
<strong>Eagle</strong> <strong>Access</strong> <strong>Control</strong> <strong>Systems</strong>, <strong>Inc</strong>. / (800) 708-8848 / www.eagleoperators.com<br />
(10)
Slide Gate Operators / <strong>Eagle</strong> I<br />
____________________<br />
The Feature Selector<br />
The selector uses an eight-station switch system that allows selection of the standard<br />
features and customized installation settings. The switch description is as follows:<br />
Note: The power should always be turned off when designating feature selector switches<br />
FEATURE SELECTOR<br />
<strong>Control</strong> Board<br />
Switch 1: Slave/Master - Sets the operator<br />
to work as Master or Slave.<br />
Switch 2: Gate Opening - Designates left or<br />
right opening.<br />
Switch 3: Motor Brake - If the "on" position<br />
is selected, the gate will stop instantly when<br />
on the limit switches. This is useful on<br />
uphill / downhill applications and on all<br />
Fail-Safe operators.<br />
Switch 4: Close Timer (On/Off) - Sets the<br />
Close Timer to the "on" or "off" position.<br />
The reset button is used to reset the micropressor.<br />
IF YOU MAKE A CHANGE WITH THE SWITCHES, YOU<br />
MUST USE THE RESET BUTTON TO APPLY CHANGES.<br />
Note: If the power light is on and the operator does<br />
not function, press the reset button once. If this does<br />
not solve the problem, proceed with turning off the<br />
power switch and then switching it back on again.<br />
<strong>Eagle</strong> <strong>Access</strong> <strong>Control</strong> <strong>Systems</strong>, <strong>Inc</strong>. / (800) 708-8848 / www.eagleoperators.com<br />
(11)
Slide Gate Operators / <strong>Eagle</strong> I<br />
____________________<br />
Master and Slave Operation<br />
NOTE: If the Master and Slave Operators are not communicating<br />
properly, verify if they are on the same phase by switching the phase<br />
jumper on either the master or the Slave Unit.<br />
EAGLE<br />
EAGLE<br />
Master Board<br />
Use 20GA stranded wire for<br />
Master/Slave communication<br />
Slave Board<br />
NOTE: The polarity is very<br />
important when connecting<br />
Master / Slave Operations.<br />
Set dip switch #1<br />
(ON) for the Master<br />
Set dip switch #1<br />
(OFF) for the Slave<br />
Use 20GA stranded wire<br />
Master <strong>Control</strong> Options<br />
Use the feature selector to choose available features by designating the various switches (1 through 4).<br />
Gate opening direction, motor brake<br />
and close timer.<br />
Please refer to page 10 for<br />
more information on individual<br />
switch functions.<br />
<strong>Eagle</strong> <strong>Access</strong> <strong>Control</strong> <strong>Systems</strong>, <strong>Inc</strong>. / (800) 708-8848 / www.eagleoperators.com<br />
(12)
Slide Gate Operators / <strong>Eagle</strong> I<br />
____________________<br />
Slave <strong>Control</strong> Options<br />
Switch #1 must be set to the Slave<br />
or to the "off" position.<br />
Switch #2 must be set to the "open<br />
left" or to the "open right" position.<br />
Switch #3 brake on / off.<br />
Switch #4 Not in use.<br />
<strong>Eagle</strong> <strong>Access</strong> <strong>Control</strong> <strong>Systems</strong>, <strong>Inc</strong>. / (800) 708-8848 / www.eagleoperators.com<br />
(13)
Slide Gate Operators / <strong>Eagle</strong> I<br />
____________________<br />
Describing The Output Connections<br />
Entire Output Section<br />
MAG Lock Solenoid Connections (24 VDC)<br />
The <strong>Control</strong> Board provides a 24VDC<br />
and relay output for MAG Locks<br />
or Solenoids.<br />
Alarm (12 VDC)<br />
Safety Alarm: If the gate hits an obstruction<br />
twice while closing or opening, the system will<br />
shut down for 5 minutes. On the Board, you<br />
have two options of reset mode.<br />
Selecting the "off" position will require a<br />
"<strong>manual</strong> reset" of the board if the previous<br />
happens. However, by selecting the "On"<br />
position, the system will automatically reset<br />
itself.<br />
Power (24 VAC)<br />
The <strong>Control</strong> Board provides 24 VAC Power,<br />
which can be used for loop detectors<br />
and receivers.<br />
<strong>Eagle</strong> <strong>Access</strong> <strong>Control</strong> <strong>Systems</strong>, <strong>Inc</strong>. / (800) 708-8848 / www.eagleoperators.com<br />
(14)
Slide Gate Operators / <strong>Eagle</strong> I<br />
____________________<br />
Connecting The <strong>Access</strong>ories<br />
With the exeption of the MAG Lock, all of these accessories can be installed<br />
on the Master or Slave operator.<br />
Photo Eye<br />
MAG Lock<br />
Reverse<br />
Loop<br />
Phantom<br />
Loop<br />
Key Lock Box<br />
Fire Lock Box<br />
Edge Sensor<br />
Exit Loop<br />
Phone Entry<br />
System<br />
<strong>Eagle</strong> <strong>Access</strong> <strong>Control</strong> <strong>Systems</strong>, <strong>Inc</strong>. / (800) 708-8848 / www.eagleoperators.com<br />
(15)
Slide Gate Operators / <strong>Eagle</strong> I<br />
____________________<br />
Description of Inputs<br />
REVERSE LOOP INPUT<br />
Reverse Loop - Momentary or Continuous Signal<br />
This input is active only when the gate is closing or when<br />
its fully open. If this input is active, the close timer is disabled.<br />
All vehicle detectors and photo-eyes should be<br />
connected here. Multiple devices may be connected in<br />
parallel.<br />
KEY / KEYPAD INPUT<br />
Key / Keypad<br />
Timer On - Momentary or Continuous Input<br />
Once activated the gate will fully open. Activation while the<br />
gate is closing will cause the gate to reopen. Continuous<br />
activation while the gate is open will disable the timer to<br />
close function from automatically closing the gate.<br />
Timer Off - Momentary Input<br />
This function must be released and reentered to be<br />
recognized. This input is to be used for COMMAND OPEN<br />
/ COMMAND CLOSE applications. The first signal will cause<br />
the gate to begin opening. The second signal will close the<br />
gate only when the gate is in the fully open position.<br />
Phantom Loop - Momentary or Continuous Signal<br />
This input is active only when the gate is at rest in the<br />
fully open position. The input has no effect on the gate<br />
when fully closed or while closing or opening. Continuous<br />
activation will prevent the gate from moving in the close<br />
direction. When the input is removed normal operation is<br />
resumed. This input is intended for a vehicle loop detector<br />
to sense a vehicle in the gate path. Multiple devices may<br />
be connected in parallel.<br />
Edge Sensor - Momentary or Continuous Signal<br />
This signal is active when the gate is opening and/or<br />
closing.<br />
If activated when the gate is opening:<br />
The gate will stop, pause and reverse in the close<br />
direction for 1 1/2 seconds and stop. Continuous<br />
activation will prevent the gate from moving in the<br />
opening direction. If the second activation occurs before<br />
the limit switch is activated, the gate will stop and reverse<br />
direction for 1 1/2 seconds and stop, thus activating the<br />
alarm mode. At this point the operator must be <strong>manual</strong>ly<br />
reset (ON/OFF) before normal operation can resume.<br />
MULTI-FUNCTION INPUT<br />
Stop - Momentary or Continuous Signal<br />
This function overrides all other signals. Once activated,<br />
the gate will immediately stop and await a new command.<br />
If the stop input is continuously activated, the gate will not<br />
move.<br />
Close - Momentary or Continuous Signal<br />
Once activated the gate will fully close. Activation while<br />
the gate is opening has no effect.<br />
If activated when the gate is closing:<br />
The gate will stop, pause and fully reopen. During this<br />
mode the timer to close, reverse loop, exit loop and<br />
phantom loop are disabled. The Key / Keypad and<br />
Receiver will cause the gate to close if a second<br />
activation occurs before the limit switch is activated. The<br />
gate will then stop and reverse direction for 1 1/2 seconds,<br />
stop again, thus activating the alarm mode. At this point<br />
the operator must be <strong>manual</strong>ly reset (ON/OFF) before<br />
normal operation can resume.<br />
Multiple devices may be connected in parallel to the<br />
Edge Sensor Input.<br />
<strong>Eagle</strong> <strong>Access</strong> <strong>Control</strong> <strong>Systems</strong>, <strong>Inc</strong>. / (800) 708-8848 / www.eagleoperators.com<br />
(16)
Slide Gate Operators / <strong>Eagle</strong> I<br />
____________________<br />
Receiver Connections<br />
The Receiver Terminal is mounted on the control box for easy<br />
installation and is pre-wired for a 3-wire or 4-wire receiver.<br />
3-Wire Connections<br />
4-Wire Connections<br />
(24V)<br />
COMMON<br />
GRD<br />
(24V)<br />
COMMON<br />
GRD<br />
Receiver Connections<br />
on the <strong>Eagle</strong> Diamond<br />
Board<br />
____________________<br />
Gate Travel Distance / Setting The Limit Switches<br />
The limit switches must be set so that the gate stops at the proper<br />
position. Follow these instructions to appropriately set the limit switches.<br />
Adjust cams for<br />
proper stoppage<br />
Limit Switches<br />
Limit Switches<br />
Be sure that the locking plate<br />
is locked into place after each<br />
adjustment<br />
<strong>Eagle</strong> <strong>Access</strong> <strong>Control</strong> <strong>Systems</strong>, <strong>Inc</strong>. / (800) 708-8848 / www.eagleoperators.com<br />
(17)
Slide Gate Operators / <strong>Eagle</strong> I<br />
____________________<br />
The Fail Safe System<br />
The Fail Safe System does not require a crank or special tool to <strong>manual</strong>ly open the gate in case<br />
of emergency. If a situation does arrise, simply turn off the power switch and push open the gate.<br />
____________________<br />
Optional Release Procedure<br />
Using the <strong>Eagle</strong>-2070-Fire Box<br />
Pull Firmly On<br />
The "T" Handle<br />
To Release<br />
The Chain<br />
TURN THE POWER TO THE GATE OPERATOR OFF<br />
AND UNLOCK THE FIRE BOX<br />
THE CHAIN IS HELD IN PLACE BY A SPRING LOADED PIN<br />
Mounting The Secondary Entrapment<br />
Note: <strong>Eagle</strong> <strong>Access</strong> <strong>Control</strong> <strong>Systems</strong>, <strong>Inc</strong>.<br />
recommends the installation of Edge Sensors<br />
on all sliding gate operator systems.<br />
All Contact Sensors<br />
Are Connected To<br />
Edge Sensor Inputs<br />
*<br />
WALL<br />
*<br />
EDGE SENSORS<br />
(TOP VIEW)<br />
* * *<br />
GATE OPENING<br />
*<br />
WALL<br />
<strong>Eagle</strong> Operator<br />
* All Edge Sensors are shown<br />
at recommended locations.<br />
Edge Sensors should be<br />
appropriately installed at<br />
recommended locations to<br />
ensure proper entrapment<br />
protection against injury.<br />
<strong>Eagle</strong> <strong>Access</strong> <strong>Control</strong> <strong>Systems</strong>, <strong>Inc</strong>. / (800) 708-8848 / www.eagleoperators.com<br />
(18)
<strong>Eagle</strong> <strong>Access</strong> <strong>Control</strong> <strong>Systems</strong>, <strong>Inc</strong>.<br />
13286 Paxton Street<br />
Pacoima, CA 91331<br />
Tel: 818-899-2777 Fax: 818-899-2666<br />
Toll Free: 800-708-8848<br />
www.<strong>Eagle</strong>Operators.com