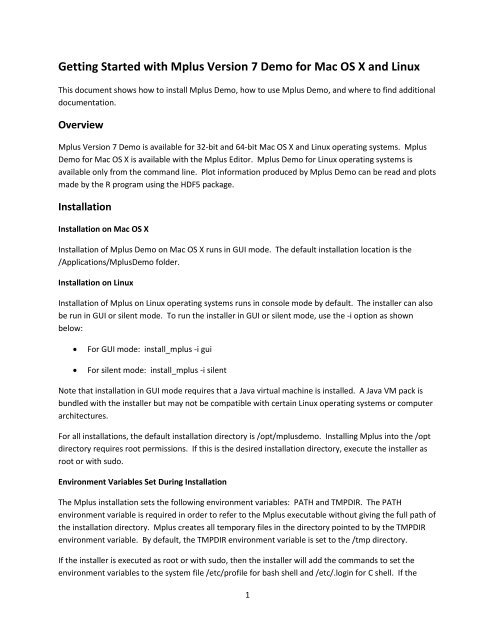
Getting Started with Mplus Version 7 Demo for Mac OS X and Linux
Getting Started with Mplus Version 7 Demo for Mac OS X and Linux
Getting Started with Mplus Version 7 Demo for Mac OS X and Linux

You also want an ePaper? Increase the reach of your titles
YUMPU automatically turns print PDFs into web optimized ePapers that Google loves.
<strong>Getting</strong> <strong>Started</strong> <strong>with</strong> <strong>Mplus</strong> <strong>Version</strong> 7 <strong>Demo</strong> <strong>for</strong> <strong>Mac</strong> <strong>OS</strong> X <strong>and</strong> <strong>Linux</strong><br />
This document shows how to install <strong>Mplus</strong> <strong>Demo</strong>, how to use <strong>Mplus</strong> <strong>Demo</strong>, <strong>and</strong> where to find additional<br />
documentation.<br />
Overview<br />
<strong>Mplus</strong> <strong>Version</strong> 7 <strong>Demo</strong> is available <strong>for</strong> 32-bit <strong>and</strong> 64-bit <strong>Mac</strong> <strong>OS</strong> X <strong>and</strong> <strong>Linux</strong> operating systems. <strong>Mplus</strong><br />
<strong>Demo</strong> <strong>for</strong> <strong>Mac</strong> <strong>OS</strong> X is available <strong>with</strong> the <strong>Mplus</strong> Editor. <strong>Mplus</strong> <strong>Demo</strong> <strong>for</strong> <strong>Linux</strong> operating systems is<br />
available only from the comm<strong>and</strong> line. Plot in<strong>for</strong>mation produced by <strong>Mplus</strong> <strong>Demo</strong> can be read <strong>and</strong> plots<br />
made by the R program using the HDF5 package.<br />
Installation<br />
Installation on <strong>Mac</strong> <strong>OS</strong> X<br />
Installation of <strong>Mplus</strong> <strong>Demo</strong> on <strong>Mac</strong> <strong>OS</strong> X runs in GUI mode. The default installation location is the<br />
/Applications/<strong>Mplus</strong><strong>Demo</strong> folder.<br />
Installation on <strong>Linux</strong><br />
Installation of <strong>Mplus</strong> on <strong>Linux</strong> operating systems runs in console mode by default. The installer can also<br />
be run in GUI or silent mode. To run the installer in GUI or silent mode, use the -i option as shown<br />
below:<br />
<br />
<br />
For GUI mode: install_mplus -i gui<br />
For silent mode: install_mplus -i silent<br />
Note that installation in GUI mode requires that a Java virtual machine is installed. A Java VM pack is<br />
bundled <strong>with</strong> the installer but may not be compatible <strong>with</strong> certain <strong>Linux</strong> operating systems or computer<br />
architectures.<br />
For all installations, the default installation directory is /opt/mplusdemo. Installing <strong>Mplus</strong> into the /opt<br />
directory requires root permissions. If this is the desired installation directory, execute the installer as<br />
root or <strong>with</strong> sudo.<br />
Environment Variables Set During Installation<br />
The <strong>Mplus</strong> installation sets the following environment variables: PATH <strong>and</strong> TMPDIR. The PATH<br />
environment variable is required in order to refer to the <strong>Mplus</strong> executable <strong>with</strong>out giving the full path of<br />
the installation directory. <strong>Mplus</strong> creates all temporary files in the directory pointed to by the TMPDIR<br />
environment variable. By default, the TMPDIR environment variable is set to the /tmp directory.<br />
If the installer is executed as root or <strong>with</strong> sudo, then the installer will add the comm<strong>and</strong>s to set the<br />
environment variables to the system file /etc/profile <strong>for</strong> bash shell <strong>and</strong> /etc/.login <strong>for</strong> C shell. If the<br />
1
installer is executed <strong>with</strong>out root permissions, then either the file .profile (<strong>for</strong> bash shell) or .cshrc (<strong>for</strong> C<br />
shell) is updated <strong>with</strong> the new settings <strong>for</strong> the PATH <strong>and</strong> TMPDIR environment variables.<br />
The following table summarizes these settings:<br />
Running installer... as root or <strong>with</strong> sudo as non-root<br />
For Bash shell<br />
/etc/profile<br />
.profile<br />
For C shell<br />
/etc/.login<br />
.cshrc<br />
Since the settings of these files are only applied during the login process, sourcing the specific file or relogging<br />
in will apply the settings to any opened sessions.<br />
The typical <strong>Mplus</strong> installation installs the <strong>Mplus</strong> executable file, the <strong>Mplus</strong> User's Guide in PDF <strong>for</strong>mat in<br />
the Documentation directory, <strong>and</strong> examples from the <strong>Mplus</strong> User's Guide in the Examples directory.<br />
When disk space is limited, install <strong>Mplus</strong> <strong>with</strong> the minimal option which will install all files except the<br />
<strong>Mplus</strong> examples. This option can be selected after running the <strong>Mplus</strong> installer.<br />
Uninstalling <strong>Mplus</strong><br />
To uninstall <strong>Mplus</strong>, execute the uninstall_mplus comm<strong>and</strong> in the uninstall directory in the <strong>Mplus</strong><br />
installation directory. Note that if root permissions were used when installing <strong>Mplus</strong>, then the same<br />
permissions are required <strong>for</strong> uninstalling <strong>Mplus</strong>.<br />
Running <strong>Mplus</strong><br />
Running <strong>Mplus</strong> on <strong>Mac</strong> <strong>OS</strong> X<br />
Start the <strong>Mplus</strong> Editor <strong>for</strong> <strong>Mac</strong> <strong>OS</strong> X. The <strong>Mplus</strong> Editor can be found in the /Applications/<strong>Mplus</strong><strong>Demo</strong><br />
folder. Create a new file by using the New option under the File menu or open an existing file by using<br />
the Open option under the File menu. To run <strong>Mplus</strong>, click on the Run button. The <strong>Mplus</strong> output file will<br />
be created in the folder where the input resides. When the <strong>Mplus</strong> run finishes, the output file will be<br />
opened in the <strong>Mplus</strong> Editor automatically.<br />
The <strong>Mplus</strong> Editor features keyword highlighting of the <strong>Mplus</strong> comm<strong>and</strong>s.<br />
For in<strong>for</strong>mation on how to use <strong>Mplus</strong> from the comm<strong>and</strong> line on <strong>Mac</strong> <strong>OS</strong> X, please refer to the tutorial<br />
<strong>for</strong> using <strong>Mplus</strong> on <strong>Mac</strong> <strong>OS</strong> X on the <strong>Mplus</strong> website at www.statmodel.com/mactutorial.shtml.<br />
Running <strong>Mplus</strong> from the Comm<strong>and</strong> Line on <strong>Linux</strong><br />
<strong>Mplus</strong> <strong>Version</strong> 7 <strong>Demo</strong> is available <strong>for</strong> <strong>Linux</strong> operating systems from the comm<strong>and</strong> line.<br />
Following are steps to use <strong>Mplus</strong> from the comm<strong>and</strong> line:<br />
1. Open a comm<strong>and</strong> prompt.<br />
2
2. Set the environment variables <strong>for</strong> <strong>Mplus</strong> (if not already set).<br />
3. Run <strong>Mplus</strong>.<br />
To run <strong>Mplus</strong>, type the following at the prompt<br />
mpdemo <br />
substituting <strong>with</strong> the name of the text file containing <strong>Mplus</strong> instructions that you<br />
wish to run. An output file <strong>with</strong> the same name as the input file but <strong>with</strong> the OUT extension will be<br />
created in this directory. The input files <strong>for</strong> the examples from the <strong>Mplus</strong> User's Guide have the<br />
extension INP. <strong>Mplus</strong> input files can be edited using any text editor.<br />
Environment Variables <strong>for</strong> <strong>Mplus</strong><br />
<strong>Mplus</strong> uses the following environment variables. For instructions on setting environment variables,<br />
refer to the section on Setting Environment Variables.<br />
If the TMPDIR environment variable is set, then all <strong>Mplus</strong> temporary files will be created in that<br />
directory. If TMPDIR is not set, then some <strong>Mplus</strong> temporary files will be created in the /tmp folder <strong>and</strong><br />
others will be created in the directory where <strong>Mplus</strong> is running.<br />
Other environment variables used by <strong>Mplus</strong> are: TERM, COLORTERM, MPLUS_TERM, MPLUS_TERM_X,<br />
<strong>and</strong> MPLUS_TERM_T. Please refer to the section about Multiple Processes in <strong>Mplus</strong> <strong>with</strong> PROCESSOR<br />
(STARTS) <strong>for</strong> more in<strong>for</strong>mation about how these variables are used.<br />
Stack Size <strong>and</strong> <strong>Mplus</strong> on <strong>Linux</strong><br />
Some <strong>Mplus</strong> runs may require a bigger stack size than the default stack size. These runs usually result in<br />
an incomplete output file <strong>and</strong> 'segmentation fault' appearing in the comm<strong>and</strong> prompt window. The<br />
stack size can be increased <strong>with</strong> the ulimit comm<strong>and</strong> in bash shell or the limit comm<strong>and</strong> in C shell. The<br />
default stack size varies. To check the stack size, use ulimit -a in bash shell or limit stacksize in C shell.<br />
Multiple Processes in <strong>Mplus</strong> <strong>with</strong> PROCESSOR (STARTS)<br />
The default terminal program used by the PROCESSOR (STARTS) feature is determined from the setting<br />
<strong>for</strong> the TERM environment variable.<br />
<strong>Mac</strong> <strong>OS</strong> X<br />
On <strong>Mac</strong> <strong>OS</strong> X, if the setting <strong>for</strong> the TERM environment variable is set to xterm or xterm-color, then the<br />
xterm will be used <strong>for</strong> the new <strong>Mplus</strong> processes. If TERM is not set to either of these settings, then the<br />
shell comm<strong>and</strong> interpreter sh will be used. This setting will not open a new window <strong>and</strong> screen printout<br />
from the <strong>Mplus</strong> processes will come out in no particular order.<br />
3
The default terminal program <strong>for</strong> the PROCESSOR STARTS feature can be overridden by setting the<br />
MPLUS_TERM environment variable. The setting <strong>for</strong> MPLUS_TERM should point to the terminal<br />
program to use. The MPLUS_TERM_X environment variable must also be set to specify the execute<br />
option of the terminal program. The MPLUS_TERM_T environment variable can be set to specify the<br />
title option of the terminal program. The MPLUS_TERM_X variable is required if MPLUS_TERM is set;<br />
the MPLUS_TERM_T variable is optional.<br />
A special script, called start<strong>Mplus</strong>, is provided in the <strong>Mplus</strong> installation directory <strong>for</strong> starting new <strong>Mplus</strong><br />
processes <strong>with</strong> the Terminal application on <strong>Mac</strong> <strong>OS</strong> X. To use this script, set the MPLUS_TERM variable<br />
to 'applescript' <strong>and</strong> both MPLUS_TERM_X <strong>and</strong> MPLUS_TERM_T to 'startMpus'. The new Terminal<br />
windows will not close by default when the new <strong>Mplus</strong> processes have terminated.<br />
<strong>Linux</strong><br />
For <strong>Linux</strong> operating systems, if the setting is equal to xterm, then xterm will be used. If TERM is not<br />
set to xterm, then the shell comm<strong>and</strong> interpreter sh will be used. This setting will not open a new<br />
window <strong>and</strong> screen printout from the <strong>Mplus</strong> processes will come out in no particular order.<br />
The default terminal program <strong>for</strong> the PROCESSOR STARTS feature can be overridden by setting the<br />
MPLUS_TERM environment variable. The setting <strong>for</strong> MPLUS_TERM should point to the terminal<br />
program to use. The recognized programs are: gnome-terminal, konsole (<strong>for</strong> KDE desktops), xfce4-<br />
terminal, <strong>and</strong> xterm. For all other terminal programs, the MPLUS_TERM_X environment variable must<br />
also be set to specify the execute option of the terminal program. The MPLUS_TERM_T environment<br />
variable can be set to specify the title option of the terminal program. The MPLUS_TERM_X variable is<br />
required if MPLUS_TERM is set; the MPLUS_TERM_T variable is optional.<br />
The following table summarizes which terminal programs will be used:<br />
Environment Variable Settings<br />
TERM=xterm<br />
TERM=something else<br />
TERM not set<br />
MPLUS_TERM=gnome-terminal<br />
MPLUS_TERM=xfce4-terminal<br />
MPLUS_TERM=konsole<br />
MPLUS_TERM=xterm<br />
MPLUS_TERM=something else<br />
Terminal Program Used<br />
Xterm<br />
Sh<br />
Sh<br />
gnome-terminal<br />
xfce4-terminal<br />
Konsole<br />
Xterm<br />
(required) MPLUS_TERM_X variable<br />
(optional) MPLUS_TERM_T variable<br />
4
<strong>Mplus</strong> Plot Capabilities<br />
<strong>Mplus</strong> <strong>for</strong> <strong>Mac</strong> <strong>OS</strong> X <strong>and</strong> <strong>Linux</strong> operating systems does not come <strong>with</strong> the plot capabilities provided as<br />
part of the <strong>Mplus</strong> Editor <strong>for</strong> the Windows version of <strong>Mplus</strong>. Instead, the GH5 file produced by the PLOT<br />
comm<strong>and</strong> can be read <strong>and</strong> plots made by the R program using the HDF5 package. For more in<strong>for</strong>mation,<br />
please visit the <strong>Mplus</strong>-R page on the <strong>Mplus</strong> website at www.statmodel.com/mplus-R/.<br />
Setting Environment Variables<br />
The comm<strong>and</strong> <strong>and</strong> syntax <strong>for</strong> setting <strong>Linux</strong> environment variables will be given <strong>for</strong> the two most popular<br />
shells which are bash shell <strong>and</strong> C shell. For other shells, please consult the man pages <strong>for</strong> that shell by<br />
typing 'man shellname'.<br />
For bash shell:<br />
<br />
export MPLUS_TERM=xterm<br />
For C shell:<br />
<br />
set MPLUS_TERM=xterm<br />
The comm<strong>and</strong>s given above can be entered into .bashrc <strong>for</strong> bash shell or .cshrc <strong>for</strong> C shell. After they<br />
are added to the .bashrc or .cshrc, the settings will automatically apply every time a new shell is opened<br />
<strong>and</strong> need not be set manually.<br />
Additional Documentation<br />
The Documentation directory contains the <strong>Mplus</strong> User's Guide <strong>for</strong> <strong>Version</strong> 7 in PDF <strong>for</strong>mat. For <strong>Mplus</strong><br />
updates, please check the Support page on the <strong>Mplus</strong> website at www.statmodel.com. Updates to the<br />
R functions are available on the <strong>Mplus</strong>-R page at www.statmodel.com/mplus-R/.<br />
<strong>Mplus</strong> Diagrammer, <strong>Version</strong> 1.01, November 2012<br />
The <strong>Mplus</strong> Diagrammer can be used to draw an input diagram, to view a diagram created from an<br />
analysis, <strong>and</strong> to view a diagram created using an input <strong>with</strong>out an analysis. In <strong>Version</strong> 1, diagrams are<br />
available <strong>for</strong> the types of models specified in Chapters 3, 5, <strong>and</strong> 6 of the <strong>Mplus</strong> User’s Guide. The<br />
diagram along <strong>with</strong> the corresponding input file can be saved <strong>for</strong> future use. The diagram can be saved<br />
as a PDF <strong>for</strong> publication.<br />
Input Diagram<br />
The Diagrammer uses a set of drawing tools to draw a diagram. Once the Diagrammer is opened, the<br />
input diagram can be drawn using a set of drawing tools that can be accessed via the toolbar, menus,<br />
<strong>and</strong> pop-up menus. The toolbar buttons <strong>and</strong> menu items available <strong>for</strong> drawing are: Move tool, Draw<br />
square, Draw circle, Draw factor model, Draw growth model, Draw path, Draw covariance, Draw<br />
residual, <strong>and</strong> Add caption. All of the toolbar buttons are shown in the picture below.<br />
5
To draw a diagram of a factor model, click on the Draw factor model button or select Draw factor model<br />
from the Diagram menu <strong>and</strong> then click on the open page. A prompt <strong>for</strong> the number of observed<br />
variables will appear followed by a prompt asking whether default variable names should be used or<br />
variables names should be entered. If the prompt Enter variable names is selected, a prompt <strong>for</strong> the<br />
name of the factor is followed by a prompt <strong>for</strong> the names of the observed variables. A second factor<br />
model can be added by clicking again on the page. To move the factor model, right-click on the factor<br />
circle or on any of the factor indicator squares <strong>and</strong> choose Select factor/growth model. This activates<br />
the Move tool. Click on the part of the page where you want the factor model to be placed or drag it<br />
there. To deselect the factor model, right-click anywhere on the page <strong>and</strong> select Deselect all. An<br />
observed variable can be added to the model by clicking on the Draw square button or selecting Draw<br />
square from the Diagram menu. An arrow can be used to connect the factor to the observed variable by<br />
clicking on the Draw path button or selecting Draw path from the Diagram menu. When Draw path is<br />
selected, click on the object from which the arrow originates <strong>and</strong> pull the arrow head to the object<br />
where the arrow ends. Click on that object. In addition to the drawing tools, pop-up menus are<br />
available. Right-clicking on an object or a blank area in the diagram brings up pop-up menus showing all<br />
available options. When using a one-button <strong>Mac</strong> mouse, press the control key while pressing the mouse<br />
button to bring up the pop-up menus. The combination of the control key <strong>and</strong> mouse click is the same<br />
as a right-click on a two-button mouse.<br />
While a diagram is being drawn on the left-h<strong>and</strong> side of the screen, the MODEL comm<strong>and</strong> is being<br />
written on the right-h<strong>and</strong> side of the screen. When the input diagram is complete, the rest of the <strong>Mplus</strong><br />
language can be added to the right-h<strong>and</strong> side of the screen. The analysis can be run by clicking on the<br />
RUN button. A file <strong>with</strong> a dgm extension is created that contains the diagram. The diagram can also be<br />
saved as a PDF using the Export to PDF option of the FILE menu. To make changes to the diagram after it<br />
is opened, click on the Input mode menu item of the Diagram menu. This option switches the diagram<br />
from an output diagram to an input diagram where changes to the diagram can be made. The input file<br />
is shown on the right-h<strong>and</strong> side of the screen. Prior to the analysis, the diagram <strong>and</strong> input file can be<br />
saved by using the Save option of the File menu. The file has an mdg extension. It contains both the<br />
diagram <strong>and</strong> the input file.<br />
Output Diagram<br />
The Diagrammer can be used to view a diagram created from an analysis. This is the default. For other<br />
choices, see the <strong>Mplus</strong> menu in the <strong>Mplus</strong> Editor. To use the<br />
Diagrammer to view a diagram, open an input <strong>and</strong> click on the RUN button. Once the analysis is<br />
completed, the output diagram will open automatically behind the output file. The diagram can be<br />
edited using the drawing tools described above. Parameter estimates <strong>and</strong> st<strong>and</strong>ard errors are printed on<br />
the diagram as the default. The View menu shows the menu items <strong>for</strong> changing what is printed on the<br />
diagram. To edit the diagram, select Input mode from the Diagram menu. Then select any of the<br />
drawing tools, <strong>for</strong> example, Draw path, to change the diagram. When a change is made to the diagram,<br />
the corresponding change is made to the input file. If a model contains parameter labels, they can be<br />
added to the diagram by selecting Show parameter labels from the View menu. A title can be added to<br />
the diagram by using the Add caption button or menu item. Once the diagram has been changed, go to<br />
the input file <strong>and</strong> click on the RUN button to obtain the diagram <strong>with</strong> the new parameter estimates <strong>and</strong><br />
st<strong>and</strong>ard errors.<br />
6
A file <strong>with</strong> a dgm extension is created that contains the diagram <strong>and</strong> the input file. The diagram can also<br />
be saved as a PDF using the Export to PDF option of the FILE menu. To make changes to the diagram<br />
after it is opened, click on the Input mode menu item of the Diagram menu. This option switches the<br />
diagram from an output diagram to an input diagram where changes to the diagram can be made. The<br />
window on the right-h<strong>and</strong> side shows the input file.<br />
Diagram From Input<br />
The Diagrammer can be used to view a diagram created using an input <strong>with</strong>out an analysis, <strong>with</strong> or<br />
<strong>with</strong>out data. Open an input file <strong>and</strong> go to the <strong>Mplus</strong><br />
menu. Select Get diagram <strong>with</strong>out analysis (data) or Get diagram <strong>with</strong>out analysis (no data). Then click<br />
on the RUN button. Once the input is processed, the diagram will be opened behind the output file.<br />
Changes to the diagram can be made in two ways. The first way is to open the input file, make changes<br />
to the input, <strong>and</strong> process the input. The second way is to edit the diagram <strong>and</strong> save the changes to the<br />
diagram. The diagram can be edited using the drawing tools described above. To edit the diagram, select<br />
Input mode from the Diagram menu. Then select any of the drawing tools, <strong>for</strong> example, the arrow to<br />
change the diagram. If a model contains parameter labels, they can be added to the diagram by<br />
selecting Show parameter labels from the View menu. A title can be added to the diagram by using the<br />
Add caption button or menu item. Once the diagram has been changed, save the diagram <strong>with</strong> an mdg<br />
extension by using the Save option of the File menu.<br />
7