Manual - Virgin Mobile
Manual - Virgin Mobile
Manual - Virgin Mobile

You also want an ePaper? Increase the reach of your titles
YUMPU automatically turns print PDFs into web optimized ePapers that Google loves.
USER GUIDE
WELCOME<br />
Thank you for choosing the CDM-8610, our new model,<br />
developed by top researchers to support the CDMA2000 1X<br />
system through Qualcomm-manufactured MSM6050 chips<br />
and CDMA technologies. This product allows for a GUI<br />
animation menu.<br />
Among its many advanced features, the T9 input mode<br />
makes it much easier to enter letters, with proven<br />
technologies including:<br />
Full graphic display of 9 text input lines and 1 icon line<br />
with variable font size.<br />
Easy to enter letters through the T9 text input mode.<br />
GUI & Animation display compliant with CDMA2000 1X.<br />
Full graphic main display - 65K color.<br />
Navigation key and 25 keys aligned for more convenience.<br />
Advanced 2-way speakerphone.<br />
Text messaging and call waiting.<br />
IMPORTANT INFORMATION<br />
This CDM-8610 user guide contains very important<br />
information about how to handle and use the product.<br />
So please read this manual thoroughly, pay attention to the<br />
warranty on the back page and be alert to the exclusions<br />
and limitations of your warranty, which are related with the<br />
unauthorized use of components.<br />
TABLE OF CONTENTS<br />
CHAPTER 1. BEFORE USING YOUR PHONE .................................5<br />
INSIDE THE PACKAGE .....................................................................................6<br />
HANDSET DESCRIPTION.................................................................................7<br />
THE FUNCTION KEYS.............................................................................................8<br />
Chapter 1<br />
DISPLAY INDICATORS ...........................................................................................9<br />
BATTERY USAGE...........................................................................................10<br />
BATTERY INSTALLATION ....................................................................................10<br />
BATTERY REMOVAL.............................................................................................10<br />
BATTERY CHARGING ...........................................................................................11<br />
POWER CONNECTION ......................................................................................11<br />
BATTERY TALK TIMES .......................................................................................11<br />
BATTERY STANDBY TIMES ...............................................................................11<br />
BATTERY HANDLING INFORMATION..........................................................12<br />
DOs.........................................................................................................................12<br />
DON’Ts...................................................................................................................12<br />
CHAPTER 2. BASIC OPERATION ..................................................13<br />
TURNING THE PHONE ON / OFF ..................................................................14<br />
TURNING THE PHONE ON...................................................................................14<br />
TURNING THE PHONE OFF..................................................................................14<br />
YOUR VIRGIN MOBILE ACCOUNT ......................................................................14<br />
ACCESSING THE MAIN MENU .....................................................................15<br />
MENU SUMMARY .........................................................................................16<br />
BASIC FUNCTIONS ........................................................................................19<br />
MAKING A CALL ...................................................................................................19<br />
SPEAKERPHONE...................................................................................................20<br />
PAUSE FEATURE ..................................................................................................20<br />
ANSWERING A CALL............................................................................................21<br />
CALLER ID FUNCTION..........................................................................................21<br />
CALL WAITING FUNCTION ..................................................................................21<br />
ADJUSTING VOLUME ..........................................................................................22<br />
Chapter 2<br />
SILENCER MODE ..................................................................................................22<br />
LOCK ......................................................................................................................22<br />
DURING A CALL .............................................................................................23<br />
MUTE(UNMUTE)...................................................................................................23<br />
MESSAGING .........................................................................................................23<br />
MY PHONE # .........................................................................................................23<br />
MAKING AN EMERGENCY CALL..................................................................24<br />
911 IN LOCK MODE ..............................................................................................24<br />
911 USING ANY AVAILABLE SYSTEM ...............................................................24<br />
CHAPTER 3. MEMORY FUNCTION...............................................25<br />
STORING A PHONE NUMBER ......................................................................26<br />
ENTERING<br />
Chapter<br />
LETTERS, NUMBERS & SYMBOLS ...........................................27<br />
3<br />
STANDARD INPUT MODE....................................................................................28<br />
T9 INPUT MODE....................................................................................................29<br />
NUMERIC MODE...................................................................................................30<br />
SYMBOL MODE ....................................................................................................30<br />
MAKING A CALL THROUGH THE PHONE BOOK ........................................31<br />
SPEED DIALING ....................................................................................................31<br />
1
TABLE OF CONTENTS<br />
TABLE OF CONTENTS<br />
CHAPTER 4. MENU FUNCTION ....................................................33<br />
VIRGIN MOBILE ACCOUNT...........................................................................34<br />
CHECKING YOUR ACCOUNT BALANCE.............................................................34<br />
TOP-UP YOUR ACCOUNT ....................................................................................34<br />
VIRGIN ALERTS..............................................................................................35<br />
TO VIEW A STORED VIRGIN ALERT....................................................................35<br />
RECENT CALLS ..............................................................................................36<br />
ALL CALLS.............................................................................................................36<br />
MISSED CALLS .....................................................................................................37<br />
INCOMING CALLS ................................................................................................38<br />
OUTGOING CALLS ...............................................................................................39<br />
CONTACTS .....................................................................................................40<br />
FIND BY NAME......................................................................................................40<br />
FIND BY NUMBER.................................................................................................41<br />
ADD NEW ..............................................................................................................42<br />
GROUP...................................................................................................................42<br />
ADD NEW GROUP .............................................................................................42<br />
CHANGE GROUP NAME ....................................................................................43<br />
ERASE GROUP ...................................................................................................43<br />
SPEED DIAL.................................................................................................44<br />
MSG.GROUP .........................................................................................................44<br />
ADD NEW MSG. GROUP ...................................................................................44<br />
CHANGE MSG. GROUP NAME..........................................................................45<br />
SEND TEXT GROUP ...........................................................................................45<br />
ERASE GROUP ...................................................................................................45<br />
MY PHONE # .........................................................................................................46<br />
TOOLS.............................................................................................................47<br />
ALARM...................................................................................................................47<br />
Chapter 4<br />
SCHEDULER ..........................................................................................................49<br />
ADD EVENT ........................................................................................................49<br />
VIEW EVENT LIST...............................................................................................50<br />
CALCULATOR........................................................................................................51<br />
STOPWATCH.........................................................................................................52<br />
WORLD CLOCK .....................................................................................................52<br />
SETTINGS .......................................................................................................53<br />
SOUNDS ................................................................................................................53<br />
RINGTONES........................................................................................................53<br />
MESSAGES.........................................................................................................53<br />
VOICEMAIL.........................................................................................................54<br />
VOLUME.............................................................................................................54<br />
TONE LENGTH ...................................................................................................56<br />
SILENCER MODE ...............................................................................................56<br />
DISPLAY.................................................................................................................57<br />
MENU STYLE......................................................................................................57<br />
GRAPHICS ..........................................................................................................57<br />
SUB SCREEN......................................................................................................58<br />
GREETING MESSAGE ........................................................................................58<br />
CONTRAST .........................................................................................................59<br />
BACKLIGHT ........................................................................................................59<br />
CALL OPTIONS......................................................................................................60<br />
CALL ANSWER...................................................................................................60<br />
ACTIVE FLIP........................................................................................................60<br />
AUTO ANSWER..................................................................................................61<br />
AUTO RETRY ......................................................................................................61<br />
LOCATION ..........................................................................................................62<br />
2<br />
SECURITY ..............................................................................................................63<br />
PHONE LOCK .....................................................................................................63<br />
RESTRICT ...........................................................................................................63<br />
CHANGE CODE ..................................................................................................65<br />
SPECIAL NUMBERS...........................................................................................65<br />
ERASE ALL .........................................................................................................66<br />
Chapter 4<br />
RESET TO DEFAULT SETTINGS.........................................................................66<br />
PHONE INFO..........................................................................................................67<br />
S/W VERSION.....................................................................................................67<br />
H/W VERSION ....................................................................................................67<br />
CHAPTER 5. GAMES......................................................................69<br />
GAMES............................................................................................................70<br />
BLACKJACK...........................................................................................................70<br />
Chapter 5<br />
ORGANIZATION OF THE MENU ........................................................................70<br />
DIRECTION OF ACTION .....................................................................................71<br />
MAGIC HEXA.........................................................................................................72<br />
DIRECTION .........................................................................................................72<br />
CHARACTERS.....................................................................................................72<br />
OBSTRUCTION BLOCK ......................................................................................72<br />
CHAPTER 6. VOICEMAIL AND TEXT MESSAGING.....................73<br />
WHEN A NEW MESSAGE ARRIVES .............................................................74<br />
VOICEMAIL .....................................................................................................74<br />
SEND TEXT MSG......................................................................................................75<br />
INBOX........................................................................................................................76<br />
ERASE.................................................................................................................76<br />
FORWARD..........................................................................................................76<br />
SAVE TO CONTACT............................................................................................77<br />
SAVE ...................................................................................................................77<br />
VIRGIN ALERTS ........................................................................................................78<br />
VIRGIN ALERTS.....................................................................................................78<br />
OUTBOX....................................................................................................................79<br />
CHECKING SENT TEXT MESSAGES ...................................................................79<br />
ERASE.................................................................................................................79<br />
SEND TO.............................................................................................................79<br />
Chapter 6<br />
SAVE TO CONTACT............................................................................................80<br />
SAVE ..................................................................................................................80<br />
SAVED .......................................................................................................................81<br />
SAVED....................................................................................................................81<br />
ERASE MSGS............................................................................................................82<br />
ERASE MESSAGES...............................................................................................82<br />
MSG SETTINGS........................................................................................................83<br />
MSG SOUNDS ......................................................................................................83<br />
AUTO TEXT ...........................................................................................................83<br />
SAVE TO OUTBOX................................................................................................84<br />
AUTO ERASE.........................................................................................................84<br />
INBOX .................................................................................................................84<br />
OUTBOX .............................................................................................................84<br />
3
TABLE OF CONTENT<br />
CHAPTER<br />
Chapter<br />
7. VIRGINXTRAS ..........................................................85<br />
7<br />
START VIRGINXTRAS....................................................................................86<br />
START VIRGINXTRAS ..........................................................................................86<br />
VIRGINXTRAS ................................................................................................87<br />
ACCESSING VIRGINXTRAS .................................................................................87<br />
C<br />
Ḥ<br />
1<br />
CHAPTER 8. SAFETY AND WARRANTY ......................................89<br />
SAFETY INFORMATION FOR WIRELESS HANDHELD PHONES ................90<br />
EXPOSURE TO RADIO FREQUENCY SIGNALS.................................................90<br />
ANTENNA CARE.................................................................................................90<br />
DRIVING SAFETY ..................................................................................................91<br />
ELECTRONIC DEVICES .........................................................................................92<br />
PACEMAKERS ....................................................................................................92<br />
OTHER MEDICAL DEVICES ...............................................................................92<br />
POSTED FACILITIES...........................................................................................92<br />
OTHER SAFETY GUIDELINES ..............................................................................93<br />
AIRCRAFT ...........................................................................................................93<br />
BLASTING AREAS ..............................................................................................93<br />
POTENTIALLY EXPLOSIVE ATMOSPHERES .....................................................93<br />
Chapter 8<br />
PRECAUTIONS ......................................................................................................94<br />
SAFETY INFORMATION FOR FCC RF EXPOSURE ......................................95<br />
CAUTIONS.............................................................................................................95<br />
BODY-WORN OPERATION ................................................................................95<br />
SAR INFORMATION.......................................................................................96<br />
FDA CONSUMER<br />
Chapter<br />
UPDATE ............................................................................98<br />
7<br />
PROTECT YOUR WARRANTY .....................................................................102<br />
12-MONTH LIMITED WARRANTY...............................................................103<br />
Chapter 1<br />
BEFORE USING<br />
YOUR PHONE<br />
This chapter provides important information about using the<br />
CDM-8610 including:<br />
INSIDE THE PACKAGE<br />
HANDSET DESCRIPTION<br />
BATTERY USAGE<br />
BATTERY HANDLING INFORMATION<br />
“Licensed by QUALCOMM Incorporated under one or more of the following Patents : U.S.Patent No.<br />
4,901,307 U.S.Patent No. 5,056,109 U.S.Patent No. 5,099,204 U.S. Patent No. 5,101,501 U.S. Patent No.<br />
5,103,459 U.S. Patent No. 5,107,225 U.S.Patent No. 5,109,390.”<br />
4<br />
5
INSIDE THE PACKAGE<br />
HANDSET DESCRIPTION<br />
C<br />
H<br />
1<br />
This package should include all items pictured below.<br />
If any are missing or different, immediately contact the retailer where<br />
you purchased the phone.<br />
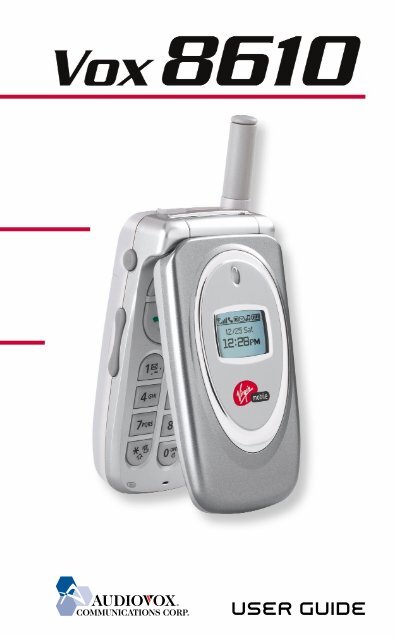
This phone is a tri mode CDMA2000 1X digital phone. The CDM-8610<br />
weighs 3.89 oz. and the dimensions are 1.82” x 3.56” x 0.92”.<br />
C<br />
H<br />
1<br />
Earpiece<br />
65K Color<br />
LCD Display<br />
Antenna<br />
Handset<br />
AC Charger<br />
External<br />
LCD Clock<br />
Send Key<br />
Function Keys<br />
Navigation &<br />
OK<br />
END/<br />
Power Key<br />
CLR/<br />
Speaker Key<br />
User <strong>Manual</strong><br />
Volume Keys<br />
Standard Battery<br />
Microphone<br />
6<br />
7
HANDSET DESCRIPTION<br />
HANDSET DESCRIPTION<br />
C<br />
H<br />
1<br />
Menu<br />
Contacts<br />
Icons<br />
Displays various icons.<br />
Text & Graphic area<br />
Displays instructions and messages.<br />
Soft keys<br />
Shows the functions currently<br />
assigned to each soft key.<br />
With the phone closed, press and hold this button<br />
to change the look of the External LCD clock.<br />
DISPLAY INDICATORS<br />
Signal Strength - Current signal strength -<br />
the more lines, the stronger the signal.<br />
Service Indicator<br />
Indicates call is in progress, indicates the<br />
phone cannot receive a signal from the network at<br />
the moment.<br />
C<br />
H<br />
1<br />
Message<br />
New text message.<br />
THE FUNCTION KEYS<br />
Digital mode - Phone is operating in digital mode<br />
or 1x service area.<br />
<strong>Virgin</strong>Xtras<br />
Balance<br />
Recent Calls<br />
Messaging<br />
Press to make or receive a call.<br />
Press to turn the phone on, to end a call or to<br />
return to the initial page. Press and hold to turn<br />
the phone off.<br />
(Left Soft Key) Press to access the Main Menu or<br />
the functions displayed at the bottom of your<br />
screen.<br />
Press to clear a digit from the display, to return<br />
to the previous page, or to enable speakerphone<br />
mode.<br />
Press and hold to enter silencer mode.<br />
Press and hold to enter lock mode.<br />
At the main screen<br />
- Press and hold UP key to access the<br />
Balance and LEFT key for <strong>Virgin</strong>Xtras.<br />
Press DOWN key to access Recent<br />
Calls and RIGHT key for Messaging.<br />
Inside the menu<br />
- Within a menu, use to scroll through<br />
menu options, or to select a function<br />
displayed on the screen.<br />
(Right Soft Key) Press to access the Main Menu<br />
or the functions displayed at the bottom of your<br />
screen.<br />
Battery - Battery charging level -<br />
the more blocks, the stronger the charge.<br />
Mute<br />
Phone is mute during a call.<br />
Ringtone Off - Appears when Ringtone Off is<br />
selected as the ring mode.<br />
Emergency Call<br />
Blinks when an emergency call is in progress.<br />
Voicemail<br />
New Voicemail.<br />
Vibrate On & Silencer Mode - Phone will not<br />
emit sounds. Phone will vibrate when an incoming<br />
call is received.<br />
Schedule<br />
Appears when either an event or an alarm is set.<br />
Ring Mode - Appears when a ringtone has been<br />
selected and ringtone mode is ON.<br />
High & Vibrator Mode Icon - Appears when High<br />
& Vibrator Mode is selected as the ring mode.<br />
Speakerphone Icon<br />
Phone is in speakerphone mode.<br />
GPS Icon<br />
Indicates the Location Service of your phone is<br />
disabled/enabled.<br />
8<br />
9
BATTERY USAGE<br />
BATTERY USAGE<br />
C<br />
H<br />
1<br />
BATTERY INSTALLATION<br />
1 u Place the battery on the back of the handset<br />
and slide into place. v Push the battery down<br />
until it locks into place.<br />
BATTERY CHARGING<br />
POWER CONNECTION<br />
1 Plug the AC charger into a standard outlet.<br />
C<br />
H<br />
1<br />
BATTERY REMOVAL<br />
• Fully charge the battery before using – it is not charged when<br />
purchased.<br />
• The battery will charge more quickly with the phone turned off.<br />
1 u Pull down the release latch, lift up the<br />
battery and v remove the battery from the<br />
handset.<br />
BATTERY TALK TIMES<br />
The operating time is subject to your handset usage and configuration.<br />
Battery<br />
PCS<br />
STD 970 mAh<br />
EXT 1700 mAh<br />
200m<br />
350m<br />
BATTERY STANDBY TIMES<br />
The operating time is subject to your handset usage and configuration.<br />
If the battery is not correctly placed in the compartment, the<br />
handset will not turn on and/or the battery may detach during use.<br />
Battery<br />
STD 970 mAh<br />
EXT 1700 mAh<br />
CDMA<br />
140hour<br />
240hour<br />
These times are for a new battery. Talking and Standby times decrease<br />
over the battery's lifetime.<br />
10<br />
11
BATTERY HANDLING INFORMATION<br />
C<br />
H<br />
1<br />
DOs<br />
l Only use the battery and charger approved by the<br />
manufacturer.<br />
l Only use the battery for its original purpose.<br />
l Try to keep batteries in a temperature between 41ºF<br />
(5ºC ) and 95ºF (35ºC).<br />
l If the battery is stored in temperatures above or below<br />
the recommended range, give it time to warm up or<br />
cool down before using.<br />
l Store the discharged battery in a cool, dark, and dry<br />
place.<br />
l Purchase a new battery when its operating time<br />
gradually decreases after fully charging.<br />
l Properly dispose of the battery according to local laws.<br />
Chapter 2<br />
BASIC OPERATION<br />
C<br />
H<br />
2<br />
DON’Ts<br />
l<br />
l<br />
l<br />
l<br />
Don’t attempt to disassemble the battery – it is a<br />
sealed unit with no serviceable parts.<br />
Don’t accidentally short circuit the battery by carrying it<br />
in your pocket or purse with other metallic objects such<br />
as coins, clips and pens. This may critically damage<br />
the battery.<br />
Don’t leave the battery in hot or cold temps. Otherwise,<br />
it could significantly reduce the capacity and lifetime of<br />
the battery.<br />
Don't dispose of the battery in a fire.<br />
This chapter addresses and explains the basic features of your phone<br />
including<br />
TURNING THE PHONE ON / OFF<br />
ACCESSING THE MAIN MENU<br />
MENU SUMMARY<br />
BASIC FUNCTIONS<br />
DURING A CALL<br />
MAKING AN EMERGENCY CALL<br />
12<br />
13
TURNING THE PHONE ON / OFF<br />
ACCESSING THE MAIN MENU<br />
C<br />
H<br />
2<br />
TURNING THE PHONE ON<br />
1 Press and hold , until your “Power On” logo<br />
appears and the tone sounds.<br />
• If “Password” appears on the display enter your<br />
4-digit password to unlock your phone. (see pg. 63 for more<br />
information on locking your phone.)<br />
• The default password is the last 4 digits of your phone number.<br />
Your phone can be customized via the menu. Each function can be<br />
accessed by scrolling with the Navigation Key or by pressing the<br />
number that corresponds with the menu item.<br />
Balance<br />
Top-Up<br />
Messaging<br />
<strong>Virgin</strong>Xtras<br />
Recent Calls<br />
Contacts<br />
Tools<br />
Settings<br />
C<br />
H<br />
2<br />
TURNING THE PHONE OFF<br />
Games<br />
1 Press and hold , until “Power Off” logo<br />
appears.<br />
1 To access the menu in idle mode,<br />
press [MENU].<br />
• Immediately change or recharge the battery when “Low<br />
Battery Warning Power Off” appears on the display.<br />
Memory may possibly be damaged if the phone turns off<br />
due to the battery completely draining.<br />
• Turn the phone off before removing or replacing the battery.<br />
If the phone is on, unsaved data may be lost.<br />
YOUR VIRGIN MOBILE ACCOUNT<br />
2<br />
Press the Navigation Key to scroll through the<br />
menu.<br />
3 To return to the previous page, press [CLR].<br />
To exit the current menu and return to the idle<br />
mode, press .<br />
You can manage your <strong>Virgin</strong> <strong>Mobile</strong> account from your phone. The basic<br />
tasks are summarized below. For more information about your account, visit<br />
www.virginmobileusa.com.<br />
4 Press [OK] to enter a function when its main<br />
page is displayed.<br />
CHECKING YOUR VIRGIN MOBILE ACCOUNT BALANCE<br />
You can check the amount of money remaining in your <strong>Virgin</strong> <strong>Mobile</strong> account.<br />
From the main screen, press and hold . Or, select Menu --> Balance.<br />
TOP-UP YOUR ACCOUNT<br />
Top-Up is how you add money to your <strong>Virgin</strong> <strong>Mobile</strong> account. It's like filling up<br />
your gas tank before you hit the road. You can Top-Up your account right over<br />
your phone, but you'll need to register a credit card with <strong>Virgin</strong> <strong>Mobile</strong> first. Or, use<br />
a Top-Up card from one of the thousands of stores that carry them. To Top-Up,<br />
select Menu --> Top-Up and select the appropriate options.<br />
Hotkeys<br />
At the main screen, press and hold the Navigation Key as follows to<br />
access these functions:<br />
• UP Key: Balance<br />
• DOWN Key: Recent Call Logs<br />
• RIGHT Key: Messaging<br />
• LEFT Key: <strong>Virgin</strong>Xtras<br />
FOR MORE INFORMATION<br />
For more information about your <strong>Virgin</strong> <strong>Mobile</strong> account, Top-Up, <strong>Virgin</strong> <strong>Mobile</strong><br />
Service, and Accessory Purchases, visit www.virginmobileusa.com or contact<br />
<strong>Virgin</strong> <strong>Mobile</strong> at (888) 322-1122. For more information about the technical<br />
aspects of your phone, visit www.audiovox.com.<br />
14<br />
15
MENU SUMMARY<br />
MENU SUMMARY<br />
Level 1 Level 2 Level 3 Level 4 Level 1 Level 2 Level 3 Level 4<br />
C<br />
H<br />
2<br />
1. BALANCE<br />
2. TOP-UP<br />
3. MESSAGING<br />
4. VIRGINXTRAS<br />
5. GAMES<br />
6. RECENT CALLS<br />
7. CONTACTS<br />
1. Send Text Msg<br />
2. Inbox<br />
3. <strong>Virgin</strong> Alerts<br />
4. Outbox<br />
5. Voicemail<br />
6. Saved<br />
7. Erase Msgs<br />
8. Msg Settings<br />
1. Ringtones<br />
2. *MTV<br />
3. Havana Nights<br />
4. Daily Dose<br />
5. Voice Greetings<br />
6. Vh1 2 go<br />
7. Music<br />
1. BlackJack<br />
2. Magic Hexa<br />
1. All Calls<br />
2. Missed Calls<br />
3. Incoming Calls<br />
4. Outgoing Calls<br />
1. Find by Name<br />
2. Find by Number<br />
3. Add New<br />
4. Group<br />
5. Speed Dial<br />
6. MSG Group<br />
7. My Phone #<br />
1. Inbox<br />
2. Outbox<br />
3. Saved<br />
1. MSG Sounds<br />
2. Auto Text<br />
3. Save to Outbox<br />
4. Auto Erase<br />
1. Old Inbox<br />
2. Entire Inbox<br />
1. Inbox<br />
2. Outbox<br />
8. TOOLS<br />
9. SETTINGS<br />
1. Alarm<br />
2. Scheduler<br />
3. Calculator<br />
4. Stopwatch<br />
5. World Clock<br />
1. Sounds<br />
2. Display<br />
3. Call Options<br />
4. Security<br />
1. Add Plan<br />
2. View Event List<br />
1. Ringtones<br />
2. Messages<br />
3. Voicemail<br />
4. Volume<br />
5. Tone Length<br />
6. Silencer Mode<br />
1. Menu Style<br />
2. Graphics<br />
3. Sub Screen<br />
4. Greeting Message<br />
5. Contrast<br />
6. Backlight<br />
1. Call Answer<br />
2. Active Flip<br />
3. Auto Answer<br />
4. Auto Retry<br />
5. Location<br />
1. Phone Lock<br />
2. Restrict<br />
1. Item 1<br />
2. Item 2<br />
3. Item 3<br />
1. Ringtones<br />
2. Key Tone<br />
3. Voice Call<br />
4: Speakerphone<br />
1. Screen Saver<br />
2. Wallpaper<br />
Main LCD<br />
Sub LCD<br />
LCD<br />
Key pad<br />
Dimming<br />
Retry time<br />
Repeat<br />
1. Outgoing<br />
2. Recent Calls<br />
3. Contacts<br />
4. Browser<br />
C<br />
H<br />
2<br />
16<br />
17
MENU SUMMARY<br />
Level 1 Level 2 Level 3 Level 4<br />
MAKING A CALL<br />
BASIC FUNCTIONS<br />
C<br />
H<br />
2<br />
5. Phone Info<br />
3. Change Code<br />
4. Special #’s<br />
5. Erase All<br />
6. Reset to Default<br />
Settings<br />
1. S/W Version<br />
2. H/W Version<br />
1. Special #’1<br />
2. Special #’2<br />
3. Special #’3<br />
1 Enter a phone number using the keypad.<br />
To modify the phone number you have entered :<br />
• To erase one digit at a time press .<br />
• To erase the entire number, press and hold .<br />
2 Press .<br />
The indicator, , appears on the display.<br />
C<br />
H<br />
2<br />
• If “CALL FAILED” appears on the display or the line is busy,<br />
press or .<br />
• If you activate the “AUTO RETRY” function, the phone will<br />
automatically retry for the number of times you have selected.<br />
(see page 61).<br />
• If the number you’re calling is stored in the phone book, the<br />
name and number will appear when the call is placed.<br />
3 To end a call, press .<br />
Please see page 26 for more details about storing a phone<br />
number.<br />
18<br />
19
BASIC FUNCTIONS<br />
BASIC FUNCTIONS<br />
SPEAKERPHONE<br />
ANSWERING A CALL<br />
C<br />
H<br />
2<br />
1 To activate the speakerphone when the phone is<br />
in idle mode, answering mode, and calling mode<br />
press and hold .<br />
2 The phone returns to normal (speakerphone off)<br />
after ending a call or when the phone is turned off<br />
and back on.<br />
1 To answer a call, press any key except , ,<br />
or .<br />
l See page 60 for more information on setting Any Key Answer<br />
or Send Key Answer.<br />
l Press [MENU] . When you set the Active flip,<br />
you may answer a call simply by opening the phone.<br />
2 To end the call, press .<br />
C<br />
H<br />
2<br />
PAUSE FEATURE<br />
You can dial or save a phone number with pauses for use in the<br />
automated systems where you need to enter a credit card number,<br />
a social security number, and so on.<br />
1 To insert a pause, enter a phone number then<br />
press [MENU]. Select either a Hard Pause<br />
(“P” appears) or a Timed Pause (“T” appears).<br />
In Auto Answer Mode, a call is automatically answered after a<br />
preset number of rings. See page 61 for more details.<br />
CALLER ID FUNCTION<br />
Identifies caller by displaying their phone number. If the caller’s name<br />
and number are already stored in your phone book, they both will<br />
appear. This feature is system dependent. Please contact your<br />
service provider for details.<br />
2 Press to dial or [SAVE] to store.<br />
Please see page 26 for more details about storing a phone<br />
number.<br />
The caller ID is stored in the call history.<br />
CALL WAITING FUNCTION<br />
Notifies you of an incoming call when you are on the phone by<br />
sounding a beep and displaying the caller’s phone number on<br />
the screen.<br />
1 To answer another call while on the phone,<br />
press . This places the first call on hold.<br />
To switch back to the first caller, press<br />
again.<br />
20<br />
21
BASIC FUNCTIONS<br />
DURING A CALL<br />
ADJUSTING VOLUME<br />
To display menu options during a call, press .<br />
C<br />
H<br />
2<br />
Adjusts the volume of the ringtone, keypad tone and speaker.<br />
1 Press [MENU] and select one<br />
of the following.<br />
l<br />
l<br />
l<br />
l<br />
Ringtones: Controls the ringtone volume.<br />
Key Tone: Controls the keypad tone.<br />
Voice Call: Controls earpiece volume.<br />
Speakerphone: Controls the speakerphone volume.<br />
MUTE (UNMUTE)<br />
Mutes any sounds from your side of the call.<br />
1 Press [MENU] .<br />
l<br />
l<br />
To deactivate, press [MENU] .<br />
The phone will automatically un-mute in Emergency<br />
Call or Callback mode.<br />
C<br />
H<br />
2<br />
2 Adjust volume and press [OK] to save it.<br />
Press the volume keys on the side of the phone to adjust<br />
volume of microphone during a call.<br />
MESSAGING<br />
Enables you to send a text message (SMS) during a call.<br />
SILENCER MODE<br />
Mutes your phone's ringtone and key tones. Activates the vibration<br />
mode to alert you of an incoming call or message.<br />
1 To turn silencer mode on/off,<br />
press and hold .<br />
LOCK<br />
Locks your phone and prevents unauthorized use. Once locked,<br />
your phone can only be used after inputting the password.<br />
1 Press [MENU] .<br />
MY PHONE #<br />
Enables you to see your phone number while on a call.<br />
Please see page 46 for more details.<br />
1 Press [MENU] .<br />
1 To lock the phone, press and hold .<br />
2 To unlock the phone, press then input the<br />
password.<br />
l<br />
Lock feature will deactivate when the phone is powered<br />
off. Upon next power up, you will need to press to<br />
unlock phone again.<br />
The default password is the last 4 digits of your phone number.<br />
22<br />
23
MAKING AN EMERGENCY CALL<br />
C<br />
H<br />
2<br />
This 911 feature puts your phone in the Emergency Call Mode<br />
when you dial the preprogrammed emergency number, 911.<br />
It also operates in the lock mode and out of the service area.<br />
911 IN LOCK MODE<br />
The 911 call service is available even in the lock mode.<br />
1 Enter “911” and press .<br />
2 The call connects.<br />
3 The phone exits the Lock Mode for 5 minutes.<br />
Chapter 3<br />
MEMORY FUNCTION<br />
C<br />
H<br />
3<br />
l<br />
When the call ends, the phone returns to the Lock Mode.<br />
911 USING ANY AVAILABLE SYSTEM<br />
1 Enter “911” and press .<br />
2 The call connects.<br />
This chapter addresses memory functions including:<br />
STORING A PHONE NUMBER<br />
ENTERING LETTERS, NUMBERS & SYMBOLS<br />
MAKING A CALL THROUGH THE PHONE BOOK<br />
3 The phone maintains the Emergency Mode<br />
for 5 minutes.<br />
l When the call ends, the phone returns to the Lock Mode.<br />
l The phone continuously attempts to receive service from<br />
any available system. However, it can’t make a call.<br />
The 911 call is not recorded in the recent call list.<br />
24<br />
25
STORING A PHONE NUMBER<br />
ENTERING LETTERS, NUMBERS & SYMBOLS<br />
The phone book stores up to 300 entries.<br />
1 Enter phone # and press [SAVE].<br />
The input mode will be automatically activated when necessary to<br />
enter letters and numbers. As shown below, there are 4 available<br />
modes ; Standard input mode (abc), T9 input mode (T9Word),<br />
Numeric mode (123), and Symbol mode (Symbols).<br />
C<br />
Ḥ<br />
3<br />
2 Choose “New Contact” or “Existing Contact”.<br />
Press [OK] to select.<br />
3 The Phone # will appear above a list of icons.<br />
The name of the icon is displayed below the list.<br />
Use the Navigation key to choose the type of #<br />
you’re adding, as indicated by the icon.<br />
Press [OK] to select.<br />
4<br />
Enter a name and press [OK].<br />
Follow instructions for entering text on page 27.<br />
To change the input mode, press [MODE].<br />
5 Use the Navigation key to scroll through more<br />
options for the entry (group, other numbers,<br />
ringtone).<br />
l<br />
l<br />
l<br />
l<br />
l<br />
Group – Personal, Business, Etc.<br />
Set Secret – Lock, Unlock.<br />
Ringtone – Select Ringtone Type.<br />
Msg. Ringtone – Select Msg. Ringtone Type.<br />
The other fields are set to Numeric mode as a default.<br />
6 To store the entry, press [SAVE].<br />
“New contact added” or “Contact edited” will<br />
be displayed.<br />
The input mode indicator appears on the lower right of<br />
the display when letters and numbers are entered.<br />
To select the desired input mode among the 4 modes<br />
below, press [MODE] and select the desired mode,<br />
then enter letters and numbers.<br />
Input mode indicator<br />
Abc: Abc mode<br />
T9Word: T9 mode<br />
123: Number mode<br />
Symbols: Symbol mode<br />
The following illustrates the function assigned to each key in the input<br />
mode.<br />
Mode<br />
Next<br />
Space<br />
Clear<br />
KEY FUNCTION<br />
Shift<br />
Press to change mode.<br />
[T9Word][Abc][123][Symbols]<br />
Press to view the next matching word if<br />
the highlighted word is not the word you<br />
intended.<br />
Press to accept a word and add a space.<br />
Press to select a letter case, upper or<br />
lower, of the standard text input or T9 text<br />
input mode. [Abc], [ABC], and [abc]<br />
indicate the standard text input.<br />
[T9Word], [T9WORD], and [T9word]<br />
indicate the predictive text input.<br />
Press to delete a character to the left of<br />
the cursor.<br />
C<br />
H<br />
3<br />
Save<br />
Store the letters and numbers you enter.<br />
26<br />
27
ENTERING LETTERS, NUMBERS & SYMBOLS<br />
ENTERING LETTERS, NUMBERS & SYMBOLS<br />
STANDARD INPUT MODE<br />
Use the digit keys to enter letters, numbers and characters.<br />
1 Enter letters using the keypad as follows:<br />
T9 INPUT MODE<br />
The T9 input mode incorporates a built-in-dictionary to determine a<br />
word based on the entered characters. A word can be entered more<br />
quickly by pressing a key once per character.<br />
C<br />
H<br />
3<br />
Keypad<br />
1<br />
2ABC<br />
3DEF<br />
4GHI<br />
:<br />
1<br />
Time<br />
1<br />
A<br />
D<br />
G<br />
:<br />
Repetitions<br />
2 times<br />
.<br />
B<br />
E<br />
H<br />
:<br />
Repetitions<br />
3 times<br />
@<br />
C<br />
F<br />
I<br />
:<br />
Repetitions<br />
4 times<br />
-<br />
2<br />
3<br />
4<br />
:<br />
Repetitions<br />
5 times<br />
’<br />
A<br />
D<br />
G<br />
:<br />
1 Press [MODE] then select the “T9Word”.<br />
2 Press a digit key once to enter the character<br />
you want and enter all the characters to input<br />
the word you want.<br />
3 To view the next matching word, press .<br />
C<br />
H<br />
3<br />
9WXYZ<br />
W<br />
X<br />
To change the input mode, press [MODE]<br />
and select the mode.<br />
Y<br />
Z<br />
9<br />
4 To accept matching word and enter a space,<br />
press .<br />
2 To enter a space, press . After two seconds,<br />
the cursor will automatically move to the next<br />
column.<br />
To enter a compound word.<br />
l Enter the first part of the word and press [ ] to accept it.<br />
l Enter the last part of the word and press [ ] to enter the<br />
word.<br />
3 Repeat until letters are entered.<br />
There is a 160 character limit.<br />
To enter “phone book” in the T9 input mode.<br />
4 To delete one digit, press . To delete the<br />
entire entry, press and hold .<br />
- Press [ ][MODE] and select the “T9Word” mode to select the<br />
T9 input mode and [ ] to choose the small letter case (T9Word).<br />
5 To change from lowercase to uppercase,<br />
press .<br />
- Press [ ] and you will see “phone” highlighted.<br />
Press [ ] to see the next matching word and [ ] to select it.<br />
Select Abc mode, by pressing [ ][MODE].<br />
When you select this mode, the Abc icon appears as a visual<br />
confirmation.<br />
- Find the key that corresponds to the letter you want to enter.<br />
- Press it as many times as needed for the letter to appear on the<br />
screen.<br />
- To enter the name “John”:<br />
Press [ ]<br />
J<br />
Press [ ]<br />
o<br />
Press [ ]<br />
h<br />
Press [ ]<br />
n<br />
- Press [ ] and you will see “book” highlighted.<br />
Press [ ] to move to the next matching word and [ ] to<br />
select the compound word and enter a space.<br />
28<br />
29
ENTERING LETTERS, NUMBERS & SYMBOLS<br />
MAKING A CALL THROUGH THE PHONE BOOK<br />
NUMERIC MODE<br />
SPEED DIALING<br />
Allows you to enter numbers.<br />
1 Press [MODE] and select the “123 (Numeric<br />
mode)”.<br />
Dials a number simply by pressing and holding the last digit of speed<br />
dial #. For a 2-digit location number, press the first number then<br />
press and hold the second number. To store a number in Speed Dial:<br />
1 Press [MENU] .<br />
C<br />
H<br />
3<br />
2 To enter a number, press a digit key.<br />
SYMBOL MODE<br />
Allows you to enter symbols.<br />
2 To assign a phone number to a location, select<br />
the location and press [ASSIGN].<br />
l<br />
If a phone number is already assigned to the location,<br />
press [Erase] and the navigation key to delete.<br />
C<br />
H<br />
3<br />
1 Press [MODE] and select the “Symbols<br />
(Symbol mode)”.<br />
3 The phone book list will be displayed<br />
alphabetically. Select a name and press [OK].<br />
2 Select symbol you want to enter with the<br />
Navigation key.<br />
4 “Speed dial # X edited” will be displayed.<br />
l<br />
Use the Navigation key to view a different line of symbols.<br />
Press [ ],<br />
or<br />
Press [ ],<br />
• “Unassigned” appears if the location pressed is available.<br />
• A phone number that is set as secret will ask a password.<br />
• A call can be made by pressing its entry number and .<br />
• To call an assigned number, press & hold the last digit of the<br />
speed dial #.<br />
30<br />
31
C<br />
H<br />
3<br />
Chapter 4<br />
MENU FUNCTION<br />
C<br />
H<br />
4<br />
This chapter addresses accessing the menu and using its functions<br />
and features to customize your phone.<br />
VIRGIN MOBILE ACCOUNT<br />
VIRGIN ALERTS<br />
RECENT CALLS<br />
CONTACTS<br />
TOOLS<br />
SETTINGS<br />
32<br />
33
VIRGIN MOBILE ACCOUNT<br />
VIRGIN ALERTS<br />
You can manage your <strong>Virgin</strong> <strong>Mobile</strong> account from your phone. The<br />
basic tasks are summarized below. For more information about your<br />
<strong>Virgin</strong> <strong>Mobile</strong> account, visit www.virginmobileusa.com.<br />
CHECKING YOUR ACCOUNT BALANCE<br />
You can check the amount of money remaining in your <strong>Virgin</strong> <strong>Mobile</strong><br />
account.<br />
These alerts appear on your screen when the phone is on.You may<br />
receive alerts from <strong>Virgin</strong> <strong>Mobile</strong> which include information about your<br />
account balance, service information, and other announcements.<br />
These alerts appear on your screen when the phone is on.<br />
TO VIEW A STORED VIRGIN ALERT<br />
The 20 most recent <strong>Virgin</strong> Alerts you have received are stored in the<br />
<strong>Virgin</strong> Alerts menu.<br />
1<br />
2<br />
From the main screen, press navigation key<br />
up and hold.<br />
Press [MENU] “BALANCE”.<br />
1 To view a stored message,<br />
press [MENU] .<br />
2 Highlight the message and press .<br />
C<br />
H<br />
4<br />
All Balance messages are saved to a <strong>Virgin</strong> Alerts folder.<br />
Capacity for saved messages is limited to 20 messages.<br />
3 To close the message, press [OK].<br />
C<br />
H<br />
4<br />
TOP-UP YOUR ACCOUNT<br />
You can Top-Up your account over the air.<br />
To Top-Up your account over the air using your phone, you need a<br />
credit card registered with <strong>Virgin</strong> <strong>Mobile</strong> and service on your phone.<br />
1 Press [MENU] “TOP-UP”.<br />
2 Press to proceed.<br />
34<br />
35
RECENT CALLS<br />
RECENT CALLS<br />
Access the recent call logs by pressing [MENU] .<br />
MISSED CALLS<br />
C<br />
H<br />
4<br />
ALL CALLS<br />
Displays information about the 60 most recent numbers dialed, missed<br />
and received. Places a call to a selected number by simply pressing .<br />
1 To see a list of the 60 most recent numbers,<br />
press [MENU] .<br />
If the number is already stored in your phone<br />
book, only the name appears. If the number is<br />
not stored, only the phone number appears.<br />
2<br />
To view call details, press [OK].<br />
• Call details include date, time, and phone number.<br />
• When the phone # is stored in your contacts and the entry has<br />
been set as secret, the caller's name is not displayed.<br />
Displays information of the 20 most recently missed calls.<br />
Place a call to a missed call number by simply pressing .<br />
1<br />
To see a list of the 20 most recently missed<br />
calls, press [MENU] .<br />
If the number is already stored in your phone<br />
book, only the name appears. If the number is<br />
not stored, only the phone number appears.<br />
2 To view missed call details, press [OK].<br />
• Call details include date, time, and phone number.<br />
• When the phone # is stored in your contacts and the entry has<br />
been set as secret, the caller's name is not displayed.<br />
C<br />
H<br />
4<br />
3 Press [MORE] [ERASE] to delete the<br />
number or press [SAVE] to save it.<br />
l<br />
l<br />
l<br />
l<br />
l<br />
Save: To store the phone number in your phone book.<br />
Erase: To erase highlighted entry or displayed entry.<br />
Prepend: You may want to add a country code in front of a<br />
number before you save it. E.g. add "1" before a long<br />
distance number. To do so, select Prepend.<br />
Send text: To send a message the phone number.<br />
Erase all: To erase recent calls list.<br />
After 20 missed calls, the oldest call will automatically be<br />
erased from the history.<br />
After 60 incoming, outgoing or missed calls, the oldest call<br />
will automatically be erased from the history.<br />
36<br />
37
RECENT CALLS<br />
RECENT CALLS<br />
INCOMING CALLS<br />
Displays information of the 20 most recently answered calls.<br />
Place a call to a received number by simply pressing .<br />
OUTGOING CALLS<br />
Displays information of the 20 most recently dialed calls.<br />
Place a call to a received number by simply pressing .<br />
1 To see a list of the 20 most recently answered<br />
calls, press [MENU] .<br />
If the number is already stored in your phone<br />
book, only the name appears. If the number<br />
is not stored, only the phone number appears.<br />
1 To see a list of the 20 most recently dialed<br />
calls, press [MENU] .<br />
If the number is already stored in your phone<br />
book, only the name appears. If the number is<br />
not stored, only the phone number appears.<br />
2 To view incoming call details, press [OK].<br />
2 To view outgoing call details, press [OK].<br />
C<br />
H<br />
• Call details include date, time, and phone number.<br />
• When the phone # is stored in your contacts and the entry has<br />
been set as secret, the caller's name is not displayed.<br />
• Call details include date, time, and phone number.<br />
• When the phone # is stored in your contacts and the entry has<br />
been set as secret, the caller's name is not displayed.<br />
C<br />
H<br />
4<br />
4<br />
3 Press [MORE] [ERASE] to delete the<br />
number or press [SAVE] to save it.<br />
3 Press [MORE] [ERASE] to delete the<br />
number or press [SAVE] to save it.<br />
l<br />
l<br />
l<br />
l<br />
l<br />
Save: To store the phone number in your phone book.<br />
Erase: To erase highlighted entry or displayed entry.<br />
Prepend: You may want to add a country code in front of a<br />
number before you save it. E.g. add "1" before a long<br />
distance number. To do so, select Prepend.<br />
Send text: To send a message the phone number.<br />
Erase all: To erase recent calls list.<br />
l<br />
l<br />
l<br />
l<br />
l<br />
Save: To store the phone number in your phone book.<br />
Erase: To erase highlighted entry or displayed entry.<br />
Prepend: You may want to add a country code in front of a<br />
number before you save it. E.g. add "1" before a long<br />
distance number. To do so, select Prepend.<br />
Send text: To send a message the phone number.<br />
Erase all: To erase recent calls list.<br />
After 20 incoming calls, the oldest call will automatically be<br />
erased from the history.<br />
After 20 outgoing calls, the oldest call will automatically be<br />
erased from the history.<br />
38<br />
39
Stores up to 300 entries, each of which can be assigned to a group.<br />
Entries can be retrieved by name, phone number or group.<br />
FIND BY NAME<br />
CONTACTS<br />
Retrieves an entry by name, and calls the number by simply<br />
pressing .<br />
FIND BY NUMBER<br />
Retrieves an entry by number, and calls the number by simply<br />
pressing .<br />
1<br />
CONTACTS<br />
Press [MENU] .<br />
C<br />
H<br />
4<br />
1<br />
2<br />
3<br />
4<br />
Press [MENU] .<br />
l<br />
When you even press under standby state, you move to<br />
the same screen.<br />
The list of names in your phone book is<br />
displayed alphabetically.<br />
Use Navigation key to select the name.<br />
Enter a name or its character string or scroll<br />
through the list with the Navigation Key.<br />
Please see page 27 for instructions on entering<br />
letters, numbers and symbols.<br />
Matching entry will be displayed. Highlight an<br />
entry. Press [OK] to edit the entry. Press<br />
[MORE] to 1. Send text, 2. Erase or 3. Prepend.<br />
2<br />
3<br />
4<br />
5<br />
The list of phone numbers saved in your phone<br />
book will be displayed in numeric order.<br />
Enter a part of the phone number or scroll<br />
through the list with the Navigation Key.<br />
The name associated with that number will be<br />
displayed at the bottom of the screen.<br />
l<br />
The cursor will move to the phone number that matches<br />
the number you enter.<br />
Matching entry will be displayed. Highlight an<br />
entry and press [OK] to edit the entry.<br />
Press [MORE] to select option 1. Erase or<br />
2. Prepend.<br />
To call the selected number, press .<br />
C<br />
H<br />
4<br />
l<br />
If the entry is set to secret, you will be asked for<br />
your password.<br />
5<br />
To call the selected number, press .<br />
40<br />
41
CONTACTS<br />
CONTACTS<br />
ADD NEW<br />
CHANGE GROUP NAME<br />
Adds a new entry to the phone book. Please see page 26 for<br />
alternate way to add an entry to the phone book.<br />
1<br />
To add a new entry to the phone book,<br />
press [MENU] .<br />
1<br />
Press [MENU] .<br />
Select an existing group name.<br />
2 Press [MORE] then select “Rename”.<br />
2<br />
The first field highlighted is Name. Enter the<br />
name for the entry, then press [OK].<br />
3<br />
Input a new group name.<br />
3<br />
Press the Navigation Key down to enter all the<br />
other information (group, phone number, etc.).<br />
4 Press [OK] to save it.<br />
C<br />
H<br />
4<br />
4<br />
l<br />
PHONE BOOK FIELD :<br />
Name/<strong>Mobile</strong>/Home/Office/Group/E-mail/Ringtone/<br />
Msg.Ringtone/Set Secret.<br />
When all information for the entry is entered,<br />
press [SAVE] to save the entry.<br />
The default group names (All, Personal, Business, Etc.)<br />
cannot be changed.<br />
ERASE GROUP<br />
C<br />
H<br />
4<br />
GROUP<br />
Allows you to classify phone entries into groups. Existing groups<br />
include Personal, Business, Etc. and All.<br />
ADD NEW GROUP<br />
1 Press [MENU] .<br />
Select an existing group name.<br />
2 Press [ERASE] to delete it.<br />
“Erase this group?” will be displayed.<br />
1<br />
To add a new group, press [MENU] .<br />
A maximum of seven groups is allowed.<br />
3 Press [OK] again to confirm it.<br />
2 Press [MORE] then select “Add Group”.<br />
The default group names (All, Personal, Business, Etc.)<br />
cannot be erased.<br />
3<br />
Input a new group name.<br />
4 Press [OK] to save it.<br />
42<br />
43
CONTACTS<br />
CONTACTS<br />
SPEED DIAL<br />
CHANGE MSG. GROUP NAME<br />
Calls can be placed to numbers stored in speed dial press & hold the<br />
last digit of speed dial # the keypad.<br />
1 Press [MENU] .<br />
2 To assign a phone number to a location, select<br />
the location and press [ASSIGN].<br />
1<br />
3<br />
Press [MENU] .<br />
Highlight an existing group name.<br />
2 Press [MORE] to rename the group.<br />
Input a new group name.<br />
l<br />
If a phone number is already assigned to the location,<br />
press [ERASE] and the [OK] to delete.<br />
4 Press [OK] to save it.<br />
C<br />
H<br />
4<br />
3 The phone book list will be displayed<br />
alphabetically. Select a name and press [OK].<br />
4 “Speed dial # X edited” will be displayed.<br />
SEND TEXT GROUP<br />
1 Press [MENU] .<br />
Highlight an existing group name.<br />
C<br />
H<br />
4<br />
MSG. GROUP<br />
2 Press [MORE] to send a message.<br />
Allows you to group up to 10 phone numbers. You can add, change,<br />
and delete Msg.Group.<br />
ADD NEW MSG. GROUP<br />
3 Input a message and phone number.<br />
1<br />
To add a new group, press [MENU] .<br />
A maximum of five groups is allowed.<br />
4 Press [MORE] to send it.<br />
ERASE GROUP<br />
2 Press [MORE] to add a group.<br />
3<br />
Input a new group name.<br />
4 Press [OK] to save it.<br />
1 Press [MENU] .<br />
Highlight the group name to be deleted.<br />
2 Press [ERASE] to delete it.<br />
“Erase this message group?” will be displayed.<br />
3 Press [OK]. “This message group erased”<br />
will be displayed.<br />
44<br />
45
CONTACTS<br />
TOOLS<br />
MY PHONE #<br />
To display your phone number and service information.<br />
1 Press [MENU] .<br />
2 To return to the previous page, press [OK].<br />
ALARM<br />
You can set up to 3 alarms.<br />
1<br />
2<br />
To display alarm entries, press [MENU] .<br />
Select one of the entries using the Navigation Key.<br />
To set a new alarm, choose item 1, 2 or 3.<br />
To edit an existing alarm, select that alarm.<br />
Press [OK].<br />
To delete the existing one, press [ERASE] and [OK].<br />
C<br />
H<br />
4<br />
3 Press the Navigation Key down to select alarm<br />
options.<br />
TIME SETTING<br />
Use the keypad to set a time for the event and<br />
the to select AM or PM then press [OK].<br />
C<br />
H<br />
4<br />
SETTING<br />
Use the Navigation key to select a setting for the<br />
alarm (Once, Daily,Off).<br />
SNOOZE SETTING<br />
Use the Navigation key to select a Snooze setting<br />
(No Use, 1 time after 5 min, 1 time after 10 min,<br />
3 times by 5 min).<br />
RINGTONE SETTING<br />
To set a “Ringtone” press [MORE], then select<br />
“Default” or “Change” using the Navigation key.<br />
To save it press [OK].<br />
Default: To set default ringtone type.<br />
Change: To set custom ringtone type.<br />
46<br />
47
TOOLS<br />
NOTES SETTING<br />
Using the keypad input an alarm message then<br />
press [OK].<br />
TOOLS<br />
SCHEDULER<br />
Sets an event and reminds you of that event.<br />
ADD EVENT<br />
4<br />
To save an alarm setting press [SAVE].<br />
1 Press [MENU] .<br />
2<br />
Move the Navigation Key left, right, up or down to<br />
choose a date in the calendar and press [OK].<br />
3<br />
To select alarm options press the Navigation key<br />
downwards.<br />
C<br />
H<br />
4<br />
DATE SETTING<br />
Use the keypad to change or enter the date<br />
then press [OK].<br />
TIME SETTING<br />
Use the keypad to set a time and to select<br />
AM or PM then press [OK].<br />
PLAN SETTING<br />
Use the keypad to input a plan message then<br />
press [OK].<br />
SETTING<br />
Select an alert time interval option (On Time, 10 Min<br />
Before, 30 Min Before, 1 Hour Before, No Alarm)<br />
using the Navigation Key.<br />
RINGTONE SETTING<br />
To set a Ringtone, press [MORE], then select<br />
“Default” or “Change” using the Navigation key.<br />
To save it press [OK].<br />
Default: To set default ringtone type.<br />
Change: To set custom ringtone type.<br />
C<br />
H<br />
4<br />
48<br />
49
TOOLS<br />
TOOLS<br />
4 Press [SAVE] to save it or [CLR] to<br />
return to the calendar.<br />
CALCULATOR<br />
To access the calculator:<br />
5 The date of the event will be marked on your<br />
calendar.<br />
1 Press [MENU] .<br />
VIEW EVENT LIST<br />
2 Example: follow the instructions below to<br />
calculate (8*6)/4-2.5<br />
C<br />
H<br />
4<br />
1 To view the Event List,<br />
press [MENU] .<br />
2 Move the Navigation Key to choose an event<br />
and press [OK] or [ERASE].<br />
Press [MORE], then select “Erase All” using<br />
the Navigation Key.<br />
Input 8.<br />
Move the Navigation Key right.<br />
Input 6 and press the Navigation Key.<br />
Move it left.<br />
Input 4 and press the Navigation Key.<br />
Move it downward.<br />
Input 2 and press the to input (.).<br />
Press 5, .<br />
: X, : -, : /, : +, : ., : Reset, : =.<br />
C<br />
H<br />
4<br />
3 To reset, press [RESET].<br />
50<br />
51
TOOLS<br />
SETTINGS<br />
STOPWATCH<br />
Simultaneously times up to six different events. To operate the<br />
stopwatch:<br />
Customizes your phone and optimizes performance through a variety<br />
of settings.<br />
SOUNDS<br />
1 Press [MENU] .<br />
Sets Ringtones, Messages, Voicemail, Volume, Tone Length and<br />
Silencer Mode.<br />
2 To measure a time period.<br />
1. To start the stopwatch, press [START].<br />
2. To pause it, press [STOP].<br />
3. Press [START] to resume it or [RESET]<br />
to reset counter.<br />
RINGTONES<br />
To select a ringtone type for incoming calls:<br />
1 Press [MENU] .<br />
C<br />
H<br />
4<br />
3 To time up to six events at once:<br />
1. To start, press [START].<br />
2. To stop a time period and continue<br />
measuring another one, press [CONT].<br />
3. To stop the second and continue measuring<br />
a third one, press [CONT].<br />
4. To measure up to six time periods, repeat the<br />
above steps.<br />
5. To stop, press [STOP]. To review the<br />
results,press [VIEW].<br />
6. To return to the stopwatch, press [OK].<br />
7. To reset it, press [RESET].<br />
2 Select “Ringtones” with the Navigation Key.<br />
<strong>Virgin</strong> Tone 2.0<br />
Siren<br />
Arcade<br />
Techno<br />
Jingle<br />
3 To confirm, press [OK].<br />
To stop playing a ringtone, press [PAUSE].<br />
MESSAGES<br />
C<br />
H<br />
4<br />
WORLD CLOCK<br />
To select a ringtone type for incoming messages:<br />
To display the time and date in pre-programmed cities:<br />
1 Press [MENU] .<br />
2 Select a city with the Navigation Key.<br />
1 Press [MENU] .<br />
2 Select “Tone_1,2,3,4,5” with the Navigation Key.<br />
3 The world map appears with the city, its date<br />
and time.<br />
As the daylight saving time is not applied, it may be different from<br />
the actual time during DST.<br />
3 To confirm, press [OK].<br />
To stop playing a ringtone, press [PAUSE].<br />
52<br />
53
SETTINGS<br />
SETTINGS<br />
VOICEMAIL<br />
KEY TONE<br />
To select a ringtone type for incoming Voicemail:<br />
To adjust keypad tone:<br />
1 Press [MENU] .<br />
1 Press [MENU] .<br />
2 Select “Tone_1,2,3,4,5” with the Navigation Key.<br />
2 Adjust the keypad tone.<br />
Off/Level1-5 (Min- , Max- )<br />
3 To confirm, press [OK].<br />
3 To save, press [OK].<br />
To stop playing a ringtone, press [PAUSE].<br />
VOICE CALL<br />
C<br />
H<br />
4<br />
VOLUME<br />
Controls the Ringtones, Key tone, Voice Call and Speakerphone<br />
volume and alerts you to incoming calls in a variety of modes.<br />
RINGTONES<br />
Controls the Ringtones volume and alerts you to incoming calls in the<br />
following modes.<br />
1 Press [MENU] .<br />
To adjust earpiece volume:<br />
1 Press [MENU] .<br />
2 Adjust the earpiece volume.<br />
Level1-5 (Min- , Max- )<br />
3 To save, press [OK].<br />
C<br />
H<br />
4<br />
2 Select one of the following options:<br />
Ringtone Off, press (Min).<br />
Vibrate On<br />
Ringtone Mode – Volume Levels 1-5.<br />
High & Vibrate – The ringtone sounds after vibration,<br />
press (Max).<br />
SPEAKERPHONE<br />
To adjust speakerphone volume:<br />
1 Press [MENU] .<br />
2 Adjust the speakerphone volume.<br />
3 To confirm, press [OK].<br />
Level1-5 (Min- , Max- )<br />
3 To save, press [OK].<br />
54<br />
55
SETTINGS<br />
SETTINGS<br />
TONE LENGTH<br />
To adjust tone length:<br />
1 Press [MENU] .<br />
2 Select “Normal” or “Long” and press [OK]<br />
to save it.<br />
SILENCER MODE<br />
To place the phone in Silencer Mode so all phone sounds are muted:<br />
DISPLAY<br />
Allows you to customize the display.<br />
MENU STYLE<br />
To select a display menu style:<br />
1 Press [MENU] .<br />
2 Select “Grid”, “Fold” or “List” and press [OK]<br />
to save it.<br />
C<br />
H<br />
4<br />
1 Press [MENU] .<br />
2 Select “On” or “Off” and press [OK]<br />
to save it.<br />
l<br />
Shortcut – Press and hold to activate/deactivate this<br />
feature.<br />
GRAPHICS<br />
To select an LCD display:<br />
SCREEN SAVER<br />
Grid<br />
1 Press [MENU] .<br />
Fold<br />
List<br />
C<br />
H<br />
4<br />
2 Select “Time Setting” or “Screen Saver” with<br />
the Navigation key.<br />
l<br />
l<br />
Time Setting: Off, 5 Secs, 10 Secs, 20 Secs, 30 Secs.<br />
Screen Saver: Select an image. (Default image - <strong>Virgin</strong>)<br />
3 Press [OK] to save it.<br />
WALLPAPER<br />
1 Press [MENU] .<br />
2 Select one of the Wallpapers with the Navigation<br />
key.<br />
l<br />
Default image - Birdy, Hearts, Julie, <strong>Mobile</strong>, Mobilize, Pineapple,<br />
Pinky, V<br />
3 Press [OK] to save it.<br />
56<br />
57
SETTINGS<br />
SETTINGS<br />
SUB SCREEN<br />
1 Press [MENU] .<br />
2 Select “Digital” or “Analog”.<br />
CONTRAST<br />
To adjust the display contrast:<br />
MAIN LCD/SUB LCD<br />
1 Press [MENU] .<br />
3 Press [OK] to save it.<br />
2<br />
Select “Main LCD” or “Sub LCD”.<br />
l<br />
l<br />
Main LCD: Level 1~5.<br />
Sub LCD: Level 1~5.<br />
C<br />
H<br />
4<br />
GREETING MESSAGE<br />
To input a personal greeting:<br />
1 Press [MENU] .<br />
2 Select “Message”, “Font”, “Bg” or “Enter<br />
Message” to personalize your greeting.<br />
Press [OK].<br />
l<br />
l<br />
l<br />
l<br />
Message: On/Off.<br />
Font: White, Blue, Dark Blue, Magenta, Gray, Black.<br />
Bg: Transparent, White, Blue, Yellow, Gray, Black.<br />
Enter Message: Enter message (Default-<strong>Virgin</strong> <strong>Mobile</strong>).<br />
3 To save, press [OK].<br />
BACKLIGHT<br />
Backlights the display and keypad for easy viewing in dark places.<br />
LCD/KEYPAD/DIMMING<br />
1 Press [MENU] .<br />
2 Select “LCD”, “Keypad” or “Dimming”.<br />
C<br />
H<br />
4<br />
3<br />
To save, press [SAVE].<br />
l<br />
l<br />
l<br />
l<br />
LCD: 5 Secs/15 Secs/30 Secs/60 Secs/Always On.<br />
Keypad: 5 Secs/15 Secs/30 Secs/60 Secs/Always On/Always Off.<br />
Dimming: On/Off.<br />
INFO: 1. Dimming is ON by default.<br />
2. While charging, it may act like ON even if Dimming is<br />
set as off.<br />
3 To save, press [OK].<br />
When the Subscriber terminal is connected to external power<br />
(Hands free car kit), The backlight setting change to”Always On”.<br />
58<br />
59
SETTINGS<br />
CALL OPTIONS<br />
CALL ANSWER<br />
To select an answer mode:<br />
1 Press [MENU] .<br />
2 Select “Any Key” or “Send Key”.<br />
AUTO ANSWER<br />
Automatically answers a call after a preset time. An ideal setting for<br />
the hands-free car kit.<br />
1<br />
Press [MENU] .<br />
2 Select one of the following:<br />
l<br />
SETTINGS<br />
Off / 5 Secs/ 10 Secs/ 18 Secs.<br />
l<br />
l<br />
Any Key: Press any key to answer an incoming call except<br />
, , , and .<br />
Send Key: Press only to answer a call.<br />
This function will not be active when you select Vibrate, Silent,<br />
Etiquette or Ringtone after Vib as a ringtone mode.<br />
C<br />
H<br />
4<br />
3 To save, press [OK].<br />
ACTIVE FLIP<br />
3 To save, press [OK].<br />
AUTO RETRY<br />
C<br />
H<br />
4<br />
Selects an Active Flip Answer mode as follows.<br />
1 Press [MENU] .<br />
2 Select “On” or “Off”.<br />
3 To save, press [OK].<br />
Automatically redial a call up to 5 times after a set time interval.<br />
Available where signal is weak or where phone hardly comes on.<br />
1 Press [MENU] .<br />
2<br />
Under Retry Time, select a time interval option<br />
(Off, 3 Secs, 5 Secs, 7 Secs, 10 Secs). The Repeat<br />
Category will appear when a time frame is chosen.<br />
l<br />
l<br />
When Active Flip On is selected, an incoming phone call can<br />
be answered simply by opening the phone.<br />
When Active Flip Off is selected, you will need to open the<br />
phone and follow the Answer mode you have selected.<br />
3<br />
Under Repeat, select a time interval option<br />
(1 Time, 3 Times, 5 Times).<br />
4 To save, press [OK].<br />
60<br />
61
SETTINGS<br />
SETTINGS<br />
LOCATION<br />
SECURITY<br />
To determine whether or not the network system can detect your<br />
position:<br />
Prevents others from using the phone without permission and allows<br />
access to security features only after inputting a password.<br />
1 Press [MENU] .<br />
2 Select “Location On” or “911 Only”.<br />
PHONE LOCK<br />
Prevents others from using your phone without permission.<br />
When locked, calls cannot be made and the menu cannot be<br />
accessed without password.<br />
l<br />
l<br />
Location On: Your location is now available to the network.<br />
911 Only: Your location will be hidden from network<br />
& application except 911.<br />
1 Press [MENU] and enter “Password”.<br />
The default password is the last 4 digits of your phone number.<br />
C<br />
H<br />
4<br />
3 To save, press [OK].<br />
2 Press and select “Lock Now”, “Lock On<br />
Power Up” or “Unlock”.<br />
l<br />
l<br />
l<br />
Lock Now: Lock the phone now.<br />
Lock On Power Up: Do not lock the phone now, but lock the<br />
next time the phone is powered on.<br />
Unlock: Unlocks the phone.<br />
C<br />
H<br />
4<br />
If your phone loses power when locked, it will remain locked<br />
when powered-up again.<br />
3 To save, press [OK].<br />
RESTRICT<br />
When you attempt to make a restricted call.<br />
OUTGOING<br />
Blocks all outgoing calls – except emergency calls – but allows<br />
incoming calls to be answered.<br />
1 Press [MENU] and enter “Password”.<br />
2 Press and select “Allow” or “Restrict”.<br />
l<br />
l<br />
Allow: Allows outgoing calls.<br />
Restrict: Restricts outgoing calls.<br />
3 To save, press [OK].<br />
62<br />
63
SETTINGS<br />
SETTINGS<br />
RECENT CALLS<br />
CHANGE CODE<br />
Blocks access to Recent Call List.<br />
Changes your 4-digit password<br />
1 Press [MENU] and enter “Password”.<br />
1 Press [MENU] and enter “Password”.<br />
2 Press and select “Allow” or “Restrict”.<br />
l<br />
l<br />
Allow: Allows access to the recent calls menu.<br />
Restrict: Restricts access to the recent calls menu.<br />
The default password is the last 4 digits of your phone number.<br />
3 To save, press [OK].<br />
2 Press .<br />
CONTACTS<br />
Blocks access to, and protects data in your phone book.<br />
3 Enter a new password and press [OK].<br />
C<br />
H<br />
4<br />
1 Press [MENU] and enter “Password”.<br />
2 Press and select “Allow” or “Restrict”.<br />
4 Enter the new password again and<br />
press [OK].<br />
C<br />
H<br />
4<br />
l<br />
l<br />
Allow: Allows access to the phone book.<br />
Restrict: Restricts access to the phone book.<br />
SPECIAL NUMBERS<br />
Stores 3 phone numbers that can be called even in the lock mode.<br />
3 To save, press [OK].<br />
1 Press [MENU] and enter “Password”.<br />
When a contact is stored as secret, that contact's name will not<br />
be displayed when they call.<br />
The default password is the last 4 digits of your phone number.<br />
BROWSER<br />
Restricts access to browser.<br />
2 Press and select a location.<br />
1 Press [MENU] and enter “Password”.<br />
2 Press and select “Allow” or “Restrict”.<br />
3 Press [ASSIGN] and input a phone number,<br />
press [OK] to save.<br />
l<br />
l<br />
Allow: Allows access to the browser.<br />
Restrict: Restricts access to the browser.<br />
You can delete a special number by selecting it, pressing<br />
[ERASE], then [OK].<br />
3 To save, press [OK].<br />
64<br />
65
SETTINGS<br />
SETTINGS<br />
ERASE ALL<br />
PHONE INFO.<br />
Clears all phone book entries.<br />
Displays the technical information about your phone:<br />
1 Press [MENU] and enter “Password”.<br />
S/W VERSION<br />
The default password is the last 4 digits of your phone number.<br />
1 Press [MENU] .<br />
C<br />
H<br />
4<br />
2 Press .<br />
3 Select “Contacts” or “Downloaded Ringtones”<br />
and press [OK] to erase all the items in those<br />
categories.<br />
RESET TO DEFAULT SETTINGS<br />
2 The software version appears.<br />
3 Press [OK].<br />
H/W VERSION<br />
1 Press [MENU] .<br />
C<br />
H<br />
4<br />
Resets phone to default settings.<br />
1 Press [MENU] and enter “Password”.<br />
2 The hardware version appears.<br />
The default password is the last 4 digits of your phone number.<br />
3 Press [OK].<br />
2 Press .<br />
3 Select “Yes” or “No”, then press [OK].<br />
When you select “yes” you will see “Reset Phone this will<br />
reset to default settings. Reset Phone?”.<br />
Press [OK] to begin Reset process.<br />
4 To reset the phone, press [OK].<br />
66<br />
67
MEMO<br />
Chapter 5<br />
GAMES<br />
C<br />
H<br />
4<br />
This section explains the features associated with your phone’s<br />
Games. You can play games on your phone between phone calls.<br />
An incoming call, message, alarm, or alert automatically ends the<br />
game.<br />
C<br />
H<br />
5<br />
GAMES<br />
68<br />
69
GAMES<br />
GAMES<br />
C<br />
H<br />
5<br />
BLACKJACK<br />
You know the rules of the game - whoever gets closest to 21 without<br />
going over wins. Think you can beat the dealer? Good luck!<br />
1 Press [MENU] .<br />
2 Press any key to start the game.<br />
ORGANIZATION OF THE MENU<br />
l<br />
1) How to manipulate<br />
- Betting: 1~4 (4: MAX)<br />
- Action: 1-HIT<br />
2-STAY<br />
3-SPLIT<br />
4-DOUBLE<br />
5-INSURANCE<br />
2) Organization<br />
- START : Starts the game.<br />
- HELP : Views explanation about key manipulation and Black Jack.<br />
- OPTION : Sets up On/Off of sound and vibration.<br />
- SCORE : Checks out a saved score.<br />
- QUIT : Finishes a game.<br />
3) How to play the game<br />
<br />
CARD RUN<br />
INTRO BETTING BETTING<br />
& ACTION<br />
RESULT<br />
l<br />
DIRECTION OF ACTION<br />
l<br />
4) Game rules<br />
- Order of action: User goes first then the dealer goes next.<br />
- Winning condition: Either the user or the dealer will win the game<br />
whoever the sum of card number is closer to 21. The user also wins<br />
when the dealer goes over 21.<br />
- Losing condition: A player will lose the game whenever the user’s<br />
sum of number exceeds 21. The user also loses when the dealer’s<br />
sum of number is closer to 21 than the user, assuming both the user<br />
and the dealer’s sum of number is less than 21.<br />
- Making even: When both the user and the dealer have Black Jack,<br />
the game makes even.<br />
- CASH : money in possession<br />
- BET : Betting money<br />
- Betting button & Action button : Action or betting<br />
button<br />
- MAX : Maximum betting money<br />
- DECK : Card deck<br />
- TABLE : Game table<br />
1) HIT<br />
Order of action: User goes first then the dealer goes next.<br />
Receives one more card. A player can receive as many cards as<br />
possible, but when the sum of number goes over 21, the user loses<br />
2) STAND<br />
Refusing to receive any more cards. The user will have to wait and see<br />
the outcome of the game after selecting STAND.<br />
3) SPLIT<br />
If the two cards received first are the same, the user can choose to<br />
split the two cards. In other words, a player can play the game against<br />
the dealer with two decks. Note that the money in possession should<br />
exceed the betting money during the split. In the event of Split, the<br />
user only has one chance to hit.<br />
4) DOUBLE<br />
When the sum of two card numbers is 9, 10 or 11, unless the money<br />
remaining is less than the betting money, the user can double the<br />
betting money.<br />
5) INSURANCE<br />
It can only be used when the opened dealer’s card is ‘A’. The money in<br />
possession should exceed half of betting money. Half of the present<br />
betting money will paid as the insurance. If the dealer makes Black<br />
Jack, the user will take all betting money. Otherwise, the betting money<br />
will belong to the dealer.<br />
C<br />
H<br />
5<br />
3 To end the game, press .<br />
70<br />
71
GAMES<br />
MAGIC HEXA<br />
The object of this game is to get rid of all the blocks before it's too<br />
late. Line-up three blocks in a row - horizontally, vertically, or<br />
diagonally - and they'll disappear. Here's a hint: Some blocks have<br />
special powers. Put those to good use!<br />
1 Press [MENU] .<br />
2 Press any key to start the game.<br />
Chapter 6<br />
C<br />
H<br />
DIRECTION<br />
l<br />
- Change: Changes the position of the block<br />
- Drop: Block moves downward<br />
- Left: Block moves leftward<br />
- Right: Block moves rightward<br />
- Movement of the Block: The block can move left,<br />
right and down<br />
- Revolving the Block: The block can be revolved<br />
- Getting rid of the Block: The blocks will be removed, when three same<br />
blocks are consecutively positioned (Horizontally, Vertically and<br />
Diagonally)<br />
- Obstruction Block: During each stage, after a certain period of time,<br />
an obstruction block appears.<br />
- Game Over: If the block is filled, the game will be over.<br />
VOICEMAIL AND TEXT<br />
MESSAGING<br />
This chapter addresses Voicemail and Text Messaging functions<br />
including:<br />
5<br />
CHARACTERS<br />
WHEN A NEW MESSAGE ARRIVES<br />
l<br />
- Henzel: The main character of the game.<br />
- Gretel: Another main character. Henzel’s little sister.<br />
- Fairy: Helps Henzel and Gretel by providing items.<br />
VOICEMAIL<br />
SEND TEXT MSG<br />
INBOX<br />
C<br />
H<br />
- Witch: Drops glass blocks so that Henzel and Gretel<br />
cannot complete the mission.<br />
- Bat: Works for the witch, and bothers Henzel and Gretel<br />
by dropping rocks to the water.<br />
OBSTRUCTION BLOCK<br />
VIRGIN ALERTS<br />
OUTBOX<br />
SAVED<br />
ERASE MSGS<br />
6<br />
l<br />
- Crystal: Glass blocks which cannot be breaked.<br />
- Rock: Heavy rocks which cannot be breaked.<br />
- Lightening: Lightening item which gets rid of the blocks for<br />
the vertical line.<br />
- Storm: Storm Item which gets rid of the contacting block.<br />
- Fire: Fire Item which gets rid of 8 blocks around.<br />
MSG SETTINGS<br />
3 To end the game, press .<br />
72<br />
73
WHEN A NEW MESSAGE ARRIVES<br />
SEND TEXT MSG<br />
1 The following display appears<br />
when a new message arrives.<br />
To send a new message:<br />
1 Press [MENU] .<br />
2 To display the message,<br />
press [READ].<br />
2 Under Send To, input the phone number and<br />
press [OK].<br />
By pressing [MORE], you can choose from the following:<br />
1. Contacts: Allows you to search for a phone number which<br />
is stored in the phone book.<br />
2. Msg Group: Allows to select all the phone numbers in a group.<br />
3. 123: To change the input mode.<br />
4. Save: Stores the phone number the message was sent to.<br />
By pressing [RECENT], allows to select one number of all<br />
recent calls list.<br />
VOICEMAIL<br />
3 Under Message, input a new text message<br />
and press [MORE].<br />
(Please see page 27 for more details on entering letters,<br />
numbers and symbols.)<br />
C<br />
H<br />
6<br />
Displays the number of Voicemails and accesses them by<br />
pressing [Call].<br />
1 To access your Voicemail,<br />
press [MENU] .<br />
You can choose from the following:<br />
1. Send: Allows you to send the text message.<br />
2. Auto Text: Allows you to select the saved auto text message.<br />
3. Save to Auto Text: Stores the text message in the saved auto<br />
text messaging.<br />
4. Callback: Allows you to input the callback number.<br />
By pressing [Abc], to change the input mode.<br />
C<br />
H<br />
6<br />
74<br />
75
INBOX<br />
INBOX<br />
The Inbox manages received text messages. To access:<br />
1 Press [MENU] .<br />
: New Msg (not read)<br />
: Old Msg (already read)<br />
2 Select a message and press [OK].<br />
The message is displayed.<br />
3. SAVE TO CONTACT<br />
1 To save number to contact,<br />
press “Save to Contact”.<br />
4. SAVE<br />
1 To save the text message in your phone,<br />
press “Save”.<br />
3 To Reply to the message, press [REPLY].<br />
4<br />
Press [MORE].<br />
1. ERASE<br />
1 To erase the message, press “Erase”.<br />
2 Press .<br />
C<br />
H<br />
6<br />
2. FORWARD<br />
1 To forward the text message, press<br />
“Forward”.<br />
2 Input the phone number of the person you are<br />
sending the message, then press [OK].<br />
3 To forward the text message, then<br />
press [MORE] and select “1. Send”.<br />
C<br />
H<br />
6<br />
76<br />
77
VIRGIN ALERTS<br />
OUTBOX<br />
VIRGIN ALERTS<br />
1 Press [MENU] .<br />
2 Select a message, then press [OK].<br />
3 The <strong>Virgin</strong> Alert message will be displayed.<br />
Manages sent text messages or messages waiting to be sent.<br />
CHECKING SENT TEXT MESSAGES<br />
1 Press [MENU] .<br />
Select a message, then press [OK].<br />
: Auto resend<br />
: Fail<br />
: Not send<br />
: Sent<br />
: Cancel msg<br />
: Saved msg in editing<br />
2 The text message is displayed.<br />
3<br />
4<br />
To Resend message, press [RESEND].<br />
Press [MORE].<br />
C<br />
H<br />
6<br />
1. ERASE<br />
1 To erase the message, press “Erase”.<br />
2 Press [OK].<br />
2. SEND TO<br />
C<br />
H<br />
6<br />
1<br />
2<br />
To send the message to the other person,<br />
press “Send to”.<br />
Input the phone number, then press [OK].<br />
3 Input your text message, then press [MORE]<br />
and select “1. Send”.<br />
78<br />
79
3. SAVE TO CONTACT<br />
OUTBOX<br />
1 To save the number to your contacts,<br />
press “Save to Contact”<br />
2 Press [OK].<br />
4. SAVE<br />
1 To save the message, press “Save”.<br />
SAVED<br />
SAVED<br />
Manages saved messages from the Inbox/Outbox.<br />
1 Press [MENU] .<br />
Select a text message then press [OK].<br />
2 The text message is displayed.<br />
Press [MORE].<br />
3 If the text message is saved<br />
from the “Inbox” menu, this<br />
screen will be displayed.<br />
If the text message is saved<br />
from the “Outbox” menu, this<br />
screen will be displayed.<br />
C<br />
H<br />
6<br />
4 Select an option by pressing [OK].<br />
C<br />
H<br />
6<br />
80<br />
81
ERASE MESSAGES<br />
ERASE MSGS<br />
1 Press [MENU] .<br />
2 1. To erase all the inbox messages, press .<br />
Old: Deletes read Message(s).<br />
Entire: Deletes all the message(s) in the Inbox.<br />
2. To erase all the outbox messages, press .<br />
3. To erase the saved messages, press .<br />
3 Select “OK” or “Cancel” with [OK]<br />
or [CANCEL].<br />
MSG SETTINGS<br />
Manages messaging features through various features.<br />
MSG SOUNDS<br />
Enables phone to alert you of an incoming message.<br />
1 Press [MENU] .<br />
Then press for “MSG Sounds”.<br />
2<br />
3<br />
Select one of the following options:<br />
To confirm, press [OK].<br />
AUTO TEXT<br />
Ringtone<br />
Vibrate<br />
Silent<br />
Ring & Remind<br />
Vibrate & Remind<br />
To edit the auto text message you have saved:<br />
C<br />
H<br />
6<br />
1 Press [MENU] .<br />
Then press for “Auto Text”.<br />
Select one message from the list with the<br />
Navigation key and press [OK].<br />
2 To add the saved auto text message,<br />
press [ADD].<br />
3 The text messaging is displayed.<br />
Press [MORE].<br />
To edit the saved auto text message,<br />
press [EDIT].<br />
To erase the saved auto text message,<br />
press [ERASE].<br />
C<br />
H<br />
6<br />
82<br />
83
MSG SETTINGS<br />
SAVE TO OUTBOX<br />
1<br />
Press [MENU] .<br />
Then press for “Save to Outbox”.<br />
2<br />
3<br />
Select from “Off”, “On” or “Prompt” with<br />
the Navigation key.<br />
Press [OK].<br />
Chapter 7<br />
VIRGINXTRAS<br />
C<br />
H<br />
6<br />
AUTO ERASE<br />
Automatically erases inbox/outbox messages when new messages<br />
arrive.<br />
INBOX<br />
1<br />
2<br />
3<br />
OUTBOX<br />
Press [MENU] .<br />
Press .<br />
Select “Disable” or “Enable” with Navigation key.<br />
Press [OK].<br />
This chapter explains how to access <strong>Virgin</strong>Xtras - a fun collection of<br />
features including music, movies, and more.<br />
START VIRGINXTRAS<br />
VIRGINXTRAS<br />
1<br />
2<br />
3<br />
Press [MENU] .<br />
Press .<br />
Select “Disable” or “Enable” with Navigation key.<br />
Press [OK].<br />
C<br />
H<br />
7<br />
84<br />
85
START VIRGINXTRAS<br />
START VIRGINXTRAS<br />
<strong>Virgin</strong>Xtras - are a fun collection of features which you can access<br />
directly from your phone - music, movies, and more. Charges may<br />
apply. Visit www.virginmobileusa.com for details.<br />
1 To access <strong>Virgin</strong>Xtras, press .<br />
2 Scroll down the page using the navigation<br />
key .<br />
3 To select one of the softkeys (options) at the<br />
bottom of the display, press or .<br />
4 To return to the previous page, press .<br />
VIRGINXTRAS<br />
ACCESSING VIRGINXTRAS<br />
You can access a variety of entertainment, music, and information<br />
services.<br />
1 To start a <strong>Virgin</strong>Xtras session and<br />
access these services,<br />
press [MENU] .<br />
When you select <strong>Virgin</strong>Xtras, a session is<br />
initiated.<br />
You cannot receive incoming calls when a<br />
<strong>Virgin</strong>Xtras session is in progress.<br />
5 To exit <strong>Virgin</strong>Xtras, press .<br />
C<br />
H<br />
7<br />
C<br />
H<br />
7<br />
86<br />
87
MEMO<br />
Chapter 8<br />
SAFETY AND<br />
WARRANTY<br />
C<br />
H<br />
7<br />
This chapter addresses the safety guidelines and precautions to<br />
follow when operating your phone. Please be aware of all the<br />
following safety info before operating your phone.<br />
SAFETY INFORMATION FOR WIRELESS<br />
HANDHELD PHONES<br />
SAFETY INFORMATION FOR FCC RF EXPOSURE<br />
SAR INFORMATION<br />
FDA CONSUMER UPDATE<br />
PROTECT YOUR WARRANTY<br />
12-MONTH LIMITED WARRANTY<br />
C<br />
H<br />
8<br />
88<br />
89
SAFETY INFORMATION FOR WIRELESS<br />
HANDHELD PHONES<br />
Read This Information Before Using Your Handheld<br />
Portable Cellular Telephone<br />
EXPOSURE TO RADIO FREQUENCY SIGNALS<br />
Your wireless handheld portable telephone is a low power radio<br />
transmitter and receiver. When it is ON, it receives and also sends out<br />
radio frequency (RF) signals.<br />
In August 1996, the Federal Communications Commissions (FCC)<br />
adopted RF exposure guidelines with safety levels for handheld wireless<br />
phones. Those guidelines are consistent with the safety standards<br />
previously set by both U.S. and international standards bodies:<br />
ANSI C95.1 (1992) *<br />
NCRP Report 86 (1986) *<br />
ICNIRP (1996) *<br />
Those standards were based on comprehensive and periodic evaluations<br />
of the relevant scientific literature. For example, over 120 scientists,<br />
engineers, and physicians from universities, government health agencies,<br />
and industry reviewed the available body of research to develop the ANSI<br />
Standard (C951).<br />
The design of your phone complies with the FCC guidelines (and those<br />
standards).<br />
ANTENNA CARE<br />
Use only the supplied or an approved replacement antenna.<br />
Unauthorized antennas, modifications, or attachments could damage<br />
the phone and may violate FCC regulations.<br />
SAFETY INFORMATION FOR WIRELESS<br />
HANDHELD PHONES<br />
Talking on the phone while driving is extremely dangerous and is illegal in<br />
some states. Remember, safety comes first. Check the laws and<br />
regulations on the use of phones in the areas where you drive.<br />
Always obey them.<br />
Also, if using your phone while driving, please:<br />
l<br />
l<br />
l<br />
DRIVING SAFETY<br />
Give full attention to driving. Driving safely is your first responsibility.<br />
Use hands-free operation, if available.<br />
Pull off the road and park before making or answering a call, if<br />
driving conditions so require.<br />
If you must use the phone while driving, please use one-touch, speed<br />
dialing, and auto answer modes.<br />
An airbag inflates with great force. DO NOT place objects, including both<br />
installed or portable wireless equipment, in the area over the airbag or in<br />
the air bag deployment area. If in-vehicle wireless equipment is<br />
improperly installed and the air bag inflates, serious injury could result.<br />
WARNING: Failure to follow these instructions may lead to serious<br />
personal injury and possible property damage.<br />
C<br />
H<br />
8<br />
1* : American National Standards Institute.<br />
2* : National Council on Radiation protection and measurements.<br />
3* : International Commission on Nonionizing Radiation Protection.<br />
C<br />
H<br />
8<br />
90<br />
91
SAFETY INFORMATION FOR WIRELESS<br />
HANDHELD PHONES<br />
SAFETY INFORMATION FOR WIRELESS<br />
HANDHELD PHONES<br />
The Health Industry Manufacturers Association recommends that a<br />
minimum separation of six (6”) inches be maintained between a handheld<br />
wireless phone and a pacemaker to avoid potential interference with the<br />
pacemaker. These recommendations are consistent with the independent<br />
research by and recommendations of Wireless Technology Research.<br />
Persons with pacemakers :<br />
l<br />
l<br />
ELECTRONIC DEVICES<br />
Most modern electronic equipment is shielded from RF energy.<br />
However, certain electronic equipment may not be shielded against<br />
the RF signals from your wireless phone.<br />
PACEMAKERS<br />
ALWAYS keep the phone more than six inches from your<br />
pacemaker when the phone is turned on.<br />
Do not carry the phone in a breast pocket.<br />
OTHER SAFETY GUIDELINES<br />
AIRCRAFT<br />
FCC and Transport Canada Regulations prohibit using your phone while<br />
in the air. Turn your phone OFF before boarding an aircraft.<br />
BLASTING AREAS<br />
To avoid interfering with blasting operations, turn your phone OFF when in<br />
a “blasting area” or in areas posted: “Turn off two-way radio.” Obey all<br />
signs and instructions.<br />
POTENTIALLY EXPLOSIVE ATMOSPHERES<br />
Turn your phone OFF when in any area with a potentially explosive<br />
atmosphere and obey all signs and instructions. Sparks in such areas<br />
could cause an explosion or fire resulting in bodily injury or even death.<br />
l<br />
l<br />
Use the ear opposite the pacemaker to minimize the potential for<br />
interference.<br />
If you have any reason to suspect that interference is taking place,<br />
turn your phone OFF immediately.<br />
Areas with a potentially explosive atmosphere are often, but not always,<br />
clearly marked. They include fueling areas such as gas stations; below<br />
deck on boats; fuel or chemical transfer or storage facilities; vehicles using<br />
liquefied petroleum gas (such as propane or butane); areas where the air<br />
contains chemicals or articles, such as grain, dust, or metal powders; and<br />
any other area where you would normally be advised to turn off your<br />
vehicle’s engine.<br />
OTHER MEDICAL DEVICES<br />
If you use any other personal medical device, consult the manufacturer of<br />
your device to determine if they are adequately shielded from external RF<br />
energy Your physician may be able to assist you in obtaining this<br />
information.<br />
Turn your phone OFF in healthcare facilities when any regulations posted<br />
in these areas instruct you to do so. Hospitals or healthcare facilities may<br />
be using equipment that could be sensitive to external RF energy.<br />
C<br />
H<br />
8<br />
POSTED FACILITIES<br />
Turn your phone OFF where posted notices so require.<br />
C<br />
H<br />
8<br />
92<br />
93
SAFETY INFORMATION FOR WIRELESS<br />
HANDHELD PHONES<br />
PRECAUTIONS<br />
Your Handheld Portable Telephone is a high quality piece of<br />
equipment. Before operating, read all instructions and cautionary<br />
markings on (1) AC Adaptor (2) Battery and (3) Product Using Battery.<br />
DO NOT use this equipment in an extreme environment where<br />
high temperature or high humidity exists.<br />
DO NOT abuse the equipment. Avoid striking, shaking or<br />
shocking. When not using, lay down the unit to avoid possible<br />
damage due to instability.<br />
DO NOT expose this equipment to rain or spilled beverages.<br />
DO NOT use unauthorized accessories.<br />
DO NOT disassemble the phone or its accessories. If service<br />
or repair is required, return unit to an authorized Audiovox<br />
cellular service center. If unit is disassembled, the risk of<br />
electric shock or fire may result.<br />
DO NOT short-circuit the battery terminals with metal items etc.<br />
SAFETY INFORMATION FOR<br />
FCC RF EXPOSURE<br />
WARNING! Read this Information before using<br />
CAUTIONS<br />
In August 1996 the Federal Communications Commission (FCC) of the<br />
United States with its action in Report and Order FCC 96-326 adopted an<br />
updated safety standard for human exposure to radio frequency<br />
electromagnetic energy emitted by FCC regulated transmitters. Those<br />
guidelines are consistent with the safety standard previously set by both<br />
U.S. and international standards bodies. The design of this phone<br />
complies with the FCC guidelines and these international standards.<br />
Use only the supplied or an approved antenna. Unauthorized antennas,<br />
modifications, or attachments could impair call quality, damage the<br />
phone, or result in violation of FCC regulations.<br />
Do not use the phone with a damaged antenna. If a damaged antenna<br />
comes into contact with the skin, a minor burn may result. Please contact<br />
your local dealer for replacement antenna.<br />
BODY-WORN OPERATION<br />
This device was tested for typical body-worn operations with the<br />
back of the phone kept 2.0 cm. from the body. To maintain<br />
compliance with FCC RF exposure requirements, use only belt-clips,<br />
holsters or similar accessories that maintain a 2.0 cm. separation<br />
distance between the user’s body and the back of the phone,<br />
including the antenna. The use of belt-clips, holsters and similar<br />
accessories should not contain metallic components in its assembly.<br />
The use of accessories that do not satisfy these requirements may<br />
not comply with FCC RF exposure requirements, and should be<br />
avoided.<br />
For more information about RF exposure, please visit the FCC<br />
website at www.fcc.gov<br />
C<br />
H<br />
8<br />
C<br />
H<br />
8<br />
94<br />
95
SAR INFORMATION<br />
SAR INFORMATION<br />
THIS MODEL PHONE MEETS THE GOVERNMENT’S<br />
REQUIREMENTS FOR EXPOSURE TO RADIO WAVES.<br />
Your wireless phone is a radio transmitter and receiver. It is designed<br />
and manufactured not to exceed the emission limits for exposure to<br />
radio frequency (RF) energy set by the Federal Communications<br />
Commission of the U.S. Government. These limits are part of<br />
comprehensive guidelines and establish permitted levels of RF<br />
energy for the general population. The guidelines are based on<br />
standards that were developed by independent scientific<br />
organizations through periodic and thorough evaluation of scientific<br />
studies. The standards include a substantial safety margin designed<br />
to assure the safety of all persons, regardless of age and health.<br />
Additional information on Specific Absorption Rates (SAR) can be<br />
found on the Cellular Telecommunications Industry Association (CTIA)<br />
web-site at http://www.wow-com.com.<br />
* In the United States and Canada, the SAR limit for mobile phones<br />
used by the public is 1.6 watts/kg (W/kg) averaged over one gram of<br />
tissue. The standard incorporates a sub-stantial margin of safety to<br />
give additional protection for the public and to account for any<br />
variations in measurements.<br />
C<br />
H<br />
8<br />
The exposure standard for wireless mobile phones employs a unit of<br />
measurement known as the Specific Absorption Rate, or SAR. The<br />
SAR limit set by the FCC is 1.6 W/kg. * Tests for SAR are conducted<br />
with the phone transmitting at its highest certified power level in all<br />
tested frequency bands. Although the SAR is determined at the<br />
highest certified power level, the actual SAR level of the phone while<br />
operating can be well below the maximum value. This is because the<br />
phone is designed to operate at multiple power levels so as to use<br />
only the power required to reach the network. In general, the closer<br />
you are to a wireless base station antenna, the lower the power<br />
output.<br />
Before a phone model is available for sale to the public, it must be<br />
tested and certified to the FCC that it does not exceed the limit<br />
established by the government-adopted requirement for safe<br />
exposure. The tests are performed in positions and locations (e.g., at<br />
the ear and worn on the body) as required by the FCC for each<br />
model. The highest SAR value for this model phone when tested for<br />
use at the ear is 1.15 W/Kg and when worn on the body, as described<br />
in this user guide, is 0.393W/Kg. (Body-worn measurements differ<br />
among phone models, depending upon available accessories and<br />
FCC requirements). While there may be differences between the SAR<br />
levels of various phones and at various positions, they all meet the<br />
government requirement for safe exposure.<br />
The FCC has granted an Equipment Authorization for this model<br />
phone with all reported SAR levels evaluated as in compliance with<br />
the FCC RF exposure guidelines. SAR information on this model<br />
phone is on file with the FCC and can be found under the Display<br />
Grant section of http://www.fcc.gov/ oet/fccid after searching on<br />
PP4TX-110C.<br />
C<br />
H<br />
8<br />
96<br />
97
FDA CONSUMER UPDATE<br />
FDA CONSUMER UPDATE<br />
C<br />
H<br />
8<br />
U.S. Food and Drug Administration -Center for Devices and<br />
Radiological Health Consumer Update on Wireless Phones<br />
1. Do wireless phones pose a health hazard?<br />
The available scientific evidence does not show that any health problems are<br />
associated with using wireless phones. There is no proof, however, that wireless<br />
phones are absolutely safe. Wireless phones emit low levels of radio frequency<br />
energy (RF) in the microwave range while being used. They also emit very low<br />
levels of RF when in the stand-by mode. Whereas high levels of RF can produce<br />
health effects (by heating tissue), exposure to low level RF that does not produce<br />
heating effects causes no known adverse health effects. Many studies of low level<br />
RF exposures have not found any biological effects. Some studies have suggested<br />
that some biological effects may occur, but such findings have not been confirmed<br />
by additional research. In some cases, other researchers have had difficulty in<br />
reproducing those studies, or in determining the reasons for inconsistent results.<br />
2. What is FDA’s role concerning the safety of wireless phones?<br />
Under the law, FDA does not review the safety of radiation-emitting consumer<br />
products such as wireless phones before they can be sold, as it does with new<br />
drugs or medical de-vices. However, the agency has authority to take action if<br />
wireless phones are shown to emit radio frequency energy (RF) at a level that is<br />
hazardous to the user. In such a case, FDA could require the manufacturers of<br />
wireless phones to notify users of the health hazard and to repair, replace or recall<br />
the phones so that the hazard no longer exists. Although the existing scientific data<br />
do not justify FDA regulatory actions, FDA has urged the wireless phone industry<br />
to take a number of steps, including the following:<br />
• Support needed research into possible biological effects of RF of the type<br />
emitted by wireless phones;<br />
• Design wireless phones in a way that minimizes any RF exposure to the user<br />
that is not necessary for device function;<br />
and<br />
• Cooperate in providing users of wireless phones with the best possible<br />
information on possible effects of wireless phone use on human health.<br />
FDA belongs to an interagency working group of the federal agencies that have<br />
responsibility for different aspects of RF safety to ensure coordinated efforts at the<br />
federal level. The following agencies belong to this working group:<br />
• National Institute for Occupational Safety and Health<br />
• Environmental Protection Agency<br />
• Federal Communications Commission<br />
• Occupational Safety and Health Administration<br />
• National Telecommunications and Information Administration<br />
The National Institutes of Health participates in some interagency working group<br />
activities, as well. FDA shares regulatory responsibilities for wireless phones with<br />
the Federal Communications Commission (FCC). All phones that are sold in the<br />
United States must comply with FCC safety guidelines that limit RF exposure. FCC<br />
relies on FDA and other health agencies for safety questions about wireless<br />
phones. FCC also regulates the base stations that the wireless phone networks<br />
rely upon. While these base stations operate at higher power than do the wireless<br />
phones themselves, the RF exposures that people get from these base stations are<br />
typically thousands of times lower than those they can get from wireless phones.<br />
Base stations are thus not the subject of the safety questions discussed in this<br />
document.<br />
3. What kinds of phones are the subject of this update?<br />
The term “wireless phone” refers here to handheld wireless phones with built-in<br />
antennas, often called “cell,” “mobile,” or “PCS” phones.<br />
98<br />
These types of wireless phones can expose the user to measurable radio<br />
frequency energy (RF) because of the short distance between the phone and the<br />
user’s head.<br />
These RF exposures are limited by Federal Communications Commission safety<br />
guidelines that were developed with the advice of FDA and other federal health and<br />
safety agencies. When the phone is located at greater distances from the user, the<br />
exposure to RF is drastically lower because a person’s RF exposure decreases<br />
rapidly with increasing distance from the source. The so-called “cordless phones,”<br />
which have a base unit connected to the telephone wiring in a house, typically<br />
operate at far lower power levels, and thus produce RF exposures far below the<br />
FCC safety limits.<br />
4. What are the results of the research done already?<br />
The research done thus far has produced conflicting results, and many studies<br />
have suffered from flaws in their research methods. Animal experiments<br />
investigating the effects of radiofrequency energy (RF) exposures characteristic of<br />
wireless phones have yielded conflicting results that often cannot be repeated in<br />
other laboratories. A few animal studies, however, have suggested that low levels<br />
of RF could accelerate the development of cancer in laboratory animals. However,<br />
many of the studies that showed increased tumor development used animals that<br />
had been genetically engineered or treated with cancer-causing chemicals so as to<br />
be predisposed to develop cancer in the absence of RF exposure. Other studies<br />
exposed the animals to RF for up to 22 hours per day. These conditions are not<br />
similar to the conditions under which people use wireless phones, so we don’t<br />
know with certainty what the results of such studies mean for human health. Three<br />
large epidemiology studies have been published since December 2000. Between<br />
them, the studies investigated any possible association between the use of<br />
wireless phones and primary brain cancer, glioma, meningioma, or acoustic neuroma,<br />
tumors of the brain or salivary gland, leukemia, or other cancers. None of the<br />
studies demonstrated the existence of any harmful health effects from wireless<br />
phone RF exposures. However, none of the studies can answer questions about<br />
long-term exposures, since the average period of phone use in these studies was<br />
around three years.<br />
5. What research is needed to decide whether RF exposure from wireless<br />
phones poses a health risk?<br />
A combination of laboratory studies and epidemiological studies of people actually<br />
using wireless phones would provide some of the data that are needed. Lifetime<br />
animal exposure studies could be completed in a few years. However, very large<br />
numbers of animals would be needed to provide reliable proof of a cancer<br />
promoting effect if one exists. Epidemiological studies can provide data that is<br />
directly applicable to human populations, but 10 or more years’ follow-up may be<br />
needed to provide answers about some health effects, such as cancer. This is<br />
because the interval between the time of exposure to a cancercausing agent and<br />
the time tumors develop - if they do -may be many, many years. The interpretation<br />
of epidemiological studies is hampered by difficulties in measuring actual RF<br />
exposure during day-to-day use of wireless phones. Many factors affect this<br />
measurement, such as the angle at which the phone is held, or which model of<br />
phone is used.<br />
6. What is FDA doing to find out more about the possible health effects of<br />
wireless phone RF?<br />
FDA is working with the U.S. National Toxicology Program and with groups of<br />
investigators around the world to ensure that high priority animal studies are<br />
conducted to address important questions about the effects of exposure to<br />
radiofrequency energy (RF). FDA has been a leading participant in the World Health<br />
Organization International Electromagnetic Fields (EMF) Project since its inception<br />
in 1996. An influential result of this work has been the development of a detailed<br />
agenda of research needs that has driven the establishment of new research programs<br />
around the world.<br />
99<br />
C<br />
H<br />
8
FDA CONSUMER UPDATE<br />
FDA CONSUMER UPDATE<br />
C<br />
H<br />
8<br />
The Project has also helped develop a series of public information documents on<br />
EMF issues. FDA and the Cellular Telecommunications & Internet Association<br />
(CTIA) have a formal Cooperative Research and De-velopment Agreement<br />
(CRADA) to do research on wireless phone safety. FDA provides the scientific<br />
oversight, obtaining input from experts in government, industry, and academic organizations.<br />
CTIA-funded research is conducted through contracts to independent<br />
investigators. The initial research will include both laboratory studies and studies of<br />
wireless phone users. The CRADA will also include a broad assessment of<br />
additional research needs in the context of the latest research developments<br />
around the world.<br />
7. How can I find out how much radiofrequency energy exposure I can get by<br />
using my wireless phone?<br />
All phones sold in the United States must comply with Federal Communications<br />
Commission (FCC) guidelines that limit radiofrequency energy (RF) exposures. FCC<br />
established these guidelines in consultation with FDA and the other federal health<br />
and safety agencies. The FCC limit for RF exposure from wireless telephones is set<br />
at a Specific Absorption Rate (SAR) of 1.6 watts per kilogram (1.6 W/kg). The FCC<br />
limit is consistent with the safety standards developed by the Institute of Electri-cal<br />
and Electronic Engineering (IEEE) and the National Council on Radiation Protection<br />
and Measurement. The exposure limit takes into consideration the body’s ability to<br />
remove heat from the tissues that absorb energy from the wireless phone and is<br />
set well below levels known to have effects. Manufacturers of wireless phones<br />
must report the RF exposure level for each model of phone to the FCC. The FCC<br />
website (http://www.fcc.gov/oet/rfsafety) gives directions for locating the FCC<br />
identification number on your phone so you can find your phone’s RF exposure<br />
level in the online listing.<br />
8. What has FDA done to measure the radiofrequency energy coming from<br />
wireless phones ?<br />
The Institute of Electrical and Electronic Engineers (IEEE) is developing a technical<br />
standard for measuring the radiofrequency energy (RF) exposure from wireless<br />
phones and other wireless handsets with the participation and leadership of FDA<br />
scientists and engineers. The standard, “Recommended Practice for Determining<br />
the Spatial-Peak Specific Absorption Rate (SAR) in the Human Body Due to<br />
Wireless Communications Devices: Experimental Techniques,” sets forth the first<br />
consistent test methodology for measuring the rate at which RF is deposited in the<br />
heads of wireless phone users. The test method uses a tissue-simulating model of<br />
the human head. Standardized SAR test methodology is expected to greatly<br />
improve the consistency of measurements made at different laboratories on the<br />
same phone. SAR is the measurement of the amount of energy absorbed in tissue,<br />
either by the whole body or a small part of the body. It is measured in watts/kg (or<br />
milliwatts/g) of matter. This measurement is used to determine whether a wireless<br />
phone complies with safety guidelines.<br />
9. What steps can I take to reduce my exposure to radiofrequency energy<br />
from my wireless phone?<br />
If there is a risk from these products—and at this point we do not know that there<br />
is—it is probably very small. But if you are concerned about avoiding even<br />
potential risks, you can take a few simple steps to minimize your exposure to<br />
radiofrequency energy (RF). Since time is a key factor in how much exposure a<br />
person receives, reducing the amount of time spent using a wireless phone will<br />
reduce RF exposure.<br />
• If you must conduct extended conversations by wireless phone every day, you<br />
could place more distance between your body and the source of the RF, since<br />
the exposure level drops off dramatically with distance. For example, you could<br />
use a headset and carry the wireless phone away from your body or use a<br />
wireless phone connected to a remote antenna.<br />
Again, the scientific data do not demonstrate that wireless phones are harmful. But<br />
if you are concerned about the RF exposure from these products, you can use<br />
measures like those described above to reduce your RF exposure from wireless<br />
phone use.<br />
10.What about children using wireless phones?<br />
The scientific evidence does not show a danger to users of wireless phones,<br />
including children and teenagers. If you want to take steps to lower exposure to<br />
radiofrequency energy (RF), the measures described above would apply to children<br />
and teenagers using wireless phones. Reducing the time of wireless phone use<br />
and increasing the distance between the user and the RF source will reduce RF<br />
exposure. Some groups sponsored by other national governments have advised<br />
that children be discouraged from using wireless phones at all. For example, the<br />
government in the United Kingdom distributed leaflets containing such a<br />
recommendation in December 2000. They noted that no evidence exists that using<br />
a wireless phone causes brain tumors or other ill effects. Their<br />
recommendation to limit wireless phone use by children was strictly precautionary;<br />
it was not based on scientific evidence that any health hazard exists.<br />
11.What about wireless phone interference with medical equipment?<br />
Radiofrequency energy (RF) from wireless phones can interact with some<br />
electronic devices. For this reason, FDA helped develop a detailed test method to<br />
measure electromagnetic interference (EMI) of implanted cardiac pacemakers and<br />
defibrillators from wireless telephones. This test method is now part of a standard<br />
sponsored by the Association for the Advancement of Medical instrumentation<br />
(AAMI). The final draft, a joint effort by FDA, medical device manufacturers, and<br />
many other groups, was completed in late 2000. This standard will allow<br />
manufacturers to ensure that cardiac pacemakers and defibrillators are safe from<br />
wireless phone EMI. FDA has tested hearing aids for interference from handheld<br />
wireless phones and helped develop a voluntary standard sponsored by the<br />
Institute of Electrical and Electronic Engineers (IEEE). This standard specifies test<br />
methods and performance requirements for hearing aids and wireless phones so<br />
that that no interference occurs when a person uses a “compatible” phone and a<br />
“compatible” hearing aid at the same time. This standard was approved by the<br />
IEEE in 2000. FDA continues to monitor the use of wireless phones for possible<br />
interactions with other medical devices. Should harmful interference be found to<br />
occur, FDA will conduct testing to assess the interference and work to resolve the<br />
problem.<br />
12.Where can I find additional information?<br />
For additional information, please refer to the following resources:<br />
• FDA web page on wireless phones (http://www.fda.gov/cdrh/ phones/index.html)<br />
• Federal Communications Commission (FCC) RF Safety Pro-gram<br />
(http://www.fcc.gov/oet/rfsafety)<br />
• International Commission on Non-Ionizing Radiation Protec-tion<br />
(http://www.icnirp.de)<br />
• World Health Organization (WHO) International EMF Project<br />
(http://www.who.int/emf)<br />
• National Radiological Protection Board (UK) (http://www.nrpb.org.uk/)<br />
C<br />
H<br />
8<br />
100<br />
101
PROTECT YOUR WARRANTY<br />
12-MONTH LIMITED WARRANTY<br />
C<br />
H<br />
8<br />
Read your Warranty carefully, with the special consideration to<br />
paragraph seven of the Limited Warranty for your unit.<br />
“Warranty does not apply to... or to any product or part<br />
thereof which has suffered through alteration... mishandling<br />
misuse, neglect or accident”.<br />
Many companies are making look alike accessories and in some<br />
cases, promoting that their product is equal to or better than the<br />
Audiovox product. Be careful. Some of these products may not be<br />
compatible to use with your Audiovox product and may damage the<br />
unit or cause it to malfunction. If service is required on your unit and it<br />
is determined that a non-Audiovox accessory has created the<br />
problem with your unit, the Warranty will not apply. In addition, if the<br />
unit has already suffered irreversible damage by reason of a noncompatible<br />
accessory, the Warranty will be voided. To protect your<br />
Warranty, use only compatible accessories which cannot damage or<br />
interfere with the functioning of your Audiovox product.<br />
AUDIOVOX COMMUNICATIONS CORP.<br />
555 Wireless Blvd., Hauppauge, New York 11788, 800-229-1235<br />
16808 Marquardt Avenue, Cerritos, California 90703, 562-802-5100<br />
Audiovox Communications Canada Co.<br />
5155 Spectrum Way, Unit #5, Mississauga, Ontario<br />
Canada L4W 5A1, 800-465-9672<br />
Audiovox Communications Corp. (the Company) warrants to the<br />
original retail purchaser of this Audiovox handheld portable cellular<br />
telephone, that should this product or any part thereof during<br />
normal consumer usage and conditions, be proven defective in<br />
material or workmanship that results in product failure within the<br />
first twelve (12) months period from the date of purchase, such<br />
defect(s) will be repaired or replaced (with new or rebuilt parts) at<br />
the Company’s option, without charge for parts or labor directly<br />
related to the defect(s).<br />
The antenna, keypad, display, rechargeable battery and battery<br />
charger, if included, are similarly warranted for twelve (12) months<br />
from date of purchase.<br />
This Warranty extends only to consumers who purchase the<br />
product in the United States or Canada and it is not transferable or<br />
assignable.<br />
This Warranty does not apply to:<br />
(a) Product subjected to abnormal use or conditions, accident,<br />
mishandling, neglect, unauthorized alteration, misuse, improper<br />
installation or repair or improper storage;<br />
(b) Product whose mechanical serial number or electronic serial<br />
number has been removed, altered or defaced.<br />
(c) Damage from exposure to moisture, humidity, excessive<br />
temperatures or extreme environmental conditions;<br />
(d) Damage resulting from connection to, or use of any accessory<br />
or other product not approved or authorized by the Company;<br />
(e) Defects in appearance, cosmetic, decorative or structural items<br />
such as framing and non-operative parts;<br />
(f) Product damaged from external causes such as fire, flooding,<br />
dirt, sand, weather conditions, battery leakage, blown fuse, theft<br />
or improper usage of any electrical source.<br />
The Company disclaims liability for removal or reinstallation of the<br />
product, for geographic coverage, for inadequate signal reception<br />
by the antenna or for communications range or operation of the<br />
cellular system as a whole.<br />
To obtain repairs or replacement within the terms of this Warranty,<br />
the product should be delivered with proof of Warranty coverage<br />
(e.g. dated bill of sale), the consumer’s return address, daytime<br />
phone number and/or fax number and complete description of the<br />
problem, transportation prepaid, to the Company at the address<br />
shown below or to the place of purchase for repair or replacement<br />
processing.<br />
C<br />
H<br />
8<br />
102<br />
103
12-MONTH LIMITED WARRANTY<br />
In addition, for reference to an authorized Warranty station in your<br />
area, you may telephone in the United States (800) 229-1235, and in<br />
Canada (800) 465-9672 (in Ontario call 905-712-9299).<br />
THE EXTENT OF THE COMPANY’S LIABILITY UNDER THIS<br />
WARRANTY IS LIMITED TO THE REPAIR OR REPLACEMENT<br />
PROVIDED ABOVE AND, IN NO EVENT, SHALL THE COMPANY’S<br />
LAIBILITY EXCEED THE PURCHASE PRICE PAID BY PURCHASER<br />
FOR THE PRODUCT.<br />
ANY IMPLIED WARRANTIES, INCLUDING ANY IMPLIED WARRANTY<br />
OF MERCHANTABILITY OR FITNESS FOR A PARTICULAR<br />
PURPOSE, SHALL BE LIMITED TO THE DURATION OF THIS<br />
WRITTEN WARRANTY. ANY ACTION FOR BREACH OF ANY<br />
WARRANTY MUST BE BROUGHT WITHIN A PERIOD OF 18<br />
MONTHS FROM DATE OF ORIGINAL PURCHASE. IN NO CASE<br />
SHALL THE COMPANY BE LIABLE FOR AN SPECIAL<br />
CONSEQUENTIAL OR INCIDENTAL DAMAGES FOR BREACH OF<br />
THIS OR ANY OTHER WARRANTY, EXPRESS OR IMPLIED,<br />
WHATSOEVER. THE COMPANY SHALL NOT BE LIABLE FOR THE<br />
DELAY IN RENDERING SERVICE UNDER THIS WARRANTY OR<br />
LOSS OF USE DURING THE TIME THE PRODUCT IS BEING<br />
REPAIRED OR REPLACED.<br />
No person or representative is authorized to assume for the Company<br />
any liability other than expressed herein in connection with the sale of<br />
this product.<br />
Some states or provinces do not allow limitations on how long an<br />
implied warranty lasts or the exclusion or limitation of incidental or<br />
consequential damage so the above limitation or exclusions may not<br />
apply to you. This Warranty gives you specific legal rights, and you<br />
may also have other rights which vary from state to state or province<br />
to province.<br />
IN USA : AUDIOVOX COMMUNICATIONS CORP.<br />
555 Wireless Blvd.<br />
Hauppauge, NY 11788<br />
(800) 229-1235<br />
C<br />
H<br />
8<br />
IN CANADA : AUDIOVOX COMMUNICATIONS CANADA CO.<br />
5155 Spectrum Way, Unit #5<br />
Mississauga, Ontario L4W 5A1<br />
(800) 465-9672<br />
104