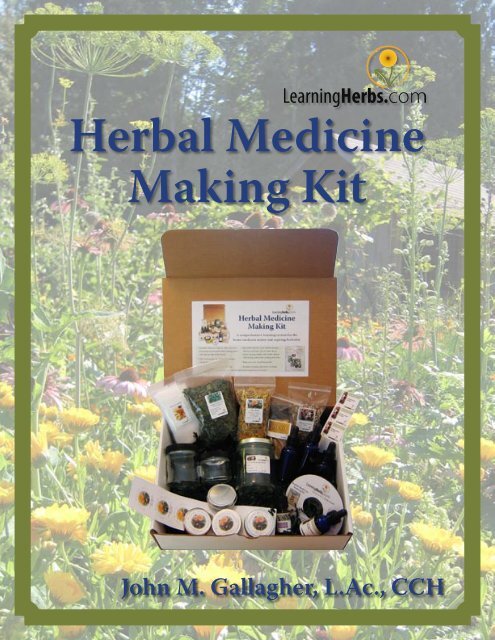
Herbal Medicine Making Kit Download Link - Learning Herbs
Herbal Medicine Making Kit Download Link - Learning Herbs
Herbal Medicine Making Kit Download Link - Learning Herbs

Create successful ePaper yourself
Turn your PDF publications into a flip-book with our unique Google optimized e-Paper software.
<strong>Herbal</strong> <strong>Medicine</strong><br />
<strong>Making</strong> <strong>Kit</strong><br />
John M. Gallagher, L.Ac., CCH
PLEASE READ<br />
Printing Recommended for this book<br />
Printing this book is recommended. You may want to have these instructions with<br />
you when working on the kit.<br />
We advise first watching the DVD introduction, and then reading the introduction<br />
in this book. With each section of the kit you do, read through this book, then watch<br />
the DVD, and with the printed instructions in hand, do the lesson. There is no lesson in<br />
this book for making the herbal infusion, therefore, just watch the DVD. The conclusion<br />
for the kit is on the DVD.<br />
In these books, clicking on any “hyperlink”, such as the web site surrounded by a box<br />
below, will bring you directly to that page if you are connected to the internet.<br />
Resource Page: http://www.<strong>Learning</strong><strong>Herbs</strong>.com/ResourcePage<br />
Also, clicking on the<br />
Page as well. You must be on-line to use this feature.<br />
icon on the top of each page will bring you to the Resource<br />
TERMS OF USE: The <strong>Herbal</strong> <strong>Medicine</strong> <strong>Making</strong> <strong>Kit</strong> and all<br />
information provided on or by <strong>Learning</strong><strong>Herbs</strong>.com is for<br />
educational purposes only. It is not intended as a substitute<br />
for the advice provided by your physician or other medical<br />
professional.<br />
You should not use the information contained herein or the<br />
products in the <strong>Herbal</strong> <strong>Medicine</strong> <strong>Making</strong> <strong>Kit</strong> for diagnosing or<br />
treating a health problem, disease or injury, or prescribing<br />
any medication.<br />
If you have or suspect that you have a serious health<br />
problem, promptly contact your health care provider.<br />
Always consult with a health care practitioner before using<br />
any herbal remedy, especially if pregnant, nursing, or have<br />
a medical condition. Always follow the manufacturer’s<br />
directions when using herbal remedies or giving herbal<br />
remedies to children.<br />
Information and statements regarding dietary supplements<br />
have not been evaluated by the Food and Drug Administration<br />
and are not intended to diagnose, treat, cure, or prevent<br />
any disease.<br />
<strong>Learning</strong><strong>Herbs</strong>.com, it’s owners or employees, shall not be<br />
liable for injury, damage, or loss allegedly arising from the<br />
information contained in the <strong>Herbal</strong> <strong>Medicine</strong> <strong>Making</strong> <strong>Kit</strong>.<br />
By purchasing the <strong>Herbal</strong> <strong>Medicine</strong> <strong>Making</strong> <strong>Kit</strong>, you have<br />
accepted our terms of use. Anyone who does not accept<br />
these terms, being the purchaser may have been unaware<br />
of them at the point of sale, may return the <strong>Herbal</strong> <strong>Medicine</strong><br />
<strong>Making</strong> <strong>Kit</strong> at any time for a full refund (we will not refund<br />
shipping costs).<br />
The <strong>Herbal</strong> <strong>Medicine</strong> <strong>Making</strong> <strong>Kit</strong><br />
Written by John M. Gallagher<br />
Edited by Kimberly Gallagher, Kat Koch<br />
Production/Layout/Photos/Web Design by John M. Gallagher<br />
© 2005, 2007 John M. Gallagher. All rights reserved.<br />
First printing/electronic release: January, 2005<br />
No part of this publication or the accompanying DVD may be reproduced, stored in a retrieval system, or<br />
transmitted, in any form or by any means, electronic, mechanical, photocopying, or otherwise, without the<br />
prior written permission of the copyright owner. <strong>Making</strong> copies of any part of this book for any purpose other<br />
than your own personal use is a violation of US copyright laws.<br />
This book is part of the <strong>Herbal</strong> <strong>Medicine</strong> <strong>Making</strong> <strong>Kit</strong>, which is published by <strong>Learning</strong><strong>Herbs</strong>.com. The<br />
<strong>Learning</strong><strong>Herbs</strong>.com, <strong>Herbal</strong> <strong>Medicine</strong> <strong>Making</strong> <strong>Kit</strong> and logos are registered trademarks. Information about the<br />
The <strong>Herbal</strong> <strong>Medicine</strong> <strong>Making</strong> <strong>Kit</strong> and may be obtained at www.<strong>Learning</strong><strong>Herbs</strong>.com.
What’s in your kit<br />
Organic Echinacea<br />
purpurea<br />
Salve <strong>Herbs</strong><br />
Comfrey*, Calendula,<br />
Plantain*, and<br />
St. Johnswort*<br />
*Organic or wildcrafted<br />
Organic Nettle leaf<br />
Urtica Dioica<br />
For use with the<br />
Nourishing <strong>Herbal</strong><br />
Infusion section<br />
of the DVD.<br />
Echinacea purpurea<br />
Date: / /<br />
Decant: / /<br />
Dried root in ____% alc.<br />
9 oz. jar for<br />
tincture making<br />
Echinacea root for<br />
tincture making<br />
<strong>Herbs</strong> for salve<br />
making<br />
Nettle for use in<br />
Roots and Branches<br />
Cheesecloth<br />
L A V E N D E R<br />
ESSENTIAL OIL<br />
10 ml.<br />
Beeswax for salve<br />
making<br />
Cheesecloth for<br />
straining herbs<br />
Lavender for salve<br />
making<br />
4 blue dropper<br />
bottles for your<br />
finsihed tinctures<br />
H E R B A L<br />
H E A L<br />
I N G<br />
S A L V E<br />
ECHINACEA<br />
Echinacea purpurea<br />
root extract<br />
Contains: Comfrey, Calendula, Plantain, and<br />
St. Johnswort (in Olive oil);<br />
essential oil of Lavender;<br />
bees wax<br />
1 fl. oz.<br />
10 labels for your finished products!<br />
4 salve tins and 2<br />
2oz. salve jars.<br />
Special Thanks & Acknowledgement to Kimberly, Jon Young, Sally King, EagleSong,<br />
Karen Sherwood, my brother Jim for designing our logo, Sandie Grumman, the Wilderness<br />
Awareness School staff and elders, Ingwe, Erin Groh, Eileen VanBronkhorst, nd the RavenCroft<br />
Community. Extra special thanks goes out to Paula at the P&G Speakeasy Cafe in Duvall,<br />
WA where I wrote most of these books. EXTRA EXTRA EXTRA special thanks to my<br />
parents for their never ending love and support.<br />
For Kimberly, Rowan, and Hailey...
Welcome<br />
<strong>Herbal</strong> <strong>Medicine</strong> Belongs to Everyone (Even you)<br />
Perhaps you have taken Echinacea for an oncoming cold<br />
and want to learn more. Maybe you heard that you can<br />
make herbal remedies at home, but haven’t found the<br />
right instruction or haven’t felt safe doing so. Or perhaps you<br />
are part of the growing number of people who want to care for<br />
themselves naturally but just do not know where to start.<br />
“There are so many herbs to learn about, the body is so<br />
complex, and I just do not have the time or energy to<br />
learn about it all. I really want to treat my family naturally,<br />
but where do I start? Who will teach me? What book can<br />
I trust? What alternative method of healing is the right<br />
one for me? I think my doctor is helping me, but it just<br />
isn’t enough. Why isn’t there a pill to cure my energy loss<br />
or migraines?”<br />
Does any of this sound familiar? Yup, I have been there too.<br />
I was actually working for a nature school for years before I<br />
felt comfortable going beyond the Echinacea I took for a cold,<br />
and even THAT was a stretch for me. I knew from experience
<strong>Herbal</strong> <strong>Medicine</strong> <strong>Making</strong> <strong>Kit</strong><br />
and all the media hype that it worked, but I had no idea<br />
what all those other bottles of herbs in the store were for.<br />
Once I ran into someone who actually made their own<br />
Echinacea tincture and could not believe they trusted<br />
their own medicine that they made in their house. How<br />
did they know what plant to use? How much of it? What<br />
if they poisoned themselves? With questions like these<br />
rattling around in our heads, herbal medicine can seem<br />
intimidating or even down right dangerous.<br />
First I’d like to encourage you to take a moment to consider<br />
the idea that western culture and western medicine<br />
have severed our connection with nature and natural<br />
remedies. It is this severed connection that leads to our<br />
fears. However, I am not out to bash western medicine.<br />
I use western medicine when I need it. Many lives are<br />
saved every day by hospitals and allopathic doctors.<br />
What I am talking about here is our every day healthcare.<br />
Preventative medicine… such as exercise, good nutrition<br />
and whatever else helps us reduce stress. A major part<br />
of our everyday healthcare can come from the nourishment<br />
and health giving gifts of the plants.<br />
Consider that plants not only clothe us and shelter us, but<br />
they are the root of our sustenance. Everything we eat<br />
comes from plants and trees, including meat (remember<br />
what the animals lower on the food chain eat). The quality<br />
of our food can make a huge difference in our vitality<br />
and quality of life. <strong>Herbs</strong> are plants, and herbal medicine<br />
actually has a lot to do with what we are ingesting for<br />
our everyday health.<br />
We all know that spinach and broccoli are good for us.<br />
They are filled with vitamins, minerals, anti-oxidants,<br />
and more. We know how to prepare them to eat. Did you<br />
know that there are other health giving plants besides<br />
the fruits and green vegetables you are familiar with? I’m<br />
2
<strong>Herbal</strong> <strong>Medicine</strong> <strong>Making</strong> <strong>Kit</strong><br />
talking about wild plants and herbs. We can eat<br />
them and make teas that are incredibly nourishing<br />
for our bodies. The “dreaded” stinging nettle<br />
is one of the most nutritious and delicious greens<br />
there are, and can easily be incorporated into your<br />
favorite dish. Another example is oatstraw. It’s<br />
nourishing for your nervous system, and a pint of<br />
oatstraw infusion has as much calcium as a glass<br />
of milk!<br />
With this kit you are about to open up a whole new<br />
world of health and nutrition. However, I realize<br />
that it takes some time to learn about herbs and<br />
to feel safe using them. I know that it can take<br />
some time before you find the right way to keep<br />
YOU healthy or to heal yourself. I can’t tell YOU how to<br />
be healthy, but I can introduce you to herbal medicine,<br />
which can be an important part of your everyday health<br />
care. I can give you a great starting place.<br />
Believe it or not, stinging nettle<br />
is one of the most nutritious<br />
herbs. You’ll get to try some in<br />
the Roots and Branches home<br />
study course.<br />
I feel a starting place is important. That may sound painfully<br />
obvious, but seriously, you’d be surprised how hard<br />
it can be to find a place to start in learning about herbs.<br />
There are so many books and web sites out there that it<br />
is dizzying. In one respect, that is a good thing. Twenty<br />
years ago there were only a few books out there. But<br />
on the other hand, someone can get so overwhelmed<br />
by all this information that they never get started. This<br />
is part of the success of the Kamana Naturalist Training<br />
Program that I helped design for Wilderness Awareness<br />
School. It helps people weed through and utilize the<br />
vast choices of field guides in a simple system that helps<br />
them learn about nature.<br />
Similarly, this herbal kit will help you learn to use the<br />
vast number of herbal resources available today. I want<br />
to support all the great books out there by helping peo-<br />
3
<strong>Herbal</strong> <strong>Medicine</strong> <strong>Making</strong> <strong>Kit</strong><br />
ple learn how to use them. I want to support all the great<br />
teachers out there by leading people to the right class<br />
for them. When I first learned about herbs I just wanted<br />
someone to teach me the basics. I had all the books,<br />
but I still needed someone to show me. I went all over<br />
the Northwest Herb Faire looking for a kit exactly like<br />
this one, but could not find one. Luckily, I found a good<br />
teacher. Once I learned the basics and learned to trust<br />
myself, the possibilities were endless. I want to help you<br />
learn to trust yourself and want to inspire you to learn<br />
more. There are many ways to learn herbal medicine,<br />
and in time you will find which is right for you.<br />
I talked earlier about the nourishing herbs we can use<br />
every day that can keep us healthy. There are also stronger<br />
herbs that can help us in times of sickness. Whether<br />
we have a cold or flu, an upset stomach, or are in a firstaid<br />
situation, the plants that grow around us can come<br />
to our aid. More serious conditions warrant experienced<br />
mainstream or alternative practitioners (herbalists, naturopathic<br />
doctors, homeopathic practitioners, acupuncturists,<br />
therapists, massage therapists, chiropractors,<br />
etc..), but everyday nourishment and relief from the<br />
most common conditions lie in our own hands. For tens<br />
of thousands of years human beings intimately knew the<br />
medicine of the plants around them. The healer of the<br />
tribe or village was called in on more serious conditions,<br />
but people knew how to stay healthy and what to use if<br />
they fell ill with a common ailment. We today can follow<br />
that same model.<br />
I am going to show you that incorporating herbal medicine<br />
into your life is simple and inspiring. As a human<br />
being, you are about to “re-learn” the medicine that<br />
has been growing around you your whole life. The same<br />
medicine that your ancestors used for millennia. <strong>Herbal</strong><br />
medicine is truly medicine that belongs to everyone.<br />
4
<strong>Herbal</strong> <strong>Medicine</strong> <strong>Making</strong> <strong>Kit</strong><br />
Why I chose to teach with a kit…<br />
I feel the best way to learn is hands-on. I also know<br />
distance education works. I still direct the best naturalist<br />
home study course available (Wilderness Awareness<br />
School’s Kamana Naturalist Training Program). So, I had<br />
this idea that I would combine distance learning with a<br />
hands-on experience.<br />
Besides the herbs I use daily to keep myself nourished,<br />
two herbal products that I often use are my homemade<br />
all purpose healing salve and my Echinacea tincture.<br />
They are the foundation of my personal first aid kit as<br />
well. I thought I would show you how to make two useful<br />
products while teaching you how easy it is to make<br />
herbal medicine.<br />
I want this kit to be the foundation of your future herbal<br />
learning endeavors. At any time, you can log on to<br />
HerbMentor.com with your free trial membership (do not<br />
misplace the yellow sheet that came in your kit).<br />
5
<strong>Herbal</strong> <strong>Medicine</strong> <strong>Making</strong> <strong>Kit</strong><br />
Whether you choose to be a part of our ongoing learning<br />
community or not, you can read, listen to or watch all the<br />
lessons you want while you are signed up.<br />
You can also download the free Roots and Branches<br />
<strong>Herbal</strong> Home Study Course on HerbMentor.com. The<br />
“Roots” part of the course will expand your herbal<br />
medicine making skills a little further past tinctures and<br />
salves. You will learn how to learn about medicinal, edible<br />
and poisonous plants, how to wildcraft ethically, how<br />
to make herbal infusions and teas (infusions also covered<br />
in this kit), the benefits of herbal vinegars, how herbs<br />
can nourish us, how to cook a meal with wild herbs, and<br />
a bit about herbal first aid.<br />
Roots & Branches, formerly the<br />
‘official follow-up course’ for the<br />
<strong>Herbal</strong> <strong>Medicine</strong> <strong>Making</strong> <strong>Kit</strong>, is<br />
still available on HerbMentor.<br />
com.<br />
We recommend you explore<br />
HerbMentor.com, and make sure<br />
you are on our free newsletter<br />
list to receive ongoing recipes,<br />
remedies and information.<br />
The “Branches” part were our free monthly newsletters<br />
designed to keep you inspired and learning. Over<br />
40 back issues are available on HerbMentor.com. The<br />
<strong>Herbal</strong>Branches newsletter was simply renamed the<br />
“HerbMentor Newsletter,” and we highly recommend you<br />
get on our current mailing list on <strong>Learning</strong><strong>Herbs</strong>.com. In<br />
other words, we continue to publish ongoing lessons.<br />
On HerbMentor.com, there are other options besides<br />
Roots & Branches to continue your learning journey. You<br />
can download a guide that instructs you on how to get<br />
the most out of the site, such as studying the herb of the<br />
month, using HerbMentor Radio, joining the community<br />
forum or calling the monthly teleconference.<br />
What motivates me is knowing that I am helping someone<br />
break down the wall that separates them from herbal<br />
medicine and/or making their own herbal medicine.<br />
I am committed to you feeling that you can be a home<br />
medicine maker. This kit gives you a starting place and<br />
the information provided helps you discover where to go<br />
next on your journey of taking your every day healthcare<br />
into your own hands.<br />
6
<strong>Herbal</strong> <strong>Medicine</strong> <strong>Making</strong> <strong>Kit</strong><br />
You don’t need a degree or to take a bunch of classes<br />
to call yourself a home medicine maker. You simply have<br />
to embrace and utilize these health-giving gifts called<br />
plants in a way that promotes life.<br />
You might have aspirations of being a Community<br />
Centered <strong>Herbal</strong>ist, a naturopath, an ethno botanist,<br />
an herbal shopkeeper, or more likely, of being someone<br />
who brings natural health to your and your family’s life.<br />
Whatever your journey is, your first step begins here…<br />
Time to start the <strong>Herbal</strong> <strong>Medicine</strong> <strong>Making</strong> <strong>Kit</strong>!<br />
Let’s talk about the herbs!<br />
Let’s take a look at a useful oversimplification of herbal<br />
categories (next page), so we begin to get a sense of the<br />
array of herbs available for our tinctures and teas.<br />
At the base, you have your nourishing herbs. Those are<br />
the plants you are going to either eat or drink in larger<br />
quantities. They are as safe as the organic veggies from<br />
your local farmstand, and in many cases, more nutritious.<br />
Some of these herbs include nettles, dandelion,<br />
burdock, chickweed, and red clover.<br />
On the next level you have your gentle medicinal herbs.<br />
Here is where you will find your gentle remedies. A<br />
couple you are already familiar with are peppermint or<br />
chamomile.<br />
Next we have your stronger medicinal herbs. These are<br />
herbs you want to use far less often, usually when you<br />
have an acute condition such as a cold, fever, or perhaps<br />
an ankle sprain. These herbs can include echinacea,<br />
goldenseal, and arnica.<br />
7
<strong>Herbal</strong> <strong>Medicine</strong> <strong>Making</strong> <strong>Kit</strong><br />
POISONOUS<br />
Dangerous to<br />
mess with<br />
Stronger Medicinal<br />
herbs<br />
Gentle medicinal herbs<br />
Nourishing herbs<br />
John’s oversimpified herbal category chart.<br />
Next up we have potentially poisonous herbs that are<br />
used for medicinal purposes, but are ones you should<br />
really stay away from unless a qualified and experienced<br />
practitioner administers them. These might include foxglove<br />
or bittersweet nightshade.<br />
And finally, at the top of the pyramid, you have your poisonous<br />
plants no one should ever ingest. These include<br />
belladonna, false hellebore and poison hemlock. (Note<br />
that some poisonous herbs can be taken internally as<br />
homeopathic remedies. Homeopathic remedies contain<br />
8
<strong>Herbal</strong> <strong>Medicine</strong> <strong>Making</strong> <strong>Kit</strong><br />
no biochemical traces of the plant. More on these remedies<br />
in the Root and Branches course.)<br />
An important thing to note is that this is a ROUGH<br />
sketch as to how you will find these herbs in<br />
nature. Meaning, there are a huge amount<br />
of nourishing herbs and gentle mind herbs, a<br />
smaller amount of stronger species, and a much<br />
smaller amount of poisonous plants.<br />
Let’s talk tinctures<br />
<strong>Herbal</strong> tinctures are herbal chemical constituents<br />
extracted into a liquid base, usually alcohol.<br />
(Note: teas are also extractions of herbal<br />
constituents, except a tea is extracting the plant<br />
into water.) What’s nice about alcohol is that 1)<br />
it is a preservative, and 2) it can extract stronger<br />
constituents than water can extract. The<br />
constituents are going to be more concentrated<br />
in a tincture than in a tea. However, alcohol does<br />
not extract the vitamins or minerals, as water will.<br />
So tinctures are used as medicine while tea can be<br />
used for your every day nourishment.<br />
Tinctures are found in bottles like these at<br />
most health food stores and herb shops.<br />
This photo was taken at RavenCroft<br />
Garden in Monroe, WA.<br />
Personally, I make most of my tinctures out of those<br />
gentle herbs such as chamomile and stronger herbs<br />
for acute situations such as Echinacea. Alcohol does a<br />
wonderful job extracting the constituents we need from<br />
these herbs to help us in many acute situations. I never<br />
touch the potentially poisonous herbs.<br />
I really like tinctures when I have an acute situation<br />
because they are effective and easy to transport. It’s<br />
hard for me at work to make herbal decoctions (strong<br />
teas that you simmer for a while). With a tincture, all I<br />
have to do, is squirt a dropper full of Echinacea in my<br />
water or juice and I am good to go. Then, when I get<br />
9
<strong>Herbal</strong> <strong>Medicine</strong> <strong>Making</strong> <strong>Kit</strong><br />
Echinacea<br />
home, I brew up a nourishing soup or herbal brew and<br />
rest. I would love to be able to run home and rest at the<br />
first sign of a cold, but you know as well as I do that<br />
isn’t always possible in this day and age. Even while I<br />
am nourishing myself and resting at home, I continue<br />
to take my herbal tinctures. They are a great way to get<br />
those stronger herbs in a concentrated form.<br />
So, Why Echinacea?<br />
Of all herbs, why did I choose Echinacea for this kit?<br />
Honestly, my first reason was because you probably have<br />
heard of it. Even my mom has used it. Secondly, it is an<br />
herb I use myself and really like. <strong>Herbal</strong>ist and author<br />
Stephen Buhner once said in a class that there are 3<br />
basic ways he uses Echinacea. 1) At FIRST sign of a cold<br />
to boost your immune system. 2) For first aid situations.<br />
Echinacea is an anti-bacterial and anti-inflammatory. 3)<br />
Directly squirted on the back of his throat for strep or a<br />
sore throat.<br />
I recently heard on NPR that the University of Washington<br />
did a study on Echinacea, and it found that it was ineffective<br />
for children with colds. That’s true. You take it AT<br />
THE FIRST SIGN of a cold. I found it sad because many<br />
will interpret that report as “Echinacea does not work.”<br />
That’s the thing about herbs. You can’t look at them in<br />
the same way you look at western drugs. There is no<br />
silver bullet in any medicine for every ailment. No two<br />
people are the same and no two illnesses are the same.<br />
<strong>Herbs</strong> work to support and nourish our health. In this<br />
case, Echinacea can work to support your immune system<br />
to help the cold virus not take hold.<br />
When I first feel signs of a cold, I take Echinacea. I might<br />
take a dropper an hour for the first couple days until it’s<br />
10
<strong>Herbal</strong> <strong>Medicine</strong> <strong>Making</strong> <strong>Kit</strong><br />
gone. I will then continue the support whether the cold<br />
takes hold or not for a few more days (just 3 droppers<br />
a day). If it takes hold, I will take it a few times a day<br />
for no more than TEN DAYS. But at the same time I<br />
am also supporting my immune system by resting,<br />
eating nourishing soups, ingesting garlic, and drinking<br />
my favorite “Special-Tea” that I make when I have<br />
a cold. This tea is covered in the ‘cold and flus’ tab on<br />
<strong>Learning</strong><strong>Herbs</strong>.com.<br />
So, what I want to get across is that tinctures are wonderful,<br />
useful, and great… BUT they are not all that<br />
herbal medicine is. In fact, the way I take herbs is<br />
almost just like that pyramid I made. I take MOSTLY<br />
nourishing herbs, then I take a little less than that in<br />
gentle remedies, and far less frequently these stronger<br />
remedies like Echinacea.<br />
Then, why am I having you make Echinacea tincture<br />
first? Why not start out with the herbal creations you<br />
will make far more often than tinctures? Well, you’ve<br />
heard of Echinacea, you’ve heard of tinctures, tinctures<br />
are certainly useful, and well… it’s FUN TO MAKE THEM!<br />
Yes, herbal teas are great, but making your first herbal<br />
tincture will be far more rewarding and inspiring as your<br />
gateway to herbal medicine making. Besides, the method<br />
you use to make tinctures is similar to the methods<br />
you use to make other herbal remedies.<br />
Your finished Echinacea<br />
tincture.<br />
<strong>Making</strong> the Tincture<br />
In the classes I teach people often find it amazing when I<br />
tell them that in the folk method, many herbal remedies<br />
are made by stuffing a jar with plants and pouring a liquid<br />
over them. Well, in a nutshell, that’s true. Of course,<br />
there is a LITTLE more too it, but basically, that is what<br />
you are doing.<br />
In making our Echinacea tincture, you are going to pour<br />
11
<strong>Herbal</strong> <strong>Medicine</strong> <strong>Making</strong> <strong>Kit</strong><br />
the packet of Echinacea root into the clear 9 oz. jar, and<br />
fill the jar with vodka until it is full. You’ll then let it sit for<br />
6 weeks, shaking it once a day. After six weeks, you’re<br />
going to strain it out through the cheesecloth. Then<br />
presto, you have your Echinacea tincture. WOW! I just<br />
explained the whole process in a paragraph!<br />
100 proof vodka is<br />
recommended for your<br />
tincture. A smaller flask<br />
will be plenty for this<br />
project.<br />
What do you do for people who don’t want to take alcohol,<br />
such as children or recovering alcoholics? For my<br />
son, I often put his tincture in juice. The amount is so<br />
small that I really do not feel it is an issue for kids, but<br />
you may feel different. If it is an issue for you or someone<br />
you know, you can put the dropper of tincture in hot<br />
tea or water. The heat will evaporate the alcohol leaving<br />
the medicine in your tea or hot water.<br />
I use 100 proof vodka most of the time. You can buy<br />
it in a small, inexpensive flask for this project. You do not<br />
need to purchase an entire big bottle unless you plan on<br />
making more tinctures or having a party.<br />
Before you begin, purchase a small bottle of 100 proof<br />
vodka. If you are under 21, please do this part of the<br />
kit with someone who is 21 or over, so that they can<br />
purchase the vodka and do this project with you. Please<br />
make sure they take with them any vodka that is left over<br />
until you work on your next herbal tincture project.<br />
Want to make more?<br />
Take any jar and repeat the process you are about to do.<br />
Fill half the jar if using dried herbs, or fill with chopped up<br />
fresh herbs. This is a good rule of thumb to follow.<br />
12
<strong>Herbal</strong> <strong>Medicine</strong> <strong>Making</strong> <strong>Kit</strong><br />
Now that you have your alcohol and kit materials<br />
ready, here’s what to do:<br />
1. Pour all of the enclosed dried Echinacea<br />
root in the enclosed 9 oz. jar.<br />
2. Fill the jar with vodka to the lip below<br />
the screwband. Make sure the Echinacea<br />
is covered. Put the lid on. Keep the jar<br />
out of direct sun light. You’ll want<br />
to keep your finished remedies out of<br />
direct sunlight as well.<br />
13
<strong>Herbal</strong> <strong>Medicine</strong> <strong>Making</strong> <strong>Kit</strong><br />
3. Label the jar with the enclosed tincturebrewing<br />
label. Fill it in with the alcohol<br />
percentage and date. For example,<br />
“Echinacea purpurea, dried and tinctured<br />
in 50% alcohol on 6/3/2004”<br />
In this example, Echinacea is part of<br />
the botanical name, so I did not put<br />
the common name. The date will help<br />
you remember when to strain it. Some<br />
advice…ALWAYS label your herbal creations.<br />
All those brown liquids begin to<br />
look alike as you grow your personal<br />
herbal apothecary.<br />
4. Shake the jar. Do this once a day for<br />
6 weeks. If this is not possible, then<br />
at least do it every day for the first 2<br />
weeks. It’s helpful to keep the jar in<br />
a place where you will remember to<br />
shake it regularly, such as on the kitchen<br />
counter.<br />
14<br />
IMPORTANT NOTE:<br />
You do not have to wait until the tincture is<br />
completed to sign up for HerbMentor.com. You<br />
can even begin the Roots & Branches course.<br />
Though you’ll enjoy any part of HerbMentor<br />
at this point, we do not recommend you do<br />
any courses until you finish the salve.<br />
MAKE SURE you check every day for<br />
the first 2 weeks to see if the vodka<br />
is covering the herbs. It is vitally<br />
important that the herbs remain covered<br />
at all times. This prevents oxidation.<br />
If the herbs are above the vodka<br />
line, add vodka until they are covered<br />
again.<br />
Read through the rest of the tincture<br />
instructions, but return to Step 5 in<br />
six weeks to complete it. Continue<br />
on and begin making your herbal<br />
salve.
<strong>Herbal</strong> <strong>Medicine</strong> <strong>Making</strong> <strong>Kit</strong><br />
5. After 6 weeks, use the enclosed cheesecloth and<br />
strain the tincture into a large bowl.<br />
6. Use a small kitchen funnel to pour your<br />
finished tincture into the enclosed dropper<br />
bottles. If there is any left over, pour into<br />
any old bottles you have in the house. Make<br />
sure you clean out any old jars by submerging<br />
them in boiling water for ten minutes.<br />
7. Label your bottles with the enclosed labels.<br />
8. You’re finished! Now have now made your<br />
own Echinacea tincture!<br />
15
<strong>Herbal</strong> <strong>Medicine</strong> <strong>Making</strong> <strong>Kit</strong><br />
Wasn’t that easy! Now, imagine the possibilities. You can<br />
make tinctures with so many herbs that can be used for<br />
so many different ailments. The process isn’t all that different<br />
from what you just experienced. Yes, I know there<br />
is a lot to learn…all those plants, all those herbal skills,<br />
all those ailments…BUT…<br />
I want to say something important with regards to how<br />
to learn herbal medicine. I want you to know that it is<br />
possible for you to feel empowered as a home medicine<br />
maker right from the beginning. Let’s face it, herbal<br />
medicine and nature are huge subjects. In fact, they are<br />
infinite. Talk to any experienced home medicine maker<br />
or herbalist, they will tell you that the more they learn,<br />
the more questions they have and the less they feel they<br />
know. Get comfortable now with the fact that you will<br />
never know it all. Nobody can.<br />
So, how can you feel empowered now?<br />
Well, the key is to just take it day-to-day, experience-to-experience.<br />
Maybe it’s once a day, or<br />
maybe it’s once a week or once a month, put aside<br />
a little time to learn about plants or practice a new<br />
herbal skill. With every little thing you learn it takes<br />
you further down the path of herbalism. Today you know<br />
more than you did yesterday. And tomorrow perhaps you<br />
will know more than today.<br />
If you keep learning, growing, picking, drinking, eating,<br />
pickling, tincturing, or infusing herbs in your life, in<br />
time you will look back and realize how much you have<br />
learned. You might have this realization when you starting<br />
telling others about herbs. It’s hard to keep in touch<br />
with how much we are learning on a day-to-day basis,<br />
but on reflection we often discover just how far we have<br />
come.<br />
16
<strong>Herbal</strong> <strong>Medicine</strong> <strong>Making</strong> <strong>Kit</strong><br />
Once again, do not focus on the vastness of the subject<br />
or how much you would like to know. Just stay focused<br />
on the present. What will you do today? That’s enough.<br />
Will you work in the garden? Make nettle soup? Use an<br />
herbal salve for a bruise? If you make it a point to learn<br />
or experience something today, you have succeeded in<br />
making steps towards your dream. Those steps might<br />
lead you towards being an herbal medicine maker, a consultant,<br />
a gardener, an herbal business owner, a teacher,<br />
or simply someone who uses herbs to improve their<br />
everyday quality of life. You really have no idea where<br />
your herbal education is leading you right now. However,<br />
in the present moment, you have a tincture and a salve<br />
to make.<br />
When I first picked a guitar up and found myself playing<br />
regularly, I guess I could have called myself a musician. I<br />
always thought that you had to be really good or have an<br />
album out to be called a musician. Then one day, someone<br />
called me a musician, and it felt right. Yes, I was a<br />
musician. It’s the same with being an herbalist. While<br />
you are using this kit, technically you are an herbalist.<br />
An herbalist is one who uses herbs. However, it might<br />
take some time before you personally feel like you are an<br />
herbalist. Perhaps one day someone will introduce you to<br />
someone else as an herbalist, and you will think, “Yes, I<br />
AM an herbalist.” It will just feel right. So, whether that<br />
time is now, next month, or next year, it will be up to<br />
you to recognize when calling yourself an herbalist feels<br />
right to you.<br />
The reason why I am even bringing this up now is<br />
because I want to keep driving home the fact that using<br />
herbs is not something reserved for naturopaths or other<br />
people with letters after their names. <strong>Herbs</strong> are for all of<br />
us. They always have been. And, becoming an experienced<br />
herbal medcine maker can only happen<br />
when you have a lot of experiences with herbs. And<br />
17
<strong>Herbal</strong> <strong>Medicine</strong> <strong>Making</strong> <strong>Kit</strong><br />
you have a lot of experiences with herbs by starting with<br />
one experience, and building on it. That one experience<br />
you started with was the Echinacea tincture. An experience<br />
to build on that will be the herbal salve. After the<br />
salve, I will give you some more ideas. Project by project,<br />
you build your knowledge.<br />
How to Make an <strong>Herbal</strong> salve<br />
I suppose the first question should be WHY make an<br />
herbal salve? Well, herbs work incredibly well in first aid<br />
situations. Cuts, bruises, bites, stings, scrapes, burns…I<br />
have had personal success with the healing power of<br />
herbs with all of these. Whereas knowing what exact<br />
herbal remedy (salve, poultice, compress, etc.) to use in<br />
a first aid situation will come in time with experience, an<br />
important part of your herbal repertoire will be the salve.<br />
I always carry an all purpose herbal healing salve in my<br />
travel first aid kit, and use it often for many situations.<br />
Rowan uses his salve on an<br />
ouchie. I use this all purpose<br />
salve you are about to make<br />
for cuts, scrapes, itching,<br />
minor burns, dry or chapped<br />
skin or lips, sun burn and so<br />
much more. I always make<br />
sure the wounds are cleaned<br />
out thoroughly first. Water<br />
first, then Echinacea tincture<br />
usually does the trick.<br />
Remember how the Echinacea plant constituents were<br />
being extracted by the alcohol when making your tincture?<br />
Basically, the same thing is happening in salve<br />
making. With a salve, the herbal chemical constituents<br />
are extracted into olive oil. After the oil is completed and<br />
strained, it is combined with melted beeswax. When the<br />
combined substance hardens, presto, you have a salve.<br />
Sound easy? Well, it is. So, let’s get to making it.<br />
Before you begin, you will need a few things you<br />
have in your kitchen. Get out your olive oil (you’ll<br />
need 1 1/2 cups, available in all supermarkets), a<br />
wooden spoon or something to stir with, a kitchen<br />
strainer, a bowl, a smaller pouring device (such as<br />
a measuring cup), and a saucepan (I like using glass<br />
Corning pans, but any pan will work. I have a double<br />
boiler insert that insures that I won’t accidentally burn<br />
18
<strong>Herbal</strong> <strong>Medicine</strong> <strong>Making</strong> <strong>Kit</strong><br />
About the herbs in your salve...<br />
Calendula<br />
Calendula officinalis<br />
Calendula is an easy flower to grow in your garden and<br />
is one of the premiere first aid herbs. You’ll find it in<br />
most first aid lotion, salve or cream formulas. It acts<br />
against inflammation, and is excellent for cleaning and<br />
healing wounds. It soothes and quiets irritation. It<br />
also increases peripheral circulation. It is a very safe<br />
herb to use externally, as all these herbs are.<br />
Comfrey<br />
Symphytum officinalis<br />
Comfrey is known as one of THE most healing herbs. It<br />
is nourishing and a very powerful herb to use externally.<br />
It is excellent for sprains, broken bones, and bruises. It<br />
is also very regenerative, which is why it is excellent for<br />
wound healing. Always make sure wounds are cleaned<br />
out with an anti-septic such as Echinacea tincture before<br />
applying remedies with comfrey, such as the salve you<br />
are making. You do not want to trap infectious material<br />
under the skin.<br />
19
<strong>Herbal</strong> <strong>Medicine</strong> <strong>Making</strong> <strong>Kit</strong><br />
Plantain<br />
Plantago major<br />
If you’re out and ever get an insect sting, find some of<br />
this very common plant quickly, chew up a few leaves,<br />
and apply it directly to the sting. It is one of the best<br />
known “first-aid kits” of the wild. It has incredible<br />
drawing qualities. It also helps to stop bleeding, helps<br />
stop infection from spreading, and takes away pain as<br />
well as itching. It is also well known for snakebites. Look<br />
for this incredible gift from nature in a sidewalk crack<br />
near you. Who knew Ortho’s most wanted could be so<br />
healing? Makes ya wonder...<br />
St. Johns Wort<br />
Hypericum perforatum<br />
You may know this as the famous antidepressant, but<br />
few know of it’s powerful first aid properties. It can heal<br />
damaged nerves, is great for sun burns, is anti-viral, and<br />
is awesome for strained muscles. I use the oil as “sun<br />
screen” in the summers. It didn’t do much for me in the<br />
intense sun of Wyoming last summer, but in Washington<br />
state, this amazing herb never fails to protect me from the<br />
summer sun. The trick is to use it regularly on commonly<br />
exposed parts of your body.<br />
20
<strong>Herbal</strong> <strong>Medicine</strong> <strong>Making</strong> <strong>Kit</strong><br />
anything on the bottom of the pan. You can often find<br />
these at second hand stores. BUT, do not let a piece of<br />
optional kitchen equipment stop you from starting.<br />
Just get going. It only takes an hour and a half.)<br />
PLEASE read these instructions at least once before<br />
making the salve. Make sure you have all your<br />
supplies nearby before starting. I also recommend<br />
you have an extra small jar or two handy in case<br />
there is extra salve.<br />
1. Pour 12 fluid ounces (1 cup and a half) of olive<br />
oil into the saucepan or double boiler. Put the<br />
pan on low-medium heat on the stove. Olive<br />
oil is used because it is more stable than most<br />
vegetable oils and will not go rancid nearly<br />
as fast. Do not heat the oil higher to make<br />
this process go faster. Doing this will further<br />
destabilize the oil and cause earlier rancidity.<br />
If using a double boiler insert, boil the water<br />
in the saucepan, turn to low-medium heat so<br />
the water does not spill out, and then pour<br />
your oil into the double boiler insert. If you<br />
use a regular saucepan, be CAREFUL and<br />
keep the heat LOW.<br />
Saucepan with double boiler<br />
insert.<br />
2. Add the salve herbs into the oil (do this right<br />
after you pour the oil in). Stir herbs into the<br />
oil with stirrer. Stir every so often for one hour.<br />
If you are using just a pan and not a double<br />
boiler, you’ll need to make sure you stir your<br />
herbs more often. You’ll also need to make<br />
sure you have the heat on low if using just a<br />
saucepan. With a double boiler, the heat can<br />
be a little below medium.<br />
21
<strong>Herbal</strong> <strong>Medicine</strong> <strong>Making</strong> <strong>Kit</strong><br />
3. After one hour, turn off the heat. Put your<br />
kitchen strainer over a bowl. Line the strainer<br />
with some of the enclosed cheesecloth. If you<br />
do not have a strainer, you can use just the<br />
cheesecloth, but you’ll need to wait for the<br />
oil to cool first. The point is, separate the<br />
oil from the plant material, but KEEP the oil.<br />
Once you have done this, compost the plant<br />
material.<br />
4. YOU NEED TO HAVE exactly ONE CUP (8<br />
oz.) of herbal oil. If you have more than<br />
this, pour off the extra (you can use it as<br />
an herbal oil for the same healing purposes<br />
as the salve). If you have a little<br />
less, make up the difference by pouring<br />
in a little extra olive oil. It is REALLY<br />
important to have exactly one cup of<br />
oil.<br />
22
<strong>Herbal</strong> <strong>Medicine</strong> <strong>Making</strong> <strong>Kit</strong><br />
5. Clean out your pan or double boiler with soap<br />
and water, or just get another pan for the next<br />
step.<br />
6. Once again, put your pan on a low-medium<br />
heat. If you are using a double-boiler, do the<br />
same as before to get it ready.<br />
7. Empty beeswax packet into the pan at any<br />
point.<br />
8. Allow the wax to melt all the way. Be careful if<br />
you are only using a pan not to burn the wax.<br />
It should gently melt. Stir as melting.<br />
23
<strong>Herbal</strong> <strong>Medicine</strong> <strong>Making</strong> <strong>Kit</strong><br />
9. When melted, pour in your herbal oil (EXACTLY<br />
1 cup!). It will solidify a little. This is normal. It<br />
will melt again. Just stir it in with your wooden<br />
spoon.<br />
10. Eventually, it will all be melted together. At this<br />
time, have all your enclosed salve jars and tins<br />
open by the stove. It is a good idea to have an<br />
extra jar ready in case you have extra salve.<br />
11. After everything is melted together, pour the<br />
melted salve into the pouring device with a<br />
spout. I use a Pyrex measuring cup available<br />
in most regular grocery stores. Any kind of<br />
measuring cup is nice because they usually<br />
have a spout.<br />
24
<strong>Herbal</strong> <strong>Medicine</strong> <strong>Making</strong> <strong>Kit</strong><br />
12. QUICKLY (and calmly) pour the salve into<br />
your jars and tins. Have some left over?<br />
Pour into your extra container.<br />
13. Add 4 drops of lavender essential oil<br />
(enclosed) to each tin and 8 drops into each<br />
2 oz. salve jar.<br />
*You could also add about a teaspoon of<br />
the essential oil to the melted salve before<br />
pouring into the tins and jars. This would<br />
eliminate this step.<br />
14. Let the jars and tins sit out until they have<br />
hardened. When they have, put the lids<br />
on them. Label the jars with the enclosed<br />
labels.<br />
You’re all finished!!!<br />
25
<strong>Herbal</strong> <strong>Medicine</strong> <strong>Making</strong> <strong>Kit</strong><br />
Other things you REALLY NEED to know about herbal oil<br />
and salve making. (You can read this now or later, for it<br />
is information used outside of salve making in the kit.)<br />
The method I taught you for making an herbal salve is a<br />
valid method, BUT it is not the method you will normally<br />
want to use. I designed this method to work for you<br />
quickly so you would have an great salve completed in<br />
no time. Here are some things to keep in mind:<br />
Your finished salve.<br />
• Normally, you make your herbal oils separately.<br />
You would have started with separate comfrey,<br />
calendula, St. John’s Wort and plantain oils rather<br />
than make the oil with all of these herbs together.<br />
I combined the dried herbs in this kit to make it<br />
easier for you to start with.<br />
Cottonwood buds ‘cold’ infusing<br />
in olive oil. Though this is a fresh<br />
plant infusion, you only half fill<br />
the jar when using cottonwood<br />
buds. Note the paper towel in the<br />
screw band lid. This allows water<br />
vapor to evaporate and prevents<br />
molding. After the oil is finished<br />
in 6 weeks and it is decanted, a<br />
regular lid is used.<br />
REPLICATING THE KIT SALVE<br />
Though we recommend using<br />
the methods listed the right to<br />
make more oils, if you want to<br />
REPLICATE the kit experience,<br />
the mixture used is one ounce of<br />
herbs by weight. We simply mixed<br />
the four herbs equally. The wax is<br />
one ounce by weight.<br />
<strong>Making</strong> the oils separately allows you to learn<br />
about the qualities of each herb one oil at a time.<br />
It also gives you the flexibility of making your salve<br />
mixtures in different ratios. In addition, you might<br />
want to use a single herbal oil remedy for a variety<br />
of health giving purposes.<br />
• You can use dried herbs as in this kit, but you can<br />
also use fresh plants. In many cases, using fresh<br />
plants will make more effective remedies. We’ll<br />
talk about gathering fresh plants in the Roots and<br />
Branches course.<br />
• Although cooking your oils to infuse herbs works,<br />
the best way is to infuse them is using the “cold<br />
method.” Essentially, you make an oil like a tincture.<br />
Chop up your fresh herbs finely and fill a jar<br />
with a loose pack. I prefer fresh herbs with oils, but<br />
if you use dried herbs, fill the jar half way. Then,<br />
fill the jar with olive oil. Cover with a cloth or paper<br />
towel and hold it in place with a rubber band. If<br />
26
<strong>Herbal</strong> <strong>Medicine</strong> <strong>Making</strong> <strong>Kit</strong><br />
you are using standard mason jars, put the paper<br />
towel or cloth on and hold it down by using the<br />
screw band part of the lid (this will help prevent<br />
molding). Stir your oil every day for the first few<br />
weeks. After six weeks, decant the oil just like you<br />
decanted the tincture. Store your oil in the same<br />
jar if you like, but with a closed lid. Store out of<br />
direct sunlight. You usually want to use oils within<br />
a year. Every fresh or dried herb has its own personality,<br />
but this is the basic formula.<br />
Lavender was also part of<br />
your salve, and its virtues<br />
are discussed on video on<br />
HerbMentor.com.<br />
• The cold method of oil making is preferred because<br />
the oil stays more stable when it is not heated. In<br />
other words, heated oils have a greater chance of<br />
going rancid sooner. This is not an issue in this kit<br />
because you made such a small amount of salve.<br />
But if you were making a larger volume of oil or<br />
you knew your oils or salves would be sitting longer,<br />
use the cold method. You can increase the<br />
life of your salves and oils by adding vitamin E to<br />
the oils. This is wise to do if you use the cooking<br />
method in the future for larger amounts of oil.<br />
• In this kit, I pre-measured the wax for you. The<br />
ratio is ONE CUP (volume) of oil to ONE OUNCE<br />
(weight) of bees wax. SO, that’s 1:1…easy! In<br />
this kit, you made 1 cup of oil, so I enclosed one<br />
ounce of wax. This is why the oil volume was so<br />
important in step 4 of the salve making. If you<br />
make three cups of herbal oil into salve in the<br />
future, then simply use 3 ounces of beeswax.<br />
YOU DID IT!<br />
So far, you completed the <strong>Herbal</strong> <strong>Medicine</strong> <strong>Making</strong> <strong>Kit</strong>.<br />
Congratulations! Now, you have the choice of either<br />
stopping here and moving on to your next project in life,<br />
continuing on to HerbMentor.com.<br />
My flowers are a well known<br />
ear ache remedy and my<br />
leaves are helpful to the lungs.<br />
Who am I? Find out in Roots<br />
and Branches...AND... there is<br />
even a video on HerbMentor.<br />
com.<br />
NOTE: The Nourishing<br />
<strong>Herbal</strong> Infusion lesson,<br />
which uses the nettles,<br />
is located on the DVD<br />
that came with your<br />
kit.<br />
27
<strong>Herbal</strong> <strong>Medicine</strong> <strong>Making</strong> <strong>Kit</strong><br />
When you first log on, it will show you a simple video on<br />
how to use the site and where to find stuff, like the Roots<br />
and Branches course or the HerbMentor Study Guide.<br />
Do as little or as much as you want. I chose to go on and<br />
design HerbMentor and write the Roots and Branches<br />
course because teaching this stuff is my passion. I am<br />
excited for you to learn. If I can keep your attention<br />
enough to try a few of the coming projects, then there<br />
is one more person in the world who wants to take their<br />
everyday healthcare into their own hands and possibly<br />
help people in their communities.<br />
If you’re choosing to go on to HerbMentor.com, please<br />
see the yellow sheet that came with your kit. The yellow<br />
sheet has instructions on how to do that as well as the<br />
code for a free trial membership.<br />
Need herbs or supplies?<br />
Click on the <strong>Herbs</strong> & Supplies<br />
link on <strong>Learning</strong><strong>Herbs</strong>.com.<br />
By doing this first before you<br />
place every order, our handcraft<br />
family business gets a<br />
small commission. It helps<br />
us offer so much great free<br />
information. Thanks!<br />
Slow, ongoing learning is the way to learn about herbs<br />
and bring them into your life, and we are proud to offer<br />
you HerbMentor.com. The original kit only had Roots and<br />
Branches, which was great, but it was not enough. So<br />
many people wanted to learn more, but I did not have<br />
the time because I was in acupuncture school.<br />
Now that I have graduated and opened a practice, I have<br />
more time to devote to <strong>Learning</strong><strong>Herbs</strong>.com. I get to do<br />
what I wanted to do from the beginning, which is provide<br />
high quality, ongoing herbal learning experiences.<br />
Even if you only join us for the trial period, we will be<br />
honored to have you. Thank you so much for making<br />
your own medicine. May the seeds planted blossom into<br />
health for you and your family.<br />
Pssst...there are 2 more pages.<br />
28
<strong>Herbal</strong> <strong>Medicine</strong> <strong>Making</strong> <strong>Kit</strong><br />
About John Gallagher, L.Ac., CCH<br />
<strong>Herbal</strong> medicine began<br />
studying John Gallagher<br />
when it covered him<br />
with poison ivy for many of his<br />
childhood summers in New Jersey.<br />
Upon reaching adulthood, he began<br />
working with Wilderness Awareness<br />
School, where he learned the<br />
virtues of the wild plants that grow<br />
around us, including the amazing<br />
dandelion (which he formerly<br />
poisoned in landscape jobs) as<br />
well as a preventative cure for poison ivy (finally). After<br />
moving to a poison ivy-free bioregion, he began seriously<br />
studying herbal medicine. He learned from some of the<br />
most talented herbalists the Northwest has to offer<br />
including Sally King and EagleSong of RavenCroft Garden,<br />
Karen Sherwood of Earthwalk Northwest, Erin Groh, and<br />
most of all, from the plants themselves.<br />
Kimberlly, Hailey, John and<br />
Rowan Gallagher<br />
John is father to his son Rowan and daughter Hailey, and<br />
husband to Kimberly.<br />
John is a licensed five-element acupuncturist with a<br />
clinic in Redmond, WA. John also runs <strong>Learning</strong><strong>Herbs</strong>.<br />
com with Kimberly and the kids. He continues to work for<br />
Wilderness Awareness School as an instructor of herbal<br />
studies for its Residential Program.<br />
He is a Community Centered <strong>Herbal</strong>ist, which is how all<br />
this kit and web site began. John is dedicated to helping<br />
people rediscover their place in nature. He and his family<br />
live in the Snoqualmie Valley, at the foothills of the<br />
Cascade Mountains.<br />
29
<strong>Herbal</strong> <strong>Medicine</strong> <strong>Making</strong> <strong>Kit</strong><br />
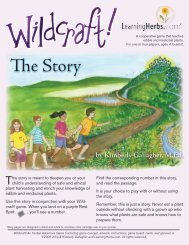
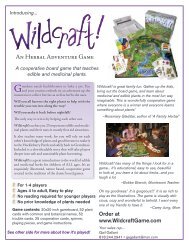
AN HERBAL ADVENTURE GAME<br />
A cooperative board game that teaches<br />
edible and medicinal plants.<br />
“Wildcraft! is great family fun. Gather up the kids, bring out the<br />
board game, and learn about medicinal and edible plants in<br />
the most fun way imaginable. This is wonderfully cooperative<br />
game where everyone is a winner and everyone learns something<br />
about plants!” —Rosemary Gladstar, herbalist, author<br />
Wildcraft! has many of the things I look for in<br />
a game... It’s educational, easy to use, beautiful<br />
to look at, you learn a lot about herbs...and<br />
you laugh a lot.<br />
–Bobbe Branch, Montessori Teacher<br />
30<br />
For 1-4 players<br />
Ages 4 to adult, Easy to play<br />
No reading required for younger players<br />
No prior knowledge of plants needed<br />
Read all about Wildcraft! at<br />
<strong>Learning</strong><strong>Herbs</strong>.com<br />
Wildcraft! is a unique and educational game<br />
that my children and I have truly enjoyed playing.<br />
My son is fascinated by the idea that plants<br />
can alleviate a variety of troubles. I especially<br />
appreciate the aspect of cooperation and teamwork<br />
incorporated into the game. It warms my<br />
heart to see my two children delight in “helping”<br />
one another accomplish the goals of the<br />
game. Thank you for producing a game that<br />
offers such a positive experience for all players<br />
over a wide age range.<br />
–Anne Agostin, mother