Social Science - John Abbott College
Social Science - John Abbott College
Social Science - John Abbott College

Create successful ePaper yourself
Turn your PDF publications into a flip-book with our unique Google optimized e-Paper software.
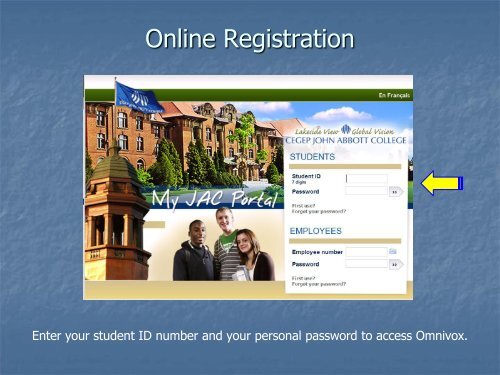
Online Registration<br />
Enter your student ID number and your personal password to access Omnivox.
Online Registration<br />
Once you have accessed Omnivox you can start the registration process by clicking on<br />
COURSE REGISTRATION in the menu on the left side of the screen.
Online Registration<br />
If you access the Course Registration module on Omnivox before your registration date<br />
you will receive the following message indicating that your access is denied.
Online Registration- 8 steps<br />
Tips to a successful registration<br />
1. Adding Courses<br />
2. Choosing Courses<br />
3. Schedule Configurations<br />
4. Schedule Selection<br />
5. Confirming your Schedule<br />
6. Progression Chart<br />
7. Online Schedule<br />
8. Payment Centre
Online Registration – Adding Courses<br />
Once you access the Course Registration module you should use your progression chart<br />
to select appropriate courses. Enter the 8-digit course number for each course then click<br />
Add after each entry. You can also check how many open seats are available in a<br />
course.
Online Registration – Adding Courses<br />
When you enter a course number in the Check for Open Seats text field you will be<br />
brought to a page that lists all of the remaining seats for the sections of the course that<br />
you entered.
Online Registration – Adding Courses<br />
Once you successfully enter an appropriate course it will appear in green in the Course<br />
Request Form.
Online Registration – Adding Courses<br />
You will be prevented from registering for courses that are not part of your progression<br />
chart or for which you do not have the pre-requisites. Errors will be identified in a<br />
warning box with red text at the top of the screen.
Online Registration – Adding Courses<br />
If you want to remove a course that has a status of TO BE REGISTERED it will<br />
automatically be removed from the Course Request Form when you click Remove.
Online Registration – Choosing Sections<br />
Once you have entered the 8 digit course number in the Course Request Form you will<br />
have 3 methods to select a section for that course.
Online Registration – Choosing Sections<br />
1) The TRY ALL option allows you to check all of the sections of a particular course<br />
number. If you leave the field as Try all every course section will be used when the<br />
system generates possible schedule configurations.
Online Registration – Choosing Sections<br />
2) You can also select a specific section of a course by clicking the drop down menu.
Online Registration – Choosing Sections<br />
3) The MULTIPLE SECTIONS option will bring you to a page where you can select<br />
several sections from a list of all of the remaining sections with seats available.
Online Registration – Choosing Sections<br />
Select the sections that you would like to take.
Online Registration – Schedule<br />
Configurations<br />
Once you are satisfied with your course selections click on show all possible course<br />
schedules to generate a list of schedule configurations based on your course selections.
Online Registration – Schedule<br />
Configurations<br />
If there is no schedule configuration available using the courses that you selected you<br />
will be notified by a warning in red text. Try adding your course requests one or two at<br />
a time or leave the section number as Try all.
Online Registration – Schedule Selection<br />
The course registration module will generate schedule configurations building a<br />
schedule using courses offered on days and times that fit together and that have<br />
open seats. Click on the configuration that you prefer.
Online Registration – Confirming Your<br />
Schedule<br />
Once you have chosen a schedule configuration verify that the courses that will be<br />
added are the courses that you want. Enter you password to confirm your schedule.
Online Registration – Confirming Your<br />
Schedule<br />
Once your registration has been processed you will see the changes that have been<br />
made to your registration. Ensure that you keep your transaction number in a safe<br />
place.
Online Registration – Confirming your<br />
schedule<br />
If you decide that you would like to remove a course from the Course Request Form<br />
after you have confirmed your schedule you can click on Remove on the left of the<br />
course that you would like to delete.
Online Registration – Confirming your<br />
schedule<br />
The course that you want to remove will now appear in red in the Course Request Form.<br />
Click on show all possible course schedules to officially remove the course from your<br />
schedule.
Online Registration – Confirming your<br />
schedule<br />
Check the course that will be removed box to make sure that the course that you want<br />
to remove is accurate. Enter your password to confirm the change to your schedule.
Online Registration – Confirming your<br />
schedule<br />
Note the change in your schedule and ensure that you keep your transaction number is<br />
in safe place.
Online Registration – Progression Chart<br />
Your progression chart will indicate the courses that you have remaining to do.
Online Registration – Progression Chart<br />
Once you have selected your courses your progression chart will indicate that they have<br />
been chosen. As soon as the Fall semester starts your progression chart will indicate<br />
that the courses are in progress.
Online Registration – Online Schedule<br />
Providing you are completely and correctly registered,<br />
you may obtain your online schedule as of 7:00 pm<br />
the day after your registration appointment.<br />
Log onto My JAC Portal and select Online<br />
Schedule from the list of menu options on the left.
Online Registration – Payment Centre<br />
Once you have completed your registration the Payment Centre will indicate if you have<br />
an outstanding balance to pay. You can pay your statement by credit card by clicking<br />
the pay selected invoices button.
Online Registration – Payment Centre<br />
You can also pay your Account Statement by telephone or at any of the interactive<br />
kiosks located around campus. Be aware that fees paid after the due date will be<br />
subject to a LATE PAYMENT FEE. Pay attention to deadlines.
Online Registration<br />
Complete registration resources are located on the<br />
Registrar’s Office web page:<br />
http://www.johnabbott.qc.ca/resources<br />
Assistance with your registration is available at:<br />
registration.help@johnabbott.qc.ca<br />
514-457-6610 local 5360 or 5363<br />
Contact an Academic Advisor should you require<br />
program-related information at:<br />
advisors@johnabbott.qc.ca<br />
514-457-6610 local 5290