
Create successful ePaper yourself
Turn your PDF publications into a flip-book with our unique Google optimized e-Paper software.
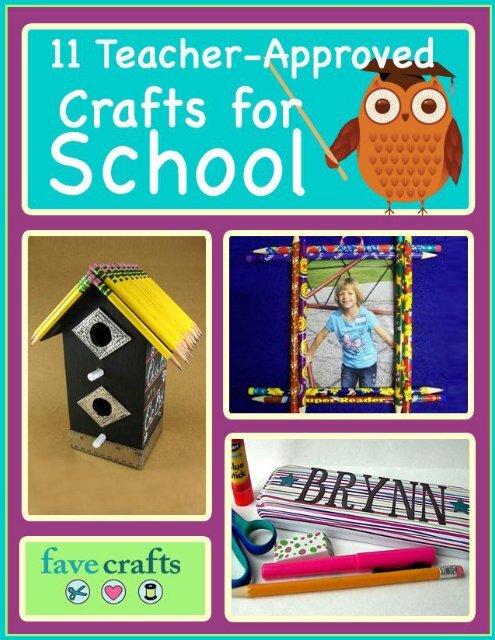
11 Teacher-Approved Crafts for School<br />
11 Teacher-Approved Crafts for School<br />
Copyright 2013 by Prime Publishing LLC<br />
All rights reserved. No part of this book may be reproduced or transmitted in any form or by any means,<br />
electronic or mechanical, including photocopying, recording, or by any information storage or retrieval<br />
system, without written permission from the publisher, except in the case of brief quotations embodied<br />
in critical articles and reviews.<br />
Trademarks are property of their respective holders. When used, trademarks are for the benefit of the<br />
trademark owner only.<br />
Published by Prime Publishing LLC, 3400 Dundee Road, Northbrook, IL 60062 – www.primecp.com<br />
Free Craft Projects<br />
Free Crochet Projects Free Knitting Projects Free Holiday Craft Projects<br />
Free Sewing Projects Free Quilt Projects Free Jewelry Projects<br />
Free Christmas Crafts Free Kids’ Craft Projects Free Crochet Afghan Patterns<br />
Find great craft projects at www.FaveCrafts.com.<br />
2
11 Teacher-Approved Crafts for School<br />
Letter from the Editors<br />
Hello, Readers!<br />
You know that summer is over when it’s time to invest in brand new school supplies. Make the<br />
transition as smooth as possible by creating a few creative back to school crafts. Kids can easily<br />
personalize their school supplies and create something worth showing off on the first day. This sense of<br />
pride will surely substitute any back to school nervousness or angst. Alternatively, teachers can begin to<br />
create crafts to decorate their classroom – it’s a fun way to provide a welcome environment for anxious<br />
new students. Whether it’s a school-themed birdhouse or a pair of pencil earrings, there are so many<br />
crafty options for teachers to enjoy. Get in the school spirit and start the new school year with a few<br />
cool crafts!<br />
You can find more craft projects, great activities for kids and decorating ideas at www.FaveCrafts.com.<br />
Our eBooks, like all of our craft projects, are absolutely FREE. Please feel free to share with family and<br />
friends and ask them to sign up at our website for free newsletters from FaveCrafts.com.<br />
We hope you enjoy reading and creating!<br />
Sincerely,<br />
The Editors of FaveCrafts<br />
www.FaveCrafts.com<br />
www.FaveCraftsBlog.com<br />
Find great craft projects at www.FaveCrafts.com.<br />
3
11 Teacher-Approved Crafts for School<br />
11 Teacher-Approved Crafts for School eBook<br />
Table of Contents<br />
School Crafts for Kids .................... 5<br />
Easy Pencil Picture Frame .............................. 5<br />
Colorful Fabric Book Cover ............................ 7<br />
Personalized Pencil Topper.......................... 11<br />
Motivational School Magnets ...................... 14<br />
Crafts for Teachers ....................... 16<br />
Back to School Birdhouse ............................ 16<br />
Back to School Pencil Earrings ..................... 25<br />
Scraptastic Notebook ................................... 29<br />
Back to School Activities .............. 30<br />
Altered Personalized Pencil Case ................. 30<br />
Denim Back to School Chalkboard ............... 31<br />
School Bead Necklace .................................. 32<br />
Special Thanks .............................. 34<br />
Look of Copper Enamel Pencil Box .............. 21<br />
Find great craft projects at www.FaveCrafts.com.<br />
4
11 Teacher-Approved Crafts for School<br />
School Crafts for Kids<br />
Easy Pencil Picture Frame<br />
By: Candace from One Minute Crafts<br />
Pencils are not only useful for writing. In fact, they can be<br />
used to create personalized pictures. This project is cute and<br />
easy to make. In fact, it's a perfect back to school craft for<br />
the kids to make.<br />
Materials:<br />
<br />
<br />
<br />
<br />
<br />
4” X 6” Picture; landscape or portrait oriented<br />
8 Pencils; new, any color, sharpened or unsharpened<br />
Ribbon; 4 inch, any color<br />
Clear tape<br />
Craft glue<br />
Instructions:<br />
1. Flip the picture over so that you are looking at its back. Make sure the picture has the top at<br />
the top even when flipped over.<br />
2. Form a loop with your ribbon and tape the ends of the loop to the top, center of the back of<br />
the picture.<br />
3. Flip the picture back over.<br />
4. Add glue onto the top and bottom of the picture along the edge, but wide enough for two<br />
pencils on each edge.<br />
5. At the top and bottom, lay two pencils pointing in opposite directions, onto the glue. Make<br />
sure the picture centered.<br />
6. Add glue down the center of each pencil set to help hold together.<br />
7. Place glue in each of the four corners on top of the pencil sets.<br />
8. Lay the other sets of two pencils on the left and right side of the picture.<br />
Find great craft projects at www.FaveCrafts.com.<br />
5
11 Teacher-Approved Crafts for School<br />
9. Again, add glue down the center of each pencil set to help hold.<br />
Find great craft projects at www.FaveCrafts.com.<br />
6
11 Teacher-Approved Crafts for School<br />
Colorful Fabric Book Cover<br />
By: Heidi Borchers<br />
Save your old bandanas! This craft is practical, fun and ecofriendly.<br />
Use brightly colored fabric with easily<br />
distinguishable prints – that way, your child will never<br />
misplace his or her textbooks.<br />
Materials:<br />
<br />
<br />
<br />
<br />
<br />
Bandanas (colors and patterns of your choice)<br />
Book of your choice<br />
Aleene’s Fabric Fusion Peel & Stick Tape<br />
Scissors<br />
Pencil<br />
Instructions:<br />
1. Lay book on bandana leaving approximately 3″ at top. Measure and cut to 3″ at bottom.<br />
2. If you are covering book that is larger than standard bandana size, you can add strips of<br />
bandanas with Peel & Stick Tape to create larger fabric size.<br />
Find great craft projects at www.FaveCrafts.com.<br />
7
11 Teacher-Approved Crafts for School<br />
3. Fold in sides to determine exact size of cover from top to bottom of book. Hand press and<br />
mark fold line with pencil.<br />
4. Wrap fabric around book and mark end fold lines with pencil.<br />
5. Apply line of Peel & Stick Tape along top and bottom edges; however, do not apply all the way<br />
to the end. You only want to apply the Tape along the bottom between the side fold lines.<br />
Remove paper backing and fold up to glue in place.<br />
Find great craft projects at www.FaveCrafts.com.<br />
8
11 Teacher-Approved Crafts for School<br />
6. Apply Peel & Stick Tape to each of the corners to the side fold lines. Remove paper backing<br />
and fold in fabric alongside fold lines.<br />
7. Insert back cover into pocket.<br />
8. Fold book back to insert front cover into front pocket.<br />
Find great craft projects at www.FaveCrafts.com.<br />
9
11 Teacher-Approved Crafts for School<br />
9. Determine desired size of pocket. Apply Peel & Stick tape along edges. Fold in edges to create<br />
clean edges on pocket.<br />
10. Apply Peel & Stick Tape along edges and bottom of wrong side of pocket. Remove release<br />
paper and glue to book cover to create pocket.<br />
Find great craft projects at www.FaveCrafts.com.<br />
10
11 Teacher-Approved Crafts for School<br />
Personalized Pencil Topper<br />
By: Chris Molnar for Theme A Party<br />
Get your child excited about school with this back to<br />
school craft! Pencil toppers are simple and easy to make,<br />
plus kids will love having their name on their pencil. These<br />
make great back to school ideas for teachers, too!<br />
Materials:<br />
<br />
<br />
<br />
<br />
<br />
<br />
<br />
Stringable letter beads<br />
Charms, decorative beads or other decorative elements, if Desired<br />
School glue<br />
Scissors<br />
1” X 8” and 1” X 3” lengths of jewelry cord in colors your child likes<br />
Pencil<br />
Pencil eraser head in a color your child likes<br />
Instructions:<br />
1. Choose a pencil eraser color. Fit it onto the top (eraser end) of the pencil.<br />
2. Choose jewelry cord in a contrasting color to the pencil eraser (or match the two colors – it's<br />
up to you). Cut the cord about 7-8” long. Use less if the name is shorter.<br />
3. Tie a knot in the end of the jewelry cord large enough that the beads won't slip off once you<br />
string them.<br />
Find great craft projects at www.FaveCrafts.com.<br />
11
11 Teacher-Approved Crafts for School<br />
4. Choose letter beads that spell your child's name or a special message. String them onto the<br />
knotted cord, in reverse order (so you end with the last bead being the first letter of your<br />
child's name). If your child would like added decoration, string colored beads or charms at this<br />
point as well.<br />
Tips:<br />
5. Give the knot at the bottom of the cord one last tug to make sure it's snug, then cut the<br />
excess string from the bottom of the cord as close to the knot as possible without allowing the<br />
cord to un-knot.<br />
6. Knot the top end of the string close to the first letter so that the beads won't budge. You<br />
should now have two knots: one at the beginning of the name and one at the end. Cut the top<br />
end of the cord so you have about 2” excess.<br />
7. Take another piece of cord in the same or a contrasting color. Cut about 3” long.<br />
8. Place a line of glue to completely cover the “neck” of the pencil eraser head. Begin wrapping<br />
the cord around the neck until the area is covered with string. Allow the glue to set, about 2-3<br />
minutes. (You may need to hold the end of the cord against the glue for about a minute to get<br />
it to stay.)<br />
9. Now take the string with the letter beads attached. Glue all over the string that you previously<br />
glued to the eraser, then cover this with the new piece of string, holding letter beads down<br />
slightly so they lie roughly parallel to the pencil as they dry. This doesn't need to be perfect –<br />
you just don't want the name sticking out too far and possibly getting snagged on things later.<br />
10. Allow to dry completely. We recommend 1 hour, depending upon how thickly you've spread<br />
the glue. A thinner line of glue will dry faster.<br />
1. For added pizzazz, string charms or colored beads before and after your child's name on the<br />
jewelry cord, or in between each letter. Possible charms include hanging musical notes,<br />
Find great craft projects at www.FaveCrafts.com.<br />
12
11 Teacher-Approved Crafts for School<br />
favorite cartoon characters, animals, sports emblems or your child's school mascot. Look in<br />
your local dollar or crafts store for threadable charms.<br />
2. This craft requires some dexterity, particularly wrapping the cord and holding it for the glue to<br />
set, so if your child is 7 or under, help her with this part.<br />
3. Beads can be a choking hazard. Do not do this craft with, or give it to, children under 3 or<br />
children who may place items in the mouth.<br />
4. If your child tends to be rather rough on her school supplies, you may choose to use a hot glue<br />
gun instead of school glue to attach the cords to the eraser and one another. DO NOT allow<br />
any child, even an older one (12 and up), to use a hot glue gun unsupervised. For children<br />
younger than 12, have an adult do the gluing and allow the kids their fun by having them<br />
choose all the colors and bead elements instead.<br />
5. This craft is appropriate for:<br />
a. With adult help: ages 4 and up<br />
b. Without adult help: ages 7 and up<br />
Find great craft projects at www.FaveCrafts.com.<br />
13
11 Teacher-Approved Crafts for School<br />
Motivational School Magnets<br />
By: Ann Butler for KellyCraft<br />
Your kids will love these magnets. Make some to<br />
hang up tests and quizzes from school. Students will<br />
be motivated to do well and have their hard work<br />
displayed.<br />
Materials:<br />
<br />
<br />
<br />
<br />
<br />
<br />
<br />
Kelly Craft "Get-It-Straight" Laser Square<br />
Duetica Lettering System: Floot<br />
Zip Dry by Beacon Adhesives<br />
Magnets<br />
Card Stock: White<br />
Card Stock: Print<br />
Scissor<br />
Instructions:<br />
1. Create words or sayings with the Duetica Lettering System and print out onto white card<br />
stock.<br />
Find great craft projects at www.FaveCrafts.com.<br />
14
11 Teacher-Approved Crafts for School<br />
2. Trim words/sayings, cut print card stock 1/2" larger than words/sayings.<br />
3. Use the "Get-It-Straight" Laser Square to align the words/sayings onto the print card stock;<br />
glue in place; then glue onto the magnet and trim as needed.<br />
Find great craft projects at www.FaveCrafts.com.<br />
15
11 Teacher-Approved Crafts for School<br />
Crafts for Teachers<br />
Back to School Birdhouse<br />
By: Carmen Flores Tanis from Bzzy Little Bee<br />
Made with simple classroom materials, this project is perfect<br />
for a teacher. The cute chalkboard design around the<br />
birdhouse makes it easy to customize and decorate. Get the<br />
kids involved in creating this fun teacher gift.<br />
Materials:<br />
<br />
<br />
<br />
<br />
<br />
<br />
<br />
<br />
<br />
<br />
<br />
<br />
<br />
<br />
Wood bird house<br />
3 dozen pencils<br />
Metal ruler<br />
Sheets of double sided tape<br />
Silver tooling foil<br />
Scrap pieces of chipboard<br />
Black chalkboard spray paint<br />
Back Sharpie permanent marker<br />
Scissors & craft knife<br />
Tin snips<br />
Embossing tool (or dull pencil or dull pointy dowel)<br />
Paint pens & white-out pen<br />
Electric pencil sharpener<br />
Scroll saw or some kind of hacksaw for cutting pencils<br />
Instructions:<br />
1. Spray paint your birdhouse black.<br />
Find great craft projects at www.FaveCrafts.com.<br />
16
11 Teacher-Approved Crafts for School<br />
2. Measure each of the side of the house and cut the metal ruler to fit.<br />
3. These shapes will decorate each of the front bird entrances.<br />
Find great craft projects at www.FaveCrafts.com.<br />
17
11 Teacher-Approved Crafts for School<br />
4. Darken the embossed designs with a little bit of black Sharpie. Wipe off excess ink.<br />
5. Fine tipped white-out correction ink pens work really well!<br />
Find great craft projects at www.FaveCrafts.com.<br />
18
11 Teacher-Approved Crafts for School<br />
6. Use a scroll saw or hack saw to shorten the pencils. Then use the electric pencil sharpener to<br />
sharpen each pencil. Dull the tips a little by rubbing them on a piece of sandpaper.<br />
Find great craft projects at www.FaveCrafts.com.<br />
19
11 Teacher-Approved Crafts for School<br />
Find great craft projects at www.FaveCrafts.com.<br />
20
11 Teacher-Approved Crafts for School<br />
Look of Copper Enamel Pencil Box<br />
By: Heidi Borchers<br />
Create a pencil box before you or your favorite kid heads<br />
back to school. This is a fun and sophisticated back to<br />
school craft. The copper enameling process is<br />
complicated and difficult to achieve at home, so use this<br />
technique instead.<br />
Materials:<br />
<br />
<br />
<br />
<br />
<br />
<br />
<br />
<br />
Aleene’s Original Tacky Glue<br />
Wood pencil box<br />
Acrylic paints – one for base coat and 3 to 4 for<br />
the mixtures<br />
Brush for base coat<br />
Tooth picks/wood skewers- for mixing<br />
Pin – I used a corsage pin<br />
Waxed paper<br />
Blue painters tape<br />
Instructions:<br />
1. For my box, I used a wood box with an indentation on the top. This is ideal for this technique<br />
so that the glue mixture does not drip off the top. You can also see that my box had a design<br />
embossed into the wood. You will not see this design once you apply your glue mixture.<br />
2. Using the brush, base coat the entire wood box. Let paint dry.<br />
Find great craft projects at www.FaveCrafts.com.<br />
21
11 Teacher-Approved Crafts for School<br />
3. Using the blue painters tape, tape off the top area where the glue mixture will be placed.<br />
4. To keep your waxed paper from moving around, tape it down to your work surface. The<br />
waxed paper should be large enough to hold the box and have space for mixing the glue and<br />
paints. Place a puddle of glue for each color of acrylic paint you will be using. Make one<br />
puddle larger (for the background color).<br />
5. Immediately squeeze acrylic paints into the puddles of glue.<br />
6. Using the toothpick or wood skewer mix the paint into the glue, until completely mixed.<br />
(Note: For the white background, you will need to mix the white paint into the glue. (If you<br />
only used the glue, it would be clear when dry which would be another technique all<br />
together).<br />
Find great craft projects at www.FaveCrafts.com.<br />
22
11 Teacher-Approved Crafts for School<br />
7. Using a wooden skewer, place the background mixture (white paint and glue) into the area<br />
you taped off. Make sure all of the wood area is covered with the mixture. Don’t worry about<br />
the uneven texture, it will flatten out.<br />
8. Immediately drop small drops of the other mixtures into the wet background mixture.<br />
9. To create your designs, place point of the pin in the center of the drop and pull outward<br />
through the glue mixture. Wipe the pin point off and continue to draw through and wipe pin<br />
off after each time.<br />
10. You can add more dots of colors on colors, and repeat pulling pin through colors.<br />
Find great craft projects at www.FaveCrafts.com.<br />
23
11 Teacher-Approved Crafts for School<br />
11. Carefully remove blue tape after about two hours. Let glue dry completely. If necessary touch<br />
up the box base coat paint color with a brush.<br />
12. For legs on box, glue plastic water bottle caps onto the bottom of the box and paint. Let paint<br />
dry.<br />
Find great craft projects at www.FaveCrafts.com.<br />
24
11 Teacher-Approved Crafts for School<br />
Back to School Pencil Earrings<br />
By: Savannah Starr<br />
If you're looking for ideas for homemade jewelry,<br />
look no further than an office supply store. Gather<br />
up some pencils and cover them in glitter for these<br />
earrings. This is a great wearable craft for teachers.<br />
Materials:<br />
<br />
<br />
<br />
<br />
<br />
<br />
<br />
<br />
<br />
<br />
No. 2 Pencils<br />
Pencil sharpener<br />
Drill with small drill bit<br />
Eye pins (one for each pencil)<br />
Aleene’s Tacky Glue<br />
Jewelry glue<br />
Glitter – pink, green, gold, copper, black<br />
Paper plates or wax paper (to catch excess glitter)<br />
Paint brush<br />
Clear spray sealer<br />
Instructions:<br />
1. To shorten pencils, sharpen to approximately 4″ in length (or shorter or longer if desired.)<br />
2. Drill through top of pencil eraser to create hole for eye pin.<br />
Find great craft projects at www.FaveCrafts.com.<br />
25
11 Teacher-Approved Crafts for School<br />
3. Using jewelry glue, glue eye pin into hole.<br />
4. Use brush to apply tacky glue to eraser area.<br />
5. Sprinkle with pink glitter.<br />
Find great craft projects at www.FaveCrafts.com.<br />
26
11 Teacher-Approved Crafts for School<br />
6. Apply glue to metal band. Sprinkle with green glitter.<br />
7. Apply glue to pencil. Sprinkle with gold glitter.<br />
8. Apply glue to end of pencil. Dip tip into black glitter.<br />
Find great craft projects at www.FaveCrafts.com.<br />
27
11 Teacher-Approved Crafts for School<br />
9. Sprinkle with copper glitter. Set aside to dry. Spray glitter with clear acrylic sealer.<br />
Find great craft projects at www.FaveCrafts.com.<br />
28
11 Teacher-Approved Crafts for School<br />
Scraptastic Notebook<br />
By: Kathy Cano-Murillo from Diary of a Crafty Chica<br />
Add some glitz and glamor to your notebooks. This is a great<br />
craft for teens and tweens, and is a clever way to get them in<br />
the mood to head back to school! Mix and match different<br />
media to create a notebook cover that's truly unique,<br />
colorful, and fun!<br />
Materials:<br />
<br />
<br />
<br />
<br />
<br />
One blank journal<br />
Assorted trims<br />
Crystal trim<br />
Craft knife<br />
Aleene's Fabric Fusion Peel and Stick Tape<br />
Instructions:<br />
1. Open the book flat, covers facing up.<br />
2. Measure and cut the trim so it goes across the entire book.<br />
3. Set out your trim in an order that you like. I love contrast, but if you look close, you can see I<br />
used gold as a repeating theme in the pattern.<br />
4. Apply the tape to the book all the way across, rub it down with your fingers and then peel off<br />
the backing.<br />
5. Apply the ribbon/trim along the sticky side.<br />
6. Keep going, when you get the composition part; use your craft knife or scissors to cut away, so<br />
that title still shows. That is what really gives the book character!<br />
7. Add trim around the frame of the title and set the crystal trim in place. If the tape is too wide,<br />
cut it in half before applying.<br />
8. Use your fingers to press the trim in place.<br />
9. Trim edges.<br />
Find great craft projects at www.FaveCrafts.com.<br />
29
11 Teacher-Approved Crafts for School<br />
Back to School Activities<br />
Altered Personalized Pencil Case<br />
By: Jennifer Ellefson for Spellbinders<br />
If you have an unusual name, personalized gifts can be<br />
tough to find. A quick and easy alternative is to make your<br />
own version using a plain item, such as this once all-white<br />
pencil case.<br />
Materials:<br />
Spellbinders Die Templates L3-01 Indulgence Font, S4-092 Stars 5<br />
WorldWin DoubleMates Perfect Plum<br />
ColorMates Deep Terrific Teal papers<br />
Pencil case<br />
Metallic rub-ons<br />
sticker maker<br />
Patterned paper<br />
Instructions:<br />
1. We purchased four Styrofoam balls (two that were 4", one 8" and one 10").<br />
2. We painted them a shade of brown so that the white was not seen in between the corks. I<br />
hung them to dry overnight.<br />
3. Next, I hot glued the corks on one by one.<br />
4. I glued a line of corks around the center and then filled in one half. Then I flipped it over and<br />
filled in the other half row by row. Occasionally the bottom of a cork had to be trimmed down<br />
some to fit into a tighter space.<br />
Find great craft projects at www.FaveCrafts.com.<br />
30
11 Teacher-Approved Crafts for School<br />
Denim Back to School Chalkboard<br />
By: Amanda Formaro for FaveCrafts<br />
This craft is a great way to use up those old<br />
school clothes. Made with old jeans, this fun<br />
mosaic framed chalkboard is great for<br />
decorating lockers, doors, or using as a<br />
classroom drawing pad.<br />
Materials:<br />
<br />
<br />
<br />
<br />
<br />
Framed chalkboard<br />
Recycled denim jeans<br />
Scissors<br />
Hot glue gun<br />
Dye or acrylic paint (optional)<br />
Instructions:<br />
1. Cut denim into squares wide enough to cover and overlap the border of the chalkboard.<br />
2. Hot glue the squares all the way around the border, overlapping a little as you go and<br />
alternating different shades and types of denim for some contrast.<br />
3. Cut colored denim into smaller squares and glue then randomly around the frame.<br />
Find great craft projects at www.FaveCrafts.com.<br />
31
11 Teacher-Approved Crafts for School<br />
School Bead Necklace<br />
By: Heidi Borchers of Inspired at Home<br />
Kids can help make this school-themed necklace with<br />
shrink plastic and wooden beads. This cute necklace<br />
makes a great gift for teacher.<br />
Materials:<br />
<br />
<br />
<br />
<br />
<br />
<br />
<br />
<br />
<br />
<br />
<br />
<br />
Shrink plastic – white<br />
Fine sandpaper<br />
Permanent marking pen – fine tip black<br />
1/8” diameter hole punch<br />
Colored pencils<br />
Non-stick baking sheet<br />
Spray sealer – gloss<br />
5 (6 mm) jump rings<br />
Needlenose pliers<br />
54” (1/8” wide) red satin ribbon<br />
Wooden beads: 26 (3/16”) assorted colors, 18 (3/8” ) white<br />
Pattern (see below)<br />
Find great craft projects at www.FaveCrafts.com.<br />
32
11 Teacher-Approved Crafts for School<br />
Instructions:<br />
1. Sand 1 side of each piece of shrink plastic. Be sure to thoroughly yet lightly sand both<br />
vertically and horizontally. Using marker, trace patterns onto sanded side of plastic. (Note that<br />
marker ink may bleed slightly on sanded surface but not to worry – this will disappear during<br />
baking!) Cut out designs. Punch holes in designs where indicated on pattern. Use colored<br />
pencils to color designs. Remember that colors will be more intense after shrinking. Referring<br />
to photo, add lettering to designs with permanent marking pen.<br />
2. Preheat toaster over (or conventional oven) to 275 to 300 degrees. Place designs on room<br />
temperature baking sheet and place in oven. Edges should begin to curl within 25 seconds; if<br />
not, increase temperature slightly. If edges begin to curl as soon as designs are put in oven,<br />
reduce temperature. After about 1 minute, designs will complete shrinking and lie flat.<br />
Remove from oven. Let cool. Apply 1 coat of sealer to front of each design. Let dry.<br />
3. Attach 1 jump ring to hole in each design using pliers. Knot ribbon about 24” from 1 end.<br />
Working from other end of ribbon, thread 4 colored beads and 3 white beads alternately onto<br />
ribbon. Thread 1 shrink plastic design onto ribbon and knot ribbon, catching jump ring of<br />
design in knot. Repeat beading sequence to thread remaining wooden beads and shrink<br />
plastic designs onto ribbon, reserving 2 beads for ribbon ends and knotting ribbon after last<br />
bead. Thread 1 bead onto each end of ribbon and knot ribbon around bead to secure.<br />
Find great craft projects at www.FaveCrafts.com.<br />
33
11 Teacher-Approved Crafts for School<br />
Special Thanks<br />
Heidi Borchers<br />
Chris Molnar<br />
Ann Butler<br />
KellyCraft<br />
Carmen Flores Tanis<br />
Savannah Starr<br />
Kathy Cano-Murillo<br />
Spellbinders<br />
Amanda Formaro<br />
Jennifer Ellefson<br />
Candace from OneMinuteCrafts<br />
Find great craft projects at www.FaveCrafts.com.<br />
34
11 Teacher-Approved Crafts for School<br />
Get excited for the back to school season with a couple of fun and creative crafts for kids, teachers and everyone in<br />
between! Kids will love personalizing their school supplies and creating gifts for their new instructor, while teachers will<br />
have a blast preparing their classrooms after a long, hot summer. Feel the back to school spirit and show some pride –<br />
these projects make it so easy!<br />
Find great craft projects at www.FaveCrafts.com.<br />
35