

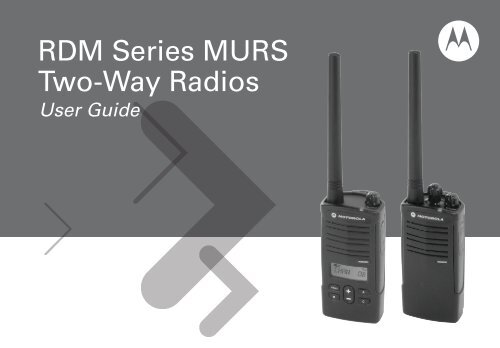
RDM Series MURS Two-Way Radios - Motorola Solutions
RDM Series MURS Two-Way Radios - Motorola Solutions
RDM Series MURS Two-Way Radios - Motorola Solutions

Create successful ePaper yourself
Turn your PDF publications into a flip-book with our unique Google optimized e-Paper software.
<strong>RDM</strong> <strong>Series</strong> <strong>MURS</strong><br />
<strong>Two</strong>-<strong>Way</strong> <strong>Radios</strong><br />
User Guide<br />
<strong>RDM</strong>2080d<br />
<strong>RDM</strong>2020
CONTENTS<br />
Contents . . . . . . . . . . . . . . . . . . . . . . . . . . . . i<br />
Safety . . . . . . . . . . . . . . . . . . . . . . . . . . . . . . iv<br />
Batteries and Chargers<br />
Safety Information . . . . . . . . . . . . . . . . . . . .v<br />
Introduction . . . . . . . . . . . . . . . . . . . . . . . . .1<br />
FCC Licensing<br />
Information . . . . . . . . . . . . . . . . . . . . . . . . . .3<br />
Radio Overview . . . . . . . . . . . . . . . . . . . . . .4<br />
Display Model – <strong>RDM</strong>2080d . . . . . . . . . . . . . .4<br />
Non-Display Model –<br />
<strong>RDM</strong>2020 . . . . . . . . . . . . . . . . . . . . . . . . . . . .5<br />
Battery Features . . . . . . . . . . . . . . . . . . . . . . .9<br />
Drop-in Tray Charger and<br />
Power Supply . . . . . . . . . . . . . . . . . . . . . . . .10<br />
Charging The Battery . . . . . . . . . . . . . . . . . .16<br />
Installing Spring Action<br />
Belt Clip. . . . . . . . . . . . . . . . . . . . . . . . . . . . .23<br />
Getting Started . . . . . . . . . . . . . . . . . . . . . 24<br />
Turning radio ON/OFF . . . . . . . . . . . . . . . . . 24<br />
Adjusting volume . . . . . . . . . . . . . . . . . . . . . 24<br />
Reading the Display<br />
(<strong>RDM</strong>2080d Model) . . . . . . . . . . . . . . . . . . . 24<br />
Selecting a Channel . . . . . . . . . . . . . . . . . . . 25<br />
Talking and Monitoring. . . . . . . . . . . . . . . . . 25<br />
Receiving a Call . . . . . . . . . . . . . . . . . . . . . . 25<br />
Scan . . . . . . . . . . . . . . . . . . . . . . . . . . . . . . . 25<br />
Signal Strength and Channel<br />
Busy Indicators<br />
(<strong>RDM</strong>2080d Model) . . . . . . . . . . . . . . . . . . . 26<br />
Low Battery Alert . . . . . . . . . . . . . . . . . . . . . 27<br />
Talk Range. . . . . . . . . . . . . . . . . . . . . . . . . . 27<br />
Computer Programming<br />
Software . . . . . . . . . . . . . . . . . . . . . . . . . . . . 28<br />
Radio Cloning. . . . . . . . . . . . . . . . . . . . . . . . 30<br />
Basic Configuration . . . . . . . . . . . . . . . . . . 31<br />
Menu Options (<strong>RDM</strong>2080d<br />
Model) . . . . . . . . . . . . . . . . . . . . . . . . . . . . . 31<br />
Battery Save. . . . . . . . . . . . . . . . . . . . . . . . . 31<br />
CONTENTS<br />
i<br />
English
CONTENTS<br />
Battery Type Settings<br />
(<strong>RDM</strong>2080d Model). . . . . . . . . . . . . . . . . . . .32<br />
Channel Alias<br />
(<strong>RDM</strong>2080d Model). . . . . . . . . . . . . . . . . . . .32<br />
Clonning Mode . . . . . . . . . . . . . . . . . . . . . . .33<br />
Roger Beep Tone<br />
(End of Transmission Tone) . . . . . . . . . . . . .34<br />
Keypad Beep (<strong>RDM</strong>2080d<br />
Model) . . . . . . . . . . . . . . . . . . . . . . . . . . . . . .34<br />
Keypad Lock/Unlock (<strong>RDM</strong>2080d<br />
Model) . . . . . . . . . . . . . . . . . . . . . . . . . . . . . .34<br />
VOX - Voice Operated Transmit . . . . . . . . . .35<br />
iVOX - Internal Voice Operated<br />
Transmit (<strong>RDM</strong>2080d Model) . . . . . . . . . . . .36<br />
VOX/iVOX Sensitivity Settings<br />
(<strong>RDM</strong>2080d Model). . . . . . . . . . . . . . . . . . . .36<br />
Nuisance Channel Delete . . . . . . . . . . . . . . .37<br />
PL Defeat . . . . . . . . . . . . . . . . . . . . . . . . . . .38<br />
Reset to Factory Defaults . . . . . . . . . . . . . . .38<br />
Advanced Configuration . . . . . . . . . . . . . .39<br />
Entering Advanced<br />
Configuration Mode. . . . . . . . . . . . . . . . . . . .39<br />
Frequency Selection . . . . . . . . . . . . . . . . . . 39<br />
CTSS/DPL Codes . . . . . . . . . . . . . . . . . . . . 39<br />
Auto Scan. . . . . . . . . . . . . . . . . . . . . . . . . . . 39<br />
Advanced Configuration<br />
(<strong>RDM</strong>2080d Model) . . . . . . . . . . . . . . . . . . . 40<br />
Other Advanced<br />
Configurations (<strong>RDM</strong>2080d Model) . . . . . . . 41<br />
Call Tone . . . . . . . . . . . . . . . . . . . . . . . . 41<br />
Microphone Gain Level . . . . . . . . . . . . . 41<br />
Scramble . . . . . . . . . . . . . . . . . . . . . . . . 42<br />
Side Button Preset to<br />
Channel Select . . . . . . . . . . . . . . . . . . . 43<br />
Advanced Configuration<br />
(<strong>RDM</strong>2020 Model) . . . . . . . . . . . . . . . . . . . . 44<br />
Reading Values Through<br />
Beeps and LED Indicators . . . . . . . . . . . 45<br />
Reading Frequency Values . . . . . . . . . . 46<br />
Reading CTCSS/DPL Values . . . . . . . . 46<br />
Reading Auto-Scan Values . . . . . . . . . . 47<br />
Changing Values . . . . . . . . . . . . . . . . . . 47<br />
Configuring a Frequency . . . . . . . . . . . . 47<br />
Configuring a Code . . . . . . . . . . . . . . . . 48<br />
Configuring Auto-Scan. . . . . . . . . . . . . . 48<br />
English ii
Frequency and Code Charts . . . . . . . . . . .50<br />
Use and Care . . . . . . . . . . . . . . . . . . . . . . .57<br />
Troubleshooting . . . . . . . . . . . . . . . . . . . . .58<br />
<strong>Motorola</strong> Limited Warranty for<br />
the United States and Canada . . . . . . . . . .62<br />
Accessories . . . . . . . . . . . . . . . . . . . . . . . .66<br />
CONTENTS<br />
iii<br />
English
SAFETY<br />
PRODUCT SAFETY AND RF<br />
EXPOSURE COMPLIANCE<br />
For a list of <strong>Motorola</strong>-approved, batteries, and<br />
other accessories, visit the following website:<br />
www.motorola.com/RDX<br />
SAFETY<br />
C a u t i o n<br />
Before using this product,<br />
read the RF energy<br />
awareness information and<br />
operating instructions in the<br />
Product Safety and RF<br />
Exposure booklet enclosed<br />
with your radio to ensure<br />
compliance with RF energy<br />
exposure limits.<br />
English iv
BATTERIES AND<br />
CHARGERS SAFETY<br />
INFORMATION<br />
This document contains important safety and<br />
operating instructions. Read these instructions<br />
carefully and save them for future reference.<br />
Before using the battery charger, read all the<br />
instructions and cautionary markings on<br />
• the charger,<br />
• the battery, and<br />
• the radio using the battery<br />
1. To reduce risk of injury, charge only<br />
rechargeable <strong>Motorola</strong>-authorized<br />
batteries. Other batteries may explode,<br />
causing personal injury and damage.<br />
2. Use of accessories not recommended by<br />
<strong>Motorola</strong> may result in risk of fire, electric<br />
shock, or injury.<br />
3. To reduce risk of damage to the electric<br />
plug and cord, pull by the plug rather than<br />
the cord when disconnecting the charger.<br />
4. An extension cord should not be used<br />
unless absolutely necessary. Use of an<br />
improper extension cord could result in<br />
risk of fire and electric shock. If an<br />
extension cord must be used, make sure<br />
that the cord size is 18 AWG for lengths<br />
up to 6.5 feet (2.0 m), and 16 AWG for<br />
lengths up to 9.8 feet (3.0 m).<br />
5. To reduce risk of fire, electric shock, or<br />
injury, do not operate the charger if it has<br />
been broken or damaged in any way.<br />
Take it to a qualified <strong>Motorola</strong> service<br />
representative.<br />
6. Do not disassemble the charger; it is not<br />
repairable and replacement parts are not<br />
available. Disassembly of the charger<br />
may result in risk of electrical shock or<br />
fire.<br />
BATTERIES AND CHARGERS<br />
SAFETY INFORMATION<br />
v<br />
English
7. To reduce risk of electric shock, unplug<br />
the charger from the AC outlet before<br />
attempting any maintenance or cleaning<br />
• The outlet to which this equipment is<br />
connected should be nearby and easily<br />
accessible.<br />
BATTERIES AND CHARGERS<br />
SAFETY INFORMATION<br />
OPERATIONAL SAFETY GUIDELINES<br />
• Turn the radio OFF when charging battery.<br />
• The charger is not suitable for outdoor use.<br />
Use only in dry locations/conditions.<br />
• Connect charger only to an appropriately<br />
fused and wired supply of the correct<br />
voltage (as specified on the product).<br />
• Disconnect charger from line voltage by<br />
removing main plug.<br />
• Maximum ambient temperature around the<br />
power supply equipment must not exceed<br />
40 °C (104 °F).<br />
• Power output from the power supply unit<br />
must not exceed the ratings stated on the<br />
product label located at the bottom of the<br />
charger.<br />
English vi
INTRODUCTION<br />
Thank you for purchasing the <strong>Motorola</strong>® <strong>RDM</strong><br />
<strong>Series</strong> <strong>MURS</strong> <strong>Two</strong>-<strong>Way</strong> Radio. This radio is a<br />
product of <strong>Motorola</strong>'s more than 75 years of<br />
experience as a world leader in the designing<br />
and manufacturing of communications<br />
equipment. The <strong>RDM</strong> <strong>Series</strong> <strong>MURS</strong> <strong>Two</strong>-<strong>Way</strong><br />
<strong>Radios</strong> provide cost-effective communications<br />
for businesses such as retail stores,<br />
restaurants, schools, construction sites,<br />
manufacturing, property and hotel<br />
management and more. <strong>Motorola</strong> Business<br />
two-way radios are the perfect communications<br />
solution for all of today's fast-paced industries.<br />
Note:<br />
Read this user guide carefully to ensure you<br />
know how to properly operate the radio<br />
before use.<br />
Business <strong>Radios</strong>,<br />
RPSD 1C15, <strong>Motorola</strong><br />
8000 West Sunrise Boulevard<br />
Plantation, Florida 33322<br />
PACKAGE CONTENTS<br />
• Radio with fixed antenna<br />
• Spring Action Belt-Clip<br />
• Lithium-Ion Battery<br />
• Power Supply<br />
• User Guide<br />
• Warranty Card<br />
• Drop-in Tray Charger<br />
• Product Safety & RF Exposure Booklet<br />
INTRODUCTION<br />
1<br />
English
INTRODUCTION<br />
For a copy of a large-print version of this user<br />
guide or for product-related questions, contact:<br />
1-800-448-6686 in the USA<br />
1-800-461-4575 in Canada<br />
This User Guide covers the following <strong>RDM</strong> <strong>Series</strong> models:<br />
1-866-522-5210 on your TTY (Text<br />
Telephone)<br />
For product information visit us at:<br />
www.motorola.com/business<br />
Model<br />
Frequency<br />
Band<br />
Transmit<br />
Power<br />
Number of<br />
Channels<br />
Display<br />
<strong>RDM</strong>2080d <strong>MURS</strong> 2 W 8 Yes<br />
<strong>RDM</strong>2020 <strong>MURS</strong> 2 W 2 No<br />
English 2
FCC LICENSING<br />
INFORMATION<br />
REGULATION ON <strong>MURS</strong> (MULTI-USE<br />
RADIO SERVICE) FREQUENCIES<br />
The <strong>RDM</strong>2020/2080 radios are exclusively<br />
<strong>MURS</strong> frequencies radios. These devices also<br />
comply with Part 15 of the FCC Rules.<br />
Operation is subject to the following two<br />
conditions:<br />
1. This device does not cause harmful<br />
interference, and<br />
2. This device must accept any interference<br />
received, including interference that may cause<br />
undesired operation.<br />
FCC License is not required. This device<br />
operates on frequencies authorized for use in<br />
the Multi-Use Radio Service (<strong>MURS</strong>). <strong>MURS</strong><br />
frequencies are available for unlicensed<br />
business or personal use. Take into account<br />
that change or modifications not expressly<br />
approved by <strong>Motorola</strong> may void the user’s<br />
authority granted by the FCC to operate this<br />
radio and should not be made. To comply with<br />
FCC requirements, transmitter adjustments<br />
should be made only by or under the<br />
supervision of a person certified as technically<br />
qualified to perform transmitter maintenance<br />
and repairs in the private land mobile and fixed<br />
services as certified by an organization<br />
representative of the user of those services.<br />
Replacement of any transmitter component<br />
(crystal, semiconductor, etc.) not authorized by<br />
the FCC equipment authorization for this radio<br />
could violate FCC rules. Use of this radio<br />
outside the country where it was intended to be<br />
distributed is subject to government regulations<br />
and may be prohibited.<br />
For questions regarding FCC license, call<br />
1-888-CALL-FCC (1-888-225-5322) or go to<br />
www.fcc.gov.<br />
FCC LICENSING<br />
INFORMATION<br />
3<br />
English
RADIO OVERVIEW<br />
DISPLAY MODEL – <strong>RDM</strong>2080d<br />
Fixed<br />
Antenna<br />
On/Off/<br />
Volume<br />
Knob<br />
Lithium-Ion<br />
Battery<br />
LED Indicator<br />
Microphone<br />
Accessory<br />
Connector<br />
PTT (Push-to-Talk)<br />
Button<br />
Model Label<br />
RADIO OVERVIEW<br />
Menu Button/<br />
Keypad Lock<br />
Front Buttons<br />
Use and to scroll up/<br />
down through channels and<br />
menu setting<br />
SB1 – Monitor<br />
Button<br />
SB2 – Nuisance<br />
Channel Delete<br />
English<br />
4
NON-DISPLAY MODEL – <strong>RDM</strong>2020<br />
Fixed<br />
Antenna<br />
Microphone<br />
Channel Selector<br />
Knob<br />
On/Off/Volume<br />
Knob<br />
Lithium-Ion<br />
Battery<br />
LED Indicator<br />
PTT (Push-to-Talk)<br />
Button<br />
Accessory<br />
Connector<br />
Model Label<br />
SB1 – Monitor<br />
Button<br />
SB2 – Nuisance<br />
Channel Delete<br />
RADIO OVERVIEW<br />
5<br />
English
On/Off/Volume Knob<br />
Used to turn the radio ON or OFF and to adjust<br />
the radio’s volume.<br />
Front Buttons (<strong>RDM</strong>2080d Model Only)<br />
Channel Selector Knob<br />
Used to switch the radio to different channels.<br />
Accessory Connector<br />
Used to connect compatible audio accessories.<br />
RADIO OVERVIEW<br />
Microphone<br />
Speak clearly into the microphone when<br />
sending a message.<br />
Fixed Antenna<br />
The antenna is not removable.<br />
LED Indicator<br />
Used to give battery status, power-up status,<br />
radio call information and scan status.<br />
• Button<br />
This button provides access to set up features<br />
like VOX/iVOX levels, battery type, etc. It also<br />
allows for navigation through various features<br />
while configuring the unit.<br />
• Toggle Up/Down Buttons<br />
Used to change channels and to scroll up/down<br />
menu options or set up configurable values.<br />
These buttons are not configurable.<br />
English<br />
6
Configurable Buttons<br />
Button<br />
Monitor<br />
Scan /<br />
Nuisance<br />
Delete<br />
Call Tone Scramble Backlight<br />
Channel<br />
Preset 1<br />
Channel<br />
Preset 2<br />
No Operation<br />
SB1 Default N/A N/A N/A<br />
SB2 Default N/A N/A N/A<br />
BUTTON A (*)<br />
Default<br />
BUTTON B (*)<br />
BUTTON C (*)<br />
Default<br />
Default<br />
Buttons are configured to default functions, other features may be assigned to these buttons as<br />
shown in the table.<br />
(*) <strong>RDM</strong>2080d Model only<br />
RADIO OVERVIEW<br />
7<br />
English
Icons Chart (<strong>RDM</strong>2080d Model)<br />
Icon Symbol Comments<br />
Battery Level<br />
Displayed during normal radio mode operation, displays battery life remaining.<br />
Channel<br />
Displayed during normal radio operation and when programming channel features.<br />
Code<br />
Displayed during normal radio operation and when programming codes features.<br />
Frequency<br />
Displayed during normal radio operation.<br />
Keypad lock<br />
Displayed whenever the Keypad lock feature is enabled (keypad is locked).<br />
Program<br />
Displayed whenever the radio is set up to Advanced Configuration Mode.<br />
RADIO OVERVIEW<br />
Scan<br />
Scramble<br />
Signal<br />
Strength<br />
Vox/IVox<br />
G<br />
L<br />
Displayed whenever the radio is set to SCAN mode.<br />
Displayed whenever scramble is enabled.<br />
RSSI Display Icon numbers of bars will indicate the strength of the received signal.<br />
Displayed when IVOX/VOX enabled or when programming MIC/MIC gain features.<br />
English<br />
8
BATTERY FEATURES<br />
The <strong>RDM</strong> <strong>Series</strong> <strong>MURS</strong> <strong>Two</strong>-<strong>Way</strong> Radio<br />
provides Lithium-Ion batteries that come in<br />
different capacities that will define the battery<br />
life. It also offers the option to use Alkaline<br />
batteries.<br />
About the Li-Ion Battery<br />
The <strong>RDM</strong> <strong>Series</strong> <strong>MURS</strong> <strong>Two</strong>-<strong>Way</strong> Radio<br />
comes equipped with a rechargeable Li-Ion<br />
battery. This battery should be charged before<br />
initial use to ensure optimum capacity and<br />
performance.<br />
<strong>Motorola</strong> batteries are designed specifically to<br />
be used with a <strong>Motorola</strong> charger and vice<br />
versa. Charging in non-<strong>Motorola</strong> equipment<br />
may lead to battery damage and void the<br />
battery warranty. The battery should be at<br />
about 77 °F (25 °C) (room temperature),<br />
whenever possible. Charging a cold battery<br />
(below 50 ° F [10 °C]) may result in leakage of<br />
electrolyte and ultimately in failure of the<br />
battery. Charging a hot battery (above 95 °F<br />
[35 °C]) results in reduced discharge capacity,<br />
affecting the performance of the radio.<br />
<strong>Motorola</strong> rapid-rate battery chargers contain a<br />
temperature-sensing circuit to ensure that<br />
batteries are charged within the temperature<br />
limits stated above.<br />
Battery Recycling and Disposal<br />
Li-Ion rechargeable batteries can be recycled.<br />
However, recycling facilities may not be<br />
available in all areas. Under various U.S. state<br />
laws and the laws of several other countries,<br />
batteries must be recycled and cannot be<br />
disposed of in landfills or incinerators. Contact<br />
your local waste management agency for<br />
specific requirements and information in your<br />
area. <strong>Motorola</strong> fully endorses and encourages<br />
the recycling of Li-Ion batteries. In the U.S. and<br />
Canada, <strong>Motorola</strong> participates in the<br />
nationwide Rechargeable Battery Recycling<br />
Corporation (RBRC) program for Li-Ion battery<br />
collection and recycling.<br />
RADIO OVERVIEW<br />
9<br />
English
Many retailers and dealers participate in this<br />
program. For the location of the drop-off facility<br />
closest to you, access RBRC's Internet web<br />
site at:<br />
DROP-IN TRAY CHARGER AND POWER<br />
SUPPLY<br />
http://www.call2recycle.org/<br />
or call:<br />
1-800-8-BATTERY<br />
This internet site and telephone number also<br />
provides other useful information concerning<br />
recycling options for consumers, businesses<br />
and governmental agencies.<br />
Drop-in Tray Charger<br />
Power Supply<br />
The radio is equipped with one Drop-in Tray<br />
Charger and one Power Supply with Adaptor.<br />
For details, see "Chargers” on page 67.<br />
RADIO OVERVIEW<br />
English<br />
10
Installing the Battery<br />
Removing the Battery<br />
Battery<br />
Latch<br />
Battery<br />
Latch<br />
slots<br />
1. Turn OFF the radio.<br />
2. With the <strong>Motorola</strong> logo side up, fit the tabs at<br />
the bottom of the battery into the slots at the<br />
bottom of the radio.<br />
3. Press the top part of the battery towards the<br />
radio until a click is heard.<br />
1. Turn OFF the radio.<br />
2. Push down and hold the battery latch.<br />
3. Pull the top of the battery out and lift it from the<br />
slots located at the bottom of the radio.<br />
RADIO OVERVIEW<br />
11<br />
English
Alkaline Battery Pack (Optional)<br />
Installing Alkaline Batteries<br />
Removing Alkaline Batteries<br />
Alkaline<br />
Battery<br />
Door<br />
Alkaline<br />
Battery<br />
Door<br />
RADIO OVERVIEW<br />
1. Turn OFF the radio and remove the Li-Ion<br />
battery.<br />
2. Assemble alkaline battery frame in the same<br />
steps as installing the Li-Ion battery.<br />
3. Pull the battery door from alkaline battery frame<br />
out and slide five AA alkaline batteries into the<br />
frame, matching the markings inside the<br />
compartment.<br />
4. Replace the battery door on the battery frame.<br />
1. Turn OFF the radio and remove the battery door<br />
on the battery frame.<br />
2. Remove the five AA alkaline batteries from the<br />
battery frame.<br />
3. Replace the battery door on the battery frame.<br />
4. Slide the battery latches, on both sides of the<br />
battery pack to remove the battery frame.<br />
English<br />
12
Li-Ion Battery Life<br />
When the Battery Save feature is ON (enabled by default) the battery life will be longer. The<br />
following chart summarizes battery life estimations:<br />
Li-Ion Battery Life with Battery Save feature ON<br />
Battery Type<br />
2 Watts<br />
Standard<br />
High<br />
Ultra High<br />
12 hours<br />
24 hours<br />
26 hours<br />
Note:<br />
Battery life is estimated based on the following standard<br />
duty cycle: 5% Transmit, 5% Receive and 90% Standby.<br />
RADIO OVERVIEW<br />
13<br />
English
Alkaline Battery Life<br />
The following chart estimates the Alkaline battery life:<br />
Alkaline Battery Life<br />
Battery Save Feature<br />
ON<br />
2 Watts<br />
26 hours<br />
Note:<br />
Battery life is estimated based on the following standard<br />
duty cycle: 5% Transmit, 5% Receive and 90% Standby.<br />
RADIO OVERVIEW<br />
English<br />
14
Battery Meter (<strong>RDM</strong>2080d Model)<br />
The battery meter located in the upper left corner of the display model indicates the remaining<br />
battery power.<br />
Battery Type<br />
<strong>RDM</strong> <strong>Series</strong> Battery Meter<br />
3 Bars 2 Bars 1 Bar<br />
Li-Ion 100% – 70% 70% – 30% 30% – 0%<br />
AA 100% – 70% 70% – 30% 30% – 0%<br />
RADIO OVERVIEW<br />
15<br />
English
CHARGING THE BATTERY<br />
The <strong>RDM</strong> <strong>Series</strong> <strong>MURS</strong> <strong>Two</strong>-<strong>Way</strong> Radio offers<br />
a Standard Charger and a Rapid Charger,<br />
which are designed to charge either the battery<br />
with the radio or a standalone battery.<br />
Charging The Battery Attached to the Radio<br />
Power Supply<br />
(Transformer)<br />
The <strong>RDM</strong> radio comes equipped with a<br />
Standard Charger.<br />
RADIO OVERVIEW<br />
Use only use <strong>Motorola</strong>-approved Drop-in Tray<br />
Single Unit Charger or Drop-in Tray Multi Unit<br />
Charger to charge the <strong>Motorola</strong>-approved<br />
battery.<br />
Note:<br />
When acquiring additional chargers or<br />
power supplies, make sure you have similar<br />
drop-in tray chargers and power supplies<br />
sets (all “rapid” or all “standard”). For part<br />
number details, refer to "Chargers” on<br />
page 67.<br />
Drop-in Tray<br />
Charger Port<br />
1. Place the drop-in tray charger on a flat surface.<br />
2. Insert the connector of the power supply into the<br />
port on the side of the drop-in tray charger.<br />
3. Plug the AC adaptor into a power outlet.<br />
4. Insert the radio with battery into the tray with the<br />
front of the radio facing the front of the charger.<br />
Note: Before charging a battery attached to a<br />
radio, turn the radio OFF to ensure a full<br />
charge. See "Operational Safety Guidelines”<br />
on page vi for more information.<br />
English<br />
16
Charging a Standalone Battery<br />
Charging a Standard Battery<br />
The drop-in tray charger has a removable<br />
bracket that is adjustable depending on the<br />
type of battery that needs to be charged. The<br />
drop-in tray charger's default position will<br />
charge a standard battery. The following image<br />
shows the orientation of the bracket for each<br />
battery:<br />
Adjustable bracket<br />
with slots on the top<br />
Adjustable bracket<br />
with slots on the bottom<br />
To charge a stand alone <strong>Motorola</strong> battery,<br />
follow steps 1 to 3 in the previous section and<br />
insert the battery into the tray, with the inside<br />
surface of the battery facing the front of the<br />
charger. Ensure the slots in the battery<br />
correctly engage in the charger (see next<br />
section for battery type details).<br />
Standard<br />
High and Ultra High Capacity<br />
RADIO OVERVIEW<br />
17<br />
English
Charging a High Capacity or Ultra High<br />
Capacity Battery<br />
The bracket in the charger must be adjusted to<br />
the correct position for either Standard or High<br />
capacity battery.<br />
Removable<br />
Piece<br />
Removable<br />
Piece<br />
Turn around<br />
horizontal<br />
180 degree<br />
To adjust the charger to accommodate the High<br />
capacity or Ultra High capacity battery:<br />
1. Squeeze both tabs on each side of the<br />
removable bracket in the drop-in charger tray<br />
and lift the bracket from the tray.<br />
2. Rotate the removable bracket 180 degrees and<br />
replace it by fitting it in the charger slot until it<br />
snaps. The label on the removable bracket<br />
should show “High & Ultra Capacity Battery”<br />
facing the front of the charger.<br />
3. Repeat same procedure to return to the<br />
charging a Standard Battery position. The label<br />
on the removable bracket should show<br />
“Standard Battery” facing front.<br />
RADIO OVERVIEW<br />
English<br />
18
Drop-in Tray Charger LED Indicators<br />
Standard Charger LED Indicator<br />
Status LED Status Comments<br />
Power ON Steady red for 3 seconds The charger has powered up<br />
Charging Blinking red (slow) The charger is currently charging<br />
Charging<br />
Complete<br />
Steady red<br />
Battery is fully charged<br />
Battery Fault(*) Blinking red (fast) Battery had a fault when it was inserted<br />
(*) Normally re-seating the battery will correct this issue.<br />
RADIO OVERVIEW<br />
19<br />
English
Rapid Charger LED Indicator<br />
Status LED Status Comments<br />
Power ON Steady green for 3 seconds The charger has powered up<br />
Charging Blinking green The charger is currently charging<br />
Top-off Charging Blinking green (slow) Battery is near fully charged<br />
Charge<br />
Complete<br />
Steady green<br />
Battery is fully charged<br />
Battery Fault (*) Blinking red (fast) Battery had a fault when it was inserted<br />
RADIO OVERVIEW<br />
Waiting to<br />
Charge (**)<br />
Double-blink yellow<br />
Battery charging conditions not suitable<br />
(*) Normally re-seating the battery pack will correct this issue.<br />
(**) Battery temperature is too warm or too cold or wrong power supply is being used<br />
English<br />
20
Estimated Charging Time<br />
The following table provides the estimated charging time of the battery. For further details, see<br />
"Battery” on page 66.<br />
Estimated Charging Time<br />
Charging<br />
Solution<br />
Standard<br />
Battery Type<br />
High Capacity<br />
Ultra High<br />
Capacity<br />
Standard Charging<br />
Solution<br />
7 hours 12 hours 13 hours<br />
Rapid Charging<br />
Solution<br />
1.5 hours 3 hours 3.5 hours<br />
RADIO OVERVIEW<br />
21<br />
English
Charging Batteries using a Multi Unit<br />
Charger- MUC (Optional)<br />
MUC LED Indicator<br />
Status LED Status Comments<br />
Charging<br />
Charge<br />
Complete<br />
Steady Red<br />
Indication<br />
Steady Green<br />
Indication<br />
The charger is<br />
currently charging<br />
Battery is fully<br />
charged<br />
RADIO OVERVIEW<br />
The Multi Unit Charger (MUC) allows drop-in<br />
charging of up to 6 batteries with radios<br />
attached or stand alone batteries.<br />
To charge the batteries follow the same<br />
procedure described for the Single Unit<br />
Charger.<br />
Note:<br />
The Multi Unit Charger is capable of cloning<br />
up to 3 radios (3 Source radios and 3 Target<br />
radios). See "RADIO Cloning” on page 30<br />
for details.<br />
Battery<br />
Fault (*)<br />
Blinking red<br />
(fast)<br />
Battery was faulty<br />
when inserted<br />
(*) Normally re-seating the battery pack will<br />
correct this issue.<br />
English<br />
22
INSTALLING SPRING ACTION BELT CLIP<br />
Belt Clip<br />
Tab<br />
Spring<br />
Action Belt<br />
Clip<br />
1. Slide the spring action belt clip rails into the belt<br />
clip grooves on the back of the battery and slide<br />
it down until the belt clip tab snaps into place.<br />
2. To remove, pull back the metal release tab on<br />
the belt clip tab and push the spring action belt<br />
clip upward to remove. (If needed, use a small<br />
flat screw driver to leverage the metal release).<br />
RADIO OVERVIEW<br />
23<br />
English
GETTING STARTED<br />
GETTING STARTED<br />
TURNING RADIO ON/OFF<br />
Turn the On/Off/Volume knob clockwise to turn<br />
ON the radio. The radio will chirp and the LED<br />
will briefly blink a red light.<br />
To turn the radio OFF rotate the On/Off/Volume<br />
knob counterclockwise until you hear a “click”<br />
and the radio LED indicator turns OFF.<br />
ADJUSTING VOLUME<br />
Turn the On/Off/Volume knob clockwise to<br />
increase the volume, or counterclockwise to<br />
decrease the volume.<br />
READING THE DISPLAY (<strong>RDM</strong>2080d<br />
MODEL)<br />
Scan<br />
Battery<br />
Level<br />
Channel<br />
Indicator<br />
Keypad Hi Power<br />
Lock<br />
Repeater/Talkaround<br />
Vox /<br />
Scramble<br />
iVox<br />
Signal<br />
Strength<br />
Programming<br />
Mode Indicator<br />
Frequency<br />
Indicator<br />
Channel Number<br />
Interference<br />
Eliminator Code<br />
Indicator<br />
Note:<br />
• The radio display shown here is for icon location<br />
only. Each radio display may appear different<br />
(channel and code) based on the pre configured<br />
radio defaults. Pressing any button, except the<br />
PTT button, will turn on the backlight.<br />
• Repeater capability is not available for these<br />
radio models.<br />
English 24
SELECTING A CHANNEL<br />
To select a channel on the <strong>RDM</strong>2080d model,<br />
press the toggle / buttons until you<br />
reach the desired channel.<br />
To select a channel on the <strong>RDM</strong>2020 model,<br />
rotate the Channel Selector Knob and select<br />
either Channel 1 or 2.<br />
TALKING AND MONITORING<br />
It is important to monitor traffic before<br />
transmitting to ensure that you do not “talk<br />
over” someone who is already transmitting.<br />
Note: The monitoring feature is pre-configured on<br />
the SB1 button.<br />
To start monitoring and talking:<br />
1. Press and hold the SB1 button to access<br />
channel traffic. If no activity is present, the radio<br />
emits a static noise.<br />
2. Press the SB1 button again to release.<br />
3. Once channel traffic has cleared, press the PTT<br />
button to talk. When transmitting, the radio LED<br />
blinks red.<br />
RECEIVING A CALL<br />
1. Select a channel by pressing the toggle buttons<br />
/ until you reach the desired channel.<br />
2. Make sure the PTT button is released and listen<br />
for voice activity.<br />
3. The LED indicator blinks RED while your radio<br />
is receiving.<br />
4. To respond, hold the radio vertically 1 to 2<br />
inches (2.5 to 5 cm) from your mouth. Press the<br />
PTT button to talk; release it to listen.<br />
SCAN<br />
The scan mode allows the radio to move<br />
through the channel scan list looking for eligible<br />
transmission activity to receive or to un mute<br />
to. The scanning feature is pre configured in<br />
the SB2.<br />
To toggle scanning on/off:<br />
1. Short press the SB2 button. When a<br />
transmission is detected, the radio stops<br />
scanning and stays on the active channel.<br />
GETTING STARTED<br />
25<br />
English
GETTING STARTED<br />
Whenever the radio is set up in “Scan Mode”<br />
the LED will signal a fast red blink.<br />
If there is transmission in another channel<br />
during this time, the radio will stay on the active<br />
channel and the transmission on the other<br />
channel will not be heard.<br />
When the transmission is over in the active<br />
channel, the radio will wait for 5 seconds before<br />
resuming Scan again.<br />
2. To scan a channel without Interference<br />
Eliminator Codes (CTCSS/DPL), set the code<br />
for the channels to ‘0’ in the CTCSS/DPL<br />
Advanced Configuration Mode.<br />
Note:<br />
If Auto-Scan has been enabled for a<br />
particular channel, there is no need to press<br />
the SB2 to start scanning, as the radio will<br />
do it automatically.<br />
SIGNAL STRENGTH AND CHANNEL BUSY<br />
INDICATORS (<strong>RDM</strong>2080d MODEL)<br />
While receiving, the radio displays the strength<br />
indicator icon and the LED blinks faster.<br />
The signal strength icon can change from one<br />
bar (weakest) to six bars (strongest) depending<br />
on the radio reception coverage. This can help<br />
determine when a radio is moving out of range.<br />
Note: Obstacles that block the signal path may<br />
affect the strength of the incoming signal.<br />
English 26
LOW BATTERY ALERT<br />
This feature provides a sequence of loud and<br />
high beep tones to alert that the battery level is<br />
low. The LED blinks orange several times. The<br />
<strong>RDM</strong>2080d also provides a battery gauge icon<br />
on the screen that indicates the battery level as<br />
shown in the previous image.<br />
TALK RANGE<br />
Industrial<br />
Inside steel/concrete<br />
Industrial buildings<br />
Up to 220,000 Sq. Ft.<br />
Multi-Level<br />
Inside multi-level<br />
buildings<br />
Up to 13 Floors<br />
GETTING STARTED<br />
27<br />
English
GETTING STARTED<br />
COMPUTER PROGRAMMING SOFTWARE<br />
In addition to the features that can be<br />
configured in Basic and Advanced<br />
Configuration via the radio panel, the Computer<br />
Programming Software (CPS) can additionally<br />
configure Transmit Time-Out Timer, PL<br />
Reverse Burst, Alternate Battery Selection,<br />
Backlight settings, Buttons Reset, CPS<br />
Manager Lock, LED enabled/disabled, Power<br />
Up Text, and Edit Scan List.<br />
The Programming Cable RKN4155 (sold<br />
separately) is required. The CPS Software is<br />
available for download at no cost at:<br />
www.motorola.com/RDX<br />
To configure the radio using the CPS, connect<br />
the radio via the Drop-in Charger Tray and<br />
CPS Programming Cable as shown in the<br />
picture below.<br />
Drop-in<br />
Charger<br />
Tray<br />
Mini-connector<br />
Radio to be<br />
programmed<br />
USB<br />
Connector<br />
CPS<br />
Programming<br />
Cable<br />
CPS Software<br />
Transmit Time-Out Timer<br />
This timer sets the amount of time (60, 120 or<br />
180 sec.) that the radio can continuously<br />
transmit before transmission is automatically<br />
terminated. A continuous tone is generated<br />
when this timer expires, indicating a time-out.<br />
English 28
PL Reverse Burst<br />
PL Reverse Burst causes a Private Line (PL)<br />
code to be sent at the end of a transmission<br />
once the PTT button is released. This subaudible<br />
tone causes the receiving radio to mute<br />
its speaker before loss of a carrier is detected.<br />
Muting the speaker eliminates unwanted noise<br />
(squelch tail) during loss of carrier detection.<br />
Choices available are: 180/240.<br />
Alternate Battery Selection<br />
The radio is capable of supporting multiple<br />
batteries solutions; therefore, the user can<br />
configure a battery type when using the<br />
accessory battery pack tray, only when the<br />
radio does not detect a valid battery type on its<br />
own. Choices available are: Alkaline, Nickel,<br />
and Lithium Ion.<br />
GETTING STARTED<br />
29<br />
English
GETTING STARTED<br />
RADIO CLONING<br />
The <strong>RDM</strong> <strong>Series</strong> <strong>MURS</strong> <strong>Two</strong>-<strong>Way</strong> radio<br />
profiles from one radio (the “Source” radio) to a<br />
second radio (the “Target” radio) by using any<br />
one of these 3 methods:<br />
• One Multi Unit Charger (optional accessory)<br />
• <strong>Two</strong> Single Unit Chargers and a Radio-to-<br />
Radio cloning cable (optional accessory)<br />
• the CPS (free software download)<br />
Cloning with a Multi-Unit Charger (MUC)<br />
The Source radio has to be in Pocket 1, 3 or 5<br />
while the Source radio to be cloned has to be in<br />
Pockets 2, 4 or 6, matching in the MUCs<br />
pockets by pairs as follows: 1 and 2 or 3 and 4<br />
or 5 and 6.<br />
When cloning, the MUC does not need to be<br />
plugged into a power source, but ALL radios<br />
require charged batteries.<br />
To clone radios with the MUC:<br />
1. Turn ON the Target radio and place it into one<br />
of the MUC Target Pockets<br />
2. Power the Source radio following the sequence<br />
below:<br />
Long press the PTT button and SB2<br />
simultaneously while turning the radio ON.<br />
Wait for 3 seconds before releasing the buttons<br />
until a distinctive audible tone is heard.<br />
English 30
BASIC CONFIGURATION<br />
MENU OPTIONS (<strong>RDM</strong>2080d MODEL)<br />
The menu options only activate whenever there<br />
is an audio accessory connected to the radio,<br />
iVOX is enabled and/or a battery type has been<br />
changed.<br />
To enter MENU options:<br />
1. Short press the MENU button. The radio will<br />
navigate to the first feature option available.<br />
Features can be navigated with the /<br />
buttons.<br />
2. After selecting the desired settings, press<br />
MENU to save and go to the next option, or<br />
long press the PTT button to save and exit or<br />
turn OFF the radio to exit without saving<br />
changes.<br />
Note: When there is no activity for more than ten<br />
seconds, MENU mode will time out.<br />
BATTERY SAVE<br />
This feature extends the battery life by placing<br />
the radio in “Idle” mode each time there is no<br />
radio activity. The battery safe feature default<br />
setting is set ON.<br />
To toggle Battery Save on/off:<br />
1. Press SB1 and SB2 simultaneously for 2 or 3<br />
seconds while powering up the radio until a<br />
quick series of beeps is heard, which indicates<br />
that Battery Save mode is ON.<br />
2. Repeat step one until the standard power-up<br />
tone is heard, which indicates that Battery Save<br />
mode is OFF.<br />
Note: The transmission threshold increases when<br />
Battery Save mode is ON. To have a slightly<br />
better transmission threshold, set Battery<br />
Save mode to OFF so that the radio is<br />
always ready to transmit or receive without<br />
any delays.<br />
BASIC<br />
CONFIGURATION<br />
31<br />
English
BASIC<br />
CONFIGURATION<br />
BATTERY TYPE SETTINGS<br />
(<strong>RDM</strong>2080d MODEL)<br />
Only if the battery pack is not detected, the<br />
radio will enable the battery type setting to<br />
select either Lithium-Ion or Alkaline.<br />
To change battery settings:<br />
1. Press the MENU button as many times as<br />
needed until the radio shows the current battery<br />
type. The display will show either “LITHIUM” or<br />
“ALKALINE”. Also a full battery icon will be<br />
shown as follows:<br />
LITHIUM<br />
CHANNEL ALIAS (<strong>RDM</strong>2080d MODEL)<br />
This feature allows the editing of the channel<br />
name or alias.<br />
To configure channel alias:<br />
1. Press PTT button and simultaneously<br />
while turning radio ON for 3 sec. The radio will<br />
emit a special beep.<br />
The display will show the channel alias blinking<br />
as shown.<br />
2. Select the battery setting according to the<br />
battery being installed on the radio.<br />
3. Press the PTT button to save the changes.<br />
2. Choose the channel number that will be edited<br />
by pressing the / buttons.<br />
3. Press the PTT button or MENU to start editing<br />
the channel name. A cursor will blink at the end<br />
of the channel name.<br />
English<br />
32
4. Use button B to move the cursor to the left.<br />
5. When the cursor is located in the first character,<br />
the radio produces a bonk tone.<br />
6. Use the / buttons to change the current<br />
selected character to the next ASCII value in<br />
alphabetical order (from A to Z). The characters<br />
will be uppercase letters.<br />
To toggle character between uppercase and<br />
lower case, press the A button. The supported<br />
lower case characters are:<br />
b, c, d, g, h, i, l, o, r, u.<br />
To insert special characters press the C<br />
button.The supported special characters and<br />
numbers are shown in the following order: 0 - 9<br />
* {} &%. + / - _ ' ' \. Character (' ') is a used for<br />
blank spaces.<br />
Note: If the radio is left idle for more than 3<br />
seconds, the current character will be<br />
accepted and the cursor will advance one<br />
space to the right.<br />
7. Long press the PTT button to save and go back<br />
to the “Channel Aliasing Selection Mode” to edit<br />
other channel alias name, -- or --<br />
Turn OFF the radio to exit without saving<br />
changes.<br />
Notes:<br />
If the channel alias name is left blank, the<br />
radio will play a bad key chirp and will stay<br />
in the editing menu mode until the channel<br />
name is edited and saved.<br />
To exit Channel Aliasing Mode, long press<br />
the PTT button.<br />
CLONING MODE<br />
Enables radio to enter cloning mode in order to<br />
clone its profile settings into other radios (using<br />
the Radio to Radio Cloning Cable or Multi-Unit<br />
Charger).<br />
BASIC<br />
CONFIGURATION<br />
33<br />
English
BASIC<br />
CONFIGURATION<br />
To enable/disable Cloning Mode:<br />
1. Press PTT and SB2 buttons while turning the<br />
radio ON.<br />
The <strong>RDM</strong>2080d emits a distinctive sound and<br />
shows the word CLONE on the display.<br />
The <strong>RDM</strong>2020 emits a distinctive sound and<br />
the LED indicates two orange heartbeats<br />
2. Turn the radio OFF and back ON to disable<br />
Cloning mode.<br />
Note: See "RADIO Cloning" on page 30 for more<br />
details.<br />
ROGER BEEP TONE<br />
(END OF TRANSMISSION TONE)<br />
This feature allows the radio to send a distinct<br />
tone at the end of each transmission. The<br />
Roger Beep default setting is set to OFF.<br />
To toggle Roger Beep Tone on/off:<br />
1. Short press the SB1 button while turning the<br />
radio ON until a distinctive beep is heard, which<br />
indicates that Roger Beep Tone is ON.<br />
2. Repeat step one until the standard power-up<br />
tone is heard, which indicates that Roger Beep<br />
Tone is OFF.<br />
Note: The tone sent at the end of each<br />
transmission is intended to notify the<br />
receiver that the transmission is complete.<br />
KEYPAD BEEP<br />
(<strong>RDM</strong>2080d MODEL)<br />
This feature enables the radio to emit an<br />
audible tone each time a button is pressed.<br />
Turning this beep off enables silent menu<br />
operation.<br />
To toggle Keypad Beep on/off:<br />
1. Short press SB2 button while turning the radio<br />
ON. The keypad operation will be silent.<br />
2. Repeat step one to activate the keypad beep.<br />
English<br />
34
KEYPAD LOCK/UNLOCK<br />
(<strong>RDM</strong>2080d MODEL)<br />
The keypad can be locked to avoid accidental<br />
changes in the radio settings. The keypad lock<br />
default setting is set to UNLOCKED. When the<br />
keypad is locked, an icon is displayed on the<br />
screen.<br />
To toggle Keypad Lock on/off:<br />
1. Press and hold MENU for 4 seconds to lock the<br />
radio keypad. All buttons lock with the<br />
exception of the PTT and Button A if “Call Tone”<br />
has been configured.<br />
2. To unlock, press MENU for 4 seconds.<br />
Note: This feature can be disabled from being<br />
configurated via the radio panel in the CPS.<br />
VOX - VOICE OPERATED TRANSMIT<br />
Enables the radio to automatically transmit due<br />
to recognition of voice. The radio automatically<br />
stops transmitting when audio is no longer<br />
present.<br />
Before using this feature, the VOX level must<br />
be configurated via the CPS. The default value<br />
for VOX level is set to OFF.<br />
To set up a VOX accessory:<br />
1. Turn the radio OFF and open the accessory<br />
cover.<br />
2. Firmly insert the plug from the audio accessory<br />
into accessory port.<br />
3. Turn the radio back ON. The radio will beep and<br />
the LED blinks double red. The <strong>RDM</strong>2080d<br />
shows the VOX icon .<br />
4. Lower radio volume BEFORE placing<br />
accessory near ear.<br />
5. To transmit, speak into accessory microphone<br />
without pressing the PTT button.<br />
BASIC<br />
CONFIGURATION<br />
35<br />
English
6. To receive, stop talking.<br />
1. Press and hold the PTT button while turning the<br />
radio ON. The display will show the icon.<br />
BASIC<br />
CONFIGURATION<br />
Note:<br />
Accessory<br />
Connector<br />
VOX<br />
Accessory<br />
VOX can be temporarily disabled by<br />
pressing the PTT button or removing the<br />
audio accessory.<br />
IVOX - INTERNAL VOICE OPERATED<br />
TRANSMIT (<strong>RDM</strong>2080d MODEL)<br />
Enables the radio to automatically transmit due<br />
to recognition of voice without the use of audio<br />
accessories. The radio automatically stops<br />
transmitting when audio is no longer present.<br />
To enable iVOX on the radio:<br />
2. To transmit, talk directly into the microphone<br />
without pressing the PTT button. There is a<br />
short threshold in the transmission that can be<br />
adjusted by changing the iVOX level in the<br />
CPS.<br />
3. Turn OFF the radio to disable iVOX.<br />
Note: iVOX operation can be temporarily disabled<br />
by pressing the PTT button while the radio is<br />
ON.<br />
VOX/IVOX SENSITIVITY SETTINGS<br />
(<strong>RDM</strong>2080d MODEL)<br />
Before changing VOX sensitivity settings, this<br />
feature must be configured via the CPS and an<br />
audio accessory must be connected to the<br />
radio. Before configuring iVOX sensitivity, the<br />
iVOX feature must have been enabled by<br />
pressing the PTT button while powering up the<br />
radio. The default sensitivity value for VOX is<br />
English<br />
36
set to OFF and the default sensitivity value for<br />
iVOX is set to Medium.<br />
To configure VOX/iVOX sensitivity:<br />
1. Short press the MENU button and navigate until<br />
the following screens are displayed:<br />
If iVOX is enabled the radio will display the<br />
following:<br />
0 = OFF (For VOX accessories only)<br />
1 = Low sensitivity<br />
2 = Medium sensitivity<br />
3 = High sensitivity<br />
3. Long press the PTT button to save and exit,<br />
--or-- short press the PTT button to configure<br />
the next feature without saving.<br />
IVOX<br />
If VOX is enabled (with accessory connected)<br />
the radio will display the following:<br />
VOX<br />
2. To change the sensitivity level, use the /<br />
buttons and choose from the following<br />
options:<br />
NUISANCE CHANNEL DELETE<br />
This feature temporarily removes channels<br />
from the “Scan List” to disregard irrelevant<br />
conversations on a “nuisance” channel that tie<br />
up the radio’s scanning.<br />
To delete a channel from the scan list:<br />
1. Short press the SB2 button to enable “Scan<br />
Mode.” This feature is pre configured by default.<br />
2. Wait until the radio stops on the “nuisance”<br />
channel.<br />
3. Long press the SB2 button. The nuisance<br />
channel is temporarily deleted during the<br />
scanning session.<br />
BASIC<br />
CONFIGURATION<br />
37<br />
English
BASIC<br />
CONFIGURATION<br />
Note:<br />
The next time Scanning is enabled, the<br />
channel will be back in the scanning list.<br />
PL DEFEAT<br />
Also known as “Squelch defeat”, this feature<br />
allows to listen or monitor any activity in the<br />
channel without noise.<br />
To toggle PL Defeat on/off:<br />
1. Short press SB1 to enable PL/DPL defeat.<br />
2. Short press SB1 again to disable PL/DPL<br />
defeat.<br />
RESET TO FACTORY DEFAULTS<br />
Reset to Factory Defaults will set back all radio<br />
features to the original factory default settings.<br />
To do so, press the PTT, SB2 and SB1 buttons<br />
simultaneously while turning ON the radio until<br />
you hear a high tone chirp.<br />
English<br />
38
ADVANCED<br />
CONFIGURATION<br />
Advanced Configuration is an optional<br />
configuration mode that allows the<br />
customization of additional features via the<br />
front panel.<br />
To establish a proper two-way communication,<br />
the Channel, Frequency, and Interference<br />
Eliminator Code must be the same on both<br />
radios, which will depend on the stored profile<br />
that has been pre configured on the radio.<br />
ENTERING ADVANCED CONFIGURATION<br />
MODE<br />
To enter Advanced Configuration Mode, press<br />
and hold both PTT and SB1 buttons<br />
simultaneously for 3 to 5 seconds while turning<br />
radio ON. The LED will start to blink green.<br />
The <strong>RDM</strong>2080d will also show the icon<br />
on the screen.<br />
These features can be configured in Advanced<br />
Configuration Mode:<br />
FREQUENCY SELECTION<br />
Any of the preset <strong>MURS</strong> frequencies can be<br />
assigned to each channel. See "<strong>RDM</strong> <strong>Series</strong><br />
<strong>MURS</strong> Frequency Chart" on page 50.<br />
CTSS/DPL CODES<br />
This feature also called Interference Eliminator<br />
Code, helps minimize interference by offering a<br />
choice of code combinations that filter out<br />
static, noise, and unwanted messages. See<br />
code table "CTCSS and PL/DPL Codes" on<br />
page 52 for specific code details.<br />
AUTO SCAN<br />
This feature enables to set a particular channel<br />
to automatically start scanning each time that<br />
channel is selected.<br />
ADVANCED<br />
CONFIGURATION<br />
39<br />
English
ADVANCED CONFIGURATION (<strong>RDM</strong>2080d MODEL)<br />
or<br />
PTT<br />
Button<br />
RX<br />
or<br />
RX<br />
or<br />
YES<br />
PTT<br />
Button<br />
PTT<br />
Button<br />
Select a preset<br />
Frequency from 1 to 5<br />
Select a preset<br />
Code from 001 to 213<br />
Set up Scan<br />
Select the channel by<br />
pressing /<br />
Toggle SB2 for YES/NO<br />
ADVANCED<br />
CONFIGURATION<br />
Notes:<br />
Continue<br />
customizing<br />
channels 2 to 8<br />
To save changes long press the PTT button. The radio will return to “Idle” Advanced Configuration Mode.<br />
To exit Advanced Configuration Mode, long press the PTT button to return to normal radio operation.<br />
Whenever the radio wraps around to the beginning of the Advanced Configuration Mode options, the<br />
changes will be automatically saved, even if the radio is turned OFF.<br />
To exit Advanced Configuration Mode without saving changes (as long as the radio has not return<br />
to the beginning), turn the radio OFF.<br />
English<br />
40
OTHER ADVANCED CONFIGURATIONS<br />
(<strong>RDM</strong>2080d MODEL ONLY)<br />
Call Tone<br />
This feature sends an alert notification to other<br />
radios in the fleet prior to the transmission with<br />
the intent to grab the receiver’s attention so the<br />
transmission is not missed.<br />
In order to configure this feature via the front<br />
panel, it must first be enabled via the CPS.<br />
To configure call tones:<br />
1. Enter “Advanced Configuration Mode” and<br />
scroll through the menu options until the screen<br />
shows the image below:<br />
TONE<br />
The current call tone setting will be blinking. A<br />
call tone value (0,1,2 or 3) must be selected by<br />
pressing the / buttons. The call tone will<br />
pre-play before being selected.<br />
2. Long press the PTT button to save and exit,<br />
--or-- short press the PTT button to configure<br />
the next feature without saving.<br />
Microphone Gain Level<br />
The sensitivity of the microphone can be<br />
adjusted in both the radio’s microphone and<br />
the accessory’s microphone to fit different<br />
users or operating environments.<br />
The Gain determines the microphone’s<br />
transmitted audio volume level for the receiving<br />
radio’s speaker.<br />
To configure microphone gain level:<br />
1. Enter “Advanced Configuration Mode” and<br />
scroll through the options by short pressing the<br />
PTT button until the screen shows the image<br />
below:<br />
IMIC<br />
The current microphone gain level setting will<br />
blink.<br />
ADVANCED<br />
CONFIGURATION<br />
41<br />
English
ADVANCED<br />
CONFIGURATION<br />
2. Select the desired microphone gain level by<br />
pressing the / buttons (1 = low gain,<br />
2 = Medium gain or 3 = high gain).<br />
3. Long press the PTT button to save and exit,<br />
--or-- short press the PTT button to configure<br />
the next feature without saving.<br />
To configure Accessory Microphone Gain:<br />
1. Enter Advanced Configuration Mode and scroll<br />
through the configuring options by short<br />
pressing the PTT button until the screen shows<br />
the image below:<br />
MIC<br />
The current accessory microphone gain level<br />
setting will be blinking.<br />
2. Select the desired gain level (1 = Low gain, 2 =<br />
Medium gain or 3 = High gain) by pressing the<br />
/ buttons.<br />
3. Long press the PTT button to save and exit<br />
--or-- short press the PTT button to configure<br />
the next feature without saving.<br />
Scramble<br />
This feature provides voice privacy by<br />
encrypting the transmission. Transmissions will<br />
sound garbled to anyone listening without the<br />
same Scramble Code activated on their radio.<br />
It does not guarantee confidentiality, but it does<br />
increase privacy.<br />
To enable scramble:<br />
1. Enter Advanced Configuration Mode and<br />
selected the channel in which scramble will be<br />
enabled.<br />
English<br />
42
2. Scroll up/down through the configuring options<br />
by short pressing the PTT button, until the<br />
screen shows the image below:<br />
Side Button Preset to Channel Select<br />
Any channel can be mapped to either button B<br />
or C as a preset channel.<br />
To map a channel to a side button:<br />
1. Enter “Advanced Configuration Mode” and<br />
choose the channel to be preset using the<br />
The current scramble setting will blink.<br />
3. Select the desired scramble value (0,1,2 or 3)<br />
by pressing the / buttons.<br />
4. Long press the PTT button to save and exit,<br />
--or-- short press the PTT button to configure<br />
the next feature without saving.<br />
/ buttons.<br />
2. Press and hold the B or C button<br />
for 2 to 3 seconds. A short press of either<br />
preset button (B and C) will play a good<br />
key chirp.<br />
Note: When scanning, a short press of either<br />
preset button will change the home channel<br />
to the preset channel. The display will show<br />
FREQ/PL and will continue to scan from the<br />
new home channel.<br />
ADVANCED<br />
CONFIGURATION<br />
43<br />
English
ADVANCED CONFIGURATION (<strong>RDM</strong>2020 MODEL)<br />
Before start configuration, the channel must be selected. This can be done before or at any time<br />
during the Advanced Configuration Mode by turning the Channel Selector knob to the desired<br />
channel.<br />
1 2<br />
Frequency<br />
CTCSS/DPL<br />
First<br />
Digit<br />
PTT<br />
First<br />
Digit<br />
PTT<br />
Second<br />
Digit<br />
PTT<br />
Third<br />
Digit<br />
ADVANCED<br />
CONFIGURATION<br />
Enter Advanced<br />
Configuration Mode<br />
(PTT + SB1 + Turn ON radio)<br />
PTT<br />
Exit<br />
Long<br />
PTT<br />
Long<br />
PTT<br />
Idle<br />
Configuration<br />
Mode<br />
Long<br />
PTT<br />
PTT<br />
“Roll Over”<br />
key chirp<br />
3<br />
Auto-Scan<br />
PTT<br />
ON/<br />
OFF<br />
English<br />
44
Reading Values Through Beeps and LED Indicators<br />
As the <strong>RDM</strong>2020 model does not have a display to show the values that are being configured, the<br />
radio will communicate this information using beeps and LED indications.<br />
Number Confirmation Beep LED Indication<br />
0 Zero beep One short orange blink<br />
1 One beep One short red blink<br />
2 <strong>Two</strong> beeps <strong>Two</strong> short red blinks<br />
3 Three beeps Three short red blinks<br />
4 Four beeps Four short red blinks<br />
5 Long beep One long red blink<br />
6 Long beep and one beep One long and one short red blinks<br />
7 Long beep and two beeps One long and two short red blinks<br />
8 Long beep and three beeps One long and three short red blinks<br />
9 Long beep and four beeps One long and four short red blinks<br />
ADVANCED<br />
CONFIGURATION<br />
45<br />
English
ADVANCED<br />
CONFIGURATION<br />
Reading Frequency Values<br />
The Frequency value is only one digit as <strong>RDM</strong><br />
<strong>Series</strong> <strong>MURS</strong> <strong>Two</strong>-<strong>Way</strong> radios have 5<br />
predefined frequencies.<br />
To read frequency values:<br />
1. From “Idle” Advanced Configuration Mode,<br />
short press the PTT button to hear the first<br />
value (Refer to "Advanced Configuration<br />
(<strong>RDM</strong>2020 Model)" on page 44). This value<br />
corresponds to the frequency's first digit value.<br />
1<br />
Frequency<br />
PTT<br />
First<br />
Digit<br />
Long<br />
PTT<br />
PTT<br />
Long<br />
PTT<br />
2. Short press the PTT button to read CTCSS/DPL<br />
values.<br />
Reading CTCSS/DPL Values<br />
When reading the values for CTCSS/PL Codes<br />
the radio signals the digit codes each time the<br />
PTT button is short pressed. The <strong>RDM</strong> <strong>Series</strong><br />
have up to 213 codes available (Refer to<br />
"Frequency and Code Charts" on page 50).<br />
The following is an example of the order in<br />
which the radio signals the “118” CTCSS/DPL<br />
code:<br />
First<br />
Digit<br />
1 1 8<br />
Second Digit<br />
To read CTCSS/DPL Values:<br />
Third<br />
Digit<br />
1. Short press the PTT button. The radio signals<br />
the first digit “1” .<br />
English<br />
46
2. Short press PTT button again and the radio<br />
signals the second digit “1”.<br />
3. Short press PTT again and radio signals the<br />
third digit “8”.<br />
Reading Auto-Scan Values<br />
After finishing reading CTCSS/DPL codes, if<br />
you short press PTT once again, the radio<br />
takes you to Auto-Scan as per “Advanced<br />
Configuration (<strong>RDM</strong>2020 Model)” on page 44<br />
(Step 3). Auto-Scan only has two values:<br />
Radio Signal Value<br />
Status<br />
0 OFF<br />
Changing Values<br />
Each time the radio signals and beeps, the<br />
current value can be changed by short<br />
pressing SB1 to increase or by short pressing<br />
SB2 to decrease. The radio will then signal the<br />
new setting it has been configured to.<br />
To abort the value configured, turn the radio<br />
OFF or change channel using the channel<br />
knob.<br />
If the radio “rolls-over” to the “Idle” Advanced<br />
Configuration Mode, the radio emits a “chirp”<br />
and radio LED starts blinking green again. All<br />
values that were changed are automatically<br />
saved.<br />
Note:<br />
1 ON<br />
Auto-Scan is set to OFF by default.<br />
ADVANCED<br />
CONFIGURATION<br />
47<br />
English
ADVANCED<br />
CONFIGURATION<br />
Configuring a Frequency<br />
Assuming current frequency value is set up to<br />
channel 1, with the MURs default frequency “1”<br />
(equivalent to 154.60000 MHz), and it will be<br />
changed to Frequency Number = “4” (which is<br />
mapped to 151.88000 MHz), follow the<br />
sequence below:<br />
1. Enter Advanced Configuration Mode.<br />
2. Short press the PTT button to enter Frequency<br />
Mode. Radio will signal current value “1” with<br />
one beep (a red blinks).<br />
3. Press the SB1 button once to increase digit to<br />
“2” (two beeps & two red blinks).<br />
4. Press the SB1 button once to increase digit to<br />
“3” (three beeps & three red blinks).<br />
5. Press the SB1 button again to increase digit to<br />
“4” (four beeps & four red blinks).<br />
6. Long press the PTT button. LED indicator will<br />
show a green heartbeat to indicate “Idle” state.<br />
7. Long press the PTT button to exit Advanced<br />
Configuration Mode or turn the radio OFF.<br />
Configuring a Code<br />
Assuming current code value is set to factory<br />
default “001”, and it will be changed to CTCSS/<br />
DPL Code = 103 follow the sequence below:<br />
1. Enter Advanced Configuration Mode.<br />
2. Short press the PTT button three times (Enter<br />
CTCSS/DPL Programming Selection Mode).<br />
Radio LED will blink orange to indicate that<br />
current value is “0”.<br />
3. Press the SB1 button once (to change first digit<br />
to “1”) LED indicator blinks red.<br />
4. Short press the PTT button (to move forward<br />
and program second digit). Radio LED blinks<br />
orange to indicate current value is “0”.<br />
5. Short press the PTT button and move ahead to<br />
program the third digit. LED indicator blinks red<br />
to indicate current value is “1”.<br />
6. Press the SB1 button to change the ‘third digit’<br />
to “2”. Press the SB1 button to change again<br />
this “third digit” to “3”. The radio will signal the<br />
chosen value.<br />
English<br />
48
7. Long press the PTT button to save changes and<br />
return to “Idle” Advanced Configuration Mode.<br />
Once in “Idle” Advanced Configuration Mode,<br />
LED indicator will start blinking a green<br />
heartbeat.<br />
8. Long press the PTT button to exit Advanced<br />
Configuration Mode.<br />
Configuring Auto-Scan<br />
Auto-Scan is the last Advanced Configuration<br />
Mode and can be set to “ON” or “OFF” on a<br />
particular channel.<br />
To set Auto-Scan to “ON”:<br />
1. Enter Advanced Configuration Mode and select<br />
the desired channel.<br />
2. Short press the PTT button six times to enter<br />
Auto-Scan Programming Selection Mode. The<br />
radio will signal beeps and will show the current<br />
Auto-Scan setting (refer to “Reading Auto-Scan<br />
Values” on page 47).<br />
3. Short press the SB1 button to toggle ON/OFF<br />
the Auto-Scan feature in the channel. When ON<br />
radio LED will blink RED once. When OFF radio<br />
LED will blink ORANGE once.<br />
ADVANCED<br />
CONFIGURATION<br />
49<br />
English
FREQUENCY AND CODE CHARTS<br />
FREQUENCY AND CODE<br />
CHARTS<br />
<strong>RDM</strong> SERIES <strong>MURS</strong> FREQUENCY CHART<br />
Channel<br />
<strong>RDM</strong>2080d <strong>MURS</strong> Display Model – Default Frequencies and Codes<br />
Frequency<br />
(MHz)<br />
Code #<br />
Code Value<br />
Channel<br />
Name/Alias<br />
Bandwidth<br />
1 154.570 1 67.0 Hz Channel 1 20.0 kHz<br />
2 154.600 1 67.0 Hz Channel 2 20.0 kHz<br />
3 151.820 1 67.0 Hz Channel 3 11.25 kHz<br />
4 151.880 1 67.0 Hz Channel 4 11.25 kHz<br />
5 151.940 1 67.0 Hz Channel 5 11.25 kHz<br />
6 154.570 0 CSQ Channel 6 20.0 kHz<br />
7 154.600 0 CSQ Channel 7 20.0 kHz<br />
8 151.820 0 CSQ Channel 8 11.25 kHz<br />
English 50
<strong>RDM</strong>2020 <strong>MURS</strong> Non-Display Model – Default Frequencies and Codes<br />
Channel<br />
Frequency<br />
(MHz)<br />
Code #<br />
Code Value<br />
Channel<br />
Name/Alias<br />
Bandwidth<br />
1 154.570 1 67.0 Hz Channel 1 20.0 kHz<br />
2 154.600 1 67.0 Hz Channel 2 20.0 kHz<br />
FREQUENCY AND CODE<br />
CHARTS<br />
51<br />
English
FREQUENCY AND CODE<br />
CHARTS<br />
CTCSS AND PL/DPL CODES<br />
CTCSS Codes<br />
CTCSS Hz CTCSS Hz CTCSS Hz<br />
1 67.0 14 107.2 27 167.9<br />
2 71.9 15 110.9 28 173.8<br />
3 74.4 16 114.8 29 179.9<br />
4 77.0 17 118.8 30 186.2<br />
5 79.7 18 123 31 192.8<br />
6 82.5 19 127.3 32 203.5<br />
7 85.4 20 131.8 33 210.7<br />
8 88.5 21 136.5 34 218.1<br />
9 91.5 22 141.3 35 225.7<br />
10 94.8 23 146.2 36 233.6<br />
11 97.4 24 151.4 37 241.8<br />
12 100.0 25 156.7 38 250.3<br />
13 103.5 26 162.2 122 (*) 69.3<br />
Note: (*) New CTCSS code.<br />
English 52
PL/DPL Codes (cont.)<br />
DPL Code DPL Code DPL Code<br />
39 23 55 116 71 243<br />
40 25 56 125 72 244<br />
41 26 57 131 73 245<br />
42 31 58 132 74 251<br />
43 32 59 134 75 261<br />
44 43 60 143 76 263<br />
45 47 61 152 77 265<br />
46 51 62 155 78 271<br />
47 54 63 156 79 306<br />
48 65 64 162 80 311<br />
49 71 65 165 81 315<br />
50 72 66 172 82 331<br />
51 73 67 174 83 343<br />
52 74 68 205 84 346<br />
53 114 69 223 85 351<br />
54 115 70 226 86 364<br />
FREQUENCY AND CODE<br />
CHARTS<br />
53<br />
English
FREQUENCY AND CODE<br />
CHARTS<br />
PL/DPL Codes (cont.)<br />
DPL Code DPL Code DPL Code<br />
87 365 104 565 121 754<br />
88 371 105 606 123 645<br />
89 411 106 612 124 Customized PL<br />
90 412 107 624 125 Customized PL<br />
91 413 108 627 126 Customized PL<br />
92 423 109 631 127 Customized PL<br />
93 431 110 632 128 Customized PL<br />
94 432 111 654 129 Customized PL<br />
95 445 112 662 130 Inverted DPL 39<br />
96 464 113 664 131 Inverted DPL 40<br />
97 465 114 703 132 Inverted DPL 41<br />
98 466 115 712 133 Inverted DPL 42<br />
99 503 116 723 134 Inverted DPL 43<br />
100 506 117 731 135 Inverted DPL 44<br />
101 516 118 732 136 Inverted DPL 45<br />
102 532 119 734 137 Inverted DPL 46<br />
103 546 120 743 138 Inverted DPL 47<br />
English 54
PL/DPL Codes (cont.)<br />
DPL Code DPL Code DPL Code<br />
139 Inverted DPL 48 156 Inverted DPL 65 173 Inverted DPL 82<br />
140 Inverted DPL 49 157 Inverted DPL 66 174 Inverted DPL 83<br />
141 Inverted DPL 50 158 Inverted DPL 67 175 Inverted DPL 84<br />
142 Inverted DPL 51 159 Inverted DPL 68 176 Inverted DPL 85<br />
143 Inverted DPL 52 160 Inverted DPL 69 177 Inverted DPL 86<br />
144 Inverted DPL 53 161 Inverted DPL 70 178 Inverted DPL 87<br />
145 Inverted DPL 54 162 Inverted DPL 71 179 Inverted DPL 88<br />
146 Inverted DPL 55 163 Inverted DPL 72 180 Inverted DPL 89<br />
147 Inverted DPL 56 164 Inverted DPL 73 181 Inverted DPL 90<br />
148 Inverted DPL 57 165 Inverted DPL 74 182 Inverted DPL 91<br />
149 Inverted DPL 58 166 Inverted DPL 75 183 Inverted DPL 92<br />
150 Inverted DPL 59 167 Inverted DPL 76 184 Inverted DPL 93<br />
151 Inverted DPL 60 168 Inverted DPL 77 185 Inverted DPL 94<br />
152 Inverted DPL 61 169 Inverted DPL 78 186 Inverted DPL 95<br />
153 Inverted DPL 62 170 Inverted DPL 79 187 Inverted DPL 96<br />
154 Inverted DPL 63 171 Inverted DPL 80 188 Inverted DPL 97<br />
155 Inverted DPL 64 172 Inverted DPL 81 189 Inverted DPL 98<br />
FREQUENCY AND CODE<br />
CHARTS<br />
55<br />
English
FREQUENCY AND CODE<br />
CHARTS<br />
PL/DPL Codes (cont.)<br />
DPL Code DPL Code DPL Code<br />
190 Inverted DPL 99 199 Inverted DPL 108 208 Inverted DPL 117<br />
191 Inverted DPL 100 200 Inverted DPL 109 209 Inverted DPL 118<br />
192 Inverted DPL 101 201 Inverted DPL 110 210 Inverted DPL 119<br />
193 Inverted DPL 102 202 Inverted DPL 111 211 Inverted DPL 120<br />
194 Inverted DPL 103 203 Inverted DPL 112 212 Inverted DPL 121<br />
195 Inverted DPL 104 204 Inverted DPL 113 213 Inverted DPL 123<br />
196 Inverted DPL 105 205 Inverted DPL 114<br />
197 Inverted DPL 106 206 Inverted DPL 115<br />
198 Inverted DPL 107 207 Inverted DPL 116<br />
English 56
USE AND CARE<br />
Use a soft damp cloth<br />
to clean the exterior<br />
Do not immerse<br />
in water<br />
If the radio is submerged in water...<br />
Do not use alcohol or<br />
cleaning solutions<br />
USE AND CARE<br />
Turn radio OFF and<br />
remove batteries<br />
Dry with soft cloth<br />
Do not use radio until<br />
completely dry<br />
57<br />
English
TROUBLESHOOTING<br />
Symptom<br />
No Power<br />
Hearing other noises or<br />
conversation on a channel<br />
Try This...<br />
Recharge or replace the Li-Ion battery.<br />
Reposition or replace AA batteries.<br />
Extreme operating temperatures may affect battery life.<br />
Refer to See “About the Li-Ion Battery” on page 9.<br />
Confirm Interference Eliminator Code is set.<br />
Frequency or Interference Eliminator Code may be in use.<br />
Change settings: either change frequencies or codes on all radios.<br />
Make sure radio is at the right frequency and code when transmitting.<br />
Refer to “Talking and Monitoring” on page 25<br />
TROUBLESHOOTING<br />
Message Scrambled<br />
Audio quality not good enough<br />
Scramble Code might be ON, and/or setting does not match the other radios'<br />
settings.<br />
Radio settings might not be matching up correctly. Double check frequencies,<br />
codes and bandwidths to make sure they are identical in all radios<br />
English 58
Symptom<br />
Limited talk range<br />
Message not transmitted or<br />
received<br />
Try This...<br />
Steel and/or concrete structures, heavy foliage, buildings or vehicles decrease<br />
range. Check for clear line of sight to improve transmission.<br />
Wearing radio close to body such as in a pocket or on a belt decreases range.<br />
Change location of radio. To increase range and coverage, you can either<br />
reduce obstructions or use UHF radio instead of VHF <strong>MURS</strong> radio. UHF radios<br />
provide greater coverage in industrial and commercial buildings. (FCC license<br />
may be required). VHF <strong>MURS</strong> is designed for outdoor or smaller or wood<br />
structures. Increasing power provides greater signal range and increased<br />
penetration through obstructions. Refer to See Talking and Monitoring on<br />
page 25.<br />
Make sure the PTT button is completely pressed when transmitting.<br />
Confirm that the radios have the same Channel, <strong>MURS</strong> Frequency, Interference<br />
Eliminator Code and Scramble Code settings. Refer to “Talking and Monitoring”<br />
section on page 25 for further information.<br />
Recharge, replace and/or reposition batteries. Refer to “About your Li-Ion<br />
Battery” section on page 9.<br />
Obstructions and operating indoors, or in vehicles, may interfere. Change<br />
location. Refer to “Talking and Monitoring” Section on page 25.<br />
Verify that the radio is not in Scan. Refer to “Scan” on page 25 and “Nuisance<br />
Channel Delete” on page 37.<br />
TROUBLESHOOTING<br />
59<br />
English
Symptom<br />
Heavy static or interference<br />
Try This...<br />
<strong>Radios</strong> are too close; they must be at least five feet apart.<br />
<strong>Radios</strong> are too far apart or obstacles are interfering with transmission.<br />
Refer to “Talking and Monitoring” on page 25.<br />
Low batteries<br />
Recharge or replace Li-Ion battery. Replace AA batteries.<br />
Extreme operating temperatures affect battery life.<br />
Refer to “About the Li-Ion Battery” on page 9.<br />
TROUBLESHOOTING<br />
Drop-in Charger LED light<br />
does not blink<br />
Low battery indicator is<br />
blinking although new<br />
batteries are inserted<br />
Check that the radio/battery is properly inserted and check the battery/charger<br />
contacts to ensure that they are clean and charging pin is inserted correctly.<br />
Refer to “Charging the Battery” section on page 16, “Drop-in Tray Charger LED<br />
Indicators” section on page 19 and “Installing the Battery” section on page 11.<br />
Verify that the radio is set to the correct battery type.<br />
Refer to “Installing the Battery” section on page 11, “Installing Alkaline<br />
Batteries” section on page 12 and “About your Li-Ion Battery” section on<br />
page 9.<br />
English 60
Symptom<br />
Cannot activate VOX<br />
Battery does not charge<br />
although it has been placed in<br />
the drop-in charger for a while<br />
Try This...<br />
VOX feature might be set to OFF.<br />
Use the CPS to ensure that the VOX Sensitivity level is not set to ‘0’.<br />
Accessory not working or not compatible.<br />
Refer to the “VOX” section on page 35.<br />
Check drop-in tray charger is properly connected and correspond to a<br />
compatible power supply.<br />
Ensure that you have the drop-in tray charger adjustable piece placed on the<br />
right position.<br />
Refer to “Charging the Battery Attached to the Radio” section on page 16.<br />
Check the charger’s LEDs indicators to see if the battery has a problem. Refer<br />
to “Drop-in Tray Charger LED Indicators” section on page 19.<br />
Note:<br />
Whenever a feature in the radio seems to not correspond to the default or pre configured values, check<br />
to see if the radio has been configured using the CPS with a customized profile.<br />
TROUBLESHOOTING<br />
61<br />
English
WARRANTY<br />
MOTOROLA LIMITED<br />
WARRANTY FOR THE<br />
UNITED STATES AND<br />
CANADA<br />
What Does this Warranty Cover<br />
Subject to the exclusions contained below,<br />
<strong>Motorola</strong>, Inc. warrants its telephones, pagers,<br />
and consumer and business two-way radios<br />
(excluding commercial, government or industrial<br />
radios) that operate via Family Radio Service or<br />
General Mobile Radio Service, <strong>Motorola</strong>-branded<br />
or certified accessories sold for use with these<br />
Products (“Accessories”) and <strong>Motorola</strong> software<br />
contained on CD-ROMs or other tangible media<br />
and sold for use with these Products (“Software”)<br />
to be free from defects in materials and<br />
workmanship under normal consumer usage for<br />
the period(s) outlined below.<br />
This limited warranty is a consumer's exclusive<br />
remedy, and applies as follows to new <strong>Motorola</strong><br />
Products, Accessories and Software purchased by<br />
consumers in the United States, which are<br />
accompanied by this written warranty.<br />
Products and Accessories<br />
Products Covered<br />
Products and<br />
Accessories as defined<br />
above, unless otherwise<br />
provided for below.<br />
Decorative<br />
Accessories and<br />
Cases.<br />
Decorative covers,<br />
bezels, PhoneWrap<br />
covers and cases.<br />
Business <strong>Two</strong>-way<br />
Radio Accessories<br />
Products and<br />
Accessories that are<br />
Repaired or Replaced.<br />
Length of Coverage<br />
One (1) year from the date<br />
of purchase by the first<br />
consumer purchaser of the<br />
product unless otherwise<br />
provided for below.<br />
Limited lifetime warranty<br />
for the lifetime of ownership<br />
by the first consumer<br />
purchaser of the product.<br />
One (1) year from the date<br />
of purchase by the first<br />
consumer purchaser of the<br />
product.<br />
The balance of the original<br />
warranty or for ninety (90)<br />
days from the date returned<br />
to the consumer, whichever<br />
is longer.<br />
English 62
Exclusions<br />
Normal Wear and Tear. Periodic maintenance,<br />
repair and replacement of parts due to normal<br />
wear and tear are excluded from coverage.<br />
Batteries. Only batteries whose fully charged<br />
capacity falls below 80% of their rated capacity<br />
and batteries that leak are covered by this limited<br />
warranty.<br />
Abuse & Misuse. Defects or damage that result<br />
from: (a) improper operation, storage, misuse or<br />
abuse, accident or neglect, such as physical<br />
damage (cracks, scratches, etc.) to the surface of<br />
the product resulting from misuse; (b) contact with<br />
liquid, water, rain, extreme humidity or heavy<br />
perspiration, sand, dirt or the like, extreme heat, or<br />
food; (c) use of the Products or Accessories for<br />
commercial purposes or subjecting the Product or<br />
Accessory to abnormal usage or conditions; or (d)<br />
other acts which are not the fault of <strong>Motorola</strong>, are<br />
excluded from coverage.<br />
Use of Non-<strong>Motorola</strong> Products and<br />
Accessories. Defects or damage that result from<br />
the use of Non-<strong>Motorola</strong> branded or certified<br />
Products, Accessories, Software or other<br />
peripheral equipment are excluded from coverage.<br />
Unauthorized Service or Modification. Defects<br />
or damages resulting from service, testing,<br />
adjustment, installation, maintenance, alteration,<br />
or modification in any way by someone other than<br />
<strong>Motorola</strong>, or its authorized service centers, are<br />
excluded from coverage.<br />
Altered Products. Products or Accessories with<br />
(a) serial numbers or date tags that have been<br />
removed, altered or obliterated; (b) broken seals<br />
or that show evidence of tampering; (c)<br />
mismatched board serial numbers; or (d)<br />
nonconforming or non-<strong>Motorola</strong> housings, or<br />
parts, are excluded form coverage.<br />
WARRANTY<br />
63<br />
English
WARRANTY<br />
Communication Services. Defects, damages, or<br />
the failure of Products, Accessories or Software<br />
due to any communication service or signal you<br />
may subscribe to or use with the Products<br />
Accessories or Software is excluded from<br />
coverage.<br />
Software<br />
Products Covered<br />
Software. Applies only<br />
to physical defects in<br />
the media that<br />
embodies the copy of<br />
the software (e.g. CD-<br />
ROM, or floppy disk).<br />
Exclusions<br />
Length of Coverage<br />
Ninety (90) days from the<br />
date of purchase.<br />
Software Embodied in Physical Media. No<br />
warranty is made that the software will meet your<br />
requirements or will work in combination with any<br />
hardware or software applications provided by<br />
third parties, that the operation of the software<br />
products will be uninterrupted or error free, or that<br />
all defects in the software products will be<br />
corrected.<br />
Software NOT Embodied in Physical Media.<br />
Software that is not embodied in physical media<br />
(e.g. software that is downloaded from the<br />
internet), is provided “as is” and without warranty.<br />
WHO IS COVERED<br />
This warranty extends only to the first consumer<br />
purchaser, and is not transferable.<br />
HOW TO OBTAIN WARRANTY SERVICE OR<br />
OTHER INFORMATION<br />
Contact your <strong>Motorola</strong> point of purchase.<br />
SOFTWARE COPYRIGHT NOTICE<br />
The <strong>Motorola</strong> products described in this manual<br />
may include copyrighted <strong>Motorola</strong> and third party<br />
software stored in semiconductor memories or<br />
other media. Laws in the United States and other<br />
countries preserve for <strong>Motorola</strong> and third party<br />
software providers certain exclusive rights for<br />
copyrighted software, such as the exclusive rights<br />
to distribute or reproduce the copyrighted<br />
software. Accordingly, any copyrighted software<br />
contained in the <strong>Motorola</strong> products may not be<br />
modified, reverse-engineered, distributed, or<br />
reproduced in any manner to the extent allowed by<br />
law.<br />
English 64
Furthermore, the purchase of the <strong>Motorola</strong><br />
products shall not be deemed to grant either<br />
directly or by implication, estoppel, or otherwise,<br />
any license under the copyrights, patents, or<br />
patent applications of <strong>Motorola</strong> or any third party<br />
software provider, except for the normal, nonexclusive,<br />
royalty-free license to use that arises by<br />
operation of law in the sale of a product.<br />
PATENT NOTICE<br />
This product is covered by one or more of the<br />
following United States patents.<br />
5896277 5894292 5864752 5699006 5742484<br />
D408396 D399821 D387758 D389158 5894592<br />
5893027 5789098 5734975 5861850 D395882<br />
D383745 D389827 D389139 5929825 5926514<br />
5953640 6071640 D413022 D416252 D416893<br />
D433001<br />
EXPORT LAW ASSURANCES<br />
This product is controlled under the export<br />
regulations of the United States of America. The<br />
Governments of the United States of America may<br />
restrict the exportation or re-exportation of this<br />
product to certain destinations. For further<br />
information contact the U.S. Department of<br />
Commerce.<br />
WARRANTY<br />
65<br />
English
ACCESSORIES<br />
AUDIO ACCESSORIES<br />
Part No.<br />
Description<br />
BATTERY<br />
Part No.<br />
RLN6306<br />
Description<br />
Alkaline Battery Frame<br />
ACCESSORIES<br />
53815<br />
53862<br />
Headset with Boom<br />
Microphone BR<br />
Remote Speaker<br />
Microphone BR<br />
53863 Earpiece with Microphone BR<br />
53865<br />
53866<br />
Headset with Swivel<br />
Boom Microphone<br />
Earbud with Clip PTT<br />
Microphone BR<br />
RLN6351<br />
RLN6305<br />
RLN6308<br />
CARRY ACCESSORIES<br />
Part No.<br />
RLN6302<br />
Standard Li-Ion Battery<br />
High Capacity Li-Ion<br />
Battery<br />
Ultra High Capacity Li-Ion<br />
Battery<br />
Description<br />
Hard Leather Carry Case<br />
56517 Earpiece with Inline Microphone<br />
RLN6307<br />
Spring Action Belt Clip<br />
56518<br />
Earpiece with Boom<br />
Microphone<br />
English 66
POWER SUPPLIES AC PIN ADAPTORS<br />
CHARGERS<br />
Part No.<br />
Description<br />
Part No.<br />
Description<br />
RLN6349<br />
SOFTWARE APPLICATIONS<br />
North America AC Pin Adaptor<br />
RLN6304<br />
Rapid Accessory Charging Kit<br />
(includes Power Supply, Drop-in<br />
Tray Charger, and AC Pin<br />
adaptor).<br />
Part No.<br />
Description<br />
RLN6309<br />
Multi Unit Charger (MUC)<br />
RVN5147<br />
CABLES<br />
Part No.<br />
RLN6303<br />
Computer Programming<br />
Software (CPS)<br />
Description<br />
Radio to Radio Cloning Cable<br />
RLN6175<br />
POWER SUPPLIES<br />
Part No.<br />
RPN4054<br />
Standard Drop-in Tray Charger<br />
Description<br />
Standard US Fixed<br />
Power Supply<br />
ACCESSORIES<br />
RKN4155<br />
CPS Programming Cable<br />
RPN4058<br />
Standard Exchange<br />
AC pin Power Supply<br />
RLN6170<br />
Rapid Exchange AC pin<br />
Power Supply<br />
67<br />
English
Notes<br />
ACCESSORIES<br />
English 68
M<br />
<strong>Motorola</strong> Inc.<br />
1301 E. Algonquin Rd.<br />
Schaumburg, IL 60196-1078 U.S.A.<br />
MOTOROLA, the <strong>RDM</strong> <strong>Series</strong> <strong>MURS</strong> Radio and the Stylized M Logo are registered in the<br />
US Patent & Trademark Office.<br />
All other product or service names are the property of their respective owners.<br />
© 2010 by <strong>Motorola</strong>, Inc.<br />
All rights reserved.<br />
Printed in Malaysia.<br />
*68012002002*<br />
68012002002-A